HOLIDAY DONATION DRIVE - SUPPORT MSW - DO YOUR PART TO KEEP THIS GREAT FORUM GOING! (89 donations so far out of 49,000 members - C'mon guys!)
×


EdT
-
Posts
2,214 -
Joined
-
Last visited
Content Type
Profiles
Forums
Gallery
Events
Everything posted by EdT
-
My preference would be to have you post questions here on the build log so that others may benefit as well - and offer answers and comments as well. I keep an eye on this daily. Ed
- 3,618 replies
-
- 1
-

-
- young america
- clipper
- (and 1 more)
-
Isopropanol is very quick and effective loosening pva glued knots - and very fast. Ed
-
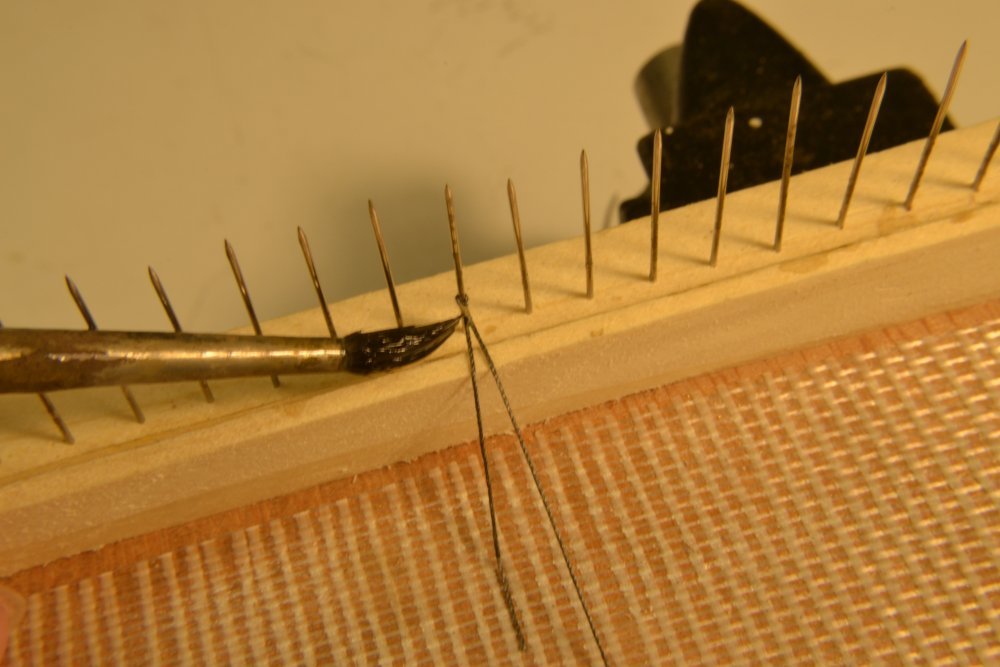
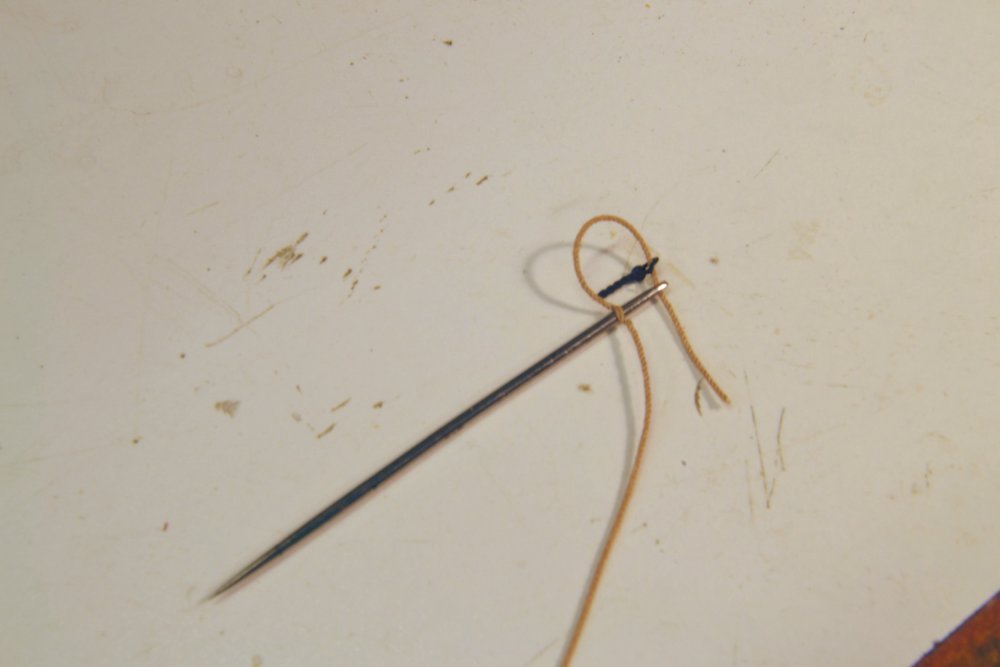
Hello Bob, Thanks for your comments. The splice shown in the first photo is one of many hundred used to lash one end of the ratline to an end shroud. the other end is made the same way but has to be made in place. I described this is the YA build log and in more detail in the book. In this case the loop is made by passing a needle through the rope then pulling it tight over a pin as shown in the picture. On these there is no wrapping below the joint. The contact between threads, plus the glue is sufficient. To finish the splice the short end is clipped off very close to - right at - the main part. On larger joints of this type some of the short end may be slightly wrapped and pinched to the main leg so when cut it shows some splice width. But in all cases of this type the glue is doing the work. I use normal yellow glue for hemp and darkened glue that dries almost black for tarred standing rigging. Because I wanted to lash the ends of the ratlines to the shrouds in a realistic manner, a method to make many small eyesplices was needed and that led to this. It worked well enough to be used on larger ropes for the many splices in the running rigging where there is more stress on the lines. The ratline fixture shown in the picture puts tension on both legs, avoiding any kinks at the splice. The method works very well in place where an eyesplice fits over an eyebolt or other point on the model. I usually pull the long end through in this case. I thin this adds some strength. This type of splice is used on small rope, sizes 40 to 100 of the crochetting thread that I use. This right-handed thread simulates rope very well. For larger sizes, usually made rope, a different process is used. I think all this is described in the build log and certainly in the book. Ed
-
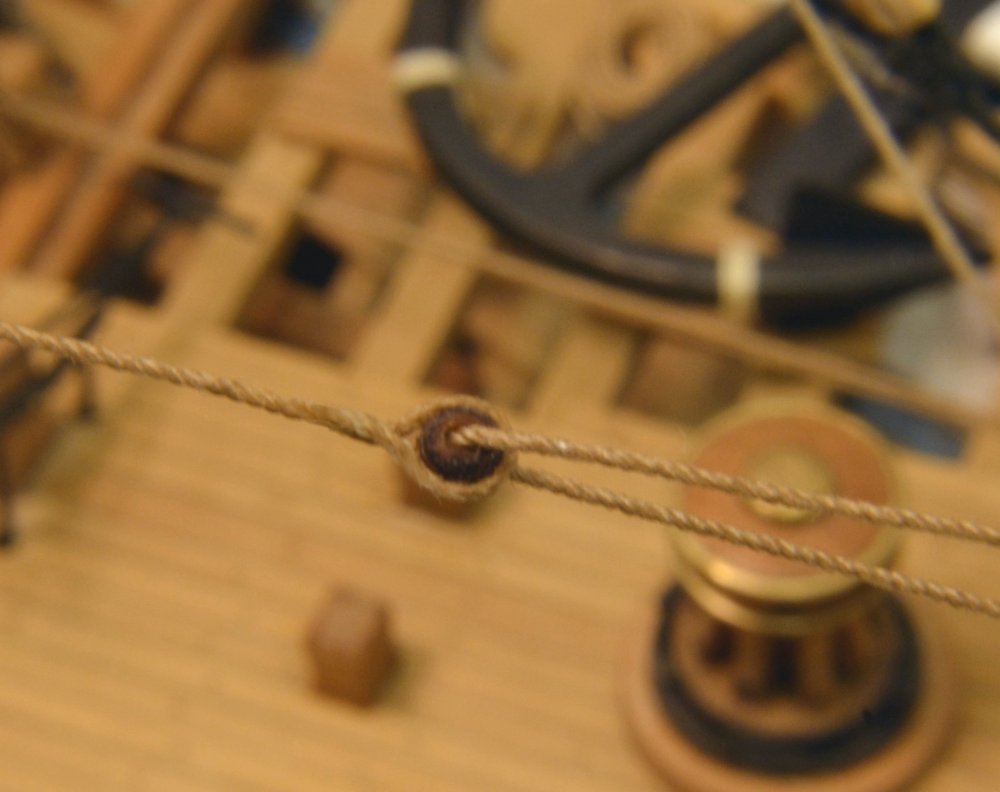
I had some doubts about using emulsion glue (PVA), or matte medium (acrylic) to secure rigging when I started the rigging job on Young America. At 1:72 or 1:96, glue of some sort is essential. These doubts were completely dispelled, rescuing me from the ordeal of using CA for anything except stiffening rope ends to thread through small holes. Making strong eyesplices (perhaps a thousand or so) in the smallest thread sizes was a daunting prospect. The pictures below show the method used and to my mind represent an acid test for the Titebond wood glue that I used. The only connection on these splices is the passing of the rope through itself, so there is no knot and the strength of the joint is due primarily to the glue. I can think of only a few failures of these splices in the entire model. The first picture shows the forming of a splice in size 80 cotton thread by passing a needle through the rope to form the splice, in this case the rope passes through a shackled eyebolt. The next picture shows such a splice in place in the rigging - under some tension. The next picture shows a splice of this type being glued in a special fixture used for making the 100's of ratline splices. I have not tested the strength of glue vs. matte medium, but I used glue. Both are aqueous polymer emulsions and can be diluted with water. The acrylic medium is formulated to modify coatings, mainly artist acrylics, or to act as a coating itself. PVA is a glue. While I expect that either could be used to seal knots, I believe that the PVA, Titebond in this case, will be stronger where the glue provides primary strength, as it does in these splices. Also, I believe in these cases, less dilution is more appropriate than in cases where the role of the emulsion is merely to prevent knot loosening. I would also add that these materials will be most effective on natural fibers - cotton or linen, and less so if at all on synthetics like poly ester. So, except for stiffening rope ends to pass through small holes, I believe CA is unnecessary in rigging. A welcome conclusion for those of us, like me, who hate using it. Ed
- 96 replies
-
- 11
-
-
Thank you for posting these, Steve. Having converted the posts relevant to the masting and rigging that were included in Volume 3, I know what a job this is. I hope YA 1:96 modelers - and potential modelers - will find these a useful supplement to the book. Good job. Ed
-
I continue to get inquiries about the drawings included with the three Volumes of the book, so I have attached a listing of all the full sized drawings. This is actually an Appendix in Volume III. Most of the questions relate to the baseboard plans, Dwgs 2B and 8B that are missing from the packet because they are included as printable pdfs on the CDs. This is so soiled or damaged baseboard plans may be replaced. Note that a misprint on p 227 of Vol I also contributes to the confusion by specifying the base plan as Dwg 11. This should read Dwg 8b. Dwg 11 is a different plan included in Vol II. Sorry for this mistake.Appendix 2 - Drawing List.pdf
-
I worked on fairing the lower hull progressively as availability presented itself. Whereas I am particular about sequence in many areas, I think this fairing process can be subject to your judgement - whenever you think the framing can take it. I had only light sanding to do. In looking back at Vol I, its clear I did not think the timing of this to be critical. I probably did some after bolting on the lower half frames and more later. I'd say the lower hull should be well faired and finish sanded by the time you get to cutting the limber channels Ch 12. Fairing the top timbers is covered in Ch 11. I am pretty sure I had done the entire hull by the time I got to the the top timbers. As for the copper bolts, after the glue has dried the ends may be filed flush. After that, they should not impede your sanding or tear up the paper, but I believe I had finished fairing before the external bolting described in Ch 8 (pp 99-100), then did more finish sanding after that..
-
Randy, you will have to use your own judgement in this. If you have beveled the frames before erection as I did, and recommended, the amount of hull sanding should be primarily smoothing - and minimal. The forward cant frames may be an exception and I described the sanding I did in the book. However, if you have left the frames rough, more sanding will be required. There is a grey area. The softwood spacers between frames should provide enough strength to support sanding (120 grit?) but maybe not if it needs to remove a lot of material. Once these spacers are in place you should be able to sand. You should be able to do some sanding right at the base of the half frames once you have fitted the "functional" copper bolts, but the spacers will be needed for sanding further up. I know there is a hesitance to pre-bevel frames. I think this is because most model frame patterns are not precise with three profiles - forward, joint line, and aft - both on the internal and external sides on the YA patterns. Because the method I used to draft the frame patterns, these are highly accurate - enough for pre-beveling. This mimics how real frames were beveled before setting. Because this was the first time for this, I was conservative at first, leaving slightly more stock for post-erection beveling. Ultimately, I found this unnecessary and actually an obstacle to precise frame erection. Perhaps you found this as well. My advice - use your judgement. Its part of the process and of the experience. Cheers, Ed
-
Thank you, Will. I appreciate your comments. I have been a long-time used of a product called Homasote. It is a dense compressed paper product sold mainly for soundproofing. It initially found use for hobbyists as model railroad track base. It holds pins well - and track spikes. I would search online for it. Lowes and/or Home Depot have carried it recently, but a general search may yield other sources. I do not know of a good substitute and have relied on it for years. Let me know what you find. Ed
-
Nice, creative technique, Tom. Thanks for sharing.
-
Hello, everyone, I see that the last posting on this topic was some time ago, but I wanted to take this opportunity to announce that the third and final volume of the book has shipped and to thank those who have purchased so far. For those who received shipments before the holidays, you may have noticed that an incorrect CD was included in those early shipments. This manufacturing error is being corrected urgently by Seawatchbooks, so you should be hearing from them shortly to receive a copy of the correct CD. Apart from this problem, the response to the book so far has been excellent - I am told. I am very glad to hear that. I will say, that work on this volume was, for me, more than the effort on the previous four books combined. There will, no doubt, be the inevitable minor errors in the immense amount of data included, and while I do not look forward to hearing about those, I will endeavor to correct important errors via this topic on this forum - as I have done with previous volumes for both ships. I monitor comments on these topics daily for that reason. So, happy new year everyone. Ed
-
Thank you, everyone, for all these comments. I have been less active on the forum for awhile, but I still check for notifications and p-messages every day. I am happy to say that YA Volume 3 has shipped - I received my copies before the holidays. Please be aware that there was a problem in assembling the book package - with the CD that was included with the book. Seawatch is sending the correct replacement CDs for all books shipped and correcting this for future shipments. If you received a book you should be hearing from them. So far, the response to the book has been very good. My thanks and apologies to all the early purchasers. As usual. I will be monitoring the forum topics in the Book Review Section here on the forum - for comments, questions etc. Any necessary corrections will also be placed on those topics - for both Naiad and Young America books. Thanks again for all your support over the past several years. Ed
- 3,618 replies
-
- 10
-
-
- young america
- clipper
- (and 1 more)
-
Still hibernating on what, when, or if, Sailor, but I got my copies of Volume III this week and maybe that will shake some cobwebs loose. Thanks for asking. Ed
- 3,618 replies
-
- 6
-
-
- young america
- clipper
- (and 1 more)
-
Thank you for these recent comments - Nils, Kortes, Svein Erik, Micheal and Clipperfan. Seems like a while since I have been in touch on the forum since the model was completed in May. Spent quite a bit of time on the third volume this summer and I believe it is soon to be out. For those of you who got the Seawatch ad insert in the last NRG journal issue, the book is featured. In addition to the features listed in the ad there are also 13 printed drawings in 1:96 and 1:72 scale. These were not mentioned in the ad. Cheers all, Ed
- 3,618 replies
-
- 4
-
-
- young america
- clipper
- (and 1 more)
-
I have used razor blades like those shown by Allan and also heavier hard metal - like saw blades. I also have 16g SS plate cut-offs that I have used a lot. One additional suggestion: scrape the shape onto the a larger wood blank of the right breadth then rip off the molding on the saw. The larger piece is easier to hold in a vise and the stiffness helps when scraping. The final sawed thickness is then always accurate even if the piece is over-scraped. Ed
-
Stick with it, Guy. Ed
-
HMCSS Victoria 1855 by BANYAN - 1:72
EdT replied to BANYAN's topic in - Build logs for subjects built 1851 - 1900
Looking good, Pat! Ed- 1,013 replies
-
- 6
-
-
- gun dispatch vessel
- victoria
- (and 2 more)
-
A somewhat belated thank you for these last comments and likes. They are very much appreciated .
- 3,618 replies
-
- 3
-
-
- young america
- clipper
- (and 1 more)
-
Hi Mark, Oil based stains sound really messy to me for this. Also, I believe Minwax stains have an oil based resin resin binder, but that may not stiffen rope if used diluted. I guess this would make the rope waterproof, making any glue sealing a problem. Add to that the environmental issues with solvents. I would not recommend. I do not use hot water to dye rope. Probably would soften cotton rope fibers. Also, no soaking. Residence time in dye is about 1 second as it is pulled through. I suppose low initial torgue in the rope strands could also be at work. I have had no problem with water softening rope - cotton or linen - thread or made rope. India ink is a suspension of carbon black in water with some shellac binder to make it waterproof. Will not fade. I do not know about sepia ink, but suspect the same. Most ink is not a solution, but a suspension of fine particles (i.e. pigment), in this case in water. Soluble, chemical aniline based dyes were invented over a century ago and largely replaced vegetable dyes that were dominant to that time. Vegetable or natural dyes are fadeproof. It is the reason oriental carpets retain the color over centuries. I believe the problem with aniline is that ultra violet light gradually breaks down the large complex molecules, thus weakening the color over time. Fortunately, our clothes spend most of their life in dark closets. Colorfast usually refers the resistance to washing, not to light. On my Victory model I used diluted acrylic gouache to color both hemp and black rope. This too is a pigment, suspension, and has shown no fading in a sunny window for 10 years. Also, acrylic bunder caused no stiffening of rope. Also no softening. Mostly linen rope on that model. I switched to walnut based on Bernard Frolich's process in his book The Art of ship Modeling. He also uses cotton crochet thread. By concentrating in the crevices between strands, dye highlights the rope turns - an advantage of dyeing rope perhaps. Good luck. I wouldn't work this issue too hard. There are good, easy solutions, sorry, suspensions. Ed
-
Hi Mark, I am with Gaetan on this one. I use walnut dye/stain as well, in the form of Vandyke crystals dissolved in water. Here is a link, but I am sure there are other sources: https://www.amazon.com/Liberon-Van-Dyck-Crystals-500g/dp/B001GU6GVU/ref=sr_1_1?keywords=van+dyke+crystals&qid=1559390082&s=gateway&sr=8-1-spell Natural walnut , as well as other vegetable dyes/stains are non-fading, a key factor. Rit, Tintex or other aniline based dyes will certainly fade, really fade, over time when exposed to light. The dye may be diluted to give the desired shade. It is very close in color to natural hemp. There is no need to dye all the line at once. I dye it in usable lengths of about 6-8 feet on an as-needed basis, by dragging it through a jar of stain as Gaetan suggests. I use a simple wood strip with a wide V-notch to hold the line down when passing through the jar - I use plastic wide-mouth food containers kept covered when not in use. I then wipe the line with paper towel and hang it up between binder clips to dry - about an hour or two is usually enough. I do this with made rope or thread for the small sizes - cotton or linen. Its an easy step. I leave the set up in one corner of the shop. It is somewhat messy. For black, I substitute diluted India Ink. For most of the lines on Young America I then treated the rope by passing it through a diluted emulsion to reduce fuzz and perhaps help with moisture absorption. I used pH neutral pva white glue, but I am sure acrylic emulsion ( matte medium) would work as well. I used one tbsp of glue in a cup of water, but did not test other concentrations. The rope was no stiffened noticeably by this and the fuzz reduction was evident. After all this I pass the line through the flame of an alcohol lamp to burn off any fuzz or fibers lifted by the process - then wrap it on cardboard spools - I should say tubes. Ed
-
Well. it would be an understatement to say I am overwhelmed by all these most generous comments. It is also nice to hear from those who have been regular but silent followers. I wish I could individually thank everyone for the more than 35 comments and 50+ likes after the last post. Every one of them is well appreciated. Perhaps one more photo would not be amiss. Thanks again, everyone, for all your support throughout the project. Ed

- 3,618 replies
-
- 68
-
-
- young america
- clipper
- (and 1 more)
-
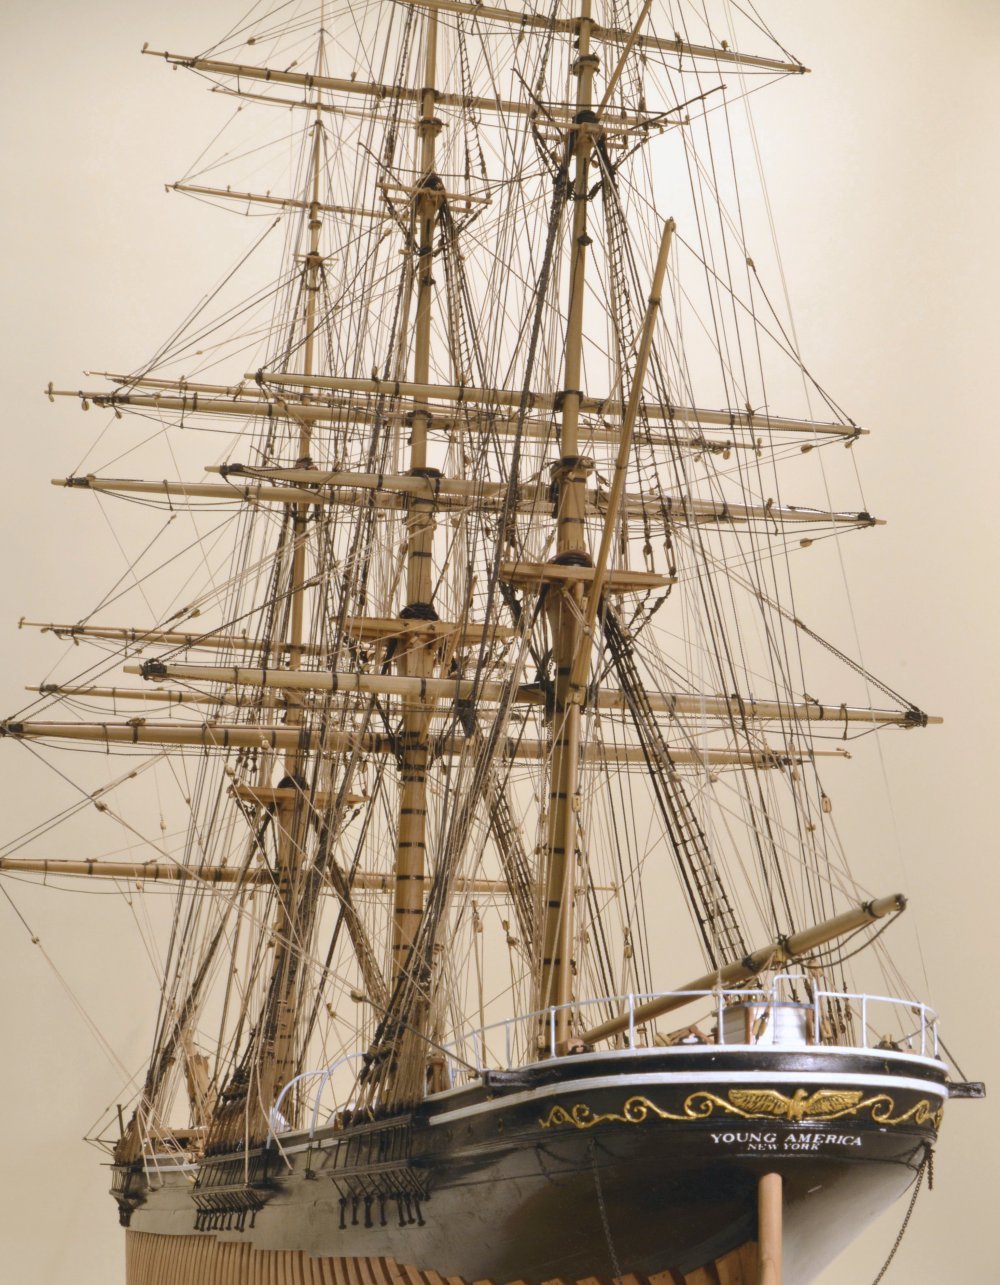
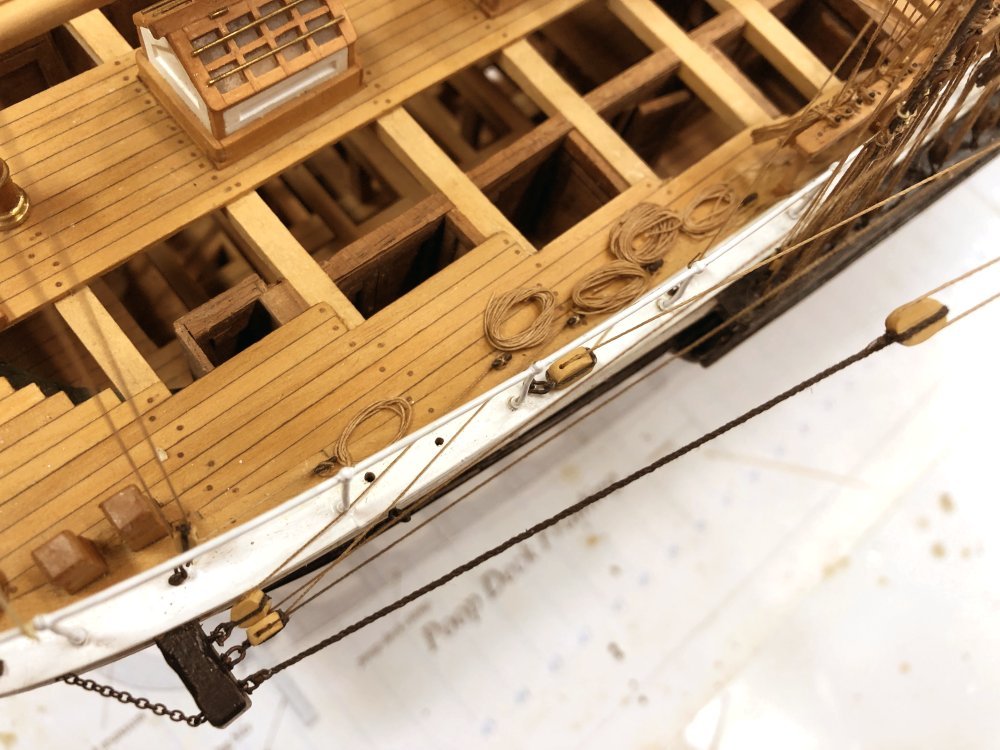
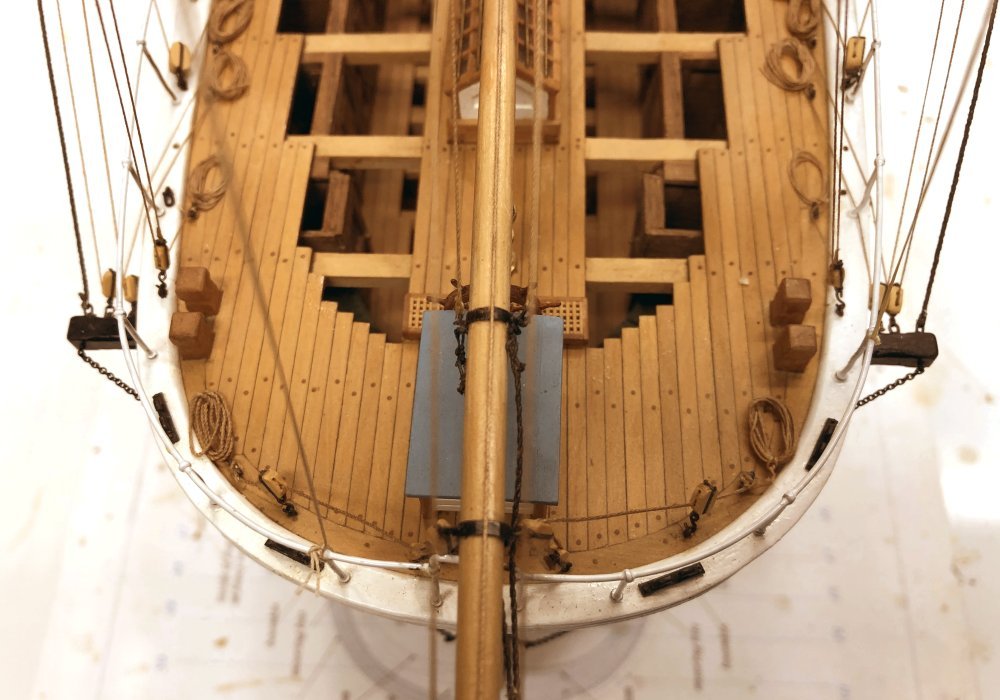
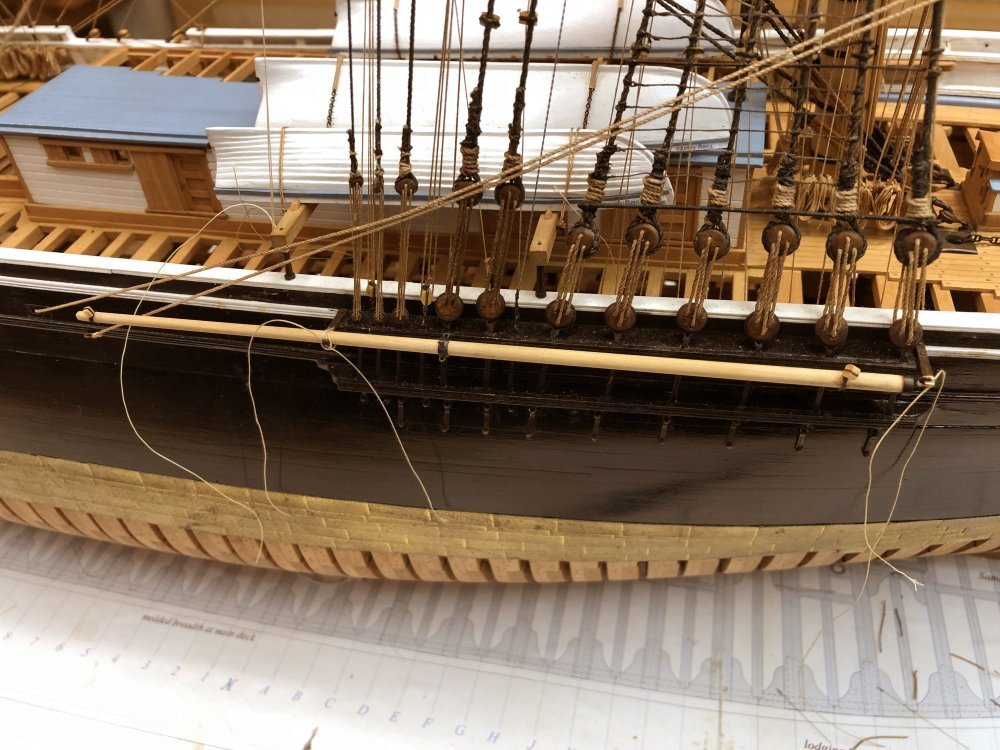
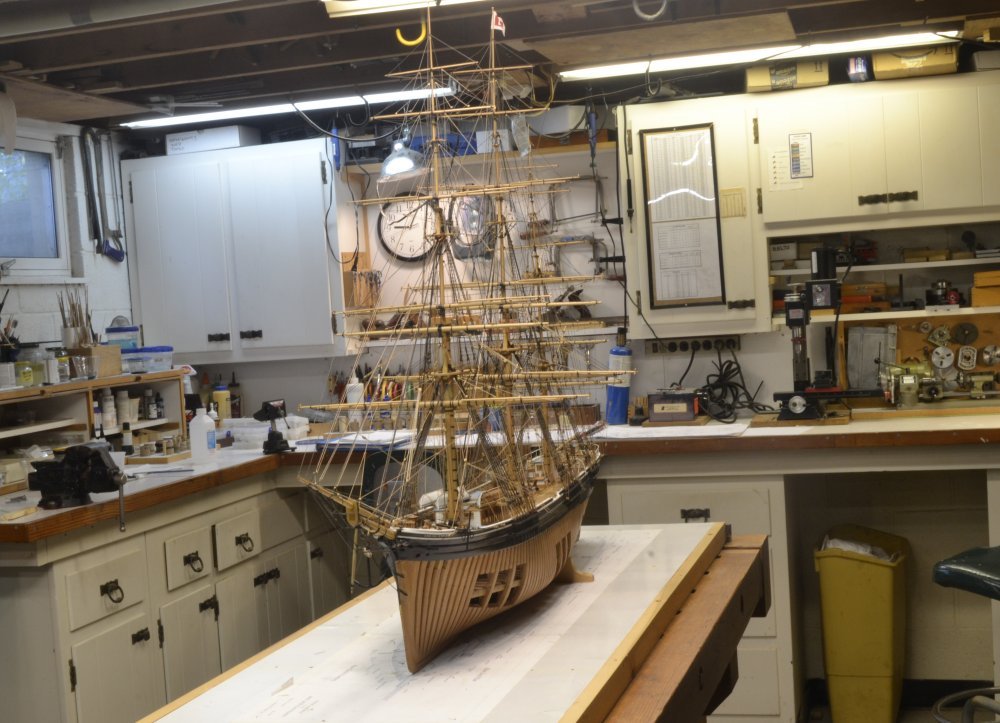
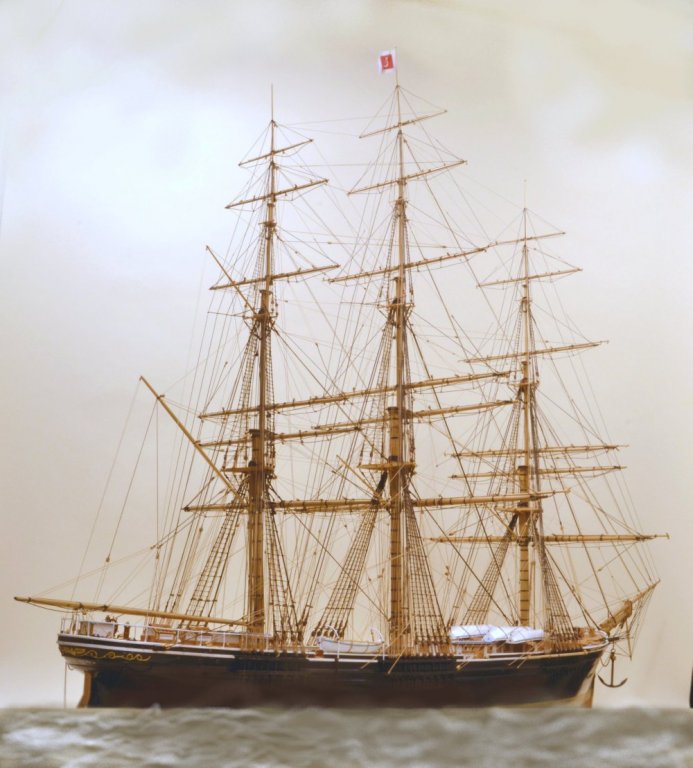
Young America - extreme clipper 1853 Part 323 – Wrapping Up Finally, 99.999% means complete. Since the last post it has been a lot of little chores: snipping rope ends, the last few rope coils, touching up with paint, waxing standing rigging lines, clean up, etc. Some of the "major" chores are described below. The first picture shows the final disposition of the crojack sheets and tacks. These were simply allowed to hang free from the clue garnet blocks with their full lengths coiled on deck. They were tied down to one of the beams under the pile of rope coils to keep them vertical and straight.. The main braces could finally be run, since access was no longer needed to the deck area between the main and mizzen masts. The next picture shows the starboard brace pendant shackled to the outer boomkin eye. The fall of the brace runs from the yard pendant through the lead block on the rail in the center of the picture, then to a deck cleat. The other blocks on the boomkin are the upper and lower main topsail braces. Two missing eyebolts still need to be fitted on the rail. The picture also shows the completion of another chore left over from the volume II work, fitting chains to support the boomkins. The next picture shows both of these. The next picture shows the starboard swinging boom, the lower studding sail boom, being lashed to the fore channel brackets. The alternative would be to store these on the skid beams over the cabin, but this seemed more appropriate, since in port these were often used to moor ships' boats. The next picture shows the model with the dust case removed in the relatively cleaned-up workshop. Finally, launch. Please excuse the amateur artwork. Couldn't resist. Ed

- 3,618 replies
-
- 87
-
-
- young america
- clipper
- (and 1 more)