
HOLIDAY DONATION DRIVE - SUPPORT MSW - DO YOUR PART TO KEEP THIS GREAT FORUM GOING! (89 donations so far out of 49,000 members - C'mon guys!)
×


EdT
-
Posts
2,214 -
Joined
-
Last visited
Content Type
Profiles
Forums
Gallery
Events
Everything posted by EdT
-
You can create a stop point on the Sherline Mill by setting the Z-Axis height to the end of travel on the bit in the sensitive drilling attachment. For example, raise the head using the Z-axis wheel with the drilling attachment fully extended so the tip of the bit rests on the surface to be drilled, then lower the precise depth required on the Z-axis. Sorry if I,m beginning to sound like a Sherline shareholder.
- 3,618 replies
-
- 3
-

-
- young america
- clipper
- (and 1 more)
-
Richard, I would urge you to look at the Sherline sensitive drilling attachment to make drilling with the mill easier. If this is the "jiggly" attachment you refer to, I am surprised. It is by far the most used device on my mill, allowing me to lower the drill by hand in a controlled, but still precise way. Drilling using the Z-axis wheel is not a good idea. Drilling pressure is difficult to control in this way. It puts heavy force on the drill bit that often results in breakage of small drills. The hand-controlled method is much better. If you do not have the drilling attachment, the link below shows it. https://www.sherline.com/product/1012-532-sensitive-drilling-attachment/ Ed
- 3,618 replies
-
- 5
-
-
- young america
- clipper
- (and 1 more)
-
Hi Randy, My Unimat is an ancient Unimat SL that I purchased used in 1978. It is not the item now offered by Micromark. I cannot comment on that product. I have a Sherline mill and can recommend it highly. Whatever tools you buy will require additional accessories to do most things. They can be expensive. If I recall correctly, the most complex milling job in the book was making the pump wheels with their 5 s-curved spokes. This required a rotary table, specific milling cutters, and of course, tools for measuring and centering of the rotary table. For these pieces I would refer you to the detailed descriptions in the book. This is a pretty complex bit of work and you may wish to forgo that complexity and the accessory cost and go with something simpler in design. Recognizing that not many of us are machinists (me included), I tried to provide very complete instructions on machining tasks. I would recommend reading those and deciding what you wish to tackle. This goes for most of the tasks where the machine tools were used. Combination tools offer advantages and have some disadvantages. Cost and perhaps space requirements are obvious advantages, but most of these tools have a small footprint on the workbench. Cost benefits include initial machine costs plus savings on any accessories that can be used in different ways on the same machine. The primary disadvantage is setup time. For many years I used the Unimat as a lathe, a mill, a circular saw, grinder and drill press. I gradually tired of the setup time required for the changeouts, sometimes multiple changes for a single piece, and eventually added single purpose tools, first a circular saw, then the Sherline mill. The Sherline mill is a very versatile tool for tasks ranging from simple drilling to complex precision tasks. In reading the books I am sure you noted that the range of uses is wide. I find that the most useful Sherline mill accessory is the sensitive drilling attachment. A rotating base for the milling vise is a useful everyday substitute for the expensive rotary table. The list of Sherline accessories is long and bank account threatening. The only gripe I have with Sherline is that the milling vise often makes me want to scream out loud. I understand its design as a rigid platform for machining, but I often wish they had a simple screw vise to use for ordinary tasks like drilling and even some light machining. I have been unsuccessful in finding something like this on the market. Tool companies seem to avoid making accessories usable on other brands. At the end of the day, you will need to evaluate your needs, your tolerance for the learning curve involved in the use of tools like this and the price tag of the initial tool and the accessories that will be needed. You may find the chapter (YA Vol I) on tools and which ones to purchase first to be helpful, if you have not yet read it. Its all part of the work process, Good luck. Ed
- 3,618 replies
-
- 2
-
-
- young america
- clipper
- (and 1 more)
-
Hi Randy, The first recommendation is to keep out debris as much as possible to begin with. Of course this is more of a nice goal rather that a practical solution. I have used a shop vac from outside the hull to suck or blow stuff out, but also used compressed air spray cans with long tubes. These are pretty effective at removing dust and getting into tight spaces. The open framing at the bottom is, of course, a big help when blowing out dust. Ed
- 3,618 replies
-
- 2
-
-
- young america
- clipper
- (and 1 more)
-
HMS Naiad 1797 by albert - FINISHED - 1/48
EdT replied to albert's topic in - Build logs for subjects built 1751 - 1800
Bravo, Alberto! Beautifully done from keel to figurehead. I love the launch cradle display. Wonderful work. Ed -
I'm sorry Randy, but I am still not following you. The deck beams do not bolt through the frames or even into the frames if /I recall correctly. If you can give me the drawing reference it may help. IF you refer to page 136, Vol I, Figure 10-11 shows the detail for the model bolting. Bolts are placed through the beam into the clamp and into the hanging knee. Is this the detail you are referring to? Ed
- 3,618 replies
-
- 2
-
-
- young america
- clipper
- (and 1 more)
-
Hi Randy, I'm not sure I understand the question. Could you be more specific? Ed
-
Beautiful work, Kiyoo, and a creative innovative development. Very glad to see your drafting ideas coming to fruition. Bravo. Ed
-
Thank you, Pat. Always good to hear from you - and to keep up with your great work. Ed
- 3,618 replies
-
- 1
-
-
- young america
- clipper
- (and 1 more)
-
Thank you, Erik, for your generous comments, and Keith for the thumbs up.. Its nice to know that the work is still being "discovered". Cheers, Ed
- 3,618 replies
-
- 2
-
-
- young america
- clipper
- (and 1 more)
-
I'd say you are way beyond the apprentice stage, Mark. Glad to see your work progressing again. Ed
-
Looking as fantastic as always, Mark. Ed
-
HMCSS Victoria 1855 by BANYAN - 1:72
EdT replied to BANYAN's topic in - Build logs for subjects built 1851 - 1900
Looks great seeing it all assembled Pat. Again, bravo on a fantastic job. Ed- 1,013 replies
-
- 2
-
-
- gun dispatch vessel
- victoria
- (and 2 more)
-
HMCSS Victoria 1855 by BANYAN - 1:72
EdT replied to BANYAN's topic in - Build logs for subjects built 1851 - 1900
Bravo, Pat. Right up to your usual standards of research and execution. Nicely done. Ed- 1,013 replies
-
- 2
-
-
- gun dispatch vessel
- victoria
- (and 2 more)
-
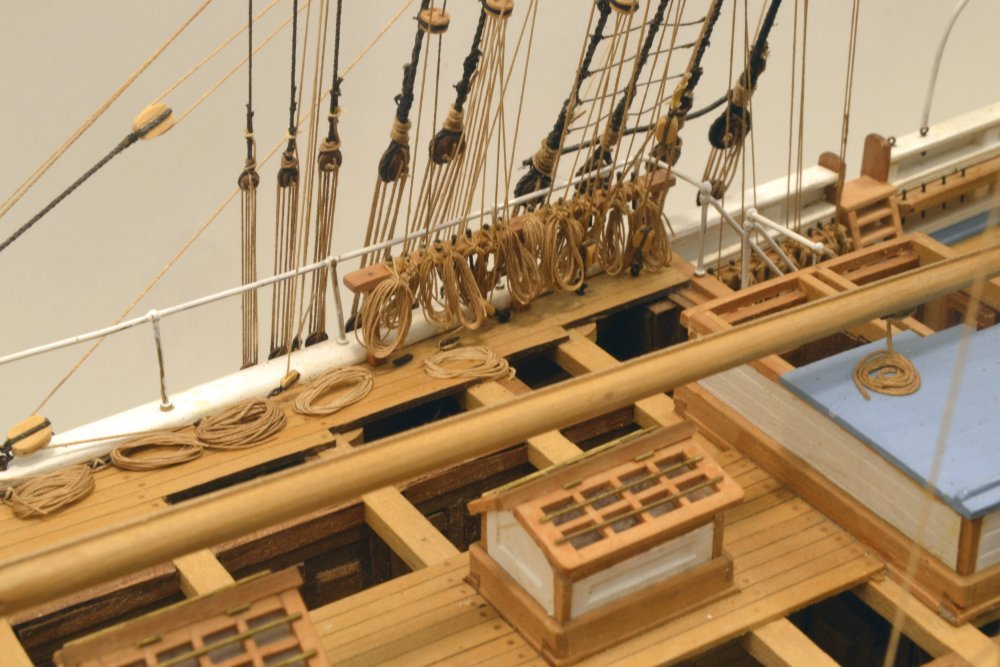
Thank you for your comments and for the images, Rick. Having read the books, you will know that deciding on that pin rail was one of the more difficult choices in designing the model. Although there were others, most are well hidden within the ship and not as visible as this one. My only excuse would be that all of those lines had to belay somewhere. For those who don't remember, here's a reminder. Note also the very full rail forward of the poop break. Cheers, Ed
- 3,618 replies
-
- 14
-
-
- young america
- clipper
- (and 1 more)
-
Lovely work, Allan. Hope she's being shipped off to a good home. Ed
- 86 replies
-
- 2
-
-
- schooner
- effie m morrisey
- (and 1 more)
-
Looks beautiful, Randy - and very familiar. Ed
-
Bravo, Maury! She looks terrific. Beautiful job. Also, love the case - and the mirror. Ed
-
HMS ROYAL KATHERINE 1664 by Doris - 1/55 - CARD
EdT replied to DORIS's topic in - Build logs for subjects built 1501 - 1750
Extraordinary, Doris. Simply beautiful. Ed- 1,035 replies
-
- 4
-
-

-
- royal katherine
- ship of the line
- (and 1 more)
-
HMS ROYAL KATHERINE 1664 by Doris - 1/55 - CARD
EdT replied to DORIS's topic in - Build logs for subjects built 1501 - 1750
Hello Doris, I have not been following all the work on MSW closely lately and I missed the post where you reported the loss of your husband. Please accept my sincere condolences on your loss. I came across the post while showing your work to someone as I often do to describe the work of an exceptionally talented artist/modeler. You are in a class by yourself, for sure. All the best, Ed- 1,035 replies
-
- 6
-
-
- royal katherine
- ship of the line
- (and 1 more)
-
Thank you Randy, for the reference. I am quite familiar with it, though over the past several years I had forgotten the specific passage. I can confirm that at the time Crothers's analysis definitely influenced my decision to use internal strapping on the YA model. I do believe, however, that there is room for doubt. And thank you, GuntherT for the images. I have never seen this photo, but agree that she is indeed Young America and I will be very pleased to add it to my collection - making a total of three. The photo will take some study, but offhand I see nothing that departs from the others in terms of detail. I would love to have had this when designing the model. Thanks again. Ed
- 3,618 replies
-
- 1
-
-
- young america
- clipper
- (and 1 more)
-
Thank you, Randy. Always good to hear reinforcement for ones educated guesses, but sorry to hear of your predicament. No suggestions come immediately to mind. What is your reference on Ocean Monarch? Ed
-
Hello Greg, nice to hear from you. I am indeed too old to be home schooling my own children. Our adventures in "distance learning" are on behalf of my daughter's two girls - kindergarten and 3rd grade. Their mom teaches at the local high school and is either at school or teaching from home all day so we are hosting the girls - 7am to 4. Pretty busy days, but I am enjoying living 3rd grade again - especially relearning math. Actually Charlotte does not need much help, having become quite computer savvy - these use several different applications, take and post photos of their work, etc. However, kindergarten with Georgia is a full time job for my wife Dorothy. Thankfully that is one-half day. The iron strapping - 4" x 1/2"(or 3/4?) if I remember correctly, was bolted at every frame and at every overlap. Frames were mortised so the iron was flush with the frame to allow planking. I installed the strapping on the inside of the hull. The internal vs. external decision was a toss up, since both were used and there is no record for any of Webb's ships, only the Lloyd's register entry which confirmed that she was strapped. It would take a better structural engineer than me to analyze any difference, but I believe it would be a wash. There would be great advantage in installation in favor of internal. Since the straps run from keel to topside the entire height would require scaffolding, unlike a single progressing working level for planking. Cutting slots to fit the straps externally would be more difficult, involving mostly overhead mortise work - likewise for the driving of bolts. Given the very short construction time for the ship and the very urgent demand for these carriers at the time, I decided that these factors would lead to internal strapping. I believe iron bolts would be used because the boltheads would be under the external hull planking. Copper would be very expensive for this and would not be appropriate against the dissimilar iron. I believe these would be the usual malleable iron bolts probably with a head on the iron side, driven through slightly undersized holes and peened over on the outer end. These would be flush like other bolting. The strap and any bolthead projection would have had to be set low enough to allow planking to lay flat on the frames. I do not know how crossing of the straps was handled to accommodate this. A long answer to a short question, but this was one of the more interesting decisions made on the model and lacking real data, assumptions had to be made. The model strapping is thin enough not to require mortising of the frames - thankfully. Ed
- 3,618 replies
-
- 2
-
-
- young america
- clipper
- (and 1 more)