


ASAT
-
Posts
619 -
Joined
-
Last visited
Content Type
Profiles
Forums
Gallery
Events
Everything posted by ASAT
-
B-25J Mitchell by Tom E - Revell - 1:48 Scale - PLASTIC
ASAT replied to Tom E's topic in Non-ship/categorised builds
Looking great Tom, nice detail work... I wonder for future reference (when I do mine) I wonder if you had painted the green first on the cowls if it would be easier to mask? Seems like a larger radius and you could shoot away from the mold line.... -
North American P-51D Mustang by Asat - Airfix - 1/48
ASAT replied to ASAT's topic in Non-ship/categorised builds
I’ll get one too, and a couple more and we’ll do a group build, we could be a Schwere Panzerkompanie..... -
North American P-51D Mustang by Asat - Airfix - 1/48
ASAT replied to ASAT's topic in Non-ship/categorised builds
Yeah, I’ve been looking into them, I have been comparing the king tigers with full interior, some with zimmeret, some without, Henschel and Porsche turrets, etc. the only thing I can guess is that the kits that are $20 more seem to have individual track links - would that be it? I am really preferring the kits with the link and length jigs that seem to have a suffix letter S after the number - Tak 2045S for example.... hard to get definitive info though.... -
North American P-51D Mustang by Asat - Airfix - 1/48
ASAT replied to ASAT's topic in Non-ship/categorised builds
Can anyone tell me the difference between the kits (king tigers) that go for $55 vs the ones that sell for $20 more? ( prices approximate) -
North American P-51D Mustang by Asat - Airfix - 1/48
ASAT replied to ASAT's topic in Non-ship/categorised builds
Thanks, I’ll look into those tools... -
North American P-51D Mustang by Asat - Airfix - 1/48
ASAT replied to ASAT's topic in Non-ship/categorised builds
Thanks Jeff, I will look for some, Craig, I will check out those vendors, are the pliers more versatile than the vise type benders? Also wondering if you have any thoughts, experiences with the King Tigers from Takom, been looking at armor recently.... -
North American P-51D Mustang by Asat - Airfix - 1/48
ASAT replied to ASAT's topic in Non-ship/categorised builds
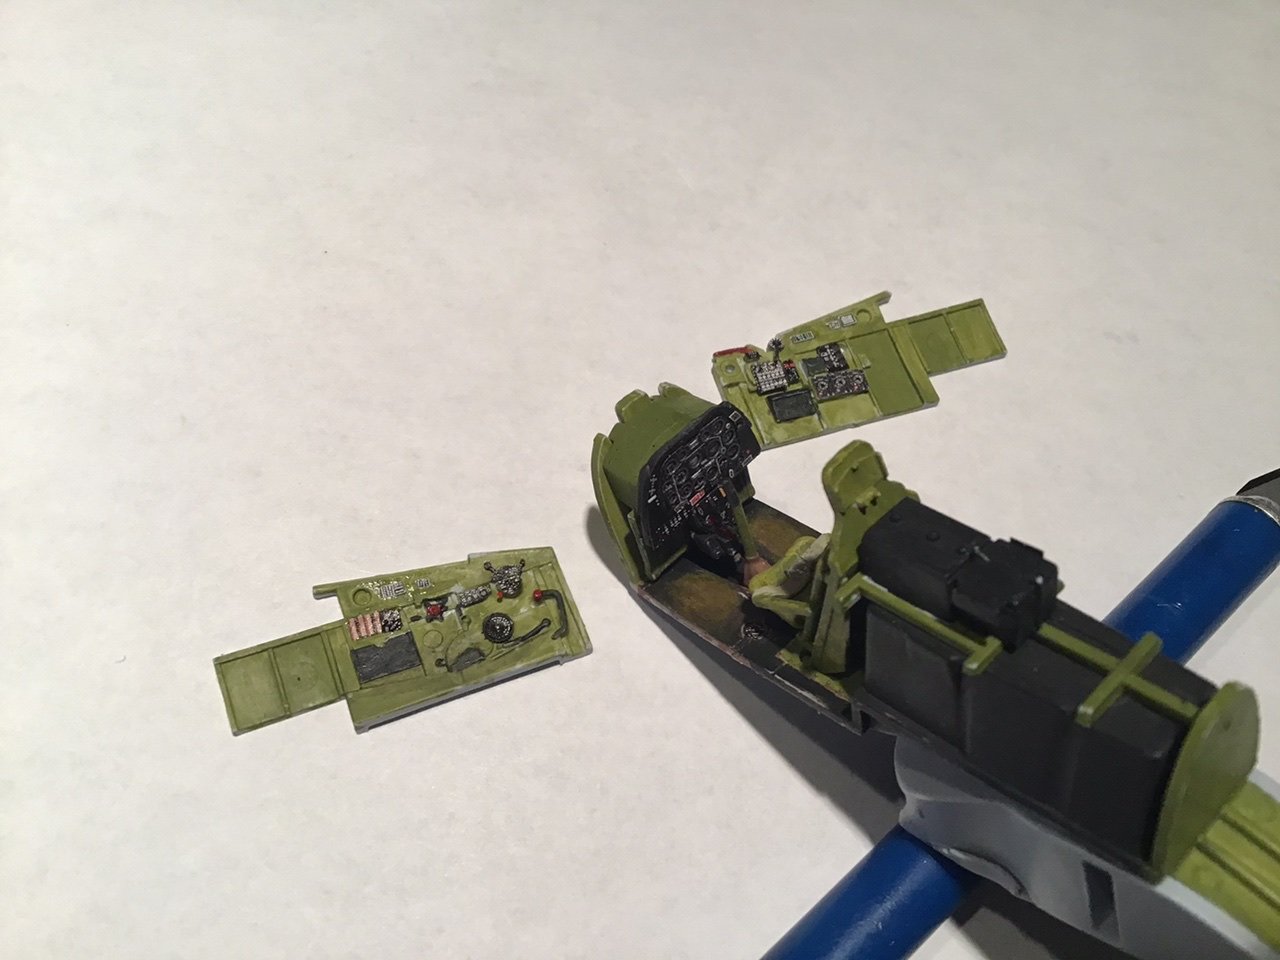
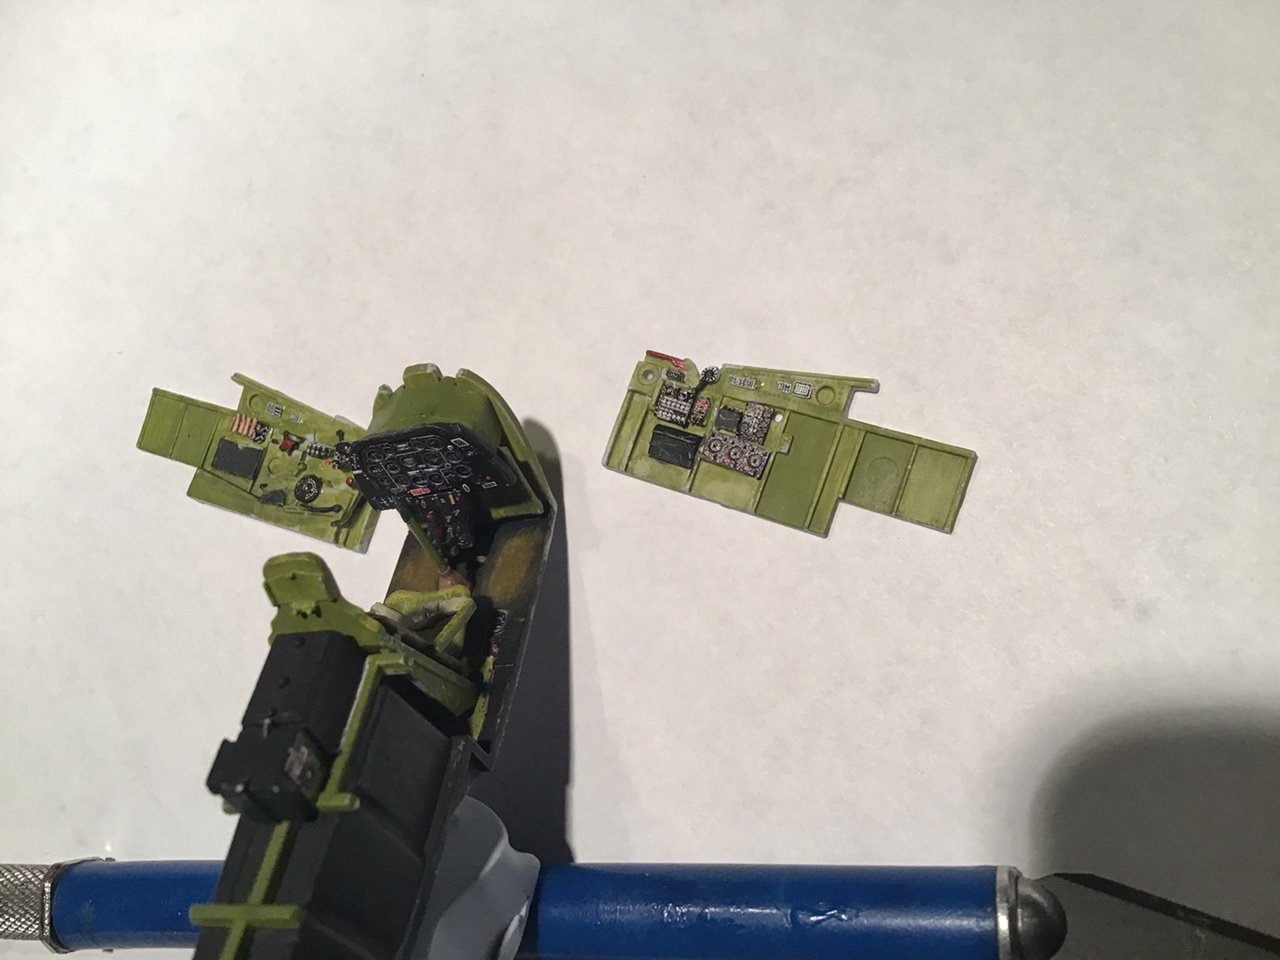
So I received my Eduard cockpit PE set from kitlinx.com and have the instrument panel and cockpit side panels sorted... adds a lot of detail but wow is it small and fiddly - I’d do it again though and probably will, might have to invest in some PE tools - any recommendations?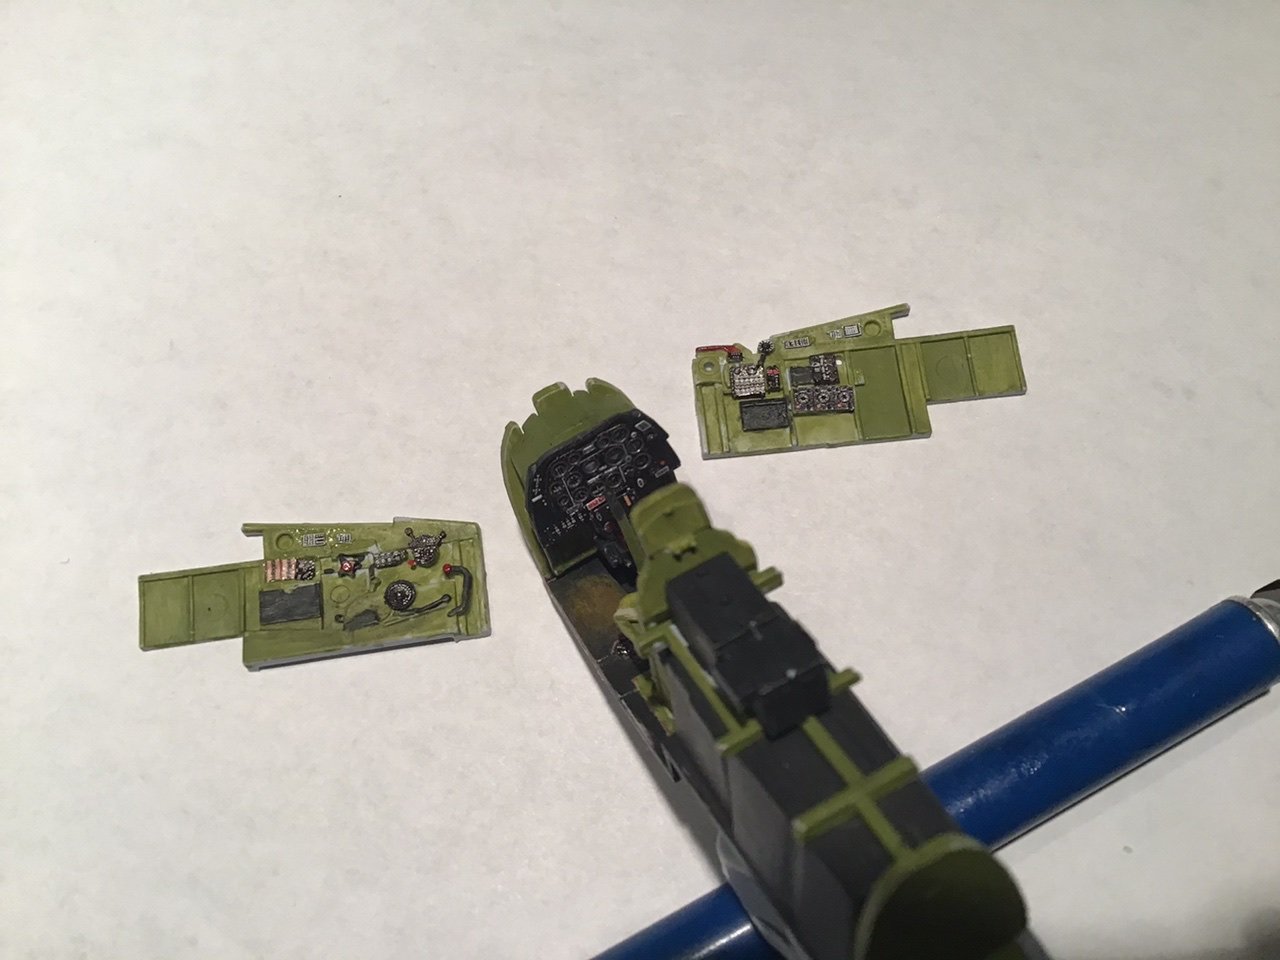
-
M4-A1 Sherman Tank by Osmosis - Italeri - 1:35
ASAT replied to Osmosis's topic in Non-ship/categorised builds
Yep, the general procedure is to : with acrylic colors clean, prime and pre shade ( if desired) the completed model paint, wait 24 hrs and mask for camouflage ( if applicable) paint other color (wait 24 hours between multiple colors/masking apply gloss clear, wait 24 hrs then decals apply more gloss over decals wait 48 hrs apply oil based washes/panel lines/weathering apply acrylic flat coat clear if more weathering/shading desired use pastels I got this procedure from jwvolz on here, look at some of his builds to see the results- wow! But there are lots of other methods too, I’m sure we all develop our own after a few builds - try a bunch, that’s what I am doing - having a great time learning! -
M4-A1 Sherman Tank by Osmosis - Italeri - 1:35
ASAT replied to Osmosis's topic in Non-ship/categorised builds
Art, I haven’t built any armor - yet! But I’m sure some of the armor guys are gonna give you all the help you need, just looking at some pics online it seems like most of that is painted green and then you can add highlights and detail etc as you weather the model after assembling..... I haven’t washed anything yet prior to paint, on smaller stuff I shoot a lacquer primer (Tamiya rattlecan fine primer is great) and then airbrush the color coat, on larger pieces ( wings, fuse etc) I did wipe with isopropyl alcohol before primer, paint. Be sure to spray the lacquer stuff outside or with good ventilation/protection- it can be nasty..... I use acrylics for the rest.... the primer really helps to show where you need to clean up a bit more or fill,sand etc.... -
M4-A1 Sherman Tank by Osmosis - Italeri - 1:35
ASAT replied to Osmosis's topic in Non-ship/categorised builds
Rabbit hole indeed! LOL... I have three builds going on now... pretty addictive stuff, I have found these new kits are light years ahead of the stuff I used to build in my youth- lots more fun and produces a really nice results.... the sticky stuff is called “ blue tack” or tacky or the like.... it’s usually used to put up posters or light signage on a wall. I got some at Lowe’s in the sandpaper section.... -
Curtiss P-40B Warhawk by Asat- Airfix- 1/48
ASAT replied to ASAT's topic in Non-ship/categorised builds
I remember hearing the phrase “keep your Mach up” from some Phantom drivers when my dad was stationed at RAF Alconbury during Vietnam - ‘69-‘70... I might have to find a good F-4 model.... -
Another Airbrushing Noob
ASAT replied to Osmosis's topic in Painting, finishing and weathering products and techniques
To me, the biggest difference is the pressures you are going to shoot at, and the intended usage/spray pattern, the gravity feeds run on a bit lower pressures as they don’t have to siphon the paint up from the reservoir and consequently can shoot a bit finer line at lower pressures. If you are doing really fine, thin lines then gravity feed will be your best option. I find that for plastic models, and so far all my wood spraying needs a siphon brush (iwata eclipse) has meet all my needs, I can get a finer line than I need, and it sprays every medium I need (so far) with a great pattern and consistency. Plus I can fill a larger container if I have a larger single color need... as always YMMV depending on your preferences- and of course, having both is the best of all! I would recommend the badger siphon cup for small jobs though (for the iwata siphon brush)- it’s pickup tube runs all the way to the bottom of the cup.... some only go halfway or so.... -
Blades for byrnes table saw
ASAT replied to michael101's topic in Modeling tools and Workshop Equipment
I guess it depends on the accuracy you require for your cuts, if you are ok with .3mm variations then it would probably be ok, it might eventually wear out your spindle shaft ... I would just source some 1/2” arbor hole blades from Jim or Malco blades..... -
B-25J Mitchell by Tom E - Revell - 1:48 Scale - PLASTIC
ASAT replied to Tom E's topic in Non-ship/categorised builds
Me too! Would there be any value in dry brushing/detailing the engine more... pushrods etc? It’s amazing how a few little things can add up to make a big difference! Looking good Tom... -
Curtiss P-40B Warhawk by Asat- Airfix- 1/48
ASAT replied to ASAT's topic in Non-ship/categorised builds
Yeah, light years ahead of the F-16 let alone the F-4 - it’s also the reason the USA maintains World Air Superiority- much less the battlefield, I don’t think anyone wants to spend the money to compete with that technology. But it’s not really where the next wars are going to be fought... unless the Chinese change their tactics -
Curtiss P-40B Warhawk by Asat- Airfix- 1/48
ASAT replied to ASAT's topic in Non-ship/categorised builds
God’s G? Ken? Grace? Cool that you were a Phantom pilot, I worked on them for a long time as an electrician doing the ARN-101 mod on the E and RF’s before ending up in flight test at Hill AFB -
Curtiss P-40B Warhawk by Asat- Airfix- 1/48
ASAT replied to ASAT's topic in Non-ship/categorised builds
I have to agree with you on that one Lou, i like the side view, but I am not enamored with the wing shape - I bought it because it is a great value when you use the 40% coupon at hobby lobby and I am using it as a learning platform. I really am attracted to the British and German designs, the Brits seem to have the smooth flowing lines and the German stuff is just brute force functionality - it’s purely a visual preference for me for now, I really need to get educated on the engineering and technical aspects of the machines of WWII - Armor as well, as I am developing an interest in modeling that as well. Thank you to everyone who has contributed to this discussion- you amaze me with your expertise and alert me to my woeful lack of knowledge -
Glenn, if you really can’t find box in the sizes you need, you let me know and I’ll send you some... I have a bunch that I have been hoarding for a while now....
-
Glenn I found some 24x3x3/8” billets on sale for $15 ea here: https://www.cookwoods.com/collections/boxwood-castello. Don’t know if there is a minimum or not, but quite a few resources came up..... they also have 18x2x2 turning squares if that’s too thin....
-
Curtiss P-40B Warhawk by Asat- Airfix- 1/48
ASAT replied to ASAT's topic in Non-ship/categorised builds
Wow! You guys are a veritable WWII aircraft history repository! That is some fascinating info on a warbird that up till now I just liked the sleek lines of.... now get on over to my P-51 build and throw down some in depth discussion on that bird so I can gain more appreciation for it as well.... I guess I’m going to have to do some reading in between model building. BTW..... thanks for the advise and compliment CDW..... !! 😀 -
Curtiss P-40B Warhawk by Asat- Airfix- 1/48
ASAT replied to ASAT's topic in Non-ship/categorised builds
Thanks guys for looking in, and thanks for all the “likes” - I have always liked this bird too Lou, especially in the Flying Tigers motif with the sharks teeth, quite the imposing look.... I didn’t know that they were not very maneuverable and considered underpowered till I started reading up on them doing this build, I guess they had a great dive rate though and the AVG guys used that to their advantage using a “dive and zoom” technique instead of normal dogfighting that contributed greatly to their success. Thanks for the tip on the canopy mask too Popeye, I didn’t think that other brands might be inferior... guess I’ll stick with Eduard... no pun intended 😎 Next up is decals and I don’t have any setting solution yet so I guess I’ll work on something else till I get that... Anyone have a great recommendation for an awesome decal setting solution/ solvent? There appears to be a ton of those as well, I’ve heard good things about the Tamiya Mark Fit Strong...? -
Curtiss P-40B Warhawk by Asat- Airfix- 1/48
ASAT replied to ASAT's topic in Non-ship/categorised builds
Thanks Ken and Edward for the kind words, and I believe you have hit the nail on the head Tigerdvr, I am having a great time.... I did get out of the house today and played some golf but after that I managed to mask up the canopy, windscreen and side glass, used a masking set from eduard - man! What a treat that is! Well worth the $6 - I could never do this well masking or freehand on my own.....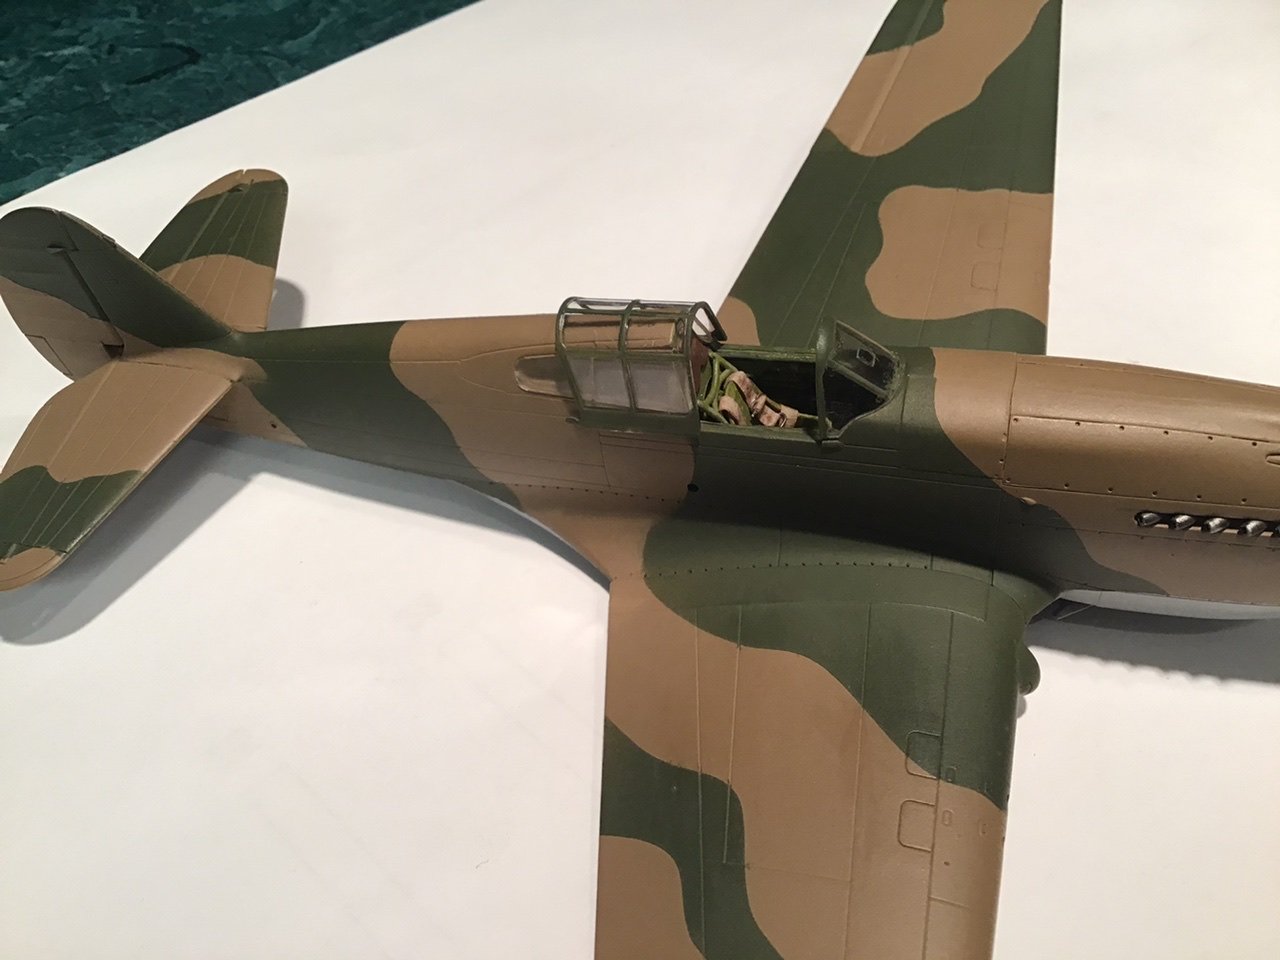
-
Curtiss P-40B Warhawk by Asat- Airfix- 1/48
ASAT replied to ASAT's topic in Non-ship/categorised builds
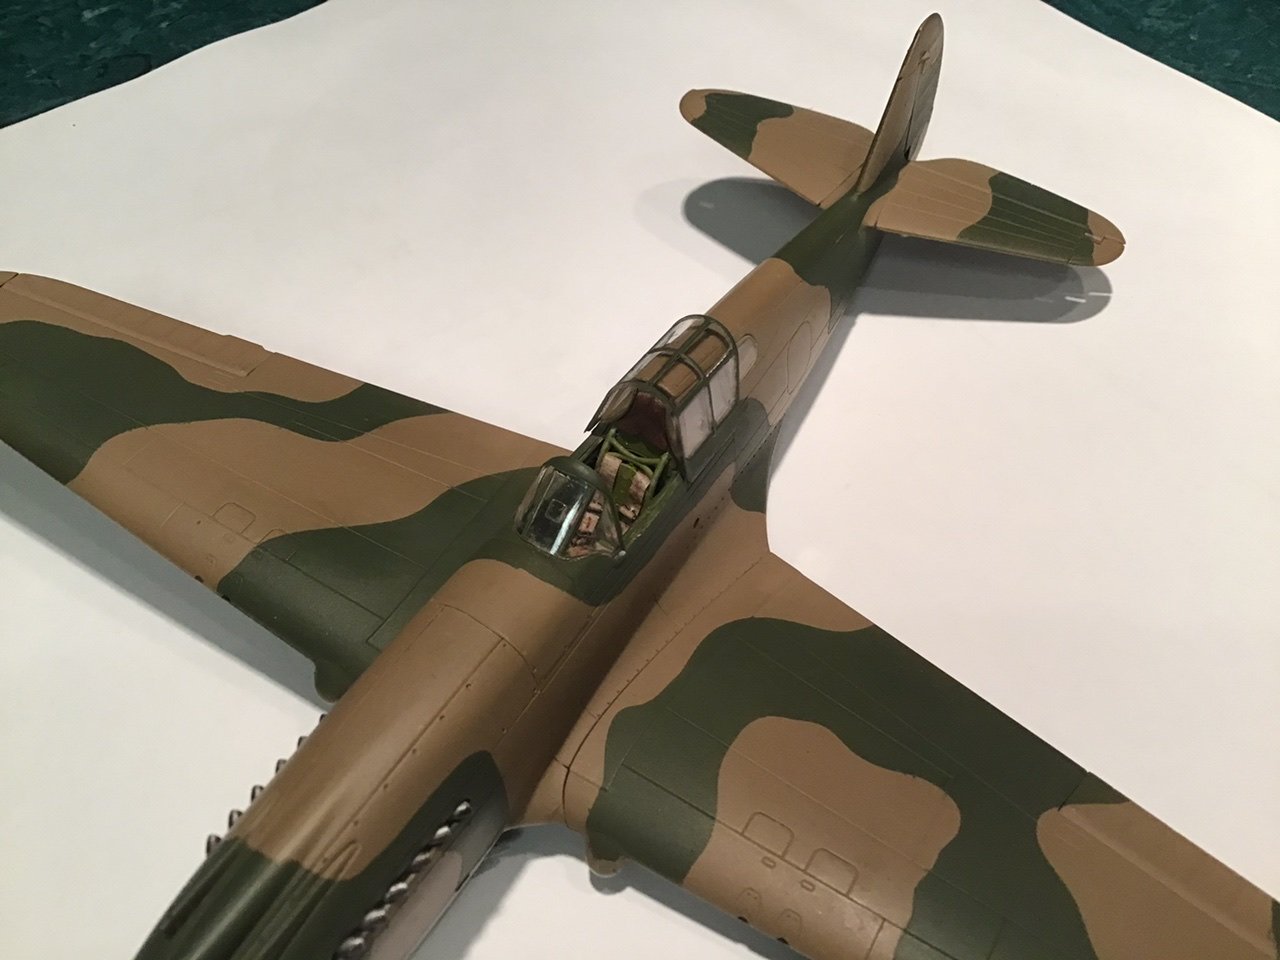
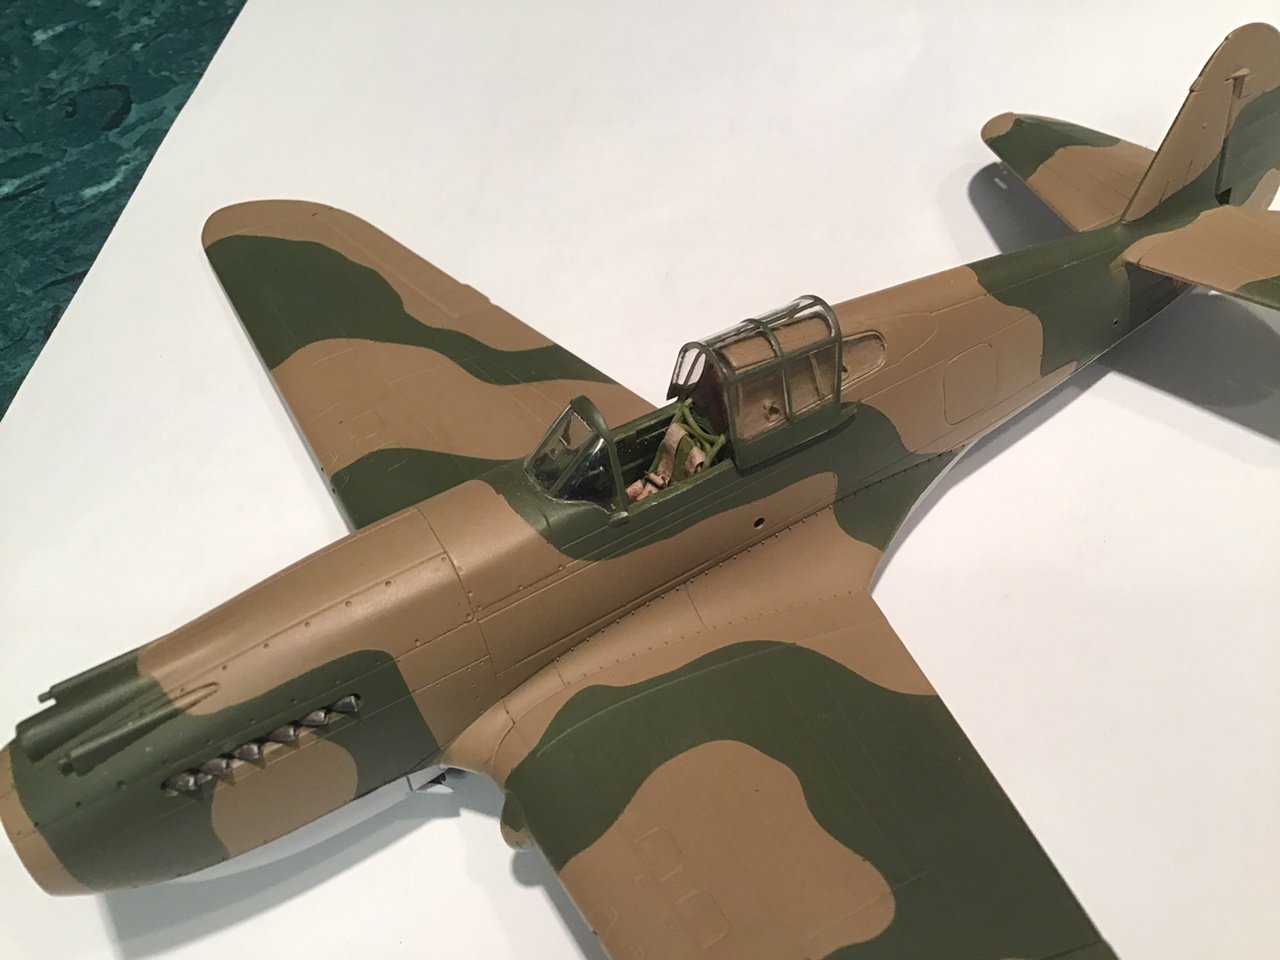
So I got some good advise in a couple of PMs from CDW and Jwvolz - so I went ahead with the camouflage masks and painted the second color and added the exhaust manifolds, I guess clear and decals are next and then some attempts at weathering .... still working out the airbrush mix and pressure techniques but this is a lot of fun!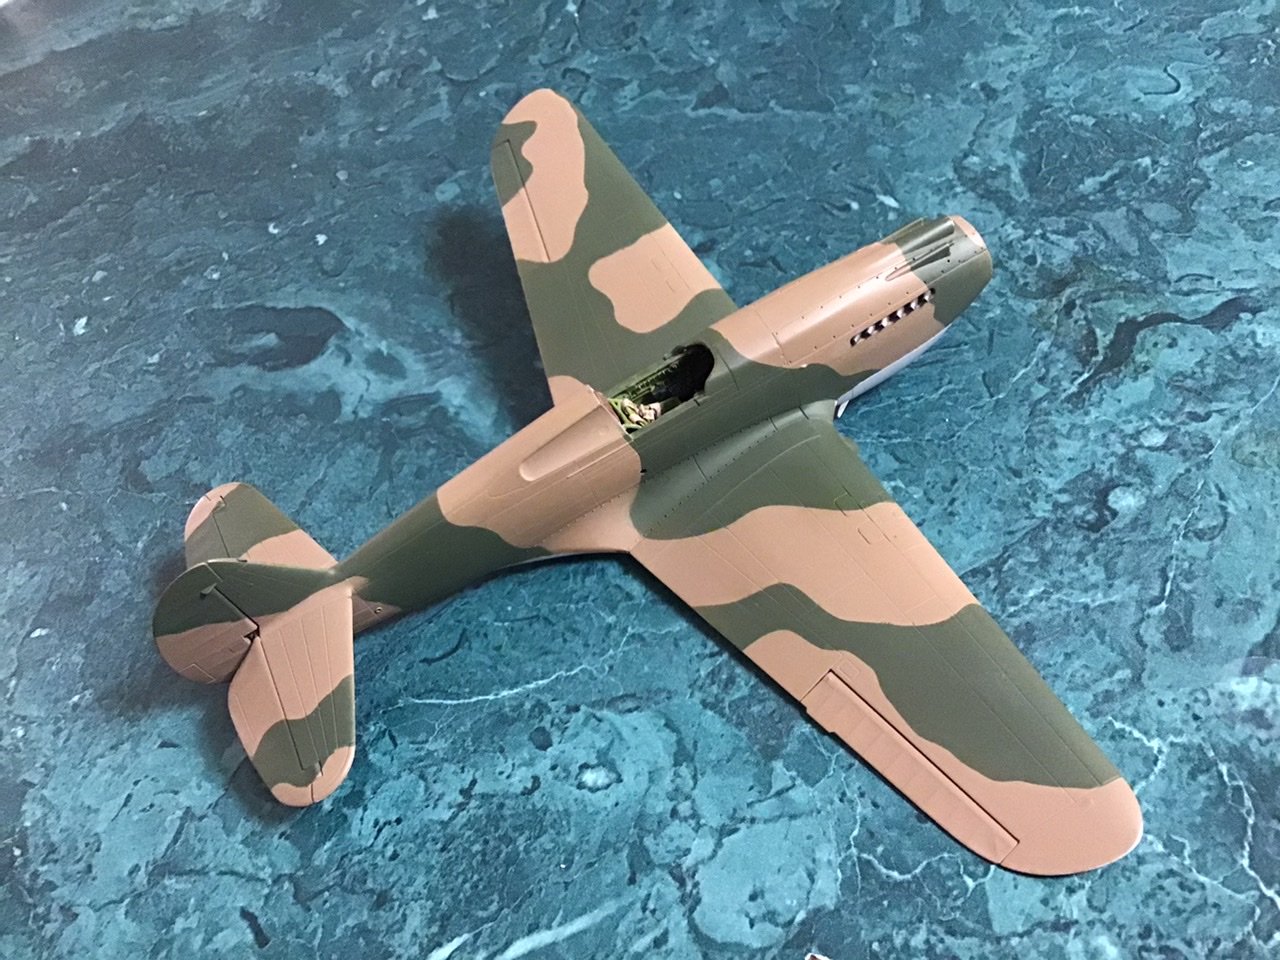
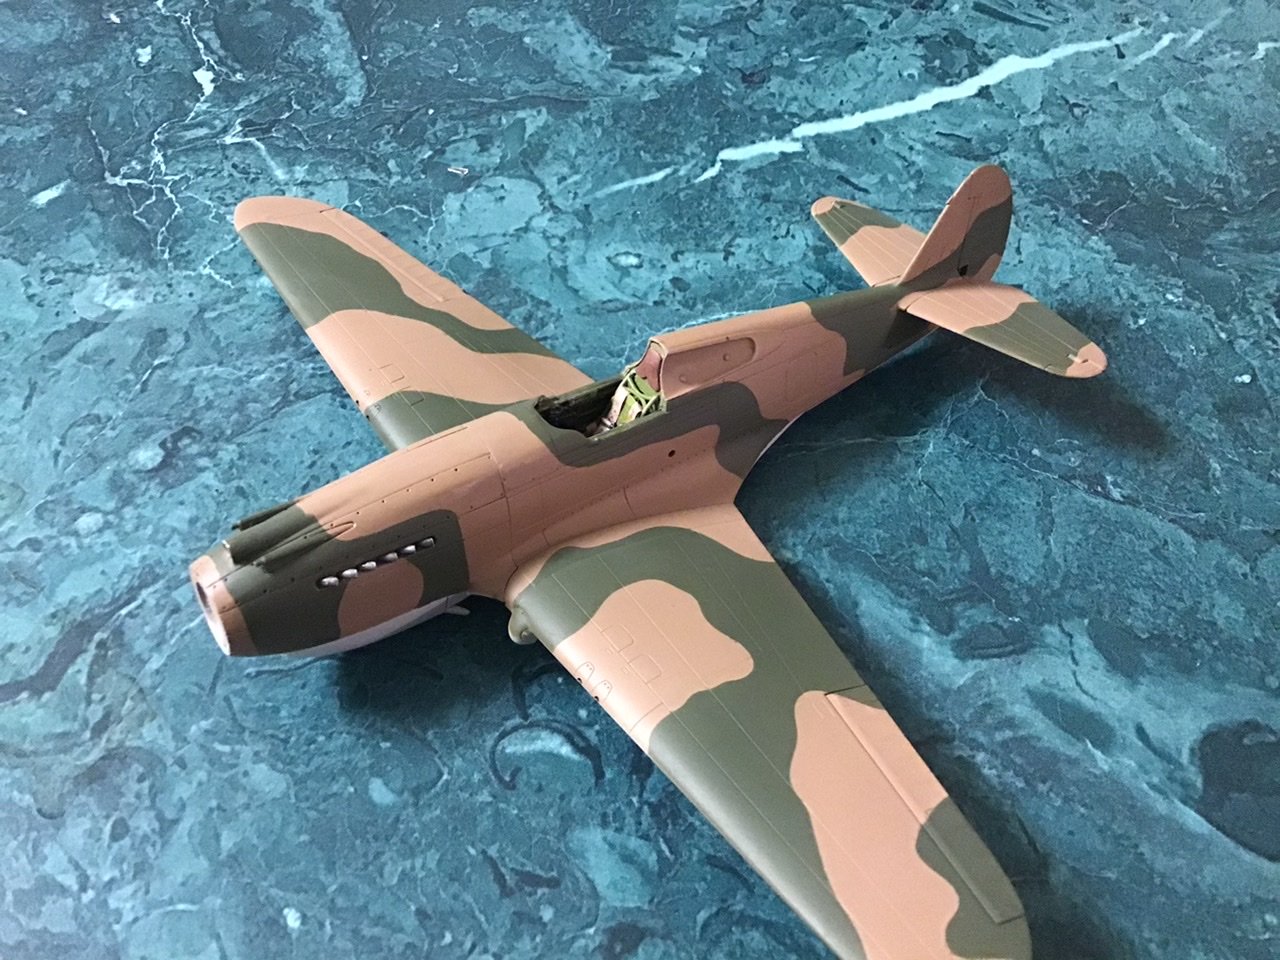
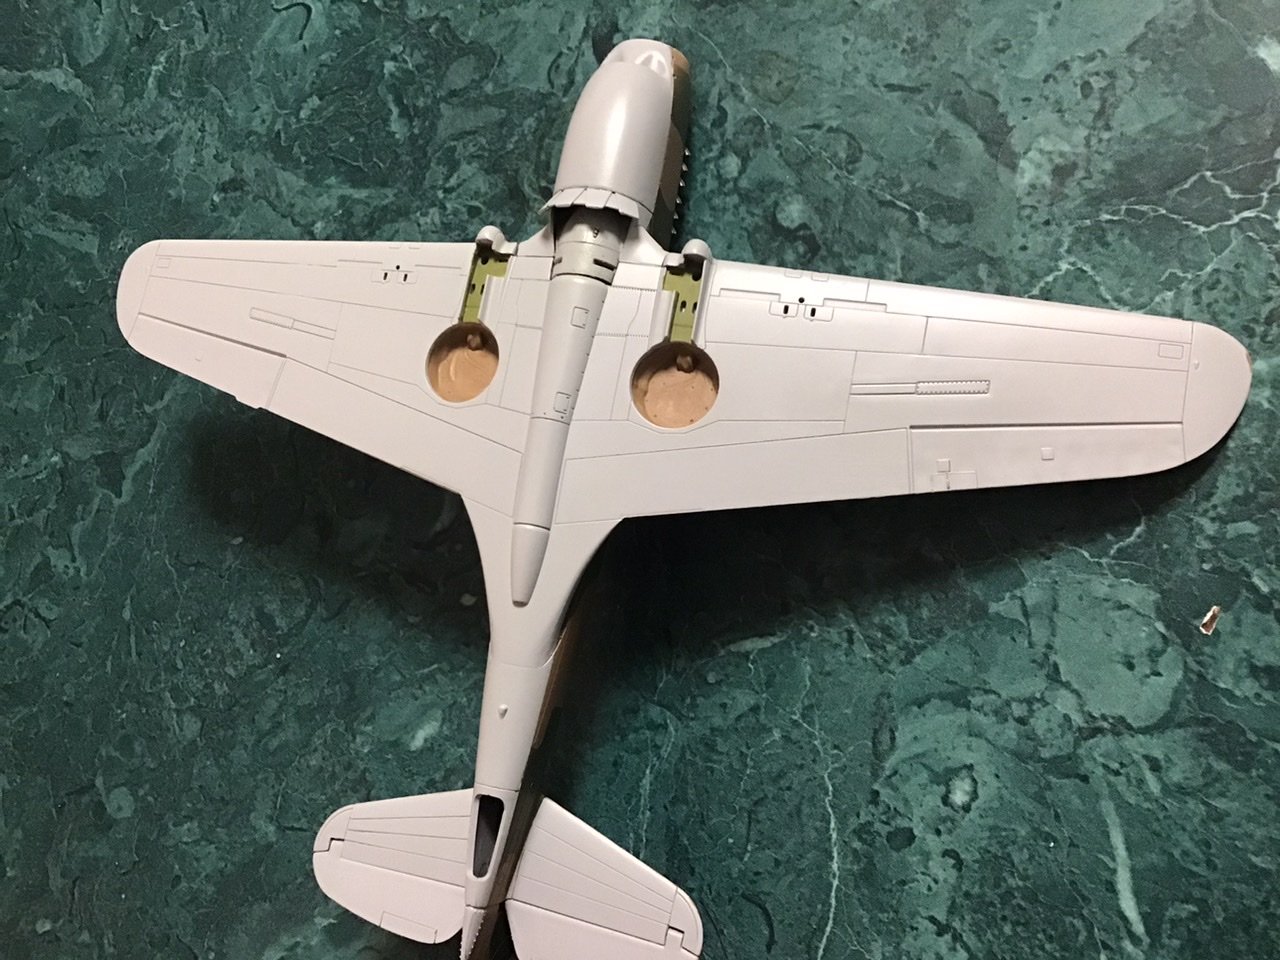
-
Curtiss P-40B Warhawk by Asat- Airfix- 1/48
ASAT replied to ASAT's topic in Non-ship/categorised builds
Thanks Popeye, I have only used acrylics up to this point.... I’m looking into oils for weathering as I guess they can be easily removed if you mess up? Sounds like just the ticket for me.....😁 this one is pretty much a test bed anyway.... -
Have you considered an airbrush and small compressor? I use one at my dining table, I am surprised that I don’t get overspray past the paper towels I use behind the model, acrylics don’t even make a stink.... a very small box setup would work as a spray booth....