


ASAT
-
Posts
619 -
Joined
-
Last visited
Content Type
Profiles
Forums
Gallery
Events
Everything posted by ASAT
-
+1 for the Dewalt....
-
Nope, You gotta make ‘em
-
Spitfire Mk IX by jwvolz - FINISHED - Hasegawa - 1:48 - PLASTIC
ASAT replied to jwvolz's topic in Non-ship/categorised builds
Joe, how long do you let acrylics dry before you would apply a camouflage mask? Are you going to weather/do panel lines etc. and how to do that now that color coats are on? i.e. no pre shading? -
Curtiss P-40B Warhawk by Asat- Airfix- 1/48
ASAT replied to ASAT's topic in Non-ship/categorised builds
Oh CDW!! Yeah he will know... I’ll give it till morning then pm him if I don’t hear anything.... -
Curtiss P-40B Warhawk by Asat- Airfix- 1/48
ASAT replied to ASAT's topic in Non-ship/categorised builds
Craig? Do you think I should start a new topic asking for help? -
Curtiss P-40B Warhawk by Asat- Airfix- 1/48
ASAT replied to ASAT's topic in Non-ship/categorised builds
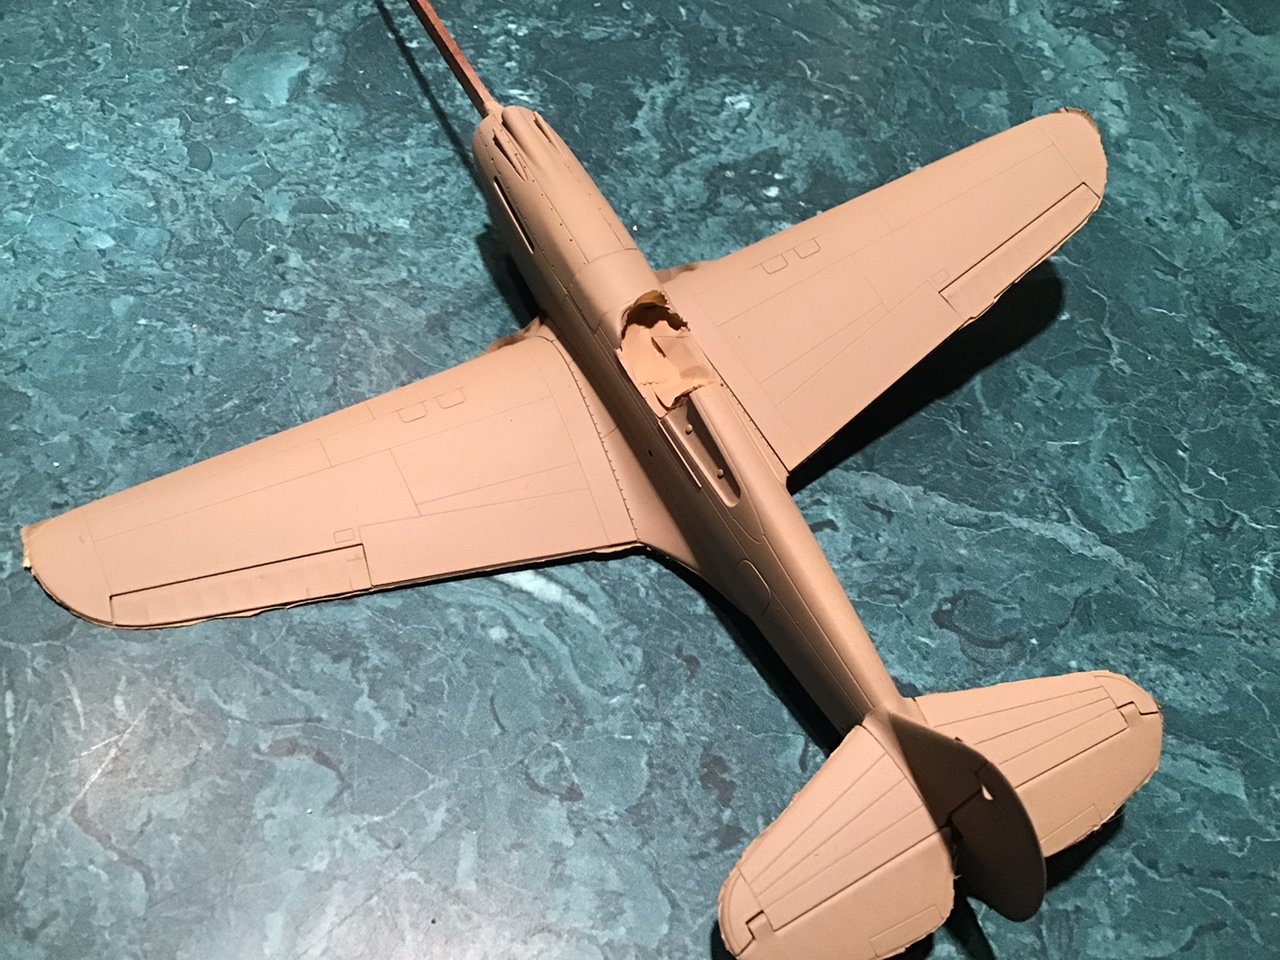
OK -I received my canopy and camouflage masks, painted the bird topside with Vallejo AV71125 Curtiss Brown, what is the procedure for installing the masks? How long do I need to wait before putting on the masks? Or do I need to shoot a varnish over the brown first? Also any tips on fitting the canopy masks so I don’t ruin them just charging in.... 😇 appreciate any help you guys can give....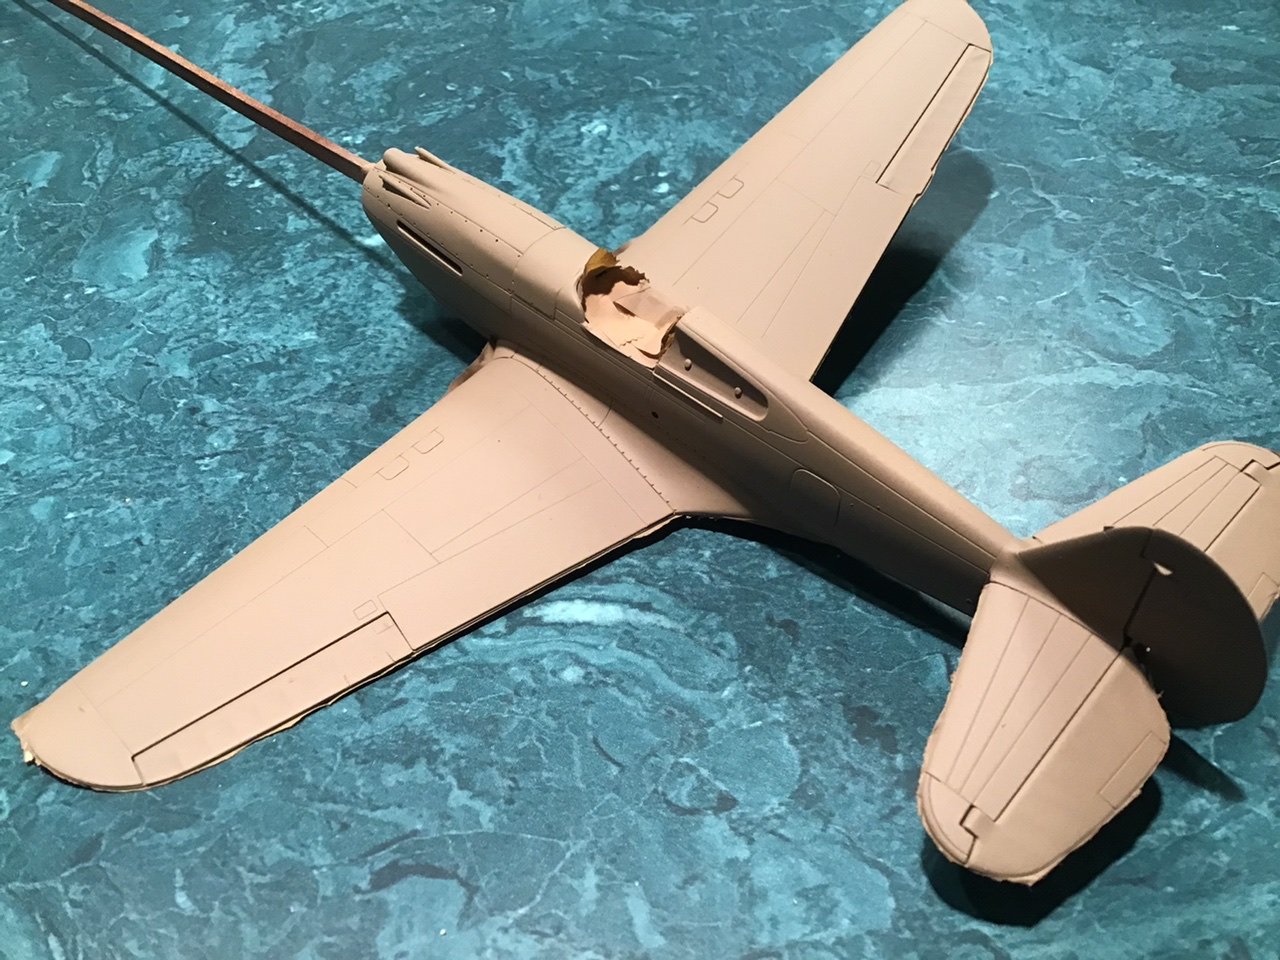
-
Nice to have good friends in high places! Looking good Doc!
-
ancre Coureur by cafmodel - 1/48
ASAT replied to cafmodel's topic in - Build logs for subjects built 1751 - 1800
Well the plans say it’s a “platform over the ballast “ so I think it’s the framing for a deck - should be covered with deck planks? Is this going to be a kit available soon? -
Yeah, your whaler is a lot like the launch, the bulkheads fore and aft you do get to glue to, and that also helps set the planks . Just be careful with glue mess on the inside of the first layer....
-
Neddie, the answer is you don’t glue the first layer to the bulkheads as I and Richard 44 explained to you in Mobbsie’s thread, I guess you could use a PVA type glue and dissolve it later with IPA (seems messy and un needed) but the instructions, plans etc, show pretty clearly that you use the bulkheads as a form, you put something on the outer edge of the bulkheads so the glued planks won’t stick to them and edge glue the planks to each other except at the bottom where you can glue to the bulkheads up to the deck line. You then break the bulkheads at the cut line (deck line) and proceed with decking and finishing the inner planking. Your best bet is to bend the planks to fit the curve of the hull and to fit the plank you are going to glue it to. Edge gluing and pre bending to fit really will follow the form and after three layers you have a pretty strong hull.....
-
Hi Neddie, I don’t think Mobbsie is on here much anymore, I built one of these also and you don’t glue the planks to the bulkheads- I glued wax paper to the edges of the bulkheads to keep the planks from adhering to them, you instead use the bulkheads as a form for the planking and edge glue the planks to each other, you need to use minimal glue on the first layer as it will be seen from the inside of the boat - I had to sand the first layer quite a bit to remove some of the excess glue marks.... hope that helps....
-
Spitfire Mk IX by jwvolz - FINISHED - Hasegawa - 1:48 - PLASTIC
ASAT replied to jwvolz's topic in Non-ship/categorised builds
Wow Joe, do you give airbrush lessons? 😁 That’s a really nice paint job... -
Chris, what is the new timeframe (approximately) for the Bristol? I asked you last fall and you indicated around spring.... understand that your business model has changed, just wondering how far to the right it got pushed?
-
B-25J Mitchell by Tom E - Revell - 1:48 Scale - PLASTIC
ASAT replied to Tom E's topic in Non-ship/categorised builds
I’ve heard of using o rings as masks after you paint the yellow - roll them down to where you want the stripes then paint the drab, trick is finding the right size o ring... and hoping they stay put on the taper.... or maybe jig them up in a drill motor and spin while you use a small brush loaded with yellow paint? I’m sure they weren’t perfect stripes.... -
B-25J Mitchell by Tom E - Revell - 1:48 Scale - PLASTIC
ASAT replied to Tom E's topic in Non-ship/categorised builds
Tom, how are you going to paint the stripes? I heard that is a difficult task because of the bombs taper.... -
Spitfire Mk IX by jwvolz - FINISHED - Hasegawa - 1:48 - PLASTIC
ASAT replied to jwvolz's topic in Non-ship/categorised builds
Joe, how old is that tooling? That looks like a great fitting kit, the seams came out very nice - is that your skill or Hasagawa’s? Looking great! -
Yep, it would be a perfect platform for a shark’s mouth graphic....
-
I agree Lou, it’s one of the things that attracted me to the model, that and the air intake, reminds me of the A7-E’s that I worked on in the Navy....
-
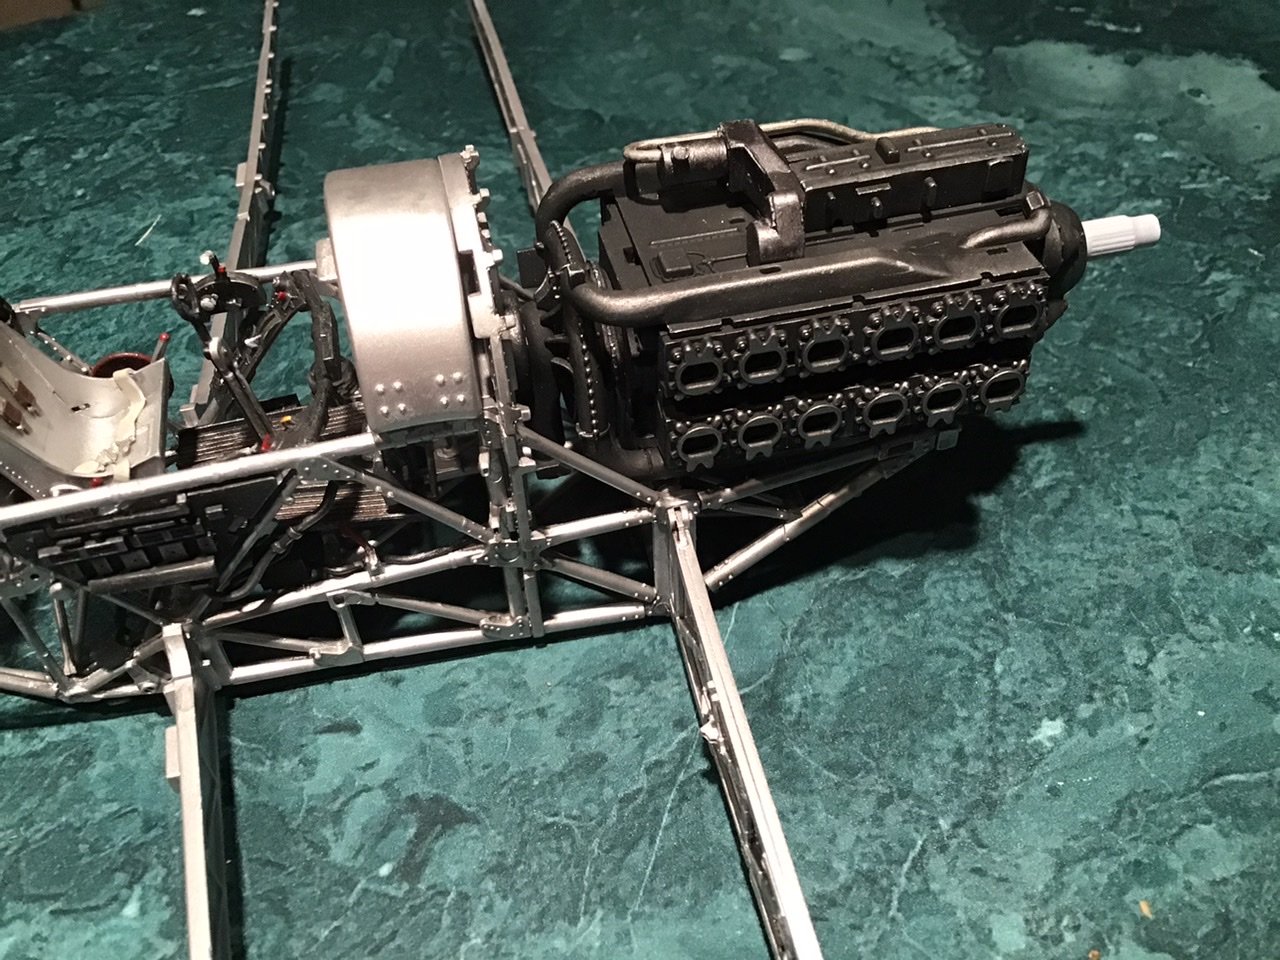
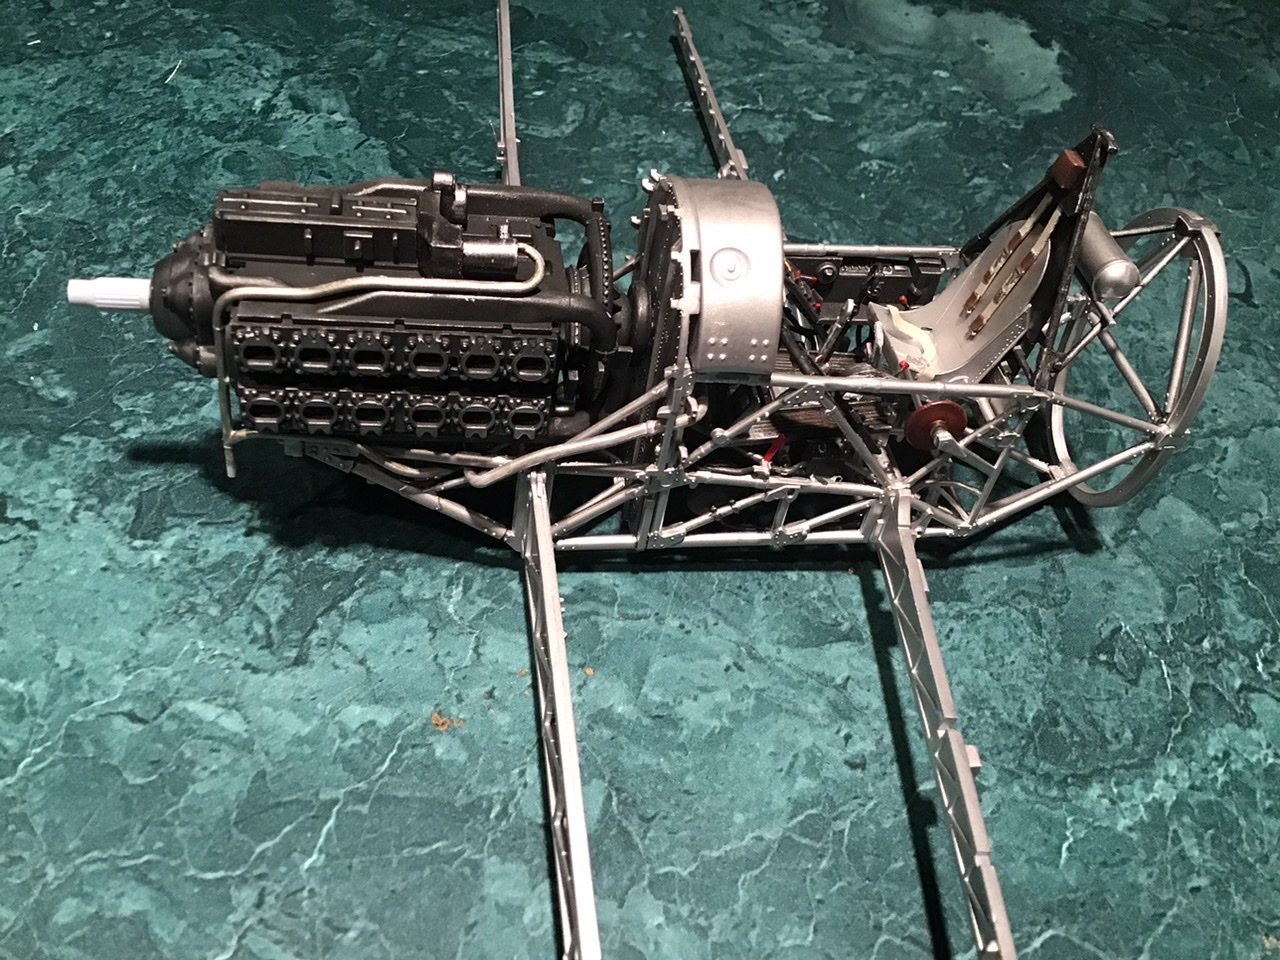
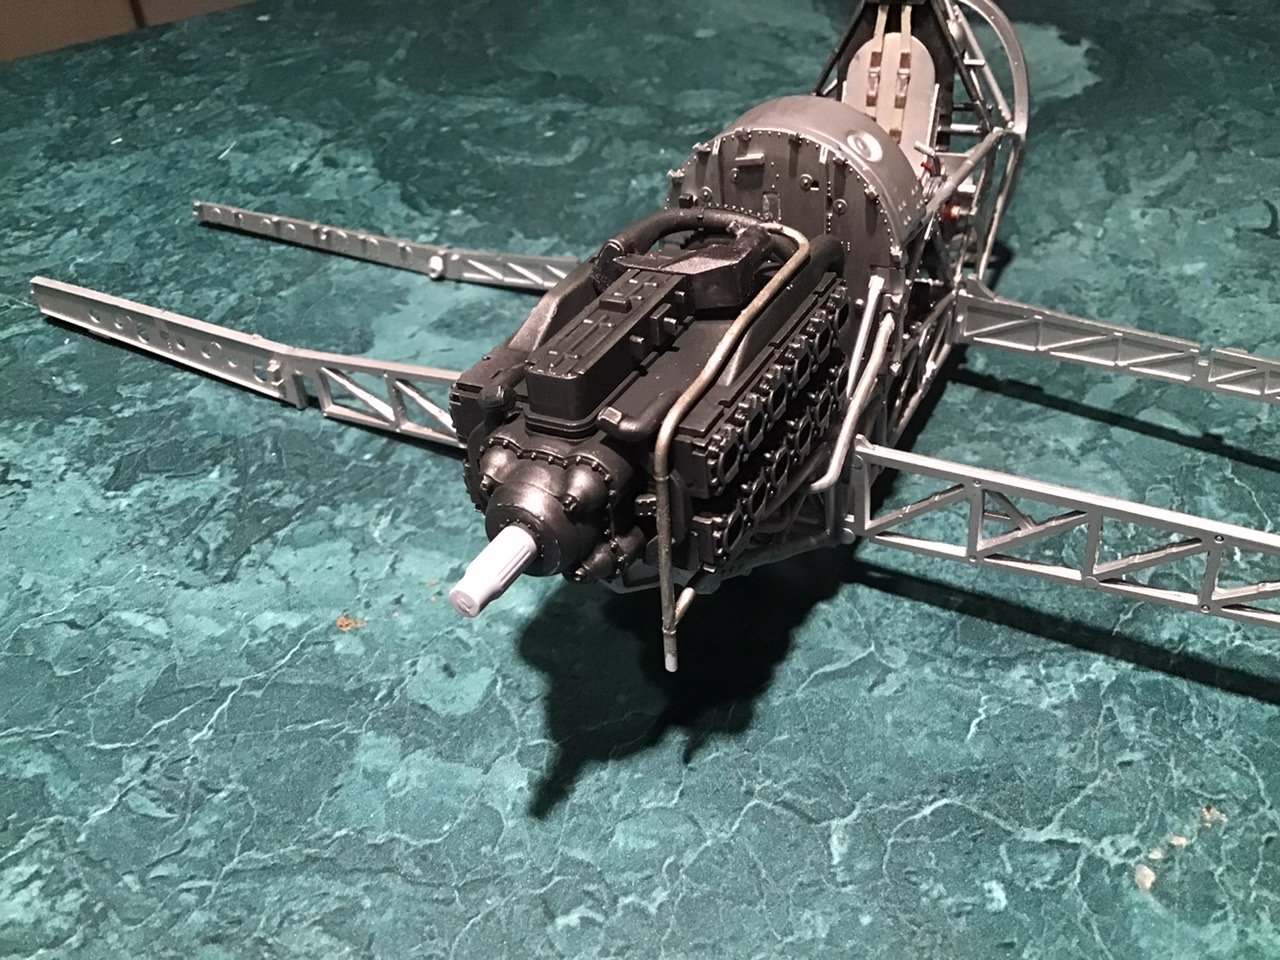
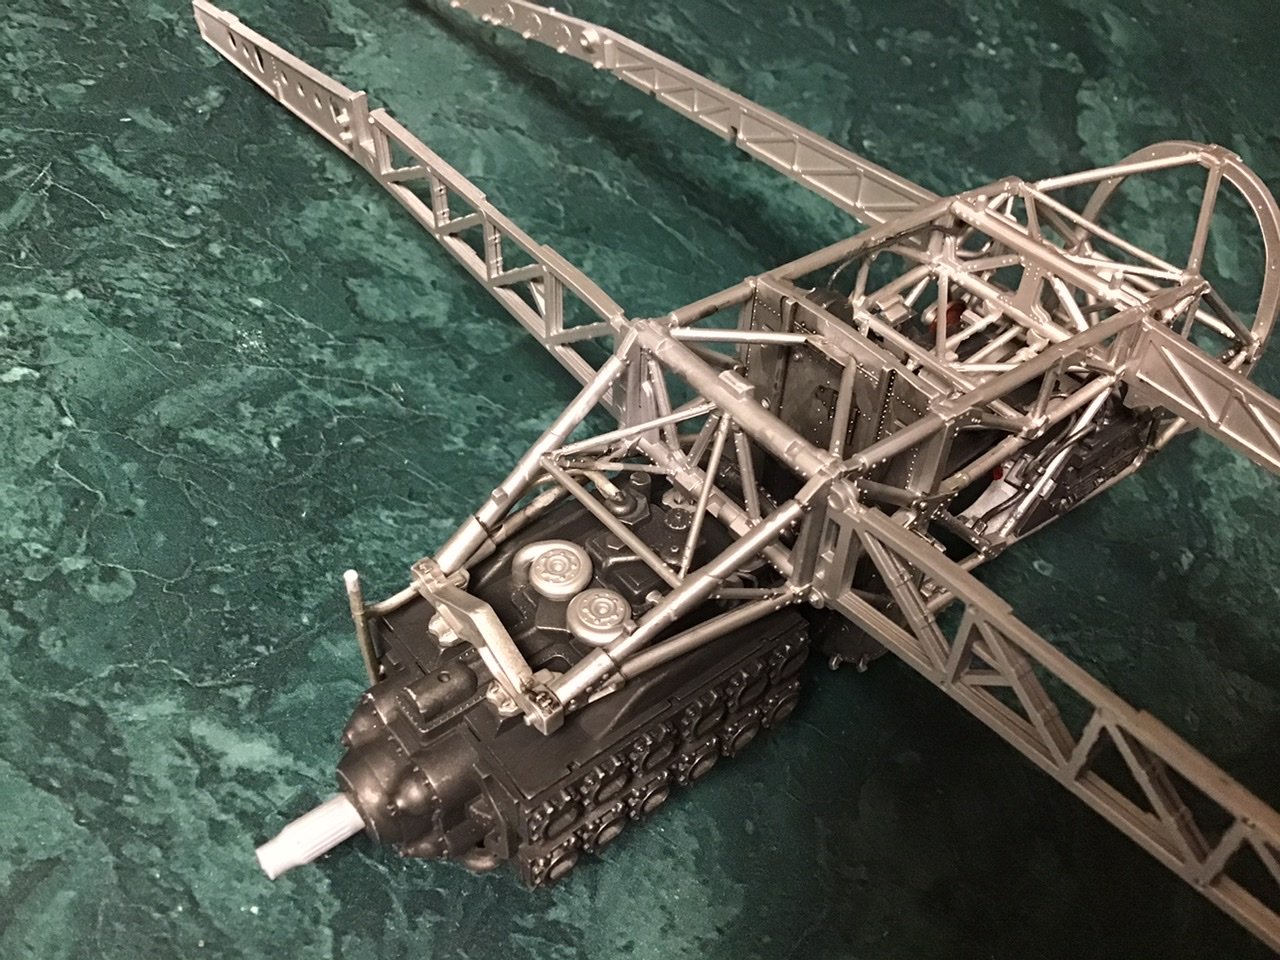
Glued on the supercharger and got the motor installed, quite a bit of plumbing to do and some of them are like those old ring puzzles.... got to twist and finesse them into place - a bright spot light would help to see some of the termination points hidden in the interior of the maze.... 😅
-
B-25J Mitchell by Tom E - Revell - 1:48 Scale - PLASTIC
ASAT replied to Tom E's topic in Non-ship/categorised builds
Looking great Tom, lots of hours of minimal breathing there! -
Well I’ll just keep reading then and learn something, about modeling and the real deal! Guess I’ve alway been more of a visual kind of guy....
-
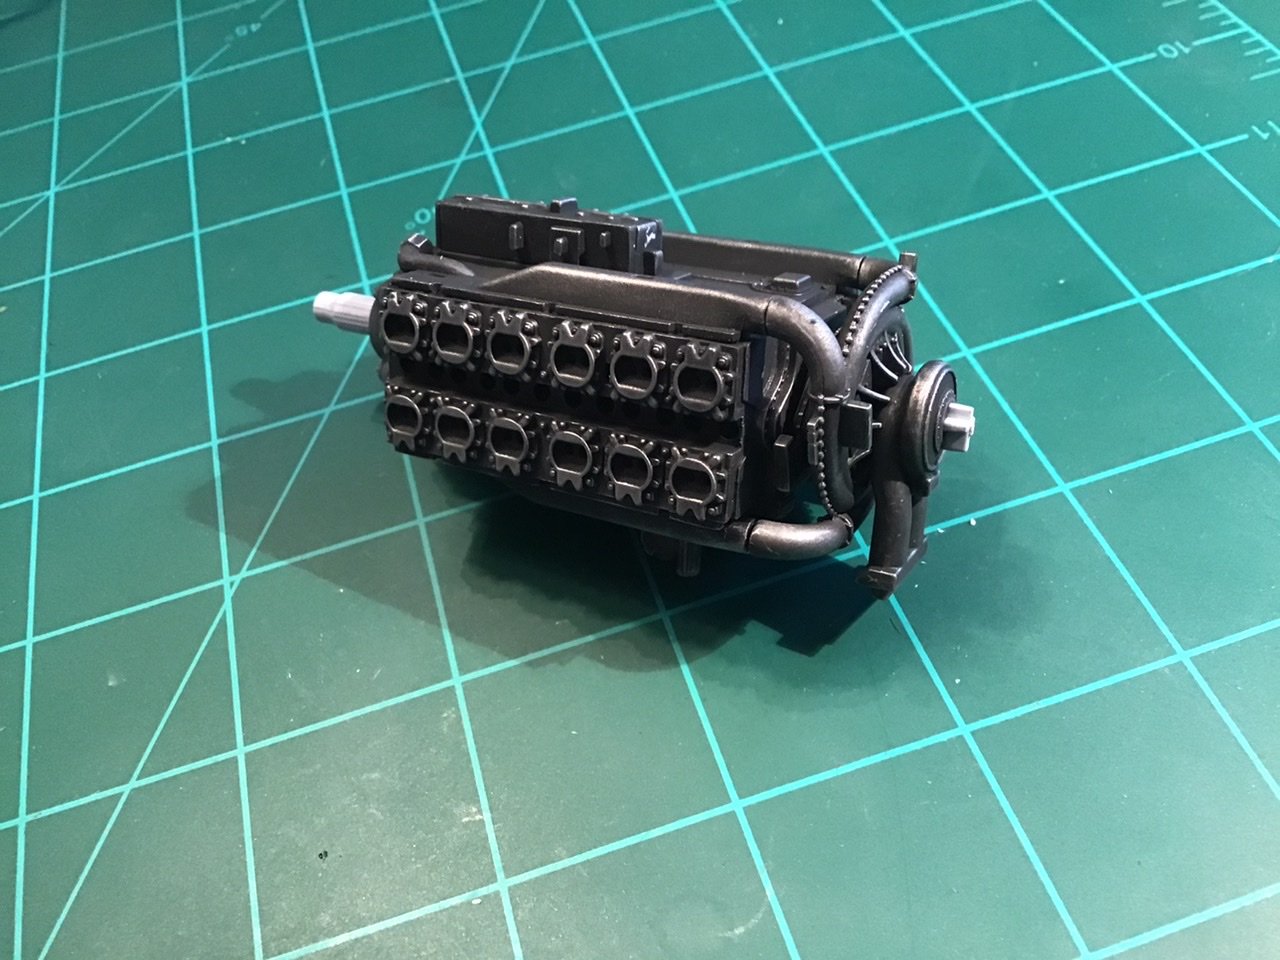
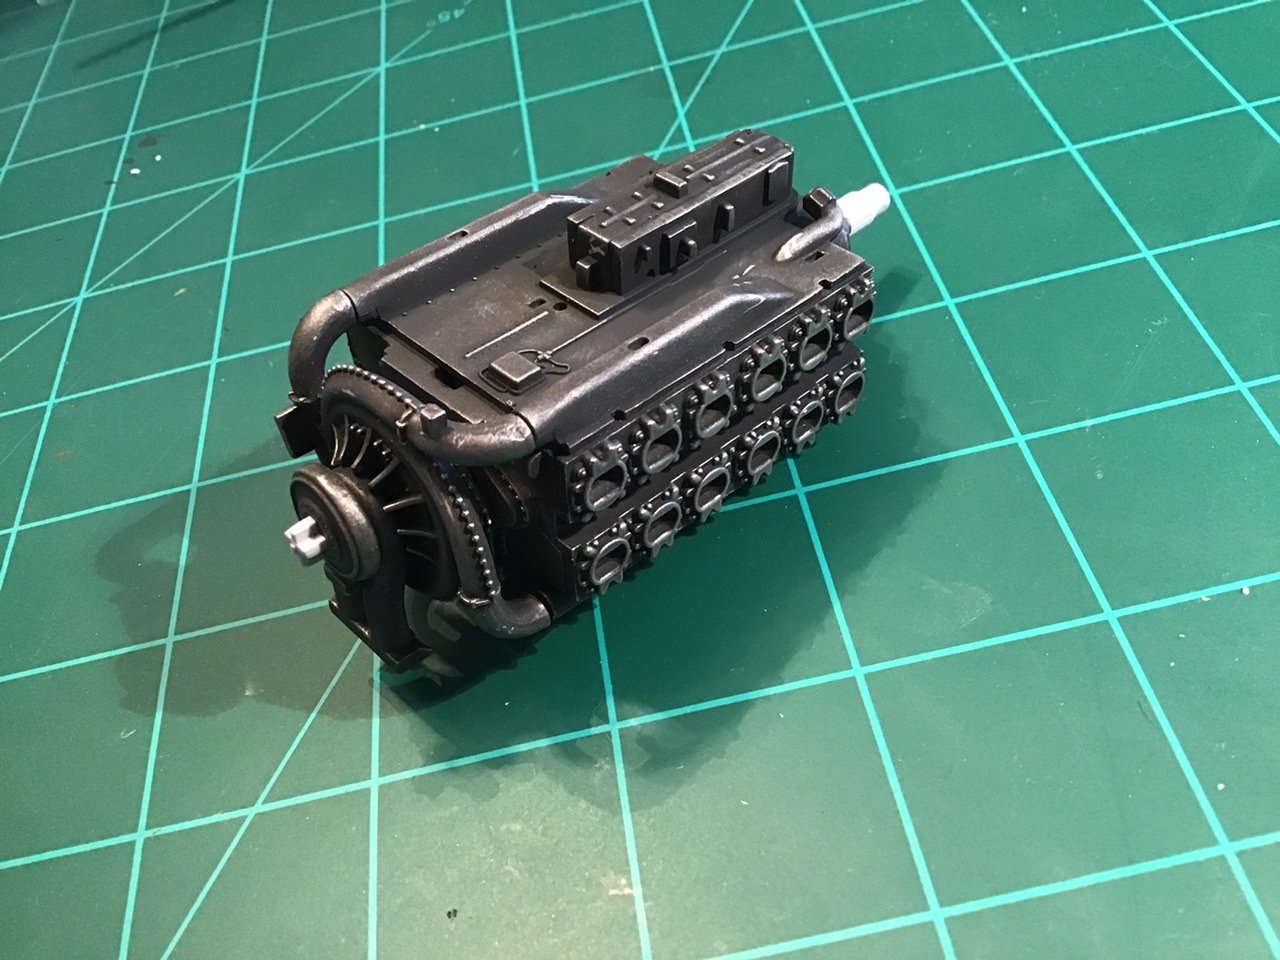
Here’s the main block and supercharger of the Napier motor - just dry fitted and some initial dry brushing to accent the detail - there are little bolts there that I didn’t even see till I started brushing! I’m having a blast on this motor! I hope I still do when I start doing all the pipes and wiring - looks pretty hairy!

-
Crap! My builds are doomed! I’m pretty much stuck in the overcoming issues of many kinds department.... Oh wait! So far all my builds depict planes that all fought on the same side....!! 😁
-
Wow.... 40 posts and nuthin’ is even glued yet? I think you boys are waxing a bit sentimental over this ol’ Sherman......😀😇
-
Thanks James, whew! Had me nervous for a bit there, I pulled out hose pieces, cleaned them up and the fit is great so far... still not sure how I’m going to tackle the canopy turtle deck area, I want to clean it up and re scribe and rivet but I’ve never done either of those things before.... gotta be easier than grafting in a whole new panel though....