


ASAT
-
Posts
619 -
Joined
-
Last visited
Content Type
Profiles
Forums
Gallery
Events
Everything posted by ASAT
-
SBD-3 Dauntless 1:48 Hasegawa - Edwardkenway-FINISHED
ASAT replied to Edwardkenway's topic in Non-ship/categorised builds
I know what you mean Edward, I’m stuck at home working and my P40 is just calling out to me..... nice looking paint job there.... is that with an airbrush? -
Curtiss P-40B Warhawk by Asat- Airfix- 1/48
ASAT replied to ASAT's topic in Non-ship/categorised builds
Hmmm - on that pic those wing gaps look huge! Do I need to fill them before I primer it? They don’t look that big sitting on the bench but I guess there wouldn’t have been any gap on the real thing right? I just hate to have to sand it with all that nice rivet detail so close to the gap..... ideas please? -
Curtiss P-40B Warhawk by Asat- Airfix- 1/48
ASAT replied to ASAT's topic in Non-ship/categorised builds
Man! What a nice kit this is! I can’t believe how everything fits together, light years different than the stuff I used to build.... very little filler needed and all the seams matched up really well. I am amazed at how the wing roots, fillets and fuse to wing joints were just a pleasure to fit and fair. I might just be swayed - might have to try a new release armor kit too! 😁🤯. Here’s a few shots before I spray it with primer - all my mistakes are right out in the open....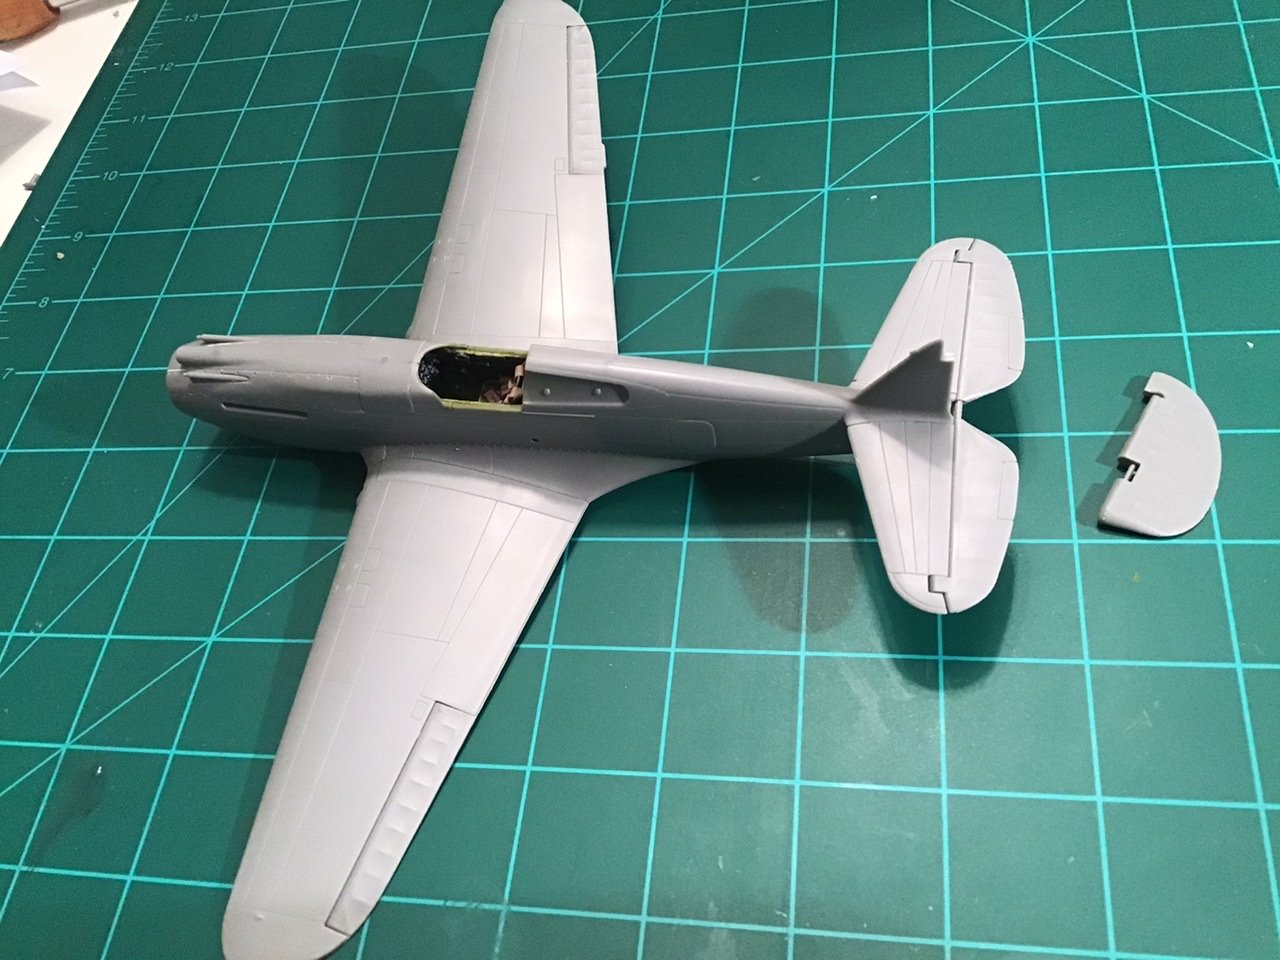
-
Curtiss P-40B Warhawk by Asat- Airfix- 1/48
ASAT replied to ASAT's topic in Non-ship/categorised builds
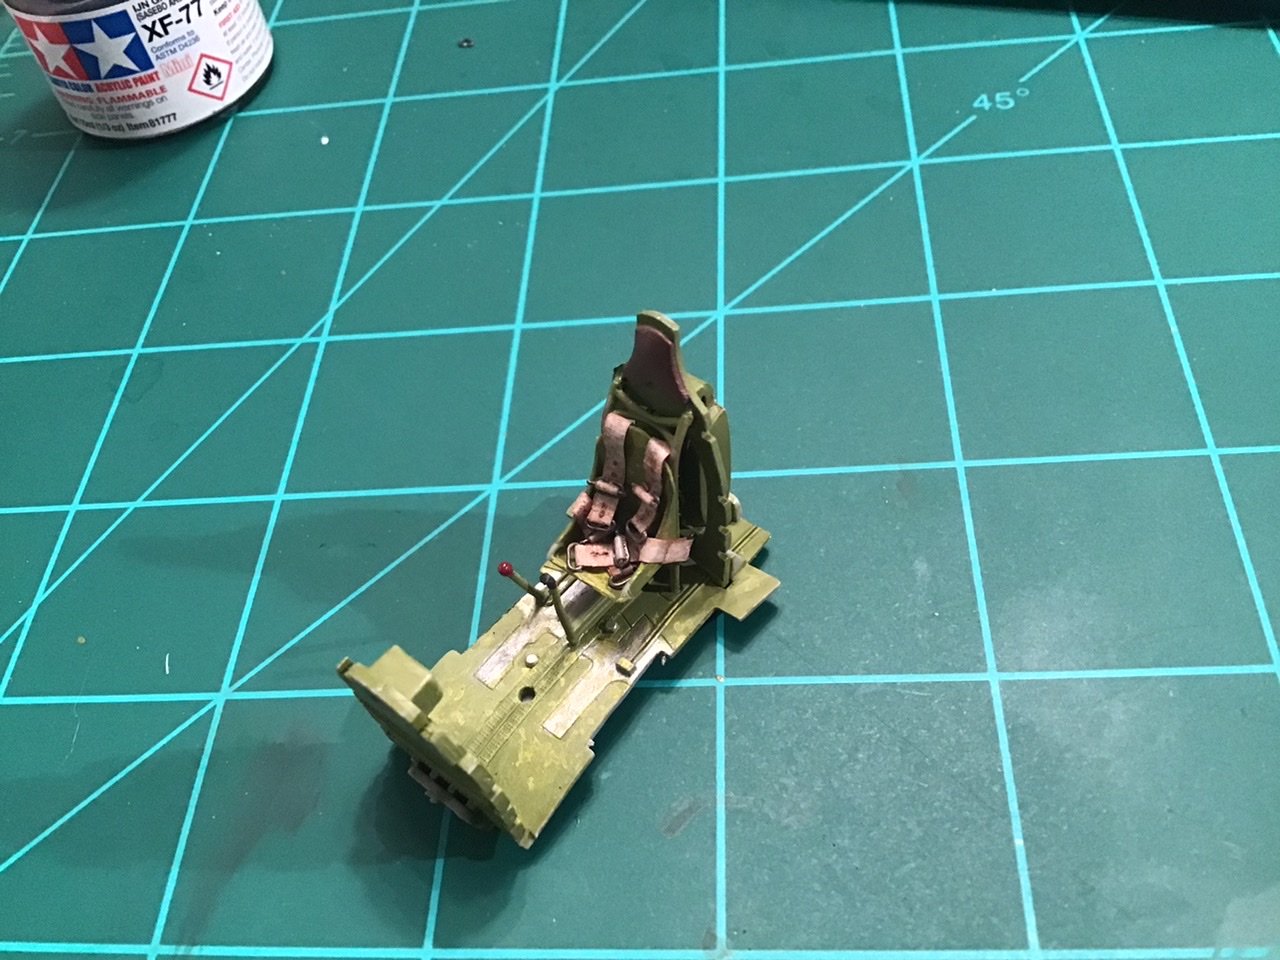
Thanks Lou, yeah looking at some other builds online I’d say they should have been 1mm wide but as fiddly as the little wire buckles were at 2mm I would probably still be doing them at 1mm. Appreciate the good word though, maybe on my next build I’ll try something smaller or PE... I’ll have a 1/48 eduard set by then - I can probably make them work on the P 51 I have waiting... -
Curtiss P-40B Warhawk by Asat- Airfix- 1/48
ASAT replied to ASAT's topic in Non-ship/categorised builds
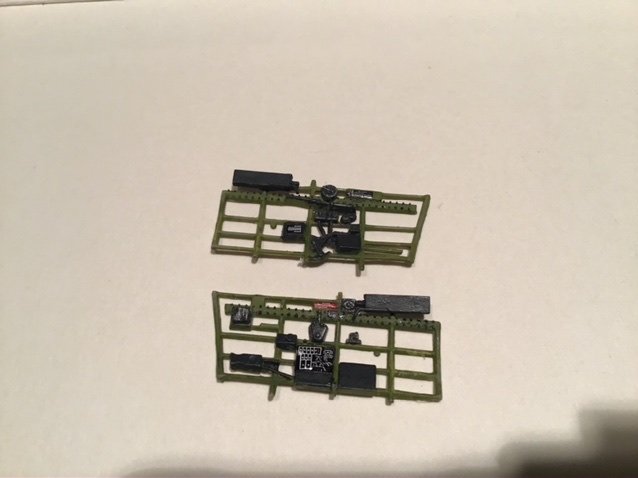
and this is how they look with the cockpit sides on - they really are a focal point since that’s about all you’re gonna see when you look in the cockpit.... definately need to make the next ones smaller or use some aftermarket- but these guys are only 2mm wide - I don’t know if I can handle them smaller .... need a bigger scale!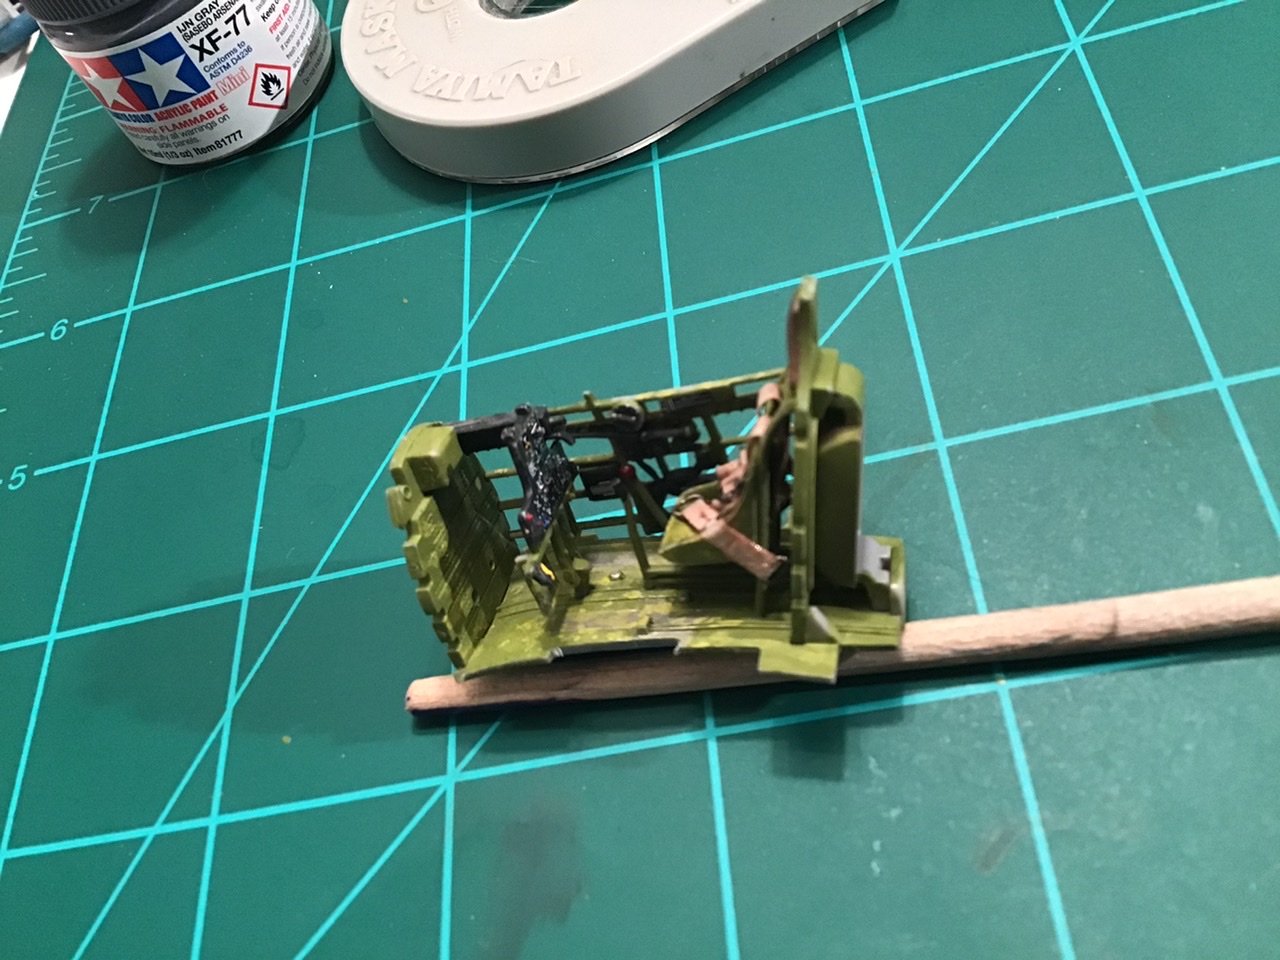
-
Curtiss P-40B Warhawk by Asat- Airfix- 1/48
ASAT replied to ASAT's topic in Non-ship/categorised builds
Well the C-Vi must be taking its toll on Amazon too, I just got word that my seat belts are delayed and the 1/24 Typhoon got lost somewhere between the model shop and USPS.... so I had to re order it and now it won’t be here till next week or the week after. I decided I have waited long enough for the P40 harness so I tried my hand at making some out of asking tape and annealed wire. They are a bit out of scale (unless they were made wider than I think they were) but they look ok for my first attempt... and this is my learning mule after all! Here’s some pics .....
-
SBD-3 Dauntless 1:48 Hasegawa - Edwardkenway-FINISHED
ASAT replied to Edwardkenway's topic in Non-ship/categorised builds
I’m liking your Dauntless Edward, it’s got me thinking.... -
Curtiss P-40B Warhawk by Asat- Airfix- 1/48
ASAT replied to ASAT's topic in Non-ship/categorised builds
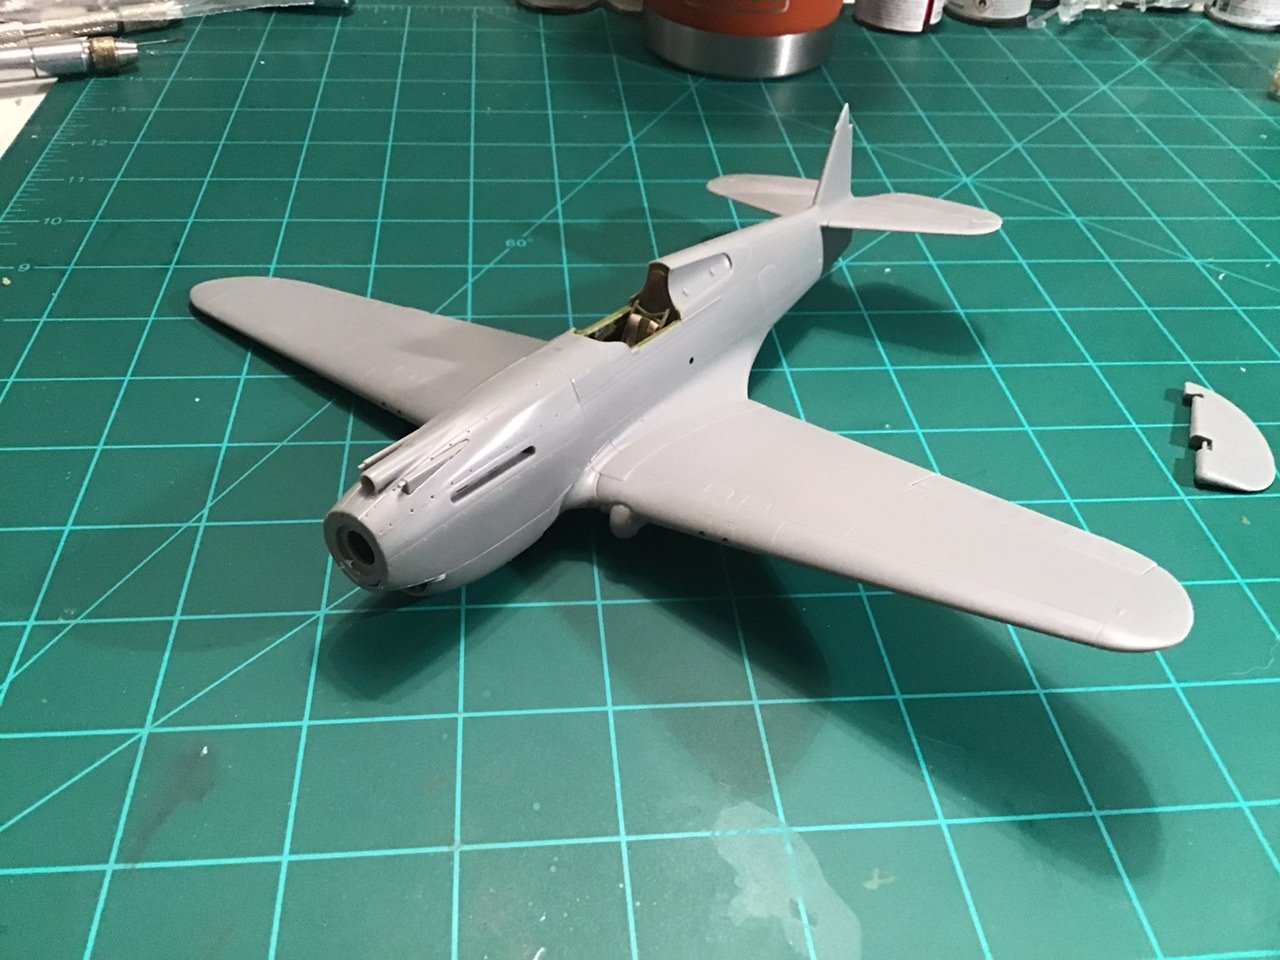
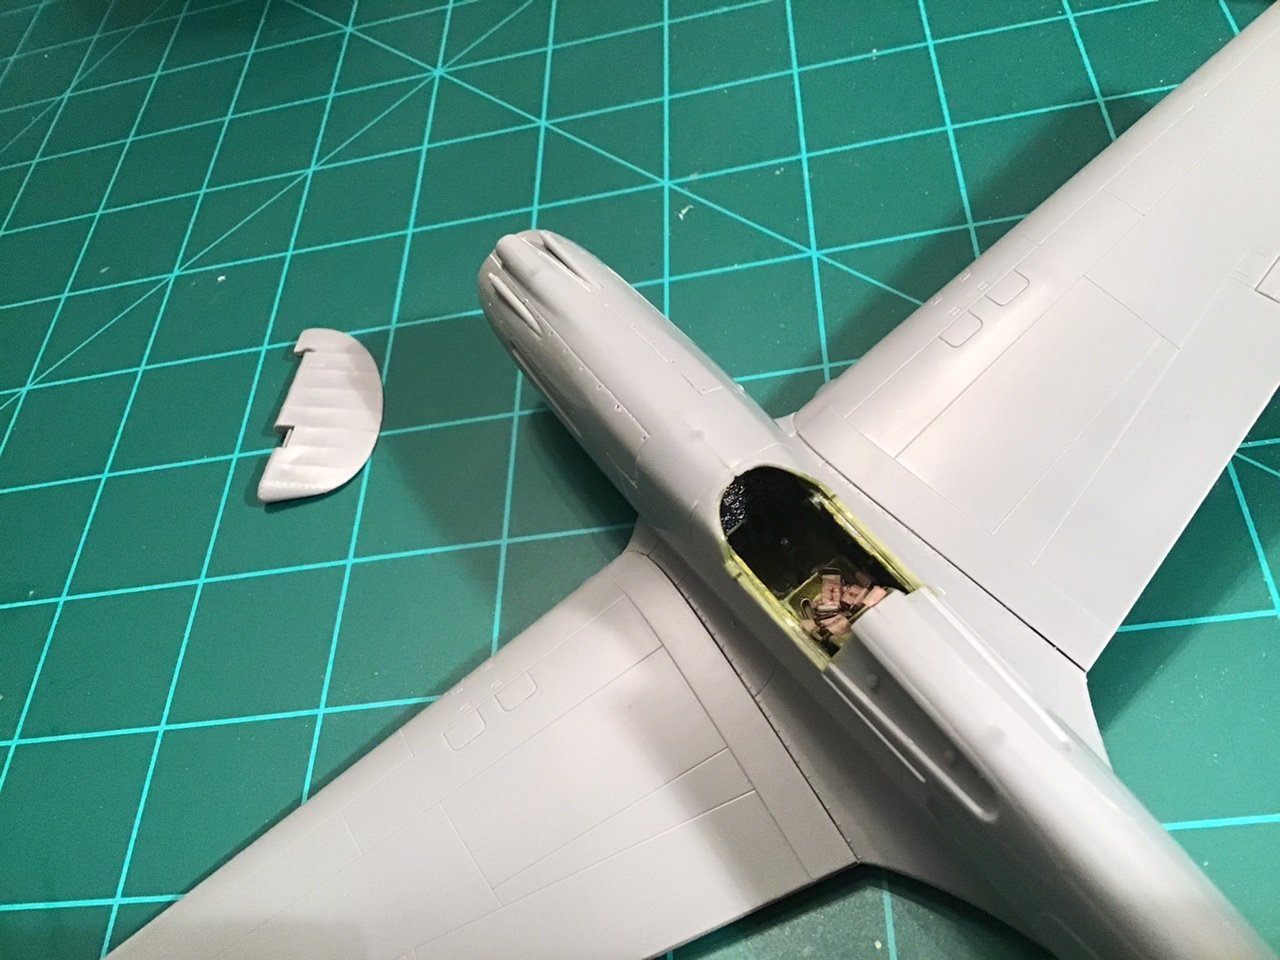
Got the instrument panel painted and decals and prepped a few air intake pieces and the wheel wells, still waiting on my belts so I can put the cockpit together and close up the fuse....pretty cool the way those screens show up with a wash.... I don’t think you’ll see em in the model though....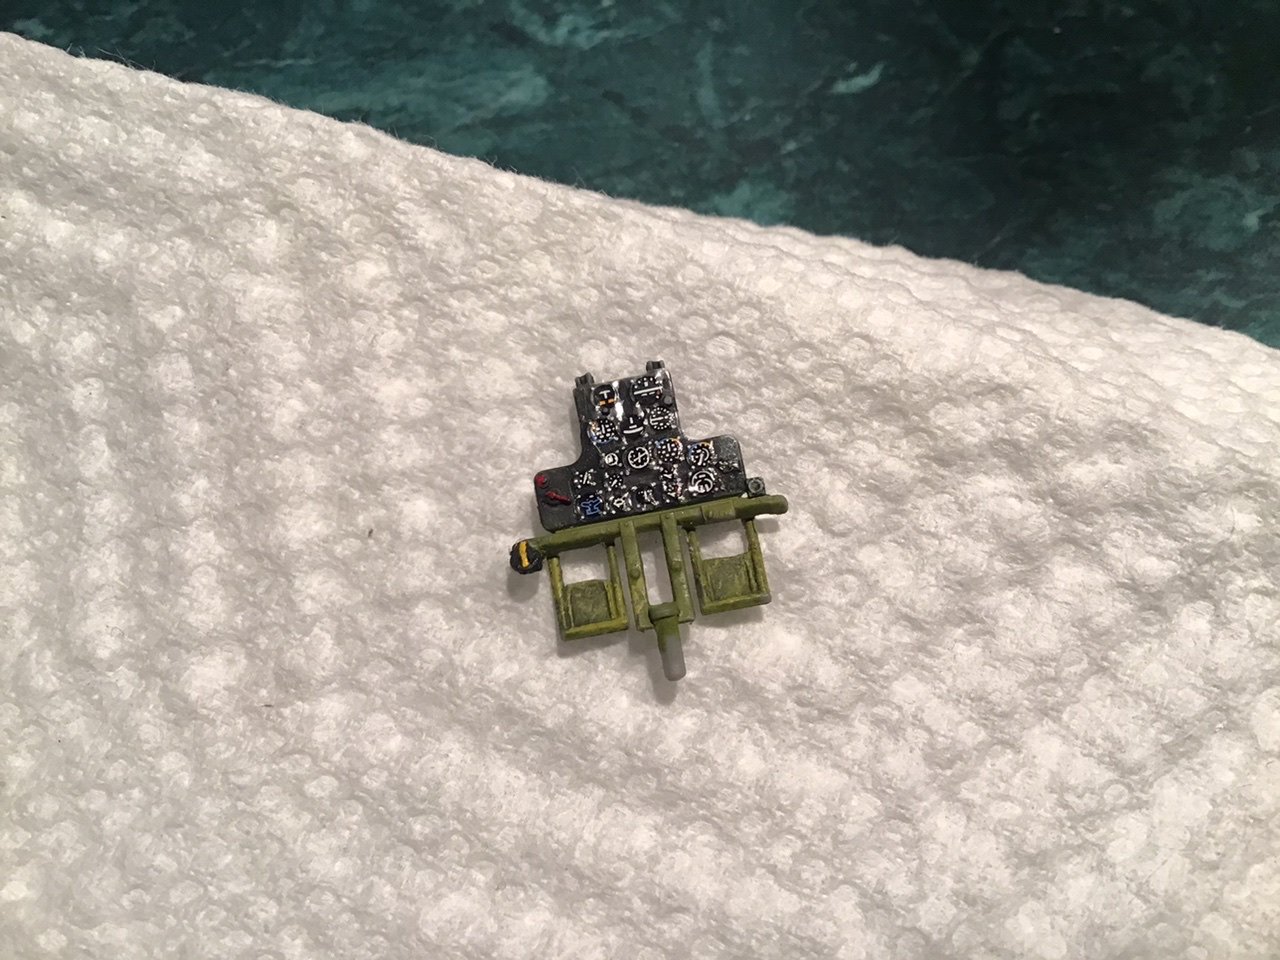
-
Curtiss P-40B Warhawk by Asat- Airfix- 1/48
ASAT replied to ASAT's topic in Non-ship/categorised builds
Thanks guys for the kind words, and all the likes! Didn’t do anything on it tonight, wife and I just hung out together on the couch and watched some movies.... trying to de stress and chill from all the strange days lately.... hoping everyone stays safe.... -
Curtiss P-40B Warhawk by Asat- Airfix- 1/48
ASAT replied to ASAT's topic in Non-ship/categorised builds
Hey OC! Your Mossy and CDW’s TBM are a big reason why I thought I would give plastic a whirl again! That and our illustrious Admin James H. - I checked in on a few of his builds and reviews and asked him for input on a large scale build. I was considering the 1/24 Airfix Hellcat and he pointed me to the Typhoon - I really like the look of that one, probably cause of the huge “mouth” intake... reminds me of the A7E’s I used to work on during my Navy days back in the mid 70’s - made two Westpac’s on the USS Coral Sea and the USS Kitty Hawk as a flight deck troubleshooter aviation electricians mate. Best job I ever had! Looking forward to learning the nuances of plastic with you guys!! -
Curtiss P-40B Warhawk by Asat- Airfix- 1/48
ASAT replied to ASAT's topic in Non-ship/categorised builds
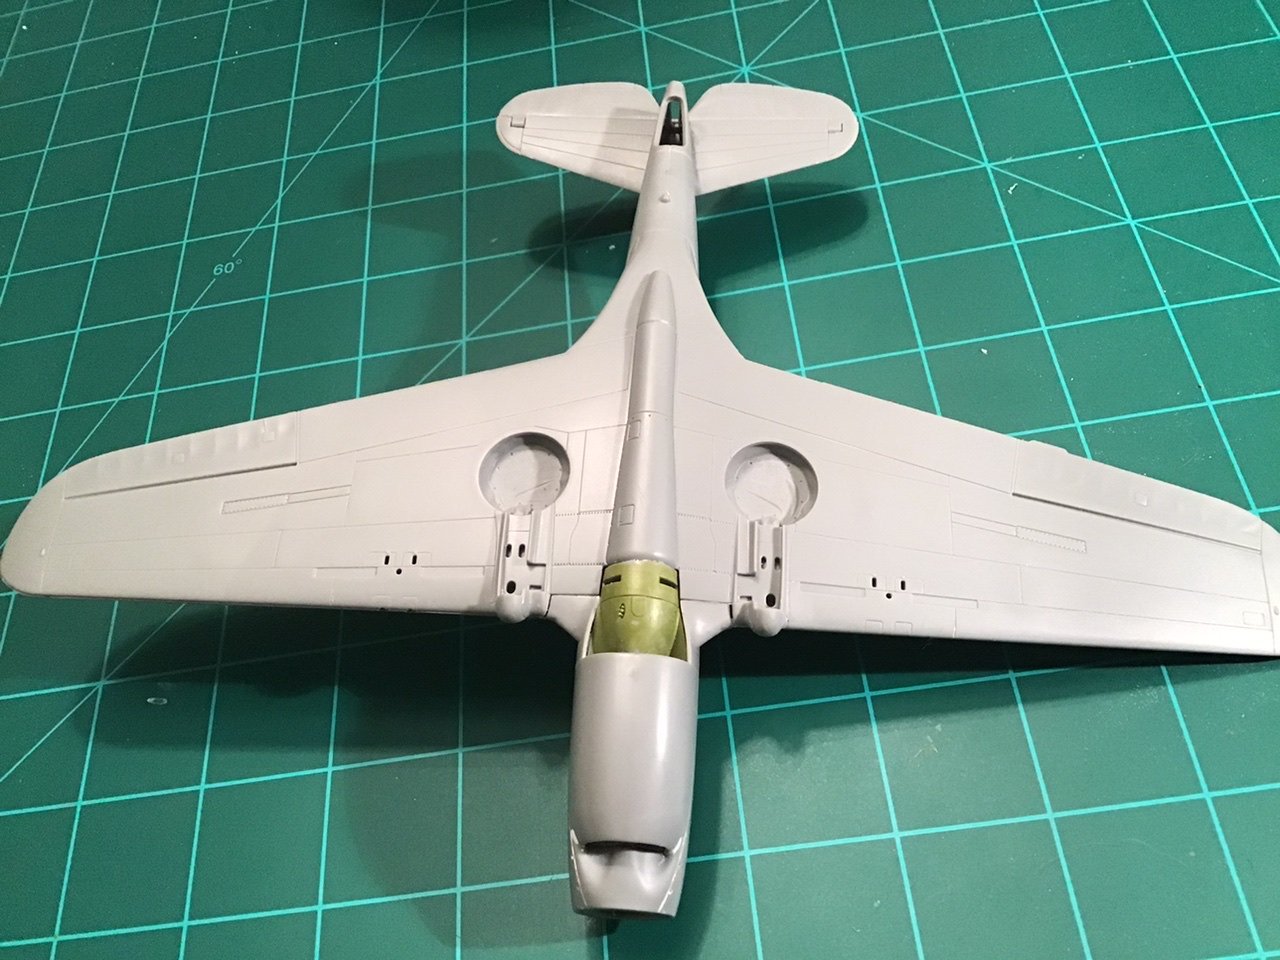
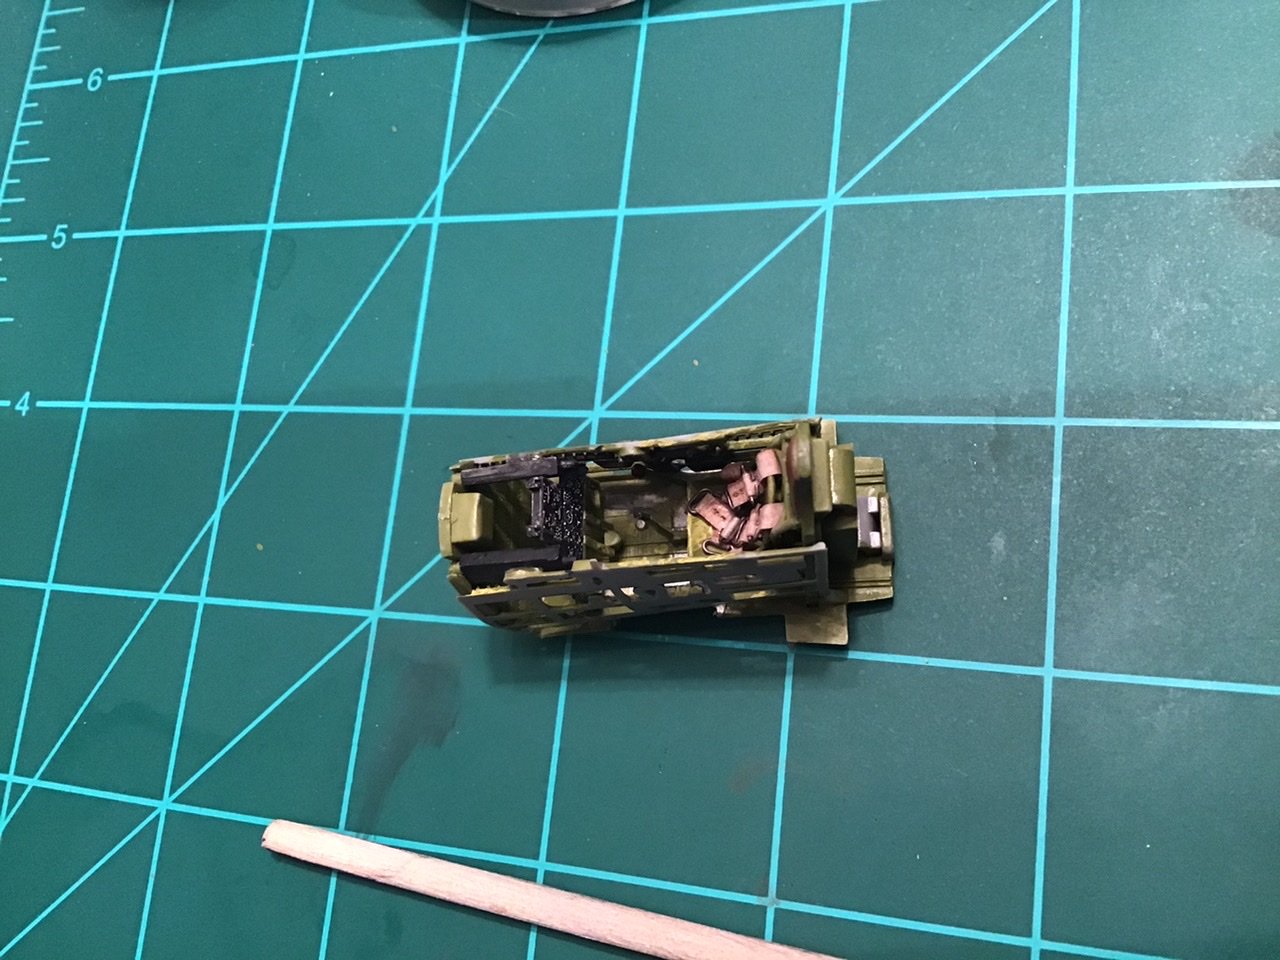
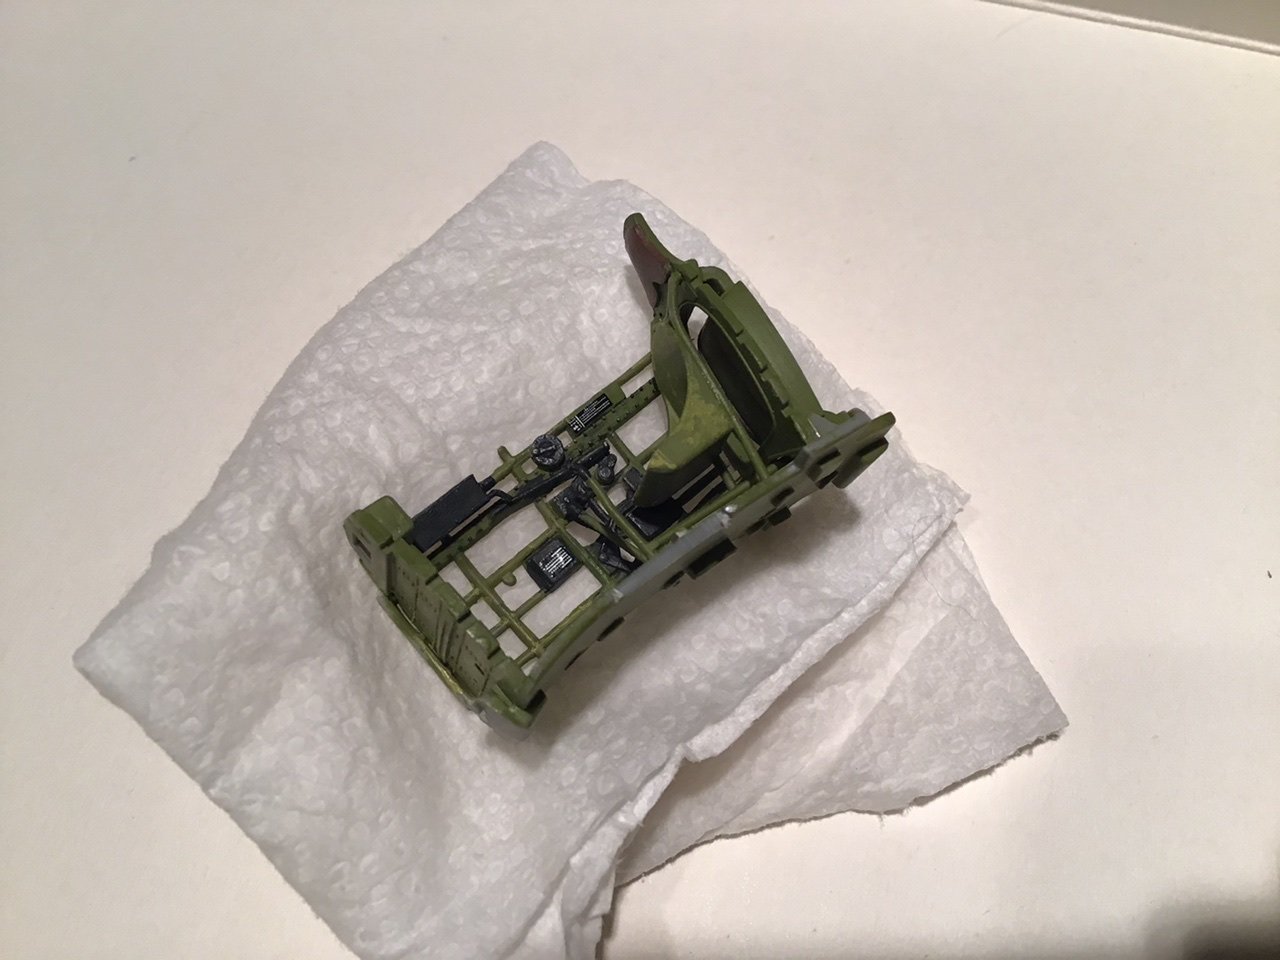
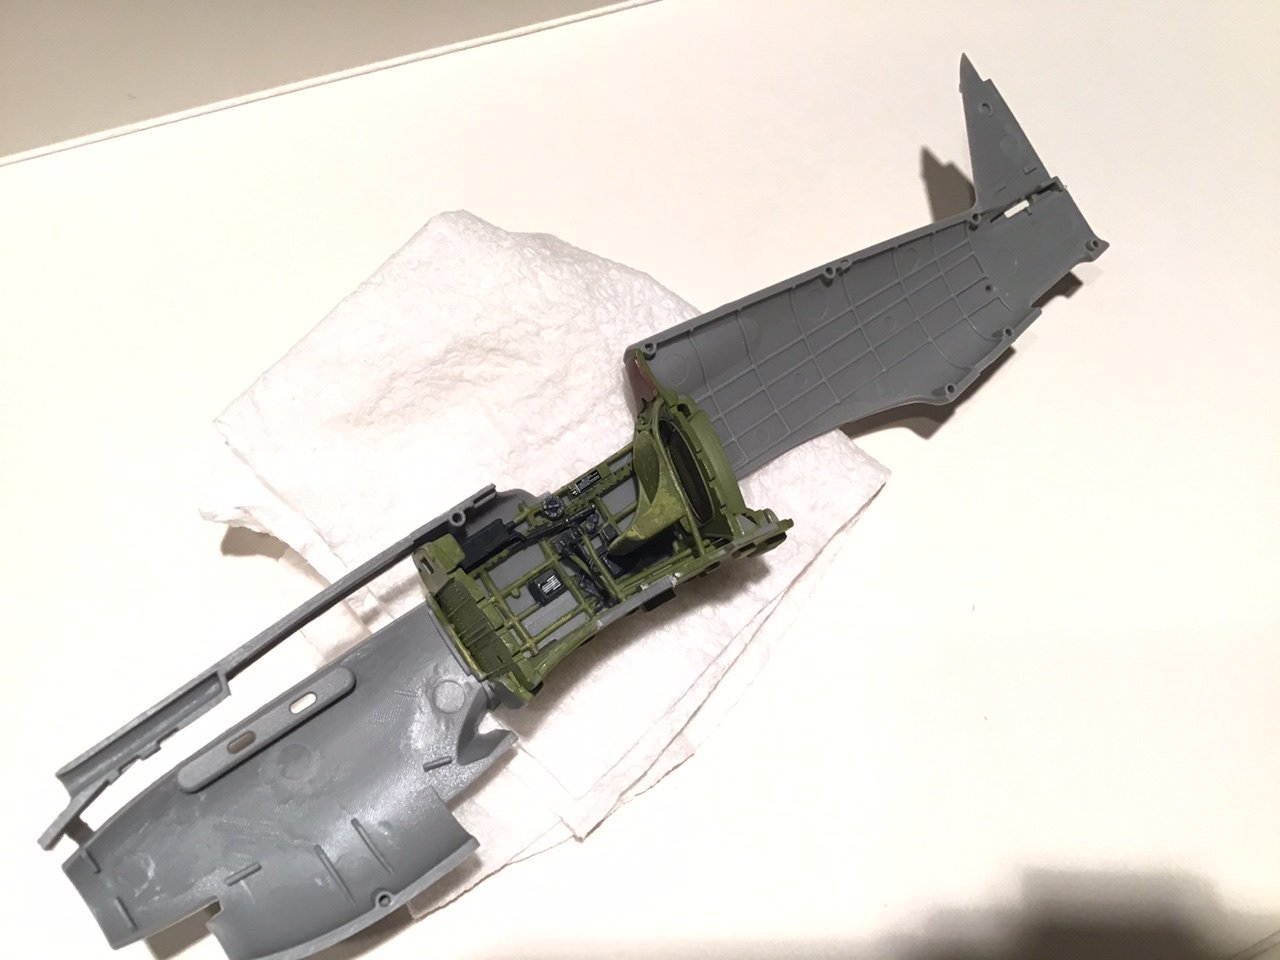
And here dry fitting together and in place in fuse....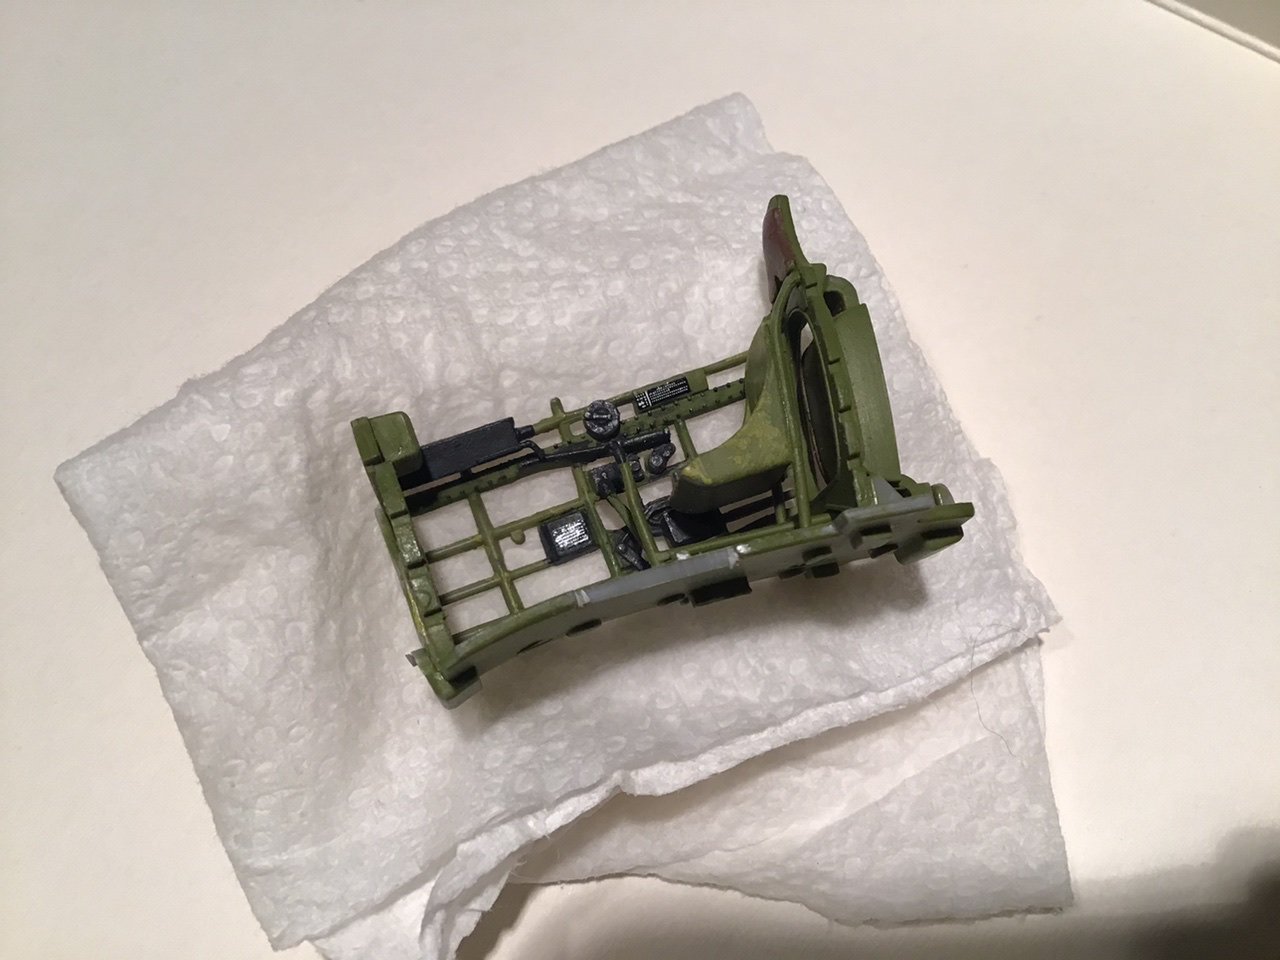
-
Curtiss P-40B Warhawk by Asat- Airfix- 1/48
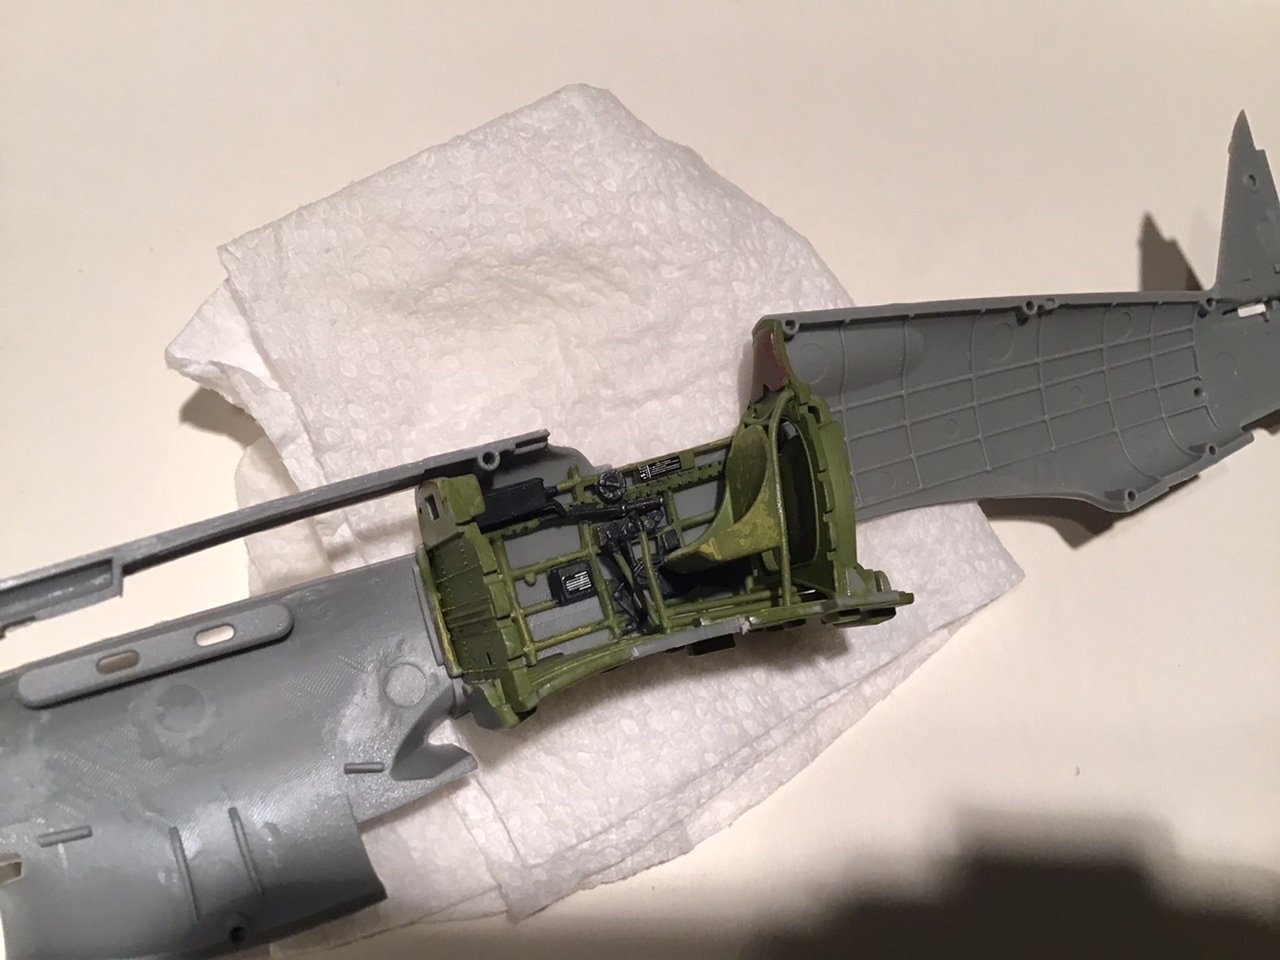
ASAT replied to ASAT's topic in Non-ship/categorised builds
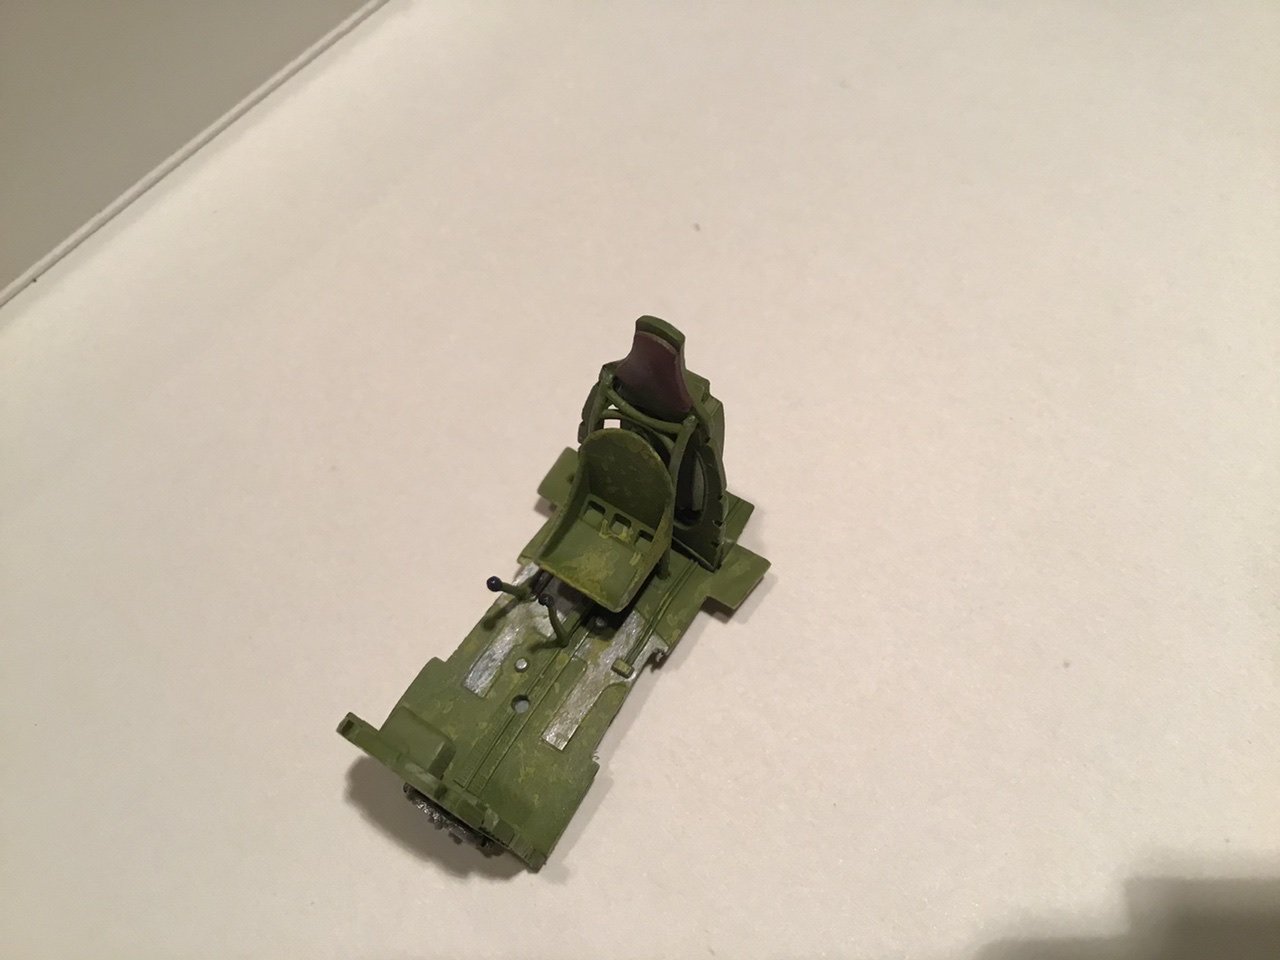
And here is the cockpit built up and my first try at weathering/wear....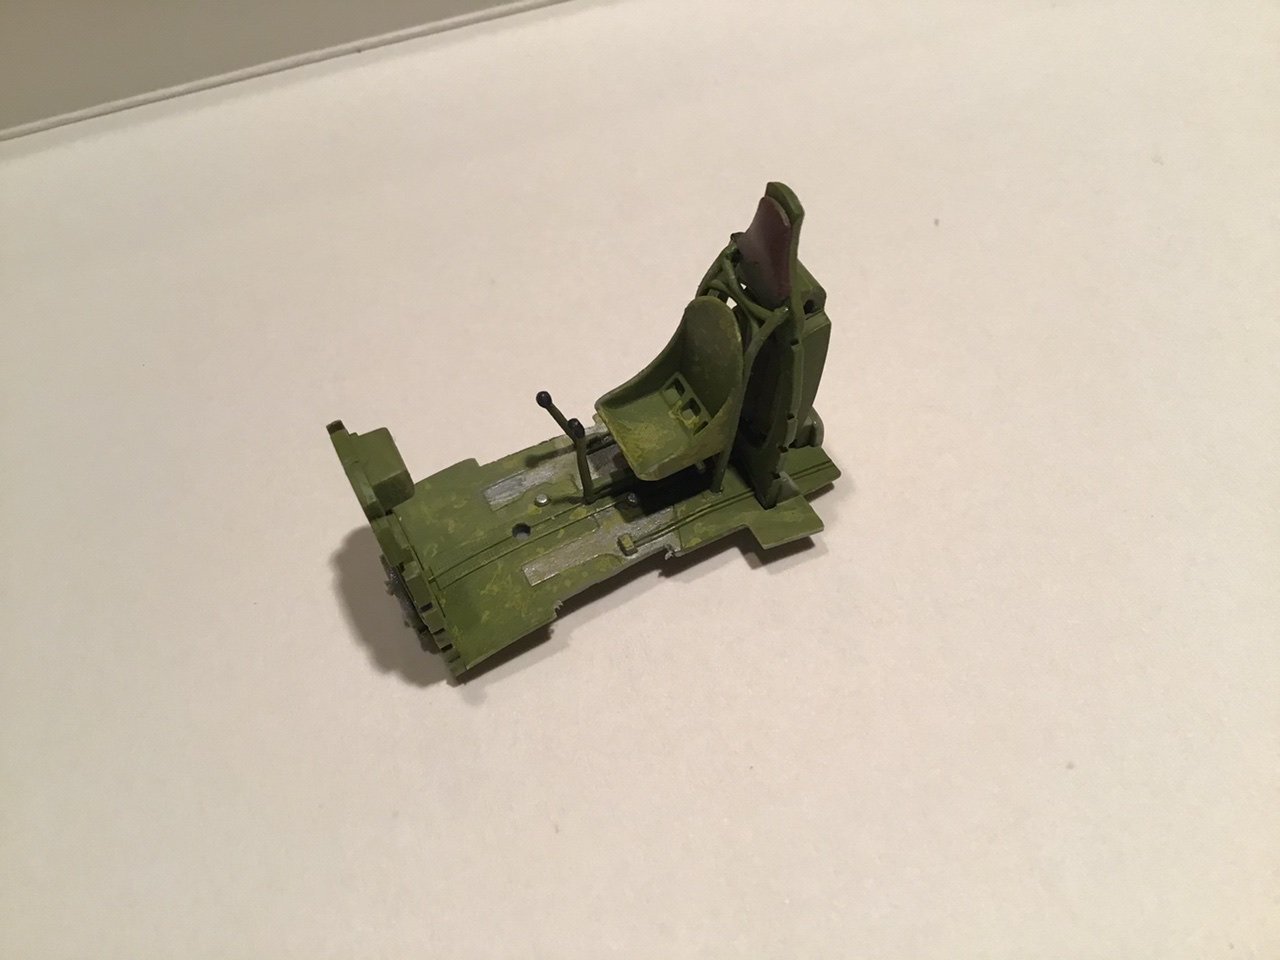
-
Curtiss P-40B Warhawk by Asat- Airfix- 1/48
ASAT replied to ASAT's topic in Non-ship/categorised builds
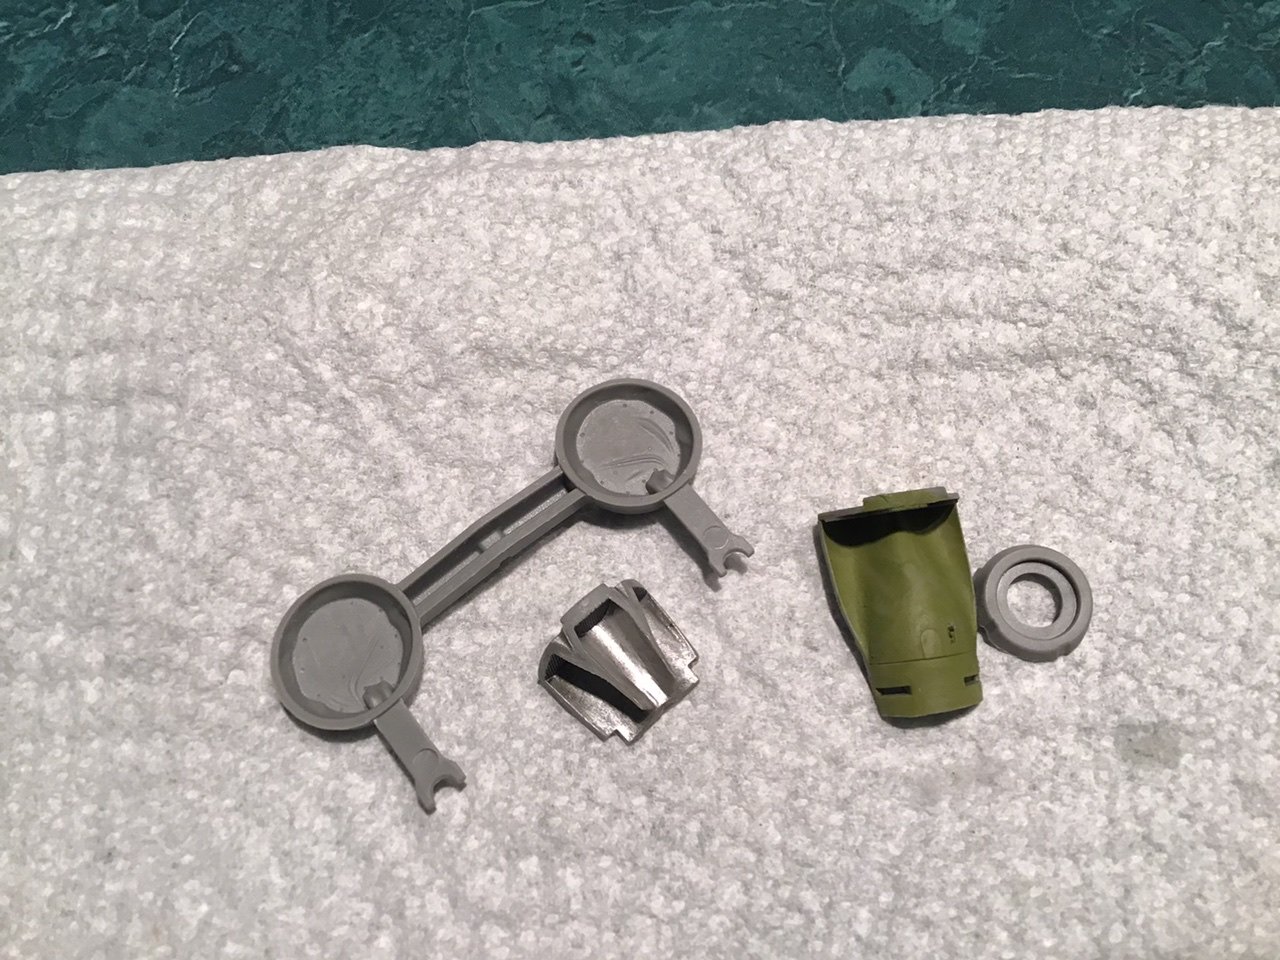
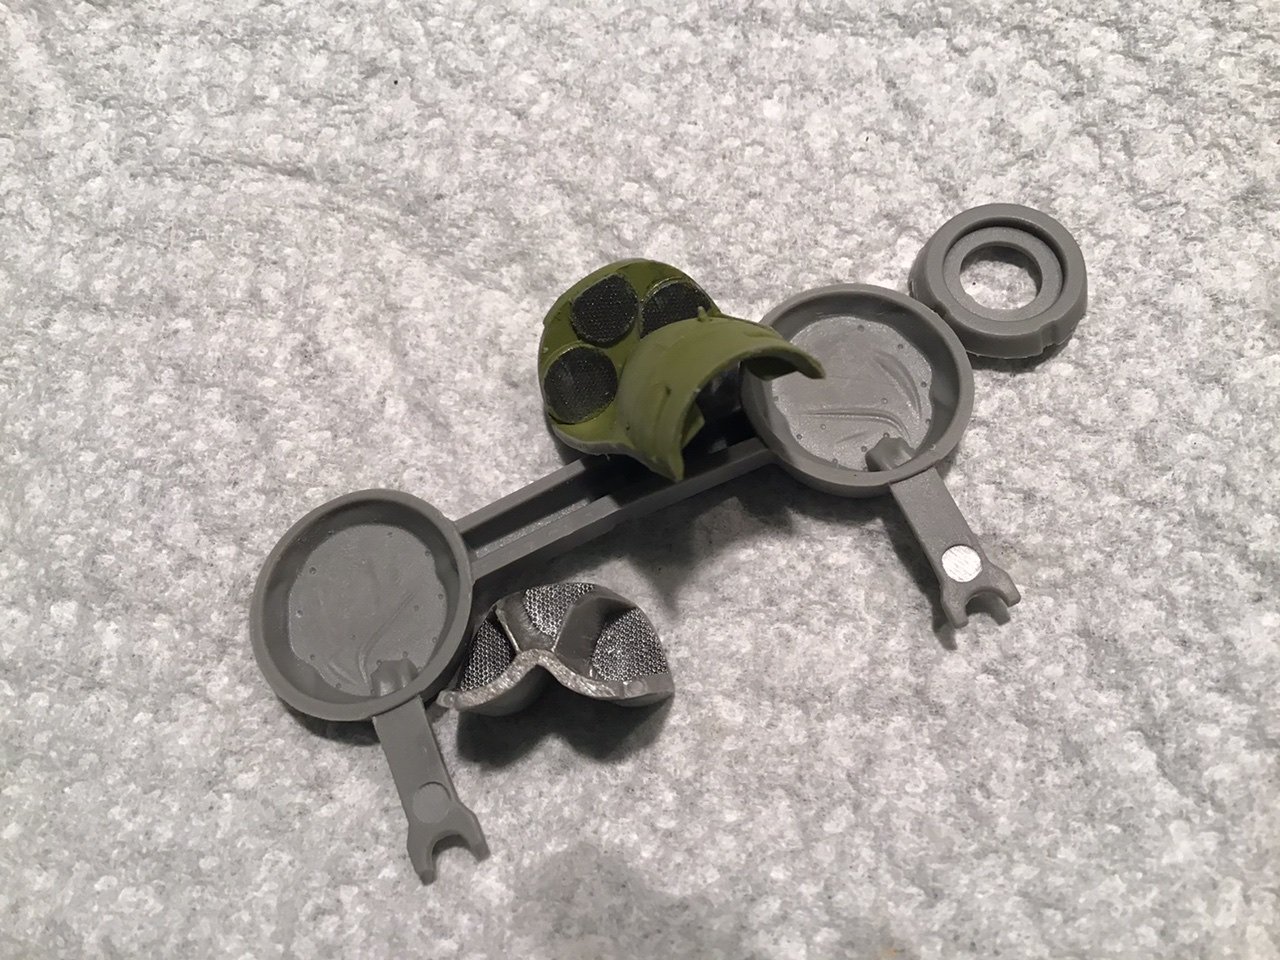
So here are some pics of my start, I haven’t done a plastic model in a loonggg time and when I did I didn’t use an airbrush or weathering techniques so as you can see it’s not my forte.... I did try and show some worn paint area’s where I think the pilots feet, and seat would wear/chip paint. I definitely need you guys to help, suggest, guide me so my next build and subsequent get better and better. I am impressed with the fit and engineering of this kit though, but it is definitely tough painting details at this small scale.... feel free to critique and offer critique and advise for more realistic outcomes.... here are the cockpit side walls before and after decals and dry brushing, need to get some decal setting solution though - the decals won’t conform to the relief molded into the parts.... I’m dreading the instrument panel decal....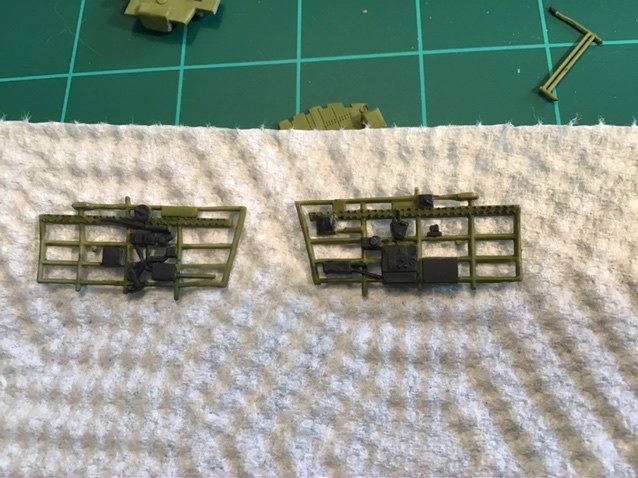
-
Hi everyone, so this build is a precursor to prepare myself for an Airfix 1/24 Typhoon build that I am waiting to receive due to “delays due to the recent earthquake in Salt Lake City” that’s what amazon said anyways. So I went to my local Hobby Lobby and bought some 1/48 scale kits - the Airfix P-51 and P-40 new release’s and the Revell 1/48 B-25J kit - I thought I could develop some needed skills on the two fighters, and I just really like the B-25 and they were all around $20 ea with a coupon at Hobby Lobby so I dove in. I decided to build the P40 first, it looks like a nice kit, very clean parts, no flash to speak of and only a few mold lines to remove so far. I have the cockpit almost done but there are no seat belts or harness for the seat - there is a pilot figure with a harness molded in but I’m depicting them all wheels down, like they are parked on the tarmac so no pilot figure for me. So I’m waiting for a harness kit from eduard and while I’m at it I ordered some paint masks for the canopy and a camouflage set too.
-
Bristol stuff? 😀👍
-
Just got mine - 10 days transit! But it was intact with no damage (UPS) Assembling it now.... I would add that a sanding block of some sort should be added to the list of tools required- the knife cleans the parts ok but the nubs need to be sanded flush..... in fact after doing a few nubs I am just using a sanding block with 100 grit on it.... and I am using 3M contact adhesive for the adhering the white laminated piece’s. just preference for laminating stuff...
-
Revenge 1577 by Asat - Amati - 1/64
ASAT replied to ASAT's topic in - Kit build logs for subjects built from 1501 - 1750
Thanks for the likes and comments guys, not yet Malcom but close.... I’d say around 30-40 hours or so by now.... -
Beautiful planking Rusty! That Pear looks cherry! 😀 Sorry, couldn’t resist..... your color is really consistent, it’s going to age soooo nice.....Gonna be awesome with the black wales too!
-
Jeff, that's a pretty frugal use of wood there, I would have cut it from a sheet - never thought of edge gluing the planks together. Thanks for that teaching moment!
-
Glenn, maybe try these “Soft Sanders”? They look stiff yet flexible enough for a curved, undulating surface.... I think Mike used them on his Winnie also. I’m going to get some for my next build. I am thinking the green and purple ones in 5 and 8” sizes. BTW, are you going with boxwood or cedar for your cheerful? https://www.shop.softsanders.com/Woodworking_c4.htm
-
Revenge 1577 by Asat - Amati - 1/64
ASAT replied to ASAT's topic in - Kit build logs for subjects built from 1501 - 1750
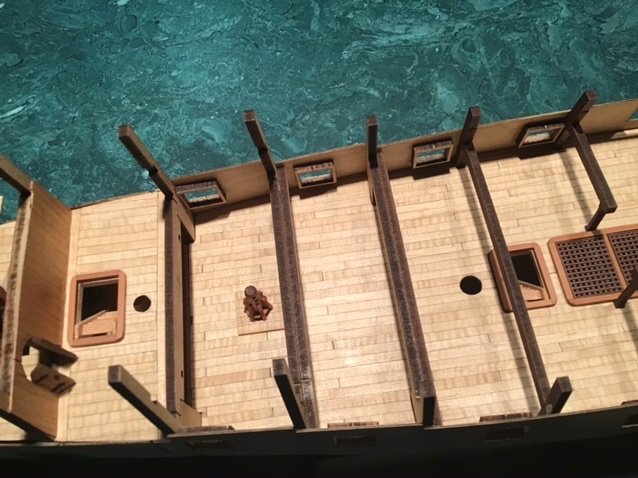
After the lower ply pieces are glued in you remove the uppers and install the lower gunport sills, and give everything a final fairing cause the lower planking is next! Finally! Woo Hoo!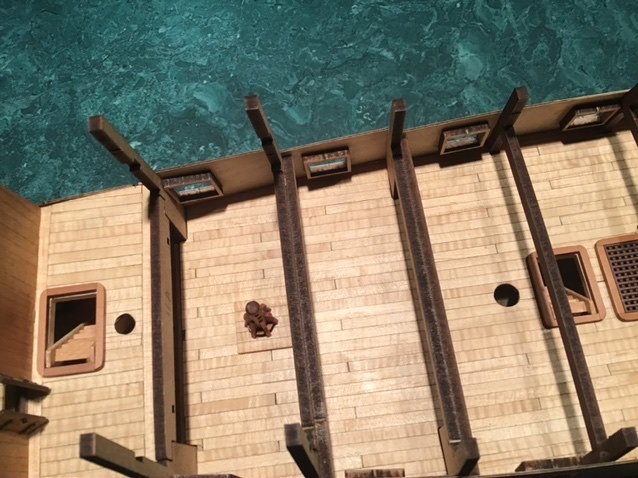
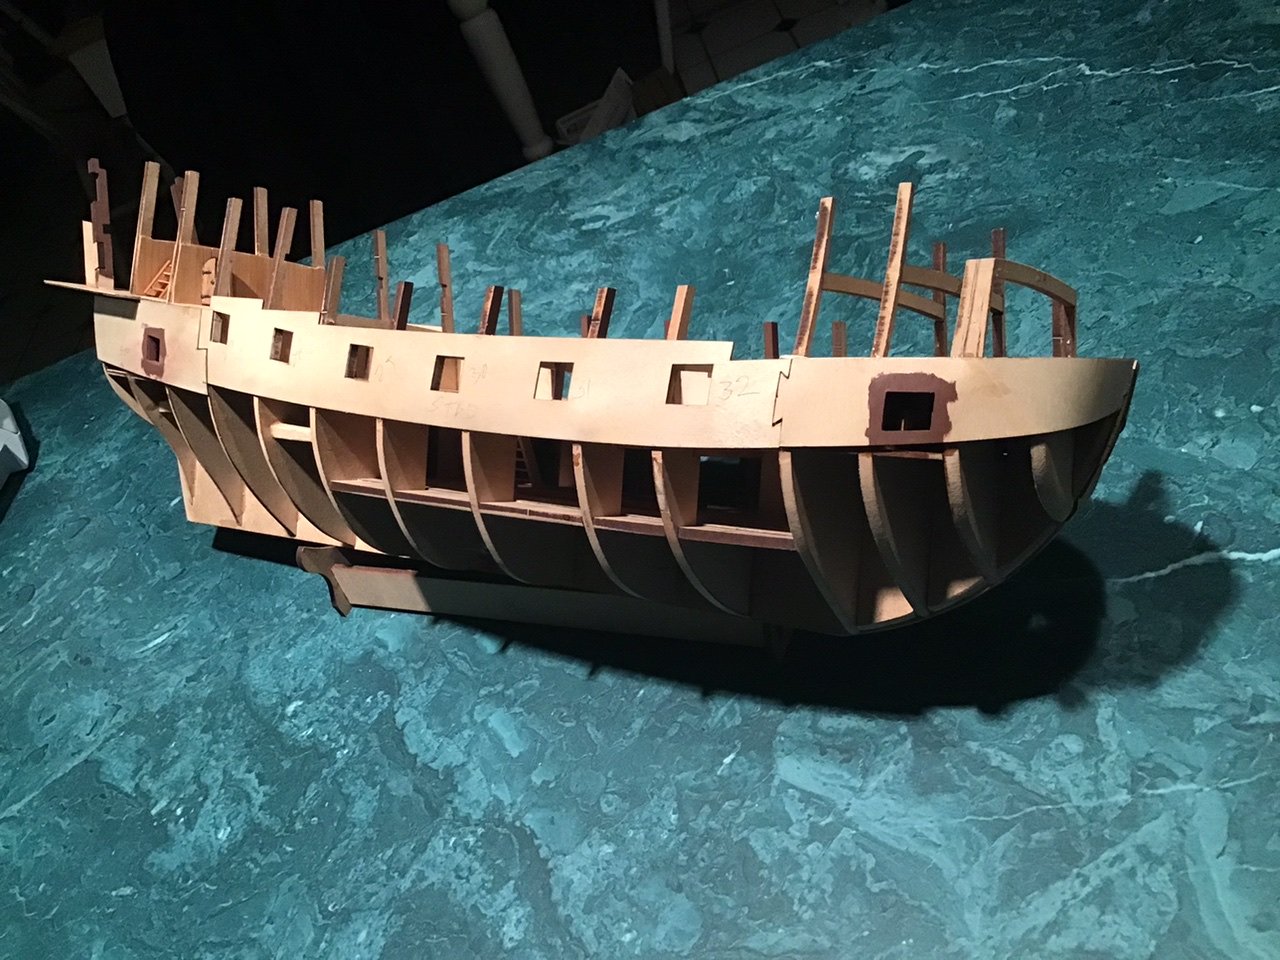
-
Revenge 1577 by Asat - Amati - 1/64
ASAT replied to ASAT's topic in - Kit build logs for subjects built from 1501 - 1750
Looks like this installed So then I had to trim some front bulkheads to fit the ply pieces, got them aligned and installed also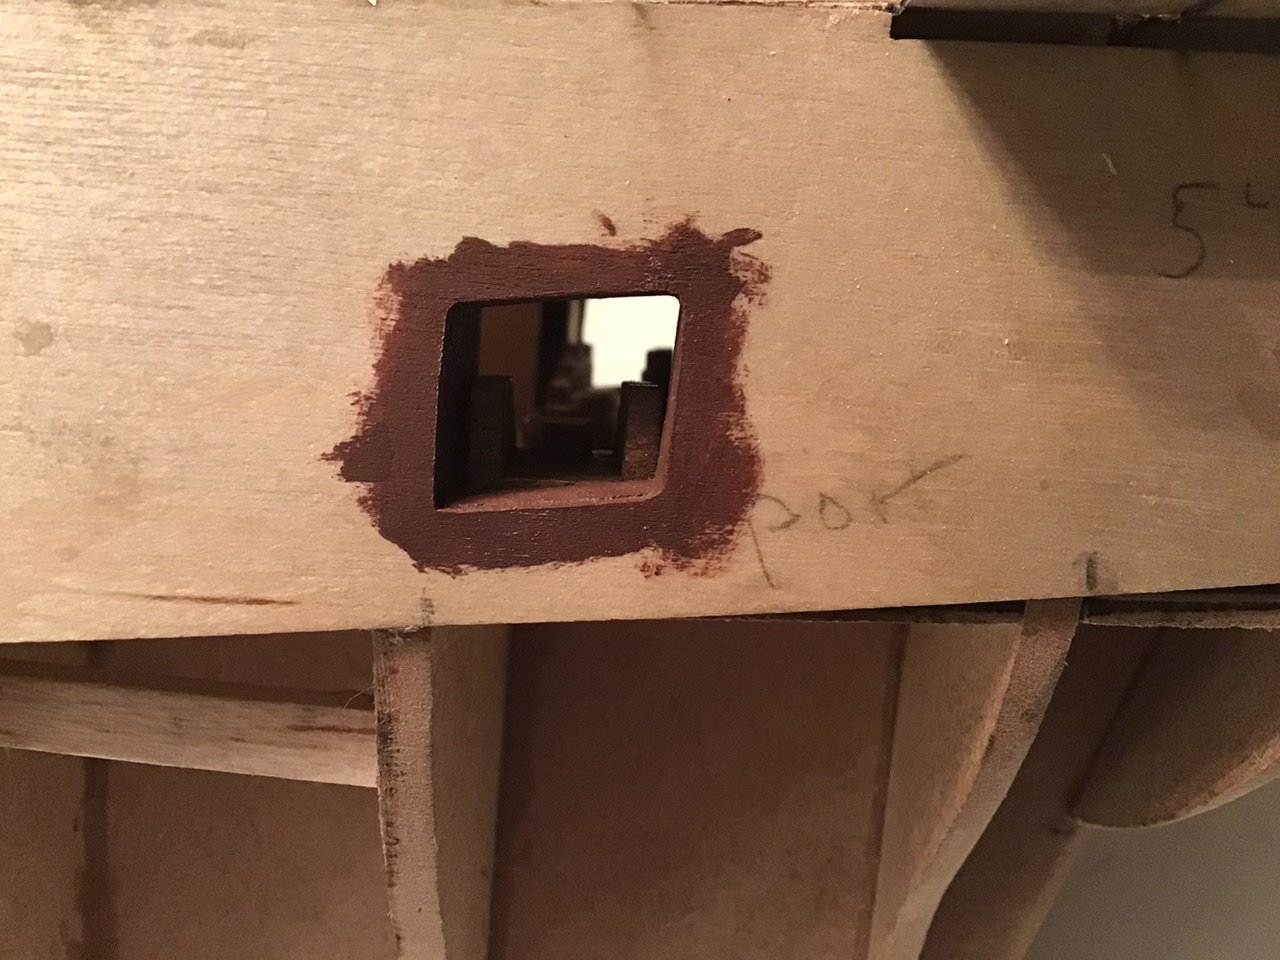

-
Revenge 1577 by Asat - Amati - 1/64
ASAT replied to ASAT's topic in - Kit build logs for subjects built from 1501 - 1750
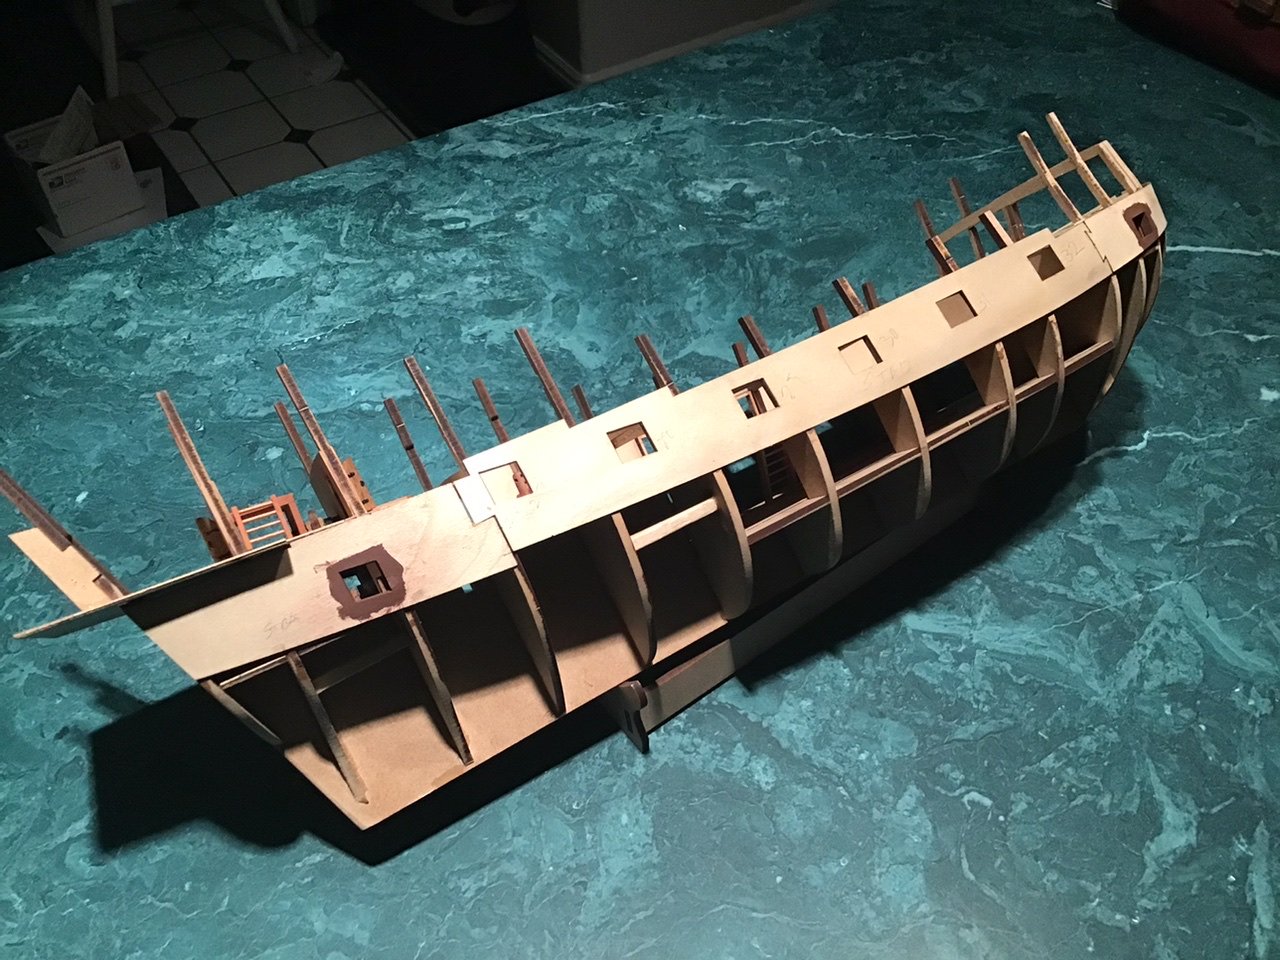
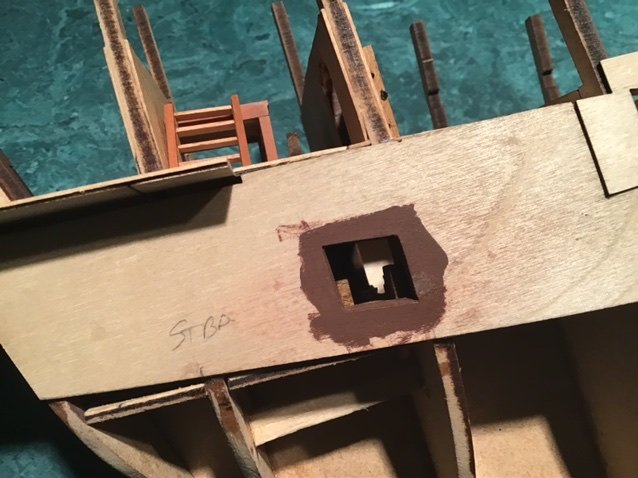
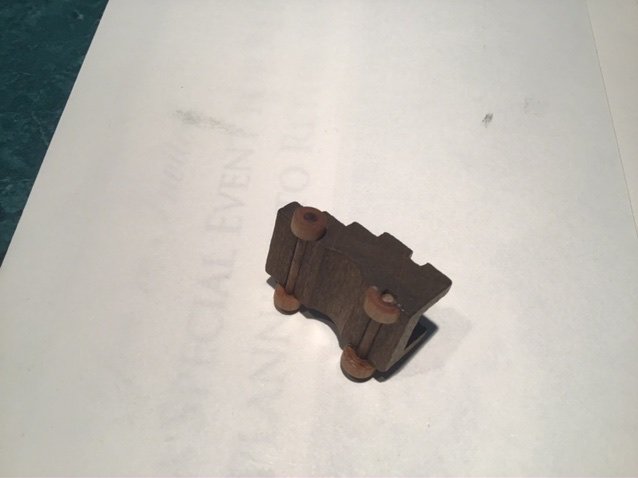
More progress this weekend, I had to temporarily pin all the ply sheets in place, check fit and mark where it all mates and install some cannon carriages where they go behind the ply bulwarks, Two of them required fudging a front truck as they fit right up against the bulkhead. On those two I cut a truck in half and glued it under the carriage to keep it square but still fit against the bulkhead.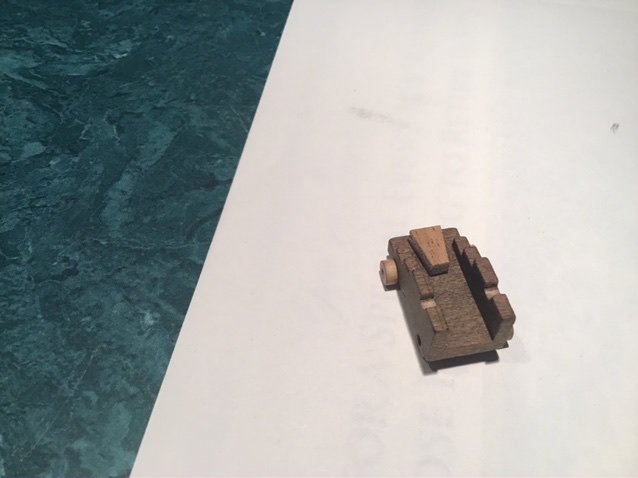
-
Hobbyzone building slip for wooden ship models
ASAT replied to aydingocer's topic in Modeling tools and Workshop Equipment
I emailed Matt and he confirmed that they received a shipment and back orders are being shipped.... -
Revenge 1577 by Asat - Amati - 1/64
ASAT replied to ASAT's topic in - Kit build logs for subjects built from 1501 - 1750
Always room for our mates across the pond Edward... still some prime seats left too! Thanks for the kudo's 🙂 Lou
