


ASAT
-
Posts
619 -
Joined
-
Last visited
Content Type
Profiles
Forums
Gallery
Events
Everything posted by ASAT
-
Glennard, your stern is coming along nice, I am always leery when shaping ports and especially rudder/mast holes, seems like planking just loves to split when you are doing round holes.... She seems a lot smaller than I thought.... camera angle or is she petite?
-
Yeah, sometimes it feels like you are doing the log for your own posterity, not a lot of interaction on some .... don’t know why some are more visited/commented on than others. Popularity of the kit and skill of the builder maybe? Look forward to your Speedy though.
-
Wahka, I think part of the reason there may not be a lot of info is it is basically the same ship as Caldercraft’s Snake kit and the Snake has carronades vs cannon and the hull is copper plated which may be why there are a few more Snakes - even so you could probably follow those build logs as well for info. And for sure if you start a log and ask for input you’ll have it....
-
It all depends on the wood species, grain direction, blade sharpness, rejection criteria and your cutting technique as to how many planks will be acceptable after ripping. I think the sander is invaluable for saving a bunch of planking that would have been rejected if ripping only.....
-
Glenn, you should start a progress log of your Lady Nelson, maybe not a build log but we could see what you’re working on and how it’s going.... or not.... no pressure, just always enjoyed your logs..... I like to see as many examples of planking success as possible.... 😀 I have a tough one coming up with my Revenge.....
-
Revenge 1577 by Asat - Amati - 1/64
ASAT replied to ASAT's topic in - Kit build logs for subjects built from 1501 - 1750
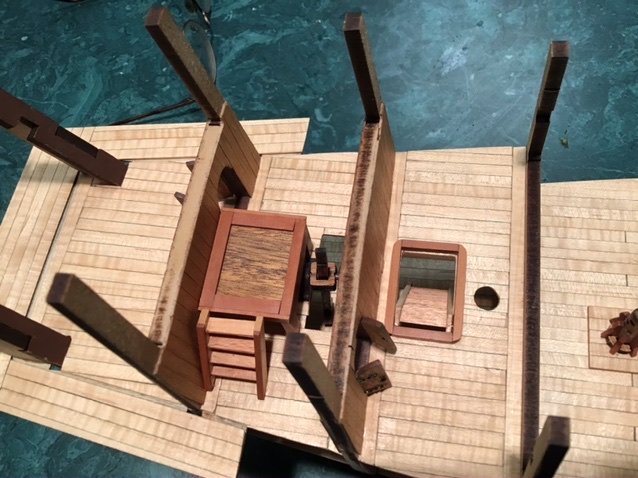
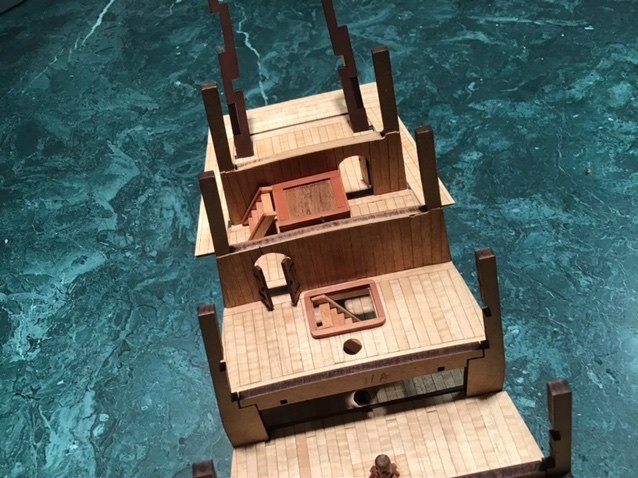
Couple of close ups of the aft deck areas and one shot of the lower decks that I’ll never see again once they are covered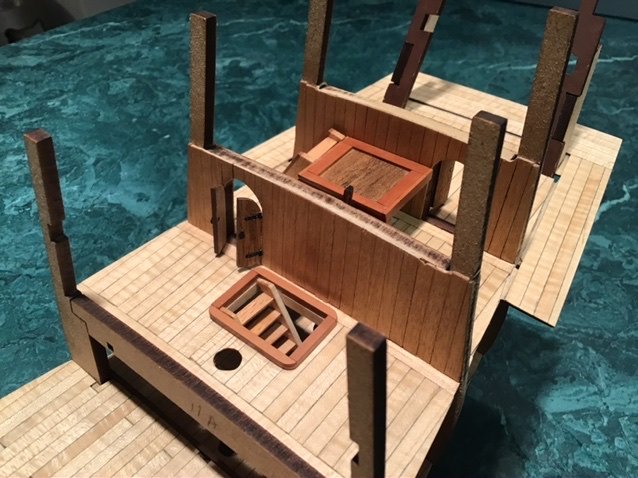
-
Revenge 1577 by Asat - Amati - 1/64
ASAT replied to ASAT's topic in - Kit build logs for subjects built from 1501 - 1750
The kit suggests painting the aft cabin bulkheads a dark brown but I planked them instead using the Tanganika deck planks that the kit provides. I like that there is a little bit of detail - the whipstaff platform and companionway and ladders. Some nice photoetch goodies for the bulkhead doors etc....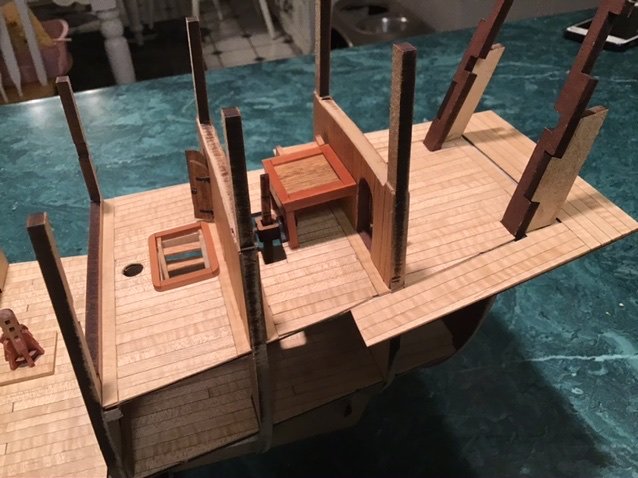

-
Maybe a ship model in 1/48?
-
Just cut it Jeff, uses more wood (depending on how many you break bending them) but a lot less frustrating and the first one fits perfectly!
-
John, that “pointed plank” is a half showing plank on the first layer of planking and the second, pinkish, pear layer is the second layer of planking so I doubt he has a pointed plank. Pretty sure all the planks have been pre spiled and come that way as part of the kit. His problem must have been he cut the second layer planks too short and didn’t take them all the way to the stem “rabbet”?
-
That saw and his thickness sander will take you a long ways in improving your models and your modeling capabilities.... I’ve had mine over 20 years and they are still my most valued modeling tools. They have paid for themselves many times over and I am amazed that they are still as accurate and powerful as when I bought them.
-
Looking good Ron, I’m always glad to see your updates, I know I’m going to be impressed or inspired or in awe.... I think your log is just so indicative of perseverance and commitment, I’ve seen your tenacity and the results speak for themselves. Nice work on that gammoning slot, see now I would convince myself I need a mill to do that well.... those head rails are a 3D challenge too, and have the potential for multiple iterations....
-
Looking great Jeff, Lots of little details that add up to that overall look of awesome results. I really like the copper caps, I wonder if that was unique to U.S. ships? Probably to keep the end grain from rotting out? Your gun rigging is awesome too!
-
Beautiful work Captain, very skilled execution..... is that Fasching you are referring.to? I remember celebrating in Wiesbaden as a boy with my Parents. Dad was US Air Force.....
-
Revenge 1577 by Asat - Amati - 1/64
ASAT replied to ASAT's topic in - Kit build logs for subjects built from 1501 - 1750
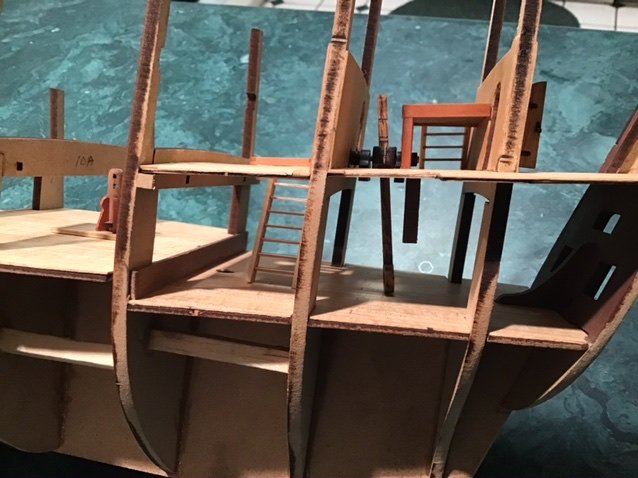
The aft bulwark pieces at the gallery platform area....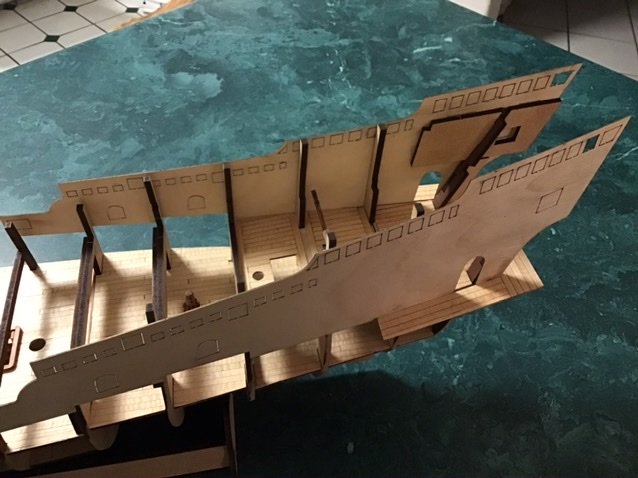

-
Revenge 1577 by Asat - Amati - 1/64
ASAT replied to ASAT's topic in - Kit build logs for subjects built from 1501 - 1750
So I think I’m done with decks for a while, I installed and planked the lower aft decks, I had to temp install the side ply pieces to get the outline of those to fit in between the gallery platforms. Pretty tedious with small planks and getting my hands between all the bulkhead uprights. Next up are some internal cabin bulkheads that I am considering remaking with Pear - especially the very aft gallery/ stern piece. We’ll see...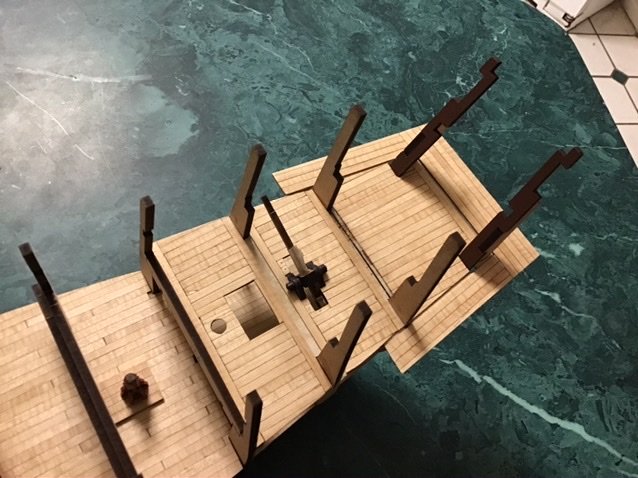
-
Revenge 1577 by Asat - Amati - 1/64
ASAT replied to ASAT's topic in - Kit build logs for subjects built from 1501 - 1750
Thanks guys for the kind remarks and all the likes! Nice to have you guys looking in, Y.T. - I didn’t think I was working that fast, I think a lot of it is the great design, it assembles very accurately and I haven’t had to spend days (or weeks) sanding the bulkheads or fairing everything together. I did use a few shim strips on a couple bulkheads and basically pre faired the first few and last couple of bulkheads just like the manual shows and it comes out great - so kudos to Chris Watton and Amati for implementing his great design. Makes me excited looking forward to even better designs coming from Mr. Watton with his new company - Vanguard Models -
Revenge 1577 by Asat - Amati - 1/64
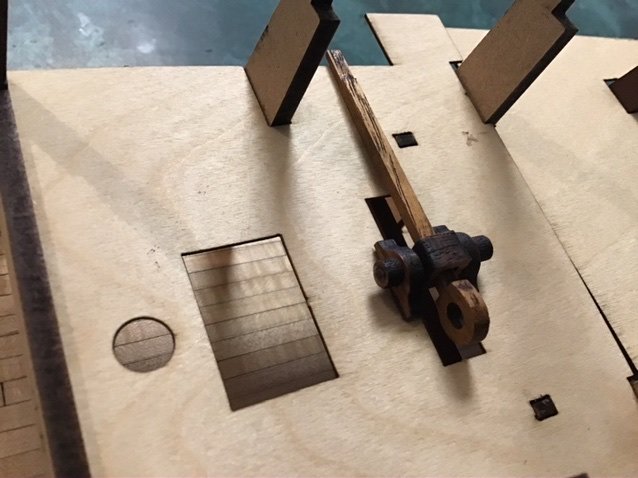
ASAT replied to ASAT's topic in - Kit build logs for subjects built from 1501 - 1750
Installed the rear gallery decks after building the “whipstaff” an early form of tiller actuation device I gather.... the decks are waiting for the side ply bulwarks and rear bulkhead to be placed and marked around then they are removed and the gallery decks are planked and bulkheads are added. Getting closer to prep for planks....whipstaff assy....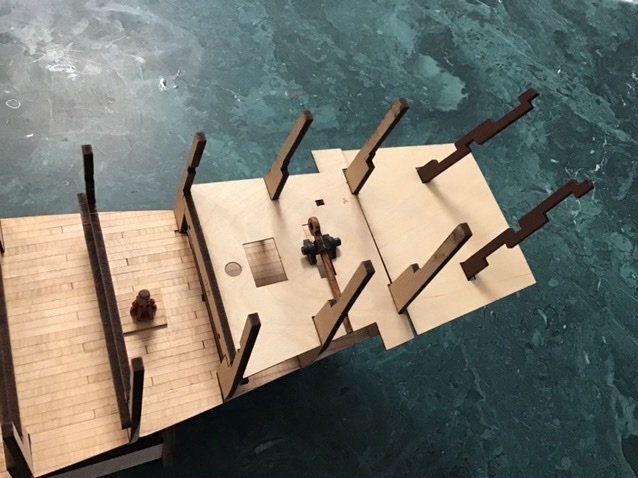
-
Revenge 1577 by Asat - Amati - 1/64
ASAT replied to ASAT's topic in - Kit build logs for subjects built from 1501 - 1750
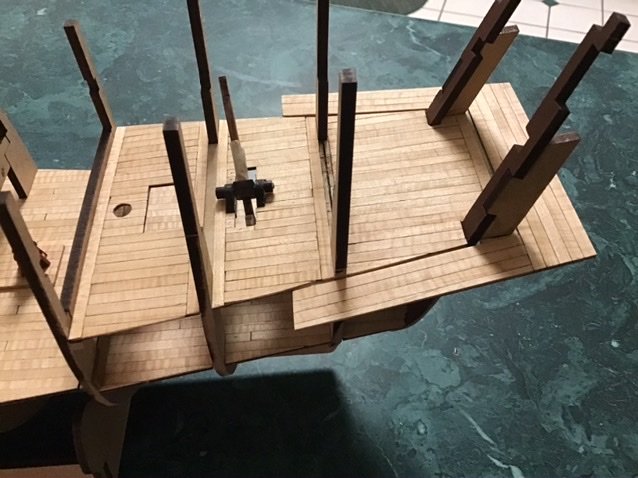
Continued installing the rest of the upper deck beams after painting the ones that *might* be seen....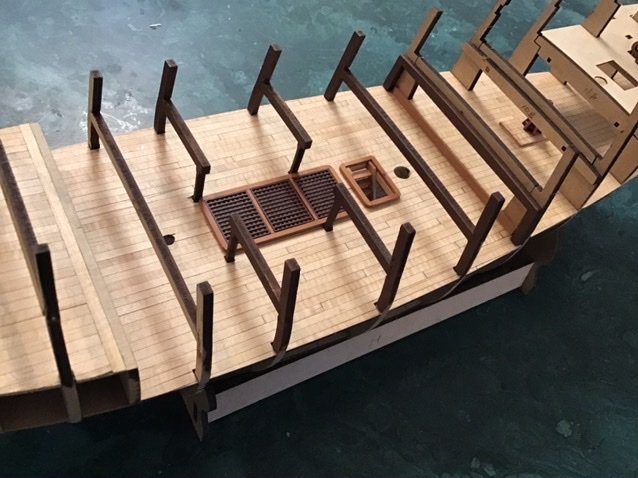

-
Nice build Daniel! Are you hooked yet? 😀
-
That pic of Slim Pickens straddling that Gun? Are you referring to him in Dr. Strangelove riding The Bomb to thermonuclear glory?😎
-
Hey Glenn! I just saw this post, yes indeed, I was inspired by your cool deck and had a bunch of nice woods.....
-
I still have one about 75% done but I want to add rigging to it - link in my sig..... Glenn Barlow just posted pics of his FA in the gallery - one of the best examples of this fun kit I have ever seen!
-
Revenge 1577 by Asat - Amati - 1/64
ASAT replied to ASAT's topic in - Kit build logs for subjects built from 1501 - 1750
So I got to looking at my capstan and thought it was over sized - looked at some resources on line and the whelps are all wrong, so I re worked it a bit, still a little big but it’s better and like I said, it’s practice for the one you will see. I know some of you guys looked at that thing and laughed, I give everyone permission to tell me if something isn’t right. At least then I’ll have the option of doing it over - constructive criticism is always good.....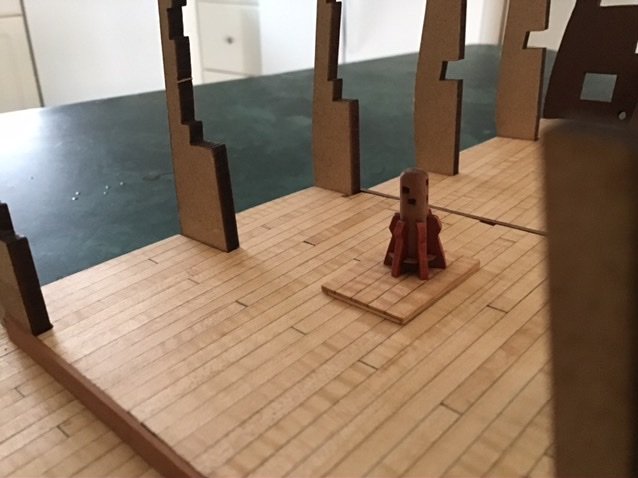
-
Revenge 1577 by Asat - Amati - 1/64
ASAT replied to ASAT's topic in - Kit build logs for subjects built from 1501 - 1750
Wow - now that would have been a lot of fun! You just knock that out in a weekend or two? Great Chris, now every one is going to be let down as they see my tiny little Revenge take shape. I think it’s cool to see how your designs developed- actually build them better and better....