pirozzi
-
Posts
843 -
Joined
-
Last visited
Content Type
Profiles
Forums
Gallery
Events
Everything posted by pirozzi
-
 Hi Cristi, The whole purpose of this forum and posted build logs is to share ideas and comments with each other. I only post my logs so that others like yourself might gain some information. Most of what I know, I got from others, and I hope to continue to do so. You and anyone else are most welcome to anything I post. Vince P.
 -
Hi Chris, The idea of making planking clamps from paper clips is genius. They are better than you can buy. Vince P.
-
Hi Pete, I don't know about you but the few times I have sent a message to them, I got an answer in 2 hours or less! When I asked for the missing parts like Denis did, they went on this site to my build log and showed me my own photo that I did have the parts afterall. Their service is unheard of in the kit manufacturer field. Vince P.
-
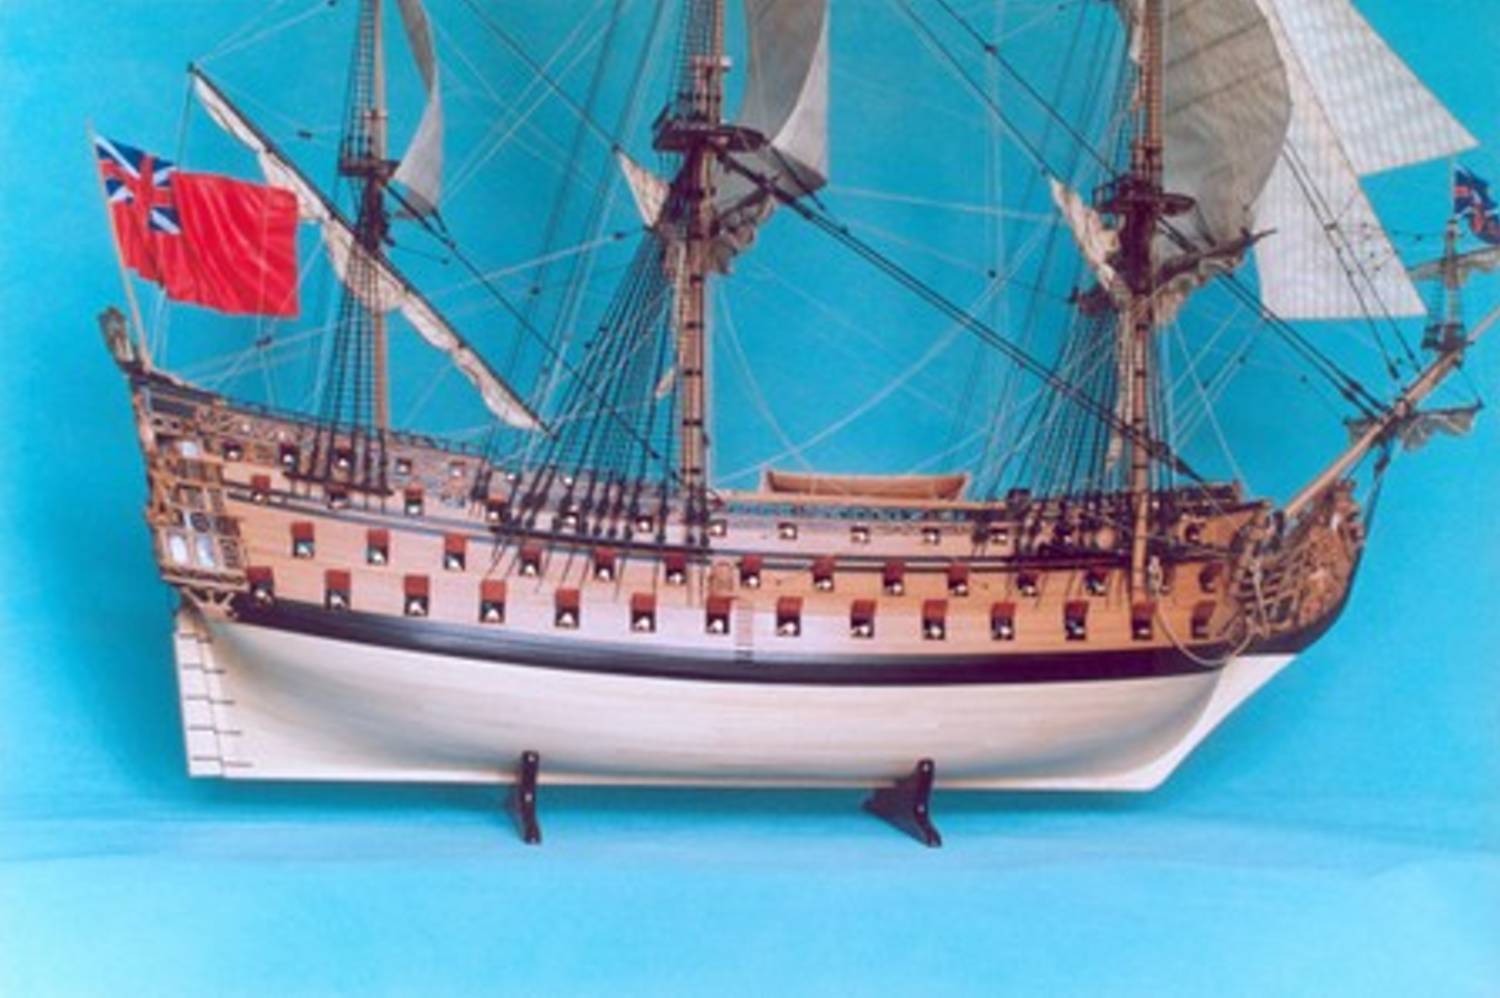
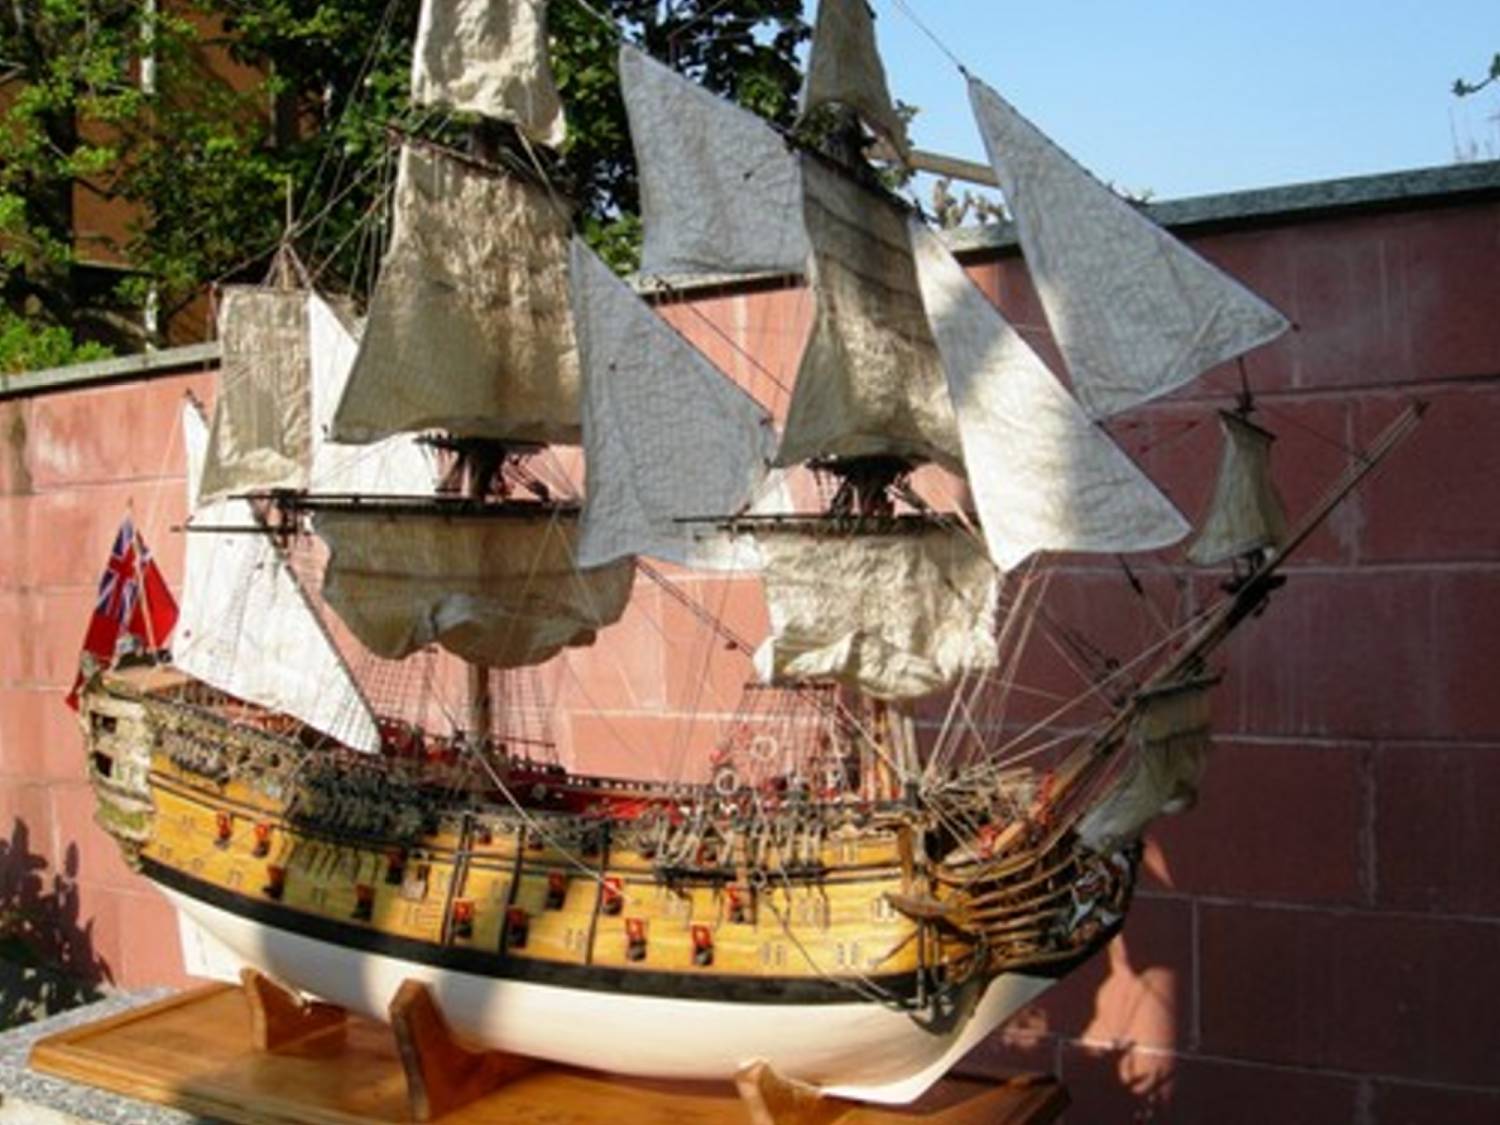
Painting below the waterline white. According to the plans, the waterline does not follow the flow of the wales and falls below the lower wale at both the bow and stern. In looking at several completed models, I see that they all have painted the white to flow with the wales. This to me looks much better and will be much easier to paint since the seam will be under the lower wale and the stern will be painted right up to the bottom of the transom. I have decided to do it this way as well. Attached are photos of 3 completed models from the Euro website that follow this idea. Vince P.


- 593 replies
-
- 3
-

-
- royal william
- euromodels
- (and 1 more)
-
Great job Keith. I was also planning to build these parts from scratch. I will follow your lead on this. Thanks. Vince P.
-
Hi Keith, Yes, I tried to hide the spiling under the wales. This hull is so complex, it is practically impossible (for me anyway) to make it perfect. I decided to plank it all the way up for 2 reasons. It was going to be hard to lay the metal decorations on the hull and only plank it up to them without any unwanted spaces. It would require cutting many small thin pieces. Also, as you pointed out, the 1mm recess of the metal pieces would take away from the prominance of the decorations. I will recess the gunport linings on only the ones that have cover doors. The rest should be flush. It will be a chore to line them, but with patience I think I can do it. There are already some little pieces of wood inside the hull that I can't shake out, so a few more won't hurt. Vince
- 593 replies
-
- 1
-
-
- royal william
- euromodels
- (and 1 more)
-
Hi Denis, The planking is still raw and just fine sanded. I will seal it and sand it with a fine paper. Then I will paint it white below the waterline and apply an oil based oak finish above the waterline. Also, the sides where the metal ornaments go will be painted black. Vince
- 593 replies
-
- 1
-
-
- royal william
- euromodels
- (and 1 more)
-
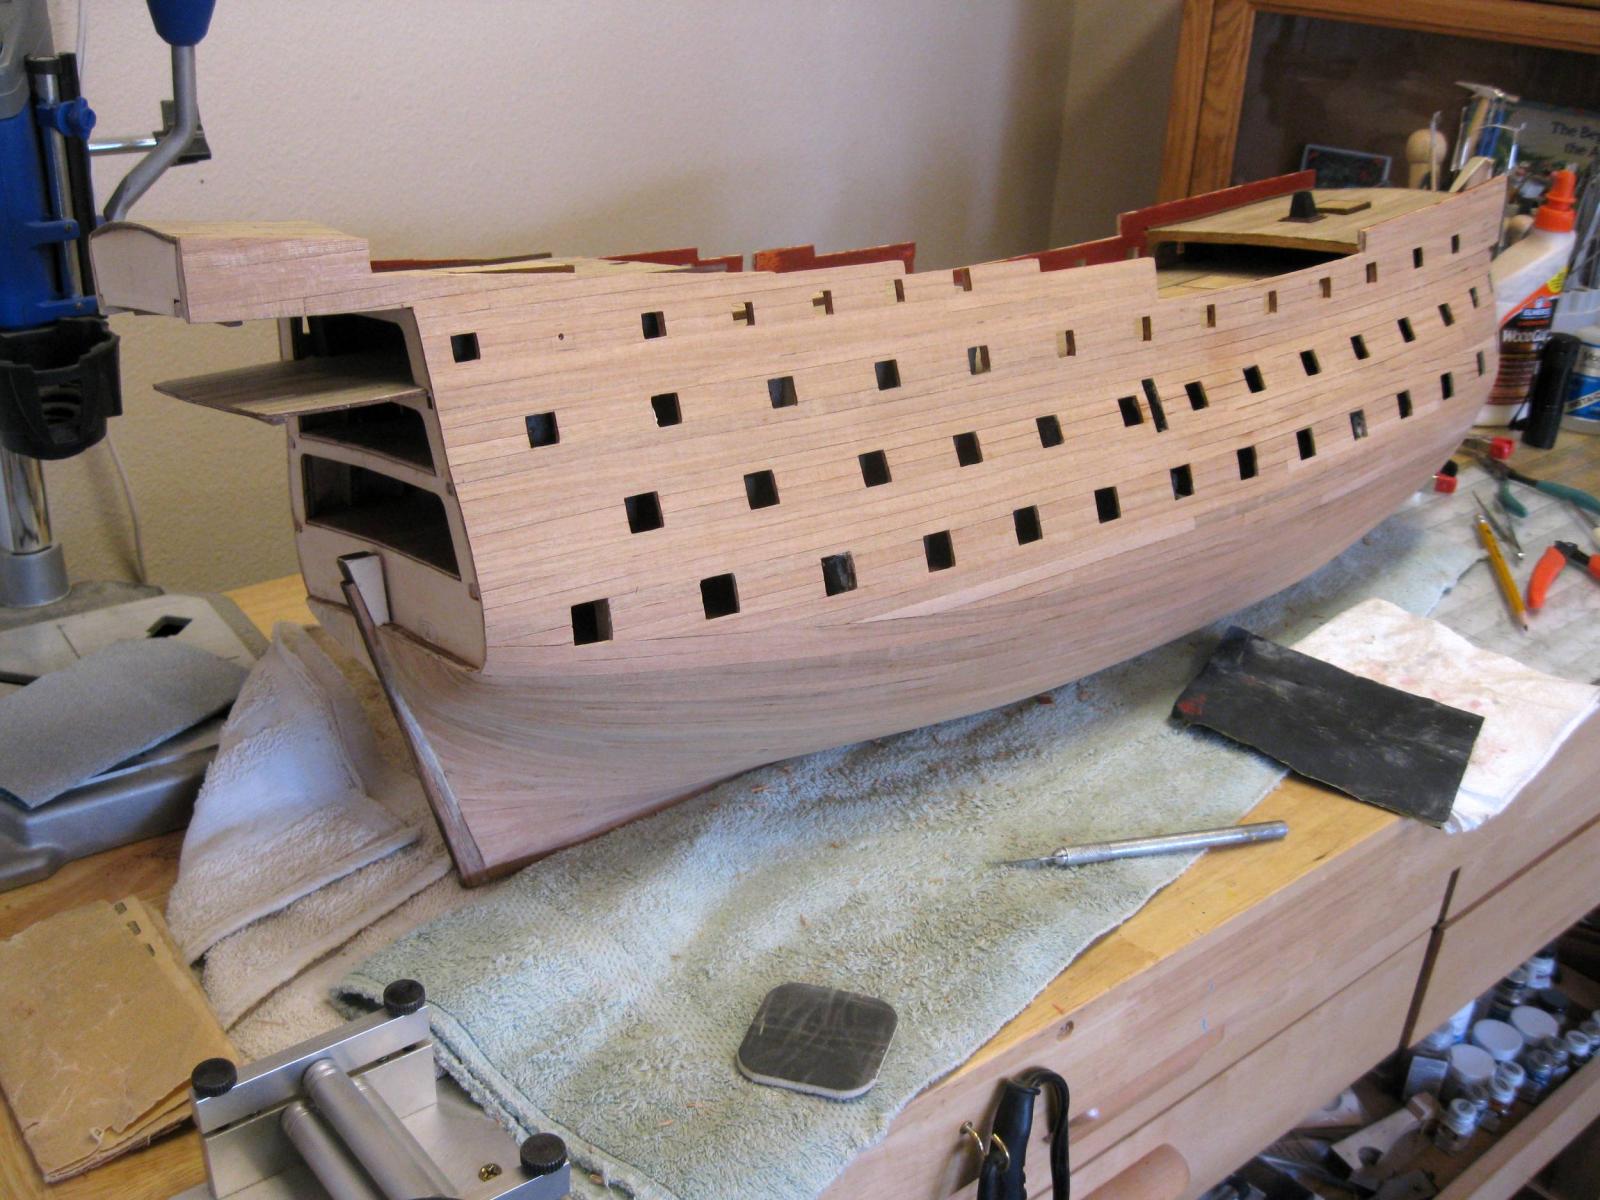
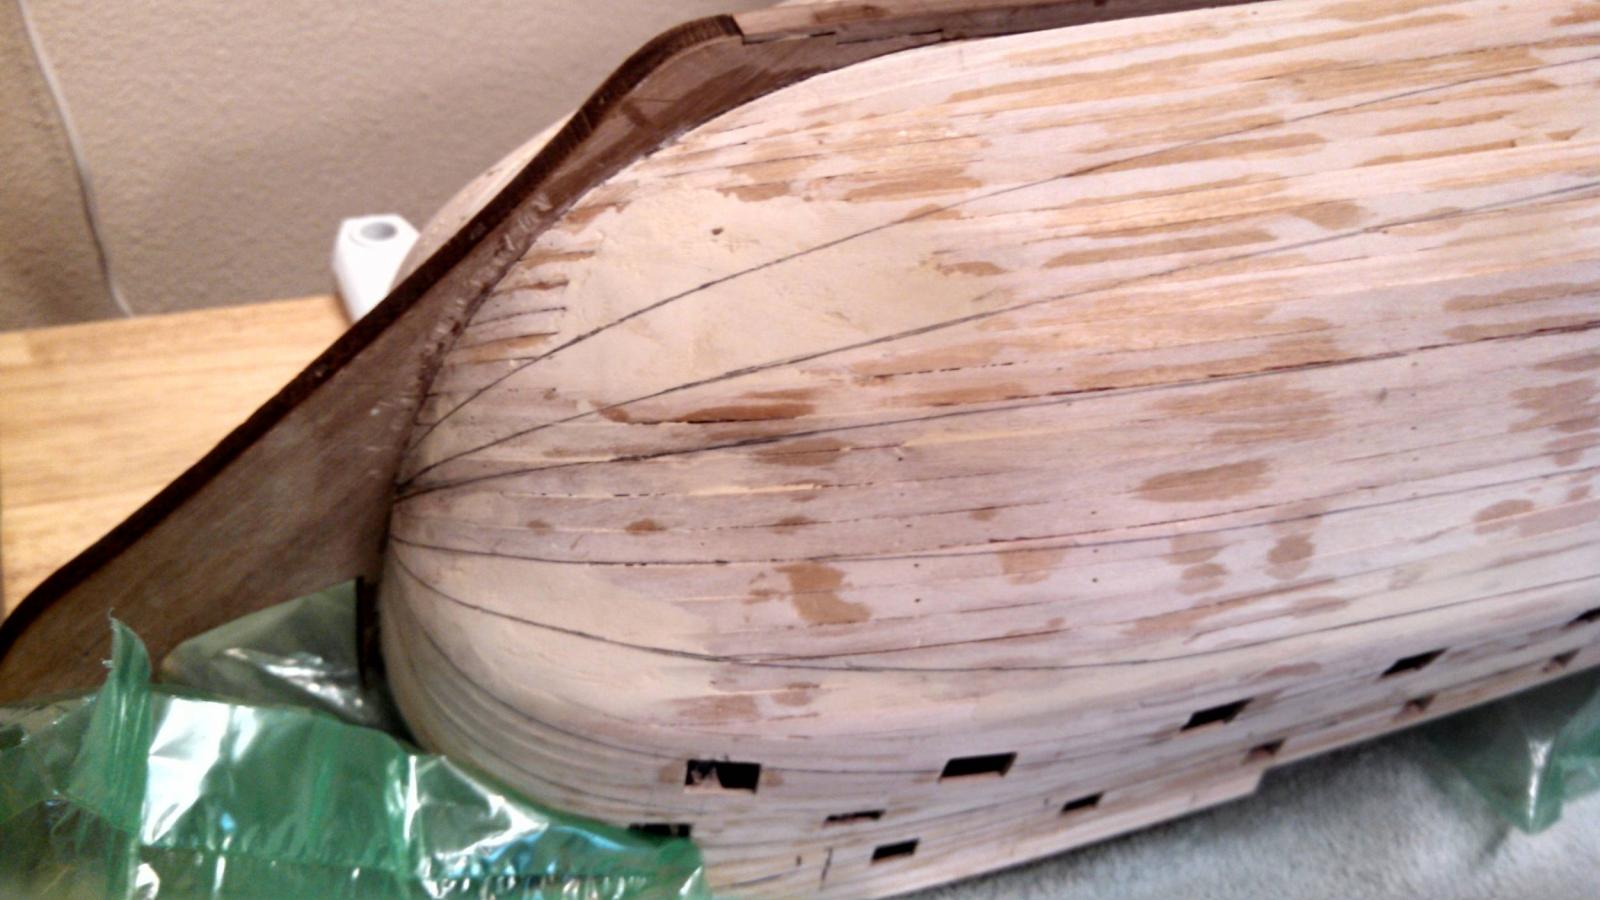
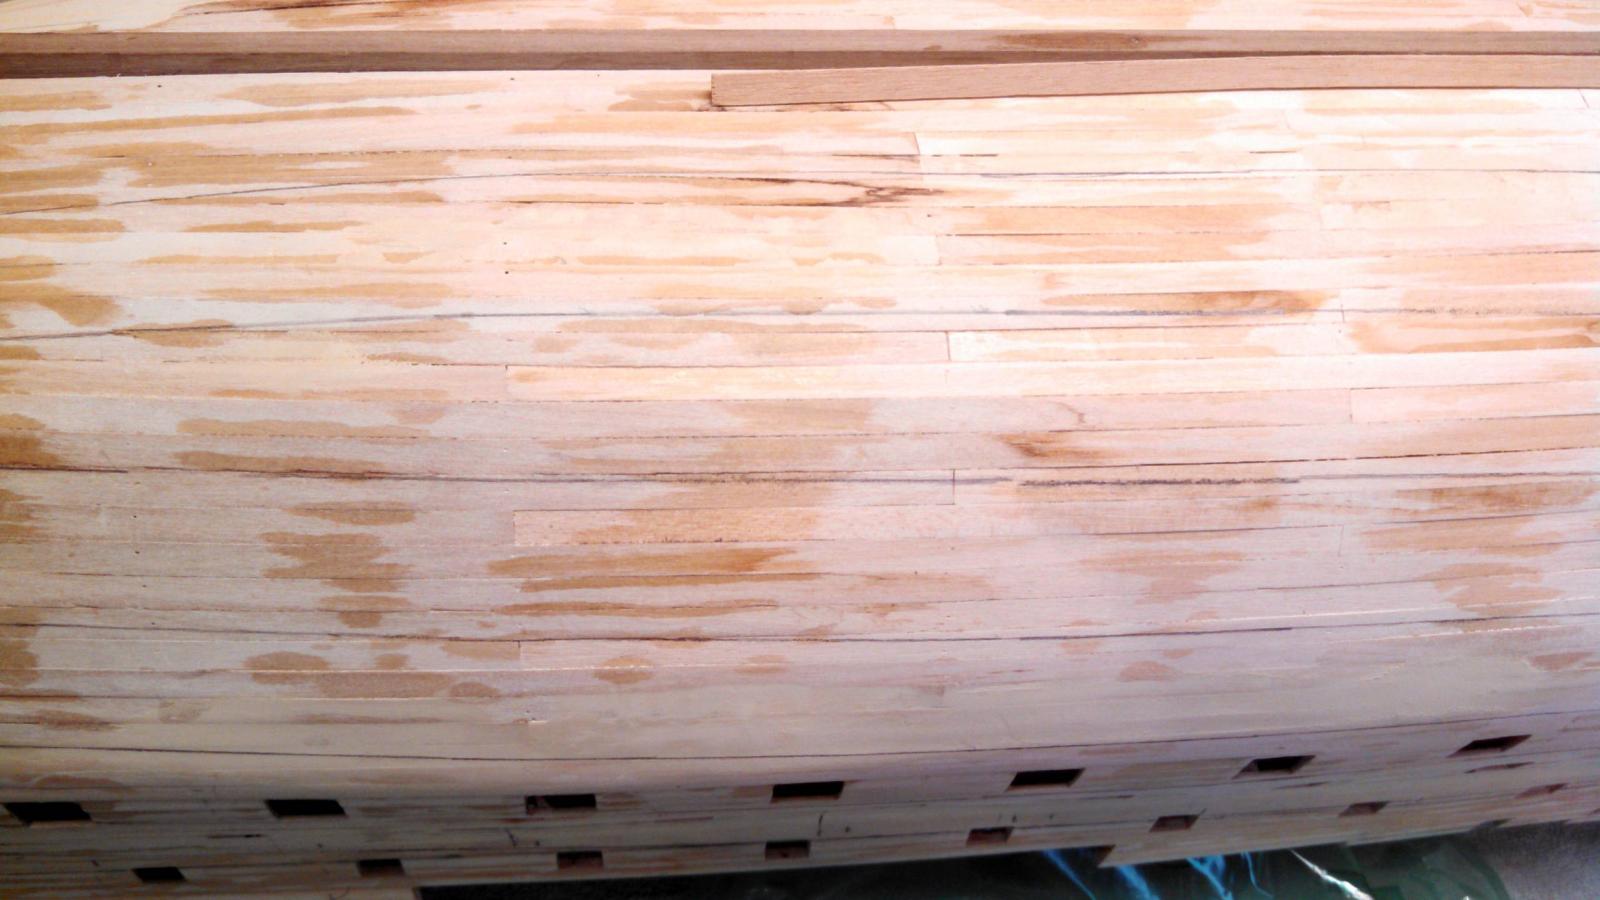
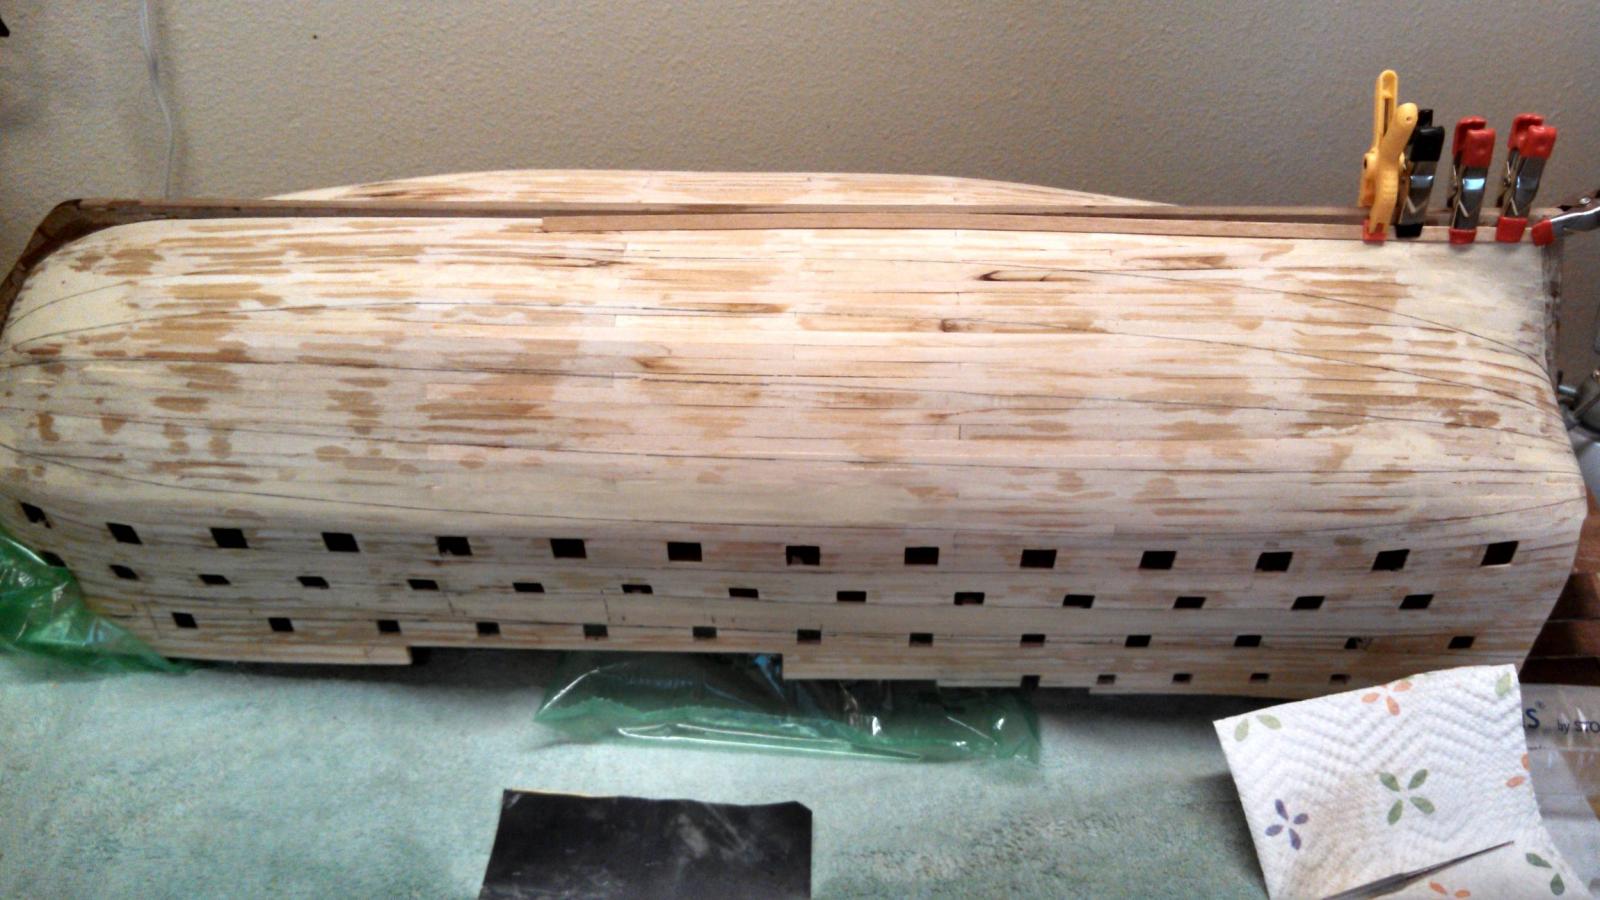
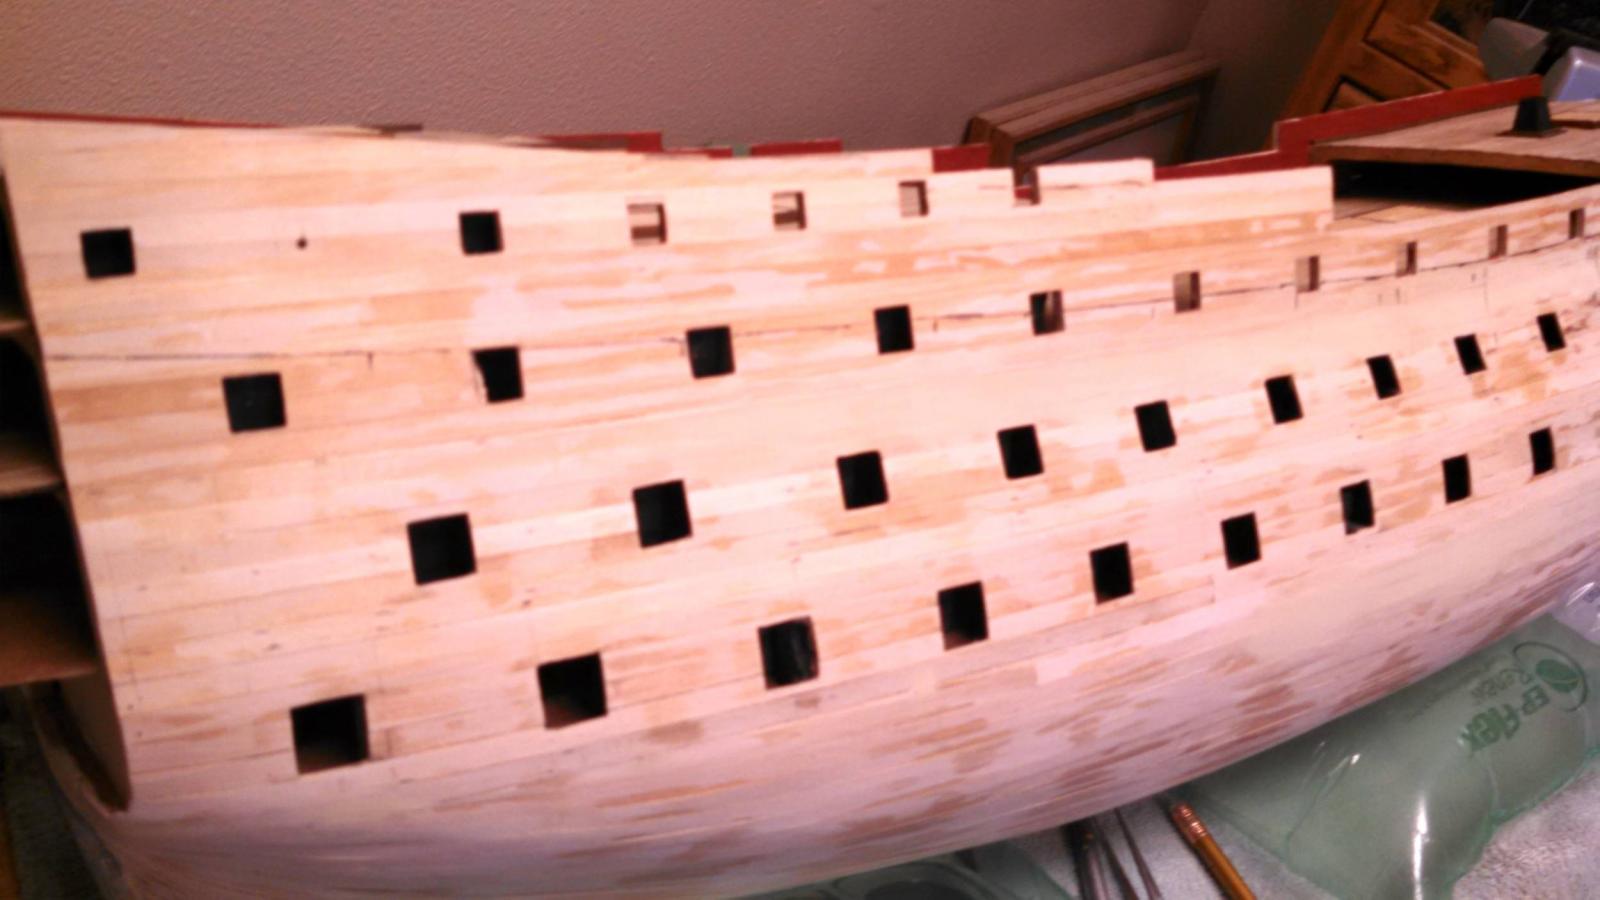
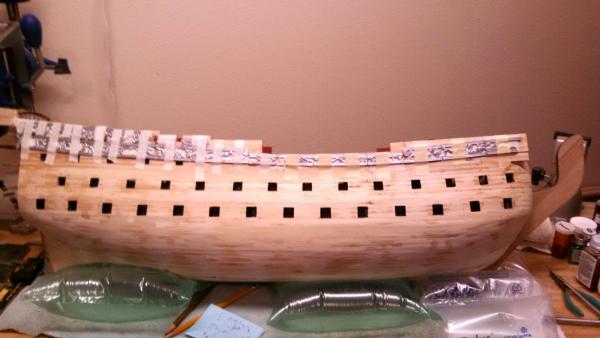
Hi All, I have not posted any photos of my build lately because I am working on the finish layer of planking and it is very slow going. This hull is so huge and complex that it takes hours to just lay a few planks. I have pretty much finished the starboard side and am putting a finish layer on the stem. It will prpbably take me another few months to complete the port side. Here is a photo of what she looks like now. Vince P.

- 593 replies
-
- 14
-
-
- royal william
- euromodels
- (and 1 more)
-
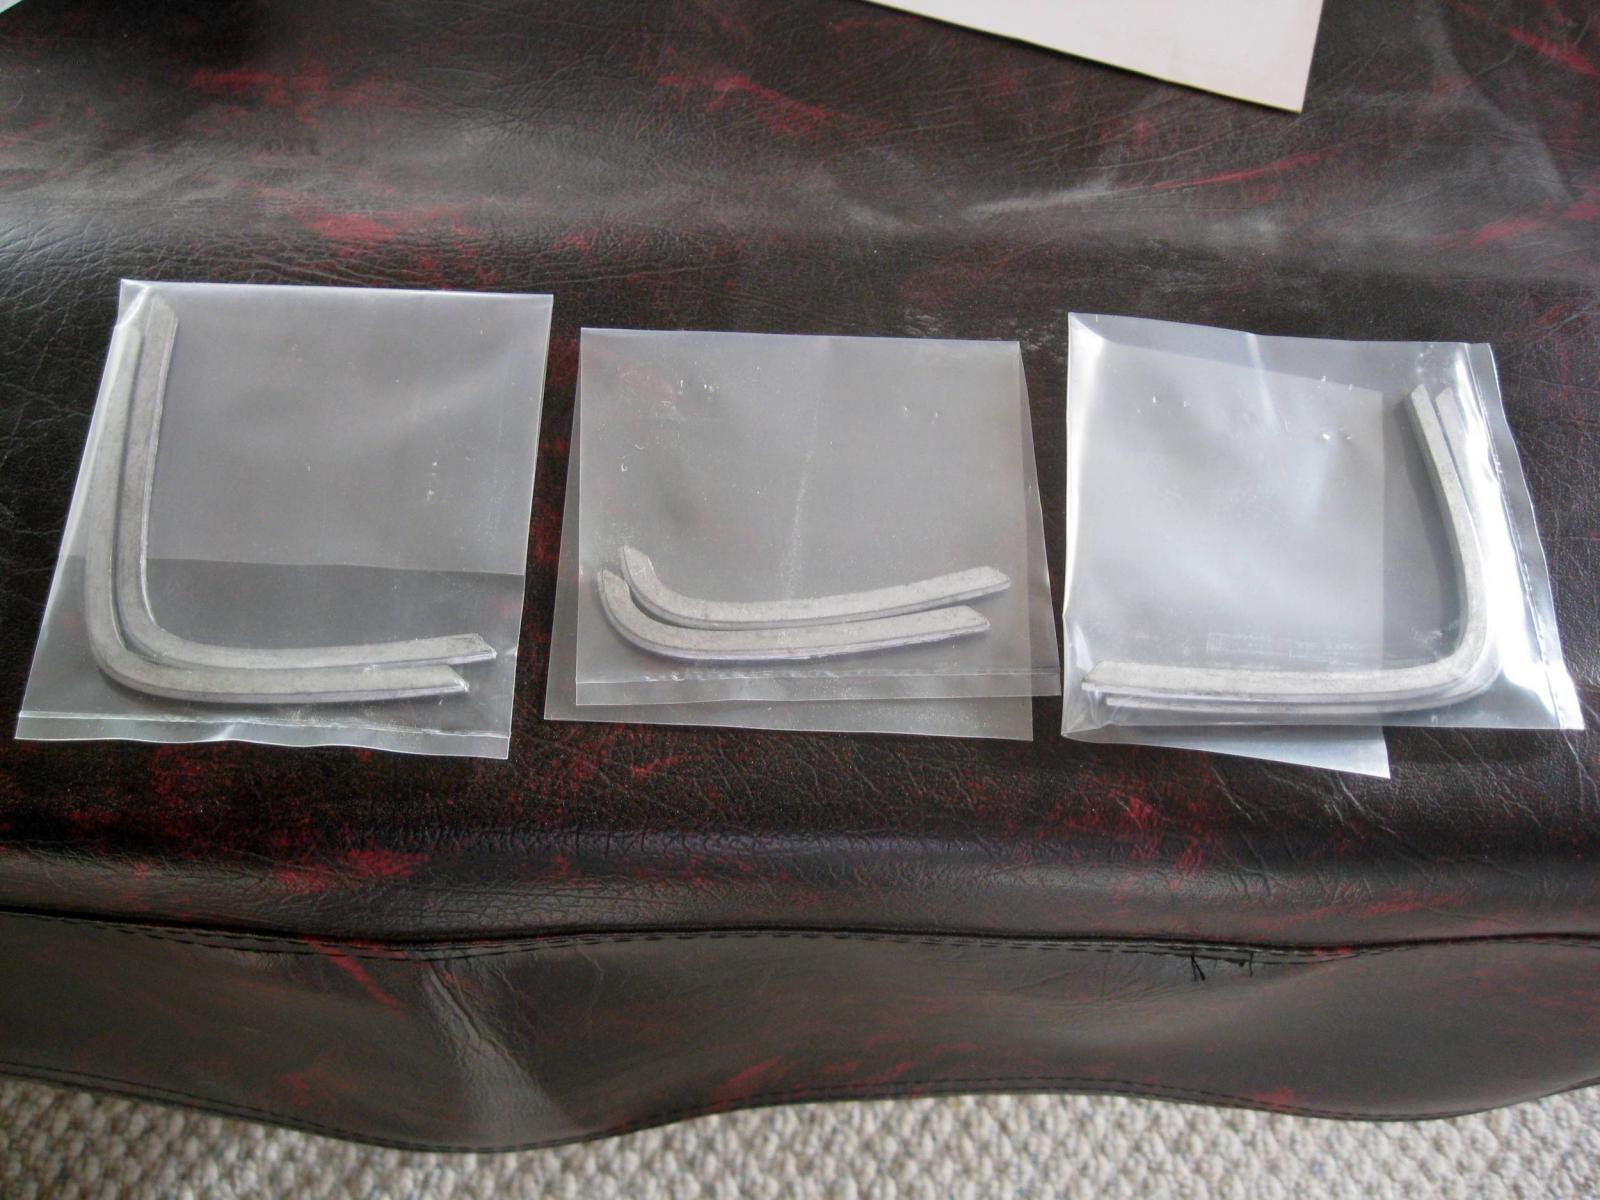
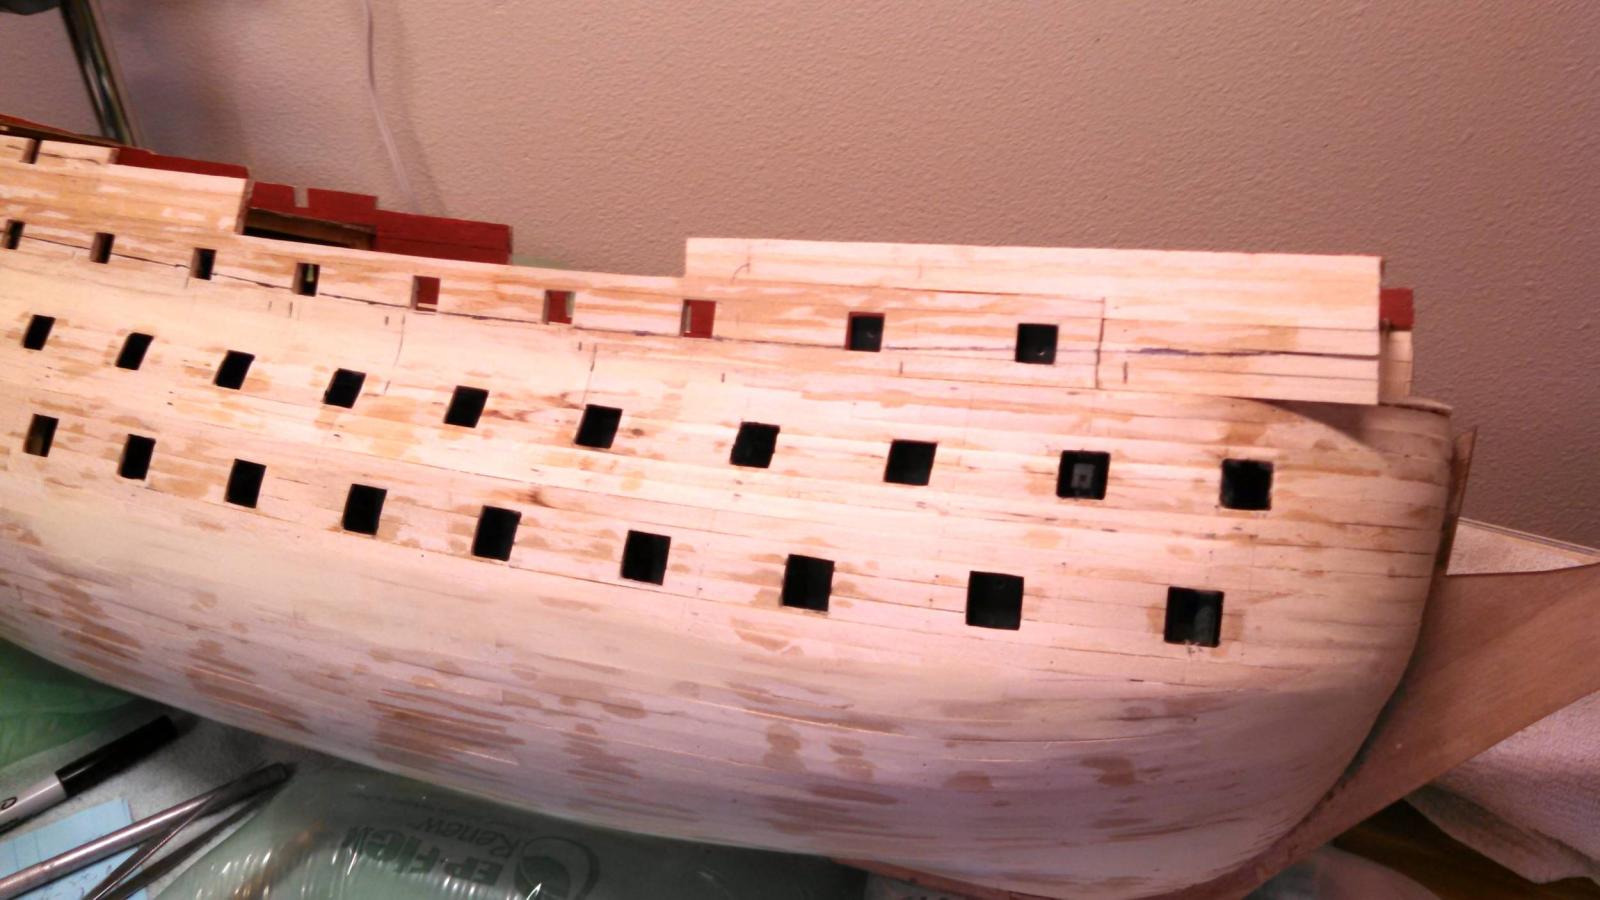
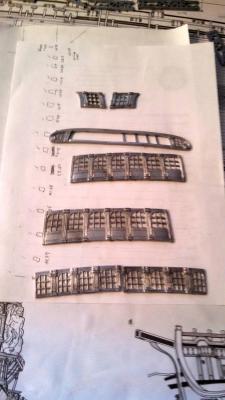
Hi Everybody, I got a message from Denis about missing pieces in the kit. It appears he was missing parts 11247, 11248, and 11249, which are metal trim pieces for the transom. Keith W also noted these pieces missing as well. I searched my parts and determined they were missing. I contacted Euromodel and asked for the parts. I got a response in 2 hours! Unbelievable service. It seems they went on this site and looked at my build log and saw the parts with the photos I posted of the contents of the box at the beginning, and there they were! The parts are not marked and I assumed they were parts for the bow railings, but they are the transom trim. I have posted a photo of the parts in the bags. I am embarassed. Anyway, look at your kits and maybe you have them too. Vince P.

- 593 replies
-
- 2
-
-
- royal william
- euromodels
- (and 1 more)
-
Hi Keith, You are doing a great job! I do know that the kit has been modified since Pete worked on his. There are some parts changed and deleted. I do not know about the railings, but will check my pile of parts and let you know. I think Denis ordered the missing parts from Euromodel. Vince
-
Thanks for the link. Those photos will help alot. Vince P.
-
Hi Denis, That is a clever idea to build that jig. Vince P.
-
Nice to see you moving along Denis. I am still plugging away, but the secong planking is very long and slow. Vince
-
Lost count years ago. Vince P.
-
Happy holiday to all of you that celebrate Thankgiving. I have not posted on my log for a while because I am working on the second planking which is taking a very long time. Vince P.
- 593 replies
-
- 2
-
-
- royal william
- euromodels
- (and 1 more)
-
Hi Keith, It is recommended to add another layer of first planking to the bulwarks. Doing so really strengthens the structure and it will support the inverted hull with no problem. Vince
-
Hi Keith, I didn't forget, just haven't done it yet. When the second planking gets up to that level, I will cut them out. Vince
- 593 replies
-
- 1
-
-
- royal william
- euromodels
- (and 1 more)
-
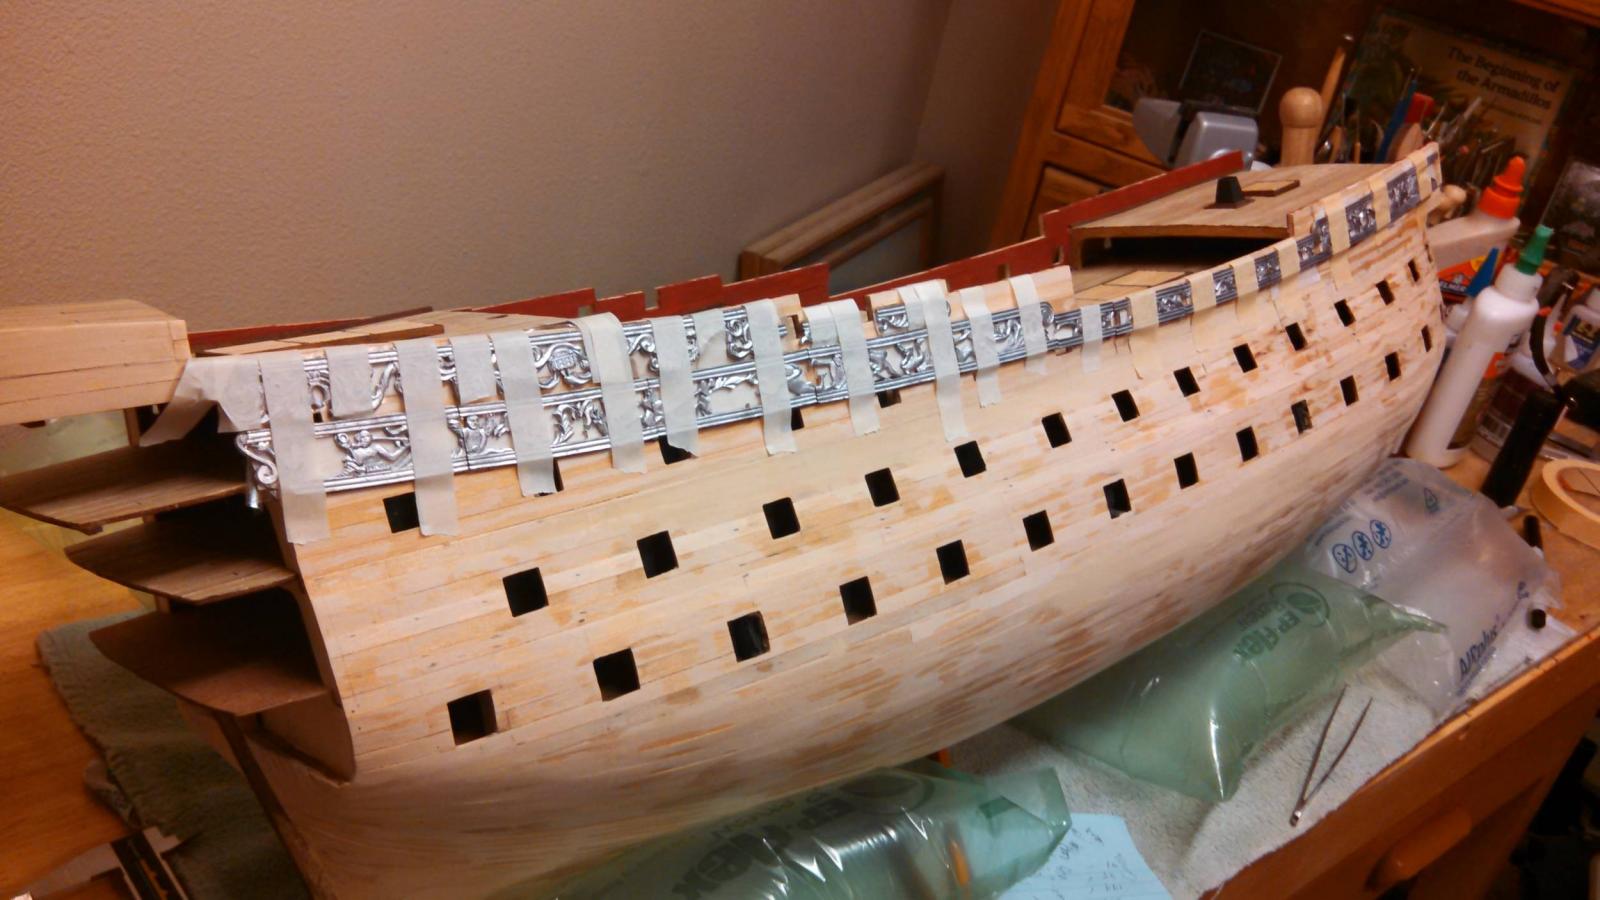
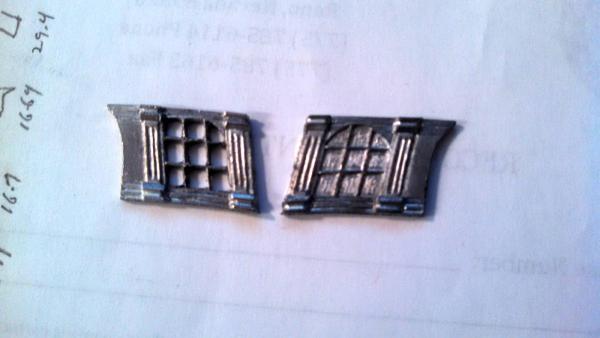
The metal castings that make up the gallery windows are OK, but the windows don't look good even when painted. I decided to cut out the window panes and will fill them in with a clear film that should look like real windows. I don't have a fancy milling machine, so I will cut them out by hand. There are literally about 100 windows, so this should take a long time. The second photo just shows the rear windows and not all of the side windows. Vince P.
- 593 replies
-
- 2
-
-
- royal william
- euromodels
- (and 1 more)
-
Nice work Denis as usual. Vince P.
-
Hi Max, As soon as I plank the first 2 or 3 bands, I will post more photos showing how joggleplanks and stealers are constructed and used. This particular hull is very complex and requires their usage in many places. Vince P.
- 593 replies
-
- 3
-
-
- royal william
- euromodels
- (and 1 more)
-
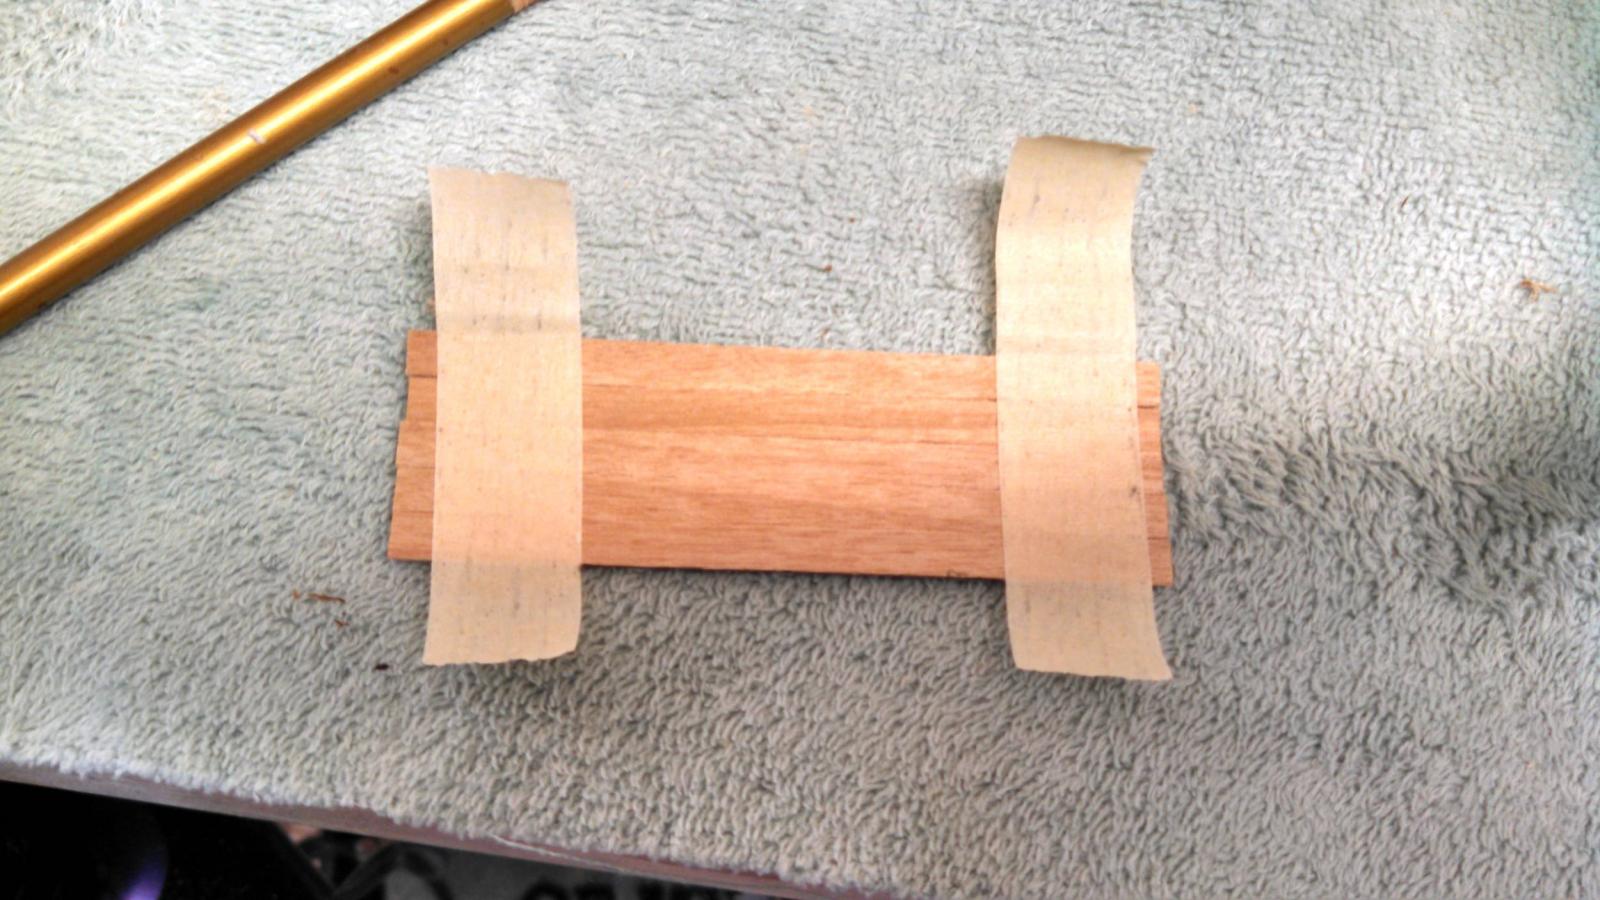
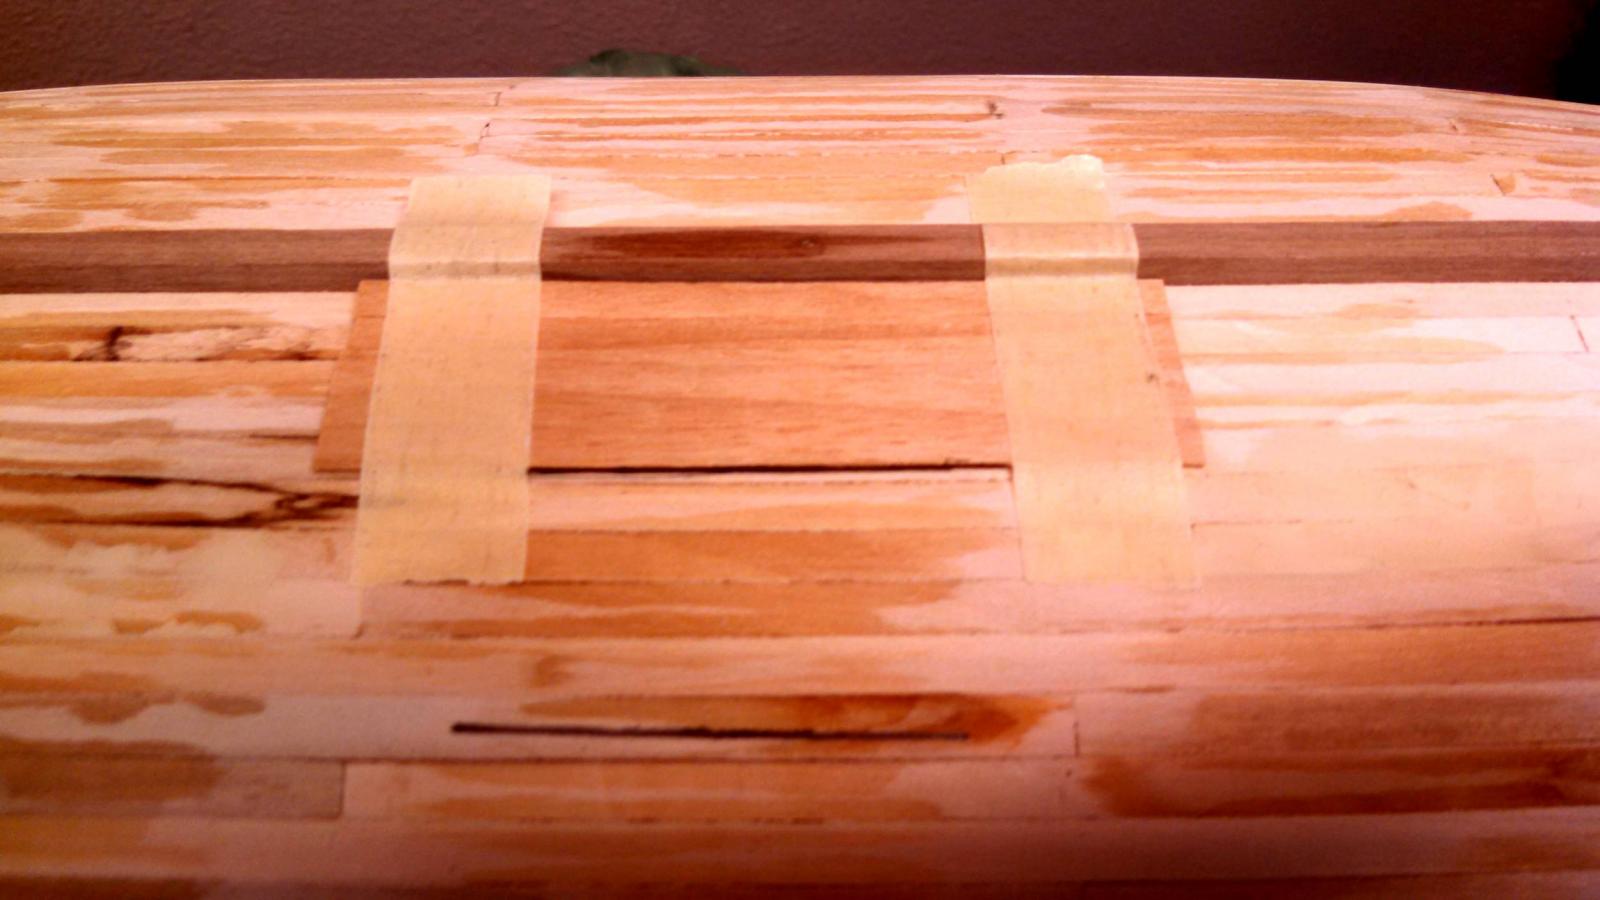
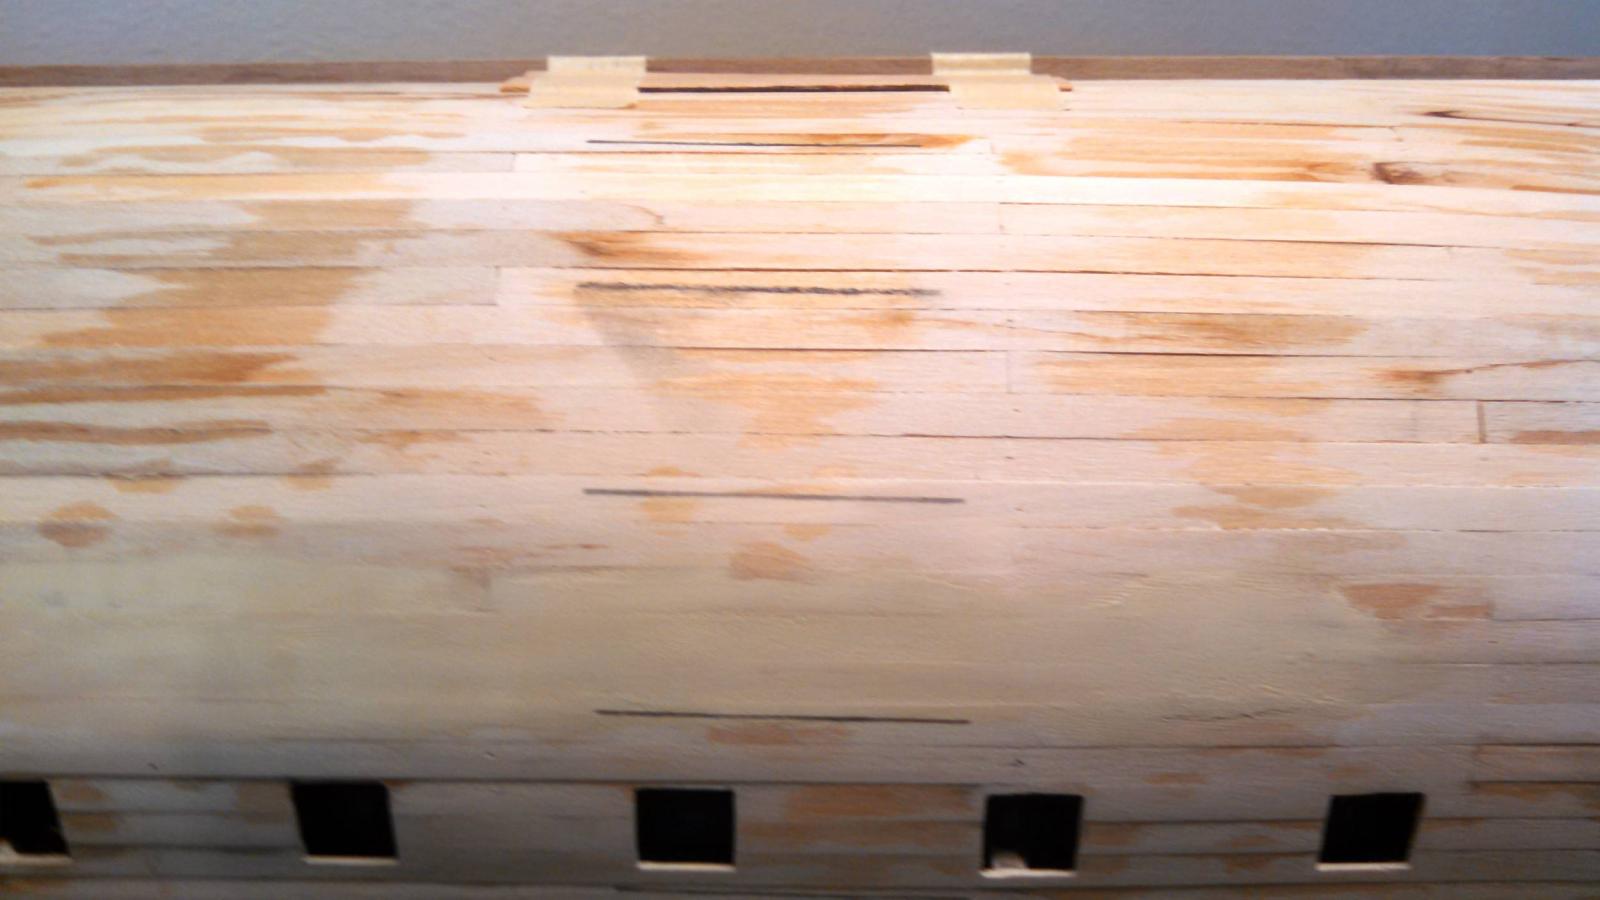
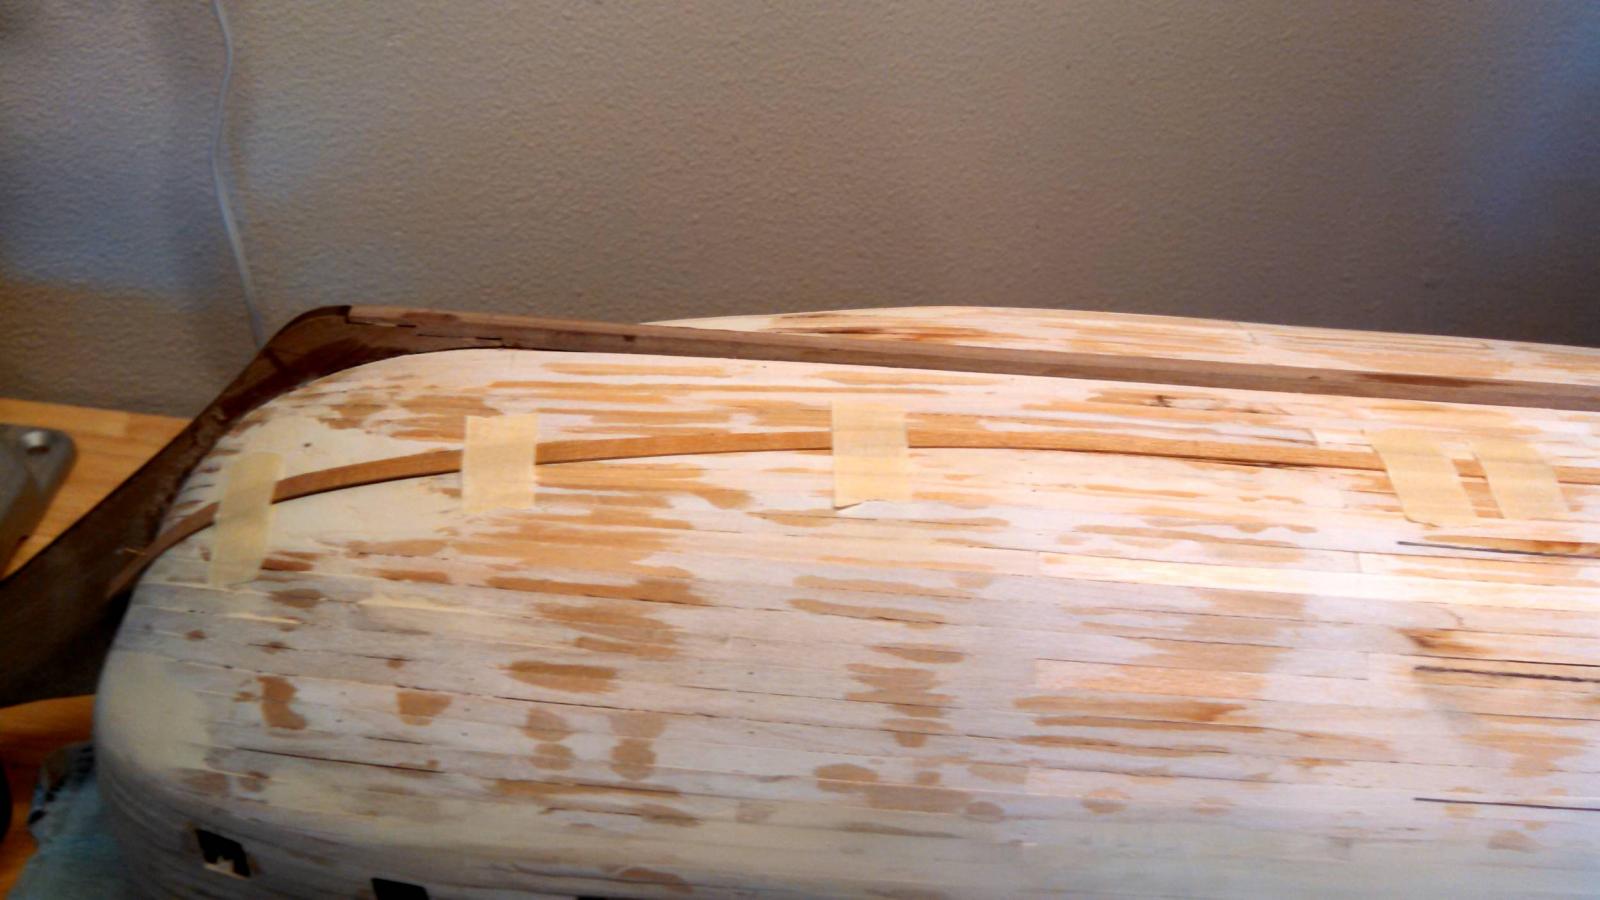
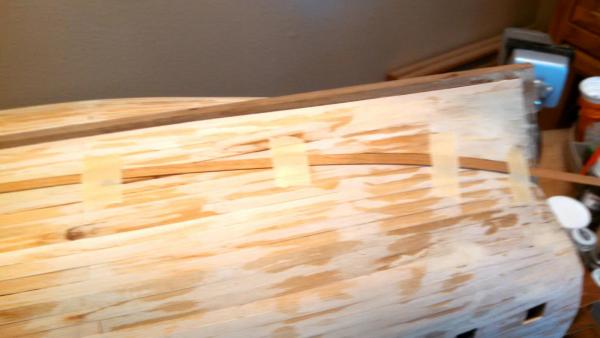
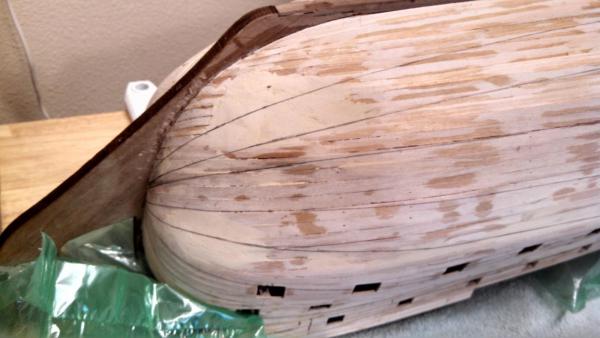
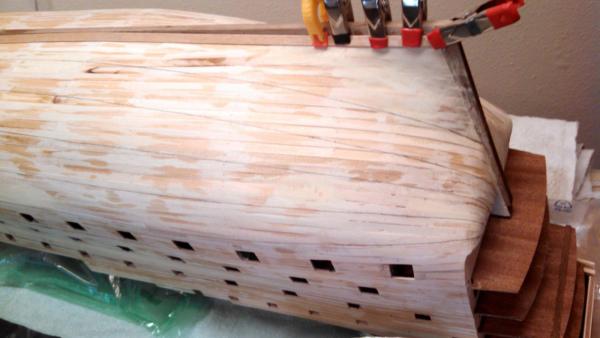
Outlining the hull for the finish second layer of planking. I have a specific method I use which works for me. There are many methods that work well. I did not invent this method, just like it better and copied it from another builder who was kind enough to publish an article in a magazine. 1. Invert the hull. 2. Divide the hull into 5 plank wide bands by taping 5 short pieces of planking wood side by side and starting from the keel, tape them to the hull midships where the planks will run parallel to the keel and at full width. Draw a pencil line at the lower edge. 3. Place the taped short strips on the pencil line and repeat all the way down the hull. Depending on the size of the hull, you may have as many as 6 or more bands. 4. Place a full length plank on the bottom of each line and tape it in a natural run so as not to twist it or bend it . 5. Draw a pencil line along the top from stem to stern. 6. Repeat for each short pencil line. You can now see how the planks run and where they will need tapering and where they will need filling in between them at the stern. By mearuring between the lines at any point along a band and dividing by 5 will give you the width of each plank at that point. Vince P.


- 593 replies
-
- 9
-
-
- royal william
- euromodels
- (and 1 more)
-
Hi Brian, I don't think the scale would be supportive of trenails. They would have to be extremely small in diameter. As far as using scale length planks, since this model does not have scale hull frames, it would be difficult to space out the plank butt joints correctly especially when using joggleplanks and stealers, which will be necessary for this hull. I do not however use full length planks from stem to stern, since it is too difficult to taper planks at both ends where needed. I cut the planks into 2 halves and stagger the joints in a 3 plank shift. I will simulate trenails with small holes at all of the joints. This is what I did on the deck planks at the butt joints. Vince
- 593 replies
-
- 2
-
-
- royal william
- euromodels
- (and 1 more)
-
Hi Brian, Yes I am using the planking supplied by Euromodel. The wood seems to be a good quality. Vince P.
- 593 replies
-
- 1
-
-
- royal william
- euromodels
- (and 1 more)
-
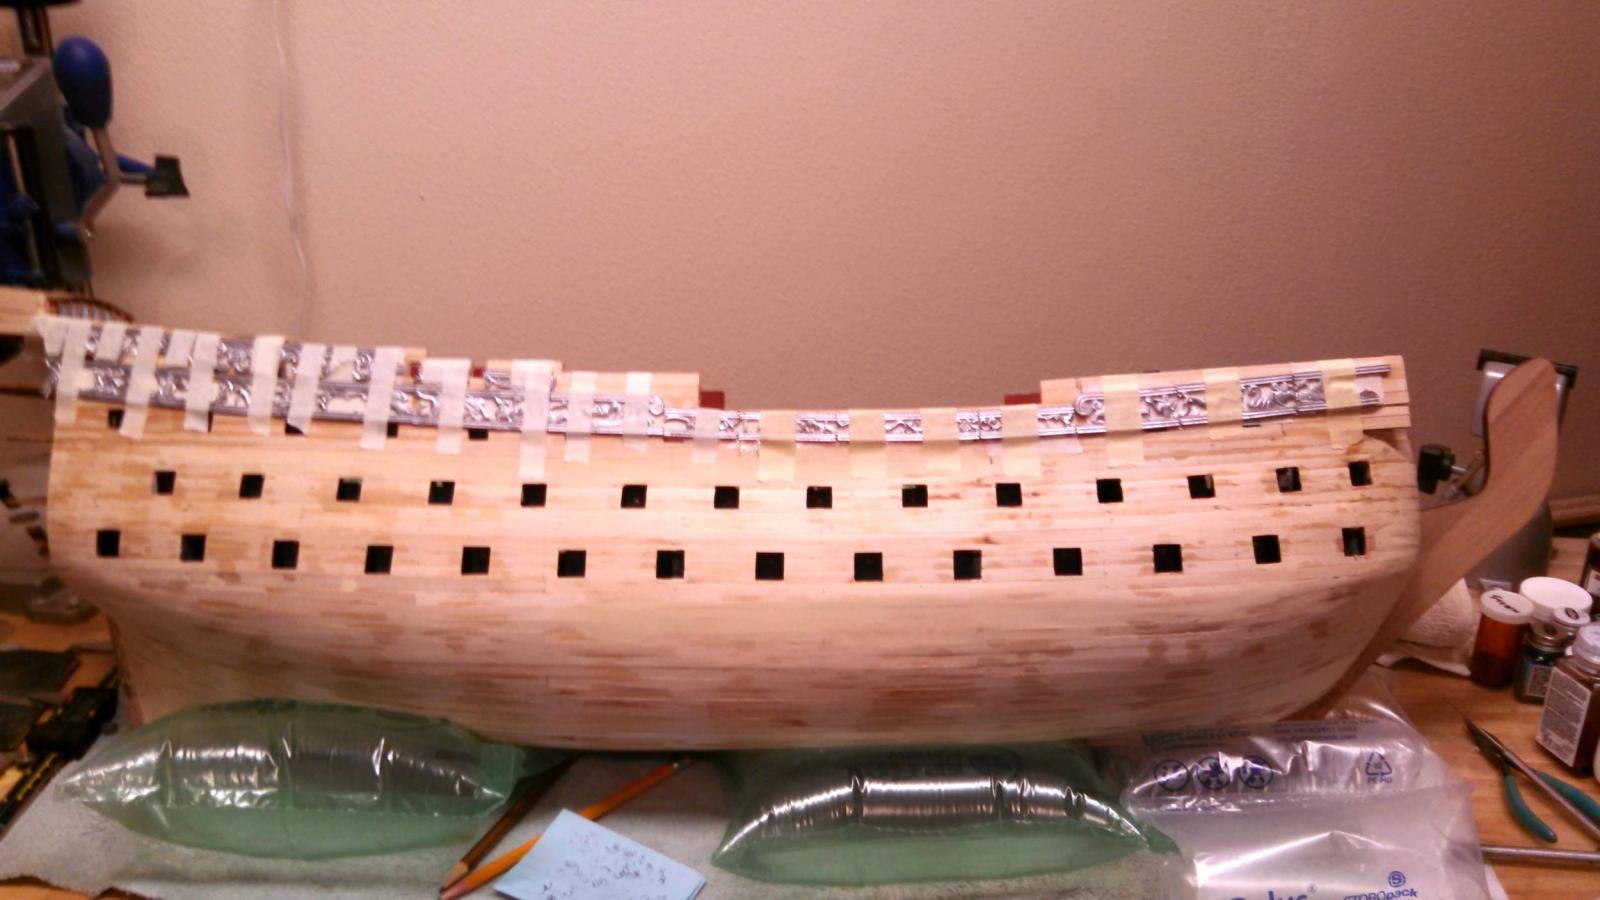
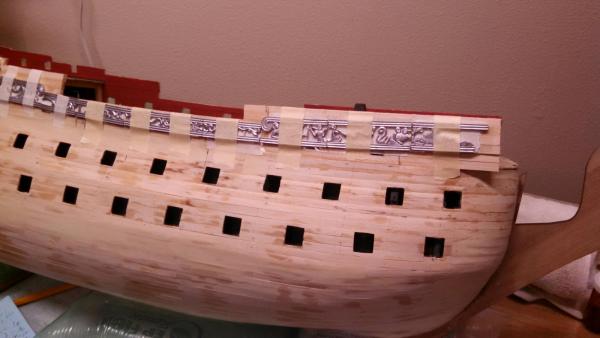
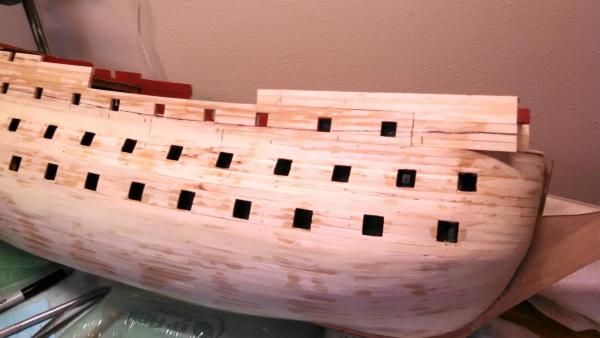
I taped all of the decorative metal pieces on the starboard side to get a run on the hull. It took much jugling to get all of them in the proper locations and required a lot of measuring from plan sheets 2 and 17. I then drew a line along the bottom edge from stern to bow and removed the pieces. This line deliniates the top border of the second finish layer of planking. I will now do the same to the port side. Vince P.


- 593 replies
-
- 13
-
-
- royal william
- euromodels
- (and 1 more)
-
Hi Keith, Both Peter in his shop notes and Keith Julier did the poop deck prior to the second planking. It seemed like a good idea to me too, so I did it. The plans give you a pretty good idea about where to locate the poop, but I hope I don't regret doing it this way. Vince