pirozzi
-
Posts
843 -
Joined
-
Last visited
Content Type
Profiles
Forums
Gallery
Events
Everything posted by pirozzi
-
 Hi Keith, Yes I have looked at all of your posts on this, over and over. I am going to use the metal trim pieces that came with the kit, so I will do it that way instead of the plans way. I am still confused as to the order of carving those 2 blocks, parts 54 and 55. The camber has to be cut, the contours for the metal decorations, the inside to fit the hull curves, and the channels for the metal trim. The plans are no help at all. Also, I don't have the fancy sanders and saws like most of you guys have. What I do will have to be done by hand. Did you do the camber first? When cutting the concave contour, did you make the width just wide enough for the decorations? And the big question, how did you determine where to place the carved blocks on the ship? It would seem to me to cut the insides first and fit them to the ship first, then the camber. How did you do it. Thanks, Vince
- 593 replies
-
- 3
-

-
- royal william
- euromodels
- (and 1 more)
-
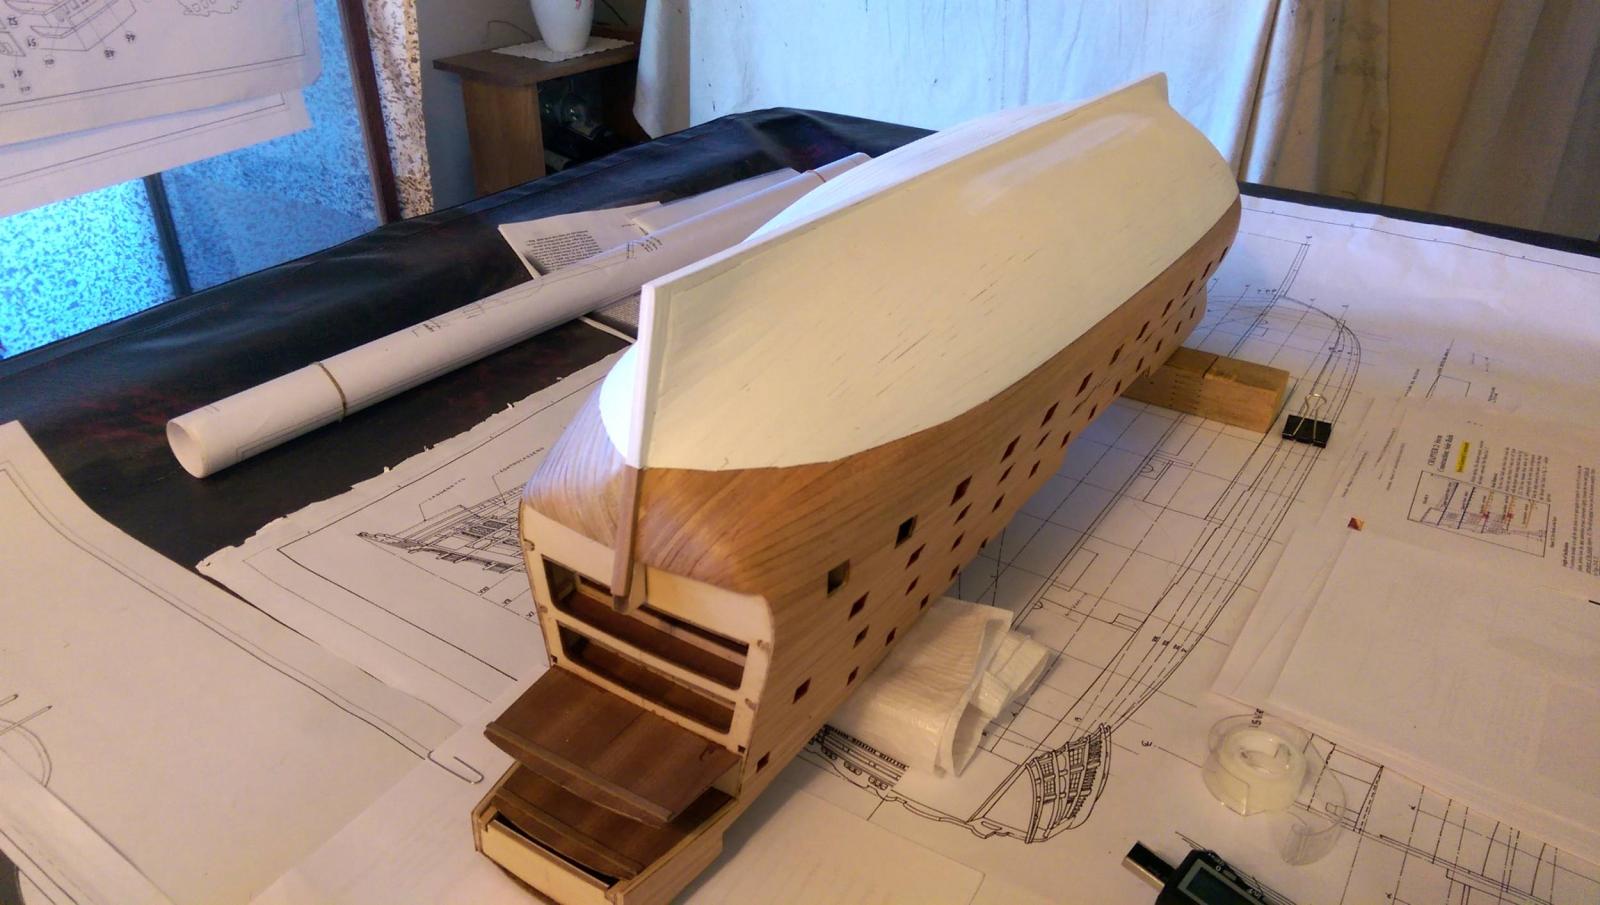
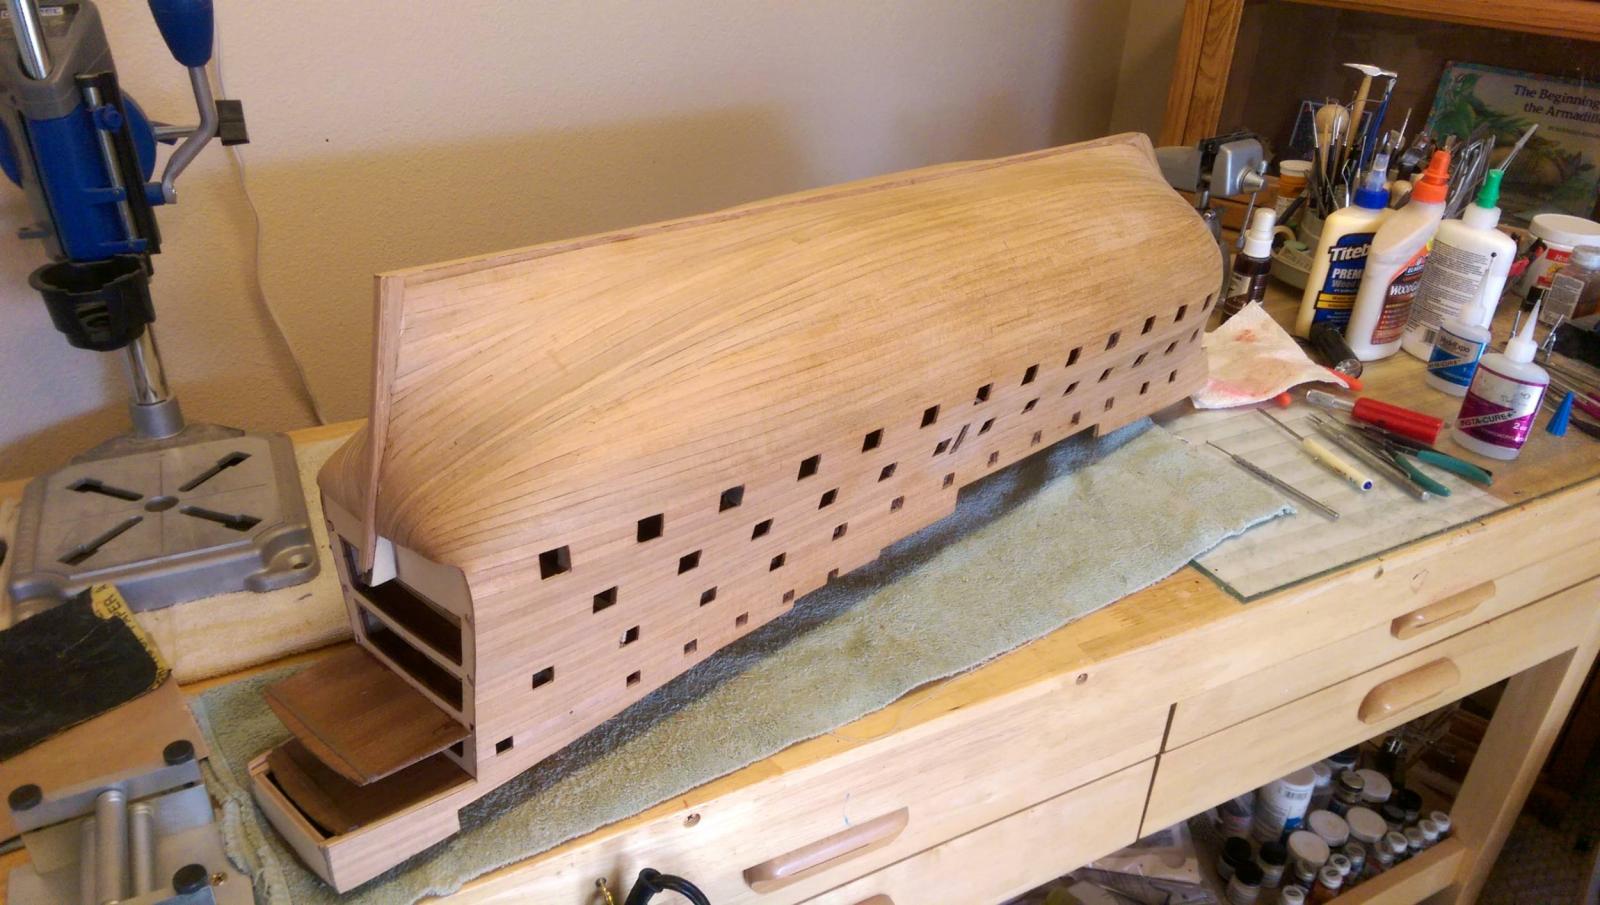
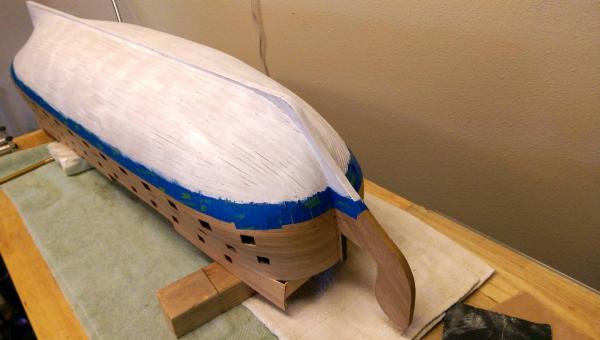
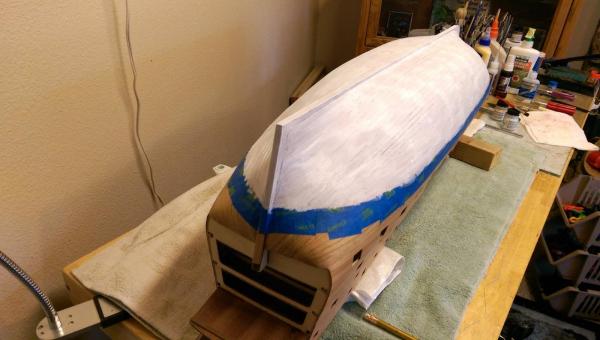
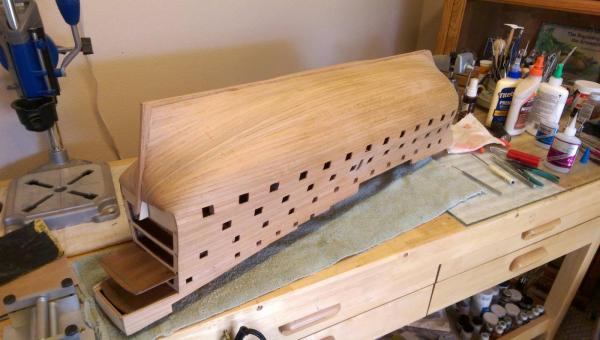
The white below the waterline is completed. Next is the most dreaded part of this build. Making the transom. I had read all of the horror stories, studied the plans for hours, reviewed Julier's notes, read Pete's notes 10 times, and gone over other build logs here. At this point, I still don't have a clue as to how to do this, or where to start. This is where the plans fail big time. The transom support pieces that have to be carved in every direction,don't even have a clear photo or drawing of how they are even supposed to look. I suppose I will give it a try, but I am not very enthusiastic about this at all. Vince P.


- 593 replies
-
- 5
-
-
- royal william
- euromodels
- (and 1 more)
-
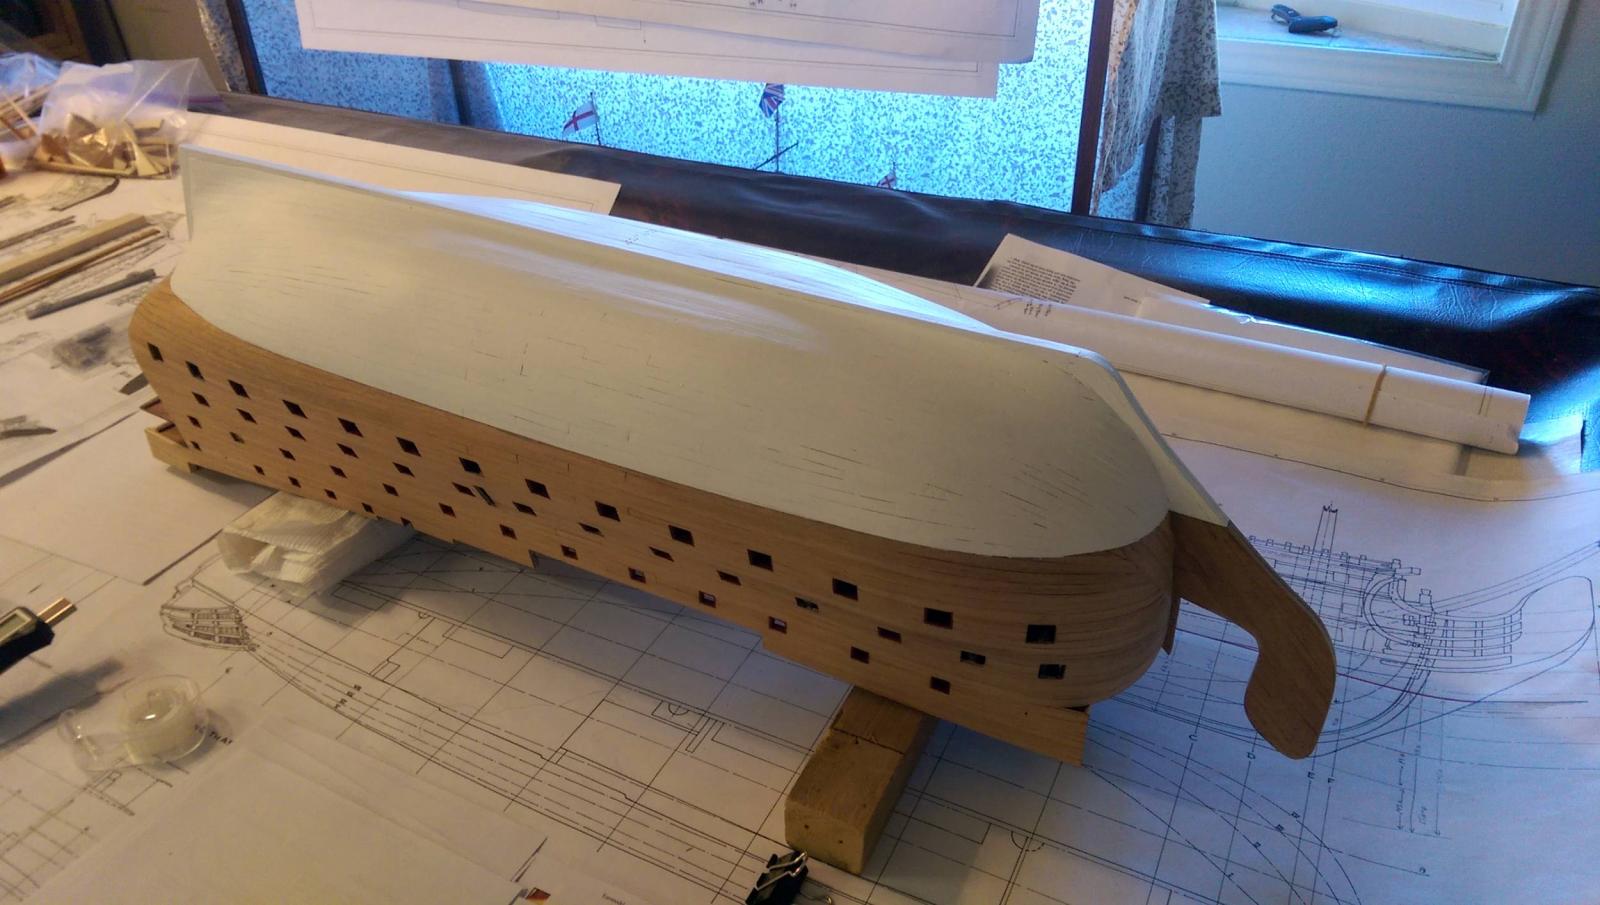
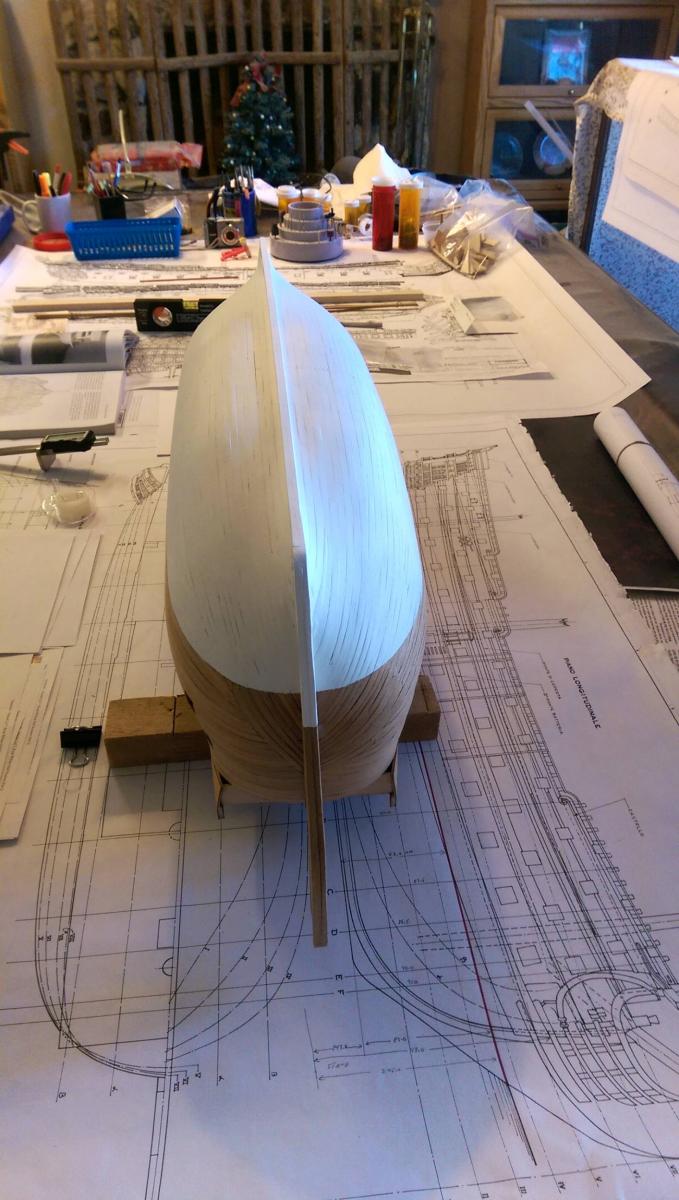
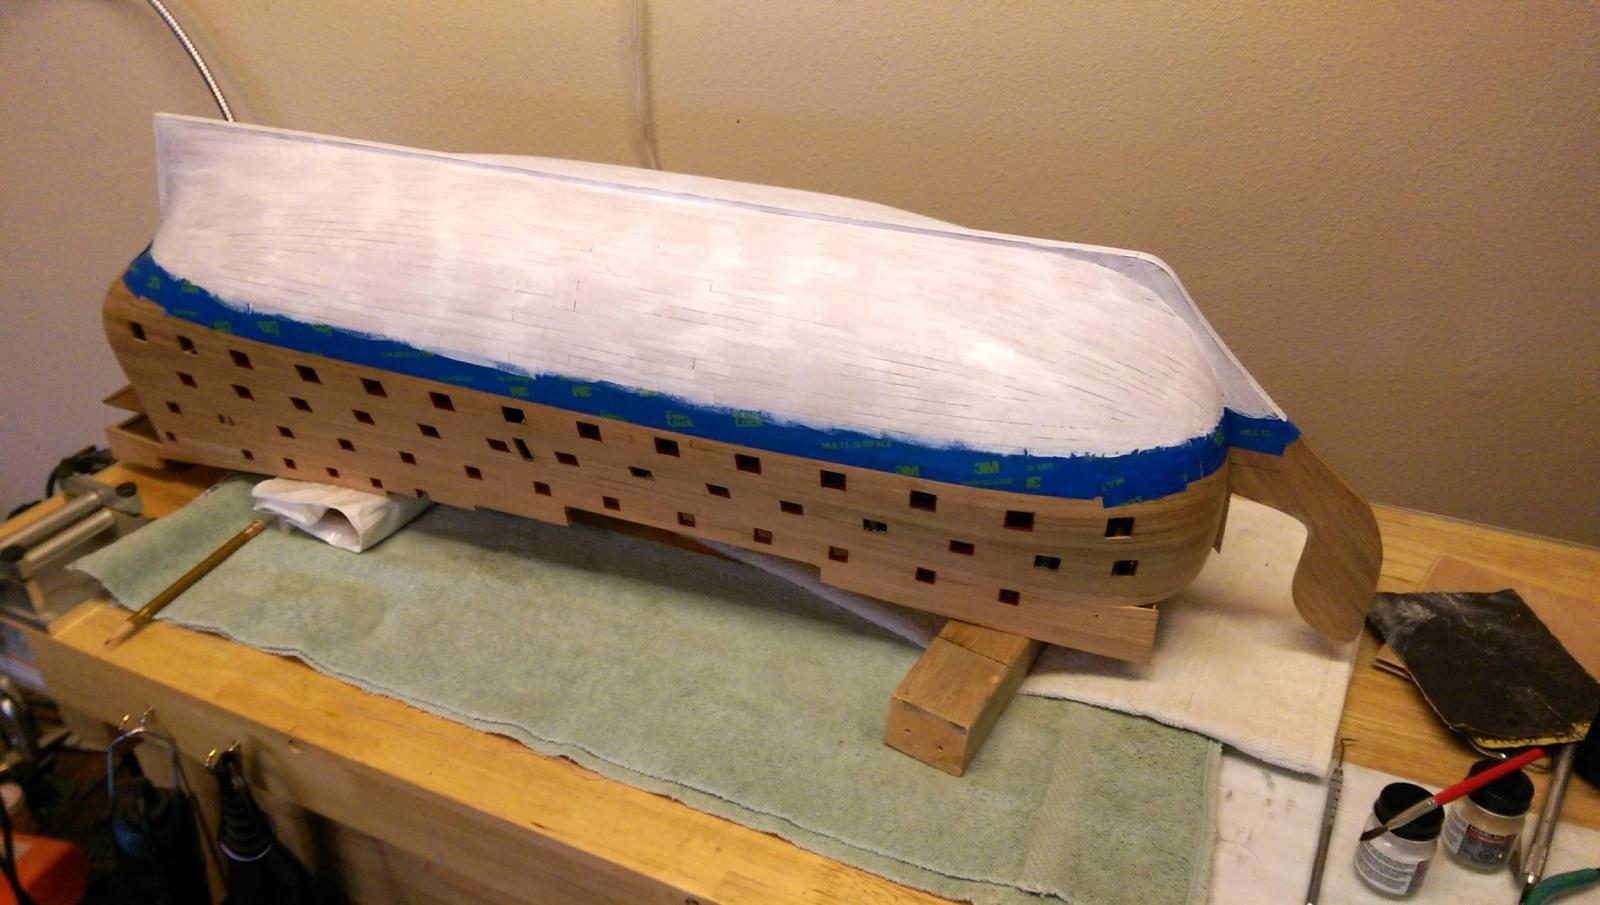
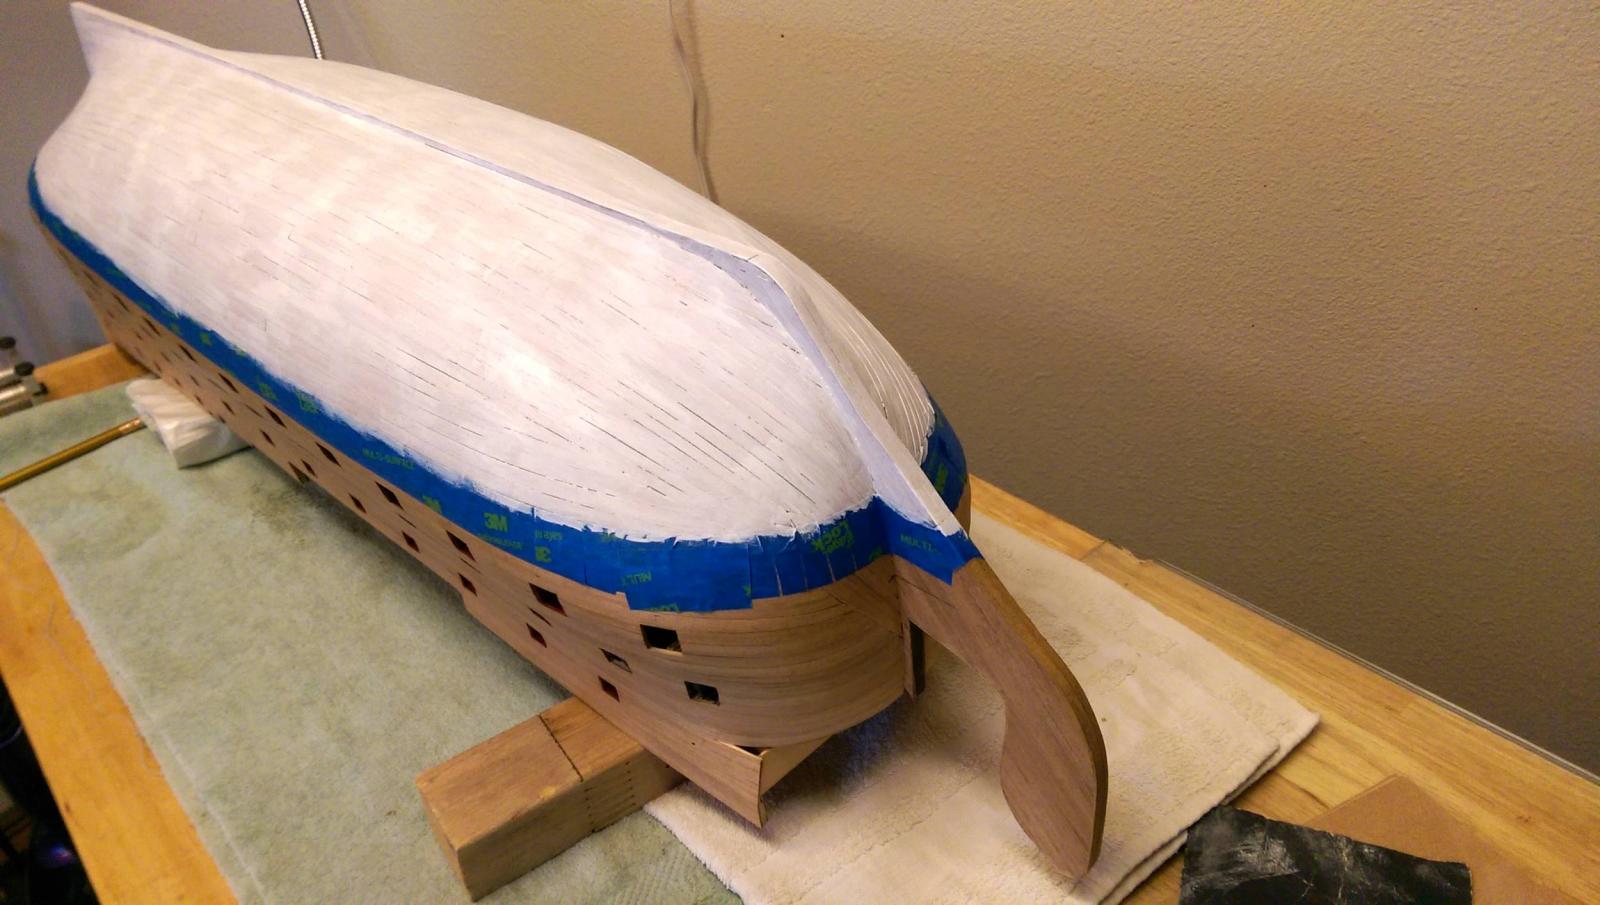
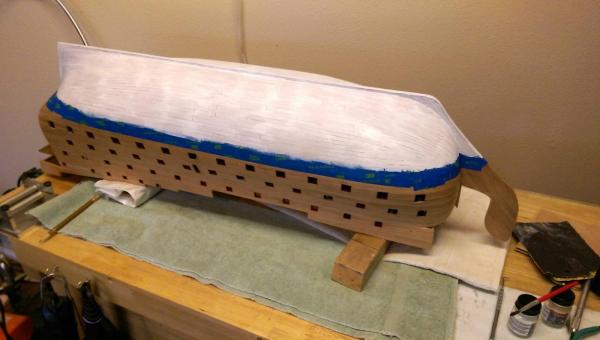
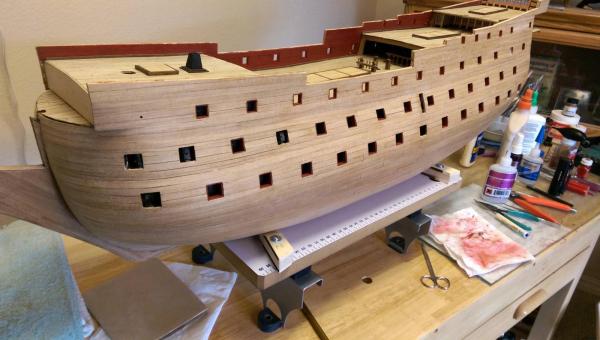
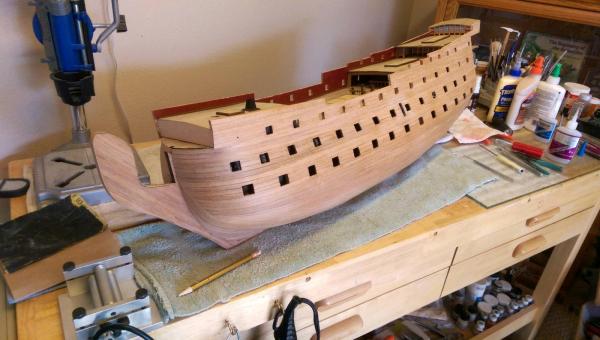
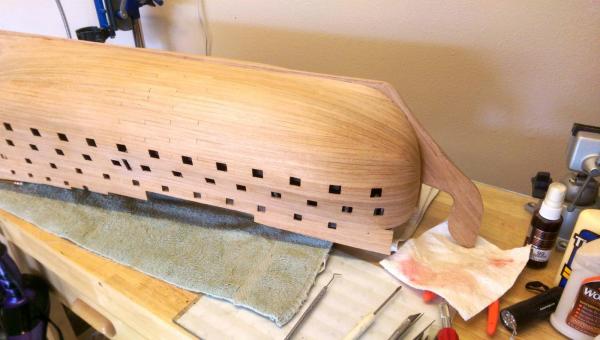
After thinking about many of the areas where the trennels will be hidden, I decided to stop that process and mark off the hull first. Thanks, KeithW. The waterline is marked off and the first coat of white primer is on. I will put 2 coats of primer and then spray on white enamel. I did this on the scrap piece with the trennels in place and they are all but invisible. There is no need to place the trennels below the water line. That should save about 2000 trennels and part of my sanity. Vince P.
- 593 replies
-
- 6
-
-
- royal william
- euromodels
- (and 1 more)
-
Nice work Cristi. Vince P.
-
Hi Keith, I am going to paint the hull below the waterline white. I did not think about some of the trennels being covered. That is a good idea. I will stop and mark off where they will be hidden and only do the rest. Thanks, Vince
- 593 replies
-
- 3
-
-
- royal william
- euromodels
- (and 1 more)
-
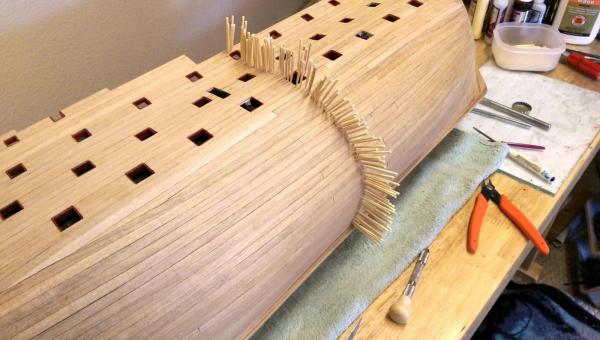
Here is just one row. I need to find a diversion or I will wind up in an institution before this is done. Vince P.
- 593 replies
-
- 9
-
-
- royal william
- euromodels
- (and 1 more)
-
Yes, now I remember those photos. Great idea mate . I still learn some neat stuff on this forum.
- 593 replies
-
- 4
-
-
- royal william
- euromodels
- (and 1 more)
-
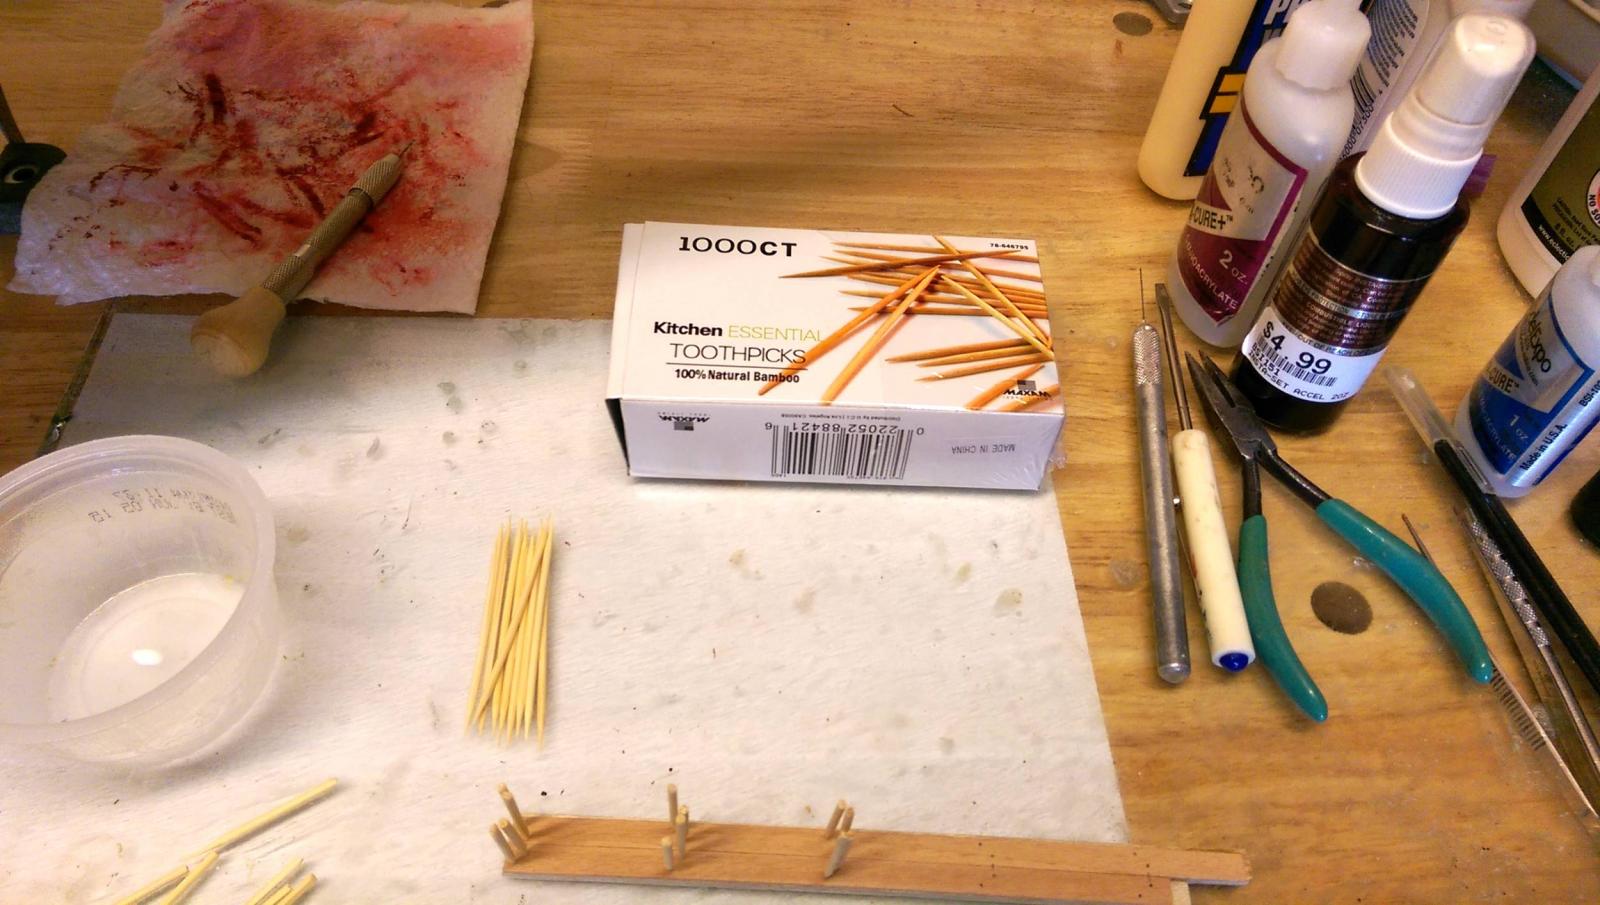
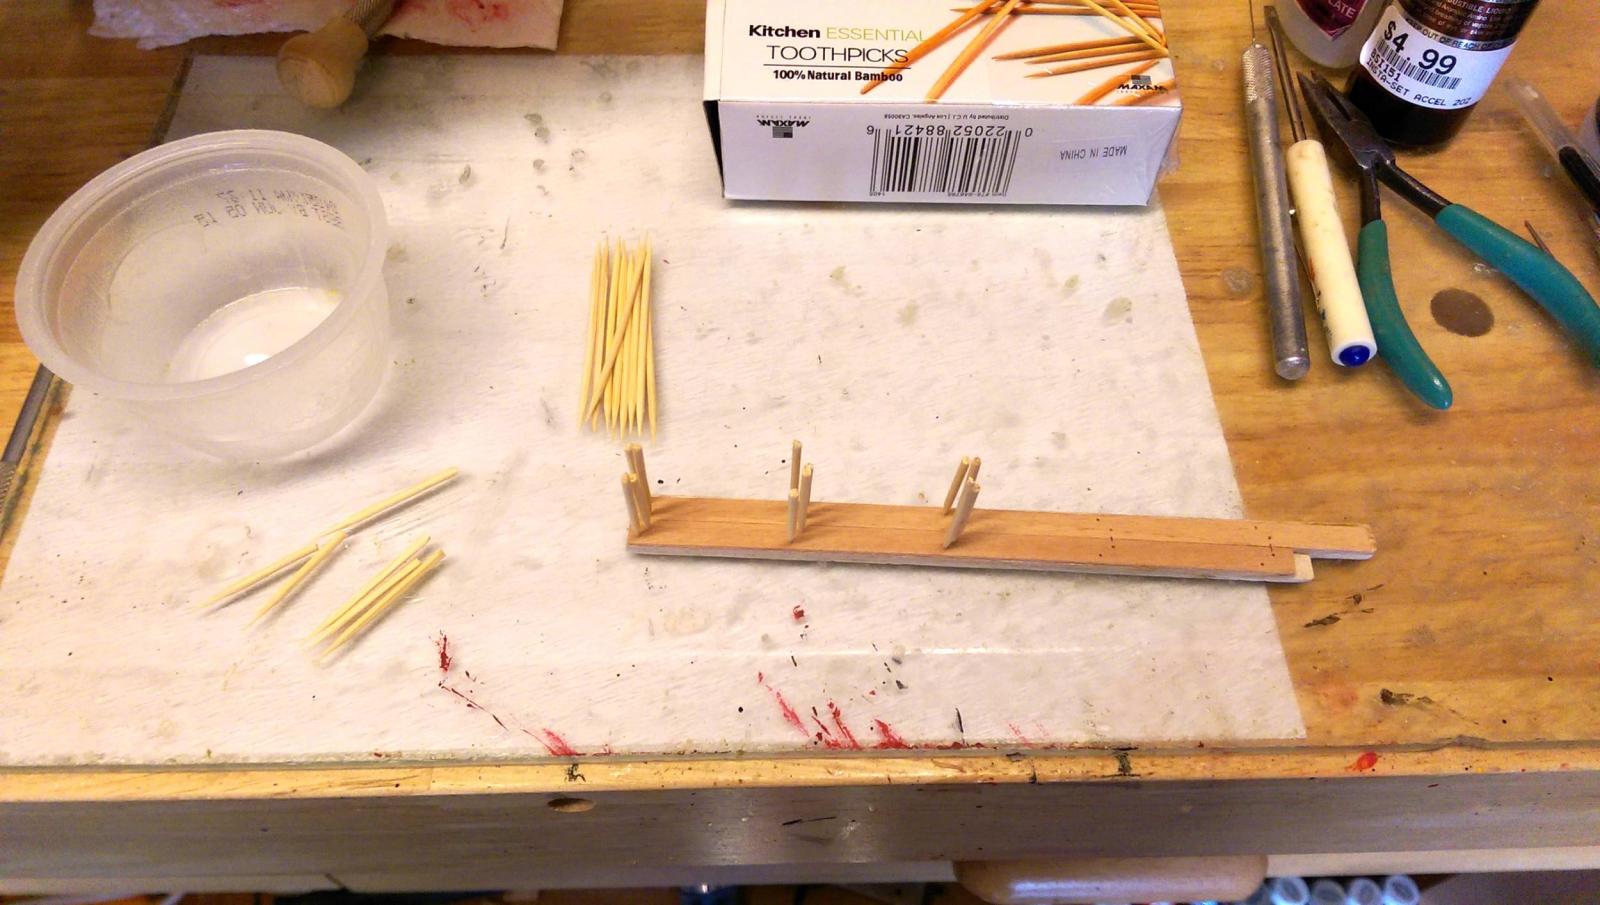
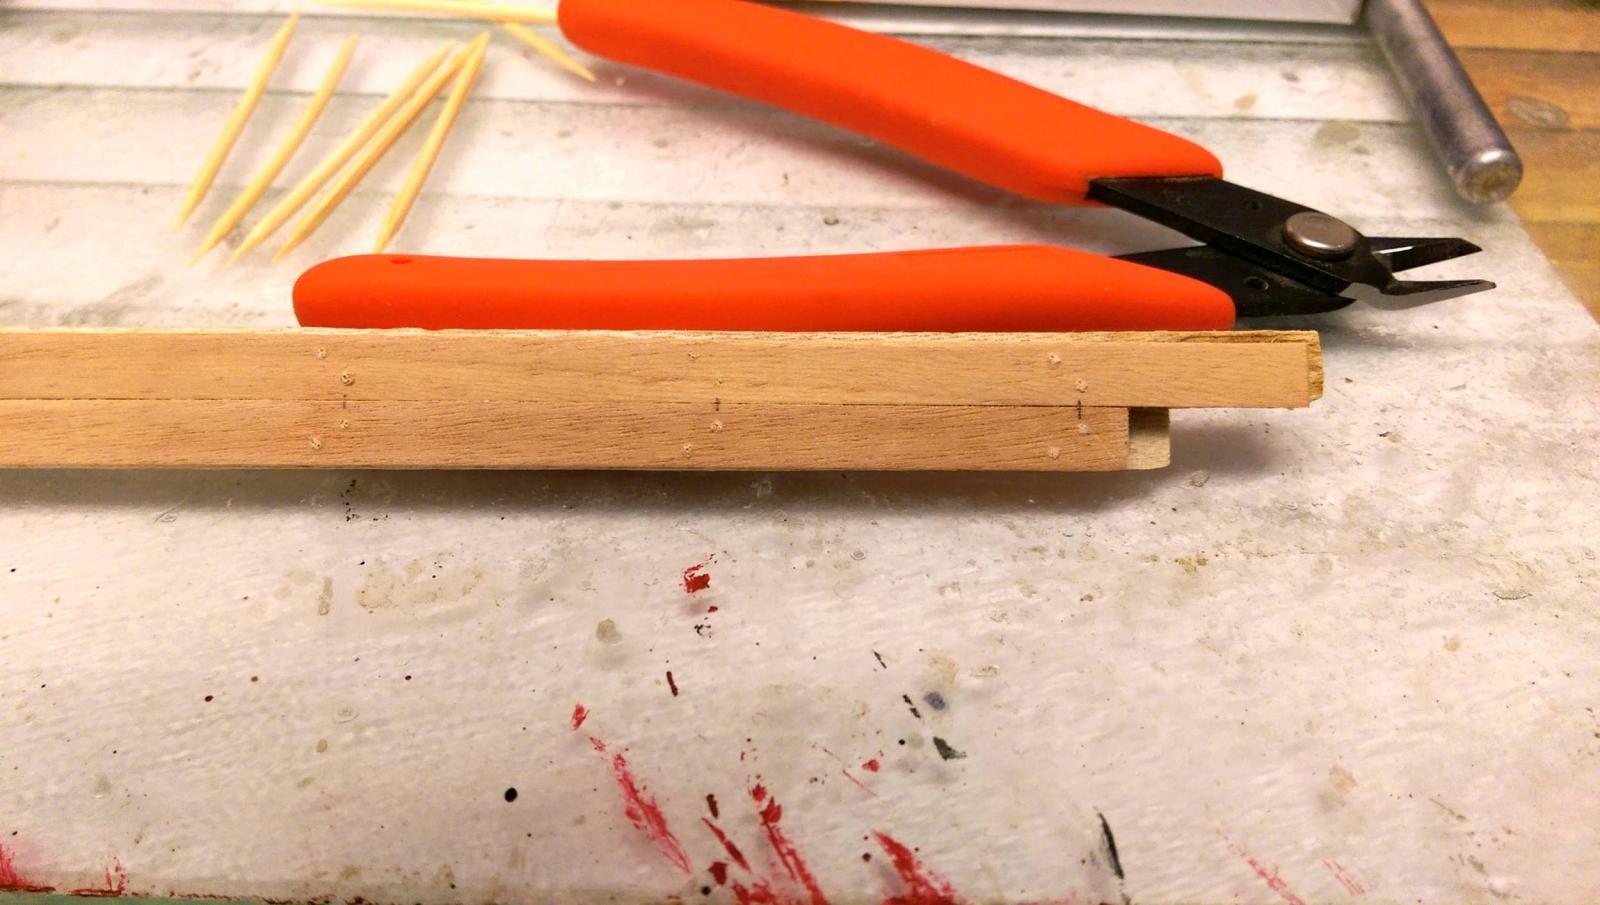
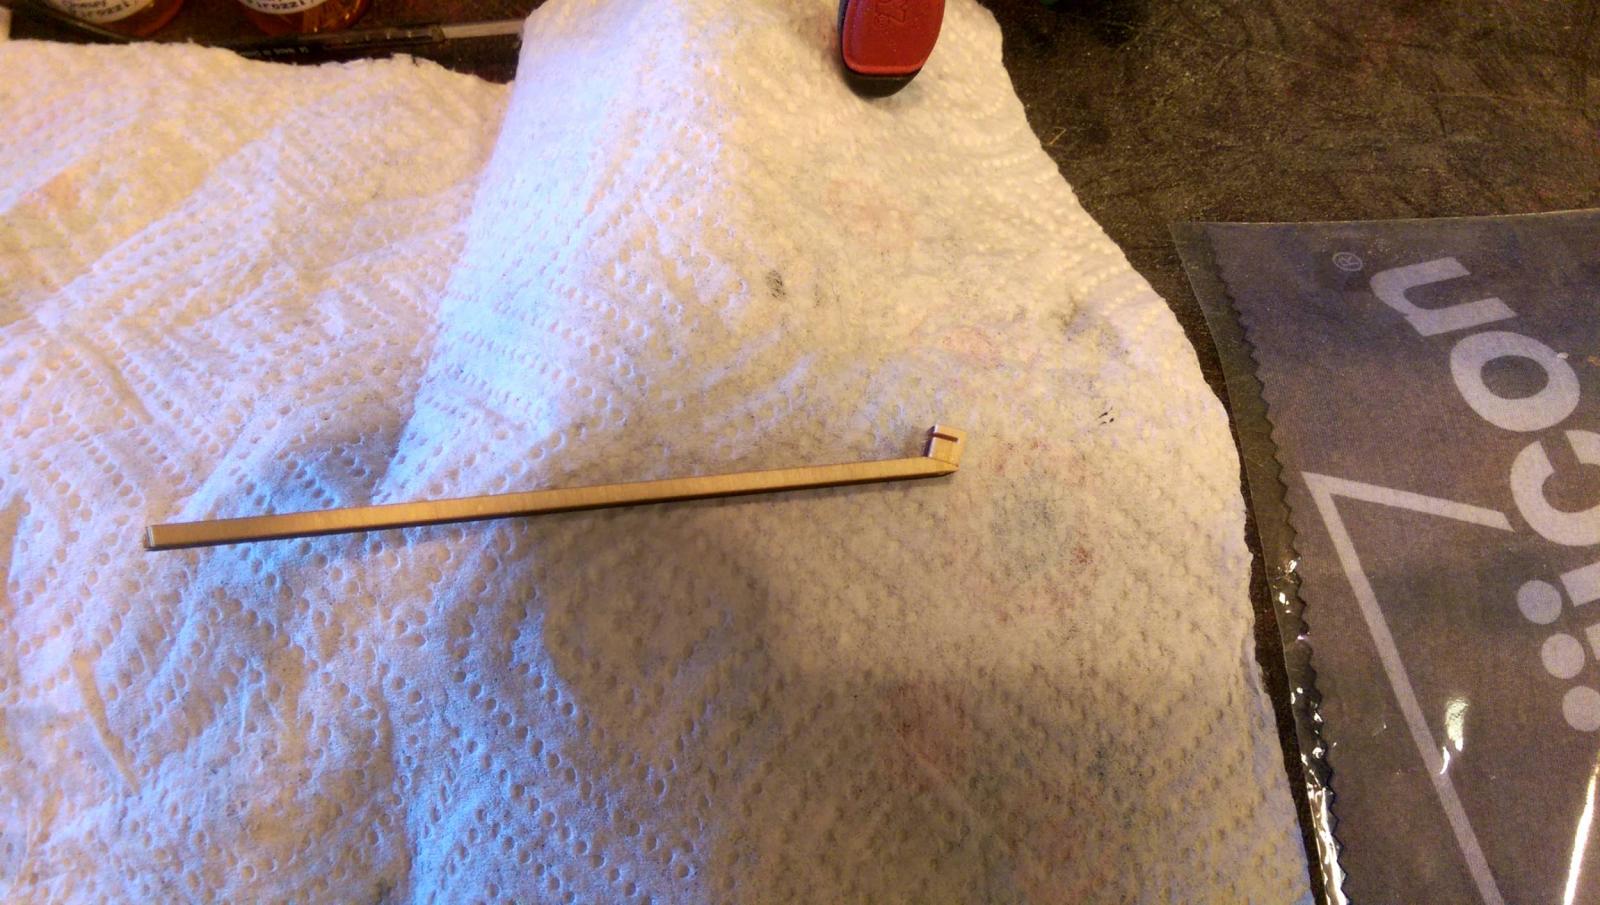
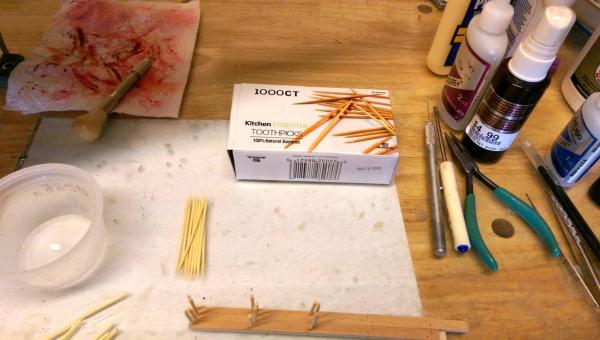
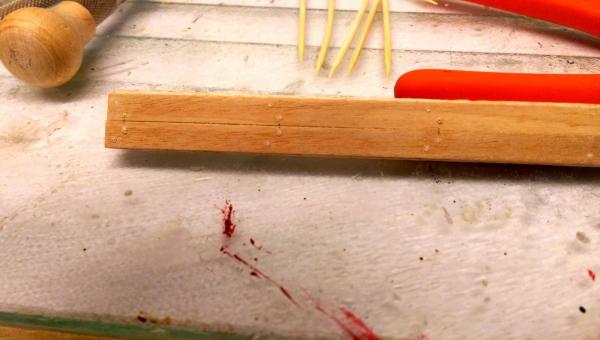
Ok, I tried the toothpick idea for treenails. First I made up a scrap planking board using the exact wood strips as on the ship, so I did not screw up the hull if it did not turn out well. Then I proceeded to drill the boards and place the toothpick ends. Once dry, I cut them off and lightly sanded. I think it looks perfect!! I will now go buy about 4000 toothpicks and start treenailing away. This should take a few months. I don't remember who I got this idea from, but it was someone on this forum. Many thanks mate!, who evere you are. Vince P.


- 593 replies
-
- 5
-
-
- royal william
- euromodels
- (and 1 more)
-
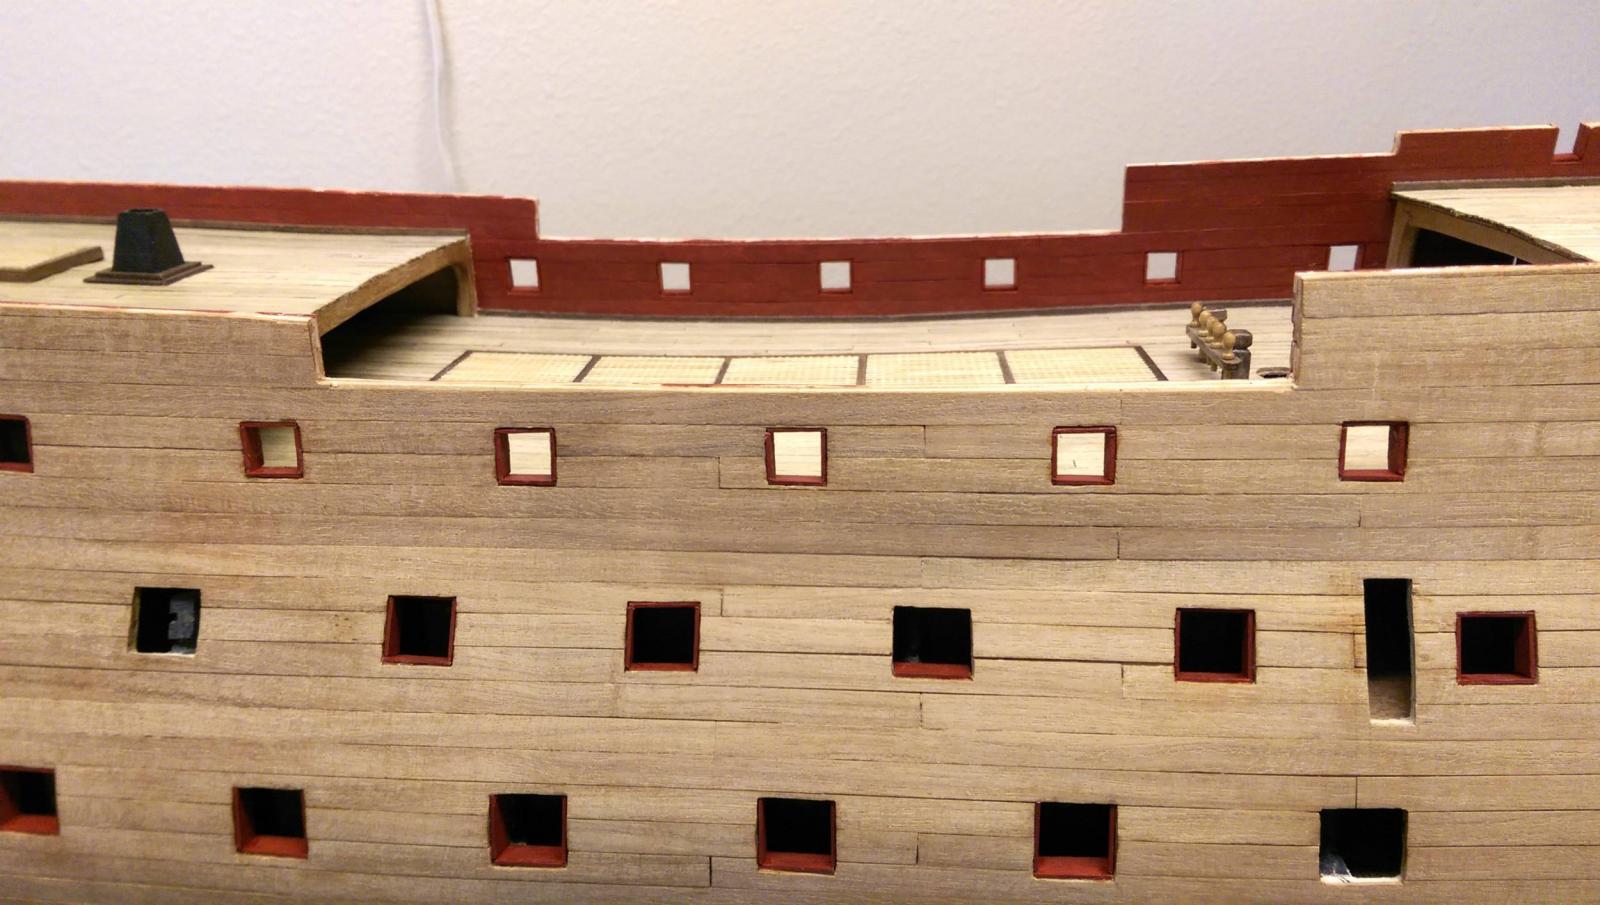
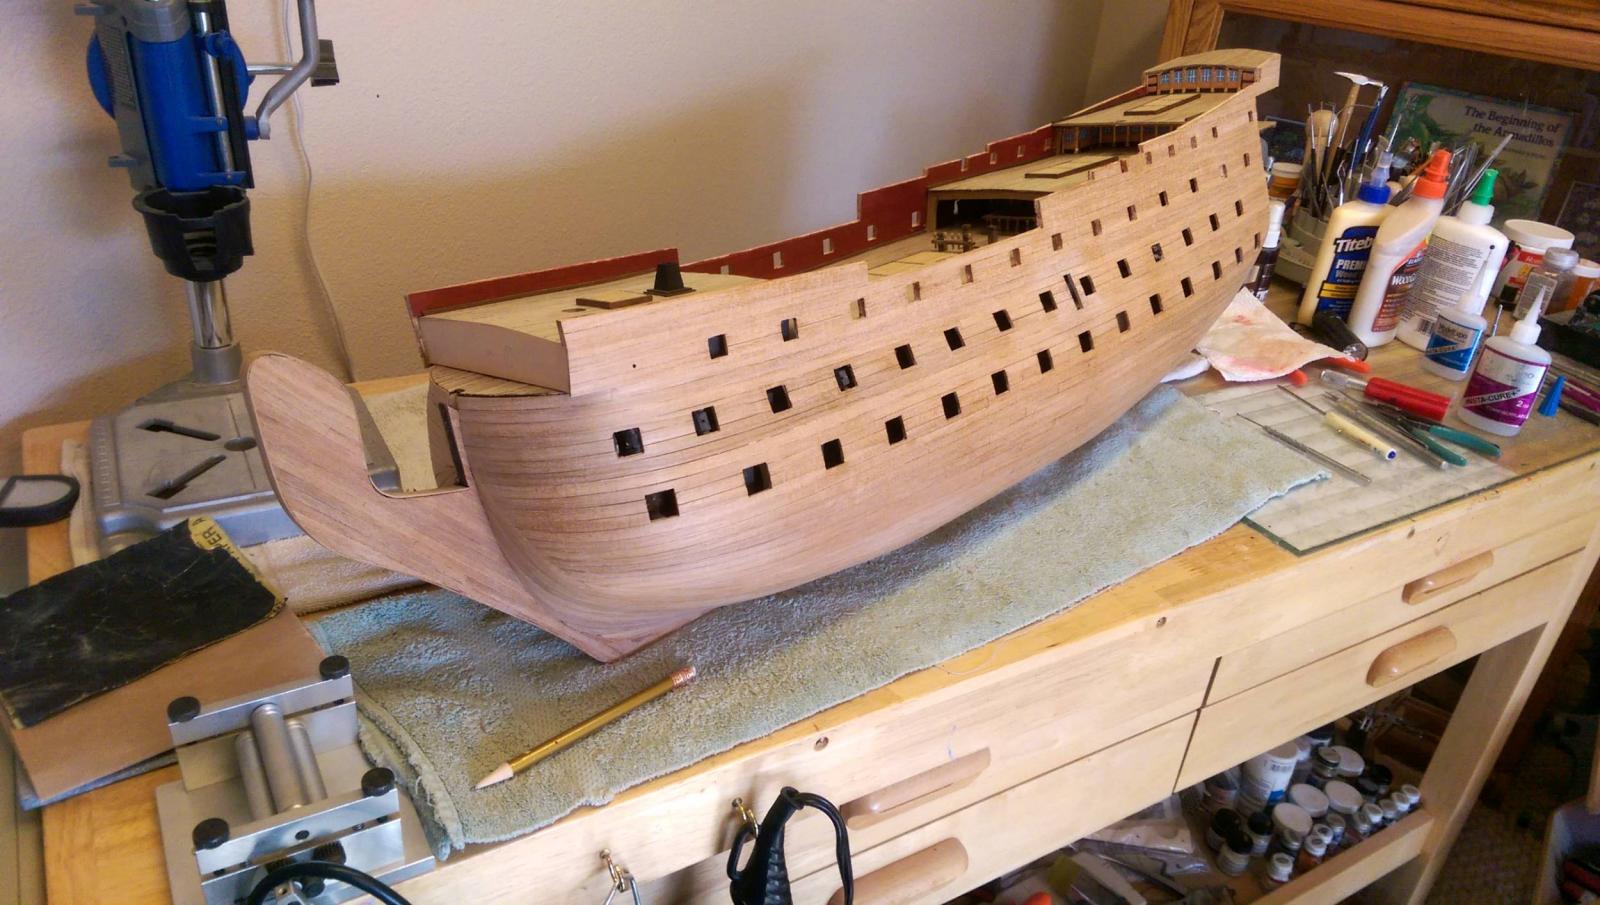
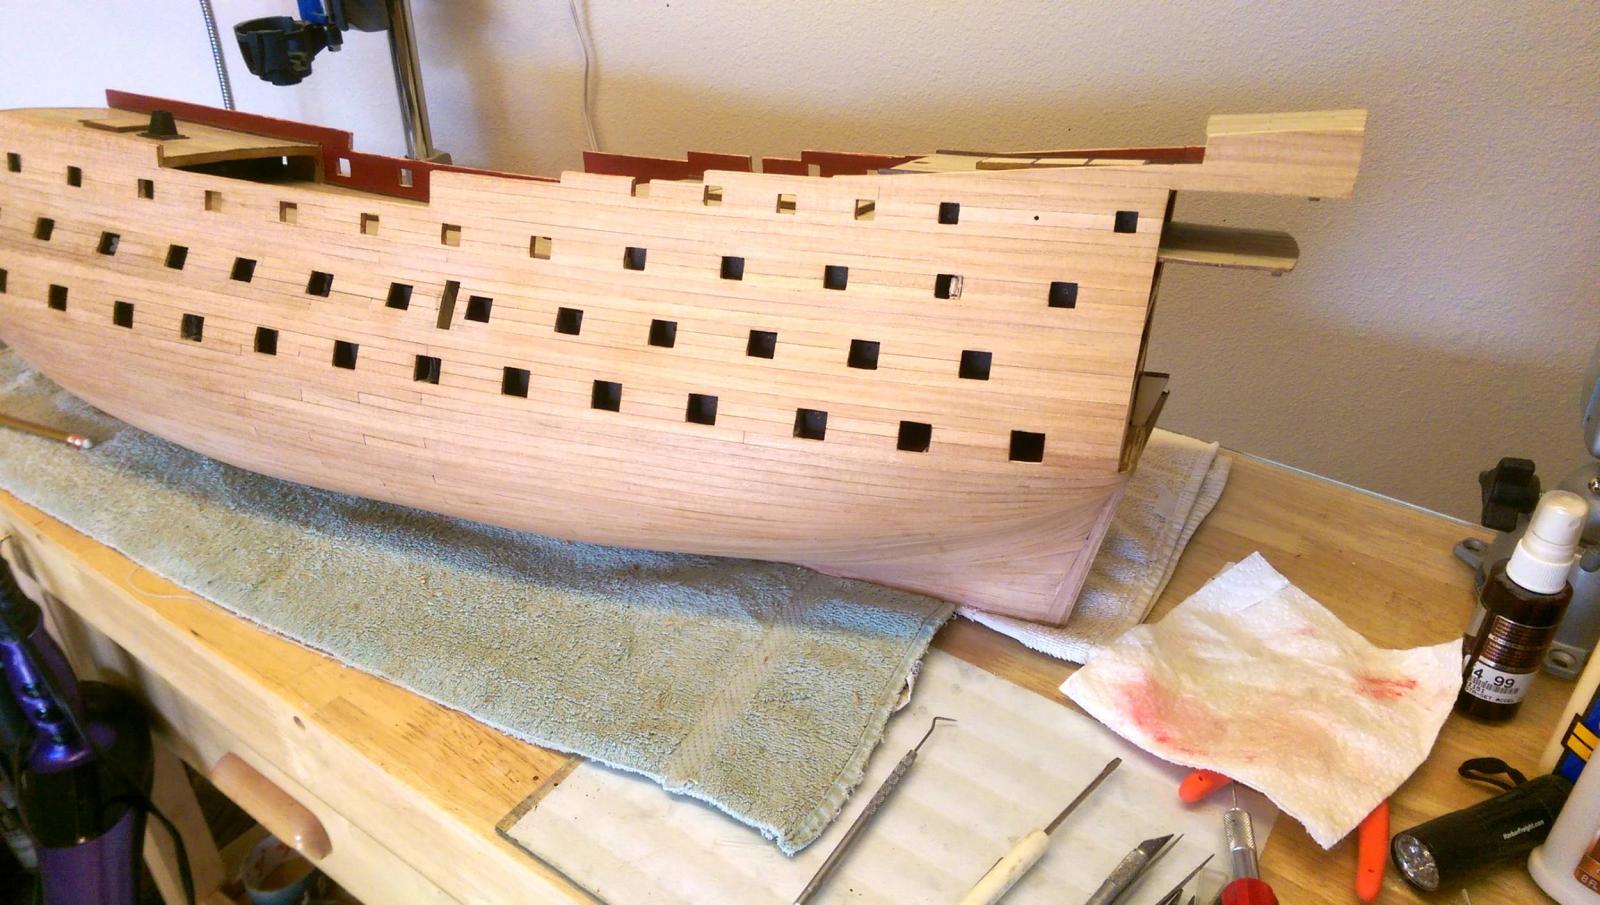
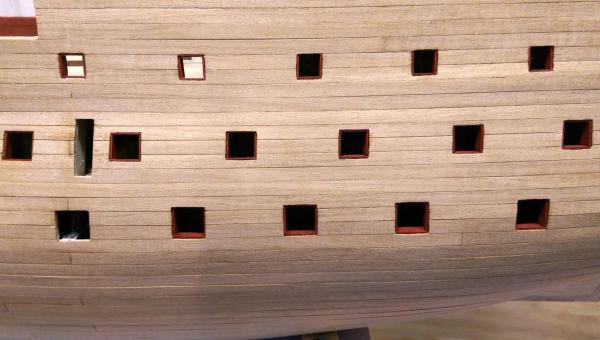
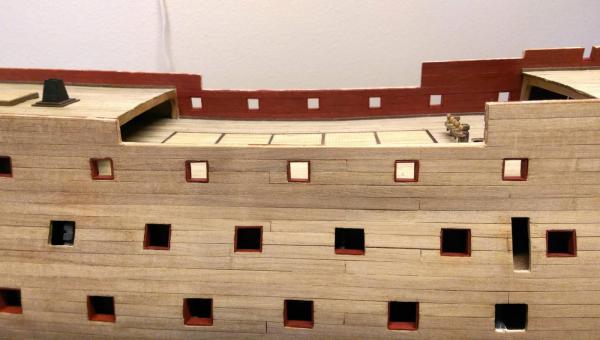
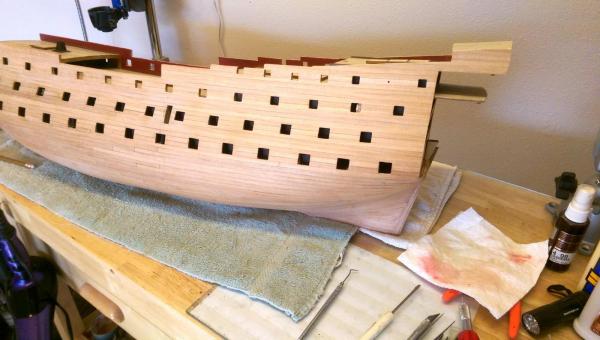
I have finished framing the gunports. It was a tedious jub, but not as bad as I thought it would be. I got spoiled from other kits I have built where the gunports are located by templates and the frames come already made. Next up is another tedious task. Trenailing the hull planks. I am going to try something I got from another experienced builder. Using round toothpicks. They are already round and tapered at each end, so you can make 2 trenails per toothpick. Just drill a small hole in the plank, put a dab of PVA on the end of the toothpick and push it into the hole. Trim it off and sand it. I will give it a try on some spare wood and if it looks good, I will do it this way. It beats having to taper down small dowls. Wish me luck! Vince P.
- 593 replies
-
- 9
-
-
- royal william
- euromodels
- (and 1 more)
-
I do know that Ages of Sail in California should have it for sale in June. No word on price. Try giving them a call. Vince P.
-
Gun ports
pirozzi replied to Jparsley's topic in Building, Framing, Planking and plating a ships hull and deck
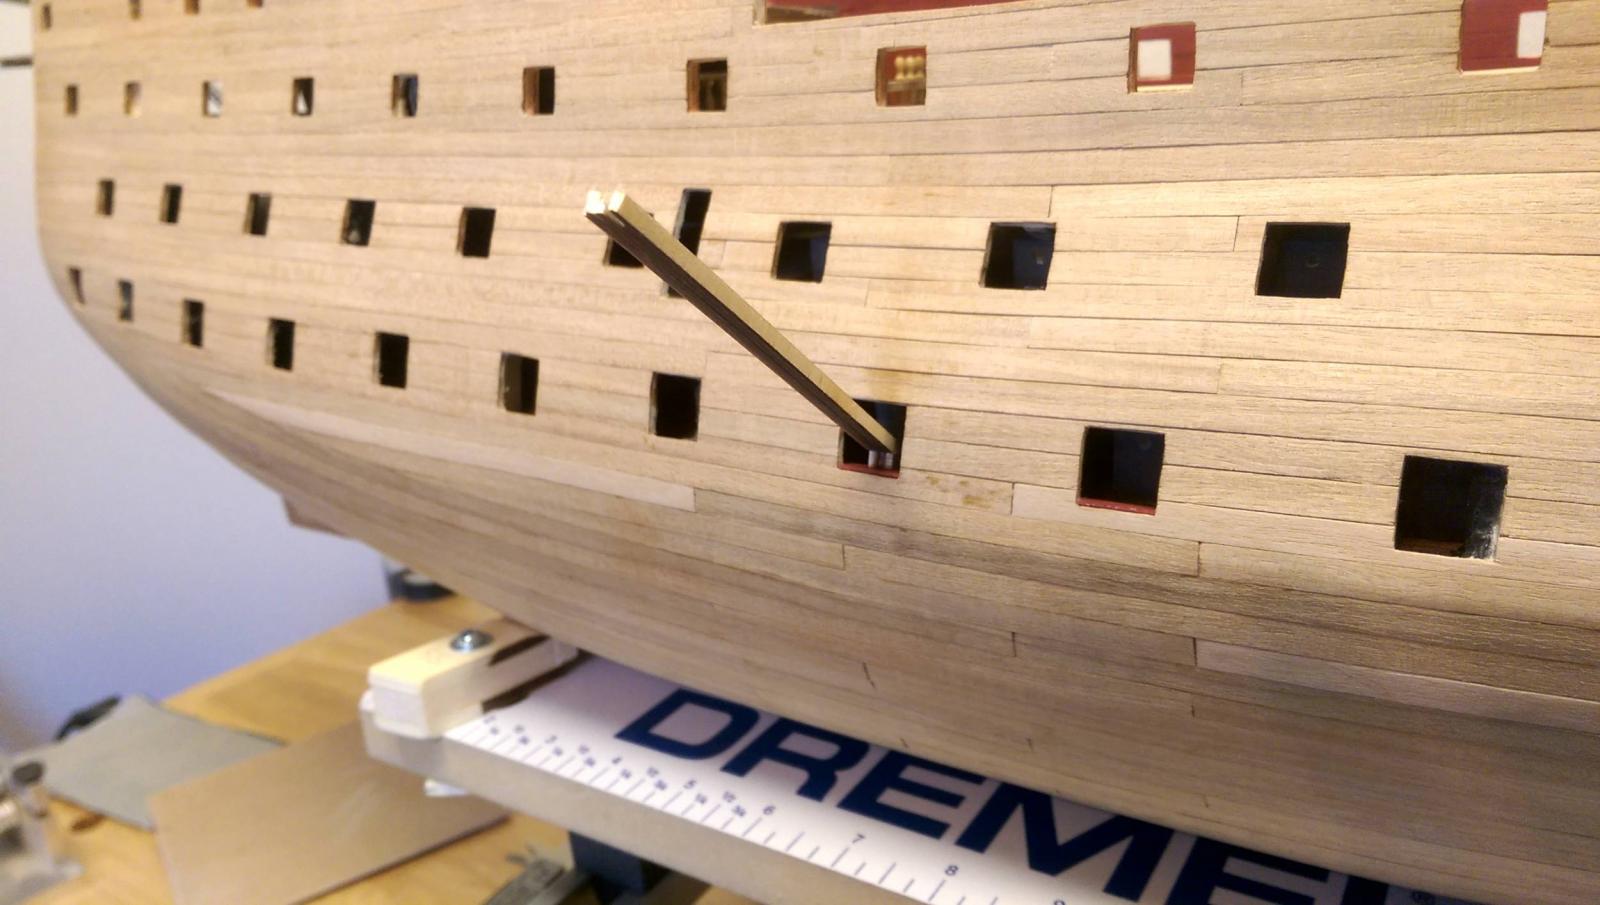
Hi JP, Another trick to help with the gunports. Look at the plans and determine the size of the ports. Take a square piece of balsa or some other soft wood and cut it exactly to the dimensions of the port. Stick a belay pin in one end. Now use this as a guage to cut the ports. Once the guage fits snugly in the hole you are done. They will all come nice and square and the same size. Vince P. -
I solved the problem of how to hold the little pieces of wood in place for the gun port linings. Since the linings have to be made from 4 individual pieces each and placed into the ports, it is challenging to hold the pieces without dropping them in the ship. I created a little tool from some scrap plywood that holds the pieces. I then put some CA glue on the piece, slip in the port hole and while holding it in place, give a little squirt of instant bonder. The piece stays in place and I just slip the little tool off and remove it. It works perfectly. Now I just have to place about 400 of these little pieces. Vince P.


- 593 replies
-
- 8
-
-
- royal william
- euromodels
- (and 1 more)
-
Hi Brian, Yes I am going to treenail the planks after I do the gun port linings. I think I have come up with a interesting way to create the treenails. I will let you know when I get that far. Vince
- 593 replies
-
- 2
-
-
- royal william
- euromodels
- (and 1 more)
-
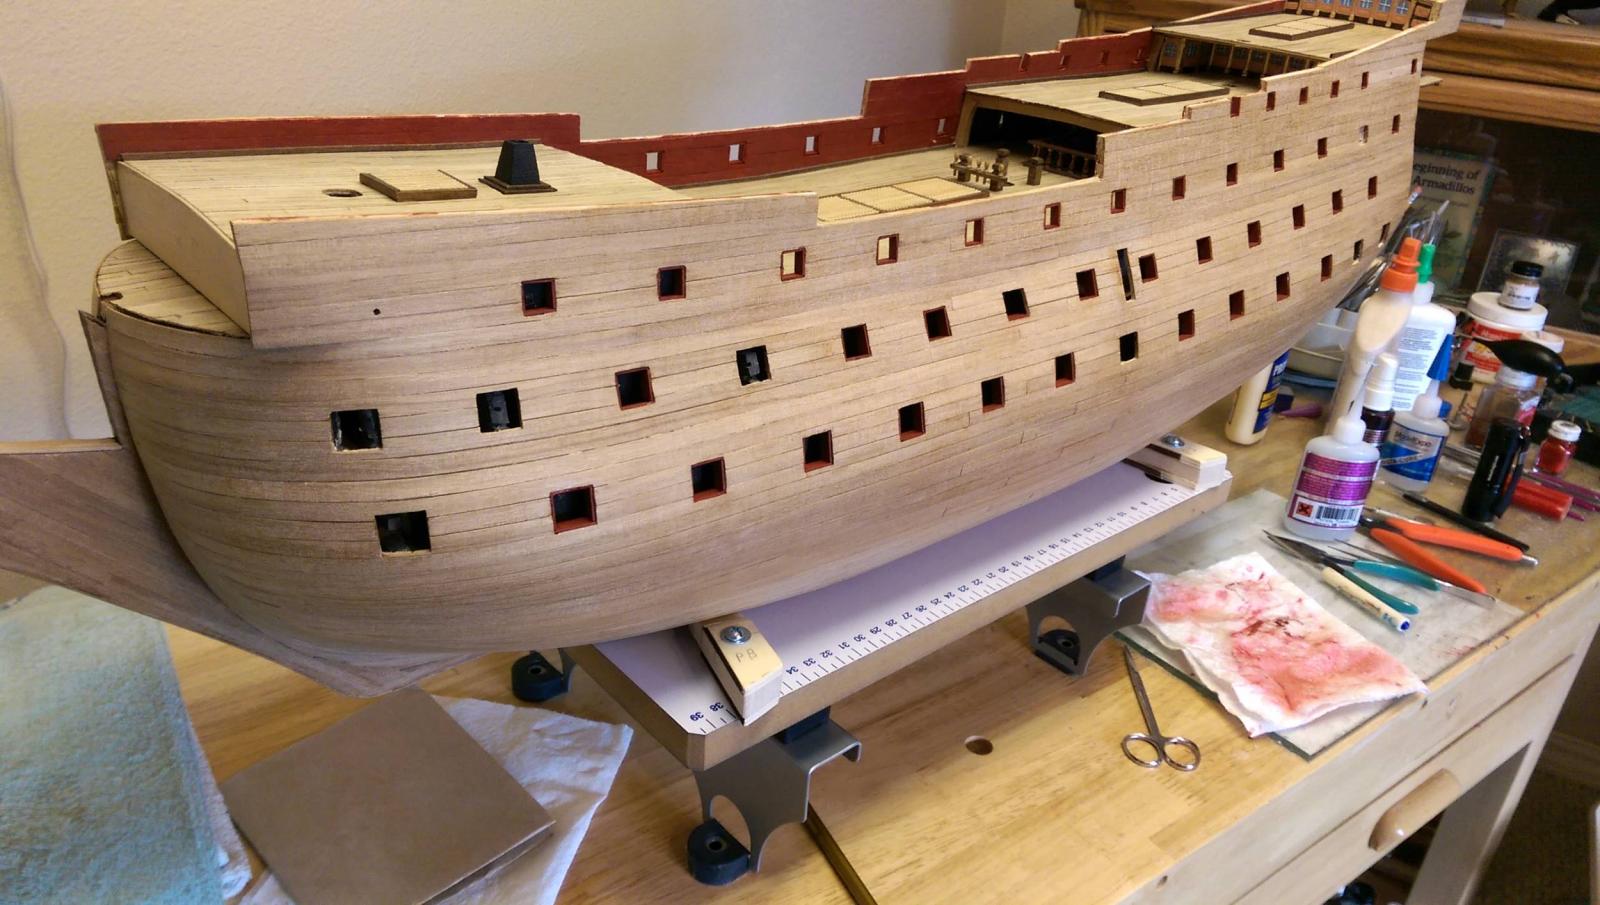
I finally completed the second finish layer of planking. That seemed to take forever. It has only been sanded but not sealed or stained and painted yet. Next up is to install the gun port linings. That will also be a monumental task as each lining consists of 4 pieces. I will use some of the leftover walnut planking strips. Vince P.
- 593 replies
-
- 9
-
-
- royal william
- euromodels
- (and 1 more)
-
Hi Everyone, I haven't posted for a while because I have been working on the daunting task of the second finish layer of planking. I am just about finished. I will post a few photos very soon. Vince P.
- 593 replies
-
- 3
-
-
- royal william
- euromodels
- (and 1 more)
-
Hi Rick, I am also building the Royal William and looking for gun port hinges. Do you have some good ones for a 1/70 or so scale? If so, how much for a 100 gunport ship? Thanks, Vince P.
-
Wow. I might have to give this one serious consideration. Vince P.
-
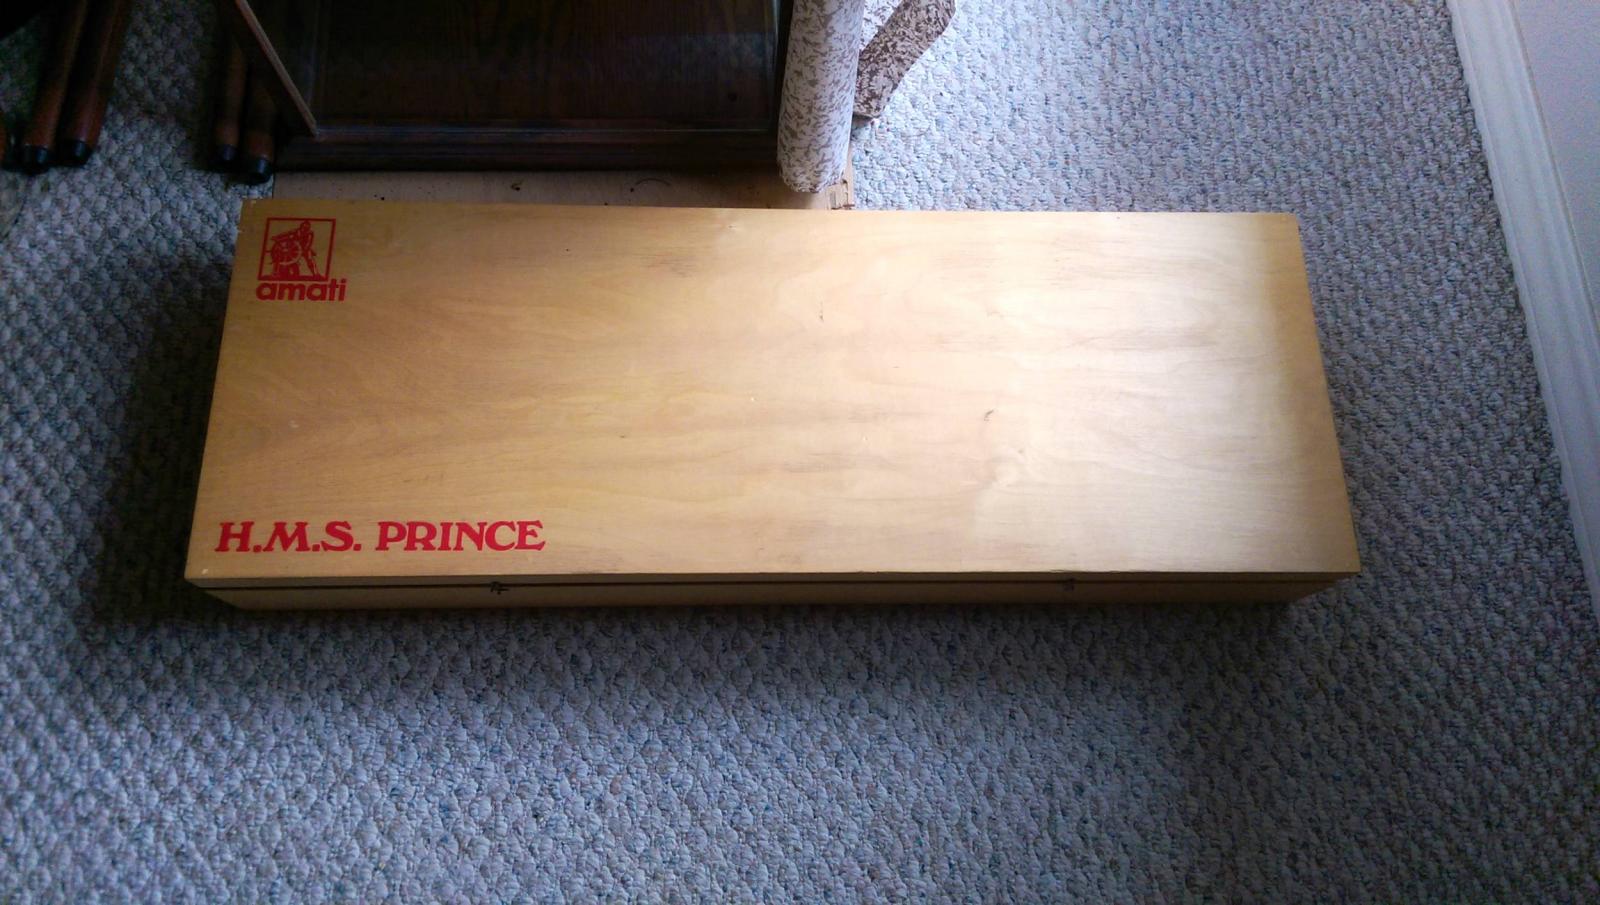
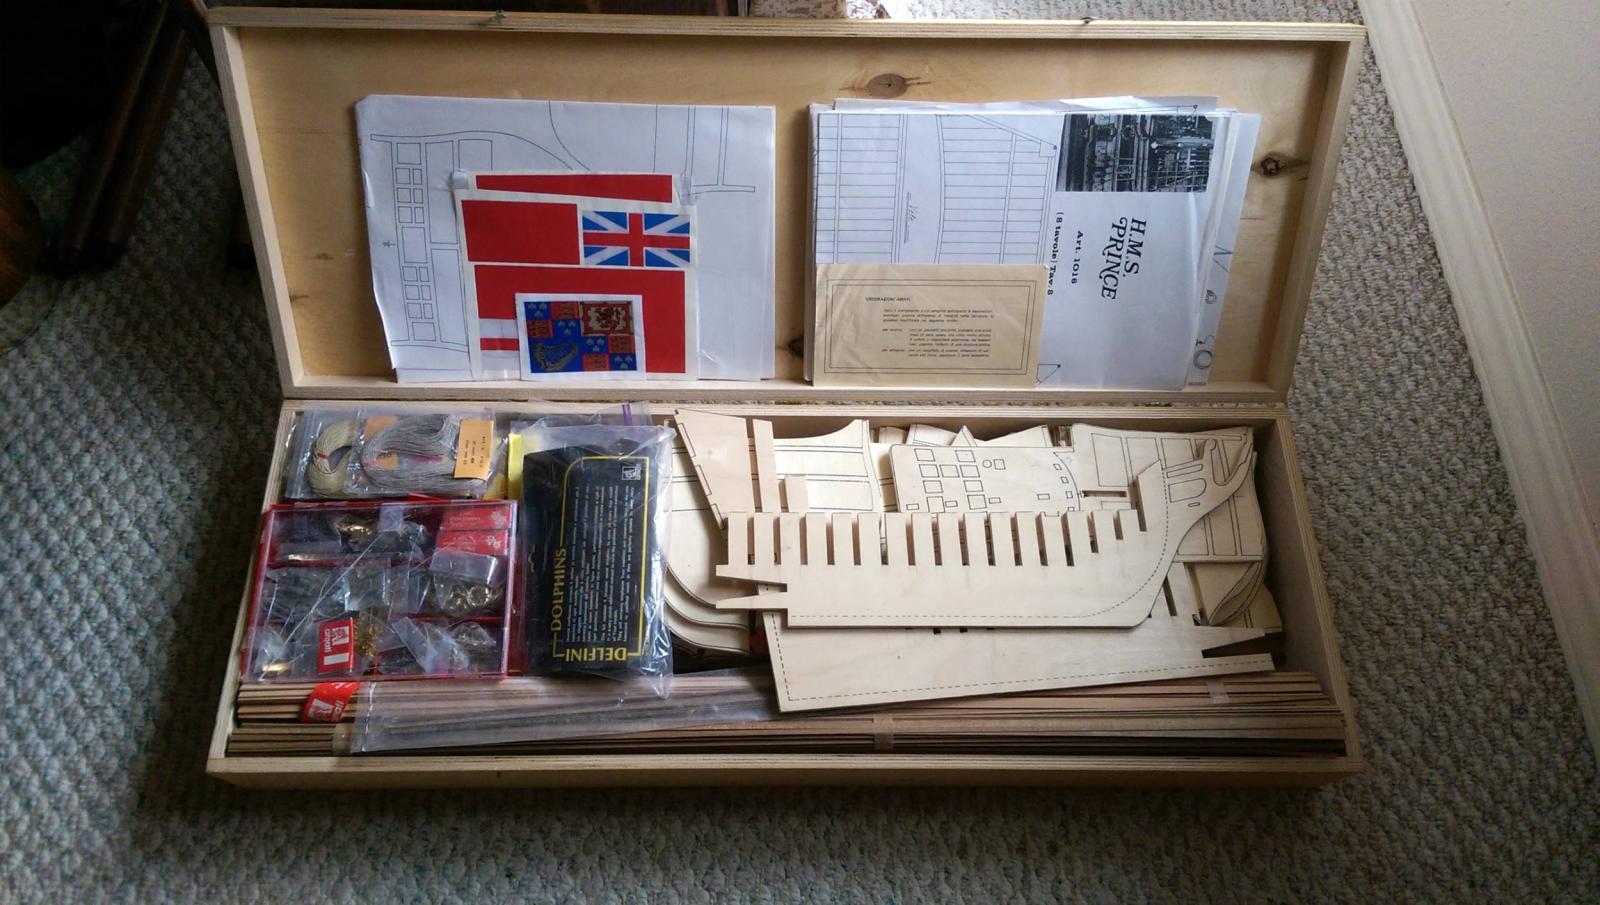
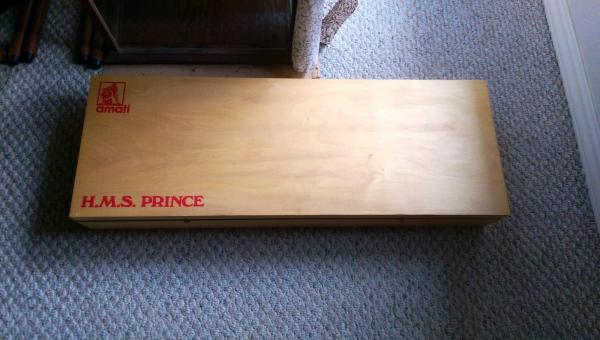
OK, I got the kit in the mail today. It is in perfect condition. It is a huge model and bigger than the Royal William and SOS. I want to rig her with sails and she came with a sail plan and sail cloth. The box she came in weighs close to 40 pounds. I will put her away in a safe place and wait until I complete the Royal William. That is probably 1-1/2 years away. Vince P.

-
Hi Ron, Your model is magnificent. It doesn't look anything like the Constructo basic kit. You certainly have the talent to make a museum quality model. Vince P.
-
I got a surprise in the mail today. The gentleman that I bought the Amati Prince kit from, apparently had a set of 8x11" full color photographs of the dockyard contemoprary model in the London Science Museum. He sent me them with some research documents as well. They are closeup photos of the model from every angle. They will really help in her construction. The kit should arrive tomorrow or so. Vince P.
-
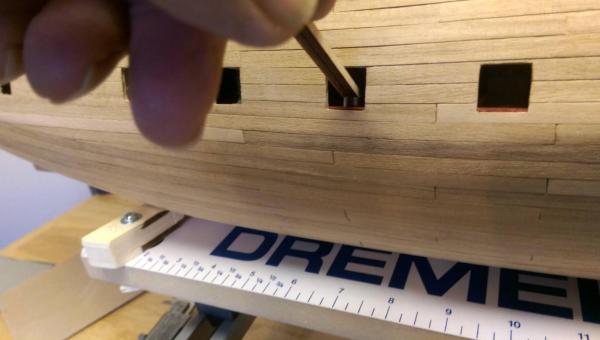
I do the same, but use a small milling bit in the Dremel instead of a drill bit. You also have to be careful to run the speed as slow as possible to keep from melting the soft metal. It goes pretty quick and I have done half of the windows so far. Vince
-
Hi Mike, I use a kit as the basic starting point and go up from there. Very few if any kits are 100% accurate. The documentation for something 200-300 years old is often sketchy and many ships were modified with no records to show it. I generally do research on ships of the period in general and make modifications and additions as I see fit. I am happy with doing it this way. I am very fond of the Amati kit and almost bought it 20 years ago. It will be a real fun project. Vince P.
-
Hi Keith, Yes, I know Chris is working on a new Amati version of the Prince, but I couldn't pass up on this opportunity to get my hands on a genuine original Amati Prince. It is a great kit and I can take it to whatever level I wish. By the time I get to working on it, maybe the new version will be out and I can use some of the features, be they an improvement over the older version. Vince
-
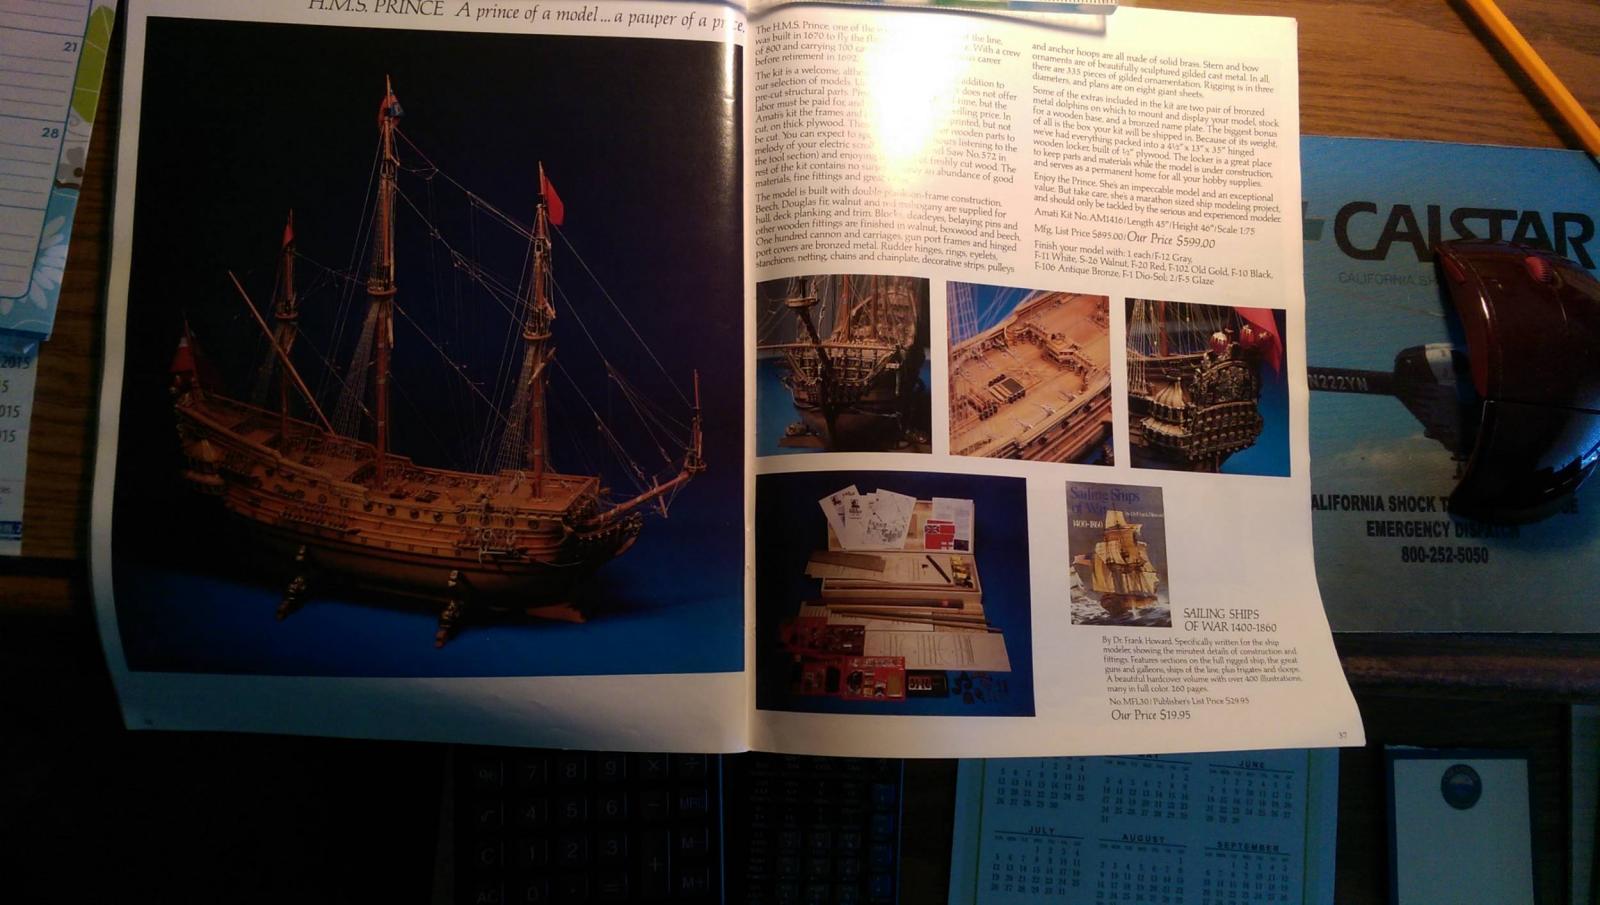
Hi Mates, As most of you know, I have been looking for a kit of the HMS Prince to match my Royal William. There are a few available models, but nothing like the original big one made by Amati back many years ago. Well, I got a private message from a gentleman on this forum yesterday. I guess he must have read this thread, or otherwise knew I was looking for the big Prince. It just so happens he has the original Amati kit bought many years ago. It is untouched in the original wood box. It even has the fancy brass dolphin bases that they added to some of the kits. The great news is he is wanting to sell it! I BOUGHT IT and he is shipping it to me. I still have a 1983 Model Expo Catalogue that features 2 full page spread on her. She will be my next project after the RW. Vince P.

-
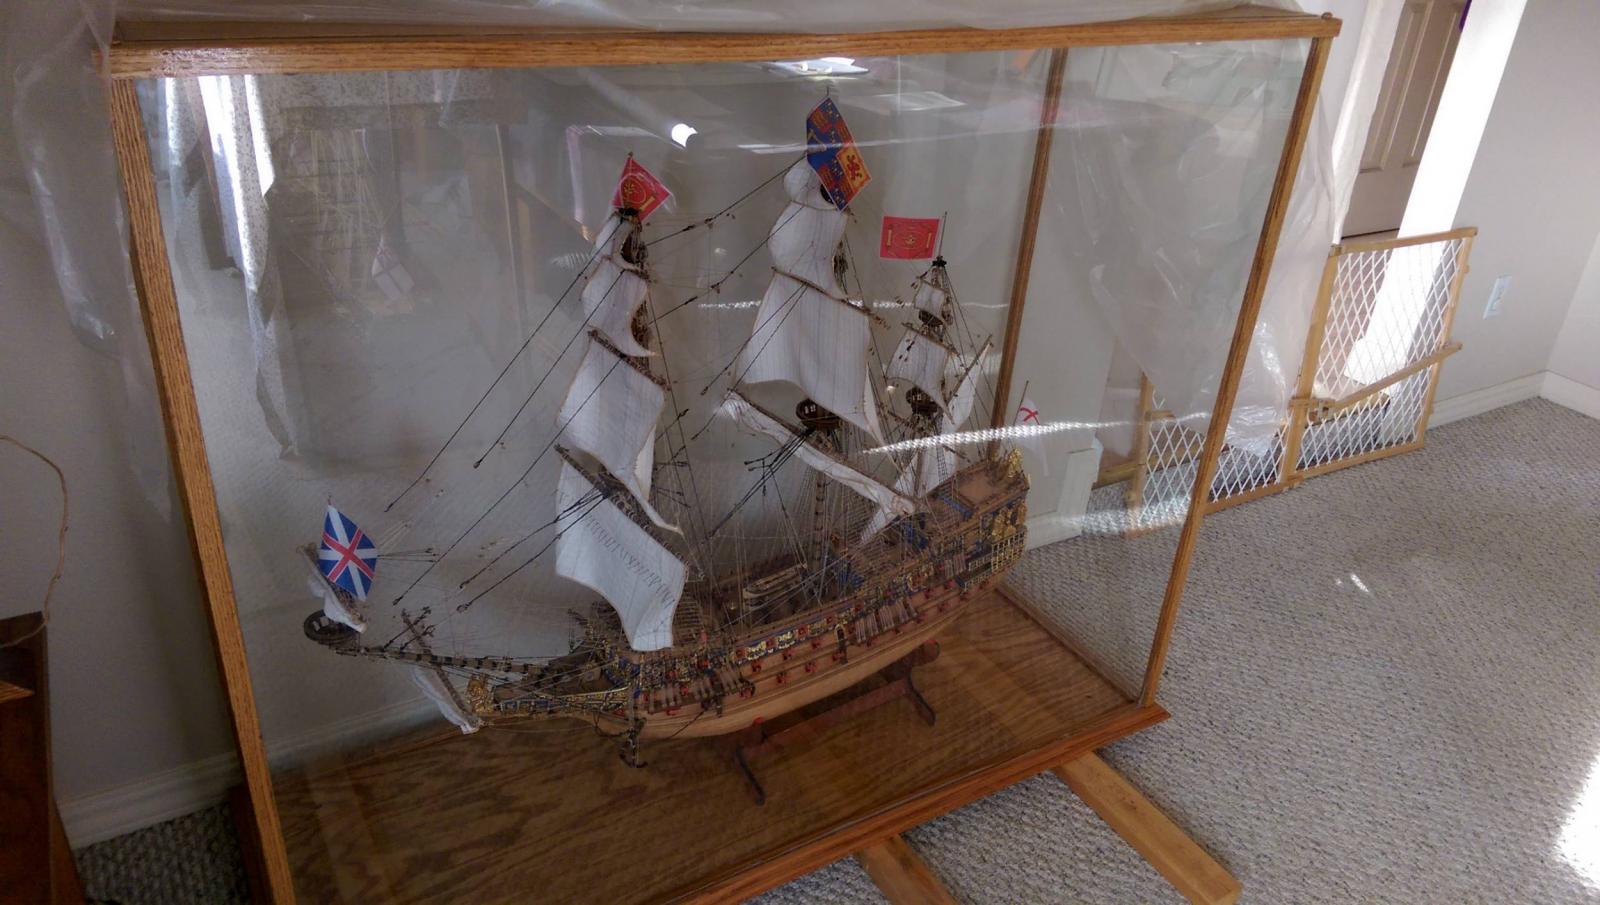
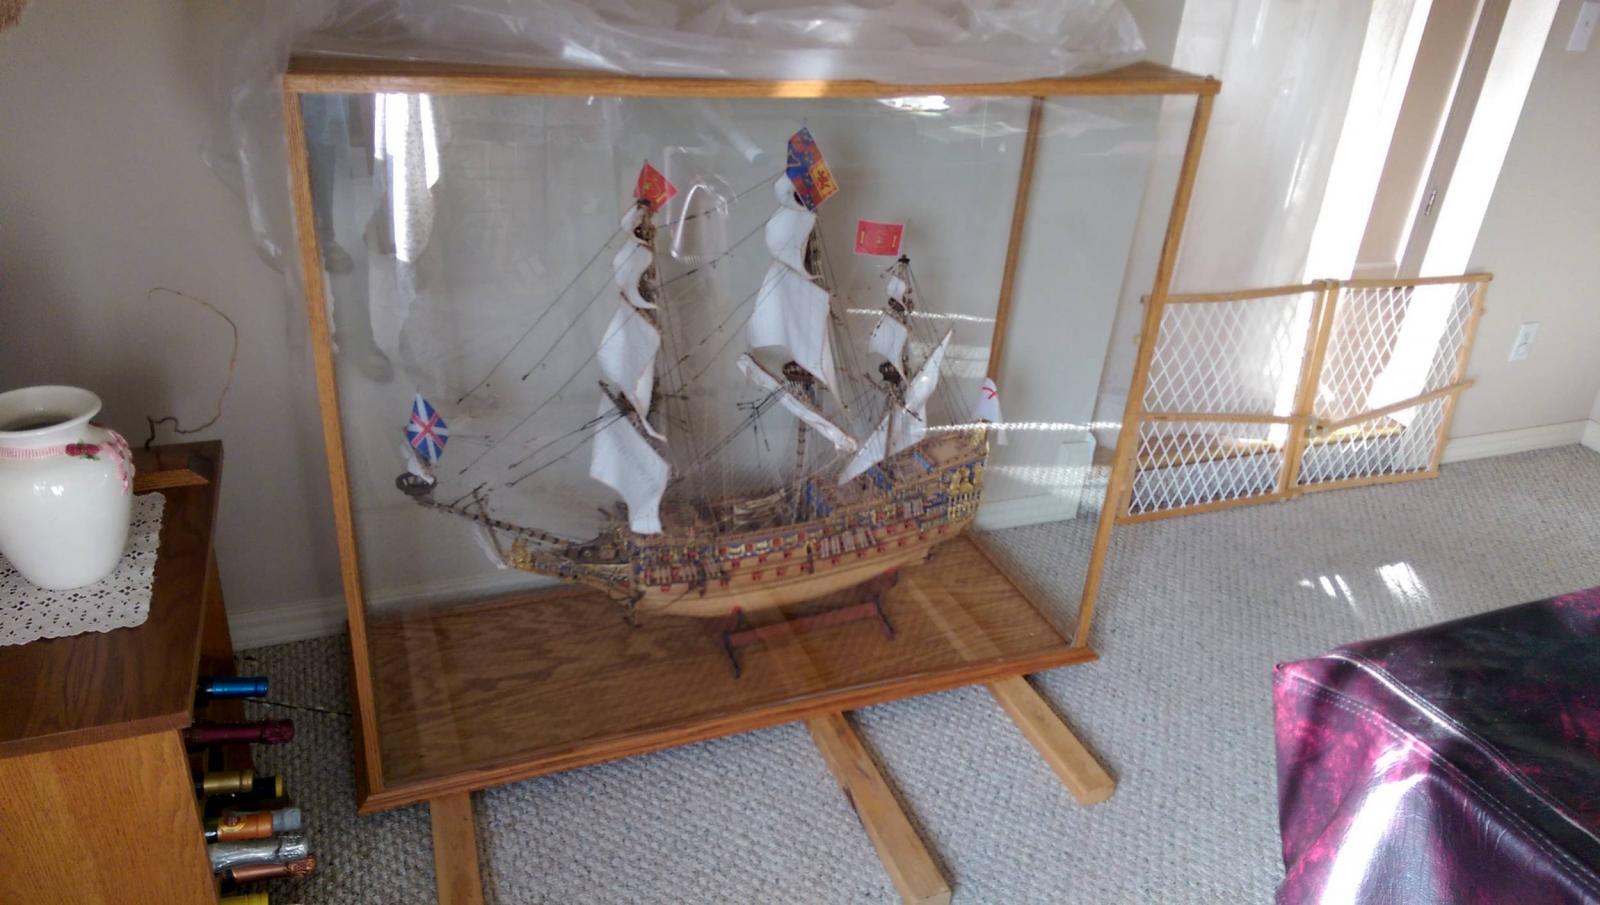
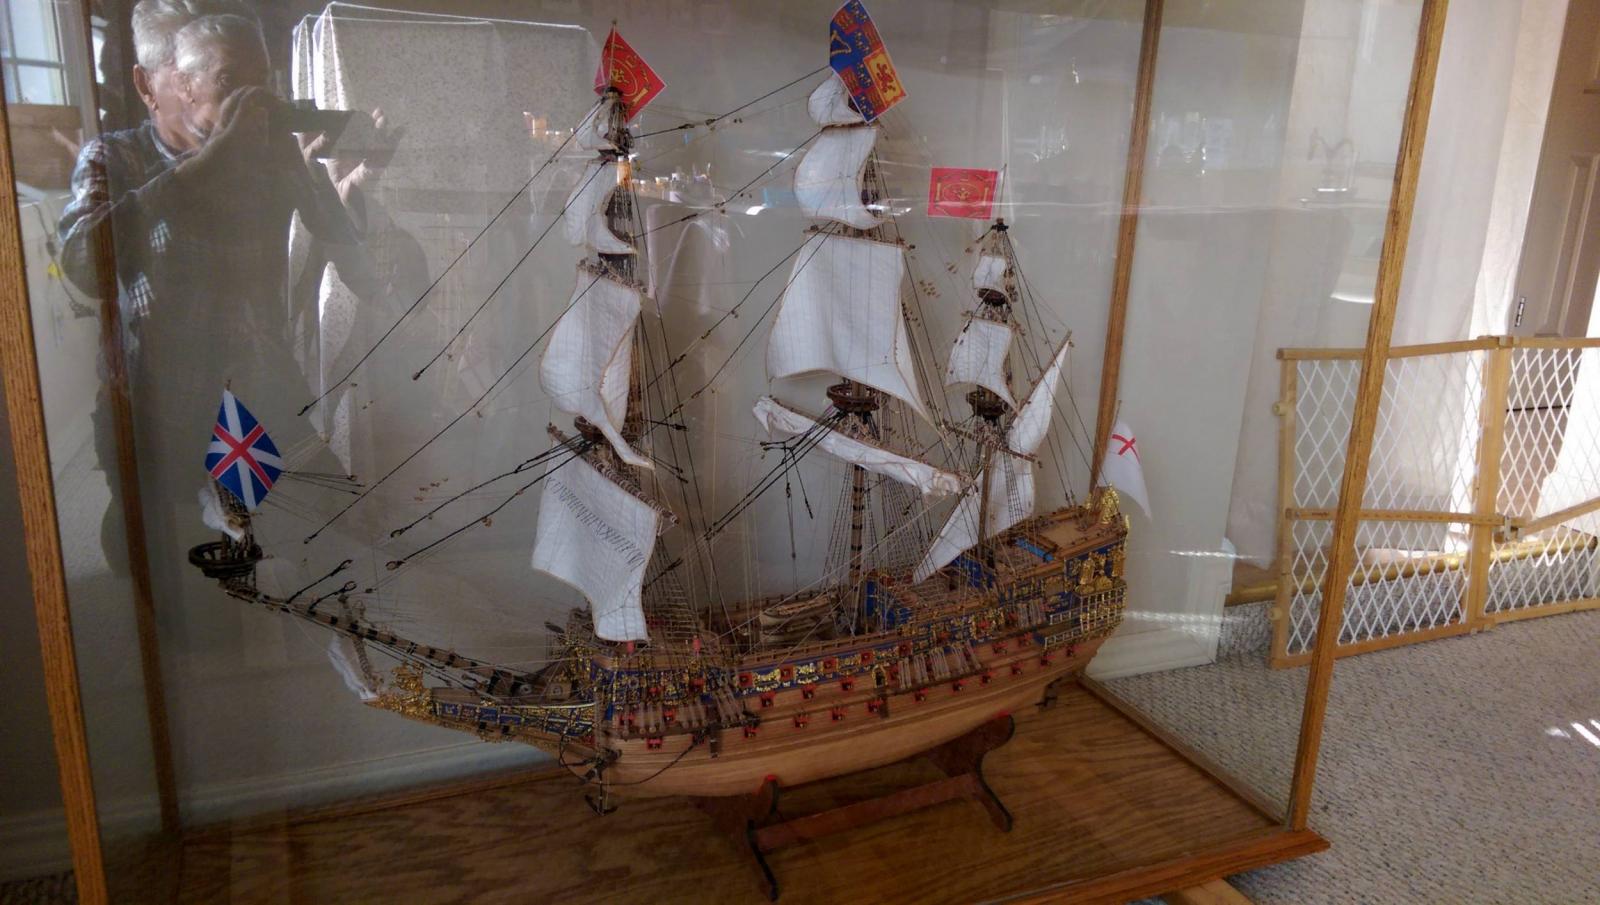
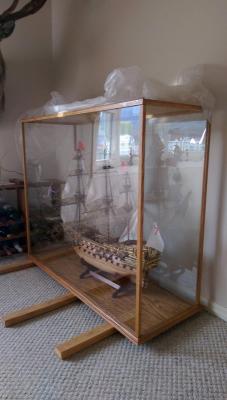
Although I finished this model over a year ago, she finally gets to rest in her new display case. Now I just have to build a shelf to put the cases on and get them off the floor. Vince P.


- 264 replies
-
- 12
-
-

-
- sovereign of the seas
- mantua
- (and 1 more)