HOLIDAY DONATION DRIVE - SUPPORT MSW - DO YOUR PART TO KEEP THIS GREAT FORUM GOING! (Only 44 donations so far out of 49,000 members - C'mon guys!)
×


popeye the sailor
-
Posts
16,007 -
Joined
-
Last visited
Content Type
Profiles
Forums
Gallery
Events
Everything posted by popeye the sailor
-
 doesn't mean anything Ziggy......it was a form of ranking system. I'm sure you'll get just as much enjoyment as I did, building one of these planes
 -
looks good OC
-
thanks OC.....yea, I need to do a couple of things to it..........wish the other pieces were with it. if I'm correct, this is part of a three piece set..........when put together it must have been huge. I was browsing the old model site this evening and I saw this this would be perfect for one to really do some detail work to. the availability is in question though........someone is interested in it I'll keep tabs on it...........I showed the admiral and even she thought it was neat thanks again everyone for all the likes

-
it's sad this is your last treasure to share with us.........your such an adept modeler. the speed in which you 'aced' card modeling is amazing. the beer car is a work of art
-
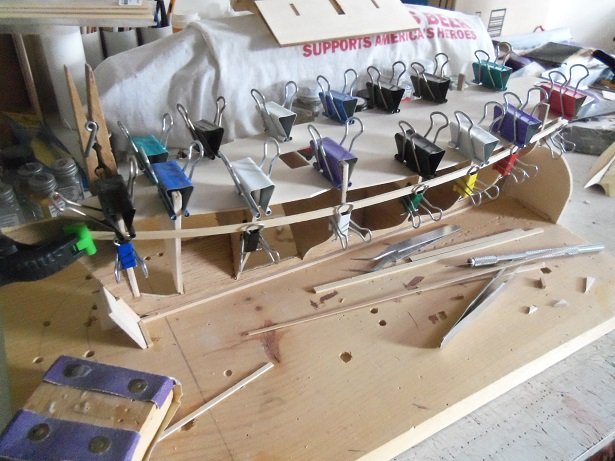
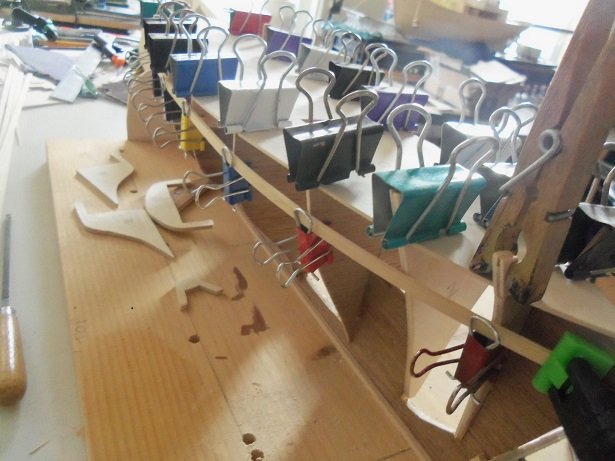
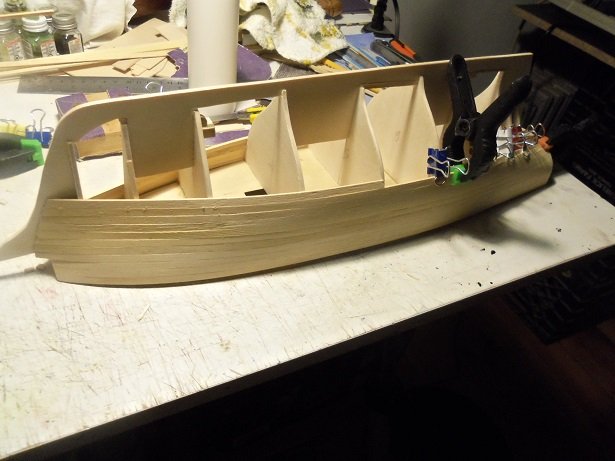
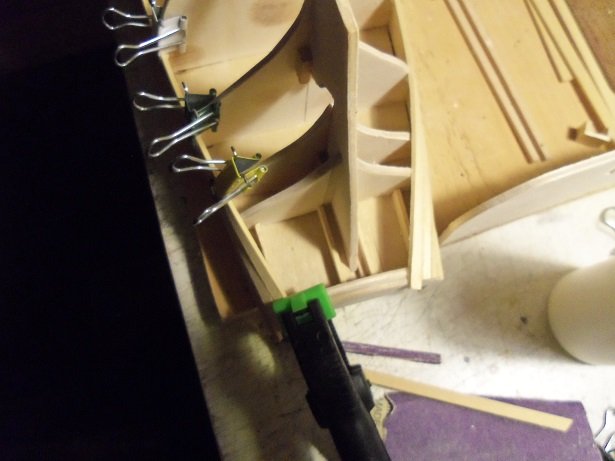
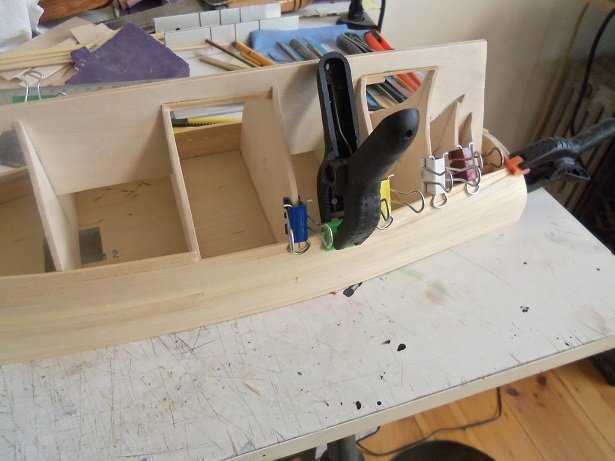
I got a bit smarter with this hull, since noticing that a couple of the bulkheads had shifted slightly, when I began to fare the frame. taking a couple of strips, I strung them along the sides, keeping the fame in alignment while the deck platform was cemented in place. I had a look at the frame tonight, and removed all the clips. doing it in this fashion also produced a nice camber to the platform.
-
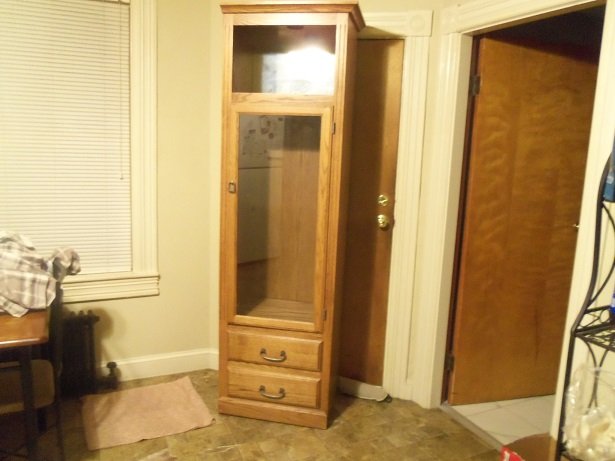
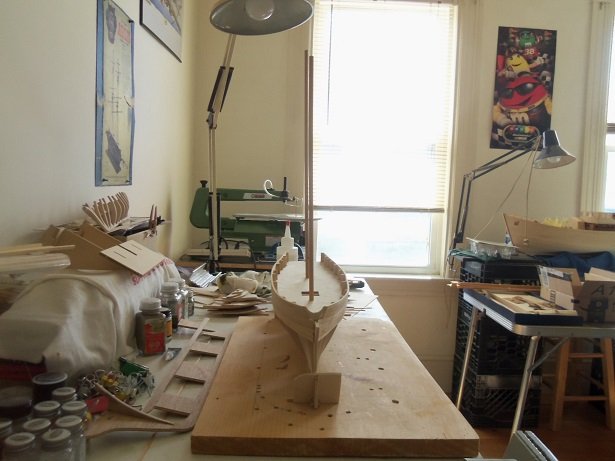
did you watch the Memphis Bell start her engines and run for a bit? it was shown after I looked at the two videos.......thanks for them Lou impressive to see them start up. seeing as I have the other two birds on their perches, I think the Memphis Belle will be standing on her own three wheels. I got home this afternoon to see this in the dining room. the top opening has a mirror in it.....not sure if I will leave it in there, but there is a light in there. the shelves are wood, but I might have some glass made instead, and put a second light in the lower part. I have to fix one of the drawers interesting wall art Kevin......if I were to do that, I think it would be a copy of some of the nose art........more Andy Warhol, don'tcha thing interesting story Thomas
- 134 replies
-
- 10
-

-
Constitution 1:96 Revell
popeye the sailor replied to jmegnin@ymail.com's topic in Plastic model kits
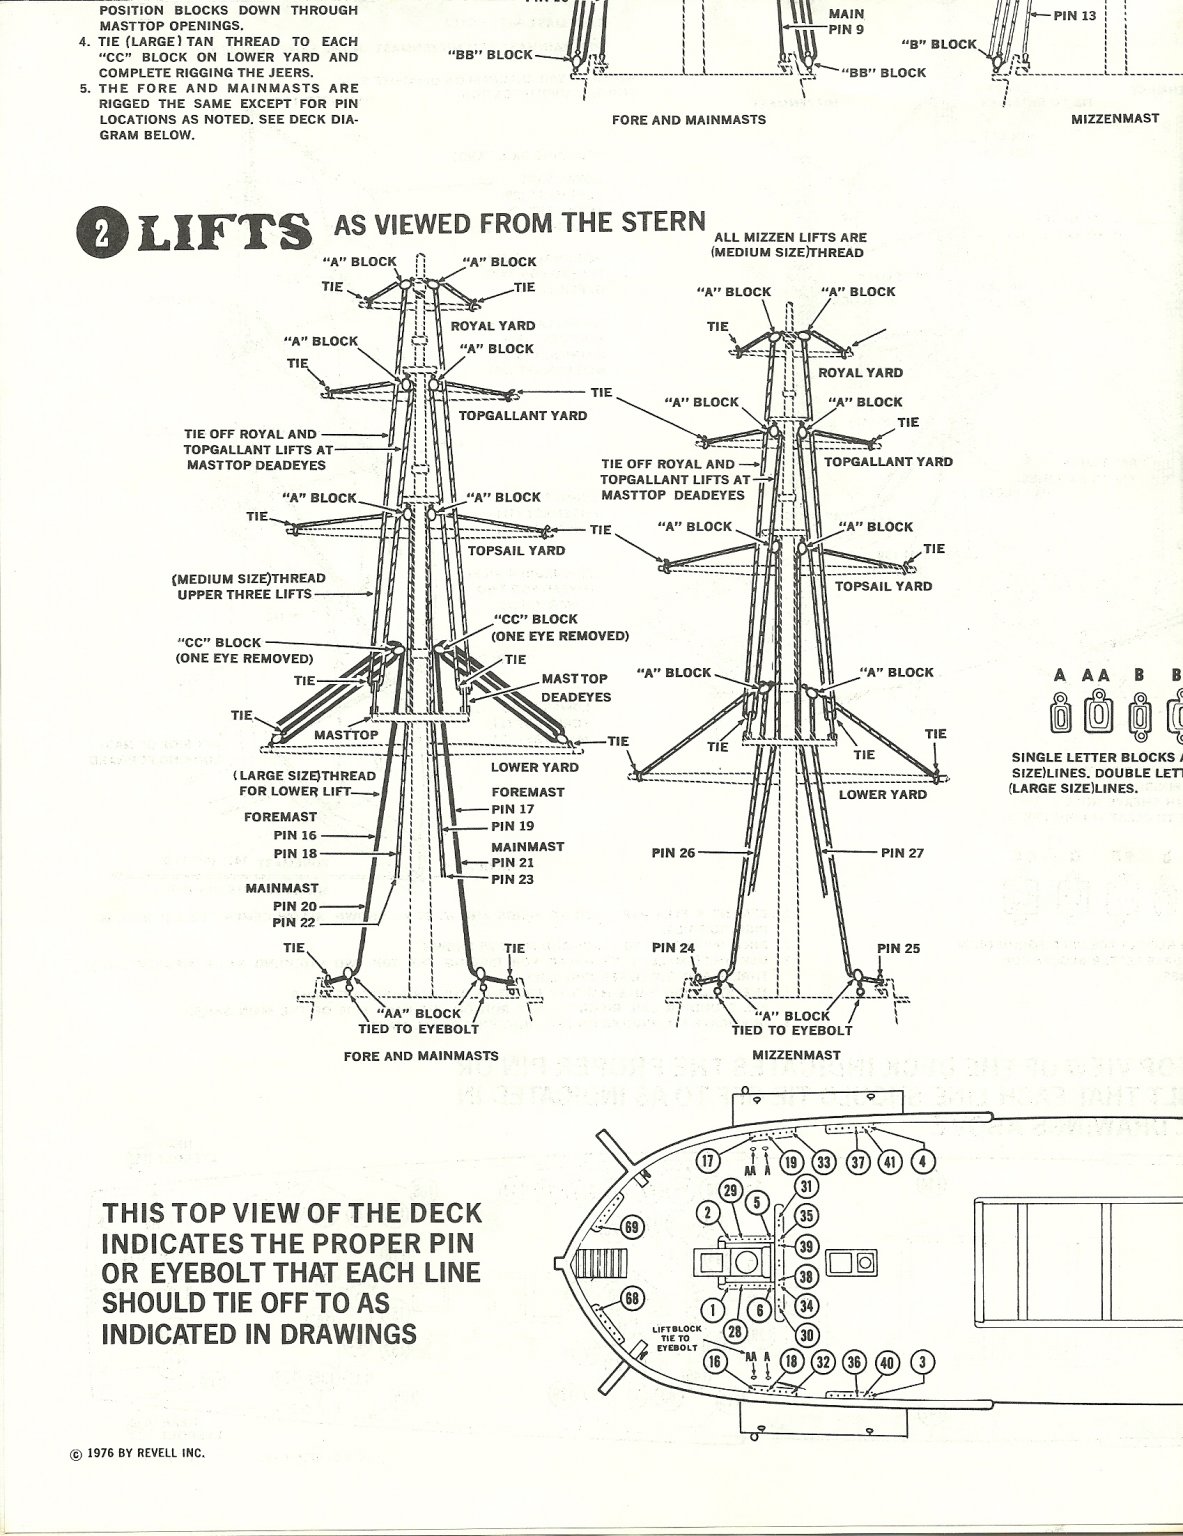
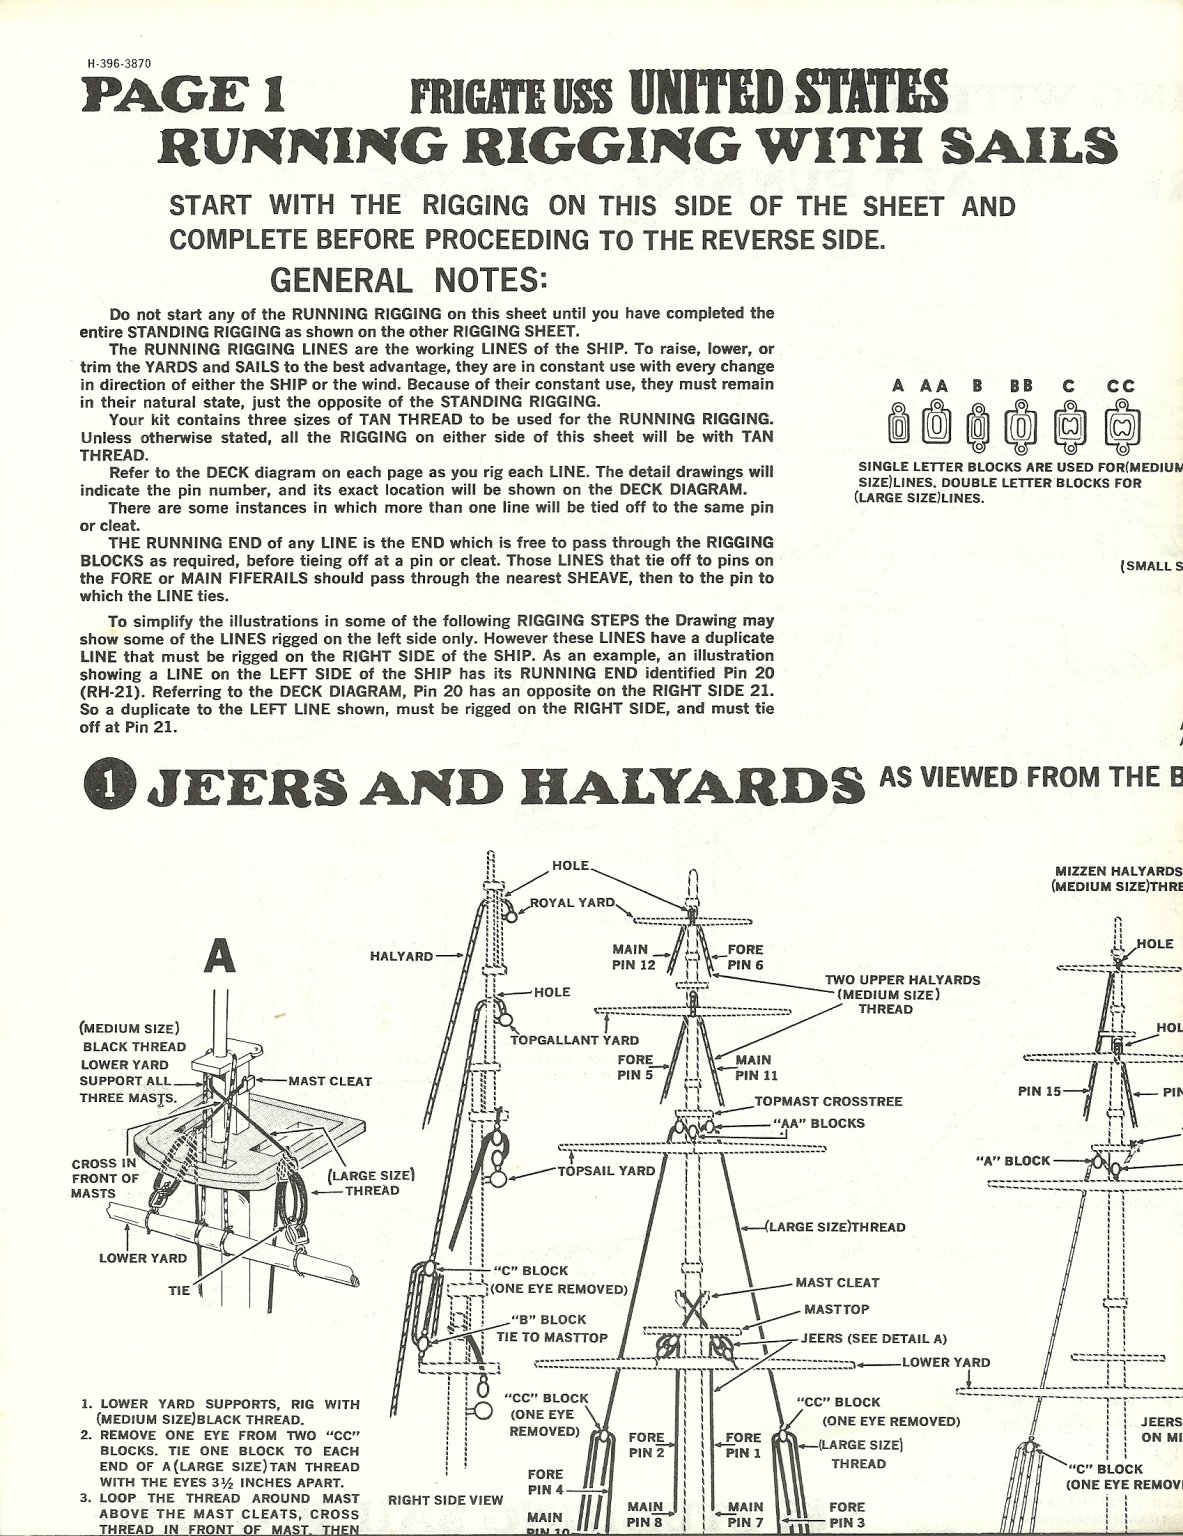
I know this is for the United States....they have the same instruction sheets -
Constitution 1:96 Revell
popeye the sailor replied to jmegnin@ymail.com's topic in Plastic model kits
than's how Revell designates the different blocks do you have the running rigging sheet? the halyards run through the masts and lead down to a pulley assembly. supper is ready and I gotta go.......look this over and see if it helps.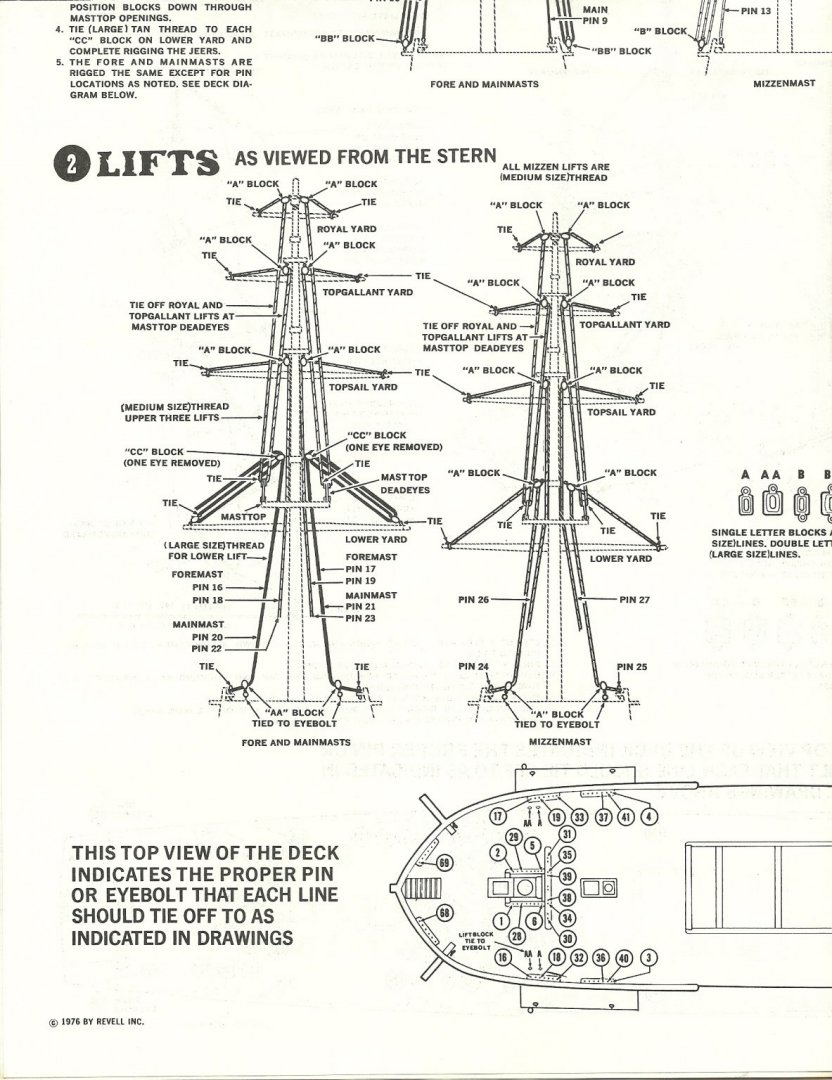

-
that must have been her big refit at Norfork. in the early stages, I thought it might be neat to do her with the cage masts that she had back in the twenties......there is after market out for it. never a bad thing to have a favorite ship for the time being....I'll work on getting this one finished. not a lot left to do, but it's time consuming. I'll keep an eye out for when you post a build log....if you model the Arizona, I'm sure it will be interesting always a pleasure to meet new folk.
-
oh.......you see the other projects in the spare room. the frame on top of the box is a recreation of the Thermopylae hull...gonna do a what if with it. the ship by the wall is the Progress. I'm building it using another old kit of the Nordkap. I guess I'm going to go ahead and model the Clotilda....with the other hull, I like the finished model on the box, so I'm going to model something like a privateer or a brig. I've always got something going on.
-
the hull came out very nice nice job on the bulwarks too. your deck still looks good...and you thought you'd ruin it
-
I've heard a lot about the Banner kit........I've never seen the kit. I'm not sure what you mean about pre thirties fit....I have her pre Pearl Harbor......I hope I have the tops right?!?! glad to hear your getting back to the table......I took a ten year vacation myself in my forties
-
thanks J.......ssshhhshhhhhhh{it could go south any moment now}. it's like I sad J....these models are butt ugly, until you get some paint on them you know what worse......no two hulls plank the same { at least I've never seen the latter}. I've never done copper before.......I've got plenty of copper paint. I'll have to look into it. I've done a few planking jobs I wouldn't write home about..........yours will be fine
-
so now your ahead of me.......so what the heck......a good sanding and there you go! no holes or gaps........right?!?!?! great job keeping that bow line....ohhhh, that's right, you have a rabbit in place there no, but really......sand it down and paint like ya said, and you should get a good looking hull. did you at least taper around the transom?
- 211 replies
-
- 2
-
-
- agilis
- steingraeber
- (and 1 more)
-
a Mosquito on a stick............great!
-
I know oysters are eaten raw....but I don't partake. but I also know clams are steamed and not eaten raw too......I love steamers. the admiral turned me onto them after we got married......now she can't turn me off! love a good chowder too.......the seafood festival at Hampton Beach is famous for it. good we got to go last year.......haven't been to the beach since the admiral became disabled. hope we get to do it again this year....can't wait! Jack....tell me those were steamers
-
this give me an idea of how your going to incorporate the crypt.......now I see where your going with this! it's impressive.........lots to do there
-
glad to see your making progress Lou I remember when I hung a cloth from the edge of my table, and draped it over my legs, to catch falling / flying parts. it wasn't practical......I'd never get into the habit of doing it every time I sat at the table. is there a fool proof method.......I doubt it, but we keep looking for new ways to thwart it
-
B-25 Mitchell "Meet Miss Runyon" by Javlin-HK-1/32
popeye the sailor replied to Javlin's topic in Non-ship/categorised builds
can't get any more detailed than that........the figures look awesome! -
ICM 1/48 Spitfire MkIX Scrapped.
popeye the sailor replied to Old Collingwood's topic in Non-ship/categorised builds
off to a great start OC -
thanks to everyone for the overwhelming responses we can take this a step further Ken.........this has gone on since the days of sail. captured ships were never burned in place..........it's sprinkled all through history. a captured ship was brought back as a 'prize'....what do you suppose they did with it........ the ship was studied and if it could be refitted, it was. we certainly weren't the only country doing it. during the Civil War, the Confederates captured the U.S.S. United States and used her as a blockade. this opens the door even wider for modelers.......a higher level would be to model a ship or plane that was used as a 'Trojan Horse'...I'm sure there were a few in 17th and 18th century history it won't be hard to display the Memphis Bell Lou.......I'll find a place for her with her like. ....even if I have to make another shelf {I keep thinking about it....one of these days}. I will look and see if I still have that article I found on her. her restoration was a long and over due process....but it wasn't because of money or time. they restored her using genuine parts......there was no jury rigging or modification of the original equipment. there is a picture of her in the hanger, beside another plane........I think it was the Shoo Shoo Baby. the Memphis Belle you see on the display floor is an exact replica....right down to the wiring harnesses. I'll have to get a updated picture of the wall.......that shelving takes up a good portion of it.......it represents roughly half of what I have finished. the question shouldn't be 'can I model it'..............the question should be 'how will I model it' I an so glad you all enjoyed the project. the next one will be even bigger......trust me
-
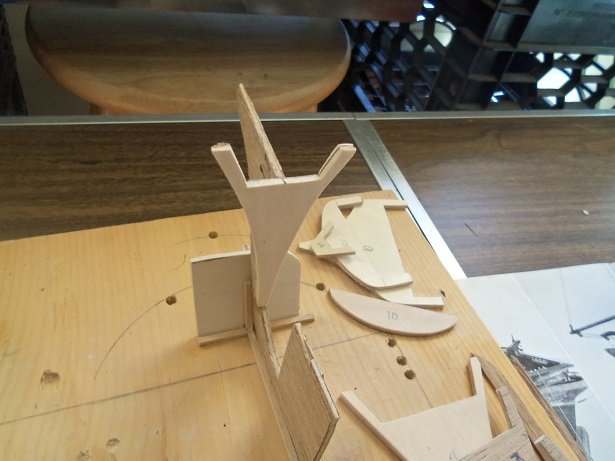
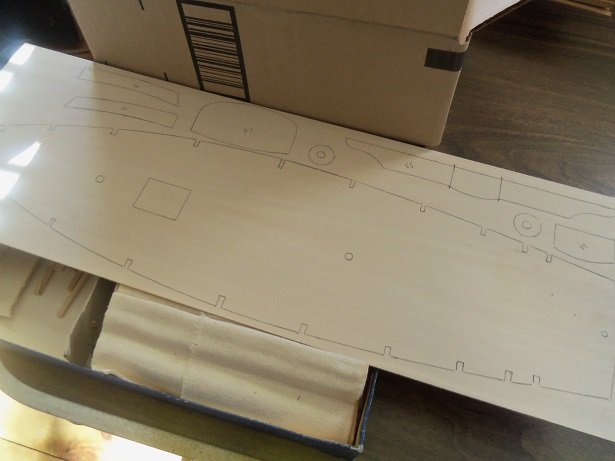
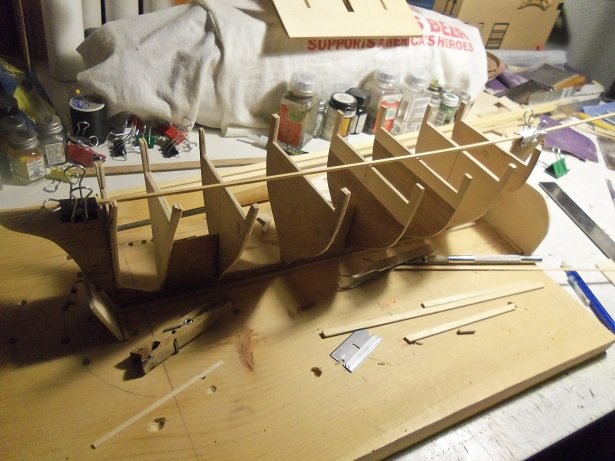
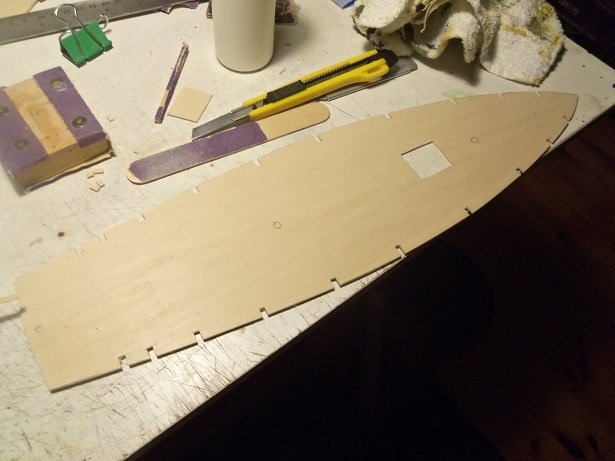
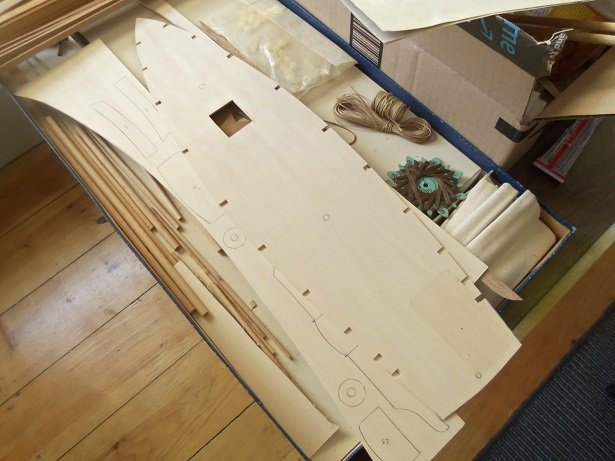
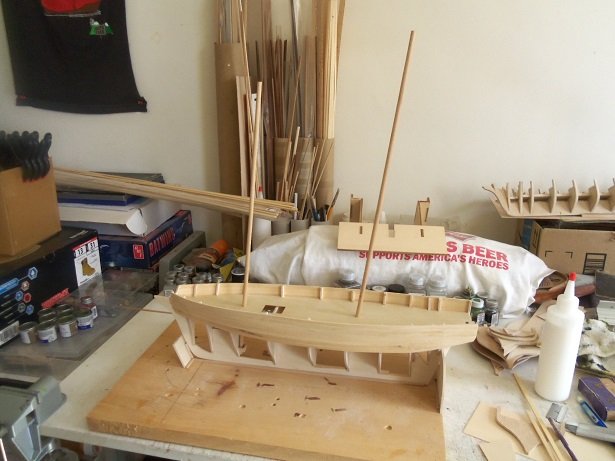
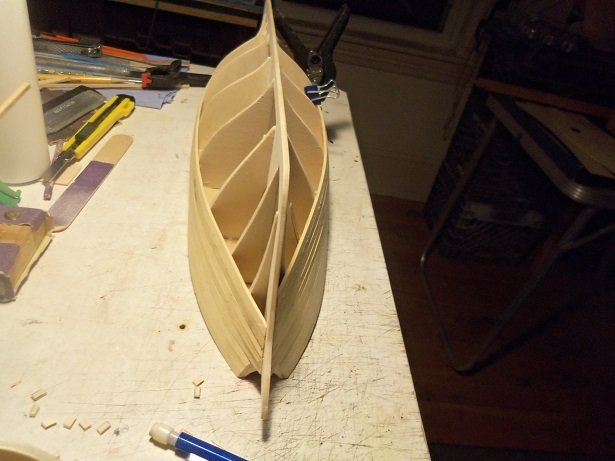
hello Ed......welcome to the log {s} if your new look'in in. yep.......a second hull. I felt bad........watching J building his with the old dried out wood.........and here I am cutting my parts from good fresh plywood. hardly seems fair, if you know what I mean........... I'm only fool'in..........actually, it's just that I still have these parts and haven't the heart to throw them away....I am a certified pack rat at heart. as you have read......neither of us got a good shake with the contents of these kits. the wood is around 50 years old.......some of J's was warped, and a good portion of the deck planking in my kit is junk.......most of the dowels in my kit are warped! it's a good thing I bought up a fair inventory of dowel I'm intrigued with the picture on the box....I like the way she looks.....although, even in that picture I think the mast are too tall. for the time being, I'll post the progress of the second hull here until I come up with a name for her....then I'll create a separate log for her. I'll keep it low key to cut out the confusion. The Second Hull I had to repair the bulkheads that the outer laminates peeled off. using the appropriate thickness of basswood sheet, they were re-laminated. the parts 10A and 1A that I had made for the first hull, were also cut out for this hull. as it equates out.....about 80 % is the original wood. there was this long stick like length from cutting out the keel part lying about....I threw the rest away. just for the fun of it, I took the outer laminates off of it.......I did it with my fingers! the next day, the rest of the bulkheads were finished off. I had cut a few extra of part #9........I cut one in half for the parts 9A. part #7 was the worse one.....both sides had to be redone. ready to go......the first bulkhead was glued in place. I had already traced out the deck parts in 1/16 sheet basswood most of the bulkheads are in place now.............the #9 bulkhead added later. the rest will be added off the jig, but I'm gonna add wood in places to stiffen the frame up. spent some time cutting out the deck parts.......first the platform it's had all night to dry........so I'll add more to the frame today


-
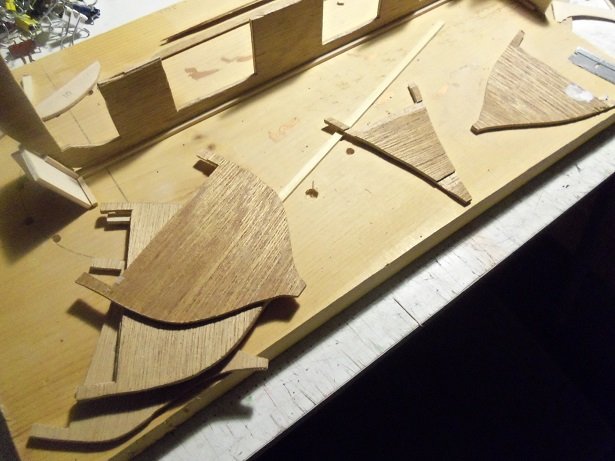
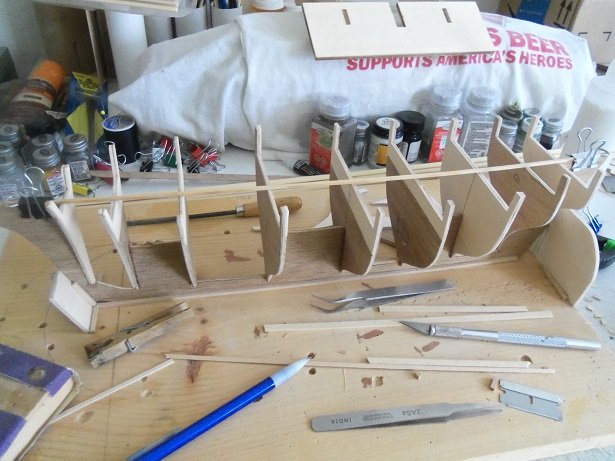
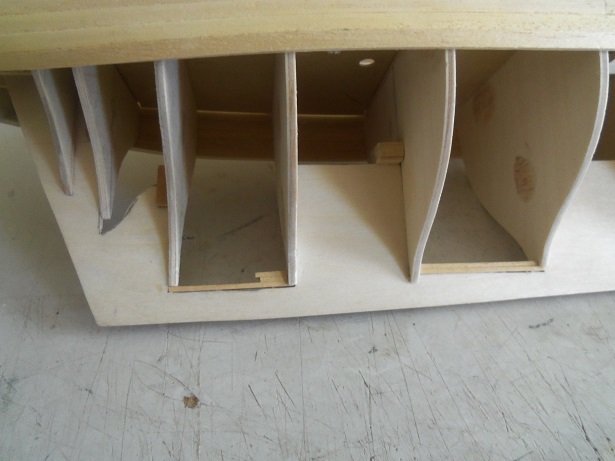
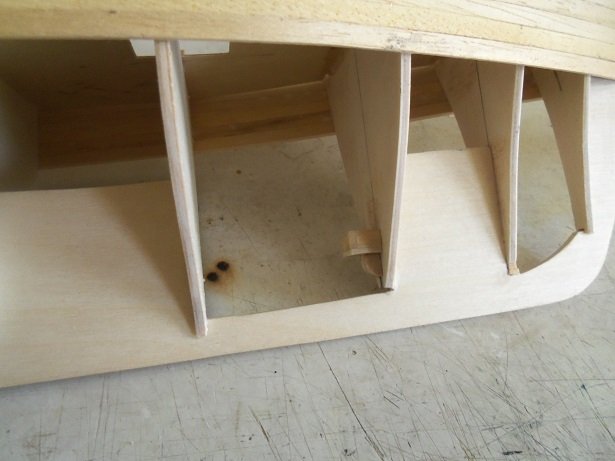
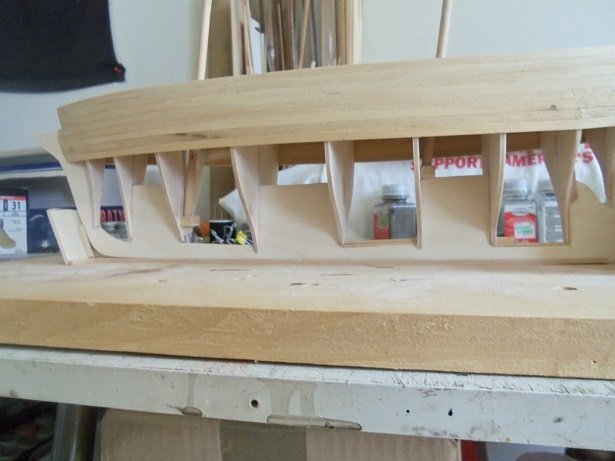
thanks J for runn'in interference for me! yea.......jee, thanks Tim for showing us your model........the gentleman did a great job in building her {anyone who can decipher this load of bollocks is to be commended}! as mentioned.......the hull frame is not a complete frame to begin with....I feels that parts are missing at the bow and stern. I see he planked the model all the way to the edge of the bow stem...interesting observation. it's great to see a model of this kit, utilizing all of the supplied parts.....we can get a better sense of the kit HEY!!!!!! where in the blue blazes did he get 2 boats!!!!!!!! I want two boats.............. feel free to add a few more pictures, if you'd like once you get away from the bulwarks J, I found that the stern needs to be tapered. this update will show you what needs to be done. who knows, it may be required to jog a plank back there or something. we have to remember that this little girl has a small tookus first though I messed with the masts and steps some more. the main mast step is already in place, seeing that it sits on one of the rises in the keel. for the fore mast, I had to raise it up some, so it won't interfere with the planking. with these pots in place, the rake of the masts are acceptable. the rake on the fore mast should be around 5 to 6 degrees, and the main mast should be a bit more. the above pictures point out another potential problem. on most plank on bulkhead models, the bulkheads have the slot at the base, to fit over the keel spine, allowing the planking to have a slight curvature to the spine. the hang over of the bulkheads will initiate the curvature, that defines the hull from the keel spine. they also limit how much spine will show after the model is planked........the garboard plank usually initiates the curvature. if this is not possible, which looks the case for this model, the keel spine may have to be trimmed to reflect this aspect. here we have two options.......add material so that all of the involved bulkheads have this feature. or blunt them all off, so the planking will do the same, and trim the keel spine. an acceptable amount of visible keel spine is around 1/4 of an inch, I would say. it's not being fair to the model though......#4 through #8 had these slots, but the wood was so old that the tips were destroyed in the cutting process. on hull #2, I tried my best to make the bulkheads with them intact. I did get a little further on the planking. I originally though that the hull could be planked with full strip.......a mistake caused me to repair a couple of the strakes at the bulwark {on the port side, I believe}. so I changed over to doing a butt in different places, breaking up the full plank runs. it didn't take long for this to change either.........the stern changed things for me. the counter and transom is a lot smaller than the bow.......even more so when you get to the bilge, or chine as it is also called. so far, the bow is following the mid ship, as far as plank spacing goes.......don't leave out the option that one or two strakes will need to be tapered. what makes this harder, is that there is no center {keel} spine that the transom bulkhead attaches to.........the instructions does call for some type of bracing. {earlier picture} before I had nothing in there, but J had done something, other than using the supplied parts [#13}, so I added them in. I believe J positioned his part #10 perpendicular for his model........I positioned mine at a slight angle, about 2 degrees or so. since there were no posts for the transom, I scratch made a part {#10A} adding posts to it....a modification of the original part. I also added that second pair of bulkheads w/posts {#9A} to decrease the amount of spacing between bulkheads #9 and #10, since the deck platform had an extra pair of bulwark post slots. if the stern stem was all the way back to the transom, things would be different. but the rudder runs up through the counter, leaving no center rib in there to terminate the planking. in that picture, one more strake on the starboard side would put me even with the port side. I ran three strakes here, one bulkhead shorter that the previous one...I'm adding in the second tapered plank in this picture. so this is where I am with this hull. small problems, but it's coming along fairly well the fun doesn't stop here............

-
hi there..........I agree ....it's a nice looking model I see he did use the mast as complete lengths....I've been thinking to myself that the dowels are too long. I too appreciate your showing us your model......will make for a great study