
HOLIDAY DONATION DRIVE - SUPPORT MSW - DO YOUR PART TO KEEP THIS GREAT FORUM GOING! (Only 36 donations so far out of 49,000 members - C'mon guys!)
×


popeye the sailor
-
Posts
16,007 -
Joined
-
Last visited
Content Type
Profiles
Forums
Gallery
Events
Everything posted by popeye the sailor
-
 hey J........the other one is gonna look like on the box......I kinda like how the model looks.
- 211 replies
-
- 1
-

-
- agilis
- steingraeber
- (and 1 more)
-
on some kits, it can be a problem placing the heads with the ladders in place...too close together. they need to be spaced apart some. super job so far....she look'in really good
-
wow....that looks really sharp J! the two tone really makes the hull pop! I do notice though that you might have less counter at the stern than mine, and with the addition of that small front bulkhead I made up, your bow carries over the stem. these are not bad things by any stretch.........from bow stem to transom, mine is about 18 inches long. you see what I mean about the masts.......mine is going to be worse because I added the mast pots. did you assemble them using the full lengths? yea....there's around 5 inches that slide into the hull, so you'll lose some there.......but the height is out of scale. even with the finished model that we were shown, the use of the full lengths, really puts it out there. I'm no whiz with the computations, but trimming them each segment even an inch or two, might be a lot better. do some checking on this, but I believe that both masts are two segmented
- 211 replies
-
- 1
-
-
- agilis
- steingraeber
- (and 1 more)
-
your doing a super job on this one Robert.....your weathering skills have sharpened a lot she looks great.......
-
looking really good Greg......did you chase out all the portholes? they look nice 'n clean....very distinct.
-
thanks John, J, and Kevin.........thanks to all who hit the like button nothing noteworthy as of yet. I wish I could plank a hull like some of the folks here.......but then again, if the plywood I used was a bit more sandable, the frame would have shaped better. hello Kevin...welcome aboard
-
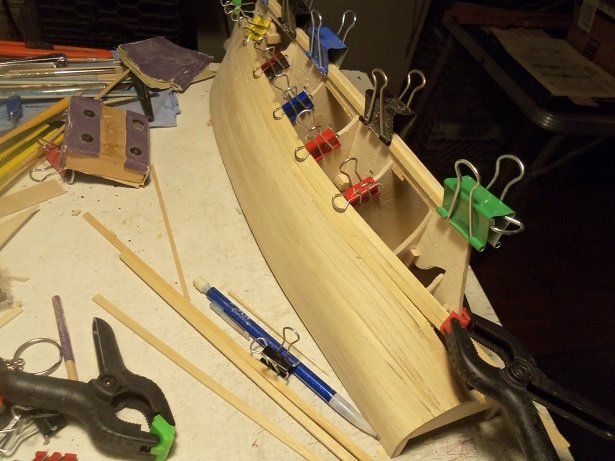
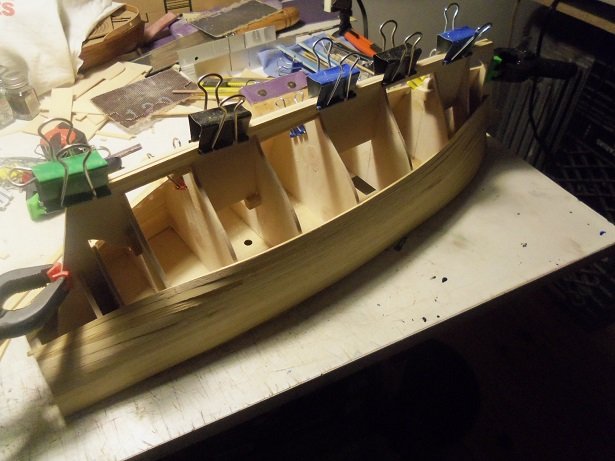
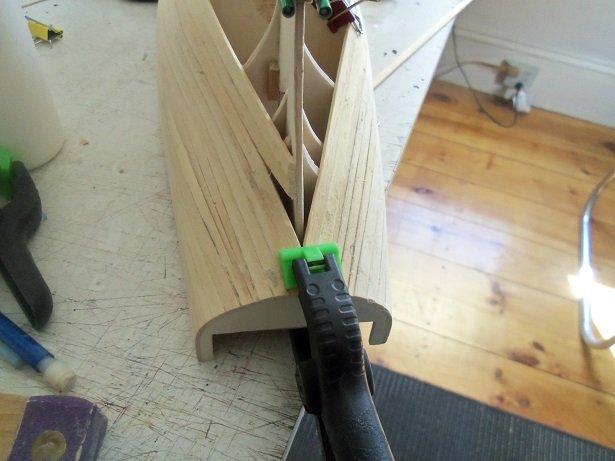
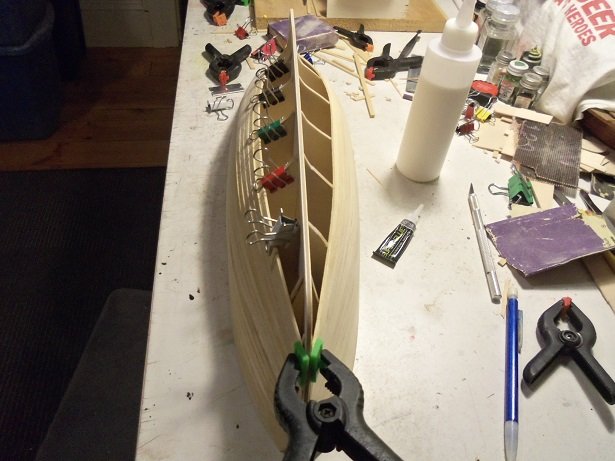
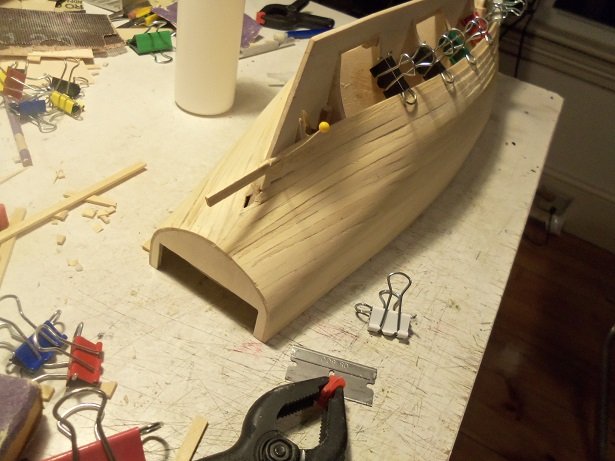
I haven't been idle this past week.........................I've made some progress on the planking. it's a slow process........lay a couple planks and allow it to dry before adding more. close second to watching paint dry more has been done to the starboard side, than the port side. the stern again is going to be a bit of trouble......I'll have to fill in the deficit at the stem. port side still needs to catch up......I'm tapering here as I did with the starboard side in an attempt to gt the line back in shape before the counter closes. the closure is going 'herringbone' on me. I did something a bit different on the port side, cutting and trimming the plank so it would fit. later I'll drill the hole for the rudder. I've also been sanding as I went along. as of tonight, I am at this point. for some reason, the port side is not behaving like the starboard side did. it leads me to believe that I either fared too much on that side, or there are alignment issues with the bulkheads. when I plank hull #2, I will see if the extra measure I did to it makes any difference. I don't have a name for her......I may end up calling her Agilis.
-
the same stuff you got...that brown leathery sheet stuff.
-
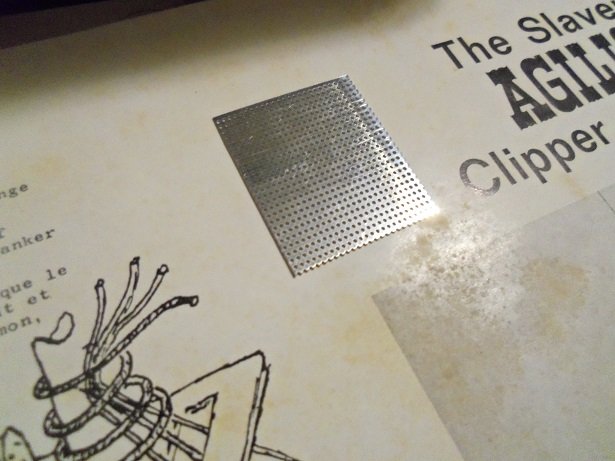
I have a different way of making grating 'wafers' in my U.S.S. United States log.........kind of a lengthy thing......not expecting it to catch on that's what you got for grating in your kit?.......I got this small metal sheet in mine. the grates look good....... here's what I got in my kit: been sleep'in with your feet hang'in out the window again, haven't you?!?! rest up and take care
- 211 replies
-
- 1
-
-
- agilis
- steingraeber
- (and 1 more)
-
well then.........who am I to be a party pooper!
-
now THAT'S a sharp paint job! very nice.........and now can see the dark blue of the ball turret really nice Craig!
-
wow....did someone barf on your plane? you could use regular typing paper........make you designs.....fold around the edges of the wing, and tape in place. spray directly at it..and not at an angle
-
I think it looks good.......should look real good encased in the fuselage
-
I noticed that about the dead eyes........must have quite a balancing act to get the 'rope' to ride on the outside edges.. they are the most convincing tackle I've ever seen really like the way you rigged the ship!
- 40 replies
-
- 3
-
-
- la tartane
- heller
- (and 1 more)
-
I think it would give you a tighter loop and you might be able to trim them a lot shorter
- 337 replies
-
- 2
-
-
- finished
- mountfleet models
- (and 1 more)
-
you could go that route....it looks Ok. I think though that it employs a few different materials and might not last too long before coming apart. how about you keep the turn buckles the way you have them, and when you rig them..... slide small brass rings to create a loop in the cable, trapping the turn buckle in the loop. cement or anchor them in place on the deck. then tighten the cables within the rings and apply a bit of solder or CA when the proper tension is achieved.
- 337 replies
-
- 5
-
-
- finished
- mountfleet models
- (and 1 more)
-
the hull came out rather well, considering that the combination of paints usually don't work well together. I wouldn't change a thing great start....glad to see another fine project!
-
great collection Nils........the Hjejlen, a very nice addition
- 38 replies
-
- 2
-
-
- billing boats
- hjejlen
- (and 2 more)
-
your way ahead of me for sure now.
-
I've never done furled sails........sails will look good on this one I'm still planking ........I think I'm at the 3/4 mark. I've done some sanding as I go along....the hull will need a little filler, but doesn't look too bad. on the second hull, I've done some of the stern work that I did with the first hull frame and fared the frame some. I'm hoping the shape is better than the first. I will post a couple pictures a bit later.....
-
so your going to go with the kit box masting? if you plan to do something like a schooner, you won't need to use the tops. I think they are a terrible shape anyway. shape them something like the Connie....flat fronted with rounded corners. nice job on the boat....awesome job
- 211 replies
-
- 1
-
-
- agilis
- steingraeber
- (and 1 more)
-
awesome looking plane ...........