


popeye the sailor
-
Posts
15,993 -
Joined
-
Last visited
Content Type
Profiles
Forums
Gallery
Events
Posts posted by popeye the sailor
-
-
to think about it, it hasn't been that long........just look at some of the other projects. some of mine are over a year old! I recently acquired this kit.....bought it for the unbelievable price of $15.00! modeling has always been a leisurely thing.....and its not supposed to be a race. take care of your family and life issues first...we'll always be here waiting for your return. I'll be following along
")
-
-
don't be hard on yourself....paint can be very unforgiving. flat and gloss is two different compositions.......flat lack the suspensions that gloss paint has. if that's a resin hull, then that would account for more heart ache. resin isn't enamel friendly, so I've read. I've never dealt with resin before.....I have the Polar Lights Batmobile and it comes with resin figures of Batman and Robin.....guess now I have my chance.
I also have a few bottles of Copper paint......bought way back in the mid 90's. I did the bottom of my United States with it, with no ill effect. of course, it needed to be thinned down a bit more than if it was a fresh bottle, but I'm good with that
the tip of giving the hull a clear coat before paint is a good one, it will give the paint something to adhere to {be sure to use a flat and not a gloss}. metallic paints are also different.....anything added to a compound will either weaken it or change it's structure. it has the suspension additive, but when the metallic additive is added, it slows down the curing process and dries to a soft finish. it needs ample time......I didn't touch my hull for at least a day or so. even then, it can be prone to finger prints and scuffs, unless it is given a clear coat {I use a flat or semi gloss lacquer}.
very nice kit you have here.....small, but all the processes are there, so there's no loss of experience {just because it's a small scale kit}. look'in good!
")
-
for this ship, he might do well with the originals. I met a fellow who is doing the Revell Cutty sark.....I have those instructions as well. the kit he bought is sold by Revell /Germany.......come to find out, they have been reproducing some of the 1:96 series kits. the instructions are terrible and poorly done.....I suspect the ones I downloaded for the Connie are the same degree. the extra parts that distinct the United States from the connie are an added poop deck, railings,and roundhouse badges. I think an extra pair of gun port lids as well. they also did away with the stern galley detail......aft bulkhead, partitions, the table, and whatever else was back there {not that this matters, but the holes and slots are still there}.
-
if they were rings, I'm surprised they weren't laser cut, since this is a kit. all the kits I've done had laser cut collars, with the exception of the Sergal kit. they look great none the less
- Old Collingwood and mtaylor
-
 2
2
-
coming along really nice Russ......I like the way the roof beams jut out over the windows. the frame looks good too. are you going to use clear cello? I found some window tint film for cars that works really well for the window panes {found it in the field next to our house....of all places}. if your interested I can send you some. a piece the size of an envelope should do the trick
-
-
look'in pretty sweet now OC! mast collars came out nice too
- mtaylor, cog and Old Collingwood
-
3
-
yea.......he's OK........kept ask'in for the number of that truck!
 I got that darn thing rigged.......had to clear my desk so I could eat supper. I even sleep here too!
- mtaylor, Canute, Old Collingwood and 1 other
-
4
-
-
yup! go here:
http://cuttysarkdrydock.wordpress.com/
you might have to dig around a little, but they are there
-
-
-
-
-
-
-
wow! this is the first model that does this, you know.....never seen this before
 it's always been refreshing to see folks want to rig the shrouds on plastic kits.
heck....even I have been daunted from doing it. the initial worry was that the method would distort the masts.......I've never had to strengthen them by the use of metal rods. yea......that's a sticky wicket.......what to do about the ones that are already cut from the sprue?!?! what can be done for the ones still on the sprues?
you could cut both sides of the sprue box and lengthen them, to widen the spread. just depends if you want to go through the hassle. kinda feel bad bring this to light

-
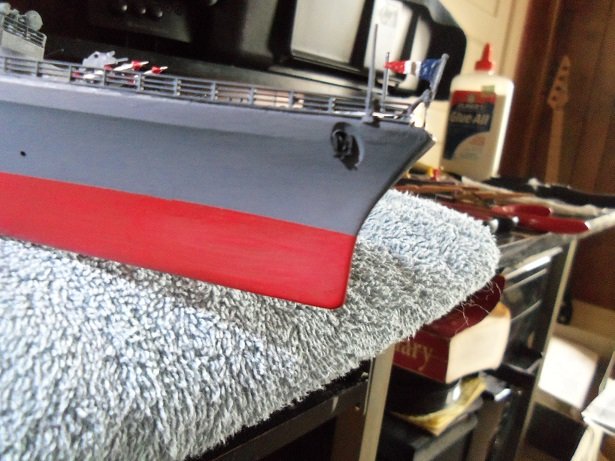
well.......this has been a dangerous preposition. with all the stuff on the deck, something was bound to get broken. it started with a bow antenna and the flag, but I was reaching for the mouse...doesn't count with actually working on the model
the latest one happened this morning.......should never had touched it before my first cup of coffee. stringing one of the lines.......tying it, my pinkie finger lashed out straight and sent one of the Helicopters flying! it's fixed now, but touch ups are in order.
during the end of last week, I solved the anchor issue. with the center parts broken off, there was no way to cement them in place on the model. there is about a 1 mm hole where they are to go. what I did was cement anchor chain on them.
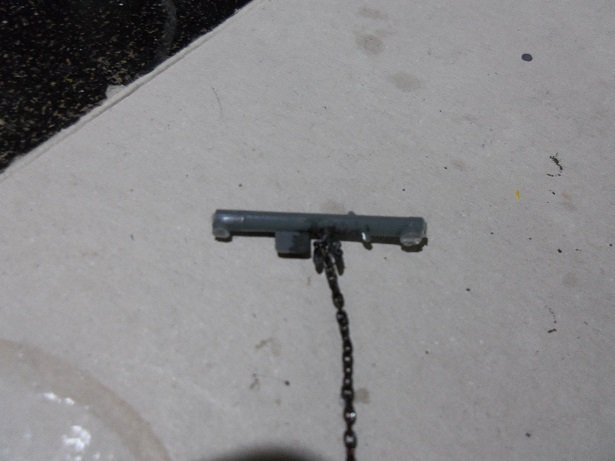
when I cut the chain, I left enough to shove into the hole. I haven't touched up yet.
after this, I worked on that net thing. I wasn't pleased to see how flimsy it was to rig. as mentioned, I added a cross bar to the top of it, but I had done some of the rigging beforehand. I ended up with some limp lines. I could go either way with this......I could have cut all of it off and used tulle for the netting, but I felt that the mesh would be way to small. so I figured that I would weave my own and add the vertical lines to it. the mesh is probably too large, but it will do.
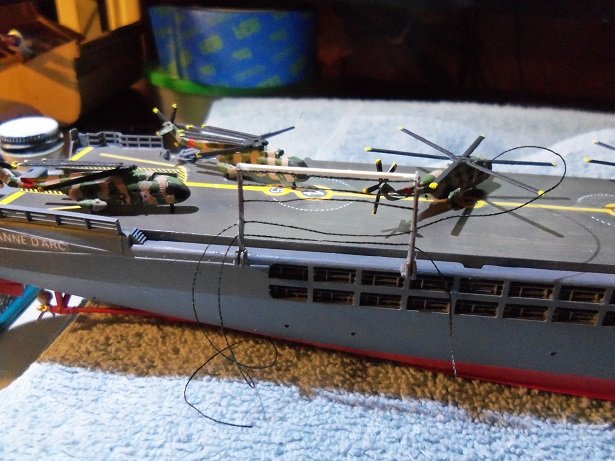
once it's painted, it may not look too bad........I've done three lines so far. more will be added

the Helicopter to the left of the picture is the one that got binged.
-
too bad you couldn't have hid the blemish with a rope coil or something. the redo came out nice though
- cog, Old Collingwood and mtaylor
-
3
-
thanks Walt......glad to have you look'in in
thanks for the suggestion Mobbsie.......but it's a bit late, I'm afraid. the cross 'threads' have already been cemented in place. the problem was that the uprights were so flimsy....they bent at the slightest tug. the closer to the base I got, it got better, but there's one that looks a little limp. I have an idea though that might change it a little and make it better. I even added a cross bar at the top between the uprights....but the problem had already presented itself to me by then. I haven't taken any pictures of it yet......I'll do that before I make the adjustment.
appreciate the good word and the likes folks......just got in from taking care of the snow fiasco outside.......2-3 inches of snow and rain on top of that....UGH!
- mtaylor, Canute, Old Collingwood and 1 other
-
4
-
yup.......with a bit of research, and some modification, any model can be mirrored to any subject that is similar. of course, you want to be sure that at least the hulls are close....outfitting the model afterwards can be very easy to do. the only real vessels you have a lot of leeway with, are pirate ships, since they used pretty much every ship they captured. what I find about this medium and modeling in general, is being able to think outside the box, and do some of the lesser ships, that manufacturers don't produce kits of. it gives one the option to be creative.....you can learn a lot more that way.
a little more Christmas hub-bub.......it's snowing right now. not much on the ground.....but it will turn to rain soon, which I think is worse than if it stayed all snow.
dioramas are cool......the usual + or - is a good rule, but don't go too far with scale
- Old Collingwood, Canute, Piet and 2 others
-
5
-
switching to white glue might be your best defense. I scrape very seldom, since white glue is made using water.....it does tend to cause the thin strips to curl. but, usually sanding with a coarser sand paper, then following it up with a finer sand paper, will clean it up nicely. for those who use thicker planking, this is not an issue, a damp cloth is all that's needed. I only use CA for tedious assemblies.
-
that's the outer frame you've built so far? all I would have suggested, is to bring in the two top windows and make them even with the lower windows. those two windows looked out of sync with the hull line. OC's picture is exactly what I'm talking about......the way they all line up. the frame you made will do just that, but it will be a lot more work........looks good though, but check out the starboard side......the line slants inward at the top.
- EJ_L, Old Collingwood and Elijah
-
3
Bismarck by Dan Vadas - FINISHED - GPM - 1:200 - CARD and PE
in - Kit build logs for subjects built from 1901 - Present Day
Posted
fantastic looking structure! the detail is just phenomenal!")