


popeye the sailor
-
Posts
16,007 -
Joined
-
Last visited
Content Type
Profiles
Forums
Gallery
Events
Everything posted by popeye the sailor
-
 my word! such a response..........I don't know what to say?!?!? looks like I'm going to have to try my best to make it interesting......doesn't appear to be too terrible a kit so far. it will be a fun build. the instructions will be my biggest hurdle, I think........gathering translation to english, and plotting where to go next. I see a bad idea with the deck platform back at the stern section, under the pop deck. the deep cuts for the aft bulkheads are very delicate and can break off {I already cracked one with a rubber band}. I suppose though, that this would not be too big a deal. the poop deck covers it and it most likely won't be seen at all. the next logical step will be to get the frame fared and ready for planking. thanks for all the kind words.......your interest in this build, and look'in in hitt'in the like button. OK Ed.......don't be a stranger my thought exactly Tom. I will try it.......if I don't chicken out and get some 1 mm wood. I do have a good supply of 1.5 x 5.......that could be another option as well. your more than welcome to follow along now that's a bag 'o popcorn! I guess a wheel broke on Sjor's cart! too bad the deathstar was broken....coulda used it a little bit ago. how long did you say it took to get parts from Zunev? {that's Venus spelled backwards........but don't you tell anyone!}. your not that far from this medium OC........your decks are wood welcome to the log my friend! I think it would be best, if you and your fridge sat next to Mark......he's a good guy and is quite knowledgeable...he can help you with the lingo.... {won't you mark}. thanks Hof....toying with some ideas for the planking. it appears that it is double planked....even though the instructions don't mention it anywhere. if it does, it's in Italian I was on the Billing Boats Danmark site yesterday......they list the Cutty Sark again at 1:75. they used to have a 'windjammer' Cutty Sark listed, but they now list the Mayflower. if it were me.......I would have opted for a larger kit........at a smaller scale, some important points about this ship could very well get lost or downsized. I see a few aspects already.....this is where the biggest changes would be made. you have a great understanding of the situation Nenad it's up to you.......heere! this is the rope that I tied to one of my ankles........if I go too far down the rabbit hole......you give it a yank..........OK!!!! Carl........you can play the devil's advocate........help Nenad with the rope {this will add some suspense.........WHILE I'M SUSPENDED!} thanks Nils........been a while since I played with a kit {and stuck to it to some degree
- 453 replies
-
- 10
-

-
- thermopylae
- sergal
- (and 1 more)
-
considering the road you've taken us on Daniel........I'd say it's been a very informative trip so far all roads do lead home sooner or later. besides, don't you have one that the gun deck is partly, {if not fully} filled out?
-
thanks Bob.........the shipping paper is good, but I do agree, they are a little thick. you can also see the indentions made by the clothes pins...something I was a bit dismayed to see. I have tried to sand down one or two......but I think I'll make another batch, just to see if I can get them looking better. I cut the wood ones with a razor blade.......cuts better and cleaner than the miter saw {hand saw with the box}. the mast is 1/4 tapered down....so, would 5/16 be a better choice? the admiral makes her own greeting cards........I'll try using a sheet of that material.........I'm sure we have old folders kicking around somewhere too
-
very clean and precise work Bob...........rigging is very neatly done. what is the advantage to stepping the mast one at a time? I know that it's easier to rig the shrouds, but are there any others? might be something that I'll have to beat into my head.......I can't seem to keep myself from assembling the entire mast tree.
-
wow........you have the high end scroll saw! it's adjustable, so you can use different size blades!
-
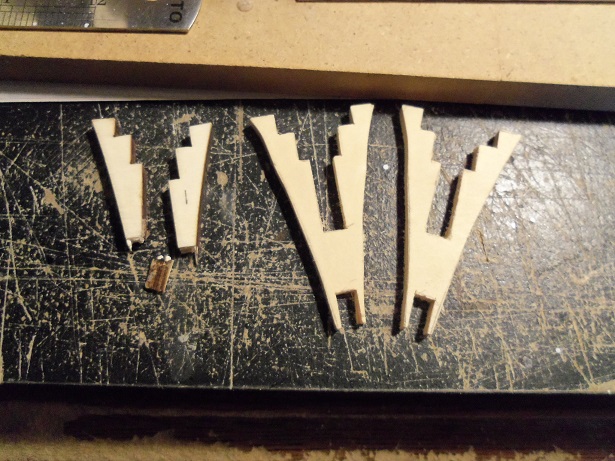
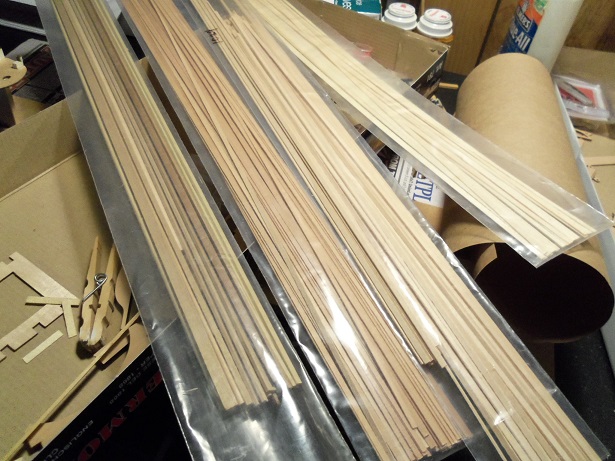
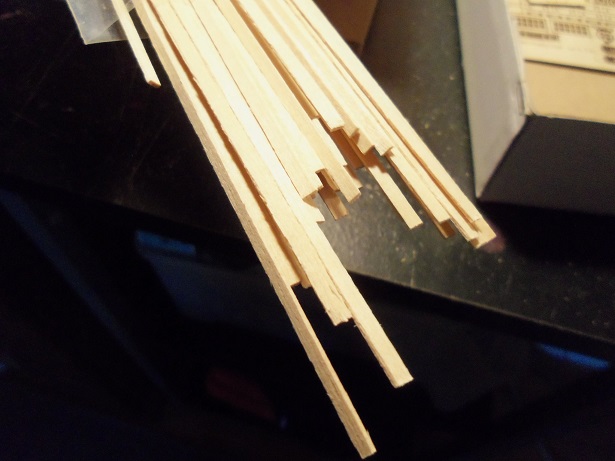
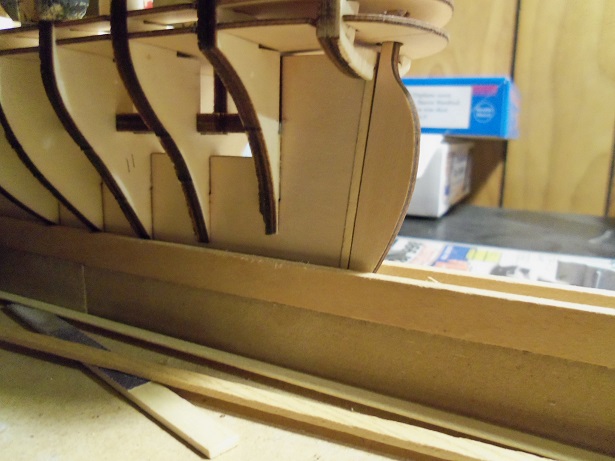
to repair the misaligned bow bulkhead........it didn't go as planned. I used alcohol to loosen up the glue, and rather than try to loosen up the center spine.....I just ran the mini hand saw through it. working with my x-actor and a single edge blade, a little head way was made.........and then...... well.......doesn't this just bite the big one! it was obvious that I put the stamp of disapproval on this attempt. it's a bit TOOOOO shattered for me to even try to repair it. I'll make one instead. this is the reason why I try to keep the parts panels intact. I have quite a few parts panels in my storage box........all I want is the hull parts. here are some I have in the box: Billings Regina.......fairly complete....been dying to make another hull - POF Billings Half Moon......fairly complete......what I don't have, I drew templates Billings AmericA ......recent production and complete Billings Boulogne Etaples..........on it's last leg.....perhaps one more hull Billings Mary Ann...........on it's last leg....patched together with metal rod Midwest lobster boat..........fairly good shape Billings Gothenborg........I think it's complete...what I don't have I drew templates I might have one or two others in there. I use them to make repair parts, or create hulls, outfitting them the way I want to. I buy the plywood, trace out the parts, and cut them out with my scroll saw. now normal plywood is a little tougher to sand and shape........the plywood that model manufacturers use is softer and less dense....easier to shape. I decided to look at the older parts panels for areas of wood large enough to make the bulkhead. the Mary Ann panels had a couple of areas I could use, so I scuttled it.....I've been wanting to buy another Cux 87 anyway. once I had the part traced out, I went out to the garage and cut them out. next was to remove the broken bulkhead........it was nice to know that the part was fully inserted in the keel. you can also see that I had cut the center spine part where it fits into the broken bulkhead. I can either cement a patch in there later, or simply fill it in completely. the only reason why it's there, was to fit that part. it's all cleaned out now. I found that the Mary Ann panels are about 1/8th of an inch........which leads me back to the question of why such a thick panel was used for this kit. the Billing's America kit is a relatively small kit........I don't recall a thick plywood being used for it. the thickness difference isn't going to matter too much, as the deck will be planked over anyway { there is a slight gap......1/8th as opposed to 3/16ths} the deck platforms were put back in place to align the bulkhead. the knighthead was also cemented in place. I also had a chance to unbundle the wood. I have quite a few of the plastic sleeves that I've gotten, from wood ordered from Billings. I have planked many hulls with 1.5 mm thick {various widths}......but I have never planked using 0.5mm. I haven't measured it, but I think it's 0.5 x 2 mm. there is no parts list included with the instructions still doesn't deter me though........anything is subject to change. following through with the plans that I will keep at bay, in the back of my mind, will be hard........although I did manage to hold off on the A.G. for a long time. creating additional hulls from this kit, is very tempting.........now made even harder, since I now have a constant reminder.
- 453 replies
-
- 21
-
-
- thermopylae
- sergal
- (and 1 more)
-
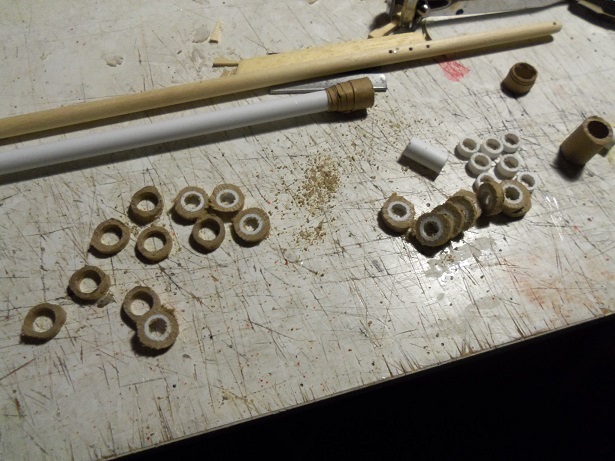
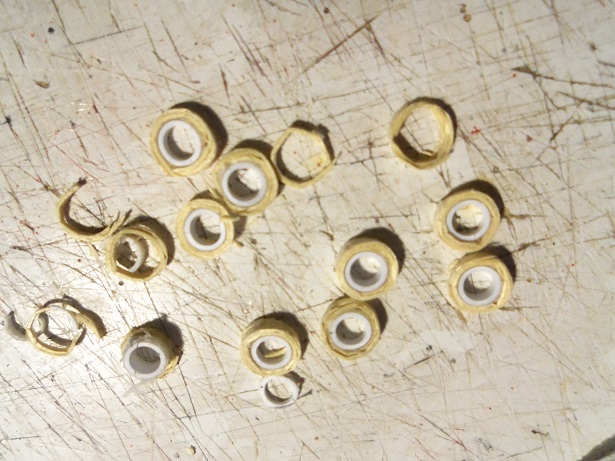
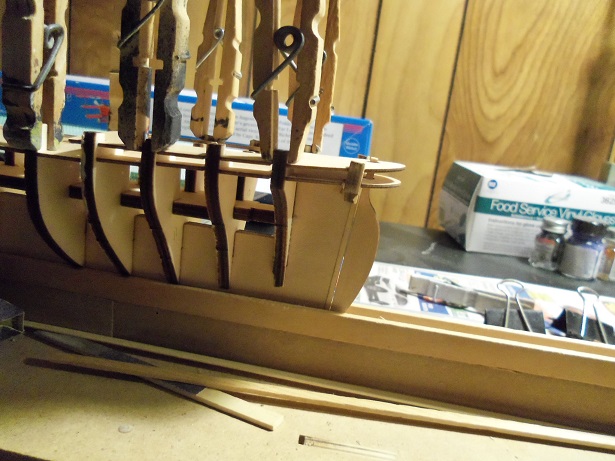
I took the latter ideas a bit further...........slicing the wraps into slices. here is the shipping paper method: here's the rolled up 0.5 obechi {with the way it splintered after being soaked, it's not basswood} using the white glue on both of these methods, the plastic centers pop right out. I had tapered the mast and added the eye bolts.......I had a tough time pulling the thee top eye bolts out. they were cemented in pretty good.......I actually broke the last one and had to drill another hole. they are a little small........they fit on the mast, but they should be a little larger. I figure that with the paper ones, I can always enlarge them a bit. either that, I can make more, but use a larger diameter dowel {that I will have to cover, 'cuz it won't be plastic}. still gotta make the sails........
-
good morning everyone! thanks for look'in in and the kind word....thanks for the likes as well welcome Jack! plenty of room my friend! at it again?!?!?! why........I haven't stopped always something going on at the Wharf welcome Steve.........considered counted! enjoy! welcome Bob.........this entire kit is a change from the Syborn! I never though how different, kits differ from brand to brand. even though the Syborn is a scratch build......the practicum credit goes to Billings....since the hull is a spin off from the Mary Ann/Cux design. I see I'll be doing a few thing differently to compensate. welcome Frank.............I lost track if I were to post a review picture right now........I'd look like Jeff Dunham and his puppets! when asked that question a while ago, I said "I'm setting myself up for retirement." they asked, "financially?" I said, "No, mentally!" welcome Ed........haven't heard form you in a while..........I hope my star reader is well. it was an admiral's pick.......but not really. I have the Revell Cutty Sark.........I though it would be cool to have the Thermopylae too....a nice pair, you might call it. I visit oldmodelkits.com quite a bit, and one day, I saw they had one. so I made up a Christmas wish list........a Revell santa Maria {made in 1960's} 1:87 scale, a 1:28 scale Revell Fokker D VII, the Revell Thermopylae 1:96 scale......a funny car or two' and the Adam West batmobile {yes, it's either my inner child, or I'm a very large child } "doctors have announced that they found an 87 year old woman to be pregnant..........they estimated that because of her advanced age, she will have a grown up!" {had to put that in here.......George Carlin humor.......ha....ha....ha} Anyway.......when she went about ordering these kits, the Thermopylae was gone. so, she did what she thought was the next best thing......ordered this one from Ages of sails {I did get my Adam West batmobile >snicker<} {it'll look good next to my Michael Keaton Batmobile}. even though the Cutty and the Thermopylae will be of different scale, I figure that I can clone a hull or two from this kit, and build a couple other clipper ships from it. anyway....you and Urmilla take care......have a great Holiday season.......and keep look'in in!
- 453 replies
-
- 7
-
-
- thermopylae
- sergal
- (and 1 more)
-
awesome progress Jesse......ship's wheel and ladders look great
- 1,306 replies
-
- 4
-
-
- syren
- model shipways
- (and 1 more)
-
really super finish Grant..........interested with how your making your wheel........looks like a cool process so far.
- 339 replies
-
- 3
-
-
- dumas
- Chris-Craft
- (and 3 more)
-
awesome job on the dredges.........you'll get better, the more you do it. I just use steel wool....let it get hot, dip it in flux, and polish with the steel wool. mine's getting old....starting to develop pits, but still works great. well done Jack!
- 250 replies
-
- 2
-
-
- willie l bennett
- model shipways
- (and 1 more)
-
WoW Bob...........I ought to send you a piece of that tinted window plastic I found in the field. I have a fairly large sheet of it it has a less than 35% tint, so you'll still be able to see inside. it's the same cello that I used in the windshield of the Tree boat.........what do ya think? offers there my friend! awesome set of windows BTW..........you must have enjoyed yourself making them
-
are you making a case for her? it will look good come presentation day....when is that?
-
thanks Pat and John........it'll be worth it for sure. with the stuff I deal with at work.......the CA will peel off thanks for the likes as well!
-
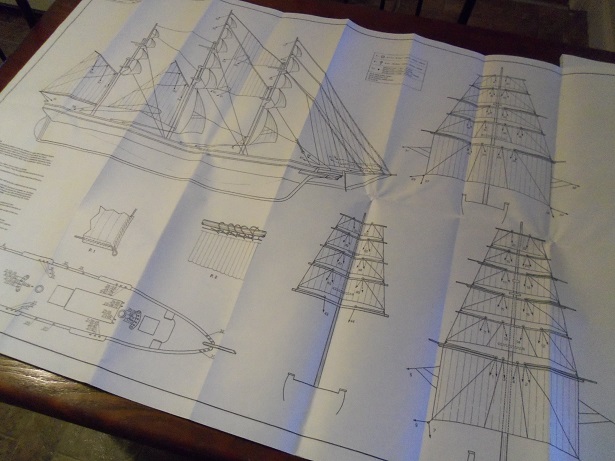
lucky chap! the bulkhead sheet was terrible.......I had to finish cutting every one of them. such is the way of life. welcome to the log Hof..... I'm used to the Billing's plans, so I'm not that far in the woods with it. I was told I can't keep it on the Kitchen table....so I pinned the plans to the wall by the build table. they are too big for my poster frames. the hull is only 18 inches long........it's gonna end up very busy if I plan to go with sails. I do the same with the deck platform........I finally took the rubber bands off the wood bundles. I have never planked a hull using 0.5 x 3 planking before. sanding the hull is gonna be a nail biter! hope you enjoy!
- 453 replies
-
- 7
-
-
- thermopylae
- sergal
- (and 1 more)
-
welcome to all the new faces....and to the usual faces as well. if it would only take a minute to get the pictures out of the camera, I'd show how I fixed my little boo boo welcome Zoltan......I got some milk crates around here somewhere. you'll have to put a cushion on them though......or you get the criss cross marks on your bum glad to have you look'in in! too much Sjors! glad to see you here good to see you Nenad.........you'll find that these two vessels have quite a bit in common....at least Revell thought so I know Carl........between the admiral and my inability to keep my fingers out of shiny boxes......I'm doomed. if there is any consolation at all, it show that I'm totally committed towards being a life long member they'll have to pry my x-actor out of my cold dead hand........"if ya gotta go, go with a smile!" glad your here John.......you know, I'm not sure about that. there are some things that I'm going to do a bit differently, but I will remember to keep them at the top, perched slightly outward. I'm a little disappointed anyway.......they don't show the studding sails. I'm going to need to add extra belay pins anyway. oh....wait! your talk'in braces....not studding booms! tuteur me! I'll have to look at that...........
- 453 replies
-
- 10
-
-
- thermopylae
- sergal
- (and 1 more)
-
hello Robin welcome to the log as well I was trying to be a good boy, and not touch this kit....but what the admiral wants....... let's see! looking at the thinner parts panels, I was sad to see that some of the punch outs for the decks were gone. I like to save these pieces.....they do well if you want to add additional detail. these odd pieces of cast off wood can serve in many different ways. the round ones, for instance, can create instrumentation bezels, light lenses, or even portholes. square ones can be box sides, extra detail for doors, hold covers.....you name it I've got a whole box of these silly little pieces, just waiting for a place to go. I forgot to add this in the log posting.........just something I think folks can use. I hope you enjoy
- 453 replies
-
- 8
-
-
- thermopylae
- sergal
- (and 1 more)
-
hello E.J. welcome to the log it's not a bad kit......I haven't fully looked into them, but there are lots of tiny fittings. I'm so used to having a parts list to follow.........there is nothing like that with this kit. I've been playing with scratch builds and necromantic mods....could be interesting to build from a kit. I do agree with you though........I've always said that these kits are merely generic in nature. it's what you do with them that makes them special I hope you enjoy the build
- 453 replies
-
- 5
-
-
- thermopylae
- sergal
- (and 1 more)
-
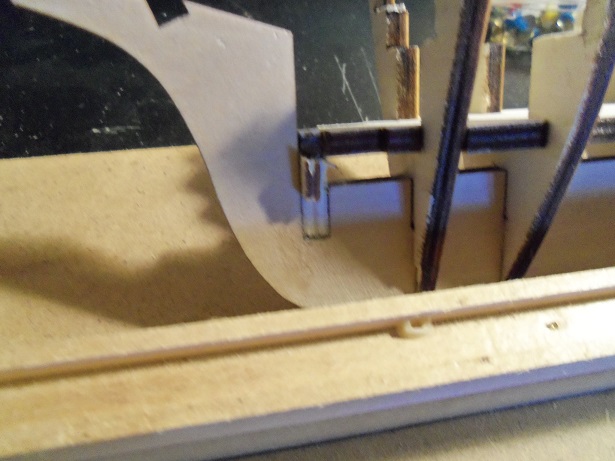
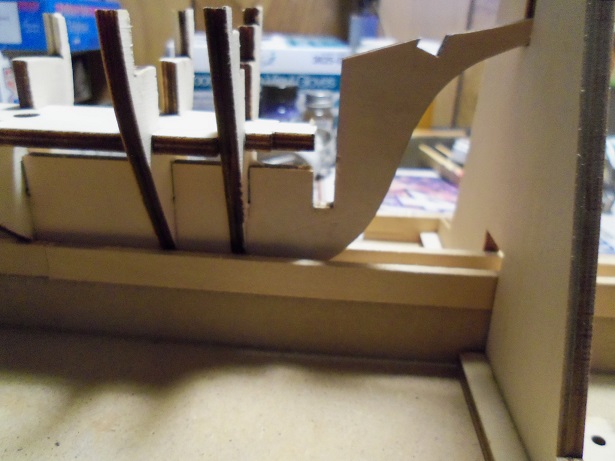
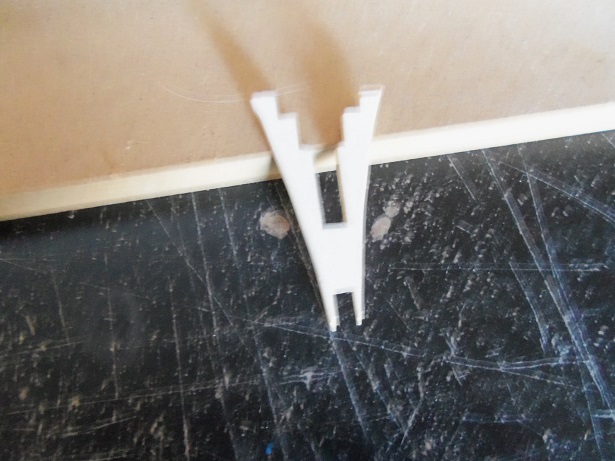
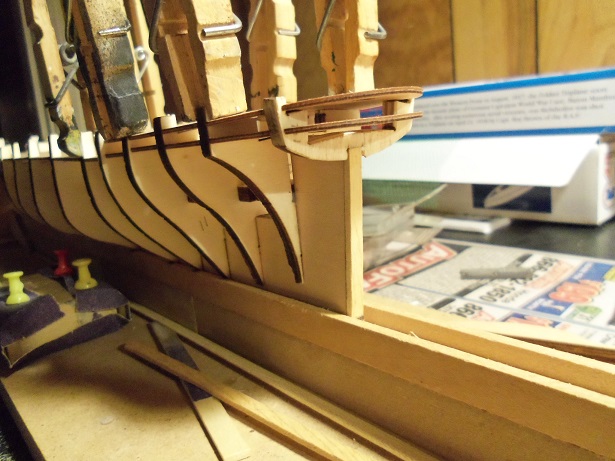
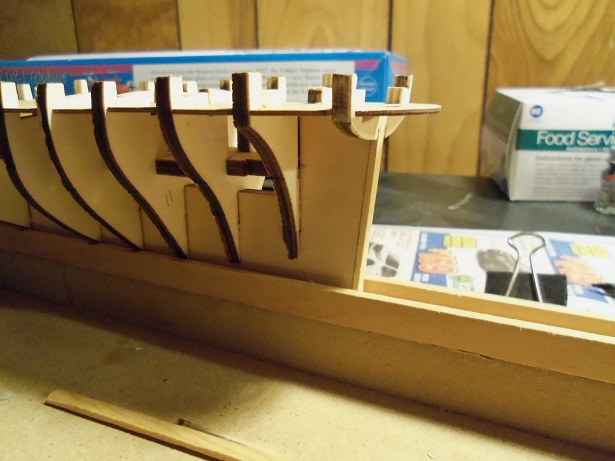
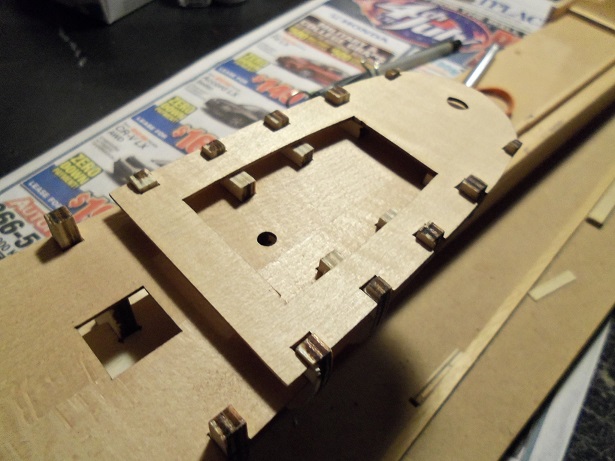
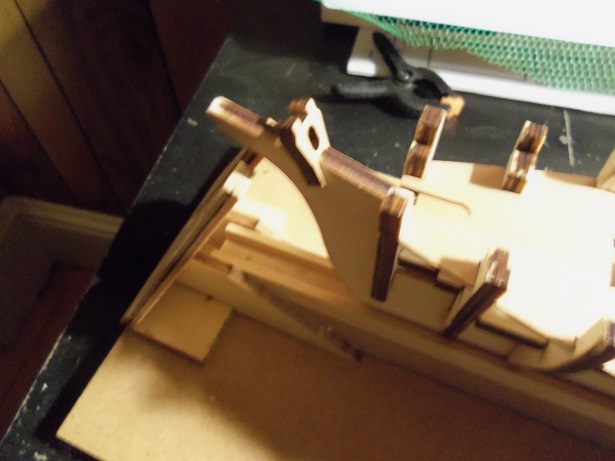
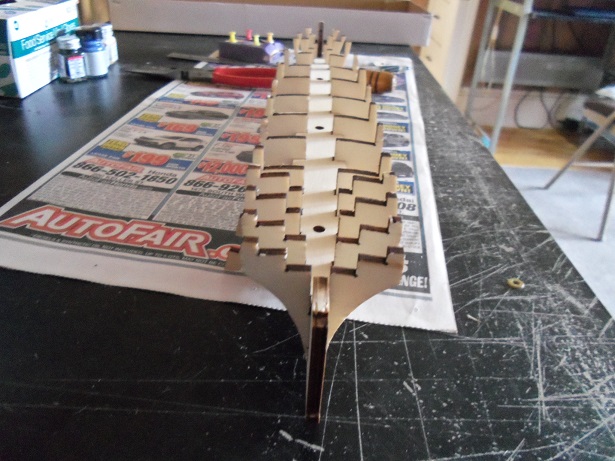
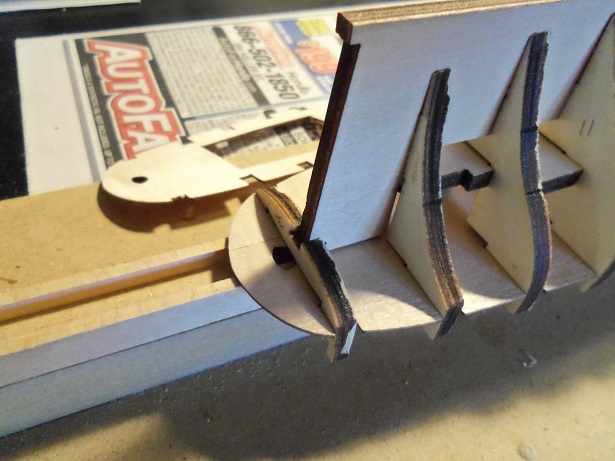
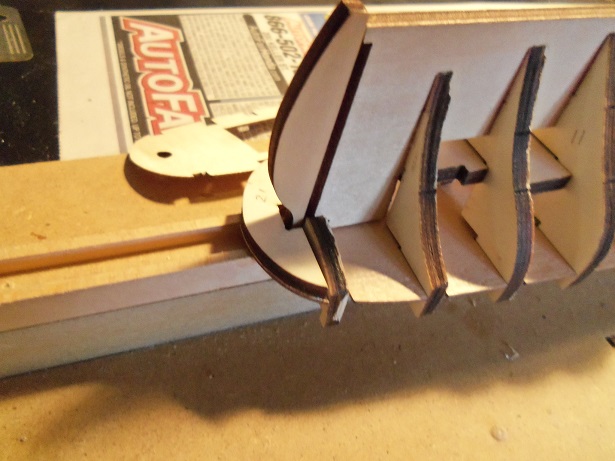
the solution is simple.......fill in that cut away. the bulkhead was cemented in place, using the deck platform and the poop deck platform as the alignment tool. now with the rudder dry fitted in place, the gap is gone. it was about 1/8th of an inch. it does sit slightly off........but it's following the keel line. I did nothing about that....... note that the platform want to curve upward........it's uneven back there. once dry, these contact areas were sanded flush. when I initially cemented the bulkhead in place, I did shim it with 0.5 thin strips, because I knew it was uneven back there. at first I was going to add the shimming, but that would have kept t he curvature......sanding it flush leveled it out. the poop deck contacts were sanded flush and the deck was dry fitted in place. ...and now for something that I caused. dry fitting the knighthead, I noticed that the deck platform was a little off. putting the fore castle in place, it was even more evident looks like I'll have to loosen the glue and reposition the #1 bow bulkhead. this isn't a big issue......just stinks that I have to make the adjustment. this is where I am at the moment........I'll make the fix here, and then I can move on.

- 453 replies
-
- 26
-
-
- thermopylae
- sergal
- (and 1 more)
-
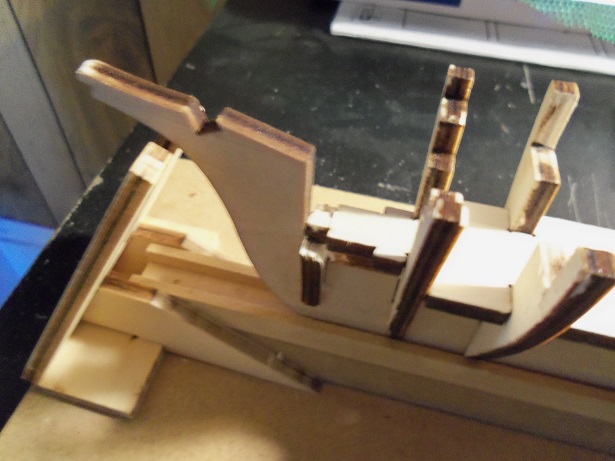
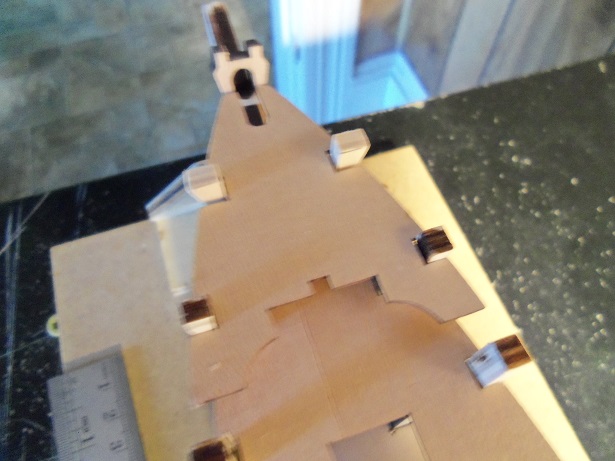
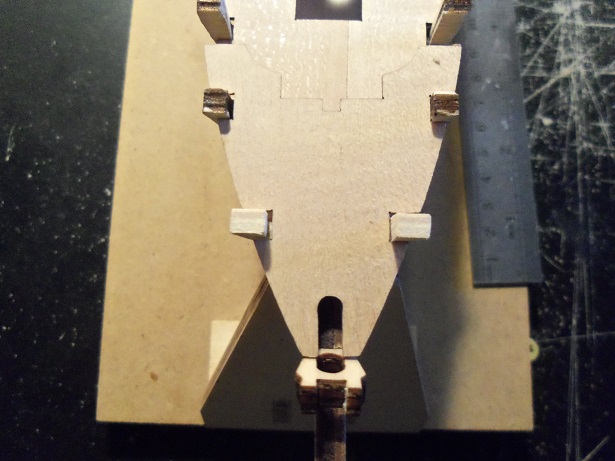
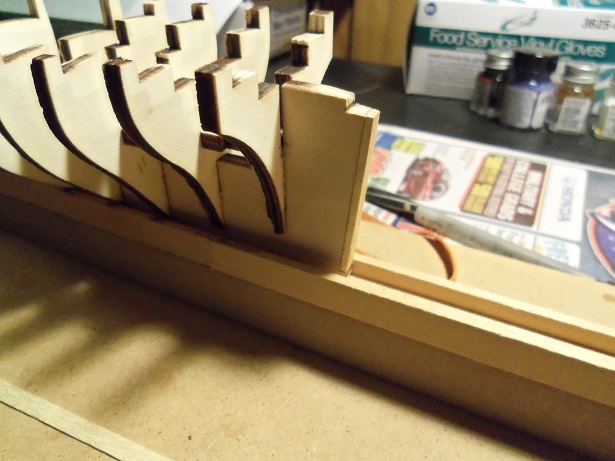
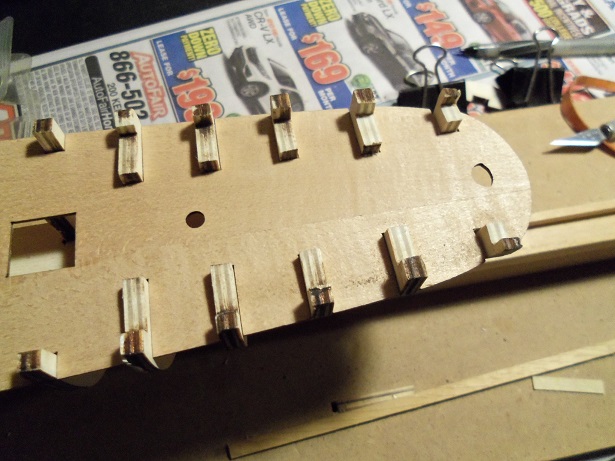
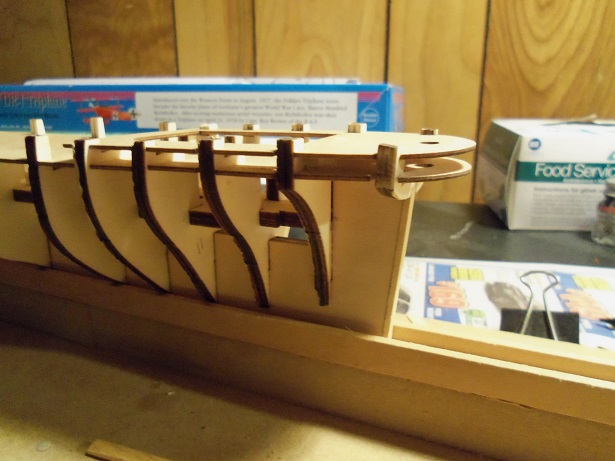
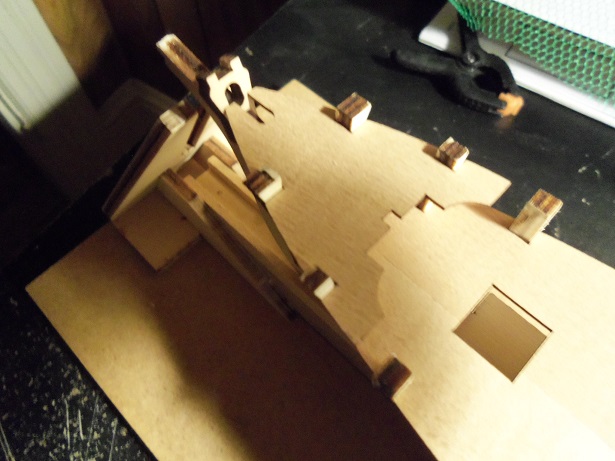
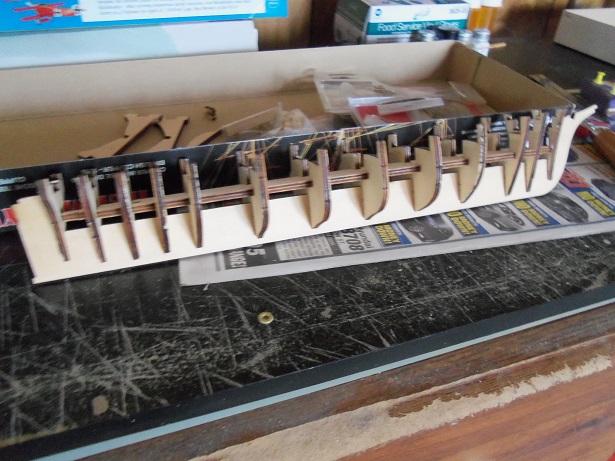
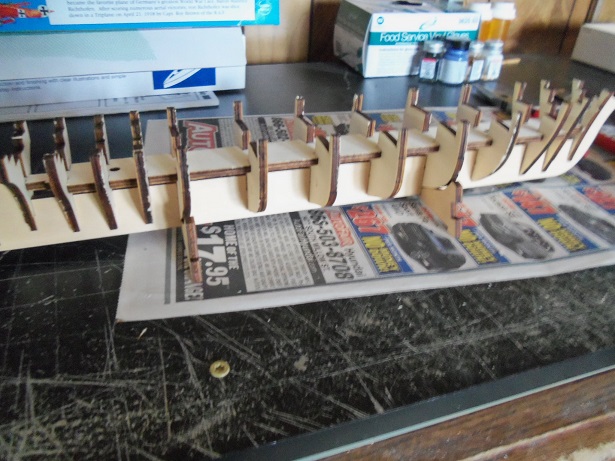
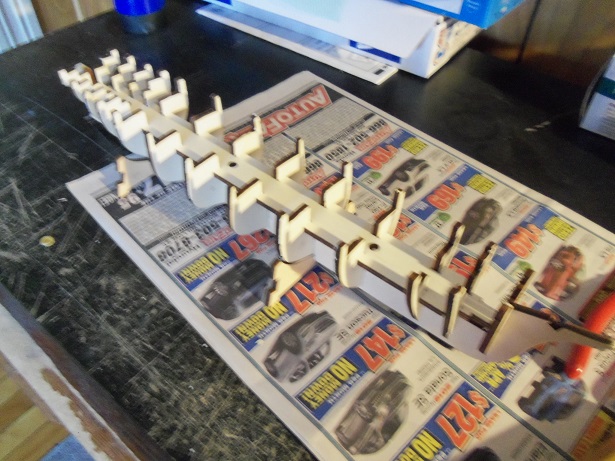
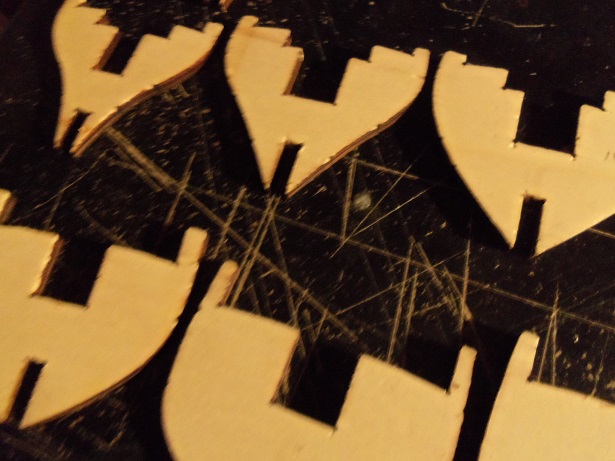
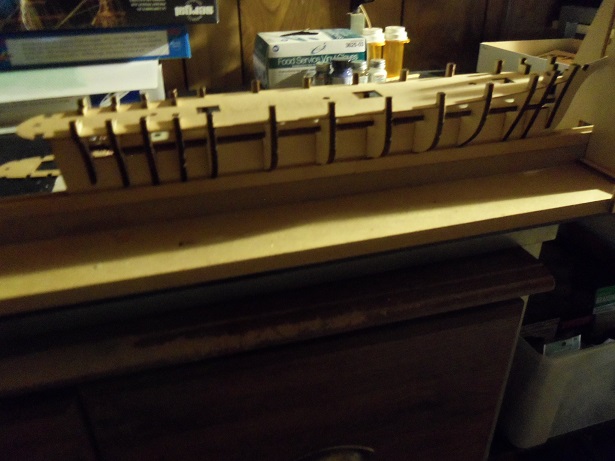
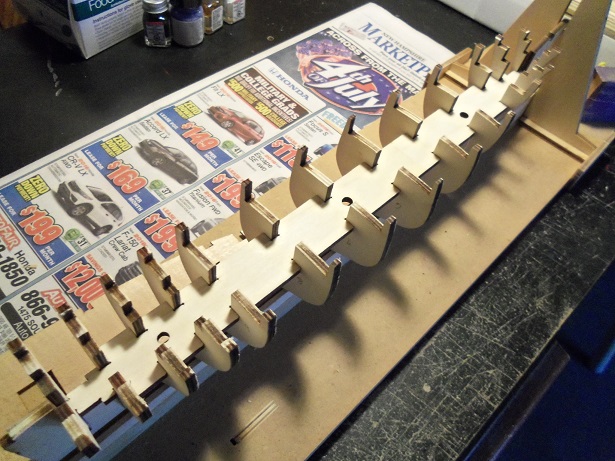
as mentioned, cutting out the bulkheads was painful. I don't know if it was me, but I thought the keel and bulkhead part were a bit too thick for this scale of kit. they are 3/16" thick......dry fitting the frame together, you'd think they were 1/4" the fit isn't too bad.....the instructions don't specify any specific slip details. I used the stand parts to prop it up. the frame was then taken apart and all the contact points were cleaned and the char was sanded off. removing them from the parts panels was a pain, as mentioned. chunks of the back layer chipped off in places. it's not a big deal.....none of it will be seen once the hull is planked. I used my Billing's build slip to assemble the hull frame. the bulkheads were cemented in place. the deck platform was used to help keep the bulkheads in alignment as they dried. when the frame was dry, the platform was removed, and the center spine contact points were sanded. the center spine was cemented in place. at this point, I've run into the first dilemma. the last bulkhead for the stern is supposed to sit flush at the end of the keel. with the deck platform and this bulkhead dry fitted in place, it doesn't. it wants to jut out past it and hang out over what is to be the cut away for the rudder. adding part #21, which is to be beveled, to aide with the counter, is to sit flush with the deck platform. it does it's job, if the stern bulkhead is left where it is. to try and alter the position of the bulkhead, with throw that off.....not that it would matter if there was a gap behind it. I have the solution......the next log will show you what I did.
- 453 replies
-
- 26
-
-
- thermopylae
- sergal
- (and 1 more)
-
Hello don.......you won't have to wait long welcome to the log
- 453 replies
-
- 5
-
-
- thermopylae
- sergal
- (and 1 more)
-
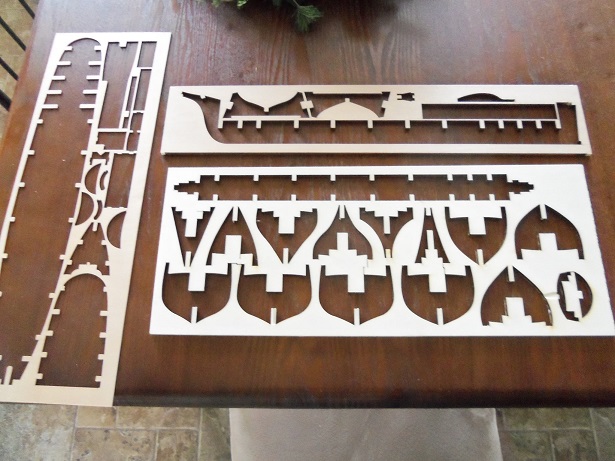
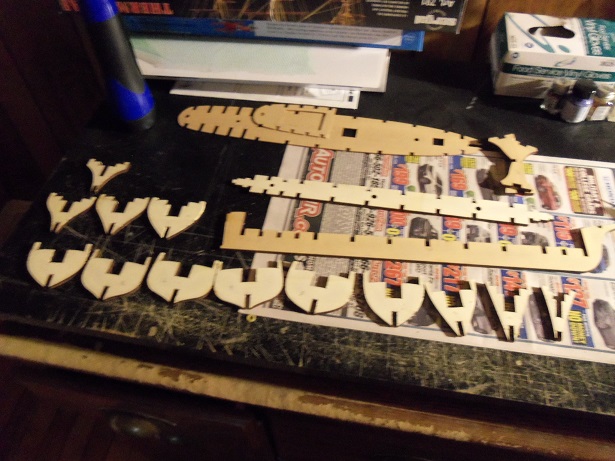
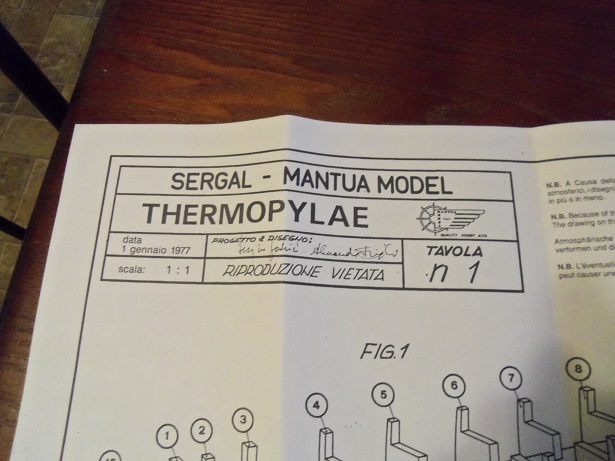
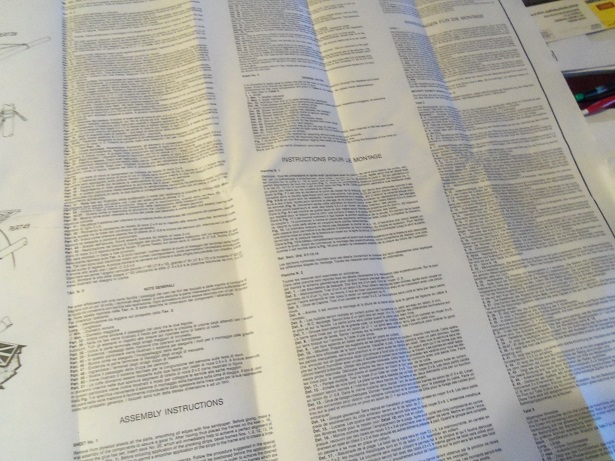
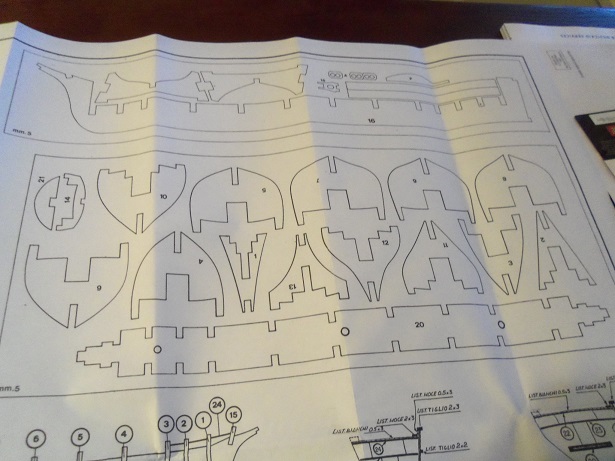
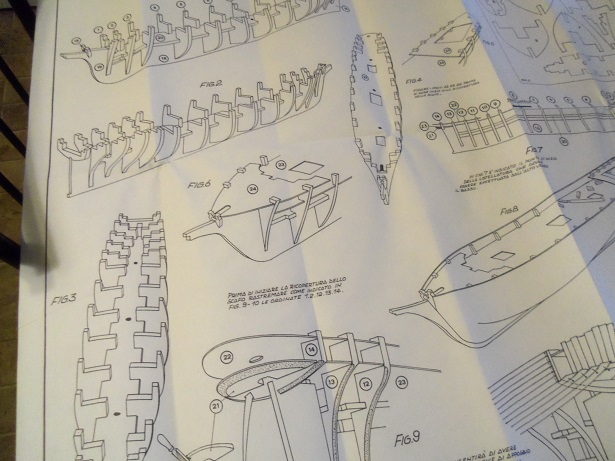
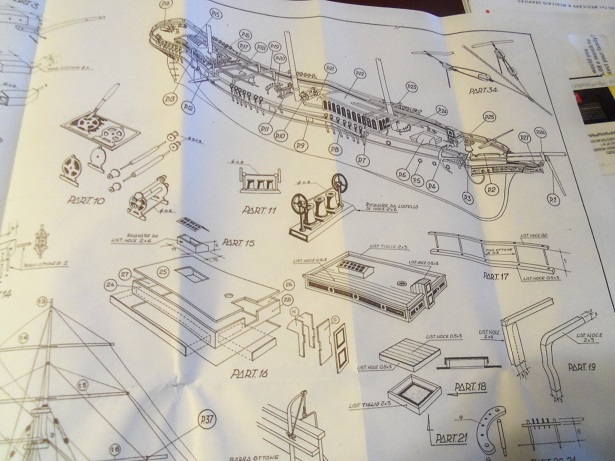
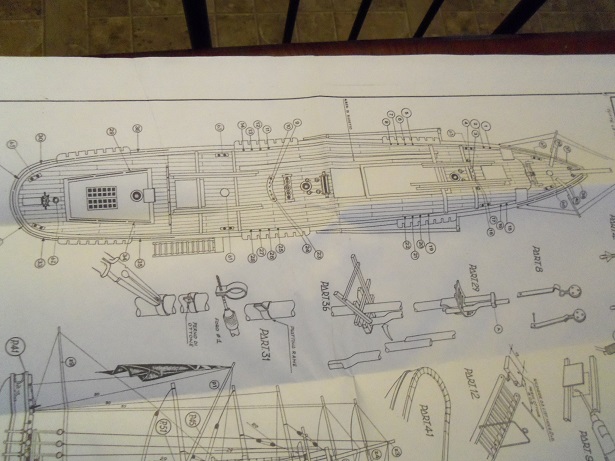
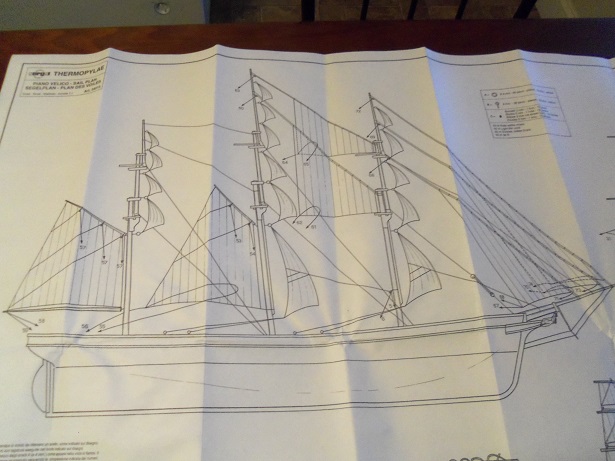
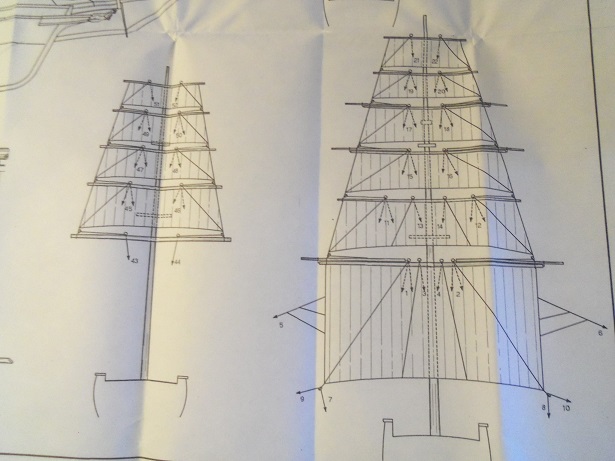
........and then there the instructions. it's mostly done in Italian....there is only a limited amount of text done in English. comparing the wood sheets to the diagrams on the instruction sheets.....they are not 1:1. even on the initial sheet itself, it says that all diagrams may be distorted or shrunk. these are nice to have.......they are not to scale though. I took great pains to try and preserve that parts panels, so that in the event that a part becomes damaged. I can trace the part out and make it. I view these as something to be blown up, in order to build a larger model of the ship. I am not used to dealing with large sheets either....most of the builds I've done were in book form....broken up and put in a school binder. it makes it easier to look ahead and plan the build. one thing that I see, is that it appears that the rigging shares belaying pins. nice that the pins are of wood, but they are too large in my opinion. multiple numbers are listed on each pin of the rigging sheet. the sail sheet is somewhat of a let down.......for those who work with these types of instruction sheets......this might be typical. they are blended into the rigging diagrams. are there shortcomings with this kit........sure. can they be dealt with..........you bet they can. I think it best though, to hold off on the cloning stuff. besides.......I'm going to need to do some cleaning to the parts panels. good thing all I care about is the hull parts let the insanity begin!

- 453 replies
-
- 23
-
-
- thermopylae
- sergal
- (and 1 more)