


popeye the sailor
-
Posts
16,007 -
Joined
-
Last visited
Content Type
Profiles
Forums
Gallery
Events
Everything posted by popeye the sailor
-
 I wasn't too familiar with this vessel....had to look it up the cannon might not be a big deal, as it may have been fitted alter the British captured her, and renamed the Fair Rosamond. further research might shed light, but the picture I saw of her did not show it. depending how large the model is, tree nailing might not be a good option........hard to get the scale right. deck pattern is important too, mapping out the butt stagger. this is a good ship design to work with.......the swift/Baltimore clipper hull type can be modified into many ships of this era. depending how the bow cannon is positioned, you could fill in the space by combining the windlass with a stanchion collar {chock} for the bow spirit.
 -
love the graphics........it's very common to fool with the spelling.....fishing boats are a good example. great job Grant!
- 339 replies
-
- 4
-

-
- dumas
- Chris-Craft
- (and 3 more)
-
thanks for the continued interest my friends. I was hoping I'd have something to report, but my projects took longer than I thought...I even put up the Christmas lights along the roof of the garage. I get to my desk........but besides looking in on the site.and news, I'd end up tinkering with an Adam west Batmobile I have sprawled in front of me {I have already done the Michael Keaton version}. today being a holiday.......nawwwww.......even a holiday doesn't prevent me from tinkering we'll see what I kin git done t'day oh crap.......another design flaw! I suppose they could enter the sort area by walking over the hold before they opened it Michael.......or climb in from the dump ramps. I guess it would be one more thing, left to the imagination Carl........your too much well folks.......best get crack'in! have a Happy Thanksgiving everyone!
- 747 replies
-
- 10
-
-
super job!........smoothed out quite a few of her lines she looks great! glad to see your finding time to work on her........it happens to us all, my friend!
-
awesome progress Nils..........fantastic workmanship!
- 2,625 replies
-
- 5
-
-
- kaiser wilhelm der grosse
- passenger steamer
- (and 1 more)
-
thank you all for the kind comments and the likes! I tried look'in last nite, but it was a fool's errand.....way too tired from a very rough work week.I got a couple small tasks to do........then I can get back to my much needed play time I bet they would pat......perhaps they need a few more visionaries in the engineering dept. that end needs to be open Carl., so the catch can fall into the sort area. you do uncover a design flaw though........I should add a cover over the control buttons, so they don't get all fishy washy
-
looks very good Hans...sweet looking transom
-
even if California was to become an island........you'd still be too far inland next ice age perhaps?
-
the thing to do is check it out........can it be pulled apart. if it can, then perhaps some epoxy or a cement can be used to repair it. the crack is obvious and looks like it goes along the entire structure. I know you don't want to go down the rabbit hole that far, but who know how much more damage you'll uncover. you mentioned you want to replace the two missing portholes.......it might be good to take one off for a proto type. actually.......I'm a bit surprised that they were happy with the early repair.....leaving a crack like that visible. then again, who really know what a crash like that will deal out for damage?!
- 749 replies
-
- 4
-
-
- albertic
- ocean liner
- (and 2 more)
-
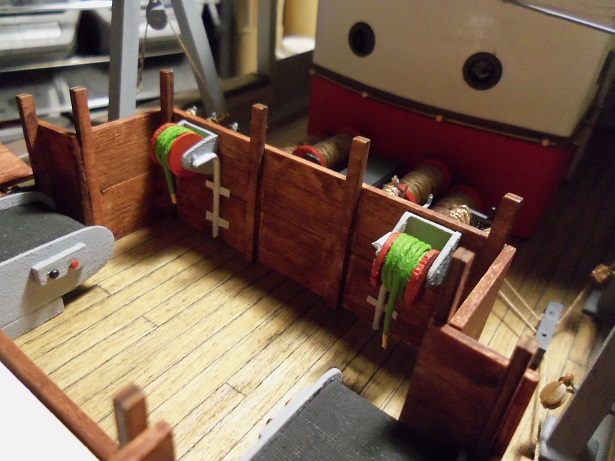
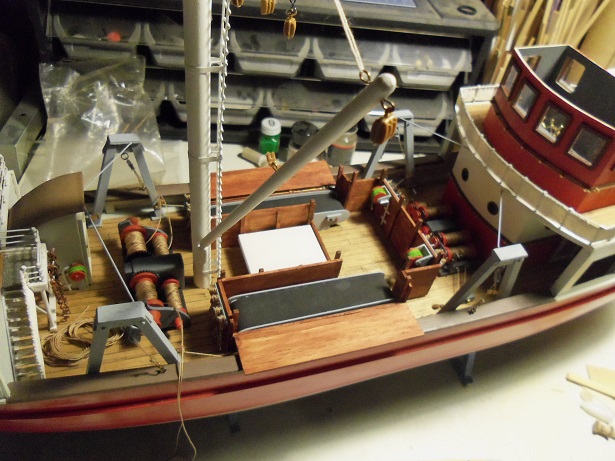
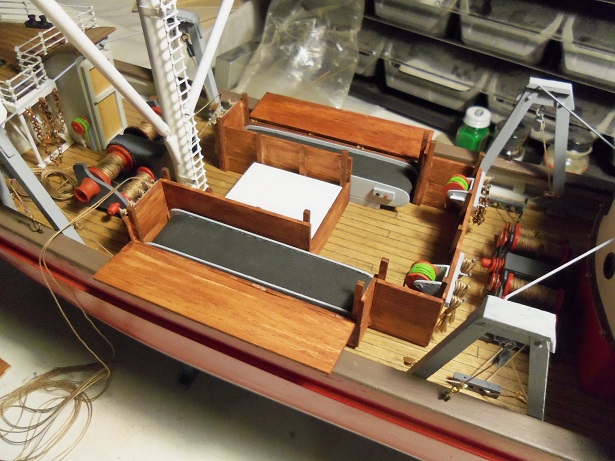
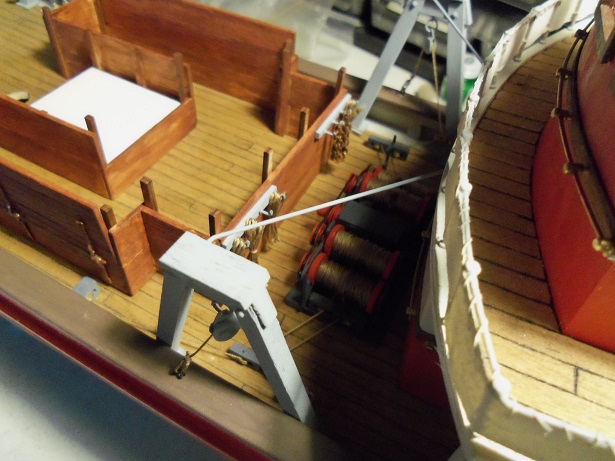
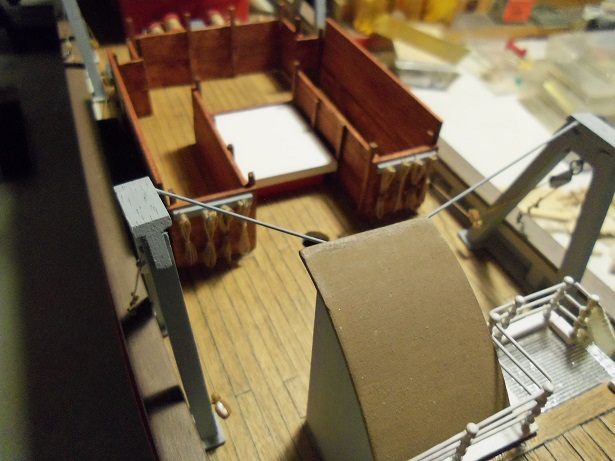
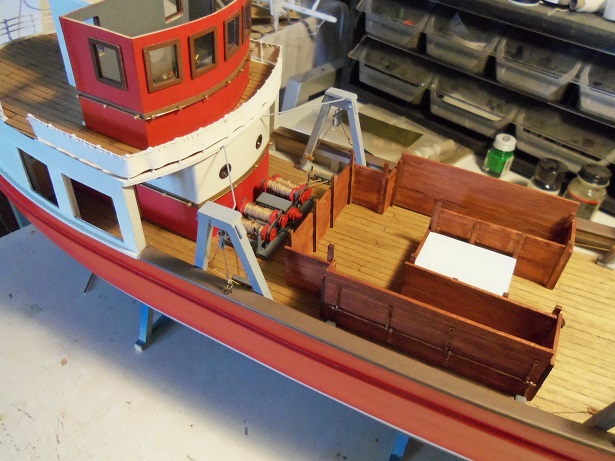
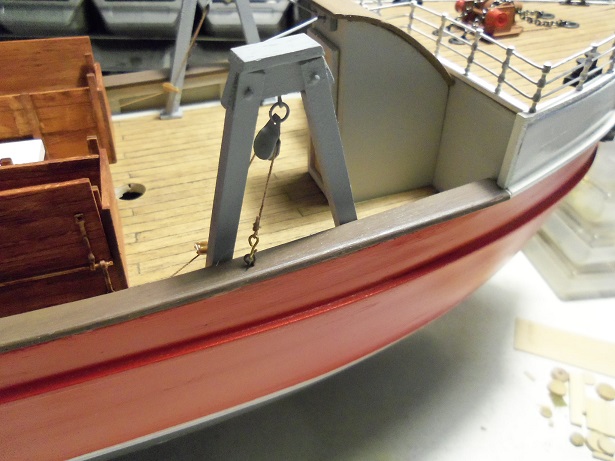
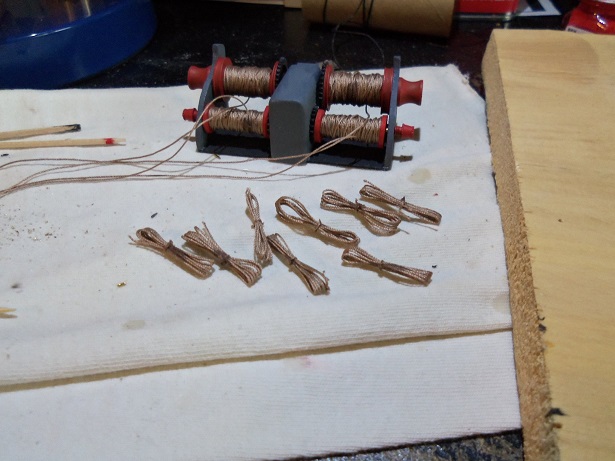
thanks to everyone for the kind comments...and to those who hit the like button. I am surprised by the response. what can I say......I'm glad that ya like it. this is the other hull I made when I did the M&M Fun Ship. it has been fun trying things out...seeing if they would work in a model like this. a bit of futuristic and automation.......and to make it functional. it's isn't a real vessel....only in my mind.... I sat at my desk here last night...after cementing the reels in place, and painting up the plumbing for them....letting them dry. I put all the other stuff back on the deck.......I'm like a kid.....gotta see all this as it's happening. moved by your comments and likes, I snapped these pictures tonight......after cementing the plumbing in place {I still gotta clean it up}. there's still a little more to go yet.......but here is how it looks so far. I feel a cad if I didn't show you the reels are in place. and here is the whole layout so far. I added some rope coils on the deck.......as said, still more to go yes Michael.......I have some spear racks in the works. glad I could make you laugh.......that'll teach me to put tape over the hole again, I really appreciate your kind word
- 747 replies
-
- 19
-
-
talk about getting into high gear...........you got the assembly line up and running! truly great Kees.....they look awesome!
- 434 replies
-
- 4
-
-
- pelikaan
- beamtrawler
- (and 2 more)
-
thanks for the kind comments and for all the likes I got those other two hose reels in place and made up the parts to plumb them in. I speared my finger again..........cutting that mig wire, and when it cut through, it sent the stub off like a rocket, into my finger. it's only a flesh wound :D night time stuff is beginning to take over.......I took to reading logs I haven't read before. the two that I read, really made my 'inner novice' show through, with the stuff I do.......they are absolutely beautiful. it's all good though.......I'm happy with the level I'm at.......as long as I can play your way too kind Pat thanks for the good word. I imagine........therefore I build
-
just keep at it OC.........a little at a time. I always think of the harder stuff and how to get it done.......by the time I get there, I'll plow through and not even notice I agree....nice to see an update
-
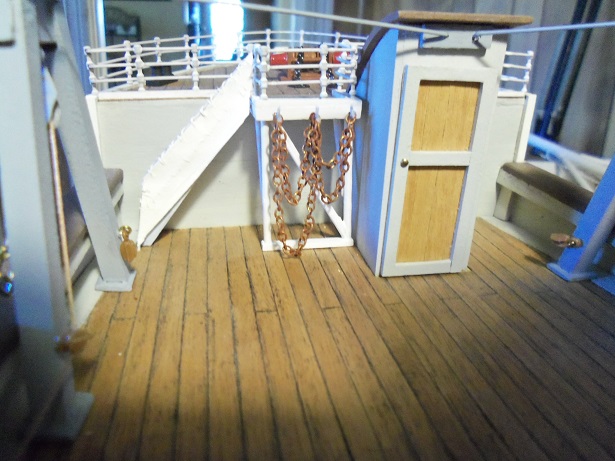
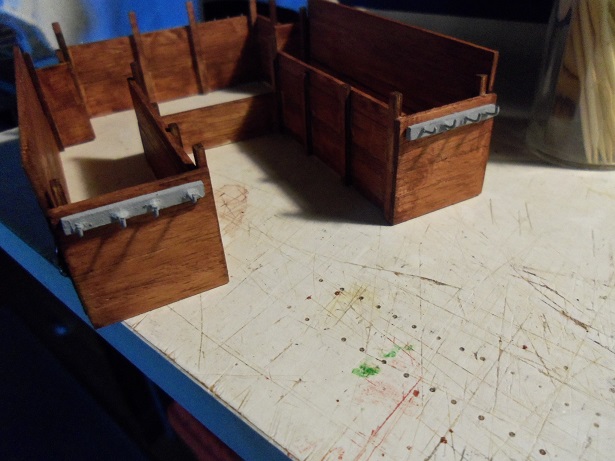
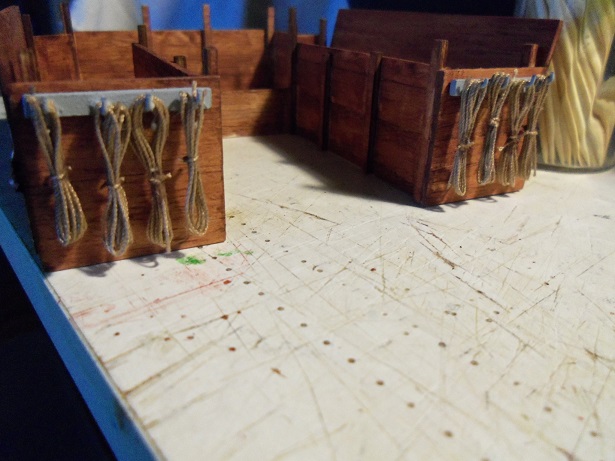
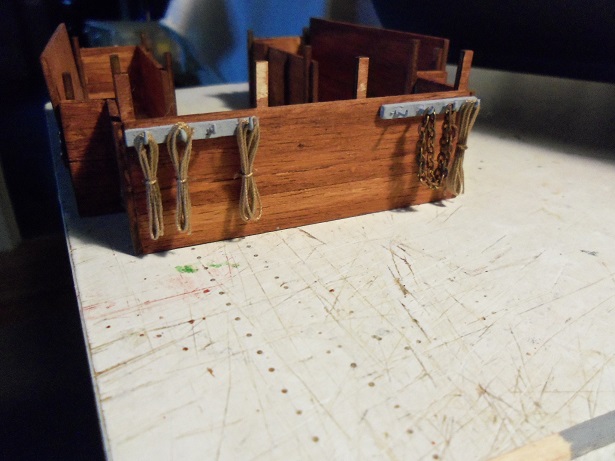
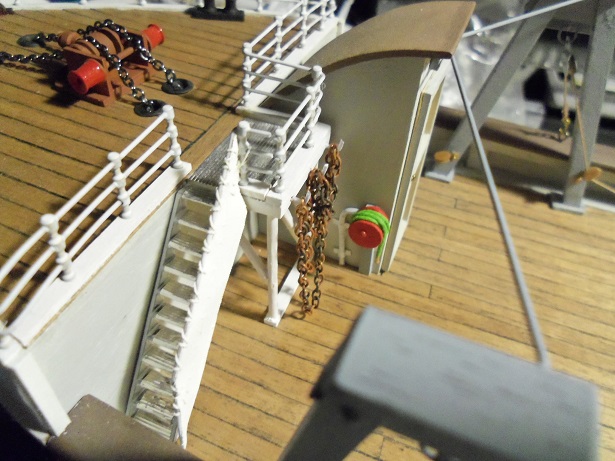
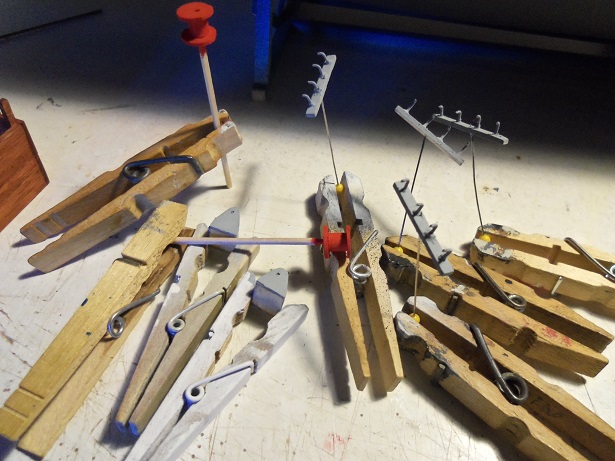
thanks for the like Bob....making all the sub assemblies can be a slow process. I got back to the table after posting the last update, and I was able to put a few things together. I had painted up a couple more sections of chain....I hung the longer one off from the platform. I thought it lacked something, so I gave it some darker brown highlights which got rid of some of the gold that showed through. coming up with another idea, I put these parts together..... the racks......I made them for both ends of the fish box...fore and aft. I added the ones at the bow end. then I filled them........ the aft pair, I put a piece of chain into the mix. I added the darker brown highlight to it before putting it in place. after adding the darker brown highlight to the chain at the platform, I added something else........a hose reel. I didn't know what to do about the nozzle, so I just painted the the tip gold to simulate brass. I made sure that I plumbed it in with a water supply. with the fish box in place on the deck.....they're not the best....but here is what it looks like so far. I still have a couple things going at the table.........if I get anything more done, I'll post it
- 747 replies
-
- 22
-
-
Cutty Sark by NenadM
popeye the sailor replied to NenadM's topic in - Build logs for subjects built 1851 - 1900
good to hear Nenad..........she looks a little home sick though. awwwwwwww! a lot of love will turn that frown upside down........then part of your happy crew!- 4,152 replies
-
- 6
-
-
- cutty sark
- tehnodidakta
- (and 1 more)
-
look'in great Jerry! your mov'in right along with the rigging
-
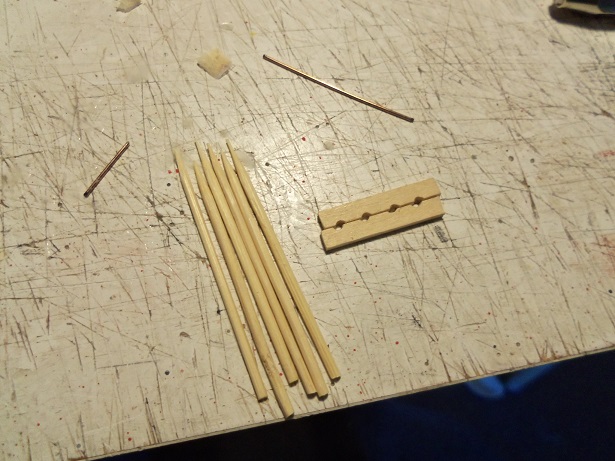
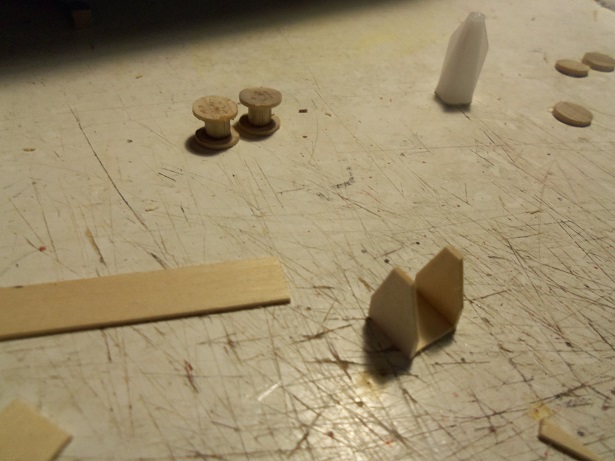
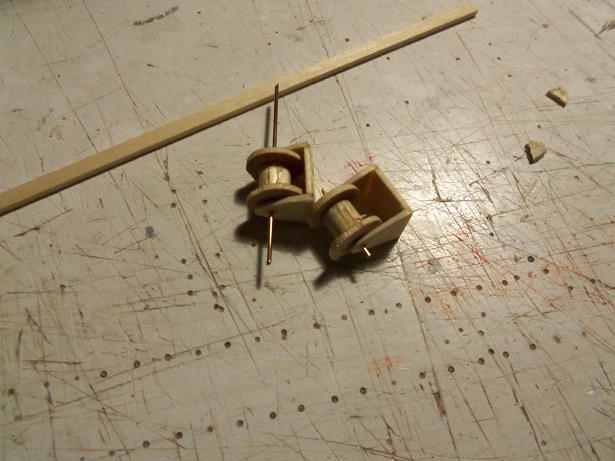
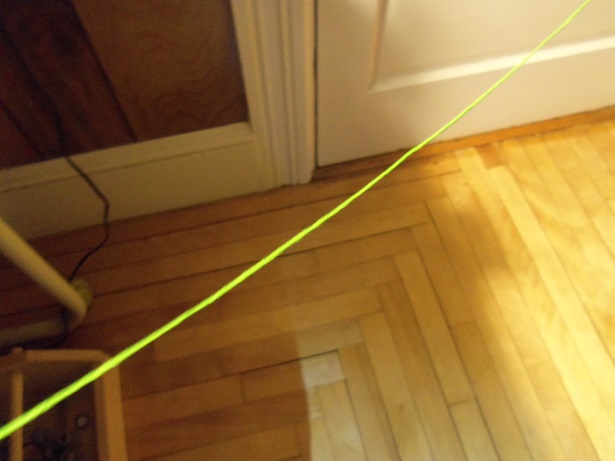
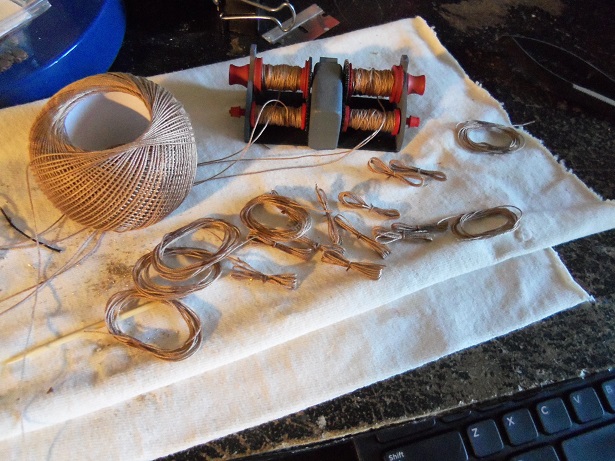
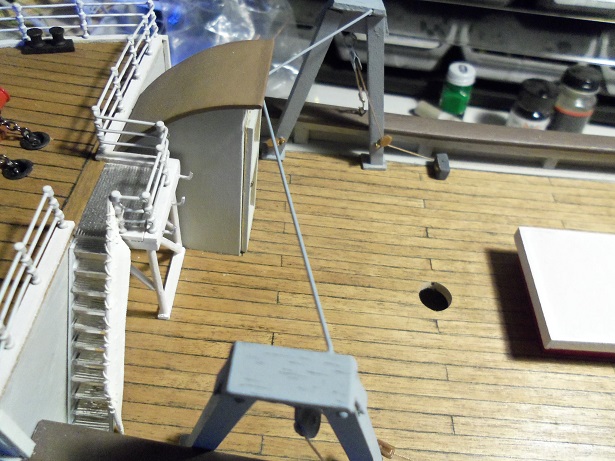
I wish I could have been more fruitful with an update this week. the second part of the mid ship assembly has produced quite a few ideas....mostly in the way of things to add. rather than any progress forward. it has also led to some mass production, to add to the tedium of the situation. to get a feel for what I want to add....or what I could possibly add, the fish box was put back in place. everything from the first part of the assembly was correctly placed. all of the termination points from the gallows was cemented and trimmed. I agreed with you Jud........the fish bow needs some sort of apparatus to keep it clean. a pair of reels were made up, slicing more dowel for the sides and the center spacer parts. I would not have thought that dowel was porous, but with thin slices in assembling the reels, I could see CA filter through them. an added pain......they kept sticking to my fingers. two reel racks were made too, to hold the reels. they are still in their raw state. it took some sanding and fashioning to get them to shape. but here they are, partially assembled. hose..........I'll do what I've done in the past. I have Billing cord {thread}....supplied in kit for the anchor rigging, large enough for it. I'm going to douse it down with paint, and groom it until it is smooth. hmmmmmmm, what color? I have some lime green......a neon green that you wouldn't catch me dead, painting a boat hull in. clamping one end of the cord in my vise, paint was poured on a rag and whipped onto the cord...in one direction only....this will make all the hairs lay down. it was messaged over and over.......as it was drying, it would become tacky.......then I could stop. I thought of other types of racks........I began making these. there are to be four of these.......toggling between them, I made rope coils. I made another type as well......these likely will be piled on the deck. I thought of a good compliment to them.....I could make some of my buoys. I first made them when I did the Nordkap, but I actually did come up with the idea, until I started the Cux 87. confusing........I was working on the Nordkap, in contact with Tom @ Billings at this point. in our conversations, he asked if I knew anyone who would want to build a model or two for him. they would be used for exhibitions at expos, on his business site as compressed build logs, and just to show folks what the finished product would look like. I didn't jump at the chance, but I did mention that perhaps some folks here on the site would like to volunteer. kinda cool........kit to build for free......although you'd need to arrange to get it back to him afterwards {scary thought, in my view....Wisconsin}. I was already sending him Nordkap build logs. I forget if he ever asked here on the site {he had opened dialog in the dealer section}....but the short of it all went by later bringing up the subject again, me expressing my doubts, him not having any doubts, and me excepting. so I ended up with two builds in the works. the idea came around with the cux, and I applied it on the Nordkap as well. quite a bit of knowledge and stuff was learned by the time these two were finished....a lot of it was gleaned here. I thought about the buoys.......but then I thought that they might make dandy lanterns. I thought they might confuse one another, even though the color of them would be different. I once showed how to make them......but it was long lost with the first big crash. if anyone would like, I can show it again......it was my initial foray into craft stores and what they had to offer. anyway.........now that I had these parts ready.......I should paint them. that happened next. I also painted up some chain to look rusty and crap.........kinda made me laugh with this one aspect I wanted to try to do, so I could at least make one iota of progress. along the platform of the fore deck stairway, I had placed some hooks. you might see them in the picture. once painted, I was going to add some chain loops to it...and there you go......a quaint bit of detail. well...........you see how close the rabbit hole is to where I'm working? that's where the chain went! my eyes were trained on the hook and trying to get the link to slip on.........I dropped it and heard the link tinkling sound of it as it went down inside the hull!. I tried to fish it out, turning the hull upside down and shaking it back and fourth, but by that time, I wasn't sure where it was in the hull. that's what I get..........

- 747 replies
-
- 20
-
-
Cutty Sark by NenadM
popeye the sailor replied to NenadM's topic in - Build logs for subjects built 1851 - 1900
a 'plug' is nothing more than a mold, in which to fashion your boat hulls to. add ship modeling into your search.- 4,152 replies
-
- 5
-
-
- cutty sark
- tehnodidakta
- (and 1 more)
-
you made a key point Michael.......it's getting colder. I've already pulled all my paint stuff from the garage. back in the cellar......sad to say. working with metal parts, you could also heat up the part a little before spraying. that will help with the cure time. since the rig I use uses the 1/4 oz bottles, I'll mix my paint, and then put it in my pocket for a short time. sounds odd, but given the temp in which paint will cure well, is crucial. light coats will give the next coat a good foundation to adhere to the flipping parts over continuously does work to some degree.......but I'm not into watching paint dry although, since your dealing with a cylinder type part, you could fit in on your lathe..........there you are.......DIY centrifuge!
- 749 replies
-
- 4
-
-
- albertic
- ocean liner
- (and 2 more)
-
thanks Sjors for the kind word! I think it has another name.........the twilight zone!
-
Cutty Sark by NenadM
popeye the sailor replied to NenadM's topic in - Build logs for subjects built 1851 - 1900
I felt you will go mad Nenad.......so I did some digging. I was looking in my 'modeler's handbook', and there is a loophole it says: "a modeler can cheat a little, but he has to make an honest attempt to cover it up." so see.........you could get some of those plastic boats {found in kits}, and plank over them....like I do but........if you plan on going all out........folks have done a very good job using plugs and assorted methods. nothing is too good for her Majesty! you'll do fine.........what you've done so far has been nothing short of awesome!- 4,152 replies
-
- 7
-
-
- cutty sark
- tehnodidakta
- (and 1 more)
-
thanks to all for the kind comments and the likes. I do feel better now.....still unsure what that was all about...felt fine in the AM. thanks Mark, John, and Pat. the mid ship will look more functional and complete, once everything is on the deck. thanks Carl........I had thoughts of locating the block pulleys along the bulwark posts, which would have made them vertical, but they were to large to fit and I couldn't see making more. since being located on the deck.......the 'kit' common place in all the past kits I've built, I located them there. actually, I was going to refer to them as sheave blocks, but I thought the terminology might be wrong as for the other blocks.......I have quite a few of them...might as well make use of them. you know......I bought those brass pulleys in three different sizes........I'm beginning to run low already I'm going to have to order more....they are quite versatile. I'll see if I can stoke up a good head of steam today