
HOLIDAY DONATION DRIVE - SUPPORT MSW - DO YOUR PART TO KEEP THIS GREAT FORUM GOING! (Only 72 donations so far out of 49,000 members - Can we at least get 100? C'mon guys!)
×


popeye the sailor
-
Posts
16,007 -
Joined
-
Last visited
Content Type
Profiles
Forums
Gallery
Events
Everything posted by popeye the sailor
-
 oh dear.........nothing here either. not a speck of sawdust to be had still busy my friend?
 -
hmmmmmmmmm........#3..........
-
they're not too bad Adam........I finally broke down and made up a jig for them. now I can't wait to get the Half Moon back on the table. hope to see your off and runn'in soon
-
he....he......I have the same miter box actually, I have two yea........you do have some irregular spacing there......I've never had or seen one like that before. I wonder what their thinking was in doing it? filler blocks in those areas might not allow any sagging of the planking......or rather, I hope that doesn't happen. don't mind me........I think too much {just ask my admiral}
-
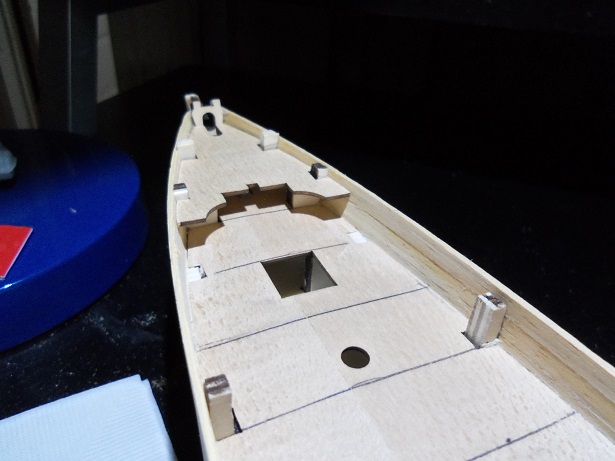
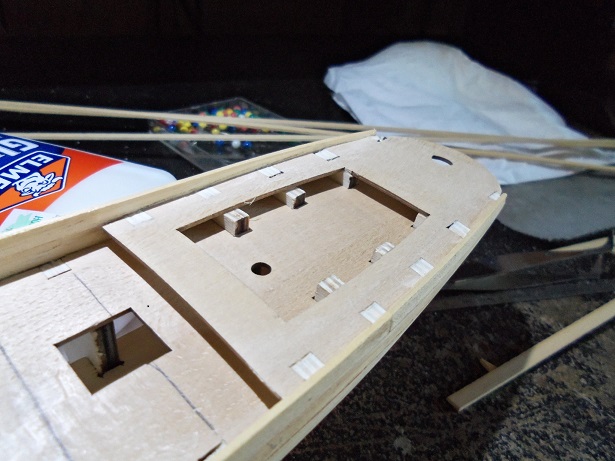
I did a little bit more, before moving on to the Syborn build. the stern is going to be tough to make the planks bend upward, in forming the counter / transom. not wanting to crush the poop deck I came up with this idea. fill it in. this will not be seen.........so why not. I had a small piece of scrap that fit perfectly.......shaped it to fit.......and cemented it in place. it doesn't impede the rudder hole......so all is good
- 453 replies
-
- 16
-

-
- thermopylae
- sergal
- (and 1 more)
-
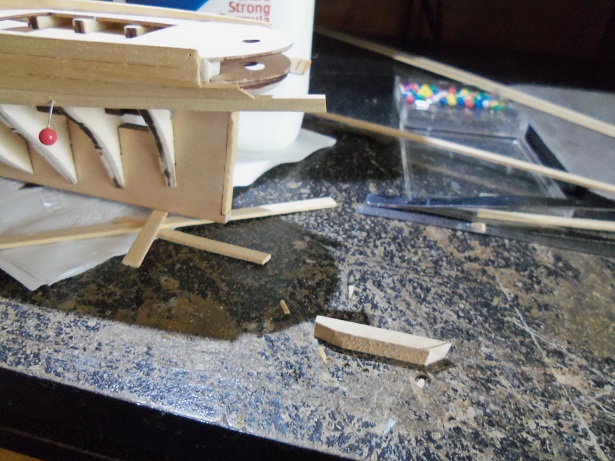
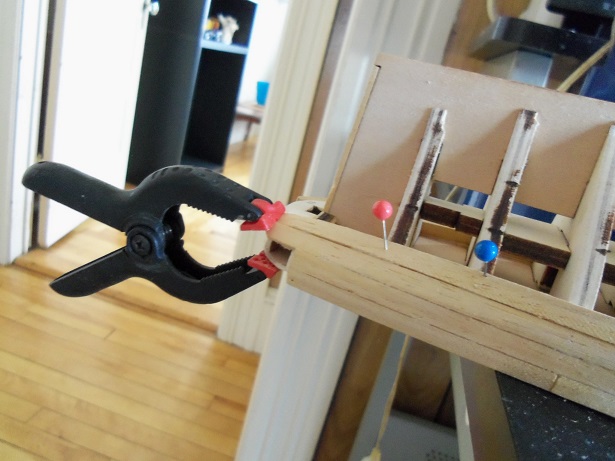
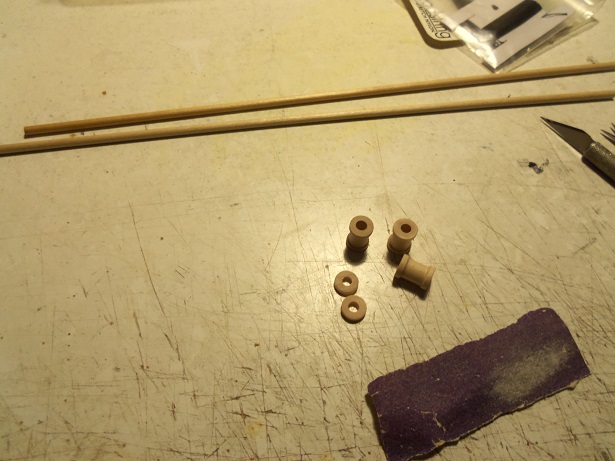
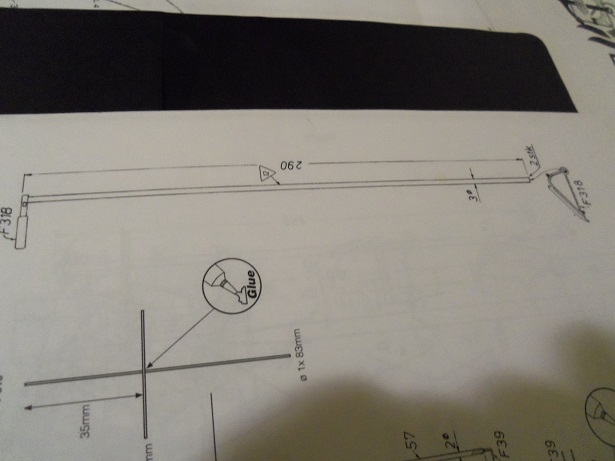
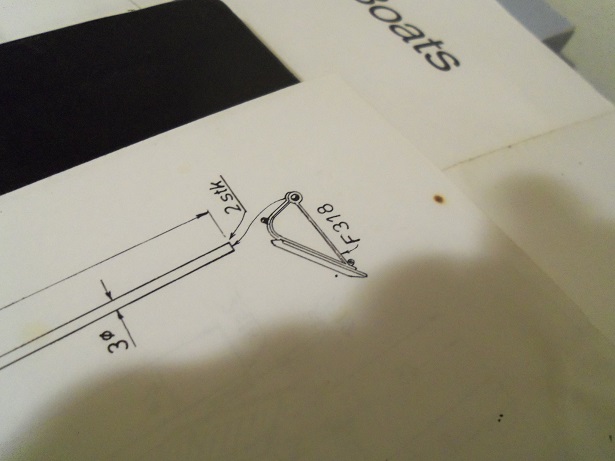
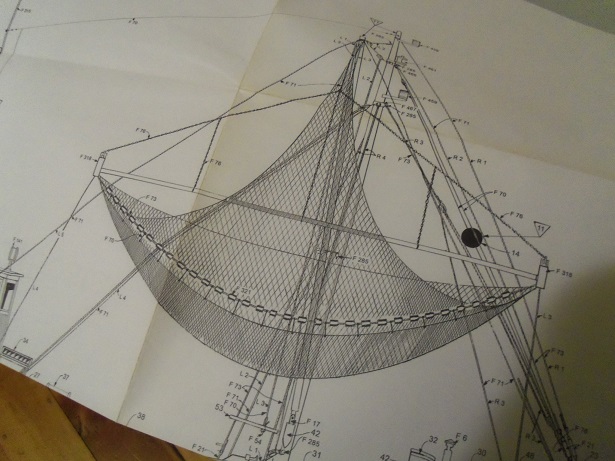
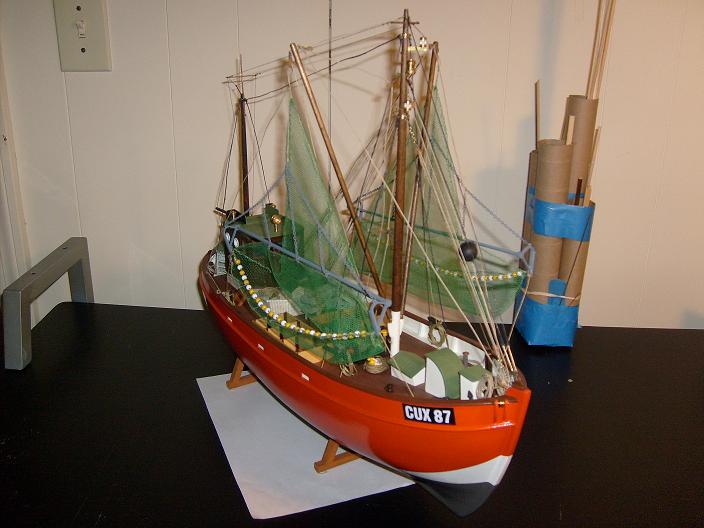
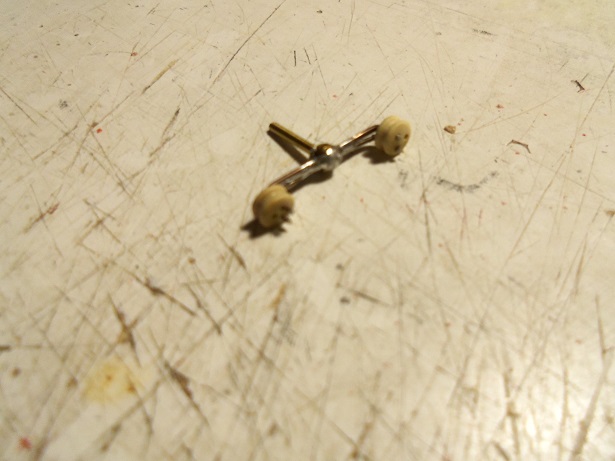
thanks Pat it's filling out ......but there's more still I had a bit of time to mess with her........the net trawl rigs are in the beginning process. there are the two dowels that are 290 mm {I may have to shorten them a little, to match the nets}. I have a pair of brass rings that are a perfect fit, but that's it.......only two. so, I'll have to make some. I took a couple of those small spools and cut the ends off them...sanded down, I think think they will do OK for the task. the net rig for the Cux.......and the part I need to make {two of them} and it all will come together to look like this. Here is what the Cux looked like.......I don't have the boat.......I sent it to Tom in Wisconsin. the next thing I did, was to bring out the soldering gun and make a jig for the shroud dead eyes. my first try didn't hold up to me spreading the arms apart to accept a dead eye. for the second attempt, I gave it a handle, as sort of a binder to hold the two sides together. it's a working jig now the port side shrouds are done.......I'm going to add ratlines. I may not go all the way up though, since there is a railing around the top. perhaps half way up may be good enough. thoughts on this would be helpful so here are the shrouds and how they look........I made provision with three eye bolts, but I only made use of two of them, to give it some sort of taper, as it goes to the top. hopefully, I can get more done tonight
- 747 replies
-
- 16
-
-
but it was sure worth it...masterful job on the railing Rob! very well done!
- 1,208 replies
-
- 2
-
-
- great republic
- clipper
- (and 1 more)
-
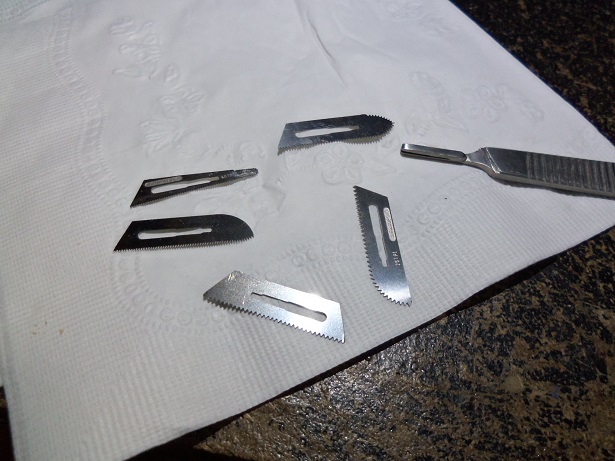
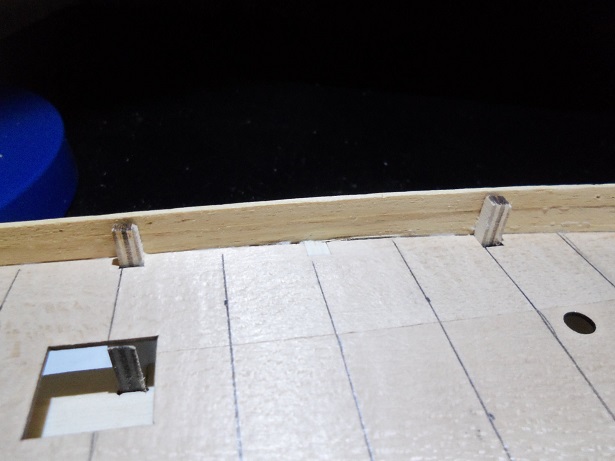
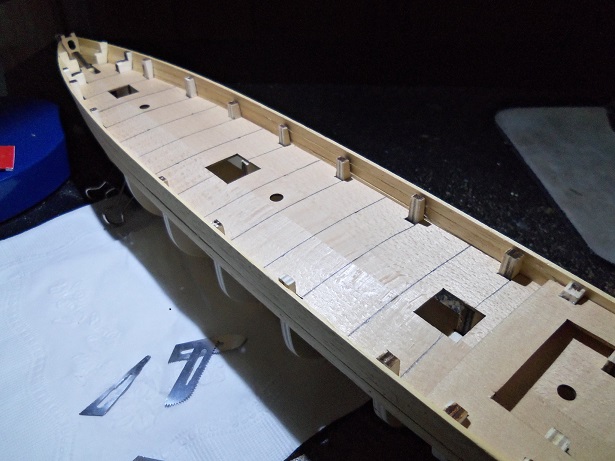
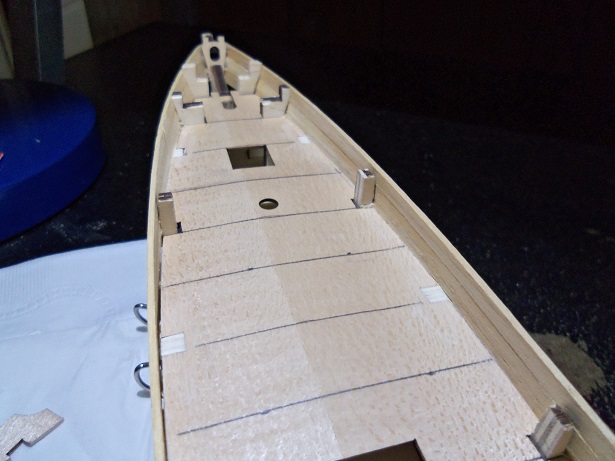
sorry to hear that.......I've looked at the site.......he had some really impressive models there I have some parts for the Billings Danmark......I have the plans and one of these days, I'll have the parts panel diagrams blown up to the scale of the model. but, that's a future pipe dream I did get a little more done to the hull.......doing a bit more today. more planking is being done...now that I've gotten below the deck line, I made sure that the deck is cemented well to the bulwarks {outer hull wall}. one thing I forgot to do, was line the deck platform for planking. I lined off at each post, and then lined off the halfway points. I got this tool a while ago....I've hardly used it, since I do most of my cutting with the miter box {I've worn out three of them so far}. these blades are saws, some are fine and some are coarse 'rip blades'. they are also very thin. with the bulwarks formed, I decided to try this saw and see how well it does. as mentioned, I'm not accustomed to cutting them out. I feel the posts give the bulwarks a bit more strength. the tool worked quite well.......a bit of sanding, and there you go. planked over, the posts will disappear ! I decided to do every other one......I left the others for handling purposes. making sure which ones held the fore deck, the front two were cut out. I also found that I needed to fit the fore deck too. with a bit of sanding, the deck was fitted. I wasn't pleased with how thick the frame part were. I'm still not........especially along the aft deck. It's not only the thickness, but how far they protrude into the poop deck area. it really cuts down on the room. I cut these out as well. I will also beef up the bulwarks a little. I followed the posts, and they seem to slope downward towards the stern. when I cap off the the stern....I'll do it then. more on her soon
- 453 replies
-
- 17
-
-
- thermopylae
- sergal
- (and 1 more)
-
very nice Bob.........glad to hear your not going to stop modeling. it would be a sad waste of talent schooners may be something you'd be interested in.
-
excellent looking kit looking forward in seeing the build.
-
binnacle looks sweet Andy you'll find that experimentation is 1/2 of success
-
what's a little filler and a good sanding........the road to perfection! looking good J
- 258 replies
-
- 2
-
-
- harriet lane
- model shipways
- (and 1 more)
-
I had to chuckle Carl........I did have a thought about some oil drums I could tuck 'em under the stairs or some place thanks for the kind comment! thanks Mark...I think this might be it for the mid ship.....although there is some stuff I planned to add. thanks for the good word. thanks also to everyone who hit the like button
-
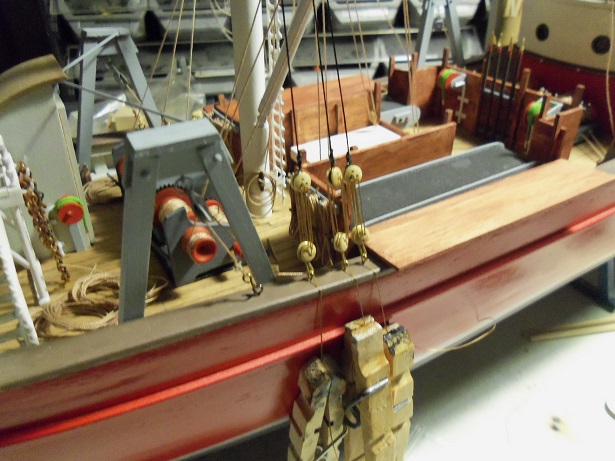
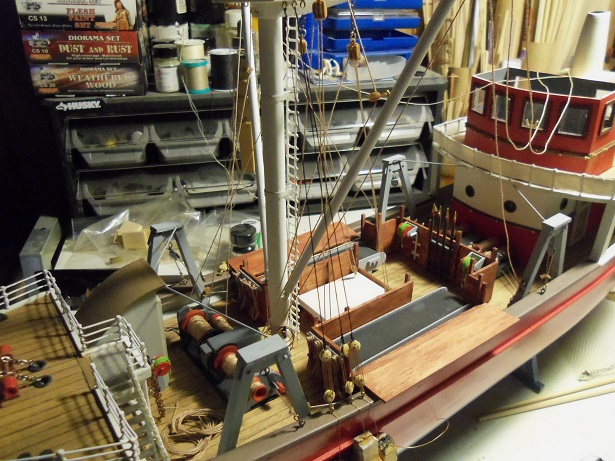
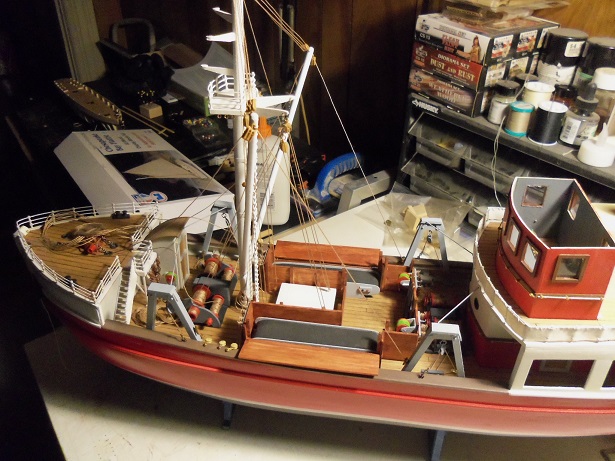
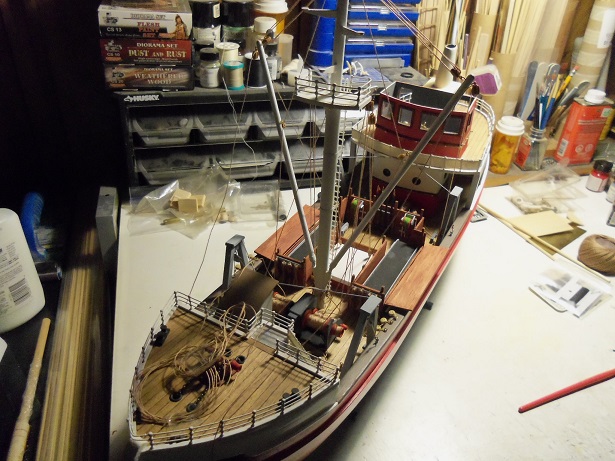
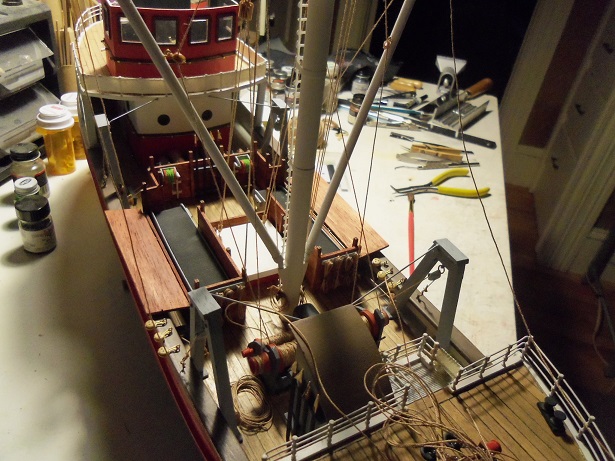
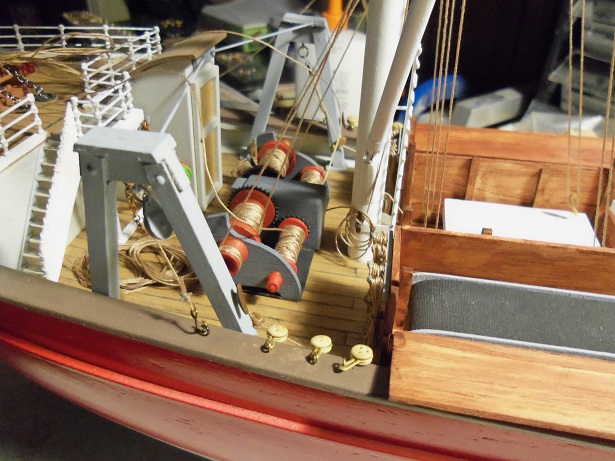
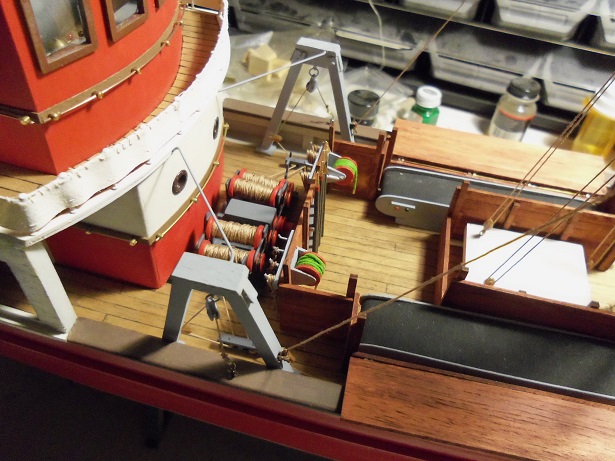
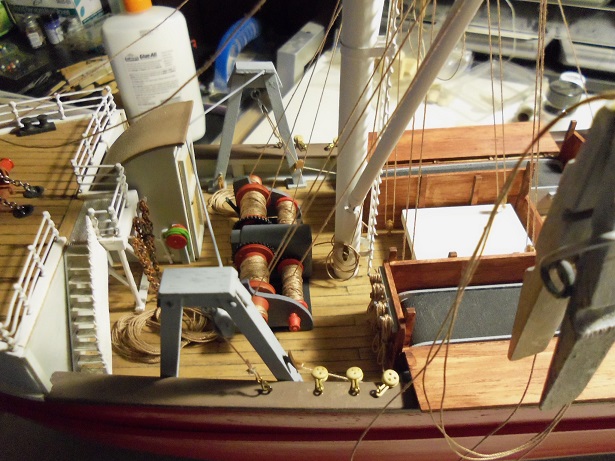
well...I'm glad to hear it Patrick and Jesse I try not to....the other build logs {on Word Press and other blogs} reflect it as well. I feel that updating progress, should be just as much fun, as building the model. less than that, would make it a chore....and that's not what I would call an achievement. I broke my own rule.........not like its a solid rule or something, but I did play around a little. I mentioned putting the fish box in place to see how it would look, now that the rigging is in the picture. I went a little further........Pat 'n you folks, so kind in your comments, I think you'd enjoy seeing what I did. the fish box and conveyors in place on deck.....the net lines lay i=on the fore deck..... if the shrouds were in place.......I still have to make the jig.......this would look very different I thought to myself, that the boom winch would look more complete with the net lines rigged the gallows winch in contrast to it's surrounding detail so I said the heck with it and rigged the net lines so as it stands right now, the forward 'haul' lines and the net lines, are the only two not terminated. there will be two other lines added for the net....they will be terminated, tied at the shrouds. the forward haul lines will be tied at the cheats on the forward gallows it will be a couple of dreary days of wet weather 'round here......I hope to get the net rigs together. I hope to have more to report soon. thanks again for the kind comments....enjoy


- 747 replies
-
- 17
-
-
you've tied the bow railings in very well.........bow spirit and boom look great the top railing is gonna take some bending......but it will definitely define the aft deck layout well done Rob !
- 1,208 replies
-
- 4
-
-
- great republic
- clipper
- (and 1 more)
-
thanks Michael, Medic and Pat I think when the nets are on, they will make an even bigger difference. added part at this point will fill in the blanks good to know my logs aren't boring thanks Pat....very kind to say
-
this will be my first clipper done in wood Rob...........I'm kinda excited about it. glad to have you look'in in
- 453 replies
-
- 7
-
-
- thermopylae
- sergal
- (and 1 more)
-
thanks for all the kind comments and thanks to those who hit the like button. after I posted, I put the fish box on the deck.......shoulda got a picture of it. once I get done with the work week.... I can continue.....i'm gonna make one of those jigs for the shrouds. good exercise for the next project I want to get on the table still more to do before the netting goes on. very glad that you like how this is coming along......I'm sure I've made a few blunders with it. having to make small changes as I go along thanks again every one!