popeye the sailor
-
Posts
16,007 -
Joined
-
Last visited
Content Type
Profiles
Forums
Gallery
Events
Everything posted by popeye the sailor
-
 the tank looks superb! the rule is.......if you can't see it, then it's not cheating quite a stash of decals you have there!
 -
awesome progress Kev........are there to be railings along the edges?
-
beautiful work my friend! your effort really shows as you add the finishing touches
-
that's an interesting bit of info......the book talks about the testing of the aircraft before putting them into service, but I don't recall the name....I'll have to see if they mention it. there are a few planes shown that are in the book........the B 17 {7+8}.....I believe that was either 'down 'n go' or 'Mr Five by Five'..... ...tell ya better when I browse there were no C47's that I saw, but the two P 38's are in the book too........funny that they are in the same order as the book. the first one stopped for fuel at the wrong airfield........the second one is a brand new plane...just put into service. the KG 200 book does mention that the pilot was later tried for his crime the book doesn't list any P 51's though.......but I'm sure there were some......they were a common aircraft used this period. the KG 200's purpose was to run secret mission, reconnaissance, and transport saboteurs and spies to their locations / missions.
-
....wasn't too great an evil. she's like dirty Harry........she has her limitations......
-
super progress James! how tall did you say he was again?
-
they're really gonna add to the dio.........the roads look great!
-
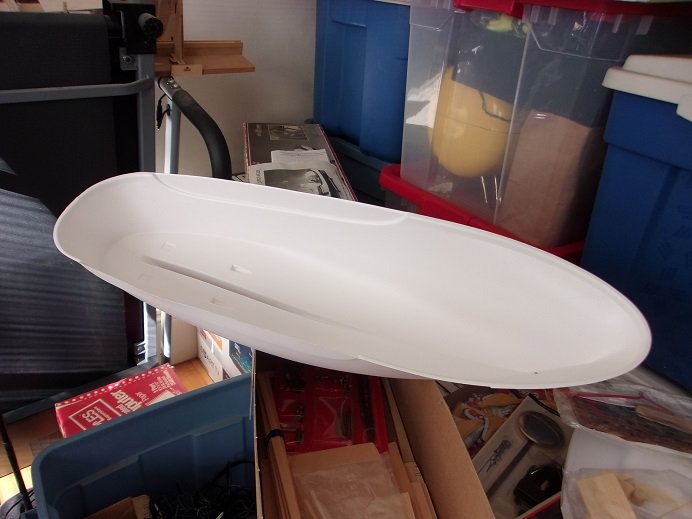
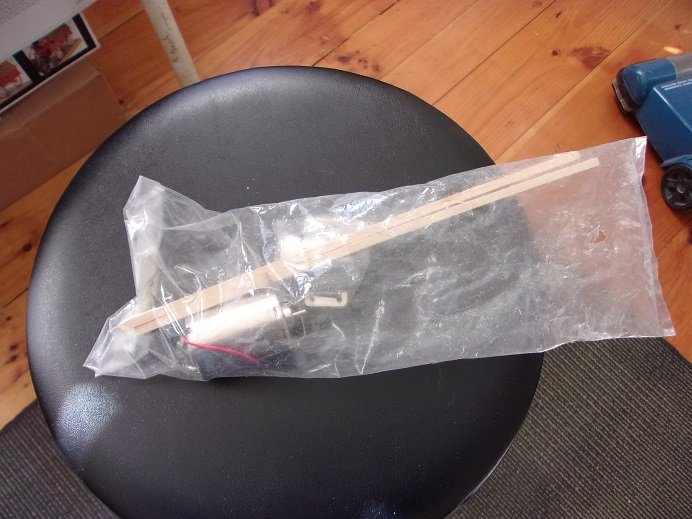
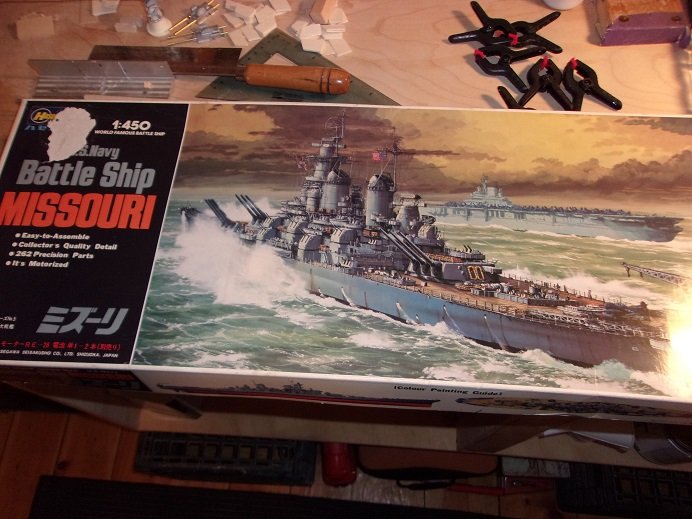
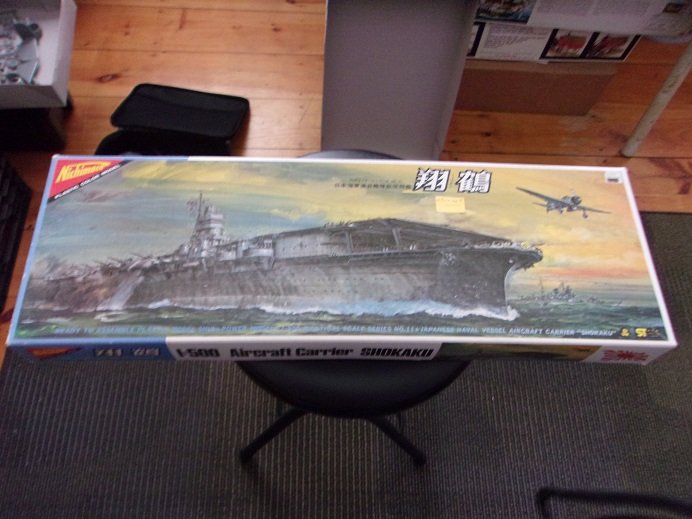
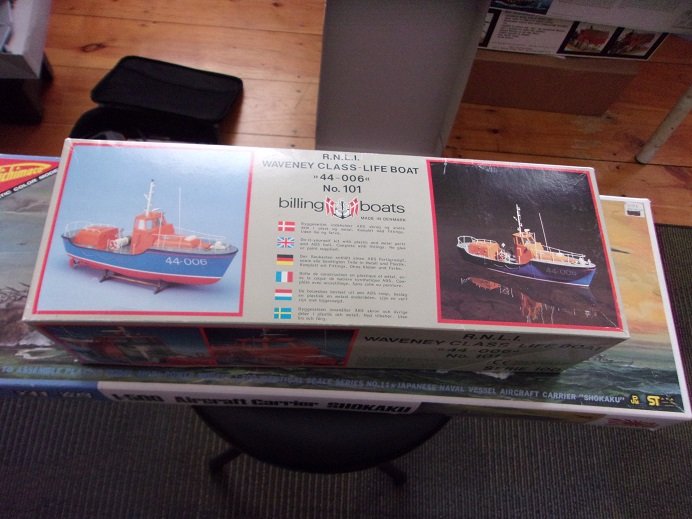
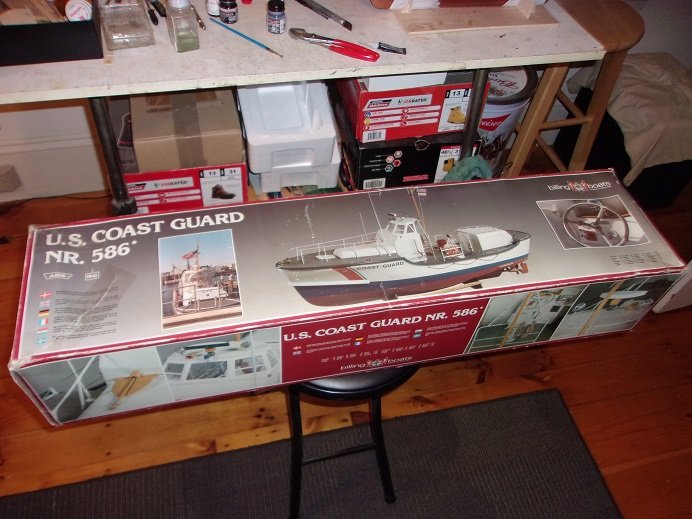
well.......I guess they will be an interesting log when I get to them being a Billing Boats fan, I knew of the larger kit.........I had no idea that they also produced the smaller kit. I'd have to pull it back out to confirm it.....wait.......... yes......there is one motor in the kit, as well as most of the running hardware. there are no servos though, so I will have to buy the rest of what I need. for the price of the kit......it was a very good buy this will be my first dealing with an ABS hull....it's about 28 inches long. the kit was produced around 1982......the smaller kit around 1990. the smaller kit lacks the wood framework that the larger one has.....that puzzles me somewhat, since it too can be made into an R/C the Missouri and the Shokaku can be motorized, but as static models, I think it would take away from their looks, so I have no plans to do it......I do have motors though. the sad thing is that there is no favorite body of water that I frequent.......other than my older son's pool {if he continues to put it up every year}. I took a look through the KG 200 book to see if there were any captured B 25's, since the British ....and even the Russians had them during WWII, but I found no records of one. a further search didn't find one either......B 17's and B 24's were the most common to be captured. time period might be a factor, but I think the B 25 was more commonly used during the war with Japan. the Mo
-
very nice progress.......half tracks are pretty cool only one I ever done was Rommel's Rod
-
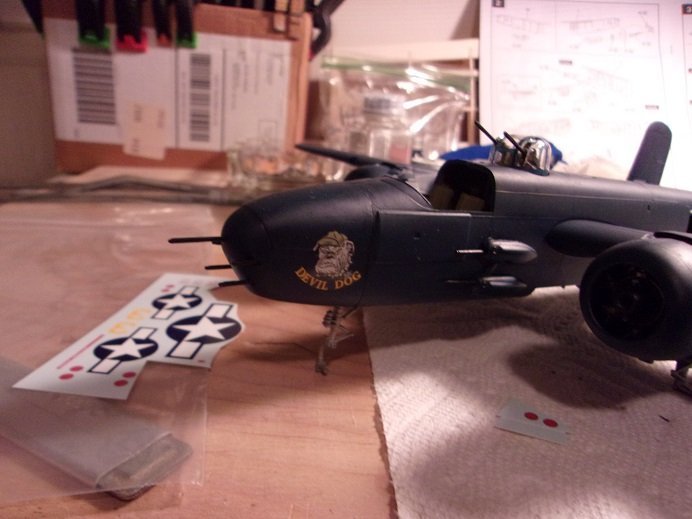
Devil Dog Squadron :: it was easy to find the decal sheet for her the biggest obstacle was the nose. I showed the props.......I forgot an important aspect, the yellow tips. that has been corrected. got a bit more done, but got side tracked with another trip to H.L.. it was the admiral's choice.....not mine {her fault I bought what I bought }
-
is that your model.......can't tell for sure if so.......you nailed it!
-
thanks....I thought the nose was going to be the problem. it came out better than I hoped
-
I know about kit world.......most of my decal purchases are from them {actually from Mega Hobby}. yea.....I'm still gonna leave this one as a generic bomber.......the kit really isn't that good to begin with. to top it off, the decals that came with it are junk! these are the old style decals where you need to cut close to the images.......the entire sheet is layered with the film even with the decal set, they seem to be lifting around the edges. looking through my decal pile, I don't have any others either.......I do have some that have the red outlines, but one, they are from another period, and two, they are 1:48.......way too big. it looks like I'll have to order decals for this one no matter how I look at it. the overheated wallet.......it was worth it check these out.... I also got these two......the larger one has the motors and running hardware
-
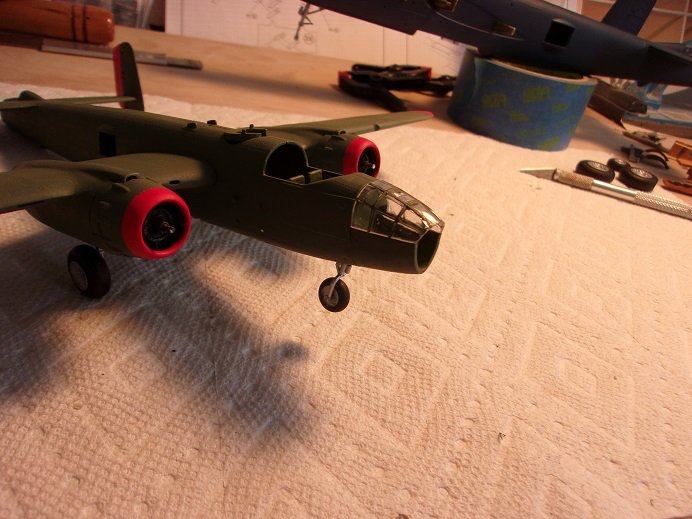
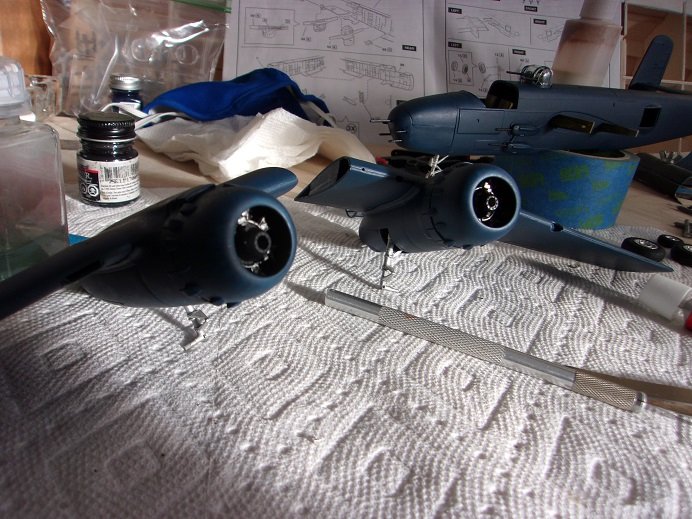
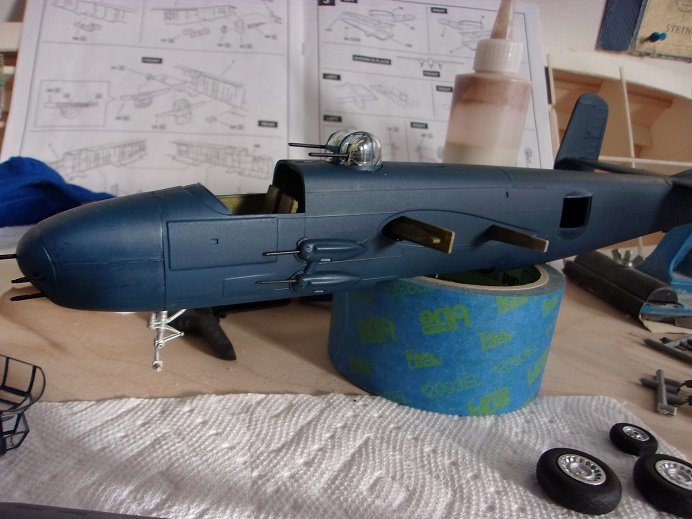
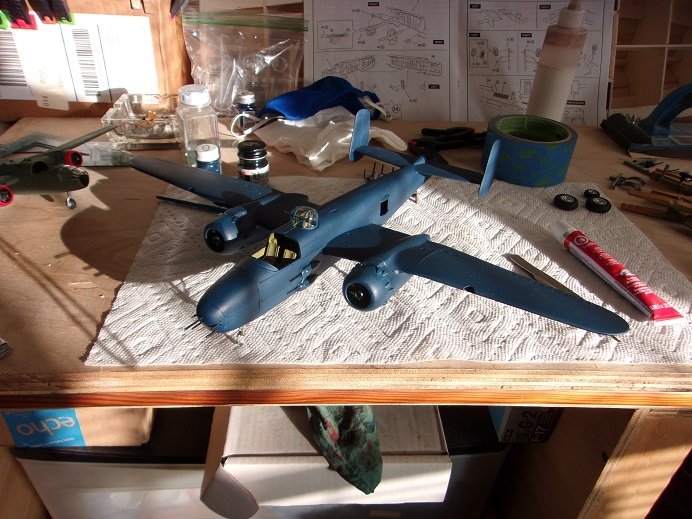
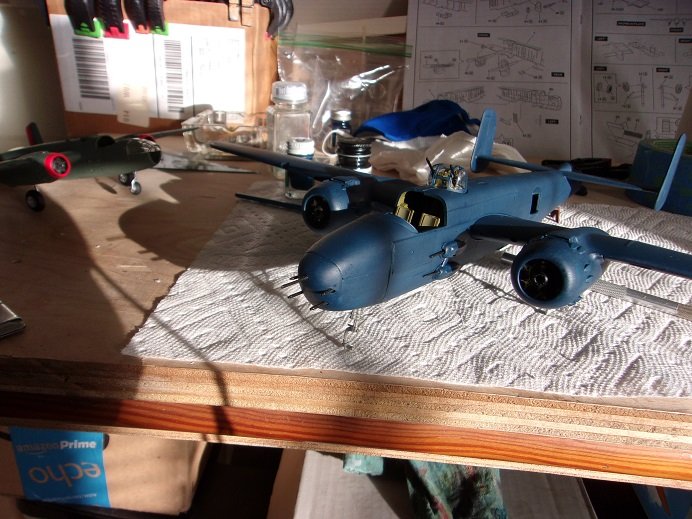
today was a good example of how bright it is in the spare room. it snowed last night and I got in from snow blow'in....kinda nice since we haven't really gotten too much snow this year. after a while....and a cup of coffee.....the sun came out and I got to work. first thing was to dry brush some aluminum on the engines.......little heavy on the dry brush, but with the cowls on, they don't look too bad. the cheek guns were next to go on..... when the cowls dried a bit, the wings were added to the plane. good shot of the nose guns...... stepped out for a bit from here......it was getting dark when I got back to her. I decided to do a few decals. the rest of the evening will be devoted to glass frames.

- 103 replies
-
- 10
-

-
I thought the same when I painted it.......just another variant of olive drab. I was going to order the Dolittle decal set.......all 16 planes, but with the model build up from Christmas, I thought I'd chill for a while and let the credit cards cool down. the set is a bit pricy and I'd likely have trouble with the budget director. this is a full bottle of paint......good that it hasn't gone bad. I did mention that I had no decals for the SAC, so that angle was moot.....so basically, your telling me that they labeled this bottle of paint wrong? if this model was 1:48 scale, I could have decaled her as the "for the Gipper", from the 42BG.......not having any decals for B 25's in this scale is a bit of a detriment.
-
it's how we all think.......but your spot on the A team...always have a plan! very detailed model......coming along really good
-
really coming along nicely!
-
very nice progress!
-
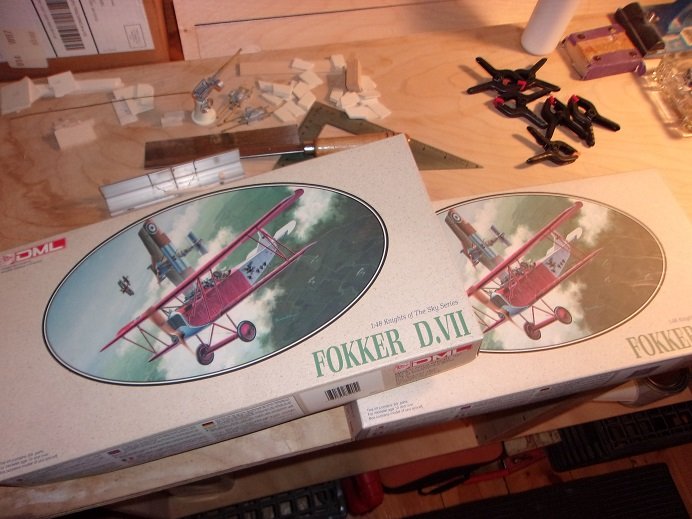
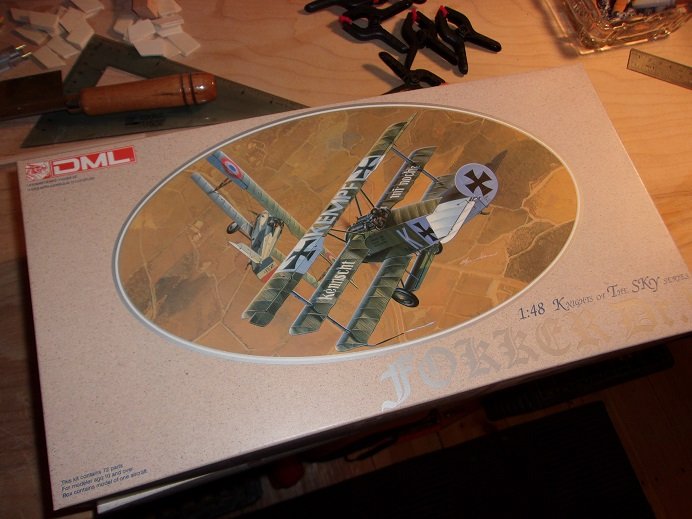
great looking models.........luv the Fokker!
-
nice progress
-
look'in good.........nice choice of kits!
-
superb job Ed......I hope you give us a peek after you've added the personnel and decals
-
looks good Kevin.......quite a change
-
thanks gents working on the wings today....hope to have them in place
-
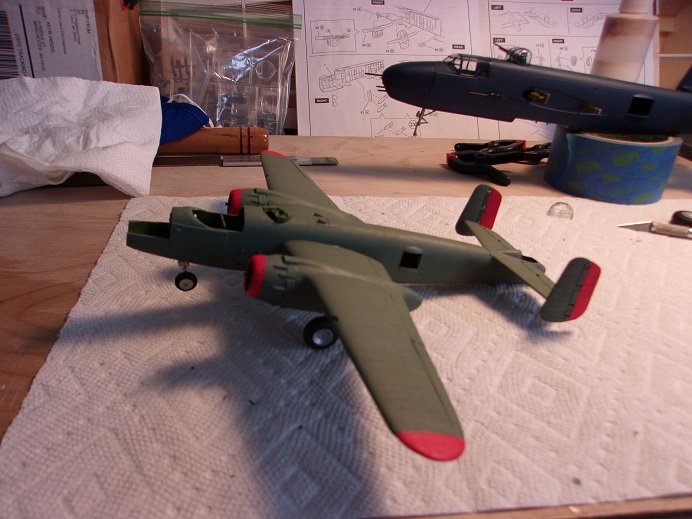
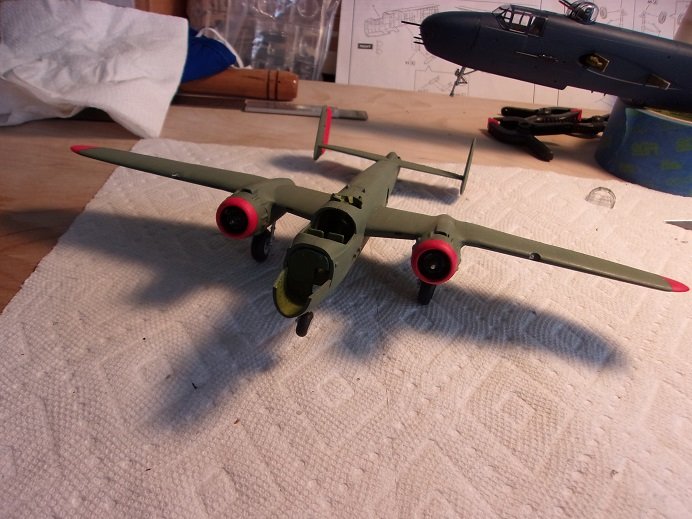
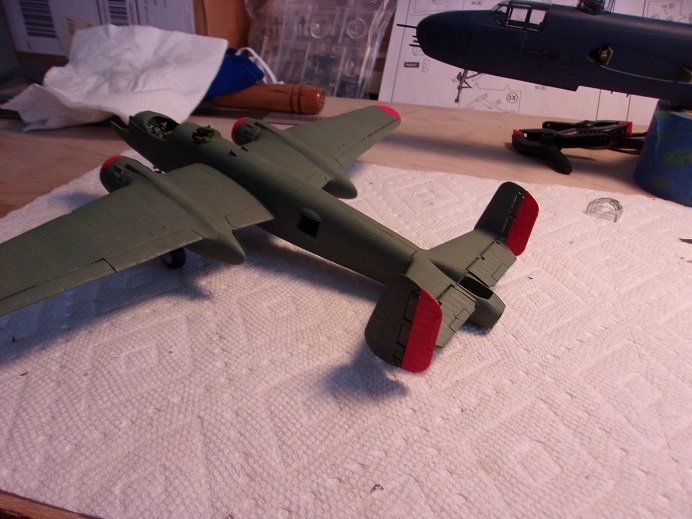
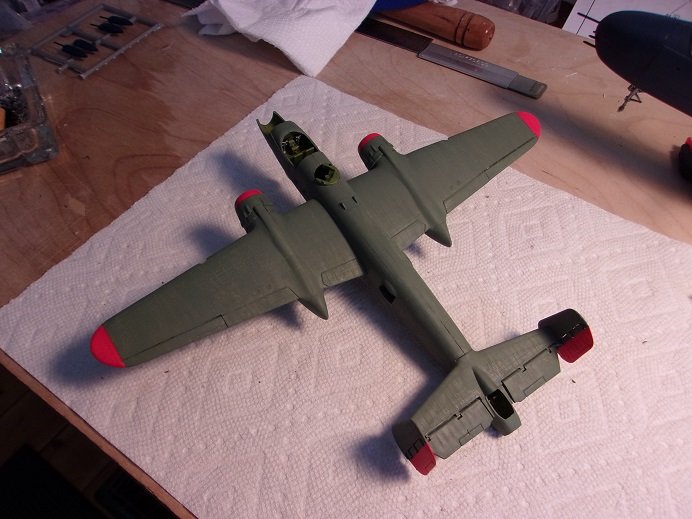
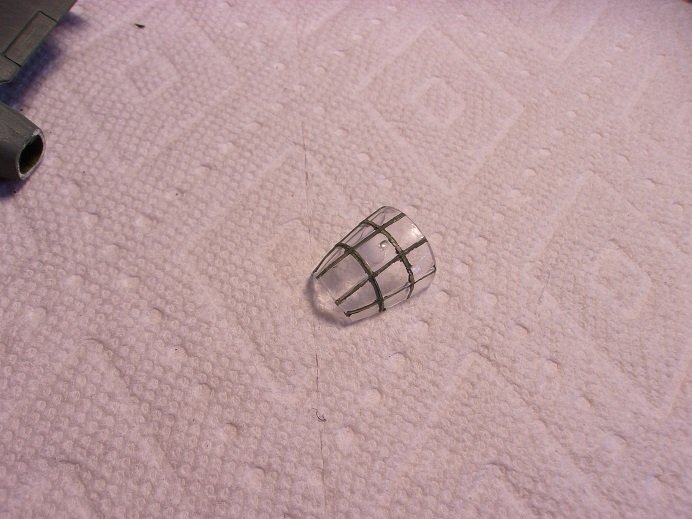
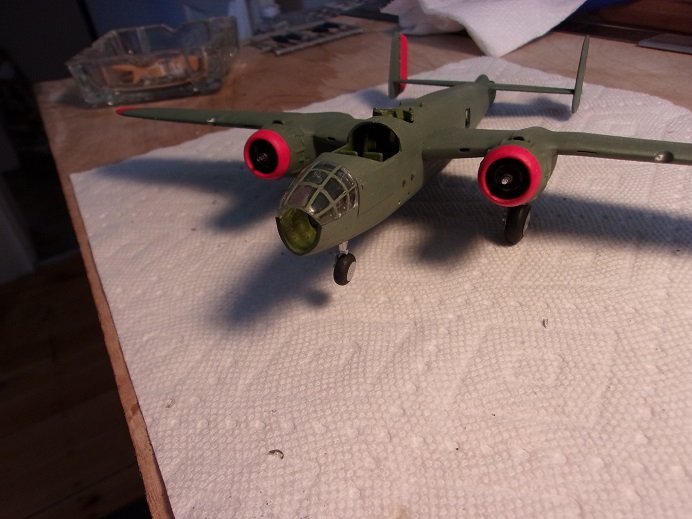
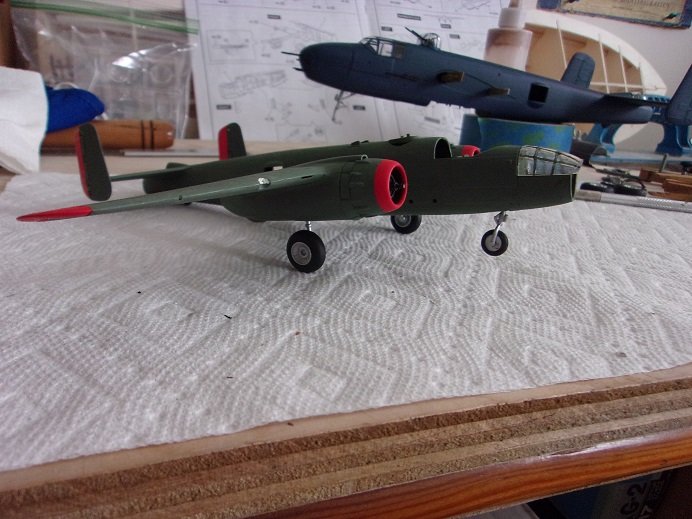
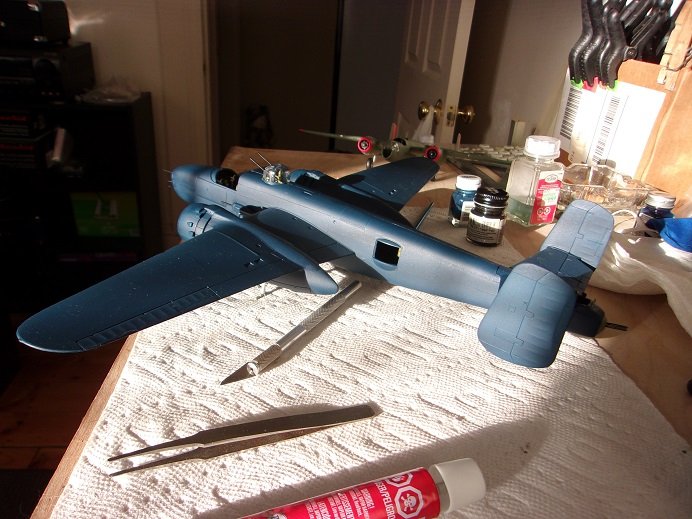
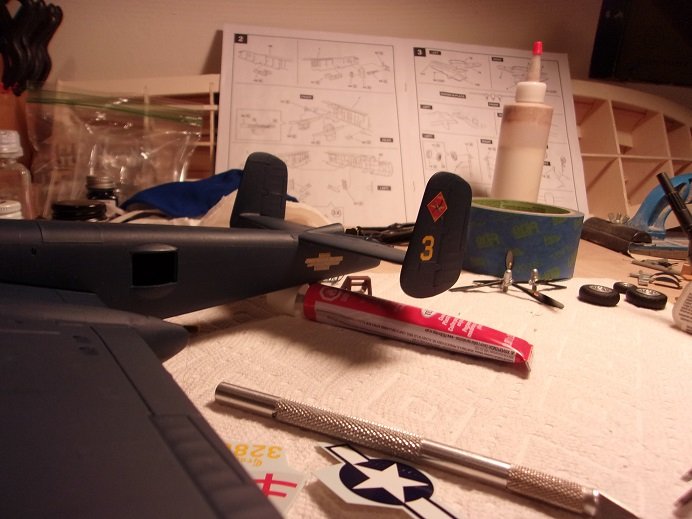
the Atlantis kit can wait..........the kit is a reissue of the old Revell kit anyway......like 1960 I think....... this build fell short for a couple of days, while I concentrated on the PBJ. looking at the three planes that can be built from this kit, I wasn't feeling it. that was when I happened on this bottle of paint that was in the bunch I got from Lou.........SAC Bomber Green........Hmmmmmmm the gears started turning......Strategic Air Command.......interesting. I was gonna go with the Ghost gray underbelly, but changed my mind just as fast. the shift went to accent markings instead. this morning, I painted the rudders, the last of the accents. going through the decals I have, I will use some I can get away with, but there are none to designate the SAC....so it will be in color only this is how she looks so far........ the cowls are stuck on there......I can't get them off to accent the engines. I'll see what I can do, but if not, I'm sure it won't affect the overall look. the interior is a chromate green....I bought another bottle when I went to H.L. last week. I was going to stripe the rudders, but that is mostly seen on British planes. heavy American bombers, like the B 17, would paint the majority of the rudder red....I simply compromised some detailing in the cockpit, but kept it simple since the canopy glass will be framed enough to hide it. further detailing would be to alter the color of the stabilizer and wing ailerons........I may do that......perhaps dry brushing. the first of the canopy glass is done. the method I use worked quite well.......I haven't done any touching up on it there is next to nothing as far as transparency goes....you know.......you paint the frames, and still see a faint translucency to it. I just let it dry a bit, and went over them again. still more to go on her......four other pieces of glass to do, armament and such.........I'll do some generic markings to finish her off. walking away from the table, I took this last picture. the light was turned off.......macro on with no flash......just normal light. I wasn't pleased how the nose gear is positioned, but that is how it located and so I guess I need to live with it. the gear door is strange too......it is split in two sections that don't make sense in the open position. I'll fudge it more soon.