


popeye the sailor
-
Posts
16,007 -
Joined
-
Last visited
Content Type
Profiles
Forums
Gallery
Events
Everything posted by popeye the sailor
-
 WOW Paul........you did a superb job on the Cux! your choice of paint is really nice I built the Cux 87 when I first got into wooden ships......built it along side my very first one, of the Nordkap. my log is long gone.......lost in the big crash..........I don't recall if I redid it, but I'm sure pictures of the finished model is in the gallery. at the moment, I've been hang'in in the plastic forum.......wish I had seen your log sooner. I could have answered some of your questions...... glad to see someone else build this wonderful model.........it's a great kit congratz my friend!
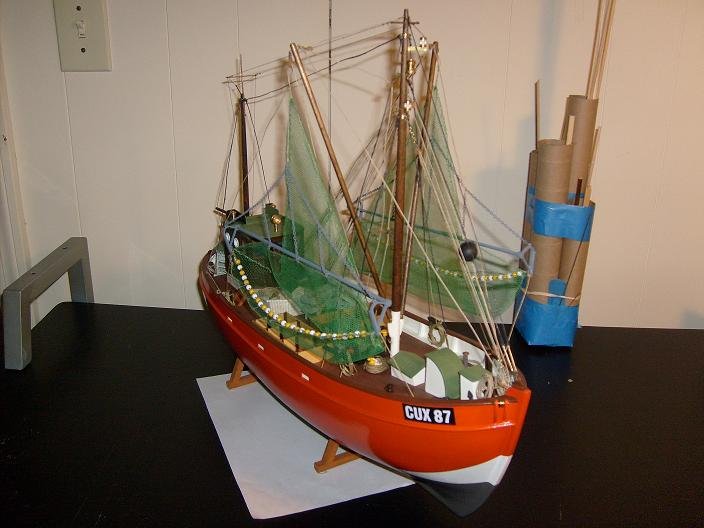
-
it may not be.........think of the interior 'box' in car models. if this kit, or the one your taking the parts from was based like this, you may find that there may be some amount of 'dead space' in the chassis tub. the transplant looks good......too bad you can't keep the functionality for the turret.
-
superb how you made the decorations.....I've seen a couple of these models already....it so nice to see one painted I'm particularly impressed with the laser cutting......in some ship kits I've done, the laser cutting caused the plywood plys to separate. it's not a real big deal.......simply cement them back together and your back in business. char isn't much of an issue either.......some don't like it, but it can be used to one's advantage, since sanding can expose the ply layers. sometimes leaving it on there can cover so much sin nice work shaping the roof beams as well. did you curve the side edges? I ask only because one kit that I built had planking that had rounded edges along both sides of the edges. cemented together as you did would have produced scrolled sides to the beams, which would add a bit more detail. I think I still have some of those planks.......something to think about for future fabrication super job........really liking the colors.
-
some of the fitting kits are available.......I recall when I built an old kit of the Nordkap.......nothing was available. most Billing kit list the fittings you will need to complete the model. I was lucky....I knew a fellow that owned a Billings warehouse in Wisconsin. sadly, he closed it down a few years ago. Ages of sails bought the warehouse and now runs Billing USA. I'm happy that he kept it As Tom built it. looking at the site, I see that they list the kit for the Jylland and the Cutty Sark {though it has a different number} I'm surprised to see that they spelt the name Nordkap wrong Roger is the fellow over there at Ages of sails.......I'd call him.....he probably can help you. there is a small word of caution though.......the newer fitting kits can be different than the original fitting kits. some of the parts, that may have been wood or metal, have been replaced with plastic and like parts. I ordered a Nordkap fitting kit for the Progress, and was surprised to see the amount of substitution that was in it. sometimes E-Bay, Etsy, and the like lists them. so......if you can find an older kit, the better you will fair check for a parts list in the kits and see if you can put something together....it may save you some money.
-
oooooooooooo.....nice start!
-
yup!!! that is one sweet ride! nicely done! why do I keep envisioning Bat fins.......
-
you got that right Ron........I regret not following my hunches instructions are like the internet.......it's always right.........isn't it?!?!?!? but what the hey........it all came out right in the end. more to come.........thanks for look'in in
-
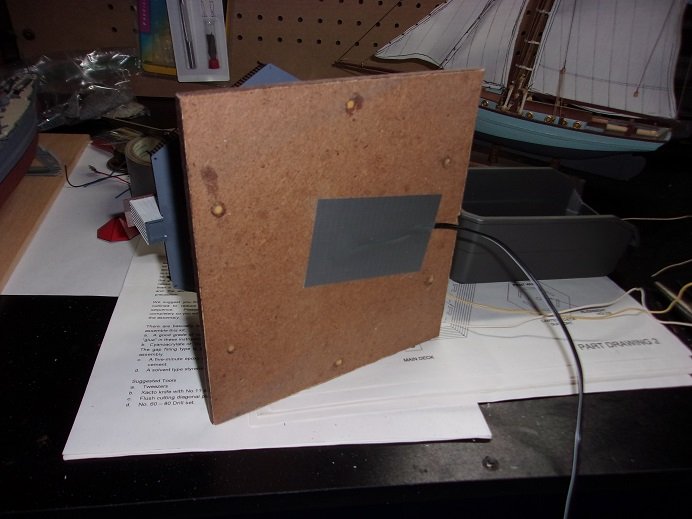
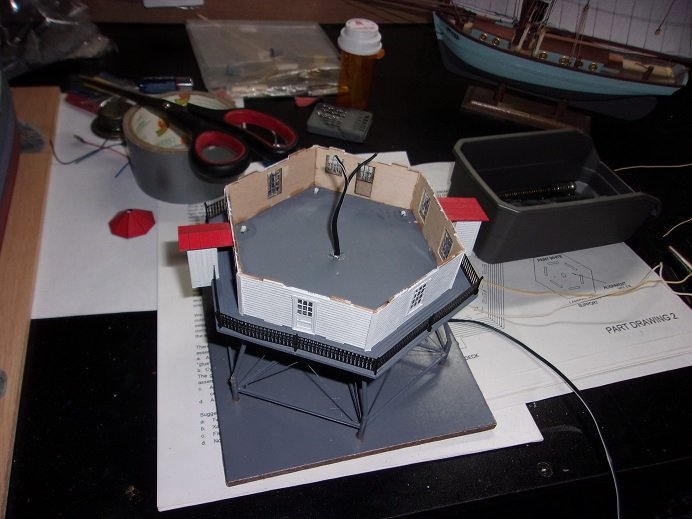
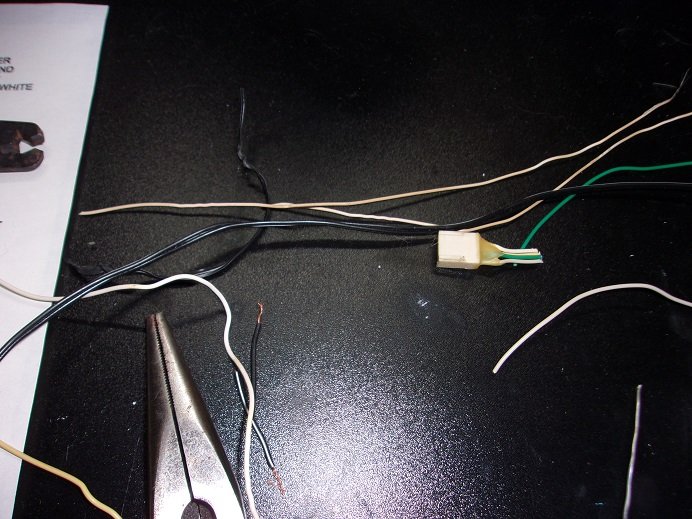
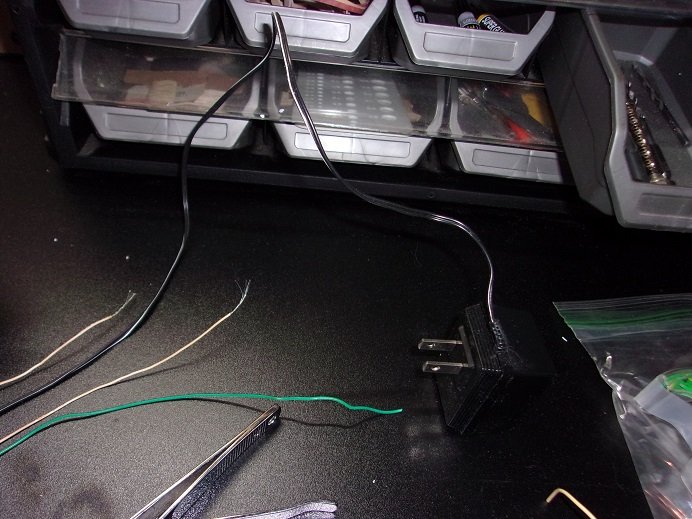
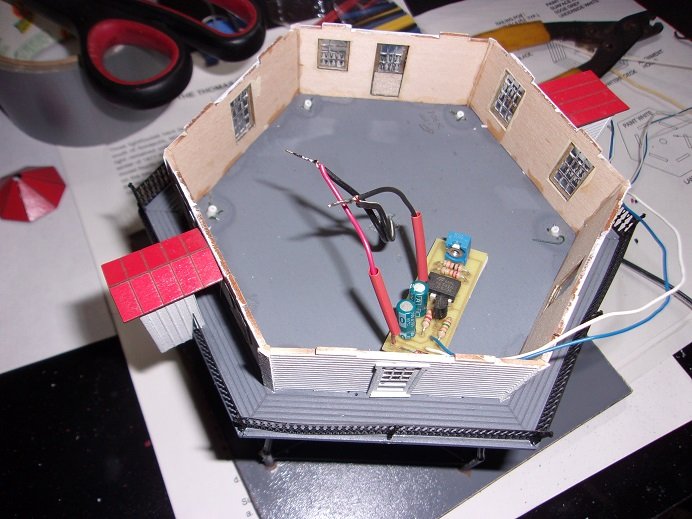
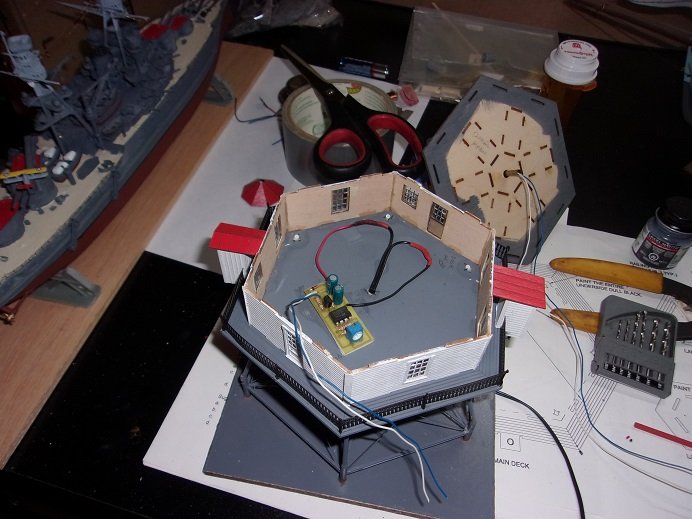
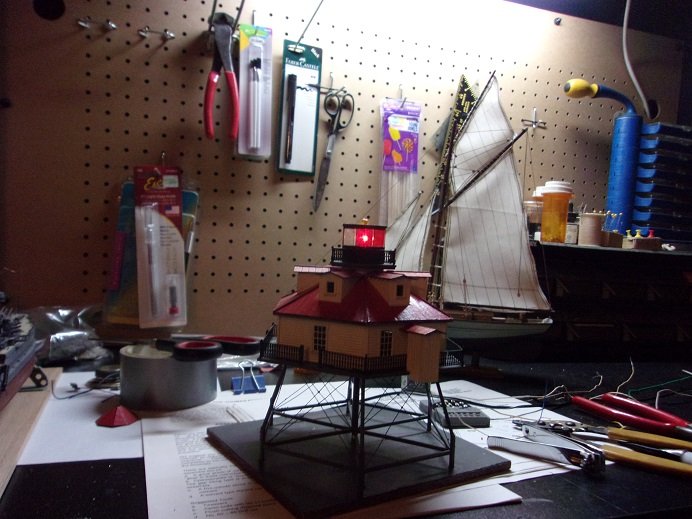
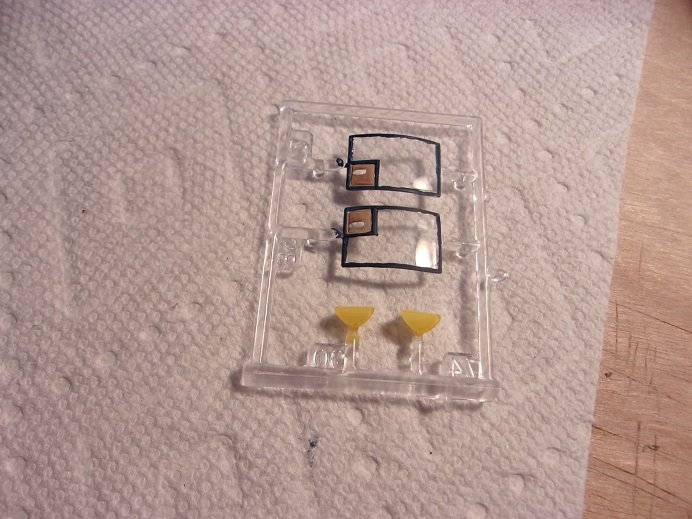
it isn't set up like that.........the brass tube only covers the plastic tube and doesn't enter the floor or base. nice thought though it's basically a support for when the deck was put on for the center. it took a little bit of do'in, but the ID of the plastic tube is now much larger.....large enough to pass the wires through. the wires, when I knew I had enough sticking out inside, it was twisted and flattened to fit in the groove. it was then covered with duct tape. I'll add another small piece to the edge later. it kind of gives you a sense of how thick the wires are.......the rest of the wires for this are much smaller the transformer is small......the size of a charging unit........I've got some of the older ones.....they are much larger {don't know why I still hang on to them........oh yea.......'cuz I'm a pack rat!} so the circuit board was connected to the wires.......soldered......and then shrink wrapped now that the plastic tube is gone, I need to fit a holder in the roof for the light.......a smaller brass tube did the trick here this brass tube would have been large enough for the transformer wires. you can see how much room these wires have. for excess sake, these wires were shortened so they wouldn't bee seen in the windows. I did have to drill the hole in the light steeple a tiny bit larger and left enough so the light is level with the glass. I was going to paint the tube that stuck out, but I got stupid and glued the glass dome on it. I haven't glued the roof on......if I had thought of it....I could have soldered plugs on the ends, in the event that I need to open it up.......I still can really. I haven't glued the roof on. I tried to take a video with the camera......but it's poor quality.......shaky and blurry in part of it. I'll try to get a good one so you can see the light working. for now, here are a couple to suffice yes Lou......the Krabbenkutter is still on the table......still need to add the boom vangs {I have part of them rigged.....does that count?} the U.S.S. Arizona is still on the table too.......these are my next projects to finish. got to get this table cleared......
-
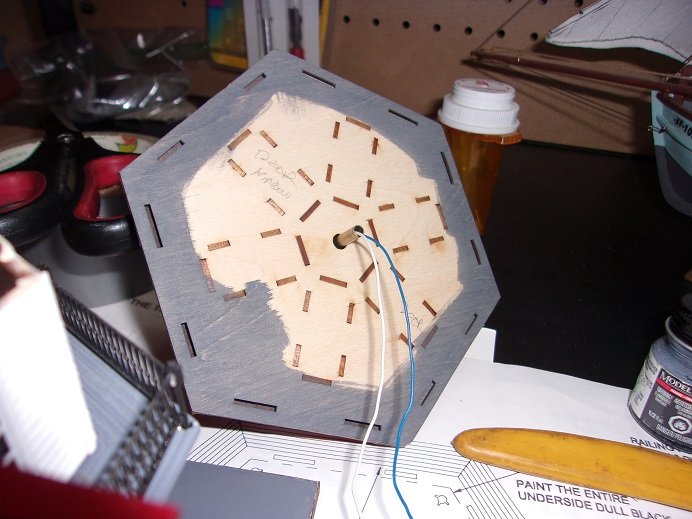
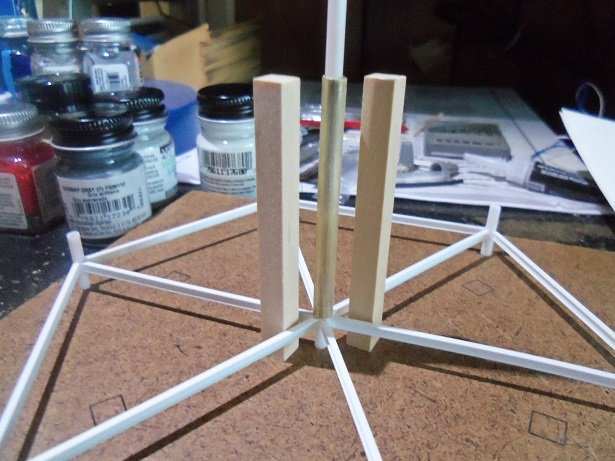
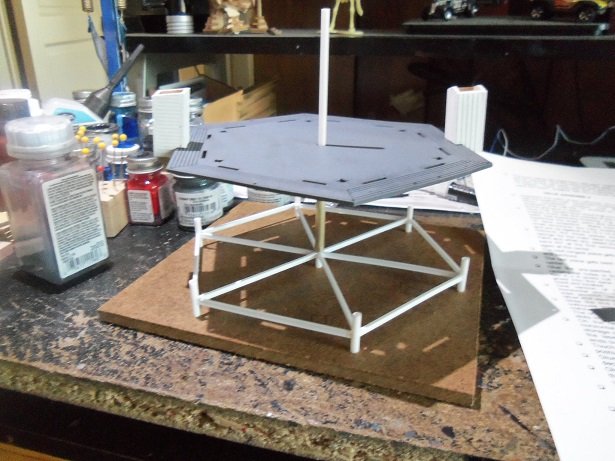
as I built the base for the lighthouse.......I had this feeling. it showed it's head today..........routing the wires up the center tube will be impossible, due to the ID being too small. back when I built it, I should have gone all the way with the brass tube I added. it made me wish I had a drill bit that would go the entire length, although in order to locate the circuit board inside the house, I would have to cut some of the tube off after it passed through the floor. the tube was cut off flush with the floor as a first step. I do have drill bits, that if I drill from the floor and from the base, I should be able to hone out the length between the floor and the base. I had to go through a couple different sizes, but I was able to hone the tube out enough to rune the wires up the tube. the wires running from the circuit board are smaller, but the wires from the transformer itself are are a bit larger, and those are the ones that need to be threaded through the tube......they are the reason why I made the groove from the tube, to the outer edge of the base. I'll have more on this later.......I'm toying with it as we speak the admiral wants to go out....got to get Gibbs some food. I hold little hope for anything else......
-
....would have saved me a lot of extra work ........although this particular model wasn't intended to be a PBJ. there are only a few parts left to add to the model........should be finished soon
-
chances are your going to repaint it......if the roof is not cemented on in any way. here's something you can try........ lay the desired side flat on a soft surface, and poke it with a suitable {rod like} tool, the size you'd like the hole to be. it will create a jagged broken area.......you will likely need to remove some of the broken stuff. cement in some framework under the roof, breaking that as well......if need be. do not remove the broken stuff......now paint in the desired colors. I know it sounds archaic.....careless actually, but then again, so are cannon balls this is a situation where imagination plays a huge part of what you want to see and convey. I've heard of folks taking a nicely built plane, and actually shooting it with bird shot, to simulate bullet holes there is some crazy stuff out there.....all in the name of art
-
the last order I placed in China got canceled due to Covid........
-
the weighted tires came with the kit........some do, and some others, aftermarket can supply them. in early times { back in my younger days}, heating the tires and pressing them on the table usually works. one does need to be careful not to heat them too much........a hot plate {or knife} can be used, but sometimes it don't look the part. failure meant that the gears would be up and a stand would be used {I always had an 'out'} that might work OC.....but you want the tire to balloon outward, where the rubber meets the tarmac. yea......the fuel ports looked like there was a bubble under them...very unappealing 💩 we had an overnight snow storm........all around us saw anywhere from 12 to 17 inches of snow. here in Manchester........8 inches I was so disappointed..........I wanted a bleed'in storm.........not a squall! I even took the day off for it.......... this storm played hell in the mid west.....I hope all in it's path faired well.
-
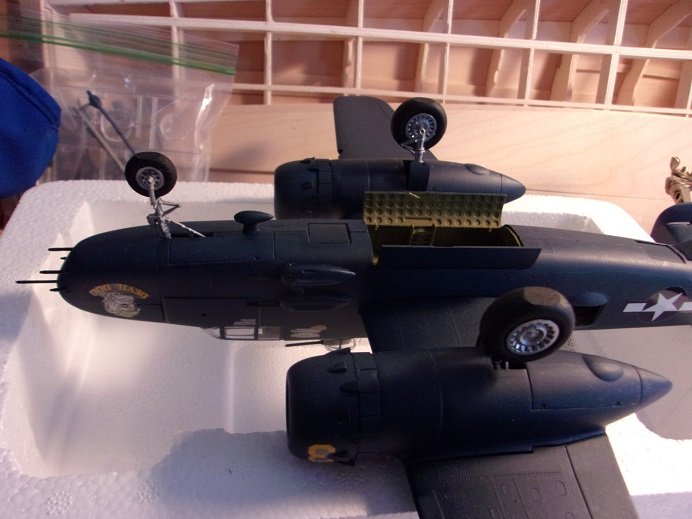
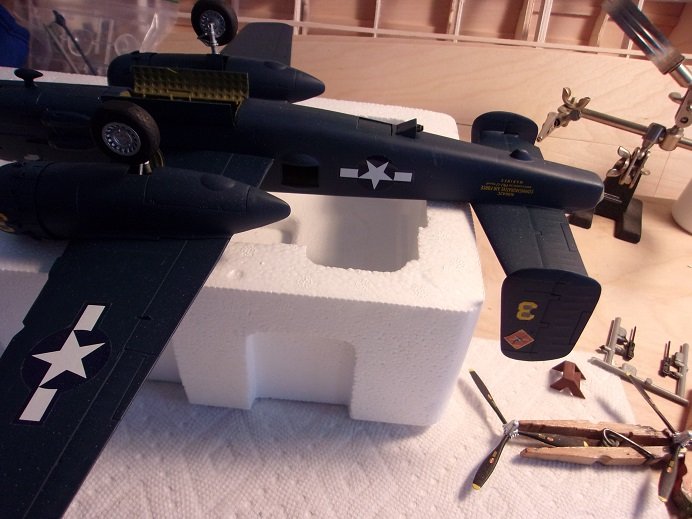
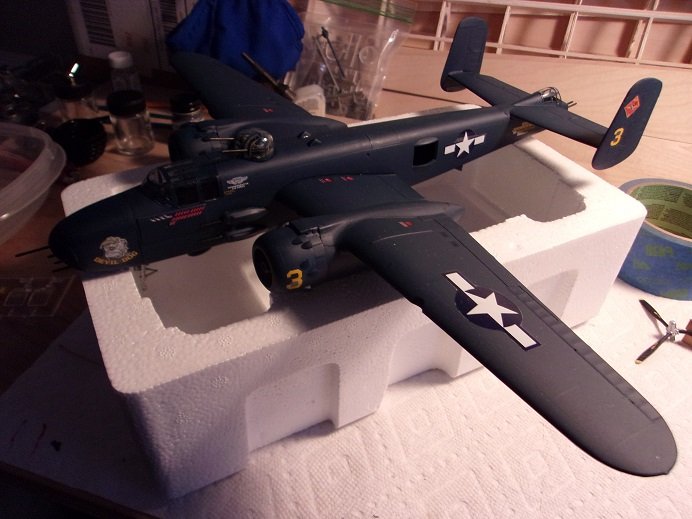
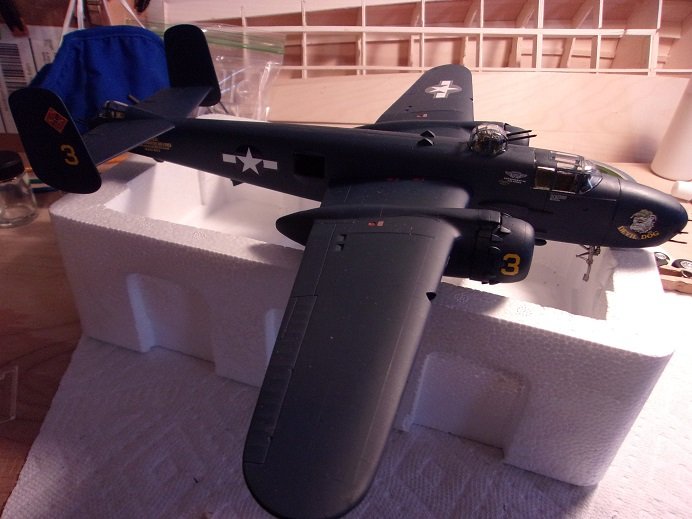
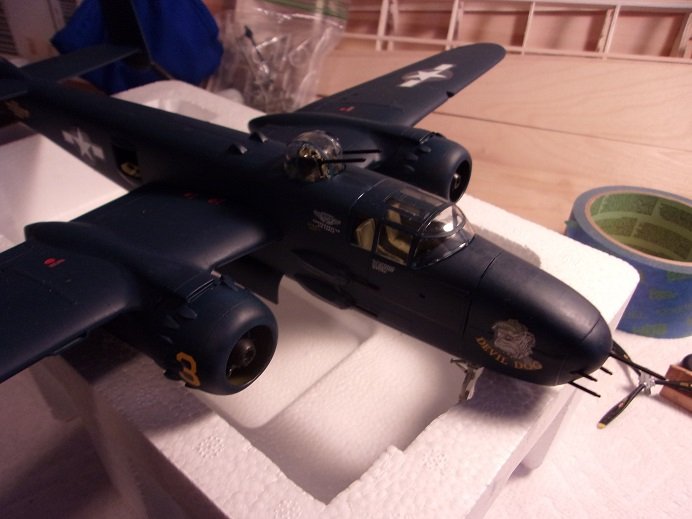
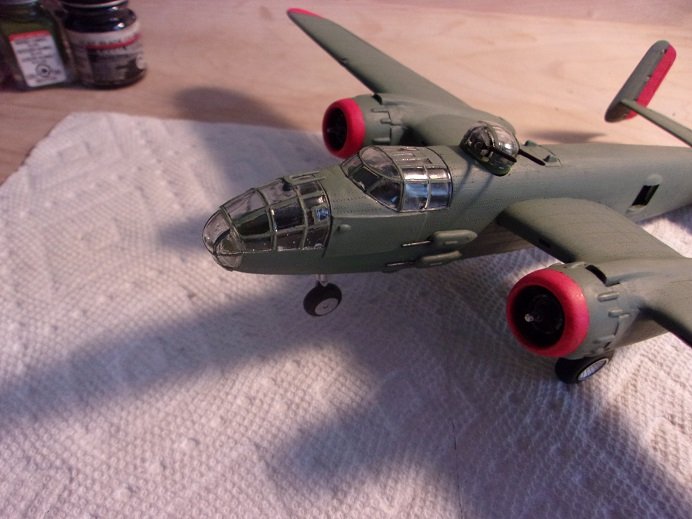
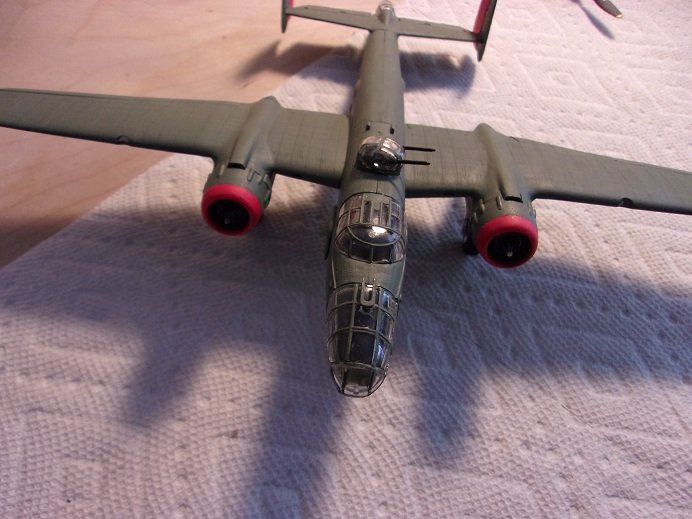
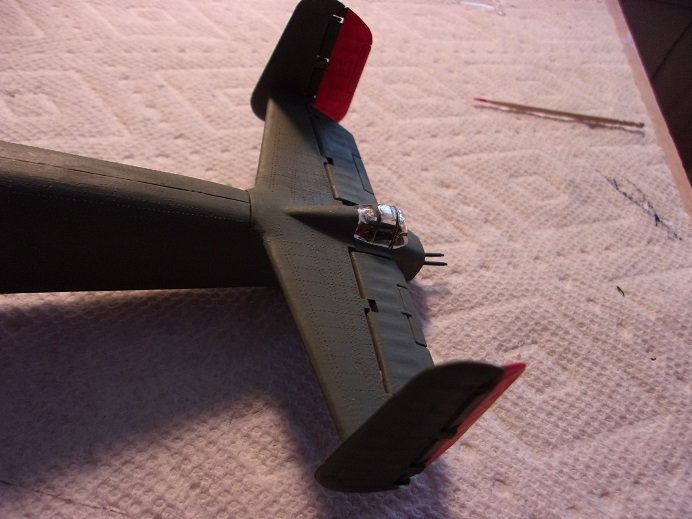
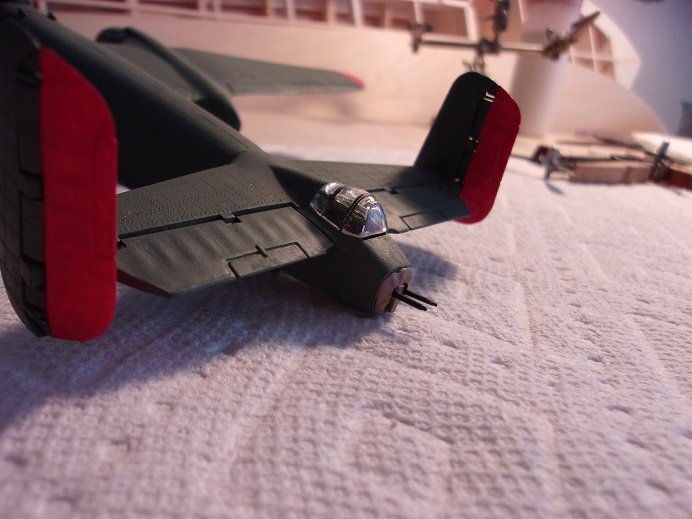
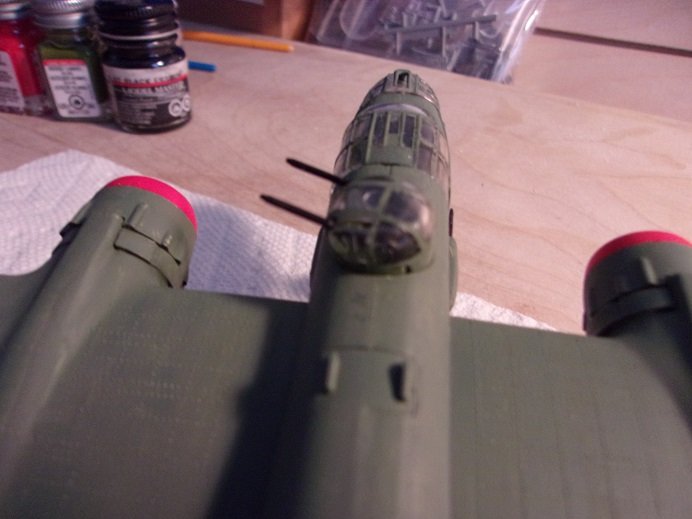
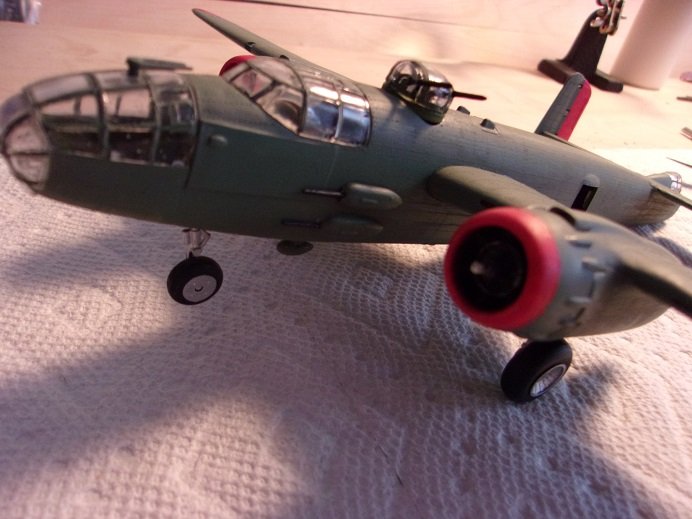
no.....a lot of them don't. there are some that do and give the balance weight requirements for it........some will even supply the weight. it's a safe bet, that if the model has a nose gear, it will be tail heavy. there are two options......you can add the weight, but to do that much of the model must be at least dry fitted together, to determine the balance points , and then figure how much will be needed. the other option is either a stand, or a display base. I've done both the stand and the base......I prefer the base better. in the case of the PBJ, the kit supplies a saw horse to prop the tail up. for this kit, if I left the bomb bay doors open, in side where the bombs would be {there aren't any}, there is a slot where a stand could be used. the kit doesn't supply a stand, so if one plans to use it, it would need to be scratch built. the PBJ had framework on the top turret, so I added it on this one as well. I haven't seen a turret that didn't possess some sort of framework. I haven't really looked into the decal dilemma...... I will need to look into the "Raben's Ravens" decals sooner or later......so I may as well do it then {I'll slip them in the overall cost somehow } gonna enjoy that project for this B 25, as mentioned, it will be a simple generic plane.......I didn't have a subject in mind when I started to build it, and still didn't have one in mind when I painted it. how am I doing? pretty good actually.......no......I'm Covid free. I'd know by now I do have a date for the vaccine......the first of April. I can't wait to get it........the admiral's is on the third.......her birthday.
-
very futuristic!
-
making some really good progress OC........the kits look awesome! interesting to see the scope of a kit expand.......the project grows
-
superb looking model Patrick........ sweet weathering job! keep going..... gotta see more...........what's next!
-
during the evening, the waist gunner's windows were painted........so were the wing lights the wheels were cemented in place as well. the tires have the weight depression on the bottoms, so I had to make sure they were all centered. very close to the end now.........likely to be finished this week
- 103 replies
-
- 10
-

-
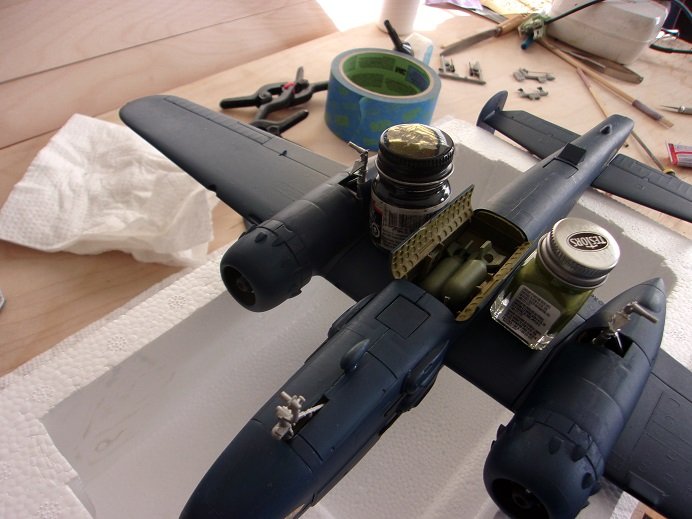
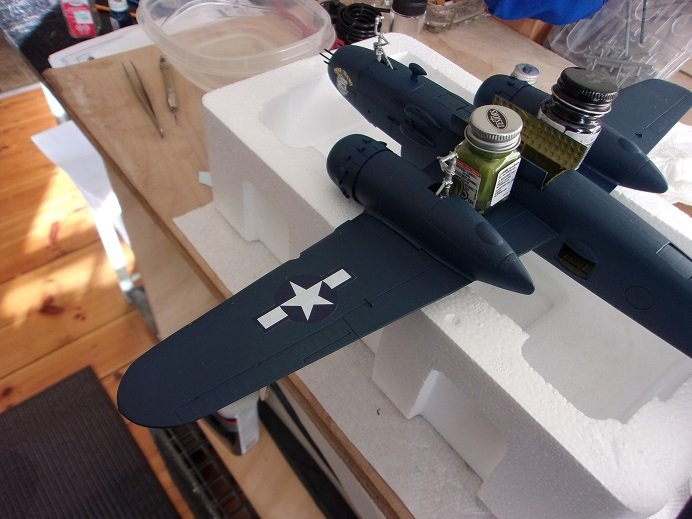
don't ask me why the last picture is there........I tried to get rid of it! happens every now and again anyway........as mentioned, there is an update on this project. before the work week, I did a bit more, adding the bomb bay doors and gear doors on the main gears. as can be seen, the two exposed bombs stayed in place.......it's the one inside that came loose, and is rattling around in the fuselage. more of the decals were added as well. I also put the finishing touches on the props...... the smaller door you see is for the nose gear....got to put the finish on it so it can be added to the model. on the other B 25, there is the same nose issue, concerning this small door.......already figured out what to do with it adding the fuel door decals to the model was a bit of a problem. they supply red circles for the ports......then red rings including the fuel door text to add over them. the fuel ports are indented into the wings, which make the decals look terrible. a solution to this was to paint the ports red and cut off the red circles, using just the fuel text decals. I painted the ports with a toothpick. more decals were added.....I think they are all in place now. not using any weights for the nose......this model too will be a tail dragger. I will make a base for her.......I think I will do something different. more to come.

- 103 replies
-
- 11
-
-
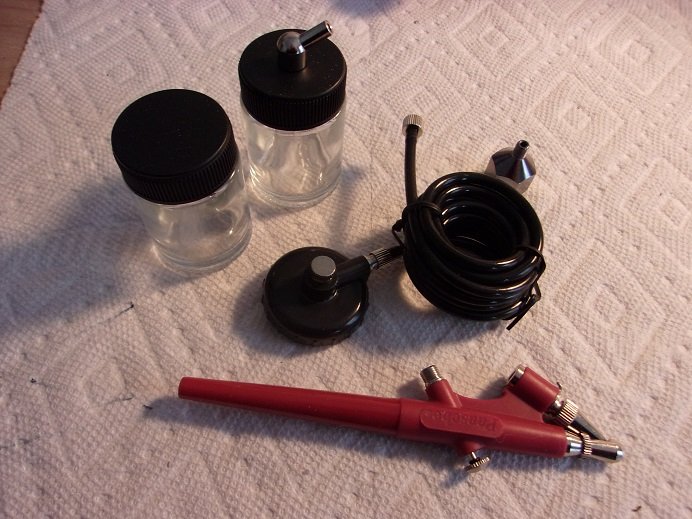
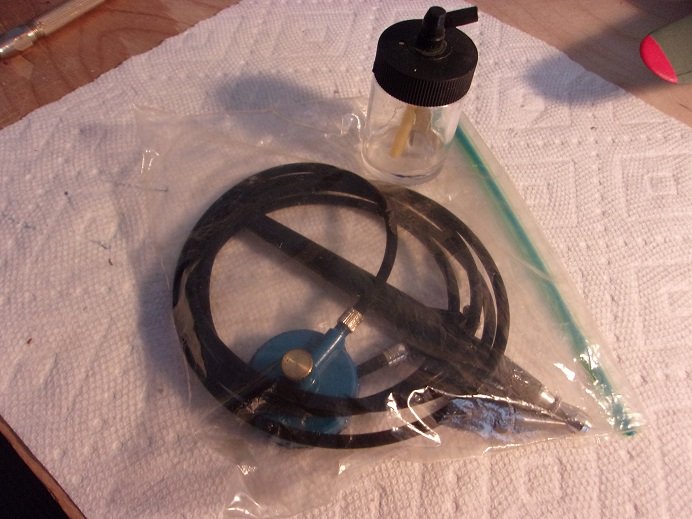
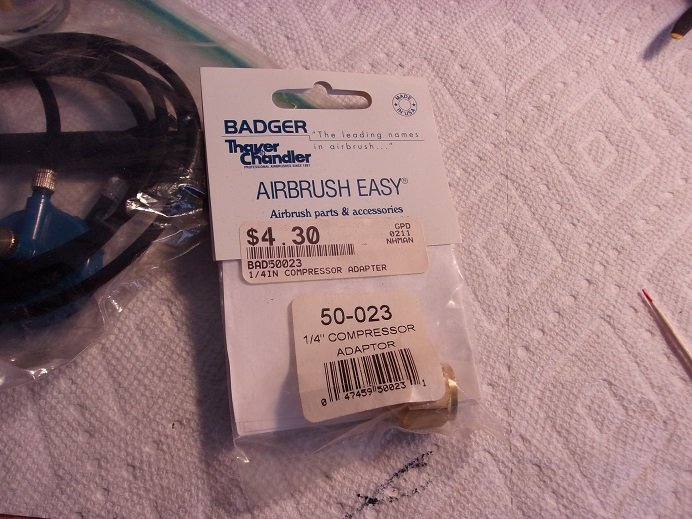
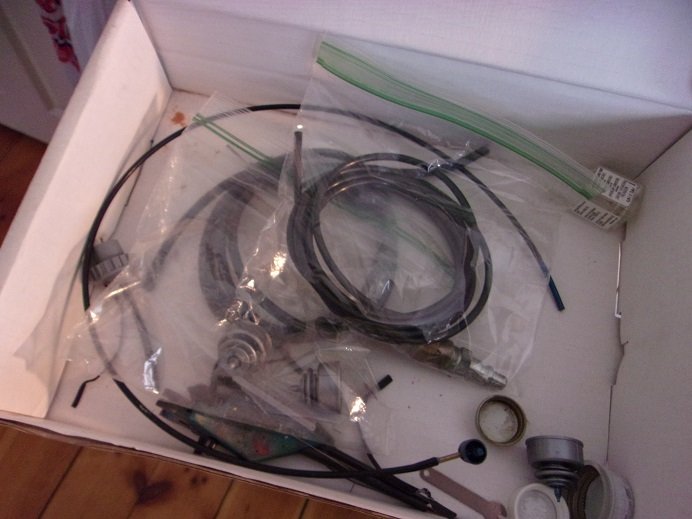
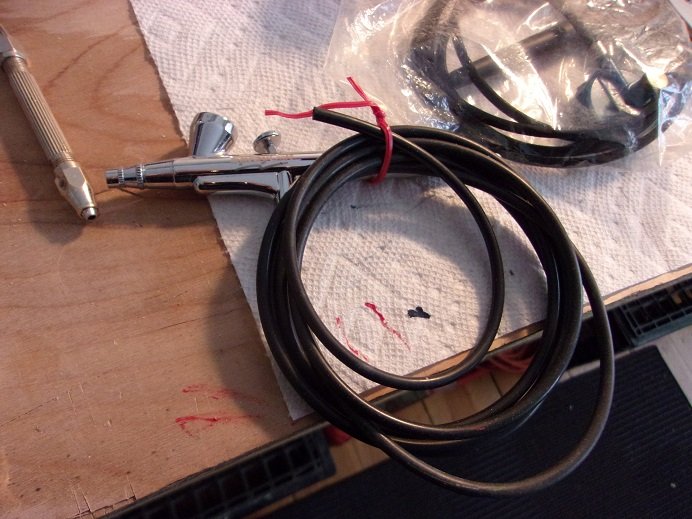
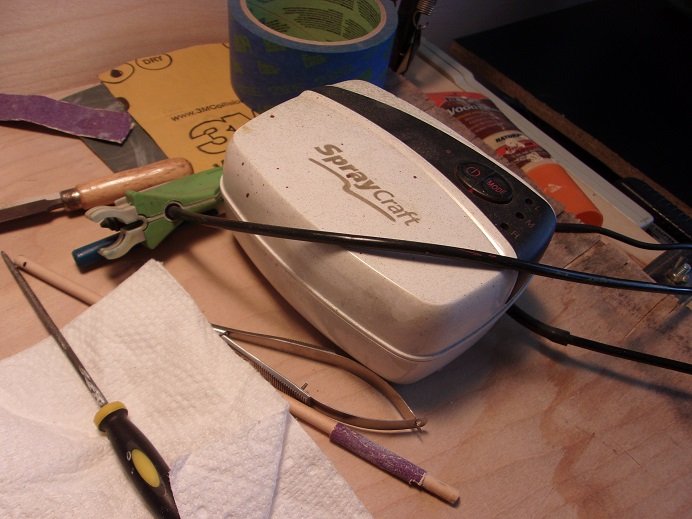
yea.......you should have seen her... I got close to the model aisle and she barked right out "don't even think about a model!" ....didn't stop me from browsing though I didn't buy anything major.....some basswood sheets.......basswood strip {packs of five}.....and I saw the latest Testor's airbrush set. I didn't buy it though because it relies totally on the compressed air cans ....there is no way to adapt it to a compressor. what I did buy, along with a two pack of cement, was a Paasche EZ starter airbrush set. it can be run with a compressed air can, or an adapter to attach it to a small compressor. the kit cost me $25.00. kind of a silly buy actually.......I have one like this stashed away in my junk box. a friend gave it to me a long time ago. I saw an adapter for it at a HobbyTown some time ago and bought it. I have never used this one.... during my time using an airbrush, I've amassed a small amount of parts.......odds and ends more like it I've bought a couple of those Testor's 'amazing air' airbrush kits in the past......they are my go to airbrush. the thing about them, is that those caps you see in the box, do get ruined from time to time. I can order extra caps, but really haven't had to do so. another thing with these siphon feed airbrushes, is that they are made totally of plastic, and can get distorted, putting the air/feed out of alignment {I think exposure to thinners is the culprit}. one I've used a couple of times is this spraycraft airbrush, which is a gravity feed. my thing with it, is that you can't tip it.......I did and got paint on my hand. I've been using the compressor that comes with the airbrush, adapting the EZ brush to it. I think it could double nicely as an Aquarium aerator......but it does what it needs to do. it has two speeds, which gives the EZ airbrush a range of adjustment, which adds to the airbrush itself........an adjustable nozzle on the airbrush allows change to the air delivery. since I'm not one to field strip airbrushes, I find the EZ airbrush to my liking........I just wipe the excess paint out of the cap, shove the tube back in it, and attach it to a bottle of thinner, which I spray till clear. can't get any easier than that well....I think I've rambled enough....there is an update on the PBJ

-
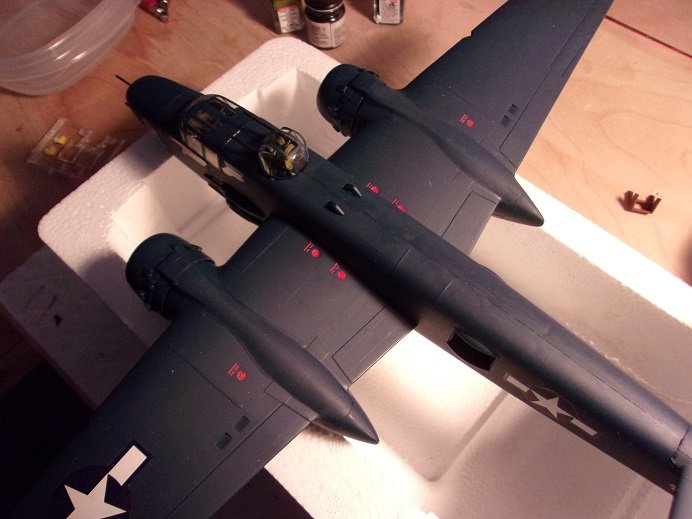
I have an update for the bomber.....really not much left to add to her now. all of the glass has been framed out.....even the top turret glass which had no frame to speak of...no detail. so I gave it some, added the guns and cemented it in place. the rest of the glass, with the exception of the waist gunner's glass has bee added, along with the gear wheels. the tail gunner's glass didn't have framing either...that was also ad-libed. since the model is a tail dragger, I will make a base for it. it might wait though till I can get some decals for her. until then
- 55 replies
-
- 12
-
-
hi all........still haven't given up hope on the tank. I've been looking around for wider rubber bands, ones that will span the width of the bogies, but I haven't found them so far. I did happen on some that are used on painter's easels {or something like that}, but I think they are too wide, and I'd have to cut and stitch them together, for a pair of workable tracks. in the meantime, I've cut two lengths of stiff wood strips, in an effort to stretch the original tracks. I'll put them on one of the heat registers for periods at a time, to heat them up and try to relax the rubber. the thing with this, is that it's no permanent.....sooner or later the rubber will shrink back and cause the same problem. but who knows.......it may work
-
very nice progress on the bike........the carbon texture looks very cool nice looking model for the future........what a body style!
-
I have a Fender/Squire bass in my collection.....plays just as good as an original Fender nice progress on the house.......you may find that scratch building gives you more freedom and will expand your imagination. I find some instructions so 'dumbed down'


