


popeye the sailor
-
Posts
16,007 -
Joined
-
Last visited
Content Type
Profiles
Forums
Gallery
Events
Everything posted by popeye the sailor
-
 being off on a tangent myself, I don't see logs I usually follow...........and the compounding of my active projects, keeps me even busier I was thinking of you the other day....today, I saw your log on the front page. she's still looking good Nils......your doing a wonderful job on her. I'm glad to hear you folks are faring well through all this, and hope you weather the storm { I'm sure things will get better....we will beat the virus}. take care and stay well!
 -
thank you Mike I still have plenty of that paint.....I've been hinting for a PBY so far the admiral is saying no.....
-
really looking superb..........glad you got the decals to behave
-
looking very good Kevin.....really nice weathering
-
very nice cockpit........quite a bit of detail. really looks good
-
dunno........I'd love to start the Raben's Ravens squadron, but I also want to finish off a couple of these lingering projects I have sitting around. I think I have at least 15 or more to choose from
-
your canoe is coming along great! you'll get better with resin work.....soon you'll be a hand at it
-
very nice progress.....the interior looks super
-
here in the city, Hobby Lobby seems to be the only place to buy models and stuff. Michael's is getting to be a joke.......their section is almost bare. they must not be seeing a lot of traffic, you can tell by the paints and how separated they are. you have to really stir the heck out of them. HobbyTown is still around, but they moved to the next town....I get e-mails from them
-
great job on the restoration...... it came out very nice
-
M29 Weasel family 1/72 (scratch) by Backer Finished
popeye the sailor replied to Baker's topic in Non-ship/categorised builds
this should be real neat to watch -
superb progress........a couple of the pictures were especially cool
-
I would imagine that there would be ropes to open and close them, just like early ships. another way you could have gone, was to do them as shutters, one on each side.
-
coming along really good! very nice detail too....hope that door opens the other way
-
I think I bought this one from Hobby Lobby......the kit is still available. a lot of my other kits, I get them from Old Model Kits .com. they have kits that I've never seen before.......some are pricy, but I think they cater to collectors, given the dating of some of the kits. I've seen kits I've built long ago.....a walk down memory lane
-
Lindberg skill level ratings
popeye the sailor replied to Robert Taylor's topic in Plastic model kits
this one I got as a Christmas gift from my grand kids a few years ago. I felt that I couldn't disappoint the little guys, even though it's a snap kit http://seymoresblogs.blogspot.com/ I did more rigging than was shown in the instructions. -
Lindberg skill level ratings
popeye the sailor replied to Robert Taylor's topic in Plastic model kits
I like the sails........reminds me of something I tried a while ago. https://wenzelswharftips.wordpress.com/wp-admin/post.php?post=35&action=edit it really is a toss up.......use the vac sails or go rouge and make cloth sails. I find the use of cloth sails to be somewhat different between plastic and wooden kits. most wooden kit are at a scale where cloth doesn't appear out of scale as much. unless the plastic model is a larger scale, the scale thickness issue with the smaller kits, is more visible. then again, I've never concerned myself with either I've got the Revell Gorch Foch, which is a skill level 5. I've also got the Monogram Bon Homme Richard and the Linberg Captain Henry Morgan...both are a skill level 3. in the hands of a beginner, I'm sure any one of these would be a very nice model.........but if one has the experience and knowledge, then the detail they possess can be brought out. it like what my bass teacher told me.......anyone can make music -
thanks all.........that paint laid down really nice.........I was impressed with how the EZ air brush worked once I got it going. I still have a bottle or two of that color....a PBY comes to mind...but that is purely plutonic at the moment, since I don't have a kit. you saved the day Lou.......don't be modest. the first link you sent showed promise.......I could have done a couple other variants with the parts contained within that order........too bad it got canceled. but you didn't give up I'm glad you didn't........another hearty 'thank you'! glad you all enjoyed the project
-
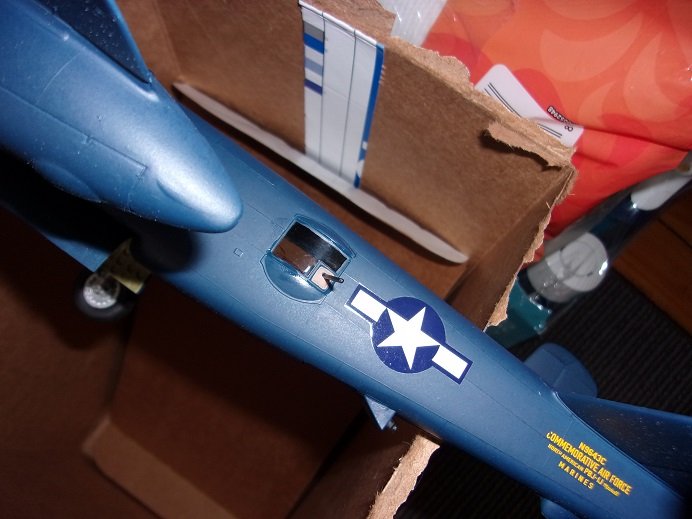
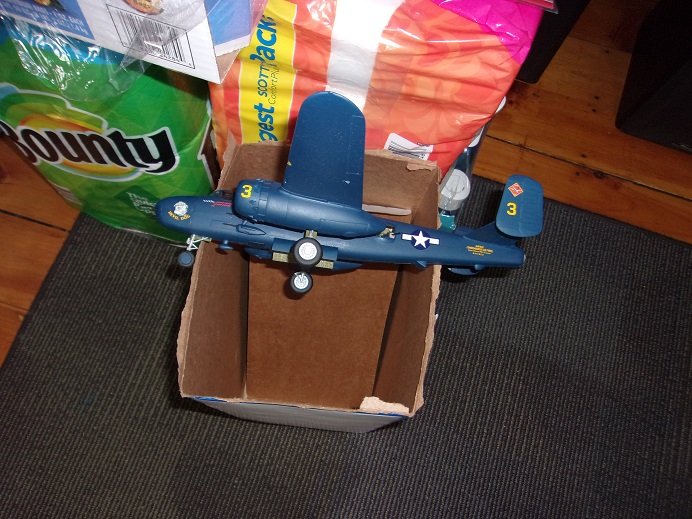
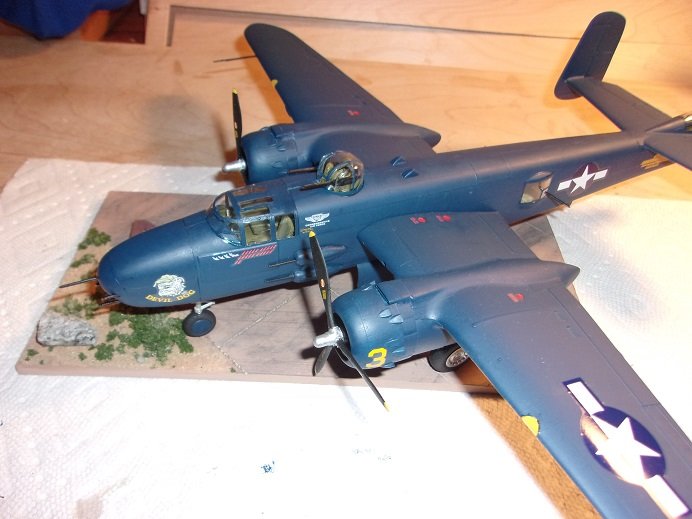
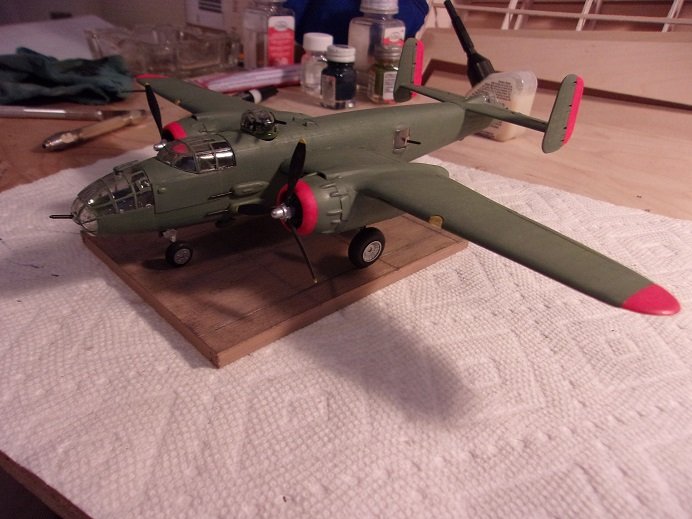
thanks gents.......although I've yet to find one that has this paint scheme. I did see one that has red and white striped rudders, but that's more of a British trait. that's why I was just going to do a generic decal job on her. I was not really happy with the fit of the kit, but I'm not one to trash a kit for that reason. I do recall these being a decent kit.......after all, this is an older Airfix kit. when and if I do decal her, I will definitely post additional pictures. the base is small enough to allow me to add them without it making it hard to do.....but it lends enough ballast to keep her on all three wheels it was still a fun kit to build.........there are others in the series.......even a couple jet aircraft. good color for a Doolittle plane..........sad that there were none that match the description found this picture in my travels...........very cool!
-
Lindberg skill level ratings
popeye the sailor replied to Robert Taylor's topic in Plastic model kits
not many go above a 5...... I think that it actually depends on the modeler. there is a lot to be said about determination.......if a person really puts their minds to the task, they can successfully build a model. I've built many plastic models in my day.....though I wish my skills were up there along some of the more accomplished modelers. my start into wooden ship modeling, began with an old kit of the Nordkap. it is one of Billing's expert kits and being an older kit, it wasn't laser cut. yet, with little skill dealing with wood {ships}, and the determination to build it......here it is I believe that the skill levels simply convey the degree of detail that the model possesses....a beginner might not attain the degree, but will be able to build the model. but anyone with some modeling skills, will be more successful. the other key traits are skill and experience. I have never paid much attention to skill levels.......I'm curious why your interested in them. if you really like the subject, and your determined to build it.........I want a front row seat in what your building
-
thanks all.......dunno OC, but I've lit only a few of my models in the past. this is the first structure model for me thanks for the heads up on the terminology Jack.......landlubber that I am thanks as well Ken, and thanks for the likes I think it will get finished this time
-
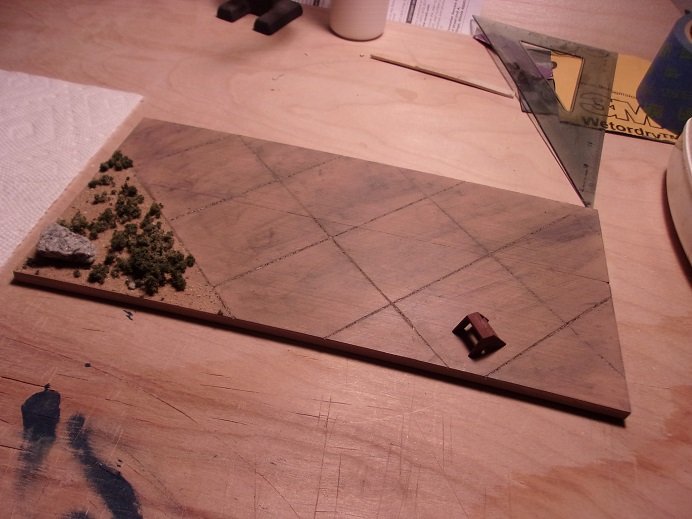
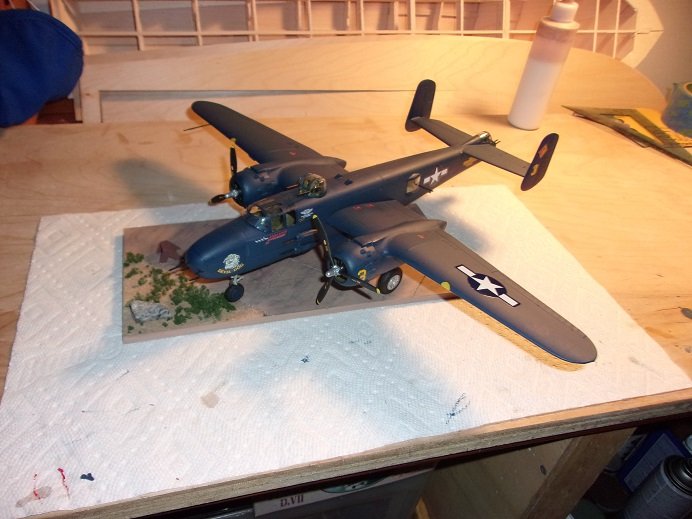
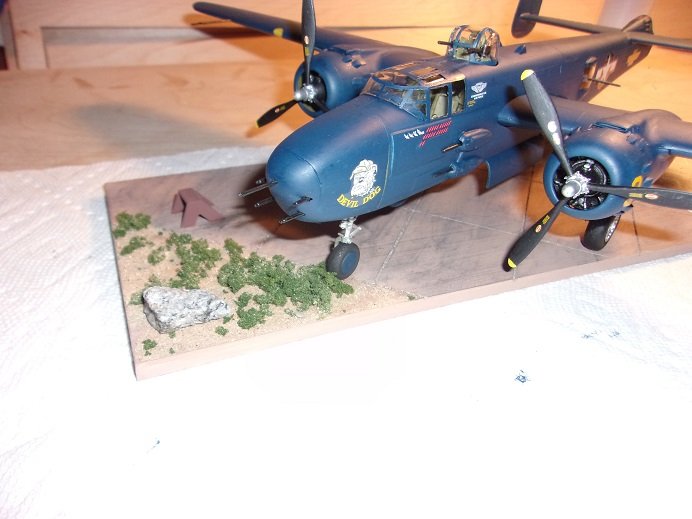
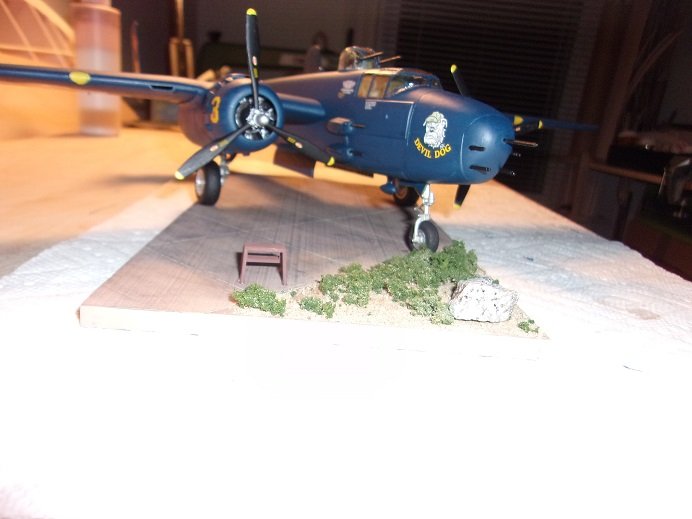
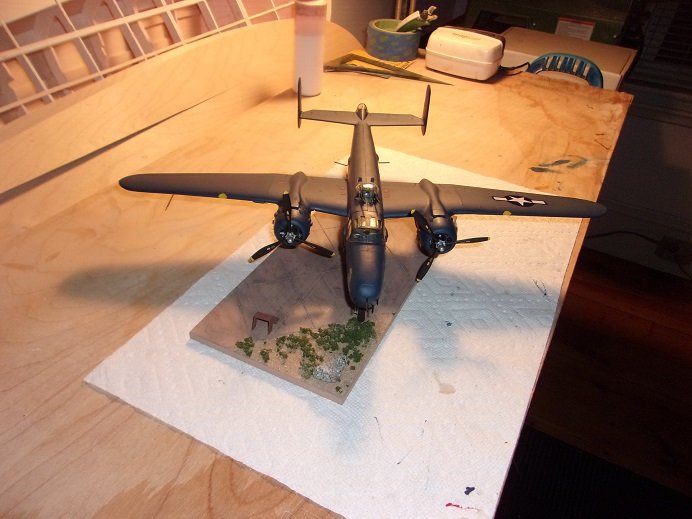
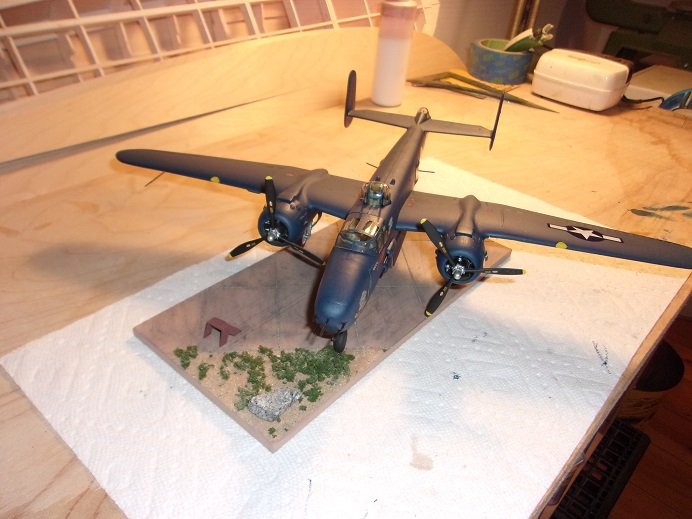
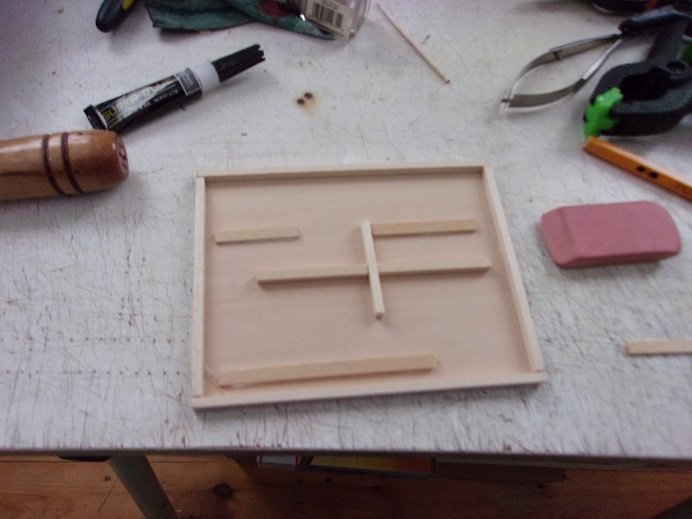
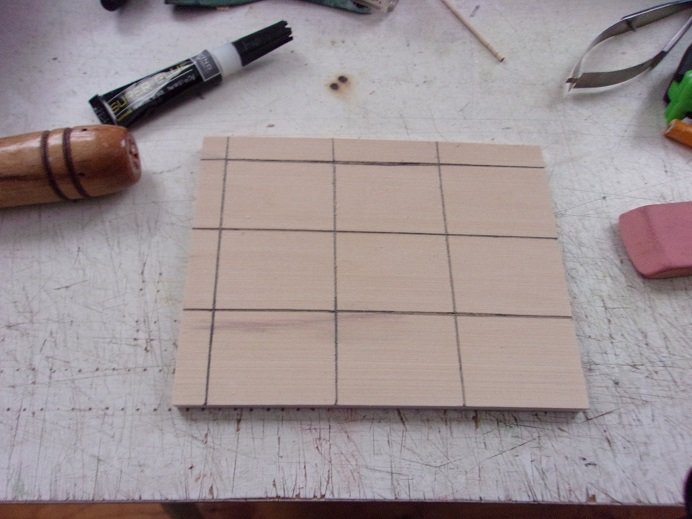
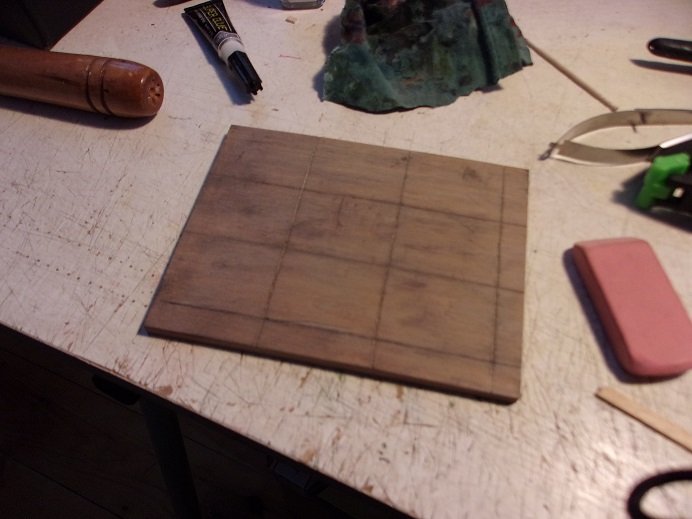
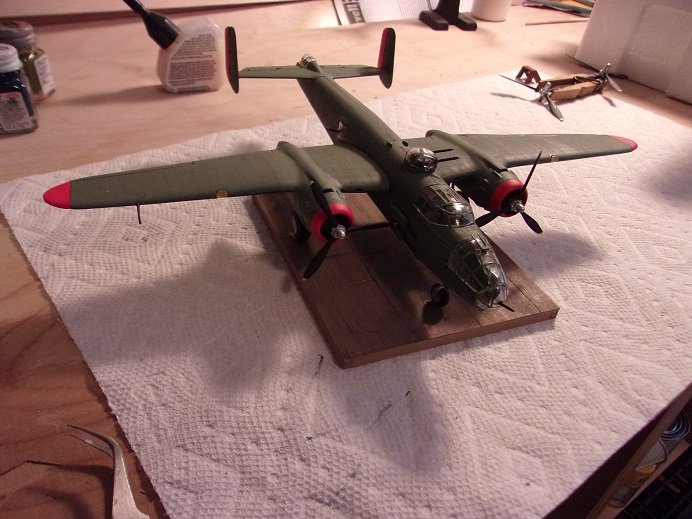
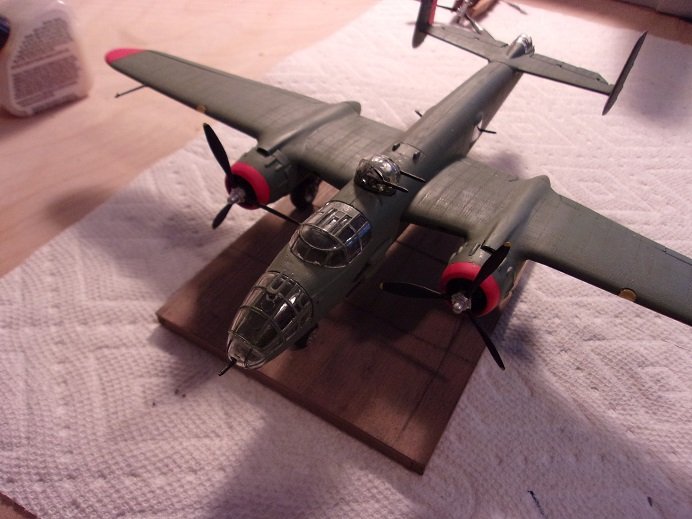
I didn't have enough time to post this last update on the PBJ 1J. assembly was down to the last few pieces.....the waste gunner's positions were added to the model. I probably didn't have to worry about cement clouding, since I painted the frames for the glass, but I used the window maker cement anyway. the things we do to assemble our models........straddling an empty soda box. adding the props was no different. supported by the wings....it was nose up, tail down. the wing lights, the pilot tube{located on the starboard wing}, and the nose gear door were added.......I almost forgot to finish painting the nose door. the base for the profile series B 25 was the second one I made.......this one was the first. as mentioned, I wanted to do them a little different, going with a cement looking tarmac, rather than asphalt. I also added a bit of terrain, to give it an edge line. not having grass, I went with some beach sand, small bits of underbrush, and a rock. the step stool will also be on the base......depending how the plane is positioned on it. the paint was the same..... ...flat tan, with dry brush battle ship gray and flat black, done with a small rag. there are a couple wonky photos here, but they looked good enough to use. I went with macro and flash......later to add more lighting after I saw what was going on. hard to believe that the nose used to be clear glass parts...very happy with how it came out. huge thanks to Lou for taking the time to send me those links........I'd still be waiting for that silly part to resurface thanks to you all for following along......your input and words of encouragement are always greatly appreciated!

- 103 replies
-
- 12
-

-

-
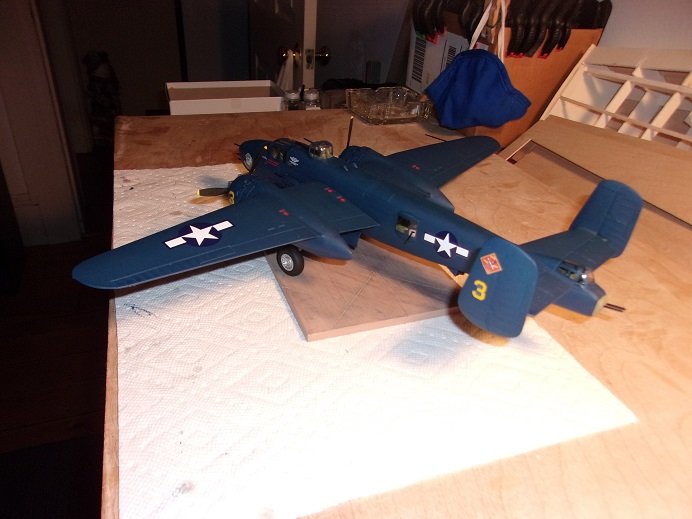
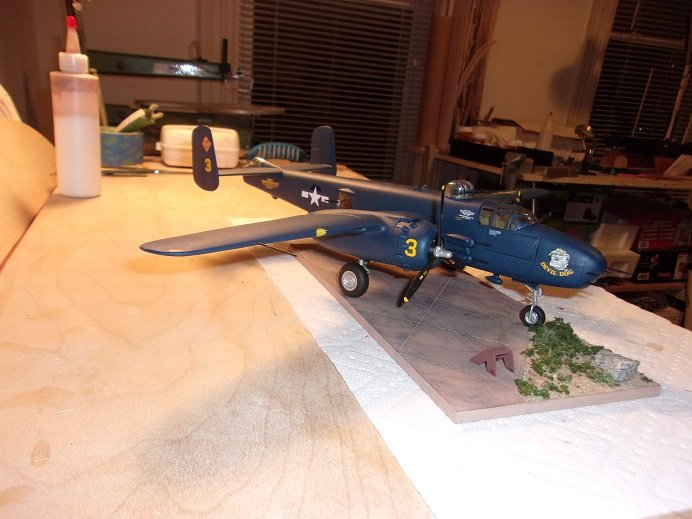
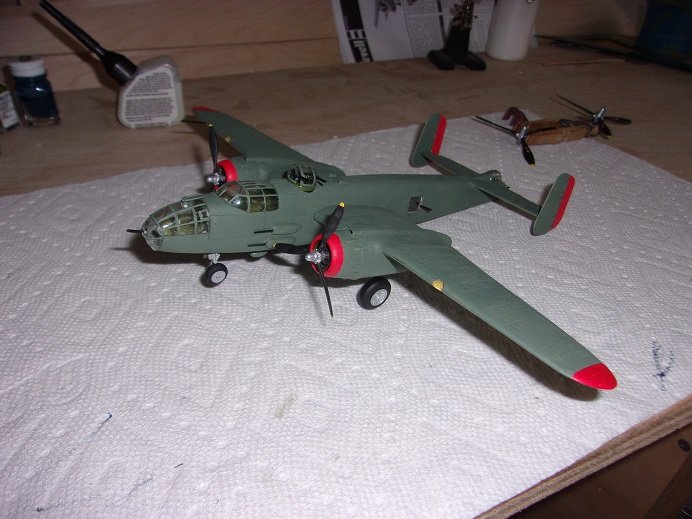
the plane is fully assembled now.......all it needs are decals. of course, I can't put 'er on a shelf looking like this.......now Can I? so, I made a base for it. one I made earlier looked good......different from the asphalt black ones I usually make. my attempt to make a concrete tarmac.......started of using too thin sheet wood and splitting as I scribed lines on it ....did some patch work there..... it was then painted a tan color, and then dry brushed with flat med gray......and then a flat black, using a small piece of rag. once dry, the plane was cemented on it. finished for now, but not forgotten

- 55 replies
-
- 12
-
-
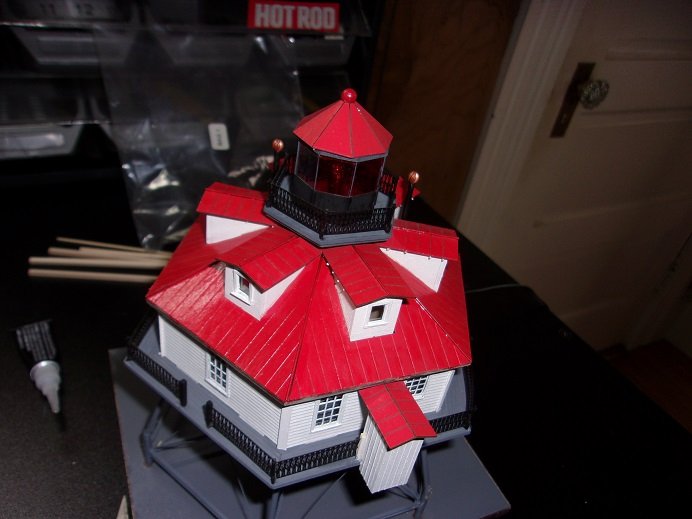
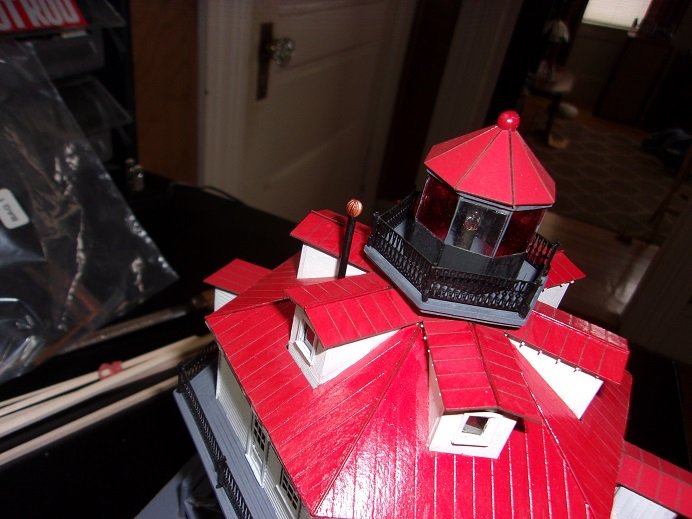
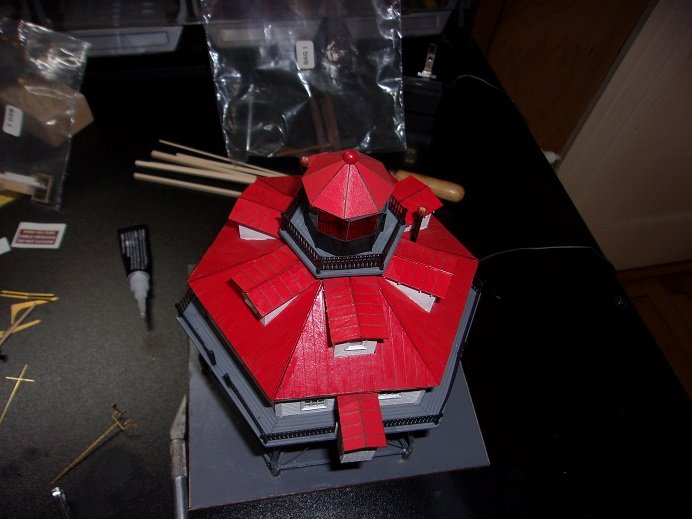
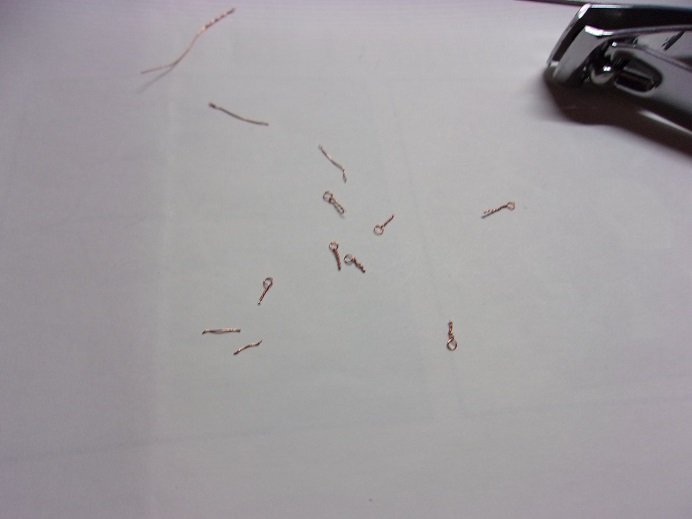
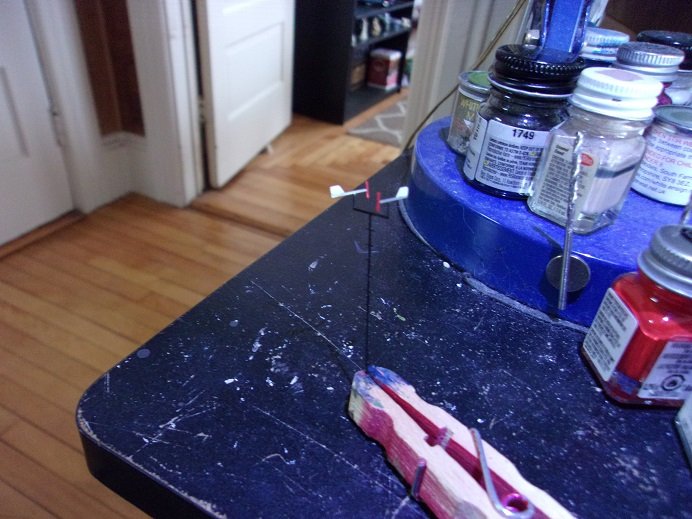
made a little more progress on the light house. the two smoke stacks were painted and cemented into place, as well as the light steeple roof and dome top { what else to call it..}. there is a dingy......small boat that is cradled off the side. I was looking at how it is rigged in place and didn't like it. I decided to drill three holes in the boat for eye bolts......one at the bow and two at the stern. taking some of the thin wire, I made up some eye bolts........I may make some smaller. thinking of really thin rope or truss cables......whatever for...I have just the thing....from an armature that came from the guts of a clock. the one in the living room stopped working and I bought the new mech for it { a kit}. we've had the clock since we were married....sentimental 'ole fool that I am I got carried away with two other projects, bit I managed to paint the wind director. more to add soon


-
congratz on a great looking model! I can see that painting greatly enhances the model....a very neat job too

