


popeye the sailor
-
Posts
16,007 -
Joined
-
Last visited
Content Type
Profiles
Forums
Gallery
Events
Everything posted by popeye the sailor
-
 that's why I did it in sections. the plastic sheeting supplied in the PT kit are quite long, roughly half the length of the hull. I chose to sheet it two sections at a time. working on the port side first...... your first cut will be along the edge you will lay at the keel.......line the edge to the left to the transom bulkhead, but give it a tiny bit extra for sanding purposes. I notice that the plank you have along the gunwale is slotted to fit there, so you can use it as the line to trim the bottom. wrapping the piece around the bulkheads, you can mark that line to trim off, and get a sense of where the third bulkhead is. the number plan might not be that way......I may be backwards, but I don't have the plans in front of me. if using that gunwale plank is a bother, you can always remove it and replace it later when the hull is sheeted. all this will depend on you gluing it back on the board though......I hope you did that. you can do two sections at a time until the hull begins to narrow to the bow......then you may need to cover only one section at a time, until the last section........you might be able to do two sections then. there is a picture of the plastic sheeting in the PT log.......using it would have meant a lot of extra work. it will take some measuring and fitting, but it can be done
 -
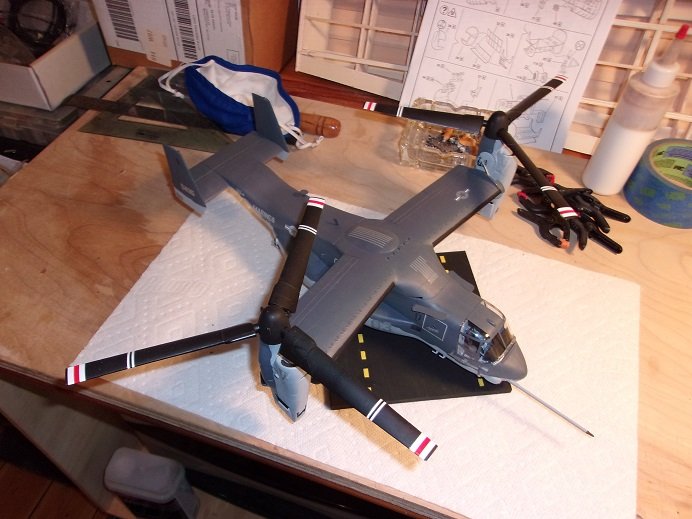
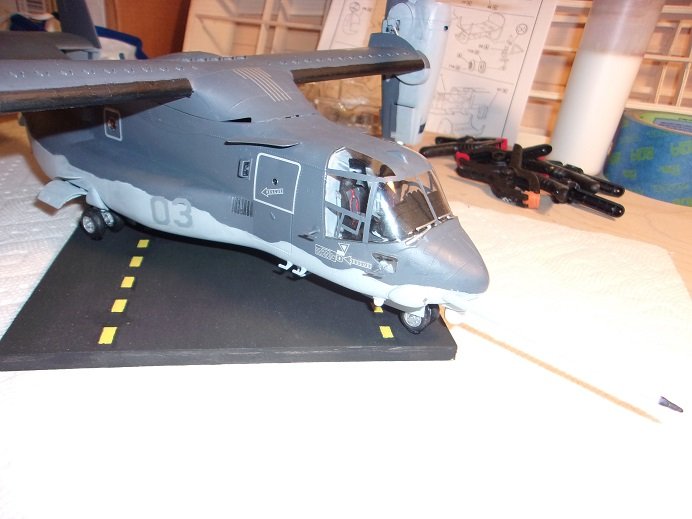
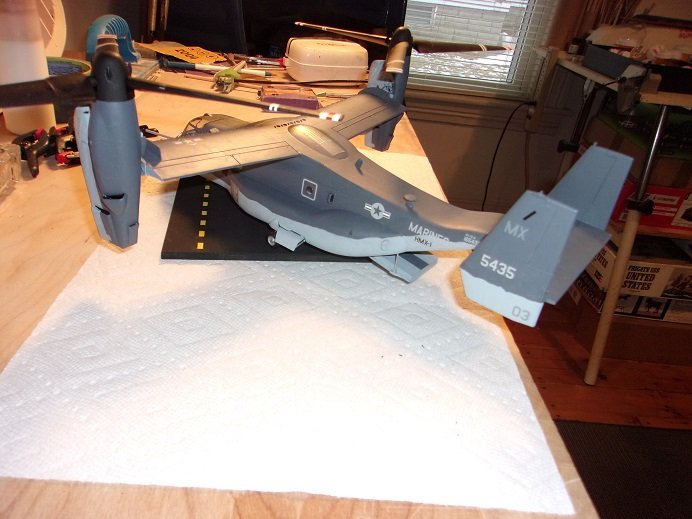
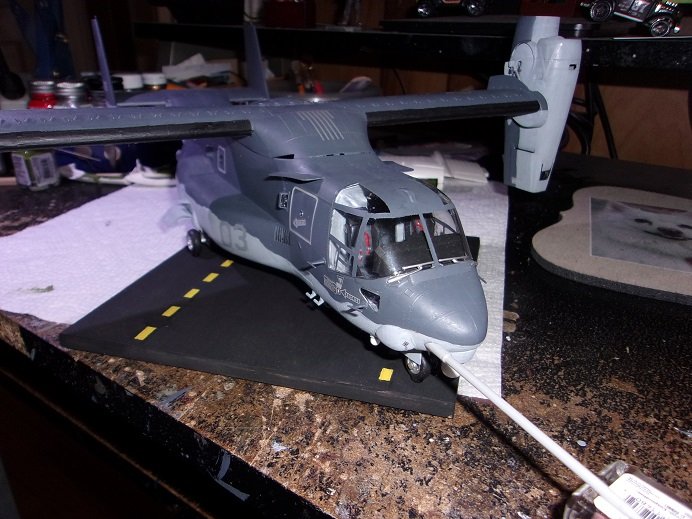
c'mon Lou.........I did a botch job on the interior! close molded stuff like that is not my strong suit. I'm beginning to think I should have gone with a different camo.........one of the decals fell off and now I can't find it! I'll have to order one of those letter sheets as I did for the B 17 builds....gonna have to be in black though {although I could just print the decals.....nothing fancy about letters}. so the fuel tube is painted and I touched up the stripes on the props....not like it mattered.......one would have to look under there to see them I'm calling her done! she takes up a good amount of room on the table......missing letters on the rudder fin thanks for following along........glad that you found it interesting

-
very well done! gotta grow the grapes
-
back then, it was all about how many one could fit in the car I think back to the happy Days era, even though I was a 60's / 70's child. it was back in the day when cars had curves.......they had style. love the color
-
they are Ken...........white and red are as well! they definitely need to be sprayed...light coats and in layers you pulled the rabbit out Jack...that's what counts! tedious decal work.....especially between the windows......super job Jack! congratz! so....what's next?
-
1/48 Italeri Hawk T.1A (On Hold)
popeye the sailor replied to Old Collingwood's topic in Non-ship/categorised builds
I'm a roller coaster nut........one thing I have learned, is never have an open bag of M&M's in your pocket -
very nice start in putting all this together.........awesome!
-
glad to see your back in action OC.......the troops are looking really good looking forward in seeing the field come together
-
superb looking model..........you really did a great job with the paint nicely done! hope you can get back to her Kurt.......I did see a kit some time ago I'd pull up a chair in a heartbeat!
-
I do a lot of fiberglass patching on small scales { patching trailer roofs}. I'll lay down a layer of resin and then spread out the cloth patch. another coat goes over it and either with spatula or brush, it is smoothed out. with the few model boats I've done, I don't usually use the cloth. the resin is more than sufficient in sealing the hull so it won't leak.......but then again, I've not done an R/C boat yet, so I haven't been able to prove my theory. the resin give me the smooth hull I'm looking for, and with what I've seen, I really don't want the cloth texture to ruin it. for a large scale job such as yours, it would likely call for some type of roller to smooth out the cloth before the second coat is applied. for the second coat, it would probably be good to wait till the initial application has had some time to set.....the second coat would also serve as a leveling effect. in any case........I'm glad it's working better for you
-
very nice
-
sounds as bad as I am........I never write down measurements I take it for granted concerning the scale I'm working on and try to stay with the scale. as you've done, it's always best to start at the bottom and work your way to the top it does appear that your working from text, so at least you have something to work with. very nice detail work! I just noticed it.......but it appears that your missing a tooth on one of the track sections on the front of the body {left one}. looks easy to add one I'm not nit picking, but I can see your a man of perfection
-
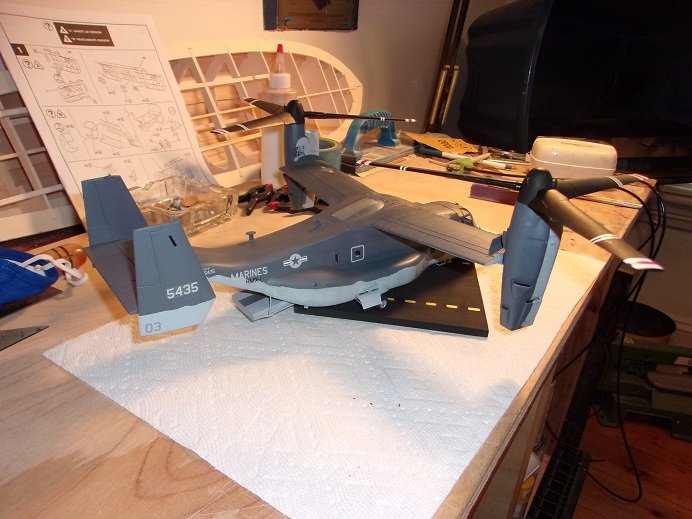
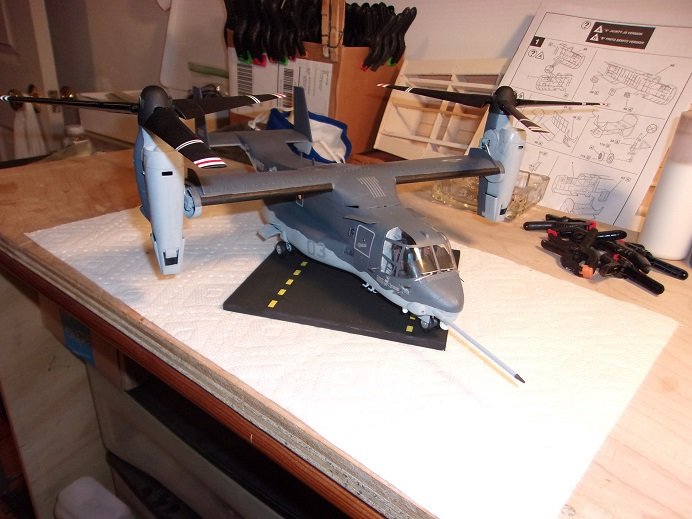
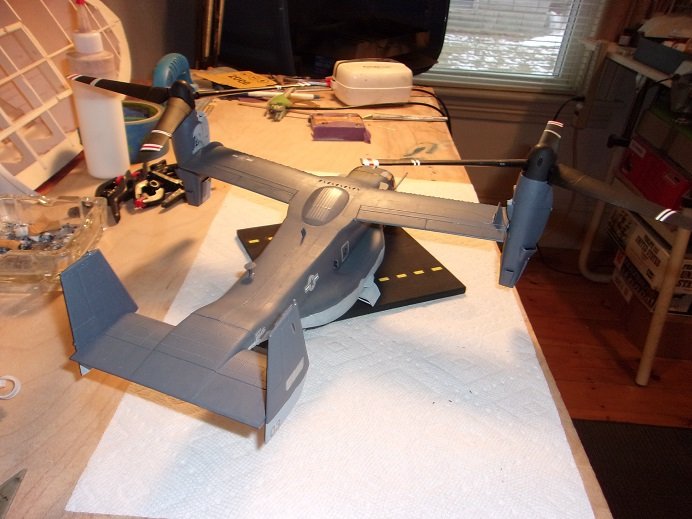
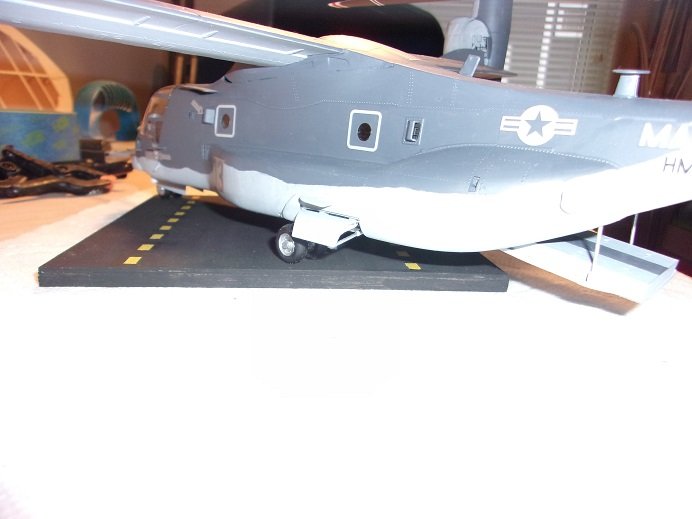
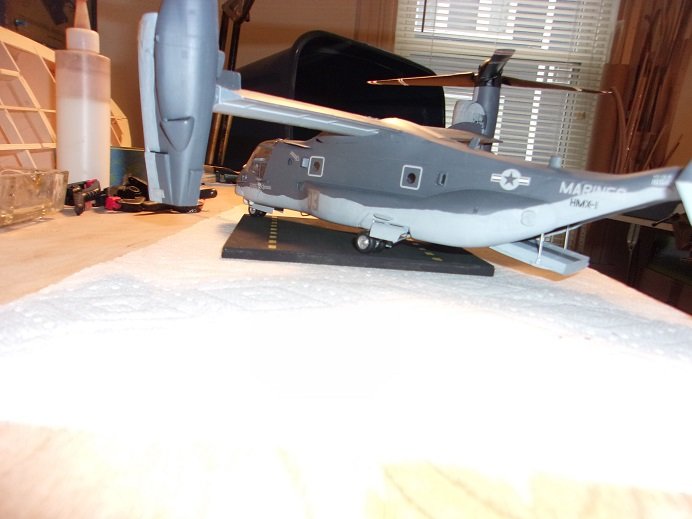
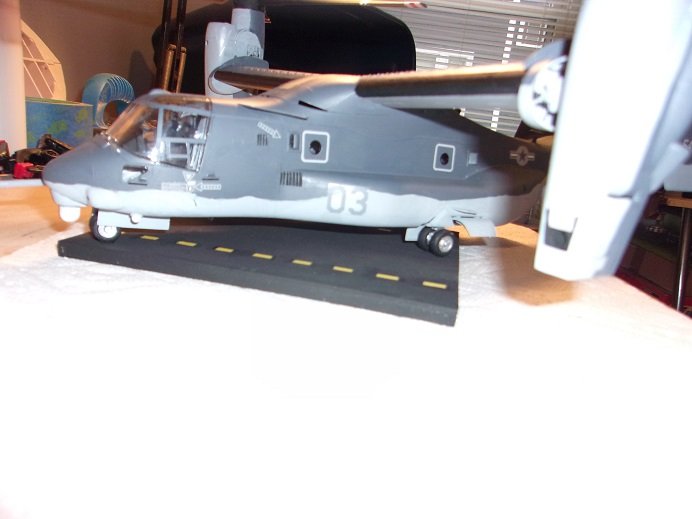
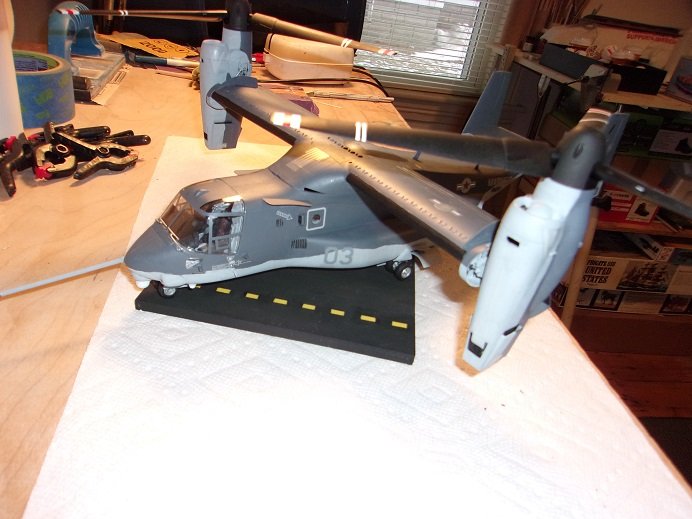
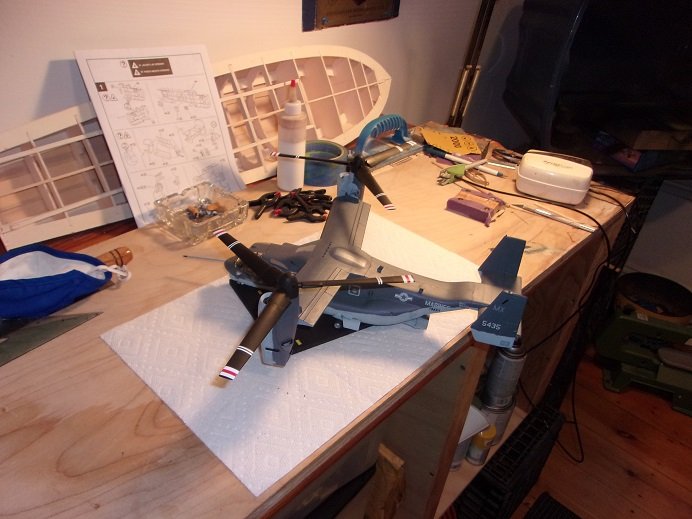
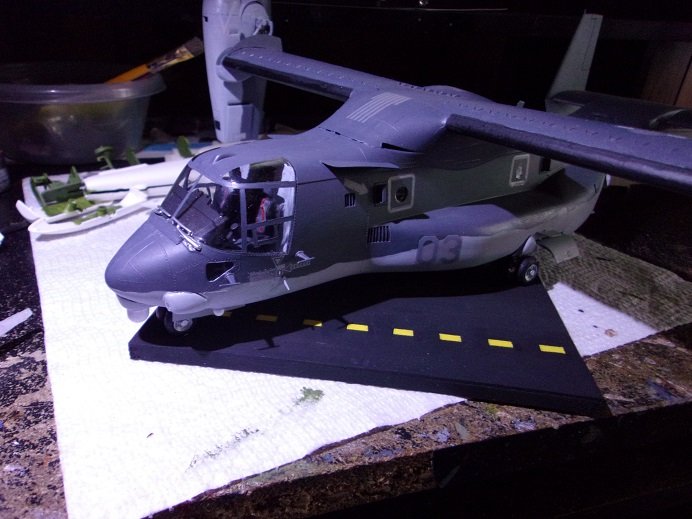
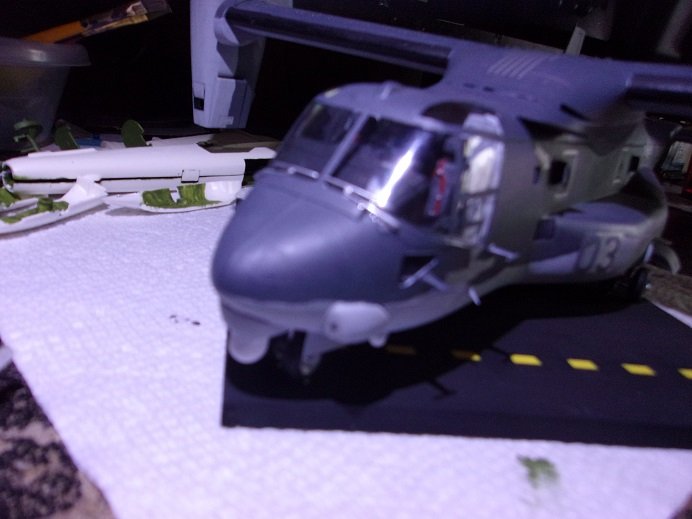
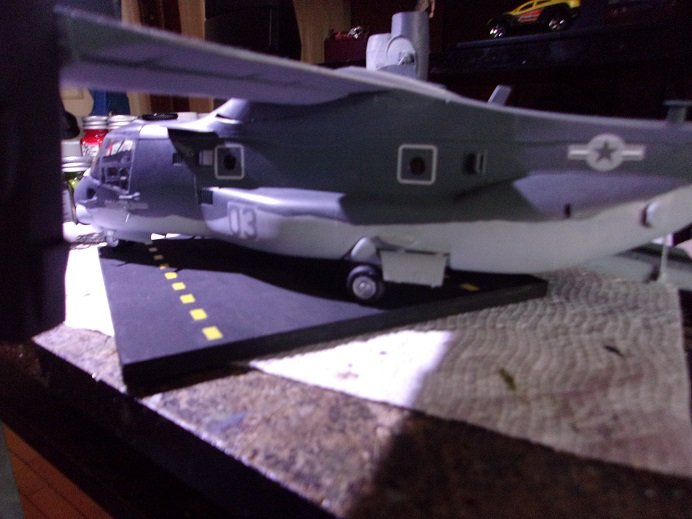
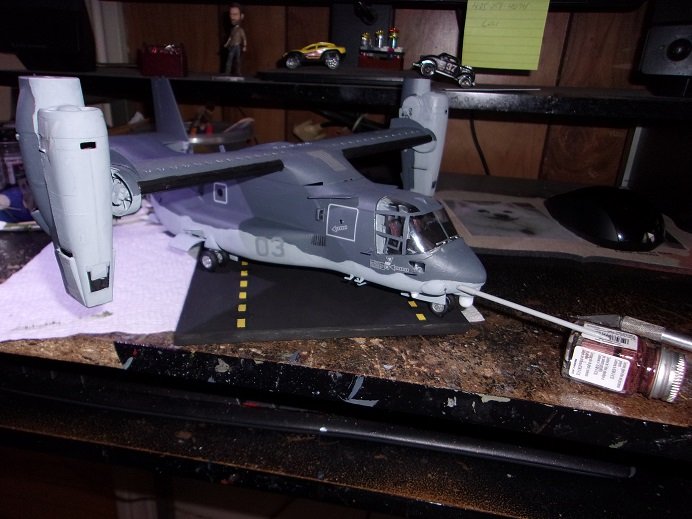
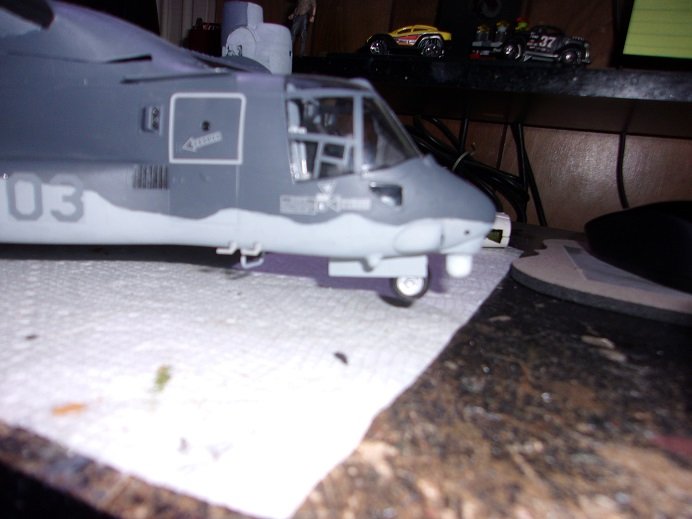
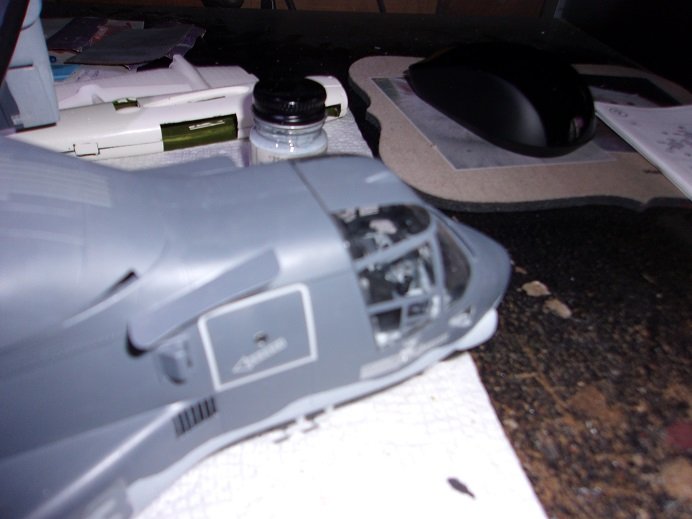
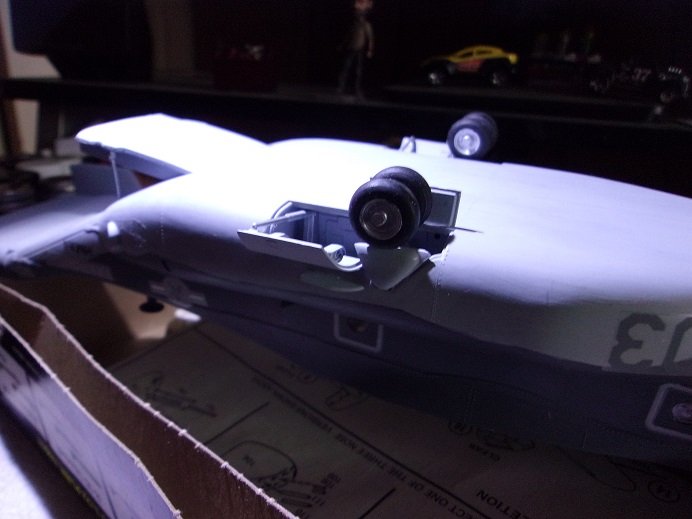
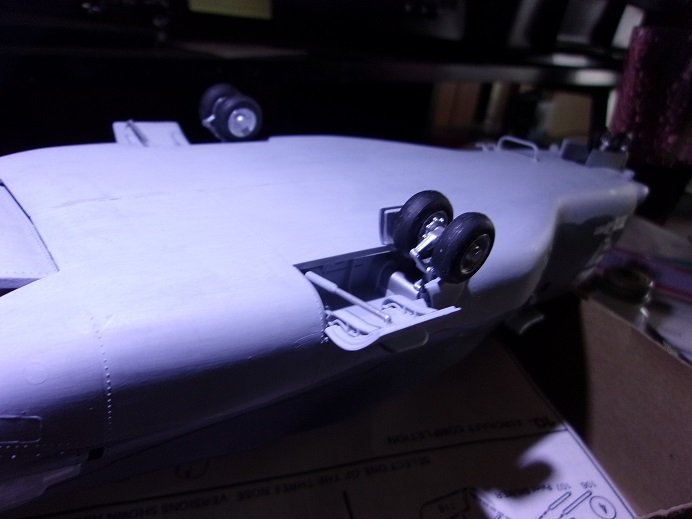
thanks Ken and OC, and thanks to all the likes I'm relieved that the gear thing was that quick a fix........still up to you Lou for the perfect model the wing was a quick fix....just trim off some of the dried glue and re-cement it back on. with the undercarriage work done, it was super glued on the base. small parts around the nose was added.....antennas , wipers and such........ I'm working on the props, finishing them up....the next pictures should be gallery pictures the refueling tube was added.......still needs painting. it's nice when I can get a good picture....I miss the focus ability of the old camera. I'll be sure to do the finish pictures in some good lighting
-
holy moly Mike! amazing work with such small parts! I'd be daunted to try one.........
- 179 replies
-
- 7
-

-
- hatsuzakura
- pit road
- (and 2 more)
-
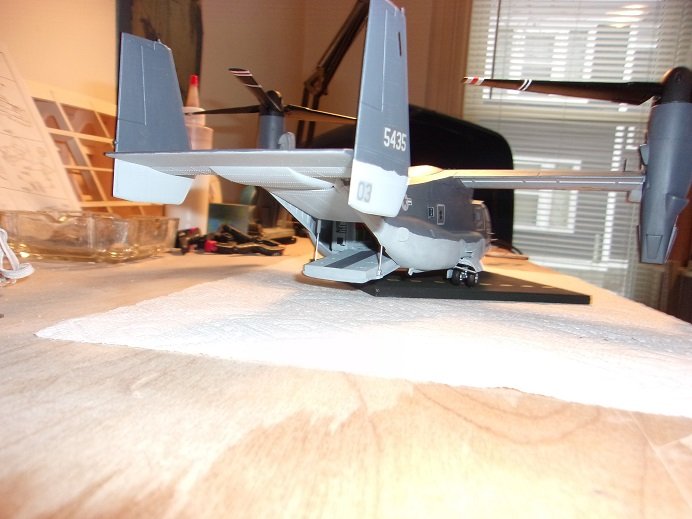
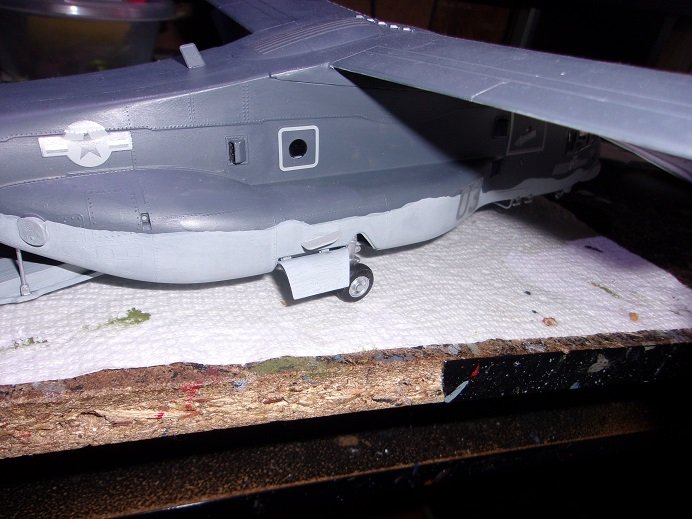
with the holidays over, I can get back to this model it took a little though to figure out what to do about the gear door situation. what I did isn't correct.......but it's the best solution. any other remedy would mean almost total disassembly of the model, and to go there would mean certain damage. the brace for the rear gear door was altered slightly.......basically cutting off the locator pins and cementing them in the proper place in the well. the door hinges were added to them and painted. once the braces were dry enough, the doors were cemented in place. the gear doors were added to the front well.....a couple other parts were added too. I tried to get a shot of what can be seen as you'd look into the cockpit.......flash wasn't a help here I went into macro without flash for these pictures. it was plain to see that the front gear door wasn't going to fit. what I did was cut the door in half, and cemented the curved part of it in place. as I was working on her, I slipped and the wing came off .......it's OK.. no damage......I can put it back on afterwards with little effort as can be seen, the other half has a definite lip groove........but the groove would have had to be cemented along the body, leaving the flat {cut} edge exposed. to make this look a bit more plausible, I switched these two halves, and cemented the part meant for the starboard side, on the port side, exposing the lip and appear as though it would mesh with the other half. the back edge is at an angle and matches the rear gear door. there is one other part, a brace for the gear itself........but I'm not sure I can add it without it looking like it would impede the operation. even if I didn't add it, cemented to the base, it likely would never be seen. so, there are a few more parts to add, and then it can be glued to the base. almost there my friends
- 96 replies
-
- 11
-
-
looking good Egilman....I wouldn't think that both sides were identical. the seascape is coming along nicely as well
-
very nice progress...the helm looks awesome is that plastic rod? did they supply it in the kit?
-
hey Jack! the jeep looks really good in the dio.....quite a bit of potential still you could get a medevac chopper and do a pick up
-
I'm sure you would have come up with it, if you were in the same situation kinda neat that it doubled as a spatula as well . I've been wanting to get back to her, to get the rails on......spray rails at the chines, the clamps and the gunwales, but the holidays helped to keep me at bay. not only that, I'll need to order some extra stuff, since I want to have the two rudder and screw arrangement, this should be done before the sheer is put on. this way, there'll be more than enough room to do what needs to be done.
-
hi there.....just tuning in here. yea....I'm glad you like the alternative idea. no....you won't need to make additional bulkheads. if you run the sections with the grain, they should conform to the frame just fine. I would suggest sheeting the frame two sections at a time. using the keel as a starting point, butting it along the keel and then wrapping it around should work out well. trim the sections slightly past the deck line {I'm guessing there aren't any bulwarks}.......you can do the final trim work once you release it from the board. create your joints so they share the adjoining bulkhead, making sure they they are flush. I cut all of the section for the PT boat by eye......some minor adjustments with the shaping before I glued them down. what you bought there is perfect, as the hull doesn't look very deep.......some of what I bought was 4 and 6 inches wide. with some kits. they supply 'rabbits' that you can cement planking or sheeting to...apparently Dumas doesn't do that. you'll also need to find if the bow stem needs to be sanded to an apex, as I did with the PT boat......... one nice thing with this hull, is that there isn't a defined chine.......you'll be able to cover it with single sheeting. I plan to use resin on the hull, but only the resin.....I don't use the cloth. sometimes I could see the cloth showing through. I figure to give it a coat of resin......sand smooth and then give it a second coat. this should more than suffice
-
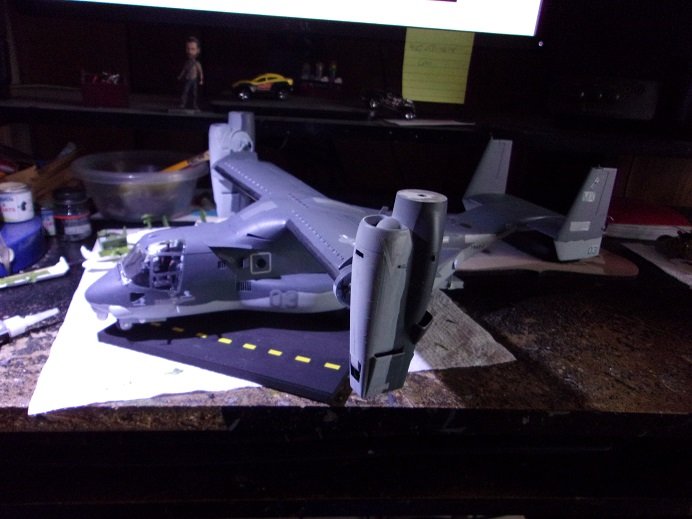
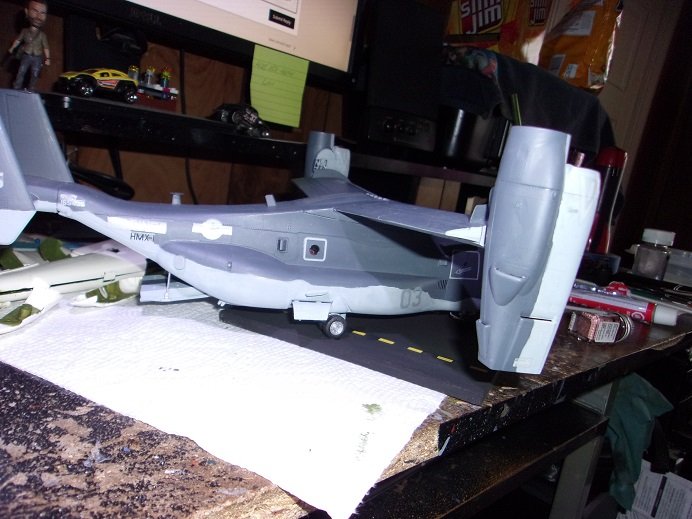
getting back to the Osprey.........I painted the base and gave it some markings. I did 'em by eye....so they might not be perfect. more on her soon
-
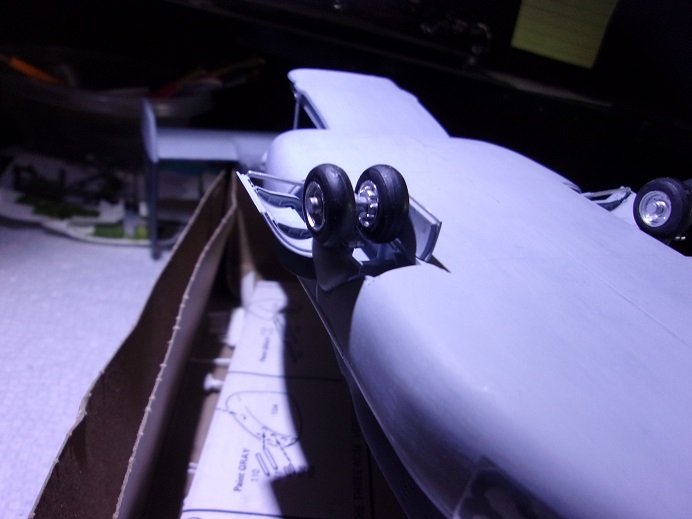
College Park........there's a College Park in Maryland and Georgia........really looks the business it's too bad you couldn't get all of that smear off the windshield. it's a fine looking model
-
Billings makes great kits.......I started with one. you got a leg up though......this is a laser cut kit my first one wasn't........but it's OK.....I learned to scratch build early on.
-
another point to make here is that the bulkheads are too far apart........there should be more of them to decrease the spacing. you can get Obechi wood from Billings.......it's thinner and a lot more flexible. I've never been a fan of Balsa, mainly due to the fact that it dings real easy. now if you don't feel like going that route, you can resort to basswood sheet, covering the hull frame in sections. you will need to anchor the frame back onto the board though, to insure that the hull will be warp free and straight. I just did this to a Dumas PT boat. they supply plastic sheets to cover the hull frame, but I thought that cutting the plastic to shape would be a lot of work. so I went with basswood sheet. I used 1/16 so that I could get good contour of the frame. I have a log going on this so you can see how I did it.
-
sounds like some really good plans there totally understand concerning your brother.......hoping things get better.

