HOLIDAY DONATION DRIVE - SUPPORT MSW - DO YOUR PART TO KEEP THIS GREAT FORUM GOING! (Only 20 donations so far - C'mon guys!)
×


popeye the sailor
-
Posts
16,007 -
Joined
-
Last visited
Content Type
Profiles
Forums
Gallery
Events
Everything posted by popeye the sailor
-
 I did .....got some decal set! this morning, I started to fit the guns, but they don't sit in the carriage straight........will need to modify she wanted me to go home and wait for her call, but I mentioned taking the trip to H.L. she said she wouldn't be in there that long..............right two teeth........she'll be in there for over an hour. it took me a half hour to go to H.L. and back....and here I am.
 -
thanks OC.......getting ready to take the admiral to her dentist appointment. with the restrictions, I can't sit in the waiting room, so I might take a side trip to H.L.
-
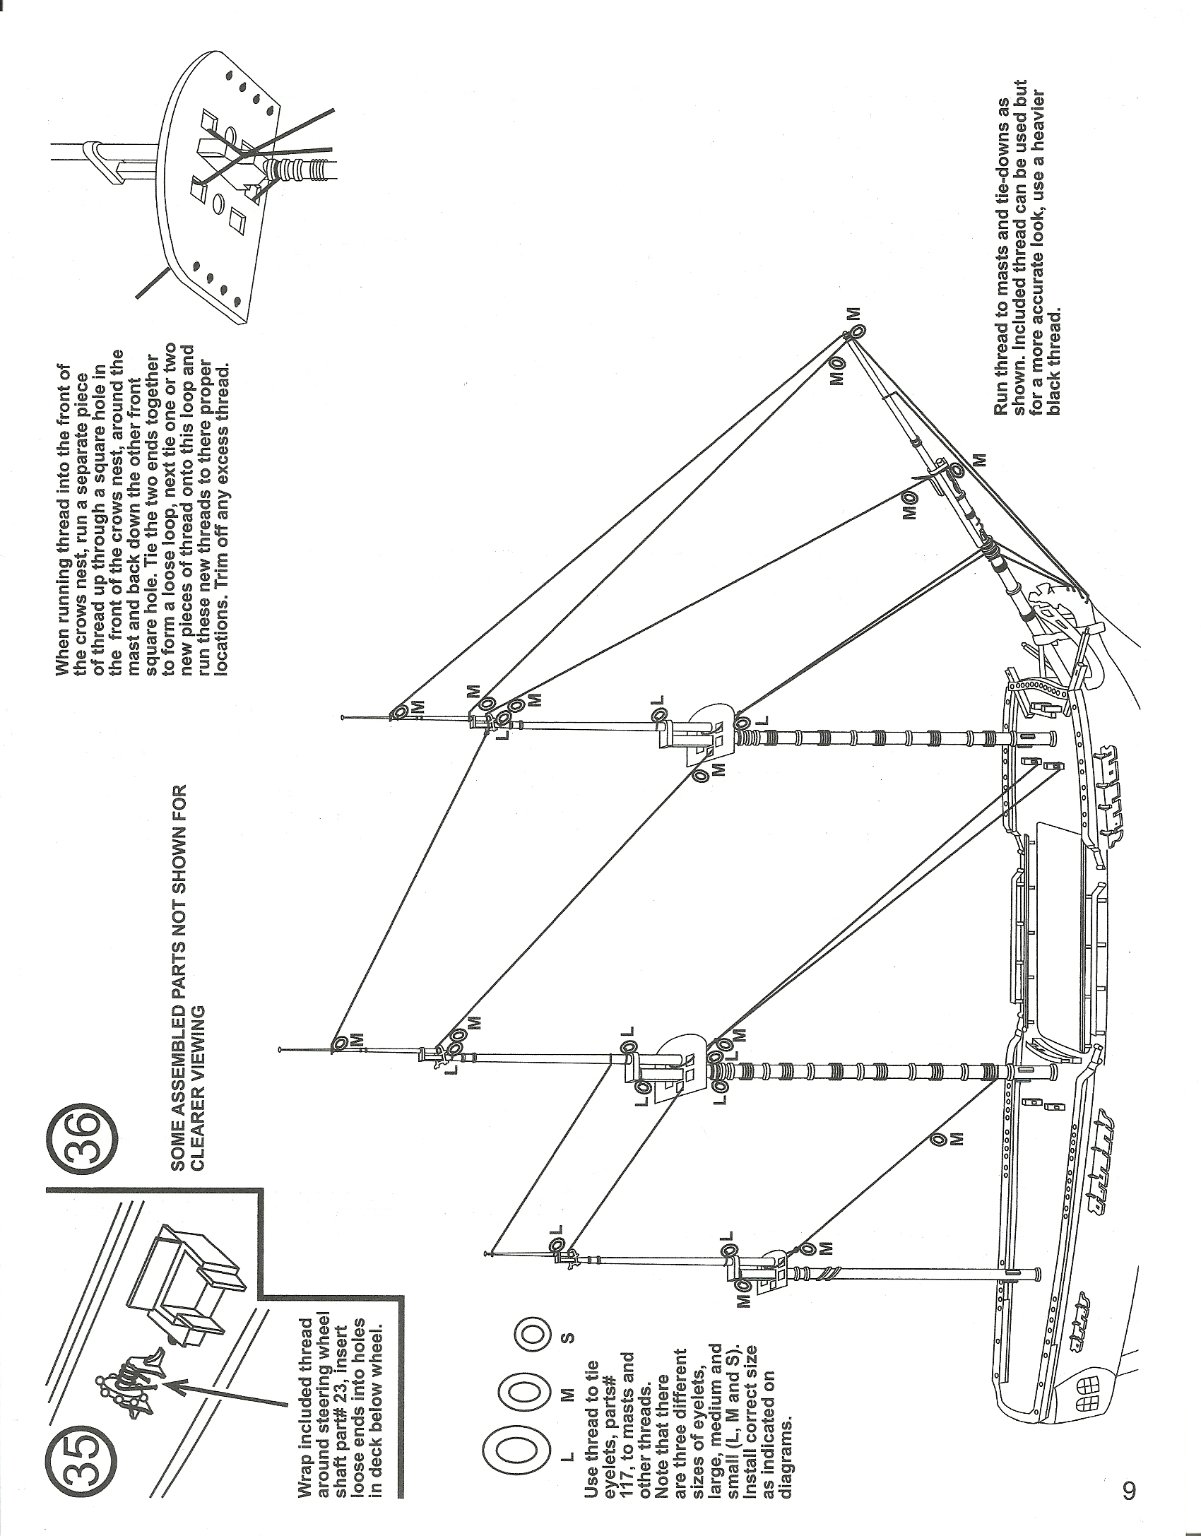
Lindberg "Jolly Roger" Instructions
popeye the sailor replied to Bernie_S's topic in Plastic model kits
I have the Jolly Rogers kit........I still have the instructions does yours have this page?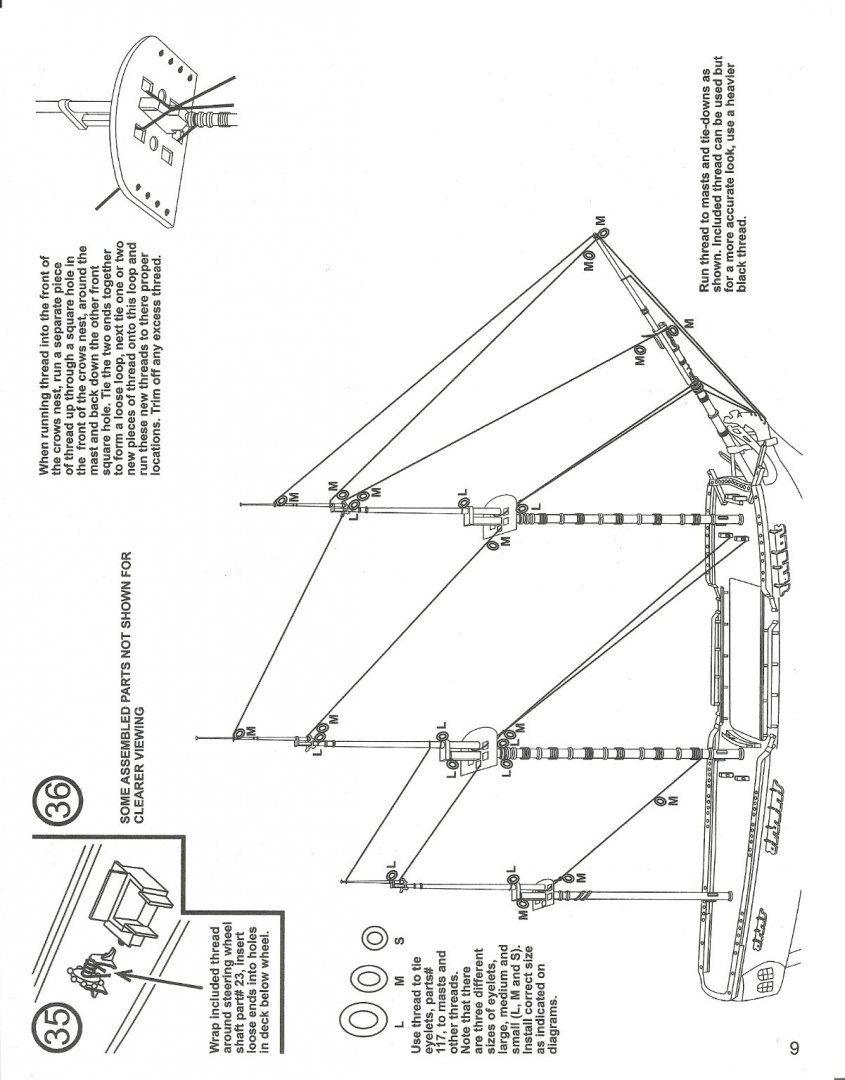
-
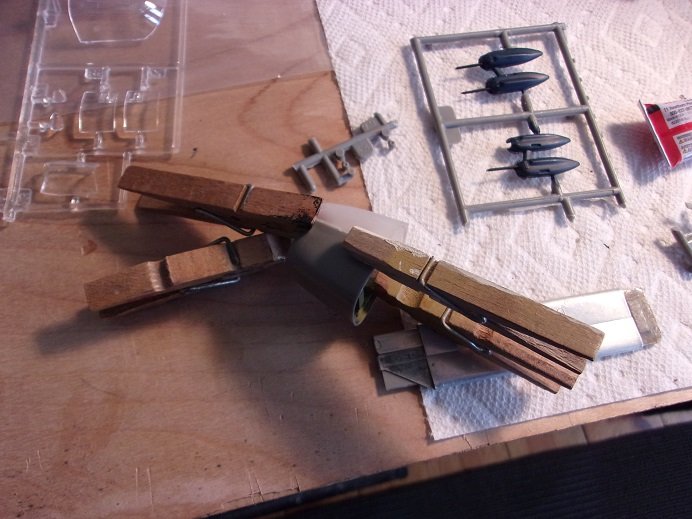
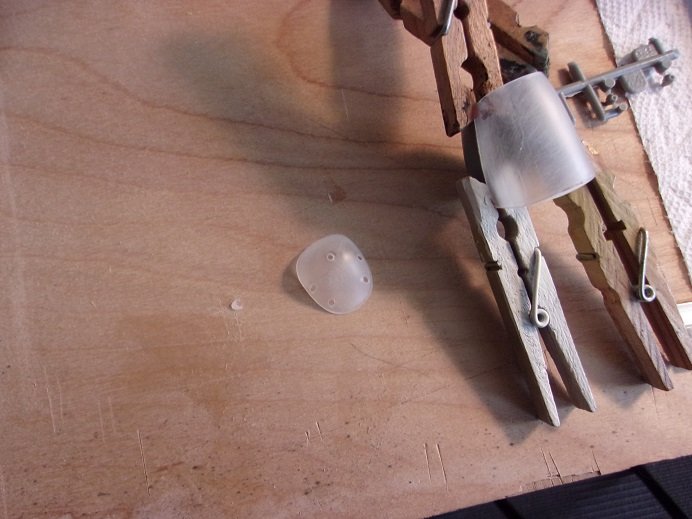
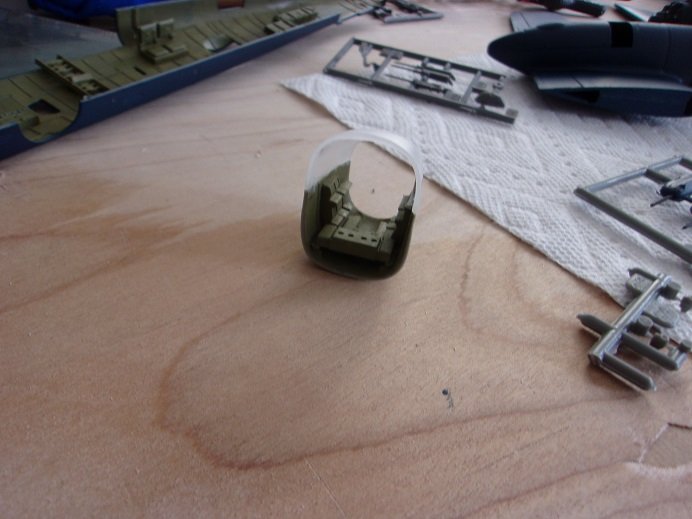
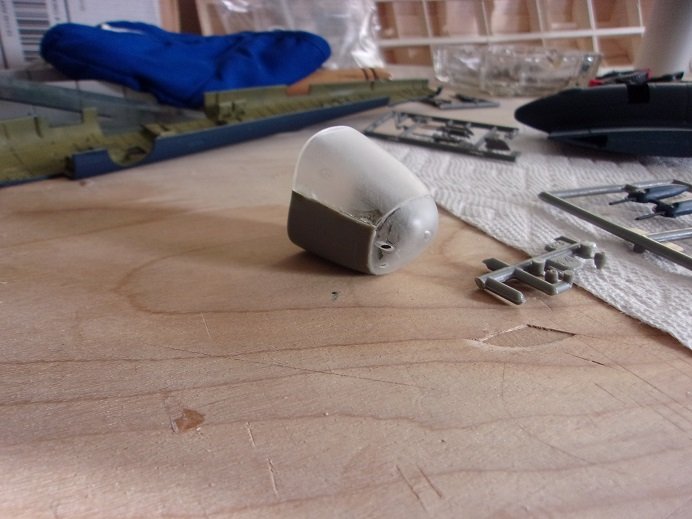
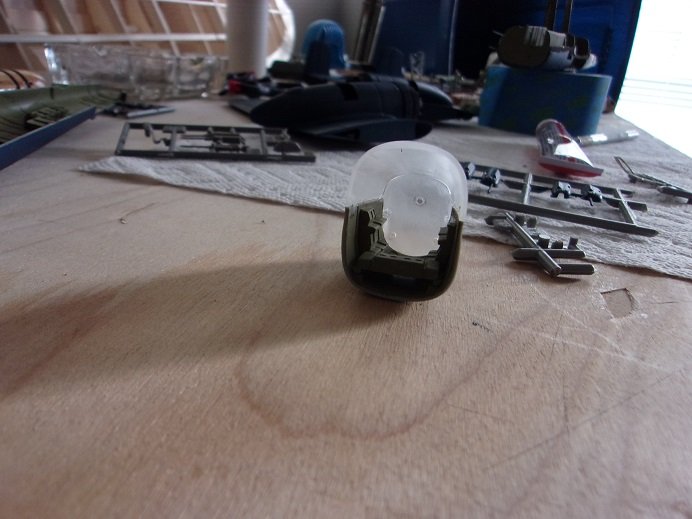
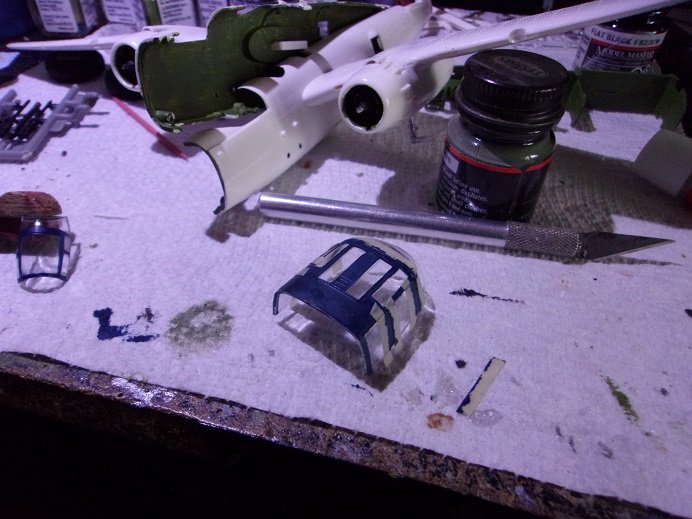
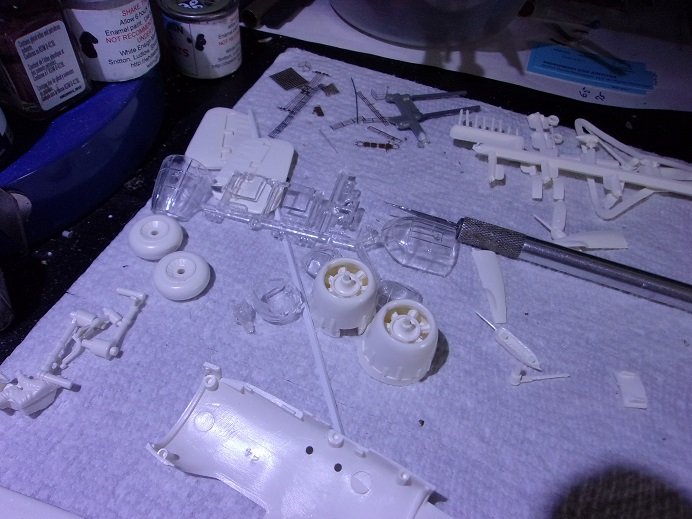
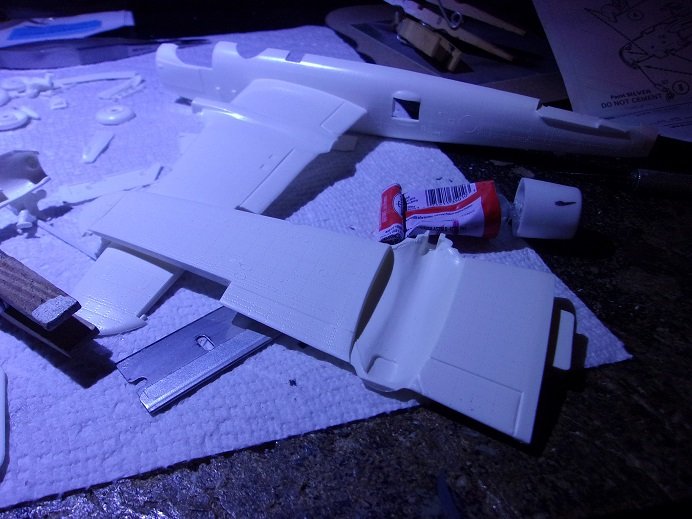
got some more done on this 'ole girl.......got a baker's dozen to show yas as mentioned, I've been painting parts that I haven't done yet. there are a couple of braces to go on the main gears, so I did that and repainted them too. the cowls painted up nicely as well. the cheek guns were painted and set aside......funny that one of the guns has to be added into the equation. it has been cemented in place on the port fuselage half. I also went ahead and cemented the turret and cockpit into the starboard half......I'll add the control sticks later, as it's fairly assessable. there was one dilemma I had to figure out. this kit really isn't set up to do a PBJ-1J.....it has the two different nose configurations, but lacks the one for the PBJ. so sorting the parts that will give me a convincing nose, I went further with the assembly. I had already assembled some of the bottom bucket for the nose section........taking the top half {which is glass - clear}, I will sand the window frame detail off and make it smooth. the front part, which is also clear {glass}, I will do the same thing to it. the top section cemented in place after the detail was sanded off. this isn't the correct front section......but it will have to do. it's only missing one gun { the bullet nose configuration}. I'm also working on the props, which I brought to the desk {where I'm doing most of the painting and sanding}. I also brought the cockpit glass and the tail gunner's glass to paint the framework. this one is going to be a little complex for how I'm doing it, but it gotta be done. more parts have made it to the assembly area the nose section is fully assembled, aside from stuff'in the guns in there progress with painting the glass is going pretty good......only a few pho pars I have to correct... I've made it a little further with the cockpit glass......only the front left to do. I'm almost done painting.........the assembly part is next

-
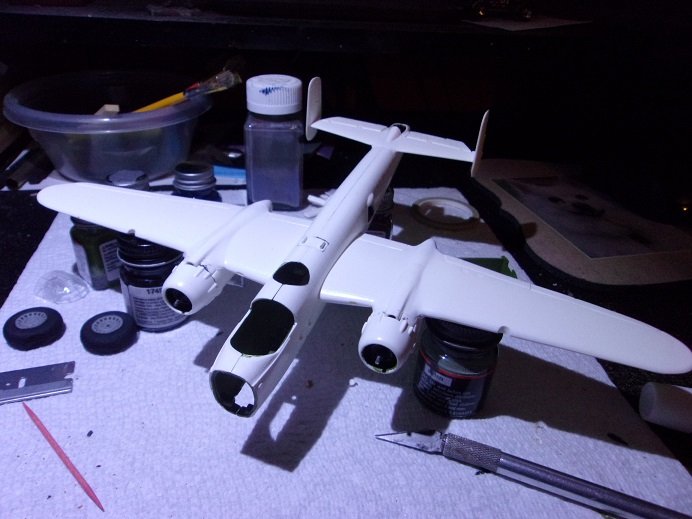
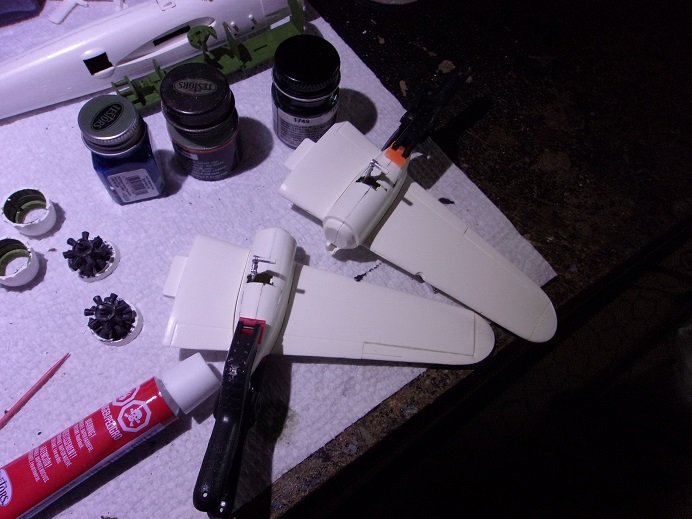
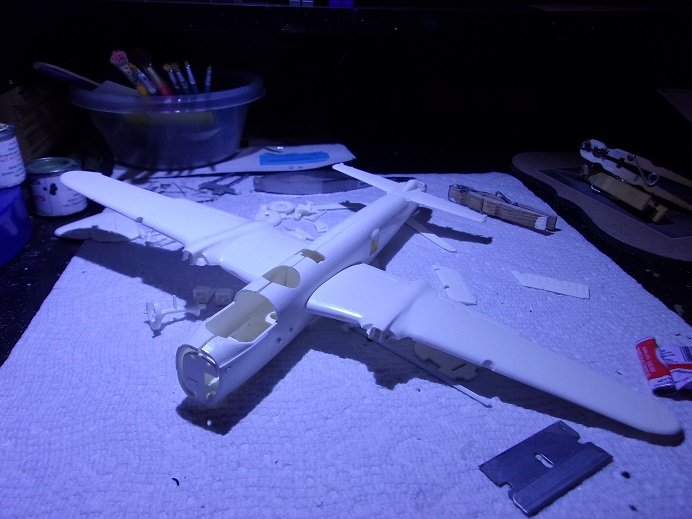
thanks all....and for the likes I did just a tiny bit more on her.....and then the rest of my time was spent on the PBJ. with the way the other one is coming out, I'm tempted to do them both as PBJ's. the Revell kit did have a hurdle to get over, but I think I sorted it out.......I'll show you in that log it's just a dry fit, but it shows more of what she'll look like....... the rudders have been added to the stabilizers.....they are drying at this time. the parts that were the big problem with the Revell kit have been cemented on the wings so I wouldn't lose them. HA...Ha Lou! sorry I missed your call.......I'll try and call ya tomorrow, but gotta take the admiral to the dentist. it never ends...... it actually stayed together long enough for me to snap this one.......it will look a lot better with paint I have the Atlantis kit still Lou.......perhaps I'll lose something then odd scale though........might be harder to get replacements


- 55 replies
-
- 11
-

-
I'm glad to see the wipers...........all the pictures I was seeing, they weren't there. here I am think.....such a nice looking model, cheap that they didn't supply wipers yea........gotta have the bumpers too........the really complete it back in the day, the major model makers had accessory cards of custom parts, so you could gussie up your models. you can still find them...... super nice job ........gangsta whitewalls and all!
-
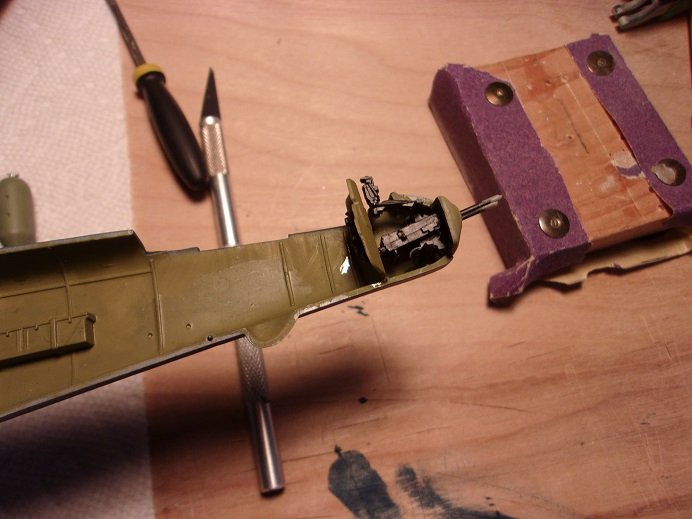
very nice progress........your idea for the wing guns is good.......what are you using to cut such small diameter tubing? I have small tube cutters, but I think I should get new ones. I know that the blades are replaceable, but I've had them for so long, that the screws are frozen. another one that I have fastens them with roll pins....but I've seen them in Hobby Lobby
-
never made it.........perhaps this week
-
where do you spend your nights........... I first though that the illuminated interior was a bit much........but then I though about my son's car nope! that looks pretty G.D. cool! great looking model.........and in my size too!
-
with as much as you did to it, I would too
-
hey there....long time! great looking project......very nice dio too! I haven't kit bashed a plastic model in years.........I do it to wood now. I saw a kit of this very plane out there.......really neat how you did it!
-
they have a run on the VW on old model kits...........must have 10 / 15 kits on there! they also had a 1/16 scale model of a super beetle. pretty cool looking model........do you think the knob is large enough
-
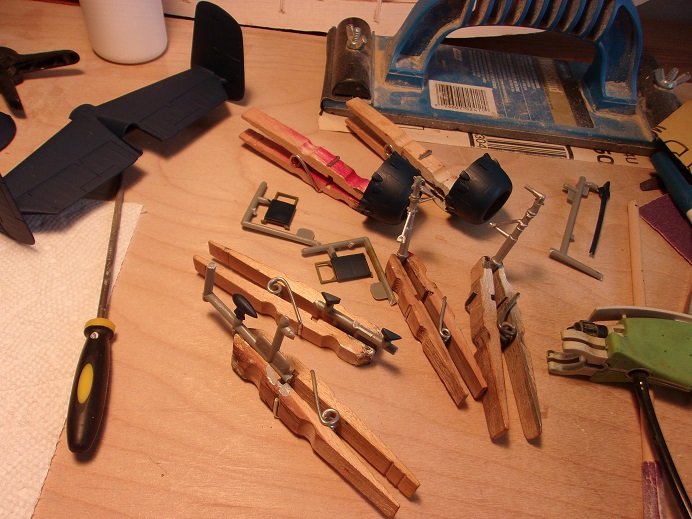
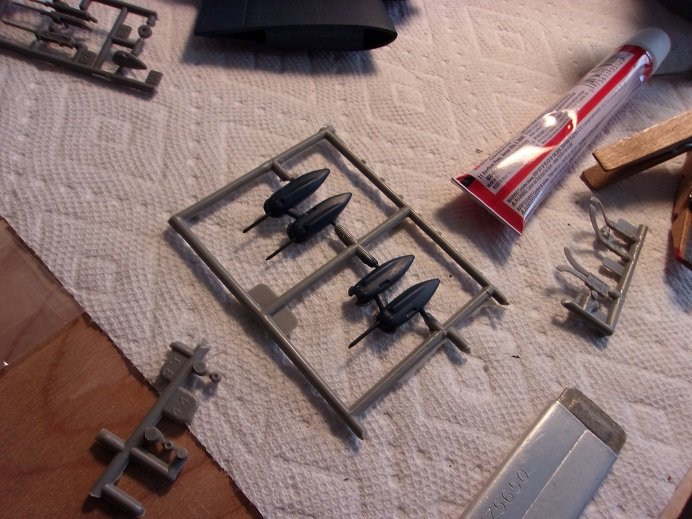
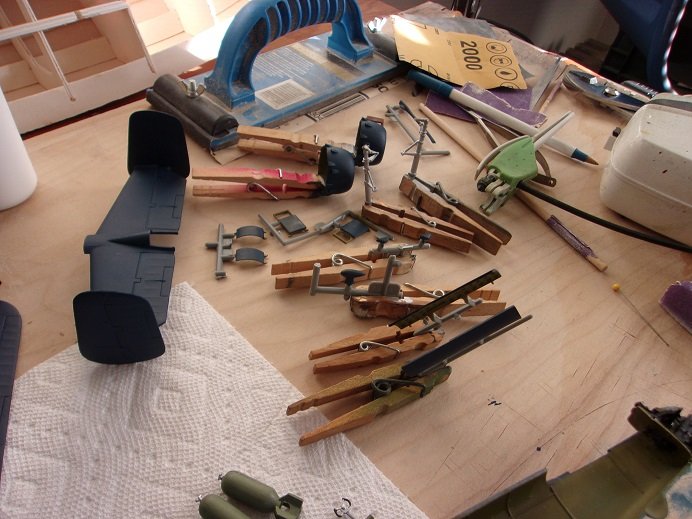
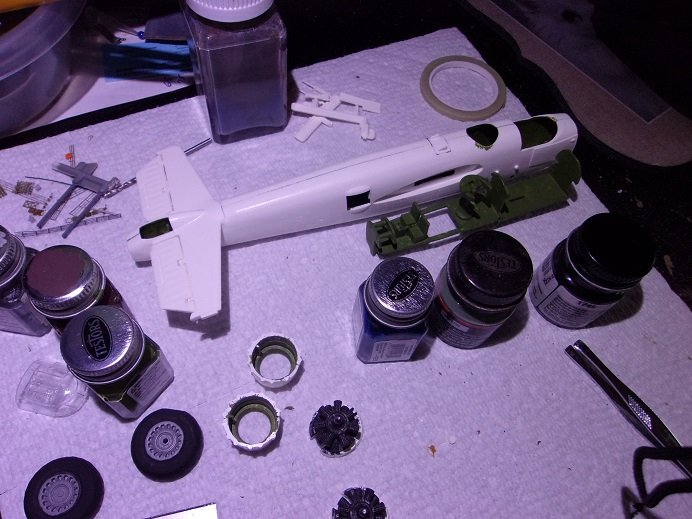
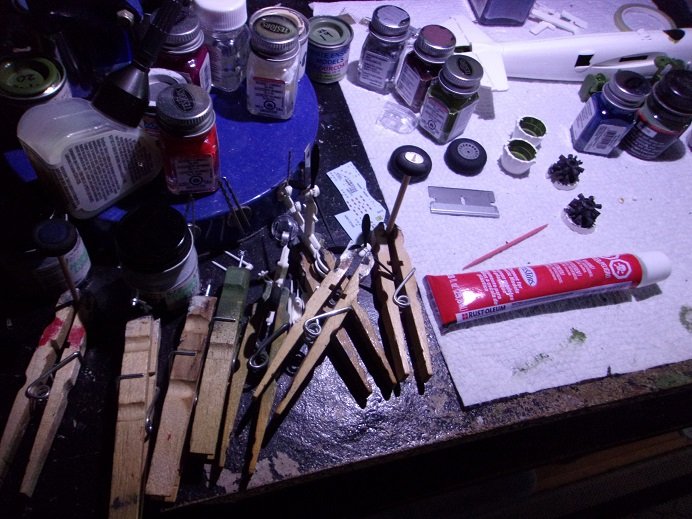
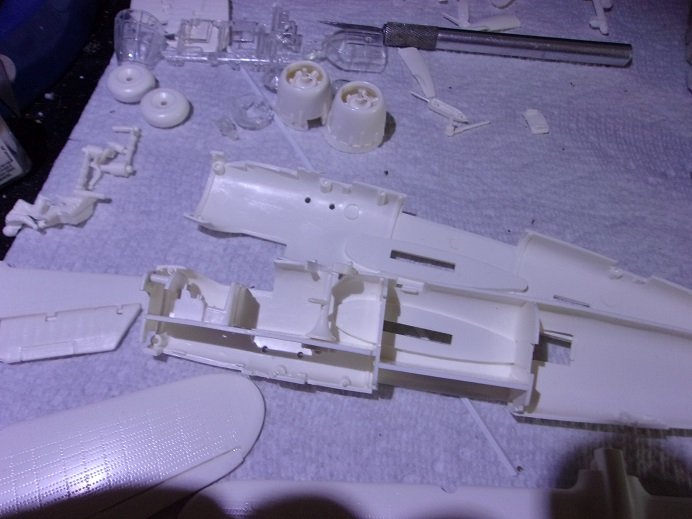
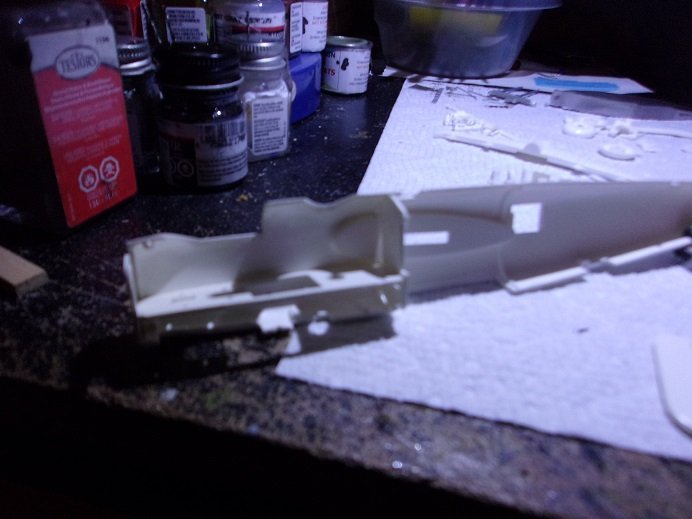
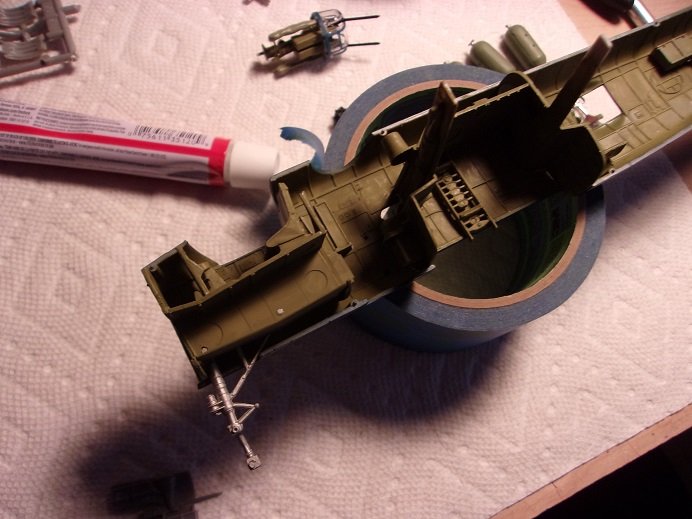
thanks OC and Ken..........this one was worse than I've been accustomed to. true that most kits do require some fitting......but this one looks like it might have been the last of the run. very soft plastic to boot.........the cement seems to soften it even more, so I need to watch how much pressure I put on the parts to hold them together. the fruits of my labor are paying off though. to bring you all up to where the model is at this moment.........the interior of the fuselage has been painted.......the landing gear has been painted, and the tires and props are in the process of being painted. the tires for the PBJ are on the table too.......they are being painted. simply......more painting. the nacelles were cemented on the wings today.......I'll be doing some trimming, scraping and sanding to clean the lines up. there is a gap at the wing tip of the port wing......I filled it with a strip of plastic. the doors were a terrible fit as well...that's why you see the clamps.....I glued them shut.
- 55 replies
-
- 12
-
-
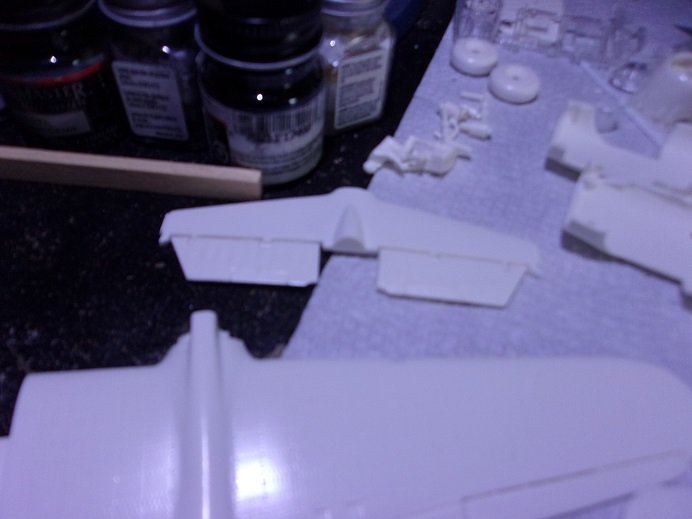
ailerons were added to the wings and stabilizer. the engines were assembled and adjusted so they would line up to the nacelles. had to do some cleaning up around the nacelle wing roots. the interior was adjusted to fit better in the fuselage. more parts were cleaned up....to either be assembled, or readied to paint.
- 55 replies
-
- 10
-
-
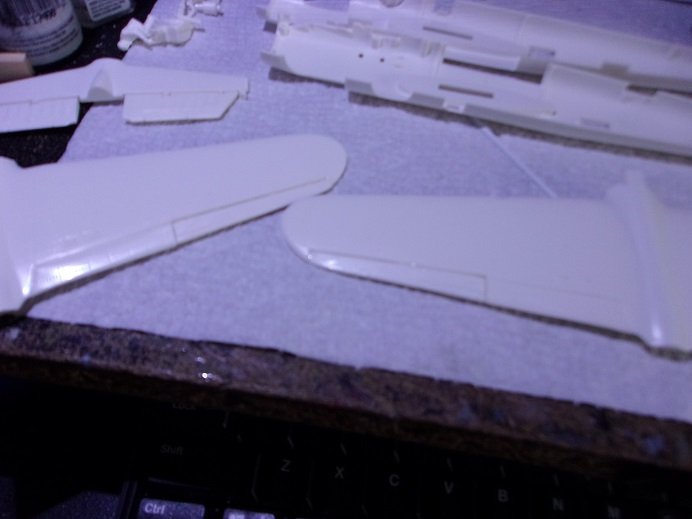
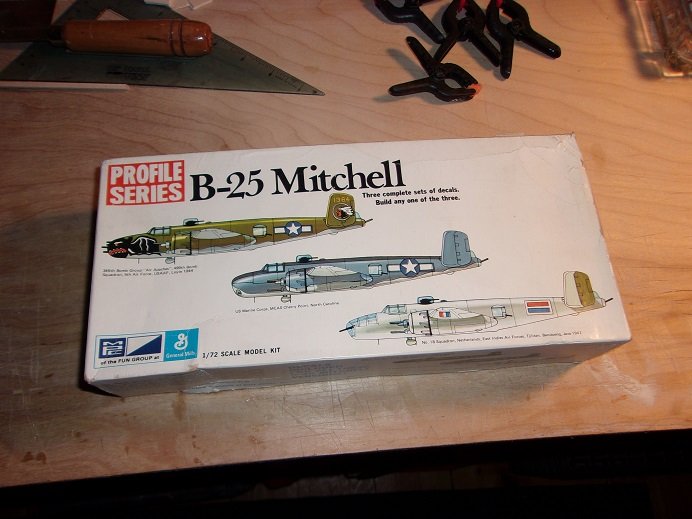
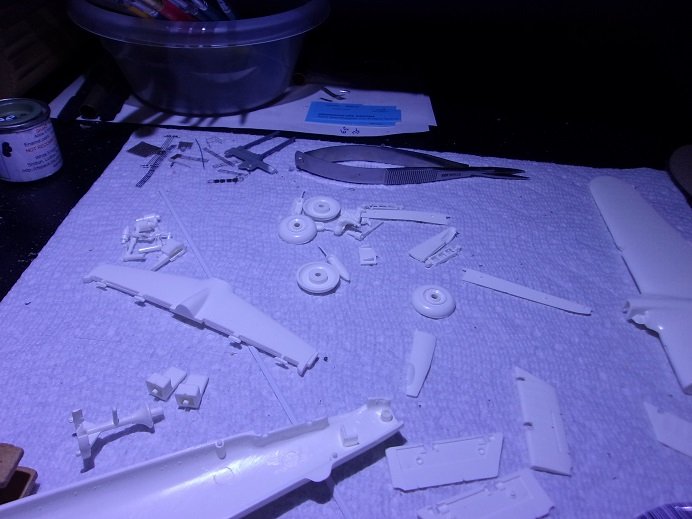
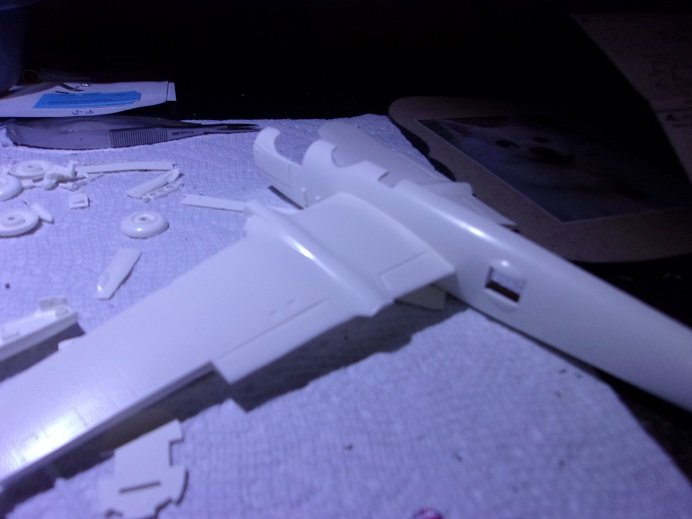
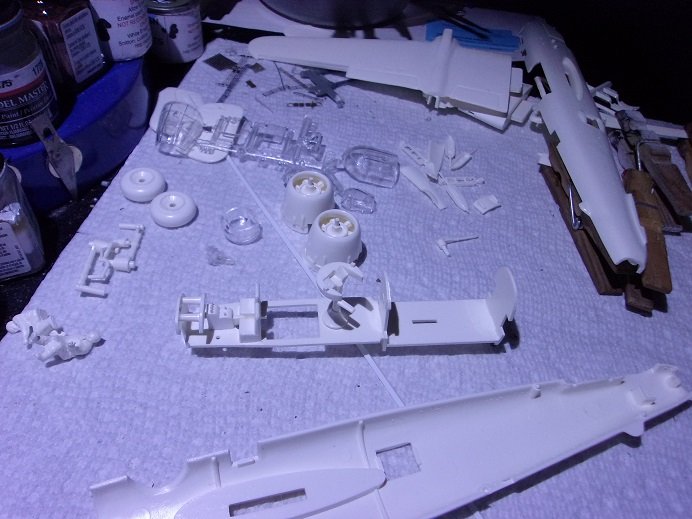
I remember these kits back in the 70's....... MPC wasn't known for their military kits...mainly cars and stuff. these kits are from airfix molds......I got it for Christmas. the box was a bit beaten up......the parts were still in the bag, but many of them were off the sprues. there is a lot of flash and poorly molded.....so bad in fact, that I was hesitant about doing a log on it. since I don't have too many models in this scale, I decided to build it....who knows....I might be able to salvage it the stabilizer fin was a little warped as well......hoping that when in place, it might straighten itself out. pardon the picture 'bluing'...... the wings were assembled and checked for fit.......a nice feature that they fit into a 'well', rather than fitted with the usual tabs the rudders were assembled....... ...and began to assemble the interior bulkheads and floor through all this, a lot of trimming and sculpting was going on, in an effort to fit the parts together at least halfway decent. fitting the model together to this degree gave me a good idea of how it would look. it does show some promise the stabilizer does straighten out alright.......so, I added more to the interior. the turret does turn, so that's a plus. three different planes can be built from this kit, as seen on the box.

- 55 replies
-
- 10
-
-
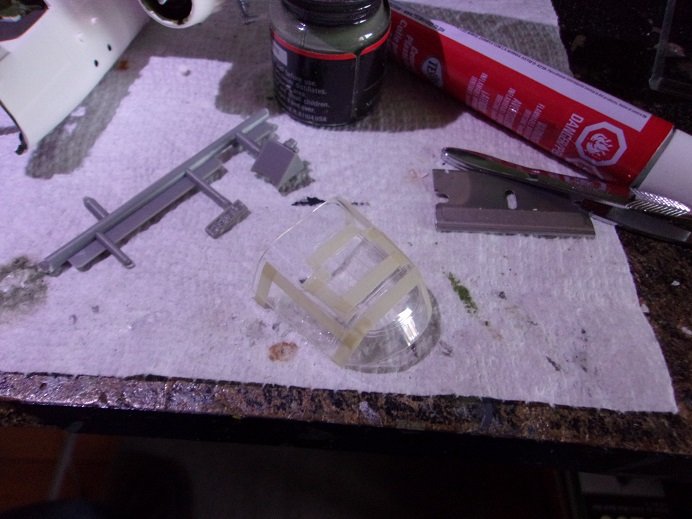
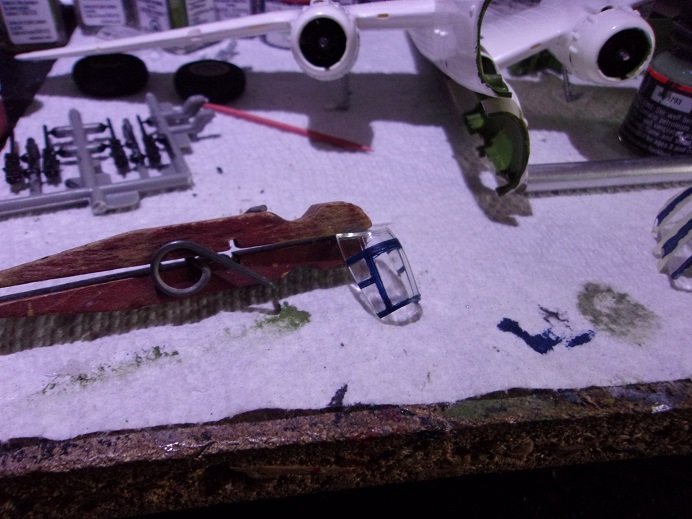
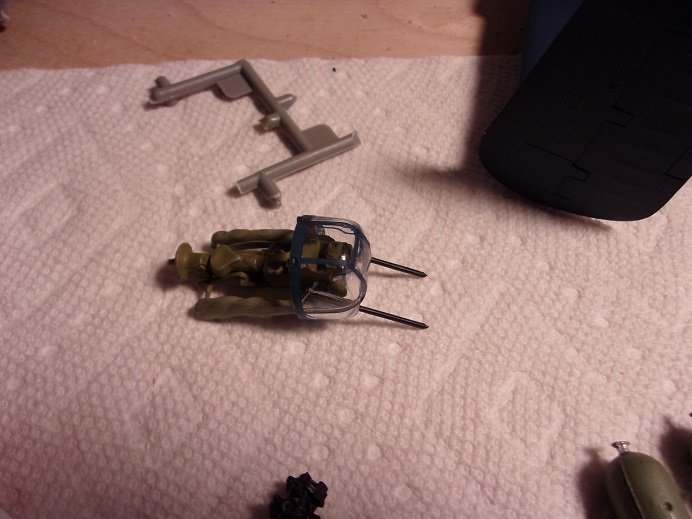
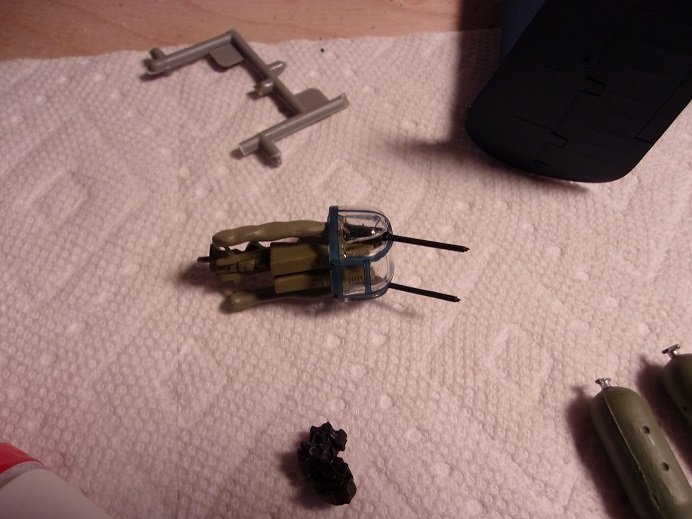
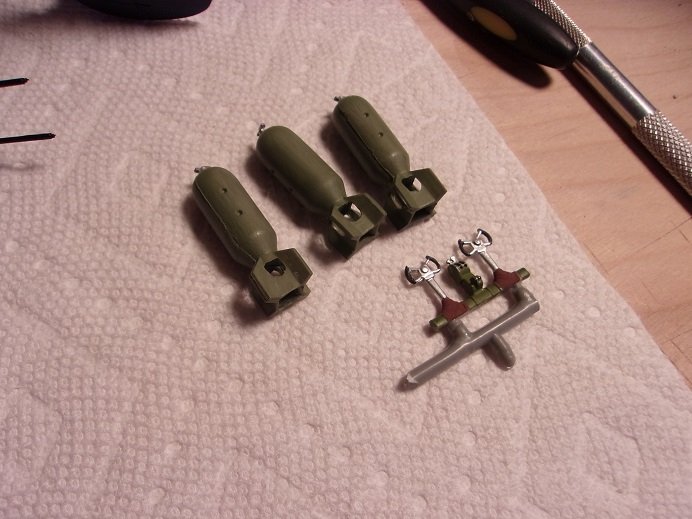
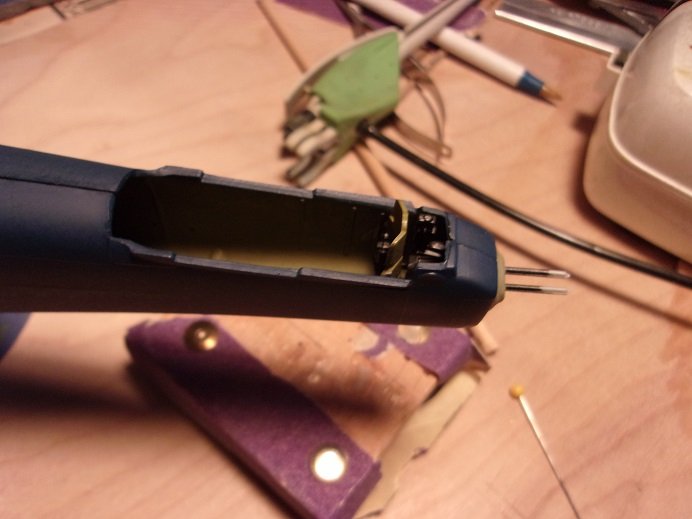
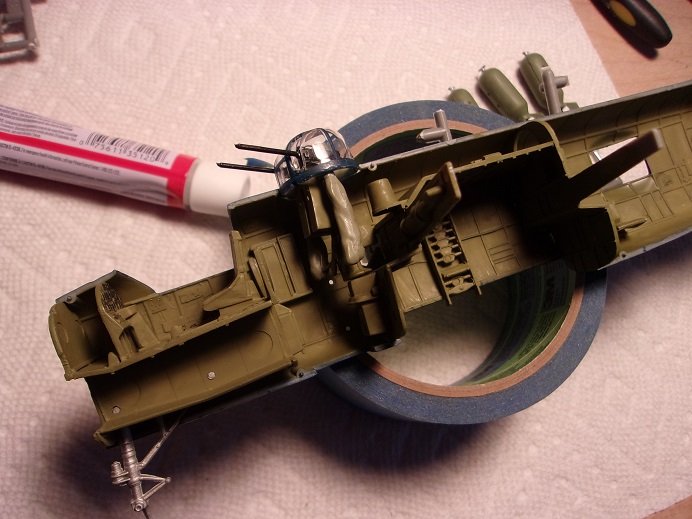
the build continues.......been doing a lot more painting since spraying the overall color. I had painted the parts that make up the tail gunner position earlier.........the guns were assembled so they could move up and down....glad I did it. with the assembly together, cementing on the 'canvas' tail cap would have been a trial. the part below is from the Accurate Miniatures set that I received, and of no consequence. I have been at my desk as well, tinkering with another B 25 kit {I'll get into that later }........but I was also working on one of my brainpharts when I build what I did of this kit. I had assembled the gun turret complete with the glass......I forgot I needed to paint the framework. so using my method with the strip tape, I got that task done without having to take it off. I think it was Ed that built this kit.......I liked the way he painted the control sticks, so I did mine the same way. the bombs were painted too here's a shot of the tail gunner's position interior........ ...and a somewhat revealing shot of the cockpit the cockpit in place, in the fuselage..... ...more to come


-
I've done that.........can't say that I liked it either I'm sure that dealing with paper, it would have been much worse.......glad you caught it early enough. looks really good so far!
-
superb looking build so far........the PE work is very well done also, a fine selection of ships for the stash.......you have the Yamato....I have the Shokaku
-
extra basswood sheet is always good........every time I go to Hobby Lobby, I always buy at least a couple sheets. I used a simple box cutter to trim the sheeting to shape, leaving a tiny bit for sanding. it's one of my go to tools for wood modeling.
-
be bold.......adventurous!
-
with my luck spraying over paints....I try to stay away from doing it. I'm currently out of micro sol.........but I have the set, and I do use it. I use warm water to soak the decals in, but I think they tend to cool off too fast......this house is a bear to heat. yes....decals have no problem sticking to gloss paint, but not painting over them, it would leave shiny areas, so I don't apply decals that way. I've tried the floor shine method, as well as the washer fluid method, and didn't like either one. the admiral has been hinting about going to Barnes and Noble.......it's a book store and it's close to Hobby Lobby. perhaps a stop there too is in order
-
thank you gents....and those who hit the like button yea, the decals were really hard to 'stick'. there are a couple of them I actually used the window maker to affix them. that worked out quite well....believe it or not.........I just used a damp paper towel to wipe the excess. flat paints are sometimes not very friendly to decals, I find. thanks again
-
OHHHHHHHHHH! you'll have FUN with this one! hope the 'boys' don't get jealous.......
-
I was just looking at he frame again.........I'm counting backwards than the instructions {I saw the number of some of the bulkheads. you can always do this too......... if the bow looks too daunting, you can always sheet the aft section up to the the turn to the bow, and then plank the rest. I will say this though.......don't use the balsa and use narrower planking....what is that.....5 to 7 mm wide balsa strip? yea, that's too wide...5 would be max I think bee sure to fare the bow bulkheads.......the aft bulkheads aren't that critical. be sure to secure the plank to each bulkhead until it dries