


popeye the sailor
-
Posts
16,007 -
Joined
-
Last visited
Content Type
Profiles
Forums
Gallery
Events
Everything posted by popeye the sailor
-
 that's in the plans Ed.....although I have no templates to work with. I don't think it will be too big a task......I've got plenty of material
 -
your progress look super.......and YEA....the Nashville kit looks really good. I'll go one better Mike.......I won't go to that site, knowing how gullible I am {the admiral would kill me}
-
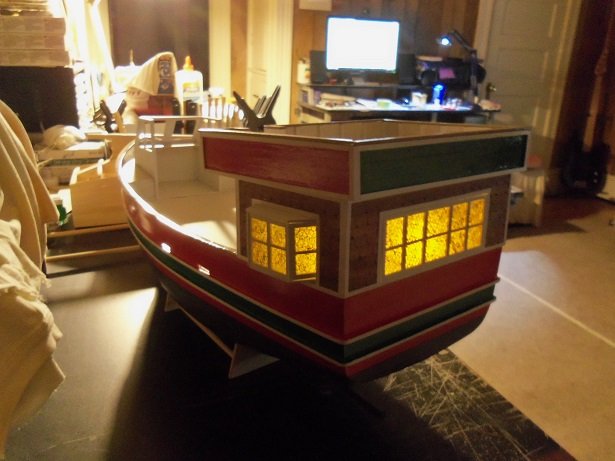
thanks all.......we even have our second dose date........did it all with one phone call. although, I don't know why the WalGreens on Varney St wasn't in the schedule for us.....we are a couple of blocks from that Pharmacy. the one we're going to is just across the river........had I known. we were there yesterday and the girl behind the counter told us they were doing it....heck, they just finished off a small room off the pharmacy for just this purpose. hey....I'm not going to quibble....we're getting it......that's all that matters thanks John.......so, you didn't know about this one? me.......with my umpteen projects....I think all I need now is a sub build, and I'd be full circle it's gonna be slow at first, so you won't miss much. once I can get the rest of the hardware I need, and can install the props and rudders....then I can get the hull resin coated and the sheer on. so glad to have you aboard John thanks Egilman......I hope you've gotten your shots too.
-
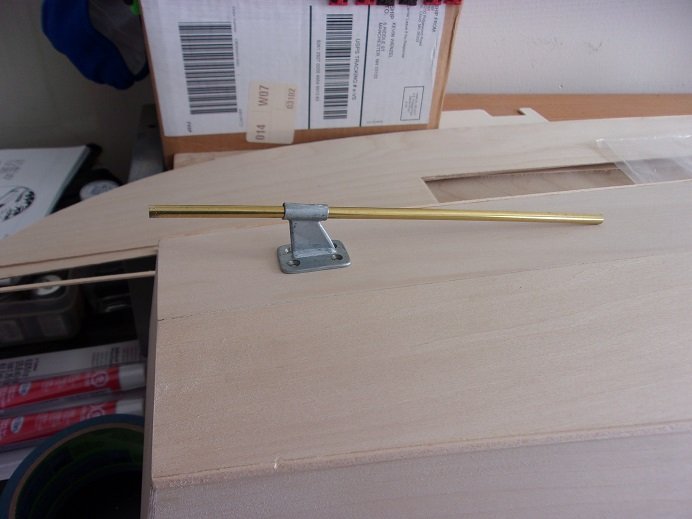
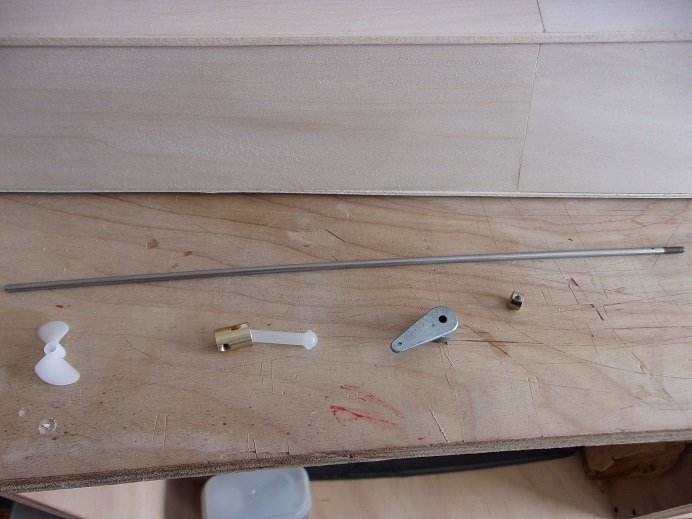
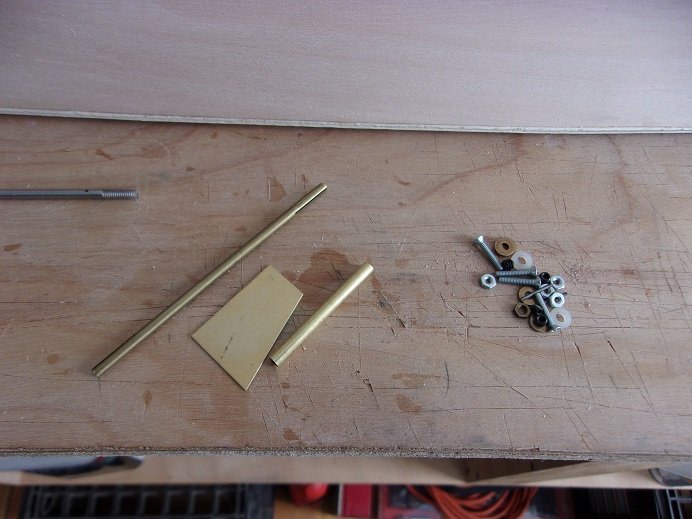
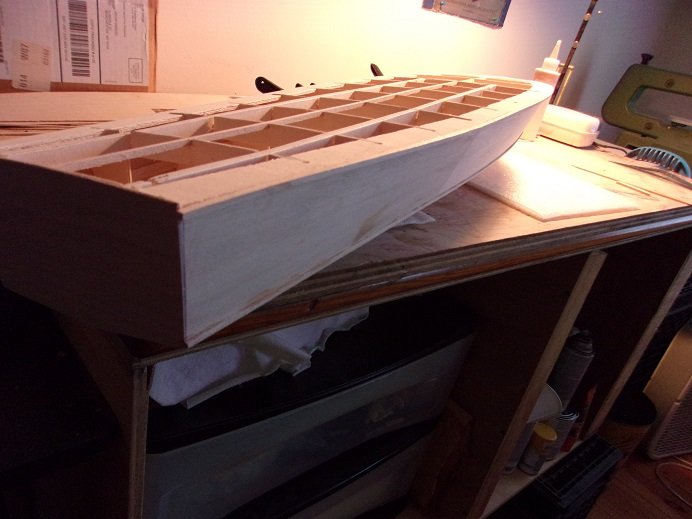
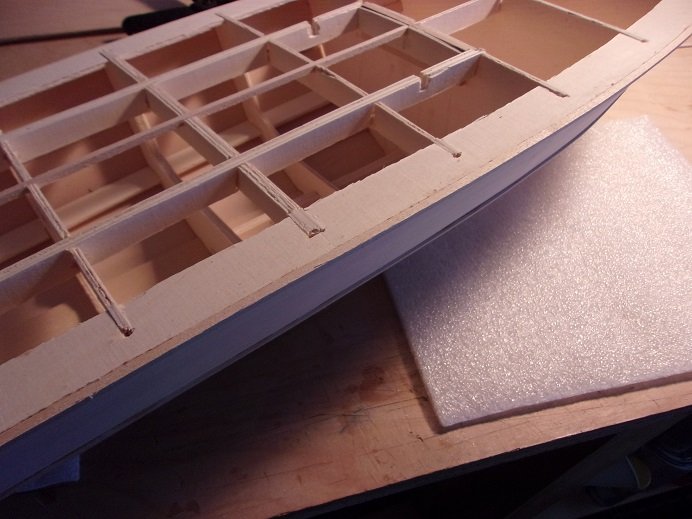
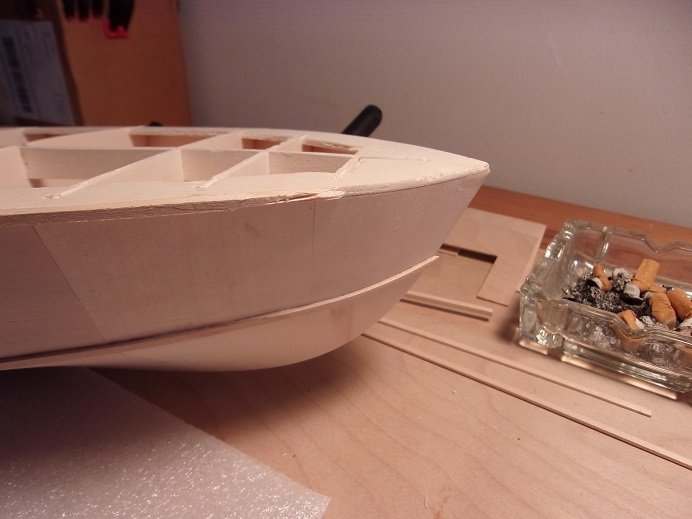
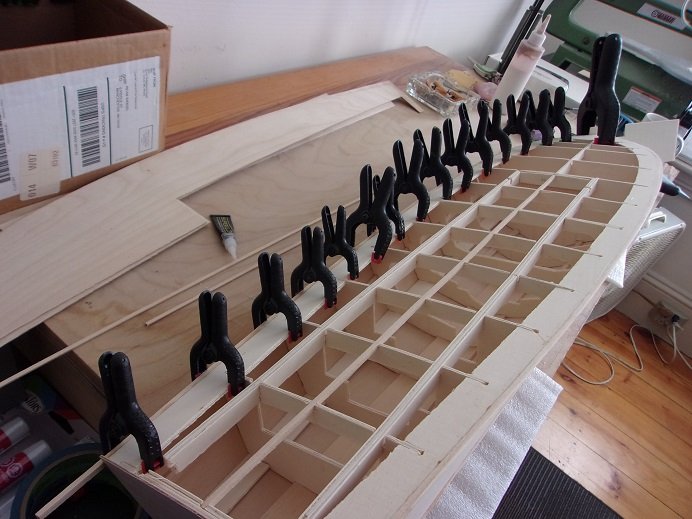
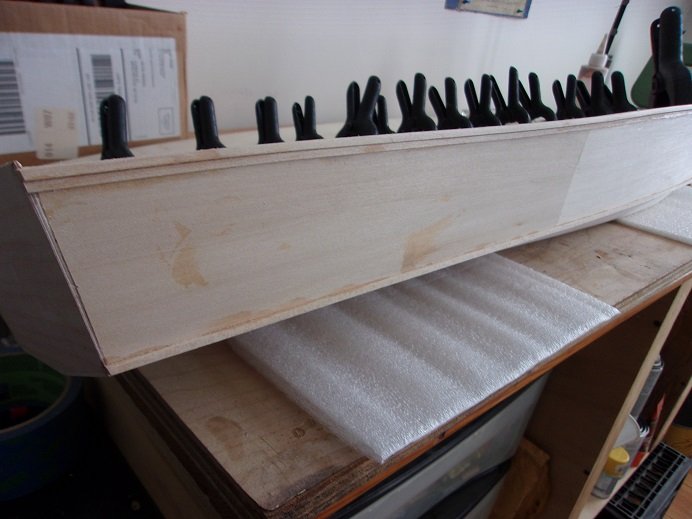
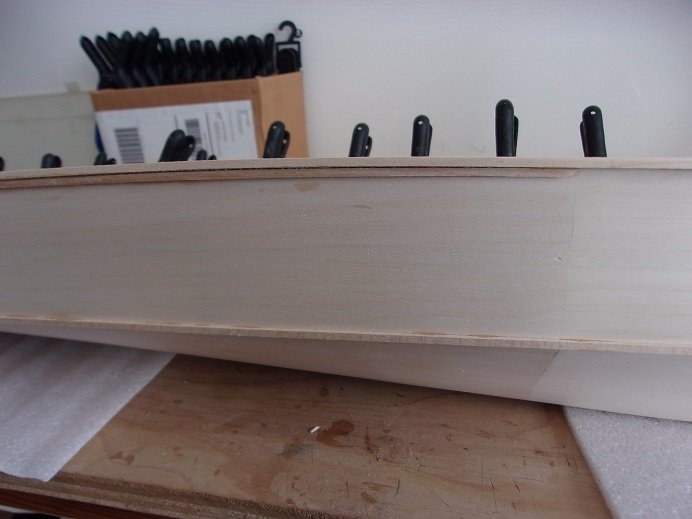
good news Ed and all look'in in..........we got moved up! I took last Saturday off......odd but with good reason. I took a call from the folks who schedule the Covid shots 'round these parts and asked if I would like to move my date up.......I said sure! he gave me tomorrow as the new date 2/26/21.......and while I had him on the phone, I asked about getting the admiral's date moved up as well. he checked and her name was on the list too........so she's getting hers right after me I can't wait!!!!!!!!!!! we're still doing all we can to stay safe you can see the angle that the shaft is at when it gets to the hull. this needs to be correct.......fingers crossed I've also been doing some look'in 'round for hardware....looks like I'd be better to order another dumas running hardware kit and a pair of 30 mm {1 3/16 three blade} props. I did find a different kit......but I don't feel like shelling out $155.00. the set up I'll be doing will cost $122.00 before all is done as it is I made a small bit of progress.......the gunwales and clamps are done, and I added reinforcements for the shafts and rudders. now I gotta get the budget directors Ok to order the stuff I need. the starboard gunwale was the first strip to add to the hull......I started at the stern this is a 1/8X1/8 strip...goes from the stern to the bow. this in total will add 1/4 to the deck surface, which is good......the sheer panels appear to be larger than the existing surface. I was getting round to the bow however, and the strip broke........just couldn't navigate the curvature. so I cut off the bad part and prepped it again, to receive a section. with that fixed.......I soaked the section in warm water and bent it slightly, the clamp was added below the gunwale. it doesn't go all the way to the bow. the port side gunwale faired better......I soaked that strip's end before gluing it on. the clamp was added to the port side after the gunwale had dried. I didn't snap any other pictures than these. looking at some of these pictures, you'll see the stern and the protrusion at the top. I dry fitted the sheer panels and found that this will need to be removed, or else the sheer will stick out past the bow.......not a super big deal. I was wondering about that anyway....I'll just cover the seam with a 1/8 thin strip {it's all good } now would be a good time to line off the rudder holes and the shaft bracket position and hole. as said, I added some thickness to these areas, so when I do drill the holes, there will be some meat there. templates are the next thing on the menu
- 221 replies
-
- 11
-

-
everyone has something to offer Tom..........even in planking help is only a picture away. glad to hear your doing OK.......there are other good glues that are comparable to CA........tite bond might be good to use. I know.........the fumes sometimes gets to me too.......makes my eyes sting a bit. hope to see more......I'll try and check in more often
-
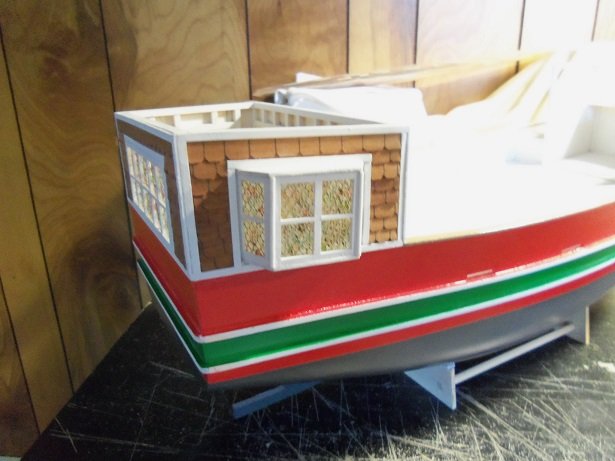
hello Per.......catching up on your progress I wish I had checked in sooner......I use a variety of acetate for glass......I've even used the film out of floppy discs. my favorite though comes from the plastic packaging that a lot of products come in these days....you can harvest a lot of flat pieces, but if you need a special curved piece, what you need can be found there too. there are a few products out there, but what I use is Testor's window cement and maker, which works well for port holes. it dries totally clear so you can't see it when gluing a window in place. I'm a brass fan, but I do agree that the blackened belaying pins look better. tarnish will occur if you have high humidity or haven't got the model in a case. every once in a while, you may find bags of silica in boxes....keep 'em . if you have your plans and stuff in boxes throw 'em in with 'em.....it will help preserve them from humidity. your progress looks very good.......
-
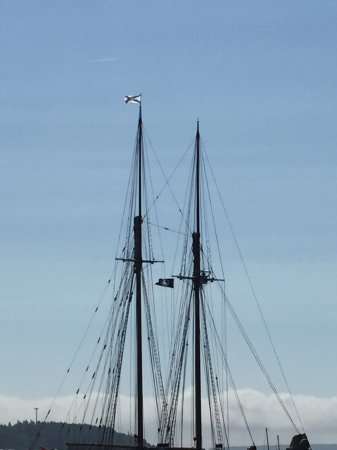
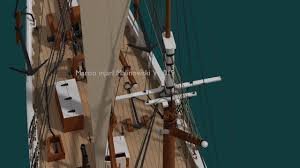
hey there bud! pretty good soldering on those collars! sorry to hear of your problem......glad though that it hasn't stopped you for very long. for your mast dilemma, look up other like ships.......even pictures can give you ideas. I'm not up on this brand of model, but I do have the Billing's Bluenose plans. I'll give them a look over.........cross trees and spreaders.......you should also have caps for the tops of the mast sections. do taper the topmost section, but the first and second sections, you can get away without, unless you need to fit parts, like the caps I looked at the Billings plans, but they don't show what I want to see.......I know I have another sheet somewhere. I did find some pictures for you to see your not too far off the mark........keep up the good work

-
Billing is usually pretty spot on with their mounting holes........I have the general diagram for R/C. if this is be a static model, it shouldn't matter.....the shaft will need to be at this required pitch, going through the hull. browsing through the shape ways site.......you could go with the mopar hood scoop. should look rather neat does the kit still supply .05X25X550 mm mahogany strips for the hull? I got a pack of them when Tom closed down Billing USA....I figure they are in this kit
- 55 replies
-
- 1
-
-
- hydroplane
- Slo-mo-shun IV
- (and 1 more)
-
wouldn't you run too, if you had this huge color mop coming at you?!?!?!
-
super progress........
-
she displays nicely .....sweet looking ships! there are a lot of models that seem to be missing something, if done out of the box. it also depends on the modeler, just how far he or she is willing to go. covering your model in wood sheet is a very good method.....you not only saved yourself from having to smell that god awful 'dope', but you were able to put your own personal touches to the model. I covered mine with the tissue, but I sealed the skin with diluted white glue, instead of the dope. it was done in a couple of coats......it also tightened the skin as it dried. a couple of coats of paint later, and that's the process. I've got a Fokker Dr1 in the closet....to the point of sanding before the tissue. they can be fun to build
-
.....so there's still more to this story........but you are finished with this part. you've done such a superb job with this project........it is a bit sad that only a select few will see it.........yes.........it's THAT good! I count myself lucky to have had the privilege........it truly is a work of art
- 789 replies
-
- 12
-
-

-
glad to see it didn't deter you from doing a good job........they look super!
-
crack'in along nicely OC.......the turret came out really good
-
McLaren M8B by CDW - Accurate Miniatures - 1:24 Scale
popeye the sailor replied to CDW's topic in Non-ship/categorised builds
never had the pleasure to build an Accurate Miniatures model...I see I'm missing something the engine looks really neat! tagg'in along as usual -
good looking model.....the windshield fits well the chrome really makes her pop your amassing quite a collection there........won't take long to fill the shelves at the rate your going the cabinet I bought a short time ago is already full
-
very nice progress.......sorry to hear about the roof issues
-
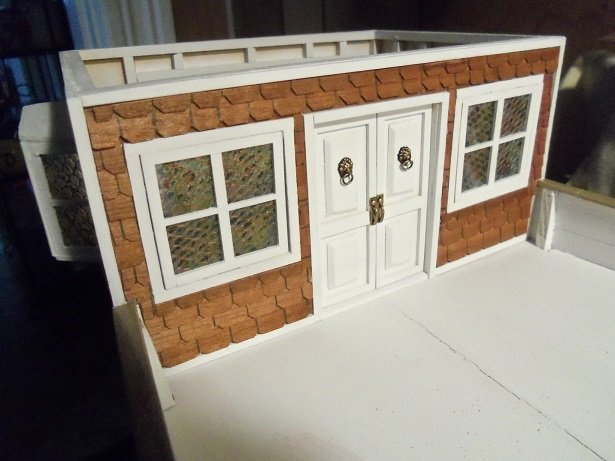
pretty much the same stuff as Testor's window maker, which I use for a variety of things. if you don't care about the clarity, you can also use diluted white glue. for a more exact diamond pattern for your panes, tulle, or fine mesh screen can be used. good on you to think of this......a super way to make windows. I did this with white glue and mesh
- 211 replies
-
- 10
-
-
holy sh__! yea......Henry's right.......you definitely need a blue sky back ground! I can't see any way you could make it look any more real.......your efforts are way over the top I am in total awe.......
- 789 replies
-
- 11
-
-
-
tantalizing! a wonderful exhibition of necromancy!
-
mine has pretty much the same camo it's all set to fly......but I don't dare......my track record with these rounded fuselages is pretty low. the best flyer I've done was a Fokker D VIII. even with the rubber band exhausted, it would glide much farther. I did a P 40 Warhawk........that one wrapped itself around a palm tree

-
nice display.........that's how I do it
-
no thanks......don't need another car to get tickets with! ......go fund me.........no good! all my friends would see it and the 'hole in the head' innuendo would start fly'in! two real nice models though........I'm look'in in
-
paper or plastic? distinctive 'box kite' tail.........with a Neuport flare very nice!
-
thanks for the good word gents.....didn't do much yesterday.....just did more with the masts. I also took some 7 mm brads and inserted them in the mast roots. helps to set the proper rake. yep.....still at it J.........can't have you be the ONLY one to have built one of these fine Steingraeber kits! you did a really nice job with yours, so at least I know there IS a fine look'in model hidden in the box somewhere. I'll keep digg'in.....I'll find it sooner or later thanks John......while it would seem logical to to do them one at a time, I hate to leave the other in the dust. knowing that I will likely need parts in pairs does make it easy. fun times

