


popeye the sailor
-
Posts
16,007 -
Joined
-
Last visited
Content Type
Profiles
Forums
Gallery
Events
Everything posted by popeye the sailor
-
 yes.......old kits can be daunting. these Steingraber kits are also quite primitive, compared to {I use the term loosely} more modern kits. age plays a big part when cutting the parts out......they utilize a different sort of billet for the parts. delamination is the most common problem. I was removing the shredded layer and cementing on a layer of 1/32 basswood, in an effort to save the parts. it was then decided to simply trace and cut the parts from newer plywood. I had all these parts that I had repaired.......I hated to toss 'em out. now that I am where I am with the Clotilda and the Agilis, it would be silly to quit on them now.......I'm gonna build 'em with what I got, staying with the 'lines' as best I can. if you venture into the Fair American, I want a front row seat the Revell 1:96 kits have always been dear to me.......I have built many of them. I don't sub the eyebolts and stick stuff in the masts either.....done correctly, there really isn't any need. there are wooden decks for these models....look into Scale decks Laser Cut Wood Decks - scaledecks.com back a few years ago, I acquired another kit of the U.S.S. United States {long story}.....I actually recreated the decks for her and planked it with 2 mm planking........what a job! there's a log on her somewhere. had I known this......I would never had done it.....but it was a vendetta in the effort to get away from the visible deck section lines. I also got another kit of the U.S.S. Constitution...I plan to do something different with her. sounds like you have a good outlook towards the future........good times ahead for you, my friend
 -
thanks gents.......just pick'in at her for the moment. still a lot to do before I put the sheer on........want to have plenty of room to get in there. a few of the joints will need a tiny bit of filler.......I've been doing the glue and sawdust method as I assembled the hull, so they are fairly minimal. the admiral still is amazed at the size of the hull........wait till she sees it with some of the structure on it
-
hey Greg! WOW man.........I see your up to your usual standards.......fantastic looking ship the decals really make her pop, and your weathering is outstanding.. she's a first class model.....you've done a superior job
-
so good to see someone building this kit! I wanted to get it and do it as an M&M racing boat for the admiral.......instead I built the Fun Ship {it was still a pretty fun project. what didn't you get instructions for? I have a set of instructions for this model......I downloaded it from the Billing UAS site. re reading your initial post cleared up my confusion.......so I took a browse at the Shapeway site.......HOLY COW man! simply awesome! I saw a couple bodies I liked........got a mind to make a funny car out of a '60 Chevy Belair........an engine would be nice too if you got these parts for the engine separately, then yes.....it would be hard to have instructions for assembly. should be an interesting project........I'm rather jealous
- 55 replies
-
- 1
-

-
- hydroplane
- Slo-mo-shun IV
- (and 1 more)
-
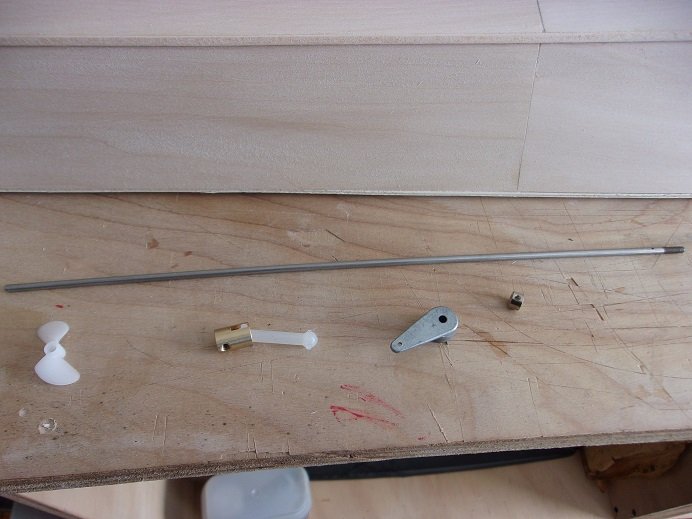
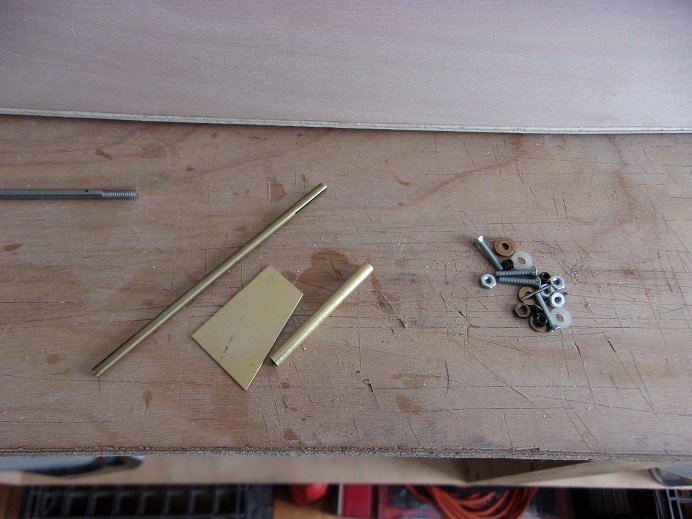
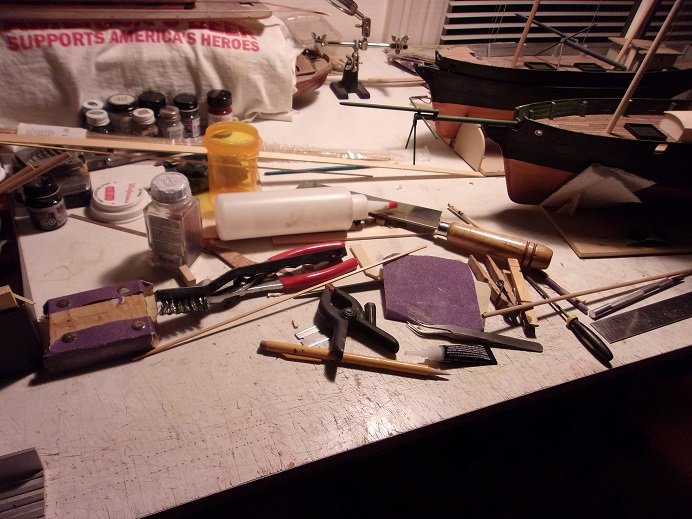
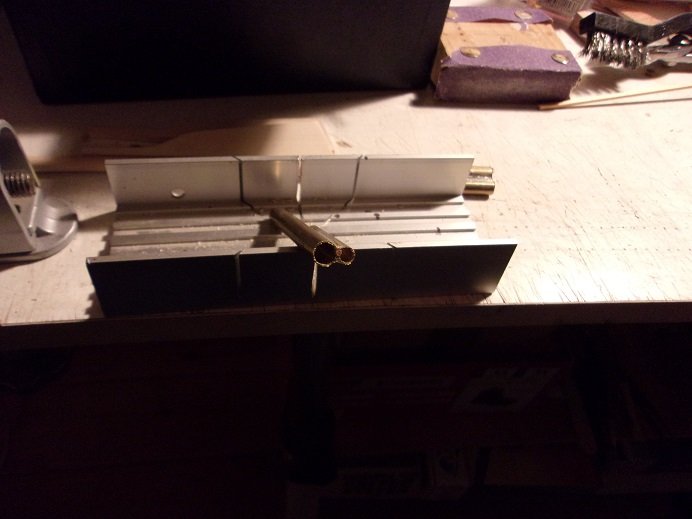
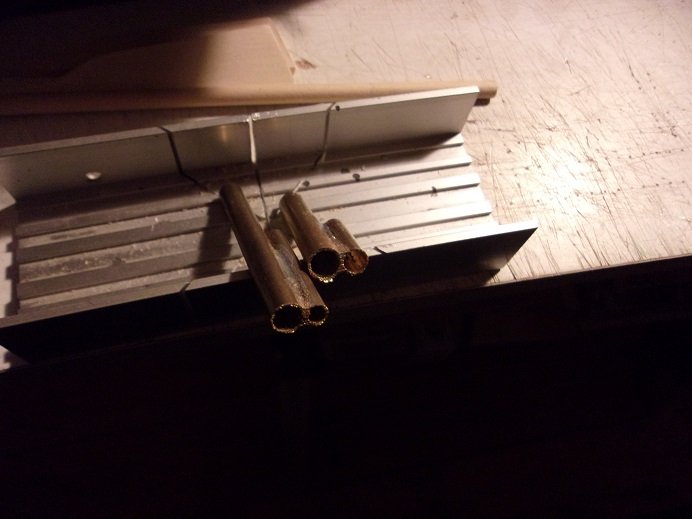
thanks for the info Mike.....I'm probably going to go with two. I really like the hardware involved. the hardware kit only supplies the main shaft bracket, and finding the center one might be a challenge, unless the base can be bent to sit flush on the keel. this fellow must be working with a different fitting kit, because the angle of the shaft is less acute. I ordered my hardware kit from Model Expo...this is what I got: the main shaft bracket and the shaft tube......it's likely set back a little bit further. it's going to be a feat to drill the hole for the shaft tube......I'm thinking of making a wood template to guide the drill. the actual shaft, the sad excuse for a prop, the U joint, the rudder arm, and thrust spacer......the set screws for the u joint and spacer are in the pile, in the last picture. here is the rudder tube, the shaft {slotted}, the rudder, and the pile of screws and what nots. his rudders aren't shaped like this one either......I wonder if trimming it is needed. if you could pass along the link for the machine guns, I'd appreciate it.........in the meantime, I think I'm going to look around for a different hardware kit. those extra parts look really good
-
haven't looked in, in a while Kevin........she certainly has evolved into a beautiful vessel the blue suits her well......love all the fittings! you've really done a fabulous job here
-
hello Michael.........we two are the pair, aren't we although your projects are a lot more 'in depth' than mine. kind of miffed that we aren't getting our shots on the same day, but glad we are getting them. there are many folks who want and need them........I hope the supply gets better. I haven't hear much about how Canada's doing in the news....if they are going by age groups or what their structure is. all we can do for the time being, is follow the guidelines and do what we can to stay safe. I'm glad to hear you and the your admiral are well. please stay safe
-
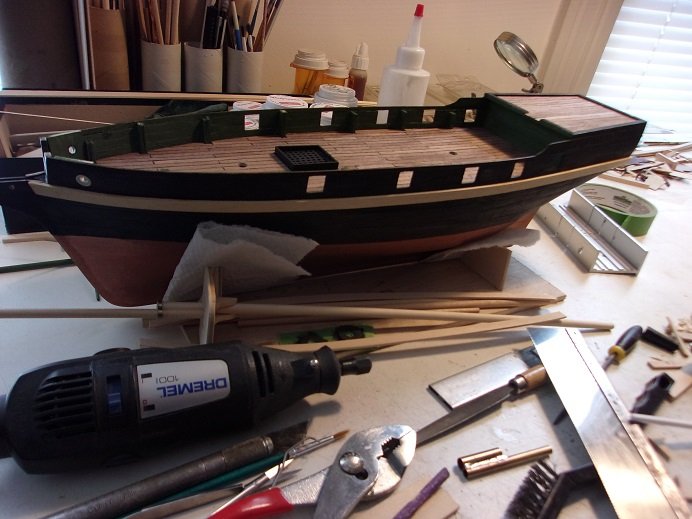
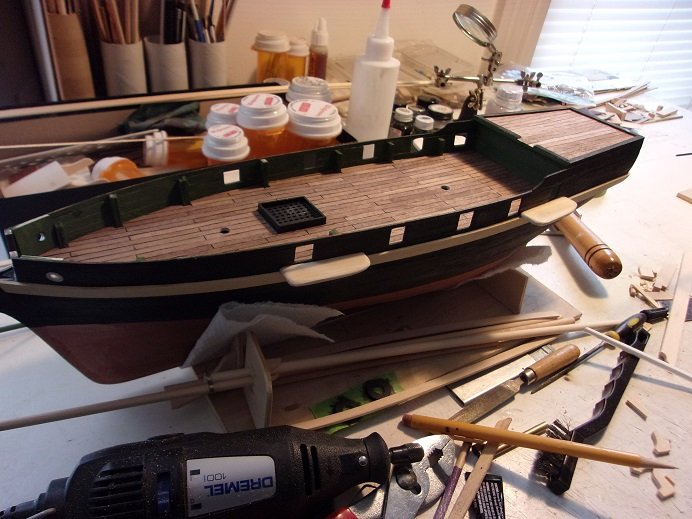
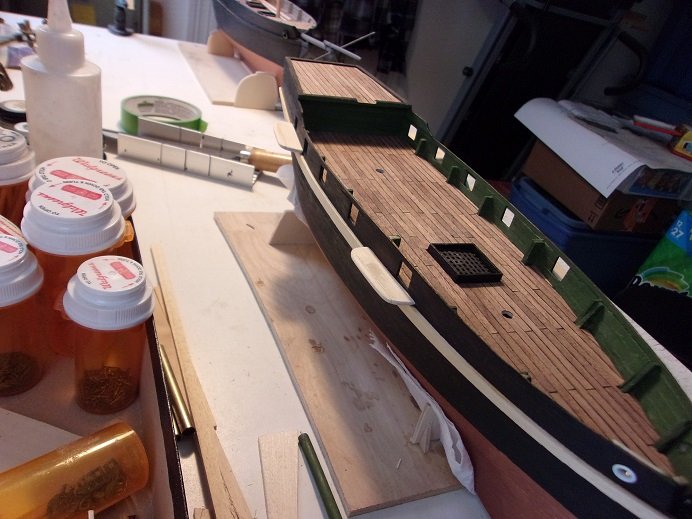
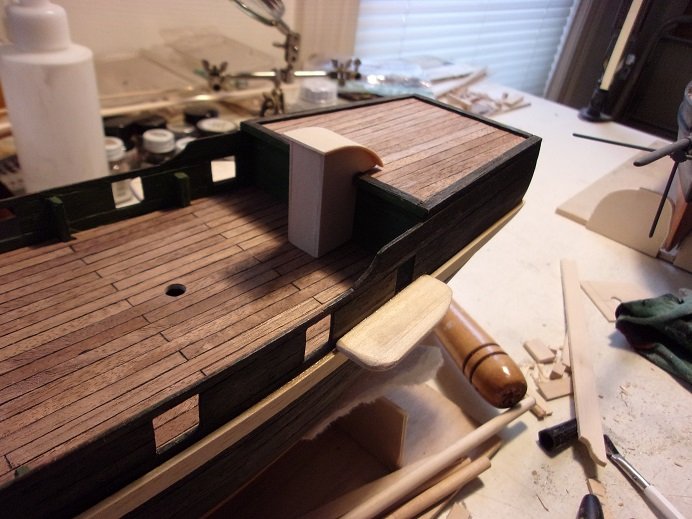
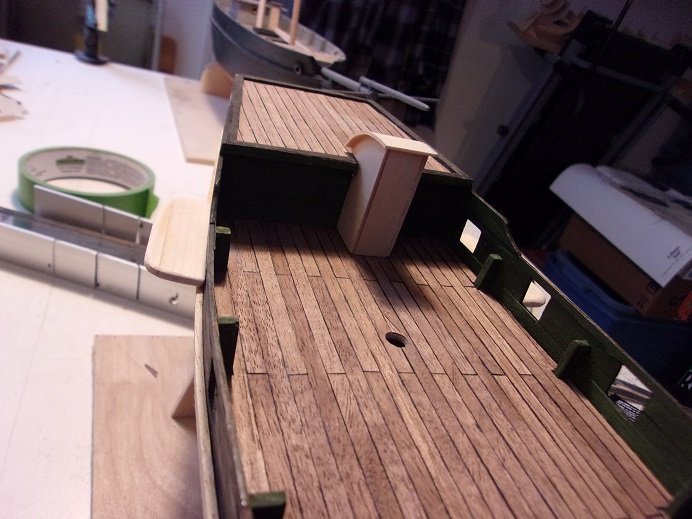
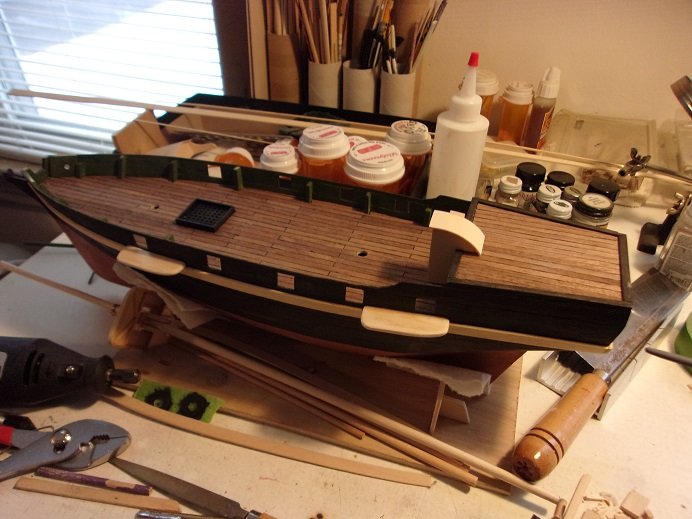
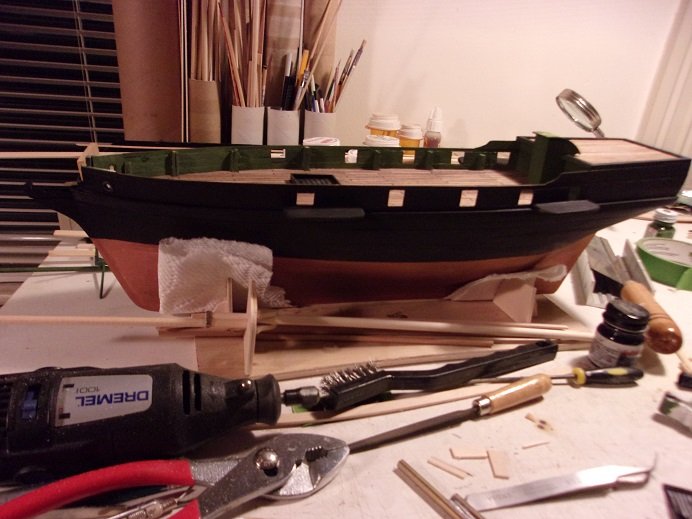
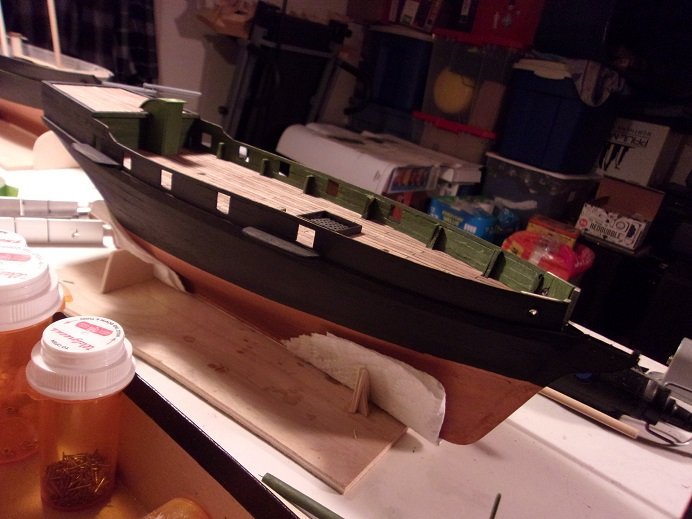
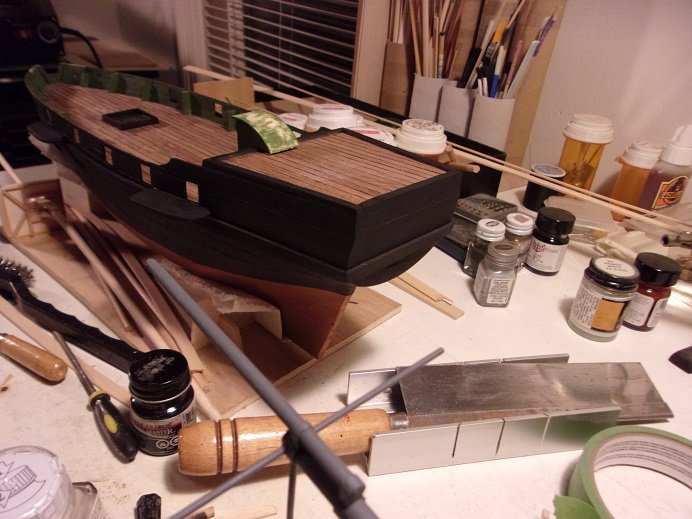
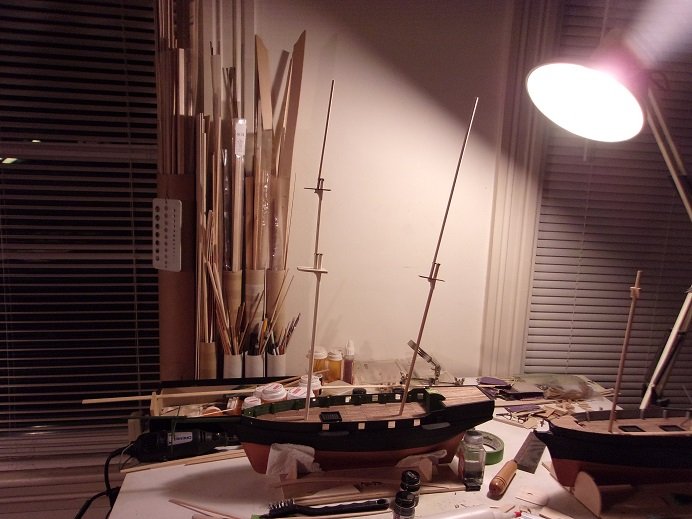
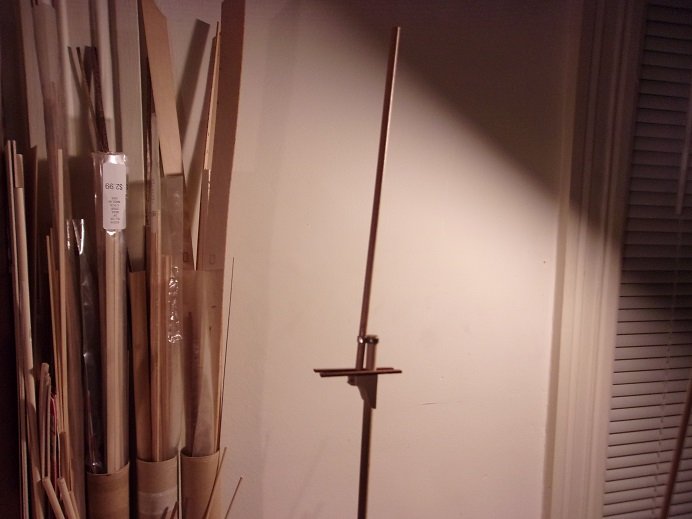
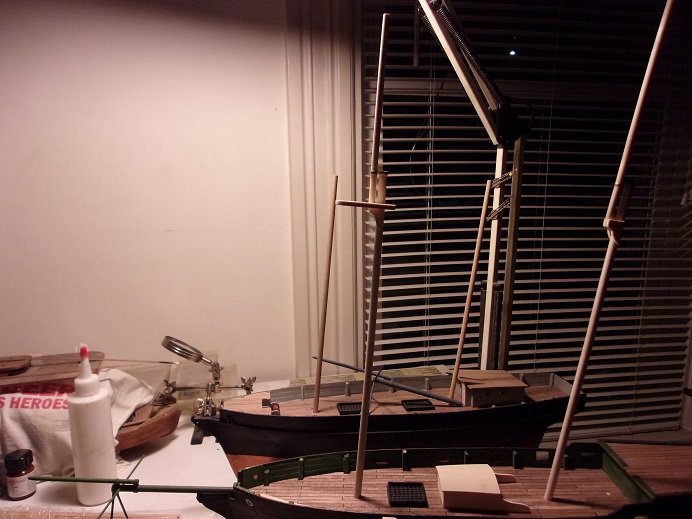
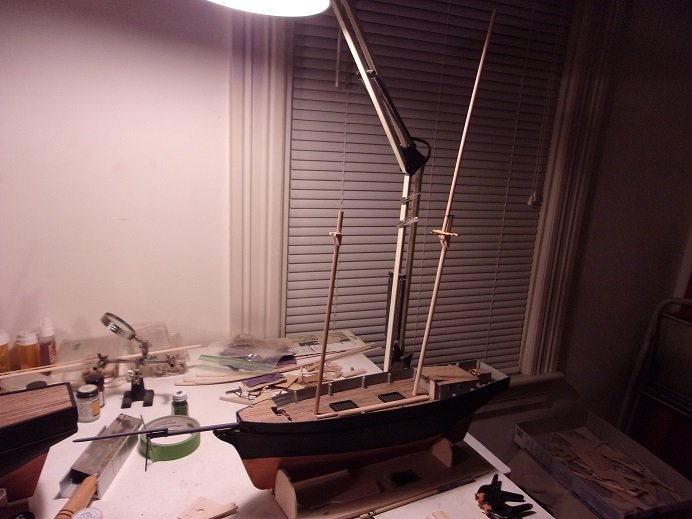
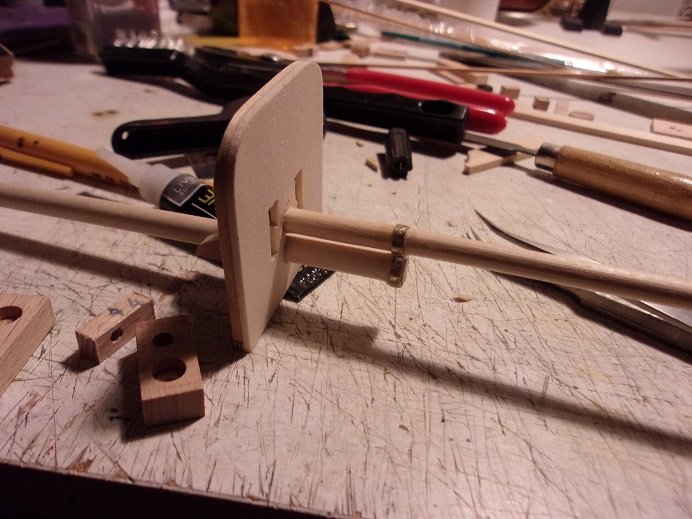
OK.........it's snowing here in the Northeast........a storm that was to produce around 7 - 8 inches, has only delivered 5 at best. I made more progress on the Agilis........ first with the wales. I laid them with enough of a gap from the gun ports, to add the dead eye channels later. as can be seen, I have the Dremel out.......I need to make a different size cap, and I'm going to try cutting them, rather than by hack saw. I have two accessory kits for it, so I think I have what I need. I made the channels from 1/8 strip....had to double up on the width to keep them far enough away from the cap rails when I get them on. .........cut out with the scroll saw and sanded round, around the edges....... I was just going to add a ladder to reach the poop deck, but I though I'd complicate the matter, by adding a companionway too. the companionway was painted in the medium green....the roof will be planked over in mahogany. then the wales and channels were painted. I thought the flat black {Model Master} would over shadow the Billing's flat black I originally painted the hull in, but the sheen and hue was unchanged. by evening, I was back on the masts. I had soldered the needed cap......5/16 X 3/16. sorry to say, but the Dremel didn't help matters.......the heat built up by cutting melted the solder and everything fell apart I ended up soldering them back together again. I have a feeling that the process should be changed to reflect this..........cut all the slices and THEN......solder them together. this way, I can make them as I need them, in the size combinations required. the mizzen was assembled......but I forgot again about the top! I'll make amends somehow....... the mast height is around 22 inches tall..........I figure I knocked them back about 3 - 4 inches, from other models I've seen of this particular kit. most took them as precut and likely didn't think they needed to. there is a size chart for each section, as well as the yards. note the drill index hanging on the strip organizer....I use it to gauge the dowel size. I have a similar organizer on table black.......the original one. great use for toilet and paper towel roll tubes, and parcel tubes. with the progress made, I'm closer to finally building those cat heads
-
hey there.........thanks Kevin yes......it is nice to get back in the 'wood' saddle again. ahhhhhh......it's like I never left thanks for look'in in.....glad that you and others are a patient lot {considering the way I build}. I hope to get some meaningful progress done on her and the Clotilda. after all.....I can't let JCT have ALLLLLLL the fun hello Johnny! glad to hear your getting back into the hobby that's a sad story my friend.......to hear you won't be able to carry on your dad's work. the thing about this kit, is it can be built in a couple of different configurations. the Agilis was a fictitious ship.....no records of a slaver with the name. this is part of the reason why I created two hulls from this one kit. I just did an update on the Clotilda......I'd be pleased you'd take a look. you may find that the Fair American kit you have, may suffer from some of the same problems that JCT and I ran into. I hope that our logs can give you some remedies to those issues. good thoughts on the Thermopylae........and the choice there of this Sergal kit is pretty close to terrible in my opinion, and I don't know too many who have actually completed it. if you can find A Revell kit, you'd be building a fine representation of the vessel. there may be a few discrepancies, but nothing that can't be modified to suit. I've built two Cutty Sark kits to date......both have been a lot of fun....the second I modified the windlass so it looks more functional....even have a blog log out there that can be found in a search. I'm a confirmed Billings nut........might be fun to built a Wasa, but if I did, I'd lean more towards the Norske Love. I even had the notion to 'blow up' the Gothenborg instructions and add the cannons.....but I still need to finish the 1:100 model first. your full story makes me happy though.......another enters the fold.......I wish you the very best, and I hope the sawdust bug bites you REAL good
-
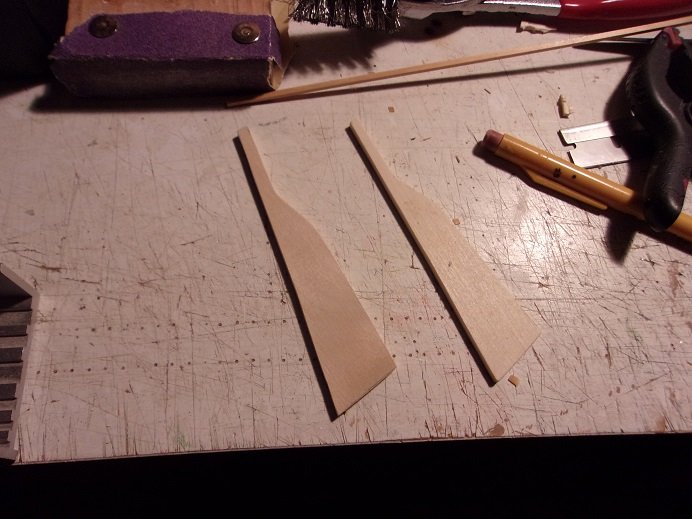
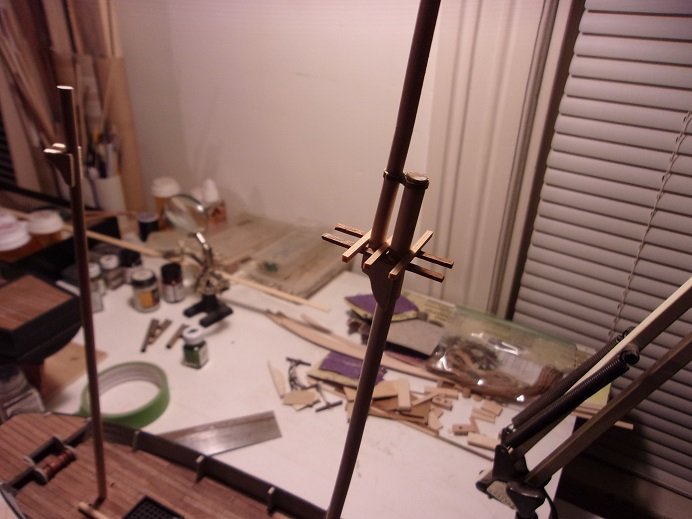
the idea of building two vessels from a single kit works well.....but it can be a little confusing. the good thing here though, is that one blooper can be a benefit to the other. most of the parts will look the same in some way or another, so a lot of the fabrications can be done in pairs. the rudders, for instance......I made up two of them....one for the Agilis, and one for the Clotilda. as mentioned in the Agilis build, I will need to make the gungeons and pintles to attach it to the stern. I did cut all of the first steps for the masts. I haven't added to the mast as of yet.......I've been concentrating on the Agilis. since the Agilis is to have both masts with a top, the recent oops in not adding one to the mizzen mast, is a boon for the Clotilda......she will inherit the mizzen, since all she requires is a crosstree. once swapped over, the crosstree was fleshed out some more. more updates soon
-
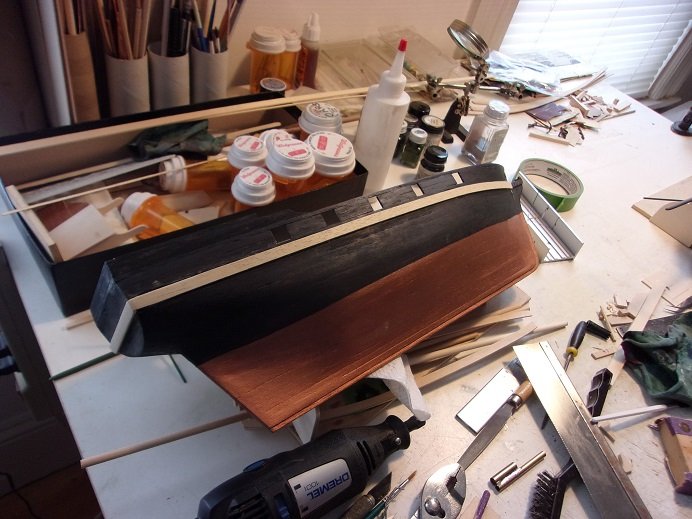
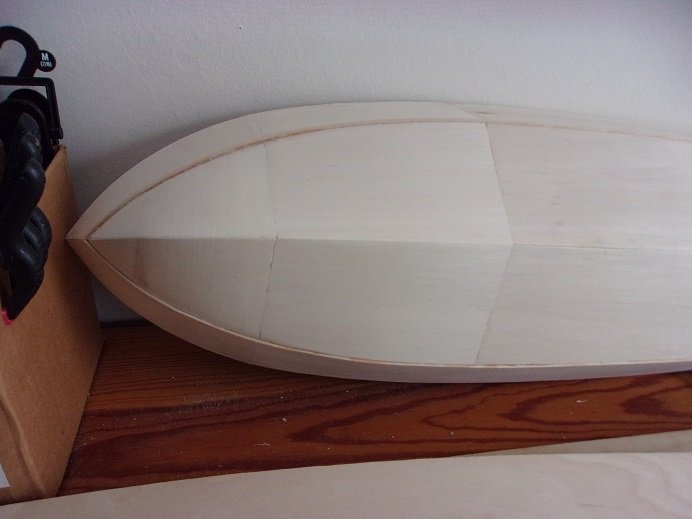
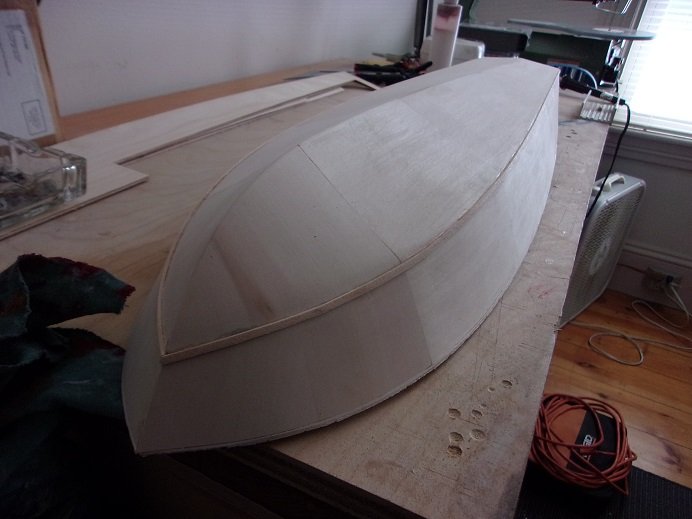
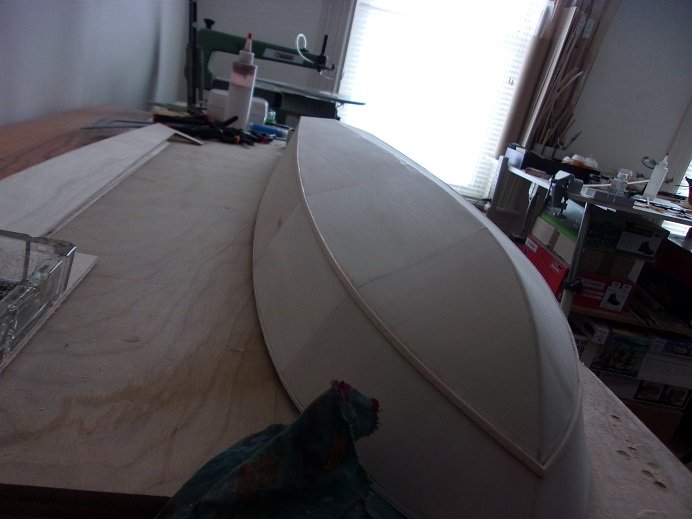
I managed to get a bit more time on the hull...actually it was a couple of days ago. I'm still leaning towards ordering a second running hardware kit, but I'm also thinking of a way to simply scratch building what I need. I only got to the chine spray rails, but I also looked into the gunwales and how the sheer fits on, seeing that the sheer is larger than the deck surface. of course the deck surface needs to be sanded.......makes a god-awful racket whenever I start to sand it. the spray rails cover the panel joints at the bow nicely.....I'm glad that worked out when I can get the sheer on, and fill the small gaps I see, then I can give her a coat of resin, starting that process. when I get to the rudders and screws, I will need to add thicker wood inside to sturdy the assemblies.......something for the future.
- 221 replies
-
- 11
-
-
hi there Jo.......it's been a while since I looked in you've made some really good progress...the hull came out fabulous! I read you had your 'tribs' in getting to this point.....two things I've learned with the hobby..........1) everything depends on the planking....and the thickness of the planking. filler is your friend......filler and sanding can cure a lot of ills. some kits supply thin planking, so this needs to be taken into consideration in sanding the hull. 2) with paint, there isn't any oops that can't be touched up. I love what you did with the hull......it look very complex......this is something that adds interest to the model. folks will look at it and say WOW! keep going .......your doing swell!
-
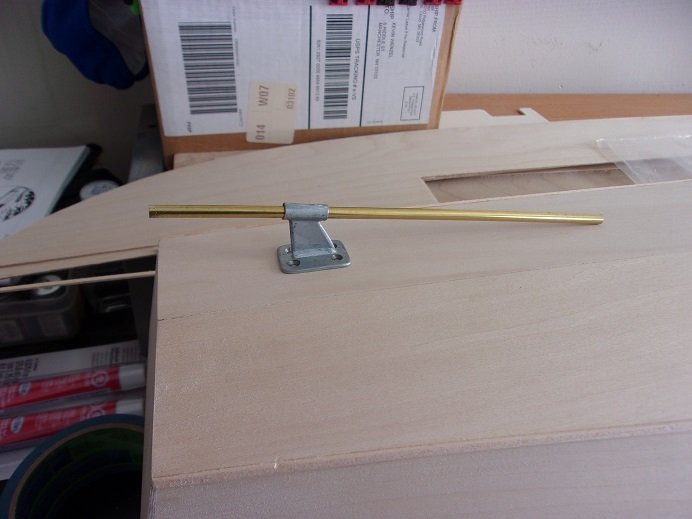
the guns look great........did you base them from a kit {of sorts}? I know you did some scratch building of them. the hatch looks great as well.....the hinge is a neat aspect. I do believe I saw the hinge sold as a long strip somewhere.........would have saved the need to use two. I want to look back in your log, but I may as well ask...... did you do the rudder {s} and screws as a single or a pair. I've sluffed on the research for the time being, but I'm settled on doing two rudders and two screws...shafts, ect. ....1) since it will be a static model, and 2) since I don't want to make it look R/C, but more towards the real thing. good to see an update my friend.......your progress is very good ...gonna look even better with these two additions in place!
-
really nice progress Mike
-
very nice progress........must be a dragon morph
-
the bus looks great very nice detail!
-
I agree........might get another someday and try something different. yep Larry.....I could have help with that.......I save every set of instructions for this very reason but egilman is correct......scalemates does allow downloads for the instructions on most kits.
-
a big hello John..........still doing great! the admiral and I are well and plan to stay that way! we have our appointments for the Covid shot, the first week of April. wouldn't miss if for the world good to see you and Pam are ok as well.......we'll beat this darn thing yet! thanks for the good word.......the caps were a small problem....these might not be period correct, but they pass muster with me I gotta find a better way to cut these darn things though........I'm going to try a Dremel to see if it works better. the only thing is Gibbs.........he hates the sound the Dremel makes. we'll see what happens
-
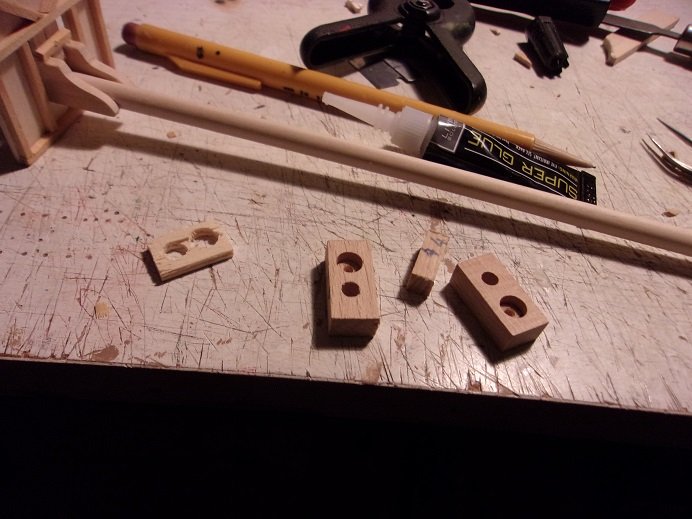
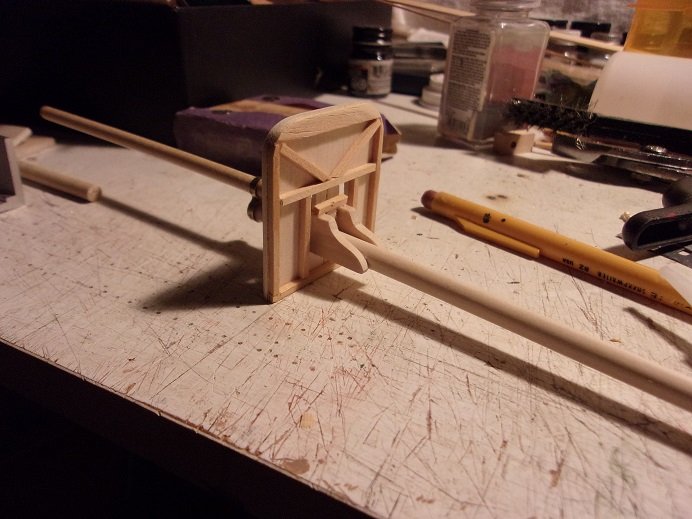
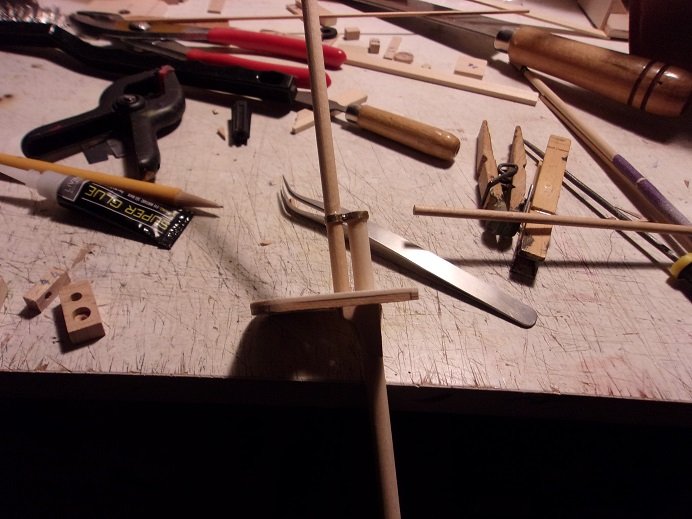
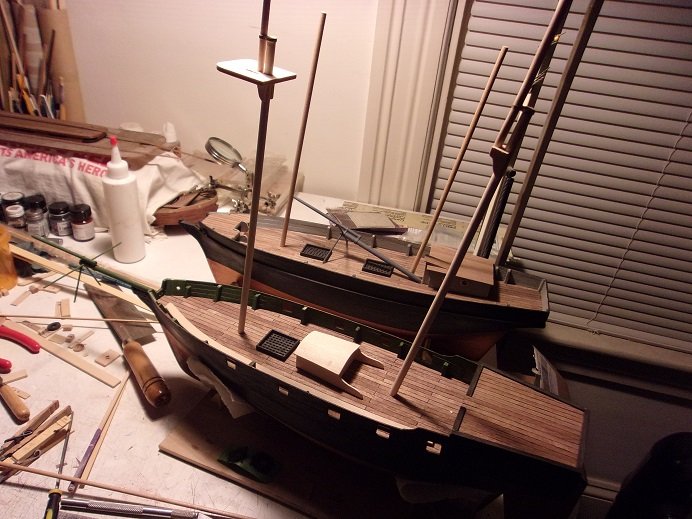
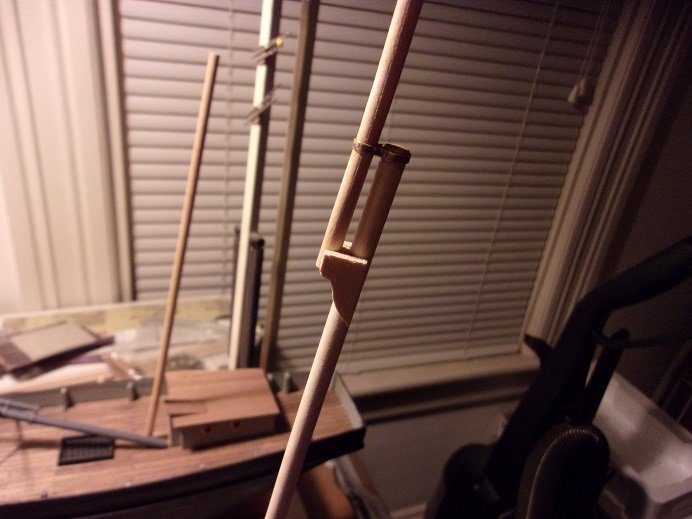
my apologies John.......I saw your post a few weeks ago. I thought I'd get something done before now, but I never made it to that table {I have three now}. somehow, through my 20 or so active projects {and others I may not have remembered to count}, I finally ended up at table white......a bit of a throw back to Game of Thrones. my two other tables are Table Black and table beech {the top is a 5/8 slab of beech plywood}. I am slowly getting my way....... and my vision anyway.......... most of the playtime was on the Agilis, but some of it will be used for the Clotilda. I did sort out some of the clutter......but it just keeps coming back! as a refresher.......most of the parts supplied in this kit is junk. either they are too thick, or the parts do not even resemble what they are intended for.........so a lot of this model will be scratch. anyone who followed JCT's build of this model, knows what he went through with his. a while ago, I began to make my own mast caps........I started with a few 1/4 X 5/32 for the bow spirits of both ships. but for the masts, I made a different combination.......1/4 X 3/16. I made these out of frustration.......all of the caps I made either chipped badly or broke. so I said the heck with it and set out to make the different size. I really need to come up with a better way to cur these.......I'm using a hack saw along with this miter box I have another miter box for the wood saws.........I may get another.......these do wear out after a while. they are a lot better than the plastic one I started out with {Zona} as mentioned.....the ones in the kit are junk. while I was blundering along with this dilemma, I made the rudders for both ships......doubling up two scrap pieces of 1/16 basswood and cutting them out on the scroll saw. I used the one from the kit as a template.......I would have used it, but it too suffers from the delamination, as all the other parts did when I cut them out. they still need shaping.......and then make the gungeons and pintles to attach them to the ships. the Agilis is to be a brig, so the masts will be fitted with tops. I made up the top for the fore / main mast. I did some reasonable bit of framing underneath. the trees are also scratch made. in JCT's log, a fellow posted a picture of the one he built. first observation was that the mast were too tall in my view, so I made the first and second segments a bit shorter. there is another segment to go on this mast still.....I wanna say its called the top gallant. I know each segment has a name, but I'm not sure of the terminology. I know the cap may not be correct.......but it kept me sane. all of the main sections of the mast have been cut for both ships.......I went out to get more 1/4 dowel to do them all. I still need to come up with a deck plan.........since adding the poop deck. I still need to add the wales to her as well. darn it........I still haven't made the cat heads for them! don't think I'll be using that cabin either.......I'll work something off the poop deck. the mizzen mast is complete except for the crosstree......the fore / main mast will be slightly taller. one thing I forgot was the top for it {I think it has one instead of the crosstree}. the small blunder will not go to waste........it will be used for the Clotilda, since she was a top sail schooner. I guess it can be considered a perk it was kinda nice to be working with wood again.......more soon.....fingers crossed


-
car and dio looks awesome! congratz on a fine build indeed!
-
sweet look'in plane....the camo looks great
-
superb looking model........second a on the oops a I always liked those types cars, but I seemed to lean towards funny cars and racers. tough luck at Daytona......eh Kyles car was a mess.......I showed it to the admiral because she's the M&M nut
-
I think I hold the record.......I keep trying to get an idea of how many.......but I always lose track then I think of what I have now in the stash....I try not to though.......then it causes confusion and wanting desire. I think that's why we have stashes in the first place.......the desire to build all those models. I guess you can say that I went 'real time' with my desires
-
cool video.......pretty ingenious!

