


glbarlow
-
Posts
4,043 -
Joined
-
Last visited
Content Type
Profiles
Forums
Gallery
Events
Posts posted by glbarlow
-
-
-
34 minutes ago, VTHokiEE said:
How exactly do you "clean" these after use?
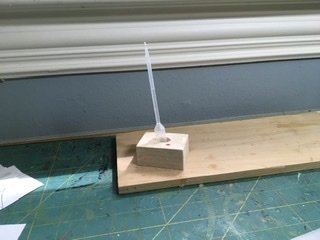
You don’t, they are disposable single use. I trim the tip a little at a time as needed to keep it neat, keep it upright when not in use with a little stand and keep the tip clear (by squeezing it till air comes out at the end my work day). At some point I toss it and reach for a new one. I use 1-3 per build.
- VTHokiEE and GrandpaPhil
-
 2
2
-
2 hours ago, Blue Ensign said:
knock up a little pictorial
That would be great, thank you! I’ll enjoy it while I’m in our lock down.
-
On another note, like Chuck you have a very pristine way of seizing blocks - I've seized hundreds of them but my method (actually Bob Hunt's I learned) leaves the ends of threads and ropes hanging there. If I cut them off too close the whole thing unravels (though I do use diluted white glue). Can you share your process or point me to a tutorial?
-
9 hours ago, Blue Ensign said:
fake it and form hooks out of very fine eyebolts
That's a good idea, thanks!
-
Update: I just found this site and placed and order, let's see what happens https://www.zoro.com/ks-precision-metals-brass-flat-bar-164-x-332-x-12-815021/i/G9105621/
-
I'm looking for just enough 1/64 x 3/32 brass strips to build Cheerful. So expensive cutters or large quantities isn't a practical solution for me. I just need the little bit for my one model. Any suggestions?
-
Anyone have any luck finding 1/64 x 3/32 brass strips. I only need enough for Cheerful so buying cutters isn't a practical solution for me. I've looked high and low for this simple little thing with no luck.
Update: I just found this site: https://www.zoro.com/ks-precision-metals-brass-flat-bar-164-x-332-x-12-815021/i/G9105621/ I placed an order, let's see what happens.
- Jorge Diaz O, hollowneck, Canute and 1 other
-
4
-
On 12/24/2019 at 5:19 AM, Blue Ensign said:
Syren 3mm black plastic hooks,
Do you have an alternate source for either these black plastic or realistic photo etched hooks (for both Speedy and Cheerful, I'm stocking up for these two models)? Thanks for any help.
Beautiful work and an excellent reference source.
-
Perhaps its the brand, I've never had any issue with the CA I use. Sorry you're having that issue, maybe the UK has the allergic kind 🙂
-
Thanks! A set is on the way. I only drill by hand and have tons of tiny drill bits, I'm always fumbling with the calibers to get the right size. These should be great
-
Really nice job, the top edge is very clean.
-
On 3/26/2020 at 11:48 AM, James H said:
A 0.6mm drill
May I ask your source for these drills?
-
8 hours ago, chris watton said:
thinking about a different stand,
I appreciate the effort but I’m not comfortable sitting my models on a stand, I need to have them mounted and fixed, so from my standpoint it isn’t needed. But that’s just me.
- chris watton, Canute, hollowneck and 1 other
-
4
-
10 minutes ago, chris watton said:
MDF will however, always be used
Good, I prefer it as well.
- mtaylor, hollowneck and Canute
-
3
-
So caved to the demand and moved from MDF to ply...? My Speedy will have white stuff anyway, historical issues aside no copper for me. Sure wish I had boxwood though
- Canute, mtaylor and hollowneck
-
3
-
The hull behind the rudder show how much nicer boxwood is over walnut. I’m sure pear wood is great but wish there was still a boxwood option.
nicely done!
-
I have two Midwest kits on hand and my own plan for working with her. We’ve built lots of magnet block works, STEM Towers and all kinds of art projects. My post was looking for kits, I have found those, so thanks and appreciation for those kit suggestions.
- Duanelaker, Mike Y and mtaylor
-
3
-
Not a new topic I’m sure. I’m looking for a diagram of rigging the cat head (Cat falls) and the anchor? Any help appreciated. I have Lees book the diagram doesn’t show how the line runs and where both rope end terminate?
-
2 hours ago, chris watton said:
Sails will be sold separately
Good. I have no interest in sails and wouldn't want to absorb the extra cost. Making them an add-on option is good call.
Those planking lines don't look very beginerish...
-
Lady Nelson is a basic cutter, but the principals and steps are the same as a more advance model, just less of it. There is also ample opportunity to kit bash it and build a better model than what comes with the kit. it’s very doable and a good start provided you’re willing to take the time and do the research on how to build models.
However, I’d recommend Vanguard Models cutter Alert. It’s a bit simpler than Speedy, the big difference is clear detailed instructions, much better materials, and good plans. Better all around than Lady Nelson, but more cost though. I think the price difference is worth it for the instructions alone.
I learned the most on my 2nd model by punching the Bob Hunt practicum and the AVS, Reed Virginia Schooner, but I’m not sure that’s available or if Hunt is still in business.
It’s about what your style. Personally I’d be bored by a simple open boat and more likely to abandon that than spending the time learning new skills and having something to display when I’m done.
-
On 3/16/2020 at 4:49 PM, SpyGlass said:
which files to order
I order a packaged set of six (which look like Derek's photo) from Amazon then ordered the two barrettes as individual files also from Amazon.
-
-
HMS Speedy by Delf - FINISHED - Vanguard Models - Scale 1:64 - Master Shipwright edition
in - Kit build logs for subjects built from 1751 - 1800
Posted
And again I enjoy my decision to not copper 🤣😂