


glbarlow
-
Posts
3,824 -
Joined
-
Last visited
Content Type
Profiles
Forums
Gallery
Events
Posts posted by glbarlow
-
-
I know how to do tree-nailing the hard way. Any suggestions on simple, perhaps historically inaccurate, but nice looking, and quick and easy way to tree-nail a deck. Pardon the blasphemy of looking for a shortcut. 😄
-
On 2/14/2020 at 9:46 AM, silbchris said:
Hey guys,
How's it going? I'm fairly new to model building but loving it. However, I've noticed recently that I've been getting a lot of headaches and I think it's from the paint I'm using for the parts. I've been researching respiratory masks like these to see if they help. Does anyone have any recommendations? I'm looking for something that will get the job done but be fairly inexpensive.
Any help would be much appreciated,
Cheers,
Chris
The easiest thing to do is use water based acrylic - I use Admiralty paints but there are any number of options. No headaches with water-based.
-
On 1/9/2020 at 10:36 PM, SpyGlass said:
Bending the gun port strips is an old issue - Speedy is nothing like as difficult as say Pegasus.
Soak the strip fit it and clamp or pin - let it dry - and then do it again !
A bit of time and you can get the strip to sit exactly without having to clamp it to shape as you glue.
Lots of Fly/Pegasus logs but heres a pointer to mine at the strip shaping point gunport strip shaping
I trace the outline of half the ship (from above view) from the plans, transfer that to a piece of 1x4 inch lumber, cut out the half hull profile with a scroll saw, cut a few notches into opposite side, soak the gunport patterns a few hours then clamp and rubber band it to dry on my board.
The pattern then fits the ship perfectly and easily with no risk to the hull. I devised this when building my Pegasus, it also worked great on the bows of my Vanguard.
- mugje and Ryland Craze
-
 2
2
-
On 12/14/2019 at 2:33 AM, Vane said:
Interesting, I have to try that too. there are many ways to do this. But i Think the gamechanger for me was when i bought my heatgun from Proxxon and started prebending the planks sideways. Everything fits so much better.
I’ve adopted the Chuck method too. It’s great. I’m m using a stream travel iron though as the heat source, much quieter:-)
-
I checked several of the sites listed but didn’t have much luck finding milled strips for ship building, specialty in millimeter sizes. This three is from 2013, anyone have more current suppliers for model grade exotic strip wood?
- mtaylor and thibaultron
-
2
-
On 12/25/2015 at 1:59 AM, mtaylor said:
Jeff retired from the premium lumber business.
Crown Timberyard has taken over, in many ways, from Jeff.
WoodProjectSource also has a variety of timbers.
Have a look here... http://modelshipworld.com/index.php/topic/384-where-to-buy-wood/ It lists these and other suppliers.
I see Crown Timberyard is also now out of business. Anyone have a good source still in business as of February 2020?
-
On 2/14/2020 at 2:50 PM, Vane said:
So I have finally decided to go with my own maple....
I'll be interested to see how it comes out. My current plan is to use the engraved deck and see how that comes out. I've planked every ship with holly or ash, spent all the time doing it and then once the ship is built out and rigged its not all that noticeable. I get the master builder point and the nuance of all modelers - and the fact that before now we really didn't have a choice. But maybe on this one I'll just enjoy the engraved deck. The Speedy might be the first kit I don't bash.
One thing that did jump out is how wide the planks on the engraved deck are, mine are normally 4-5mm.
One point to check before you get to far is making sure the cannon still fit in the gun ports with the thicker planking..
-
On 1/25/2020 at 6:02 PM, Vane said:
Thats just a shot with my mobile. The lamp was on and full daylight from the window so I am not surprised that the whitebalance is off. I will do studioshots with my profoto flashes and Nikon D500 once the deck and 2nd planking are complete.
sorry, I was actually responding in terms of Chris' Instruction manual photos....
-
On 2/12/2020 at 6:46 PM, Gerarddm said:
Just curious: twice in the past couple of months I have used the email function of the Byrnes Model Machines website to ask a couple of questions ( there is no direct email address that I can find ) and got zero response.
Is he always this uncommunicative?
I’ve not had any response to recent emails using their web system, but I have received a call back. I think as they’ve replied here there is a problem with that system. No offense, I love my Byrnes saw and sander, but their website appears to be of a very old design and could use a refresh.
-
I'd had an interest or two in my Fair American model. The link I had in my signature line went to "another site" so thinking that might be bad form I created a gallery for the completed model here on MSW under of course, Galleries. I hope you enjoy.
Sorry the HM Granado photos still go to that other site, I don't have the original photos on my computer any more so...
-
-
12 hours ago, ASAT said:
Glenn, you might be swayed when you see how the Bristol and Vanguard will be completely different builds, if it is designed like his Victory it will almost be a POF - at least it will all be interlocking mdf framing and each deck is completely built up, no dummy guns, no solid bulkheads, gunport positions exactly framed and in place by the design.... no copper plates (on Bristol) 👍 should be an awesome experience - at least for me, I have been excited about this one since Chris envisioned Vanguard Models.... and realistically it only has 12 more guns than a Minerva Class frigate 😀
As long as no copper is involved...🤣
I’ll look forward to seeing the different design and likely will be a customer despite my whining about big ships😏
- hollowneck, chris watton and mtaylor
-
3
-
6 hours ago, chris watton said:
There are a few frigates I would like to do right now, to be honest, and my potential future development plan has 4 in mind. I wanted to develop one next, but I have spent quite a bit on Bristol/Portland Class development already, and need to do this/these first. (stern and figurehead decoration already done, plus cannon barrels)
Cheers
") I am adding these 'bolt heads' in the trucks to all sizes of carriage parts now.
I am adding these 'bolt heads' in the trucks to all sizes of carriage parts now.
Sounds like a great plan. I’ll look forward to watching your development of the Bristol, I’ll probably buy it and wait for a frigate too. I think I’ll be set for the next couple of years:-)
- hollowneck, chris watton and mtaylor
-
3
-
5 hours ago, chris watton said:
Yes! lol I tried the round versions for the new 24 pounders, and they seem fine, so will change all square holes to round for future cutting.
Problem could be when you have 26-28 carriages to make up for each deck, that is a lot of axle filing to get them to fit through the round holes..
This is a small thing but great for modelers, I like to build but making round axels out of square ones many many times not so much fun. Thanks for this “innovation.”
- mtaylor, chris watton and hollowneck
-
3
-
I’m sure the Bristol will be another great model, but after the Vanguard I’m not sure I’m ever going to be up for another big gun ship. Do you have any nice frigates on your radar, one of Cochrane’s perhaps?
I’m reading the book you recommended, he was a fascinating guy. The Imperieuse would be a fun build...he said hopefully...:-)
- chris watton, Canute, hollowneck and 1 other
-
4
-
Did Chris’ instructions call for fitting the sternpost at this stage? I would leave that off untIl after the planking, it makes fitting planks flush at the stern so much easier. Or perhaps I misunderstood?
-
On 2/11/2020 at 5:22 AM, glennard2523 said:
My HM Brig-Sloop Speedy Kit is out for delivery and I am really looking forward to receiving it later today. I have been studying the on line build instructions and have started making notes in my build log book.
I have undertaken a general review my general stock of material and tools and have ordered some items which I am either low on or do not have. I will also invest in a mouse sander and small travel iron in the next few days. I have not used the AK interactive AK174 product listed in the instructions for blacking the copper parts but I will buy a bottle and give it a go as I think it may yield a better end result than my normal painting method.
In all my previous double planked builds it has been necessary to mark out a beading line and file the false keel. There was no mention of this for this build and Chris has confirmed to me that there is no requirement to do this for this model and you simply sand down the keel after the 1st planking so the 2nd planking sits flush with the rudder. This seems to be a great improvement compared to my previous builds.
I also liked Chris's tip of using a water based wood filler ( natural colour Ronseal) which he then dilutes with a small amount of PVA wood glue and water. However he did say that it is not needed as much for the pear wood as the edges are pretty good.
I have never tried Chuck's edge planking method before but have studied his video's and posts. I am intrigued by the edge bending method and can fully understand the reason for it and why it works but I am having difficulty visualising it at the moment. I don't think it is absolutely necessary for the 1st planking (as it is hidden) but I will use for the 1st planking so I can get proficient with it in readiness for the 2nd planking.
The suggested method of pre tapering the bulkheads prior to fixing the false keel sounds really good and something I thought would be a good idea in some of my previous builds.
With the laser cut deck I will probably go ahead and use it but I would like to see how practical it is to cut it up to use some of the more detailed parts in conjunction with normal deck planking.
A build log book, that’s thorough and a great idea.
-
This is my next build for later this year. Good luck on your build and thanks for starting a log.
-
17 hours ago, SpyGlass said:
Chris has not quite grasped how slow mere mortals are compared to him! Multiply by 5 or more and you might be closer to what you will actually acheive. Its not just the build time - its the learning process. Though this is a kit which "assists" the builder quite a bit
50 hours is about how long it takes me to lay the first plank😂🤣
-
-
On 2/7/2020 at 4:05 AM, glennard2523 said:
HMS Speedy ordered today, looking forward to receiving the box so I can start work on building this model.
Hey, two Glenn's both spelled the right way:-) Congrats on Speedy, hope you're doing a build log. I won't be able to get to it for a while but looking forward to building mine too.
-
On 2/6/2020 at 3:43 PM, Gregory said:
Your best option would be to make it yourself.. Sanding dust and white glue or matte, water based varnished.
Yes I know that trick, hard to do it in much volume and to keep it clean. That can be the fall back but still hoping to locate some pear wood filler. Its not a common wood in the US so not likely a Home Depot opportunity. Thanks though.
-
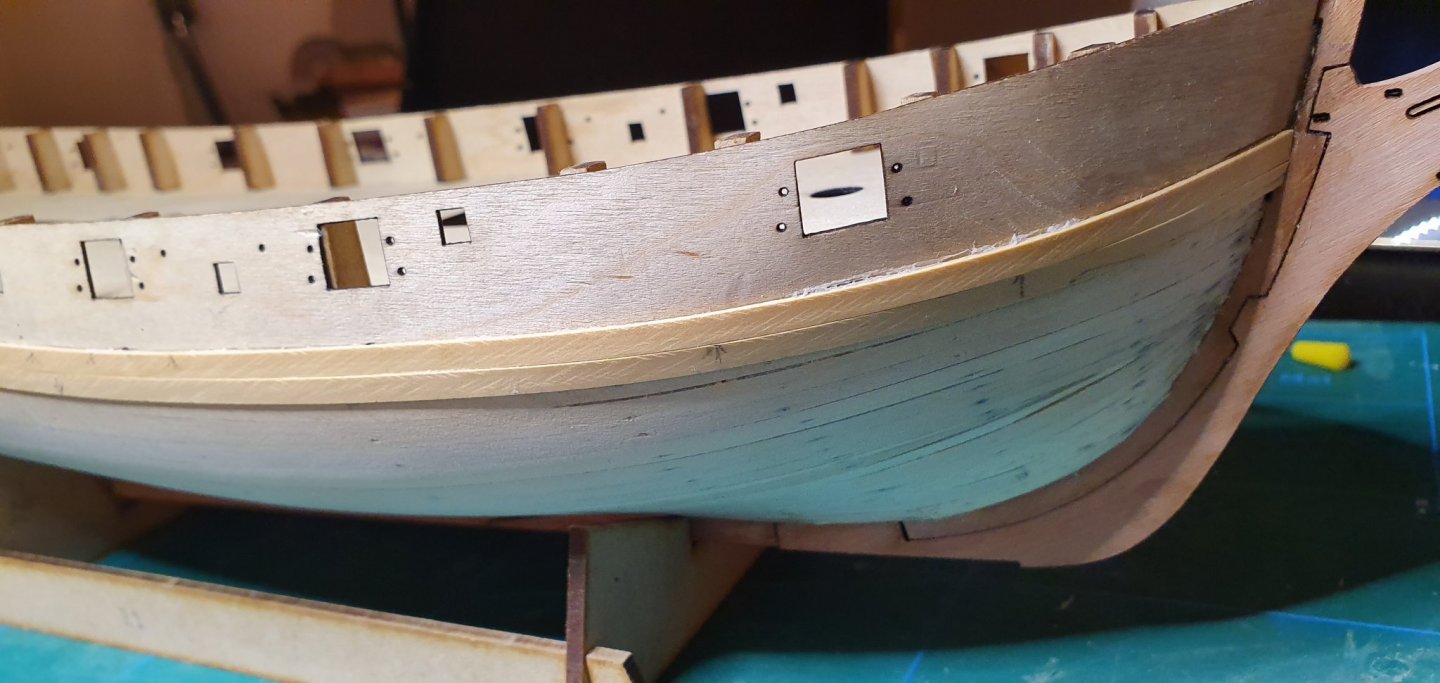
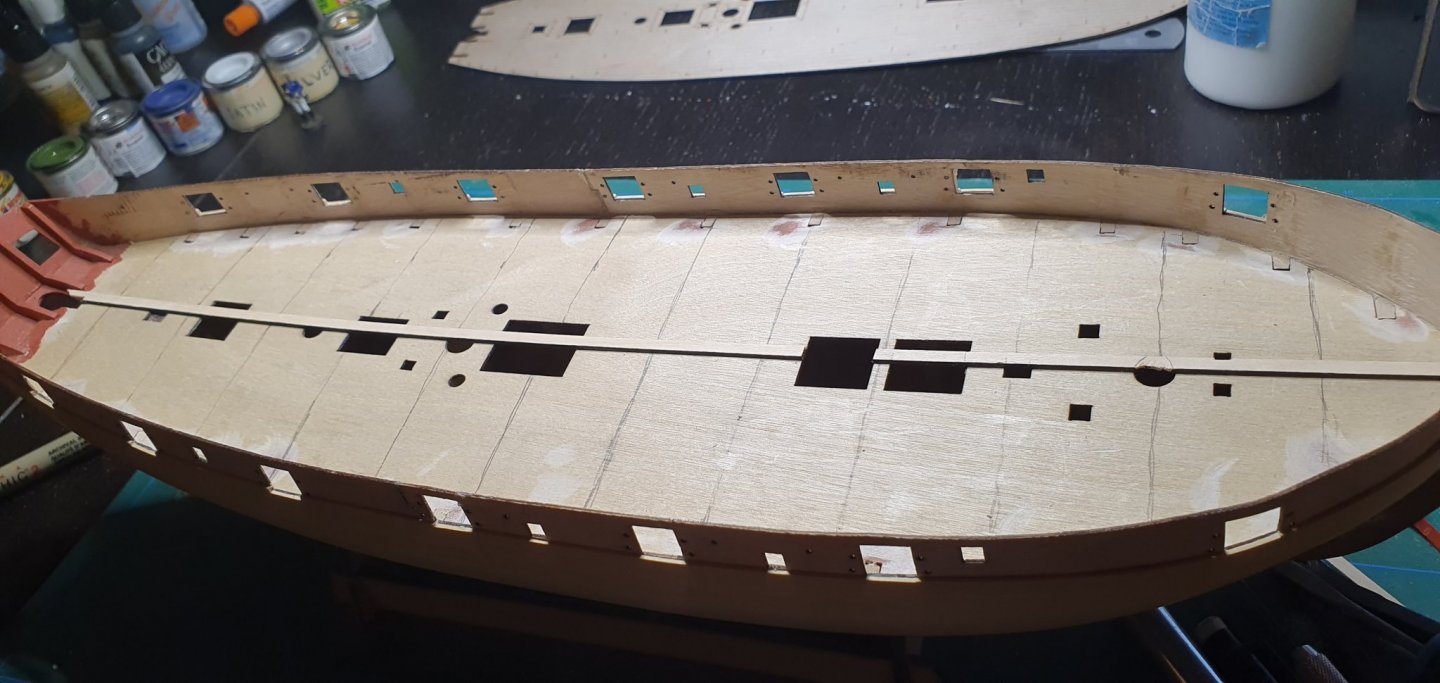
I completed one side of my model (no drop plank, still not sure why or when I’d need one, historical points notwithstanding) I’m quite pleased with the results. I’ve become pretty good at plank bending with my travel iron. Amazing how much sideways twist I could get with this process. Measuring really helps understand how to fit and where to bend.
Thanks Chuck!
- thibaultron, Ryland Craze and mtaylor
-
3
-
I have a question about building with Pearwood for those of us with less than perfect skills. Where can I find Pearwood wood filler? It has a distinctive color, natural or walnut filler would stand out.
I realize if i make no mistakes I won’t need it, an admirable goal i will set for myself, but...


Hobby Mill
in Wood discussion...Where to use it? Where to get it? What types are best? How to Finish it?
Posted
I have a Byrnes saw and can do a reasonable job of ripping my own, in fact I did for my current model since I couldn’t find anything and still had a few billets from Jeff. It’s just that I prefer not to, I don’t do it enough to be good at it and I don’t have the proper ventilation to rip something like ebony.
Even with that, I’m still looking for a source for quality woods in sheets in 3-5mm thicknesses. I’ll try some of the sites listed. I do miss Hobby Mill, didn’t realize how good I had it with Jeff.