HOLIDAY DONATION DRIVE - SUPPORT MSW - DO YOUR PART TO KEEP THIS GREAT FORUM GOING! (Only 13 donations so far - C'mon guys!)
×


glbarlow
-
Posts
4,107 -
Joined
-
Last visited
Content Type
Profiles
Forums
Gallery
Events
Everything posted by glbarlow
-
 Just ordered mine as well. As an aside, you’ll enjoy your time with Granado, she was a fun build for me.
 -
Too late to offer an opinion I imagine but I have two suggestions: Include a photo of the completed stern. I often look at the box art for inspiration and confirmation I'm on the right track. My second suggestion is to "upgrade" the color and definition of your VM logo. The white gets washed out, we all want your models to stand out. As you can tell by my replies I'm spending my morning getting caught up on your posts, my order for Speedy will be made today. 🙂
-
So if I get Speedy and call if Flirt I can do a white hull (which I'd do anyway, after Vanguard and even Pickle I am completely done with copper plating :-/?
-
It would be nice to have a high quality deck that I didn't have to pencil edges of holly cut to fit and fill, then and drill in little holes... A very nice touch. I've replaced the kit decking material on all my models, I'll look forward to not doing that this time.
-
The lengths quoted include the bowsprit right, I'm hoping the hull's not that long?
-
Is the objective to have this as the final deck or to serve as a template on where to lay planking? I'm all for it as a finished deck, but hard to tell from the photos.
-
I once made a silly little stick figure in the right scale for Pegasus. Of course I didn’t leave it on the model, but it was fun. I can’t imagine how crowded a fully manned frigate must have been. That said, I agree Chris’ business is models, not figurines.
-
Having built several of your designs, I’m a big fan of your work. I know where my next kit is coming from...
-
I see you also had fun, more than I did, with the “Captains Quarters.”
-
Just saw I'd lost my title as best Granado built 😄 I still like mine, but have to agree this is a great job (I realize I'm 5 years late posting, but I've been out of modeling for a long while.)
- 302 replies
-
- 2
-

-
- granado
- caldercraft
- (and 1 more)
-
Thanks Rusty, I got a lot of myinspiration from your builds. I’ve got all these tools, I’ll have to find some use for them eventually 🙂
- 101 replies
-
- 1
-
-
- victory models
- amati
- (and 2 more)
-
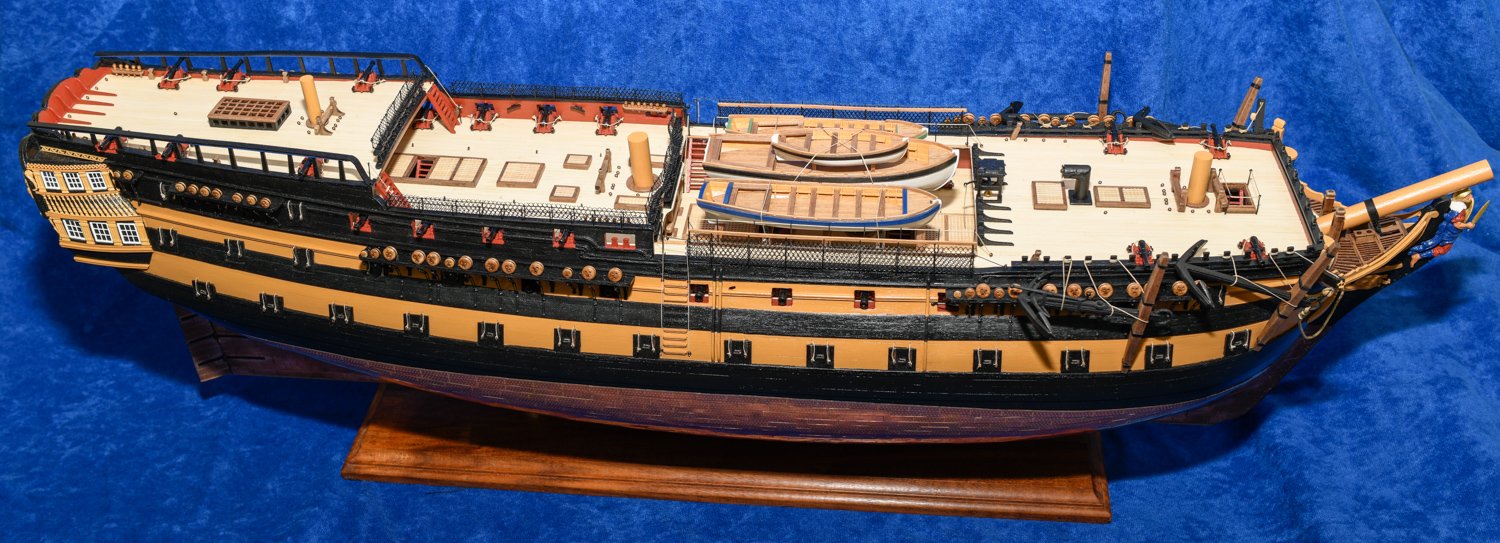
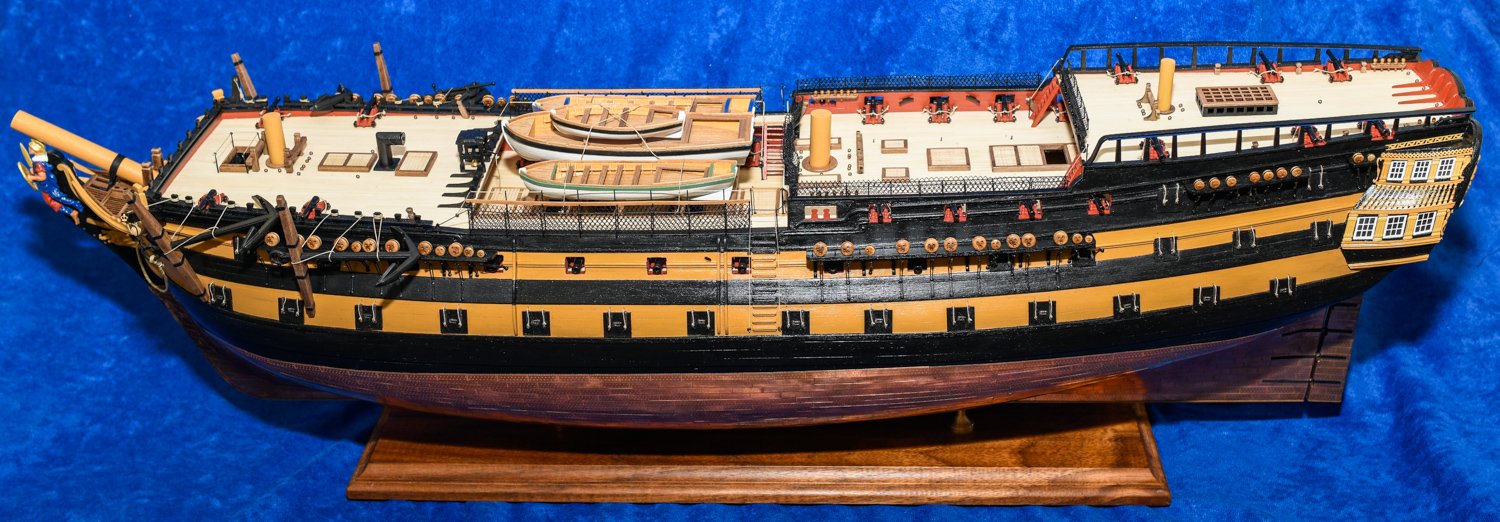
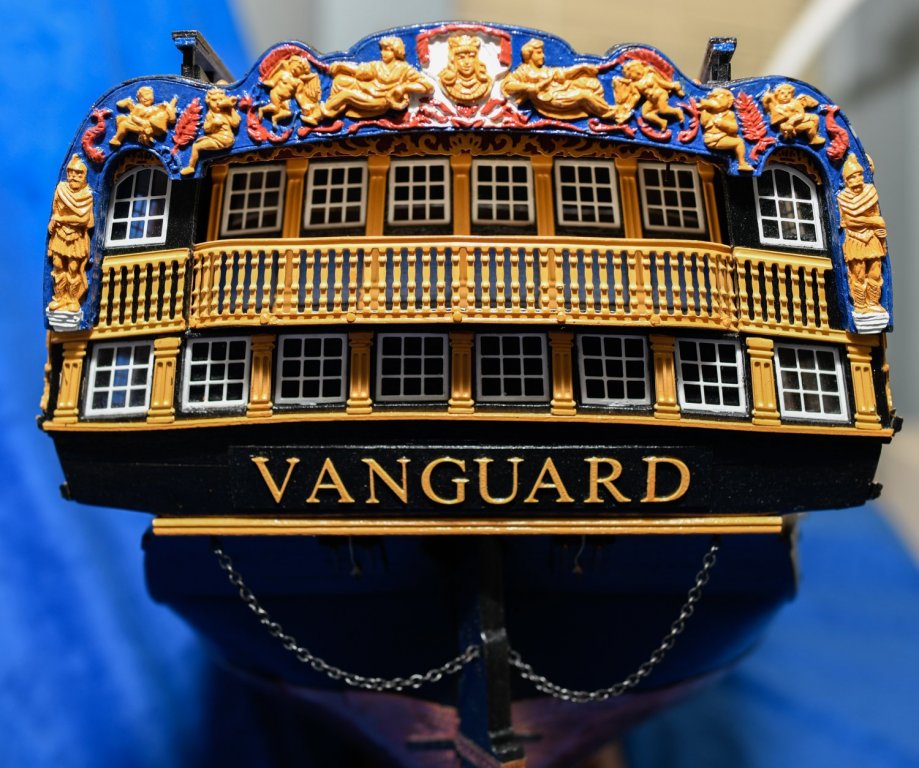
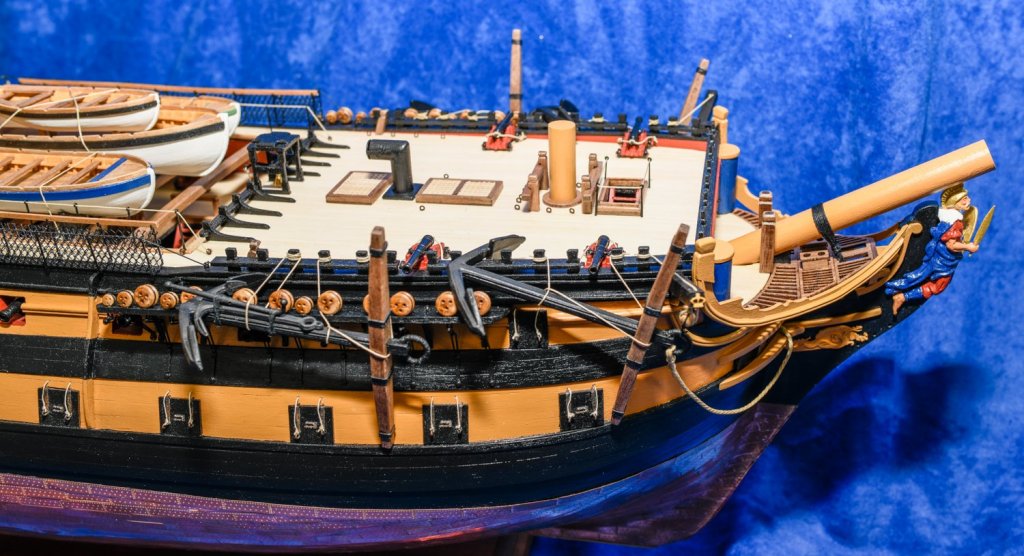
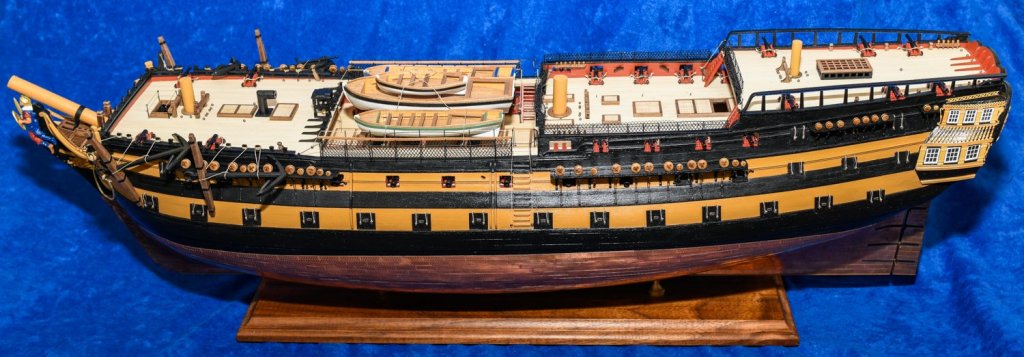
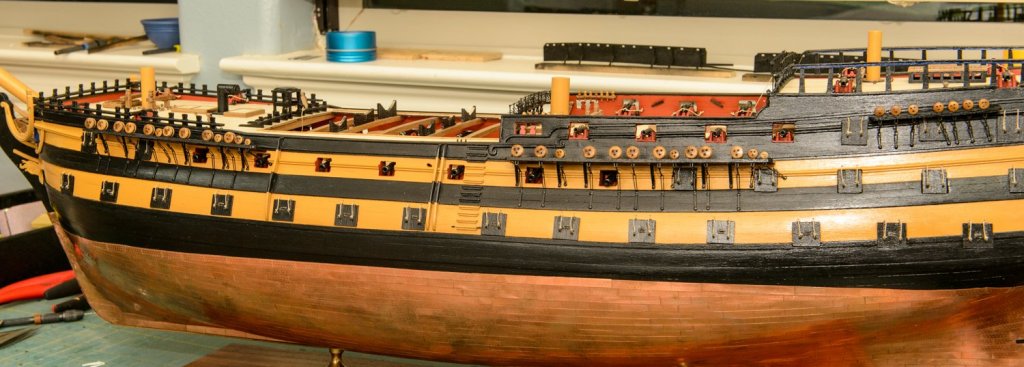
After 4 years (with a two year break between) my journey and this log for the HMS Vanguard is complete. I'm not taking it any further, as I originally stated there are no masts and rigging to be added. I've included some final photos and hope they might offer some help for others building this model, at least what some options look like or perhaps what not to do. As I said at the outset, this is a really big ship even at 1/ 72th scale its over 3 feet long and easily 3 times larger than my other models. I had wanted to build a 72 gun ship, I won't want to again. The Amati model is very complete all the fittings (generally at least 2 extra of any given one), plenty of the various wood, and well etched metal and wood parts. The plans are very complete, even if at times you have to look between the instructions, the extra and very helpful extra booklet on the hull and the many large plan sheets, most full scale. Everything needed in the level of detail needed is included in the kit. It's just big. I made little attempt at historical accuracy. I put so much effort into that, including getting copies of original plans and multiple books, on my HMS Pegasus I just didn't care this time around. It's relatively accurate, I've tried in this log to call out where I went off-book. For finishing touches I attached the anchors in the same way I did on the Pegasus, so that required some minor modifications not in the plans. The hammock netting also isn't included in the plans or the kit, I picked up a yard or so of "material" from the local JoAnn's store (fabric and sewing store in the US). I had tan, white, and black and like with the Pegasus decided on the black. The photos show I need to re-align some of it on the stern which was added months ago, and straighten a few gun tackles. Other things, such as howser rope and minor touches came from experience building past models. So, here are a few photos to show the completed model. Its no where near as shiny as the photos make it seem, just a result of my camera flash bouncing off the paint. It will be a long while, if ever, before I start another model. If I do it will be something completely different and smaller (like the Echo cross section). So after seven completed models I think I'm done. Building these models has certainly provide me with many hours of enjoyment, I hope it will for you as well. My log is complete.


- 101 replies
-
- 14
-
-

-
- victory models
- amati
- (and 2 more)
-
No problem. That's the process called splining the planks. There are lots of tutorials and logs on this phase of ship building, some more complex and precise than others. I get a pretty good result from my approach to it as evidenced by the photos. I had a really detailed log on the Pegasus where I described planking in detail, unfortunately that was all lost when this site crashed several years ago. So, I've described it in some detail in this log starting on page 1 with the first planking and further on for the second planking. That process is how I get everything to fit. Its important to get the first planking on the ship, no matter how it fits, and sand it until its the shape you ultimately want (described in the log). This includes adding "cheats," balsa wood fillers between certain frames (also in the log) because its unnatural for wood to bend in 2-3 directions at once. (so soaking comes to play). The second planking is thin so while you can and should sand it smooth, you have less wood to work with. Cutting (not sanding) the shape of the planks to fit uniformly from bow to stern is a practiced skill. The Vanguard is my 7th, and final, ship. Nonetheless I had to relearn it each time. My log and others will give you the technique (as I noted I go with a simple process I learned from someone else - some people want to get much more technical with it). It takes practice (and a lot of sharp blades) to make it work so that all you have at the end is some finishing sanding. Hopefully the beginning of the log answers your questions. You definitely want to end up with no hairline gaps. The level of accuracy varies if you're leaving it natural or painting - if your painting (and if its your first one I'd advise you to, paint covers a lot of mistakes) then wood filler (from any hardware store) also fills gaps from mistakes. I hope that helps.
- 101 replies
-
- 2
-
-

-
- victory models
- amati
- (and 2 more)
-
Sorry, I'm not sure what you mean by bevel? Are you referring to splining the planks, I described that in the post. I'm happy to help, but not clear on what you mean.
-
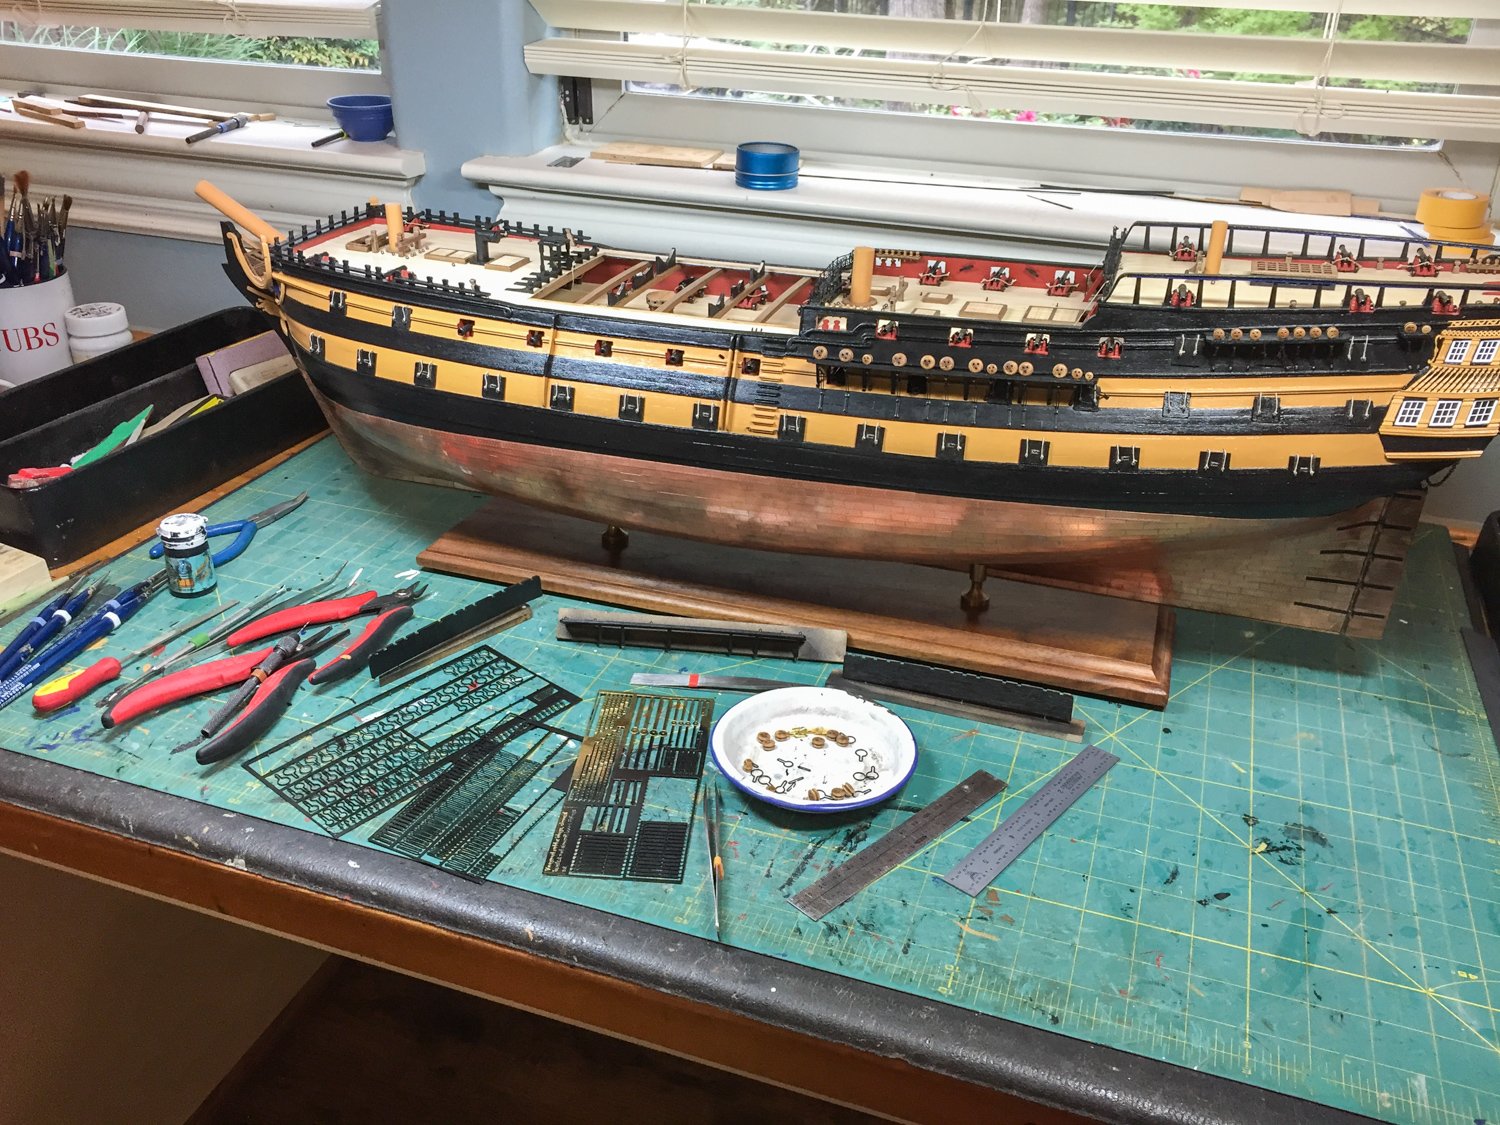
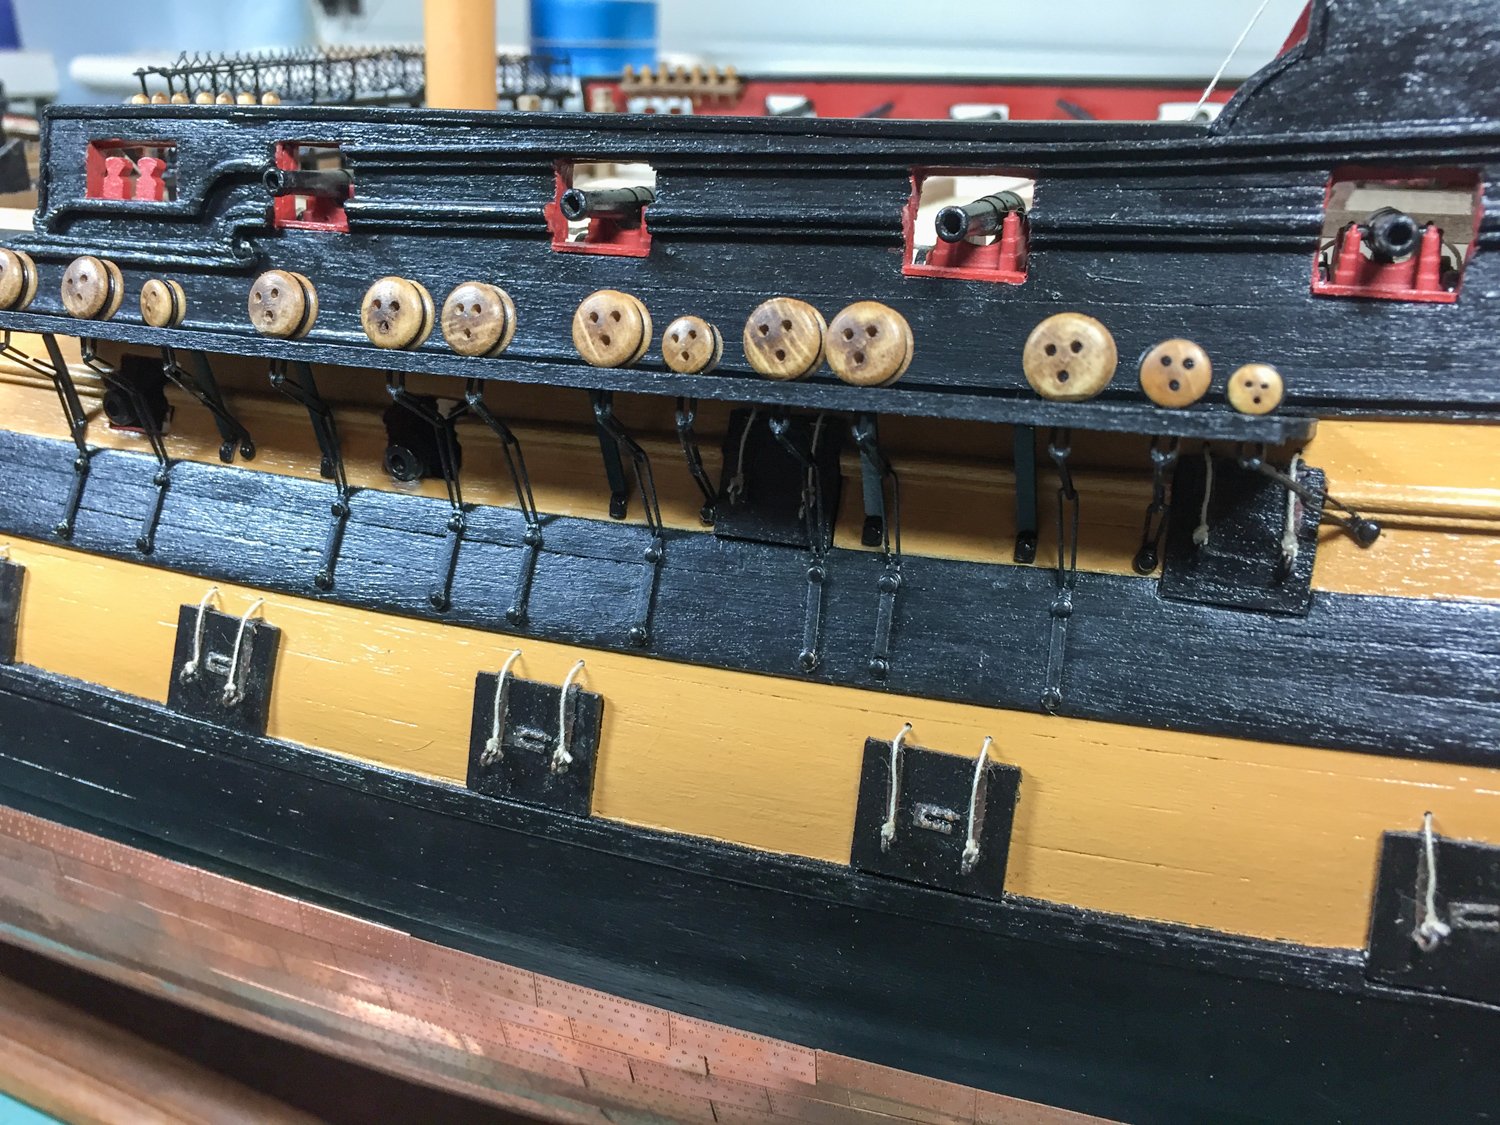
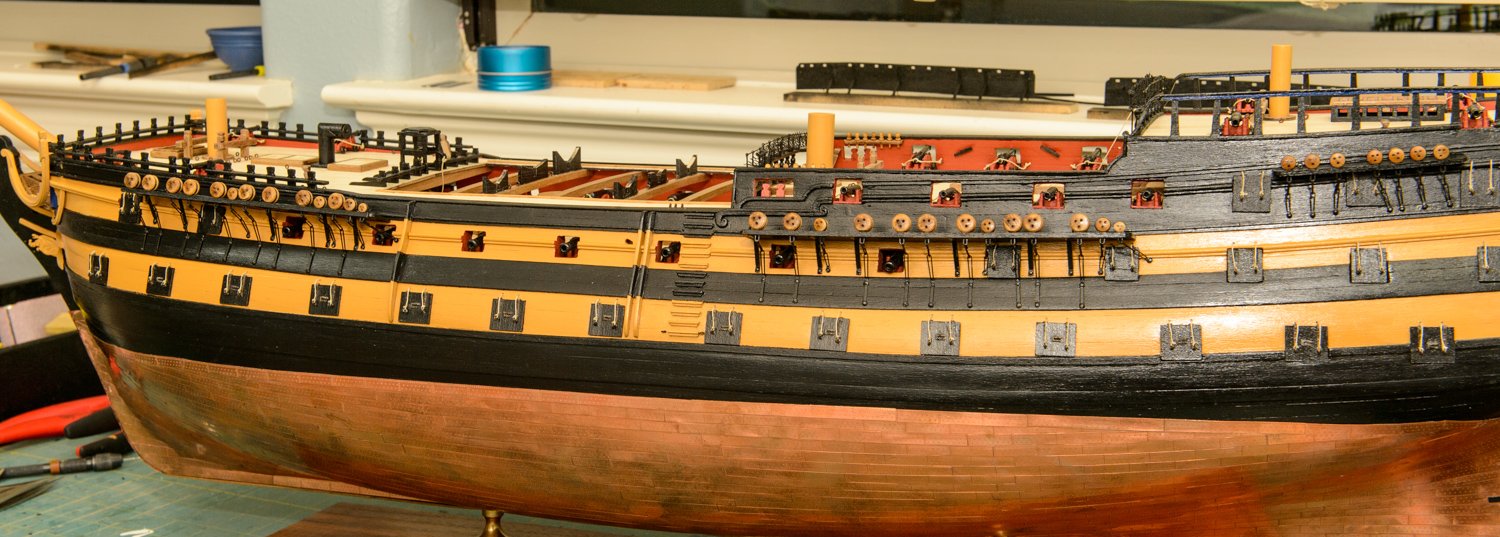
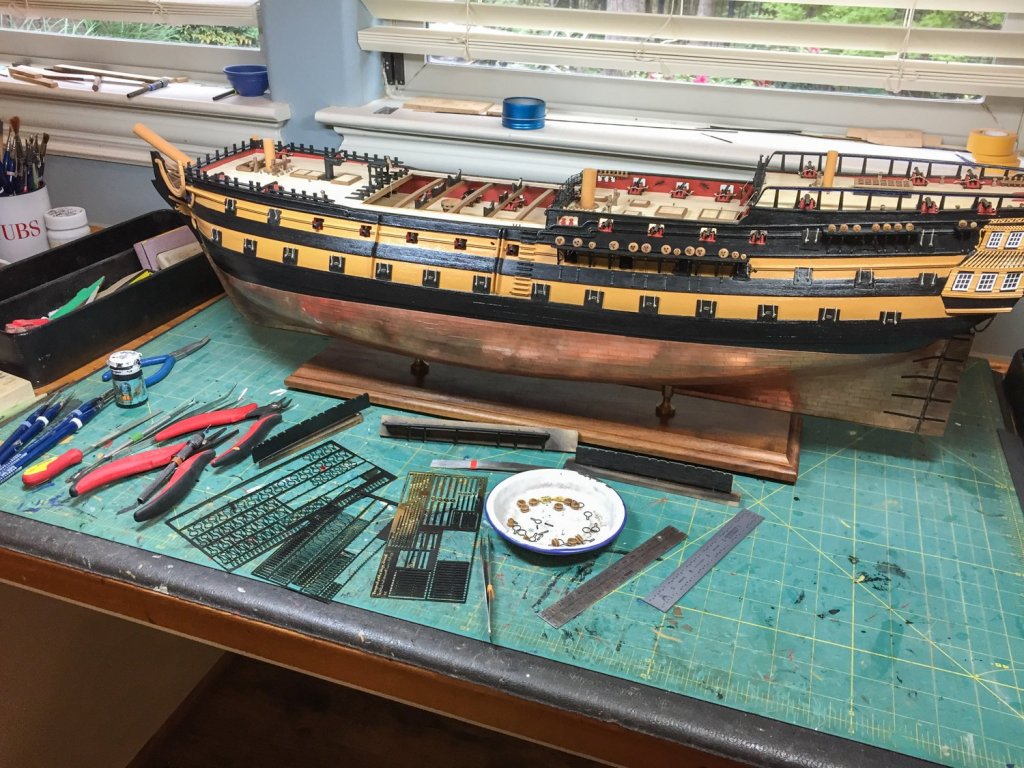
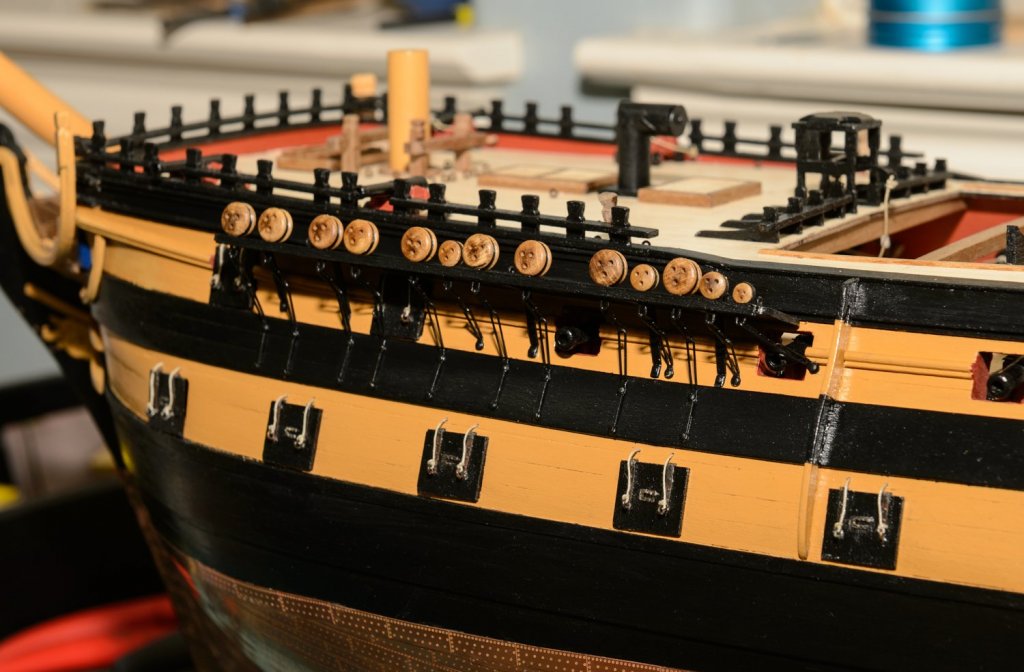
Been a while since I posted progress pics, but here goes. Working on the channels and deadeyes on a ship this size is all about the process. I airbrushed the etched metal pieces to start, then did the same to the channels. The little stands are made from leftover material and have come in handy to hold the channels while various stages of assembly dry and/or are painted. All the tools in the photo come into play at one step or another, reminding me of their value by making the assembly easier. The little white metal dish is the collection point for all the parts required for the channel I'm currently working on, after cutting them from the metal sheet, I file the cut edges then touch up the paint, which I have to do again once their installed, but it makes that final step easier. The smaller deadeyes on the main channel require a little finess to fit as they're close to a gun port, but otherwise there's no magic to it, just a lot of small detail work aligning and drilling the holes and finishing it up with the nails plugged into the hull. One key first step though is the initial fit of the channel onto the hull, aided and aligned by cut off nails serving as pins between the channel and the hull. The actual fit varies as you'd expect based on how I built the hull, I was surprised they came out as close as they did and required minimal sanding. I counted just for fun, there are 97 different pieces of wood, nails, deadeyes, and etched metal required to assemble one of the two main mast channels. Progress is slow, but having a repeatable process and a series of steps helps move it along. My own little factory assembly line. The fun continues...

- 101 replies
-
- 3
-
-
- victory models
- amati
- (and 2 more)
-
Update to the above: I measured some left over planking I had for both the inner and outer layer. Both were 31.5" long. If yours was only 20" I'd definitely contact Amati.
-
I didn't have that problem with either the first or second layer, that's quite surprising. My kit is also from Amati and both layers had plenty of both woods and planks at the needed length supplied with the kit. I'd start by contacting Amati. My kit was short starboard side copper plating for some reason. I contacted Amati and now have enough to also do another ship. It took them a while to respond, but they did by sending the copper in original packaging.
-
I've taken a really long break due to some neck surgery. I don't have much left to finish on my Vanguard so I'm planning to get back to it soon to wrap it up. While I've left open the option of masting and rigging I really have no intention to do so. My seven other fully rigged models have taken up about all the shelf space I have (available for ships...my wife lives here too:-) I see the whole site got a facelift while I was gone. Nice...
- 101 replies
-
- 3
-
-
- victory models
- amati
- (and 2 more)
-
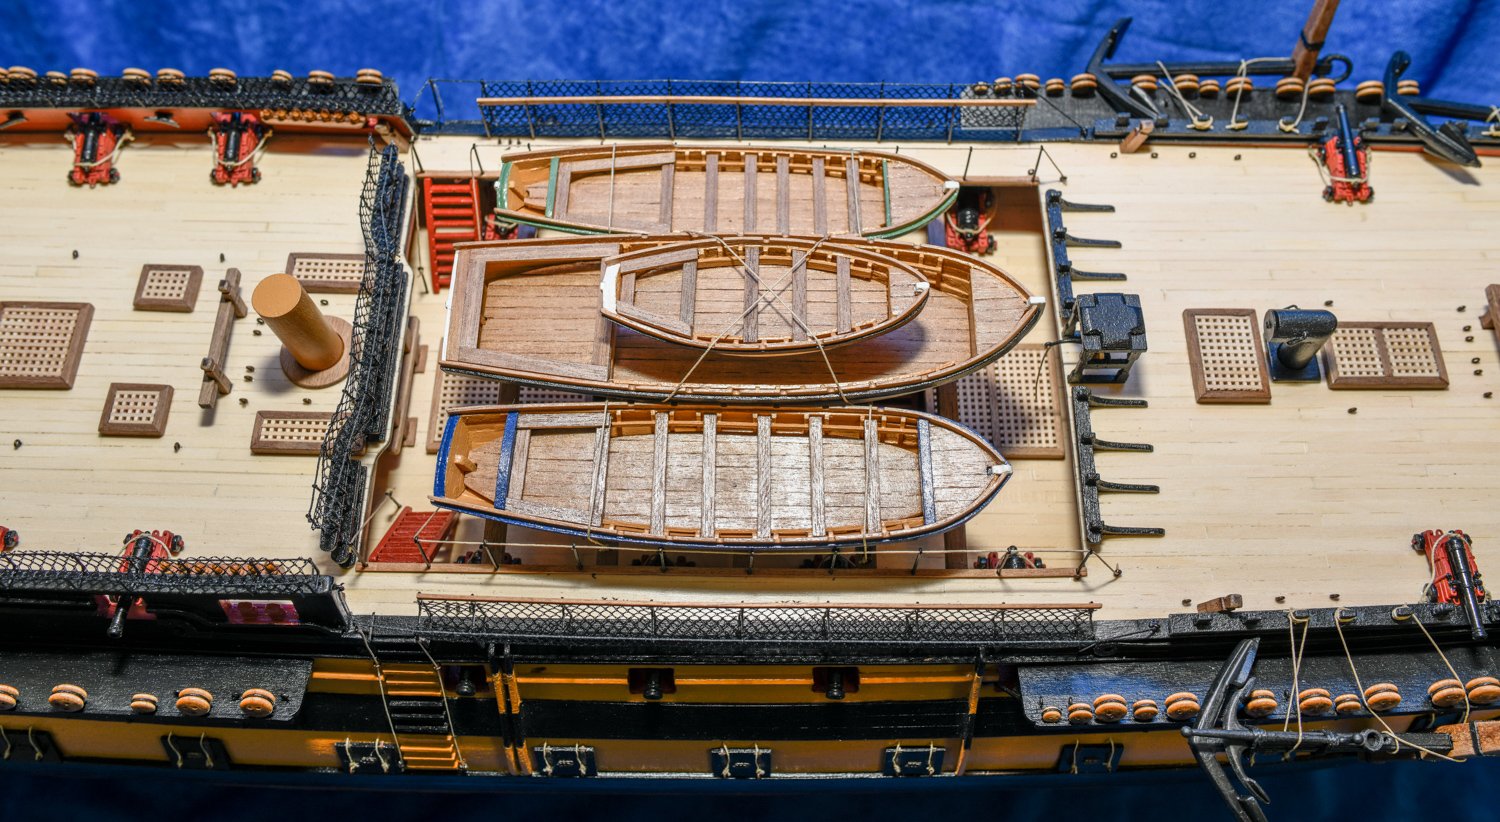
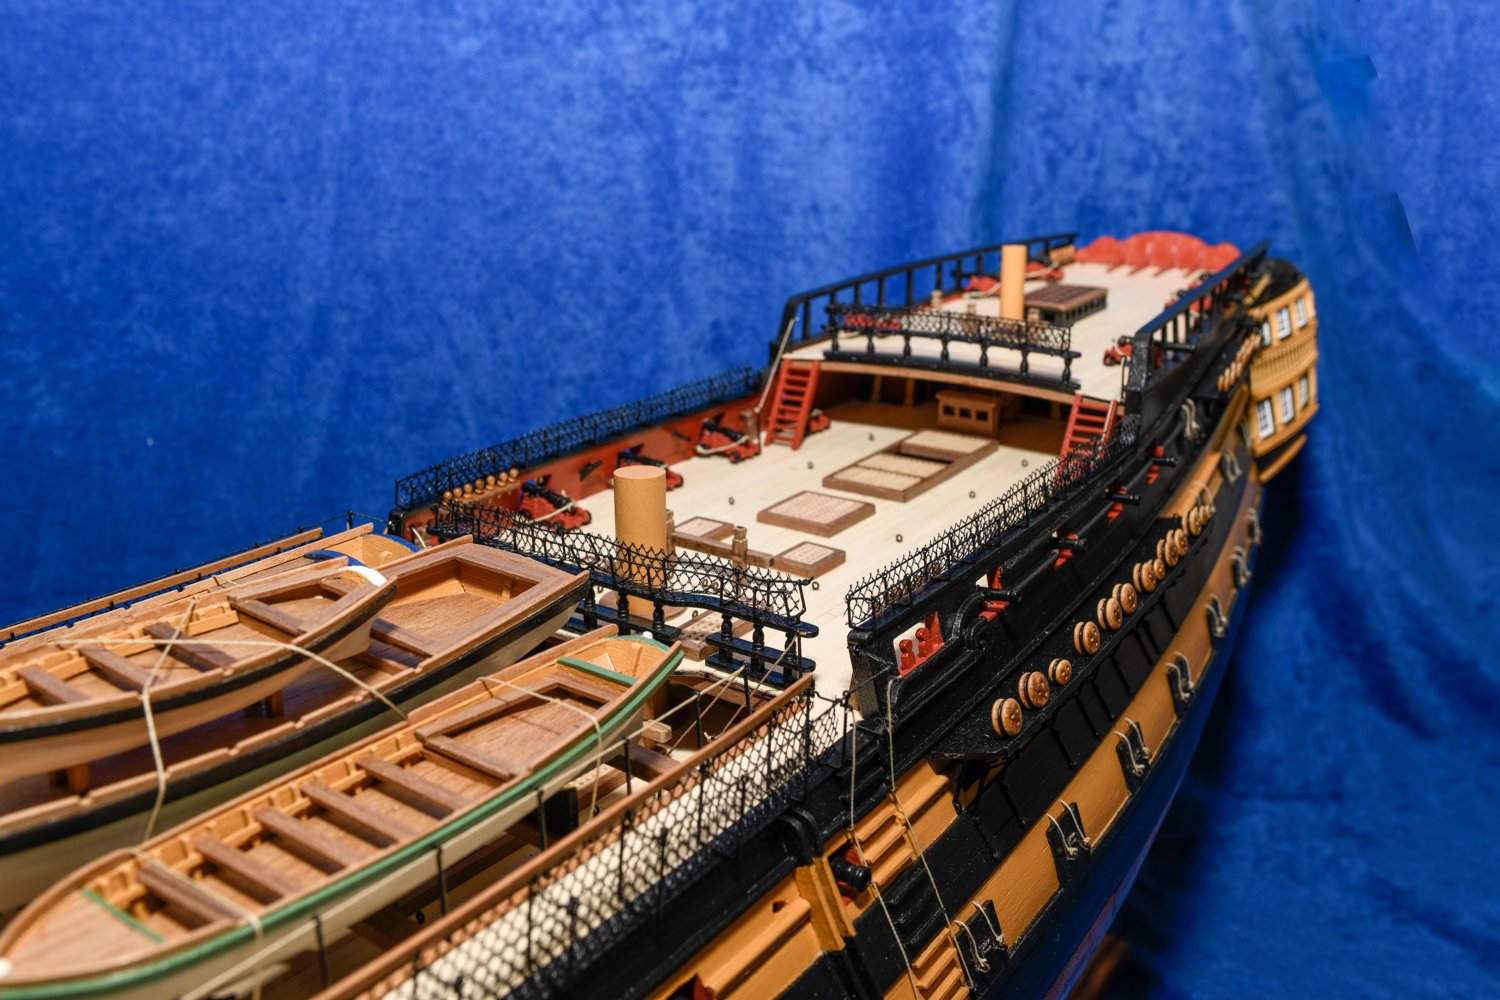
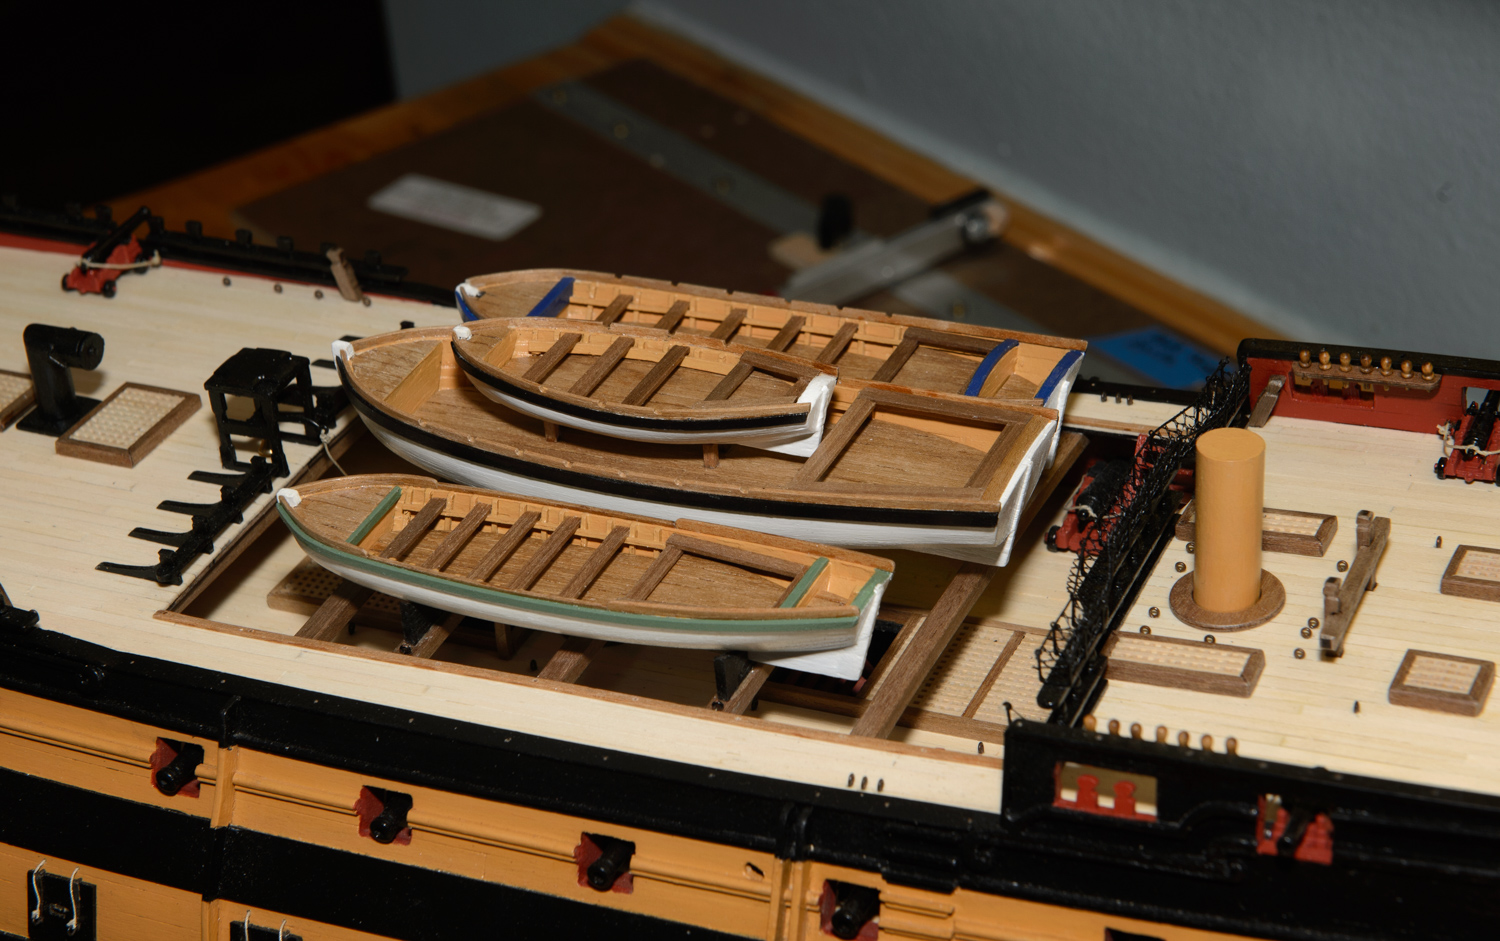
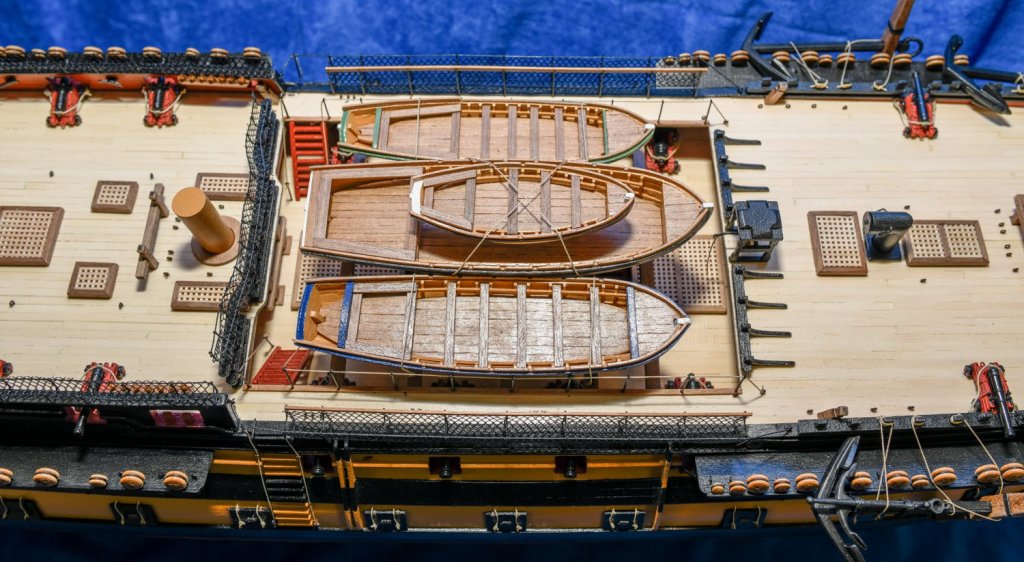
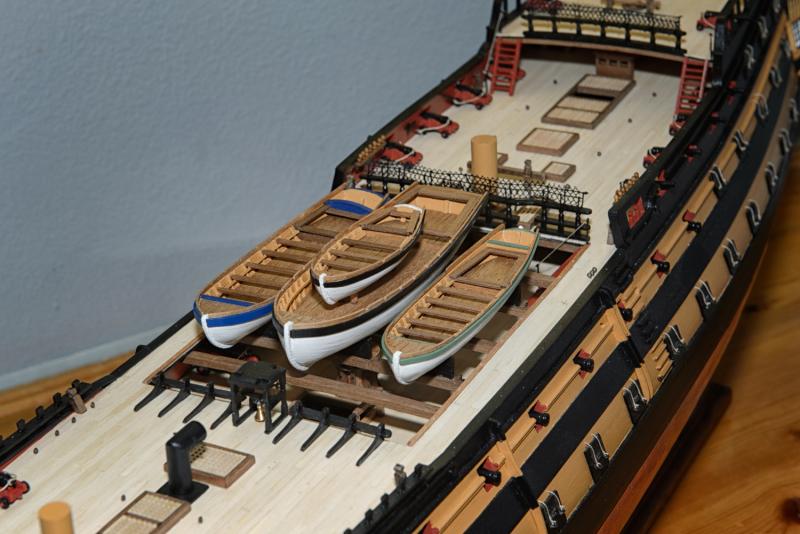
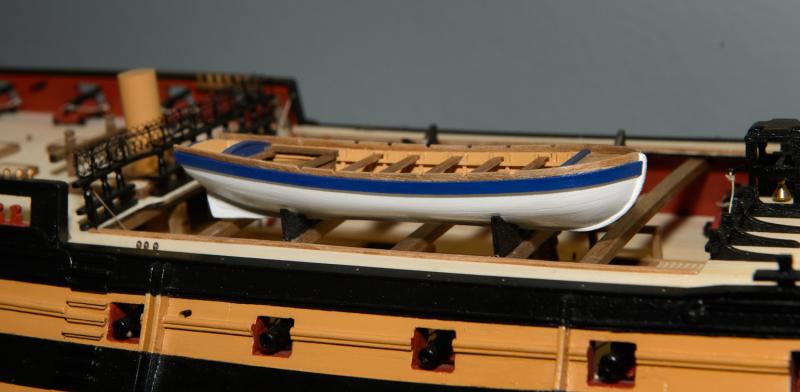
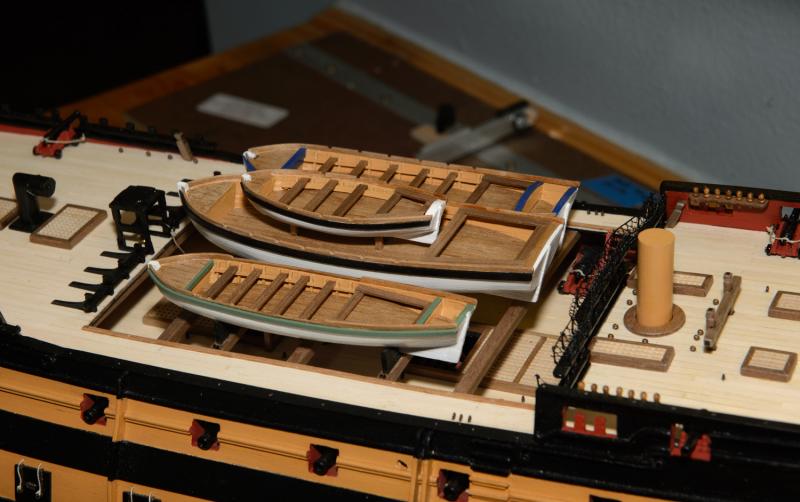
I've finished the 4th ship's boat, the admiral's barge. A few cosmetic changes from the plans to make it stand out a bit, but construction was no change from the previous three. Here is is sitting alone on the ship. And here are different views of all 4 sitting in their cradles. Not a final fit, I'll leave them off till near last so they aren't damaged as I move back to the ship to install the channels. Glad to have these done. Initially it was a nice diversion and something very different from the months spent on the Vanguard, but truthfully by the 4th one I was looking for something new to do. Still, they turned out ok and look pretty nice on the waist of the ship. Once the channels are done, I'll mount the boats, add the rail that goes along each inward side and the hammocks to the outer side. All the holes are pre-drilled as were the tie down eyelets installed. Its always good to plan ahead, so much easier later. I get few comments on this log, but hopefully someday they'll help someone looking to build ship's boats.

- 101 replies
-
- 3
-
-
- victory models
- amati
- (and 2 more)
-
Advice for planking
glbarlow replied to Slowhand's topic in Building, Framing, Planking and plating a ships hull and deck
Turns out I did do a bit of. A tutorial earlier in my Vanguard log, so long ago I had forgotten. http://modelshipworld.com/index.php/topic/3329-hms-vanguard-by-glenn-amativictory-models-172/page-2#entry120343 Maybe it will help. -
Planking stern
glbarlow replied to Tompslattery's topic in Building, Framing, Planking and plating a ships hull and deck
Definitely planked and horizontal as shown in the photos above. Lesson for next model is to do that before running the side planks as they should overlap the stern pieces (as shown above). At this point you'll have to do the opposite of that, but its not that big a deal with sanding and once the hull is painted. -
Bending with steam easily
glbarlow replied to a topic in Building, Framing, Planking and plating a ships hull and deck
Agree. I've build a lot of ships and bent a lot of planks. Water in a glass works just fine for me. -
Microwaving the wood?
glbarlow replied to a topic in Building, Framing, Planking and plating a ships hull and deck
Soaking the wood works for me, doesn't have to be hot boiling water or microwave - just soak in a glass of water. -
Advice for planking
glbarlow replied to Slowhand's topic in Building, Framing, Planking and plating a ships hull and deck
I've planked a lot of hulls, right now I'm working on the 4th ship's boat for the Vanguard model I'm building (link to my Vanguard build log in my signature line show's my work on those boats, its the most recent series of entries). In a lot of ways building a ships boat is harder than the hull because of the small size. I start with the top most plank and work my way down. However, the second plank I install is the garboard plank at the keel. You're always going to have some fill even with the most perfect planking job. You want that fill to be on the bottom where it won't be seen. However you need a neat garboard to get a good clear match to the keel. With the top plank (below the future cap rail) done and which should require splining and the bottom plank (garboard) done at the keel I start working top down. Splining and tapering to fit is not that difficult. Determine by counting how many planks it will take to fill top to bottom at the widest point, the waist of the ship. Measure the distance top to bottom at the bow between your top and bottom plank and divide by the total planks at the waist. Example if it will take 10 5mm planks at the waist to fill and your measurement is 5mm then the plank width at the bow needs to be 2mm. Its then just learning where to start the trim based on how it overlaps and use a standard Xacto knife and a metal ruler to do the trimming. Probably have to do the same thing at the stern. The comments about the trim and curve of the garboard above are correct, but I wouldn't stress much about that, its an easy trim and at the bottom of the boat not noticeable, especially after sanding and painting the final result. I'm sure somewhere on this forum is a more detailed explanation of planking (I had a detailed tutorial here once, but it was lost in the great site crash). But the basics of working top to bottom and trimming so that every plank full width at the waist reaches the bow at a smaller width is the way to go. The little fill that leaves at the bottom between the last full plank and the garboard won't ever be seen. -
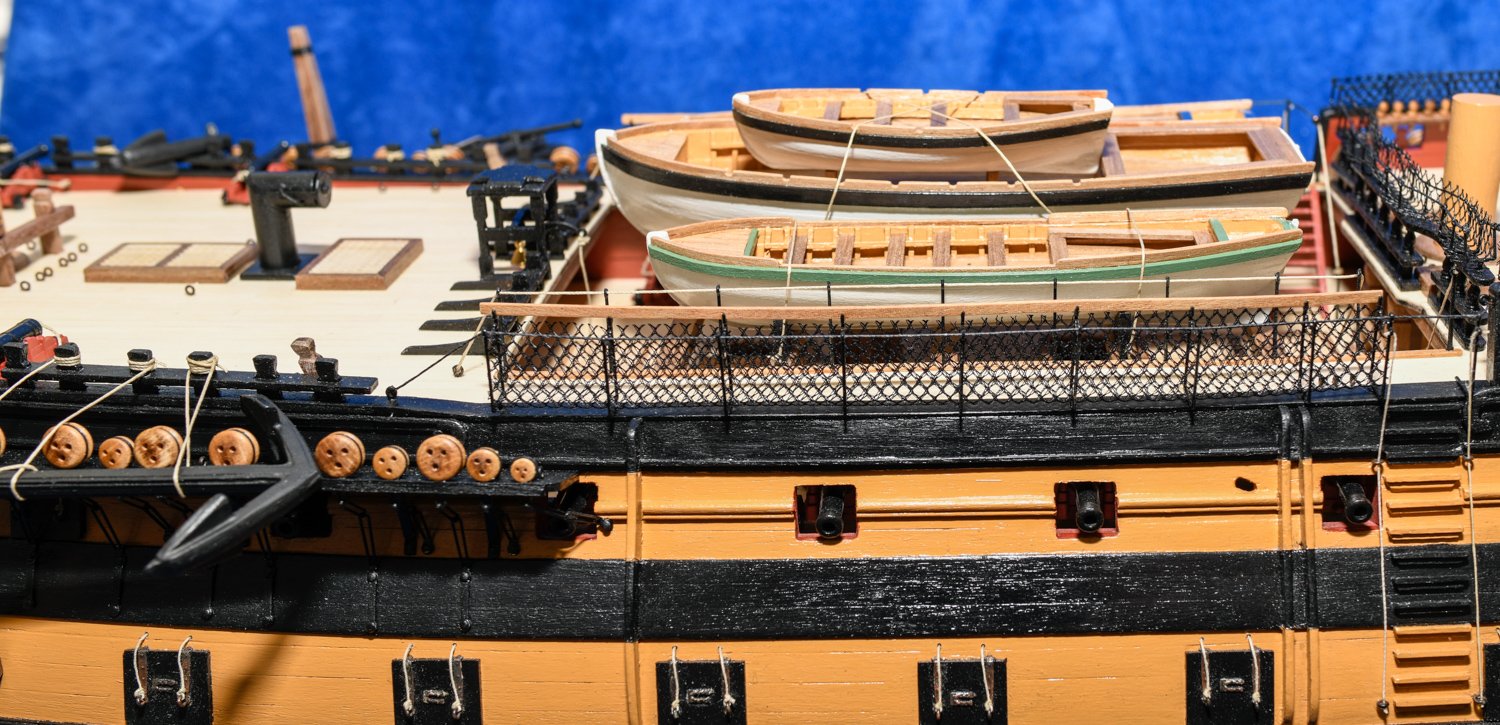
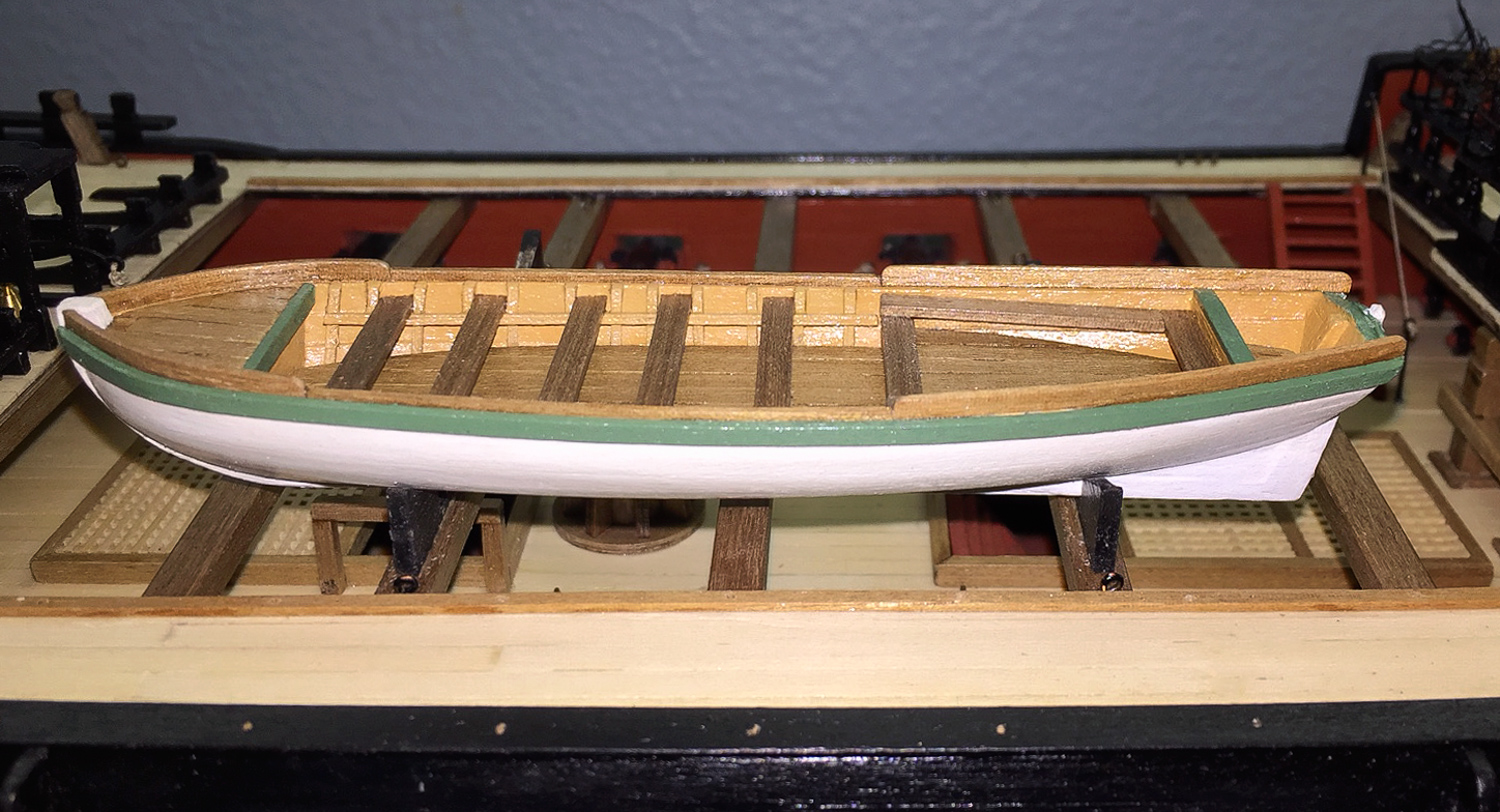
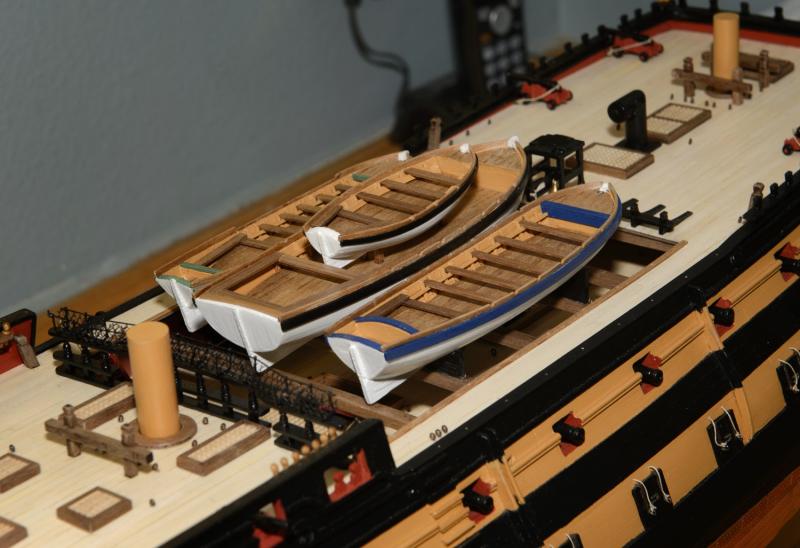
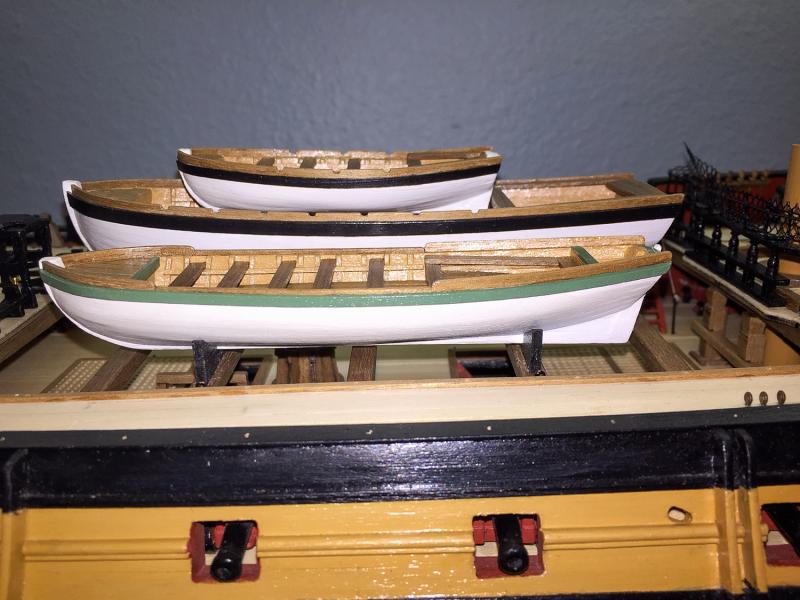
Proving anyone can build these things with patience, a bit of skill, and a lot of time here is the third of the four ships boats, the Pinnace. I added a tiny bit of flare to it and a color I'd never used before for trim, Caldercraft Admiralty Paints Olive Green. While this little boat was capable of sails so the cap rail is a bit different, I kept it natural like the other two boats (and as the fourth will be) for consistency of appearance. Plus it was more challenging for me to not be able to cover up mistakes with paint which I'm really good at doing (mistakes needing covering :-). The variations from plans include flush mounting the rear bench with the side benches instead of overlapping, and the two green trim pieces for and aft which are simply 1x2 mm pieces glued in place. Here the three are sitting temporarily on the Vanguard in their future home. The admiral's barge is the last of the four. I have the first planking on it, however work comes to a halt until after Christmas. I've got my granddaughter's doll house to assemble, clearly that is my priority. I like how these are coming out, no way I'm going to cover up all this woodwork with a bunch of metal etched oars laying inside each boat, whimsical as it may be I've decided they are all stored below due to an impending storm.

- 101 replies
-
- 1
-
-
- victory models
- amati
- (and 2 more)