glbarlow
-
Posts
3,812 -
Joined
-
Last visited
Content Type
Profiles
Forums
Gallery
Events
Everything posted by glbarlow
-
 I always use Bob Smith Industries CA Medium Insta-cure purple bottle for planking. Not because I have to use CA but because I want to. Never direct from the bottle, from thin CA applicators also from Bob Smith.
 -
The jigs and alignment designs are really clever, and we all gotta love those large rubber bands. Your nice work continues, well, nicely. Not just the build but the designing aspect, a talent that is well beyond me but one I admire.
-
Nice looking Flirt, well done. The number one rule of modeling is time to build is not a qualifier, it doesn’t matter as long as you’re enjoying yourself. The .1mm thread looks fine as ratlines, definitely don’t want anything thicker.
-
I still think you used real brick you got from the mini-brick yard. 😁
-
We all have our methods. Mine for resin cannon after removing any excess material is to wash in soapy water and rinse. Once dry I paint with Admiralty Paints Ironwork Black. I finish with Doc O’Briens weathering powders Rusty Brown using a four brush application. Not sure why but this color combination with the black generates a nice gun metal gray finish. I’ve detailed this in my Cheerful and Winchelsea build logs. All methods work, it’s just choosing one that works for you.
-
Thank you for the kind words. Mine isn’t close to Chuck’s but is a testament to the quality of his design, instruction, and parts. I am glad when my log is a reference for others as I do try to provide useful detail.
-
Thank you Matt, much appreciated. I have a lot of good modelers like you to copy…I mean emulate.
-
Thank you Chuck, I really appreciate the comment. I remember looking at your model long ago wondering if I could even come close.
-
Thanks For the comment. No WOP on the paint except for coamings, since the deck, hatch are so close it works better altogether (and the wales for the same reason) I use two Admiralty black paints. Ironwork black which has a nice matte finish (the stove and the guns) and Dull Black which couldn’t be more mis-named is only on the cap rail, timber heads, and forecastle rails. That finish is all the paint and is a bit semi gloss. It’s really not that shiny though, it bounces the light back a lot in photos. The Winsor Newton Crimson Red while very RED has nothing on it. It’s actually pretty flat and also bounces the lights back in photos.
-
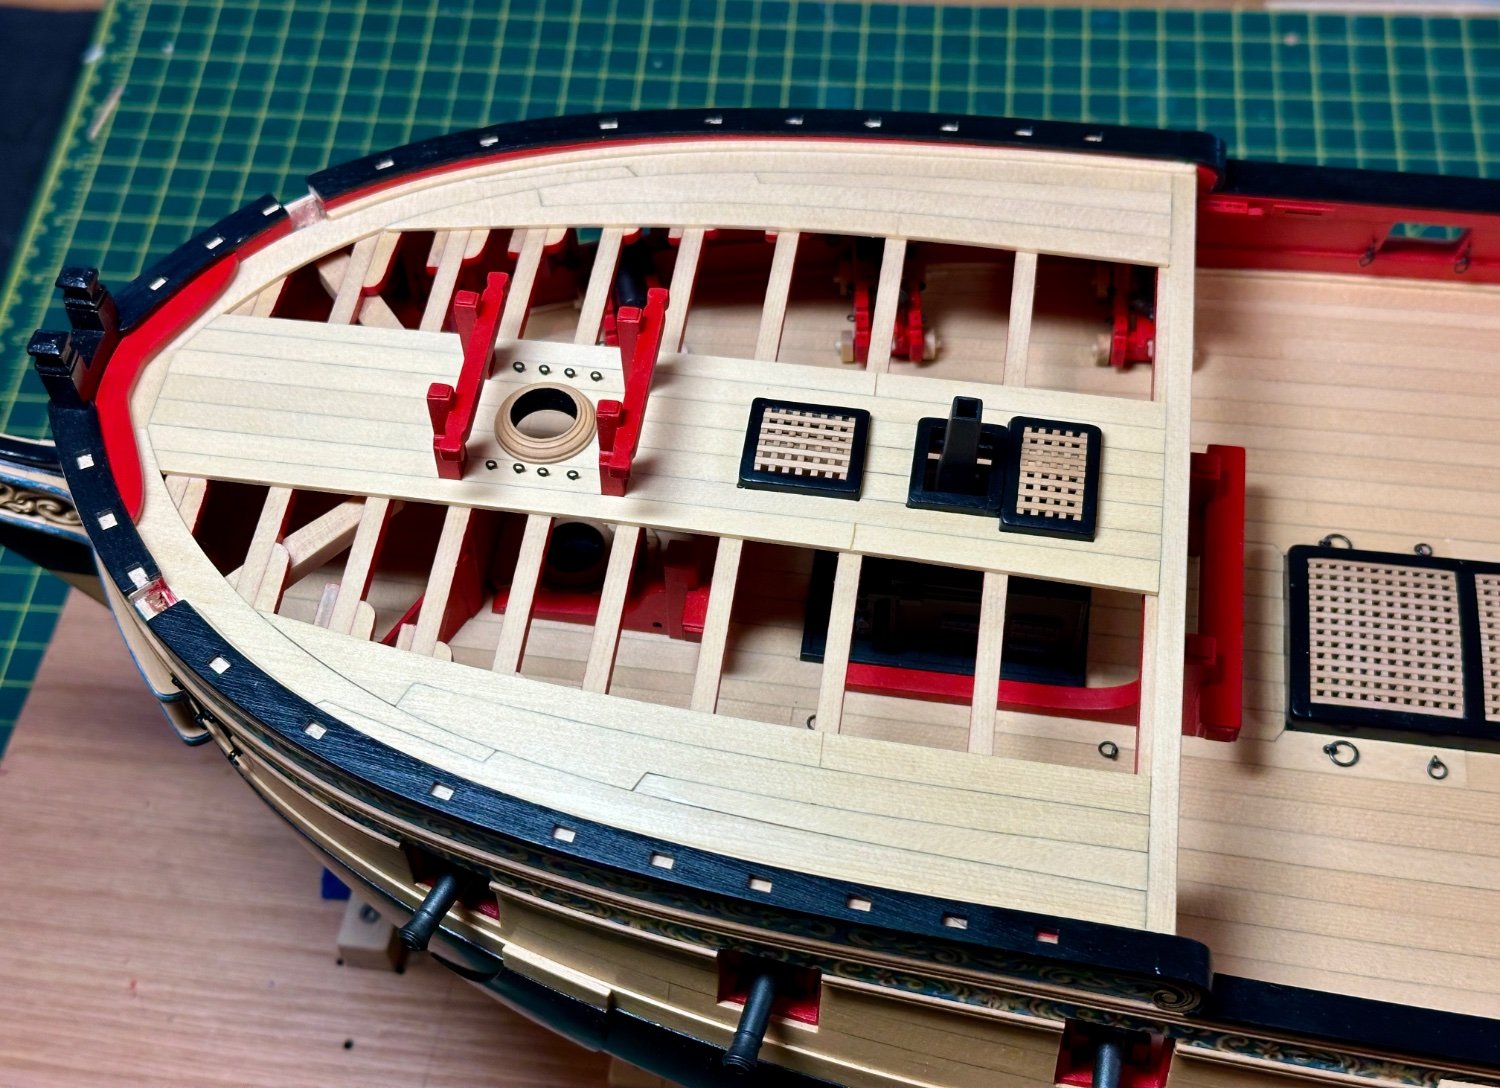
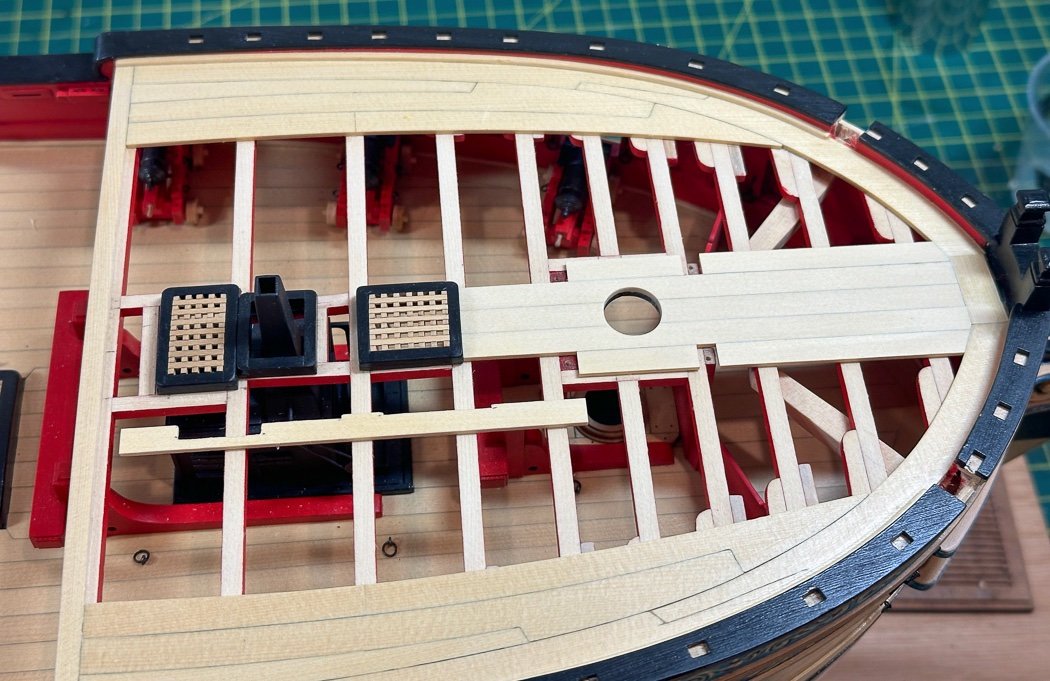
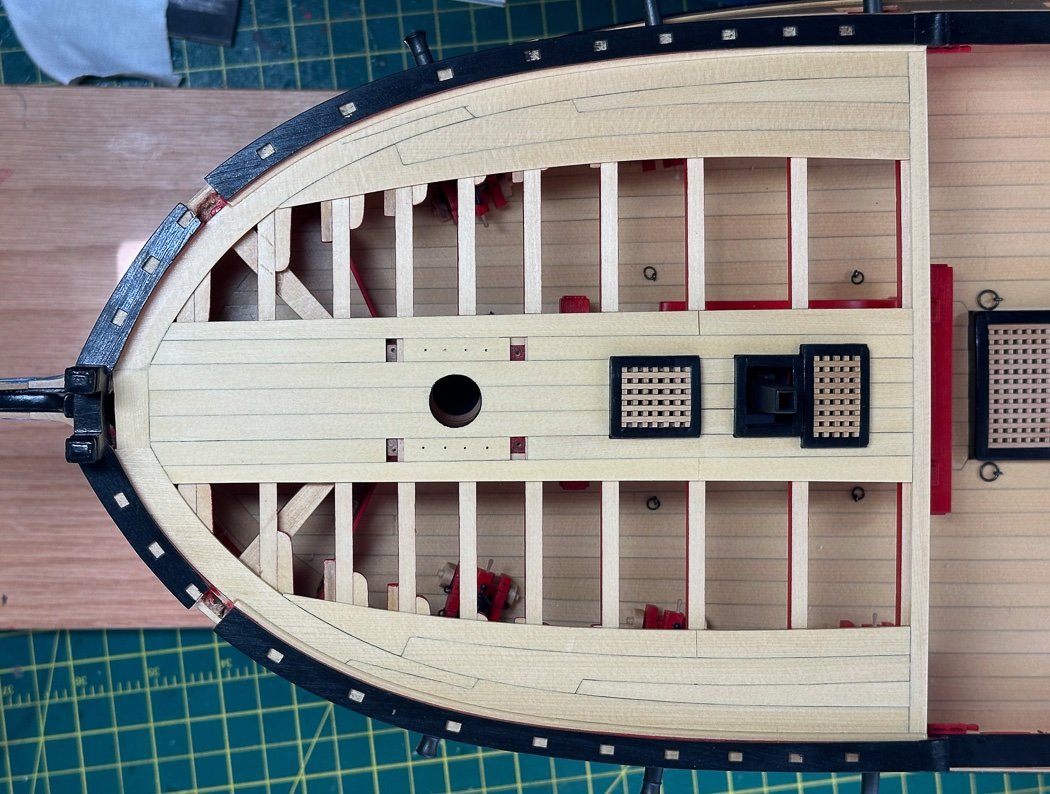
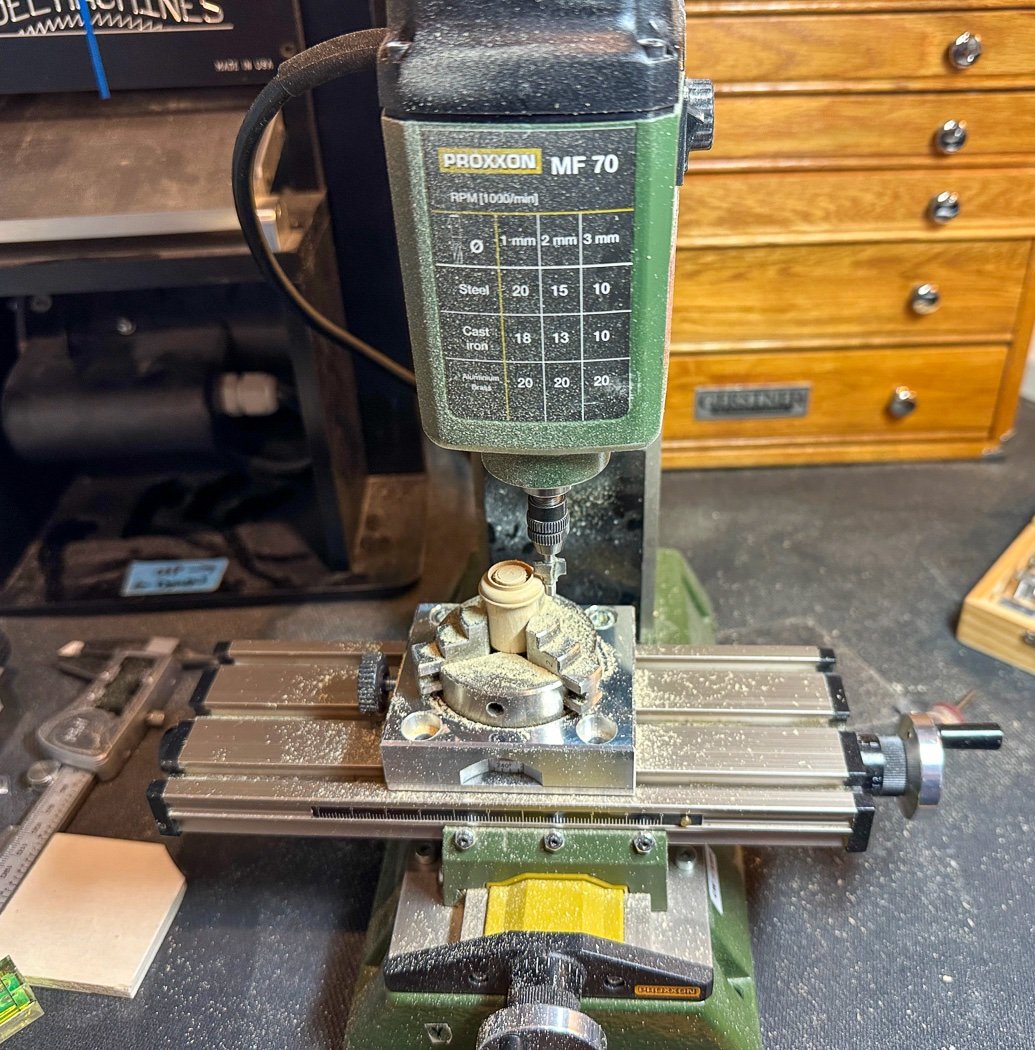
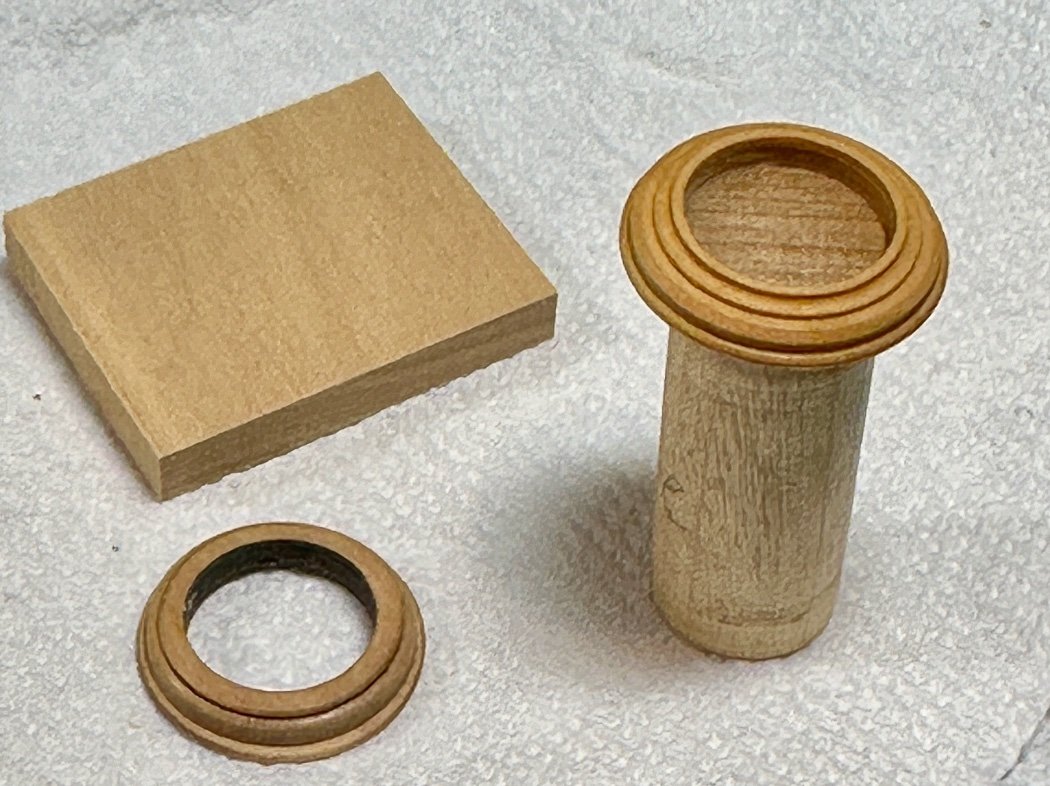
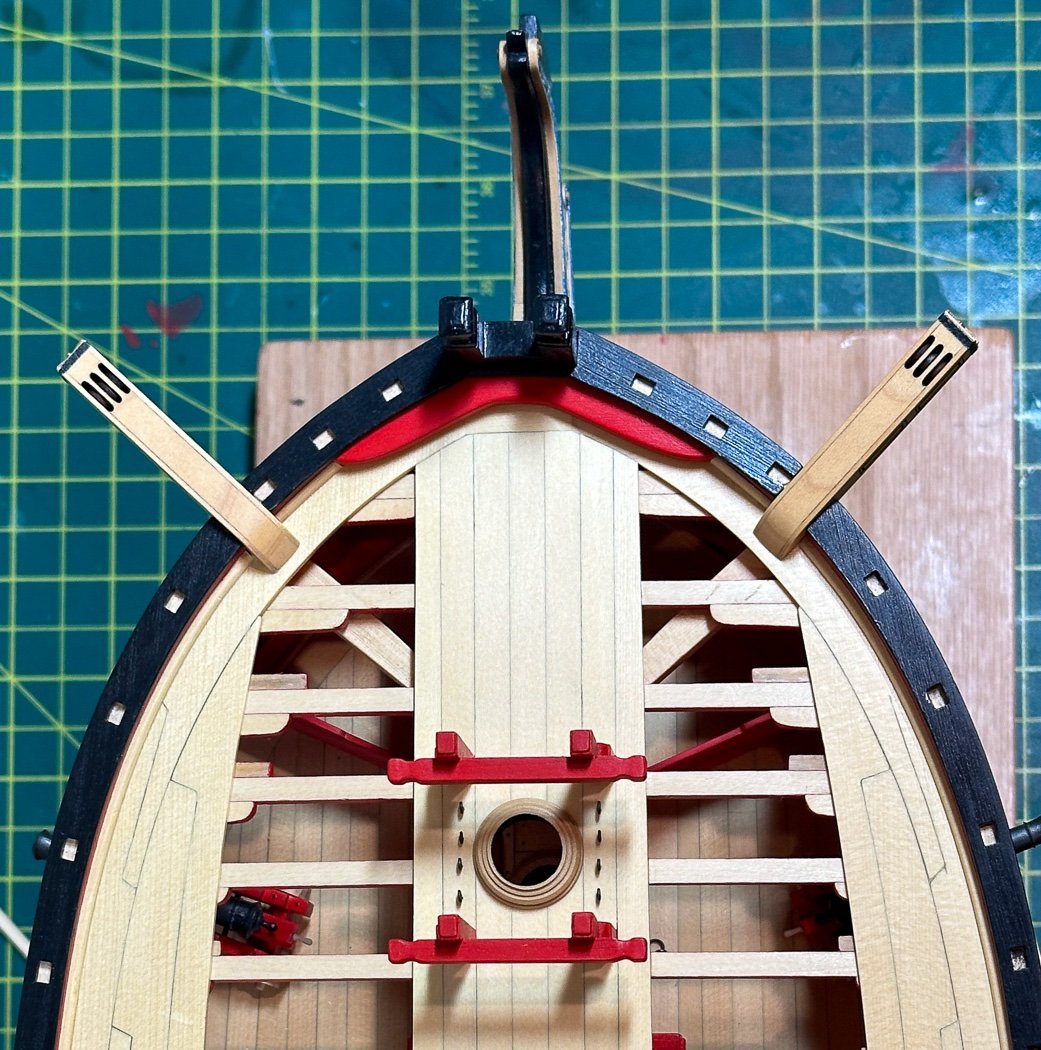
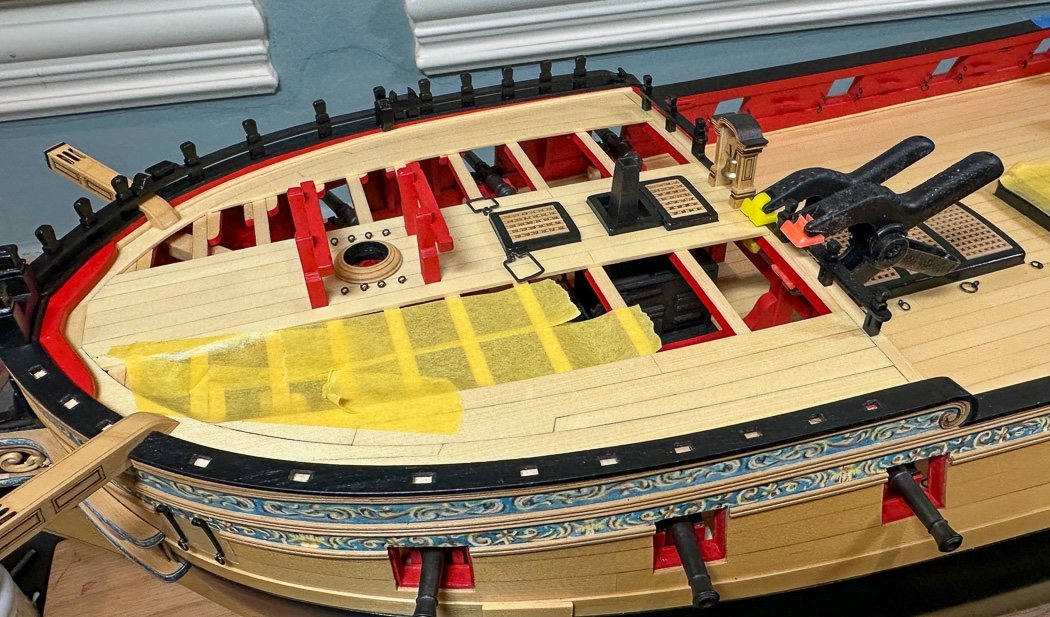
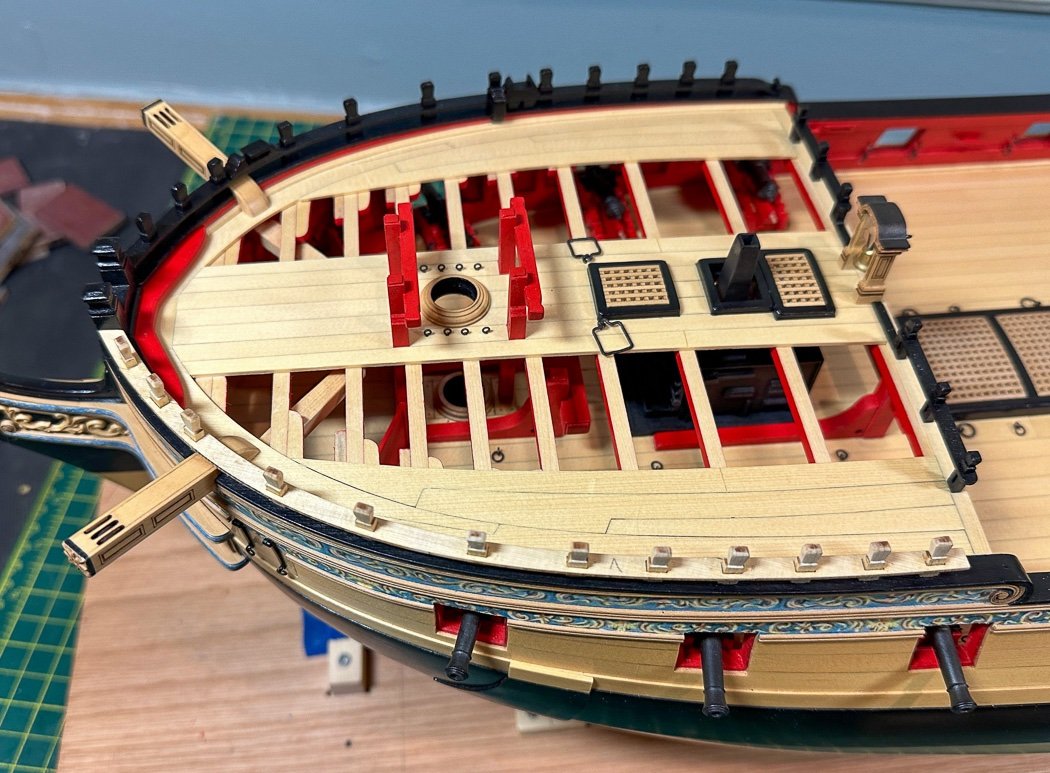
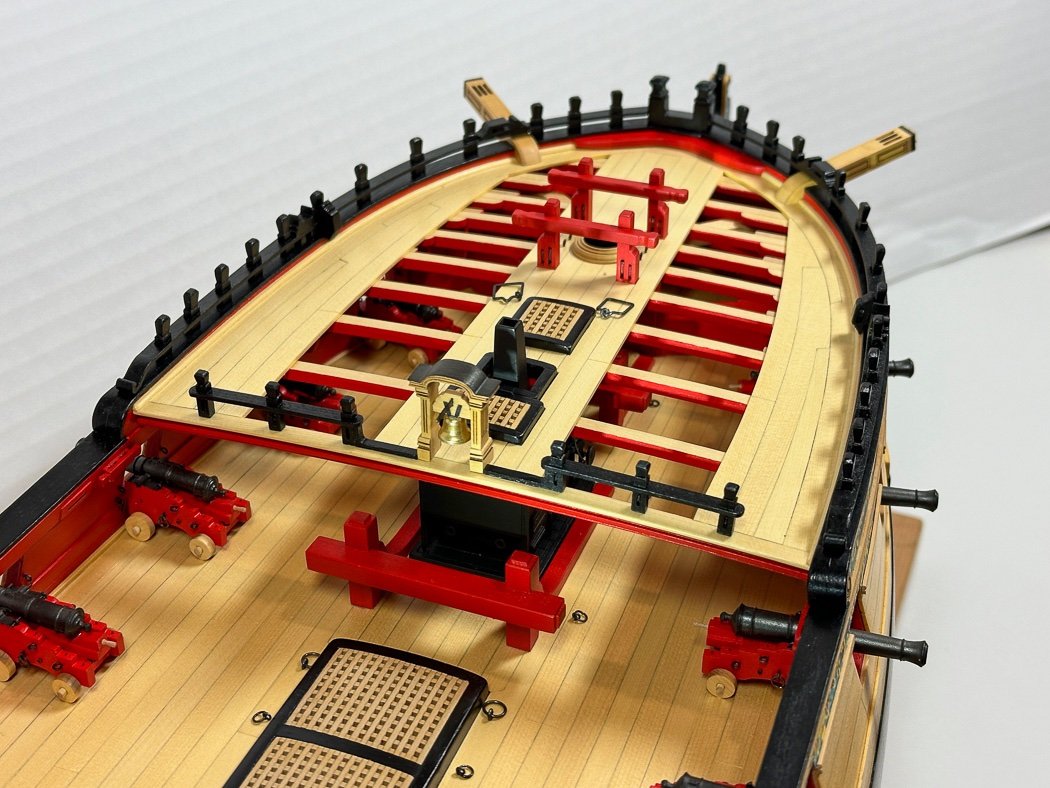
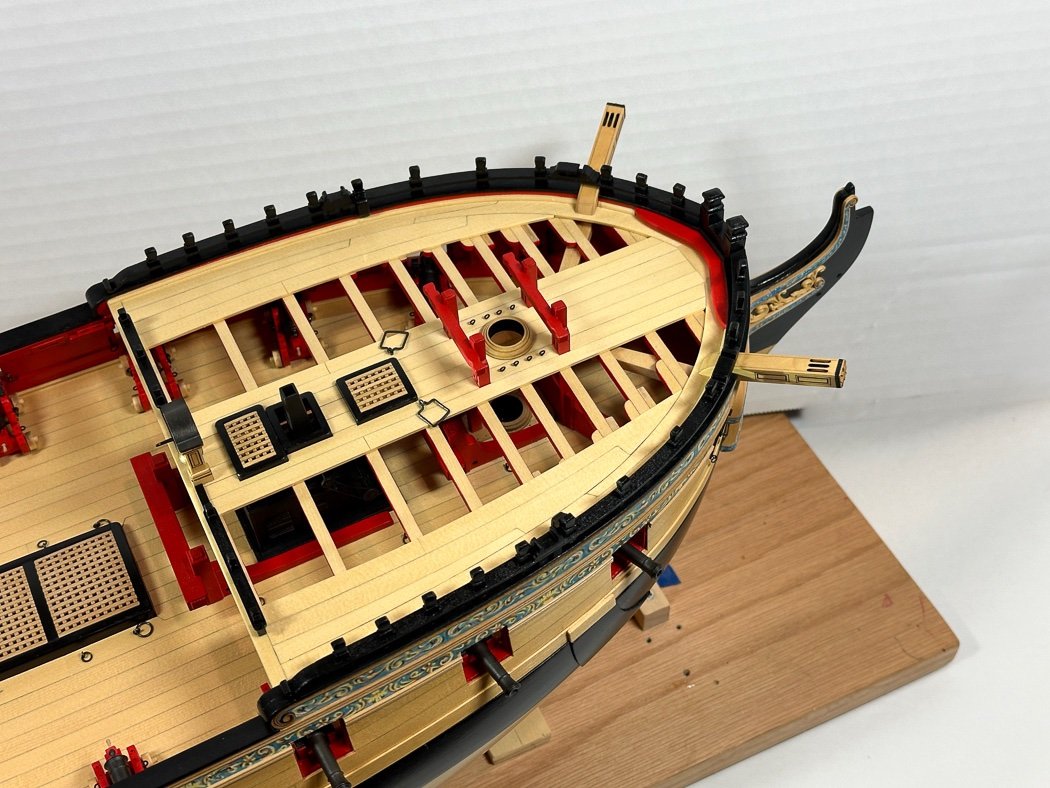
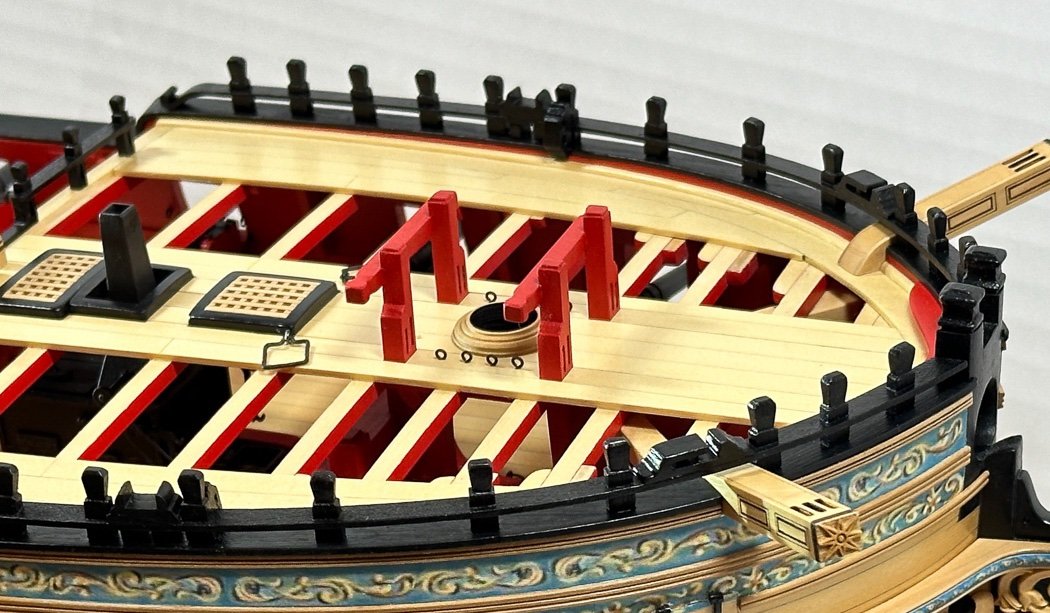
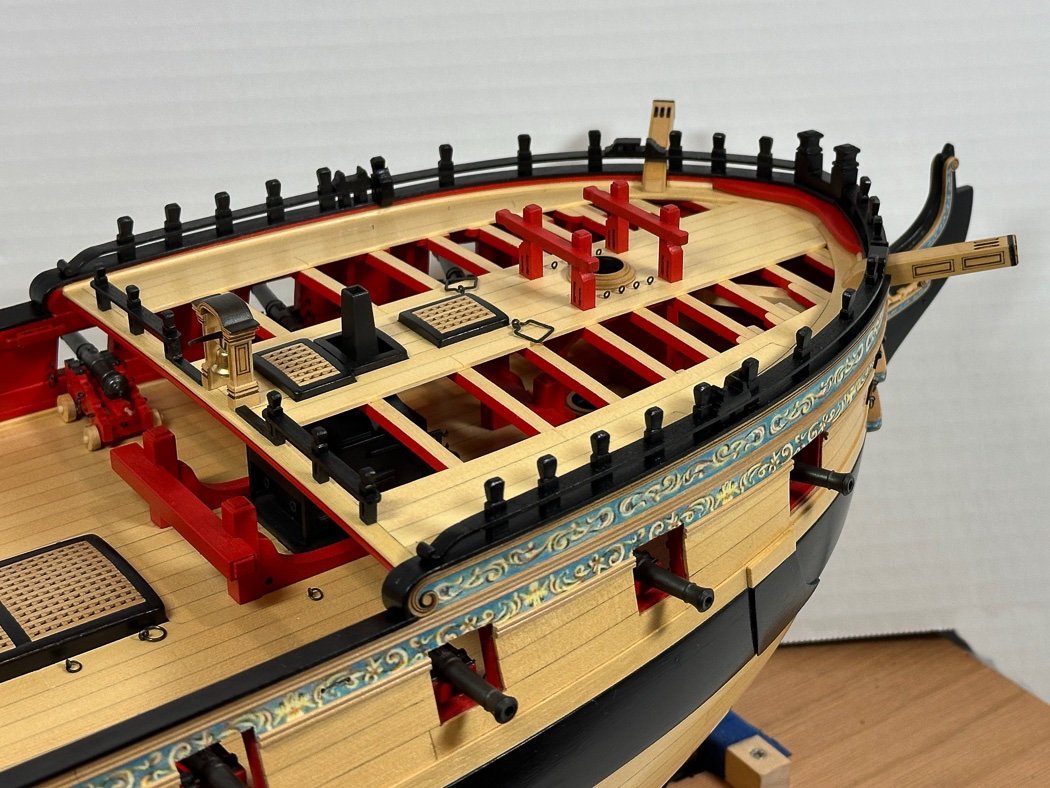
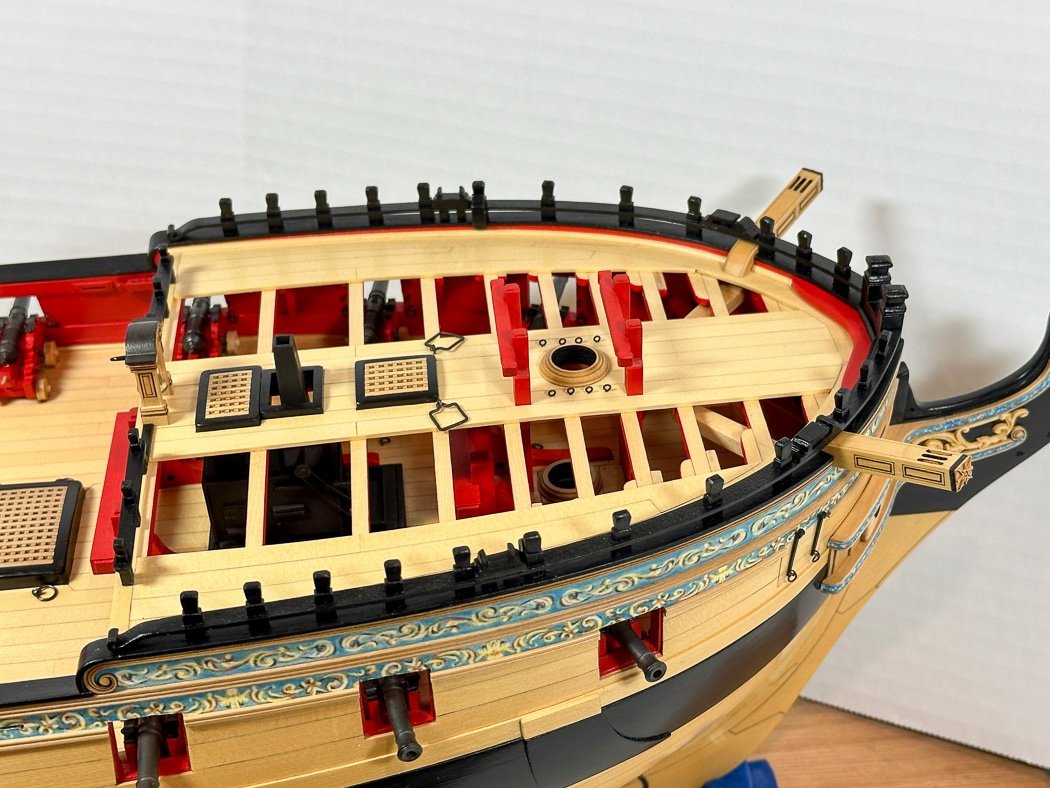
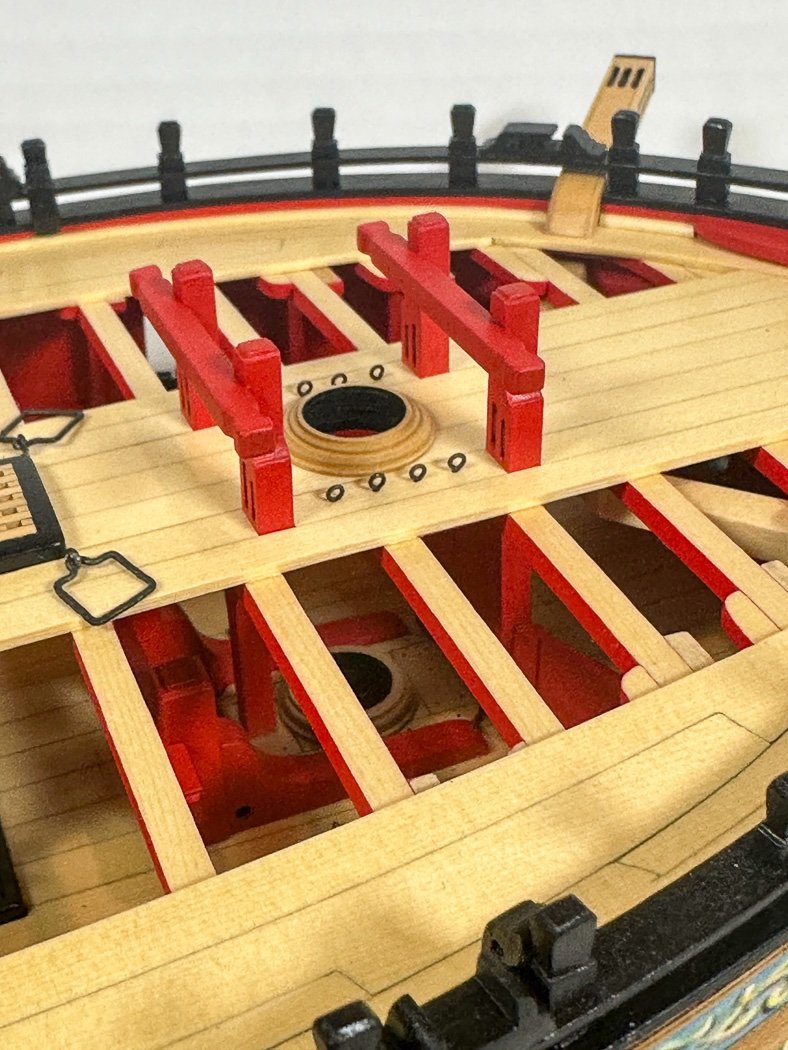
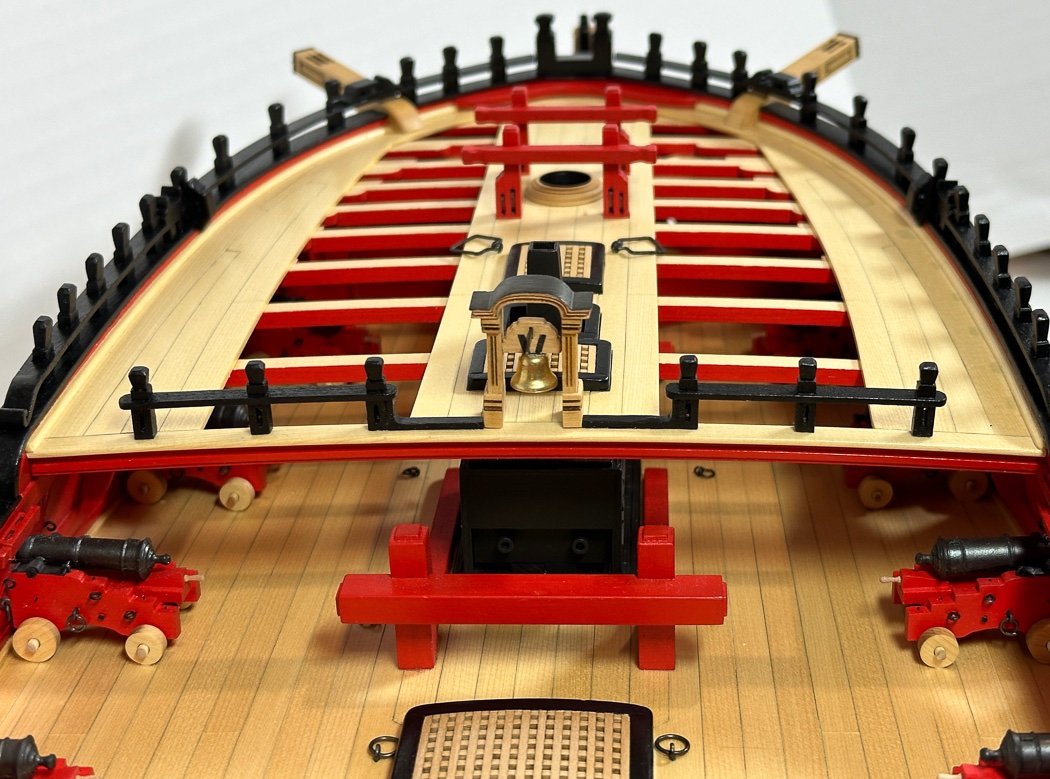
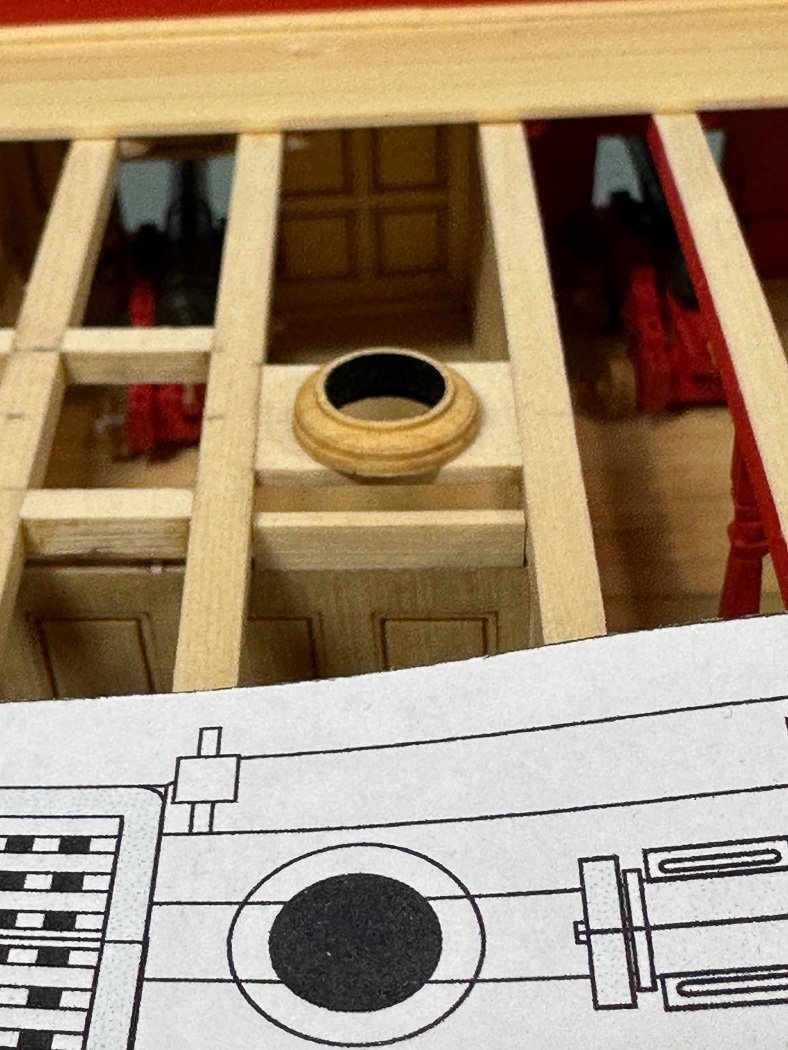
Chapter 9, Forecastle deck, is Complete A big event for me, 9 of the 12 chapters are now complete with over two years gone by since I began. Chapter 9 is devoted to the forecastle deck and all the details that set it apart. My last post, a single photo, showed a lot of the deck complete, I’ll back up a bit to show how I got there. It’s a long post so hopefully it’s worth the read. Like the outboard planks the center line follows the “every plank a project” with each plank unique widths and cuts. The center three planks are the interior width of the bitts divided by three (as the template shows). The planks meeting the bitt posts on either side are also a custom width. The forecastle bitts line up with the base installed below on the main deck making them seem one. This is a cool, but unfortunately barely visible detail. Someone suggested mini wireless camera under there, that might be fun. I’d done complex cut-outs to fit around the main deck hatches, nonetheless these take time and patience to get a precise fit. Since the main deck I’ve acquired this very thin, small razor saw with micro-teeth that made the cross cut cleaner than with the #11 blade still used for length wise cuts. While the mast ring provided is certainly fine I just can’t seem to remove enough char to make it work for me. So like I did for Cheerful I made my own. They’re kinda fun to make, using a square of boxwood heavily glued to a wooden dowel and turned on the mill. The outside and inside diameter is measured and cut to form a ring, then I use some router cutters and totally wing it to create the design. I freed it from the post carefully with acetone, painted the inside Matte Black, added two coats of WOP and it’s done. Fun. I’ve since made another for the mizzen. I had to force myself to keep this one simpler. The catheads were made up and added. The challenge is to get the right angles, which hopefully I did. The bigger challenge is having installed one then installing the second the exact same - lots of test fitting on both separate and together before either was glued in. I’m glad I cut the rail before doing the planking. I like the extra detail of the cat beam running under the deck planking. (They are the same, the photo is slightly angled and tilted). I posted earlier I’d gone a different direction with the belfry using a flat rope pull to the front shaped from a small bit of blackened brass and heavily weathering the roof to simulate lead. It and the forecastle rails were added, these are laser cut to fit either port or starboard, so being careful with that and a little sanding to match up to my version of the beam and they’re on. Glue and clamp in two stages, inside then outside, easier to maintain alignment. (again a little warp on the photo not the model, I need to learn to hold my iPhone straighter). I noticed, and not sure how I’d missed, in the single photo I posted earlier the hatches weren’t done properly. I had two choices, leave them as they were or replace them. Who am I kidding, once I noticed it I had one choice. I was able to remove and replace them without damaging the coaming, a few coats of WOP later… The spanshackle cleats are not glued in. I’m not sure I like what I made with flattened 22 gauge wire so I may come back to those later. Up next the forecastle rails and timber heads. First I tested the fit of the rails to my bow. It’s quite remarkable (as in how did I happen to manage that…) how well they fit. As with the cap rail the key was pulling out the Chapter 9 templates long long ago when the bow was being constructed around chapter 2-3. The tape is there because the little timber heads kept flipping out of my fingers into an area it’s’ now difficult to access. Then I got to spend lots of time with sanding sticks and a #11 blade shaping 24 little timber heads. Time consuming but well worth the time for the final look. Can’t wait for the Q-deck timber heads, lots more of them. A fun, and lengthy, process was slowly sanding and shaping the cat block to follow the curve and width of the rail plus adding the additional two cleats and support posts. A good time was had by all. They have detail that is lost in the photo due to the black paint. First starboard then port to complete the fitting, painting, and installing the rails. These rails are extremely delicate. I broke both of them at one point or another. Fortunately they were clean breaks and I was able to repair them, after light sanding and painting the breaks aren’t visible. Once again where’s the fun if I don’t have to fix something I broke. With that, some photos of the completed forecastle: I’m pretty happy with how it all turned out. The AYC planking, boxwood fittings, black painted railing, and RED bulwarks and breasthook really look distinctive and pretty cool I think. This is really the first element that is totally finished. A nice sense of accomplishment, and an early concern about what will I do when the whole model is finished, oh no. The chapter 10 parts are laid out and the planking ripped and ready for work on the Q-deck. Thanks as always for stopping by with your comments and likes, hope you made it to the end of this long post.


-
Excellent point of view. Maybe I’ll portray mine as after a very light battle to account for any faults in my build. That small dent in the AYC, glancing blow from a small swivel gun 🤣
-
There is no way those aren’t actually tiny real bricks cemented together 😳
-
Very crisp and neat work, fine joinery! Not sure it’s what you’re looking for, take a look at the port lid hinges Chuck offers for Winchelsea. Perhaps they can be modified to work.
-
That paintwork is amazing!
-
Not sure about that, but thank you both for saying so.
-
The key is to use bright lights to hide stuff🤣🤣. Thank you BE, much appreciated.
-
Where’s the fun if we can’t add new stuff to the workbench. Amazon thanks us.
-
Thank you, it was a trip, every centerline and port side plank is unique, as you know, only to have to be mirrored on the starboard side. Fun stuff.
-
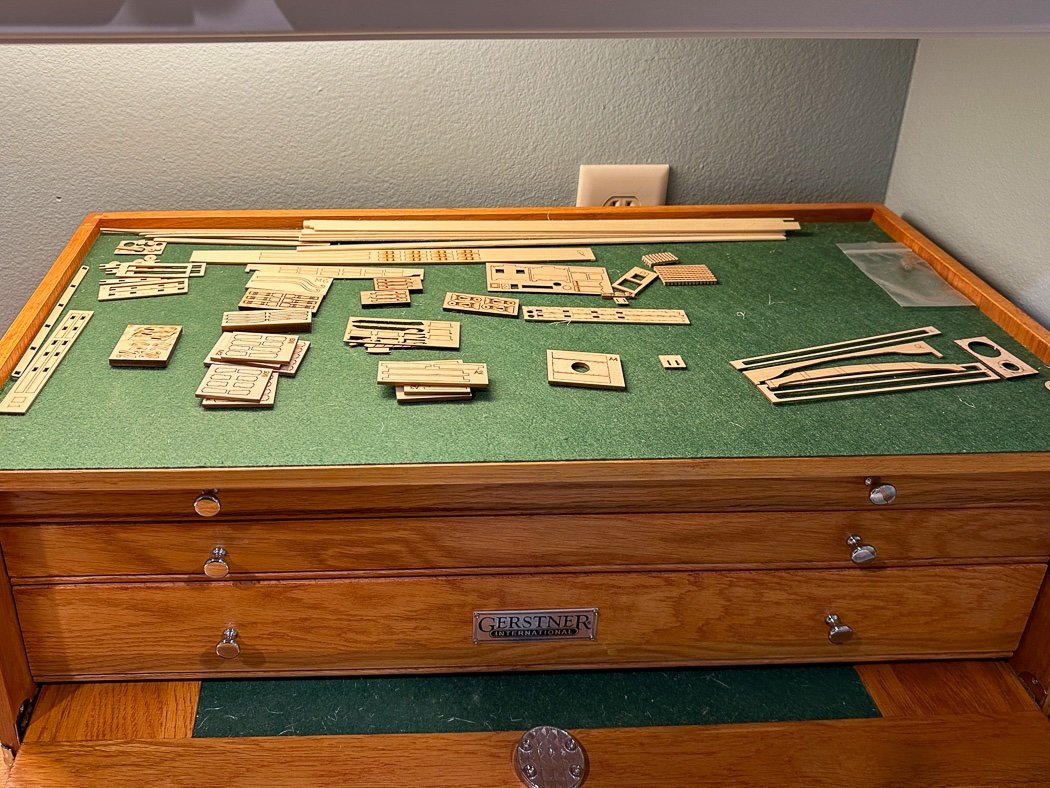
Making some progress these past few days. More detailed post later but just one photo for a quick update on forecastle work.

-
Looking great Fred!
-
Very interesting background and project beginning.
-
The overlap of the second planking should cover that. The counter is planked first then trim the hull side planking flush with the planked counter. The gaps should easily be covered, the first planking is a foundation, doesn’t always need to be a perfect match to the final look generated by. 2nd planking. The parts are generally oversized on purpose as every hull is different. You can also sand the counter piece to fit a little better. Do make sure the second planking is equal, by trial fitting, to the rudder at the stern post, generally this is more problematic than the counter. I wish my Pegasus log wasn’t lost in the great 2013 crash.
-
And you I’m glad you did and hope it’s helpful. Studying other logs is something I sure do too.