


DelF
-
Posts
1,398 -
Joined
-
Last visited
Content Type
Profiles
Forums
Gallery
Events
Posts posted by DelF
-
-
Thanks Eric, you've tempted me to have a go at carving and making my own chisels.
I agree with Steve on leaving the trunnels off.
Derek
-
15 hours ago, glennard2523 said:
However I got a bit side tracked as I have been thinking about serving the lanyards. Chuck is unable to ship his serving machine from the USA to the UK due to COVID so I have bought some gears and some brass tubing and I will now see if I can build one myself.
Good luck with the serving machine Glenn. The mechanism is fairly straightforward so hopefully shouldn’t be too difficult to make. I was fortunate that I got mine from Chuck long before covid, and I can vouch for the extra realism you get from serving rigging - especially the shrouds where they are seized round the masthead.
Derek
- Glenn-UK and Ryland Craze
-
 1
1
-
 1
1
-
That’s a very decent first attempt - certainly better than my woeful attempts at carving! I suspect a little fettling with fine files and sandpaper to round off the edges would make it very presentable.
-
Beautiful model Tim - you must be justifiably very proud. Well done!
Derek
- VTHokiEE and Old Collingwood
-
2
-
6 hours ago, clogger said:
Your Cutter looks stunning
Thanks Clogger! Whilst the kit makes a great model right out of the box, I enjoy adding a few little tweaks of my own.
Derek
P.S. I see you live in a beautiful part of the world. I've fond memories of a slow drive from Perth to Margaret River a few years ago, taking in several vineyards and great seafood restaurants along the way!
-
More nice touches - you're certainly making this model your own.
-
33 minutes ago, chris watton said:
I have no idea what TFFM is?
The Fully Framed Model, four volumes series on scratch building a Swan class sloop, by David Antscherl and Greg Herbert. See here. Fantastic series, often quoted on the forum hence the tendency to refer to it simply as TFFM.
Derek
- chris watton, mtaylor and Canute
-
3
-
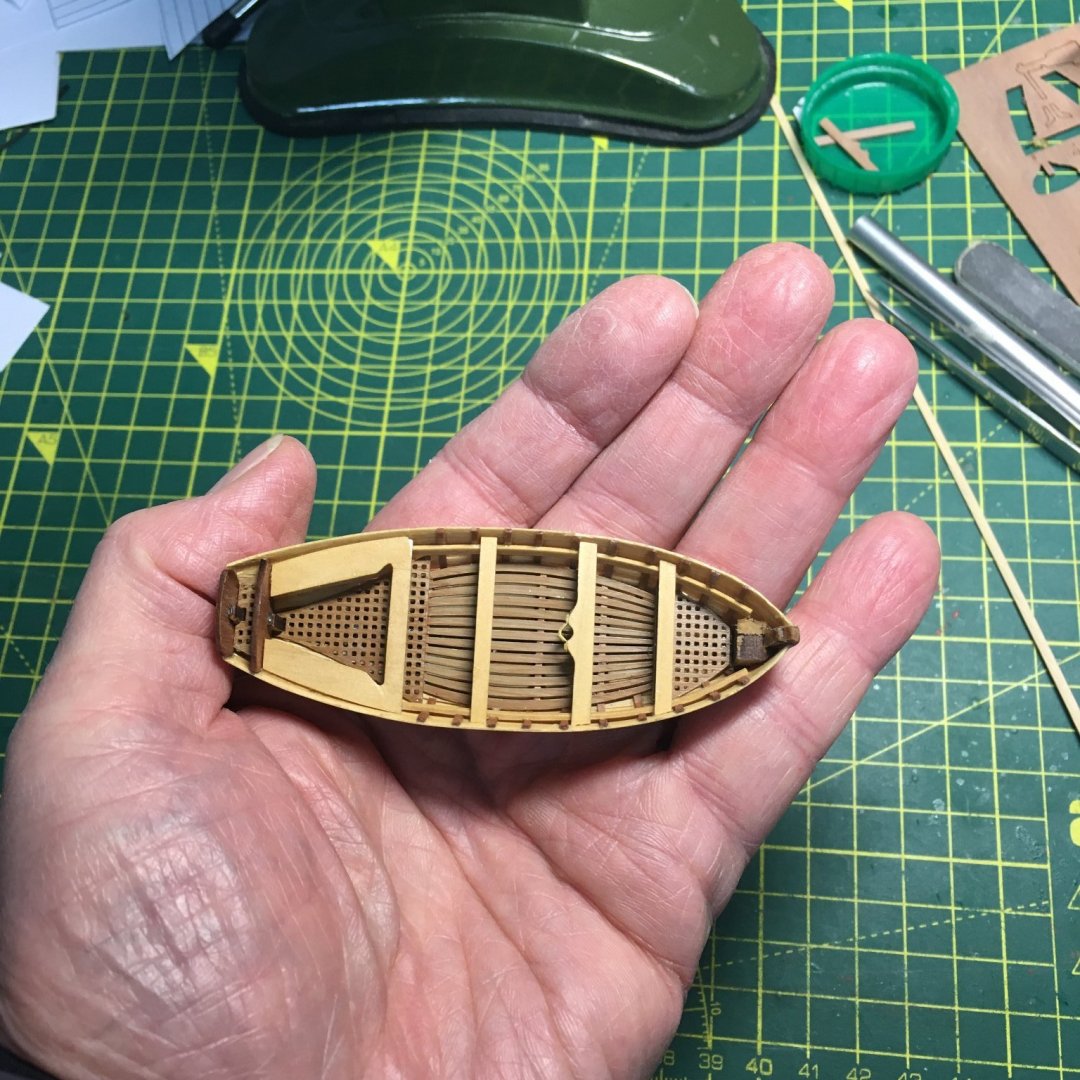
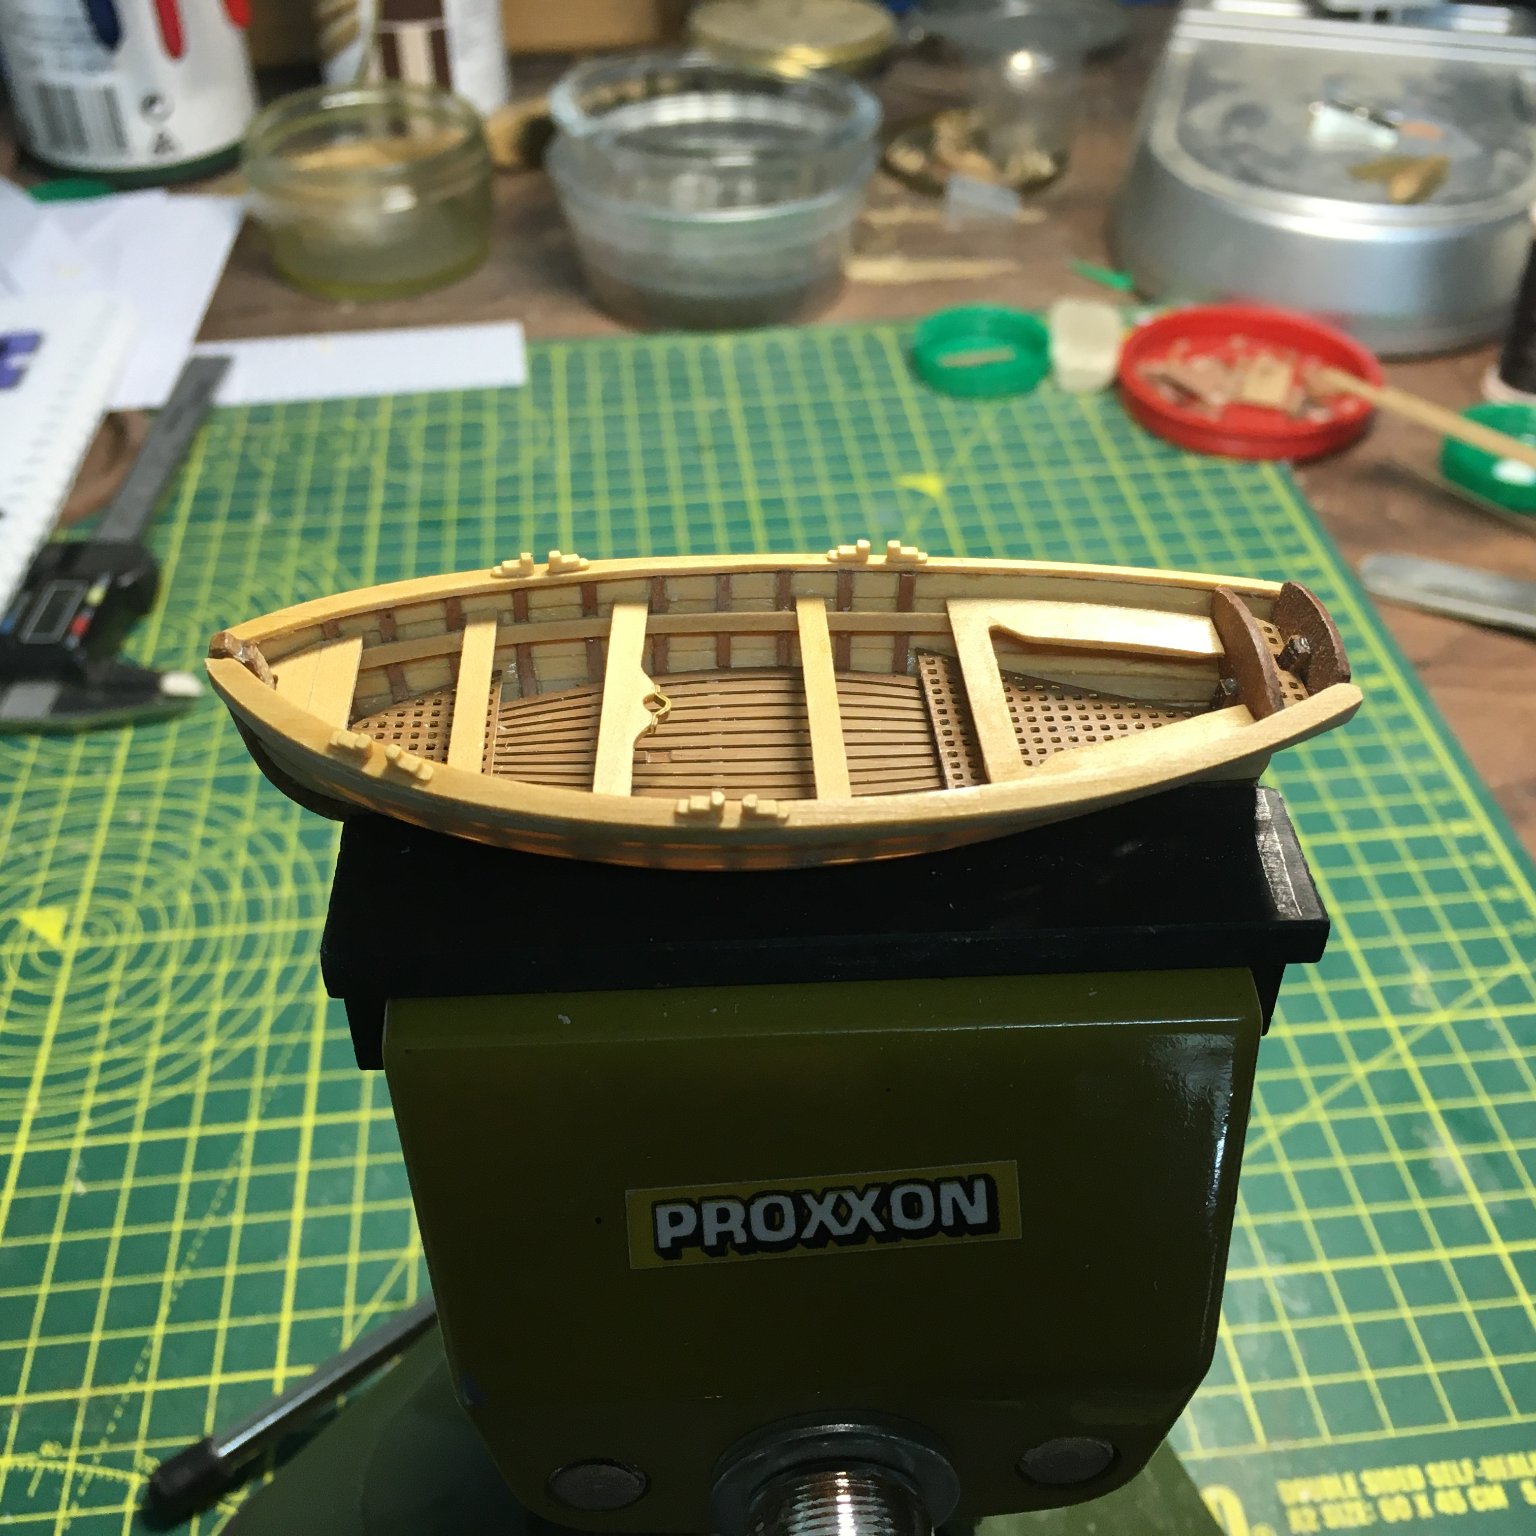
Ships Boat (aka anything but ratlines!)
I wasn't too keen on the way the rowlocks were fashioned in the kit boat, from holes cut in the wash strake:
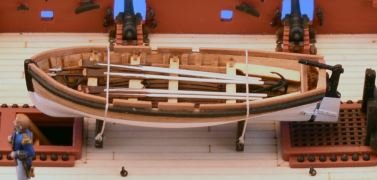
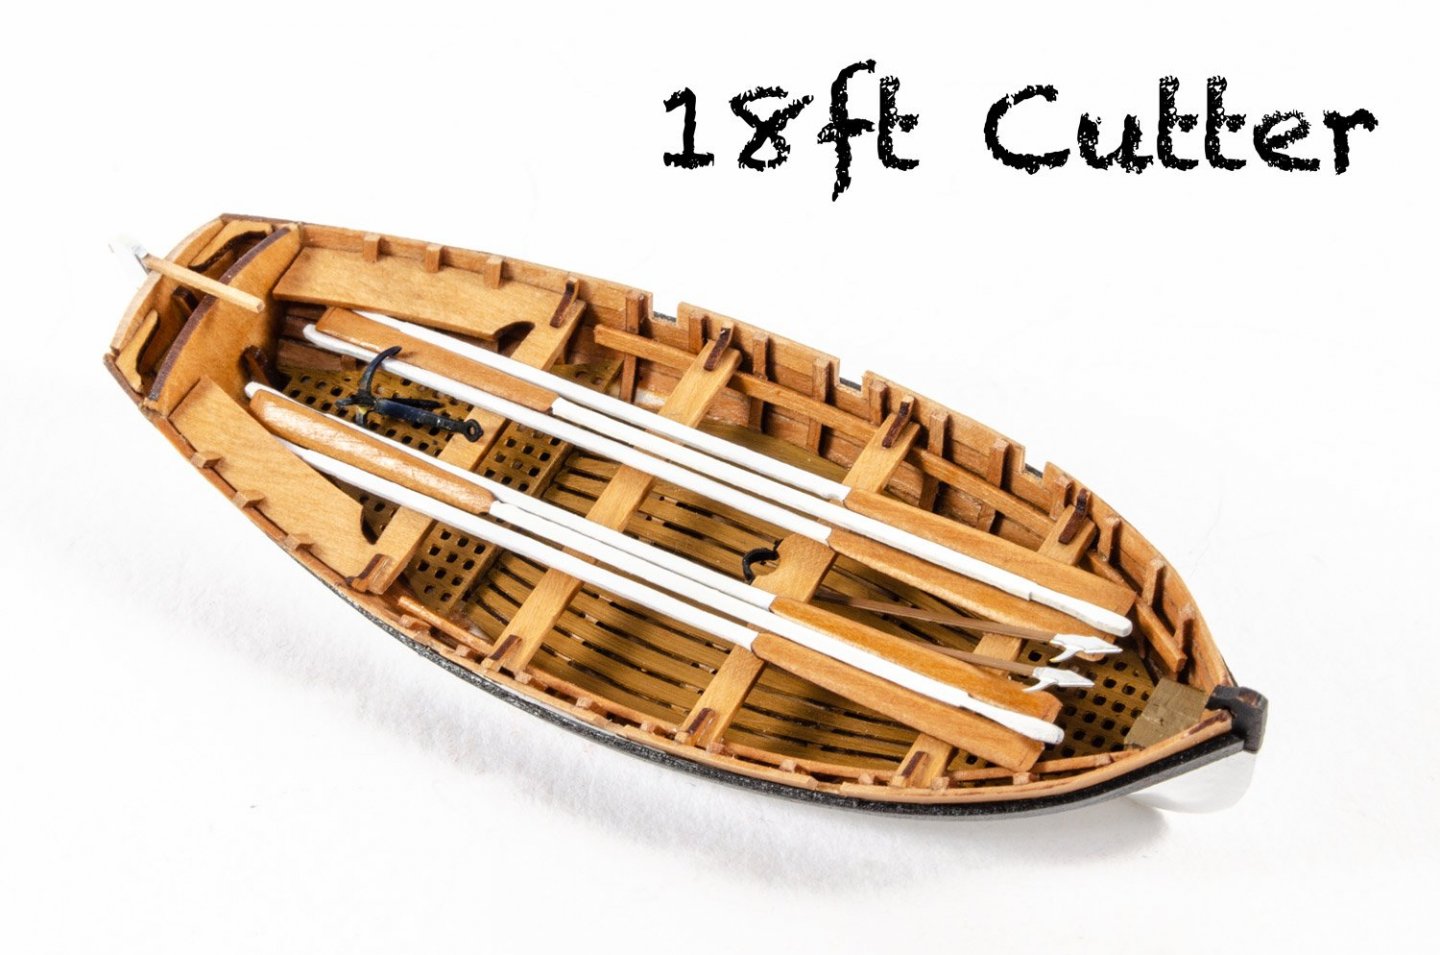
I was especially dubious about my ability to glue the wash strake edge on above the wale, especially as I had followed the kit instructions and cut the ribs off below the wash strake. Without thinking about it I also copied the kit boat in not fitting ribs in the stern section. I note that the revised 18 foot cutter Chris now offers has put this right:
I got the revised cutter from Chris with half a mind to start again, but as the original boat was already quite far advanced I thought I'd try a different approach. With the wale fitted I felt I had enough width at the top edge of the hull to have a go at fitting cap rails and more conventional rowlocks. I started by thinning a small sheet of boxwood down to 0.75mm then holding it against the top of the boat to trace each side in turn. After cutting the two halves of the cap rail on the scroll saw and sanding as close to the proper shape as I could I CA'd them in place and tried to even them up with a tad more sanding.
I made the rowlocks using the same method I employed on the English Pinnace so I won't repeat that here. Here's the link to post #47 of that log with the details. Of course this boat is only 3/8ths the size of the pinnace so the rowlocks were cut from a strip of 1 X 1.5mm boxwood. For ease of handling I kept each one on the strip until I'd finished shaping it:
Here they are rounded off and tried on for size:

I'm not entirely happy with the cap rails. They're not as symmetrical as I'd like, but I've decided not to stress about it. I'll see what it looks like finished and fitted to Speedy. If I don't like it at that stage then plan B is to make up the revised boat kit.
Btw, I've just noticed the thwarts aren't straight but fortunately they're not glued in yet.
Back to ratlines. Whoopee!
Derek
- chris watton, Matt D, clogger and 12 others
-
15
-
Very neat, and nicely in scale. Kit-supplied rings often look too large, but yours are just right. I also like the way you've bent wire round the ring - much more realistic than putting the ring on an eyelet.
-
-
59 minutes ago, glbarlow said:
I’m thinking not as I don’t know what gibs are🤣
Methinks you jest Glenn,
especially as we’ve already had this conversation 😉 . To jog your memory, here’s the bit about gibs copied from that discussion:
“...normally the only initial adjustments needed to a [Proxxon] mill are to the gibs. These are strips of metal that bear on the sliding surfaces - properly set they allow the table to move smoothly in the X and Y directions with no wobble (too loose) or binding (too tight). Adjustment is via three sets of small hex bolts with locknuts on each gib. Fortunately all mills are basically similar so any YouTube video on adjusting a mill should get you started on this.”
There’s also gibs on the z-axis but I found I didn’t need to adjust these.
Try it - it’s quite easy and should make quite a difference.
Derek
-
7 hours ago, rafine said:
The tackle are now a 50-50 proposition.
I agree with Ron - no sign of age in your work! I was very dubious about fully rigging the guns on Speedy as they are so tiny, but was eventually persuaded - and I'm glad I did. The 2mm blocks needed for the side tackle were not supplied in the kit, but the ones I subsequently got from Vanguard were such good quality they made all the difference. I also used the finest silk fly-tying thread (18/0) to keep the seizings in scale. Here's some information on the method I used. As for age, I rely on good magnification and a quality spare hands tool (Quadhands) that I found out about on the forum.
Give it a go Bob, and I'm sure you won't regret it.
Derek
-
More great work Glenn. Your care and attention to detail - and your refusal to settle for second best - are really paying dividends.
2 hours ago, glbarlow said:The Proxxon mill is great, but I wish the zero turning dials were a little bit smoother as I set those zeros, maybe they wear in over time.
Not sure what's going on here? The dials should be smooth with very little backlash. Have you adjusted the gibs?
Derek
-
-
Thanks everyone, and thanks for all the likes.
19 hours ago, VTHokiEE said:to me, the worst part of the build is making belayed rope coils
Not my favourite either Tim, so I do a few occasionally throughout the build just to break it up a bit. Makes me more inclined to experiment with different methods.
17 hours ago, whitejamest said:I'm a little bit caught in the doldrums as I struggle through my second planking,
I often 'freewheel' for a bit if I'm not feeling up to spending all my free time on a model. It's a hobby after all, not a race to finish. Having said that, I really enjoyed the time last year when I had Speedy and the English Pinnace on the go at the same time, each providing a break from the other when needed. Have you tried making up some of the deck furniture and/or masts to give yourself a break from planking?
13 hours ago, glbarlow said:I think you should copper it😁🤣
Another great idea! I've got some spare copper left over from the main hull....
I'm also inclined to agree with you about painting.
13 hours ago, glbarlow said:I have an actual boat at our Lakehouse
So have I - see my profile picture on the left.

-
On 1/25/2021 at 8:35 PM, allanyed said:
Why do you want to color it?
I agree with Allan. Apart from my current build which includes excellent blocks from Vanguard Models, I make my own from old boxwood rulers that you can still pick up from ebay for a few pounds. I protect them with pale shellac which darkens the wood very slightly and leaves a lovely finish. Perhaps you could try the natural look first, before experimenting with other finishes?
Derek
-
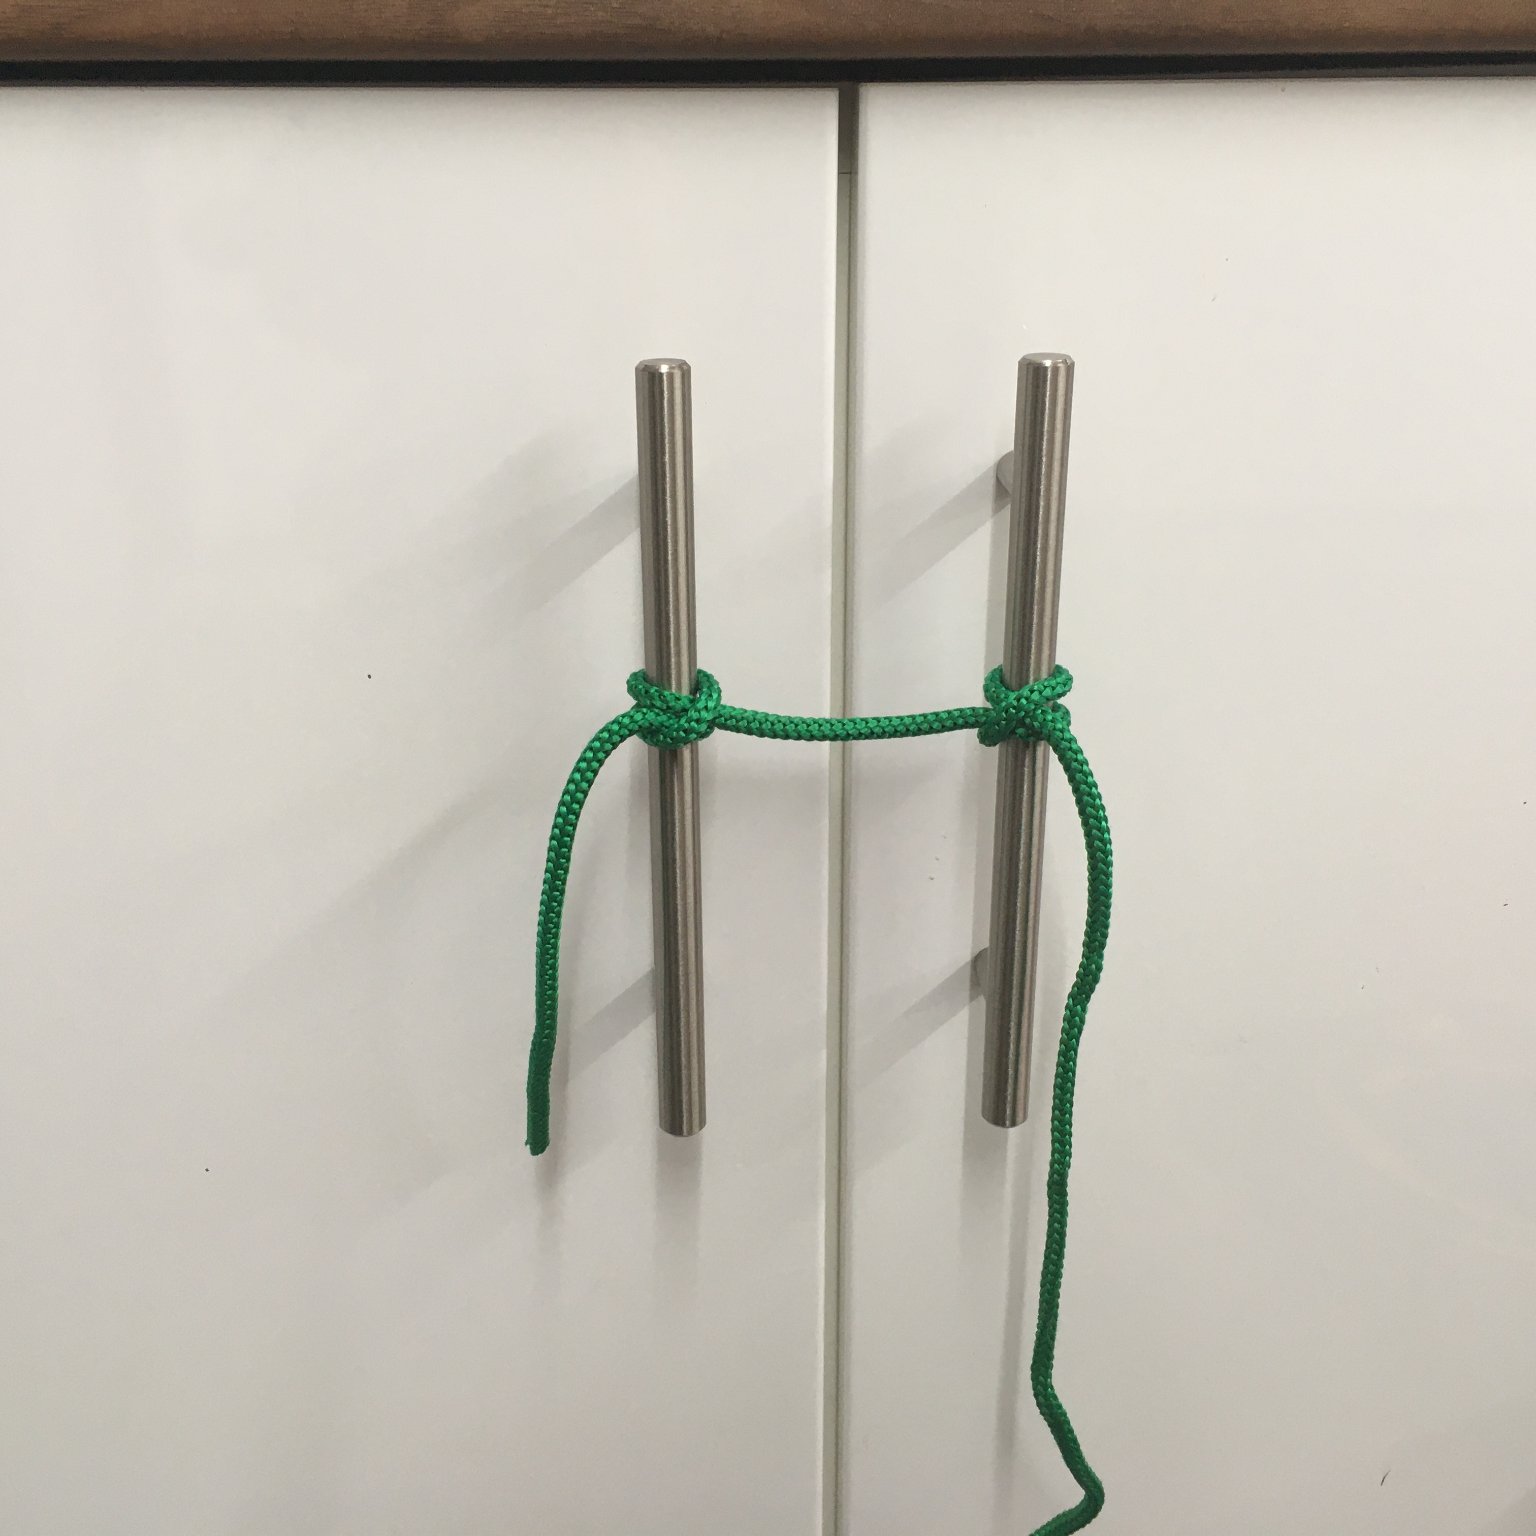
Ratlines & ships' boat
Steady but slow progress on the ratlines. I don't hate this part of the build as much as some folk seem to, but I do get frustrated at my inability to produce good, consistent work. This is despite practicing on cupboard door handles!
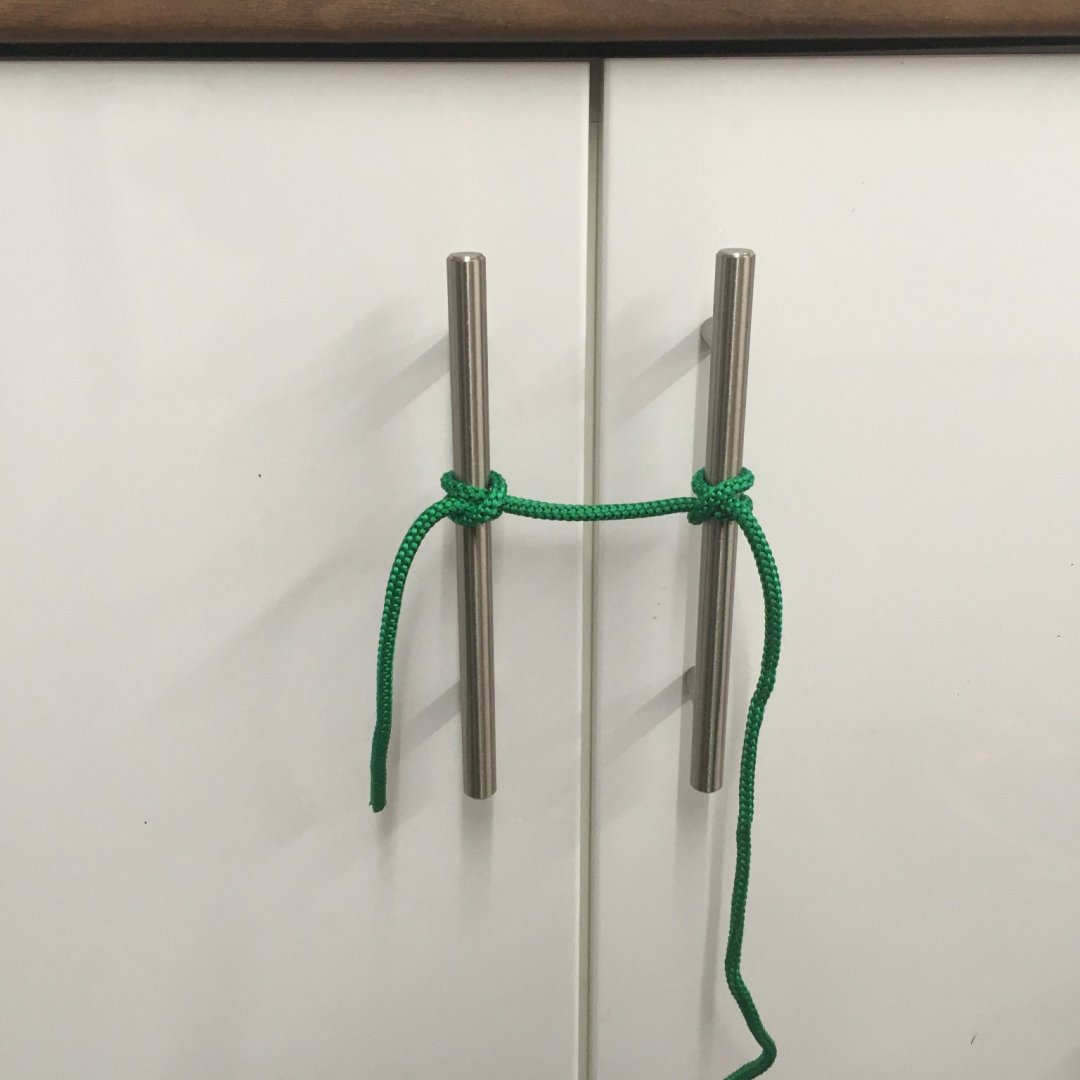
Pretty good at that scale! Anyway, I've finished the lower starboard shrouds and have just started on the port:

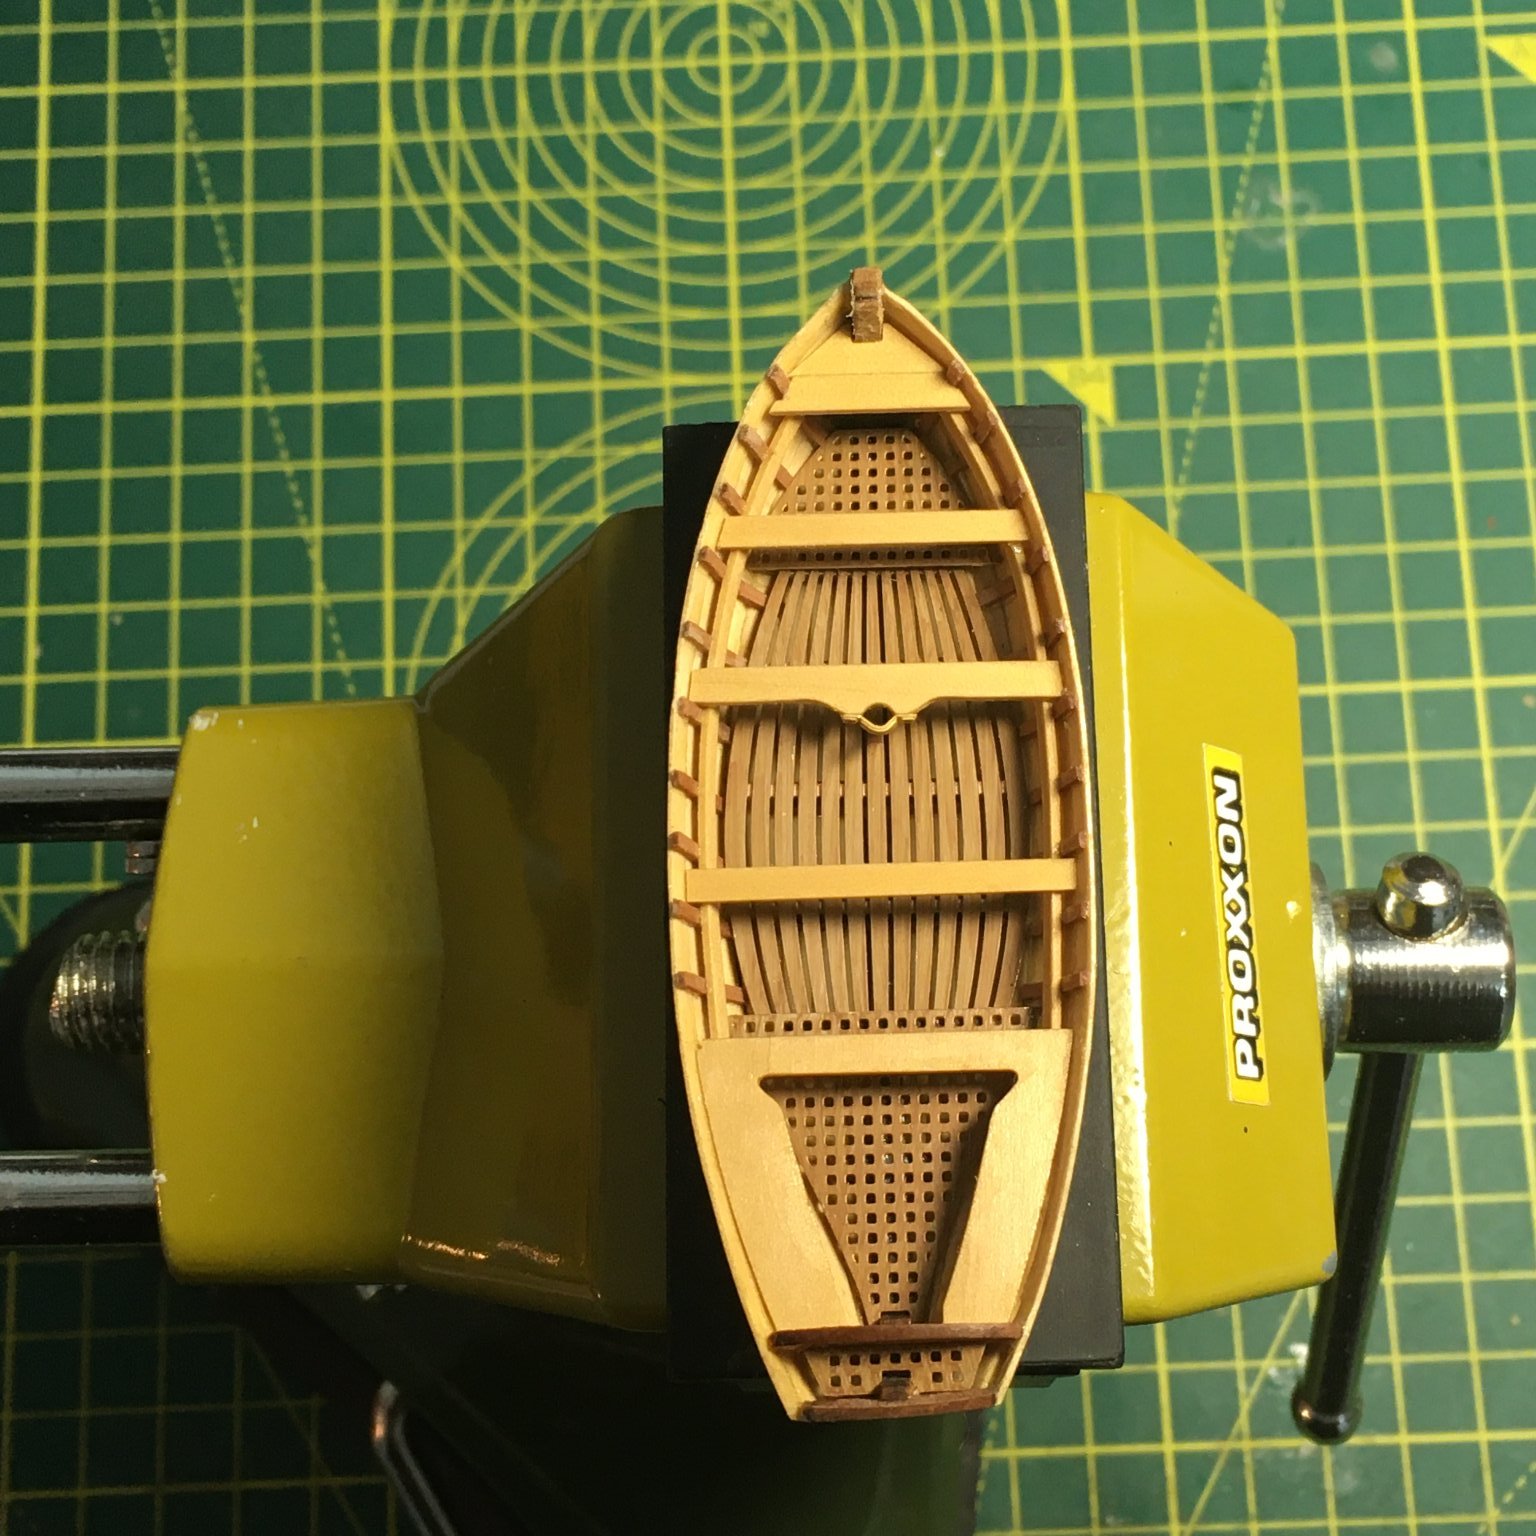
To break up the rattling I've done some more work on the ship's boat. I'm certainly glad I went for the boxwood option when I see the result so far. The kit supplied boxwood strips for the boat's hull planking, and there was enough left over to replace the pearwood thwarts as well. I departed from the manual slightly by fashioning a little platform in the bow to hide part of the MDF structure that would otherwise show:
Without the platform:
Platform fitted:
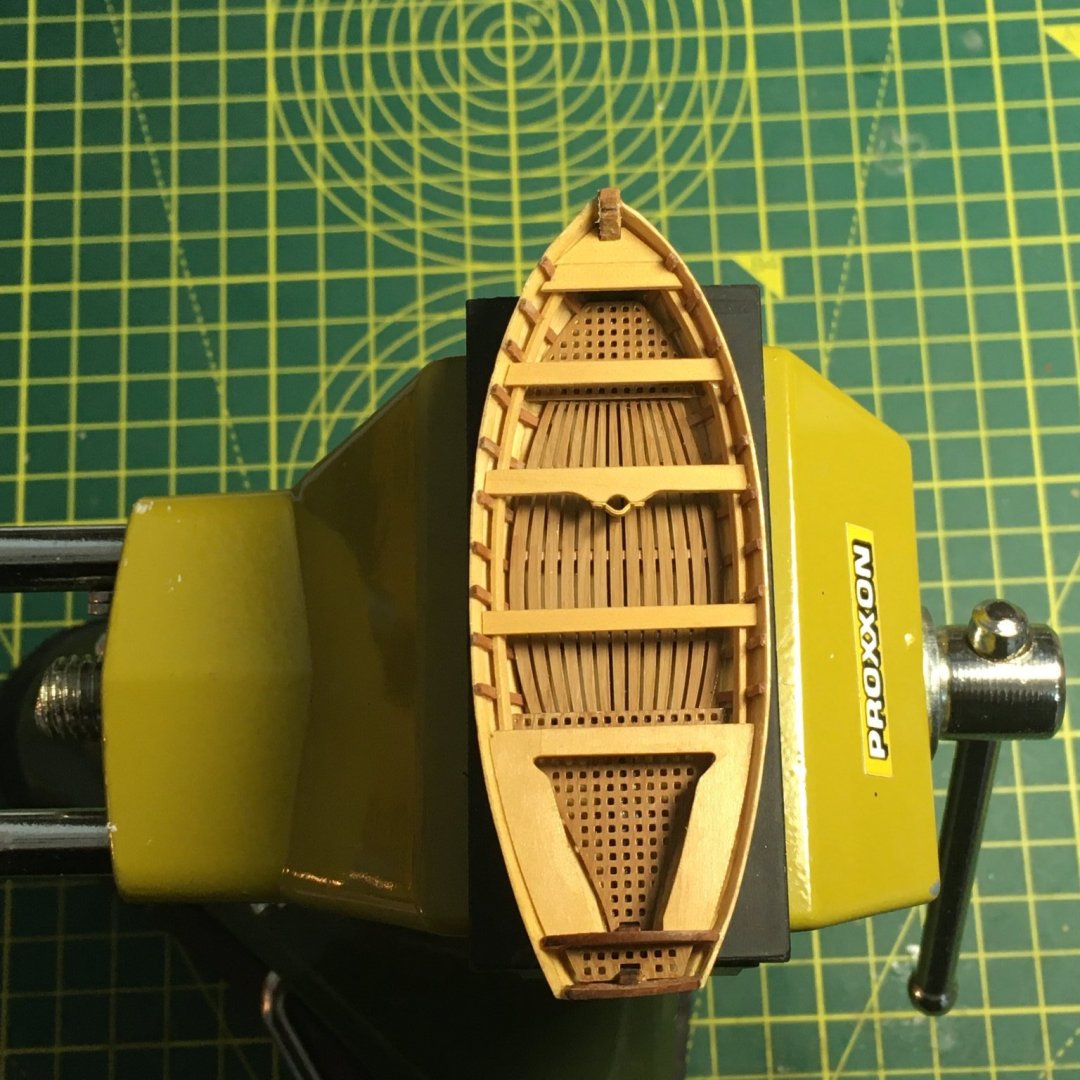
I haven't yet decided whether or not to paint the hull. It seems a shame to cover up the boxwood, and with a bit of tidying up and a couple of stealers it might look OK bare - especially when it's sitting in a cradle on the deck.

Back to the ratlines!
Derek
-
Blimey, I thought Jim was fast!
More great progress Glenn, which I'm following with interest though I'll probably read it all again when I eventually start my Duchess. I was particularly interested in your method for folding the stove - I managed to break mine on Speedy which resulted in much swearing and ca!
Derek
-
11 hours ago, vaddoc said:
The problem is that using diamond stones free hand, the bevel ends up very convex
I cheat and use a guide. All the advice Paul gives in his videos is still valid, whether or not you go freehand like he does. The best guides I know are made by Richard Kell (here). His No.1 guide is especially useful for miniature or very narrow chisels.
-
4 hours ago, EricWilliamMarshall said:
There was a third book I wanted to mention regarding sharpening
Thanks for the recommendations Eric. I think I'll treat myself to at least one of these.
For those who learn better from direct demonstrations, you can't do much better than Paul Sellers' excellent Youtube videos on woodworking. He has about 18 on sharpening all manner of hand tools, including the following two on chisels. Interestingly, in the first he uses diamond stones, and in the other he uses wet n' dry paper stuck to plate glass:
Derek
- Canute, mtaylor, Jorge Diaz O and 1 other
-
4
-
Beautifully crisp and neat work Glenn, and another great log entry - she's looking superb.
9 hours ago, glbarlow said:you just want the wood to shut up and do what you tell it to do - the wood laughs
My approach to carpentry in a nutshell! I get the same response from the wood.
9 hours ago, glbarlow said:The Seats of Ease
Glad you fitted these - the crew will be relieved. I'm more used to seeing these in the bows, but their position on Cheerful might explain the term 'poop deck'.
Also, I couldn't see any drainage holes in the stern - I hope the seats of ease don't drain into the captain's quarters?
-
I agree with Darrel - she's coming along very well.
- chris watton and Glenn-UK
-
1
-
1
-
Thanks everyone, much appreciated.
16 hours ago, glennard2523 said:Your attention to detail and workmanship is amazing
Very kind of you to say so Glenn, but I'm still learning like the rest of us. And that's not false modesty - when I look at the work of some of the true masters on the forum, people like Marsalv and Doris for example, I feel like I'm still a novice.
9 hours ago, glbarlow said:So many nautical terms, I don’t know what you’re saying in most of this post 🤣😂
Haven't you got that nautical dictionary yet Glenn
?
9 hours ago, VTHokiEE said:A lathe seems like a fun toy...
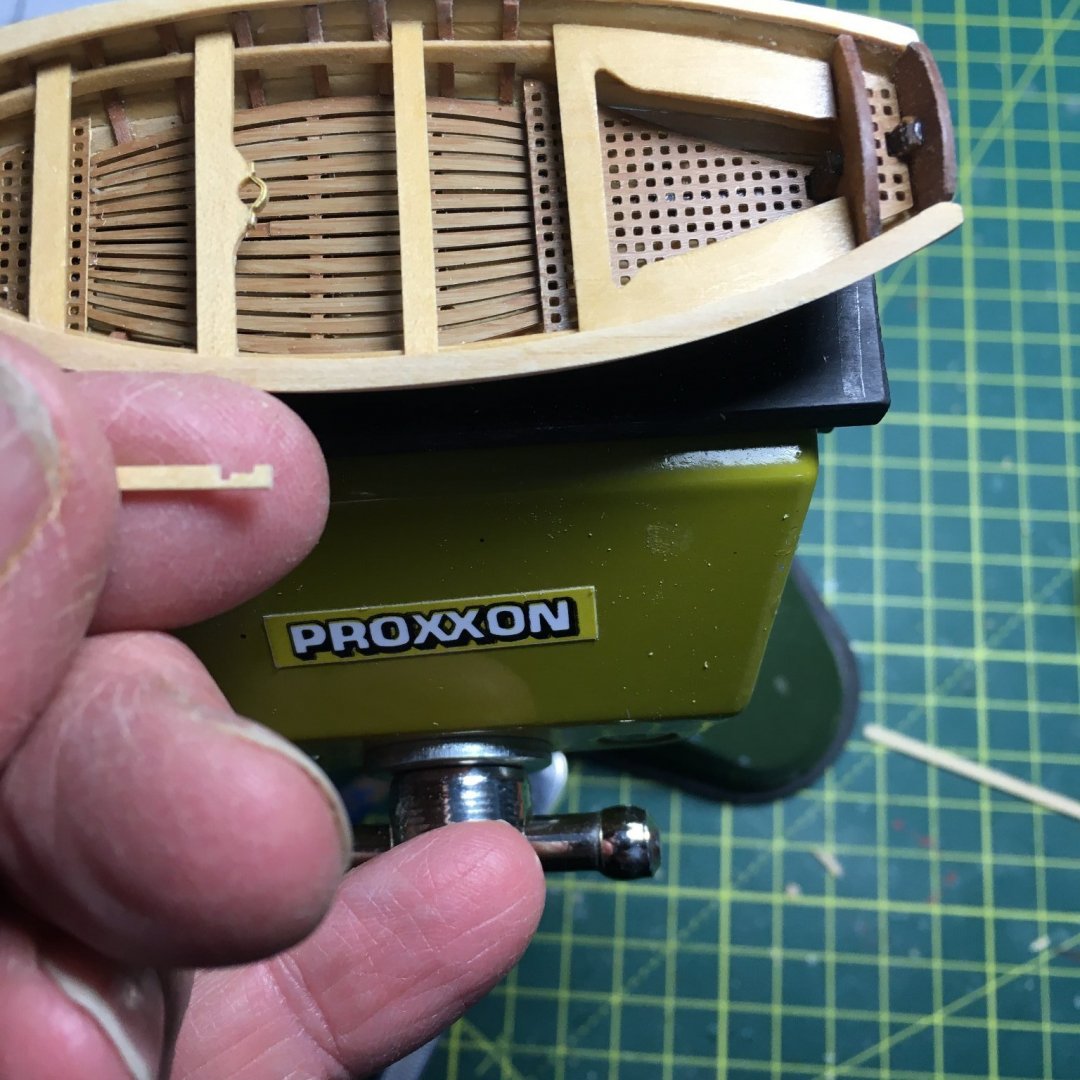
...and fun toy is right. I don't really need the metal working lathe for ship modelling, but it's good fun for little projects like this. If you ever decide to go for a lathe a wood working version like the Proxxon DB 250 I use would be much more useful (and a lot cheaper).
-
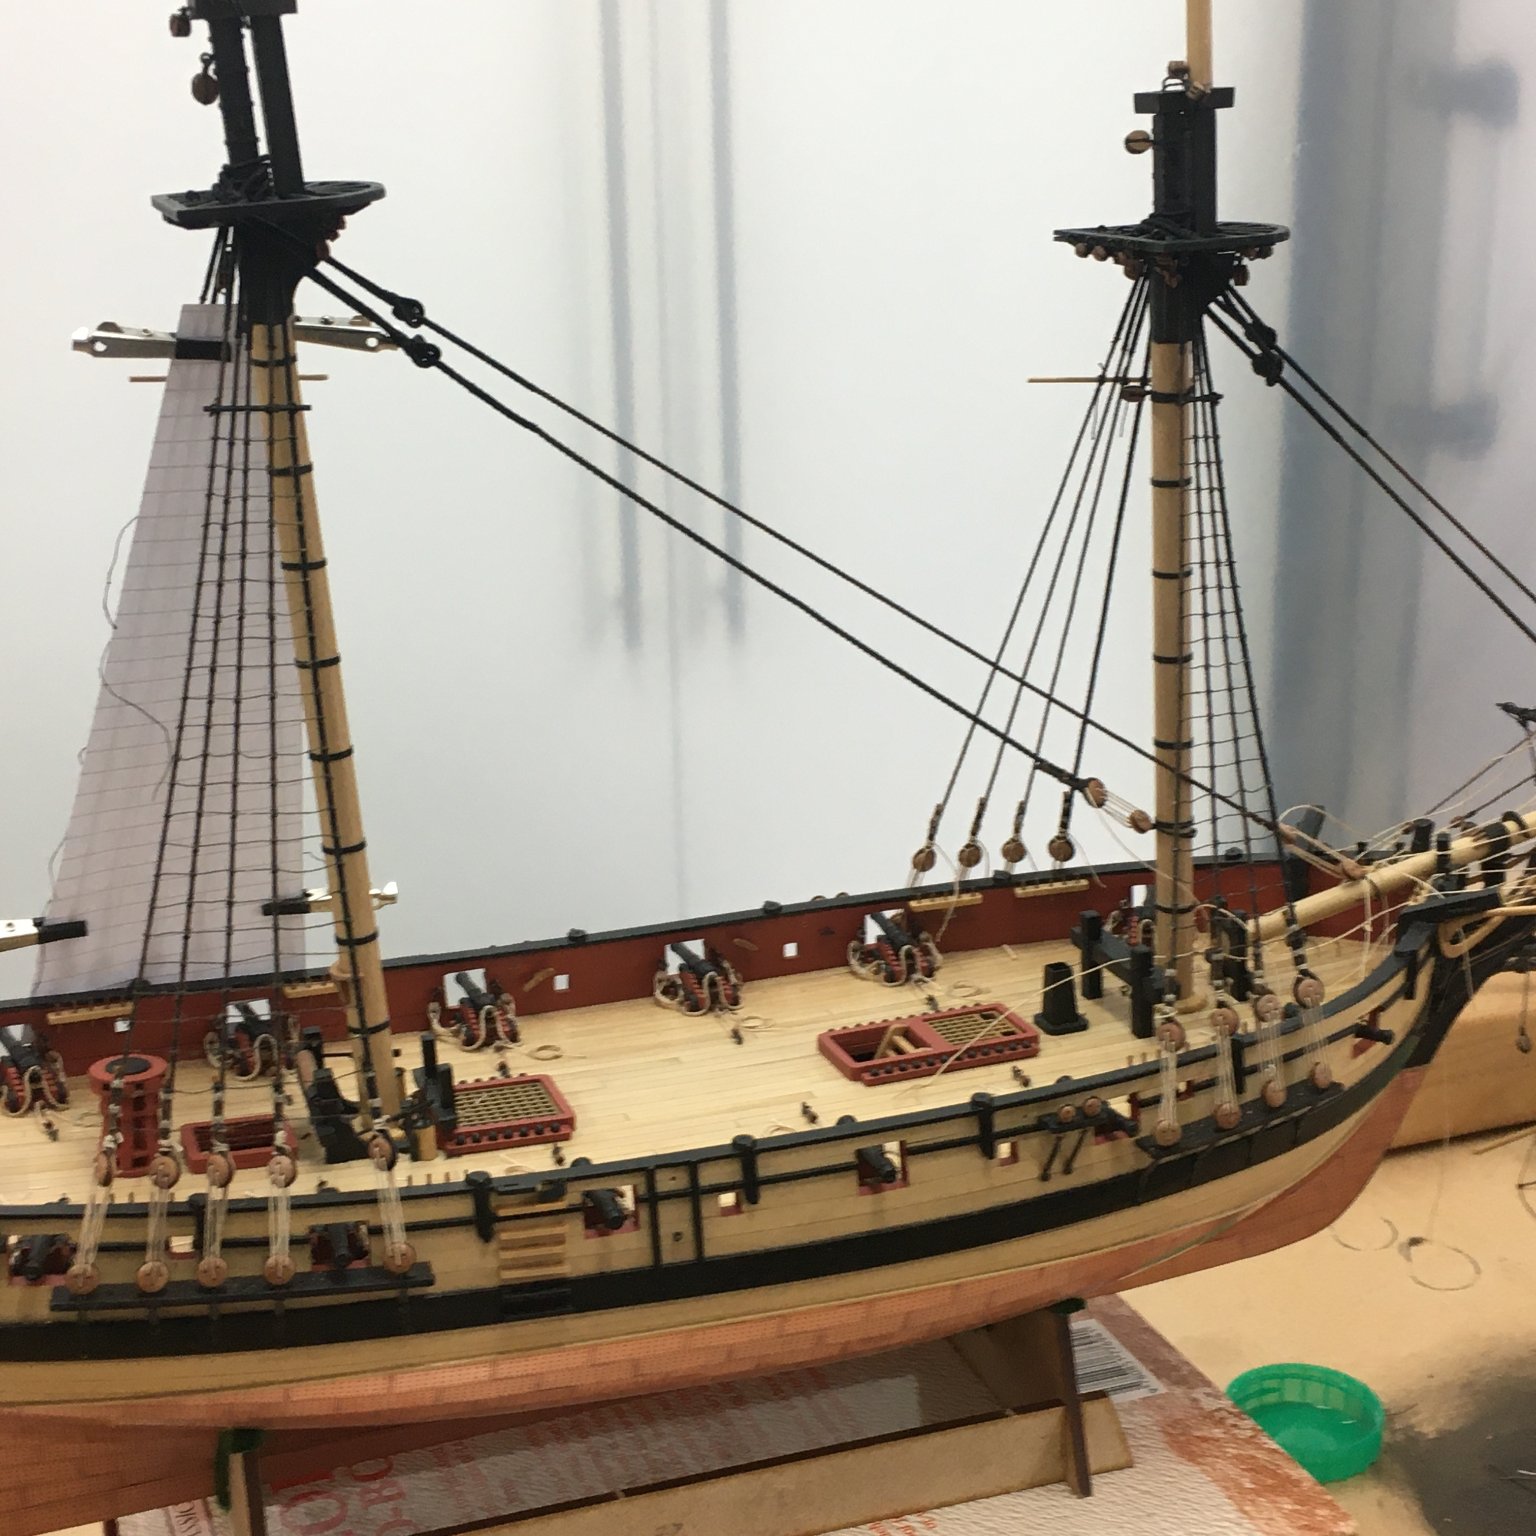
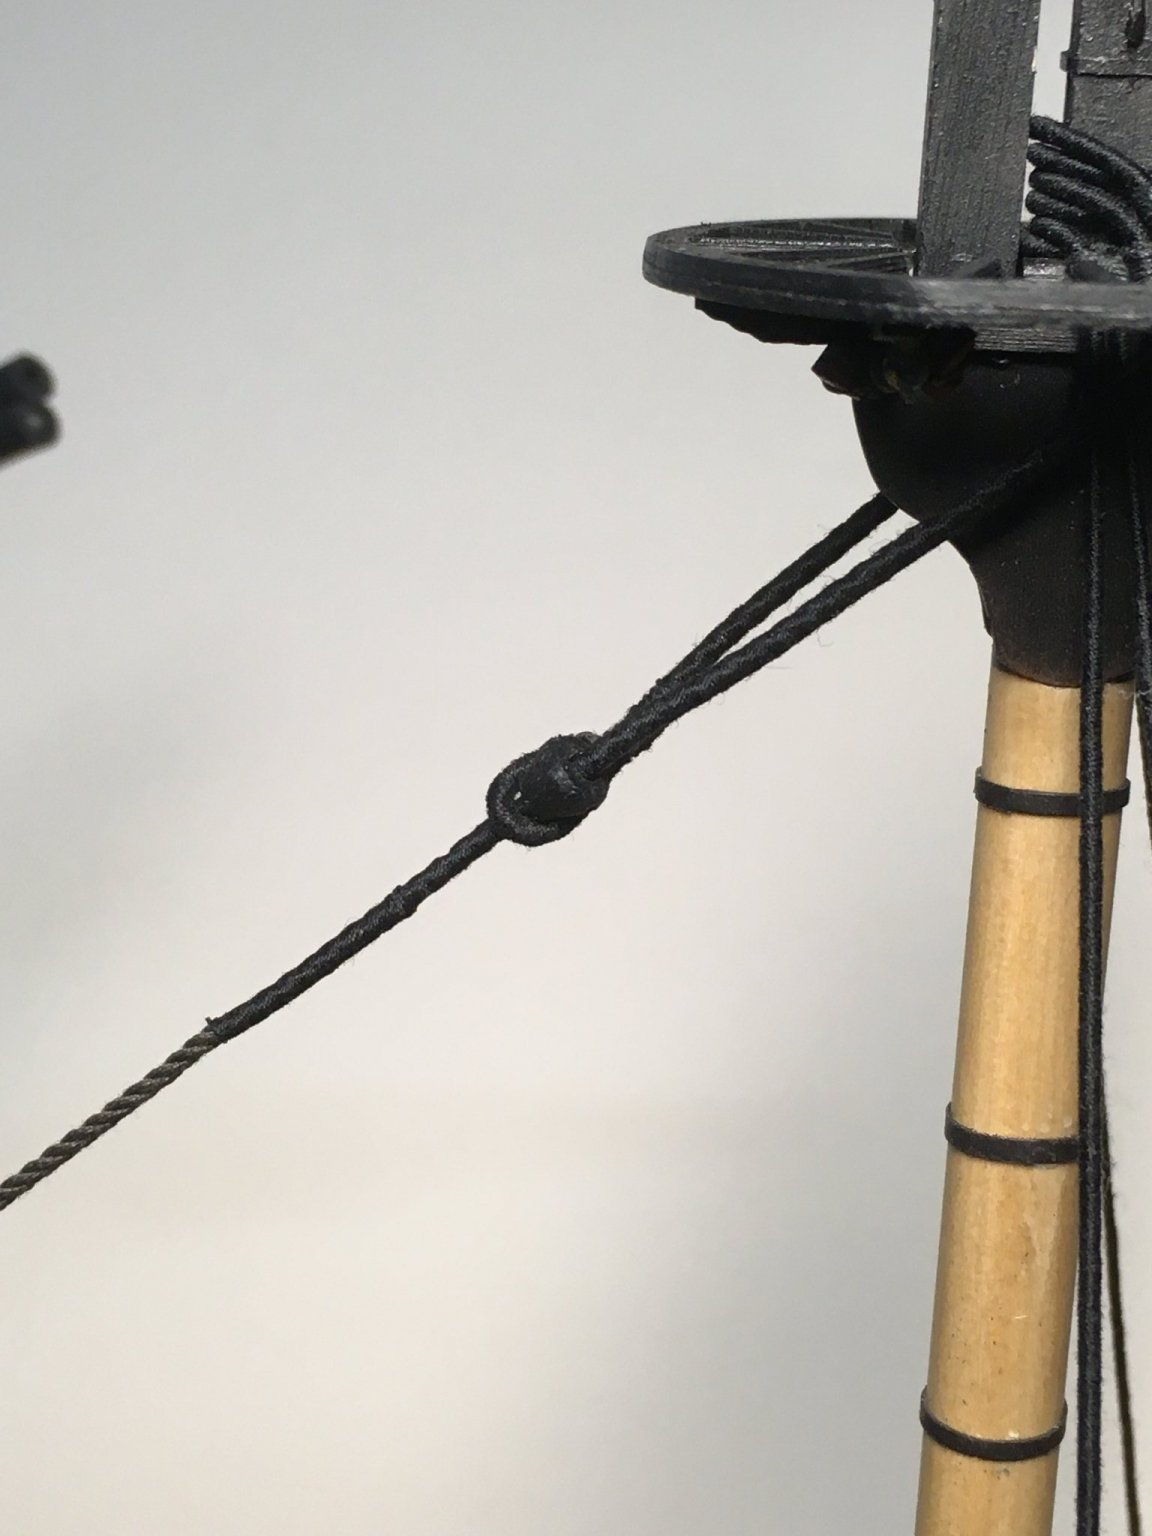
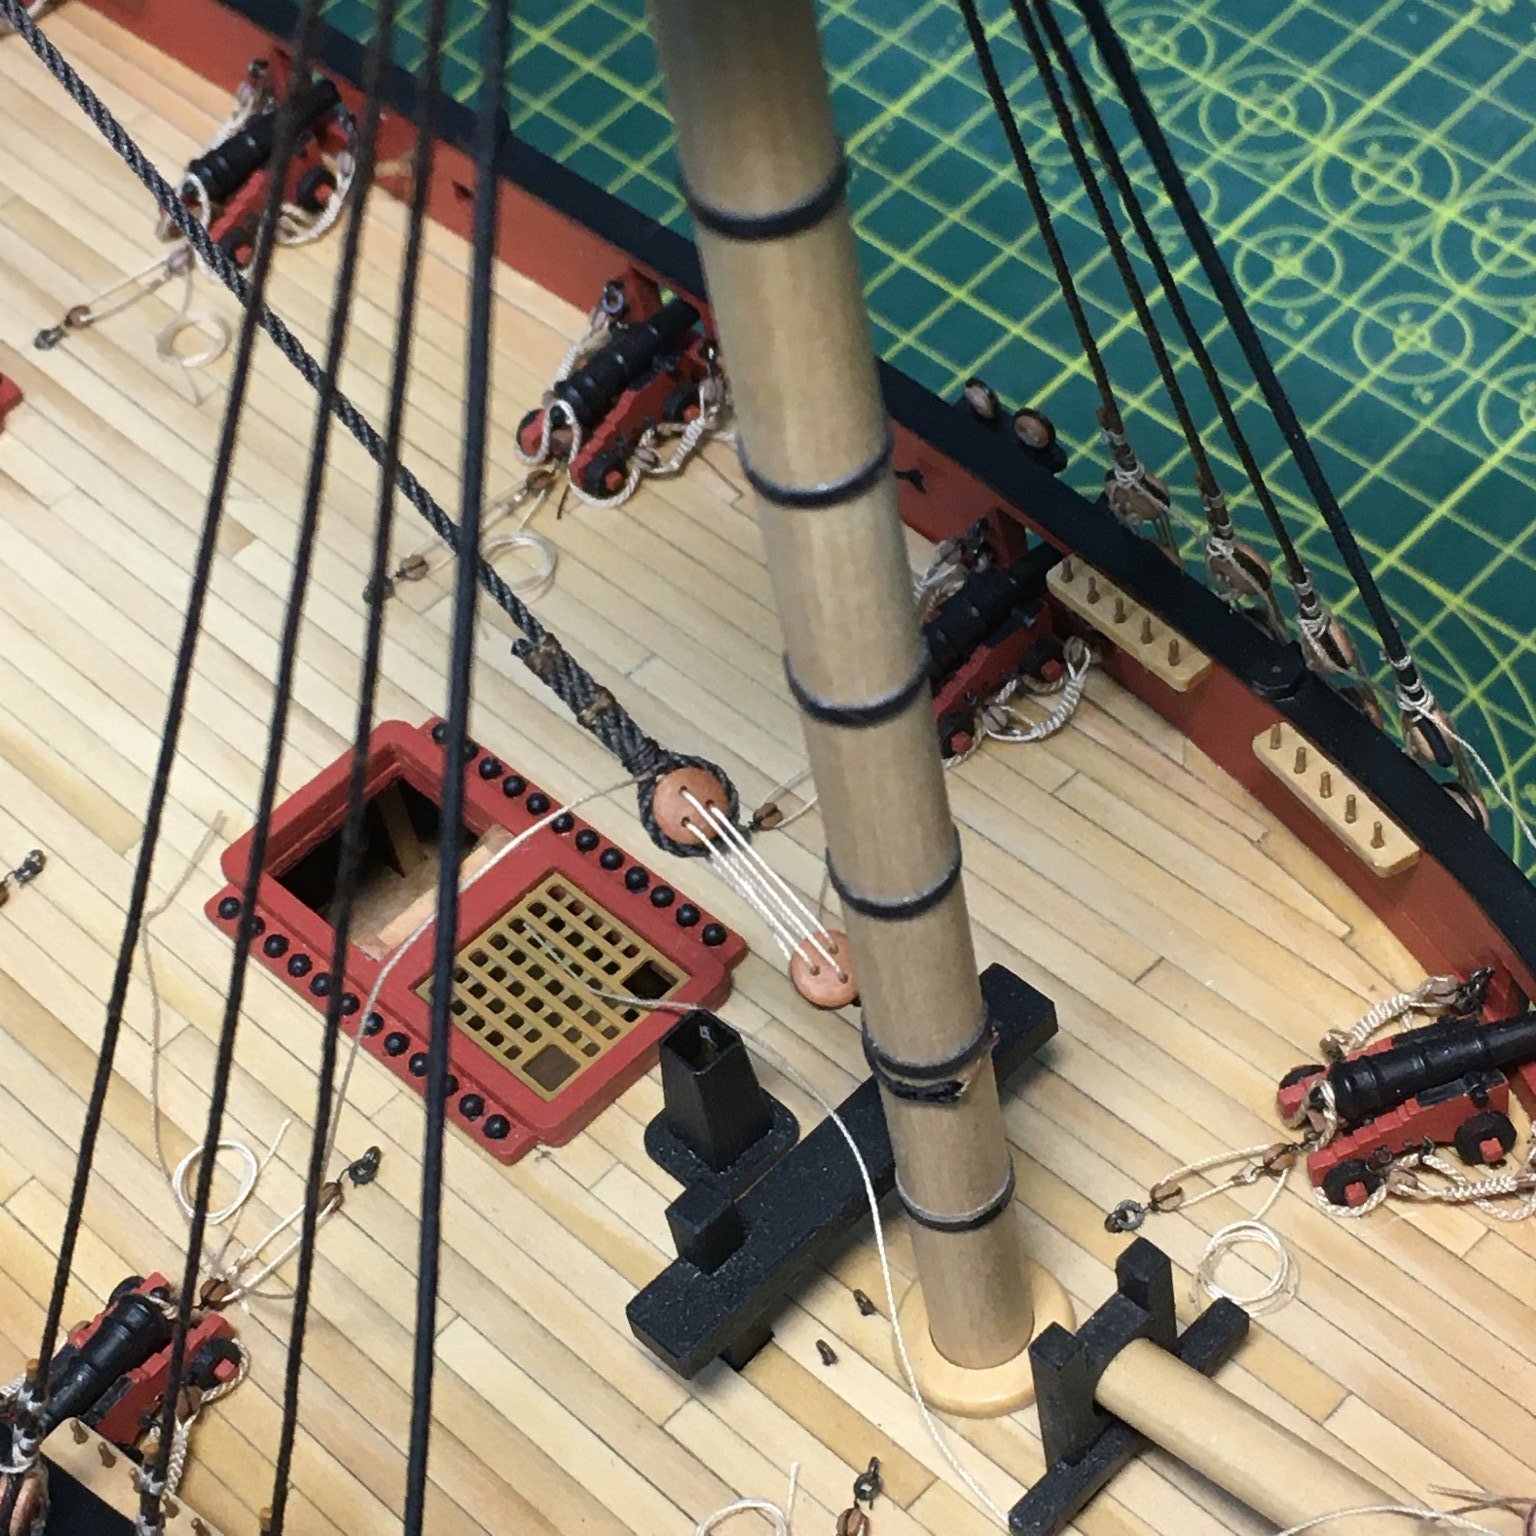
Lower mast stays
I thought I'd fit these before tackling with the ratlines:
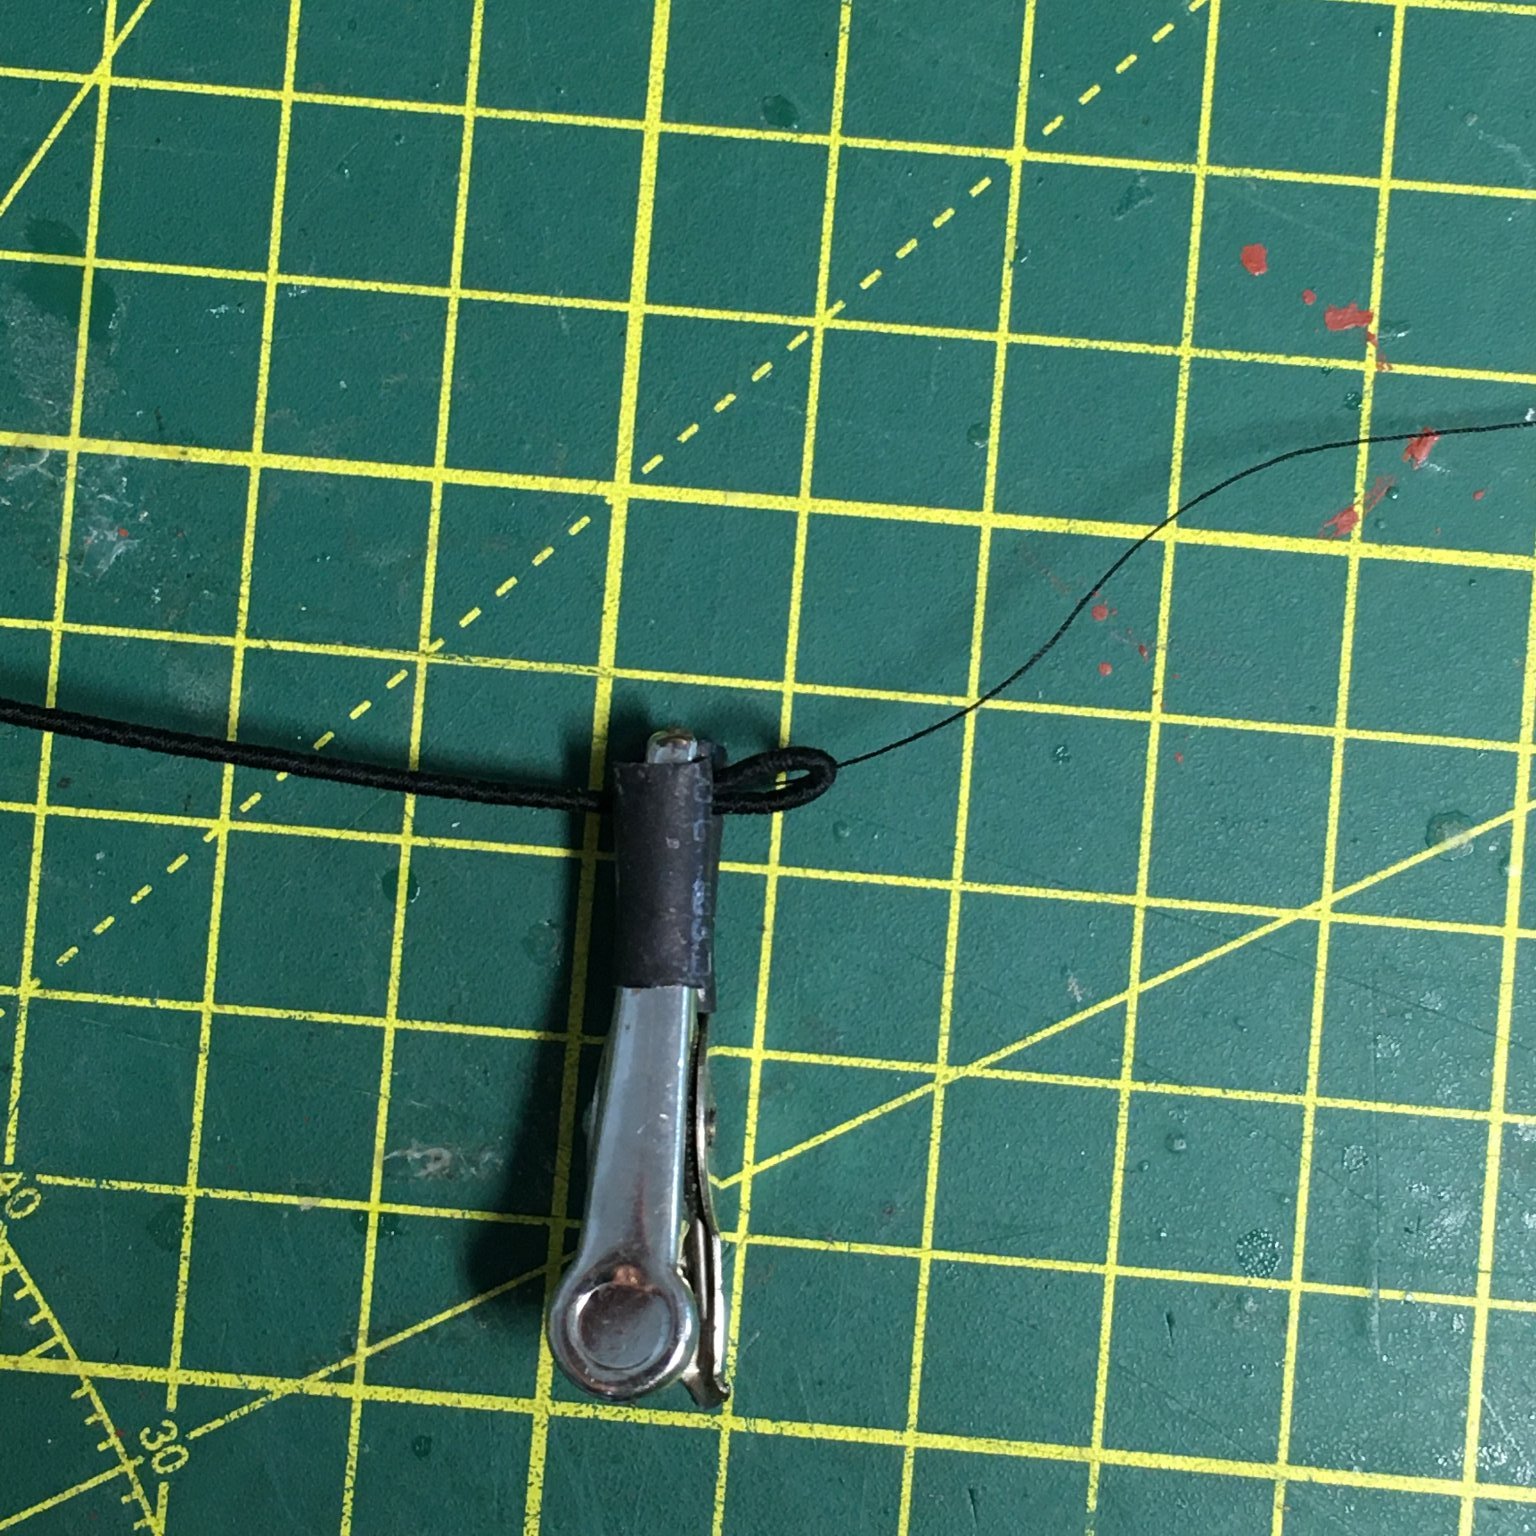
I used 1.3mm line for the main and fore stays, and 1.0mm for their preventers. Each was served from the eye down to a point about 6' (30mm) below the mouse. To serve the eye I used a method I'd read in TFFM but not tried before. Unfortunately I didn't film it all, but basically I left about 12mm/0.5" unserved at the eye end of the line, and when I threaded the serving line through the stay to start the serving I left a good long length spare. When finished serving, I used a scalpel blade to cut the unserved rope at an angle. With PVA applied, I brought the cut end round to form the eye and clamped it whilst it dried. Hopefully this shot will make the description clearer:

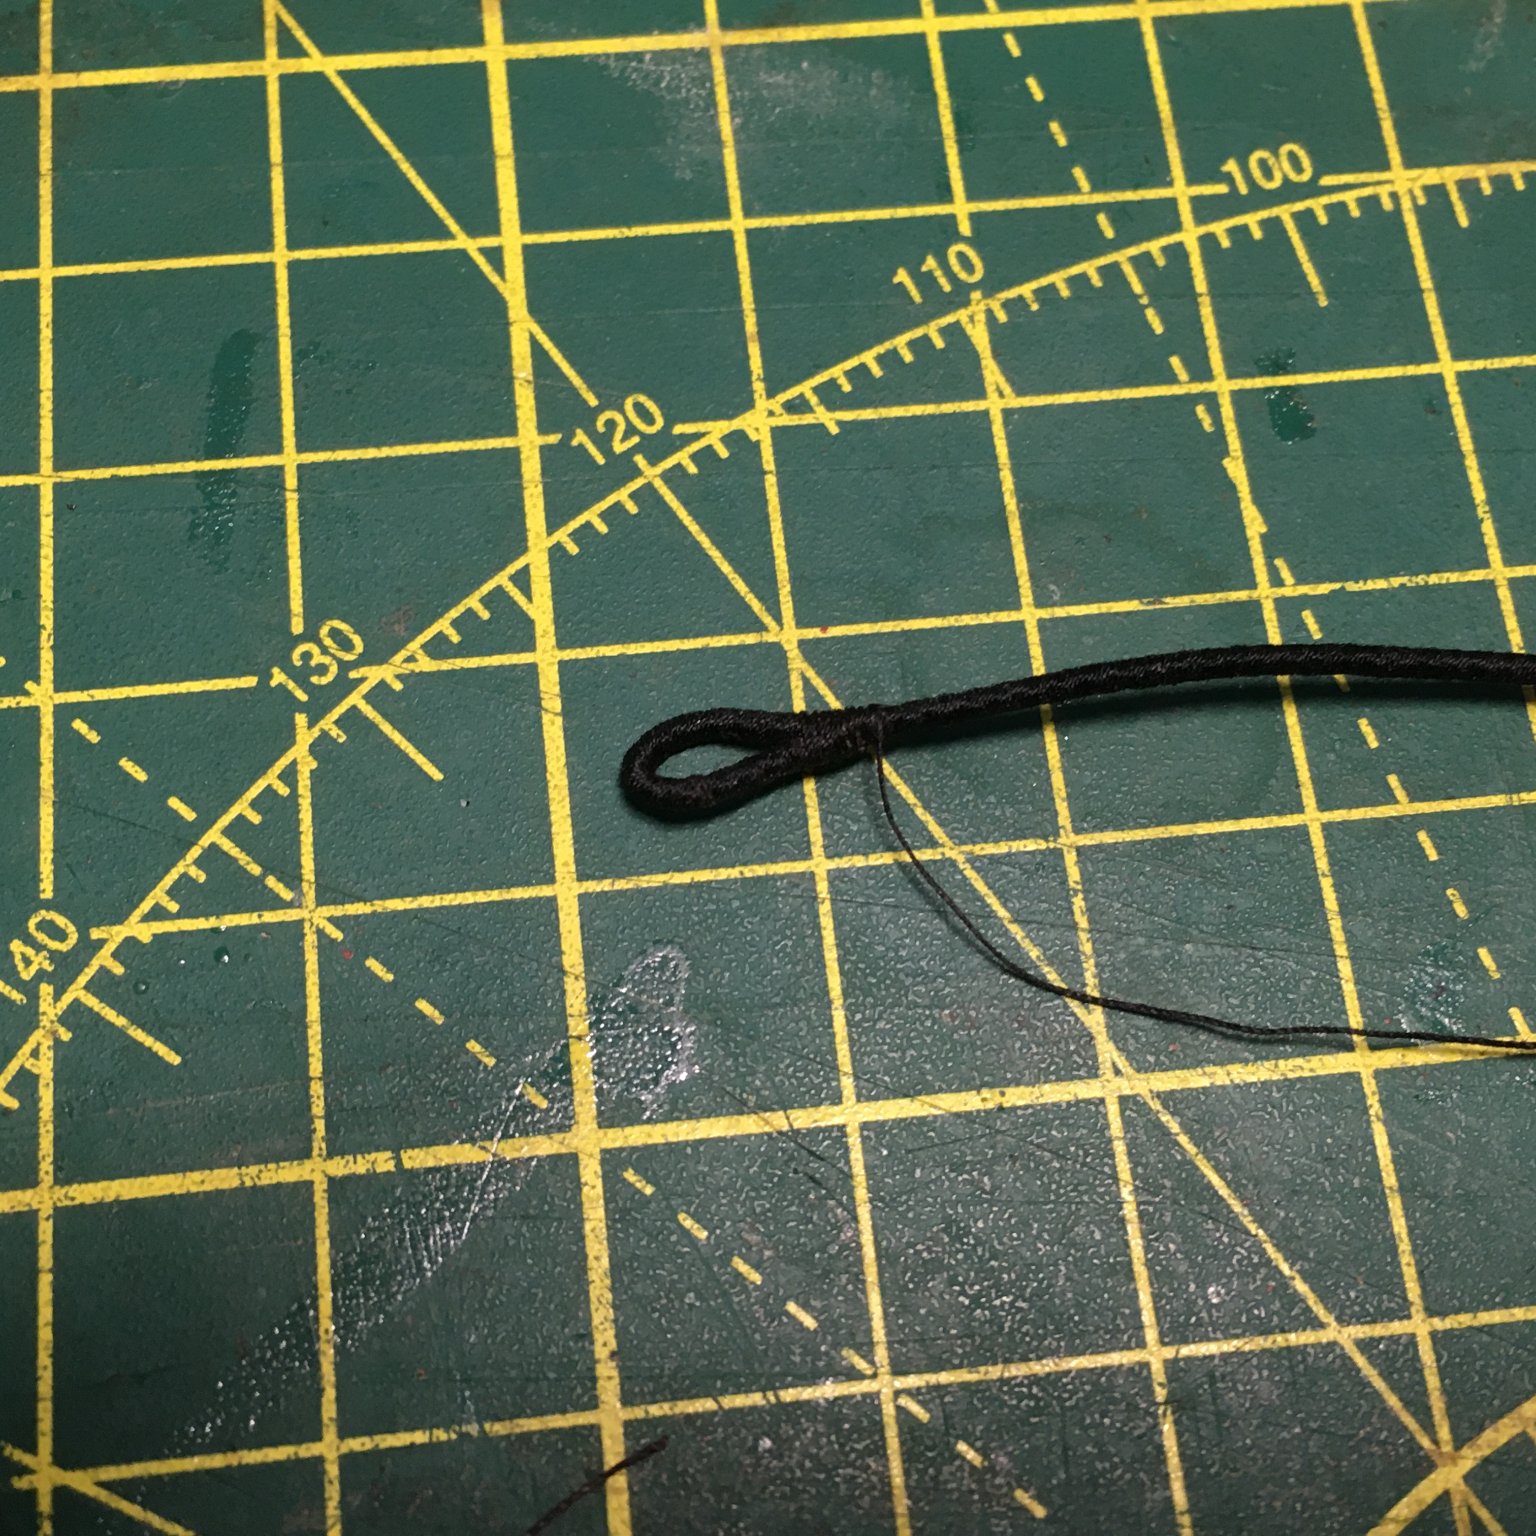
When the glue had dried I wound the spare thread round the join to cover it:

I put a half hitch in the final loop, applied a drop of dilute PVA and trimmed.
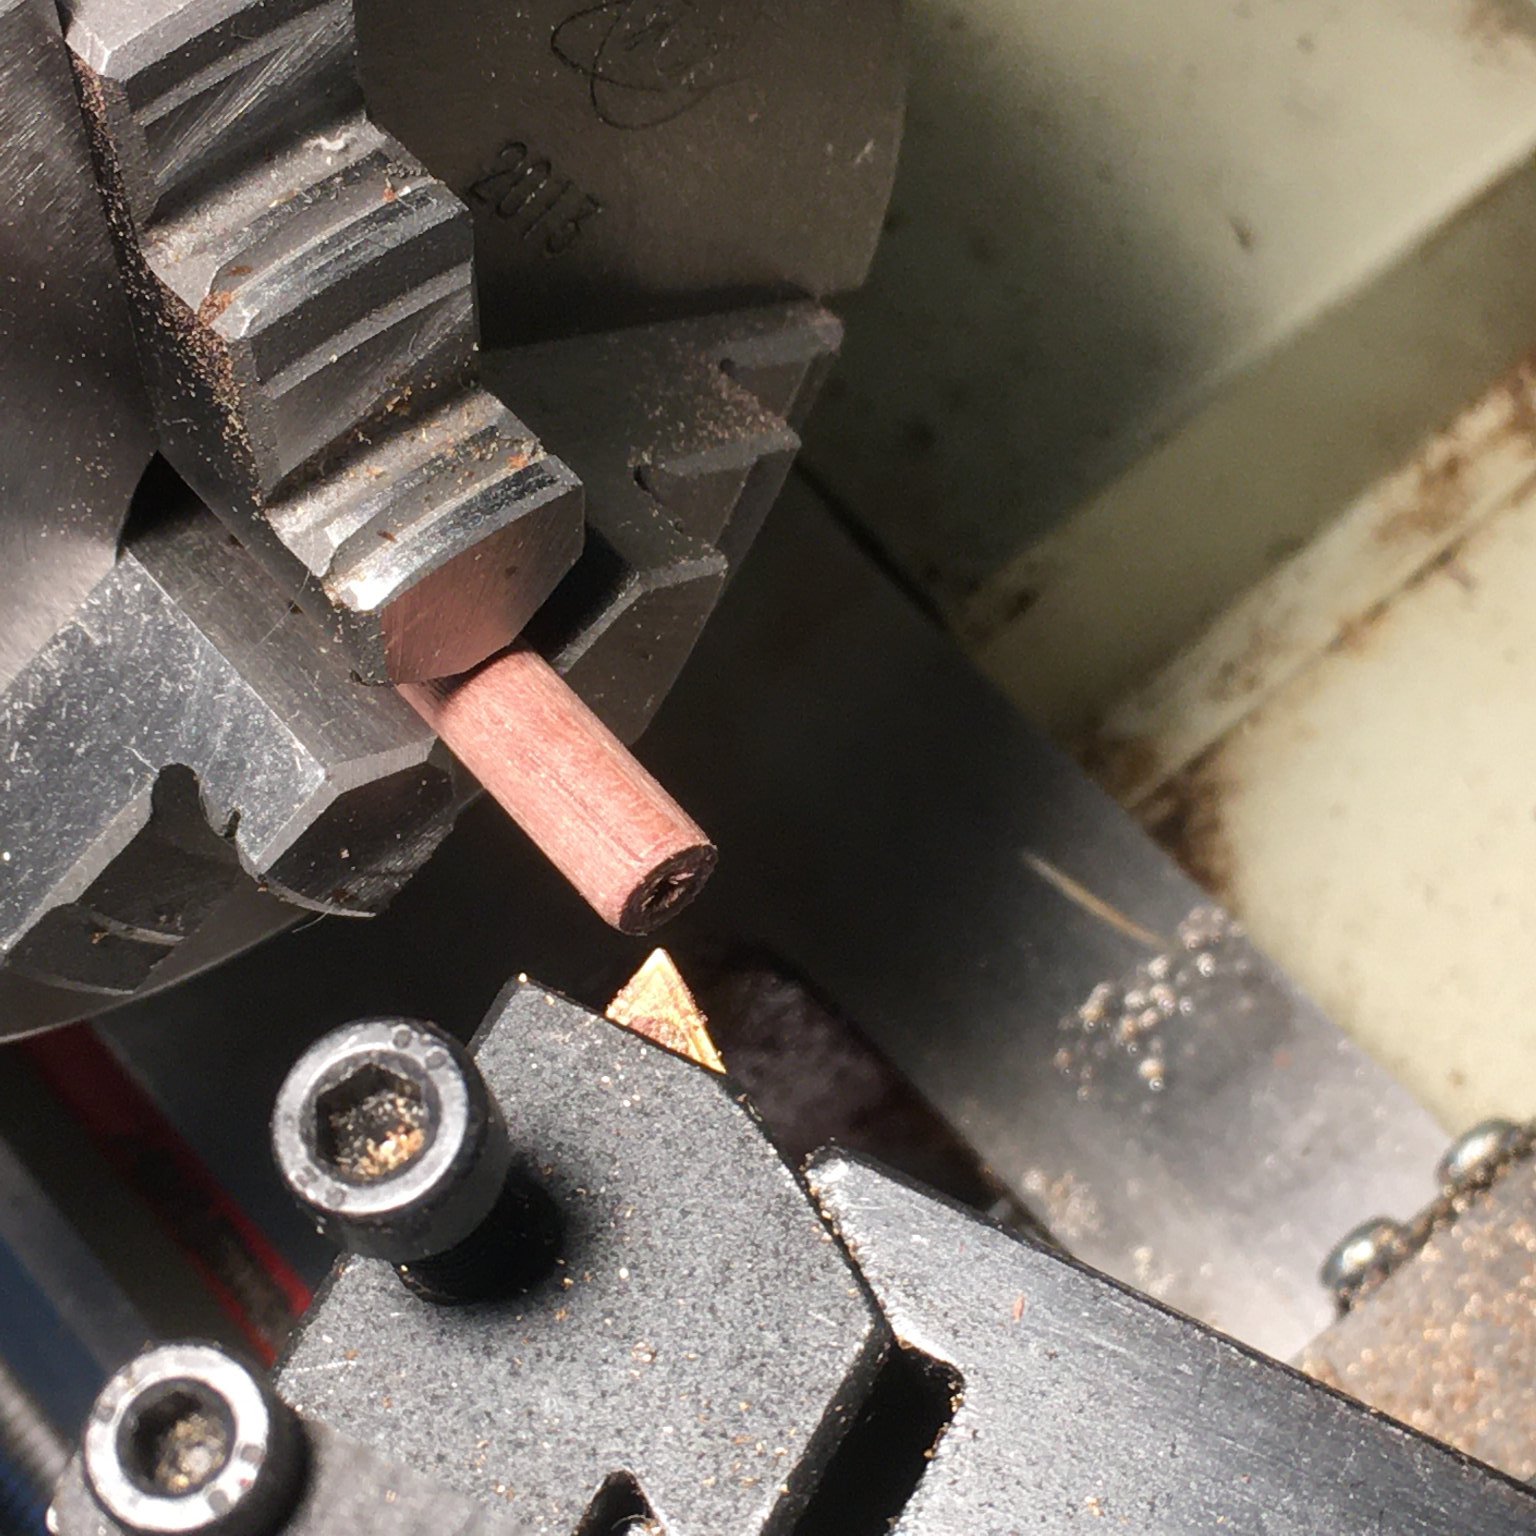
Next I had a bit of fun with the mice (mouses?). The kit supplies two sizes of black beads for these which look fine from a distance but I thought I'd make my own. I didn't want to go as far as full size practice and start weaving mice, so I again followed TFFM and made them from wood on the lathe. I started with a hole large enough to accommodate the served stays:
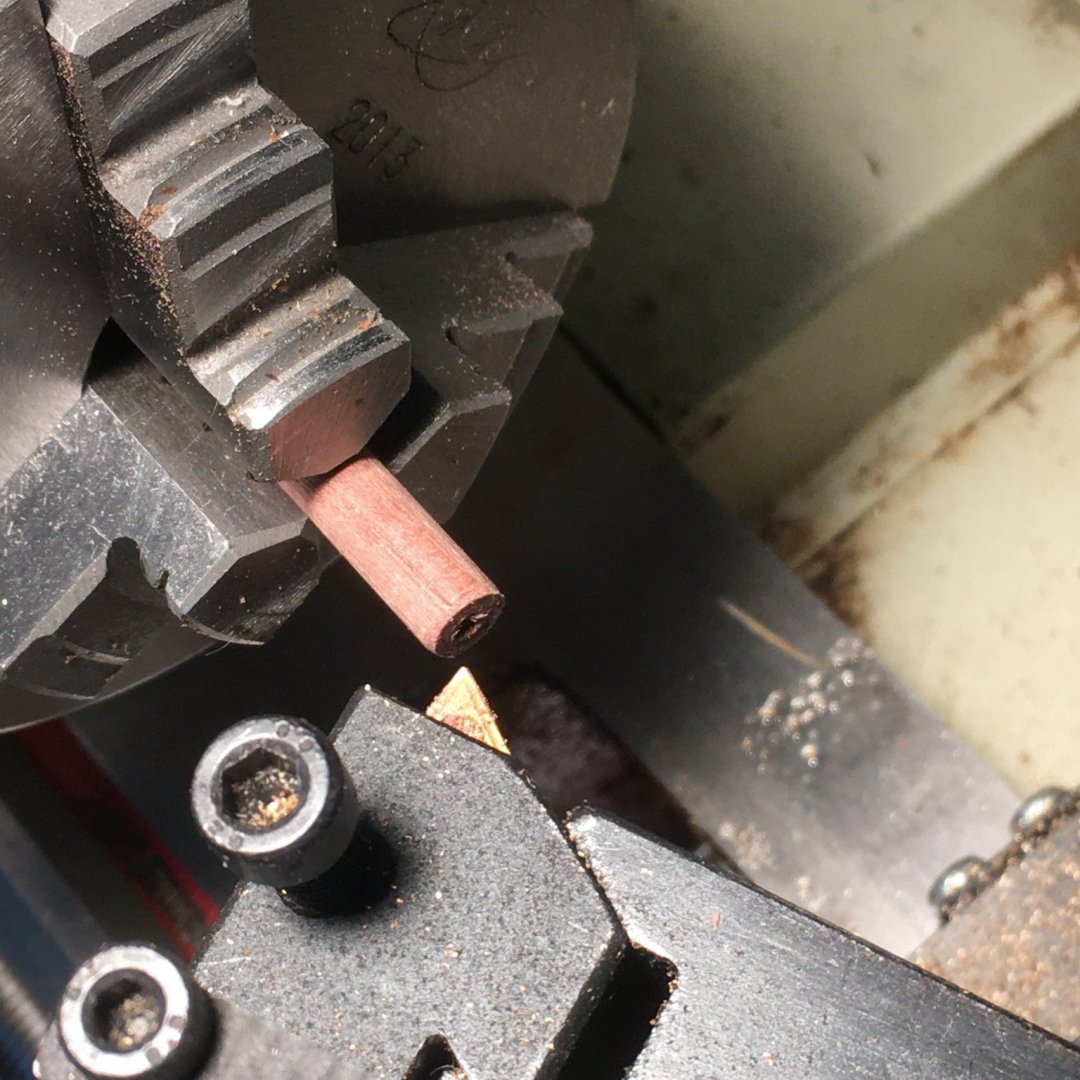
Then set the top slide at a 20 degree angle to cut a taper:

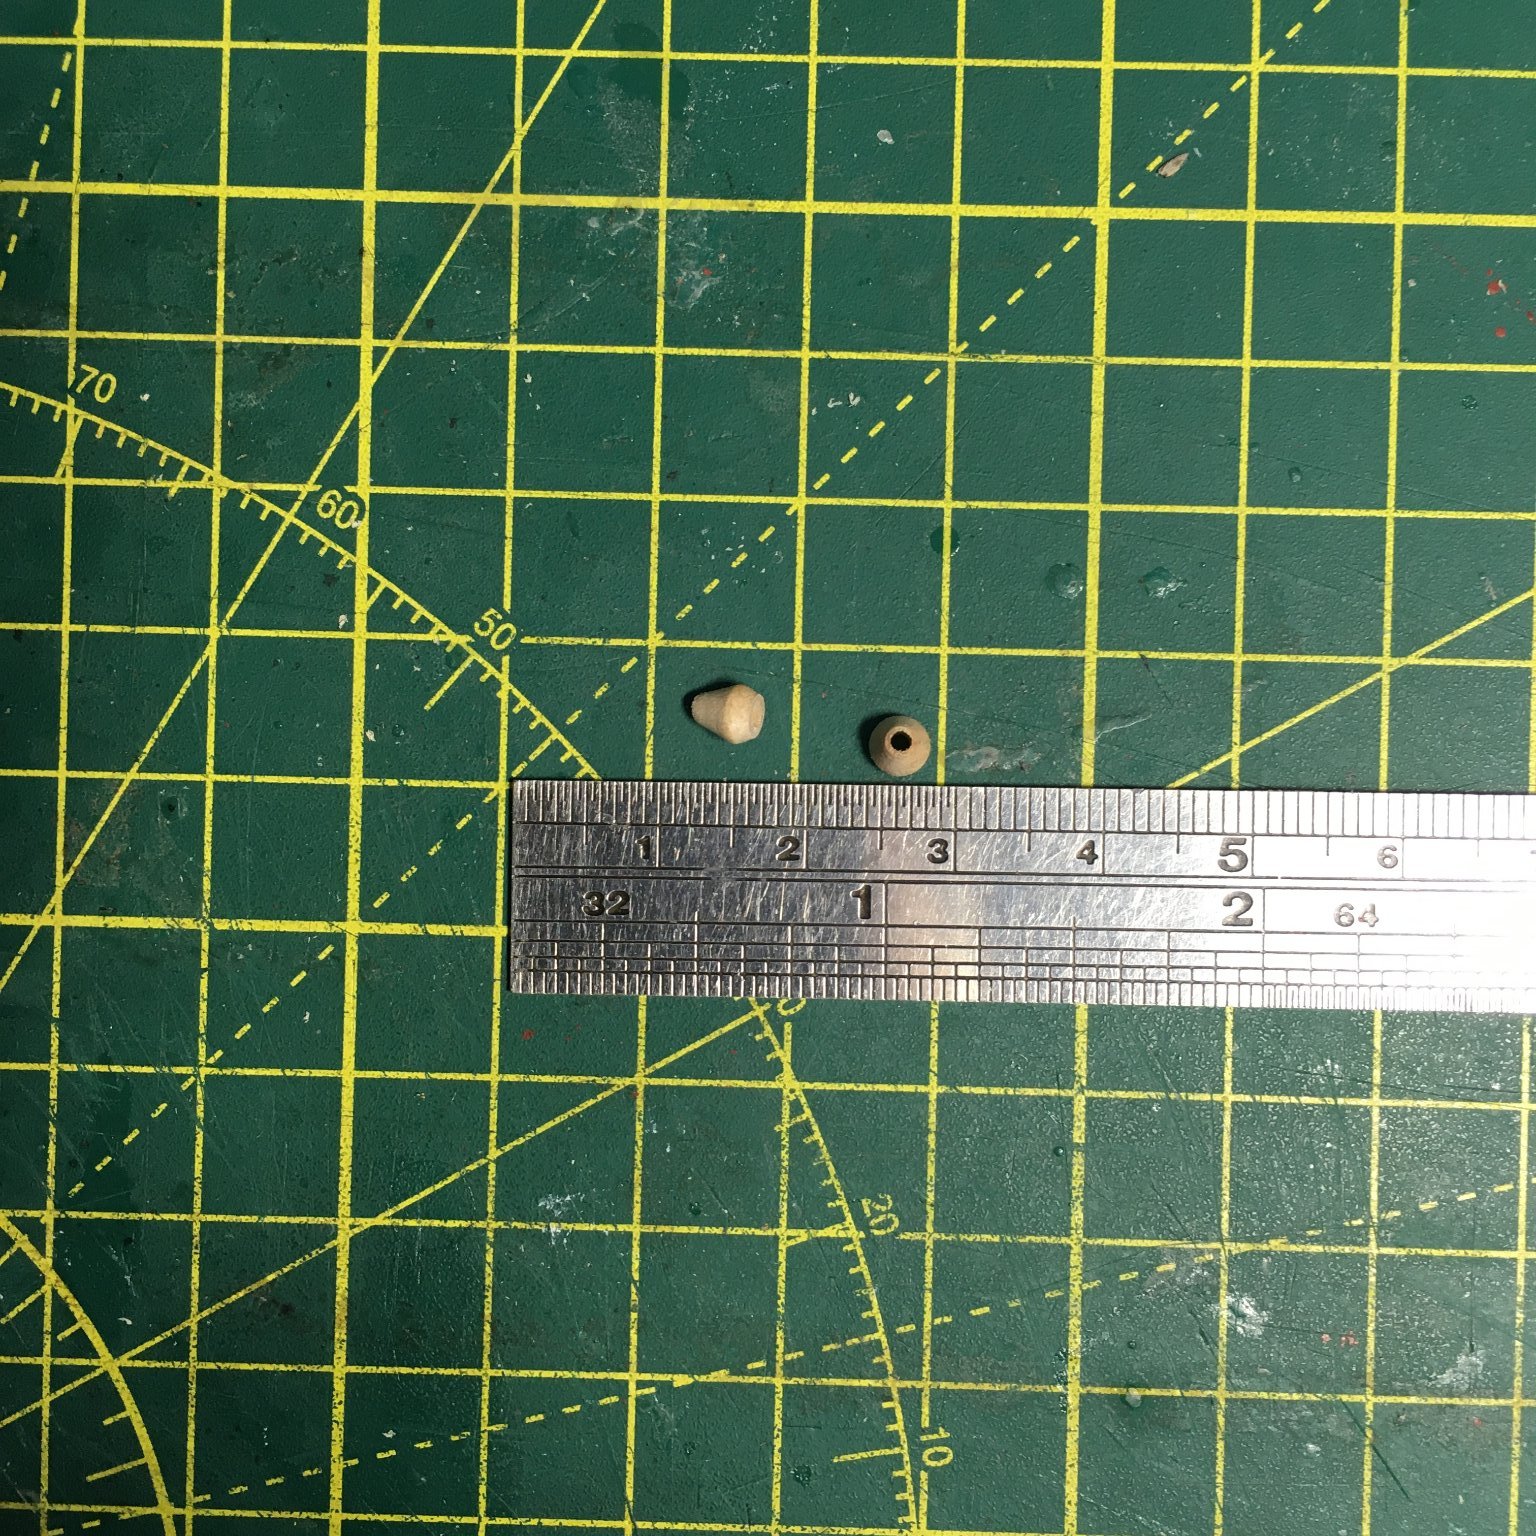
I parted the mouse with the cutter at an angle to bevel the other end. The mouse should be three times the diameter of the stay, so this told me where to part the mouse. The resulting mice I think are a slightly more realistic shape than a round bead, especially when painted to match the stay:


Finally, I seized 5mm deadeyes into the other end of each stay, using slightly darker thread than I did on the shrouds to preserve the detail better. And the lanyards are not bright white in real life, honest!
Next job will be preparing for ratlines. I'll probably do the futtock staves first, and practice my clove hitches. Having said that I'm tempted to try half hitches which might be less bulky at this scale. I'll experiment.
Derek


Joinery
in Building, Framing, Planking and plating a ships hull and deck
Posted
If you trust Google Images it's an old log cabin in Slovenia.