


DelF
-
Posts
1,409 -
Joined
-
Last visited
Content Type
Profiles
Forums
Gallery
Events
Posts posted by DelF
-
-
The kit supplied barrels are far too big. I replaced them with these 28mm ones from Amati. You can get them with carriages, but I made my own. To my eye they look in proportion, unlike the original cannon:
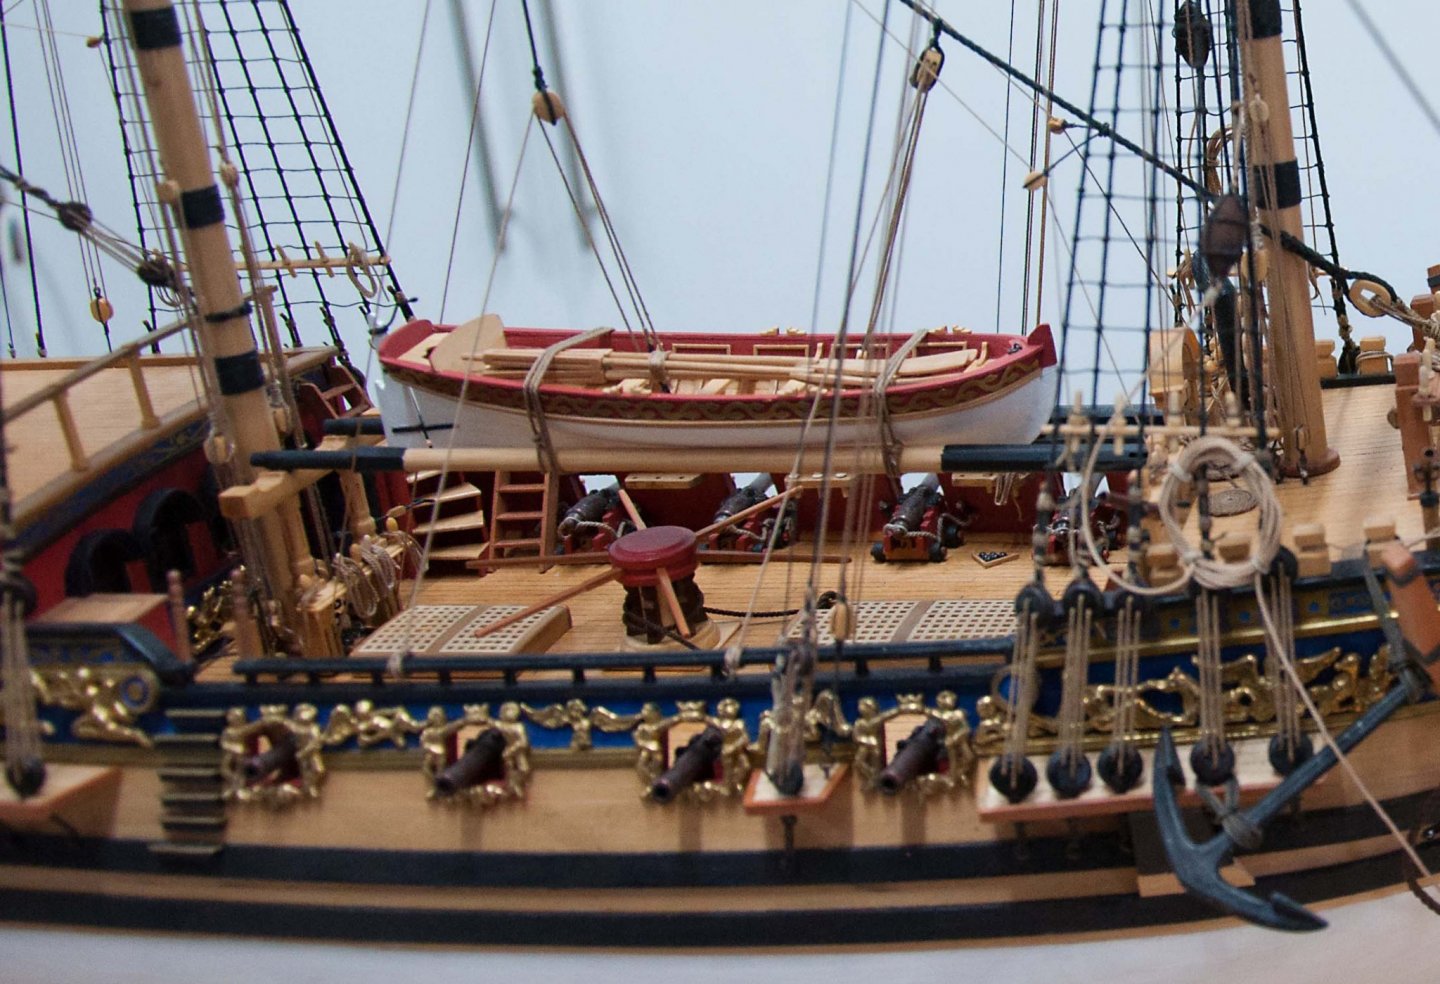
Trouble is, the AOS book is such a good reference source that you'll find yourself wanting to enhance the kit in lots of other ways. Don't get me wrong - the kit makes up into a fine and decorative model, but for me part of the fun in this hobby is looking for ways of enhancing kits to make them more historically accurate and realistic and to increase my own skills and enjoyment. There are far better examples of Royal Caroline on the forum than mine - for example check out those by Marsalv and Doris.
Derek
- chris watton and mtaylor
-
 2
2
-
Congratulations on completing a lovely model - the figures really bring her to life.
Not bad for a 168 year-old! 🤪
13 minutes ago, Bill97 said:I was 6 years in 1858.
Derek
- Ryland Craze and shipman
-
2
-
40 minutes ago, glbarlow said:
106 F, 41 C
Wow, that’s hot! The UK Record is 38.7 C/ 101.7 F set in July last year - and not in North Yorkshire! It got close to 100 where I live - I was painting a fence that day and had to retreat indoors for several restorative beers.
44 minutes ago, glbarlow said:the paste is something I’ll definitely try,
Great - it’s so useful for many aspects of our hobby.
Derek
-
19 hours ago, Blue Ensign said:
Envious of your Whitby trip
Glad to see from your Muirneag log that you were able to get a break in Devon - now I'm envious!
Derek
-
Sjors,
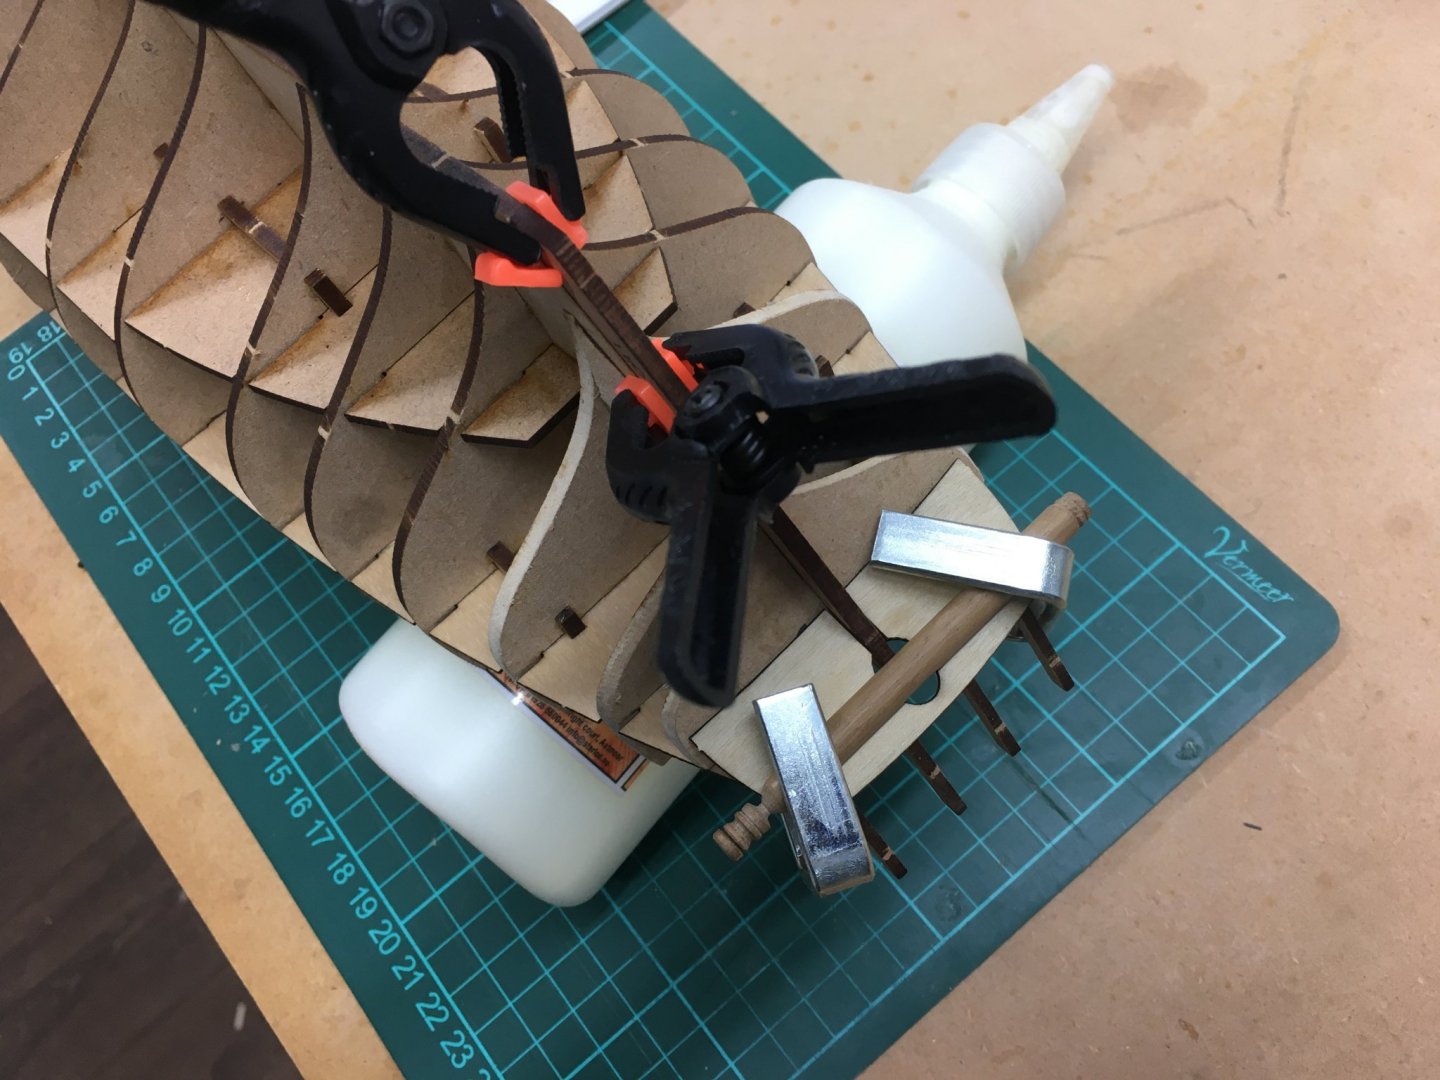
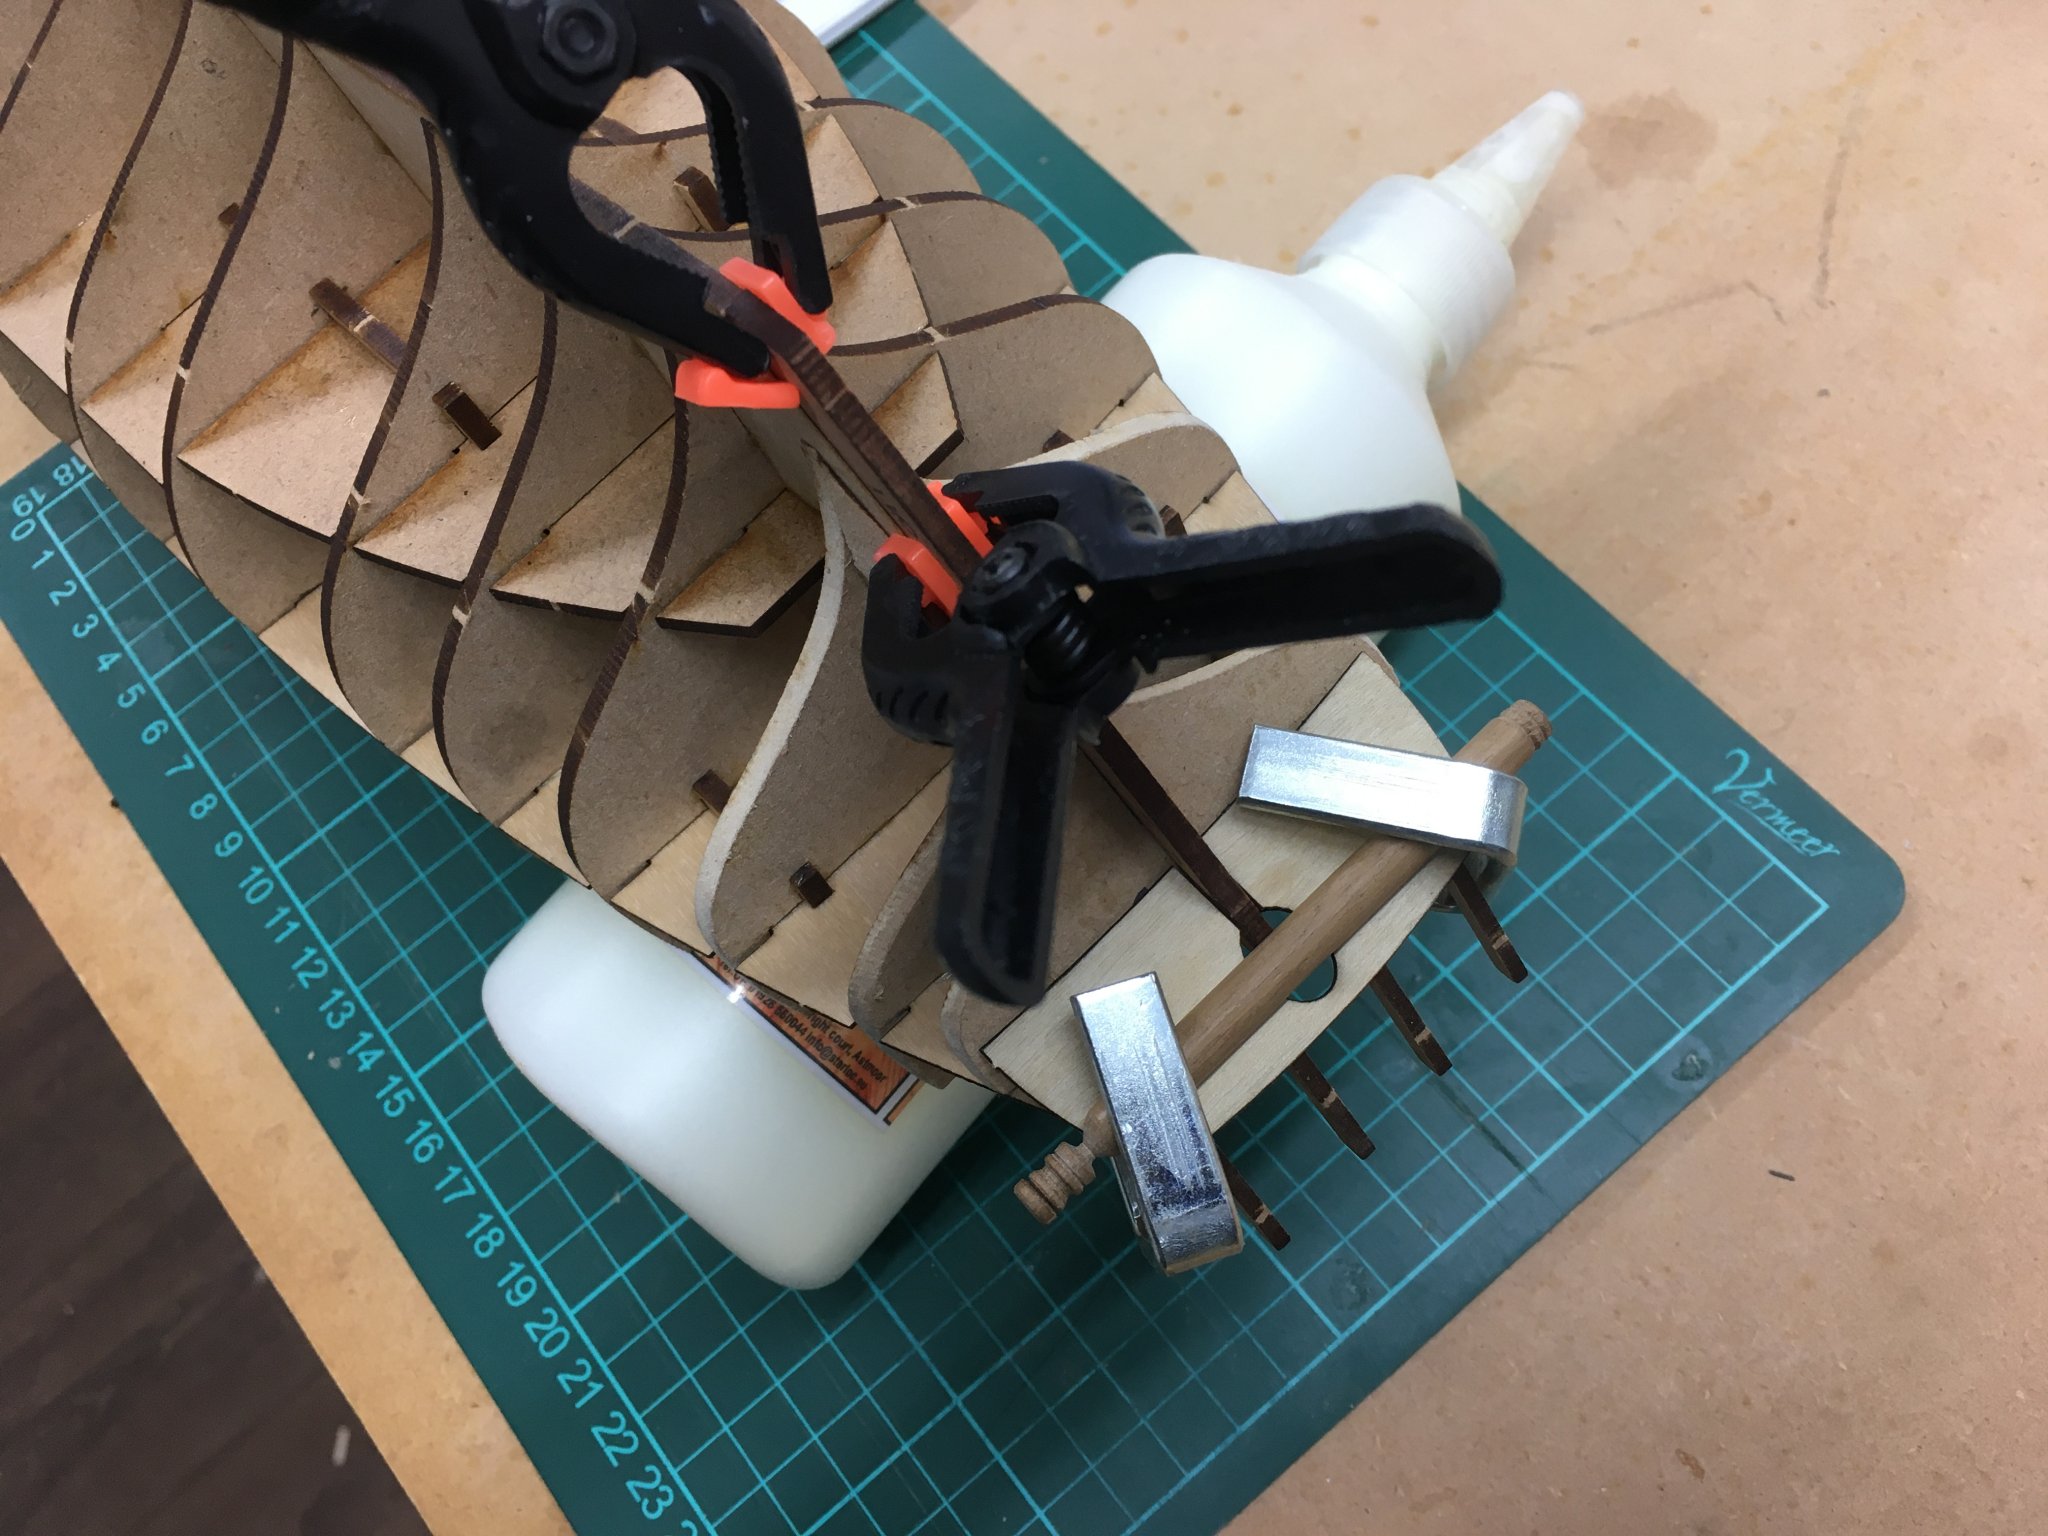
I also found the stern counter timbers tricky, although I did manage to impart a curve to the stern counter by clamping it whilst it was drying:
Here's a link to my Speedy log where I fitted the stern counter timbers.
12 hours ago, dkuehn said:My wales took up most of the space and the boom crutch parts 128 tied into the wales so I left it at that.
I agree with dkuehn - if you can get the boom crutch to tie in neatly with the wales it will look fine. However if you can fit the stern counter timber as intended it will be even better.
Derek
- Edwardkenway, Sjors, chris watton and 3 others
-
6
-
She’s really coming to life now Glenn. As Edward says, that shade of red looks just right to complement the timber.
I also bought the Amati scrapers. I suspect they’ll languish in a drawer for some time before I find a use for them.
Derek
- Edwardkenway and mtaylor
-
2
-
Rigging the spars - silver soldering repairs!
Back in the dockyard after R&R in North Yorkshire. I'm still working on rigging the 130+ blocks and deadeyes required on the masts and yards. Rather than a string of posts setting out repetitive detail I'll just focus on any out-of-the-ordinary points.
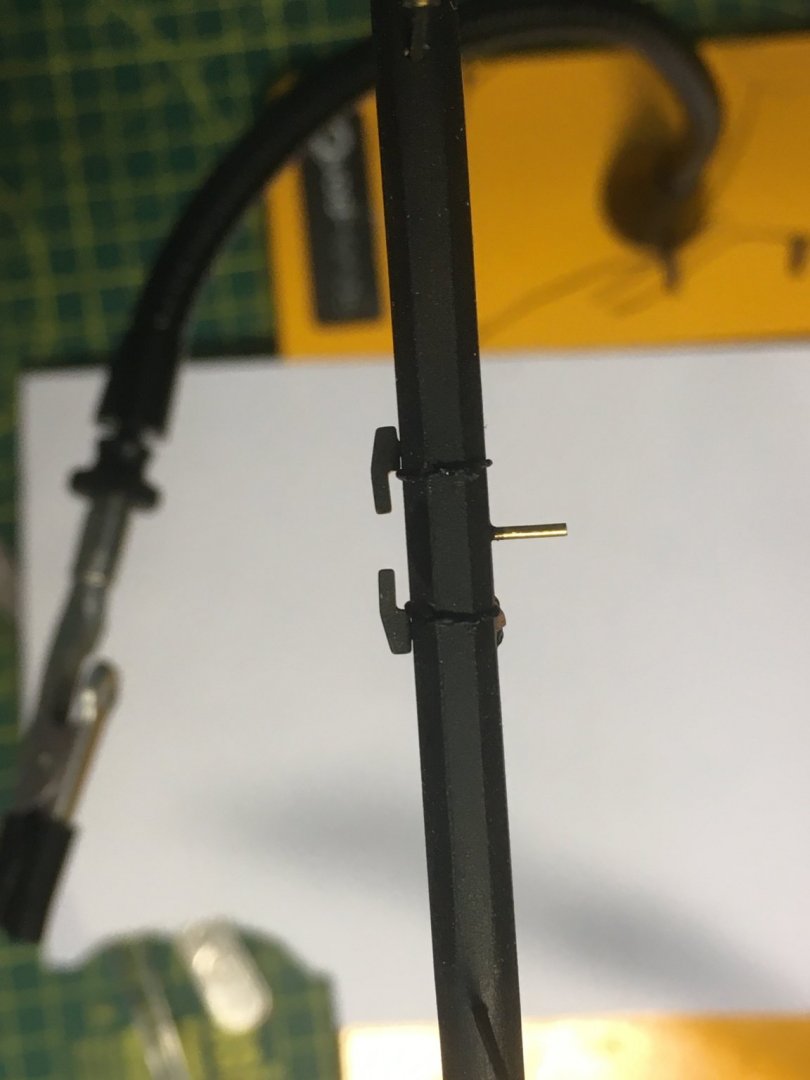
First up, a spot of repair work caused by clumsiness, whereby I managed to break one of the stunsail boom irons on the main yard. These components start out as flat pieces of photo-etch, with a score mark that enables you to bend them into a right angle:
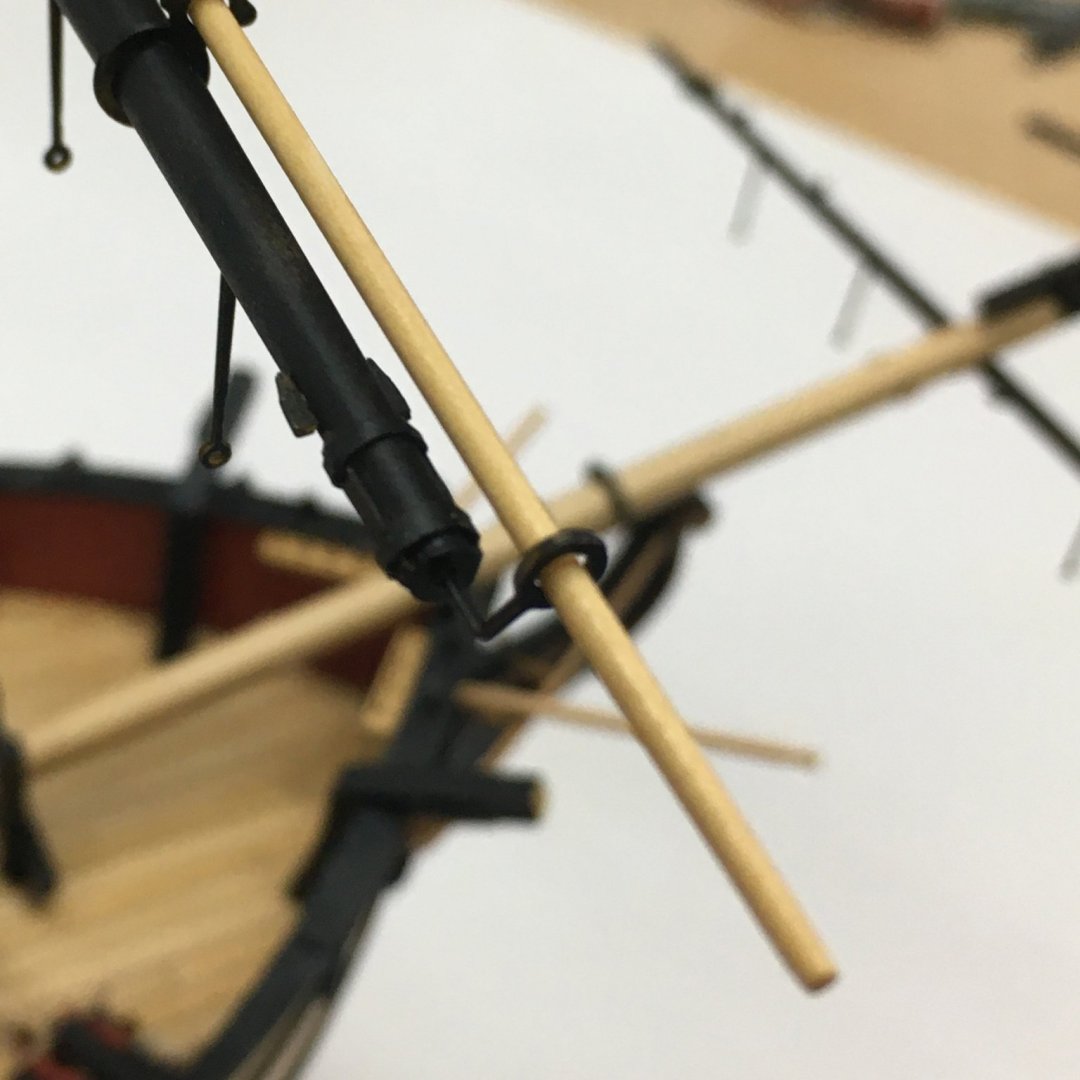
The score mark is a weak point, and unfortunately I bent the boom iron in question a couple of times by mistake when rigging the yard and I had to bend it back into shape once too often. I considered making a new iron from scratch but decided instead to try soldering the bits back together.
Silver soldering has become one of my favourite techniques for joining metal. I struggled with it initially until I discovered silver solder paste. This does away with the need for separate fluxes and solder and makes the whole process so much easier, at least for the tiny components I work with. I suspect model railway engineers handling large chunks of brass might have a different perspective! Here's the kit I use:
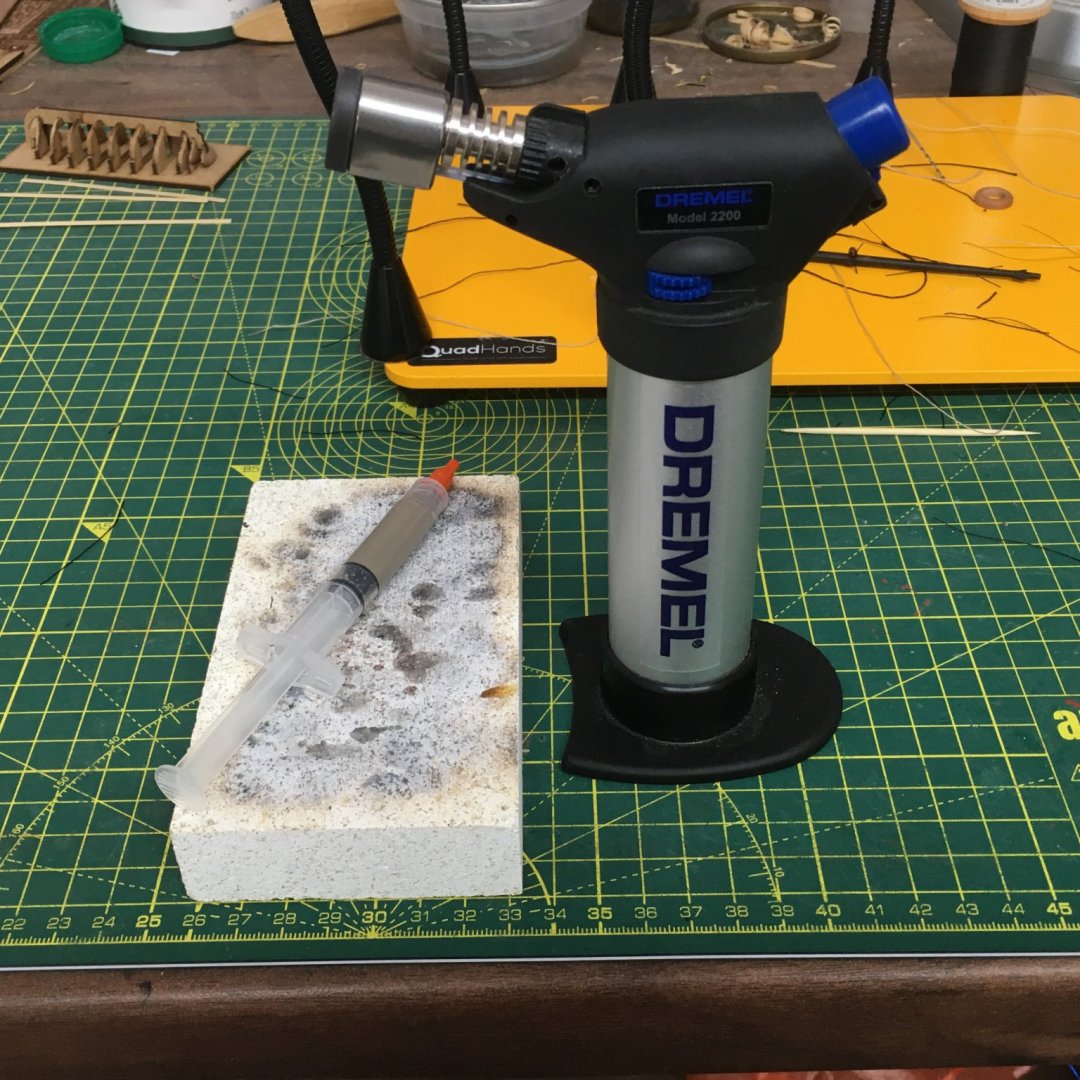
Along with the paste is a refillable gas torch and a fireproof brick. All are readily available from jewellers' suppliers and elsewhere. The paste comes in small tubes - usually about 10g - and seems quite expensive (eg here). However I've had mine years, soldered literally hundreds of items with it, and I hardly seem to have used any. For the boom iron I used a tiny speck, smaller than a pinhead. You can buy different grades of paste, usually rated easy, medium and hard depending on the temperature they flow at. That's an issue if you have to solder a joint close to an existing joint, the idea being that you do the first joint with a higher melting point solder than the second joint, so you don't disturb the first when you solder the second. However that is rarely an issue - I get by with 'easy' solder 99% of the time.
There's lots of information and how-to videos on the web, but for me the key points are that the surfaces to be joined must be clean and in close contact. I used a fine file to clean the boom iron and laid the two pieces flat on the fire brick, touching and with the tiny blob of solder sitting on top of the join. With such tiny components I don't apply the heat directly to the work. If I did, the gas jet would probably blow the components off the fire brick and/or melt the brass. Instead, I aim the flame about one inch to the side of the work then slowly move it closer, circling round to heat the work evenly. You'll know when the work is hot enough, because the paste suddenly liquifies and is wicked into the join.
It takes a bit of practice to get a 'feel' for this - for getting just the right amount of heat to the work without melting it - but it's a lot easier to master than I thought it would be, and once you've got the hang of it it's a doddle.
One of the great things about silver soldered joints is their strength. Once I'd soldered the boom iron I was able to bend it back into shape , confident that it would be as strong as an unbroken piece of brass.
If you've not tried silver soldering, or if you've tried it and given it up as too difficult (as I almost did), then I'd encourage you to give it a go. As I said, the game changer for me was silver solder paste.
Hope this was of some interest.
Derek
- BobG, Edwardkenway, Sjors and 12 others
-
15
-
Looking good! If there was an award for the fastest Flirt/Speedy build you'd be a shoo-in.
- Edwardkenway and dkuehn
-
2
-
Hi Tim. I think the length looks about right - any longer and it might droop to much on the deck. I changed my mind on the side tackle on Speedy at least three times, so I know what you're going through!
Derek
-
-
Great log James - I'm definitely going for this kit when Chris releases it.
On 9/9/2020 at 11:42 AM, James H said:Johnsons Klear
Is this product marketed under a different name in the UK now - a google search suggests it's no longer available?
Thanks
Derek
-
I'm a complete novice at airbrushing unlike the other much more experienced people who've offered advice.
However I've recently bought this modest setup and so far I'm very happy with it. It's a gravity fed double action brush (as most people recommend). The compressor is quiet (to my ear) and doesn't have a tank. All the advice I read before purchase suggested that tanks are unnecessary at the pressures we are likely to work at - the compressor just cuts in as required to maintain the pressure you set and the flow to the brush remains steady. It's small and fits neatly under the workbench. I was advised against using throwaway canisters of compressed air, although I didn't realise you could use large tanks of CO2 like Bob - I'd have dug out my old dive gear if I'd known!
The advice I do follow is to clean the brush thoroughly after each use - there are some good videos on YouTube. It takes a bit of time but it's essential. That just means I have to get better organised to minimise the number of spraying sessions. So for example I waited until I'd completed all the spars on my current Speedy build before spraying them.
Bottom line, airbrushing is a technique I wish I'd picked up years ago - should be especially useful for you if you're into plastic modelling.
Derek
-
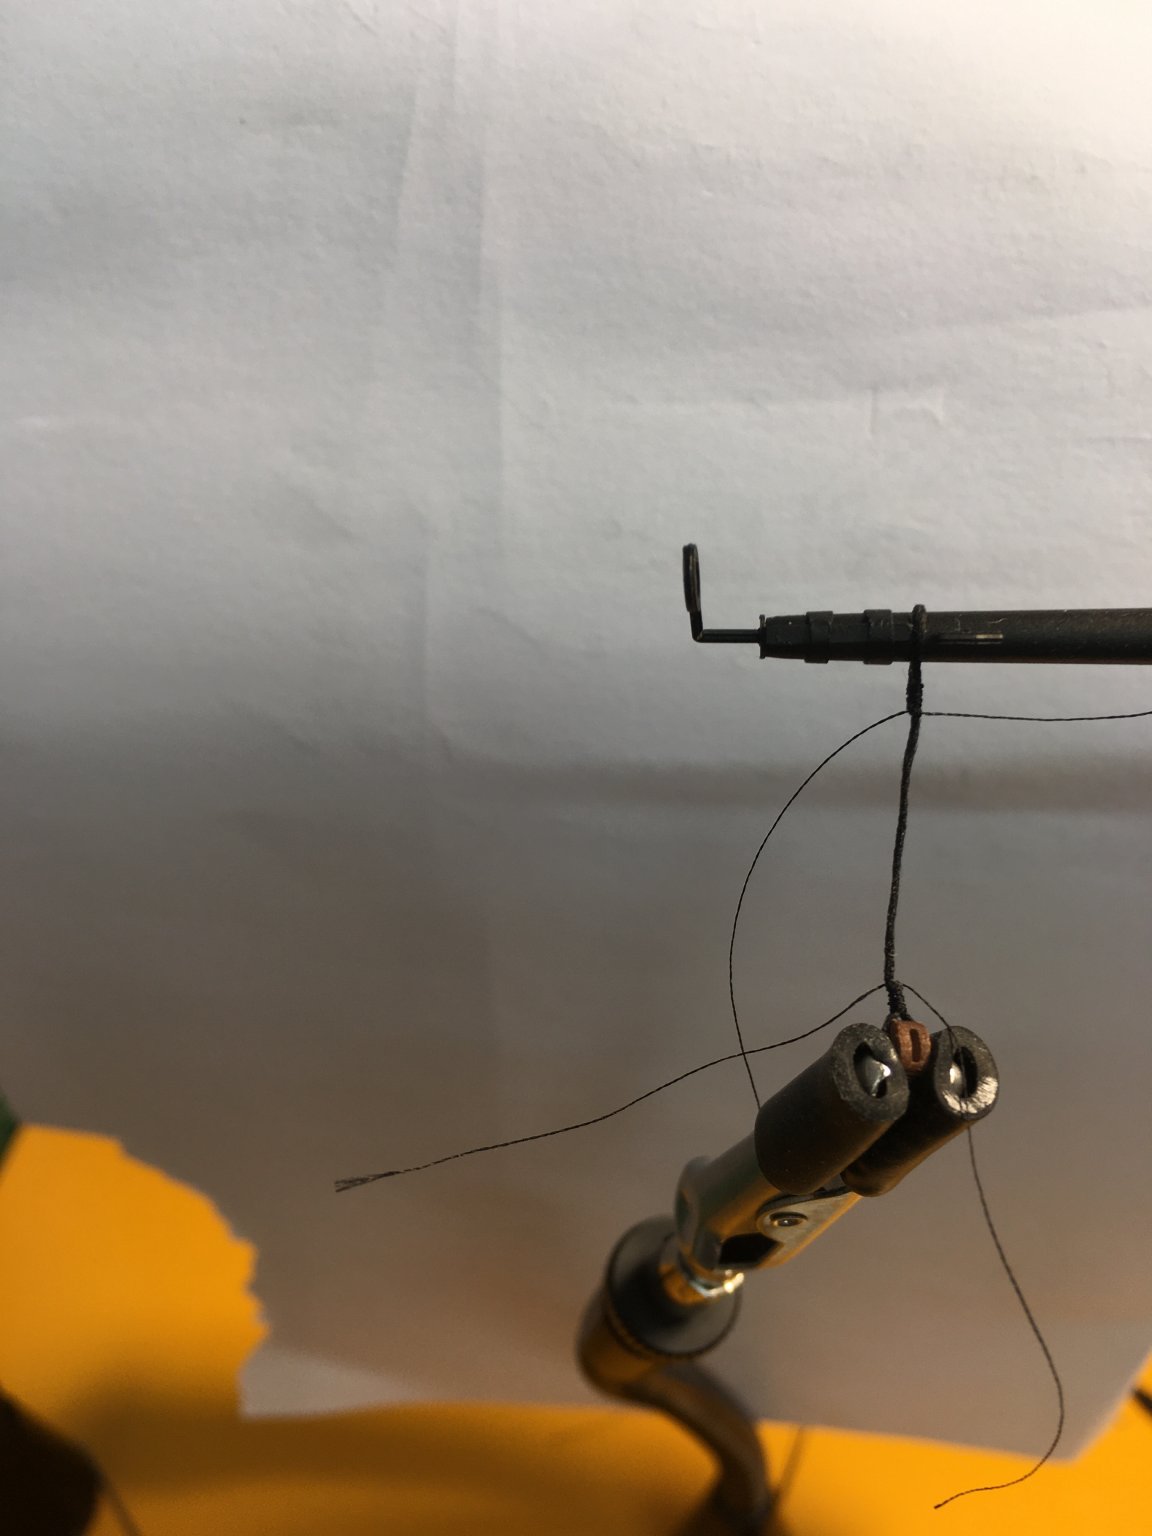
Thanks Edward. Just before I go I wanted to mention I stiffened the rings with fly tying cement in the hope they'd retain their shape. I've edited the log.
Derek
-
Rigging the Spars
We should have been returning from Canada and Alaska about now, but that's had to be postponed 'til next year. Instead we're off to the beautiful North Yorkshire coast near Whitby, of Captain Cook and Dracula fame for a few days R & R. I'll sign off with a few notes about rigging the spars. There's a long way to go, but a lot of it is repetitive so I'll just highlight a couple of general points.
First off, the quality of the blocks is superb - better than any other commercial blocks I've come across. I've made a lot of my own boxwood blocks in the past but I can't match these:
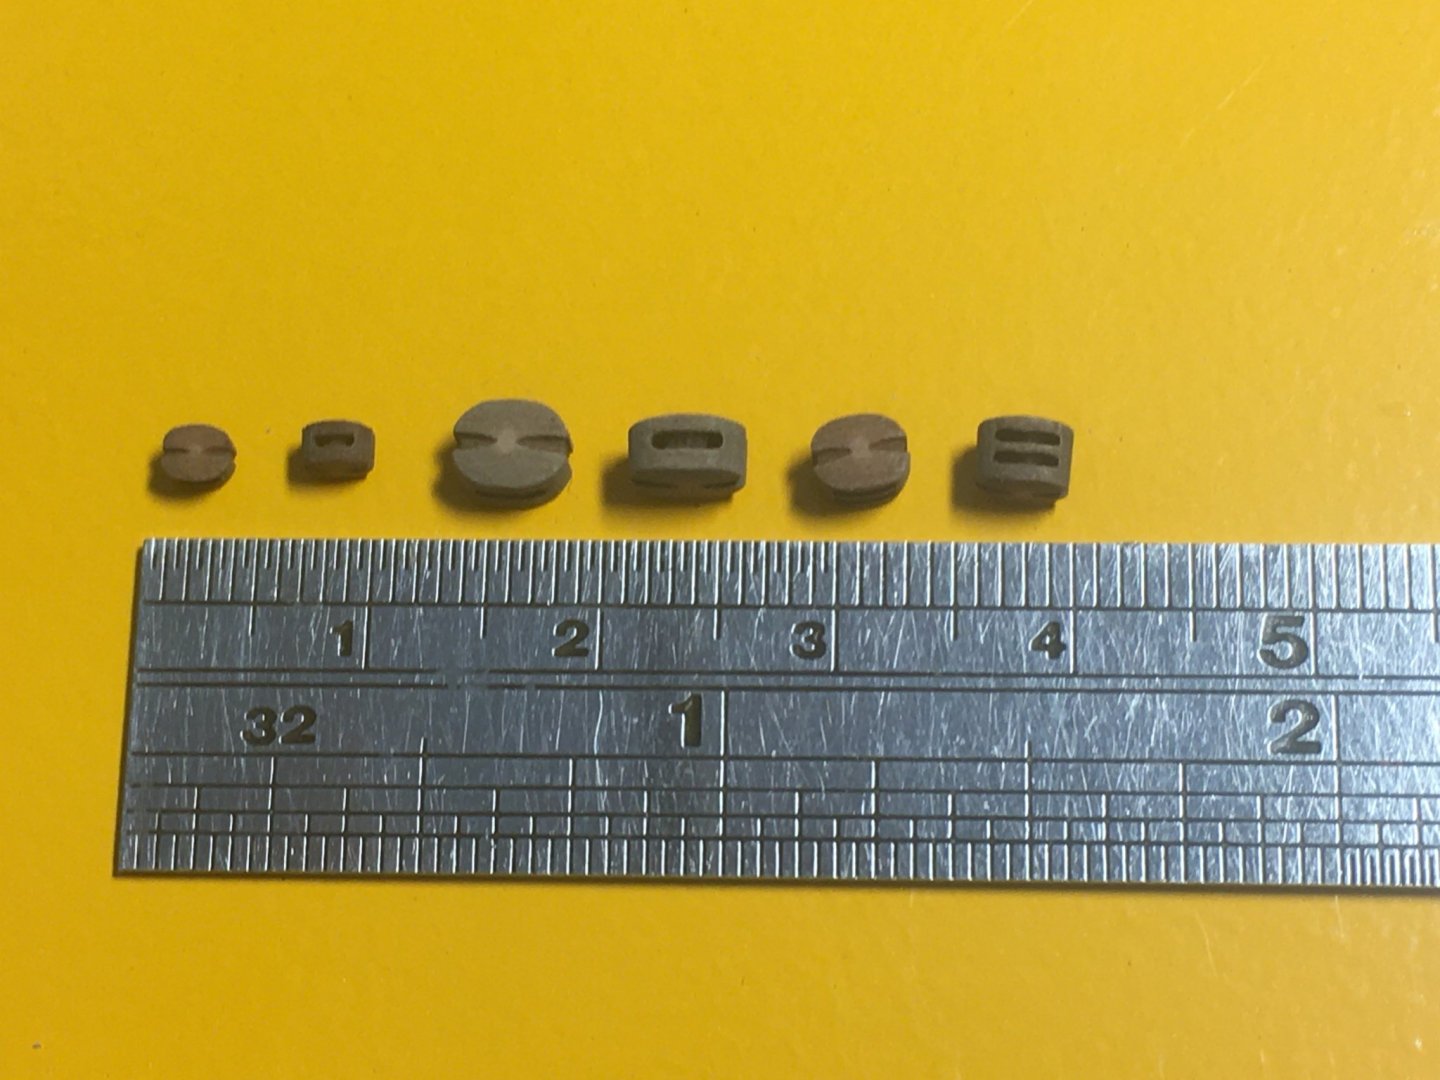
If I was being slightly picky I would point out the limited number of sizes - for example the only single blocks are 3mm and 5mm (I bought 2mm blocks separately to rig the guns). A scratch builder might want to make a wider range to better reflect full size practice. At this scale I honestly don't think it'll stand out as a problem so I'm happy to go with the kit blocks.
As for the rigging line, the quality is reasonable if slightly furry. Running it through my fingers dipped in a 50:50 mix of PVA and water sorted that. The kit supplies a good range of sizes in black and natural, the latter being a pleasing shade of off-white (ecru?). Certainly not the bright white that can spoil the look of an otherwise well-rigged model - to my eye, at least.
One odd point is that the plans often indicate that strops and other elements of standing rigging are to be made from natural thread. I can only assume a transcription error, as the photos in the manual clearly show black line being used where it should be.
On my previous build, Royal Caroline, I tried to follow full-size rigging practice as far as possible, for example serving strops where called for, and splicing eyes into the ends of strops so I could seize them round yards. I enjoyed it, but much of the work was virtually invisible, even at 1:48 scale. I will certainly carry some of that work forward into Speedy - for instance serving shrouds and stays where appropriate - but for less visible rigging elements I decided quick and easy was the way to go.
So, to rig a block to a yard I just tied a short length of line round the block with a dab of ca to hold it in place. I then tied the line round the yard, making sure the simple half-knot was positioned where it would be least visible. Another blob of ca and trimming with a sharp scalpel blade and job done.
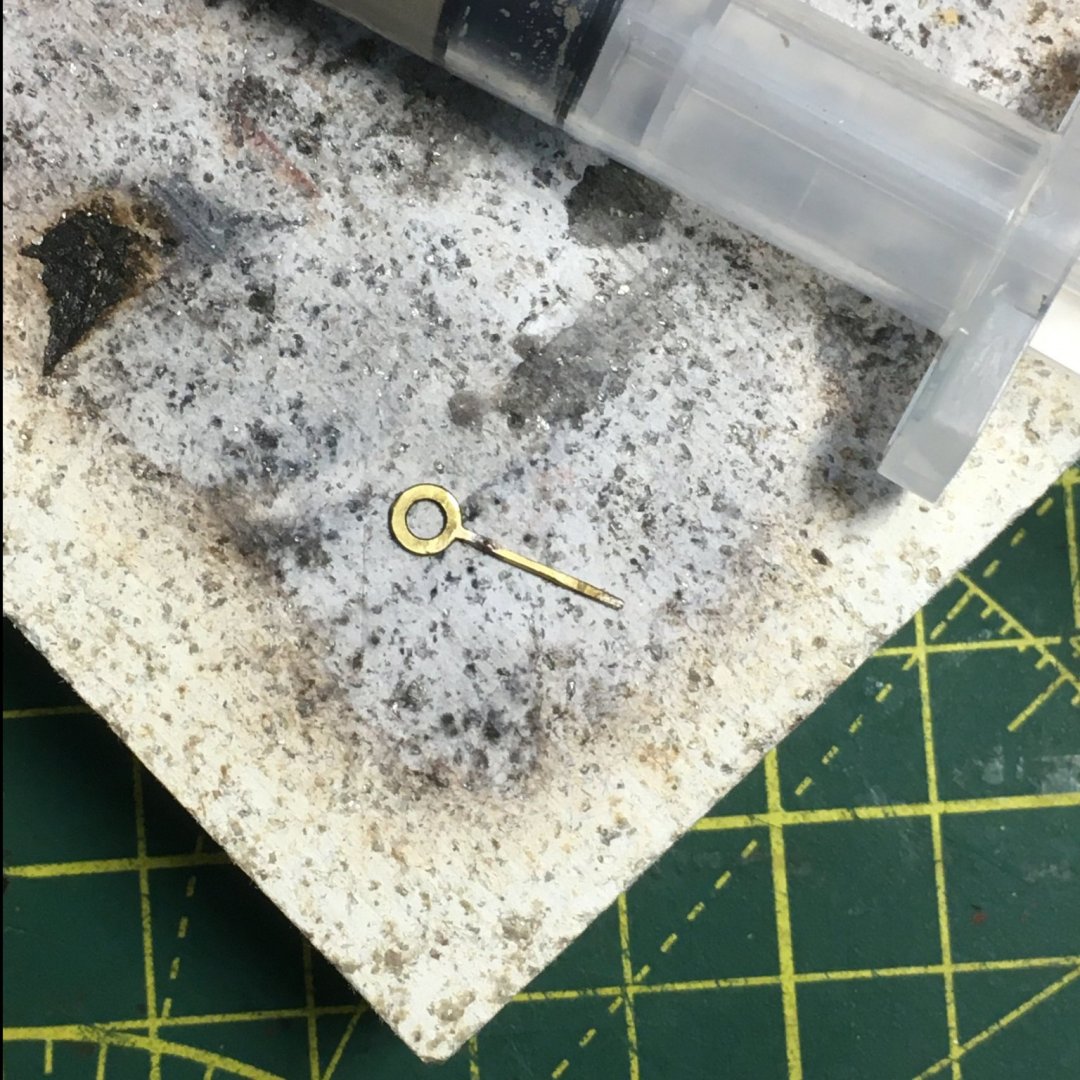
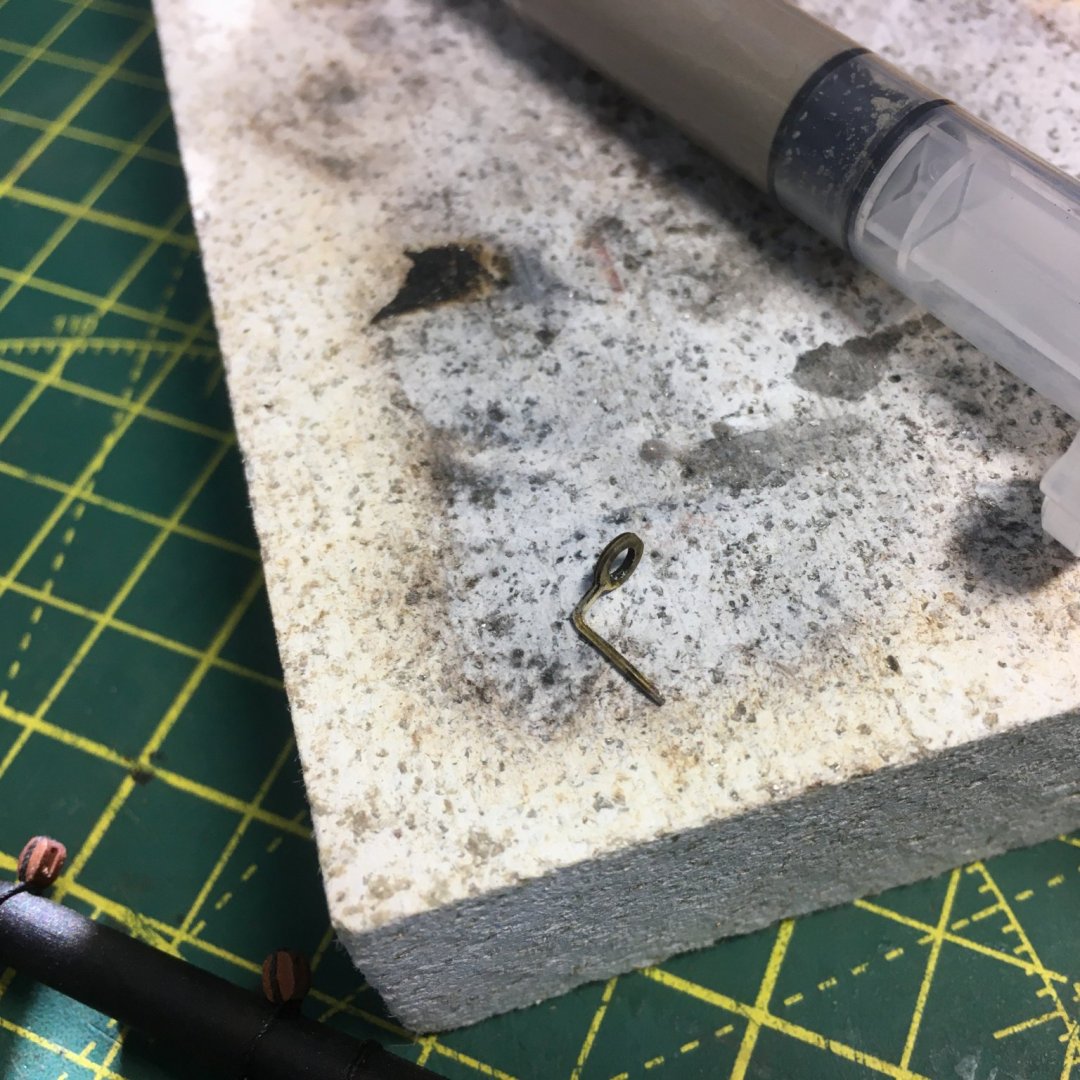
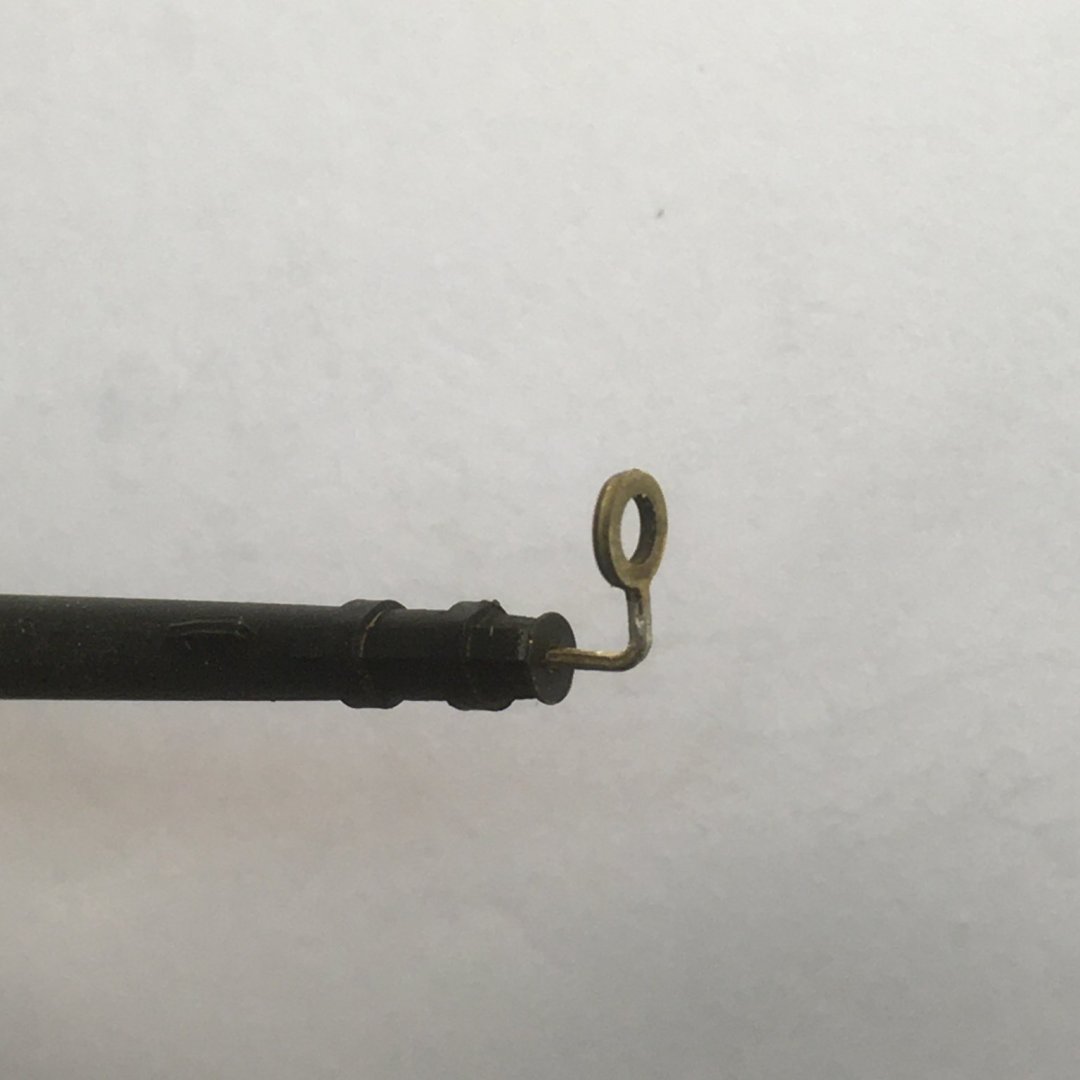
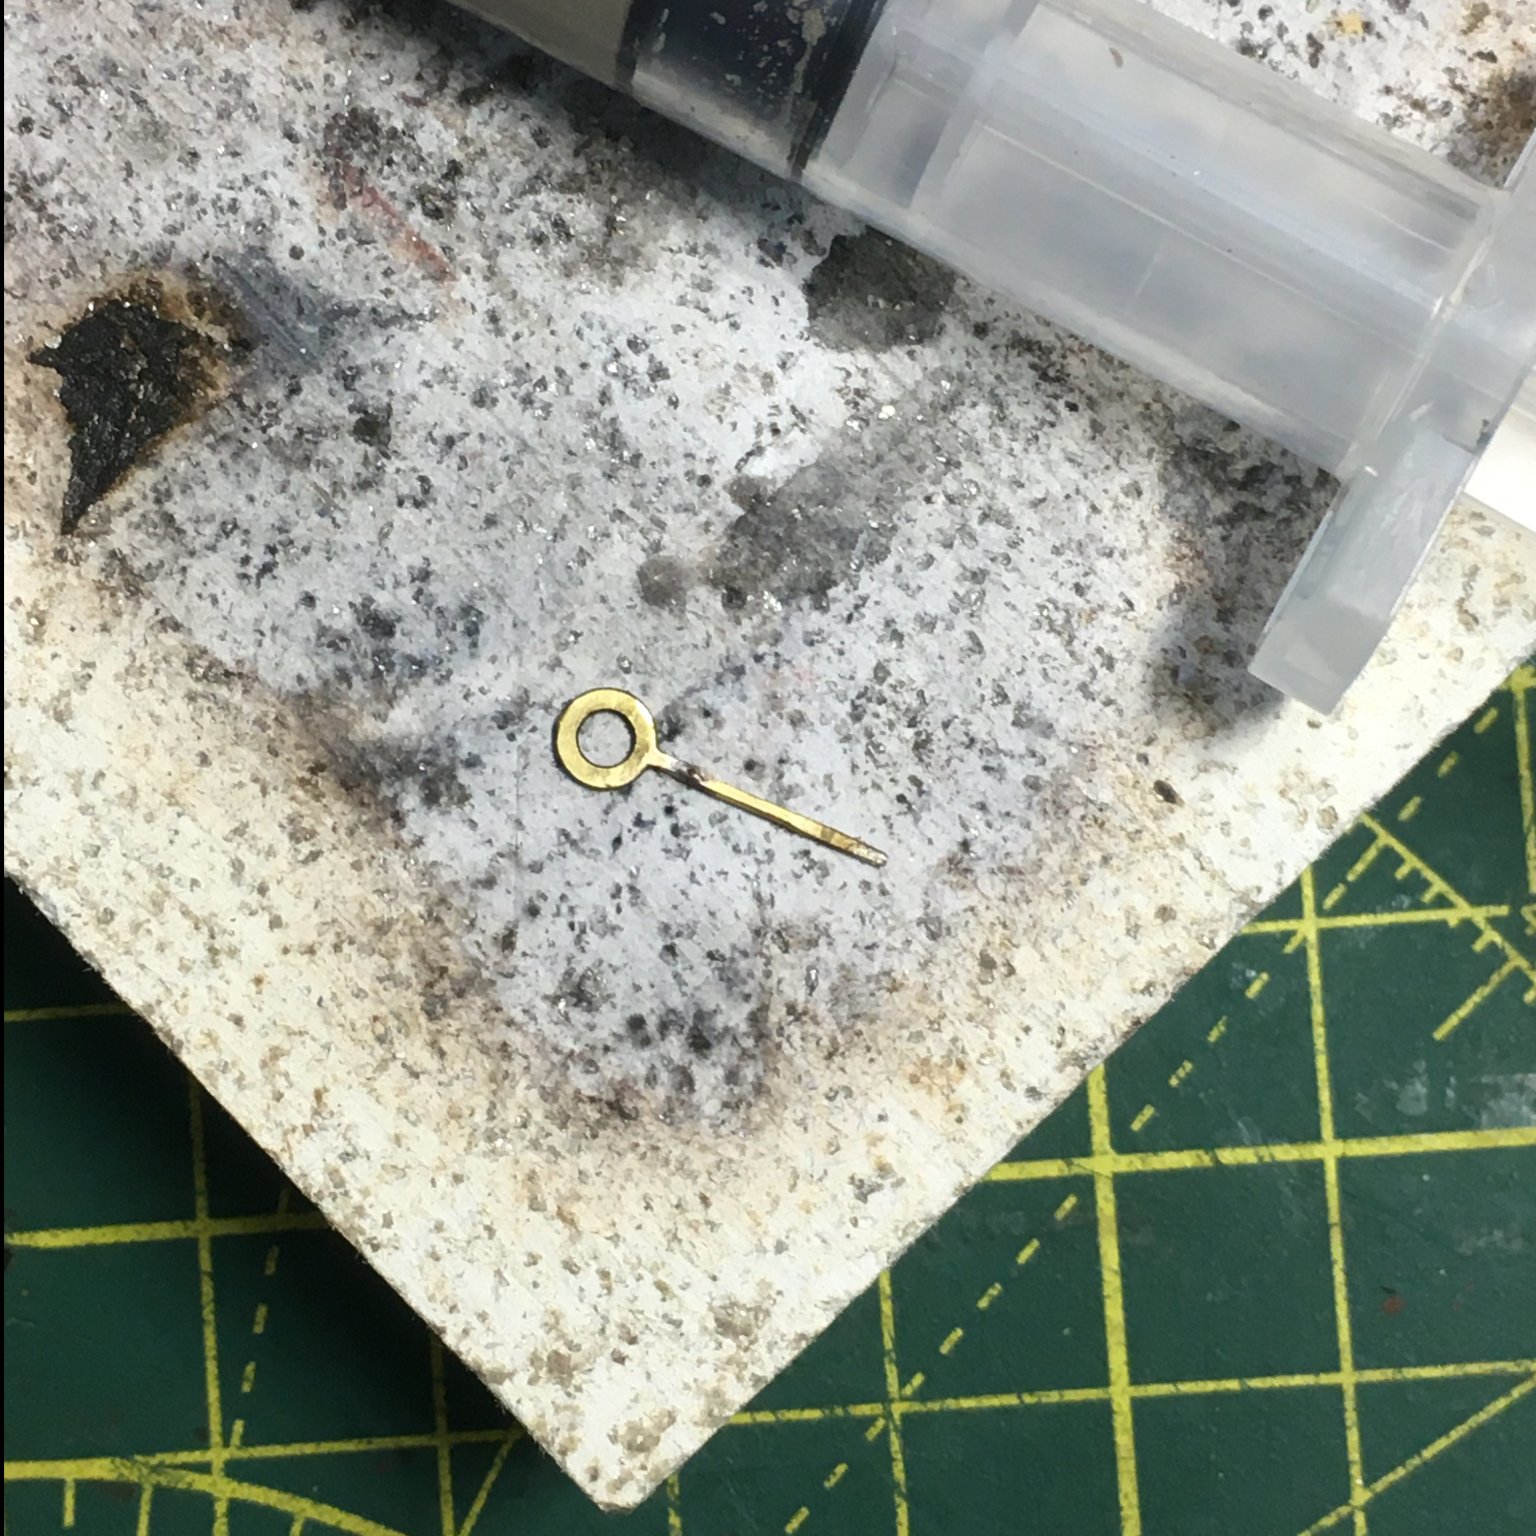
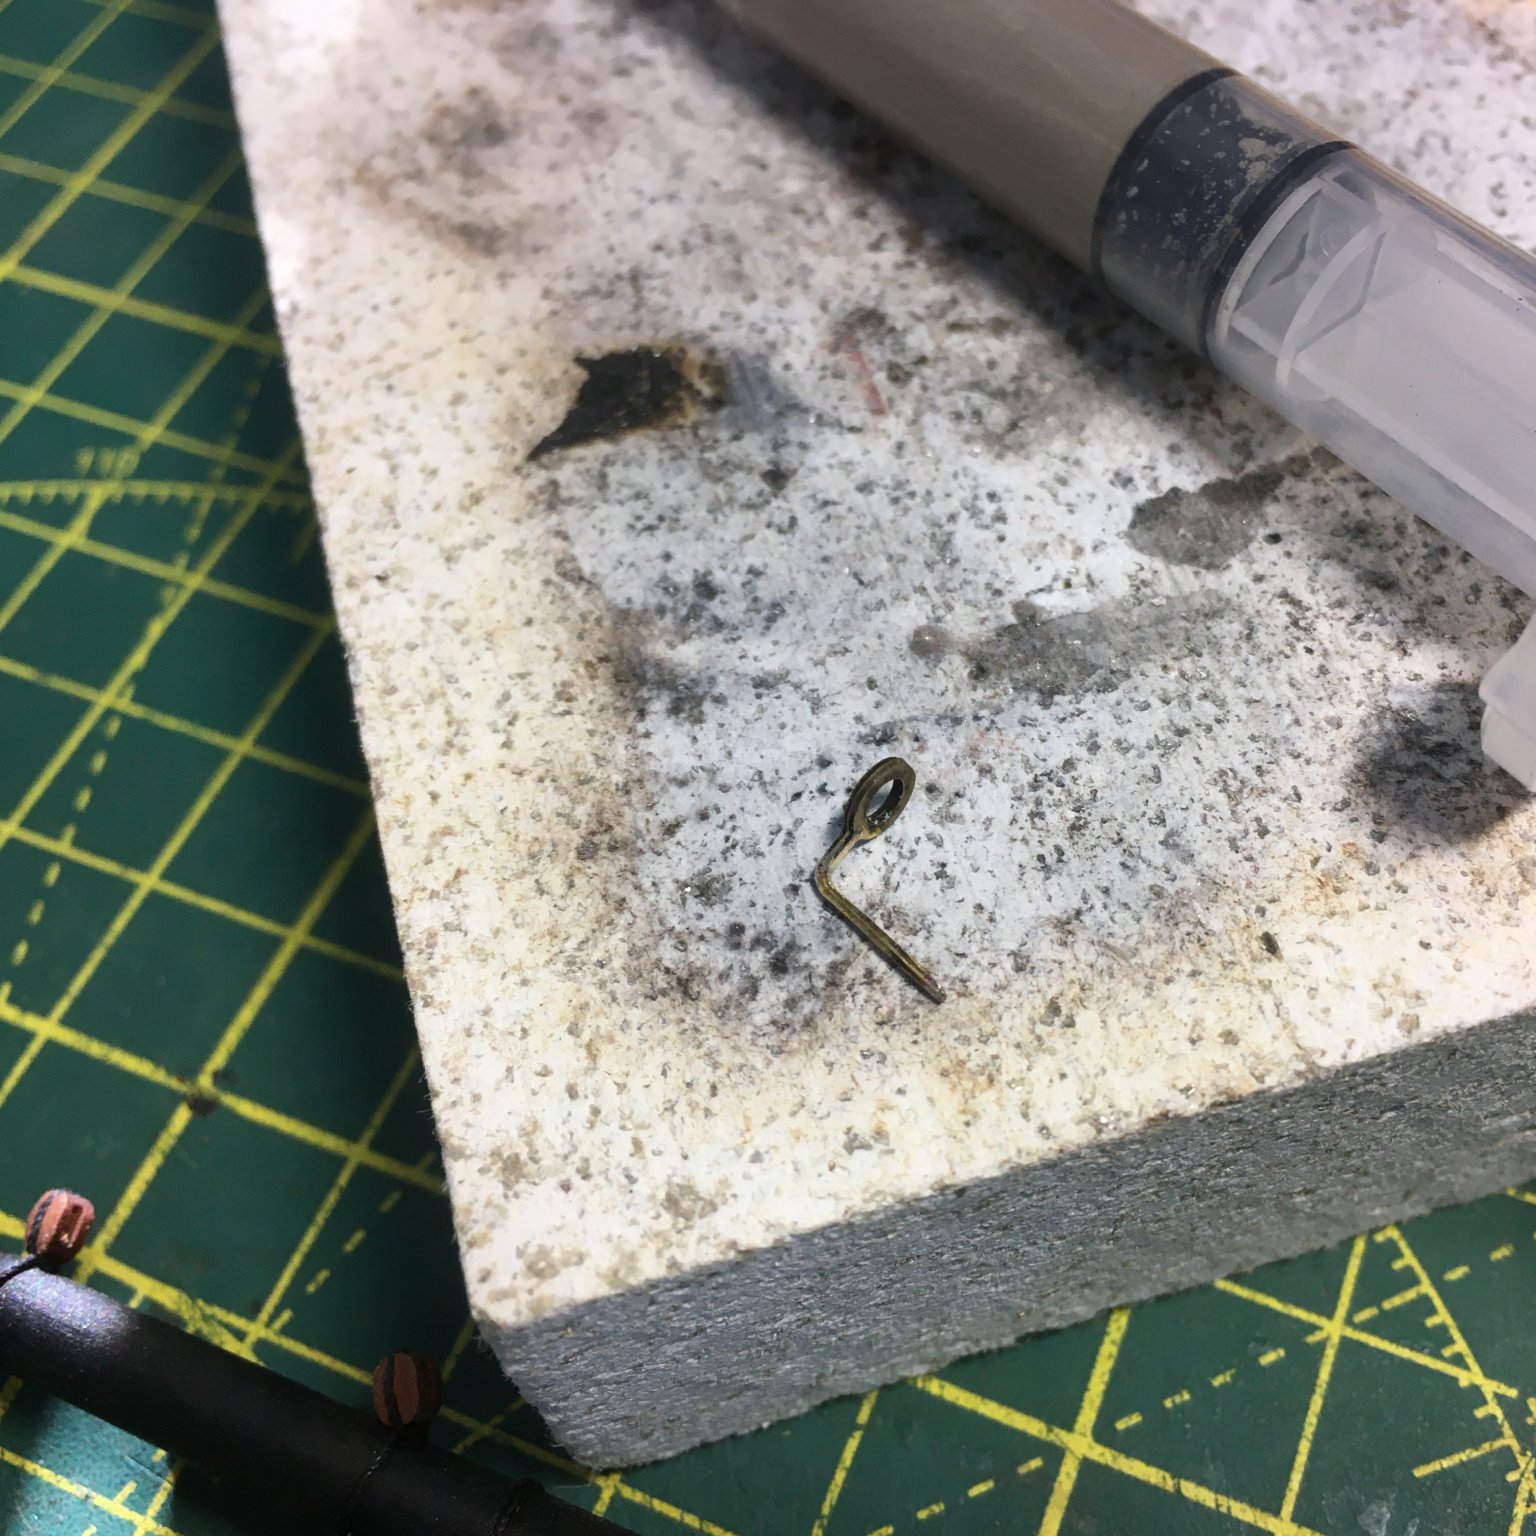
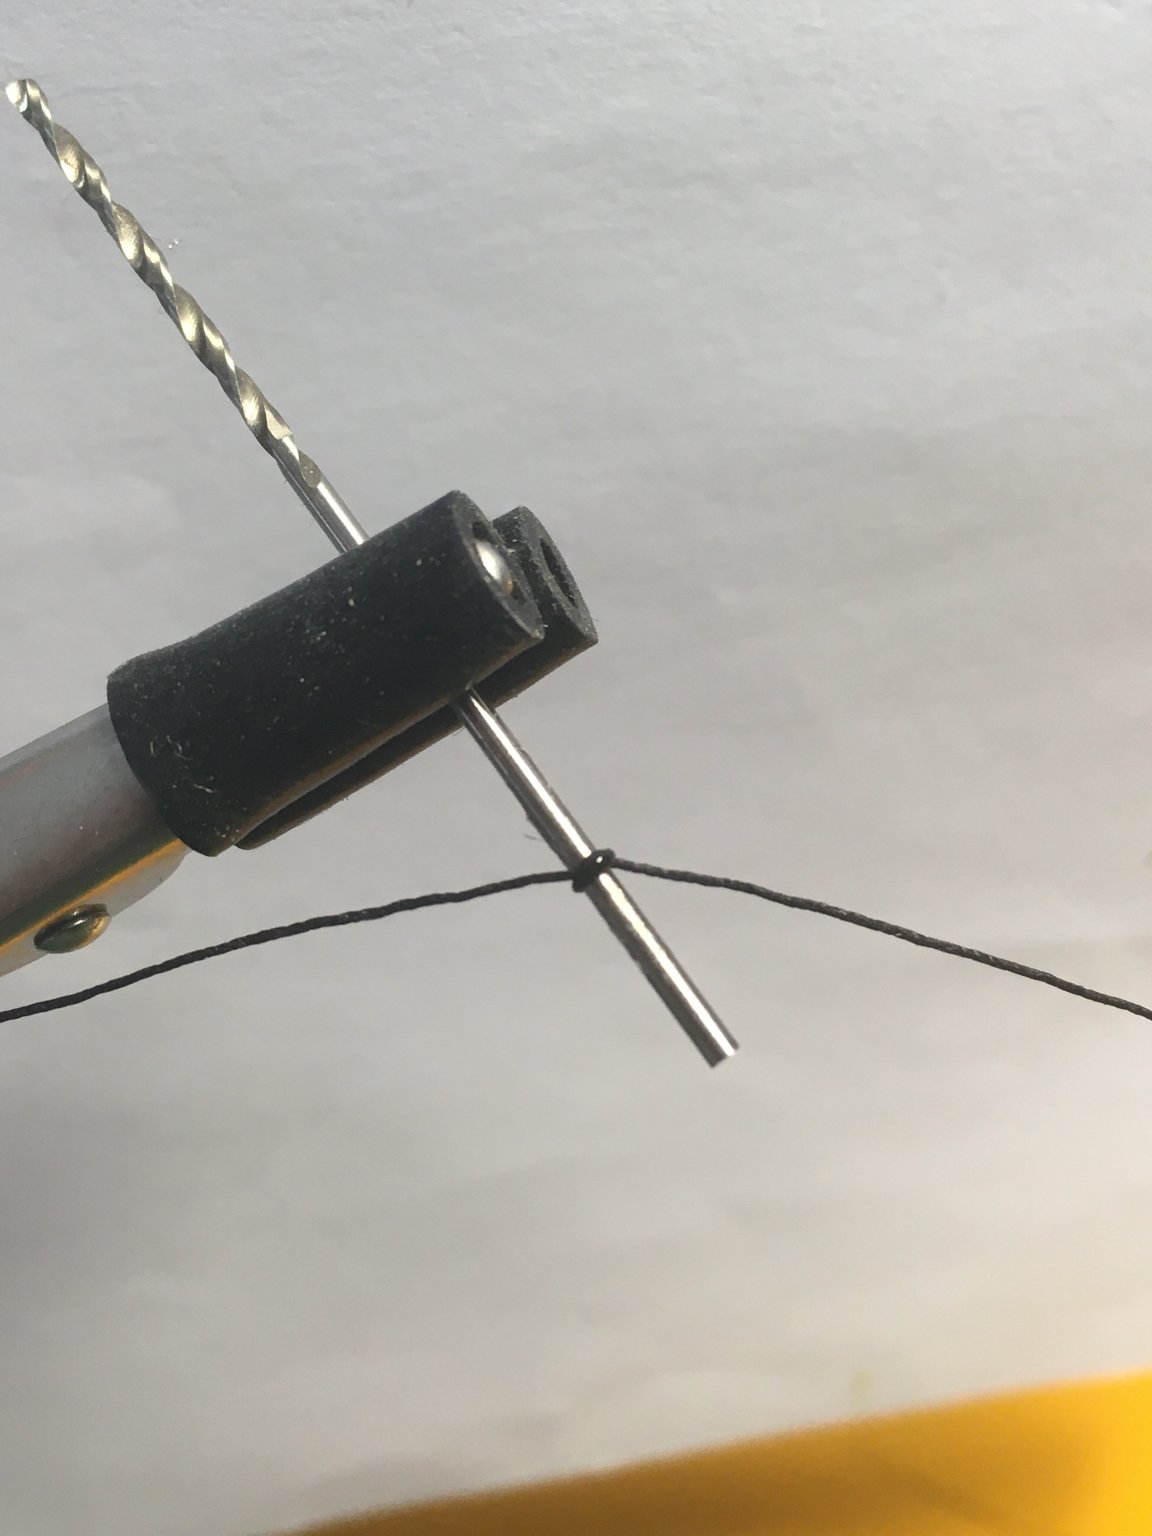
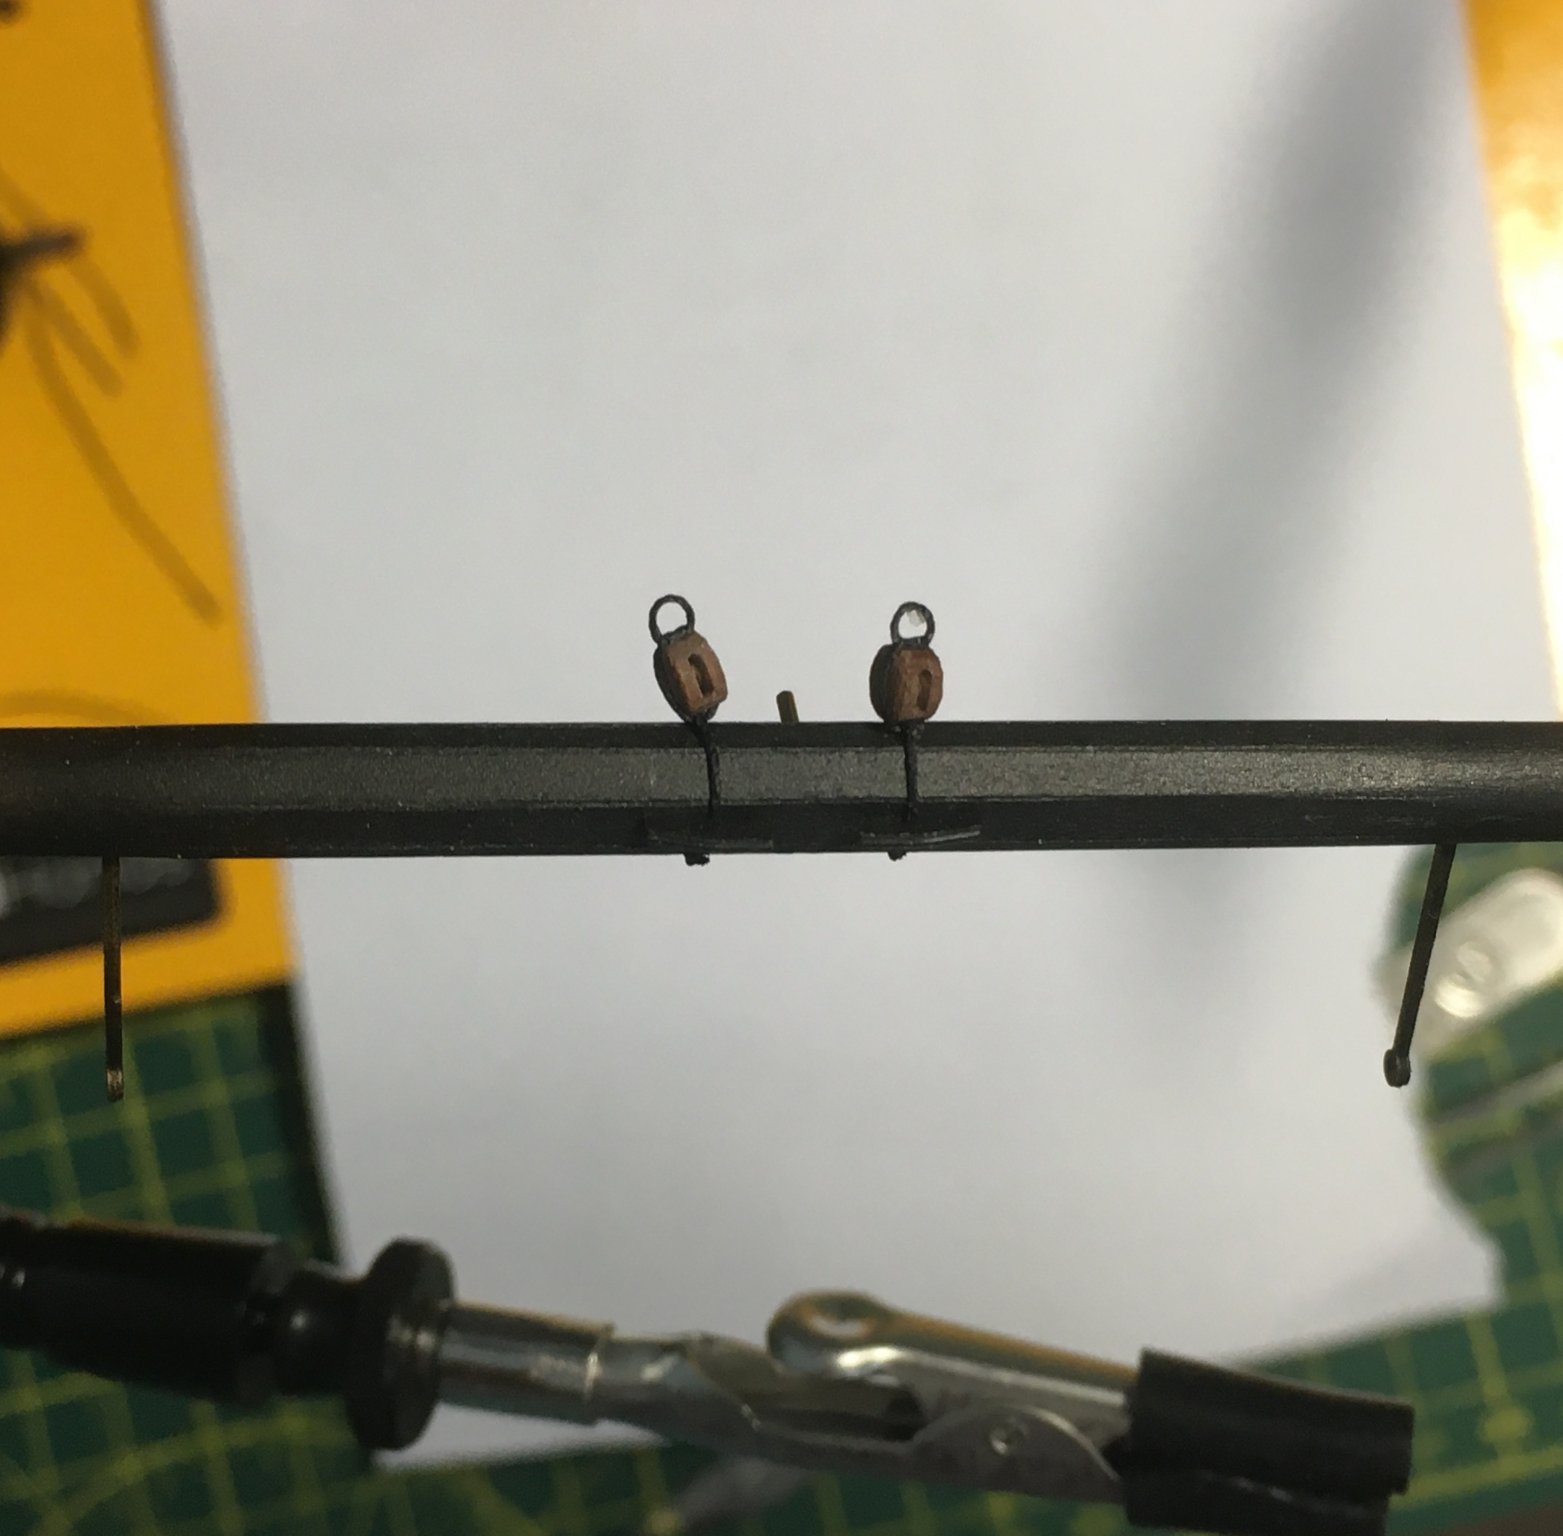
Where a ring is called for I first tied the line round a drill bit, in this case 1mm. With the drill bit still in place I tied the line round the block and proceeded as before:


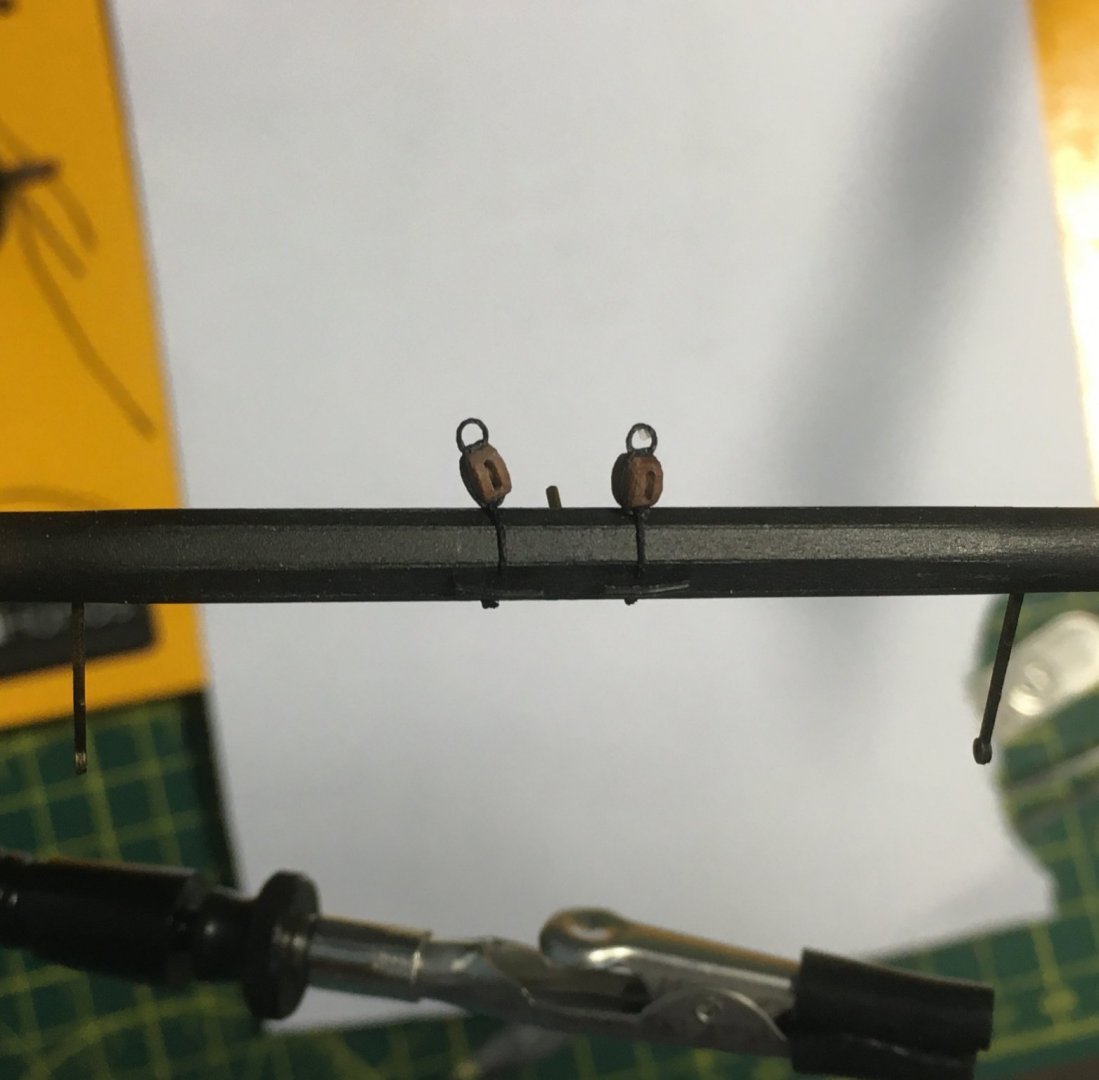
On reflection, the ring is probably a tad too large - I might redo with a 0.8mm drill bit. (Edit: I've stiffened the rings with some fly-tying cement in the hope they'll retain their shape).
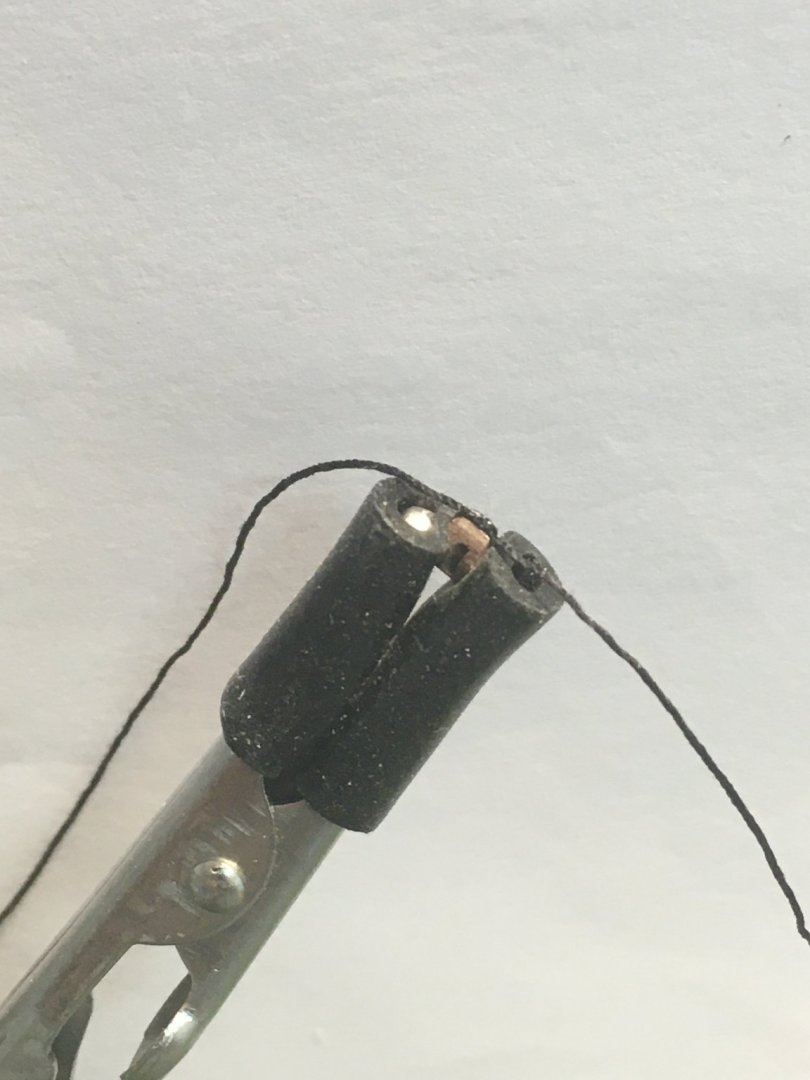
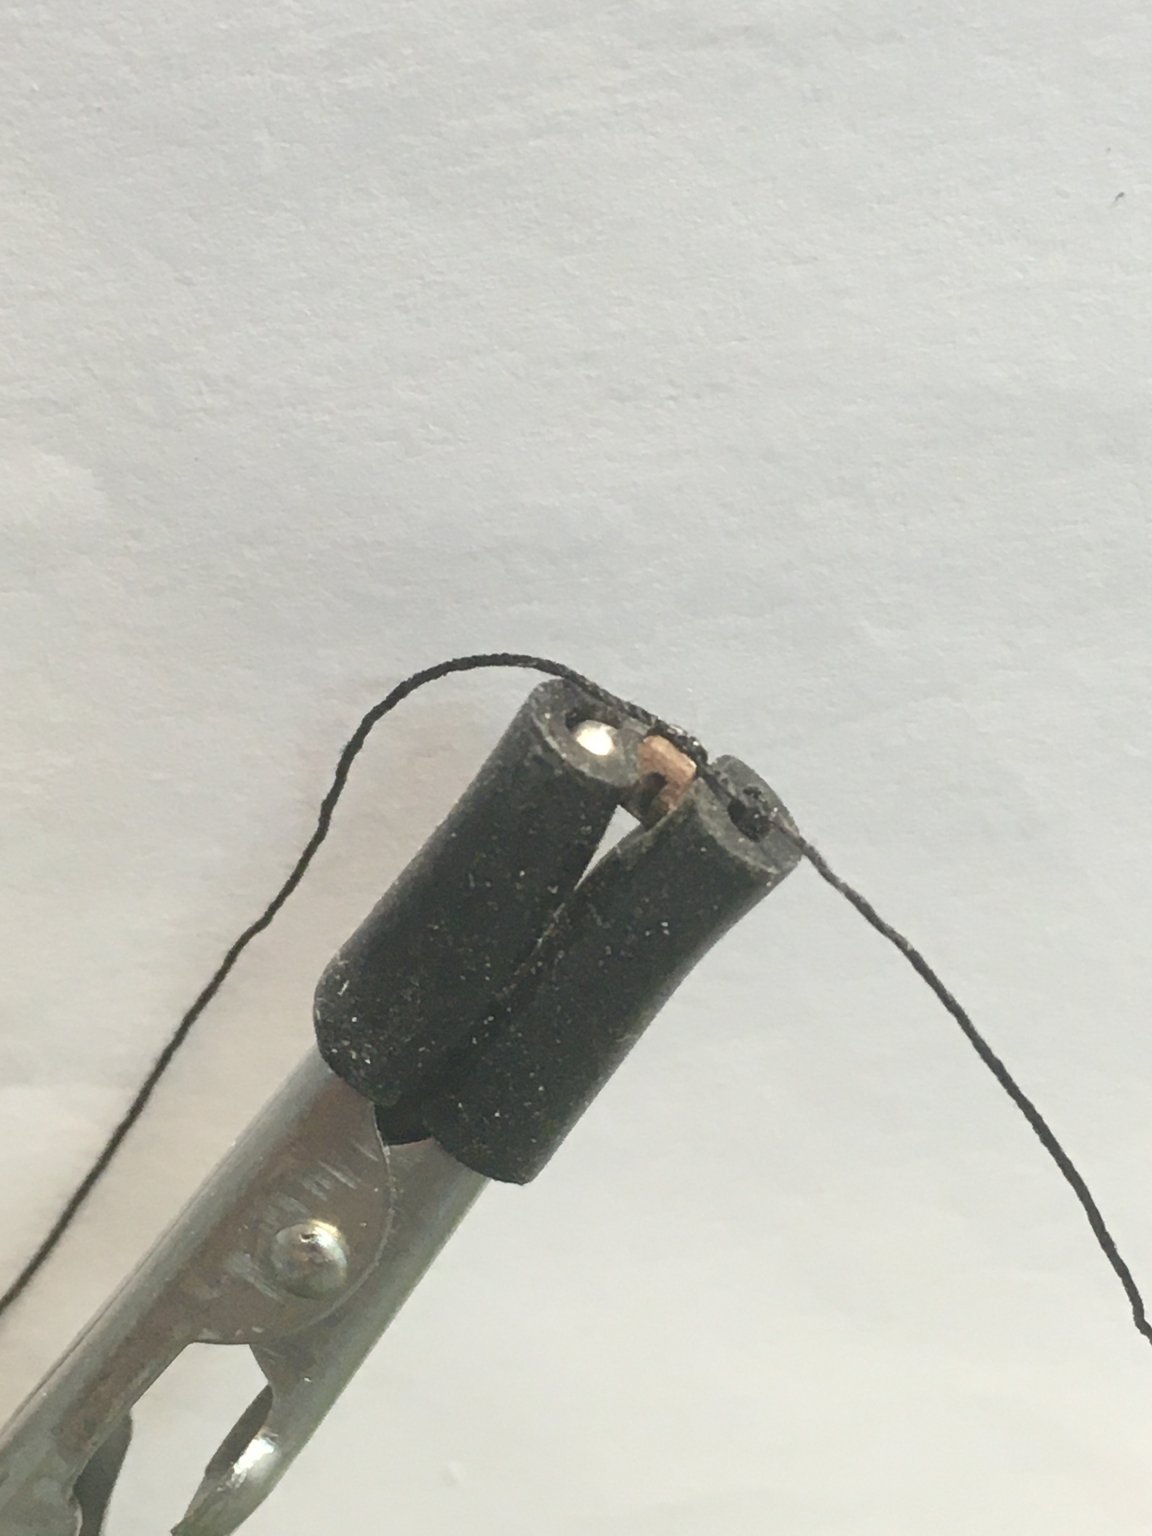
On rigging items that require seizing, like this brace pendant, I'm using the 18/0 fly fishing thread I've described before:

Right, off for that R & R!
Derek
- Sjors, KARAVOKIRIS, CiscoH and 8 others
-
11
-
Hi John
Thanks for taking the time to share this information, and for your kind comment about my builds.
I should have mentioned this in my log (so thanks for prompting me!) but I have stopped using the method I described earlier. The problem was precisely the speed of action of the blackening solution that you highlight. Because I was brushing the solution onto the PE components rather than dipping them all in one go, it took quite some time to cover them all both sides and edges. The 'minute or so' I described was mostly the time it took to apply the Brass Black. By that time, many of the components would have extra deposits of black that would rub off. Rubbing the excess off with a cloth and repeating the process worked, but in the end I figured it would be at least as quick to separate the components from the sheet and dip them all together in smaller batches.
Thanks again
Derek
- BobG and Edwardkenway
-
2
-
-
45 minutes ago, glbarlow said:
thingy covers a lot of ground.
...but don't forget, some thingies are whotsits, and others are oojimaflips. And don't get me on to doodahs! (If you've not already guessed, I'm on my third largish glass of red).
Derek
-
On 8/29/2020 at 6:04 PM, drumgerry said:
Is it just a question of measuring the distance between bulkheads and marking out the points on the planks?
If I've understood your question correctly, the answer's yes. Have you seen Chuck Passaro's planking videos? They're under <more> <planking techniques> on the menu bar.
Anyway, you're doing a really great job - your first planking looks as good as second planking so far!
Derek
-
...and I promise that’s the last time I’ll mention it. Honest 🤐😇!
-
The last word on euphroes (hopefully!).
According to the Oxford English Dictionary, euphroe comes from the Dutch juffrouw, meaning deadeye, which in turn comes from jong + vrouw = young woman, as Sjors said. According to the OED, earlier Dutch forms of the term young woman included yuffrouw, which sounds even closer to euphroe.
Now I need a drink!
- glbarlow, Sjors and Edwardkenway
-
3
-
15 hours ago, glbarlow said:
I’m trying to think what it means that you have or even know about a book with this title🤣😂
It's a great book! One of several fine nautical dictionaries, including the one Edward kindly included in the previous post (none mention "sanding the rabbit's bottom" though 🐇😀) **
**other readers will need to visit Glenn's Lady Nelson log for this reference.
-
-
Thanks Vane, much appreciated.
14 hours ago, Sjors said:In Dutch we call it “jonge vrouw” young woman
I looked up 'euphroe' in Sailor's Word Book - A Dictionary of Nautical Terms by Admiral Smyth, published in 1867. The principal spelling is given as 'uvrou', which certainly sounds like a corruption of the Dutch (at least to an Englishman's ears!). I love the way an interest in model shipbuilding leads into so many other fascinating areas of maritime and social history. Thanks again for pointing me in the right direction.
Derek
- Nunnehi (Don), BobG and egkb
-
3
-
Great to see another Vanguard model being built. The more logs the merrier.
27 minutes ago, dkuehn said:So my posting of this log is for purely selfish reasons. 😀
Nothing wrong with that. If I didn't keep a log I'd probably forget techniques from one model to the next. If others get something from the log that's great, but it's at least as much for my benefit.
Good luck
Derek
- Edwardkenway, BobG, chris watton and 1 other
-
4


HMS Flirt 1772 by drumgerry - Vanguard Models - 1:64 Scale.
in - Kit build logs for subjects built from 1751 - 1800
Posted
Well done Gerry!
That’s a great job on the first planking. I wouldn’t say you are slow - you clearly work steadily and carefully and the results show. You’ve produced a perfect base for the second planking.
Derek