DelF
-
Posts
1,409 -
Joined
-
Last visited
Content Type
Profiles
Forums
Gallery
Events
Everything posted by DelF
-
 Glad to hear you guys are getting on well with your quadhands. I wouldn’t have known about them if it wasn’t for this forum. Yet another example of what a great site this is for sharing information and ideas.
- 725 replies
-
- 2
-

-
- vanguard models
- speedy
- (and 1 more)
-
Just catching up Tim - excellent work on your spars and serving. Derek
- 436 replies
-
- 2
-
-
- vanguard models
- alert
- (and 1 more)
-
That's a good idea Tim - I think I'll try that. Thanks. I'll still have to seize the deadeyes with the masts fitted on the model to get the heights right, but that should be easier as I'll be able to swing the shroud up out of the way of the ship. I expect the quadhands will be extra useful. Derek
- 725 replies
-
- 1
-
-
- vanguard models
- speedy
- (and 1 more)
-
Hi John. Ideally, yes, I’d use the same seizing. On previous builds I made up each pair of shrouds off the model. I fitted the lower masts first, so I could fit the shroud loop over the masthead before caps were fitted. This time I’ve made up the whole masts first, which means I’ll have to seize the loops on the model. I’m not sure how easy it’ll be to do the proper seizing on the model - I’ll try, but I may have to do a simpler version! Hope this helps. What model are you working on? Derek
- 725 replies
-
- 1
-
-
- vanguard models
- speedy
- (and 1 more)
-
Thanks Tim & Glenn Starting from Step 4, take the left hand line and start wrapping it round to form the riding turns as shown in Step 5. These turns are literally 'riding' on top of the first layer, with each riding turn lying in the groove between each pair of turns in the first layer. That's why there is one fewer riding turn. Let me know if that's not clear and I'll try to explain more fully. As for locating the deadeyes in shrouds, I'll cover that in due course, but in brief I use a little jig comprising a piece of wood with pins in, such that the pins locate in the holes in a pair of deadeyes and so hold them the right distance apart. I'm sure you'll find good descriptions and photos of this technique in other folks' build logs. Derek
- 725 replies
-
- 4
-
-

-
- vanguard models
- speedy
- (and 1 more)
-
Thanks for the 'Thanks' Glenn - I recalled you saying you'd be interested in my approach to shrouds so I'm glad you found this useful.
-
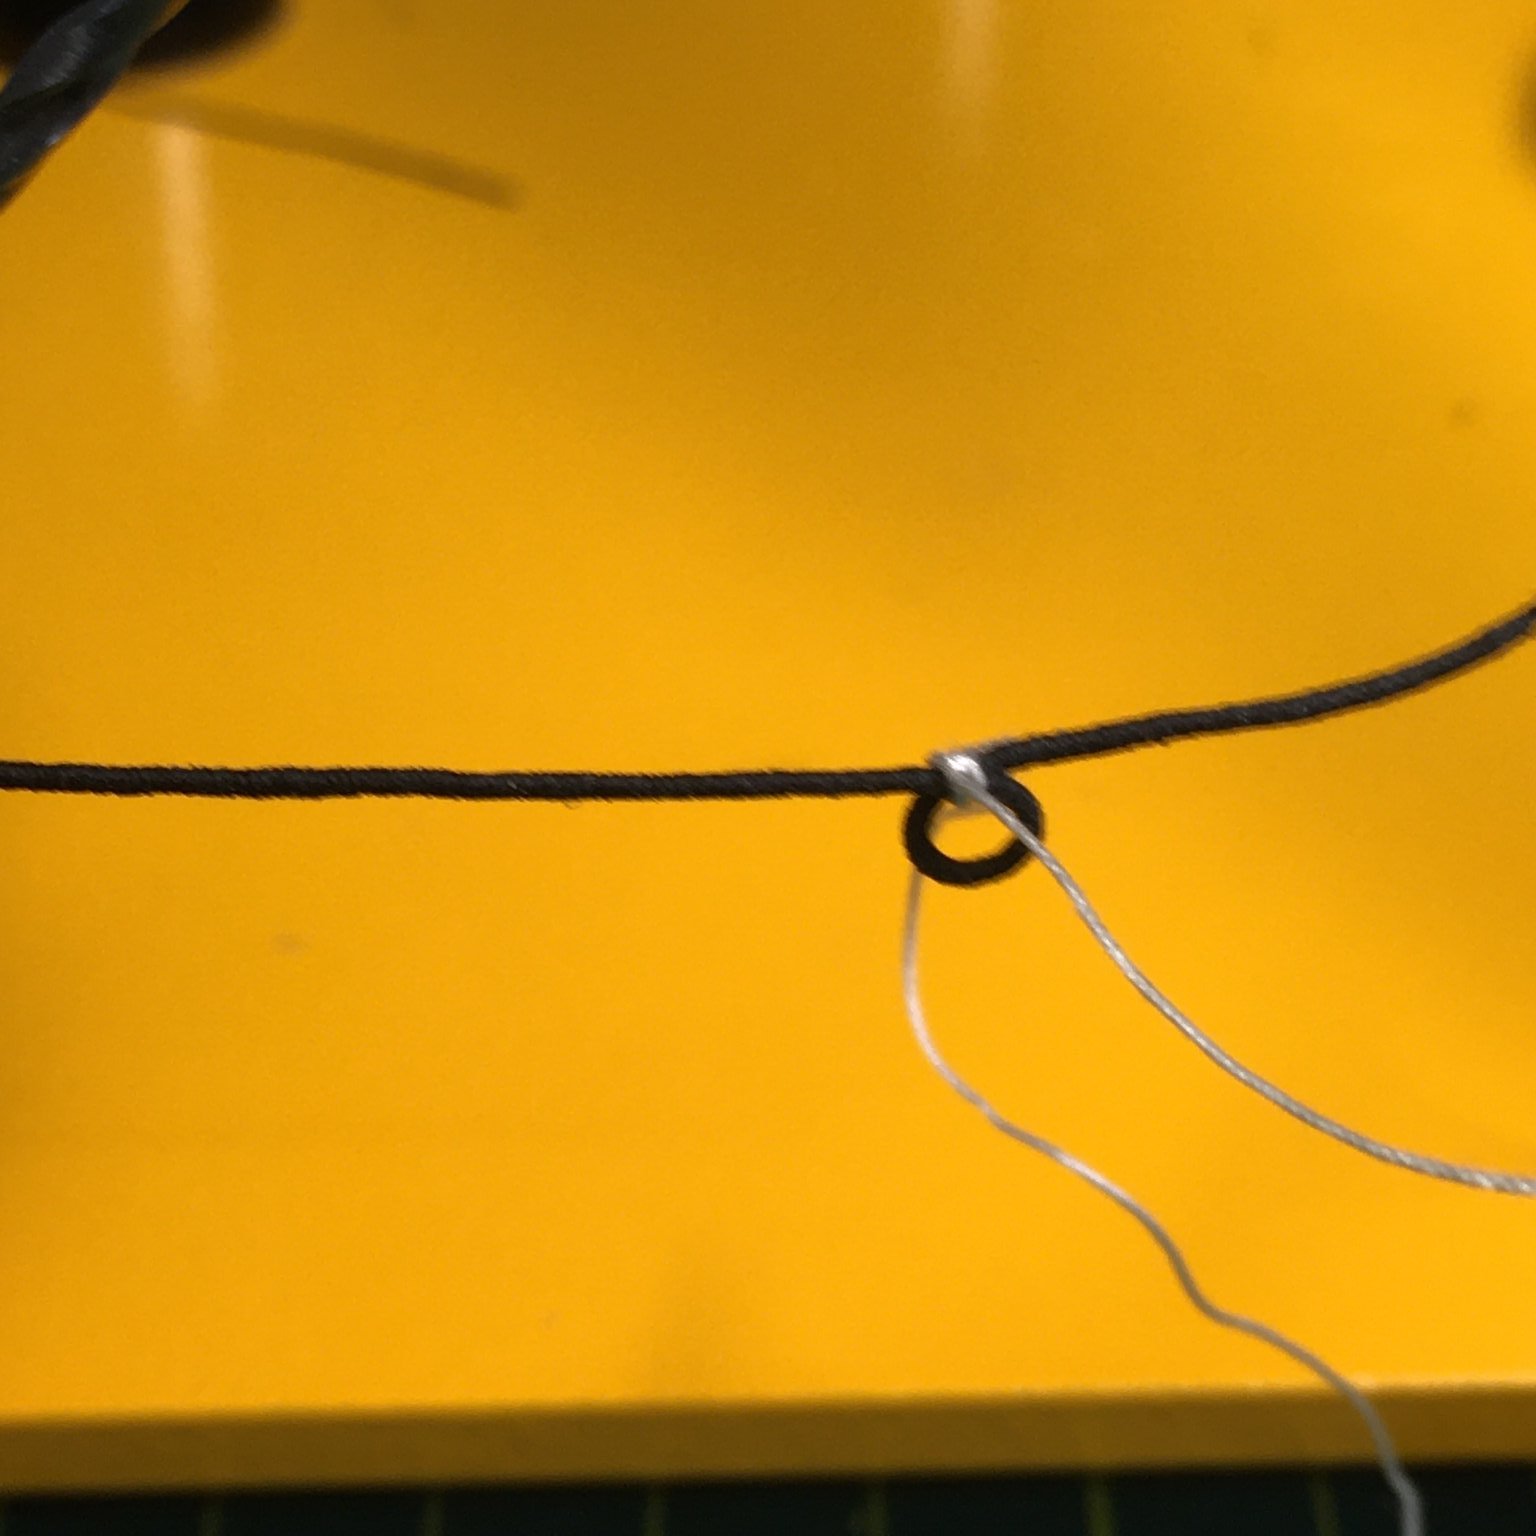
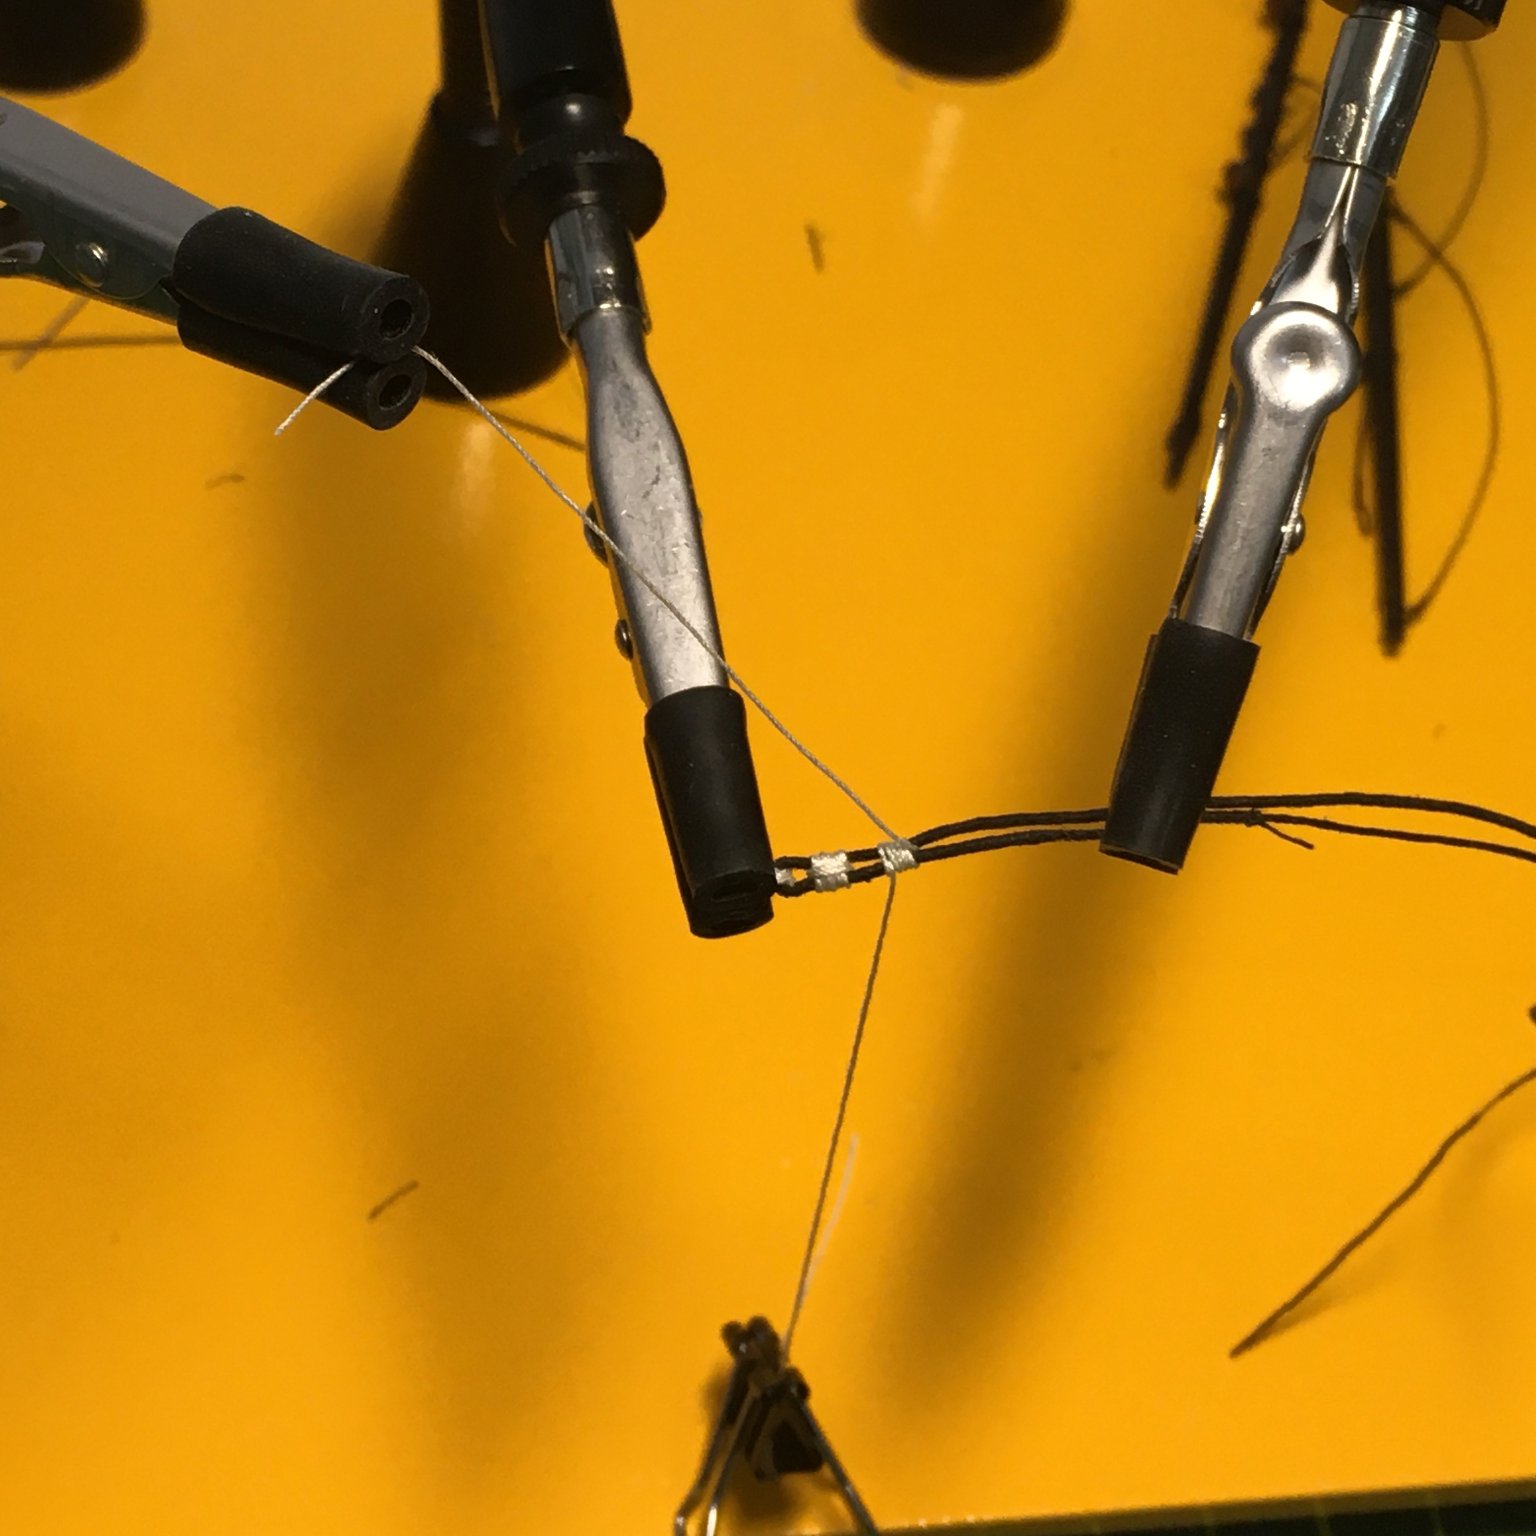
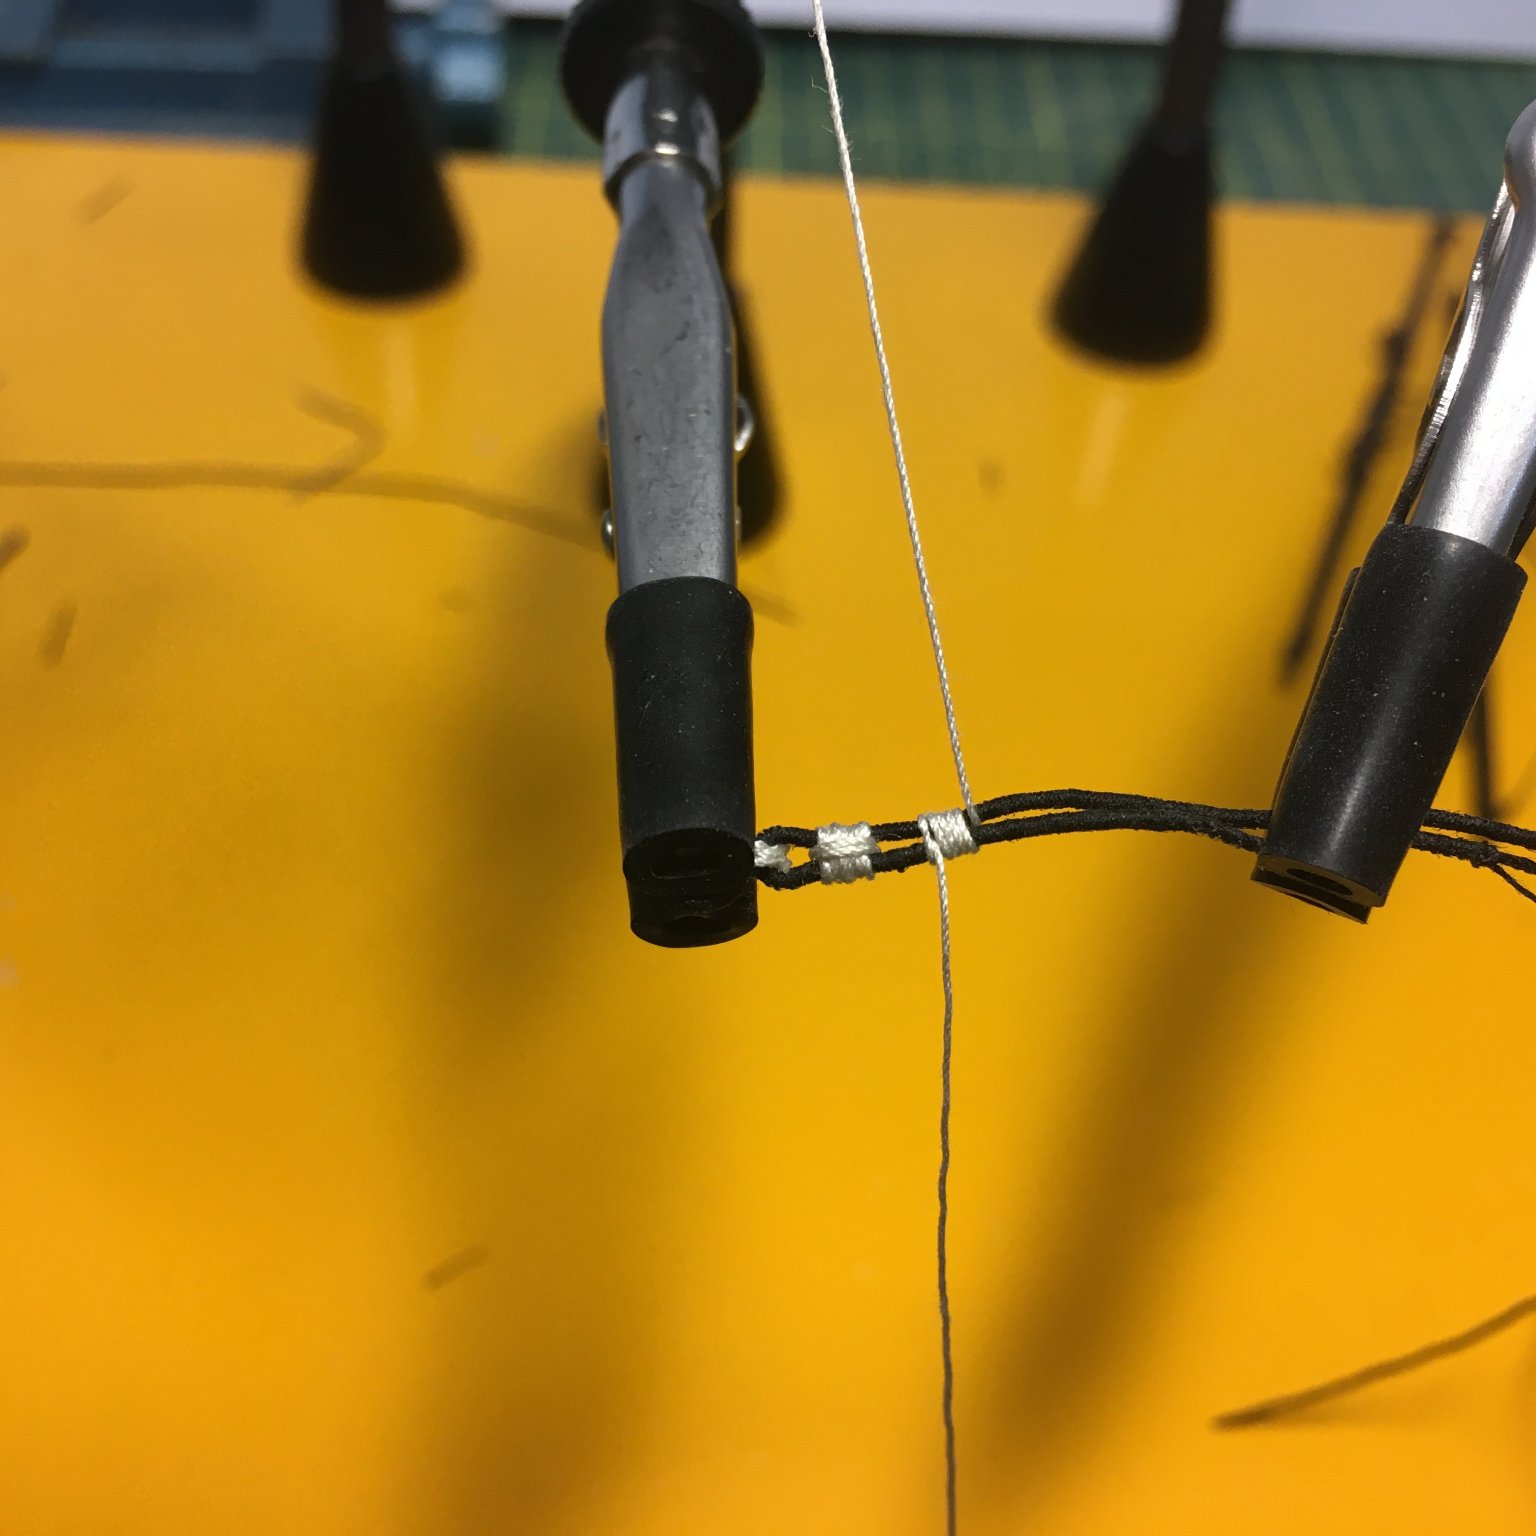
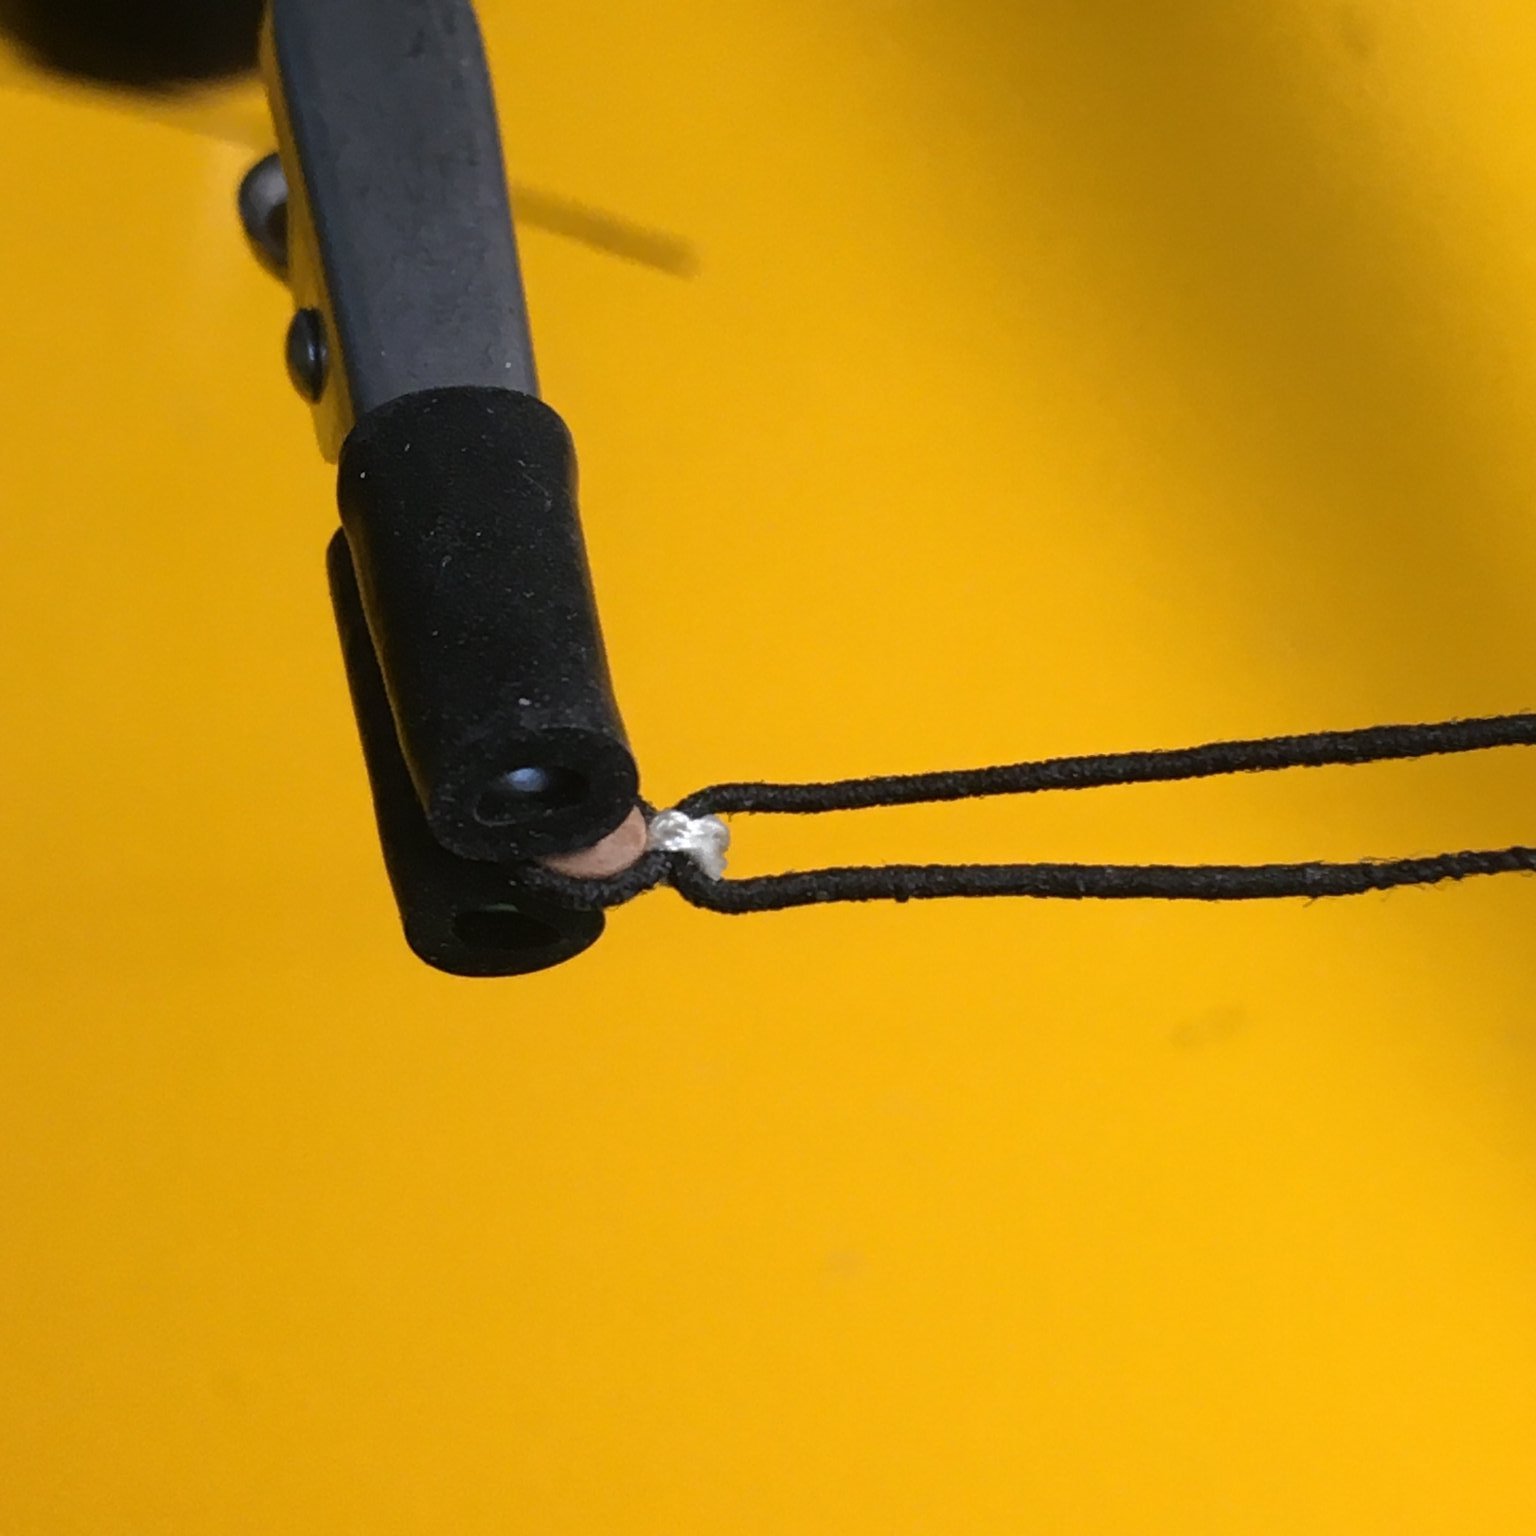
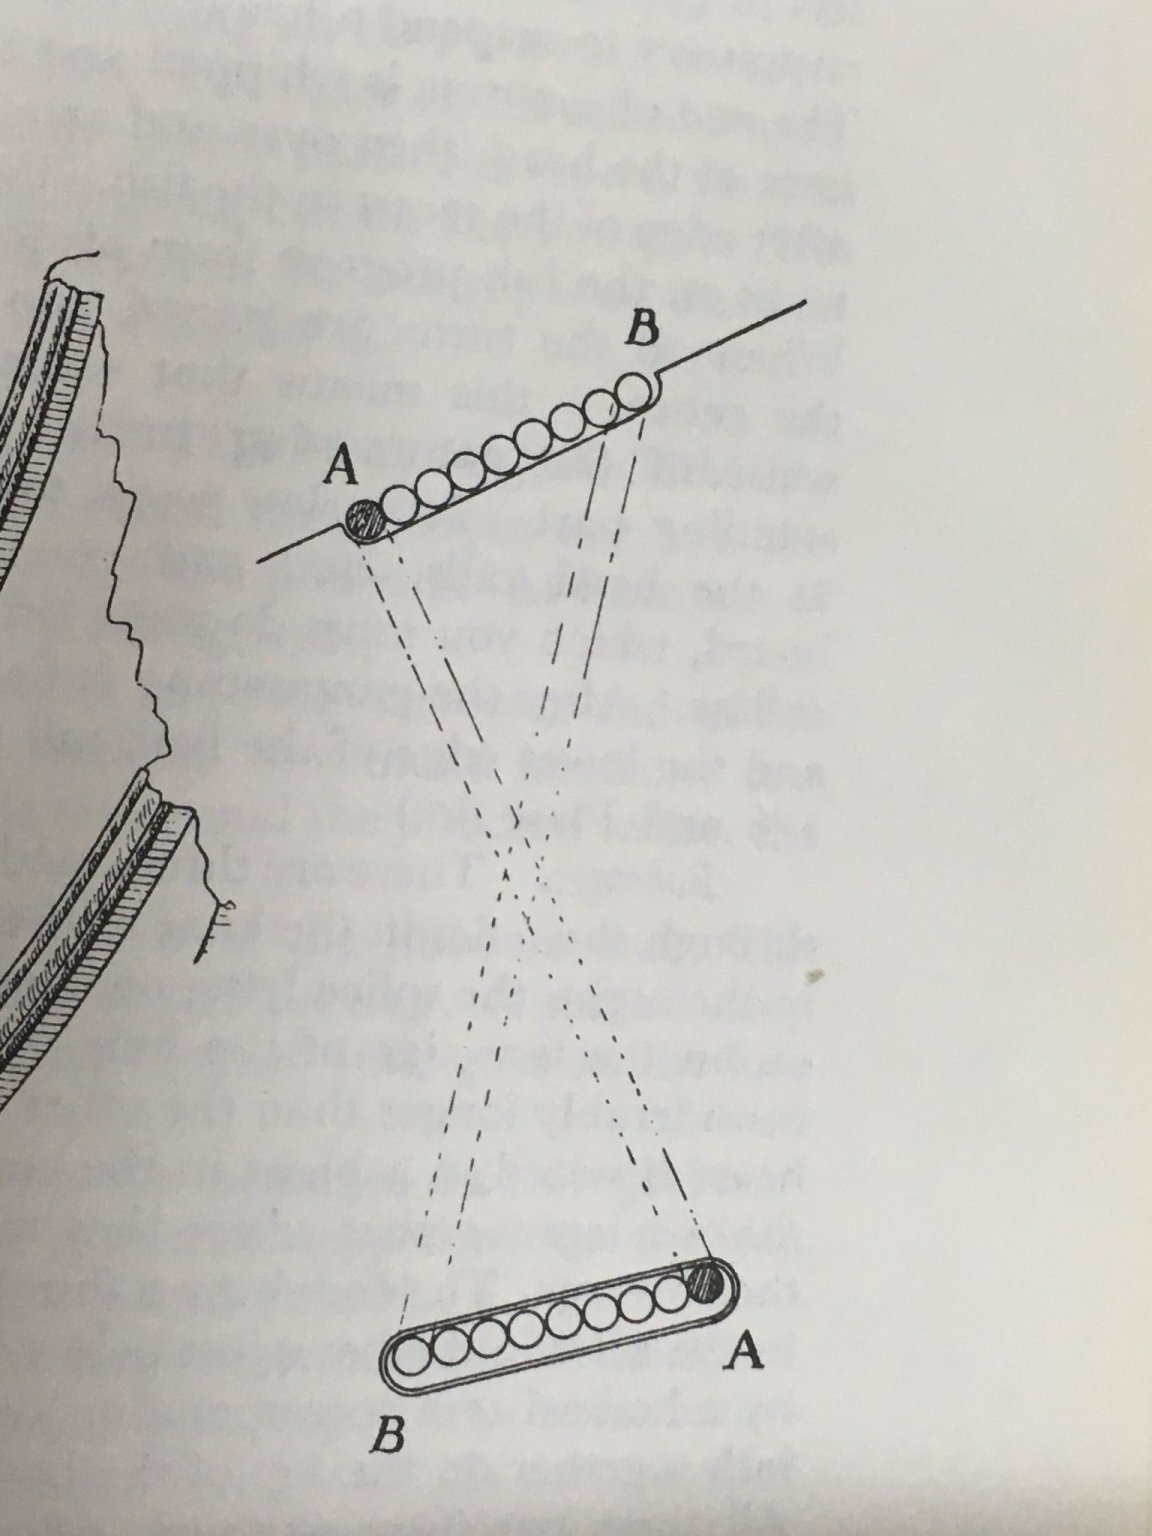
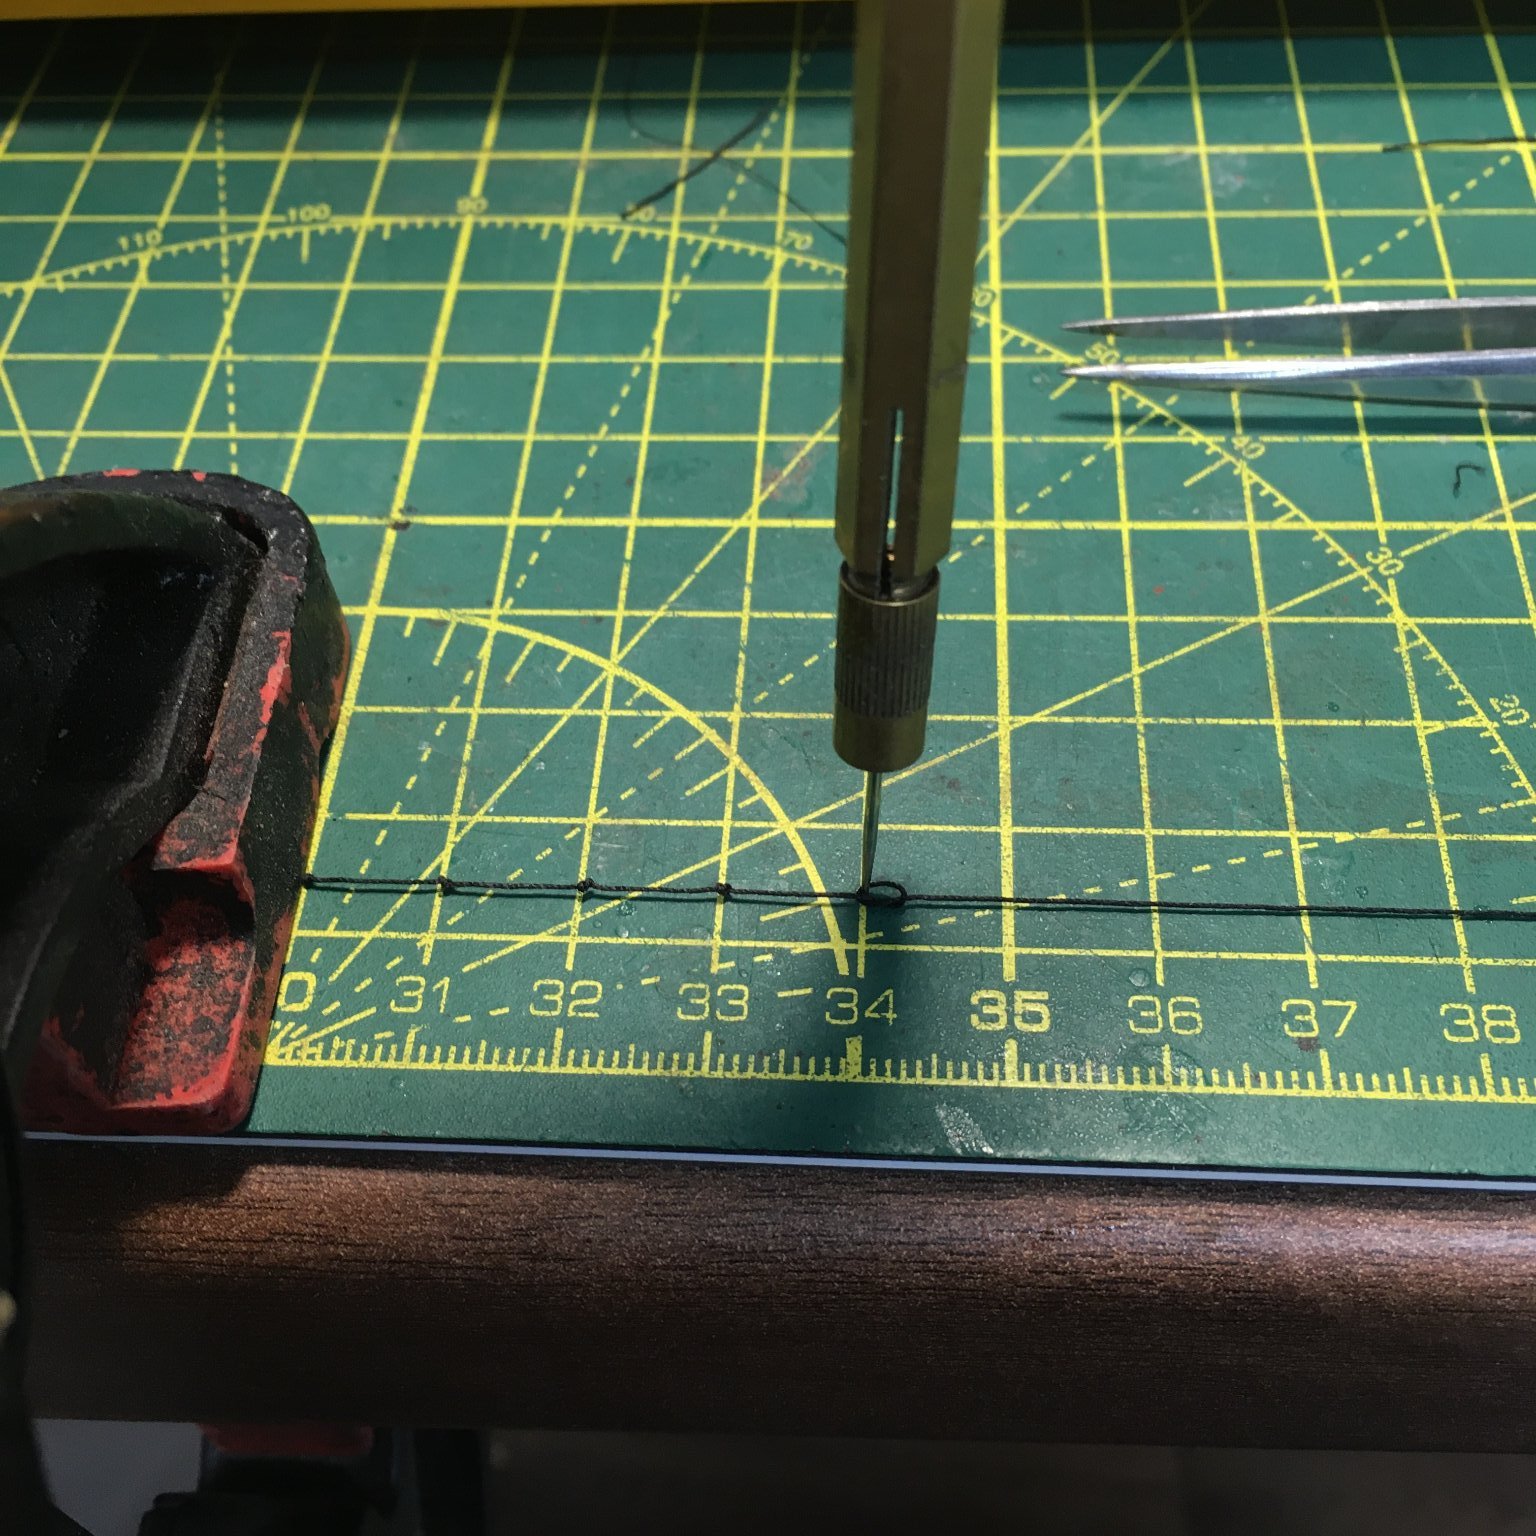
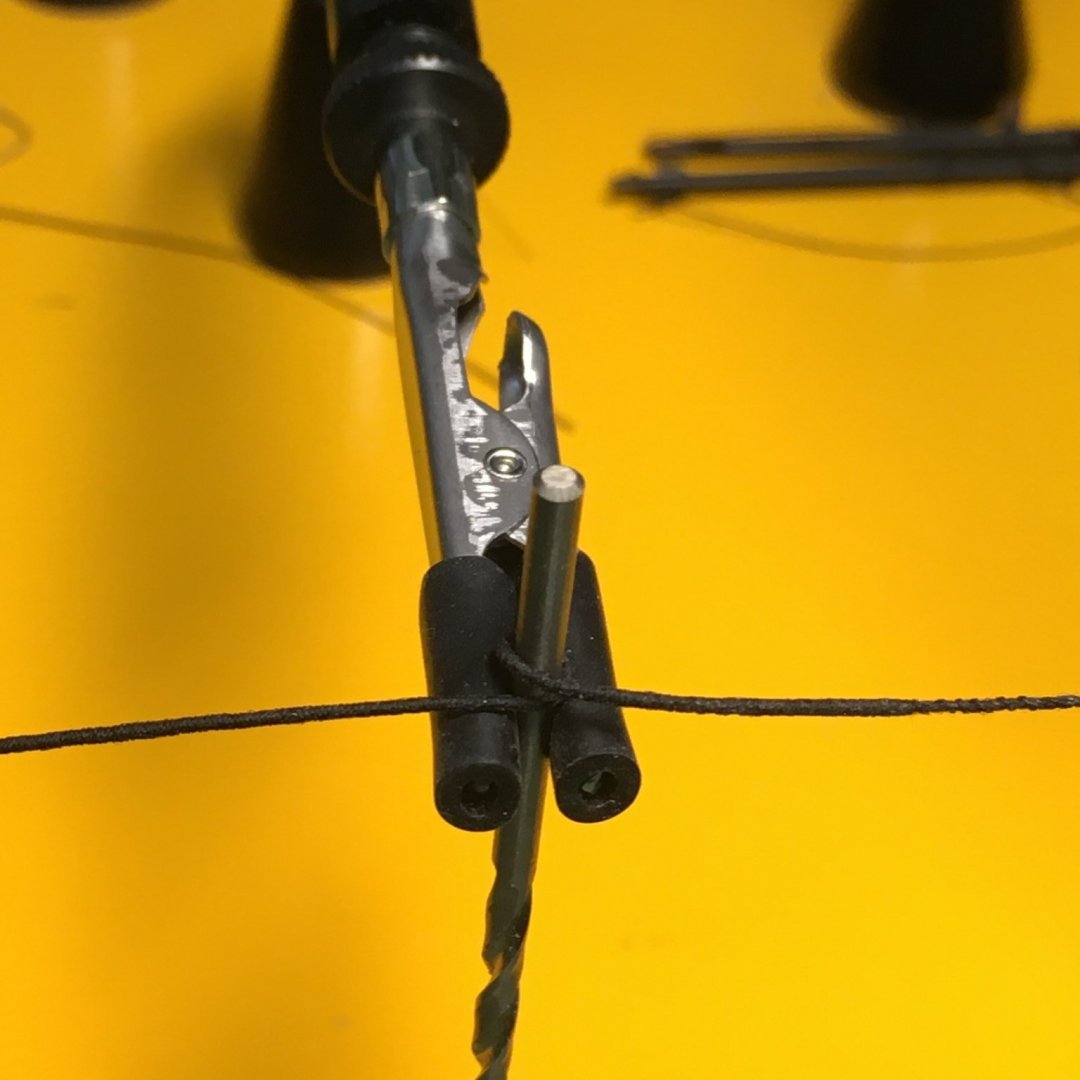
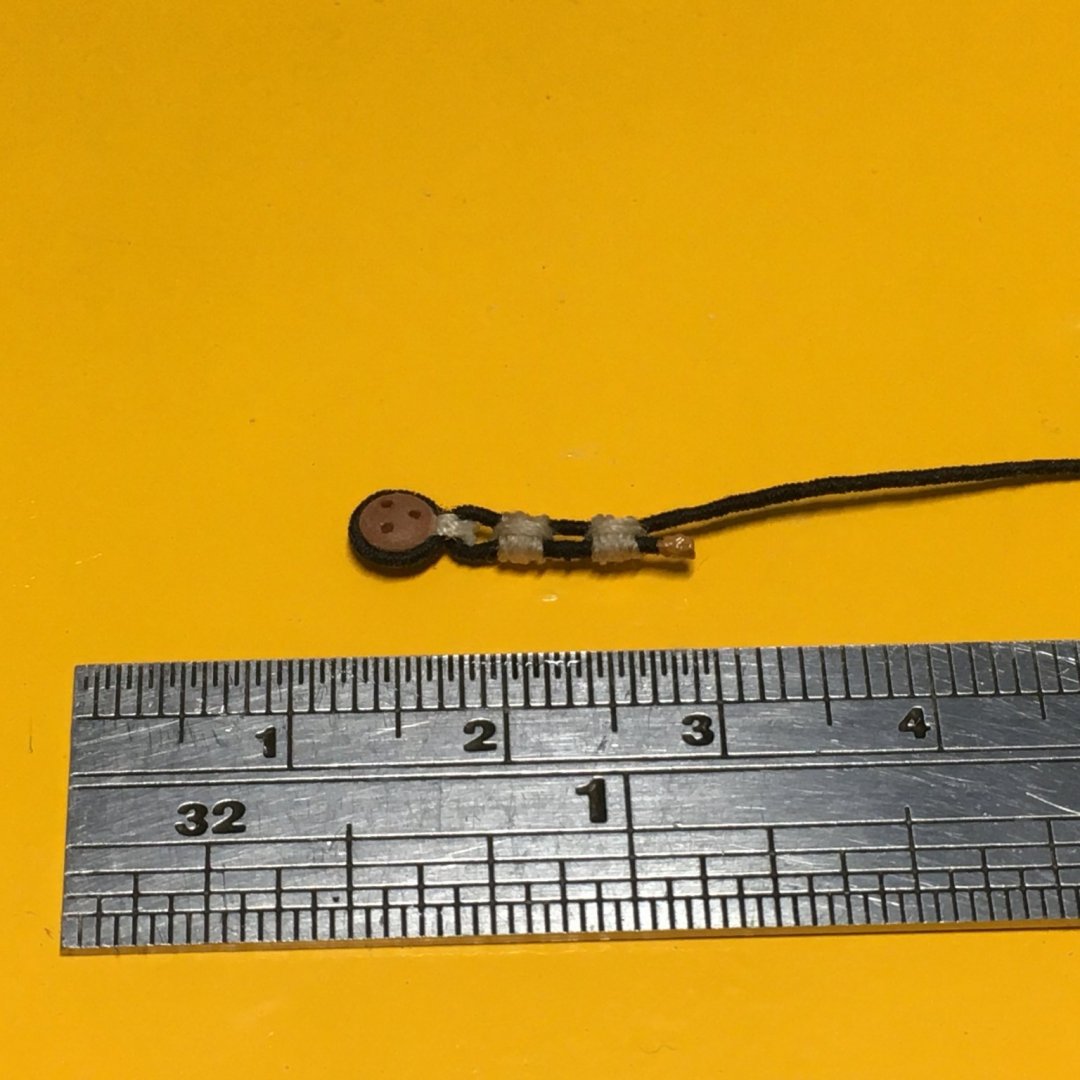
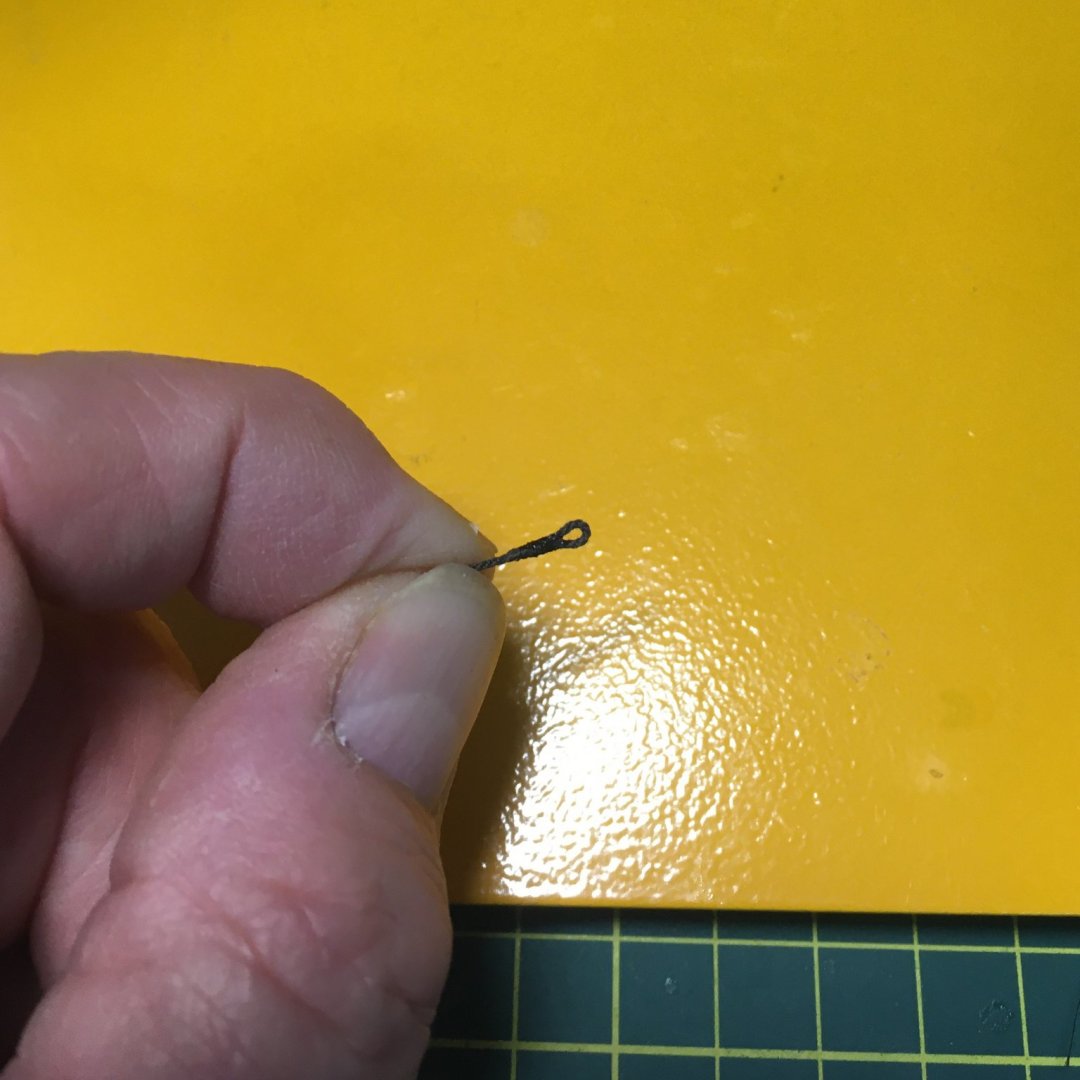
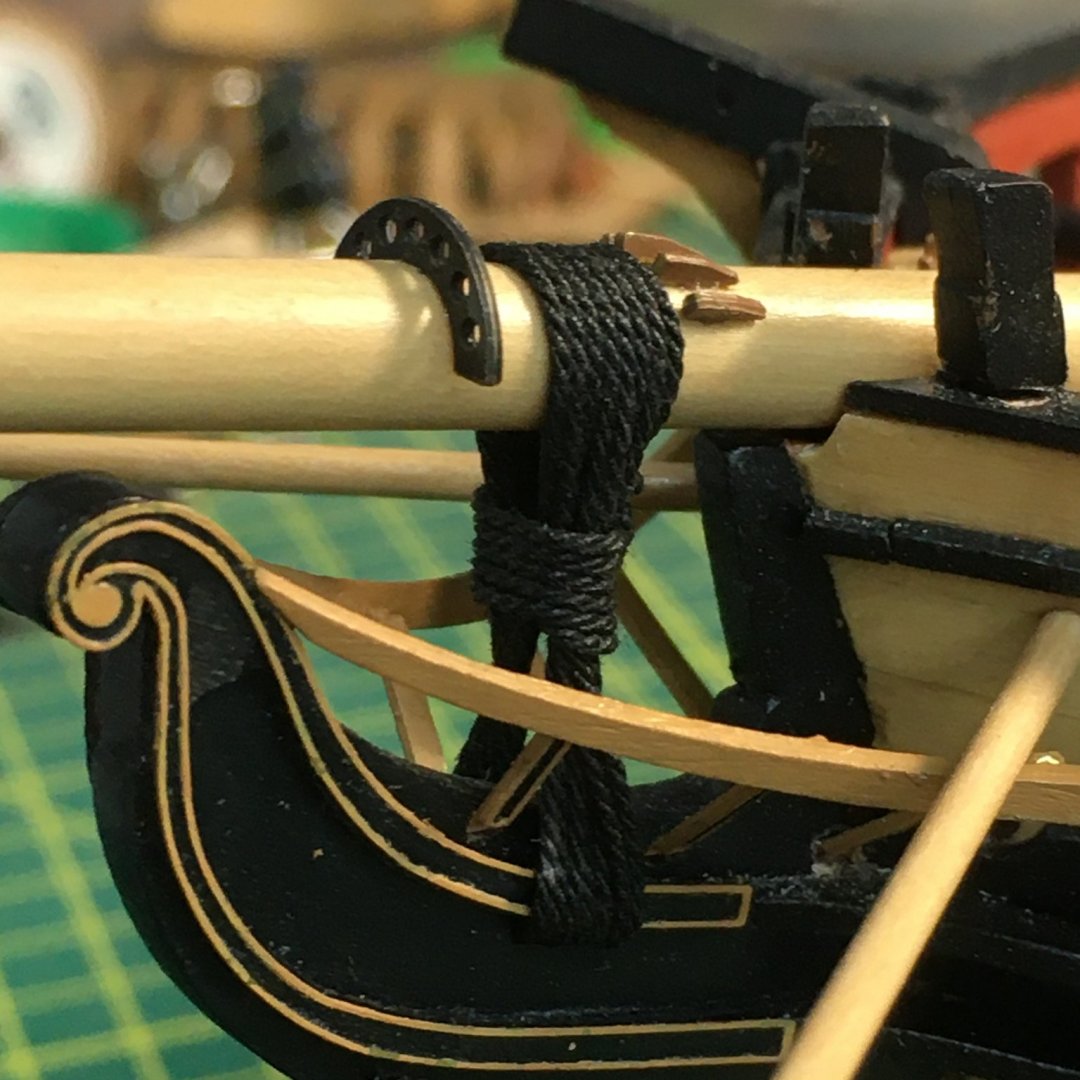
Bowsprit rigging Work on Speedy progresses very slowly, as domestic duties continue to take precedence during Mrs D's convalescence. I've decided not to fret about it, but rather to just enjoy any time I can spare for the workshop. This morning I spent an hour on the bowsprit stays, reminding myself how to seize deadeyes. Good practice for the shrouds later on! The kit calls for 0.75mm line for the stays, but as they would have been served throughout their length I decided to dig out my Syren serving machine. Using 0.5mm line served with the finest Gutermann sewing thread, the resulting rope was almost exactly 0.75mm. I find it difficult to seize deadeyes with the deadeye itself in situ - the result is usually too loose. Instead, I start the seizing using something of a slightly smaller diameter, then work the deadeye into the loop created. In this case, with a 3mm deadeye, I started the seizing round a 2.5mm drill bit: I used 0.10mm line for the seizing, using a needle to thread the line through the two parts of the served rope where they cross over. It was then a simple matter of taking a few more turns round the join, finishing off with a half knot, ca and trimming in the usual way. This is the throat seizing before trimming: Rubbish photo 😟! But you get the idea. Then, once the deadeye is worked into the loop it's on to the round seizings. I always use the following step-by-step guide to these knots which I found years ago through google. They seemed to be freely available so I hope I'm not infringing anyone's copyright: I didn't attempt to capture each stage of this process - the sketches are much clearer than my photos. I've just included a few pictures to illustrate various stages, and also to show how useful the quadhands is - at one point I'm using three of the 'hands' to keep control of various lines: The last photo shows the first seizing finished, and the second at stage 4 in the illustrated guide - just about to add the riding turns. I'd not done these knots at 1:64 scale before and I was worried they'd look too bulky, so I experimented doing them without the riding turns. They didn't look right so I stuck to the proper version. It's worth pointing out that there should be one fewer riding turns than in the first layer - I did 5 in the first layer and 4 riding turns. An obvious point, but it's important to use the same numbers of turns in each seizing - differences will stand out like sore thumbs. Both seizings finished I applied some ca to the free end of the served line and trimmed it. I painted a blob of raw sienna acrylic paint to the trimmed end to represent a leather cap. I don't know if that's historically accurate for stays, but the ends of shrouds were often wrapped in leather - presumably to prevent water standing in the cut end - so I decided it would do for stays as well. Finally, I applied some very dilute dye made from van dyke crystals to the seizings as I felt they were slightly too bright: Derek


- 725 replies
-
- 11
-
-
-
- vanguard models
- speedy
- (and 1 more)
-
Superb work James. That cedar will look beautiful, and your story of a fellow modeller's generosity in supplying you with it helps restore our faith in human nature. Hats off to Gregory! Derek
-
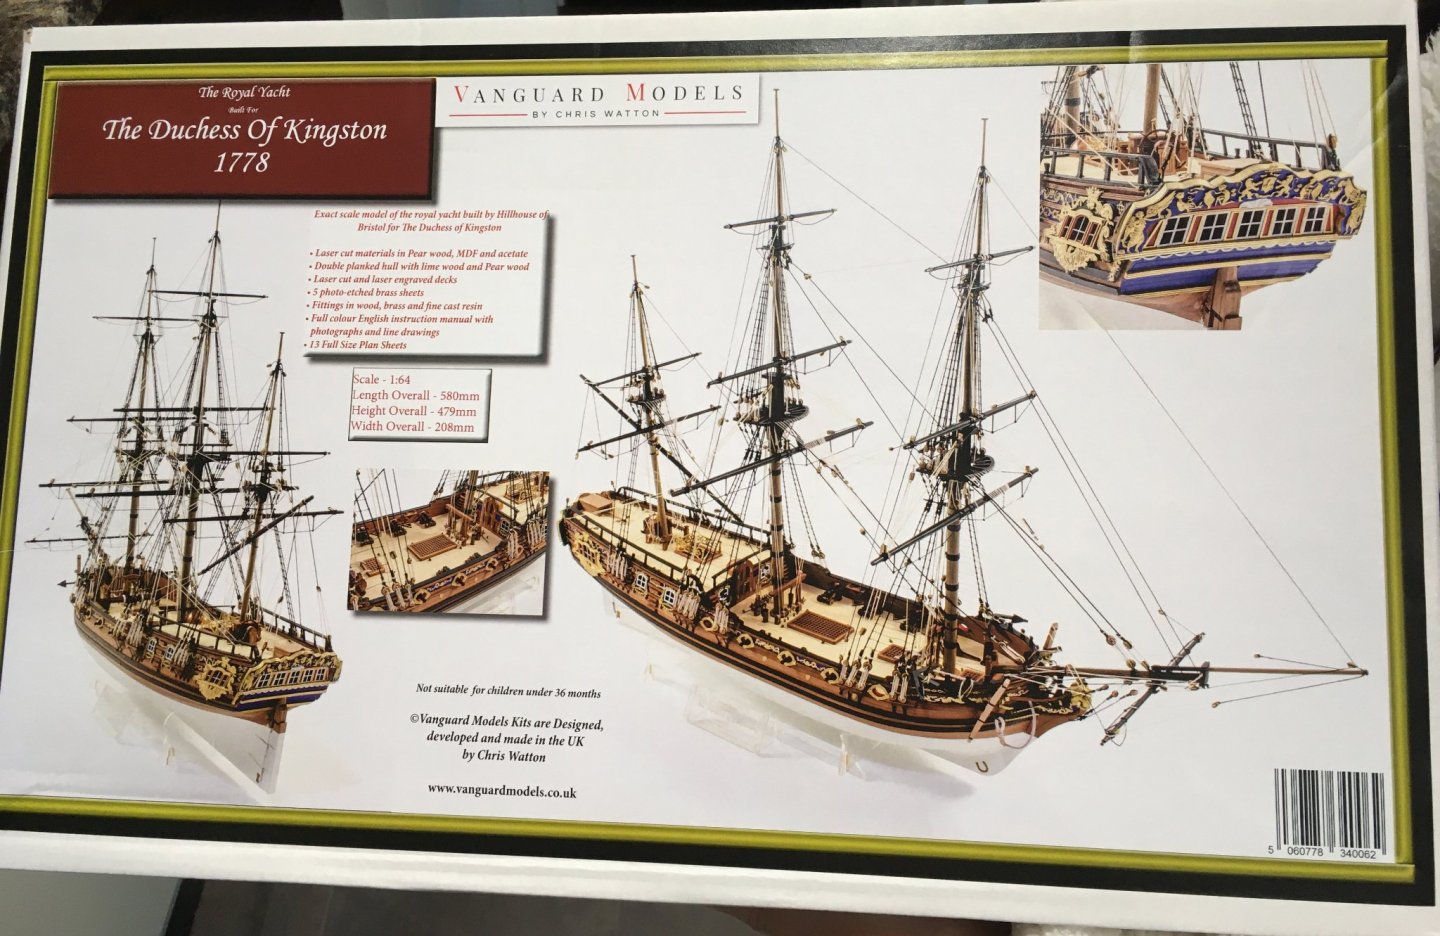
Thanks guys, and thanks for all the likes - they're appreciated. Since my earlier post UPS have delivered my next project: Chris kindly made me up a boxwood version, and I opted for the pearwood blocks which have impressed me on Speedy. Can't wait! (Actually I'll have to, as it's a Christmas present😟). Derek

- 725 replies
-
- 7
-
-
- vanguard models
- speedy
- (and 1 more)
-
Snap! I'd like to echo Glenn's thanks to Mrs Watton and to Chris. Chris kindly ran up a boxwood version for me, and I also shelled out for the pearwood blocks. I've been really impressed with these in the Speedy kit. Unfortunately, after a quick look inside to admire the contents, Mrs D. whisked the box off until Christmas. I'll just have to get vicarious pleasure from Glenn's log in the meantime. Fortunately I've got Speedy to keep me occupied in the meantime. Derek
-
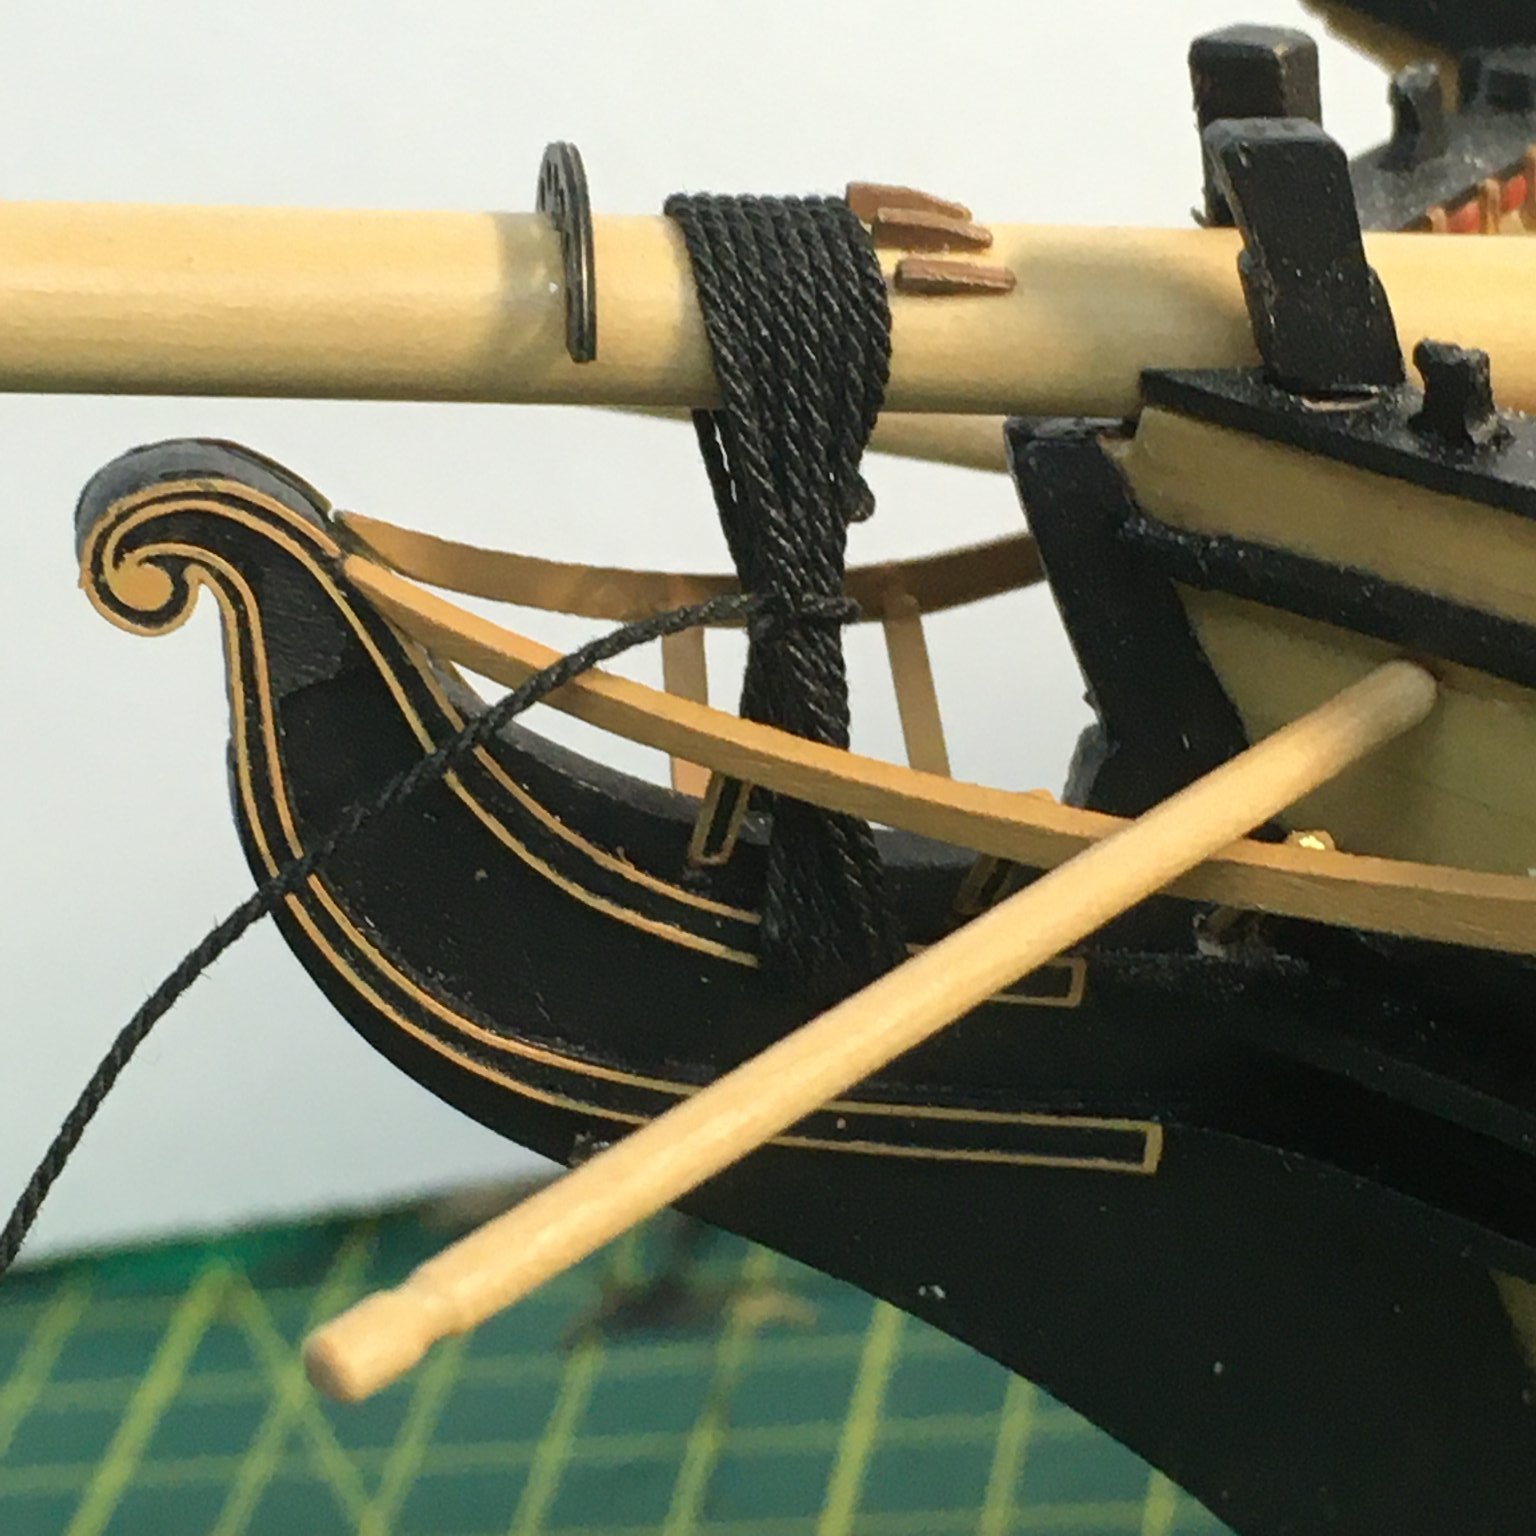
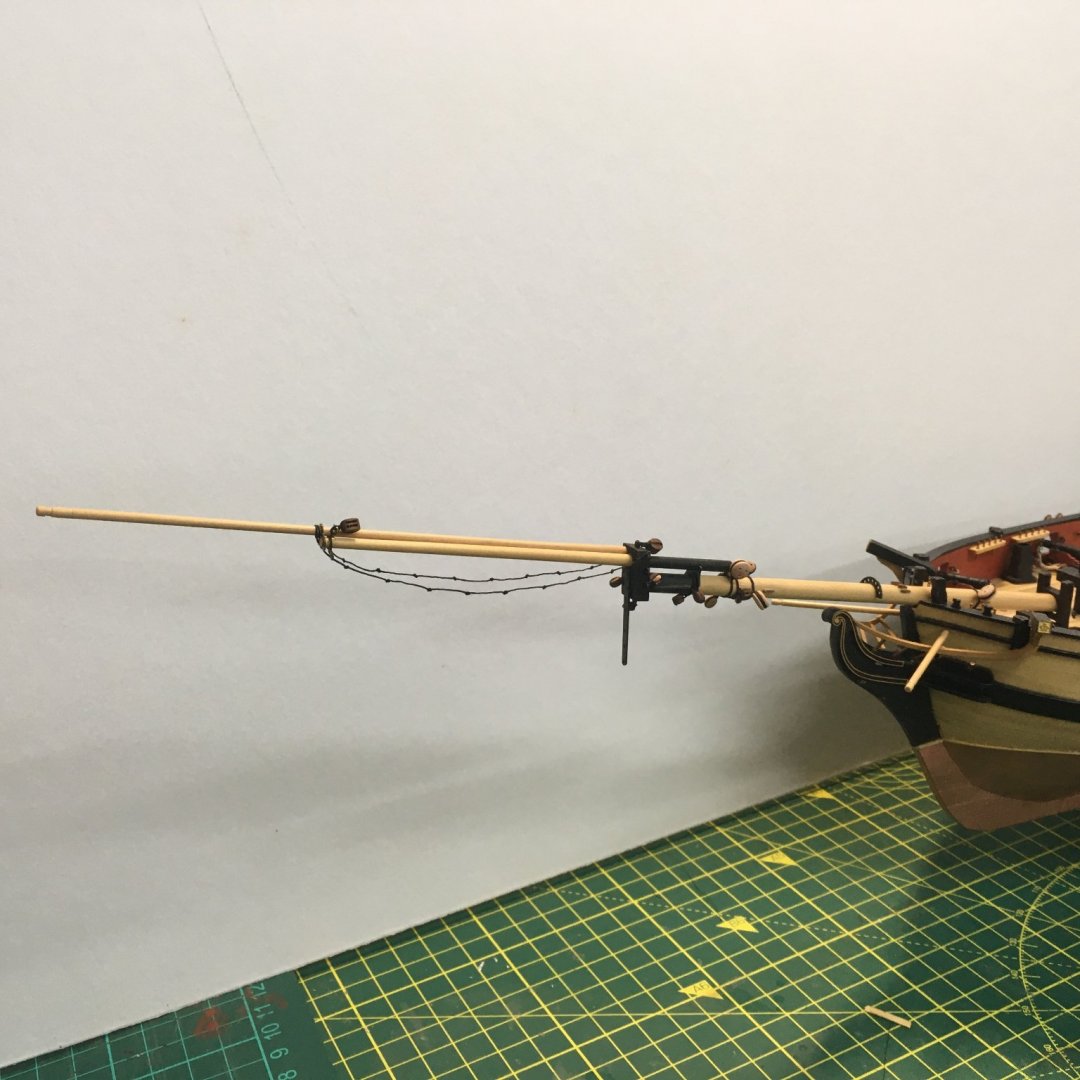
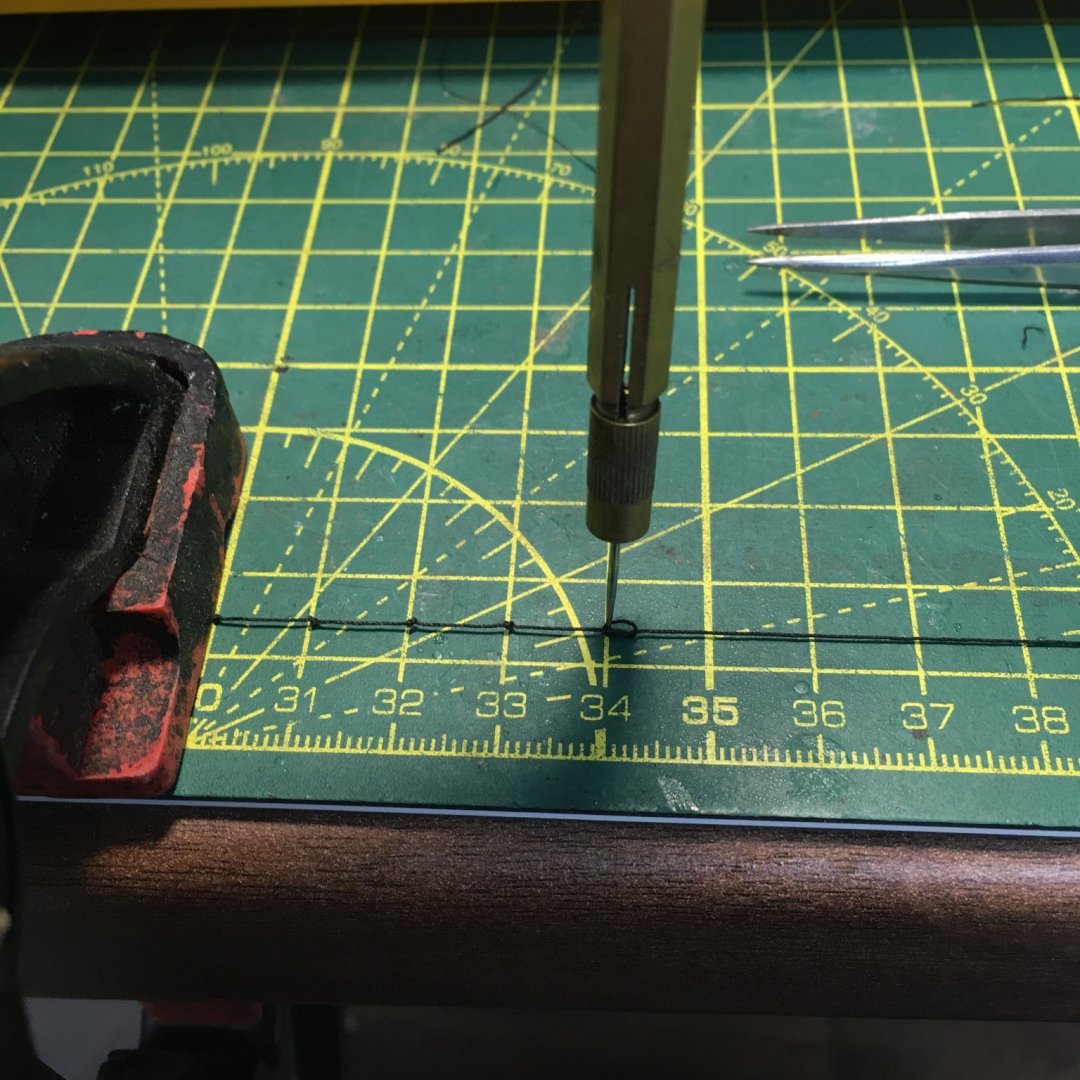
Bowsprit I managed to grab a couple of hours in the workshop and decided to fit the bowsprit. The last items of rigging I added before fitting it to the ship were the footropes on the jibboom. I decided to follow full size practice by knotting the ropes every couple of feet, using a simple method to get the spacing right: The flying jibboom should have similar footropes and hand ropes should be fitted above the bowsprit, but I'm concerned they will get in the way of other rigging at this stage so I'll leave them 'til later in the build. The gammoning came next, using 0.5mm black rope. Following full-size practice I started with an eye spliced into one end of the line, the splice being faked using my favourite fly tying thread: The free end of the rope was passed round the bowsprit and through the eye to hang down the port side, the eye being snugged up under the bowsprit. Next, I diverted slightly from Chris's instructions which show the gammoning forming parallel loops as it is wrapped round the bowsprit and through the slot in the stem. My understanding is that gammoning was usually laid so that the first loop started aft on the bowsprit then forward in the slot, with each subsequent loop following the same pattern thereby ending with an overall twisted effect: Completing the loops in this way is fiddly as you have to weave the rope through the head rails and avoid getting loops tangled in boomkins etc. Nevertheless it is relatively straightforward until you get to the stage where you need to frap the free end of the rope round the gammoning. I started by using the free end to tie a half-hitch round the port side loops, about half way down: The next job is to take the free end around the starboard side, forward to aft, then continue wrapping the rope around both sides, working up towards the bowsprit. The idea being to draw both sides together to further tighten the gammoning. To finish off, I passed the free end through the last two loops and tied off with another half-hitch. I did this at the aft end of the frapping where the hitch would be mostly hidden. As the frapping was tight, I found I had to use ca on the end of the rope to make it hard enough to poke through between the second and third loops down. Once poked through, it was a relatively simple job to bring the free end back over the top of the frapping and tie the half-hitch around the top two loops. Hope this makes sense - I didn't have a hand free to photograph each step! Here's the end result after loose ends were trimmed: Technically, there should be eight loops in the frapping to match the eight vertical loops, but with the head rails in the way I found I couldn't get the half-hitch and the first loop low enough down, and I thought it would look wrong to continue the frapping too high on the gammoning. Derek


- 725 replies
-
- 17
-
-
- vanguard models
- speedy
- (and 1 more)
-
There are 10 sheets with Speedy and I have most of them pinned up round the walls of the workshop as I'm constantly referring to them. Great quality, as with the rest of the kit. If Duchess has 13 sheets I'll definitely have to wait until I've finished Speedy before I pin them up - either that or persuade my wife that her half of the workshop needs new wallpaper! Derek
-
Need source for Preac blades
DelF replied to Barry Rudd's topic in Modeling tools and Workshop Equipment
Hi Charles Big thankyou for this - I've struggled to find blades for my Preac and Byrnes saws in the UK. I googled MSC, more in hope than expectation, and was delighted to find they have a UK branch. As you say, a huge selection and, although the individual blades are a tad expensive its a lot cheaper than shipping and import duties from the States. Derek -
Hi Glenn Glad you found the log useful. I'll certainly log my approach to shrouds when I get to them, but my workshop time is severely limited/almost non-existent at the moment. On threading blocks, I use the CA/diagonal cut method same as you, and I also find I often have to drill out the hole with a slightly wider bit. I don't think there's anything wrong with that provided the blocks are made from good quality wood. The holes in commercial blocks often seem too small, and even when I've made my own blocks I've found I needed to drill holes that were significantly larger than the nominal thread diameter. At the risk of stating the obvious, you need to be careful when soaking the end in thin CA to avoid too much CA building up and making the threading even more difficult. I drag the thread over a hard surface, twirling it as I go in order to wipe off any excess before it sets. I don't use beeswax - if the rigging line is fluffy I use 50:50 PVA and water, dabbing some on my finger and thumb and running the line through it. I've also gone for the Duchess - looks great from James's build log. Derek
-
Smart guns there Glenn. I can see I'm going to have to get some weathering powder - not something I've used before but it gives a subtle but impressive effect. Derek
- 778 replies
-
- 5
-
-
- cheerful
- Syren Ship Model Company
- (and 1 more)
-
Sorry Tim, I misunderstood. I thought you were looking for a way to fix the ends of the serving line so it didn't unravel on the rope being served. My method works for unserved rope, but to create a served strop, which I think is what you're looking for, a better method might be to leave the serving line long at both ends, bring the two ends of the rope together to form the strop, and use the spare line to seize over the gap. There's a very good description of this technique in Volume lV of The Fully Framed Model, which covers rigging. I found this volume invaluable when I rigged Royal Caroline and I would strongly recommend it if it's not already in your library. The first 3 volumes of the series are also excellent, but only really relevant if you intend to build a fully framed model. Derek
- 436 replies
-
- 2
-
-
- vanguard models
- alert
- (and 1 more)
-
Shaping up nicely Tim. I use a fine needle to take the end of the serving line through the rope being served a couple of times then apply a blob of fly tying glue or ca. Once you've finished serving the length you need, repeat the process with the other end of the serving line. Once the glue is dry at both ends you can then trim the serving line. Others have suggested a half hitch to secure the serving line but that can look a bit bulky. I second B.E.'s comments. I had a debate with myself before gluing Speedy's masts together but decided I could rig the shrouds on the model. I'm beginning to wish I'd followed B.E.'s recommendation, which was also my previous practice. Derek
- 436 replies
-
- 3
-
-
- vanguard models
- alert
- (and 1 more)
-
No problem. It gives me a few more days to work out how I'm going to tell my wife she's bought this for my Christmas present!
-
That's a fine smooth finish Glenn. Personally I prefer a slightly duller, greyer (gunmetal?) shade for cannon. Having said that, it's not always possible to judge shades from a photo so your primer might be spot on. Why not use the admiralty finish on another barrel for comparison? Derek
- 778 replies
-
- 3
-
-
- cheerful
- Syren Ship Model Company
- (and 1 more)
-
Thanks Tim - that explains my confusion! I use DMC which doesn't require baking. Derek
- 436 replies
-
- 2
-
-
- vanguard models
- alert
- (and 1 more)
-
Fascinating build B.E., which I'm enjoying following as always. Can I just ask - you mention wipe on poly, which I've struggled to find in the UK. Do you mix your own? Derek
- 261 replies
-
- 2
-
-
- muirneag
- vanguard models
- (and 2 more)
-
That looks like very good rope, especially for a first attempt. I'm not sure what you mean by baking. The technique I use, as taught by Chuck, is to stretch the rope after you've spun it, wet it down and then let it dry before you cut it free from the ropewalk. If you do that you might find the last few millimetres are slightly loose, but if you cut the rope back to where it looks tight it should stay that way. Derek
- 436 replies
-
- 4
-
-
- vanguard models
- alert
- (and 1 more)
-
Hi Mike, welcome to MSW. Your flight to the UK probably passed my sister-in-law's going in the opposite direction. She left 30 years ago to set up home with her Australian husband in Sydney. We love visiting them and touring your home country - or at least we did before covid! Btw, we've got a Sheffield postcode although we live in Nottinghamshire. Small world. Derek
-
Superb model James & Chris. Me too. I haven't told my wife yet, but she's buying me this for Christmas! Now you're just making the rest of us feel inadequate! Derek
- 117 replies
-
- 7
-
-
- vanguard models
- yacht
- (and 2 more)