


DelF
-
Posts
1,398 -
Joined
-
Last visited
Content Type
Profiles
Forums
Gallery
Events
Posts posted by DelF
-
-
Brilliant - just what I was after!
-
Hi B.E.
As I've mentioned before, I often dip into your Pegasus log for ideas and inspiration. As my own project nears completion (well, just the running rigging to go so it must be nearly done?!) I've been reminded of your display case. I'm also looking for a clear case with no obstructing frames. My own research turned up a few potential suppliers in the UK, amongst which I thought Display Cases International looked the likeliest. Before I take the plunge, would you mind sharing your supplier and your impression of their product (it certainly looks great in your photos)?
Thanks
Derek
-
Quote8 hours ago, Bob Cleek said:
This is a transfer punch below....
Great description of your shackle technique Bob. As a 'toolaholic' I've had a set of transfer punches sitting around in my workshop for years looking for a use - now I've got one. Thanks!
Derek
- thibaultron and mtaylor
-
 2
2
-
Hi Phil
Thank you for taking the time for such a considered and comprehensive explanation. I really appreciate it.
I’m attracted to the notion that 3D designing can be used to generate accurate 2D drawings and can reveal problems that might otherwise be missed, so I think I’m prepared to start out on the steep learning curve you mention.
Looking at your distinction between CAD programs and drawing programs, I believe Fusion 360 falls into the former category so I think I’ll give it a go in the first instance - there are some good-looking YouTube videos that should get me started. Once I get past the stage of unconscious incompetence and can make meaningful comparisons I’ll certainly have a look at DesignCad 3D as well.
Thanks again, and have a great Christmas and a happy New Year.
Derek
-
Hi Phil
I was fascinated to find your log. The Albatros was the first 'proper' ship model I attempted, in the early 2000s. I'd previously completed a Chinese junk which was more of an ornament than a serious ship model, but at least it whetted my appetite. Although I hadn't discovered MSW back then I was dissatisfied with the basic kit and attempted a few minor modifications - for example planking the inside of the bulwarks (a plain plywood strip in my version), making proper parrels for the gaff and boom, and adding some detail to the binnacle. However these mods were based largely on my imagination and limited maritime knowledge, unlike the careful research you have done.
I was particularly impressed by your approach to the pivot gun. Like you, I was also struck by the incongruity of a standard carriage mounted gun pointing straight at the foremast, but to my regret I just let it go in the hope visitors wouldn't notice. I had previously admired your 3D work on the USS Oklahoma City and wondered if such software would have any applications in regular modelling. Your work on the pivot gun answers that! Would you mind saying what package you use? I recently acquired the free version of Fusion 360 and wondered if that would be suitable.
I know I would make a much better job of it now, having spent a few years admiring and learning from the MSW community, but I still like my old model of the Albatros and it is still on display. All part of the learning process. I'm sure yours will be a real gem, especially given the care and planning you are putting in to it.
Thanks for posting.
Derek
-
This post from EdT's Young America log is a great tutorial on block making, showing what can be achieved with hand tools (and a great deal of skill!) https://modelshipworld.com/index.php?/topic/3453-young-america-by-edt-extreme-clipper-1853/&do=findComment&comment=534128
Derek
- mtaylor and pontiachedmark
-
2
-
9 hours ago, wefalck said:
What is 'wicking' - 'soaking' ?
In this context wicking refers to the ability of a liquid - in this case thin CA - to be drawn into a substance by capillary action. Just as the wick in a candle draws melted wax to be burned.
Derek
- thibaultron, Canute and mtaylor
-
3
-
Hi Richmond.
Keith Julier wrote about three volumes of the Period Ship Handbook. Each was a compilation of articles he wrote for Model Boat magazine (if memory serves - I haven’t access to my library just now). Each article describes how he built a popular kit. The Kit Builders Manual brings together the techniques he describes in the other books.
I found all the books very useful as a beginner - in fact I was inspired to buy Panart's Royal Caroline after reading the chapter on the kit. I found Julier’s style very helpful for a novice, with plenty of photos (albeit in black and white) and clear descriptions of necessary steps and potential pitfalls. I also liked the fact that he suggests minor modifications you can make to enhance the build. For example, on the Caroline he shows how you can use the kit material to make the bilge pumps more authentic. This certainly whetted my appetite for further “kit bashing”!
In summary, I would certainly recommend the Kit Builders Manual as a good starting point. If you have a particular model or models in mind to build, let me know and I’ll check my copies of the other books to see if they feature.
Derek
- mtaylor, chris watton, Ryland Craze and 3 others
-
6
-
-
-
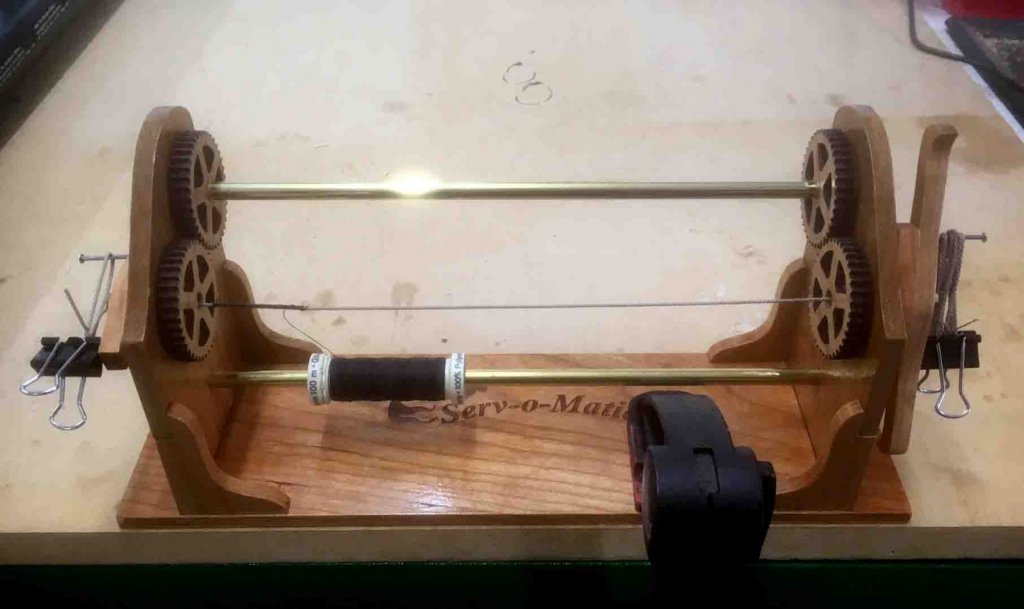
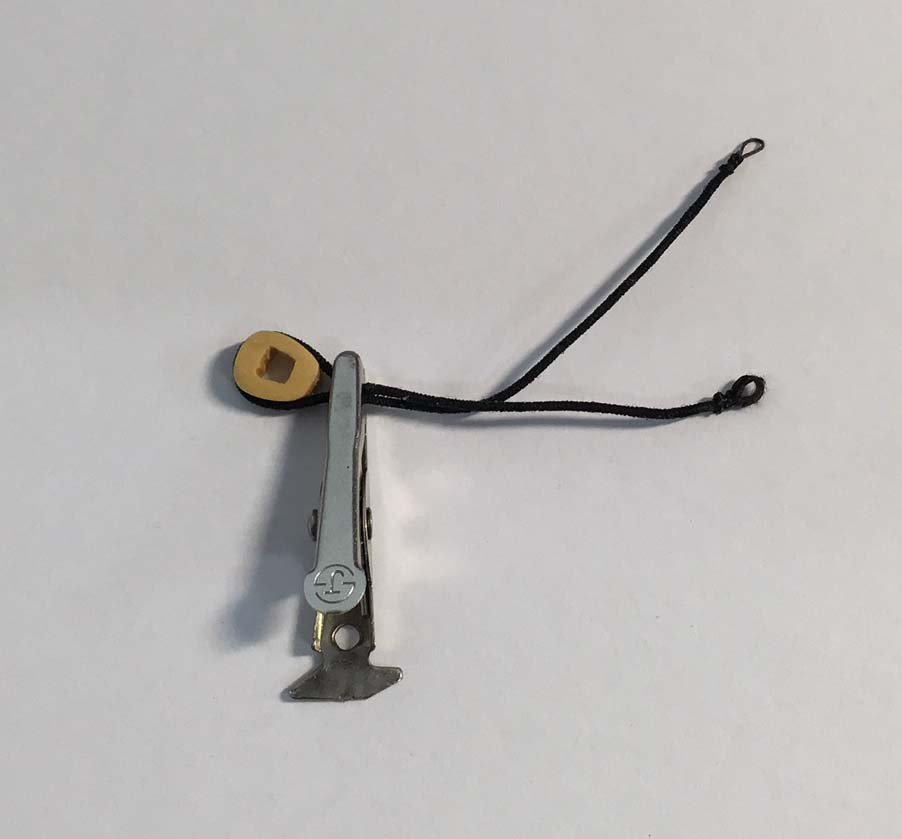
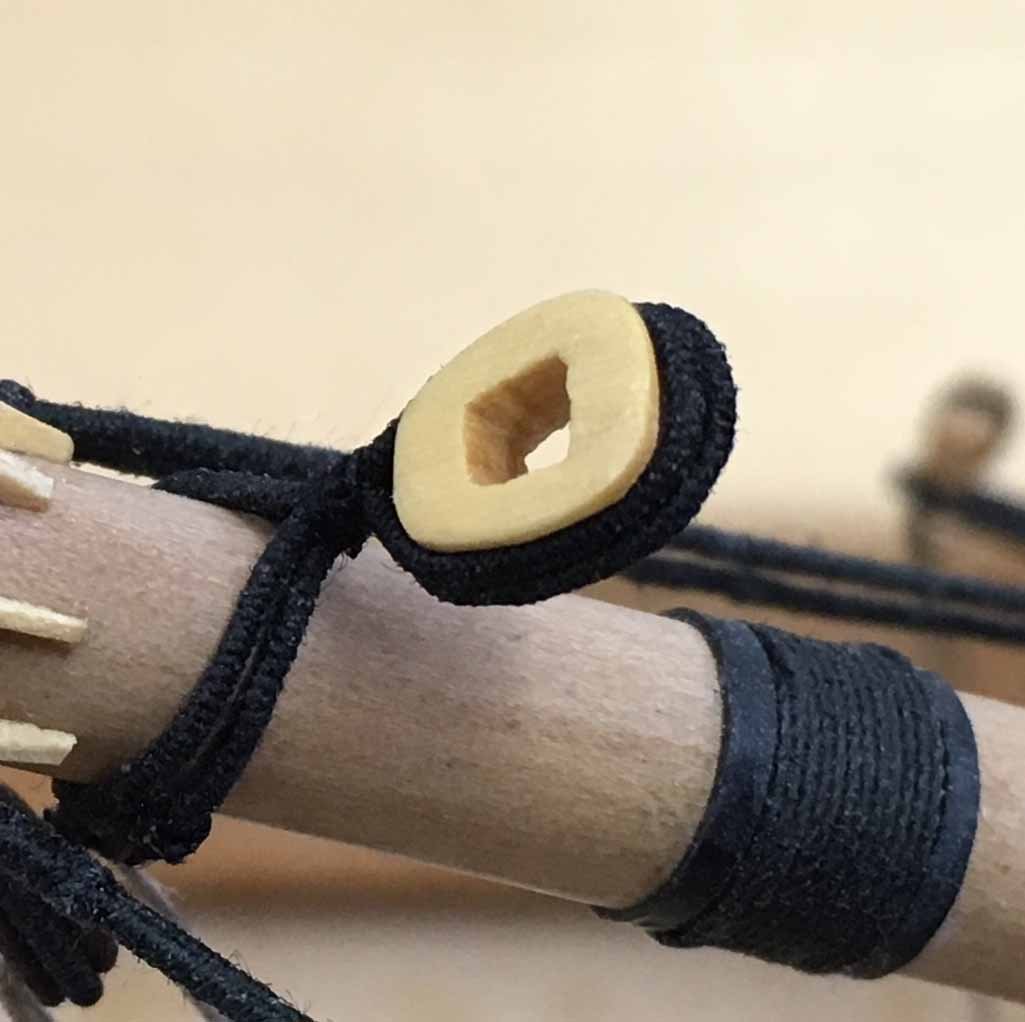
Following on from Jim's idea above, I tried the following method for producing a length of served line with an eye at each end:

One piece of dowel is a tight fit in the RH gear and the other is a sliding fit in the left gear. In this crude but effective first go, the LH dowel is kept in place at the desired position by a combination of a rubber sleeve and a small clip. You simply wind a piece of line between the hooks - as many times as needed to give the right final size - then serve as normal.
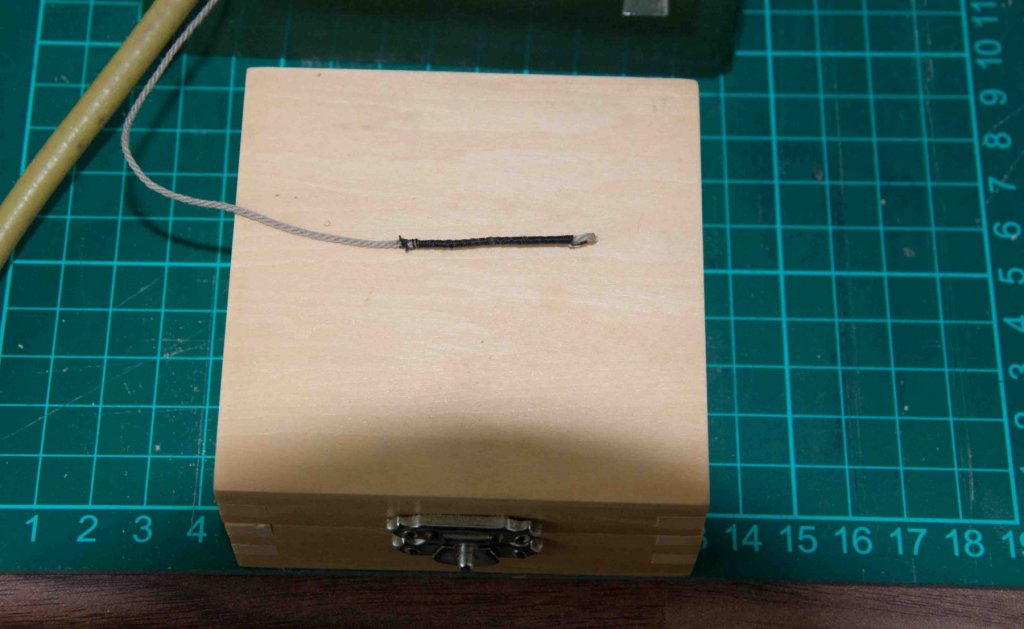
Here's the result:
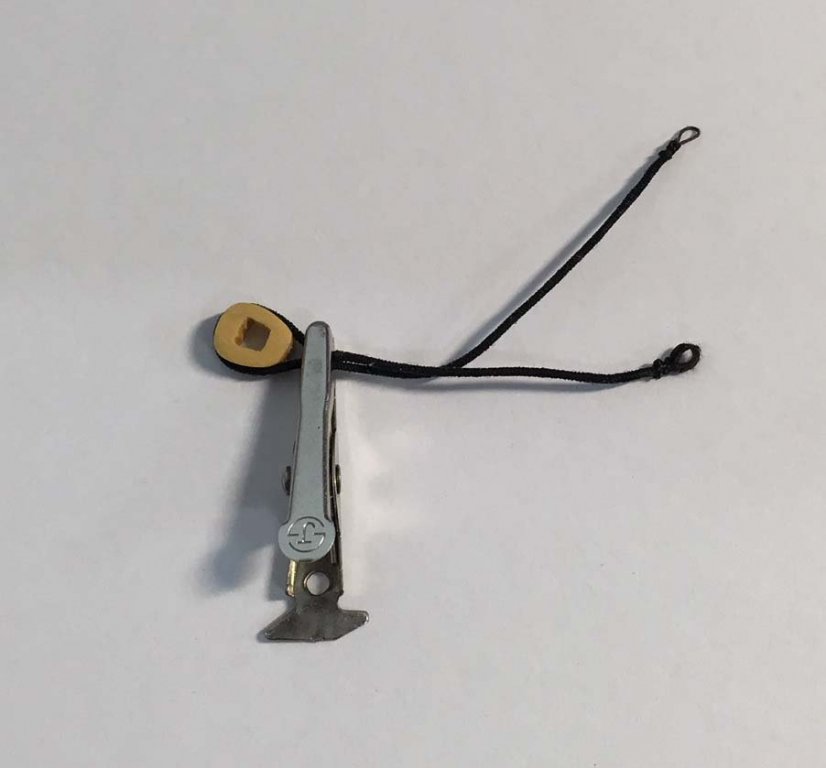

As you can see, I messed up one of the eyes (my eyes let me down and I trimmed the wrong threads!) but as the eyes are hidden under the bowsprit I let that one go.
Just shows how versatile the Serv-o-matic is.
Derek
- paulsutcliffe, JpR62, MEDDO and 2 others
-
5
-
My first model was made entirely with the use of hand tools, and I'm sure if I'd carried on like that I'd have continued to enjoy the hobby. However I've always believed (to misquote Robert Louis Stevenson) that the journey is at least as important as the destination. Over the last 10 years or so that I've been ship modelling I've really enjoyed learning new skills and techniques, and getting to grips with new hand and power tools. On occasion I've had to justify the cost of a new machine by convincing the family finance watchdog that it would come in handy round the house. To my surprise, that has actually proven true on a significant number of occasions - for example turning up replacement parts for showers and garage door mechanisms on my lathe and mill (Chuck's Rope Rocket and Serv-o-matic were harder to justify on those grounds, but fortunately much less expensive!).
Each to his and her own though - you only need to look through this forum to appreciate that there is no 'best' way to create great models.
Derek
-
-
-
Thanks to both of you for your replies. I'll give acrylic paint a go, using Frankie's described method.
- mtaylor, lmagna, thibaultron and 1 other
-
4
-
I'd be grateful for any advice folk might have about the practicality of using acrylic paint instead of acrylic ink to dye rigging. Having read advice on the Forum from Mahuna and others, I decided to experiment with acrylic ink mixed with isopropyl alcohol. This has worked well and, like Mahuna, I've decided to use various combinations of black, brown and raw sienna for the standing and running rigging. Incidentally, I'm using DMC Cordonnet thread spun up on Chuck's Rope Rocket.
My problem is sourcing ink at a reasonable price. I've found economy size bottles of black and brown, but raw sienna ink only seems to be available in small 30 ml/1 fl. oz. bottles. However I've found raw sienna acrylic paint in 150 ml bottles for the same price as the much smaller ink bottle. I've googled the difference between acrylic paint and ink without much success - from what I can gather the ink has finer particles and greater fluidity which makes it a better choice for airbrushing. However other sources say paint can be used to dye fabrics.
Before I shell out on some paint and test it for myself, does anyone have experience with using it to dye rigging successfully, and are there any specific techniques involved?
Thanks
Derek
- mtaylor and thibaultron
-
2
-
-
I agree with everyone else Javier - your work is superb. I’d love to see more examples, and details of your construction techniques (I showed my wife your pictures and she is now asking why I can’t make my models as small as yours as they would take up so much less space in the house!).
Best wishes
Derek
-
I find the black coated wire a bit too shiny for my taste. I've tried black iron wire (from wires.co.uk) with some success. It's a dull dark gray, rather than pure black, but to my eye that looks more realistic for ironwork. Others have pointed out that iron rusts, but so far I've not had that problem. A coat of matt varnish should keep the air and moisture out (I hope!).
Derek
- thibaultron, Canute, mtaylor and 1 other
-
4
-
Thanks for the tip. I looked for it on Amazon just now and saw that it is free to read if you subscribe to Kindle Unlimited. It’s a while since I’ve found a new maritime author so I’m looking forward to reading it.
Derek
- thibaultron and mtaylor
-
2
-
Got mine - really good value. Thanks for the tip!
- thibaultron, Canute, mtaylor and 1 other
-
4
-
-
-
I've just had my first go with the Syren Serv-o-Matic.
As with the Rope Rocket that I used for the first time last week, I cleaned off the laser char and applied a couple of coats of varnish. I really felt this was worth the trouble, to bring out the fine cherry. As with the Rocket however, I made the mistake of assembling the components before varnishing them. I was too impatient, and assembled both machines before realising it was then harder to apply the varnish - especially without gumming up the moving parts.
I should have followed Chuck's instructions, which as usual are comprehensive and well illustrated. A couple of points I would emphasise from my own experience. First, it really is vital to ensure all the gears move freely - to the extent that they almost feel loose and sloppy. If you watch Chuck's short Youtube video you'll get an idea of how everything should move, powered by just one finger.
Another point Chuck makes in the instructions that I would echo is the importance of getting the right tension in the rope being served - too loose and it is difficult to get the serving thread to lay on properly; too taut and the rope will pull the handles in to the machine ends and make the gears too stiff to turn freely.
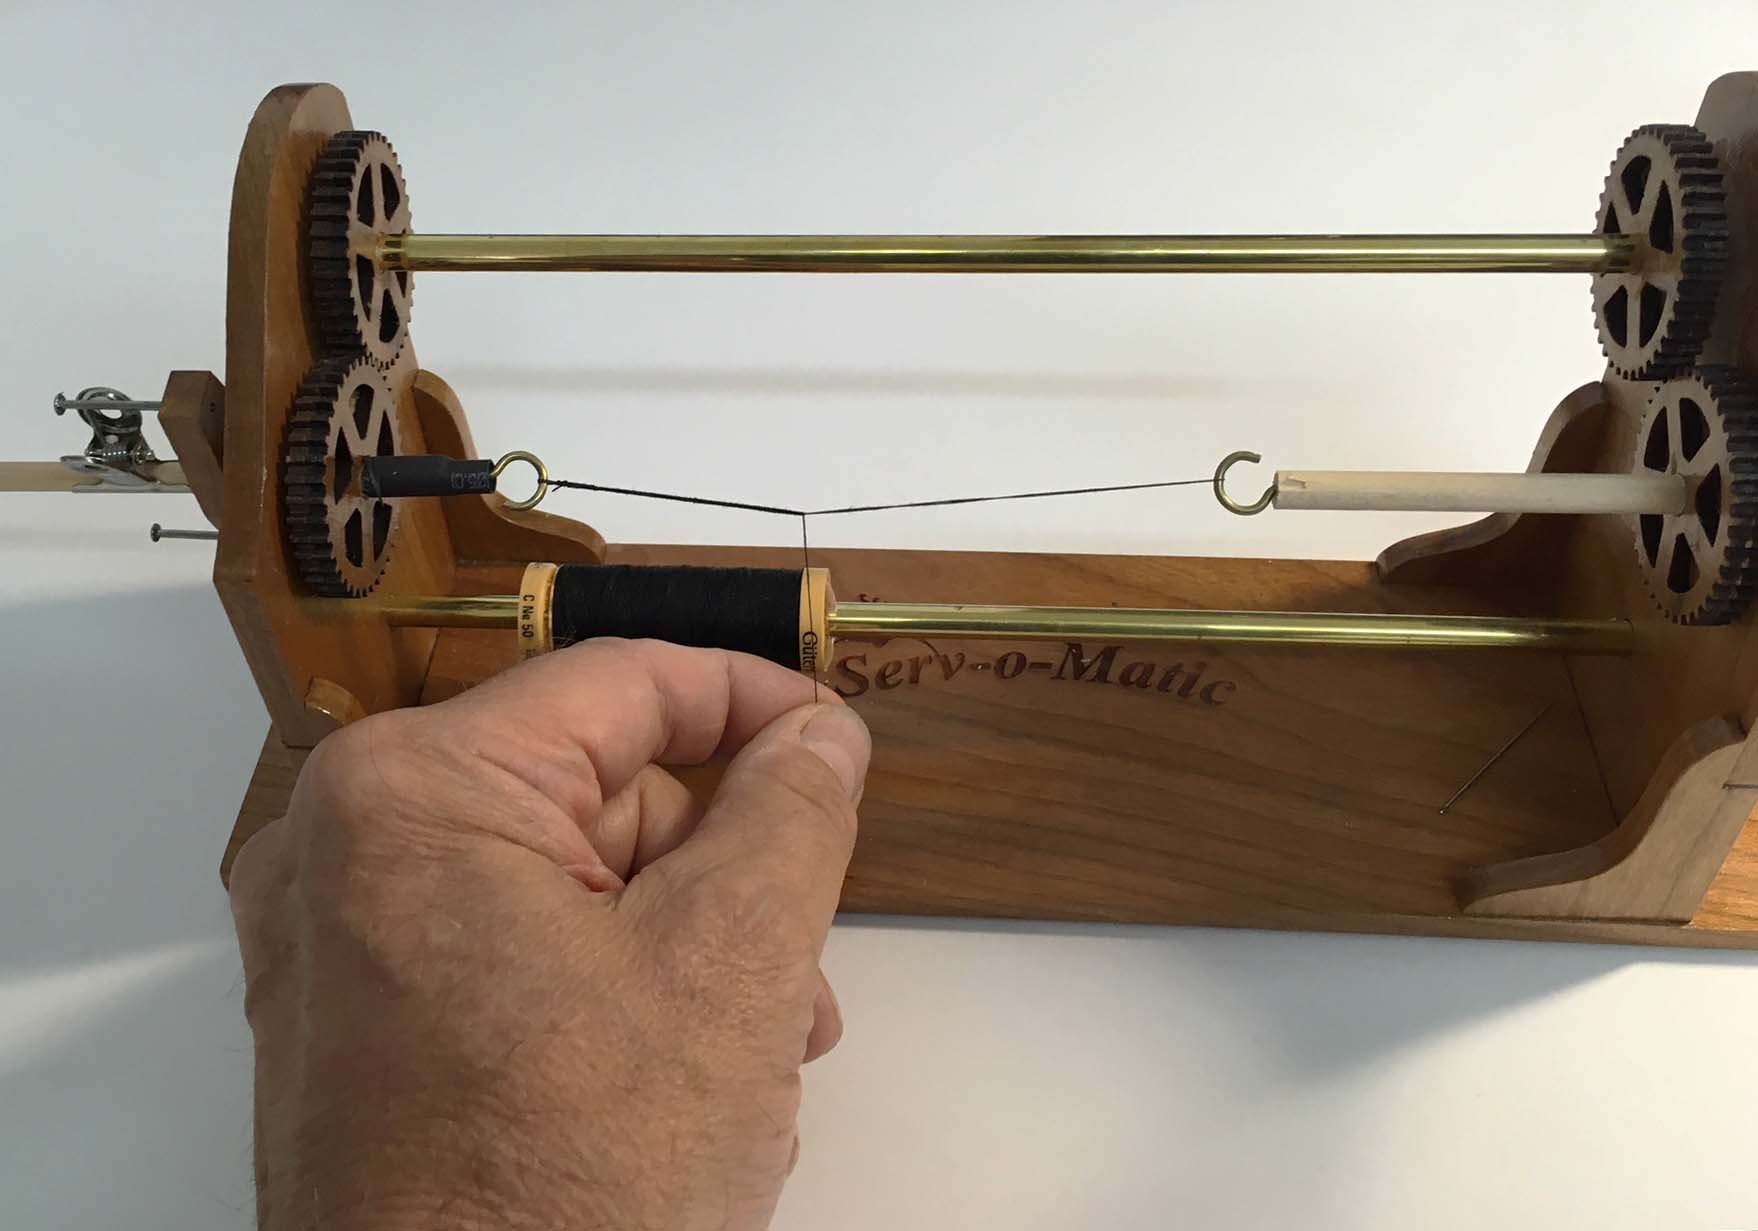
I quickly found there is a knack to serving. It's not super difficult, but it does need practice.
I experimented on a piece of light coloured rope for contrast, which tends to highlight the mistakes. I'm not sure how easy it is to see in the picture, but the serving starts out a bit gappy and lumpy on the lefthand side, then gets better towards the right as my technique improved. Also, I should have used a less 'hairy' serving thread.
Being hand powered, it's a simple matter to put mistakes right; as soon as you see a gap, or you overlap the serving thread, you just reverse direction to before the error and then continue.
In summary, another useful addition to the workshop which I'm looking forward to using in conjunction with the Rope Rocket.
Derek
- Ryland Craze, mtaylor, Vinnie and 1 other
-
4


brass black
in Metal Work, Soldering and Metal Fittings
Posted
I agree. It's the simplest, quickest and best blackening solution I've tried.
Derek