
HOLIDAY DONATION DRIVE - SUPPORT MSW - DO YOUR PART TO KEEP THIS GREAT FORUM GOING! (Only 44 donations so far out of 49,000 members - C'mon guys!)
×


BLACK VIKING
-
Posts
478 -
Joined
-
Last visited
Content Type
Profiles
Forums
Gallery
Events
Everything posted by BLACK VIKING
-
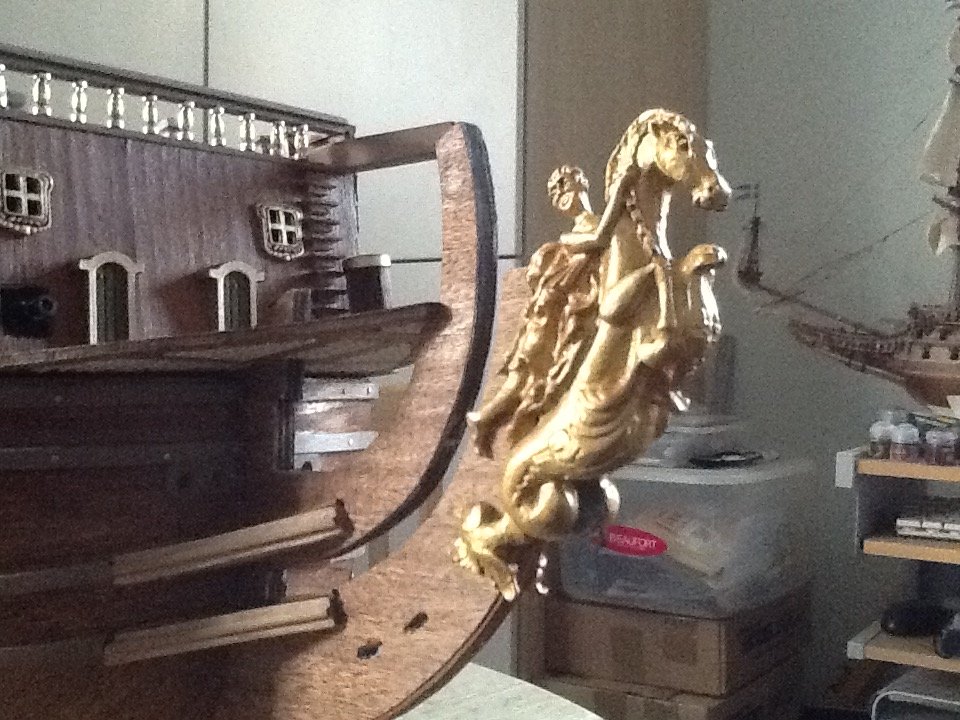
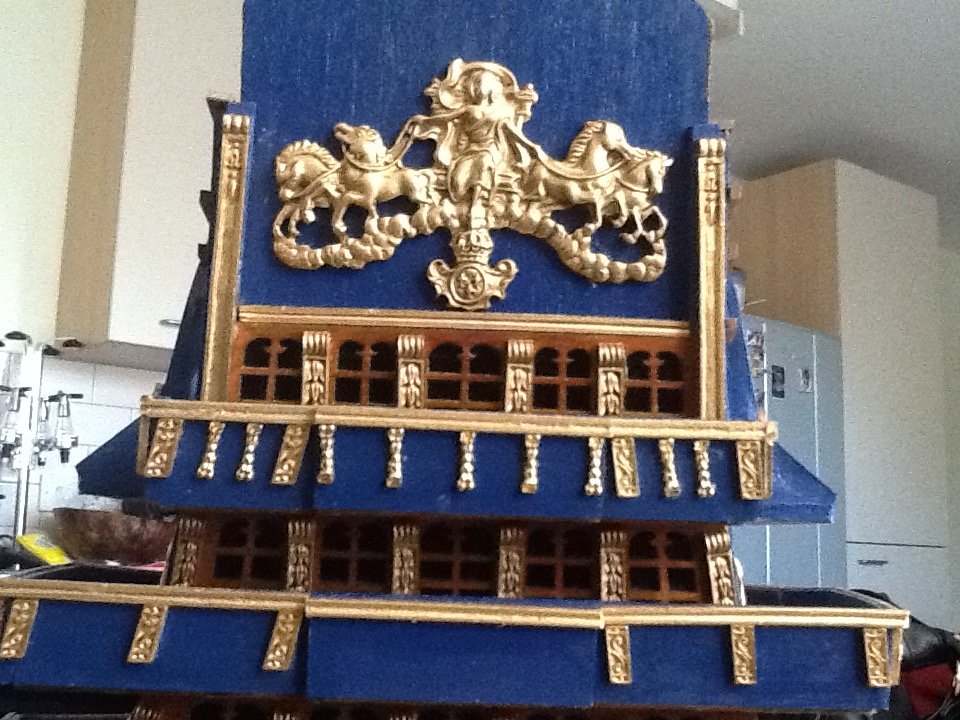
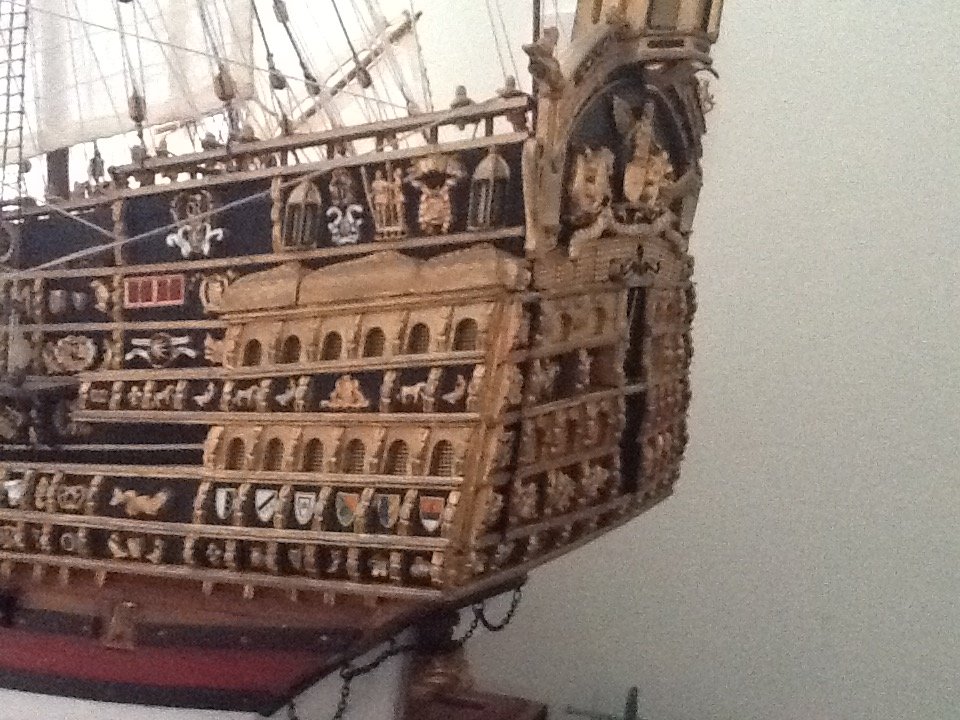
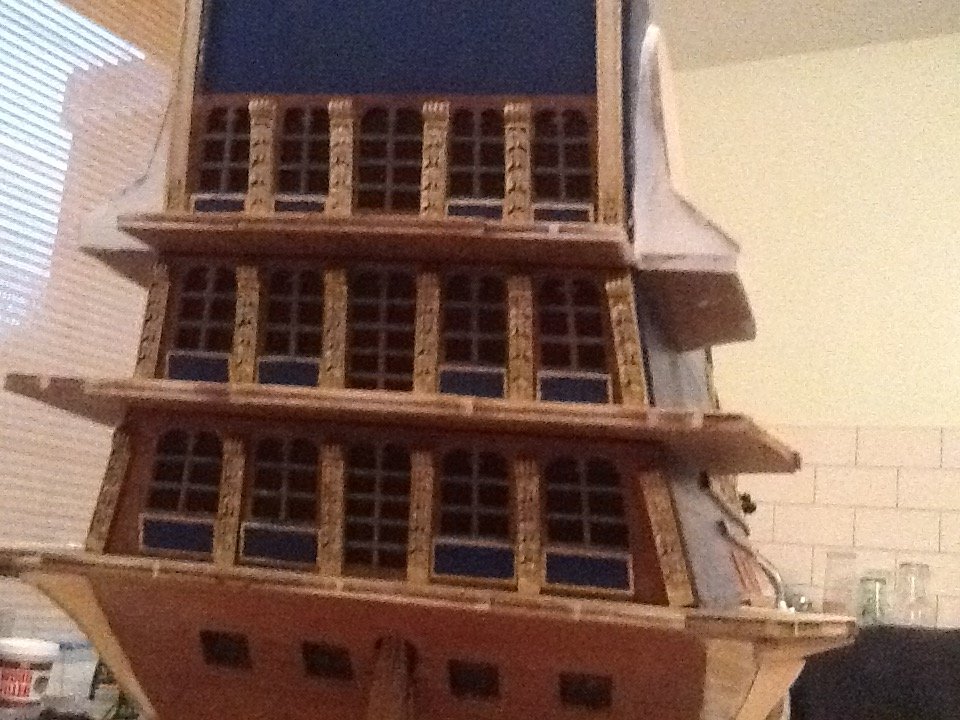
 Thanks for the likes and for looking in A lot more work done on the stern. The carvings have been painted and fitted to the stern with two pack adhesive , still a few more to do The figurehead has also been painted and dry fitted to the bow stem . l have completed the dead eyes and chain plates. The chain in the kit was gold and looked out of place so I have painted it a dark iron paint which looks so much better. Still lots more to do so till the next time happy building Martyn

-
Stunning work as always Michael the rigging looks brilliant. I also had problems with the extra pinholes on the rails and had to use a pin vice behind the ratlines, very slooow Martyn
-
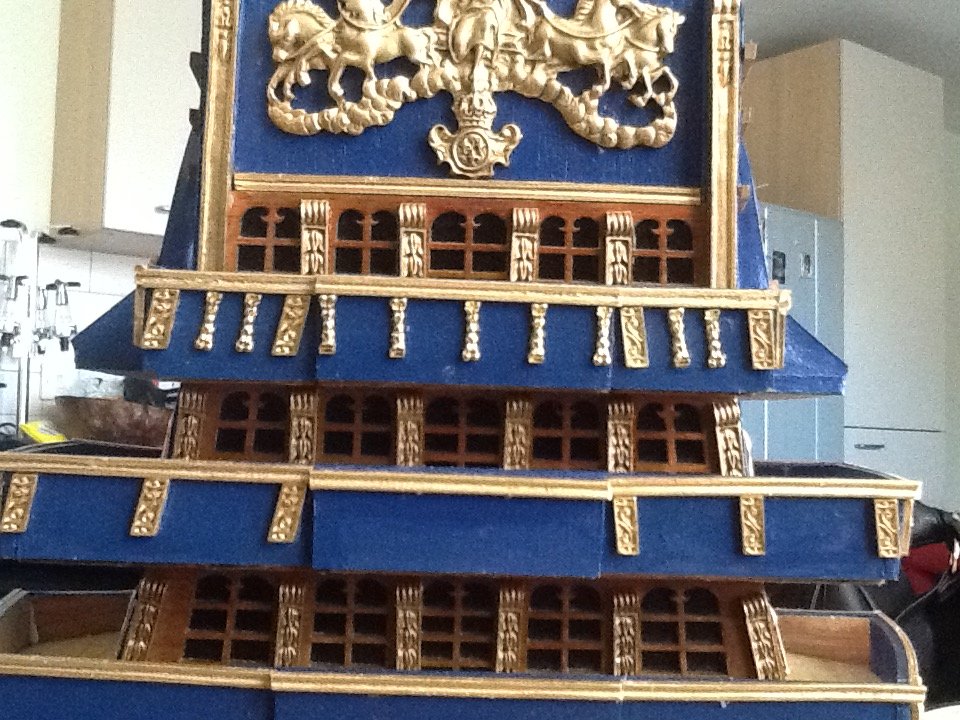
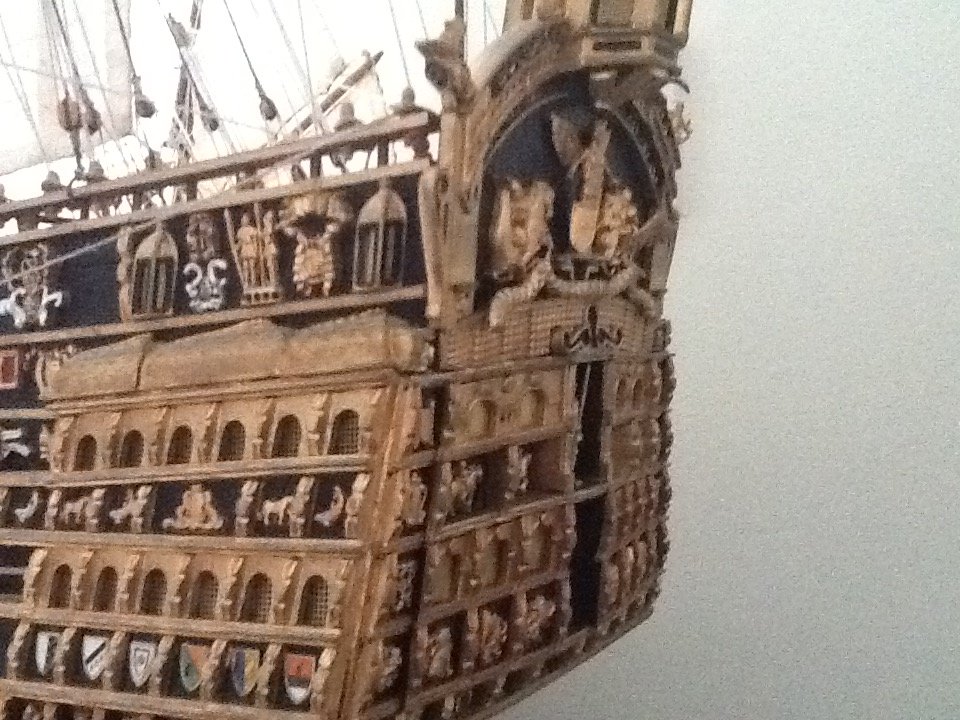
Thanks for the likes As promised a few more shots of the carvings but still a lot more to go. Martyn
-
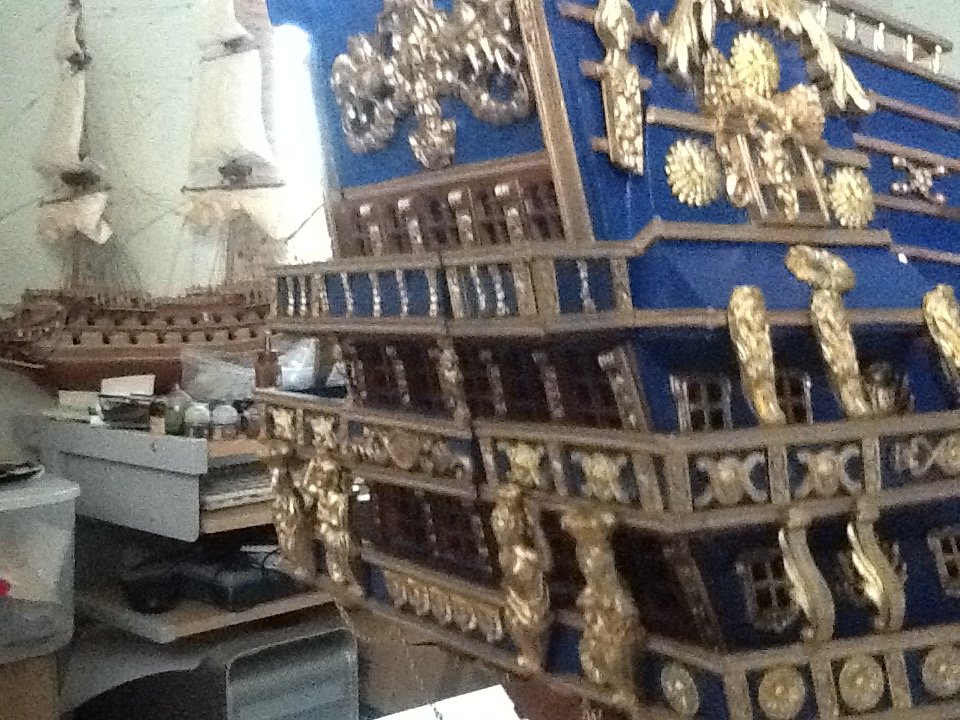
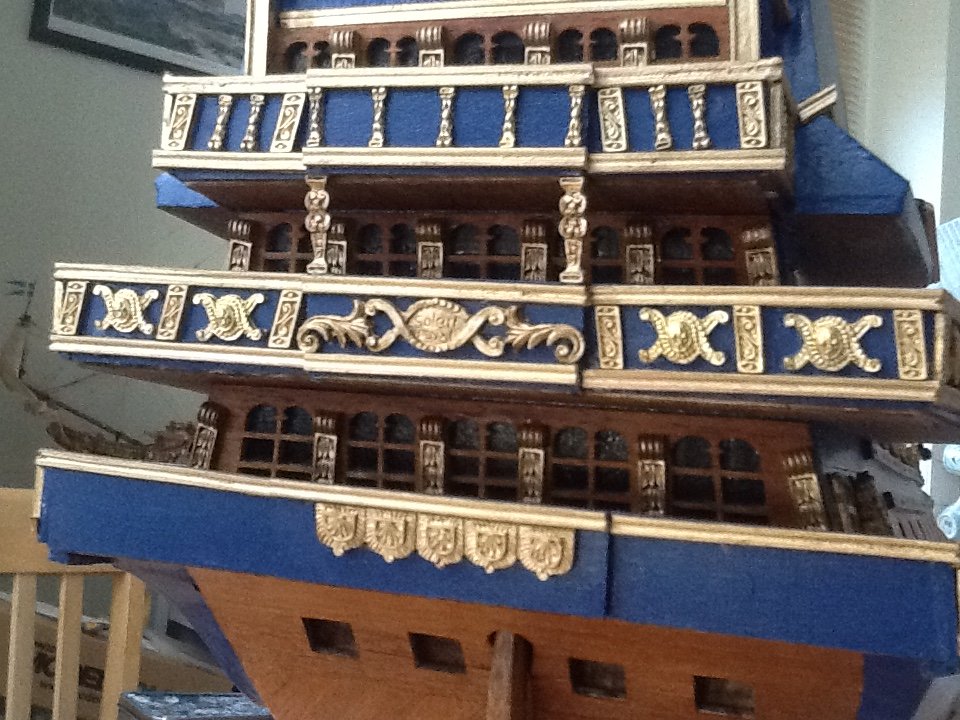
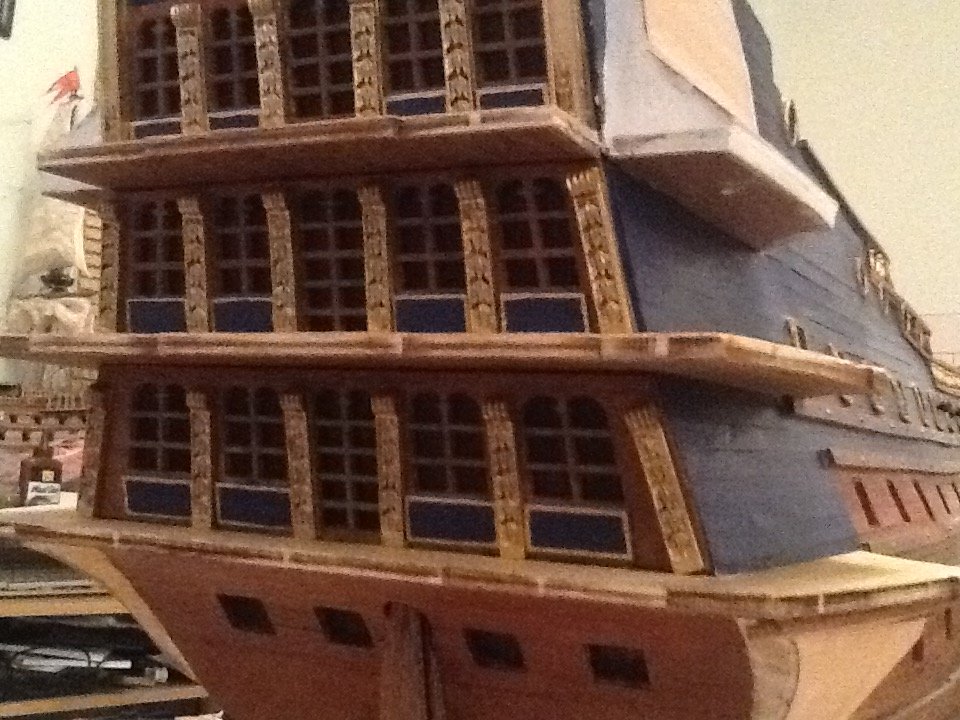
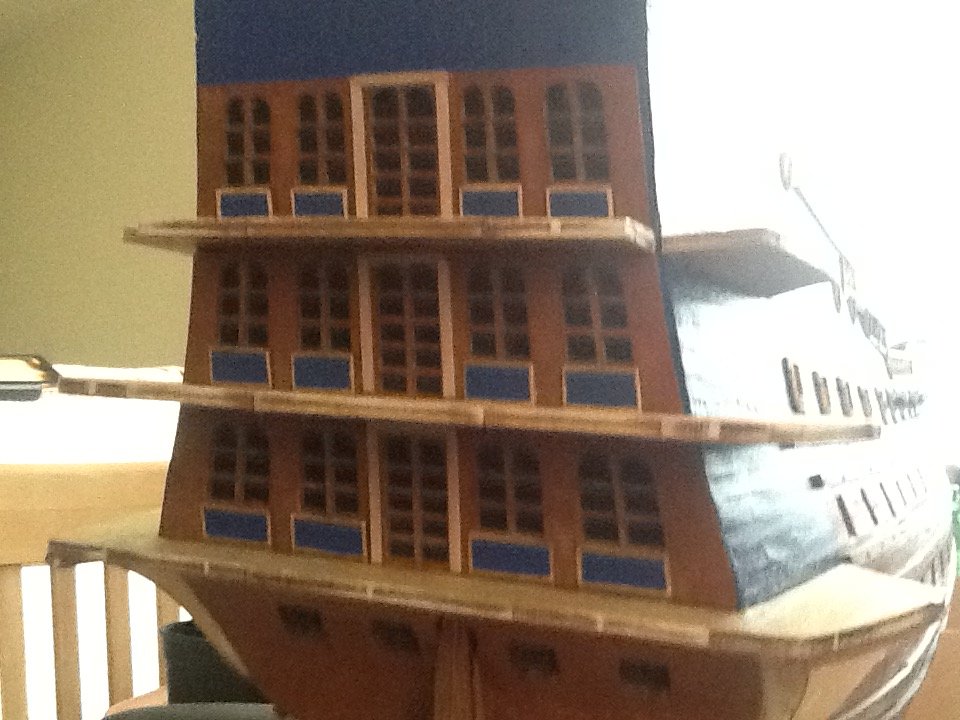
Thanks to all who have looked in and the likes A bit more work done on the stern I have started painting and fitting the hundreds of carvings to the stern of this magnificent ship. The kit gives you some 1mm brass wire to make the bands on the top and bottom of the galleries but I just couldn't get it straight enough to look good so had a think about it and came up a better idea. I have a moulding scraper and decided to use that with some 2x1mm strip pine that I had in my scrap box . The strip was passed through the scraper a few times, sanded and then painted gold. Once fitted and dry the carvings where placed in there positions and glued with two pack adhesive. Lots more to do but here's a few shots of how it's going Thanks for following Martyn

-
$10 Electric Pen Sander
BLACK VIKING replied to JohnB40's topic in Modeling tools and Workshop Equipment
Wow what a brilliant idea, thanks for sharing. I will definitely be pinching this one Martyn -
I must admit that to do all the tree nailing might be a bit overkill on this scale as like Greyhawk said they are practically invisible. Being a bit sad I have measured the ones on the Victory and they are only 30mm across so at this scale they would be minute. Martyn
- 50 replies
-
- 2
-

-
- soleil royal
- first build
- (and 1 more)
-
She is really coming together well Morgan very nice work. Looking forward to your next update Martyn
- 50 replies
-
- 3
-
-
- soleil royal
- first build
- (and 1 more)
-
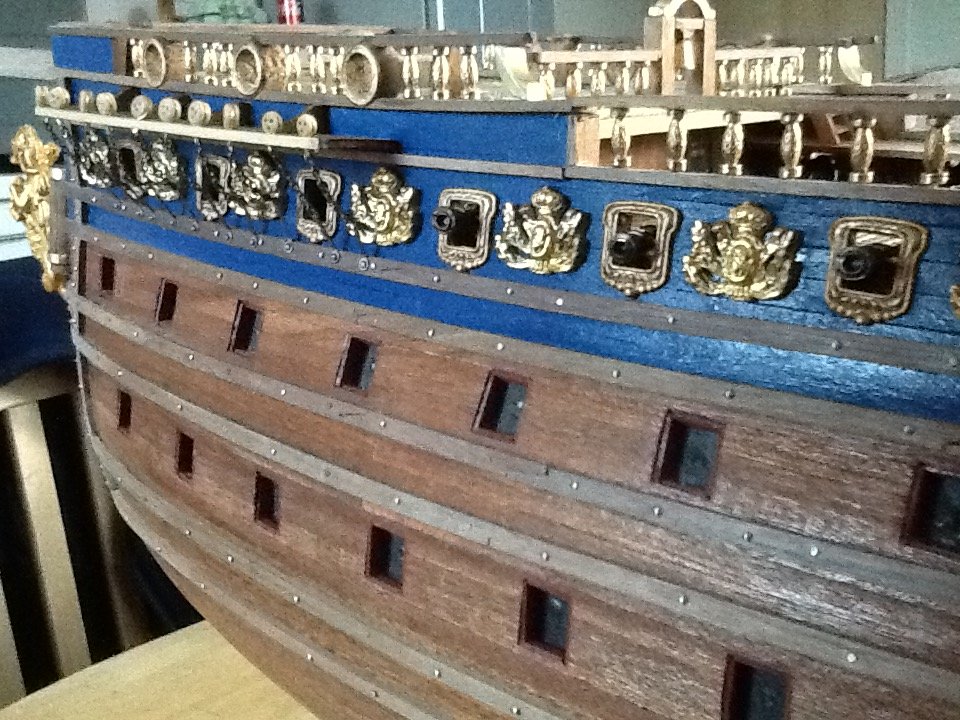
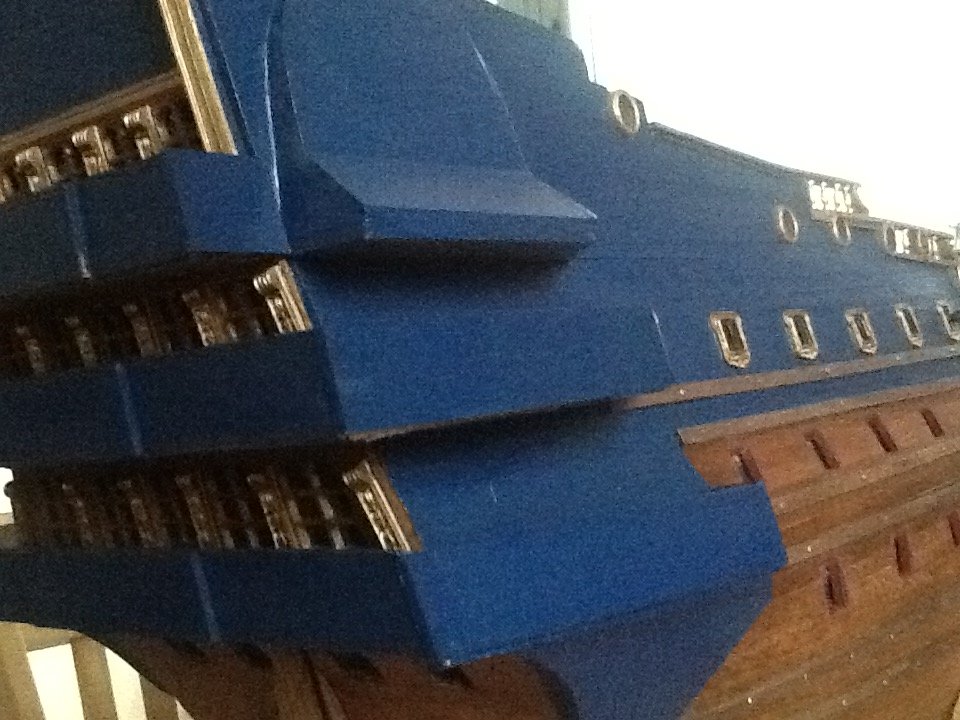
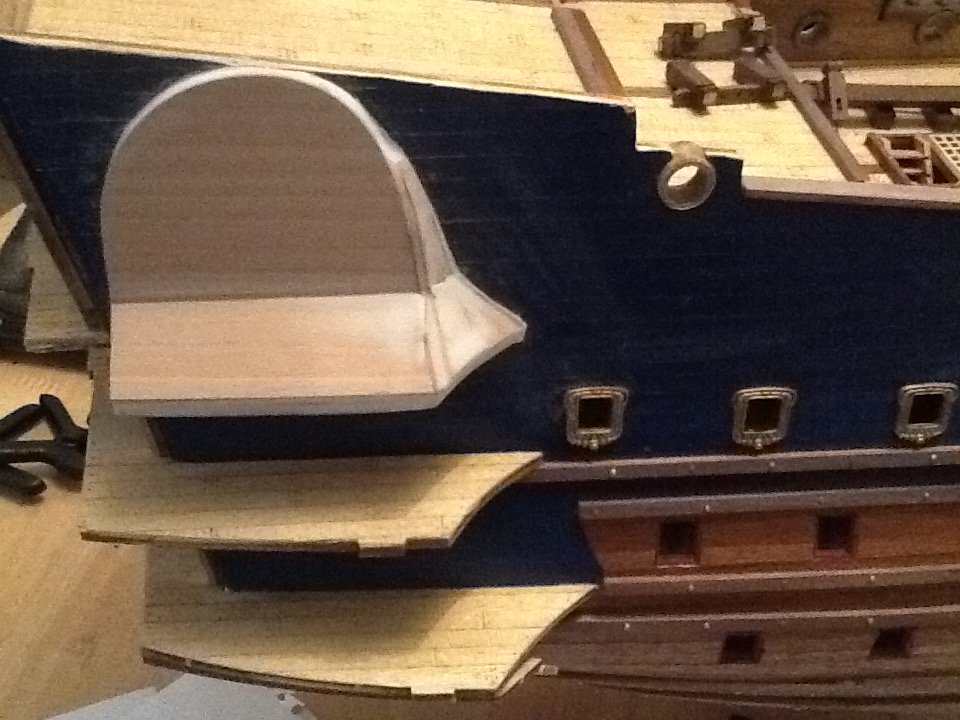
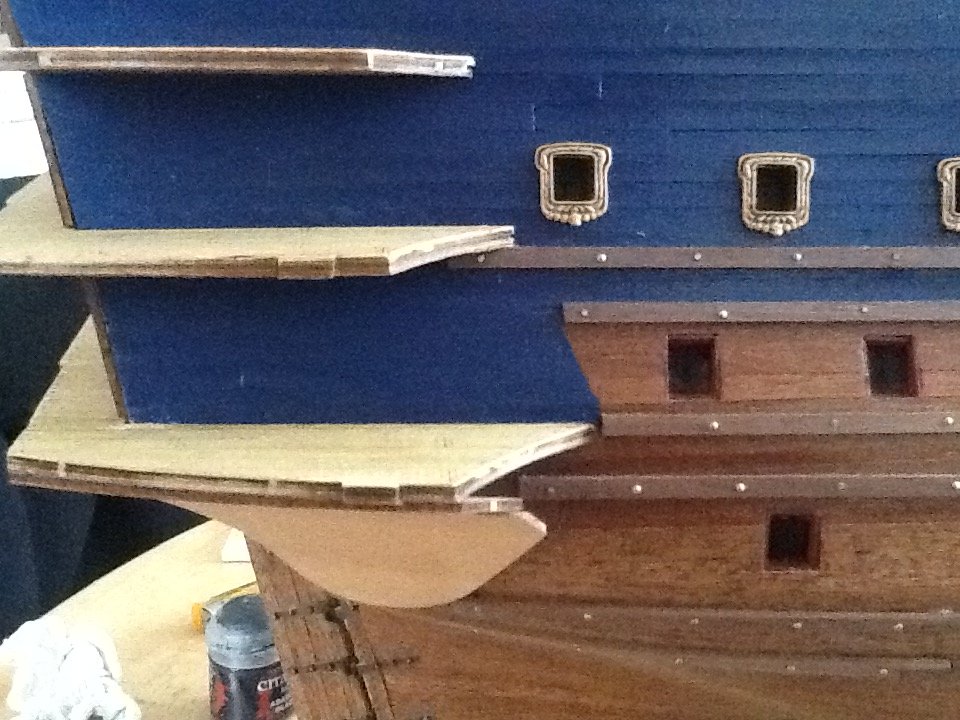
Thanks for the comments Sjors and the likes A bit more done on the SR the knightsheads and bitts have been carved and fitted. I have also completed the the rails on the forecastle and put in the round gunports Next job gluing the strakes to the topmost portion of the hull . Hopefully the next update will show some of the gold carvings in place on the hull Thanks for following Martyn
-
Looking forward to seeing these huge ships come together and the differences between the two Martyn
-
Thanks for the likes and comments There you go Bill some pics of the stern of the Sovereign of the Seas . Sorry there not very good but it was a bit gloomy here at the moment. I will try and get some more tomorrow as its going to be better weather

-
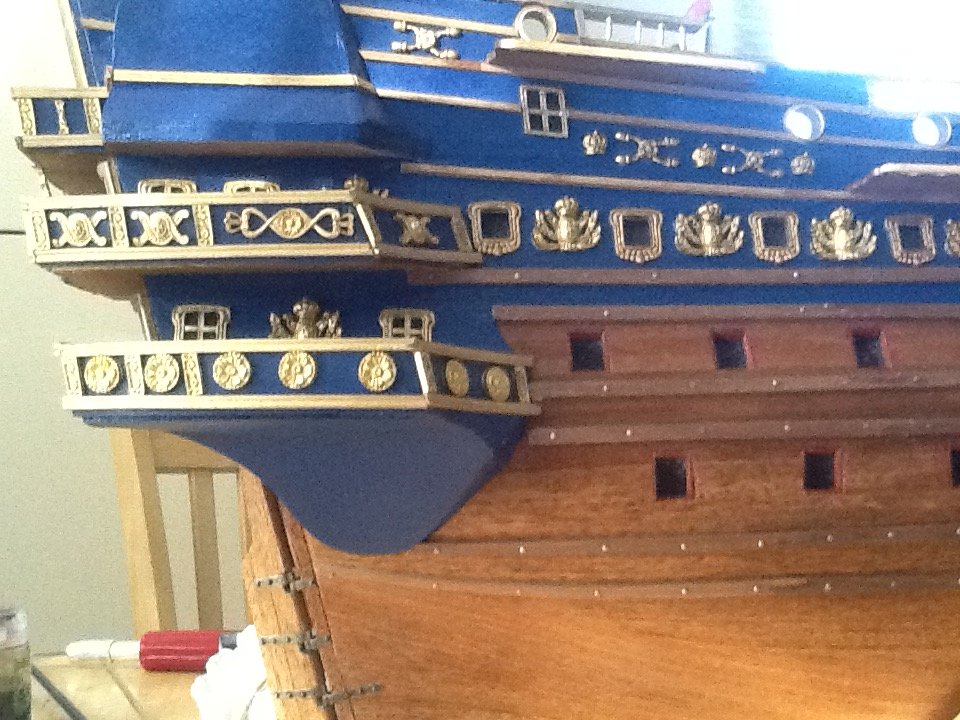
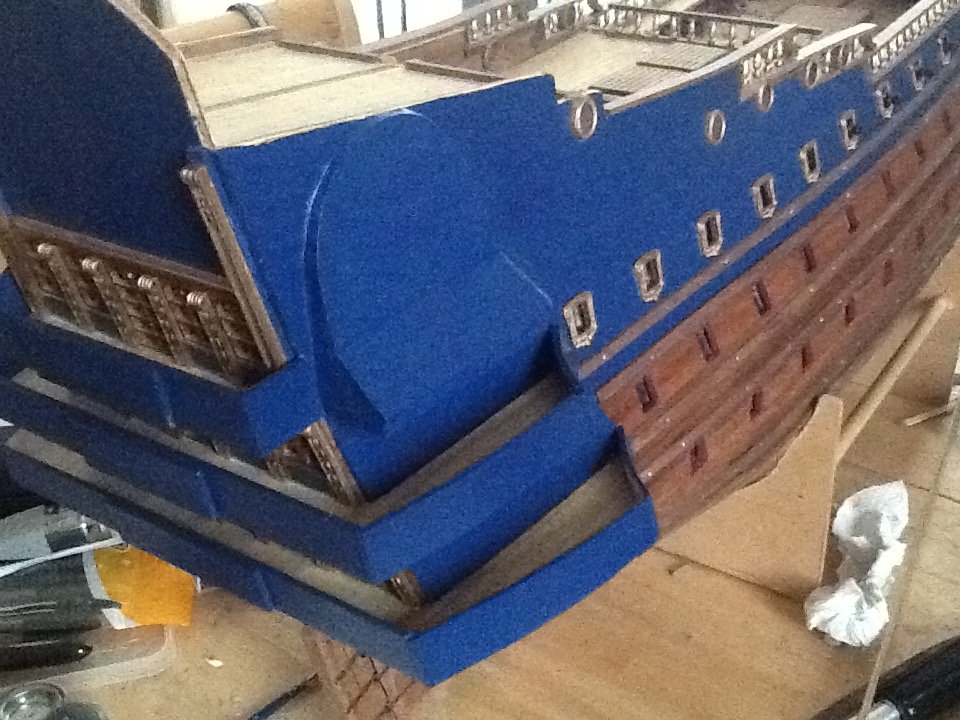
Thanks for the likes everyone I have now completed the stern galleries and have painted them . They were a real fiddle to do with lots of bending to get the right shape but really happy with them . Next job knightsheads and bitts Cheers for looking Martyn
-
Looking good Sjors very nicely done Martyn
-
Absolutely outstanding work I could certainly live with one of those on my wall , beautiful truly beautiful Martyn
-
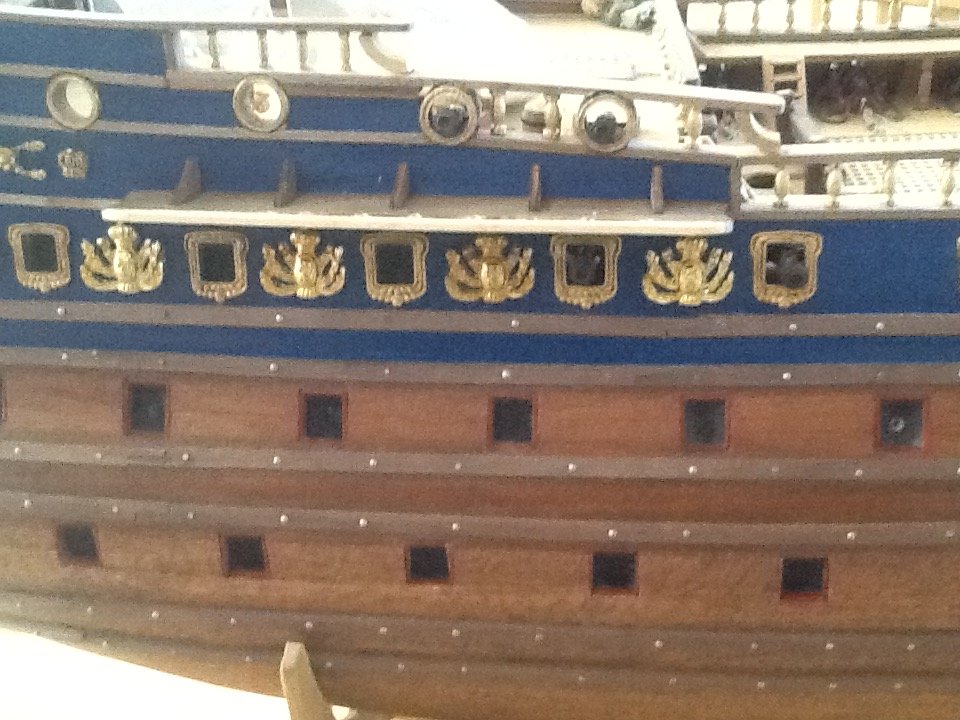
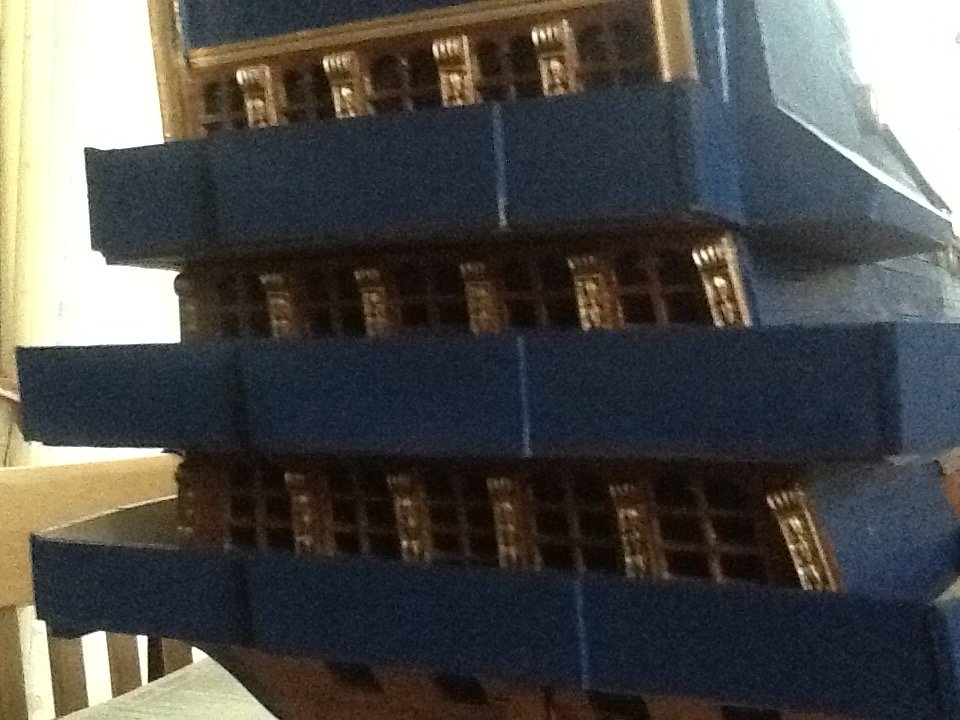
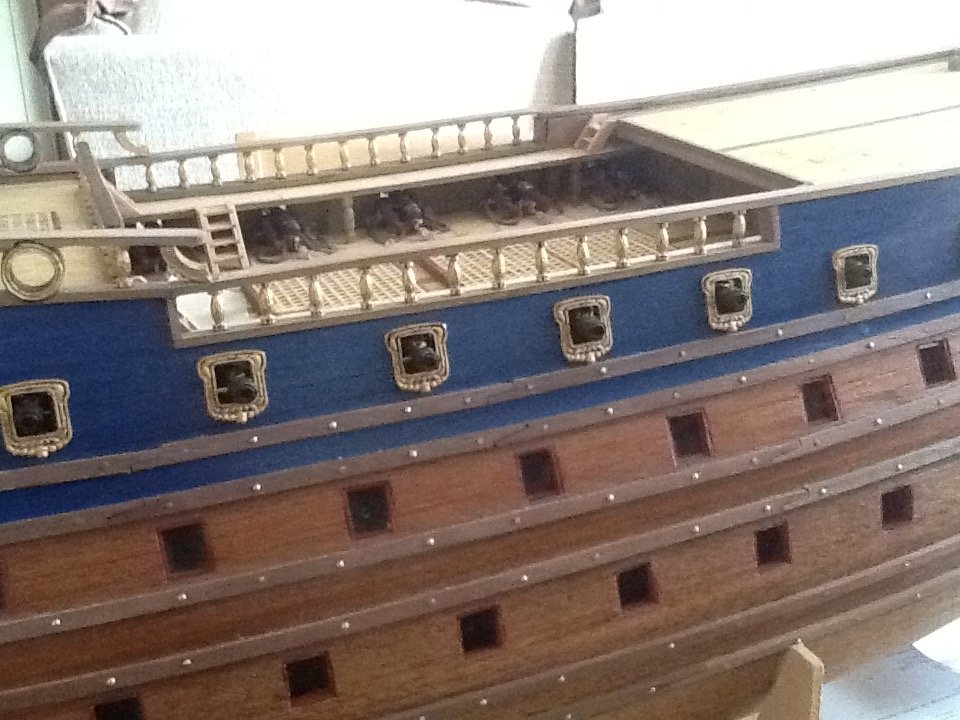
Thanks Zappto Michael and EJ for the brilliant comments and also the likes. I made a mistake by saying that the stern was boring as I should have read through the instructions as there are carved columns that go between the windows. So have painted them gold with a wash of brown to bring out the carvings and glued them in place. Still working on the galleries but slowly getting there. Thanks for looking , Martyn
-
Thanks for the likes every one. A lot more done on the SR . The rails are now fitted and the columns painted gold. Next up the stern galleries. I glued them into the slots and lined them up and left them over night to dry . The curved peace was glued to the lower gallery and while that was drying I started on the windows on the stern. These were a bit boring to look at so I have added a door frame and painted the panels under the windows blue with gold trim. Next job will be finishing the rest of the galleries hopefully in the next couple of days Thanks for looking Martyn
-
Wow I have just found this build and that is one stunning ship especially as it's radio controlled, very well done Vic . looking forward to seeing on the water Martyn
- 213 replies
-
- 3
-
-
- la couronne
- 74 gun
- (and 2 more)
-
Superb work on the main deck she is coming together very nicely ,well done my friend Martyn
- 50 replies
-
- 1
-
-
- soleil royal
- first build
- (and 1 more)
-
The oil has certainly made the wood pop , very well done Martyn
-
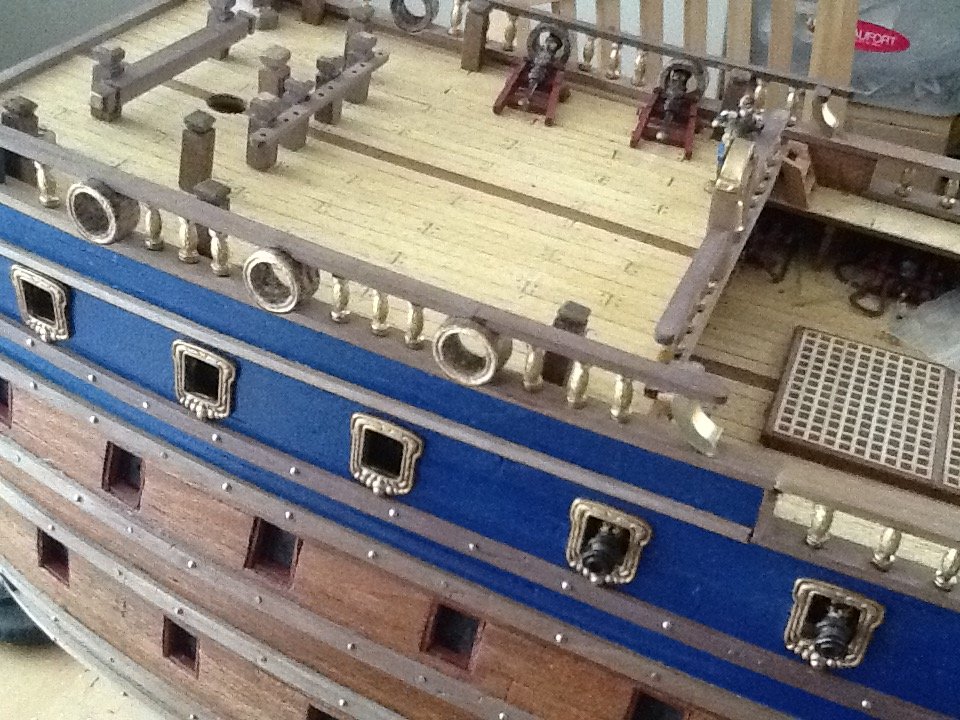
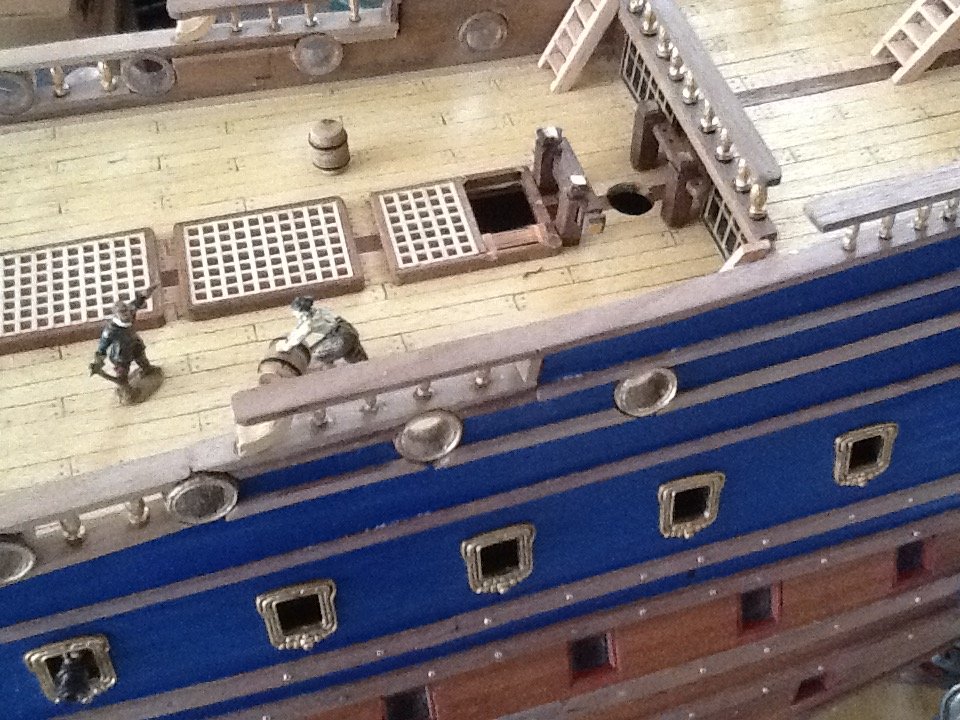
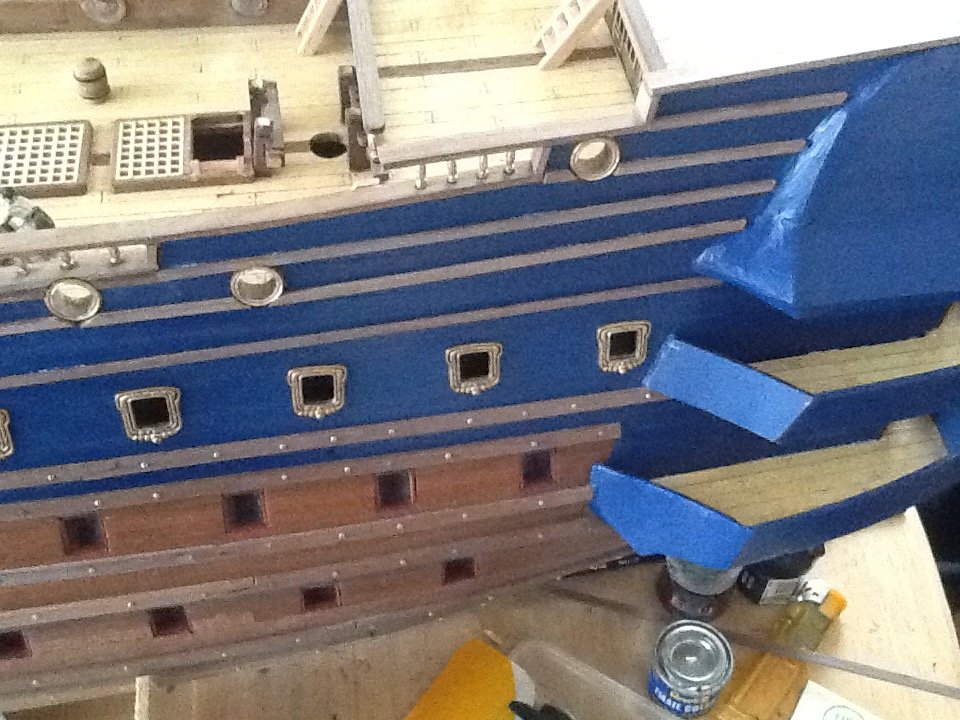
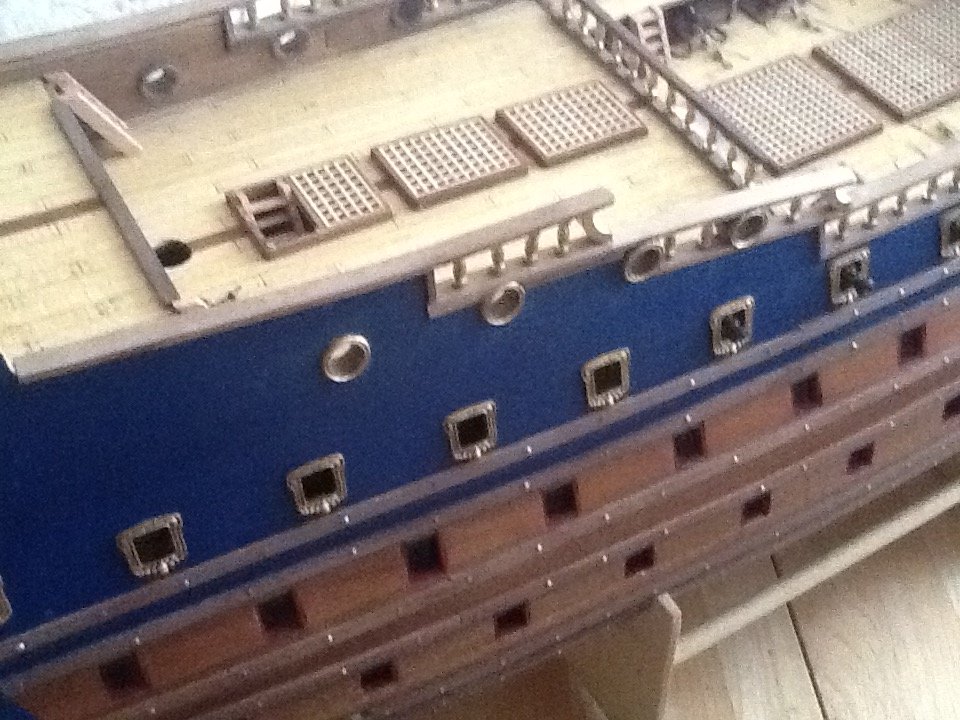
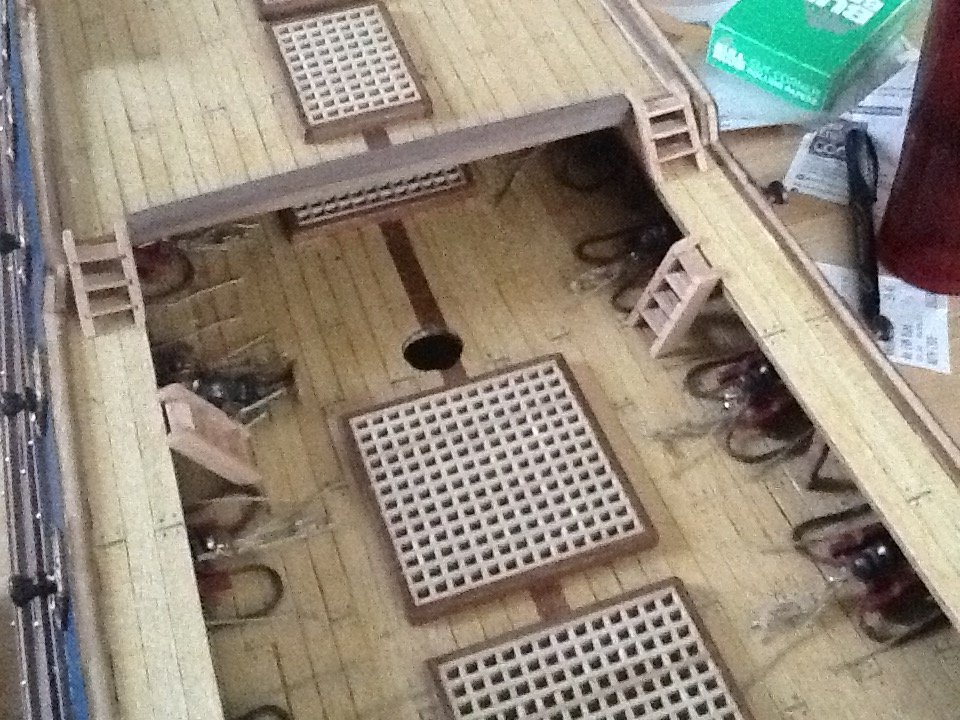
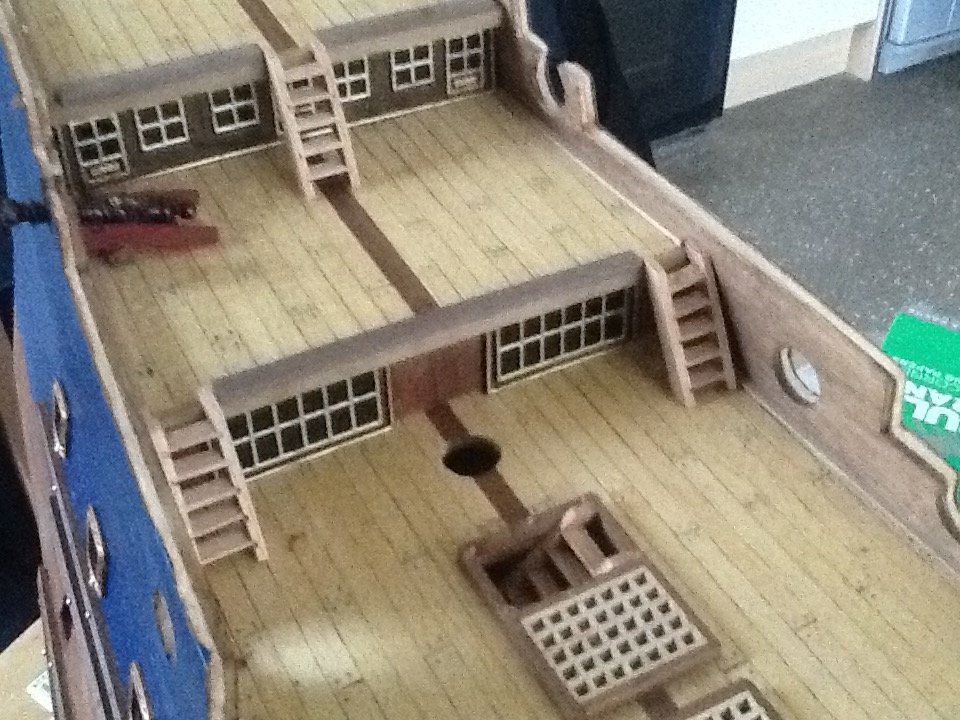
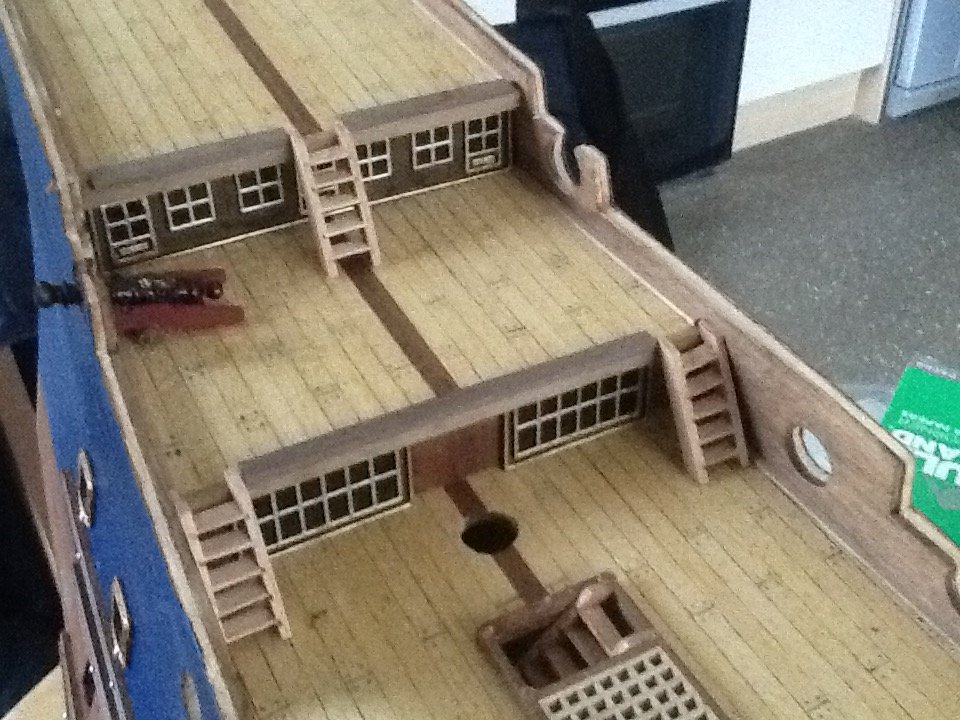
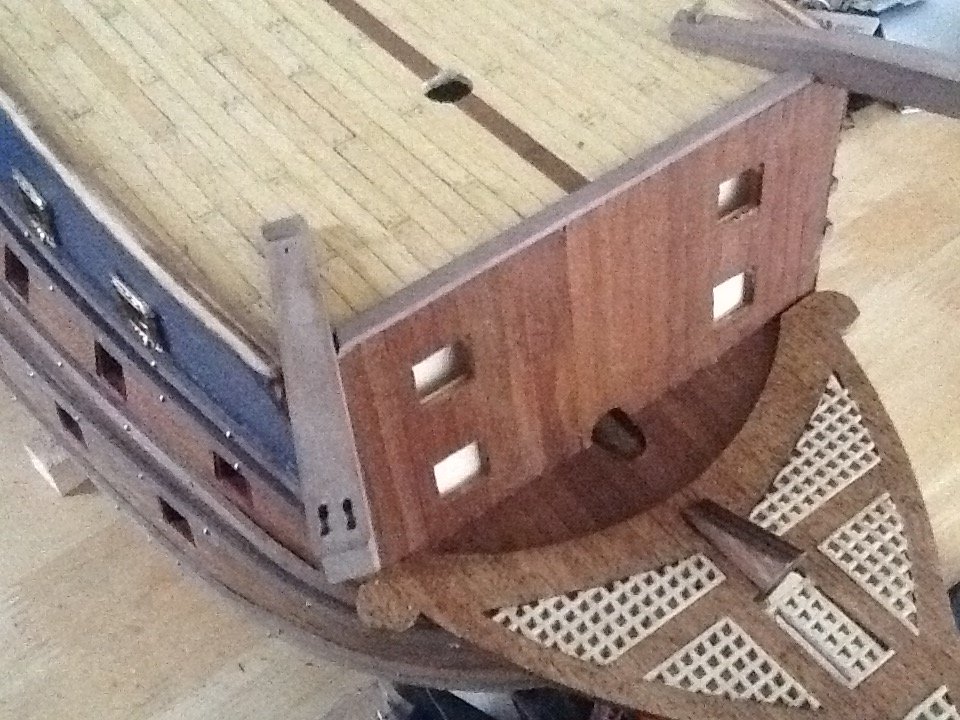
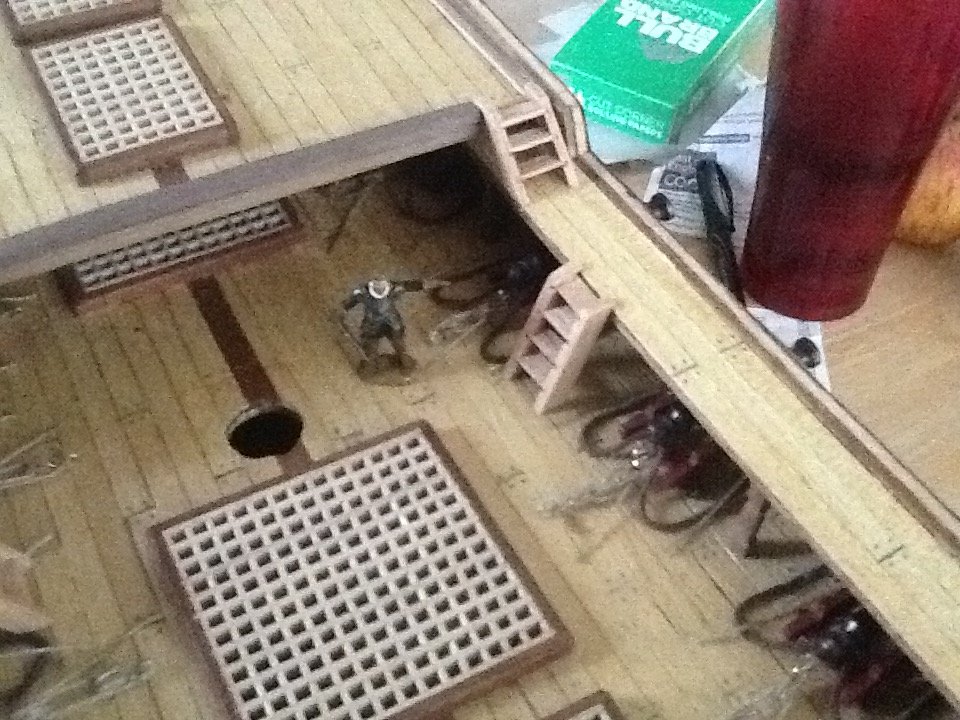
Thank you all for the likes and for looking in A little more work done on the deck furniture I have made the ladders and cat heads and painted the windows to the cabins Next job fitting the capping rails to the top of the bulwarks Martyn
-
Hi Morgan luckily Deag supply more than you need to complete the decks but I would definitely flag this up to customer services as this is unacceptable Very nicely done on the planking certainly better than the instructions Looking forward to seeing your next update Martyn