


Dfell
-
Posts
251 -
Joined
-
Last visited
Content Type
Profiles
Forums
Gallery
Events
Posts posted by Dfell
-
-
Hello - Thank you Martin W / Beta male / Blue Ensign / Mirabell61 for having a look at my build and your encouraging comments.
Martin - I must have worn the pages away on your build with my constant viewing of your build which has helped me a lot.
Have now stuck the gunport strips down and have thought one could get too hung up on getting them right which felt impossible to get 100% correct and realise things can be slightly altered at a later date.
Will probably get the gun carriages from Syren and the cannons from RB.
Blue Ensign - Had noticed you added a supportive piece on the joint and did think of doing this but once all glued up and dry the joint felt okay. We will see

(Been following your Pegasus build - incredible)
Regards
Doug
-
-
-
Thanks Don. Yes it certainly would be quite a challenge to cut the gun ports out.
May move all a millimetre or so forward as one of those small square holes on both sides just has a tiny bit of bulkhead showing which I know will be cut off at some stage.
This will also help the join as it should sit a tiny bit more on the bulkhead. Would also try and lower the bow part of strip to align with the tops of bulkheads better.
Have checked the fit with the quarter deck on and it seems okay with some trimming off the end of strip.
Anyway thanks for looking in and your comments.
Doug
- Martin W and Old Collingwood
-
 2
2
-
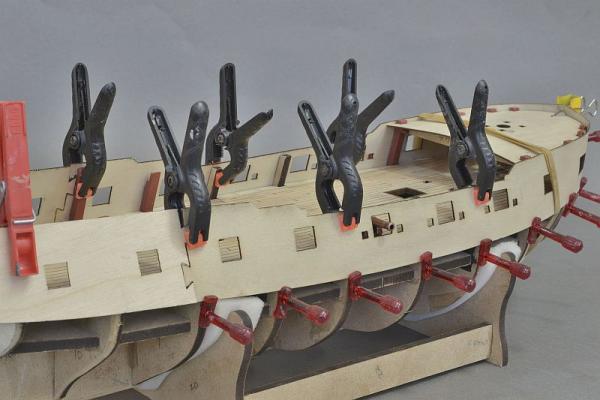
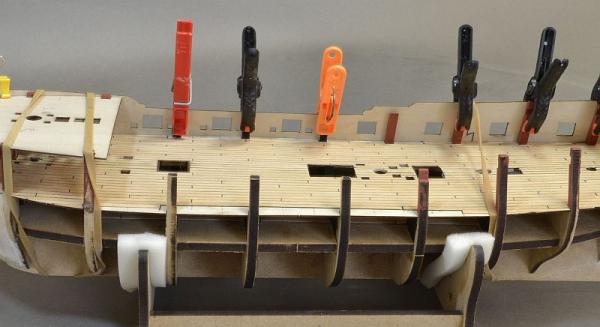
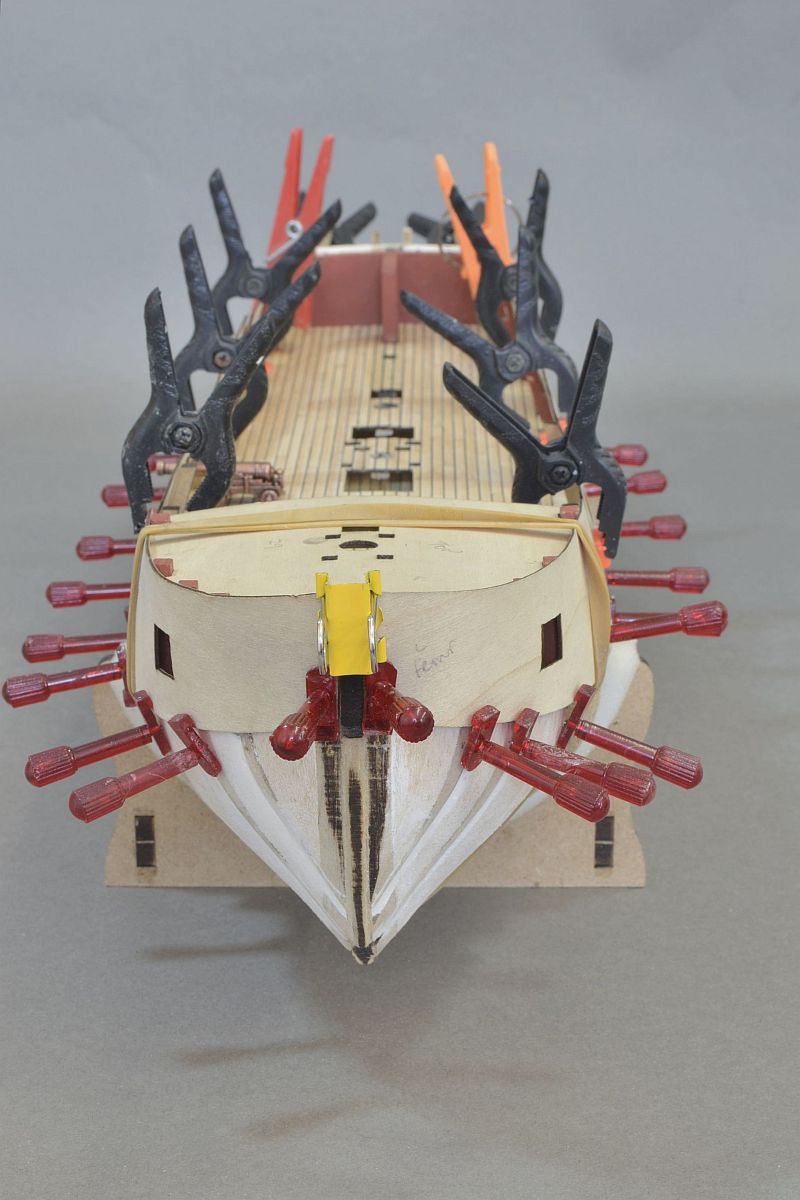
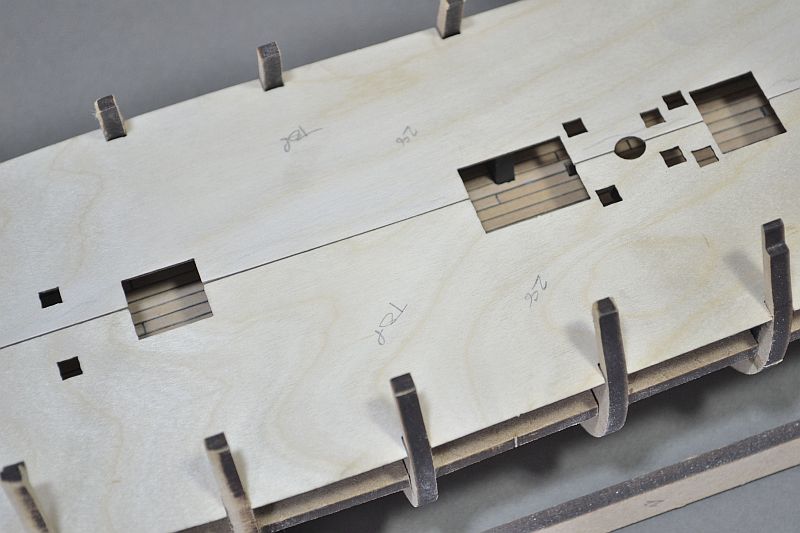
Right - now other side gun port strip dry fitted in place. Hopefully there is no obvious things wrong.
Am worried about this stage - if wrong I guess it will cause a lot of problems for other things.

Top of the strip is fraction higher at the bow bulkhead
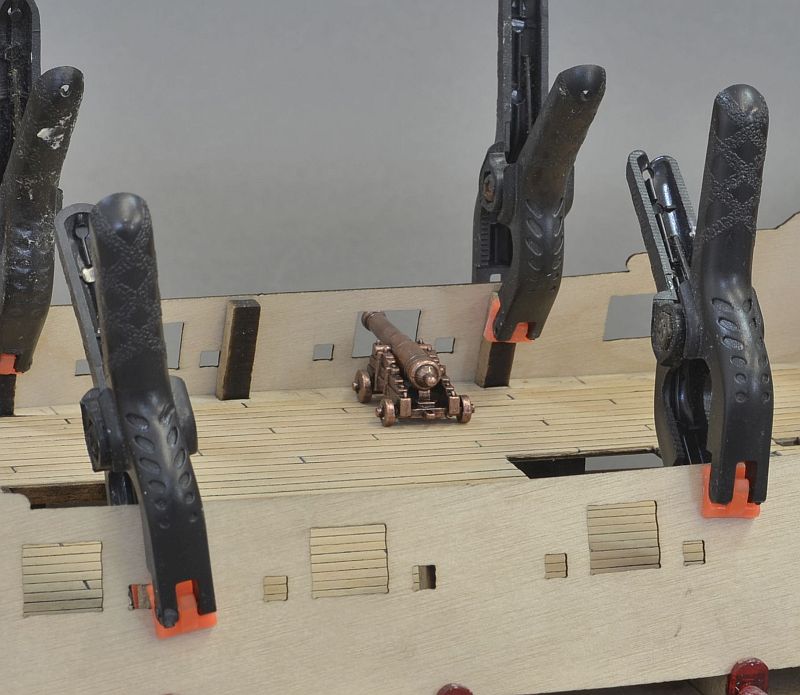
Gun in place for checking position to the opening - although would like to change the carriage which will probably alter how the gun points through opening.
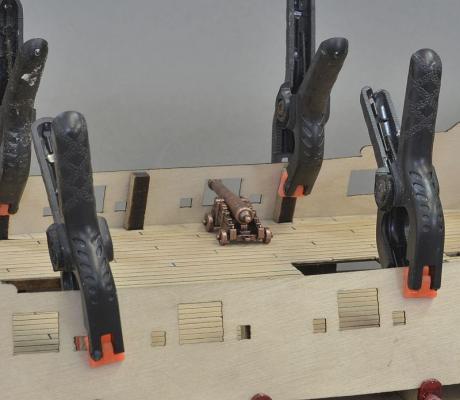
Another view

Join on strip just misses bulkhead which I understand is how it should be - strange.
Hopefully this is all okay - I will proceed with glueing it......
Regards
Doug
-
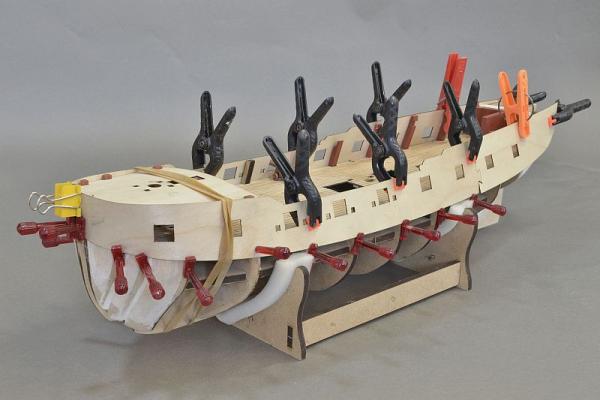
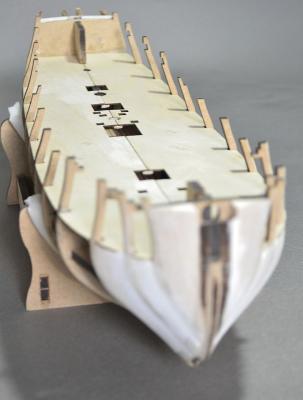
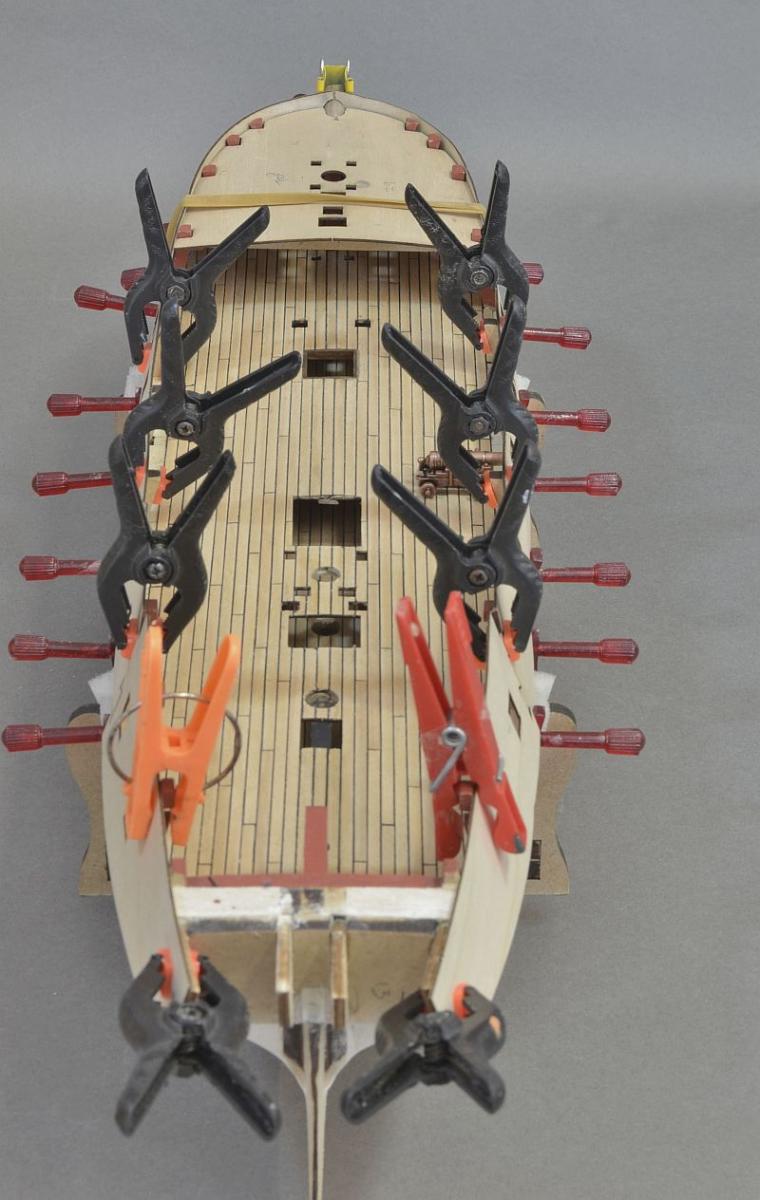
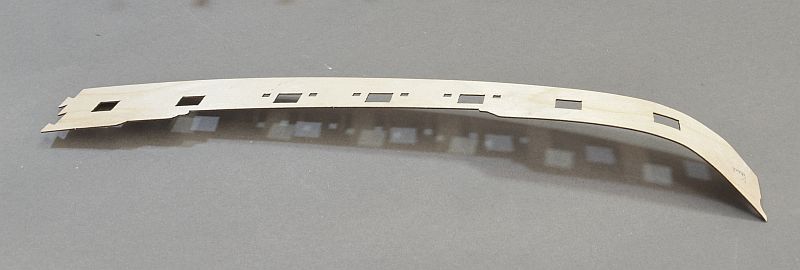
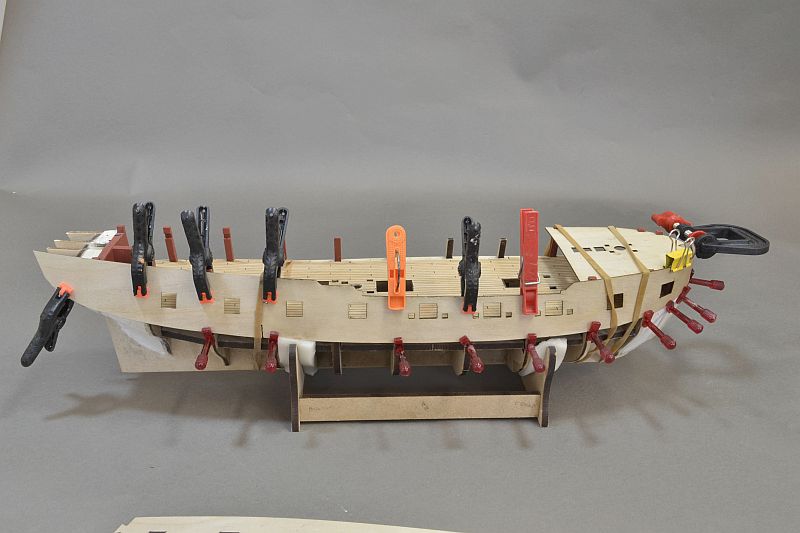
Hello - wanted to check that things are going in the right direction as I know this part of the build is extremely important.
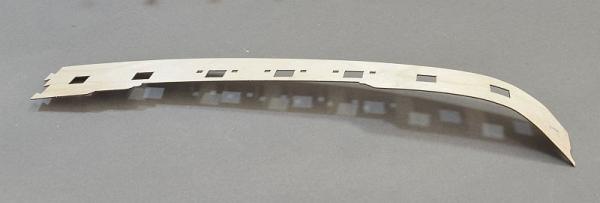
All dry fitted. The gun port strips were first heated with an iron and fixed on a board between two rows of screws forming the bow's shape
A light mist of water sprayed on and then left over night.
A test fit and to form the shape so far only one side done - fixed in place with the usual clamps etc. Again a light spray of water and this will be left overnight. Then the other side will be done.
The strip as instructed aligned to tops of bulkheads but the odd top of bulkhead a fraction too high.
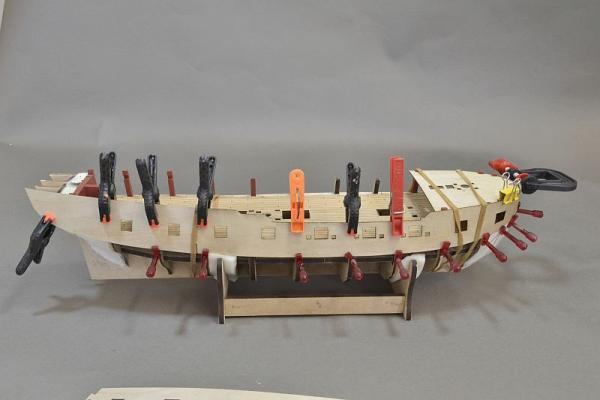

All gun openings appear the same distance above decking and have place a kit's cannon on all seems central although will source some other carriages and use kit's barrels. All needs looking into.
Please - if anyone can see something wrong I would appreciate the feed back.
Thank you
Doug
-
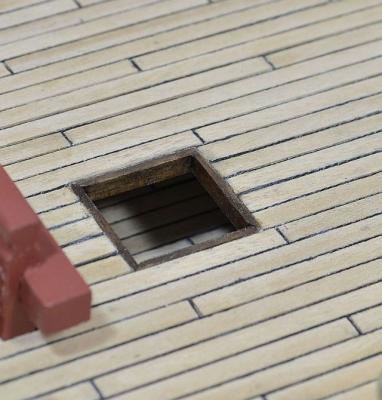
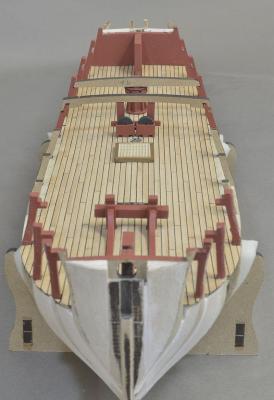
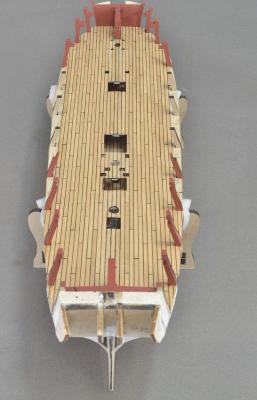
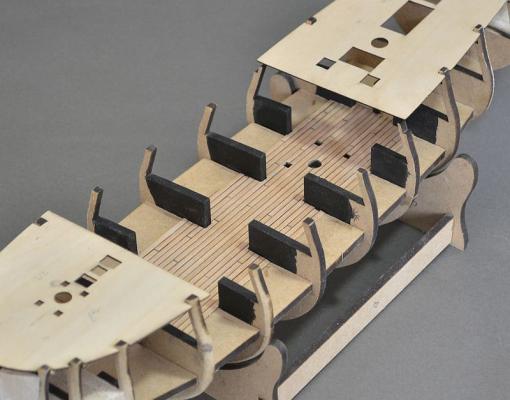
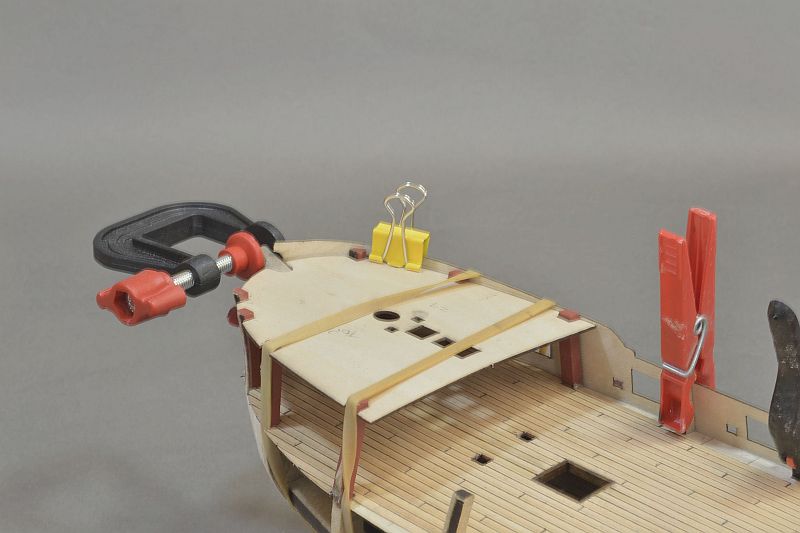
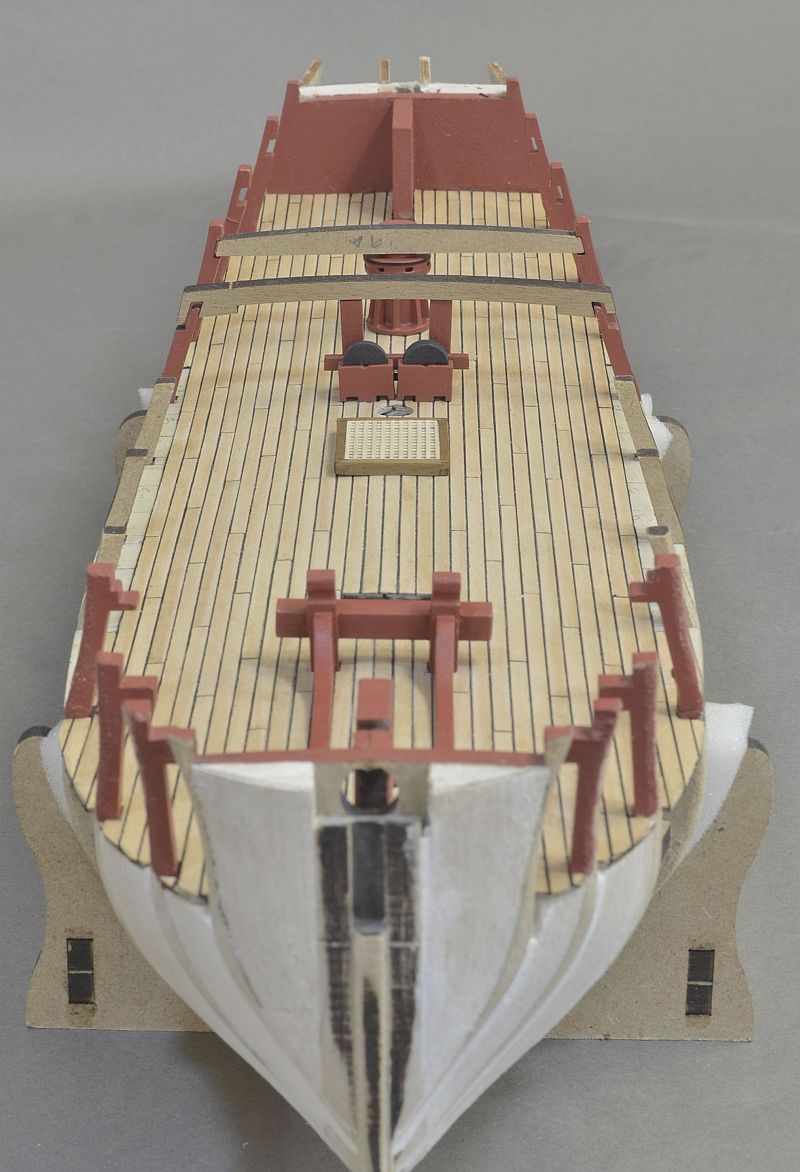
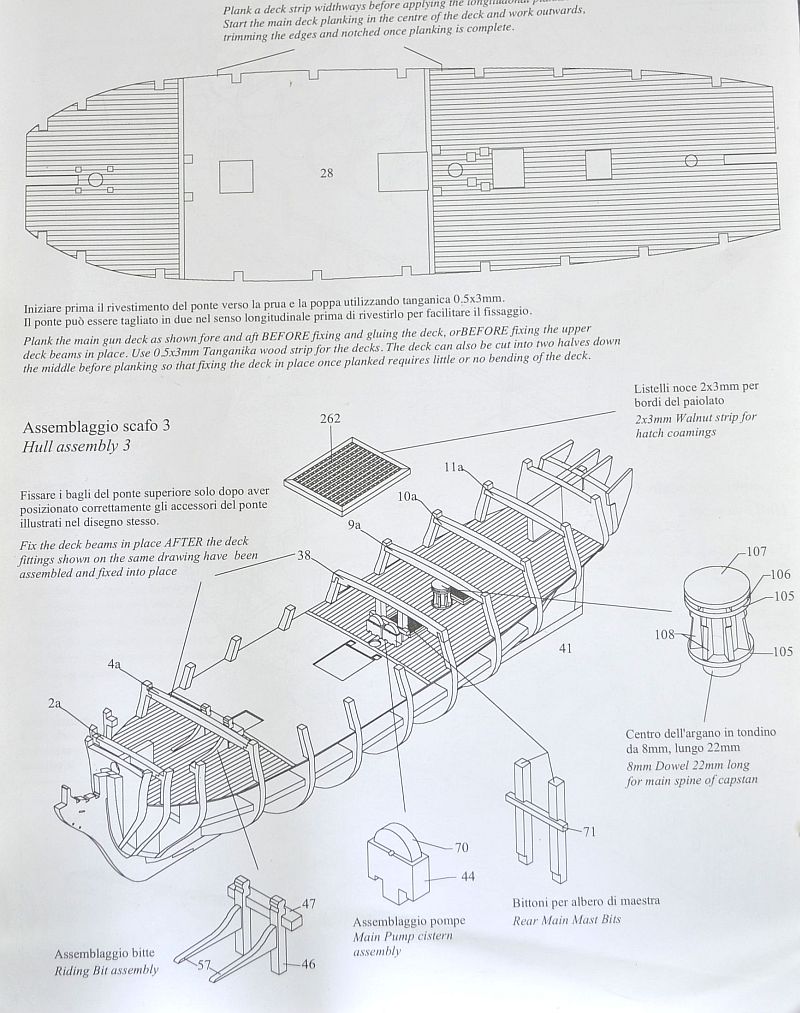
Hello - More deck fittings - all dry fitted.
Was uncertain as to width of ladder and exactly what happens around hatch opening.
Have lined hatch opening for ladder with strips of walnut to give some thickness to deck and hide ends of planks and ply underneath.
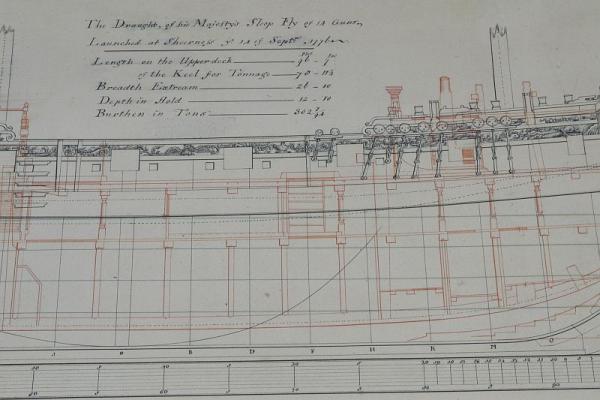
Have some plans of Fly which I would say the ladder looked at least 3 ft wide (just under 1 mtr) so have done the width to about 15 mm.
A very crude jig was used to assemble ladder - used the kit parts which were very good.
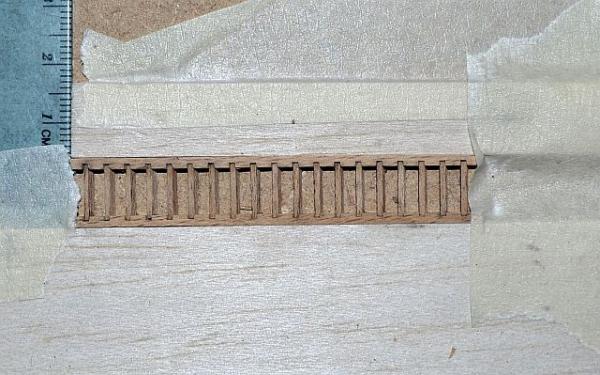
Ladder in place - feels as if too wide
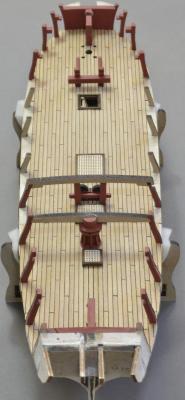
Concerned about the ladder on the Quarter deck as I know at this width it will touch the hatch below - may move the hatch opening a fraction over depending on the space for upper capstan.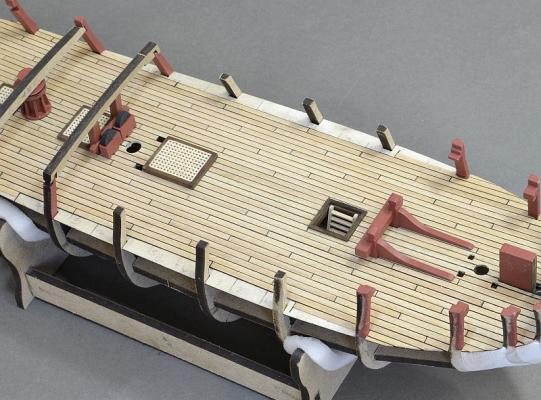
Hatches all done on lower gun deck. Have sanded the top with a slight curve to lose the flatness.
Thanks for looking
Doug
- GuntherMT, Mirabell61, ccoyle and 2 others
-
5
-
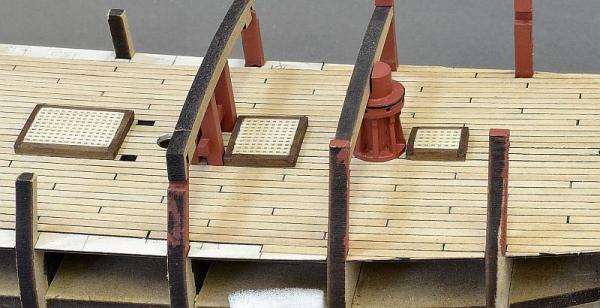
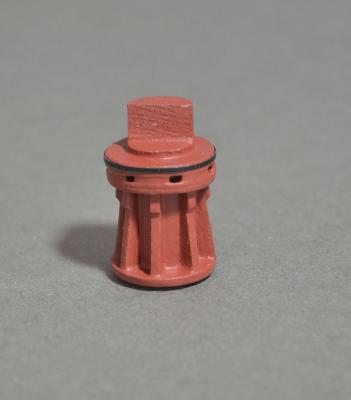
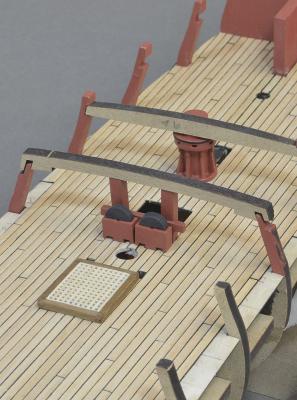
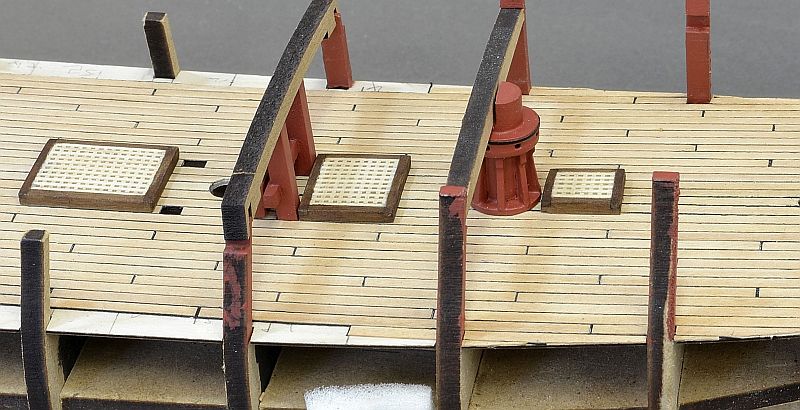
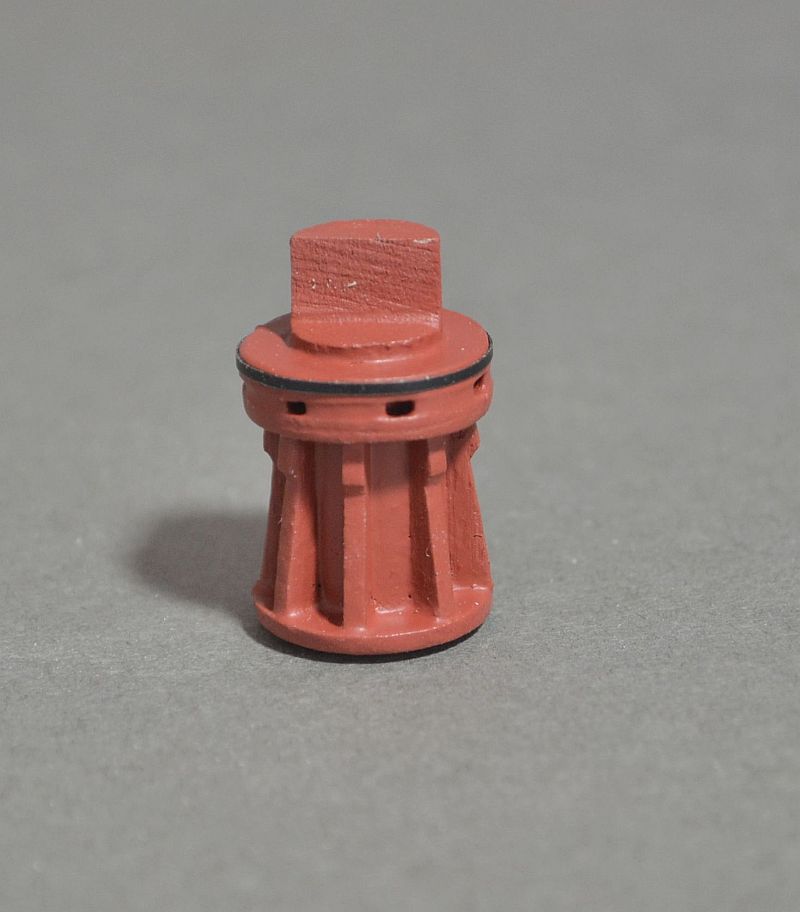
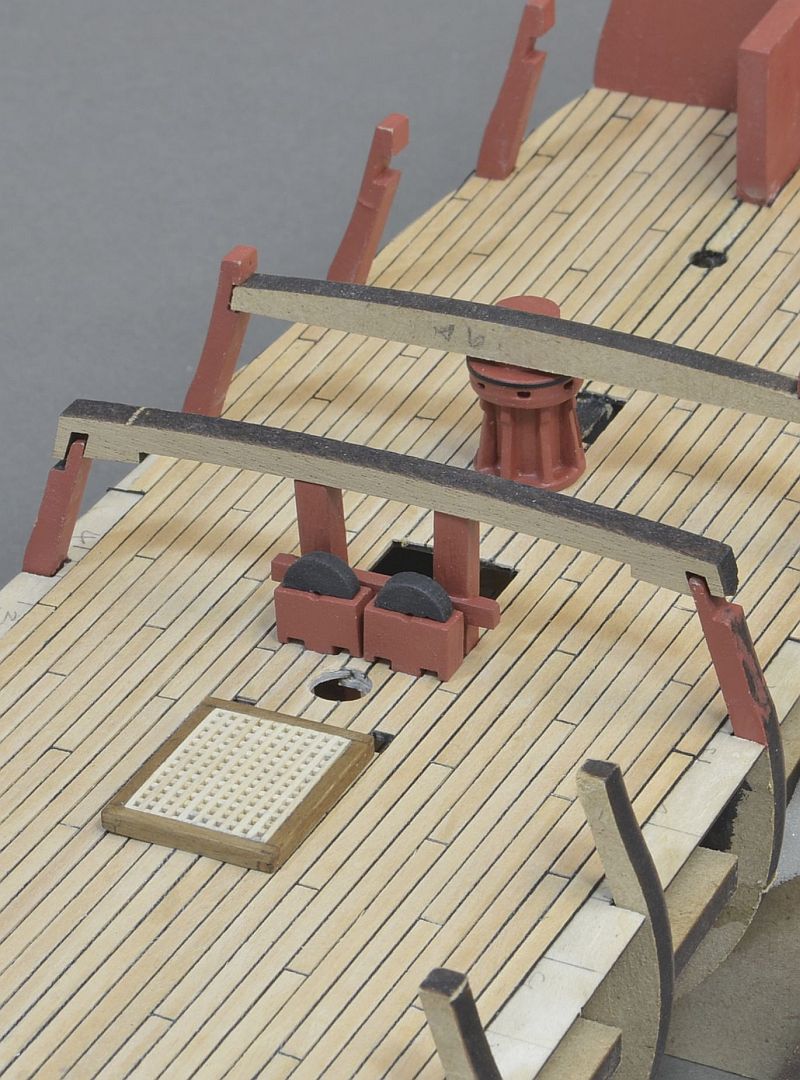
One capstan - the centre hole in various parts to make the capstan was 10mm and instructions asked for 8mm dowel? Was this situation experienced by anyone else? Just happened to have a piece of dowel that fitted and this was extended (to link with the capstan above) with a piece cut out to fit under beam. I do realize this will not be visible
Some other deck fittings dry fitted to deck - hatch, pumps cistern assembly,rear main mast bits (adjustment required so it sit under beam), riding bit assembly.
Hatch is flat with a little curvature on the underside to suit deck.
Regards
Doug
- Martin W, Mirabell61 and ccoyle
-
3
-
Thank you Nils - nice to hear from you again.
Black Viking, Beef Wellington, Seventynet,and Chris (ccoyle) thank you for the 'likes' - much appreciated.
Regards
Doug
-
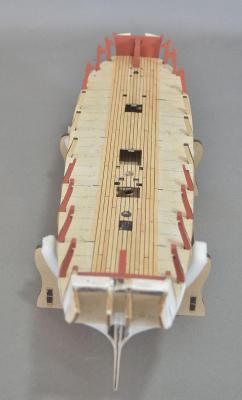
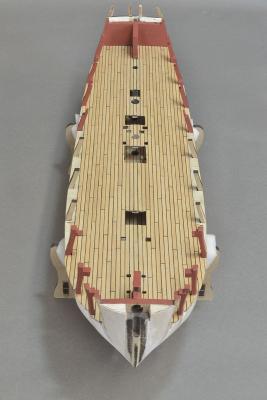
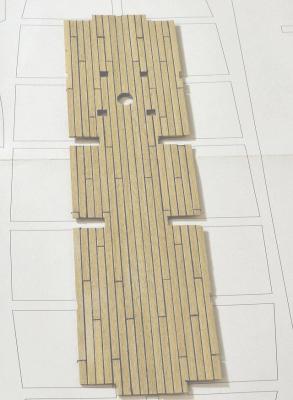
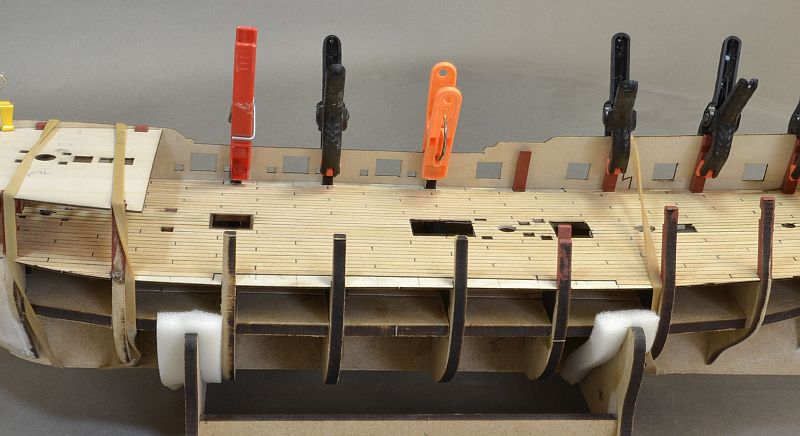
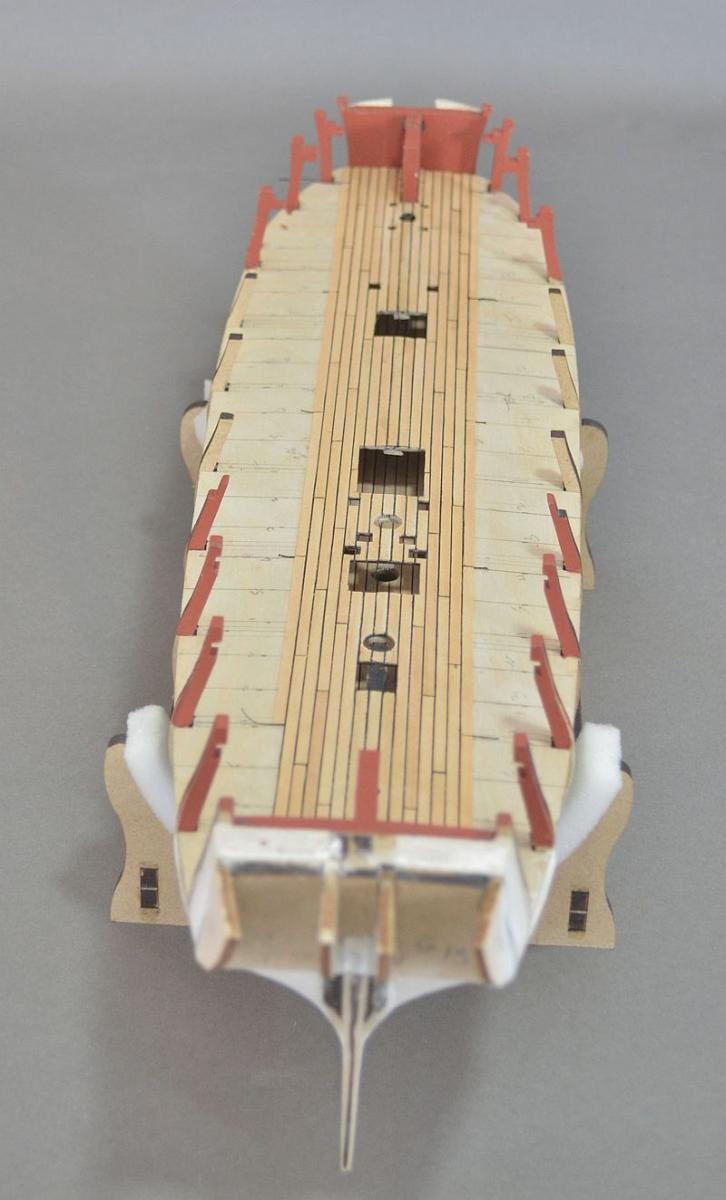
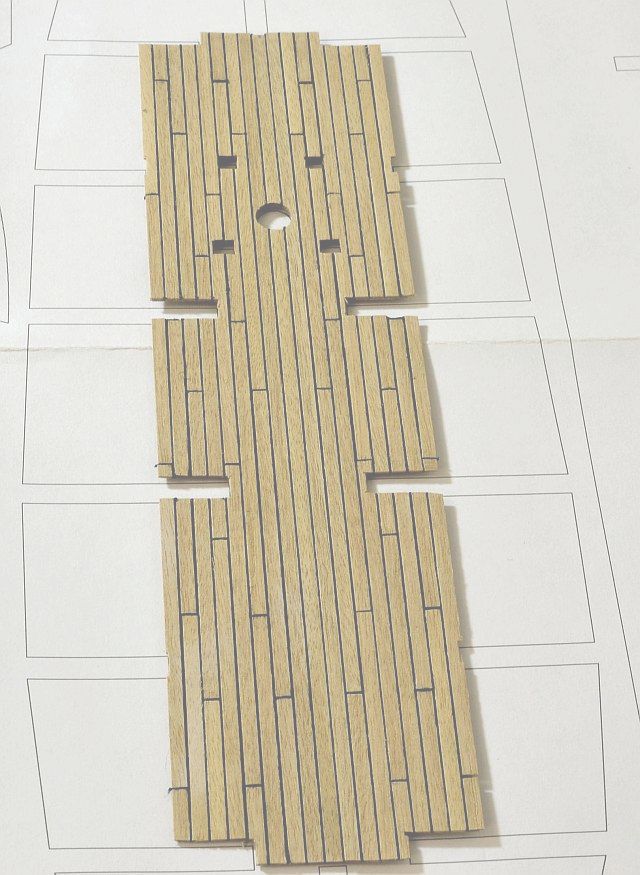
Hello - lower gun deck planked using the kit supplied Tanganyika wood although I wish I was more adventurous and tried something else as I did not feel the quality was there - but still it is suitable for my skills.
Still using 0.05 black thread - would preferred grey if I could find it. Realise the caulking is out of scale but as I used this method on my first build thought I'd keep the same build theme going - ie built badly....
Left the edges to do once the side hull section is done. Deck still to be sanded and varnished. Will now make some hatches and try and understand how to do the capstan.
Regards
Doug
-
Chris - thank you. Probably could do with some more reference books
Right, onwards with the deck planking then .....
Thanks
Doug
-
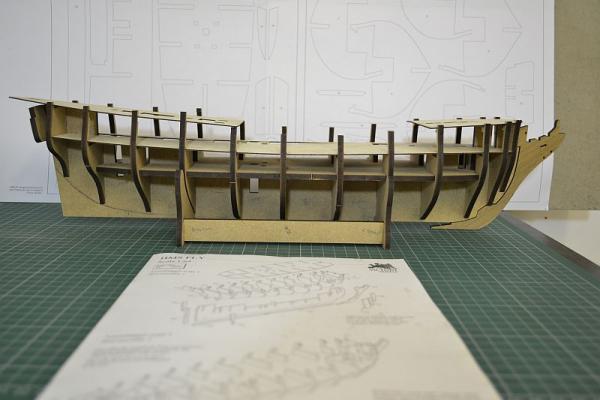
Hello - just a question before I start on the lower gun deck planking.
On the instruction it says to put a plank width way as can be seen on illustration. Is this normal as I have noticed everyone on their Fly builds plank the entire deck without these two planks across
the deck.
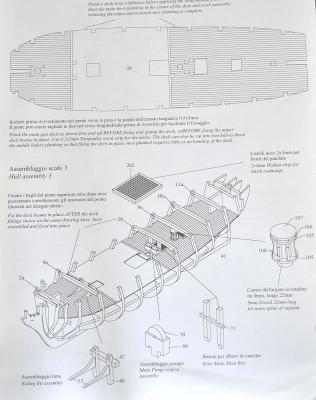
Is it down to personal choice?
Thank you if you can help, please
Regards
Doug
-
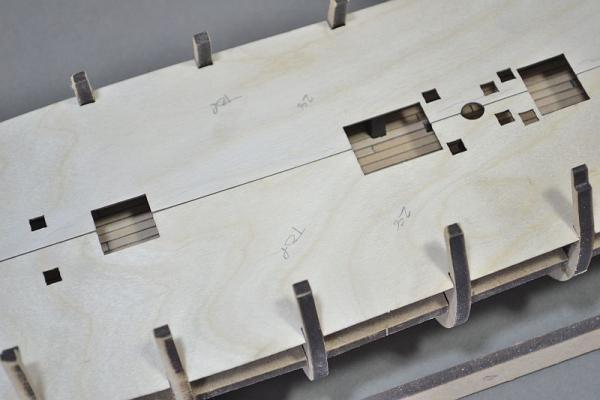
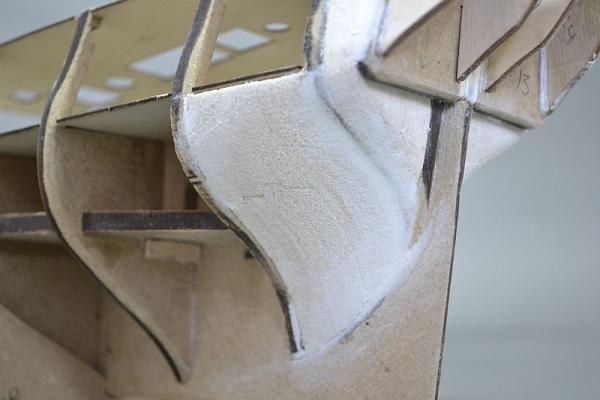
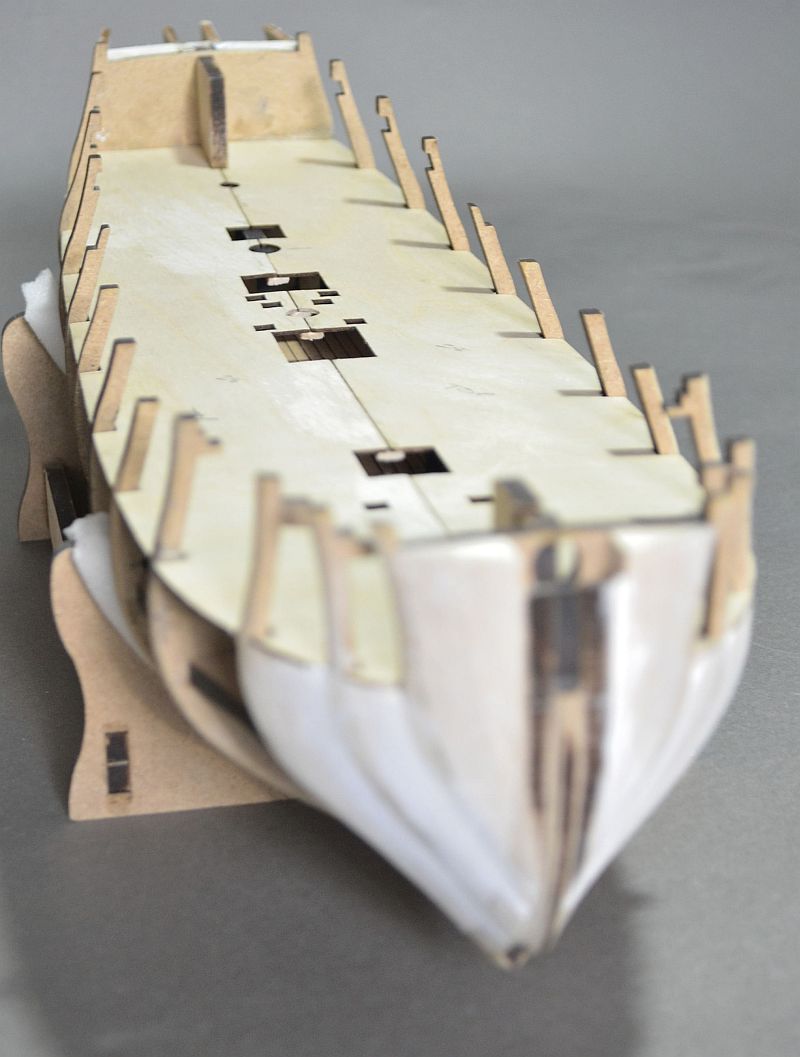
A another small step - lower gun deck in place. Have decided to plank the deck next as instructions dictate.
It comes in two halves and to help with support / strength along join have glued a strip of hull planking underneath with a lip so the other half can be attached onto.
Where there are hatches / masts etc have cut the support away.
The strength along joint is surprisingly good
Regards
Doug
-
Hello Chris - no just dry fitted
Thanks for looking in
Doug
-
Hello - a few small steps forward.
Planking done on lowest deck using kit supplied Tanganyika wood with black thread inbetween for caulking. First done onto thin ply and then glued to the MDF base.

Balsa blocks inserted for extra support. Bearding and Rabbeting all done - hard to see as keel is in MDF and not ply
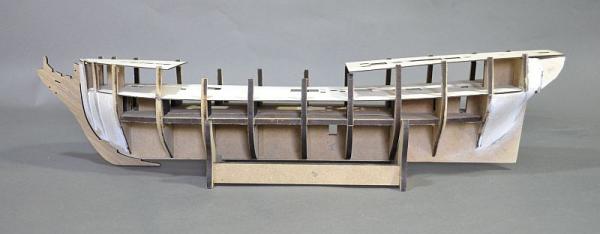
Now not sure if to follow instructions and plank the lower gun deck which came in two halves or proceed with the hull planking which I'd rather do.
Thank you for all the previous comments and encouragements.
Regards
Doug
- Martin W, BLACK VIKING and Seventynet
-
3
-
Stunning work - beautiful!!
Regards
Doug
-
-
Hello Telp - bought the ship's boat from Cornwall Model Boats.
Link to web site and item:
http://www.cornwallmodelboats.co.uk/acatalog/caldercraft-ships-boats.html
Hope this helps and hope you got my message awhile back thanking you for your previous nice comments. Thanks again
Regards
Doug
-
Hello ChrisLinden - Thank you - although I am thinking it is going to be quite a challenge.
Regards
Doug
-
Hello - Would like to ask Chris Watton when the upgrade kit for HMS Fly will be available but I see he is not taking any messages. Is there anyone who can help, please, on how I can ask Chris or is there someone who may Know if / when the kit is available.
Thank you
Doug
-
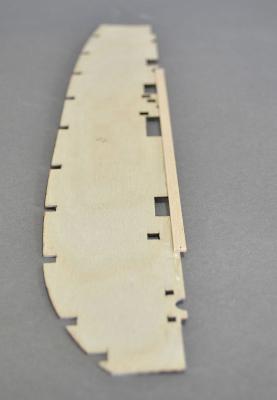
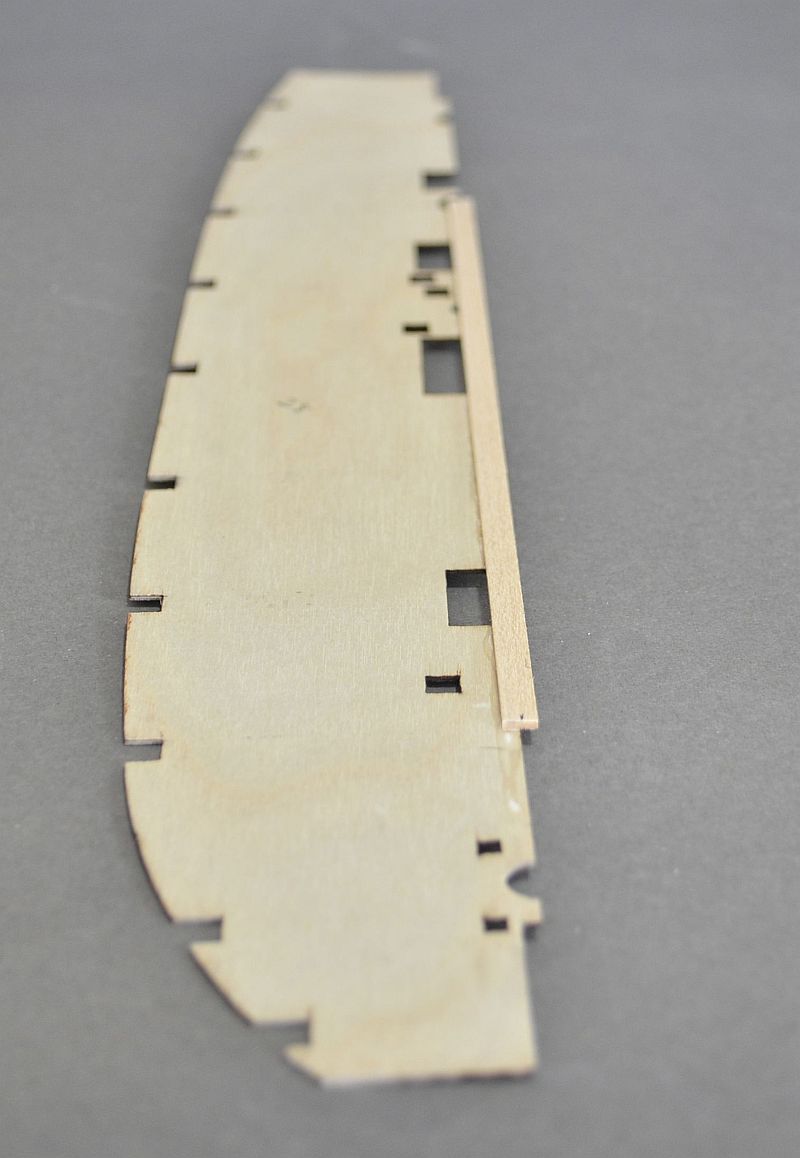
Hello - a tentative start on HMS Fly. All dry fitted so as to get a feel for things and to get back into building again.
All laser parts are an excellent fit with small amount of sanding. I can see the plywood decking will need support which I see has been pointed out in other builds.
Have been following all the great Fly builds on here and hopefully I don't let the side down.
Regards
Doug
-
RonaldB - Hi - yes the windows were a scratch built but not sure what 'resign sloops' are but if they are not in the box then I either bought them or made them
Wish you well with your Supply build and will look forward to it with interest and can certainly help you if you require any as I am sure the others on here who also have built Supply will like to help.
Regards
Doug
-
-


HMB Endeavour by kiwiron - FINISHED - OcCre - 1:54
in - Kit build logs for subjects built from 1751 - 1800
Posted
Very impressive - really like the sails. Lovely work
Well done, Ron
Regards
Doug