


Dfell
-
Posts
220 -
Joined
-
Last visited
Content Type
Profiles
Forums
Gallery
Events
Posts posted by Dfell
-
-
-
-
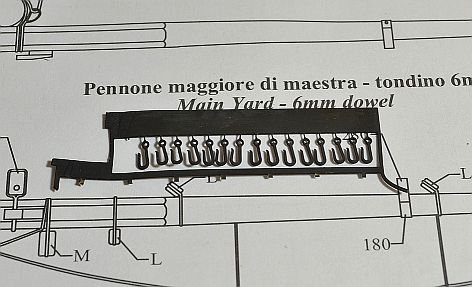
Hi - can anyone please help. Not clear as to how the lines are attached to blocks on the yards?
Are they tied to the blocks or go through the block with a knot tied to stop them passing back through?
The lines I am referring to have the numbers 48 and 49.
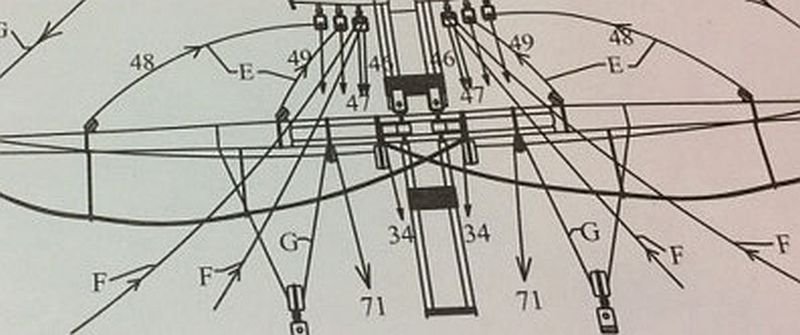
Thank you.
Doug
- billocrates and Martin W
-
 2
2
-
Thanks SpyGlass for the explanation.
Had to make a correction to my last post - the lantern was a Caldercraft item.
Doug
-
Hello - and thank you for the likes in the previous posting and thank you Busby for your nice comments and I wish you well with your build.
Had a go to slightly improve the dip in the Main Stay.
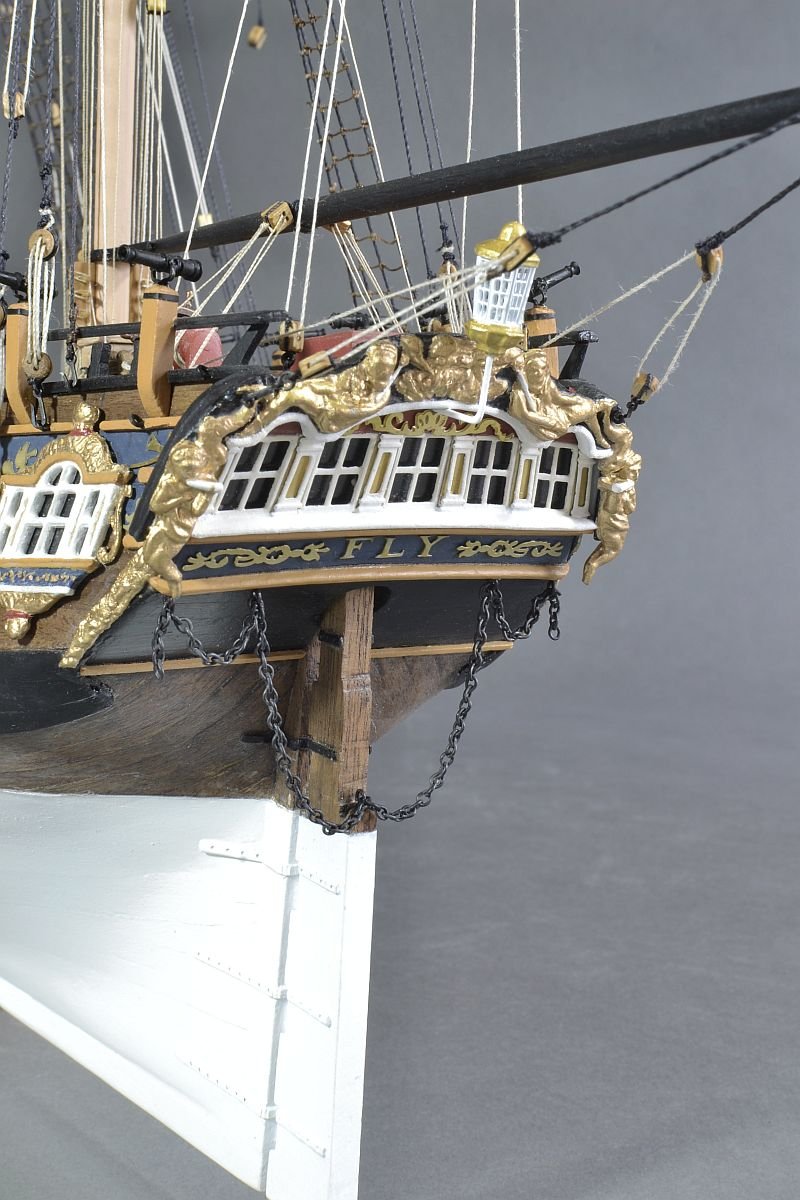
The lantern (Caldercraft) and rudder chain.

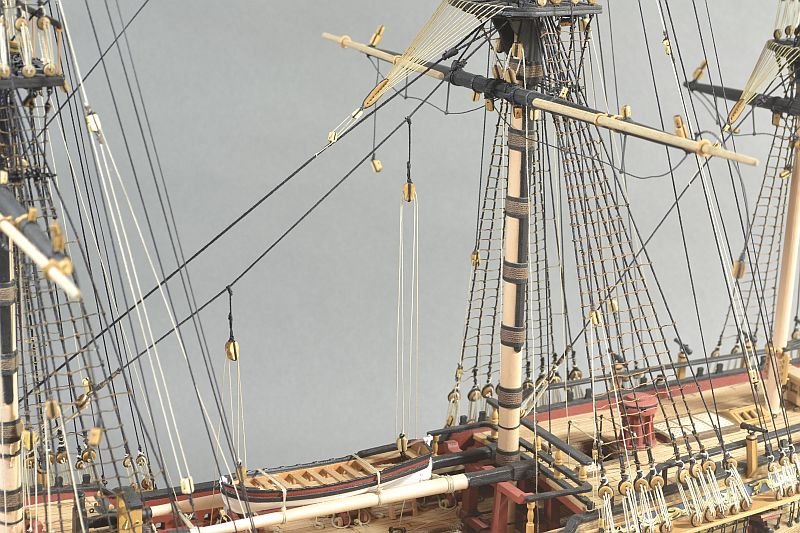
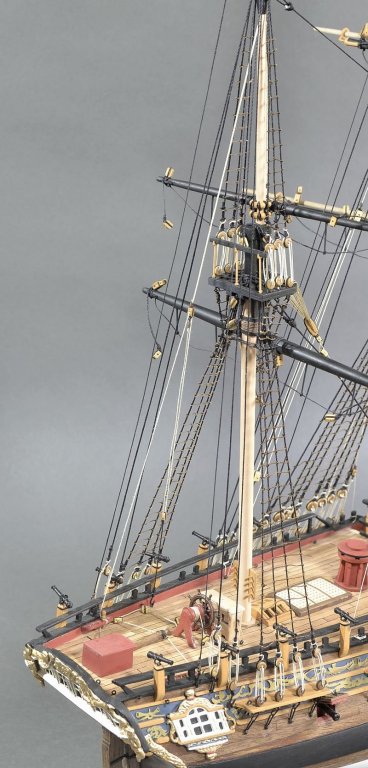
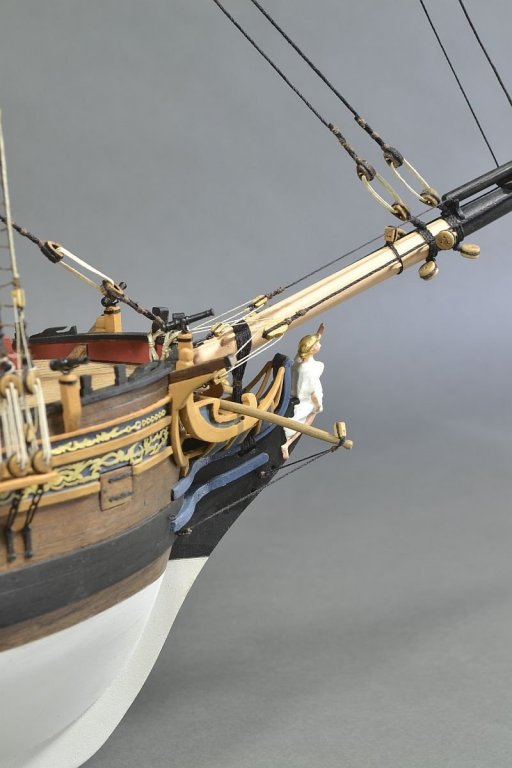
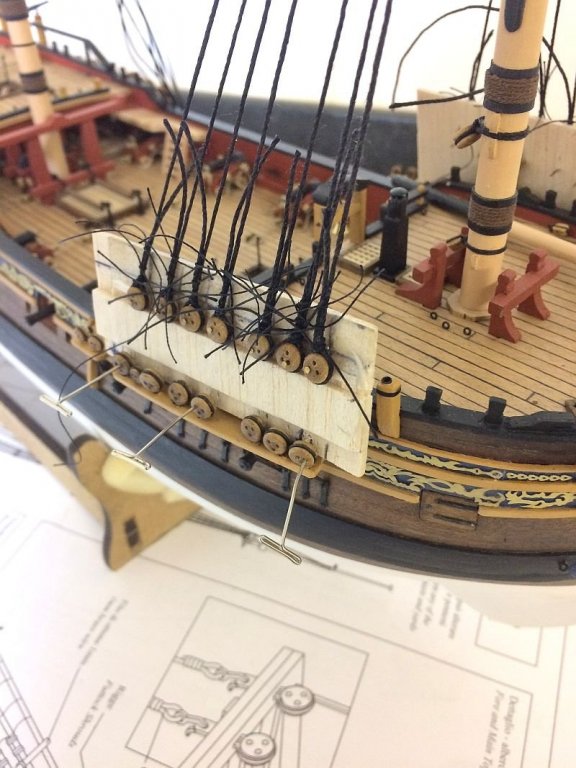
Bobstays and Bowsprit Shrouds done and so that is Sheet 11 all done. My heart sank once I studied Sheet 12 as there was so much more rigging and it was already getting hard not to lean on existing lines without a fair chance of some damage.
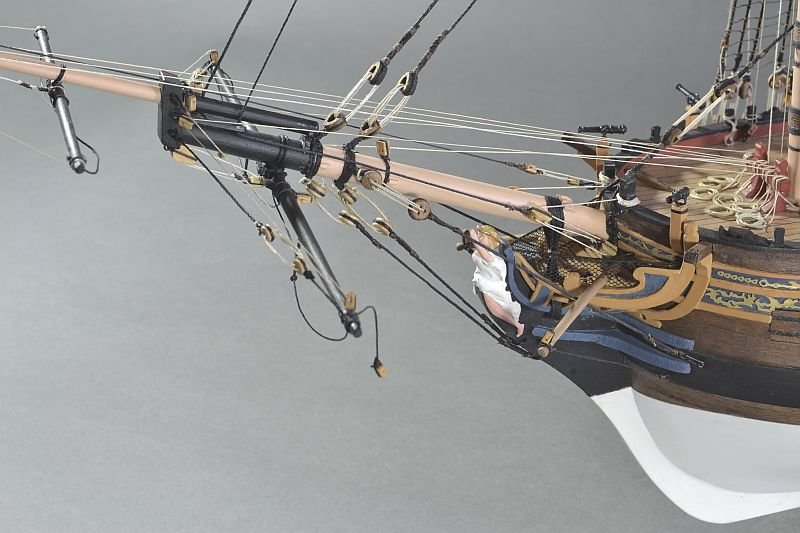
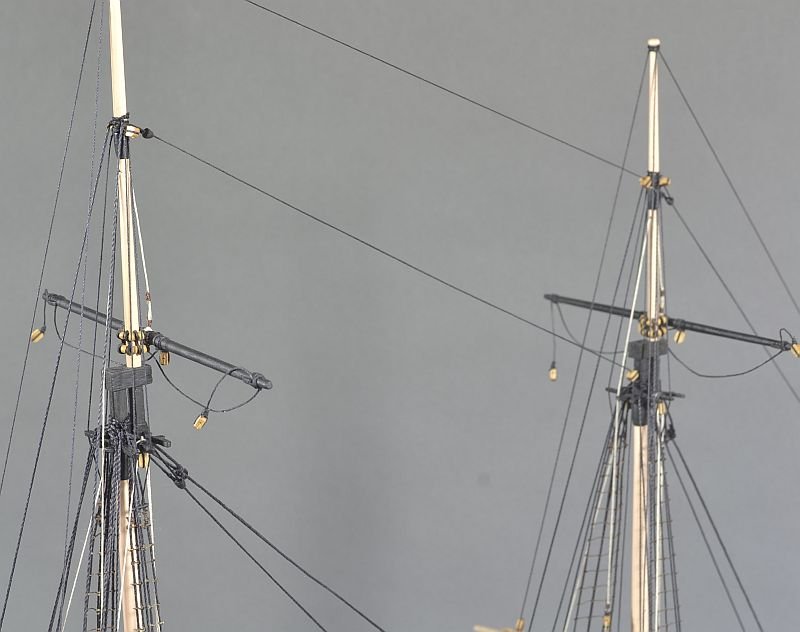
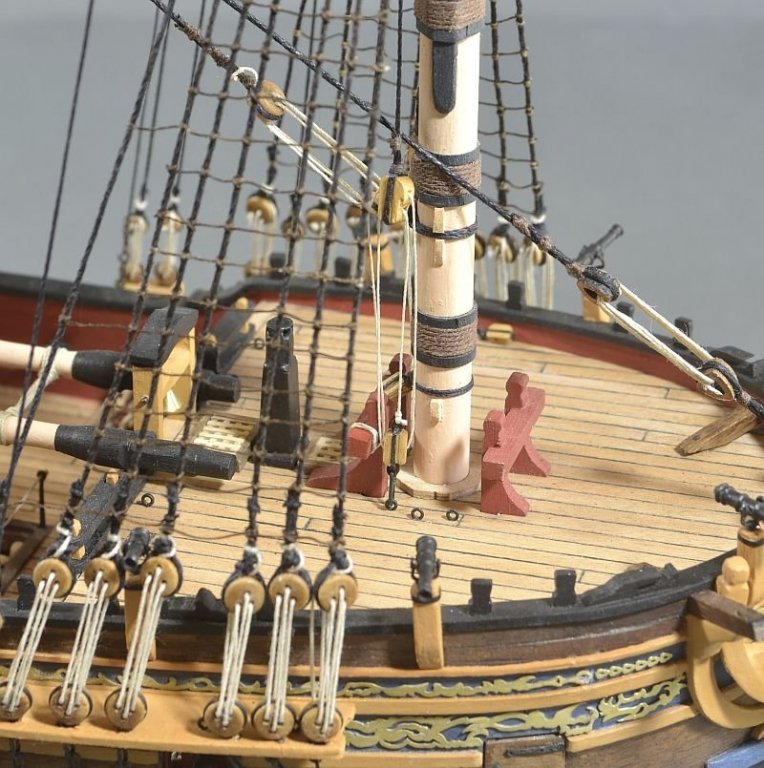
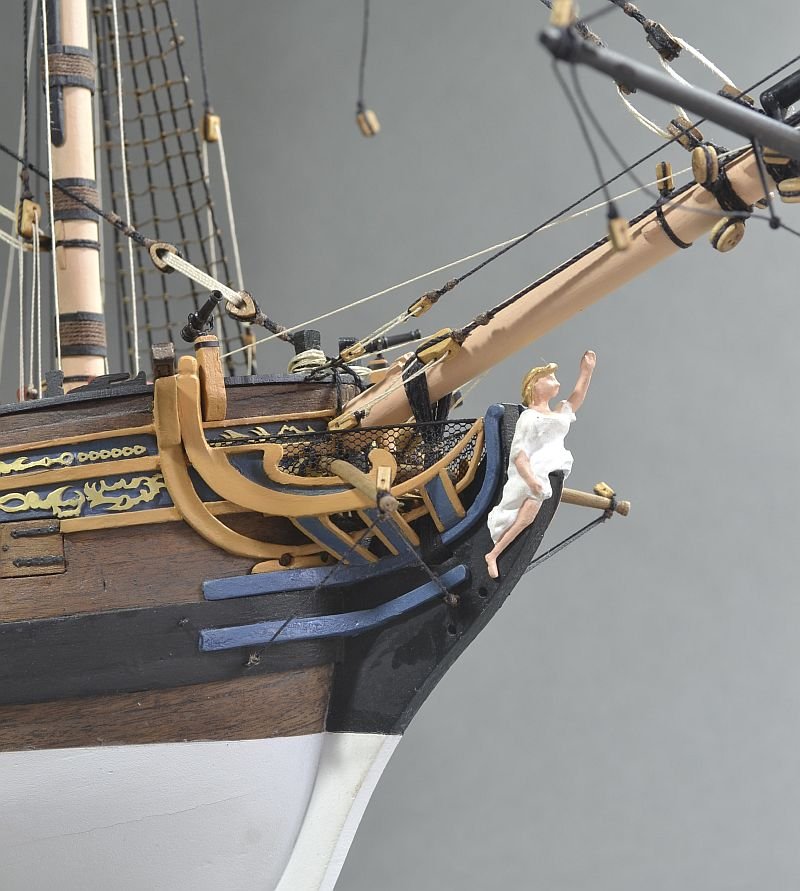
Start of Sheet 12 with a Tack Toggle. Not sure if you can see it clearly in picture and not sure what the Tack Toggle does. It looks like a quick release system perhaps.
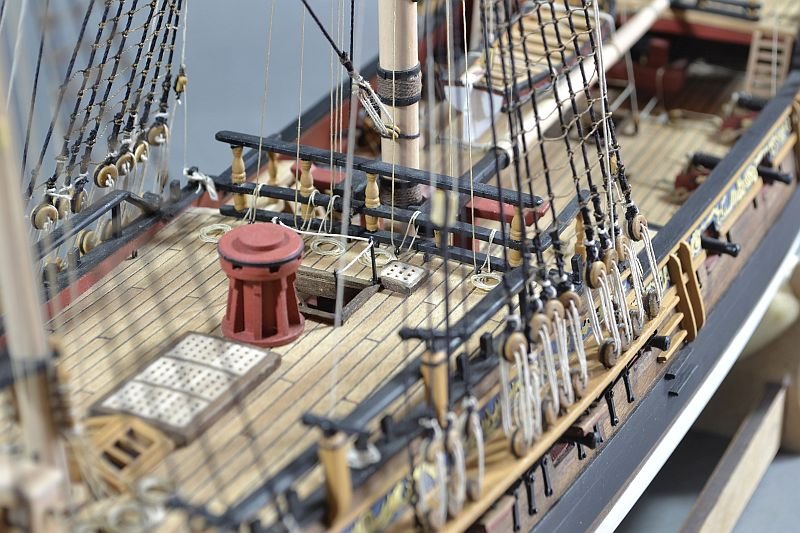
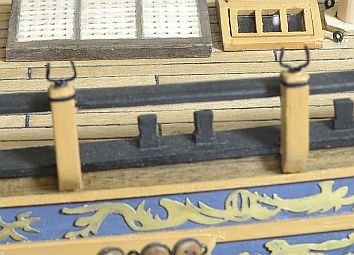
Lines to the rail have all gone through a deck ring before being tied off to the rail. Have added more eyelets than were originally asked for.
Thanks for looking.
Regards
Doug
-
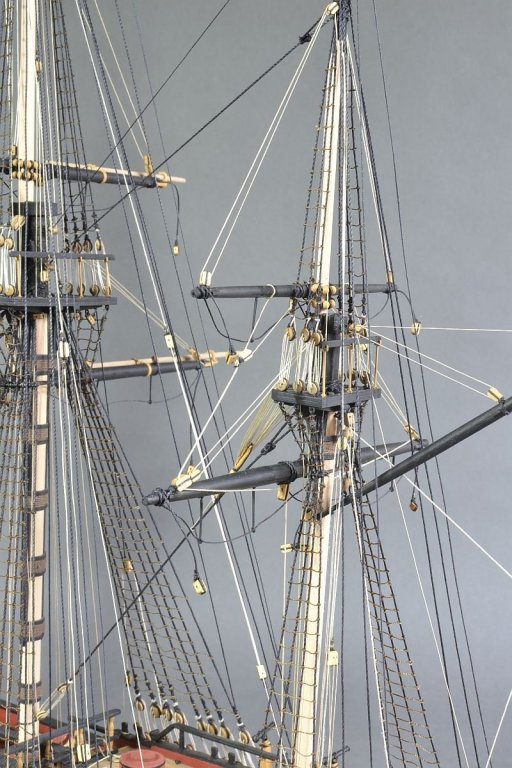
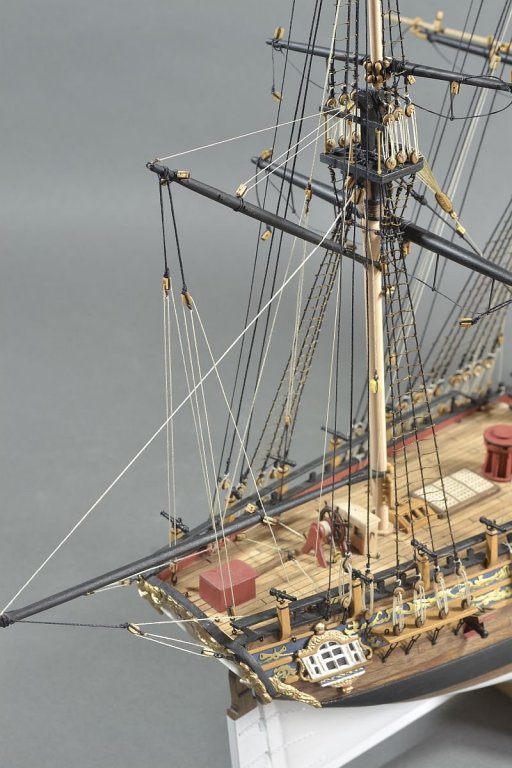
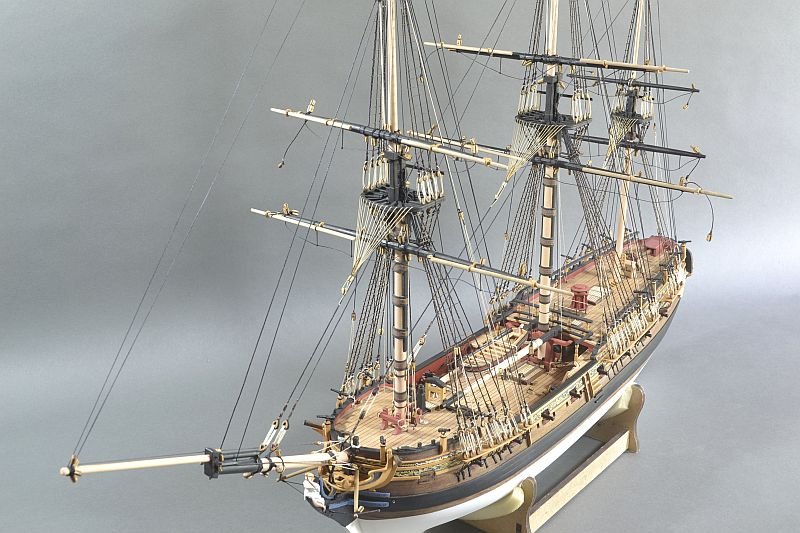
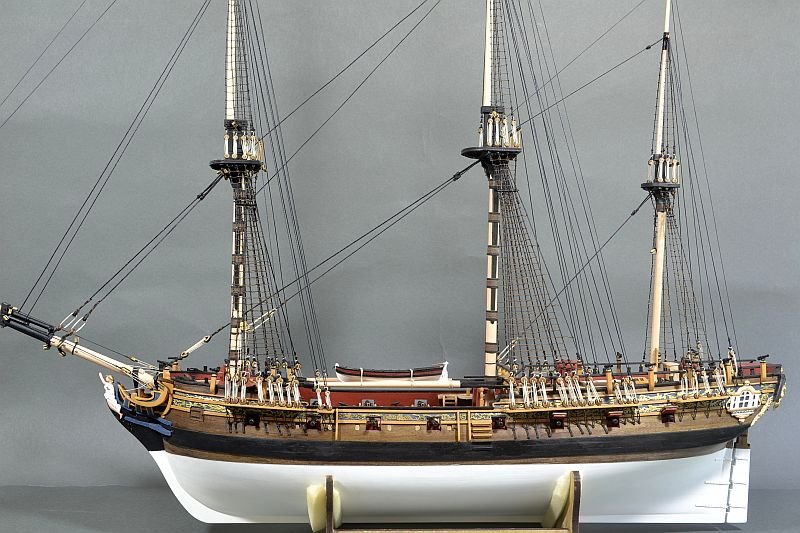
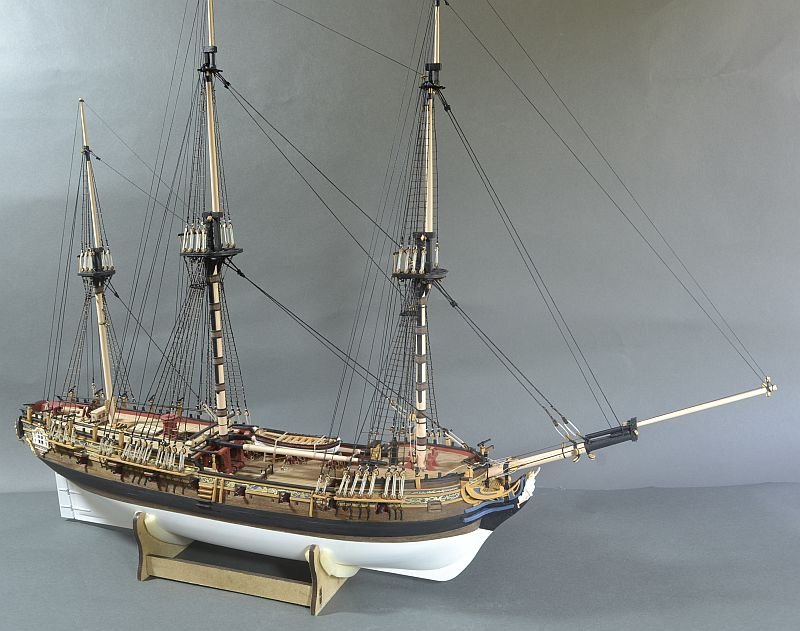
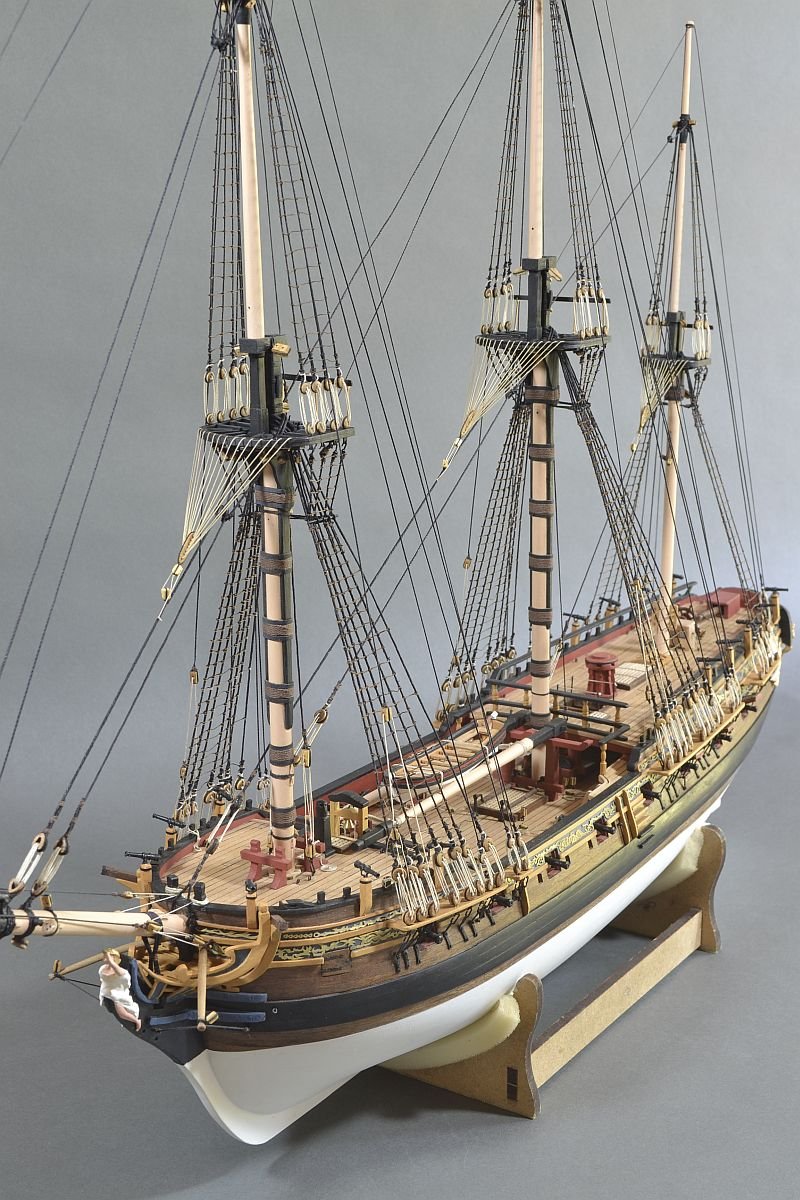
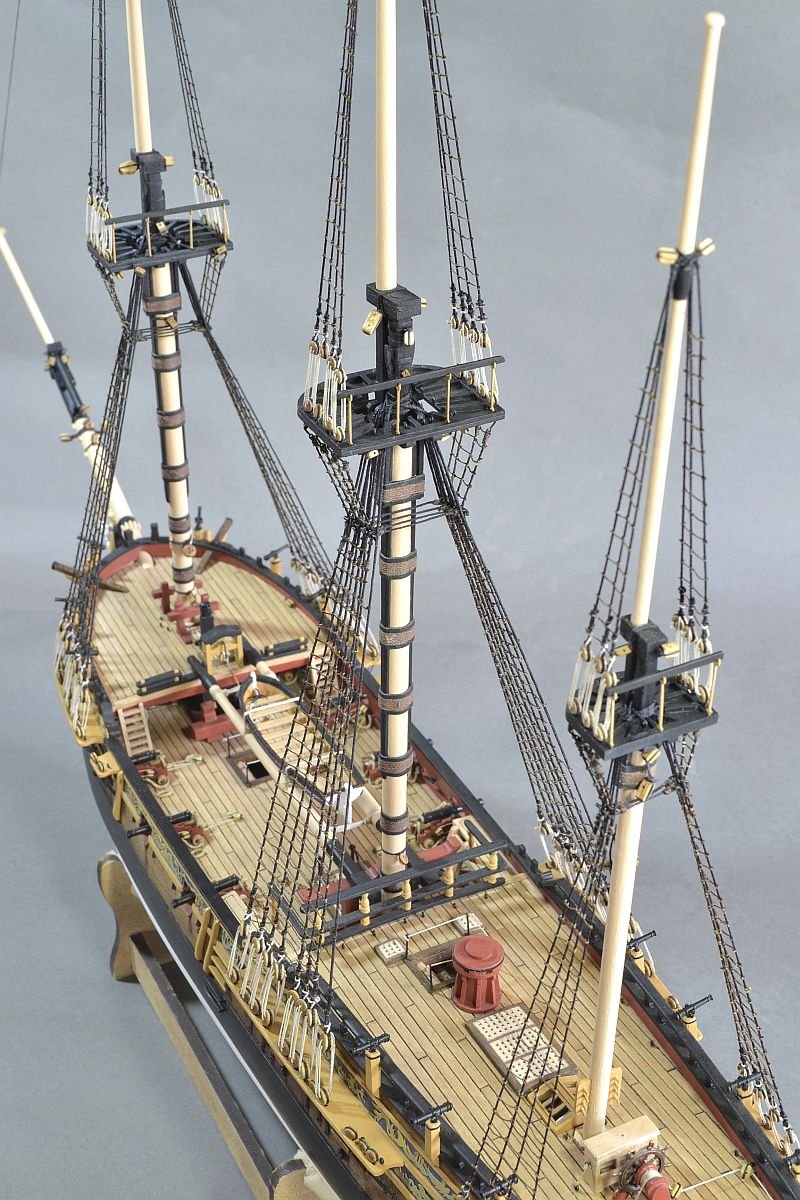
Hello - further steps forward.
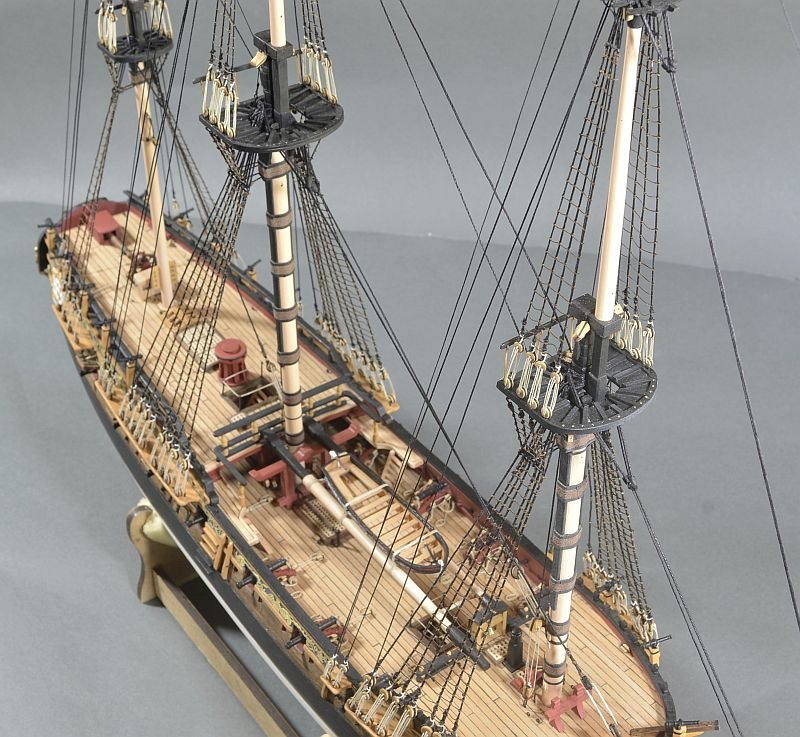
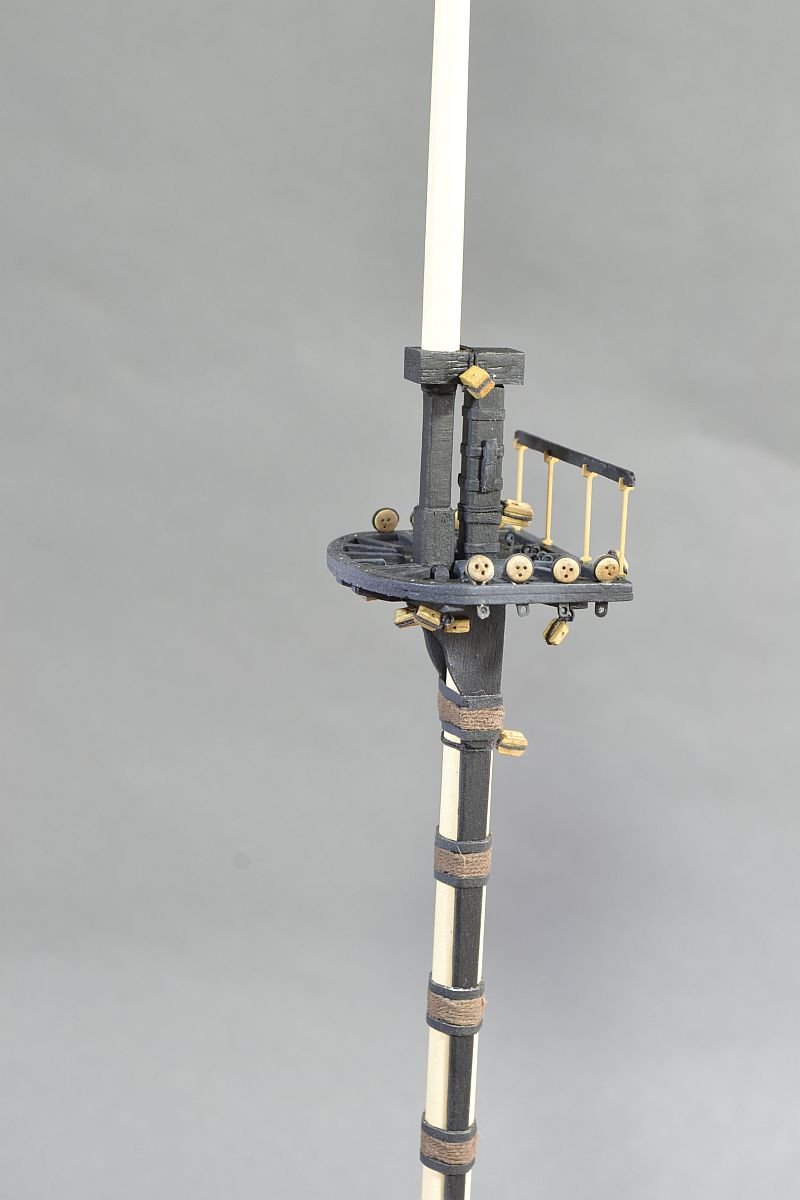
Top yards attached using smaller Parral bits from my Supply build.
Netting in place. Not sure about the style of the netting.
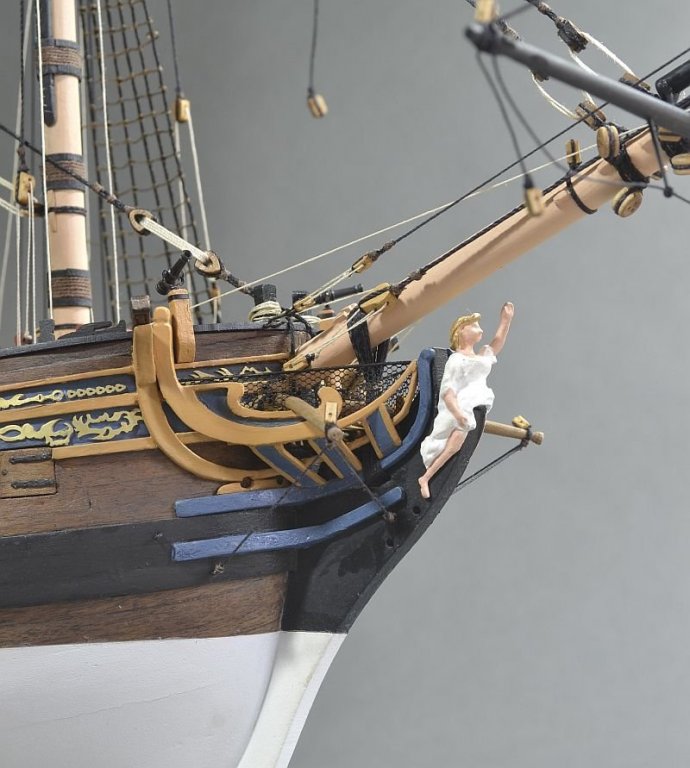
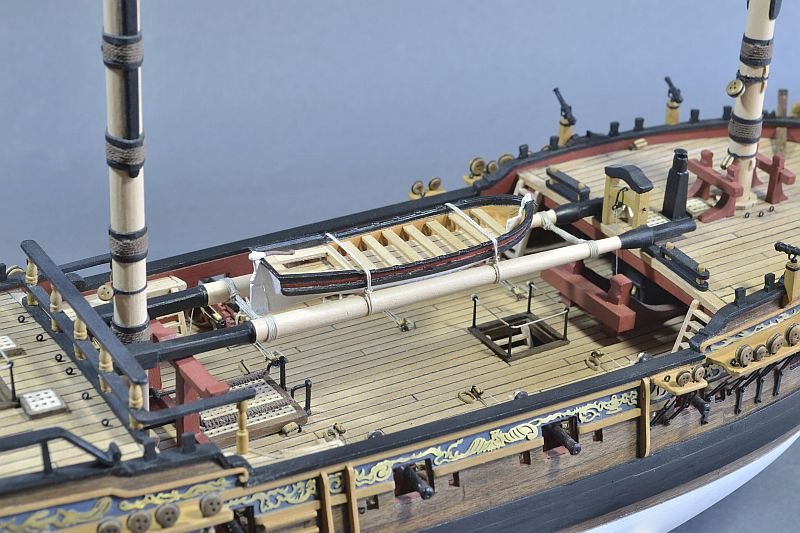
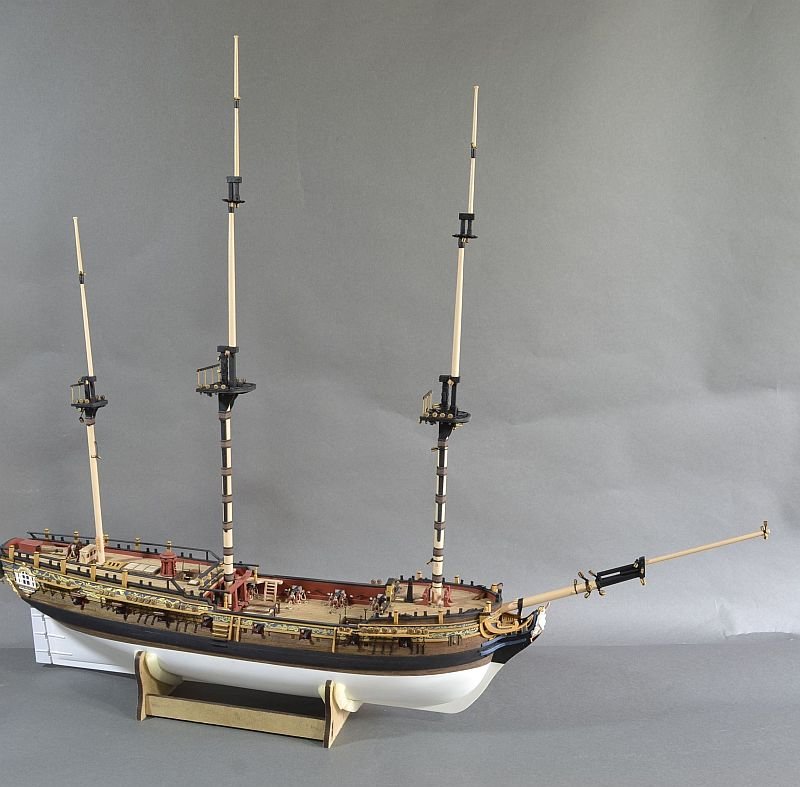
Hoist for Ship's boat. Annoyed that I was not able to keep the Stay from sagging.
Boom and Gaff are now in place. The Gaff lift line has been tied off to a belaying pin to the side on deck and not as plans to the belaying set up at base of mast.
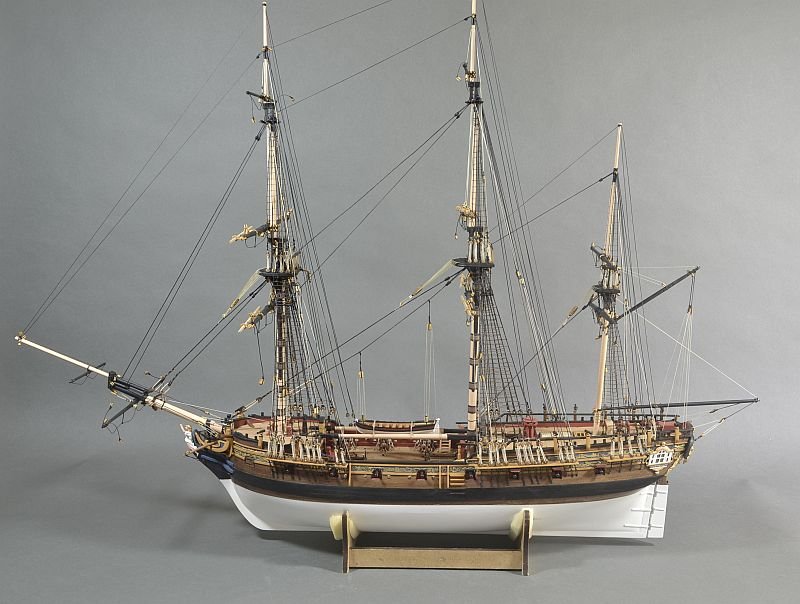
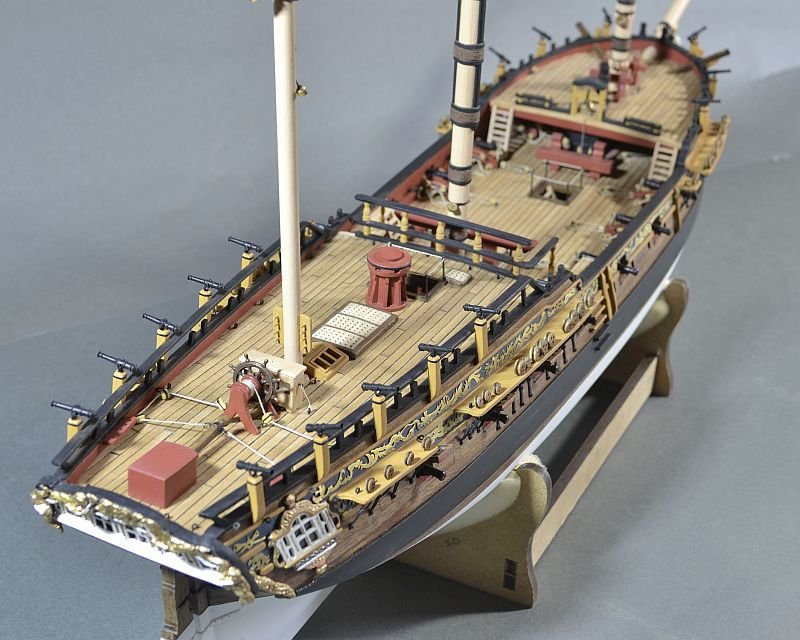
Another overall view
Thank you for looking and the 'Likes' - much appreciated.
Regards
Doug
- Blue Ensign, billocrates, davyboy and 6 others
-
9
-
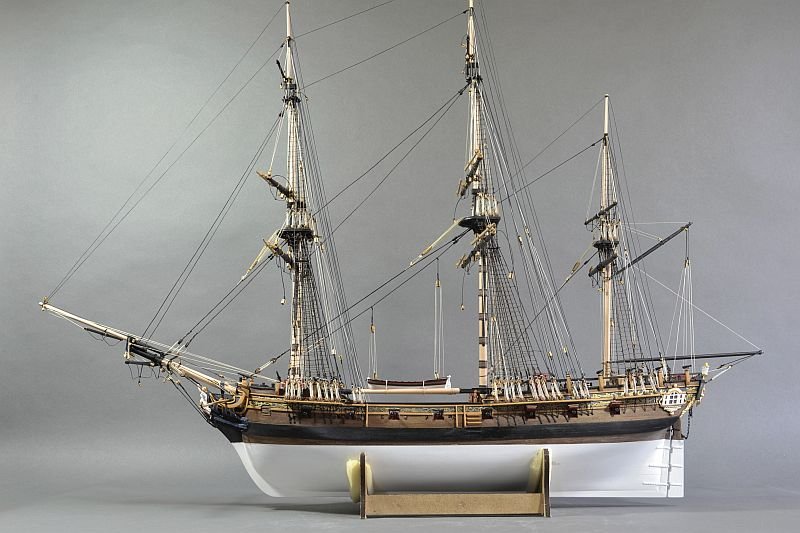
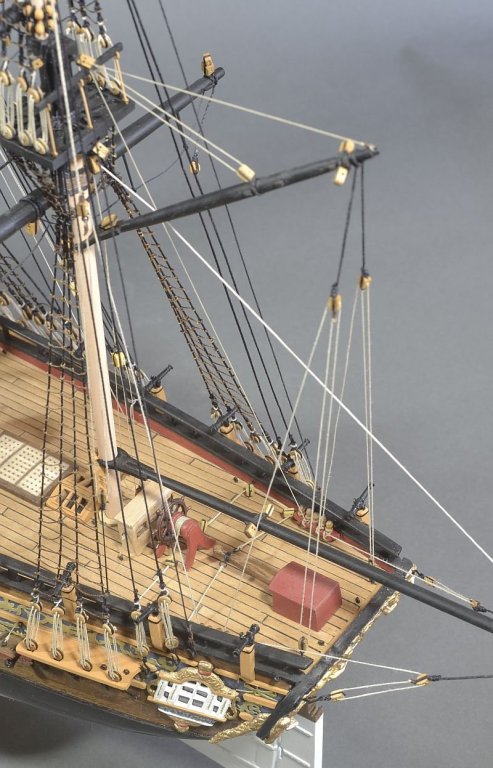
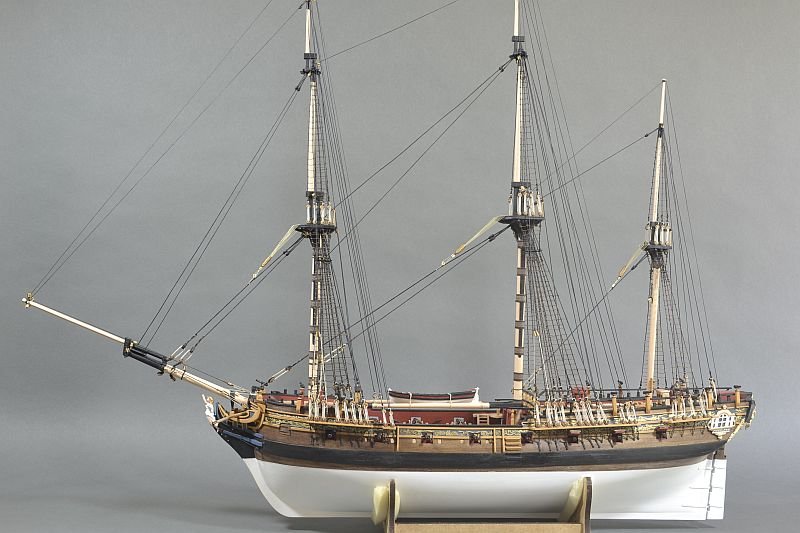
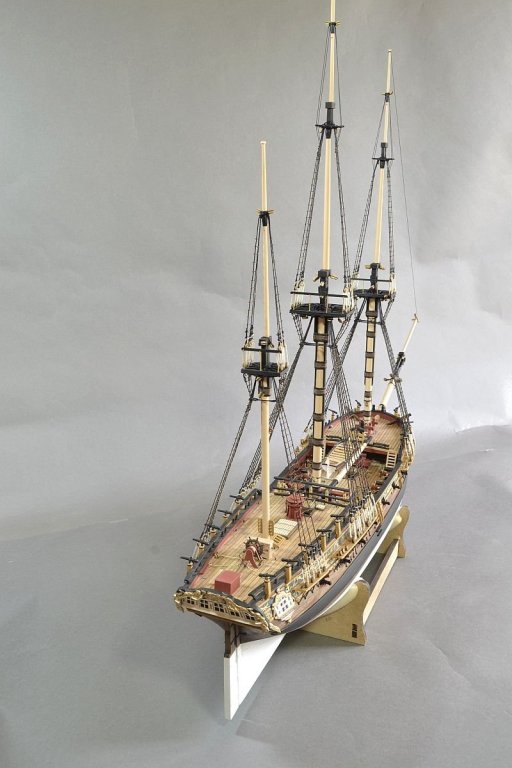
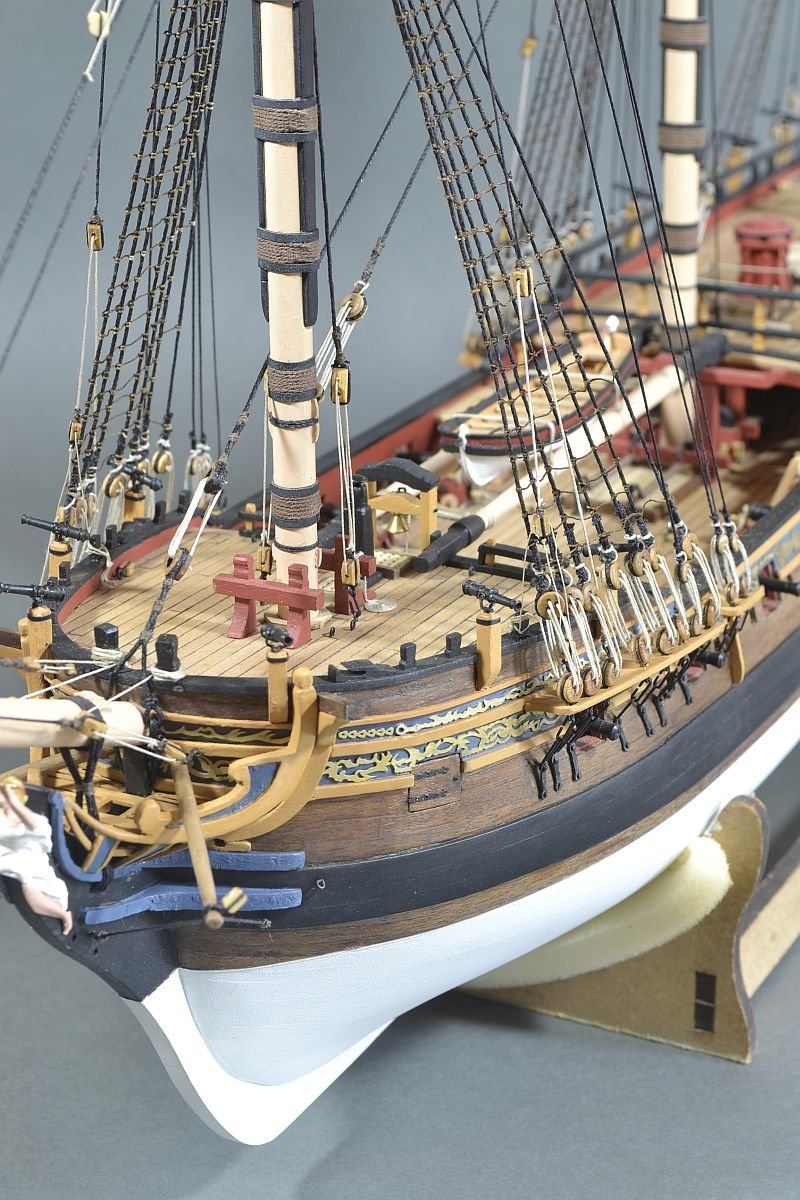
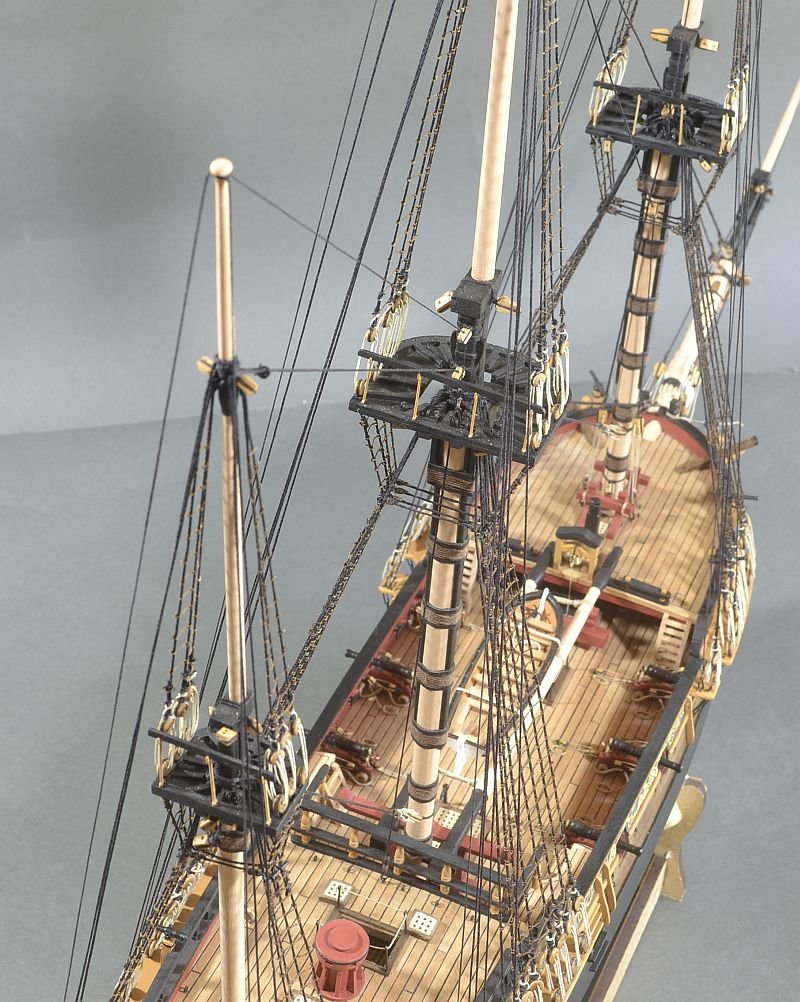
Hello - the progress so far is some yards are up and in position.
Not exactly parallel as yet but hopefully will be once fully rigged.
Parral set up - seems slightly on the big size. For the top yards will use some left over from my Supply build which are smaller.
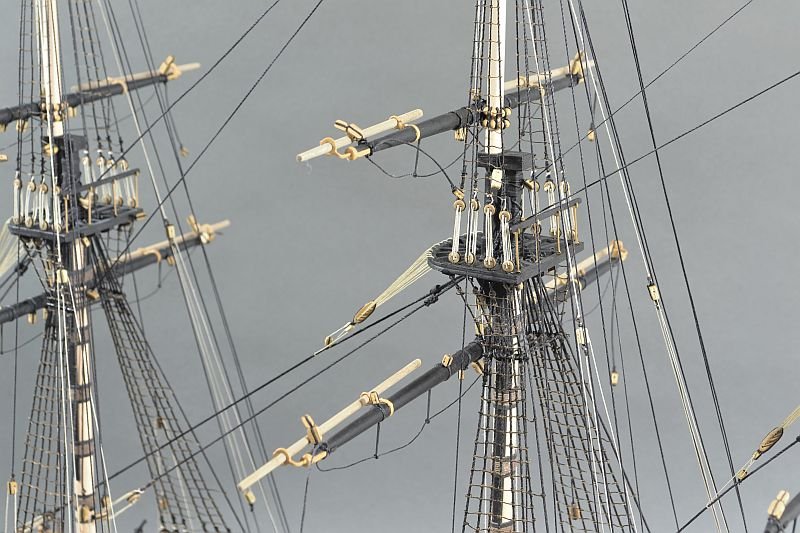
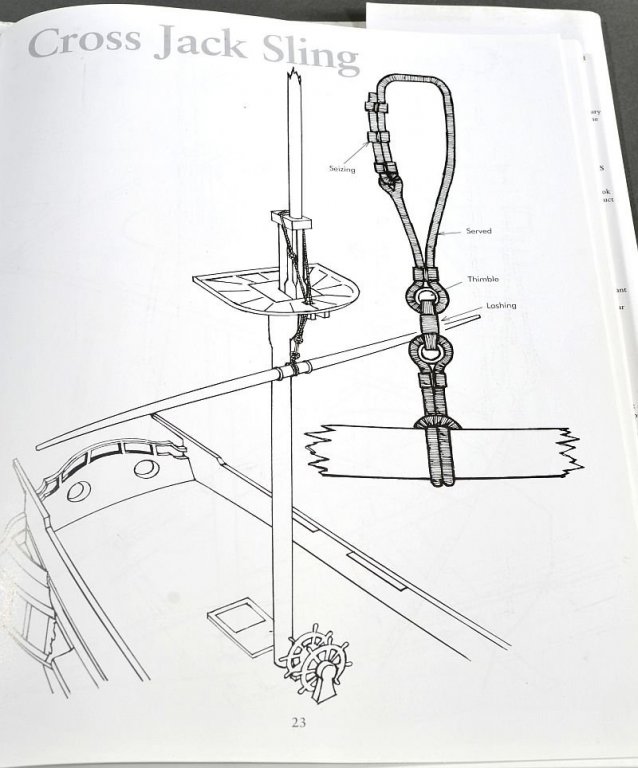
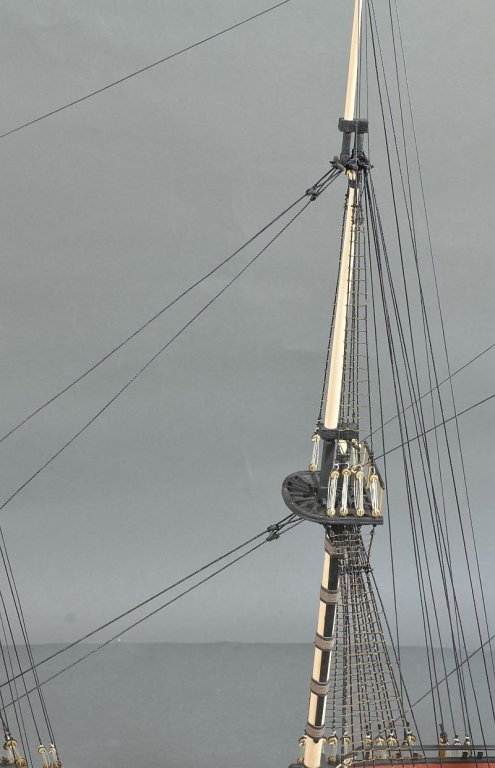
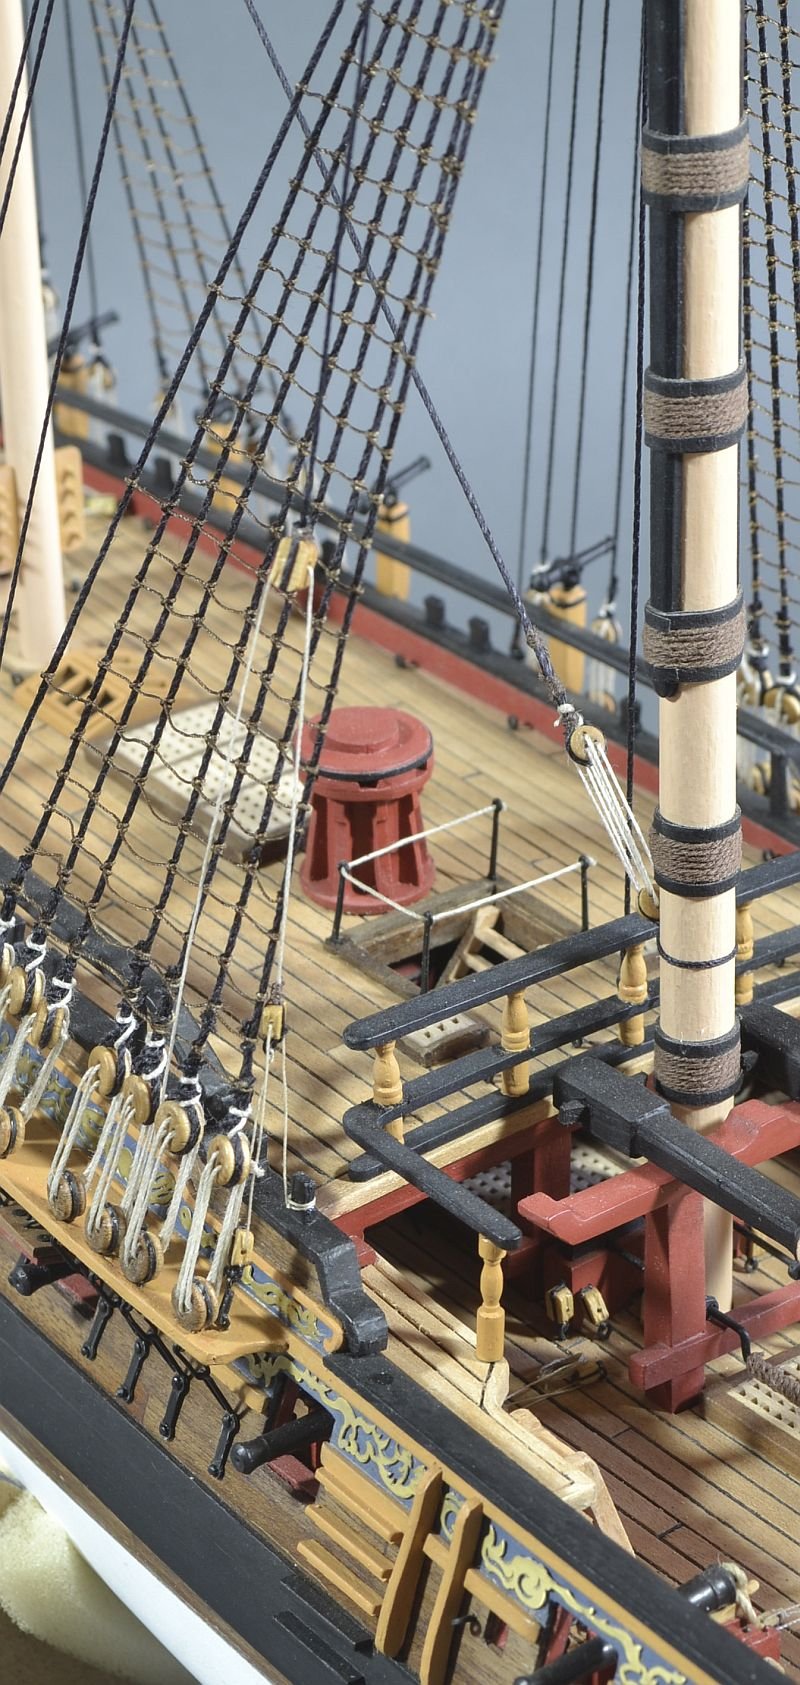
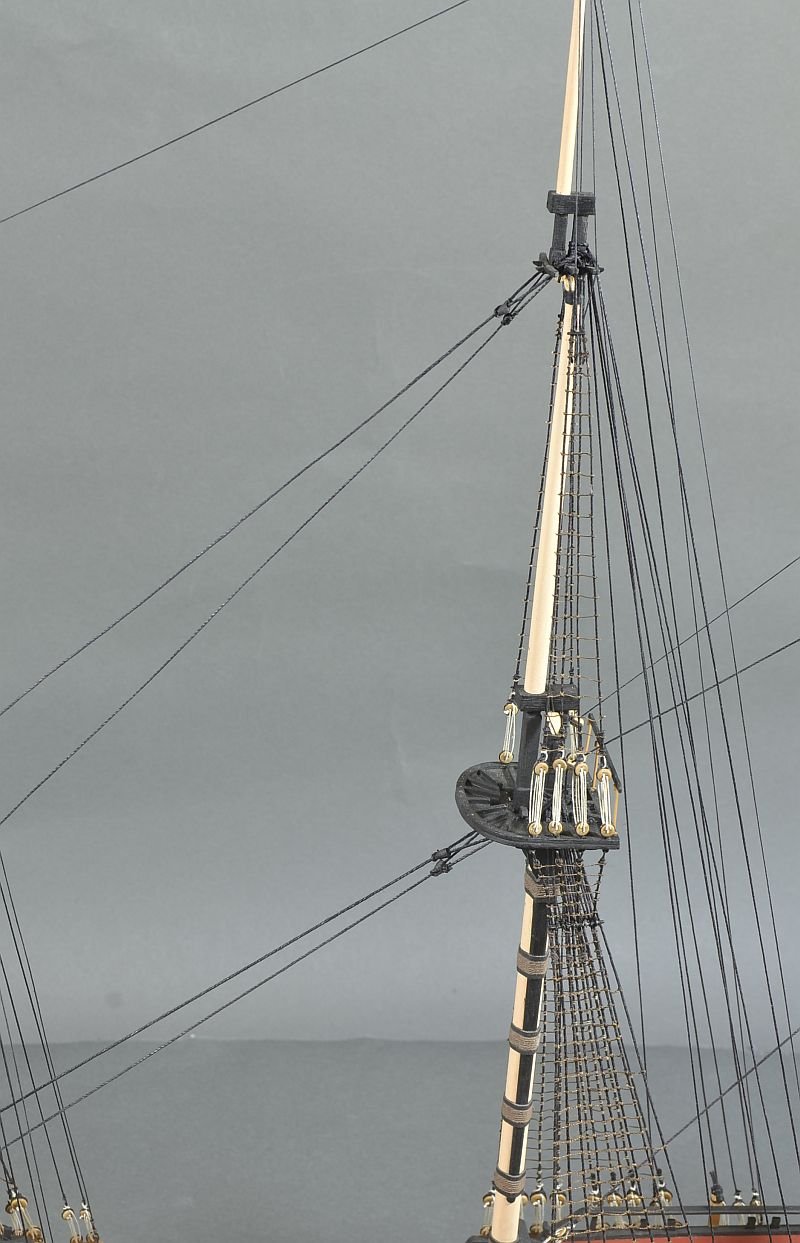
The Crossjack Tie on the mizzen mast was done slightly different from instructions. Took the centre block off and tried to copy what was illustrated in my book. the Thimbles were made from copper tubing.
An overall picture.

Thank you for looking and the ' Likes'
Doug
-
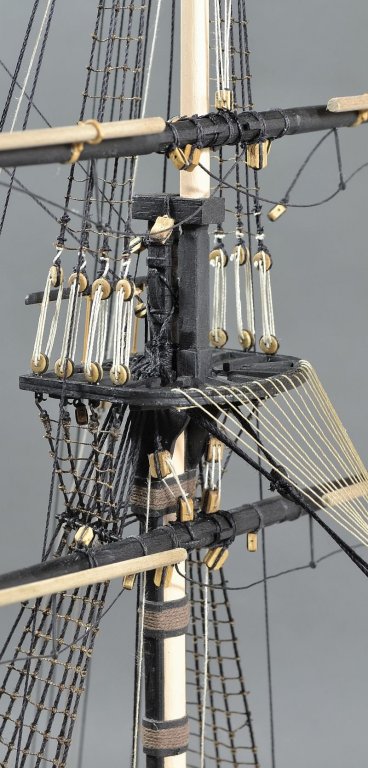
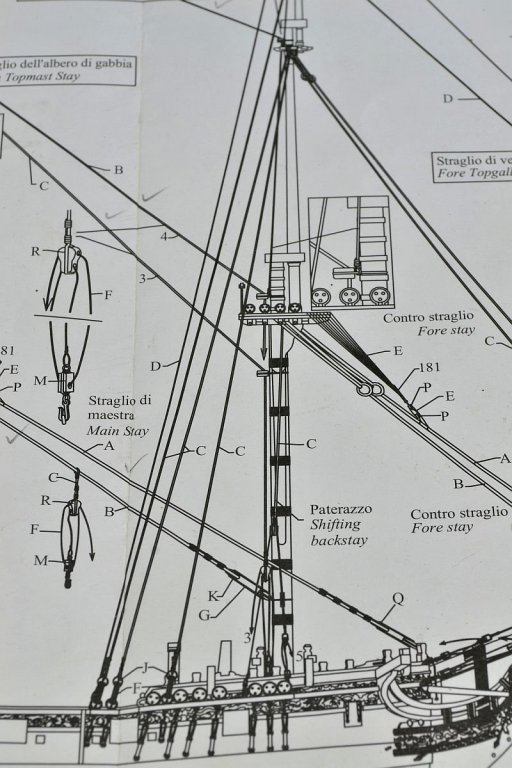
Now where was I? – Have now completed sheet 10. Had mistakenly headed a photo in my last update (now corrected) as Shifting backstay - not sure why as I had not done them as I had a problem understanding the plans.
The photo below shows plans with the Shifting backstay for the Fore mast which as I can see attaches to the Crowsnest area. Anway ignored this and attached as it is for the Main mast. Also was concerned how the lines would interfer with the Shrouds / Ratlines but it turned out not too bad.

Did not use the kit supplied Euphroe brass blocks but made some up from a bit of walnut planking – possible they are a bit big.

The Boomkins with a slight downward turn. Did in the end find on one of the plans the measurements for them.

Thank you for looking and the likes.
Regards
Doug
- Altduck, paulsutcliffe, davyboy and 5 others
-
8
-
-
Hello Skip - I stick the planks down with a few drops of super glue and the thread is dipped into diluted PVA glue and pulled through a small sponge to get the excess off before laying up against plank. It obviously will be one piece of thread running the full length of the deck with small strips of thread for the end joints between the planks. These small bits will need to have dried before you can cut them so you can do do the next full length.
Doug
-
-
Hello SkipW - the balsa is not supplied as part of the build - it seems a things that a lot of builders on this site do as it does help with the tricky extreme curved sections.
Good luck with your build - you will have have plenty of good examples for guide in your build especially Blue Ensign (I expect you have seen his Pegasus which probably inspired you to have a go)
Regards
Doug
-
Hello - Thank you for the generous comments and 'likes'. Martin - just get on with it
")
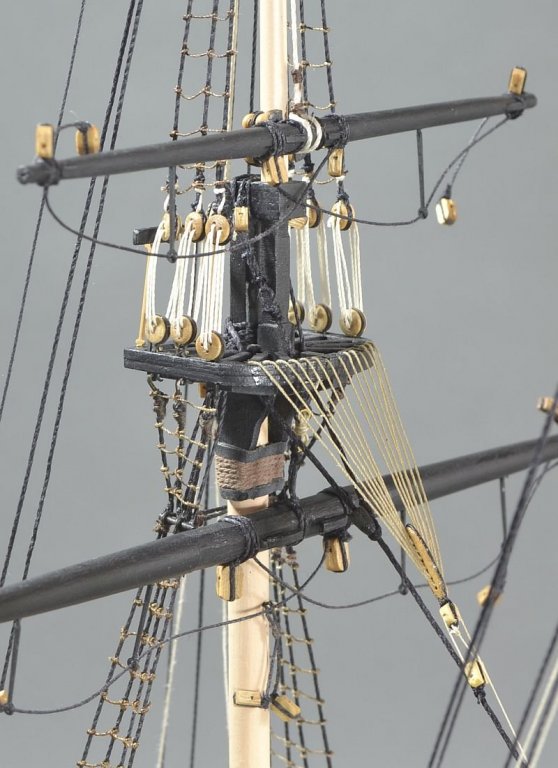
Sheet 10 nearly done with the Crowsfeet to do. So that is all the Stays and Preventer Stays.
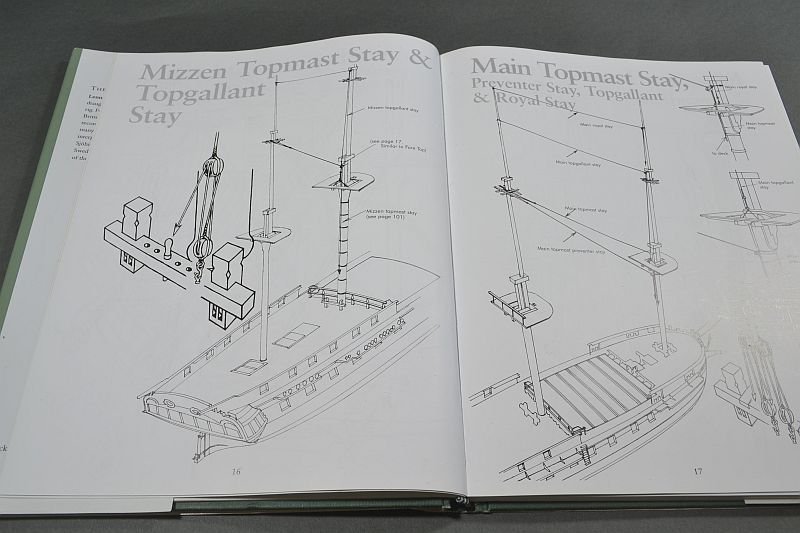
Have this book which has been a great help as the plans at times are hard to see what's what.
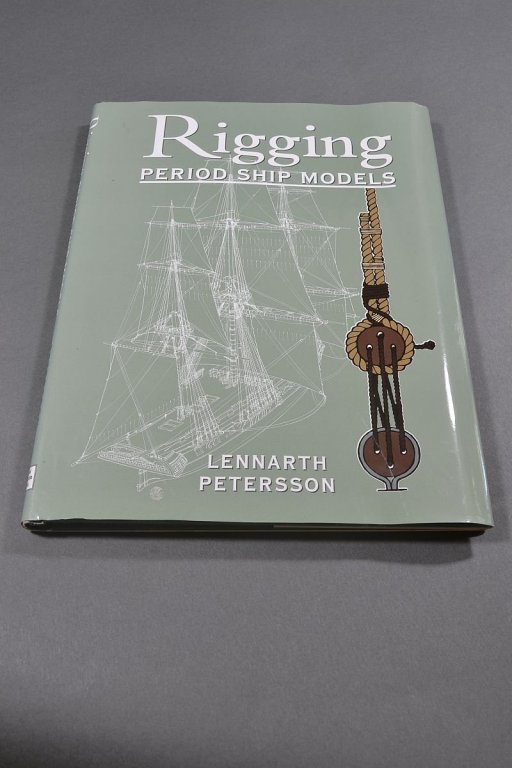
Clear illustrations.
Mouses shaped from bits of dowel turned on a Proxxon lathe.
Fore Topmast Stay and Preventer Stay secured. Ends will be sorted with a rope coil later.

Overall pictures.

Thanks for looking.
Regards
Doug
- Dubz, Landlubber Mike, Tim Curtis and 15 others
-
18
-
Thank you Blue Ensign. The shrouds maybe not tight enough - odd wobble here and there.
No way can I achieve what you do with all the historical accuracy - it’s hard enough just to do the basics
Doug
- Martin W and paulsutcliffe
-
2
-
Hello - have just completed shrouds and ratlines.
had realised that I had forgotten the supports under the quarter deck. There should be two - one in the middle and one on the end. At this late stage just put one on end as the other is not seen.
Used pieces of balsa wood to help with the spacing between deadeyes.
The futtock staves are attached to eyelets bent over to make a hook.
The ratlines are natural thread dyed with diluted walnut stain and the spacing between is 5mm or at least meant to be.
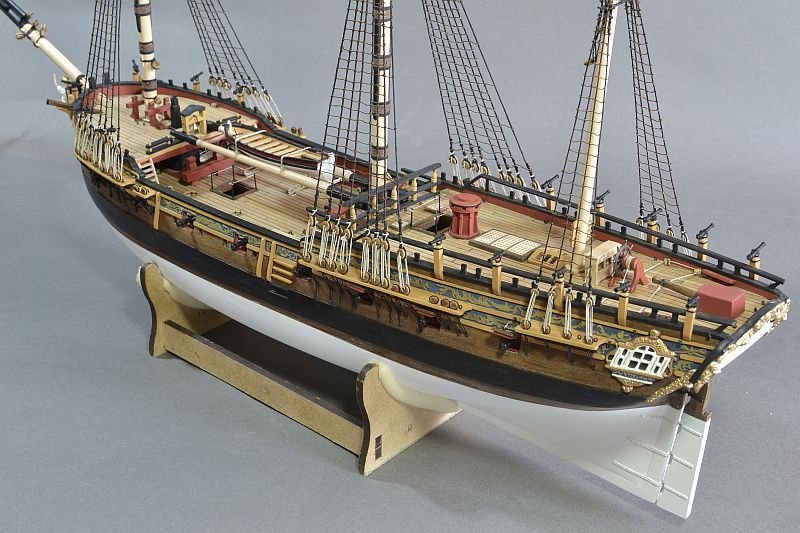


Felt I could have done better with the rigging - not completely happy with it.
Anyway the main preventer stay I guess next.
Thanks for looking in.
Regards
Doug
- oneslim, Jobbie, paulsutcliffe and 5 others
-
8
-
Looking good Johnnyreg.
Make sure the grate (under quarter deck) is okay to allow the steps to be positioned down from the quarter deck. I made mine slightly smaller to allow room for the steps.
Regards
Doug
-
-
Thanks Blue Ensign - sort of glad to get them done but it now means the rigging is next

The plans look difficult to see precisely what is happening in regards to some of the rigging.
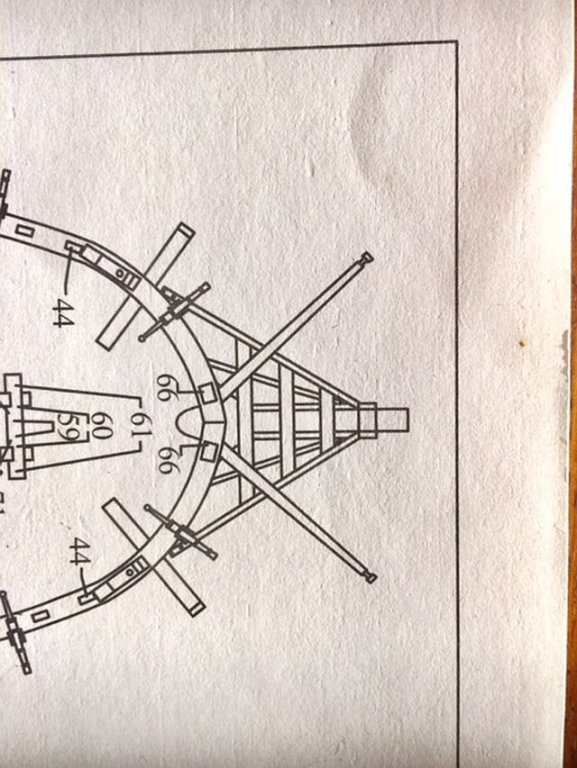
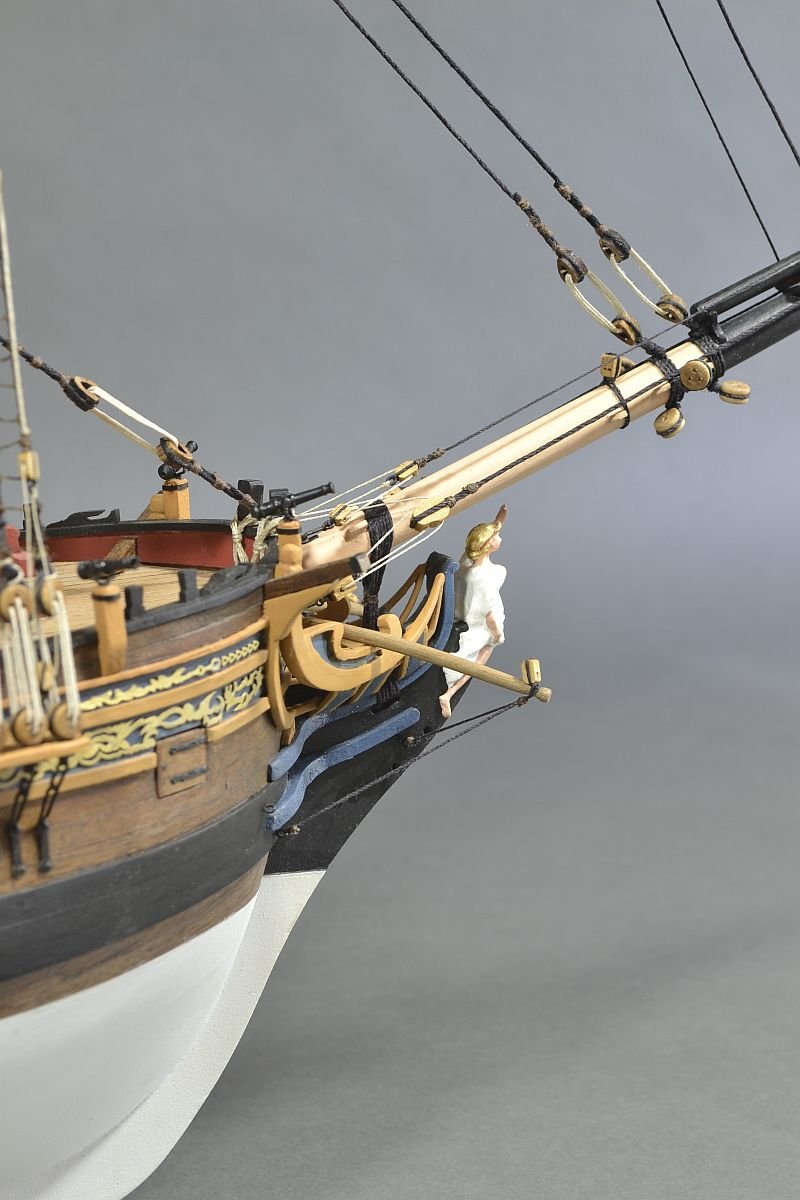
I do have a question concerning the 'tusks' on the bow - they are shown on the rigging plans but no construction details.
Am guessing they made with 2mm dowel or maybe 3mm and about 40mm in length?
Thank you to those looking in the the 'likes'.
Regards
Doug
- Martin W, billocrates and John Allen
-
3
-
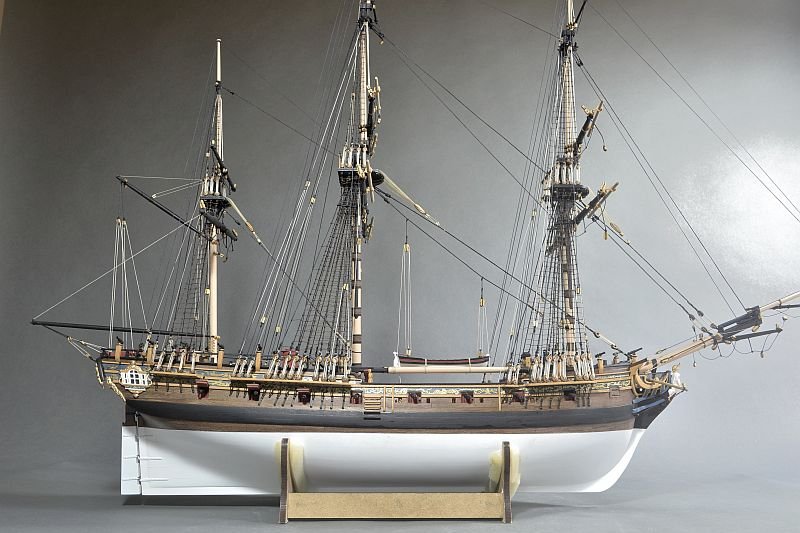
Hello - further steps forward.
Thanks Blue Ensign for looking in and thanks for your good ideas
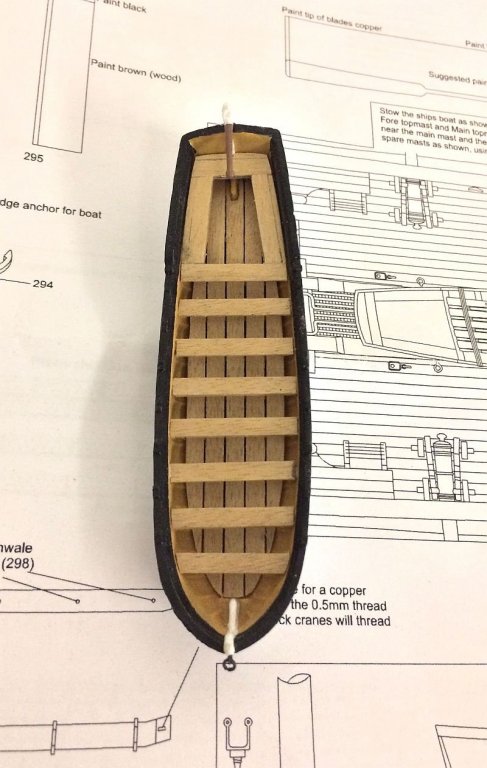
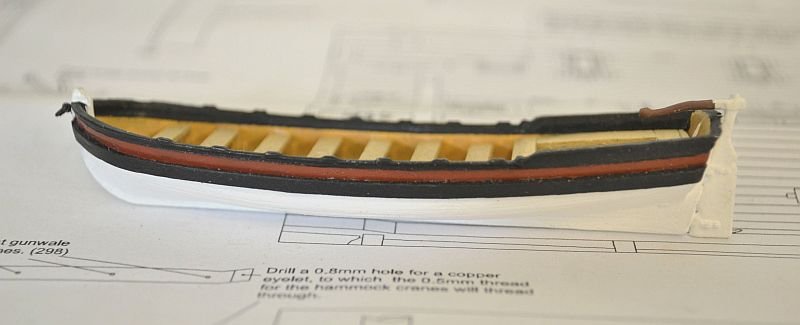
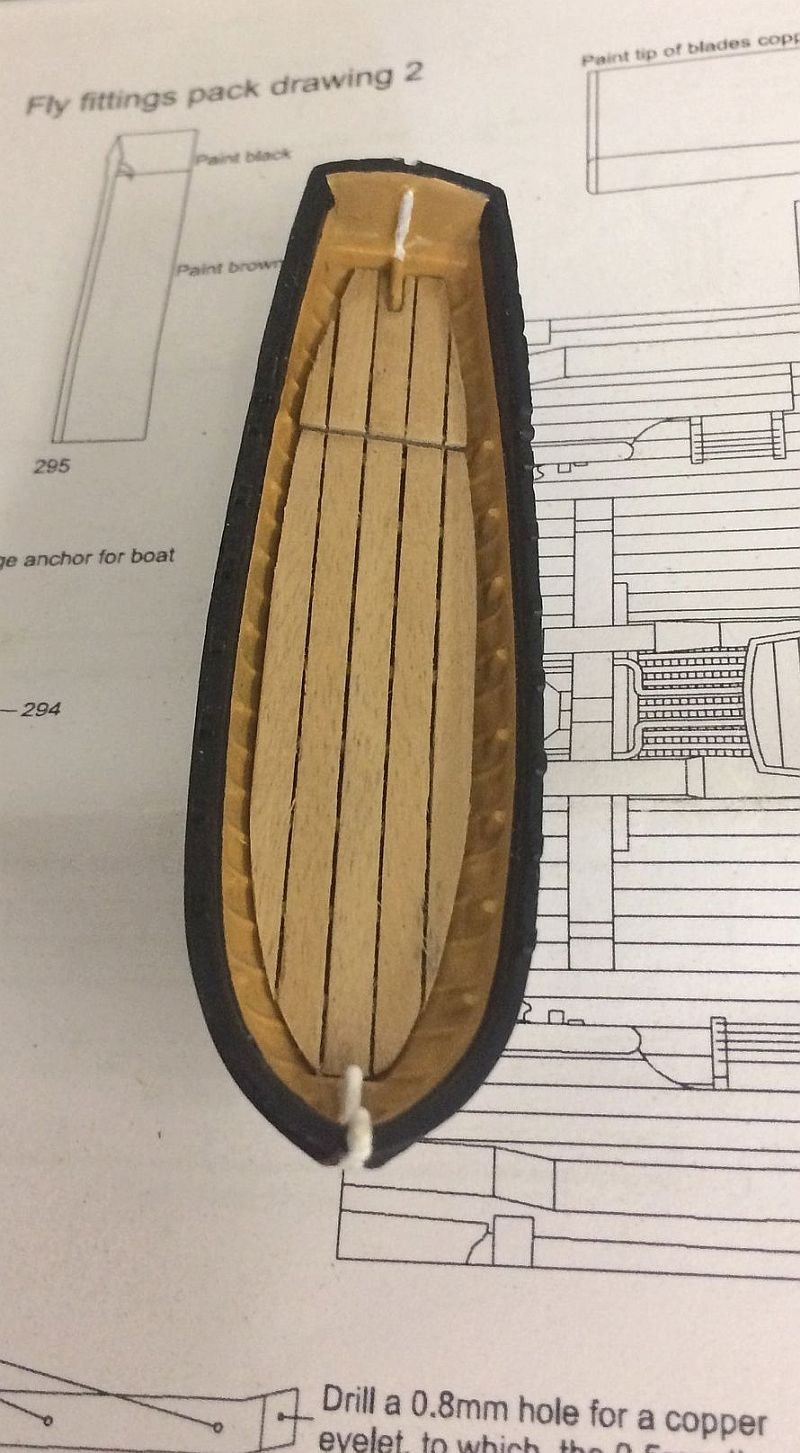
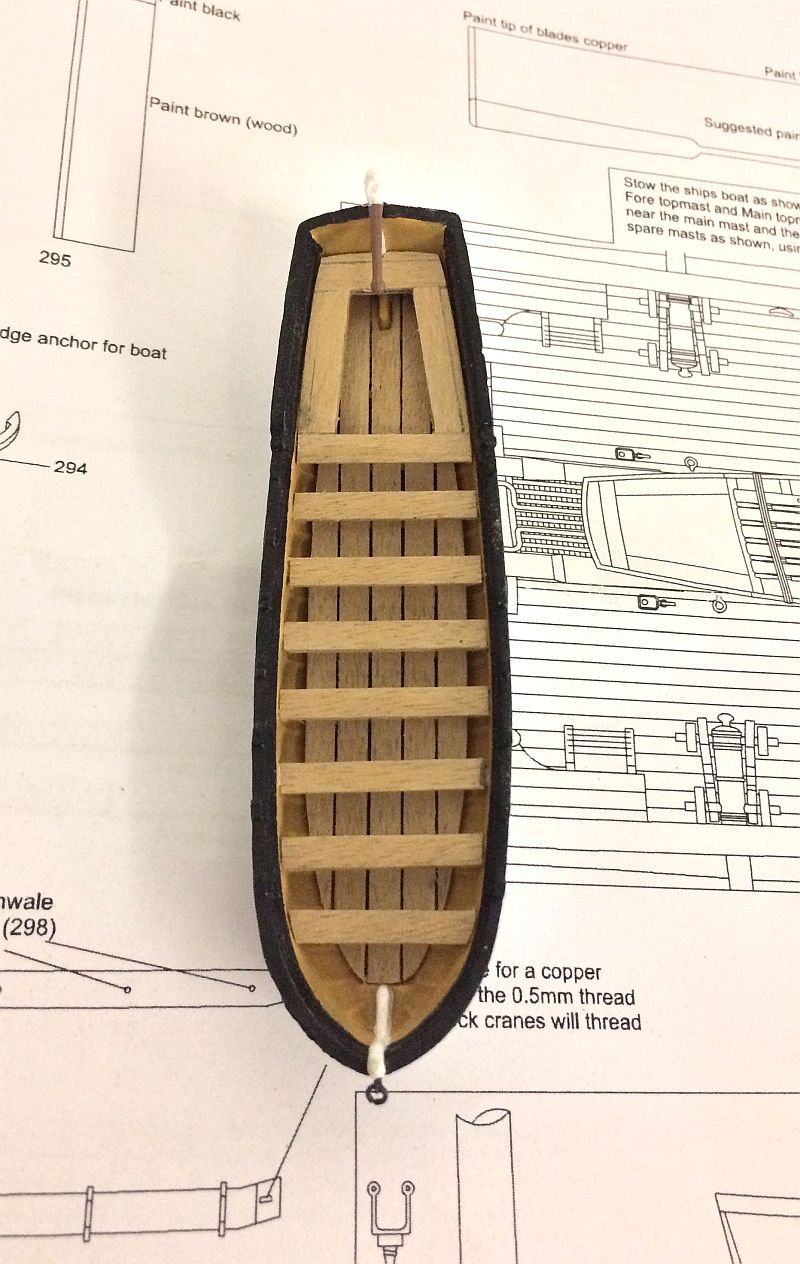
Ships boat done (metal hull supplied with upgrade kit). A strip was added along sides for wale and painted black.

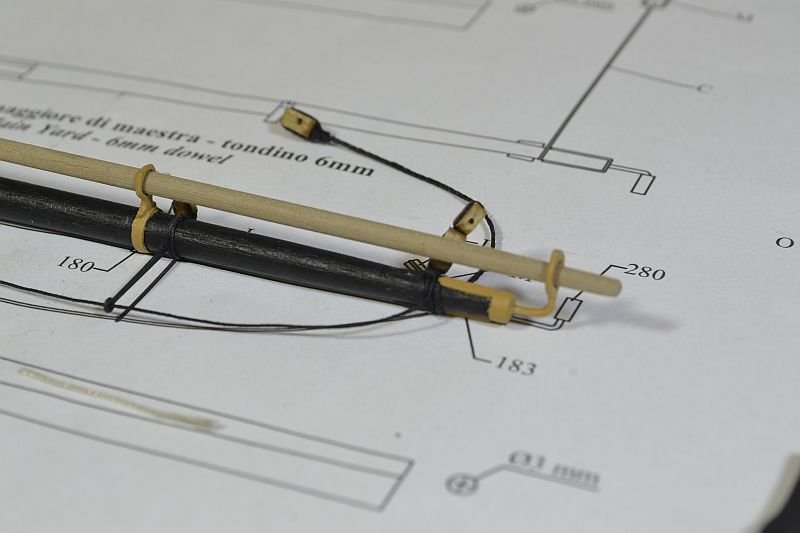
Yards are also all done as per plans.
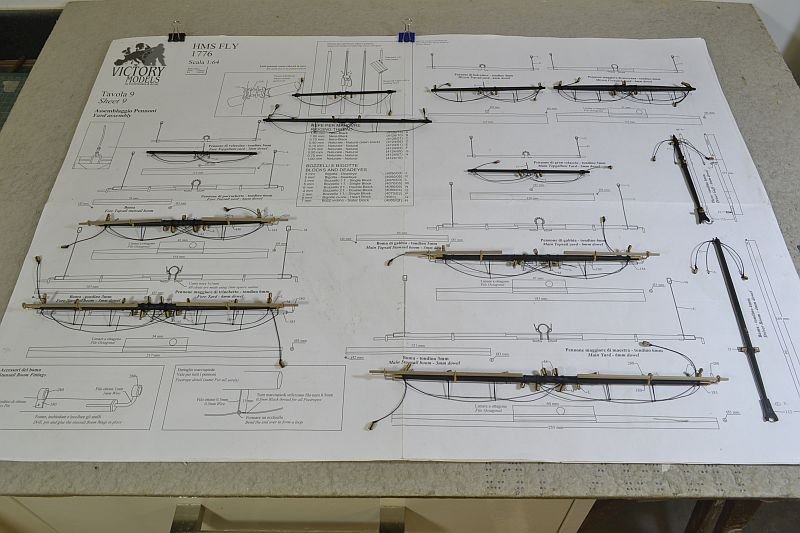
Slight modification to fixing. Used tape banded around yards (painted yellow) with parts from upgrade kit for the Stunsail Boom
It's good to see more Fly builds on here.
Regards
Doug
- Martin W, Blue Ensign, Dubz and 7 others
-
10
-
-
Hello Andrew - Thank you very much for your kind comments and hopefully my build helps you with yours as others have done with mine.
Yes, I did spray a matt varnish on the walnut hull after finishing the sanding. Once I had the waterline marked out I masked off the top section of the hull to spray below the waterline in white. First sealed the edge of the tape (being spray up to) with varnish (hand painted, Caldercraft water based matt varnish) and sprayed a grey undercoat (sanding between coats) and then sprayed the acrylic white matt, finishing off with matt varnish. When I mask off I always seal the edge of the tape with whatever colour is underneath the tape to get hopefully a clean edge.
Have never found a problem in painting over varnish even though I water down the paint.
Hopefully this has answered your question / helped and will now go and check your Supply build as for some reason have not seen it. I always look out for Supply builds as there seems not to many about.
Regards
Doug
-
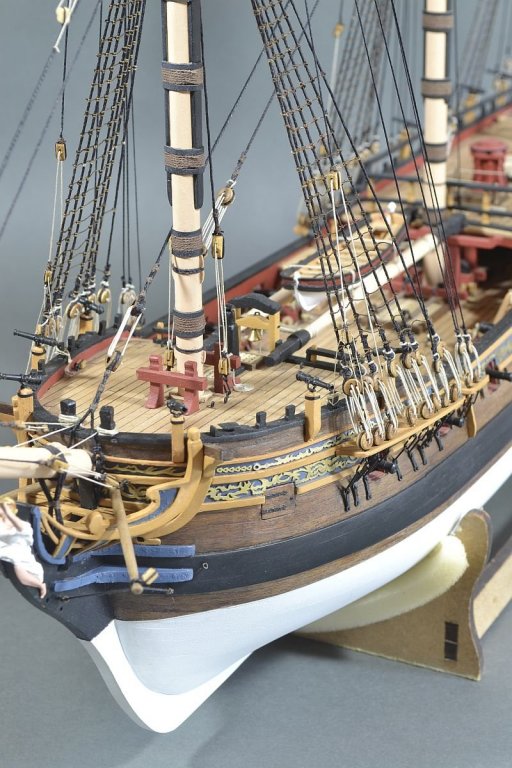
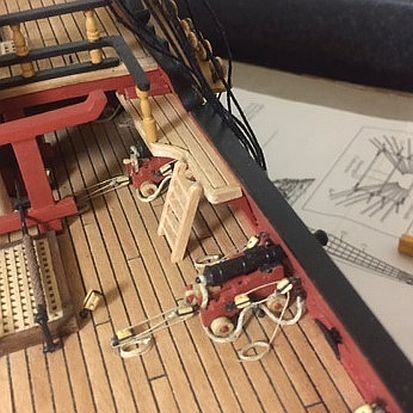
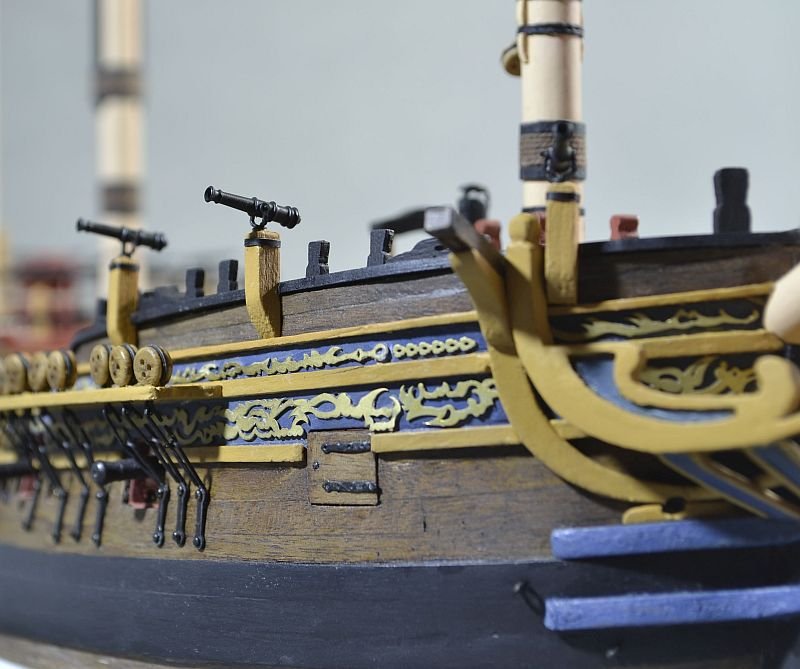
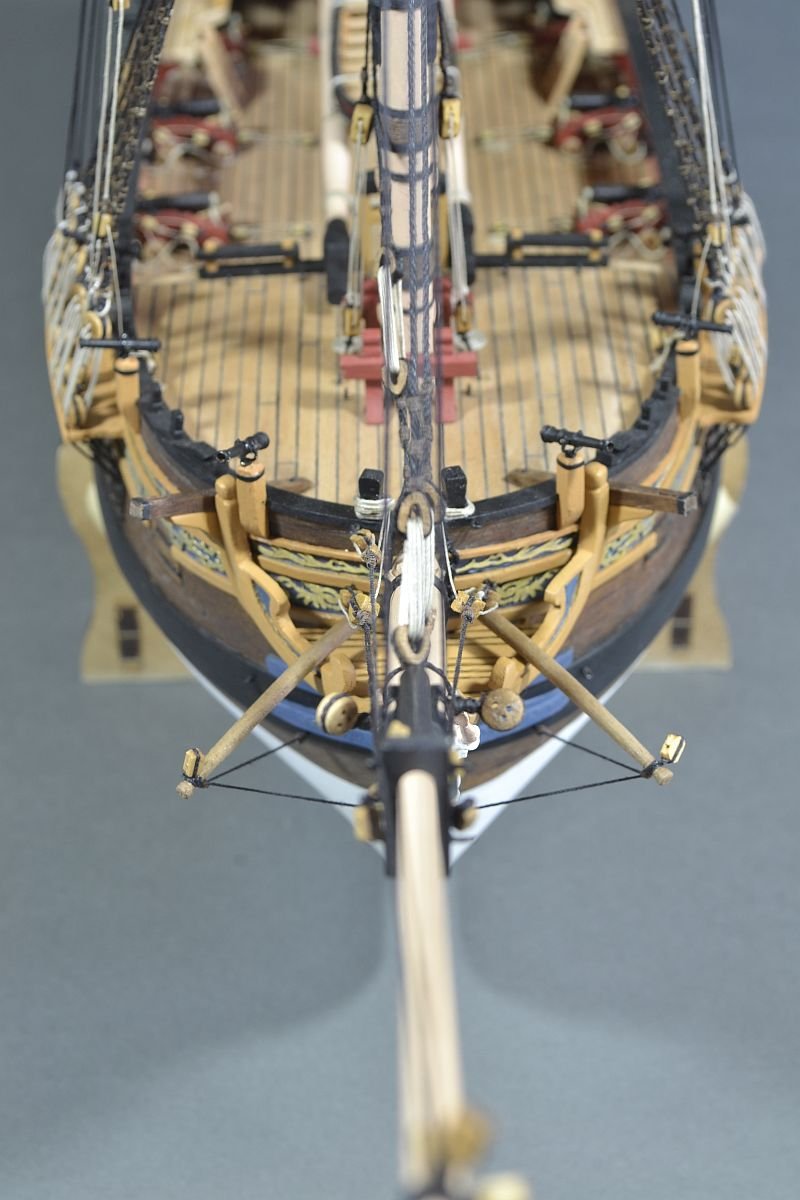
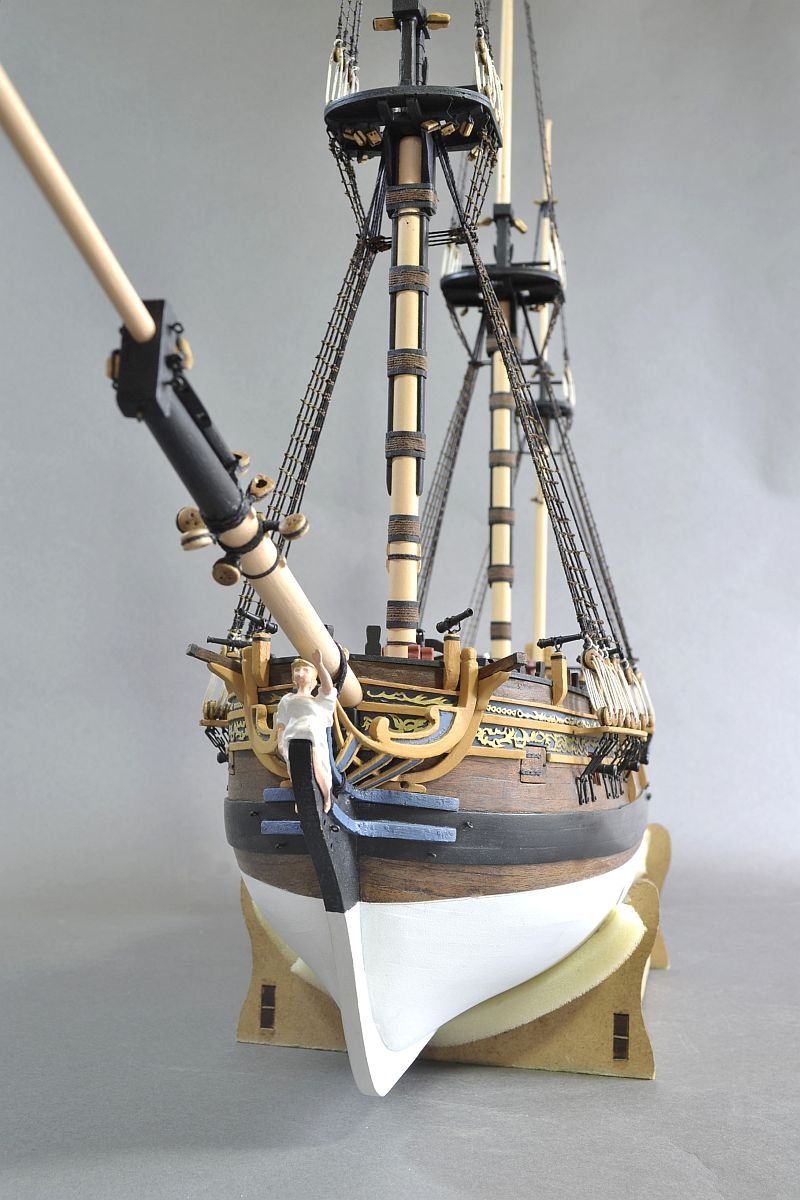
Hello - swivel guns are all in place. The guns are replacement ones from Cornwall Model Boats.
I unashamedly copied the idea of the brackets from Blue Ensign which consists of some eye hooks straightened and then bent into shape. Then dropped into a brass tube inserted into the upright stand.
(Sorry, out of focus)
Not sure the best way to arrange the cannons - either tidy or every each way..... Mind you they will probably end up every each way once starting on the rigging.
Dan - Thanks for looking and your comments. Have taken note
Thank you for all the 'Likes' - much appreciated. Thank you.
Regards
Doug
- zappto, billocrates, Tigersteve and 7 others
-
10
-
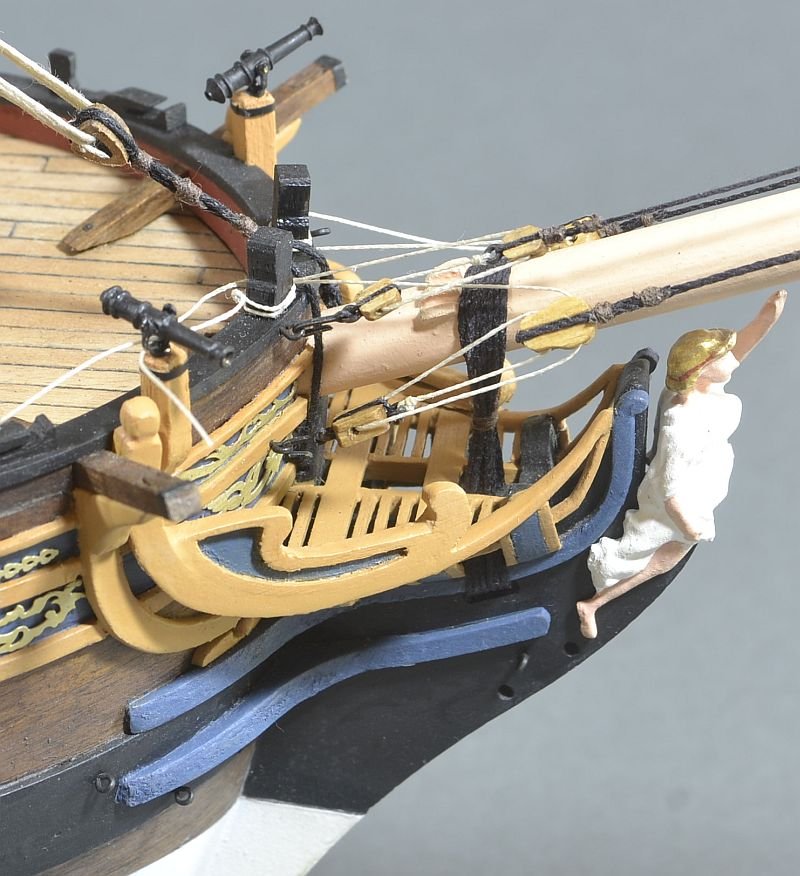
Thank you Blue Ensign. Tried to do more with the block work on the bowsprite with seizing etc but found it extremely difficult.
As with my first build, Supply, I could not rig the guns fully but this time had ago so maybe on the next build might progress a bit more....
Anyway, again thank you very much for your comments - have learnt from your Pegasus build. (when the internet allows me)
- Martin W and Old Collingwood
-
2
-
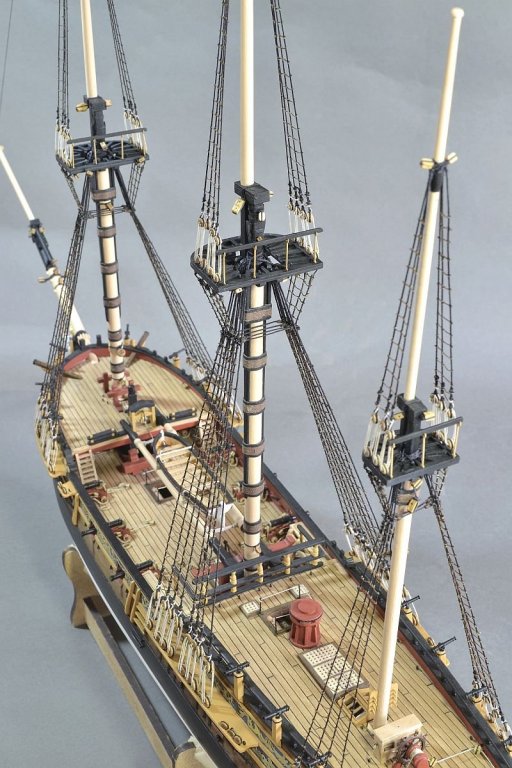
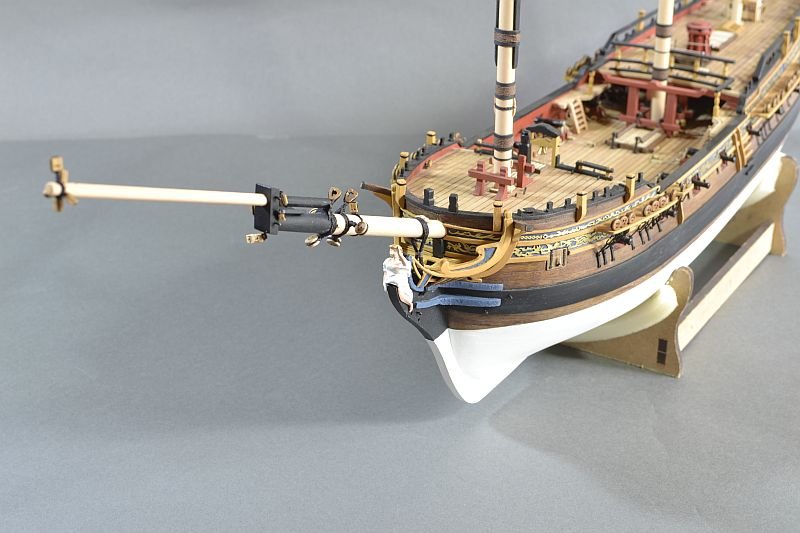
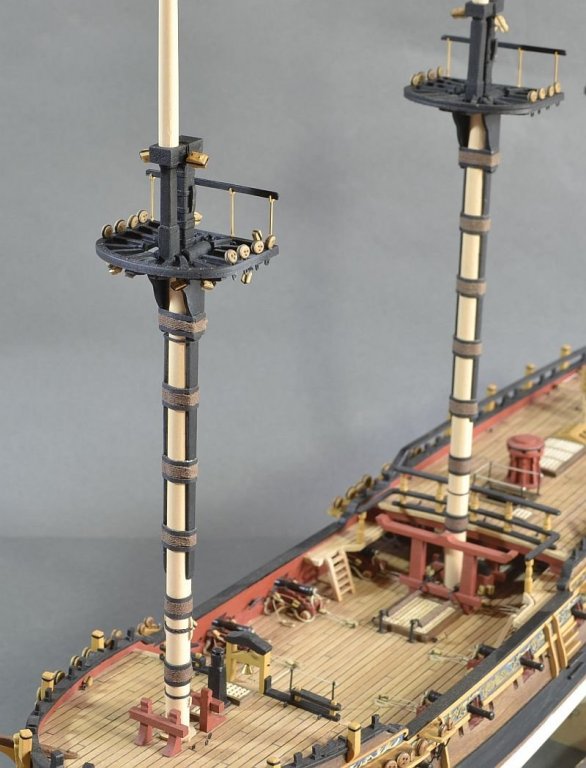
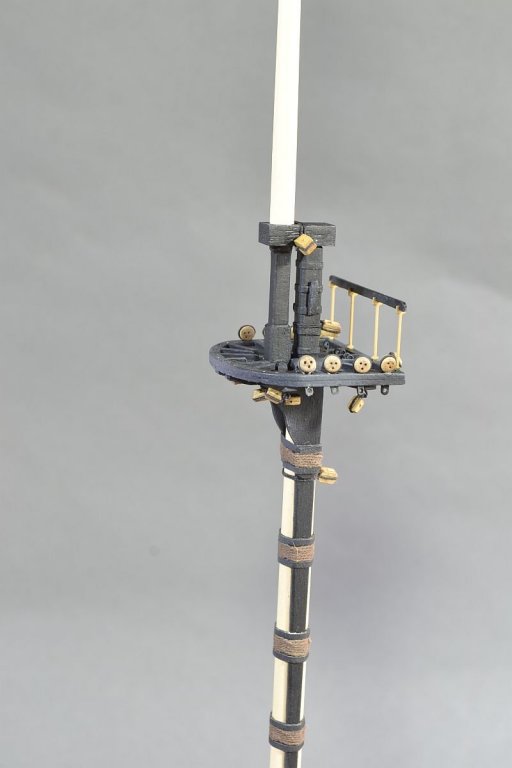
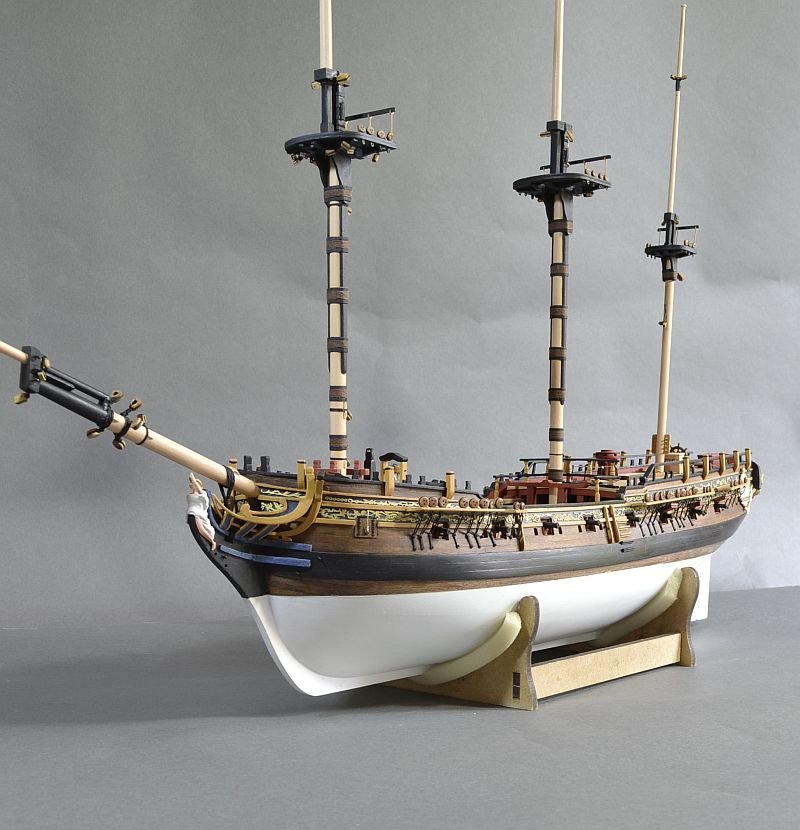
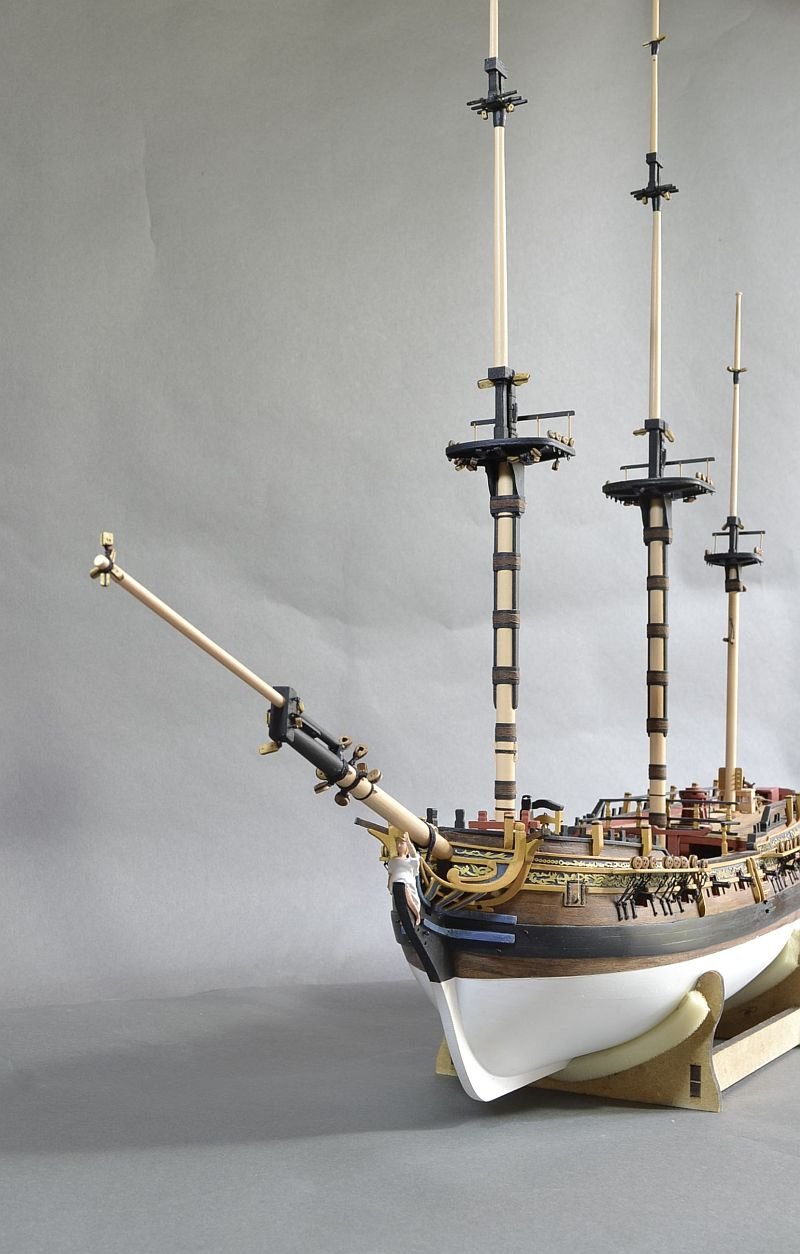
Hello - masts and bowsprit shaped (thinner at one end and thicker the other end), fitted (mostly dry fitted). 'fidded', 'bolstered' and 'blocked' as per 7 & 8 Plan sheets.
Masts painted a light cream as walnut dowel was various colour shades. The trestletrees sort of fell apart when cutting them from the laser sheets - 'probablynot' referred to them being badly lasered when he first got his Fly build. Does anyone know what has happened to him - not seen his build for a long time. Hope he is well and the builders have not put him under the concrete floor of his new conservatory......

The woolding I may have used a too thicker thread and the metal bands are black tape.

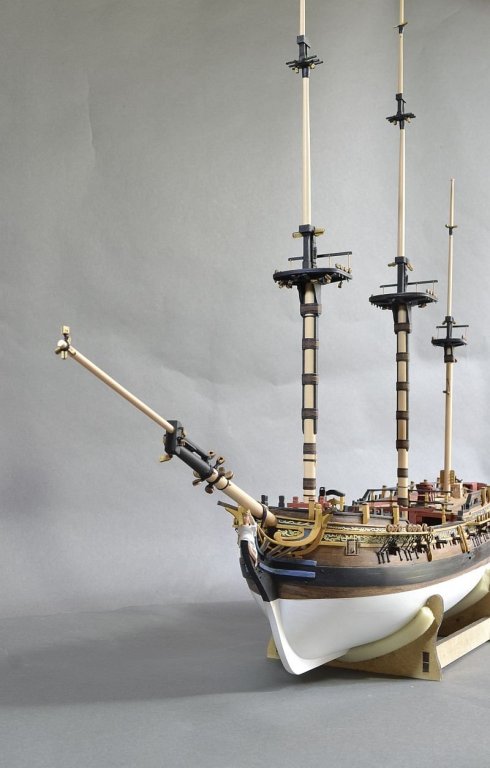
Bowsprite cap rebuilt as kit supplied was wrong shape.
Thanks for looking in
Regards
Doug
- Tigersteve, oneslim, Charlie1805 and 6 others
-
9


HMS Fly by Martin W - Amati/Victory Models - 1/64
in - Kit build logs for subjects built from 1751 - 1800
Posted
Martin - you are certainly making life difficult for yourself but it’s all looking good.
Regards
Doug