CaptainSteve
-
Posts
1,858 -
Joined
-
Last visited
Content Type
Profiles
Forums
Gallery
Events
Everything posted by CaptainSteve
-
 I did mine in gloss (perhaps a touch shinier than your second pic) ... but feel that the matt looks much better.
 -
Studding booms, how are the lower booms attached?
CaptainSteve replied to Modeler12's topic in Masting, rigging and sails
Jay, I had noticed your question in your Constitution build-log, and it instantly reminded me that I had read the answer just the previous day. Note that I do not claim to know what half the terms used in the following passage mean ... but I DO know more than I did last week. So, until Kester gets here …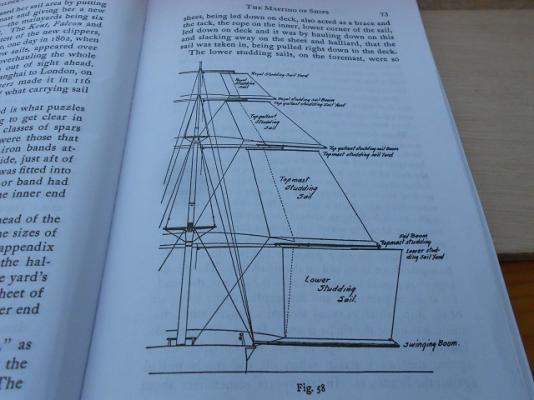
-
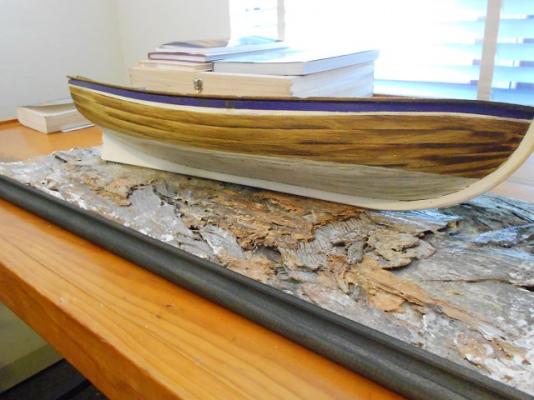
Thanks, George .... But the rough bark look is pretty much what I was going for in the first place. At the time, I was quite prepared to ditch it and start again if I didn't like it, but in the end, it's come out as good or better than I'd hoped. The wood was "baked" at low temperatures to kill off any creepy-crawlies (and there were a heap at first), and has been sealed with aircraft dope. I need to trim the edges square, and attach the black trim all around (in the above pic, it is just positioned in place for the photo). Then, I'll fit a pair of brass pedestals for the Launch to sit upon.
- 625 replies
-
- 2
-

-
- bounty launch
- model shipways
- (and 1 more)
-
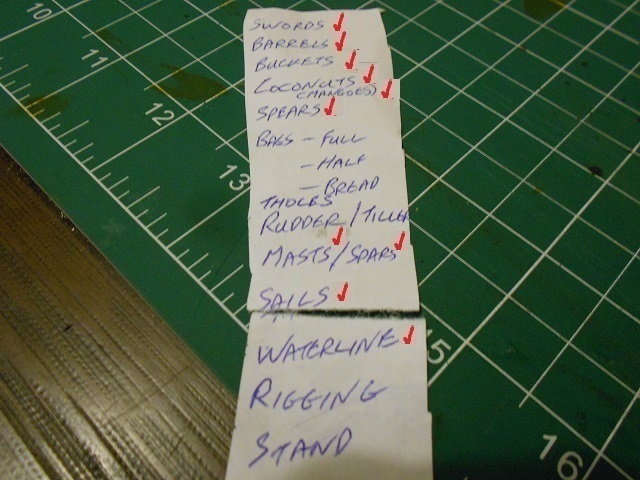
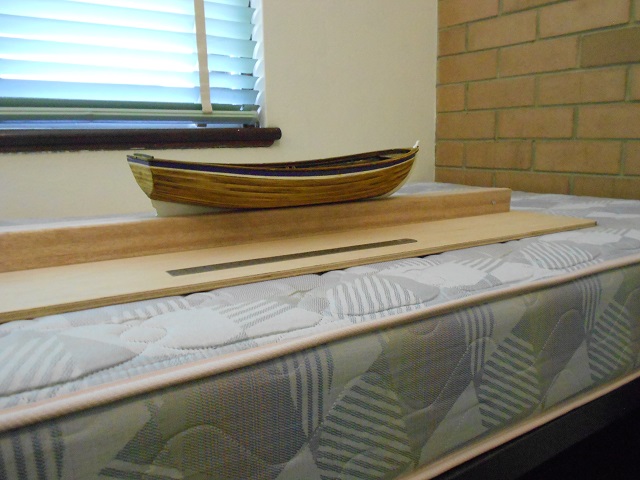
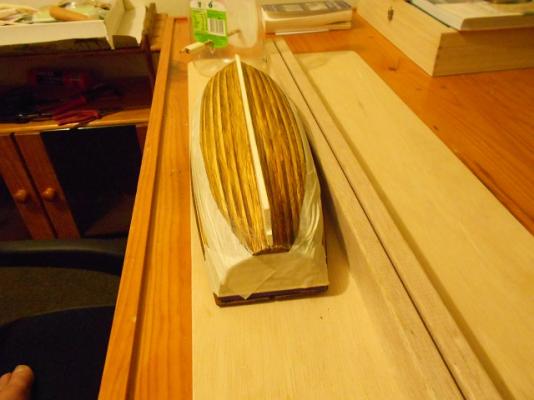
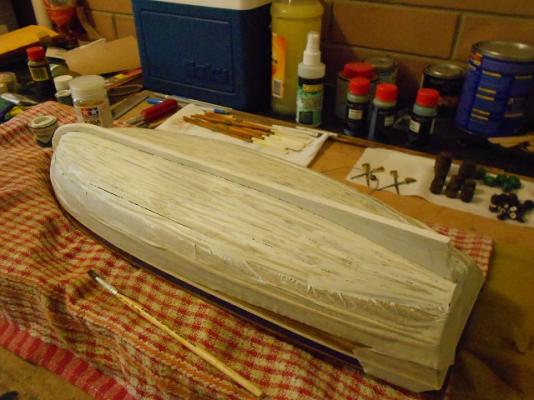
Wi’ the hot Australian summer uponeth him, CaptainSteve hath discovered that his modelling room was designed by the same Swedish gnomes who doth maketh saunas and steam-rooms. Nonetheless, Our Hero didst stealeth some hours this past eventide to ticketh one further item from his list. “Verily, I didst umm and ahh, dither and dally upon this point,” he was heard to mutter, perhaps by way of explanation. For whilst he was most proud of the wood-graining which hadst been doneth, CaptainSteve couldst not shaketh the feeling that his boat didst lacketh something for want of the external tree-nails. “Hence, I do presenteth unto Ye me scratched-up water-line … ”, he didst declare, perhaps a little too triumphantly. First up, Our Hero didst contrive to obtain a highly specialised tool in the field of ship-building – that being the water-line marker … “And, thence, I didst set about tapething off the top part o’ me planking,” CaptainSteve announced. “… a’fore painting in my water-line using a mix of matt White acrylic and thinners.” After a couple of coats had been allowed to dry (taking some three and a half minutes in Our Hero’s work-room/sauna), he didst cutteth it back wi’ fine-grit sanding blocks. “And, here in this next pic,” CaptainSteve beganeth, “me Launch doth lie lazily upon the almost-completed display-board made from bark.”


- 625 replies
-
- 11
-
-
- bounty launch
- model shipways
- (and 1 more)
-
And this link here will take you to where another Connie builder uses a ponce wheel to make the rivets on his copper plating. Hope it helps ya !!
- 113 replies
-
- 4
-
-
- constitution
- mamoli
- (and 1 more)
-
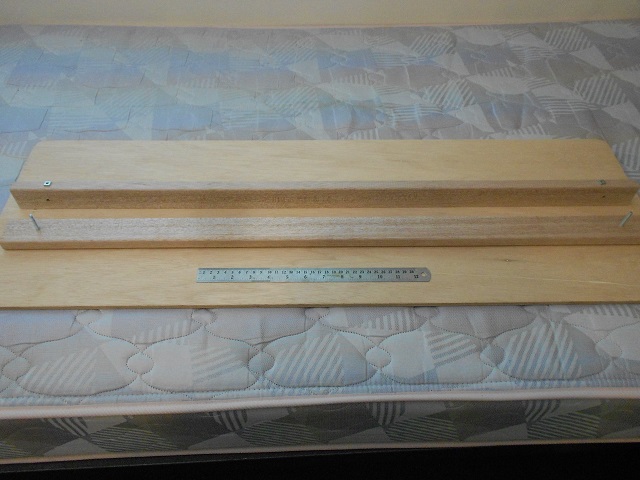
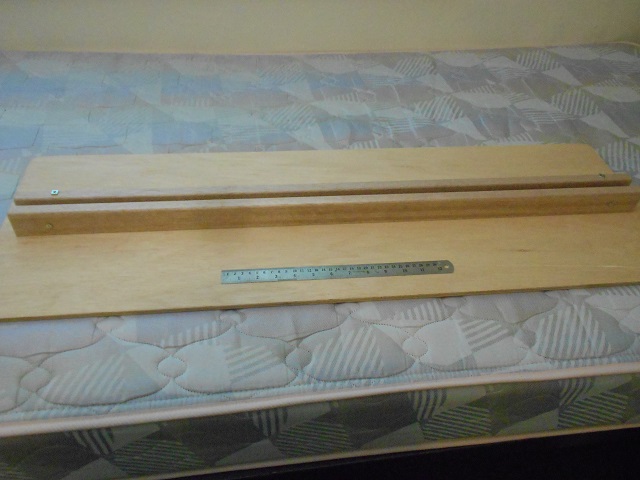
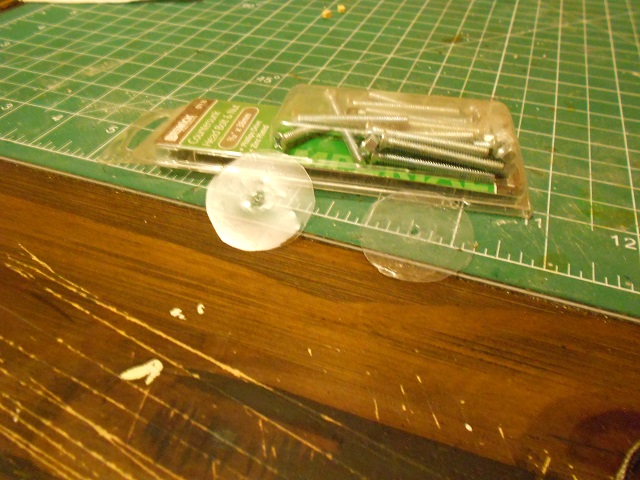
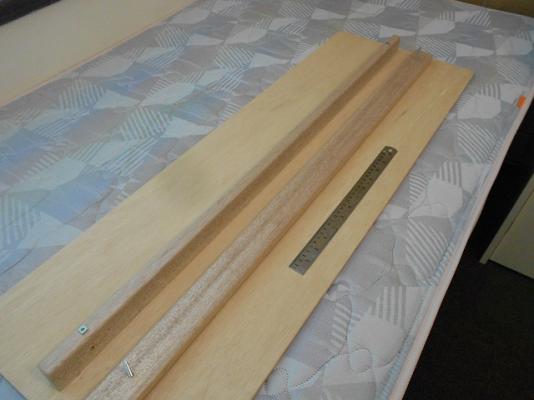
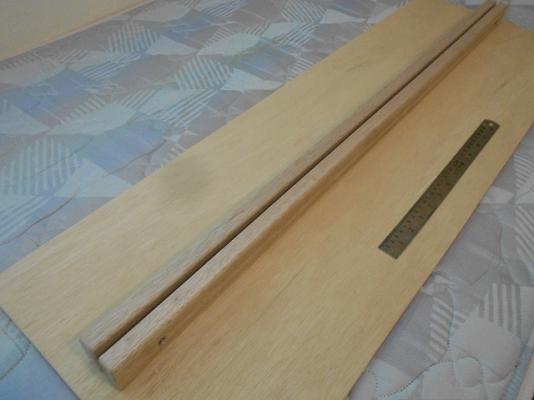
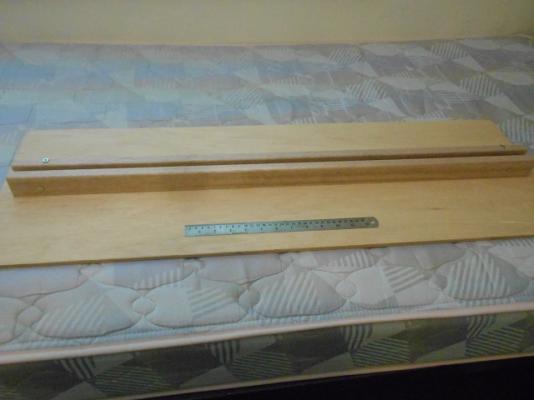
Want a cheap keel clamp ?? Here's one which I picked up just the other evening. It's designed for my soon-to-be-rebooted USS Constitution build. It was put together by a professional carpenter friend free of charge ... all I paid for was the packet of bolts. Here's a couple of pics .. Essentially, the back rail is fixed to the base-board. The front rail is free and joins to the back one using two (soon to be four) bolts. All up, it's 100cm (about 39.5 inches) long. As mentioned, I'd like to drill two extra holes thru closer to the centre, so that it will end up using four bolts to clamp shut on the keel. Here it is with my current build, the Bounty Launch, clamped into position ...


-
Tuff, What did you use to make the impressions in your copper plates ?? Sorry, but to me, the rivets just seem a bit too big for your model. Have you tried a ponce wheel ?? (Or even a gear cog from some watch-workings.)
- 113 replies
-
- 1
-
-
- constitution
- mamoli
- (and 1 more)
-
Spectacular job, Jay !! I am in awe of this ship every time you update.
- 732 replies
-
- 2
-
-
- constitution
- model shipways
- (and 1 more)
-
Thanks, 'Rat, I'm certain that someone (or their squirrels) could make that work.
- 396 replies
-
- 2
-
-
- Idea
- Bright Idea
- (and 1 more)
-
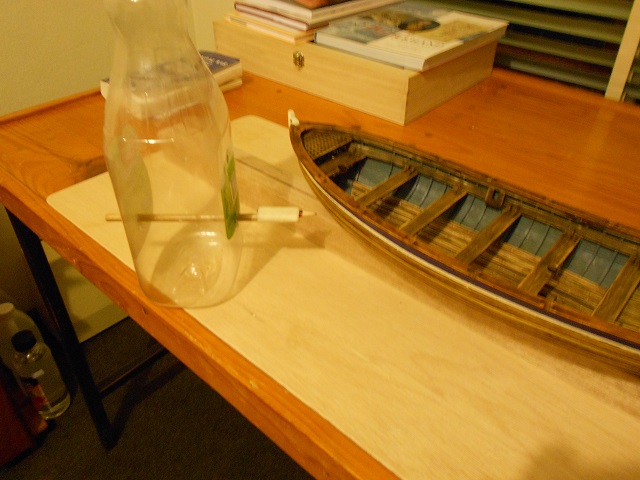
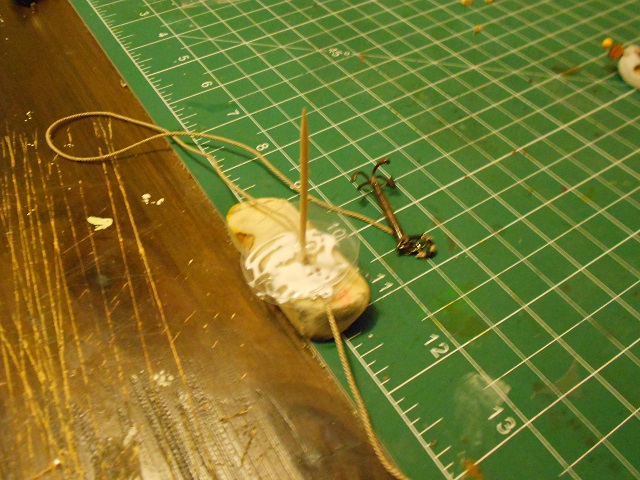
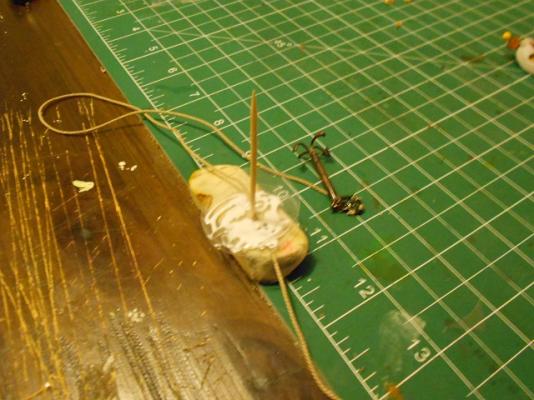
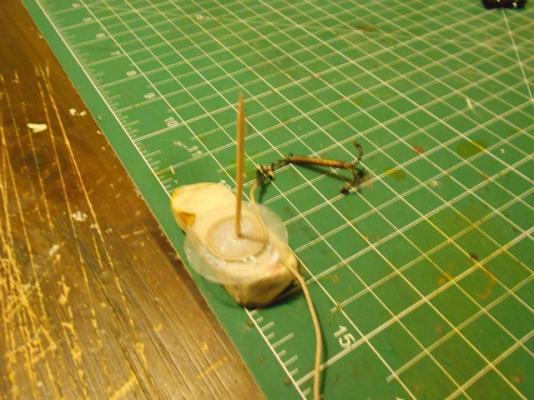
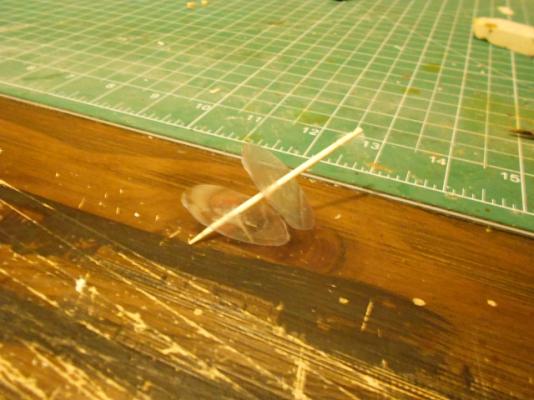
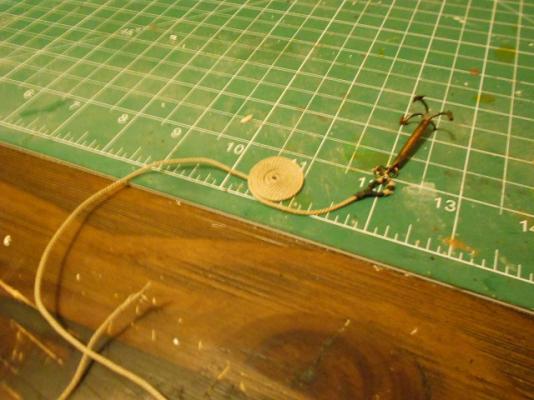
PACKAGING PLASTIC - To create Flemish Coils CaptainSteve's Disclaimer Although the following idea does not strictly adhere to the Kit-Basher's Guide mission statement of using "everyday items which could be tailored into ship parts to enhance our models", I felt that it was of value to ship-modelers, and needed to be readily accessible. This idea originated from a post by MSW member, modeller12 (although I have tweaked Jay's idea slightly). Using the rigid type of transparent plastic found in many types of packaging, cut out a pair of circular pieces. Make sure they are slightly bigger than the coils you wish to make. Make a hole in the centres and insert a toothpick through the middle. With the disc pieces still apart, smear a layer of PVA glue onto the internal side of the bottom disc. Begin to wrap your rope/thread around the toothpick. Push the plastic discs together, and insert the point of the toothpick into a common pencil eraser. (Here, I have first threaded my rope out through the hole in the bottom disc, so as to position the coil in the desired location.) Continue to wrap the rope around the toothpick by turning the whole eraser/disc/toothpick arrangement around and around. Keep the plastic discs firmly pressed together until the glue has dried. Once the glue has set, separate the plastic discs, being careful when removing the bottom, glued, disc. Remove the toothpick, and ... SHAMELESS PLUG: CaptainSteve uses and whole-heartedly endorses Chuck's ropes, as made by the Syren Ship Company.

- 396 replies
-
- 6
-
-
- Idea
- Bright Idea
- (and 1 more)
-
MM, You have just discovered the main trap which all kit-builders learn eventually. You are now, officially, ONE OF US !!!
-
Niiice ... But I wouldn't make the spigots too big. Better to understate them, than make them the focal point. OK, Squirrels .... FETCH !!!
- 425 replies
-
- 4
-
-
- bounty launch
- model shipways
- (and 1 more)
-
I thought you might say that !! The only thing missing is some bungs and spigots. (There ya go ... the squirrels have been fed !!)
- 425 replies
-
- 3
-
-
- bounty launch
- model shipways
- (and 1 more)
-
Matt, If you haven't done your barrels yet, then you could do a lot worse than check out this guy. I just wish I'd seen this before I did my barrels !!
- 425 replies
-
- 2
-
-
- bounty launch
- model shipways
- (and 1 more)
-
Matt, As noted in that 'lil spreadsheet I did, there were actually two chests taken onto the Launch. One was noted as the Carpenter's Tool Chest, and the second as the Carpenter's Clothing Chest.
- 425 replies
-
- 3
-
-
- bounty launch
- model shipways
- (and 1 more)
-
If it don't fit, just "chop" it into a bench thwart.
- 425 replies
-
- 3
-
-
- bounty launch
- model shipways
- (and 1 more)
-
Nice work there, ThreeBS ... I really like the scrollwork on your stern galleries.
-
I think the best way will be for me to do the same as you ... just hang a couple of blocks, start stringing away, and see where the squirrels wanna go. (At least they have your map to follow, if they get lost !!)
- 425 replies
-
- 3
-
-
- bounty launch
- model shipways
- (and 1 more)
-
Great work, Mundie. She's really starting to look like Connie now.
-
Nice rope work, Matt !! I reckon your solution will be the way to go.
- 425 replies
-
- 2
-
-
- bounty launch
- model shipways
- (and 1 more)
-
Did I miss the Birthday party ?? Was there cake ??
-
Darn !! All the good compliments have already been used !! Great work, Jesse and it was awesome watching it all come together.
- 607 replies
-
- 1
-
-
- scottish maid
- artesania latina
- (and 1 more)
-
Yer. I ended up faking the hinges on my tool chest by just folding pieces (4mm x 2mm) of the brass strip in half and then fitting to small, chiseled-out grooves. Now that you mention it, I cannot be certain if that brass rod I mentioned above actually came with this kit, or was something I salvaged from my tool-box. Nonetheless, you should be able to pick-up a small piece from any hardware store. I actually have a tried 'n' true method ... I start by approaching a staff member who is not too busy. Then I'll usually open with the line "I'm one of those sick people that makes model ships for fun !!" From there, if you have picked the right staff member, you should be able to get the low-down on every item of stock they sell, and how it could be used in your build. Take your plans with you (even if you end up leaving them in the car) ...
- 83 replies
-
- 2
-
-
- bounty launch
- model shipways
- (and 1 more)
-
Adrieke, Not sure I can see which tabs you are referring to ... Do be careful, though. I created a whole lot of extra work for myself in a build because I thought the plans I was using were messed up. I only worked out after the rip-out/re-build that the photograph I believed wrong was taken from a completely different angle. Not that I'm saying that is the case here ... I've not built this ship. But could you not open up the other side instead ?? Or does that mess with all your internal work ??
-
CH, You can use a pair of tin-snips to cut the brass strip tubing to make the gudgeons. Cut the basic shape a bit over-sized and then trim back with a Dremel. At least, that is what I will be doing very shortly on my own build. There should also be a piece of brass rod (about 1mm thick) which could be used to make the pintles. Beyond that, Pops' suggestion about silver soldering is something that I, too, am going to be learning very soon. As an alternative, I imagine you could use two-part epoxy glue for the brass, but I would imagine that the join will not be as strong. (I did, however, use two-part epoxy when making my grapnel anchor). Failing that, there were a couple of contributors (Pops, again) to the Kit-Basher's forum who sourced small collections of tiny brass tubing on eBay to use.
- 83 replies
-
- 2
-
-
- bounty launch
- model shipways
- (and 1 more)