HOLIDAY DONATION DRIVE - SUPPORT MSW - DO YOUR PART TO KEEP THIS GREAT FORUM GOING! (Only 24 donations so far out of 49,000 members - C'mon guys!)
×


CaptainSteve
-
Posts
1,858 -
Joined
-
Last visited
Content Type
Profiles
Forums
Gallery
Events
Everything posted by CaptainSteve
-
 ... have you tried Modeller's Shipyard ??
 -
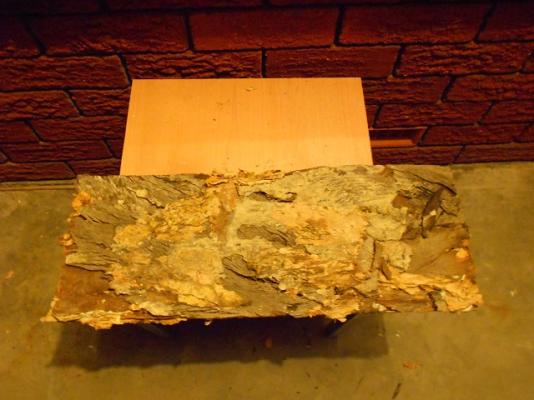
Arrr ... 'T'as been a busy weekend fer CaptainSteve, but he didst (not ten minutes ago) manage to taketh some latest in-progress shots of the base-stand. "This be after I didst giveth the whole surface a liberal brushing with Dope," he didst begin to explain-eth. ("Nay !! Not-eth THAT kind o' dope, ye dope !!") This stuff be used, so Our Hero didst learneth, to tighten up the skins on cloth and paper aircraft (and also to tear the bejeezus outta the laminate from cheap corner tables). Thusly, he be a-figuring ... paper .... bark .... paperbark ... As 'twere to turneth out, the dope not only workethed well as a sealant, but didst also work to bringeth out the colouration. More work remains ....
- 625 replies
-
- 7
-

-
- bounty launch
- model shipways
- (and 1 more)
-
How could I have missed this for so long ?? Great concept, Fartyg !!
-
Tuffie (Tuff-Guy ?? That's MR Tuff, to you ??), Have a look at this post (and the following one), and the cutaway model. I know it ain't Connie, but you may be able to pick up some ideas.
- 113 replies
-
- 1
-
-
- constitution
- mamoli
- (and 1 more)
-
I would definitely recommend building (and fitting) your quarterdeck prior to fitting the rear thwart benches.
- 83 replies
-
- 1
-
-
- bounty launch
- model shipways
- (and 1 more)
-
George, Thanks ... if it works. Patrick, I'm aiming for something which resembles a log. Basically, something rustic-looking to fit in with the whole weathered look.
- 625 replies
-
- 2
-
-
- bounty launch
- model shipways
- (and 1 more)
-
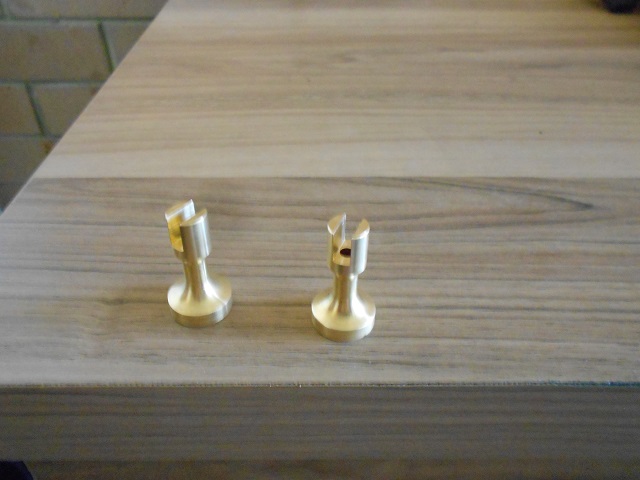
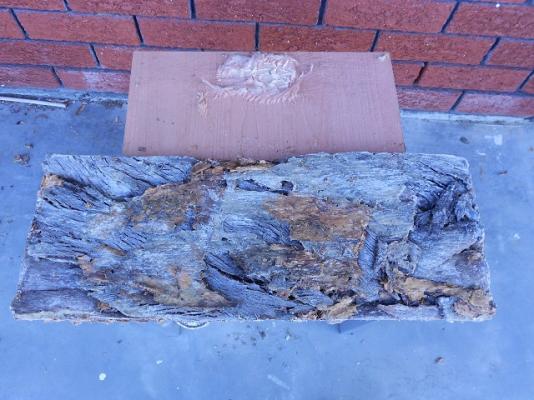
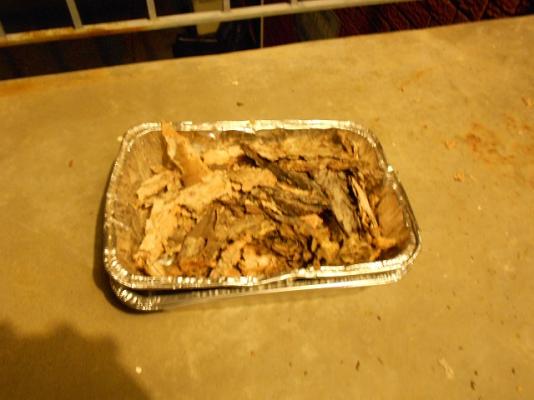
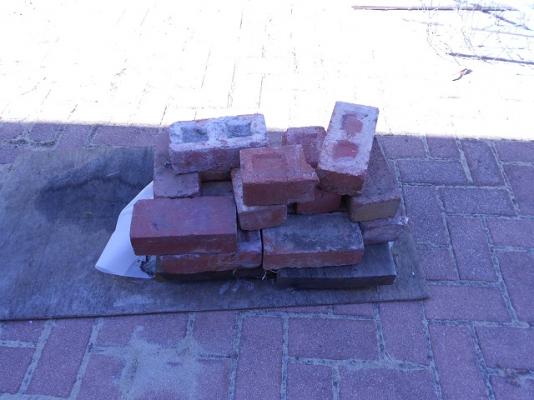
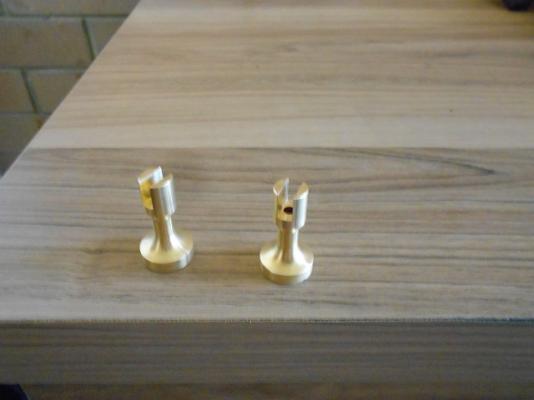
Here be some work-in-progress pictures of the bark base-plate which I am trying to make. This idea was something I saw on a web-site somewhere and I didst happen to like the look of it. I've never tried it before, and if, in the end, the whole thing doest looketh like crap, then it shall be binned. First up, a tray of bark pieces collected from nearby parklands ... ... followed by the board weighted down with wood blocks and bricks ... (Apologies for the lack of in-progress pics ... me hands didst have glue all over them.) More than a day later, and this next shot be-eth current, whilst the board doth dryeth upon CaptainSteve's balcony. Next up, Our Hero shalt be sealing the whole thing, afore fitting the pedestals ...
- 625 replies
-
- 6
-
-
- bounty launch
- model shipways
- (and 1 more)
-
Yer. Probably more like Line 3 in your pic, Matt ... tho' I be guessing (and it's only a guess) that the block would be attached to the spar.
- 625 replies
-
- 2
-
-
- bounty launch
- model shipways
- (and 1 more)
-
Based on my personal experience, it may be because kit makers provide absolutely no instructions on planking ... meaning complete newbs will end up with a first planking run which roughly resembles a dog's breakfast. The second planking, usually with veneer strips (or copper plates), will look a lot better.
-
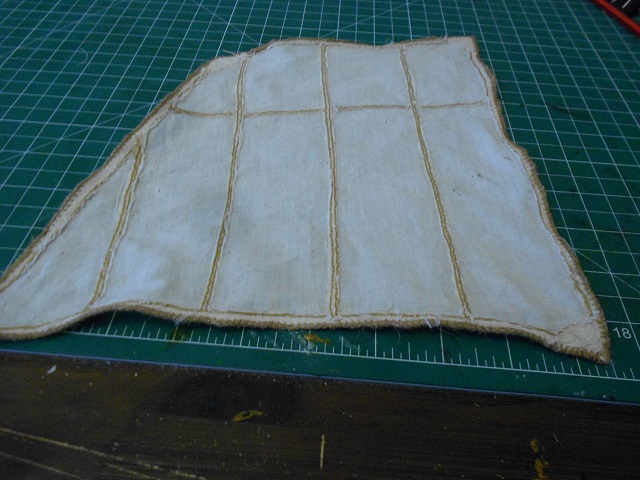
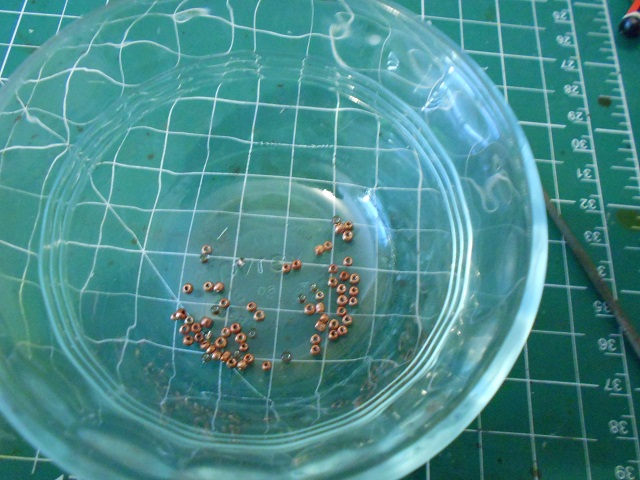
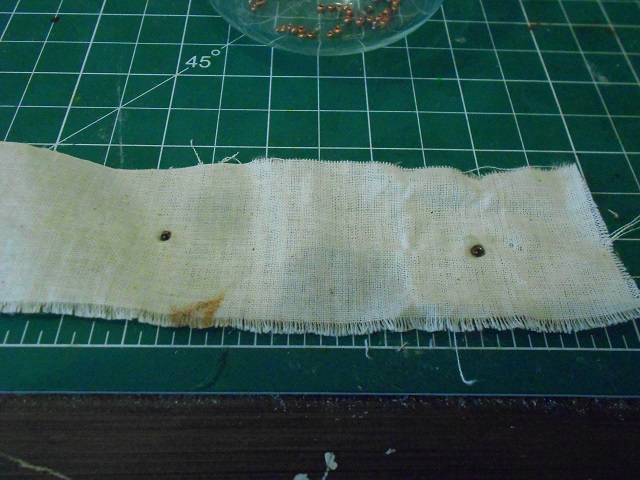
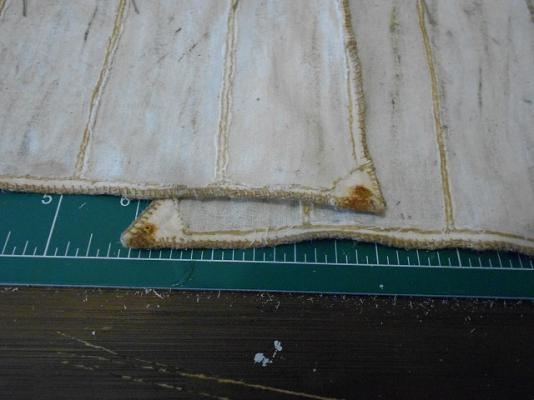
BEADS - (Is there anything they cannot do ??) Many kits feature sails. However, from my limited experience (four manufacturers), I have never seen a kit supply eyelets (grommets) for the attaching of sails to spars. For my Bounty Launch (1:16 scale), I used these beads: (... they are the very same ones used as Pommels for the cutlasses) Evenly-spaced holes were cut along the top of my sails ... The beads were coated with two-part epoxy, inserted into the holes and positioned into place ... Be sure to clear any glue from the bead hole with a toothpick before the glue sets ... or be prepared to re-drill the holes. Depending on the type of bead used, you may find the glue will react, leaving a stain. This is from a test I did prior to actually fitting the beads to my sails ... This problem could be avoided by using wooden beads (if you can find them small enough). O'course, in my case, I was looking to create a particular effect. Here is my sail after some dry-brushing ...


- 396 replies
-
- 14
-
-
- Idea
- Bright Idea
- (and 1 more)
-
Yer. Not sure if I can't be of much help to you there, yet, Matt. Not sure if I've mentioned it before, but my real-life sailing experience is next-to non-existent. But, never fear, a recent arrival is the book "Rigging Period Ship Models" by Lennarth Pettersson (ISBN 978-1-55750-970-3). It has some excellent drawings, and already I've learnt heaps - including the term, "bunt-lines", which I used above (sure hope it is correct). Until I can find a definitive answer, I be planning on attaching one (or two) blocks to each spar ... then tie a line (of Chuck's new rope) to the spar, run it down and underneath the foot of the sail and then back up the other side, through the block(s) and then down to a belaying pin. (Also, due to pics in Rigging, I be a-thinking of adding another row of reefing ties lower down to both o' me sails.) I be gettin' back to ye if I learn more on this matter ...
- 625 replies
-
- 2
-
-
- bounty launch
- model shipways
- (and 1 more)
-
Well, our Hero does appear to have survived his latest trip to CaptainAndrew's with no injuries ... No pics just yet (they need editing to protect the innocent), but we did make headway on a base-stand for me Launch. It be currently drying out on me balcony for the time being. Also, as I would like to partly furl the sails on this model, and as MS have only included just the two blocks with the kit (to be used for the spar-lifts), I picked up a pack of spare blocks from my local hobby shop yesterday and plan on adding these to the spars for bunt-lines. Finally, me order of ropes from Syren didst arrive from across the seas. I be currently serving an anchor cable for the grapnel. This doth, however, raiseth a question: Where does the free end of the anchor rope a-fix to ?? My thinkin' is that it would probably be tied-off to the forward mast-step ... but I ain't certain.
- 625 replies
-
- 3
-
-
- bounty launch
- model shipways
- (and 1 more)
-
Welcome aboard, Jordan. You have a very fine teacher sitting over on the other work-bench. Oh dear ... this is gunna get messy !!
- 625 replies
-
- 3
-
-
- bounty launch
- model shipways
- (and 1 more)
-
You've gone to a great deal of work for those barrels ... but the result is just stunning. Great job, indeed !!
- 113 replies
-
- 1
-
-
- constitution
- mamoli
- (and 1 more)
-
Great work, Bob. I always feel that rat-lines really make the build come alive.
-
Fantastic looking little lantern, Brian. My only criticism is that I cannot find the 'Add To Cart' button in your post.
-
Brilliant job on the chisels, Matt .. but, then again, you've conditioned us to expect nothing less from you. Can't wait to see 'em in your tool-chest. The boat in your picture does look a lot like the Launch ... or, at least, a lot like Model Shipways' version.
- 425 replies
-
- 1
-
-
- bounty launch
- model shipways
- (and 1 more)
-
Like Keith and Matt, I also stained and sanded back large areas of my hull multiple times. Using fine and very fine grit sandpaper, you will find that even though you are removing a lot of the staining ('colouration' be what I called it in me log), as you add other layers and then cut them back, that it tends to add depth to the wood graining.
- 83 replies
-
- 3
-
-
- bounty launch
- model shipways
- (and 1 more)
-
Cutty Sark by NenadM
CaptainSteve replied to NenadM's topic in - Build logs for subjects built 1851 - 1900
Looking at Keelhauled's pictures, it appears that Nenad has the deck colouring precisely correct. Nice job !!- 4,152 replies
-
- 3
-
-
- cutty sark
- tehnodidakta
- (and 1 more)
-
That is freakishly small, Buck !!! But, err, what about his compass box ... ??
- 515 replies
-
- 2
-
-
- artesania latina
- whaleboat
- (and 1 more)
-
I'll keep that in mind, Dave ... if (when ??) my own carving skills prove to be woefully inadequate.