HOLIDAY DONATION DRIVE - SUPPORT MSW - DO YOUR PART TO KEEP THIS GREAT FORUM GOING! (Only 36 donations so far out of 49,000 members - C'mon guys!)
×


CaptainSteve
-
Posts
1,858 -
Joined
-
Last visited
Content Type
Profiles
Forums
Gallery
Events
Everything posted by CaptainSteve
-
 Thanks, UTS. So, you like detail, huh ?? Well, another feature I saw on Chuck Passaro's 18th Century pinnace build which I quite liked, had me re-visit the two "swan-boats" last night. Originally, I had thought that the iron strip affixed over the prow as a re-inforcement was white in colour, but after having another look at Chuck's build yesterday, I now see that this will be black. As I would like to leave mine white, with a vertical row of black dots to represent the bolts, my question is this: In the days of "If it doesn't move, paint it!!", would it have been possible that this strip could have been painted ?? These strips started life as twist-ties from a pack of freezer bags. See "Kit-Basher's" for more info. EDIT: OMG ... You're the guy who puts a sabre, some mangoes and a half-cut coconut in his Bounty launch !!! Very cool, UTS!!!
-
Landlubber Mike's technique for furled sails
CaptainSteve replied to Landlubber Mike's topic in Masting, rigging and sails
Fantastic pics and tutorial, Mike. I'll definitely be re-visiting this post once I get up to doing the sails on my USS Constitution. -
Done !! I really don't like the whole concept of photography. ... especially crystal clear photography ...especially the kind that shows up every, minute flaw !!

-
Denis, I've just discovered your brilliant log and have decided that this kit is going on my Wish List. With regards doing your rat-lines, in the past I used two combs. I'd hold the first comb flat (horizontal), tie a single rat-line in place with loose knots, then push it down into position with the second comb. The shrouds/stays will fit between the tines of the combs. Tighten the knots with tweezers. Hope you find this helpful.
-
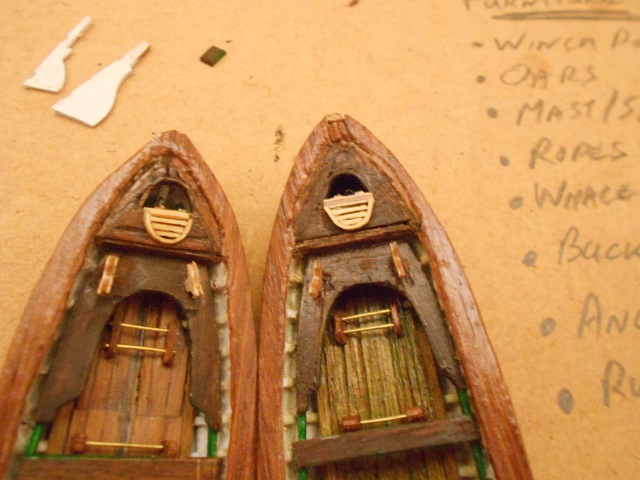
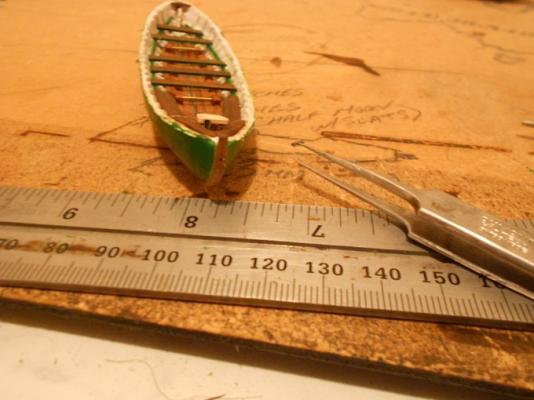
Arr !! I had a visit from my old mate, MrCritic, last night. As these meetings usually go, razor-knives were drawn. By the time we were done, the half-moon hatch from the recently rebuilt whale-boat had been mortally wounded (read "removed"). It won't take me too long to re-make this. I have to admit, though, he was right. That hatch-cover was at least 1mm too big - and maybe even as much as 1.5mm - so it HAD to go !!
-
That is a stunning model, Vince. Sure hope you are going to take plenty of pics to put in the Completed Ships Gallery - coz that one truly deserves it !!!
- 264 replies
-
- 2
-

-
- sovereign of the seas
- mantua
- (and 1 more)
-
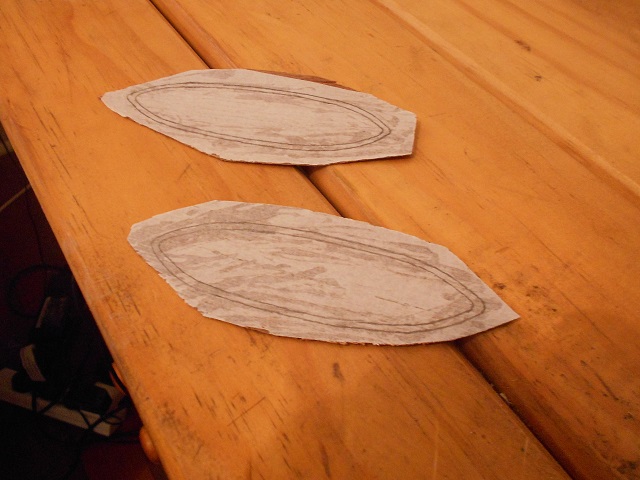
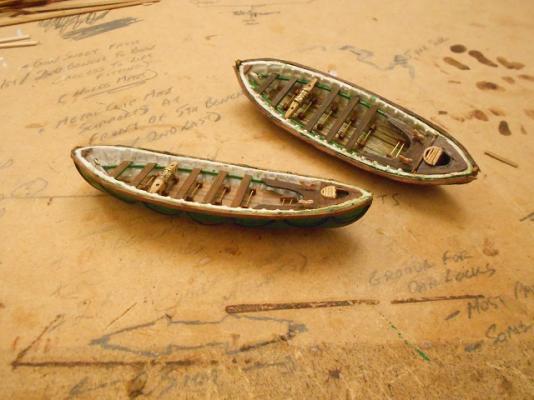
Once they are finished, then some oar locks (tholes), the rudders and furniture. And then I should finally be ready to re-create that picture of yours from so many months ago, Geoff !! Having noted what you said about cutting back on furniture, I have been giving the matter some thought. Here's what I've come up with (not set in concrete): Captain's Gig 1 furled sail 2 bunches of two oars (tied) 2 coils of rope Rudder mounted Whaleboat 1 3 bunches of oars Coiled rope around winch drum (leading to harpoon at prow) 2 Winch-poles 2-3 Coil of rope 1 bucket Rudder mounted Whale-boat 2 AS ABOVE EXCEPT 1 bundle of 5 oars Rudder stored on-board Pinnace 1 bundle of 7 oars 2 Boat hooks 2 furled sails 1 bucket 3-6 coils of rope Rudder stored on-board
-
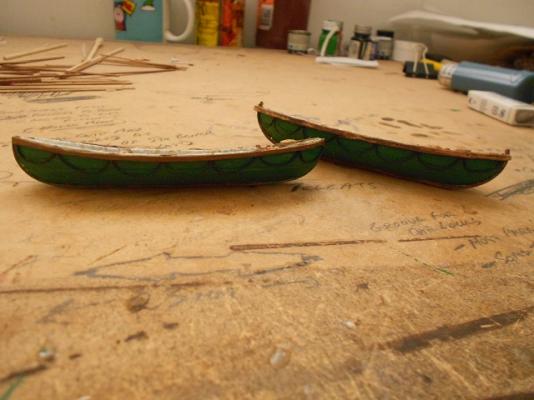
Arr !! The cap-rails proved to be a little bit fiddly. After cutting them out three times - cause I kept getting them wrong and/or breaking them - I finally got there. These still need a bit of final shaping ...

-
Arrr !! Well considered approach to your build. I think I'll just pull up a seat over here, if ye don't mind.
-
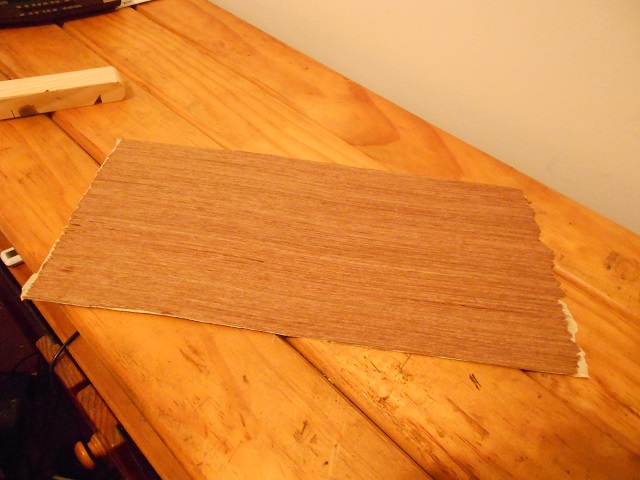
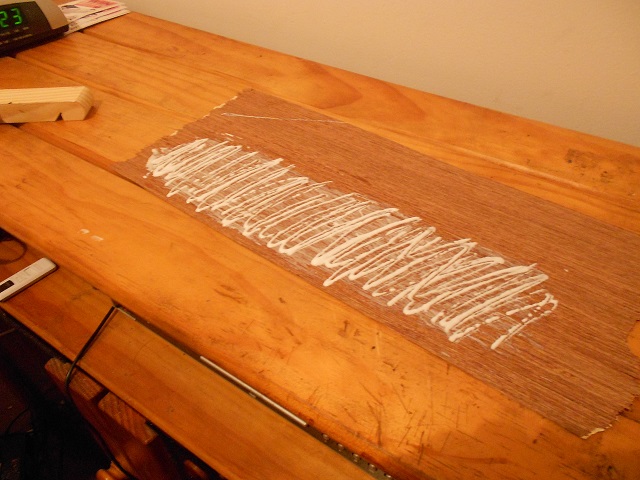
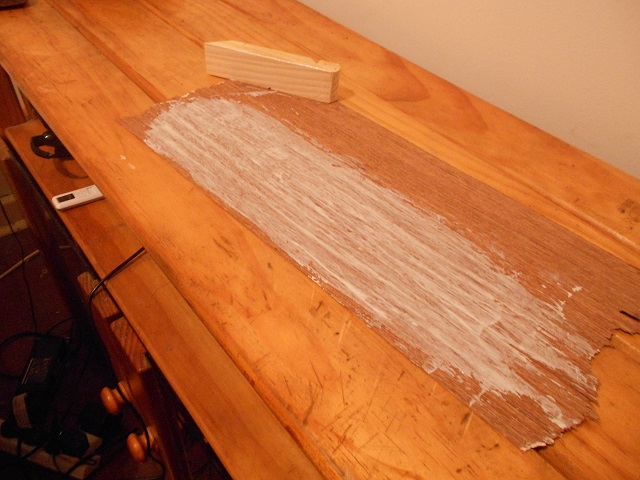
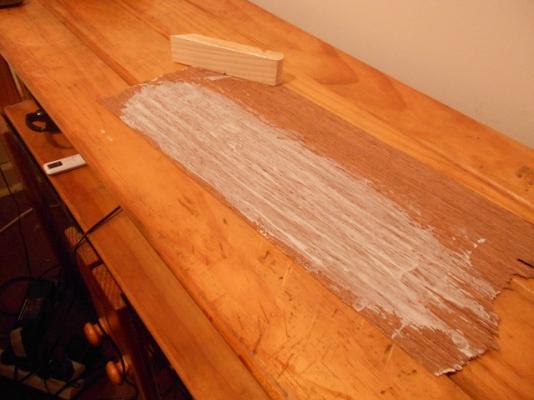
Also, I've had a re-think on the cap-rails for these two boats. I happened to acquire some sheets of veneer-thickness wood from a business I visited the other day. To them, it was just scrap left-over from a job - to me, it was 1.5sqm of trim, detail-strips and cap-rails !!! As the grain was a bit loose for small scale stuff, I coated one sheet with PVA, and sealed by pushing the glue into the grain, then left it to dry with a pile of books sitting on top. Once ready, YET ANOTHER tracing of the cap-rails taken from the plans and glued onto the veneer ...


-
Just a quick update after a very busy weekend of work (I drew Saturday shift this weekend), last-minute Christmas shopping, present-wrapping and work functions (well, only the one). Even managed to re-construct an old dart-board cabinet - that one is for my brother-in-law. Somewhere amongst all that, work continued on re-creating the hi-jacked whale-boat. Almost there ...
-
Dave !!! A brilliant thread, seeing as I'm only just embarking on my own cruise with Connie and - from the beginning - had planned to light her up. You clearly know what you are talking about, whereas I lack any technical training in electronics. I'm anxiously waiting to see your finished work. Initially, I had planned on using LEDs, along with a Flickr3 circuit-kit which I had purchased, for my build. However, now I am seriously considering switching to optic fibre. This brings up a question: Will my Flickr3 still work with optic fibre ?? One concern. Seein' as I am working with wood for my own build, then I must confess to being a tad TERRIFIED of any significant increase in heat !! Finally, a suggestion which you may/may not wish to consider for your overall design ... Primarily to reduce power usage, you could possibly incorporate a light-level detector which would switch the rest of the circuitry (lights/flickering/etc) on only when it was night-time.
-
Thanks Glider. Nice start you've made there. Thanks Keelie, Really, it has come down to me currently having very limited space - and time - to work on my build. Thus, I have chosen to work on the smaller sections of this kit for now. I can understand if some would suggest my OCD kicks in a little too frequently !!
-
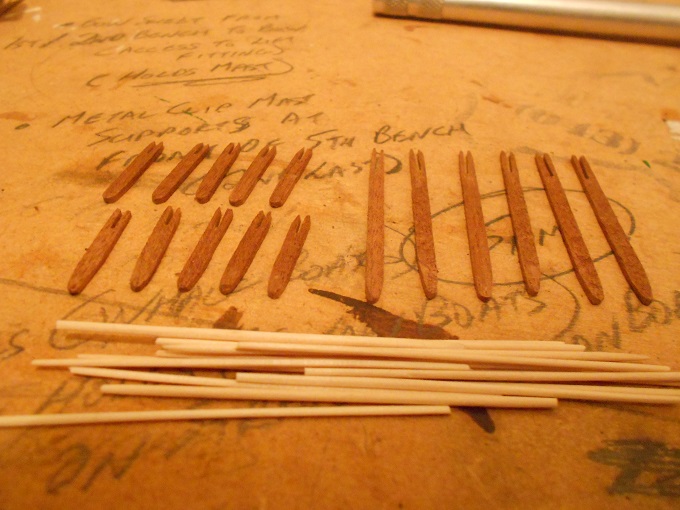
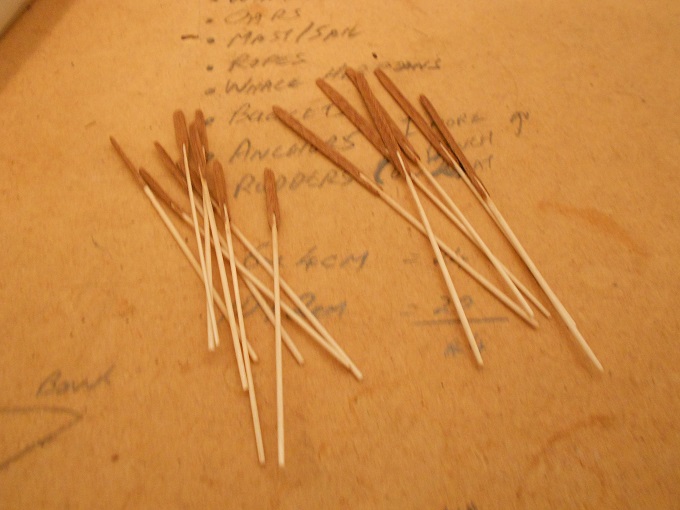
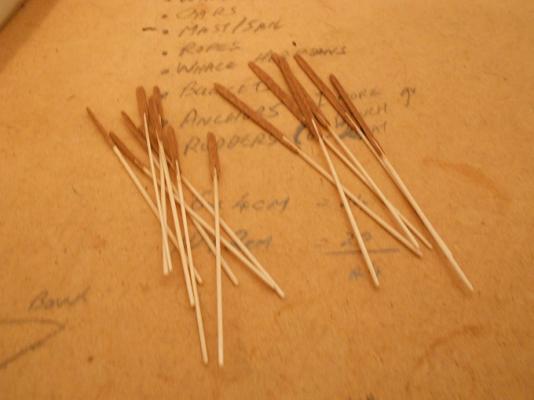
Here's mine ... TOOTHPICKS - Round toothpicks were used as handles for the oars on my USS Constitution's boats (1/76 scale). These have been sanded down to reduce their size from approx 2mm to 0.8mm. Some scrap stock was used for the oar-blades, cut to size and then grooved to take the handles.

- 396 replies
-
- 8
-
-
- Idea
- Bright Idea
- (and 1 more)
-
Ulises, I think your Vasa build is stunning !! In particular, I was extremely impressed with the doors made from round toothpicks. Could you please add those pics (with a quick explanation) here ?? That idea is brilliant !! (And perfect for this thread !!)
-
No real updates for this weekend, folks, though work does continue on my boats. Some spare time the other evening saw me put together a few ideas, and hence, I've created a little forum here on MSW which I'd very much like people to check out. After a change to the working title, it is now called "The Kit-Basher's Guide to the Galaxy." (Douglas Adams ?? No ?? Never heard of him !!)
-
DemonBorger, I actually used some pieces of fly-mesh, cut into long strips and then rolled-up to simulate the netting on my Apostol Felipe a few years back. Check it out, if you like, from the link in my tag-line. You'll see it hanging from the main flybridge.
- 396 replies
-
- 2
-
-
- Idea
- Bright Idea
- (and 1 more)
-
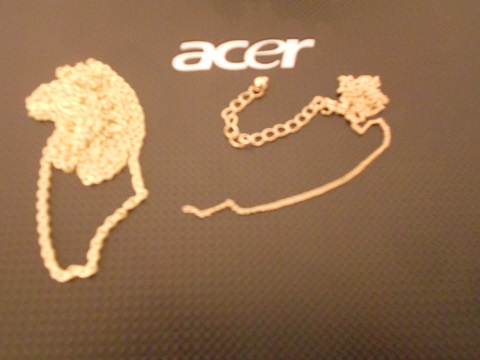
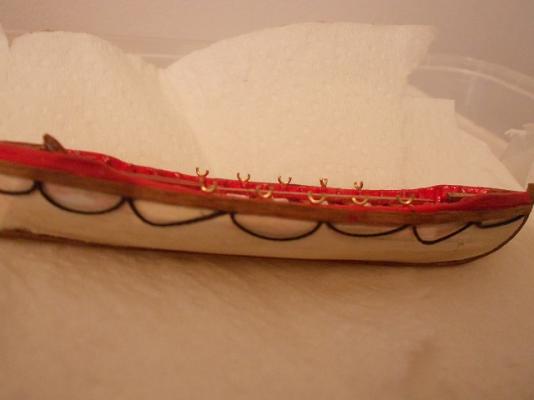
JEWELLERY - Cheap lengths of chain are ideal for numerous uses, depending on the size of the links and your model's scale. Here, I have taken links from the chain on the left, cut them in half using nail-clippers, and used them as oar-locks on my Captain's Gig (1/76 scale). (Incidentally, be VERY careful not to cut up the Admiral's necklaces without checking with her first - note my eye-patch!!)
- 396 replies
-
- 8
-
-
- Idea
- Bright Idea
- (and 1 more)
-
SANDPAPER STRIPS - Cut thin strips of very fine sandpaper to simulate leather strips, such as used for straps. The texture of the sandpaper is guaranteed to produce a few extra "Ooohs" and "Aaahs" from people who view (and touch) your model. (For these straps on my half-moon hatches, I have used black wet-n-dry sandpaper.)
- 396 replies
-
- 3
-
-
- Idea
- Bright Idea
- (and 1 more)
-
ALUMINIUM CANS - Cut strips from a flattened-out can to the scale size of flags for your ship/boat. Using transfers or by painting, glue your flag design to both sides of the aluminium. Remember to reverse the design on one side. Then crumple the aluminium piece slightly. Let the glue dry completely, and then very carefully peel your flag away from the aluminium piece. Hopefully, you will be left with a flag that appears to be permanently flapping in the breeze !! (This idea came to me from fellow USS Constitution builder here on MSW - the eminent modeler12)
- 396 replies
-
- 2
-
-
- Idea
- Bright Idea
- (and 1 more)
-
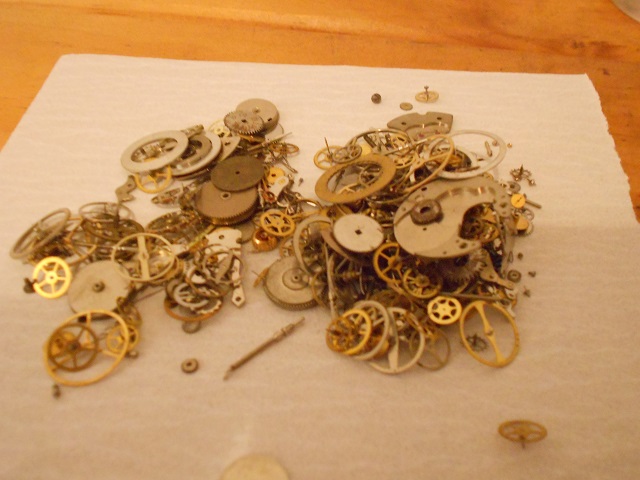
WATCH PARTS - Search E-Bay for this phrase: "steam punk". A 30g packet containing hundreds of miniscule cogs, gear-wheels, coils and springs cost me less than A$20.00 (including shipping). Watch-spring coils will, I imagine, make excellent mast-bands!!

- 396 replies
-
- 19
-
-
- Idea
- Bright Idea
- (and 1 more)
-
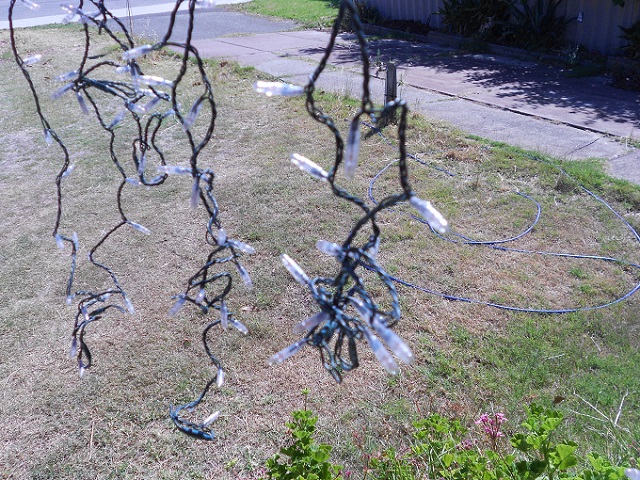
XMAS TREE LIGHTS - Recently, a string of about-to-be-installed Christmas lights caught my eye. These were only a cheap variety, but my immediate thought was: Cut the tips from each globe, drill holes of corresponding size in a strip of wood, insert former Xmas light, and you have a perfectly round porthole with a domed window pane. (Observant viewers may have noticed the complete lack of snow in my part of Australia at Christmas time - it was 38 degrees Celsius today!!)

- 396 replies
-
- 9
-
-
- Idea
- Bright Idea
- (and 1 more)
-
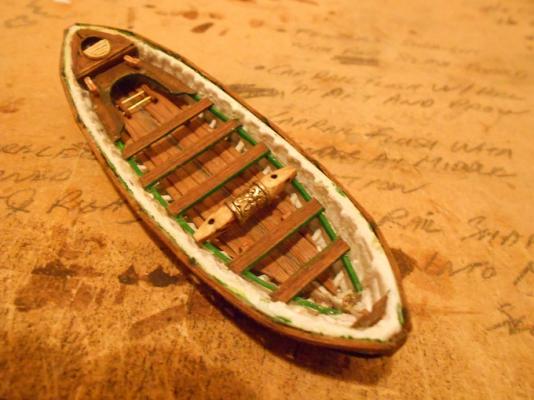
BEADS - There are thousands of different beads available. I strongly recommend spending a few hours browsing through the shelves of a good bead store, if you can find one. Otherwise, settle for a raid on the Admiral's sewing table. Try imagining each bead cut in half/sanded/sliced. This pic shows a whale-boat (1/76th scale) I am currently working on. The central drum is a bead, with the wooden ends being former chopsticks.
- 396 replies
-
- 12
-
-
- Idea
- Bright Idea
- (and 1 more)
-
CHOPSTICKS - To create winches for my whale-boats (1/76 scale), I cut the tips from a pair of take-away chopsticks. Minor sanding and shaping produced the final result. Some holes were drilled through the tips (0.2mm bit). Paint inside of holes black.
- 396 replies
-
- 3
-
-
- Idea
- Bright Idea
- (and 1 more)
-
HOUSE RULES To help with following this forum, may I suggest that you: - CAPITALIZE the name of the object at the very start of your post. - Please indicate scale with your suggestion, as various items could be used for different purposes in another scale. - Separate posts for each item AND purpose will make it easier for people wishing to search this topic. - Photos are actively encouraged !! To get things rolling, here are a few suggestions of my own: