HOLIDAY DONATION DRIVE - SUPPORT MSW - DO YOUR PART TO KEEP THIS GREAT FORUM GOING! (Only 36 donations so far out of 49,000 members - C'mon guys!)
×


CaptainSteve
-
Posts
1,858 -
Joined
-
Last visited
Content Type
Profiles
Forums
Gallery
Events
Everything posted by CaptainSteve
-
 Jay, You've sent me running for my copy of AOTS now. You might have noticed J 1/2 on pg101, which also demonstrates your point. (Items 10 & 11, in particular)
 -
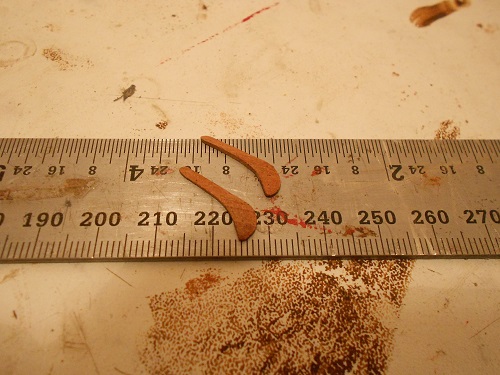
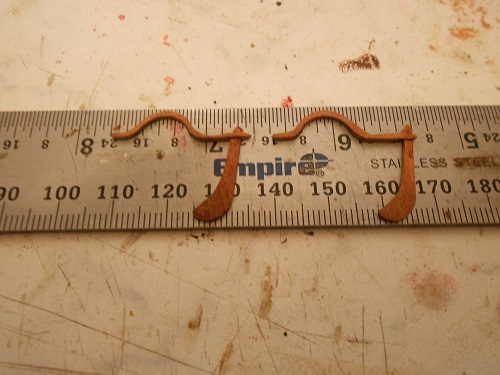
Another member of the Connie Club ...Welcome aboard, Markku. I spent the wee hours shaping a pair of whale-boat keels. I actually prefer this time of day for ship-modelling and find I usually get more done from around 2am on Sunday mornings. No work ... chores done ... the house is quiet ... As mentioned earlier, I chose to re-model these keels. They are loosely based upon the one I saw in Salty Sea Dogs' build. Okay, sure, I have deviated - yet again - from the MS plans. It isn't the first time, and I'm fairly confident (damn certain!!) it won't be the last. An outline was sketched onto some scrap pieces, cut roughly to size, and then Dremelled to get the desired shape (same process as for the tiller-arms above). I cheated a little when attaching the arms to rudders. Ideally, the keel tip would slot into a groove on the end of the arms. Instead, I trimmed a 2mm tip off my rudders, CA'd the tiller-arms (after checking the angle!!) in place, then re-attached the tip. EDIT: This pic proved to me just how handy a camera is as a ship-building tool. The angle of the second keel (on right) is out. I only noticed this after uploading the pic. It has since be corrected. I don't know how much more I will get done today. Apparently, I have a rather large bottle of beer to get through - courtesy of Jay.
-
Nice start there, Markku. I'm really impressed with the precise steps you are taking to check and re-check everything. It will pay off for you later.
-
Really nice work on your Santa Maria !! Just wondering, was it from a kit ?? Which one ??
-
Jay, A quick question (or two ... ) at this point, if I may. Are you blackening your brass-work to create an aged effect ... ??? ... or is it more to match with Connie's over-all black/white colour scheme ?? My reason for interrupting is that, for my own build, I am intending her to eventually (one day!!!) be docked with my brother ... who lives not quite 1.5km from the ocean in Mandurah, WA (No, NOT Washington state !!! Down here in Orstraya). I'm thinking that the high salt/saline atmosphere will very quickly (1-2 years) patinate(??) naturally.
-
Mr Pig !! My apologies for not discovering your build earlier. Anything further that I could possibly add to what has already been said about your work would probably be censored. That is abso-f%#$-lutely beautiful !!!
- 73 replies
-
- 1
-

-
- prince
- constructo
- (and 1 more)
-
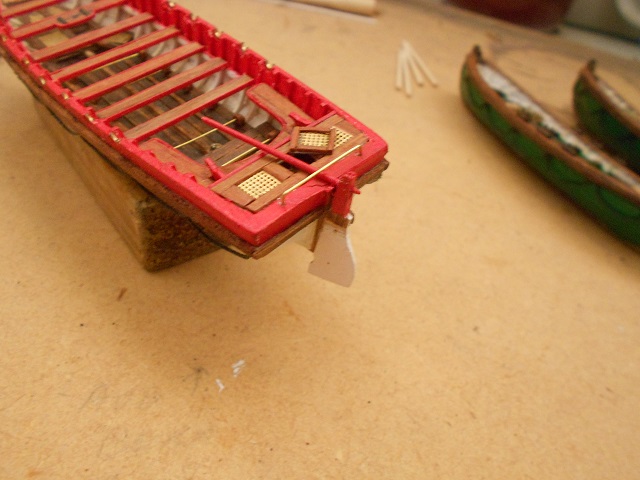
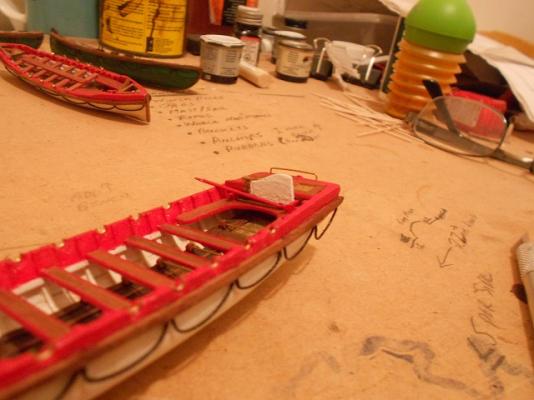
Harv, I'd really appreciate any info on this topic that you could post here !! As a fellow-member of the FakeCaptainsClub, with no actual naval experience (as per Rule 1.00a), I am considering lashing the tiller-arm along the back of my rudder, and then "lazily" laying it on the rear bench, against the wall of the cabinet. Kind of like this, with lashings to come ... EDIT: Another idea could be to do something similar, but hang it off the back stern of the pinnace (ie: instead of mounting vertically, it would be lashed horizontally). Yes, that rudder DOES look kinda rough. Only one coat had been applied when I took this pic. Sanding down and a couple more coats of paint to follow.
-
Thanks for lookin' in, Bindy. I see your build is coming along nicely ... but, seriously, with all those people dropping in on you, shouldn't SOMEONE offer to buy pizzas ???
-
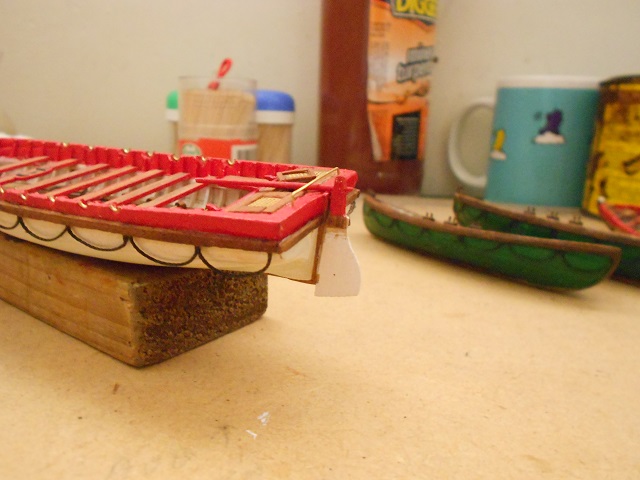
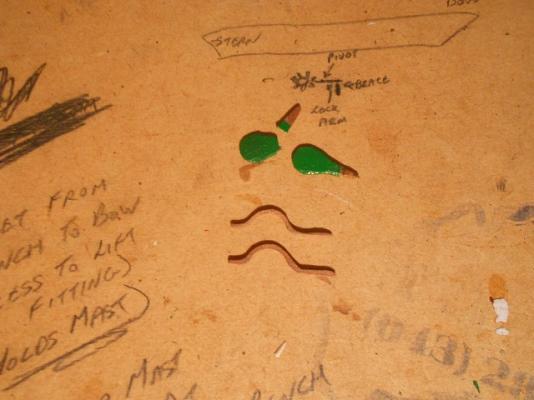
Naturally, everything was going along a little TOO well ... disaster struck when one of the LASER-CUT whale-boat rudder parts broke in half ... Uncharacteristically for me, I wasn't really all that upset when it happened. Y'see, just a few days before, I'd discovered another whale-boat builder here on MSW, Salty Sea Dog. (Seriously, if you are building a small boat, you're gunna luv this guy !!!) Salty, when I first saw the rudder on your CW Morgan whale-boat, I was jealous ... ... now, since breaking one of mine, I'm thinking that I'd really like to re-model !!! Oh well, that will give me something to do next weekend ... . .. ... By the way, I've had a re-think on furniture. I've decided to fit rudders to both whale-boats and the Gig. I tried a quick test positioning with them placed onboard the boats today. For me at least, I just found them over-powering - even choosing to make new, more stream-lined whale-boat rudders. Of course, this is mainly due to the over-sized tiller arms which are on mine. So, now, the pinnace will be the only boat to have a stored keel. This brings me to a question which was also part of the above decision: Precisely, HOW should this be stowed ???
-
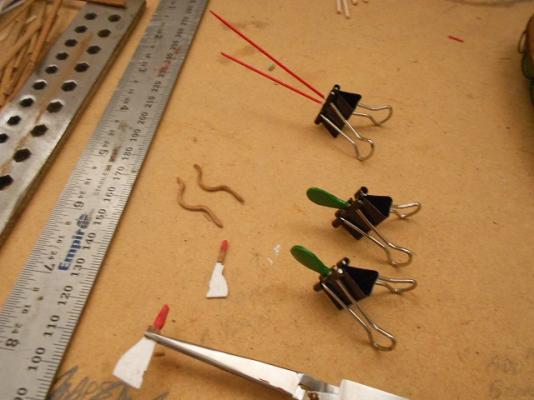
Australia Day has come and gone for another year. Somehow, despite being a holiday weekend, I got less done than I'd hoped. My only excuse - I guess SOMEONE had to drink all that beer !! I'd been dreading the prospect of having to make holes thru the top of my rudders to fit the tiller arms. So that they wouldn't split apart, I clamped each into a bulldog clip when drilling. I started with a 0.1mm guide hole, then drilled again at 0.3mm and then 0.5mm. Incidentally, NOW would be a good time for me to mention that I DID actually check the angle where tiller-arm meets rudder BEFORE drilling. A quick test fit - and I couldn't resist a photo or two ... Anyone else notice how the white on boat and rudder is different ?? Apparently, I have two different tints of white paint on my desk... Needless to say, the swan-boat keels had a re-paint and are now drying.

-
Hiya Spiff, Just thought I'd pull up a deck-chair and have a look. Nice idea doing a replica of your Dad's service craft. (Is he still around??) 1/350, huh ?? Sure hope you're handy with the paint-brush.
- 176 replies
-
- 1
-
-
- new orleans
- iron shipwrights
- (and 2 more)
-
Arrr .. pirates be timeless, Mark !! In fact, all ye need these days, apart from a cutlass, is a dozen or so DVD-burners and a solid internet connection. At least, so I've been told ...
-
Absolutely !!! Just so long as you promise to video it to keep Crackers (et al) amused !!! PS: Make sure you be wearing a HOCKEY-MASK!!
-
Mark, If ye ain't impressed wi' me idea fer making her into a pirate ship, then how about salvaging what you can as a cross-section build ??
-
Thanks for dropping in, Mark. Incidentally, I hear there will be a v2 of your Licorne build ... Thoroughly looking forward to that !! I noticed also someone suggested turning v1 into a Pirate Ship ... Now THERE be a brilliant idea !!!
-
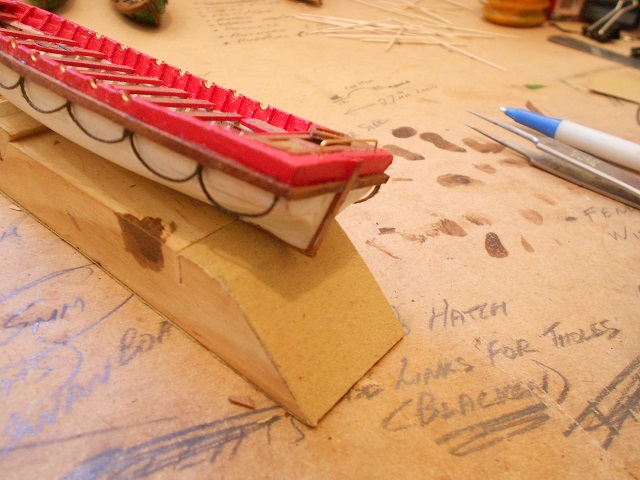
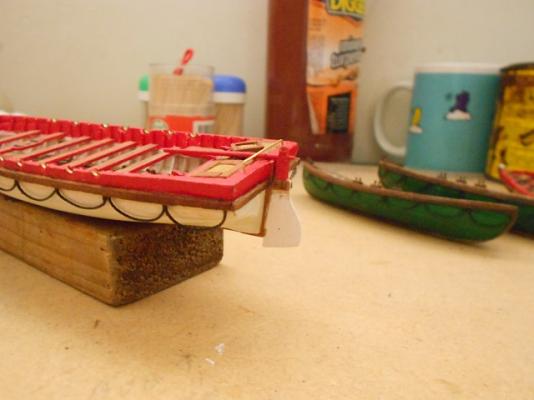
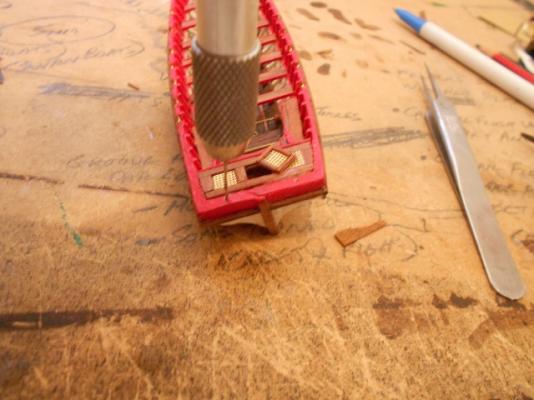
Nor can I, Andy ... nor can I !!! I moved just a couple of steps closer yesterday and today, with painting of my rudder parts. As it's a long-weekend here, I should get around to assembly tomorrow ... Also, I thought the pinnace could use just another little touch ... A couple of small holes (they are vertical, despite how I'm holding the drill for this next pic) were drilled. A short piece of copper wire was cut and shaped, and my pinnace has a new tiller-guard ... Hmmm .. should've gone with the stern-on picture.

-
A PIRATE Ship !!!!! Ye gunna turn her into a PIRATE ship ?!?!? She'll be the grandest pirate ship I (err, that is, WE) e'er sailed the Seven Seas in !!!! Oh !!! What a joy this shall be !!! I'll (sorry, WE'LL) plunder the Spanish Main like it's ne'er been plundered before !!! Just think of the damsels-in-distress to be rescued !!! Oh please say ye will, Mark !!!!!!!! DRAKE !!! Ye murderin' sea-dog !!! I (my mistake, WE) be comin' after ye NOW !!!
-
Beautiful paint job !!! One tiny thing ... can you get any thread that is thinner than what you are using for your rat-lines ??
-
Nice work, Andy !!! Something which I did NOT do on earlier builds - primarily as I never knew of this until discovering MSW - was the proper butt-end planking. I'm sure you could easily do this with your second planking.
-
Jay, I can only echo MrRiddoch's words. Your work is going to live on and be of extreme value for others such as myself.
- 732 replies
-
- 1
-
-
- constitution
- model shipways
- (and 1 more)
-
Tom, I cut my plans out and used them as templates when fairing my bulkheads, but I think you'll find the plans are deliberately asymmetrical with one side being the outline for that bulkhead, and the opposing side indicating the fairing line (this side being slightly thinner).
-
Fantastic !! I seriously wouldn't have contemplated doing that, Dave.
-
Personally, I find you cannot go past the sawdust from the very planks you wish to fill. Save it. Use the remains from the first, ROUGH sanding. When you are ready to fill, mix the smallest amount of diluted PVA (70/30 works for me) and stir to a stiff-ish, gluey paste. Spread into the cracks. Even "coat" your Boat in various areas. This can help "hide your sins" in case your original frame-work turned out to have "issues". NOT sayin' yours does - just suggesting that, perhaps, one of my earlier builds, may have .... possibly ... once .... (Thank the heavens for Double-Planked kits !!!) Anyway, allow glue to dry properly. Then wait another 48 hours ... Once COMPLETELY dry, sand down to your original planking. Finish with final sandings, using finer grit.