


gil middleton
-
Posts
308 -
Joined
-
Last visited
Content Type
Profiles
Forums
Gallery
Events
Posts posted by gil middleton
-
-
Peter, Many thanks for your kind comments. I enjoyed looking at your beautiful zeeschouw, which should be about the size of my next model. Victoria, BC is probably our most favorite city. My great grandfather was collector of customs in Victoria and my grandfather moved to Victoria from London at age 14, as an indentured servant to the Hudson Bay Co.
Michael, You are very kind, but "newbie" doesn't fit. Your "Wasa" will be a work of art with all your improvements on the kit.
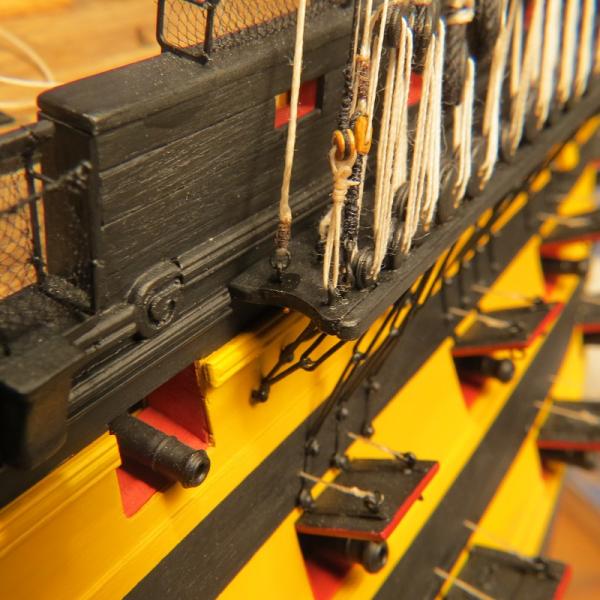
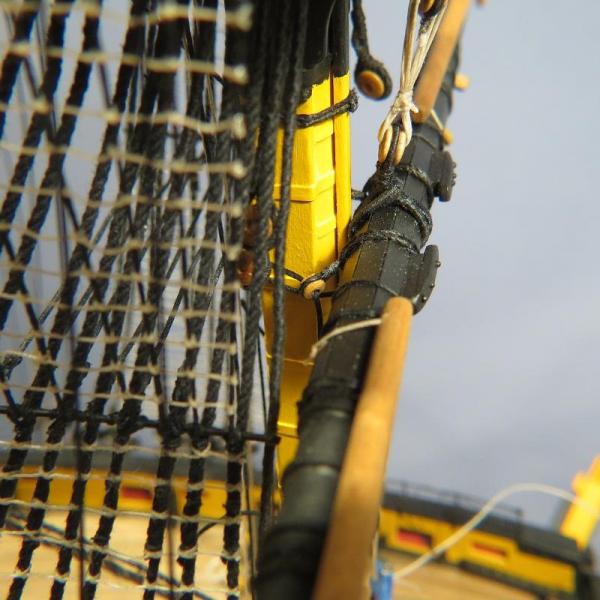
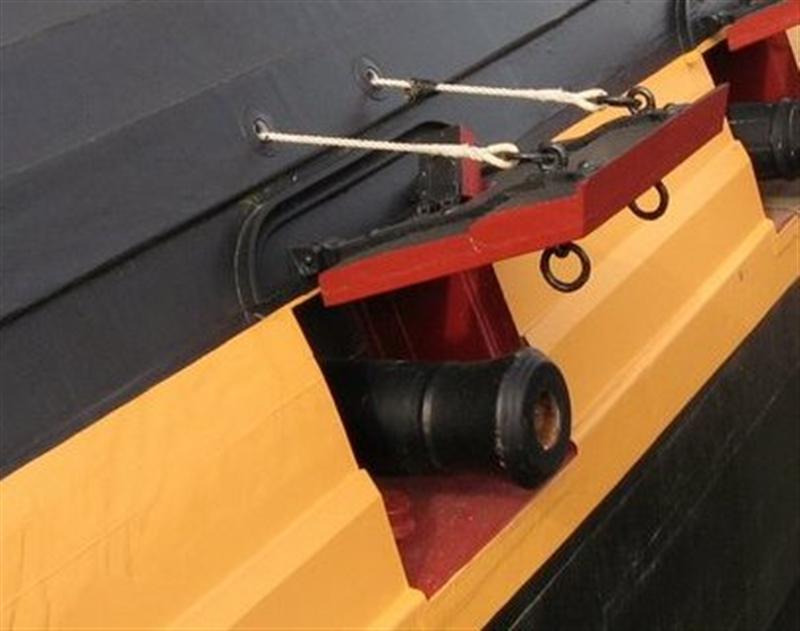
Lawrence, When I looked back in the reconstructed log, I discovered that details of the gun port lid lanyards were missing, and the photos were not in my computer. My heartfelt thanks goes to Ron (Robipod) from Calgary, Alberta who had saved my entire log (before the crash) in the cloud (where ever that is). Ron helped me download the log to my computer. So, in answer to your question on gun port lid lanyards, I'm reposting the photos from the original build log.
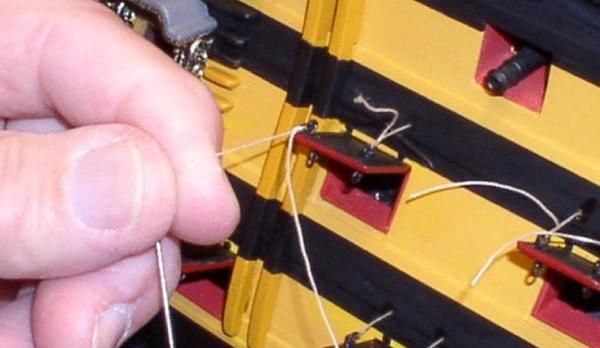
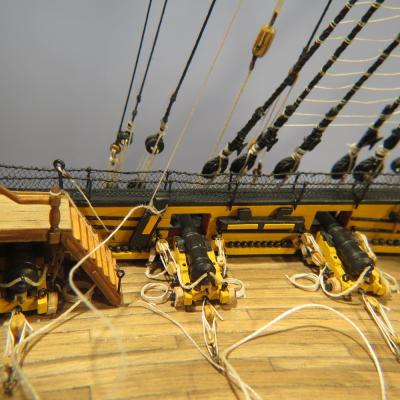
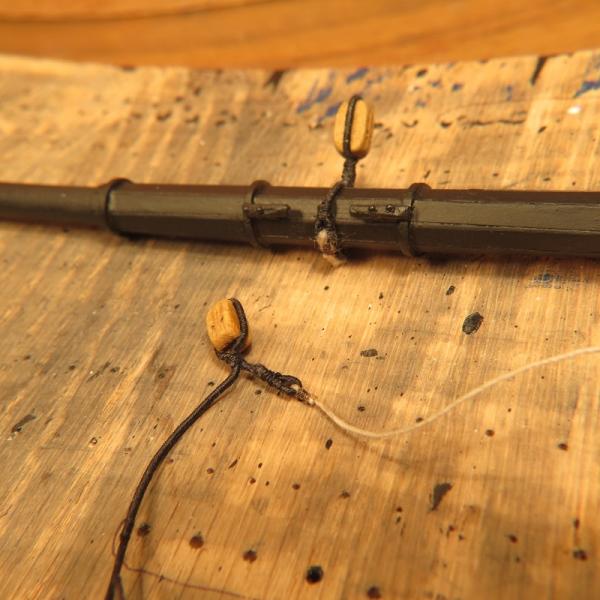
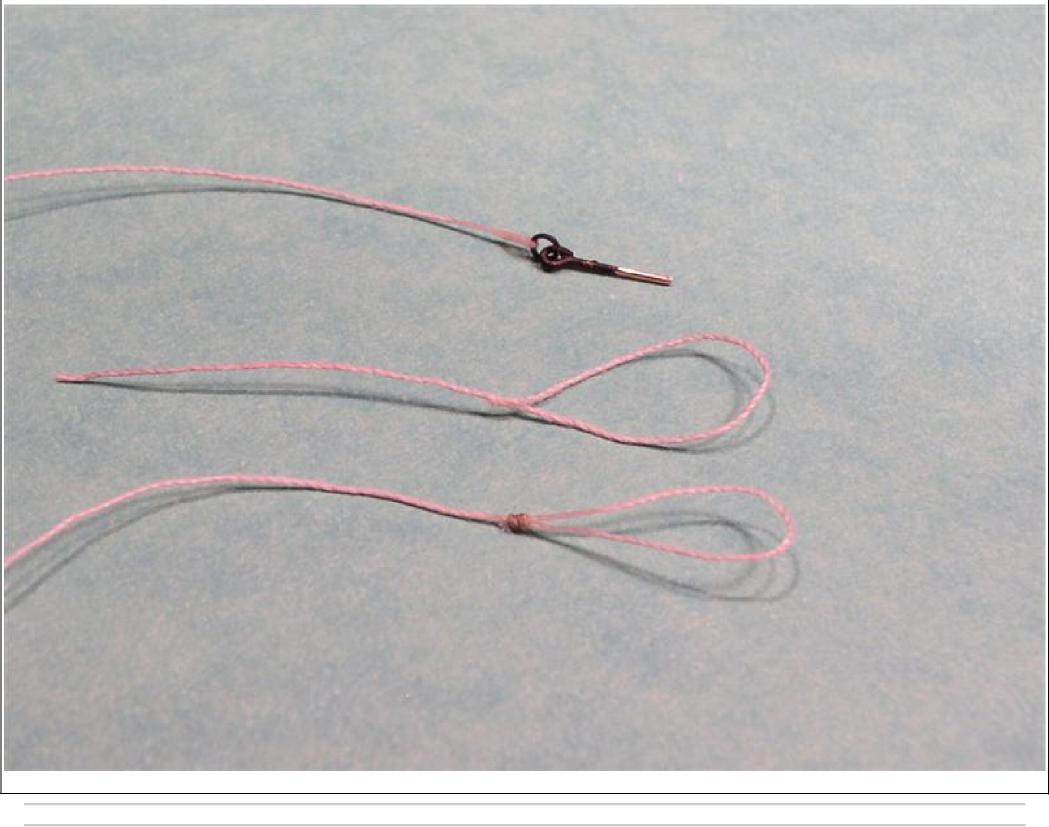
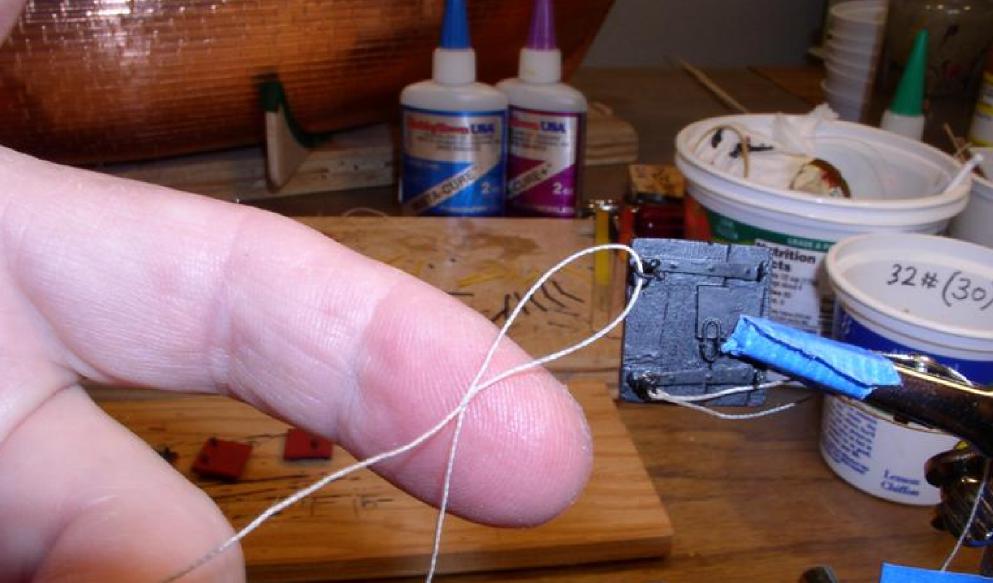
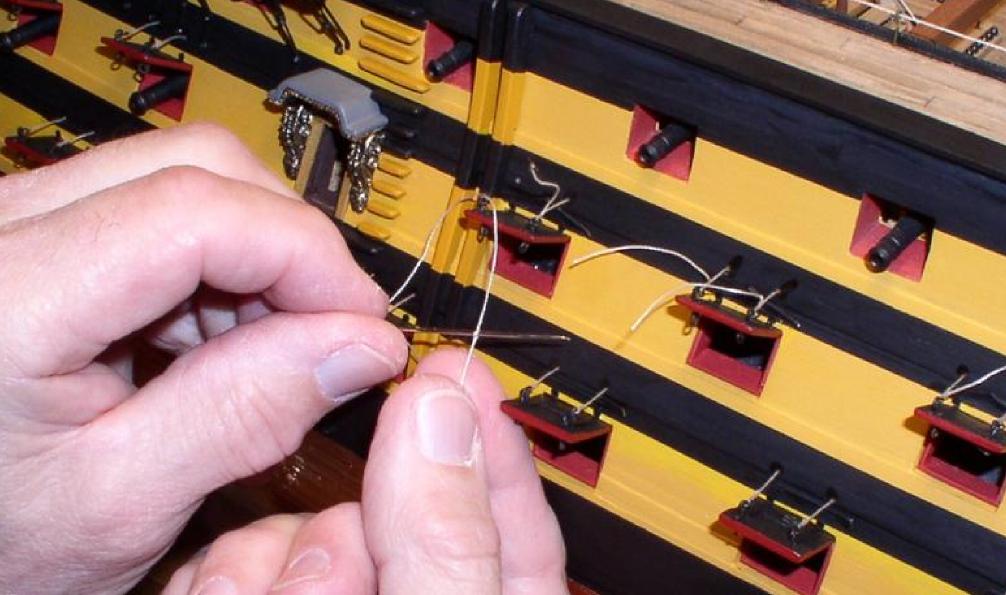
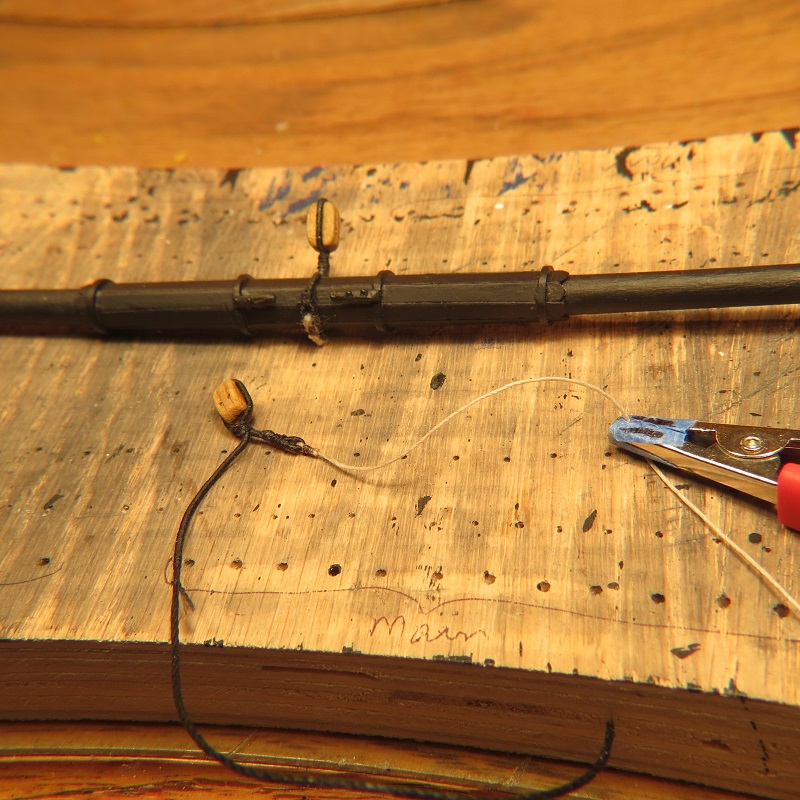
In considering the attachment of the lanyards to the gun port lids, I thought a simulated splice looked better than an eye with seizing. Not original but more natural and better scale.
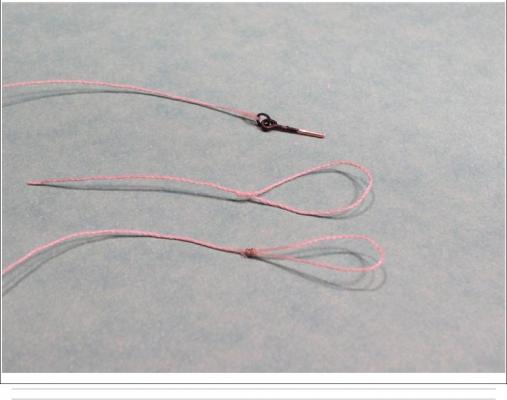
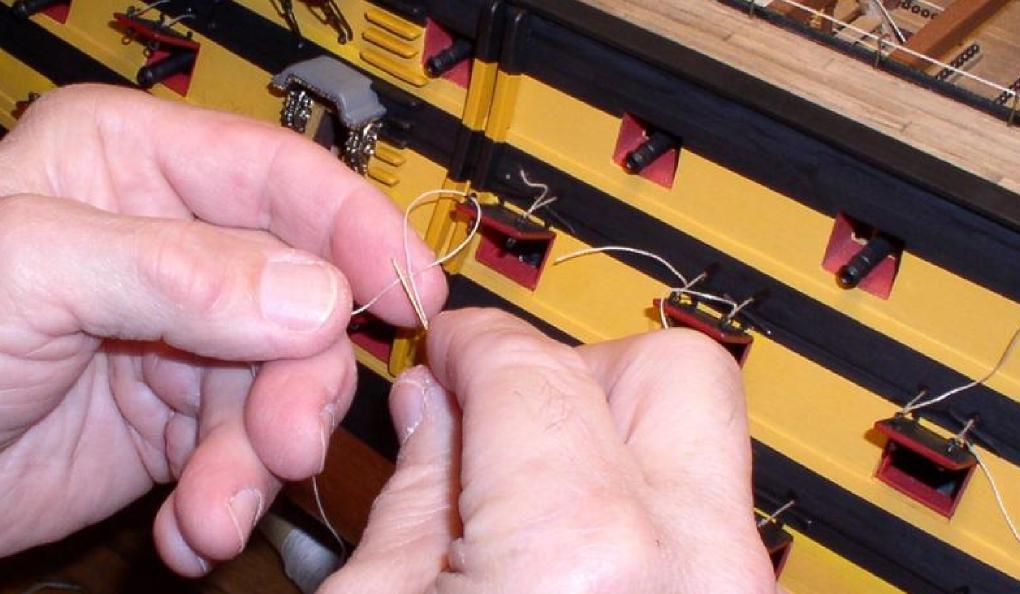
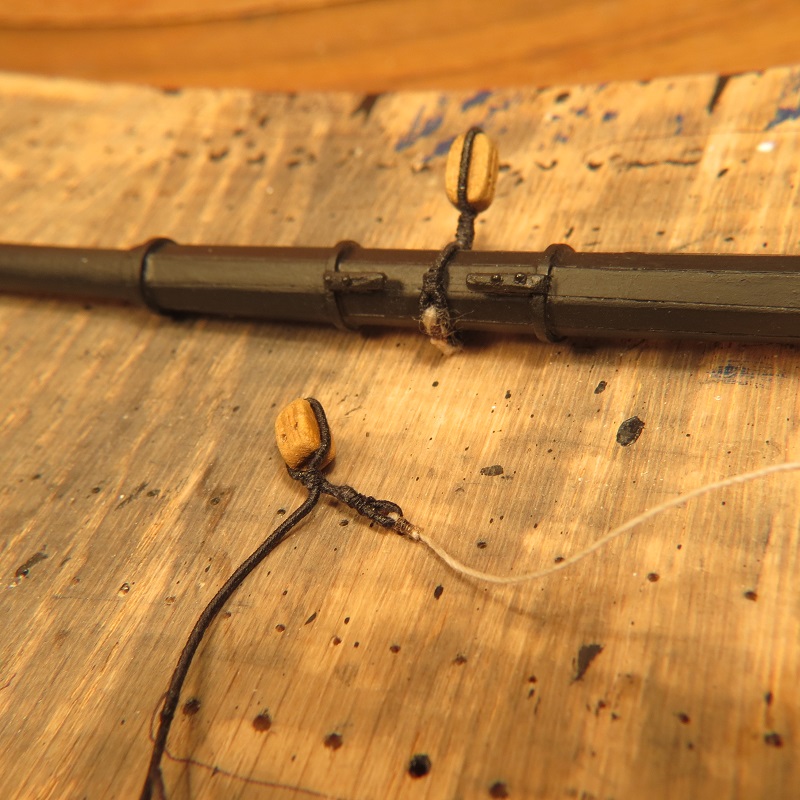
The line is passed through the ring, then with a needle, the line is passed through itself, then passed a second time just beyond the first pass creating the appearance of a "splice." Pulling on the line with the needle snubs the splice up to the eye bolt.


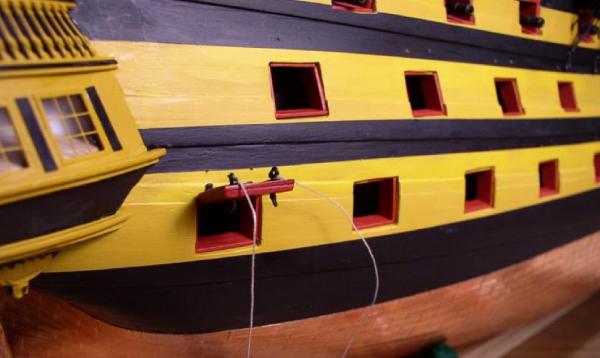
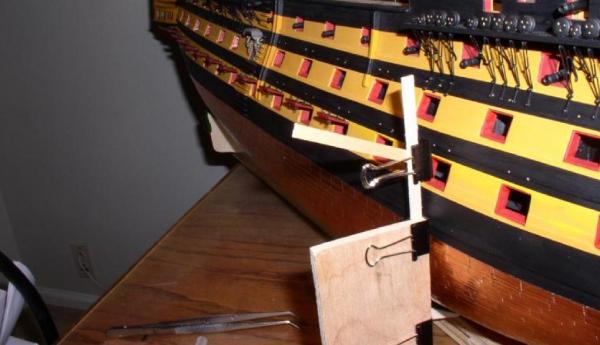
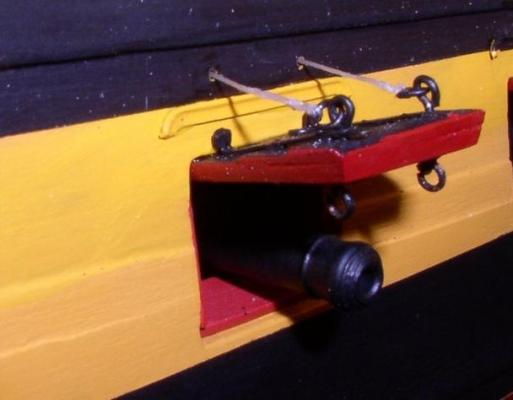
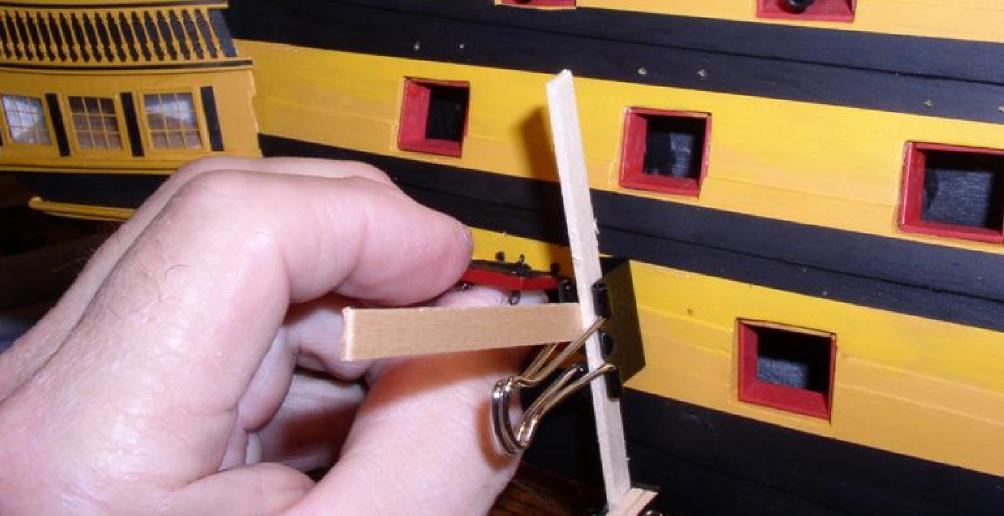
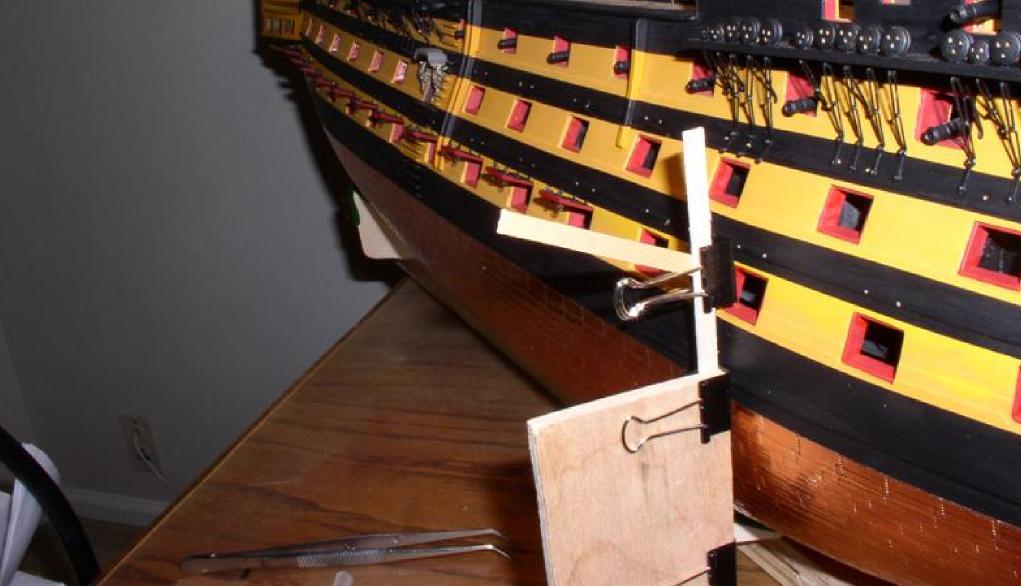
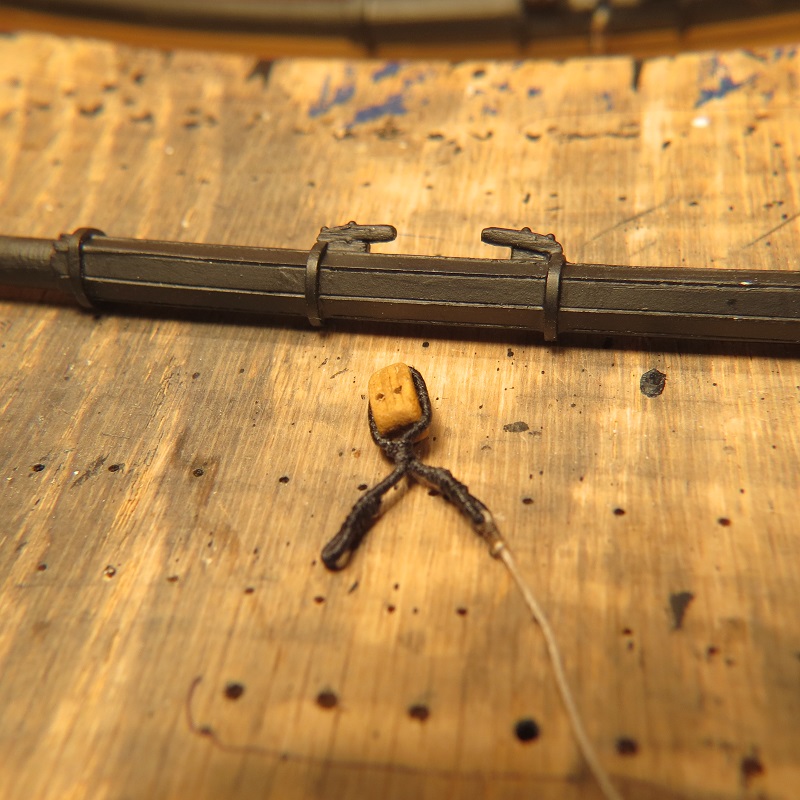
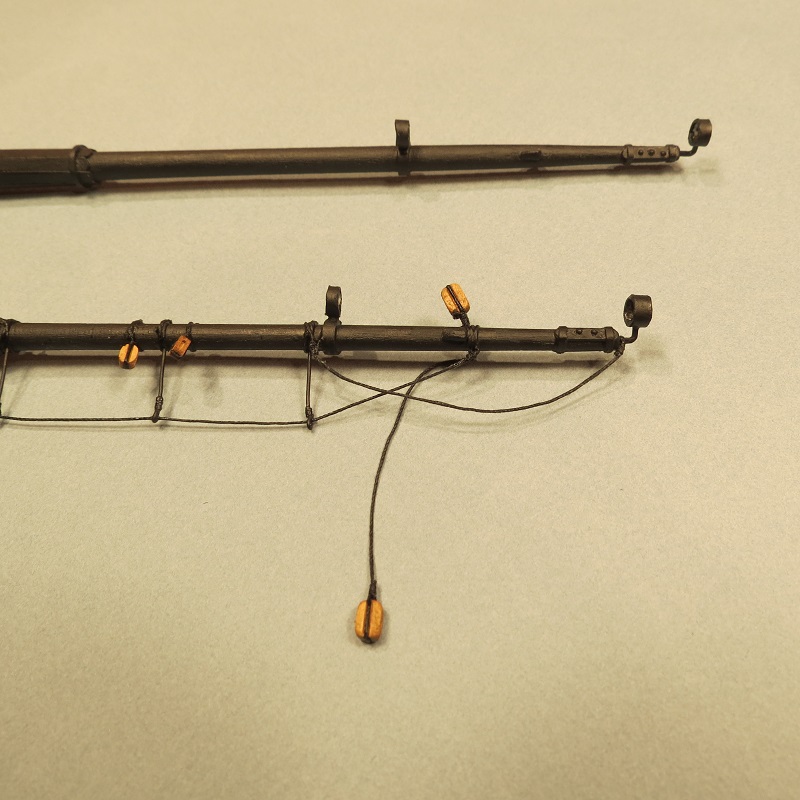
Placing the gun port lids. Holes drilled for passing the lanyards into the hull.
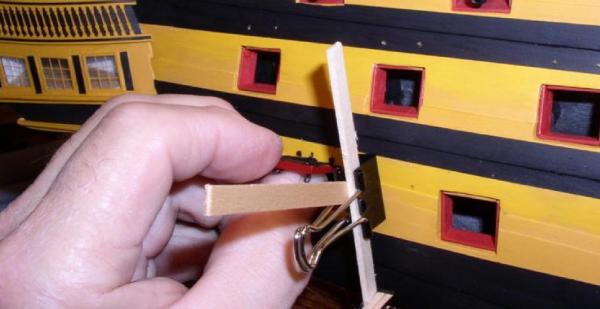
Using a fixed angle to set gun port lids at a uniformed angle.
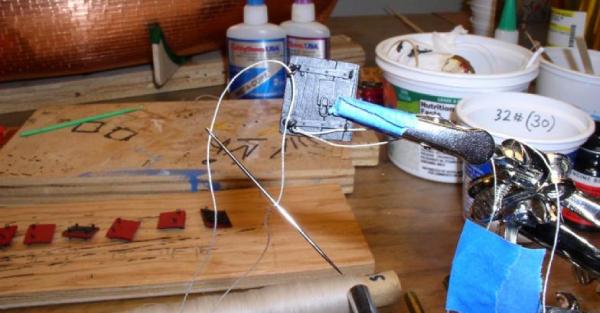
Splicing the lanyards to the ring bolts.


A gentle pull on the line with the needle snubs the splice to the ring bolt.
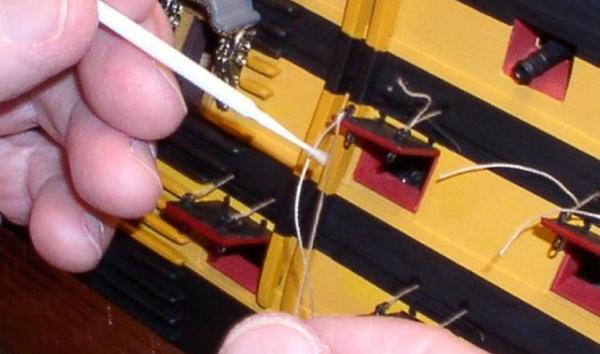
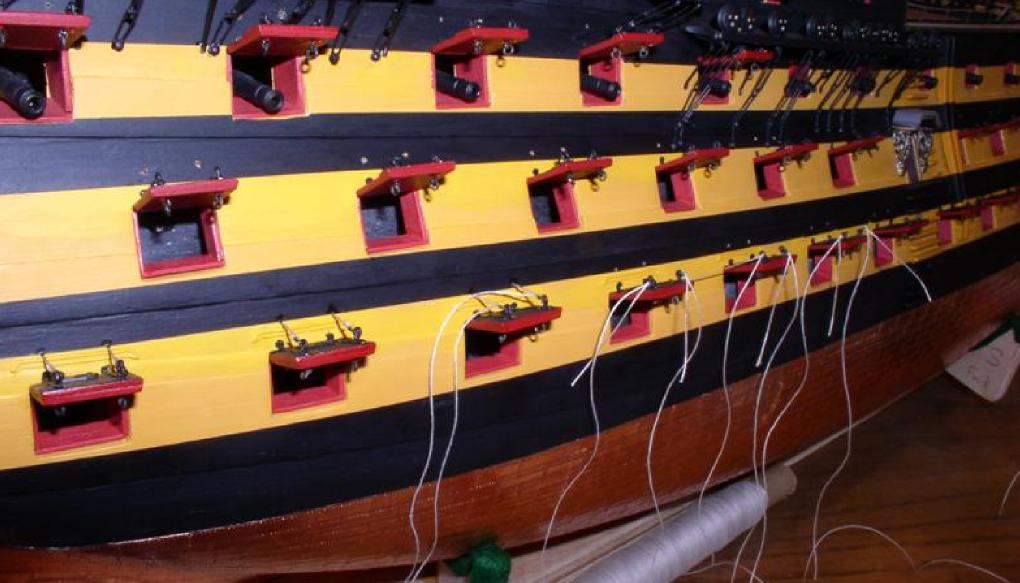
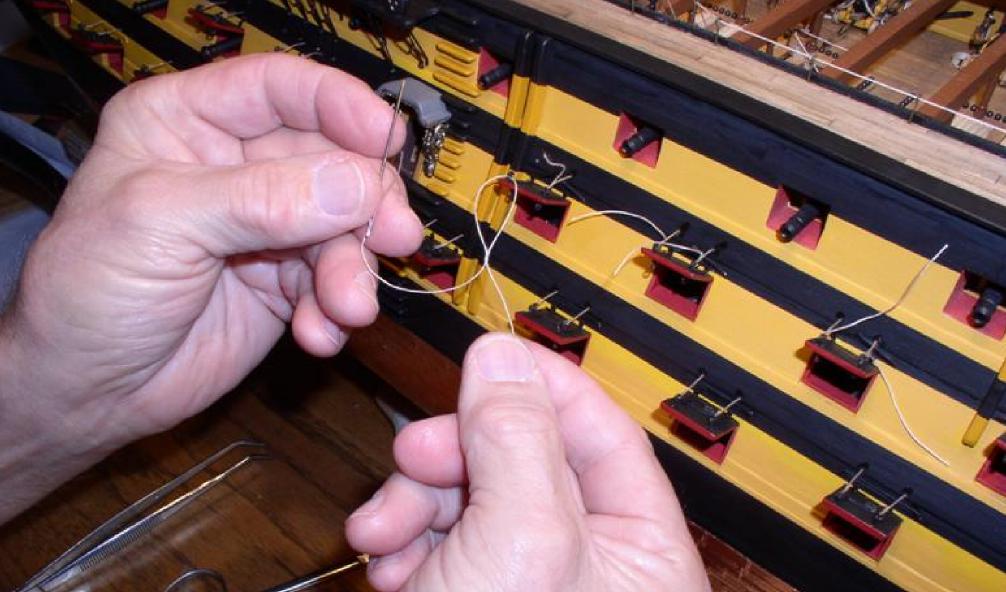
Touching the working end with fast C/A (1 to 3 sec.) creates a "thread needle" to push the lanyard into the hull. That end was cut approximately 10 mm. longer than the visible lanyard. A light touch of C/A (5 to 15 sec.) to the "thread needle" before pushing it into the hull secures the lanyard.
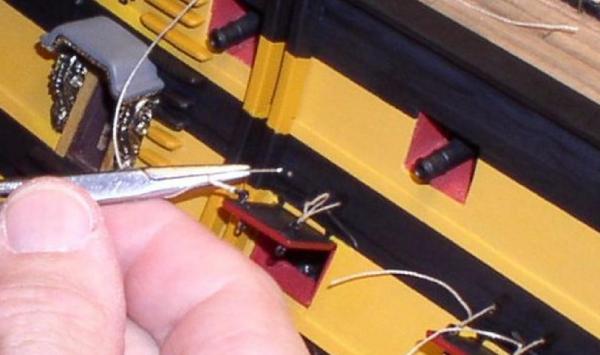
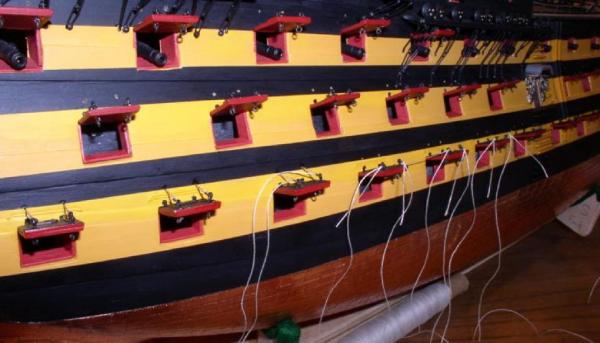
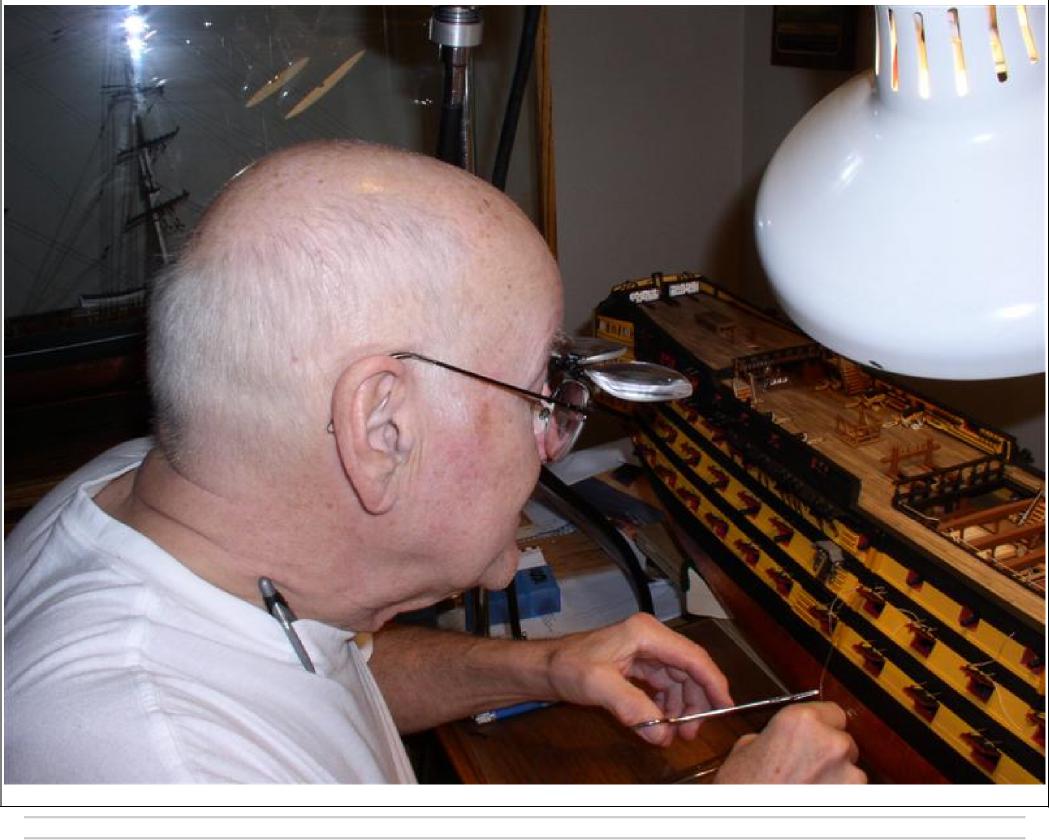
An old geezer trying to keep track of which line is which.

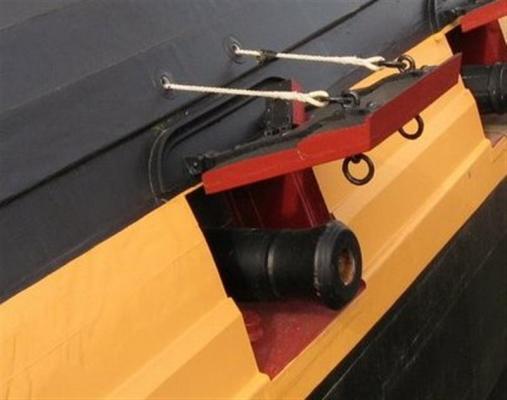
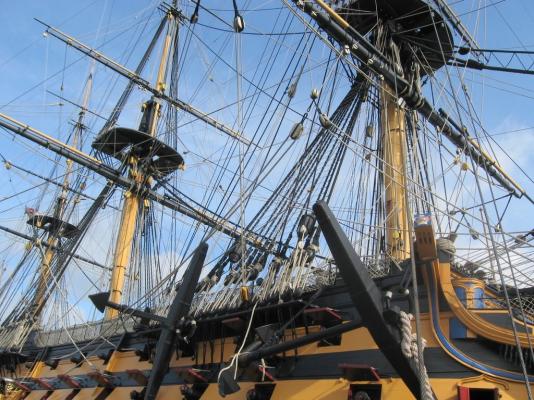
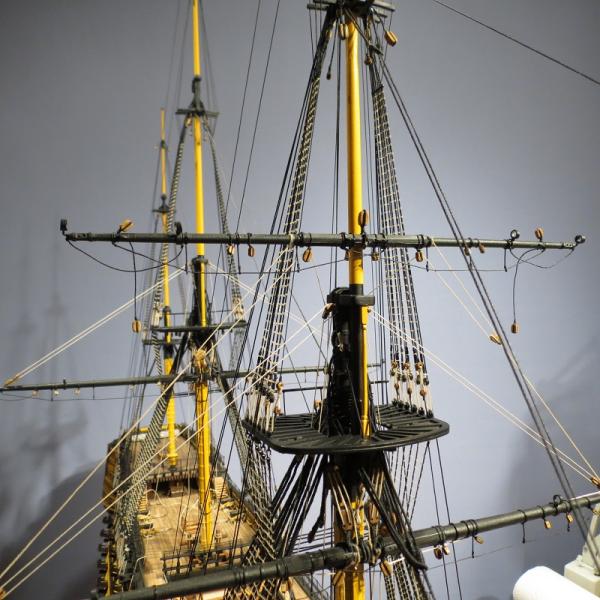
The real thing.
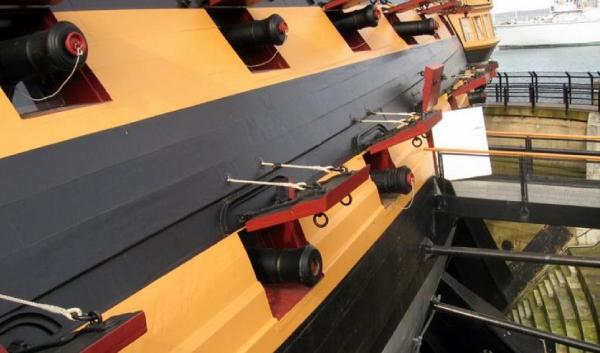
The real ship
Cheers, Gil
-
Nikos MikroΚαλώς ήλθατε στο μοντέλο πλοίου κόσμο (Welcome to Model Ship World). My Greek is zero, but it is amazing what computers can do. Thanks. GilKeith, I suspect that opening a dialog on our three year offshore adventure could overtake the build site. Perhaps I can start a dialog under "General Discussion." Cheers, Gil
-
John, Always nice to hear from my mentors, Many thanks.
Keith, If I recall, the fee was about $1,800 each way. That covered an agent, Pilot (every boat is required to have a pilot aboard) and four line handlers or fewer depending on the boat's crew. However, that was in 1999 and 2002. It would be a little less without an agent, but then one might wait for three weeks to get through and miss the weather windows for hurricanes etc. It was indeed a great adventure. Cheers, Gil
-
Ah, the Mad chemist, or is it Keith? Thanks so much for your comments. I agree with you completely. On the old log, I commented that the line labelled 0.1 mm appeared to me to be 0.2 mm or larger, or about twice the size of what would be in scale. Also, while JoTika specified the natural line for the ratlines, against the black shrouds, the appearance was almost white. I eventually toned down the contrast using a black "wash" literally painting the ratlines with a very dilute black paint which helped somewhat. In retrospect, I would have chosen to use black thread for the ratlines. Hopefully, we never stop learning. Cheers, Gil
-
Popeye, I think it's called Nautical Trivial Pursuit.
Dave, thanks for the insight. A couple weeks ago, I'd never heard of a shroud truck.
Harv and Floyd, hearing you guys reminisce about sailing adventures brings to mind the smell of salt air and visions of the open sea. I think it's about time to paint, varnish and head up the coast.
Cheers, Gil
- mtaylor, fnkershner and capnharv2
-
 3
3
-
Erebus and Terror (Not a great name for a ship. Sort of like the time between leaving the surface and hitting the bottom.) But many thanks. And Modelman, nice to hear from Finland. Popeye, Mort and Grant, Daniel, Kooyu and Sjors: a gathering of old friends at a model workshop. Thanks for your kind comments.
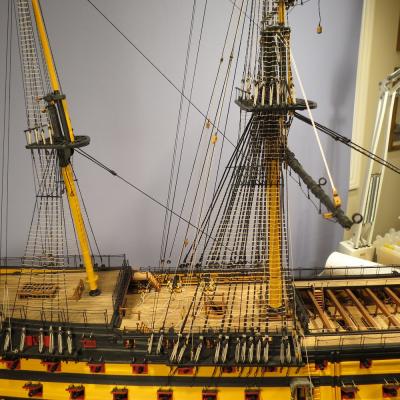
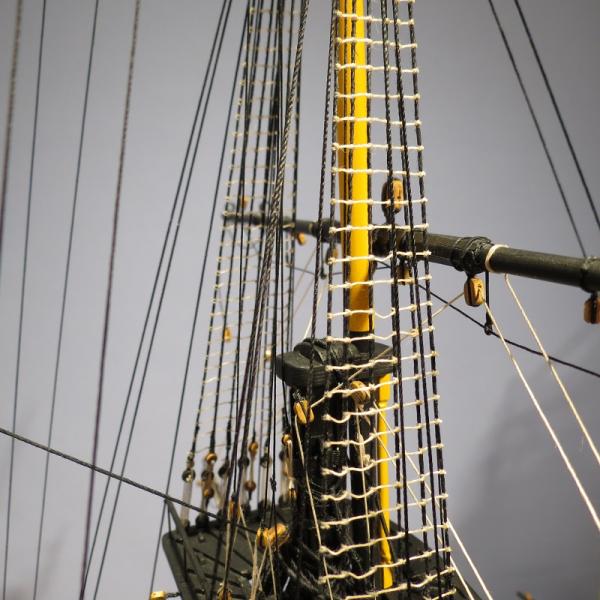
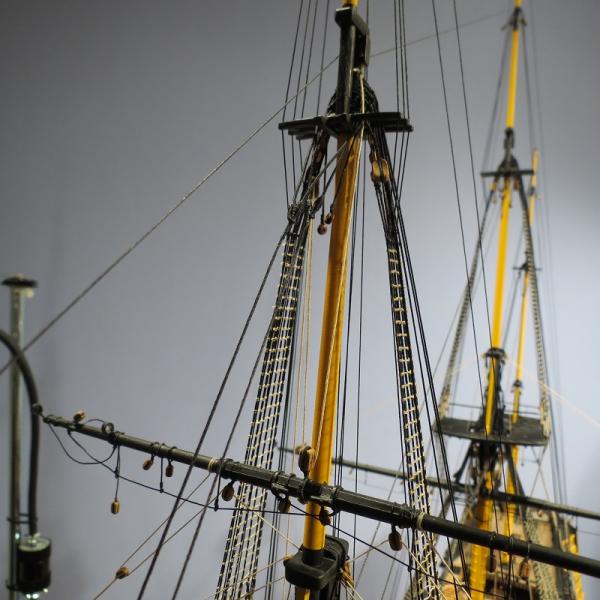
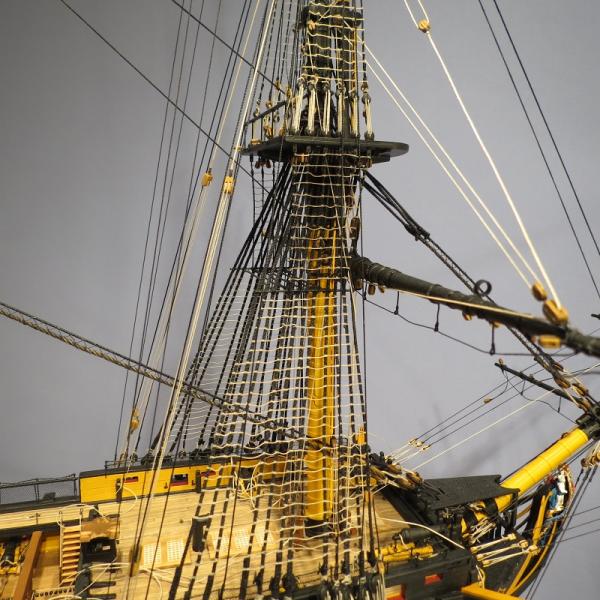
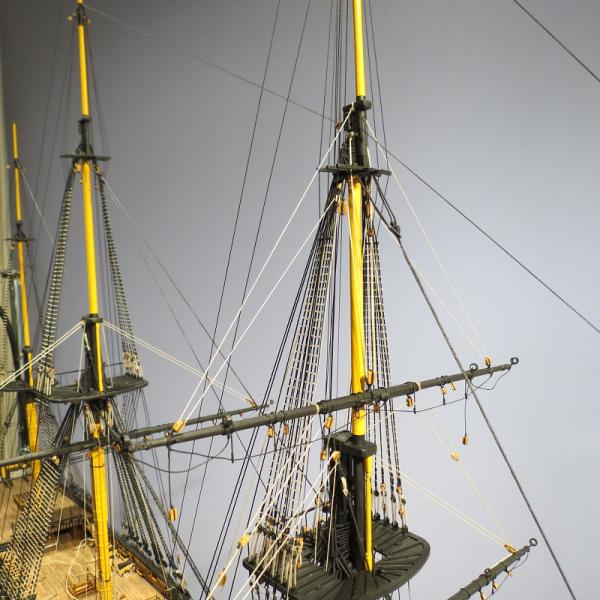
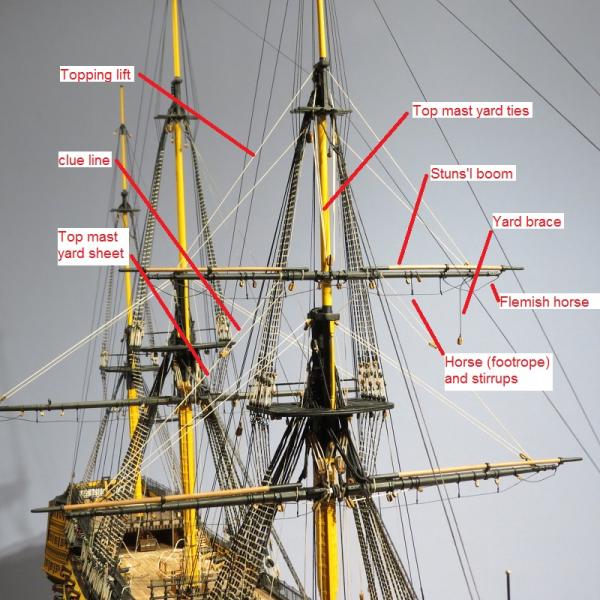
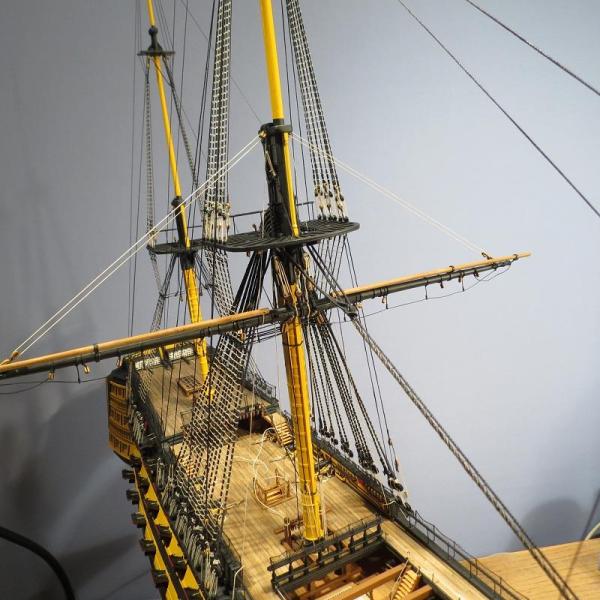
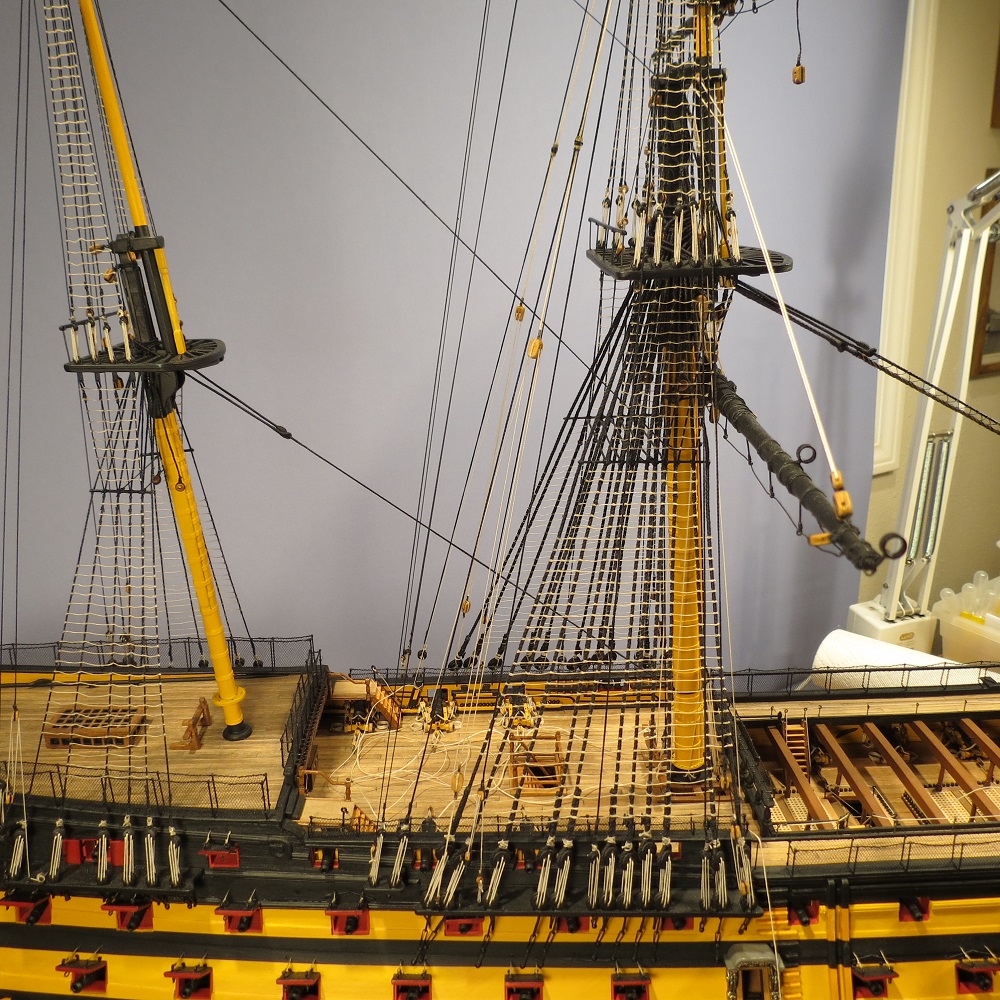
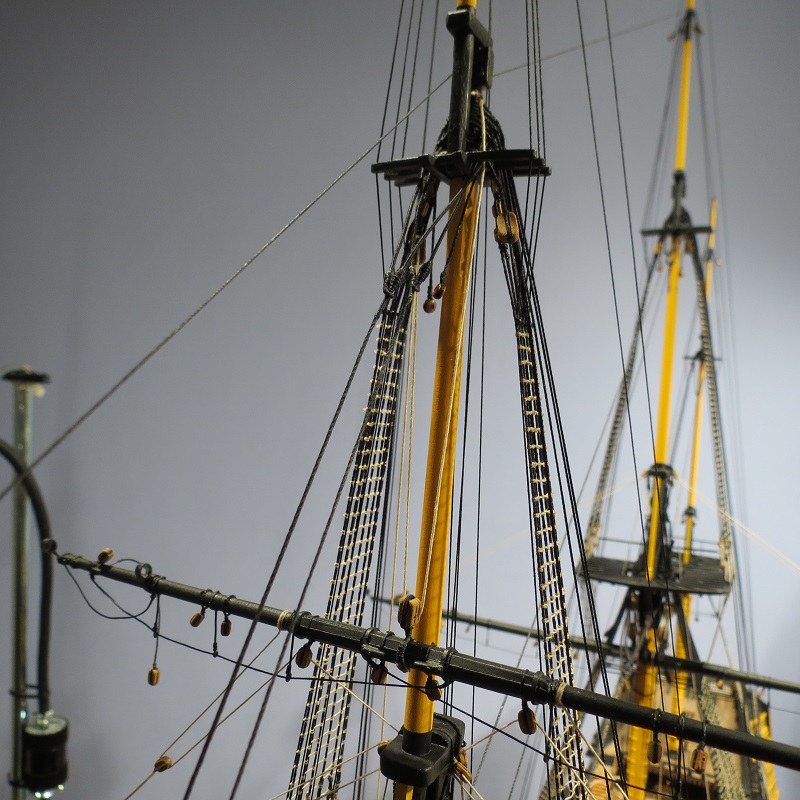
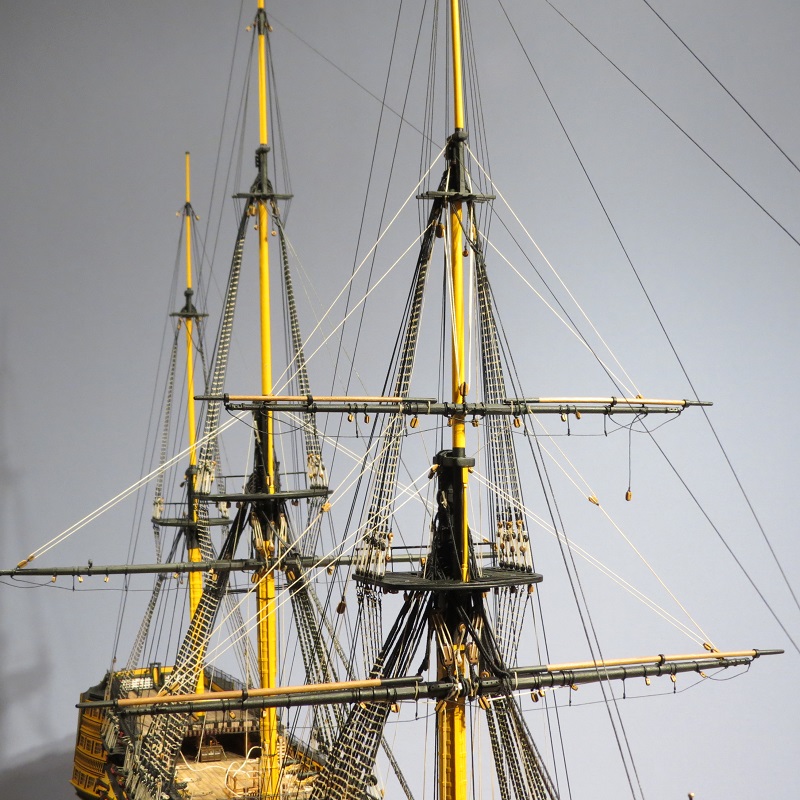
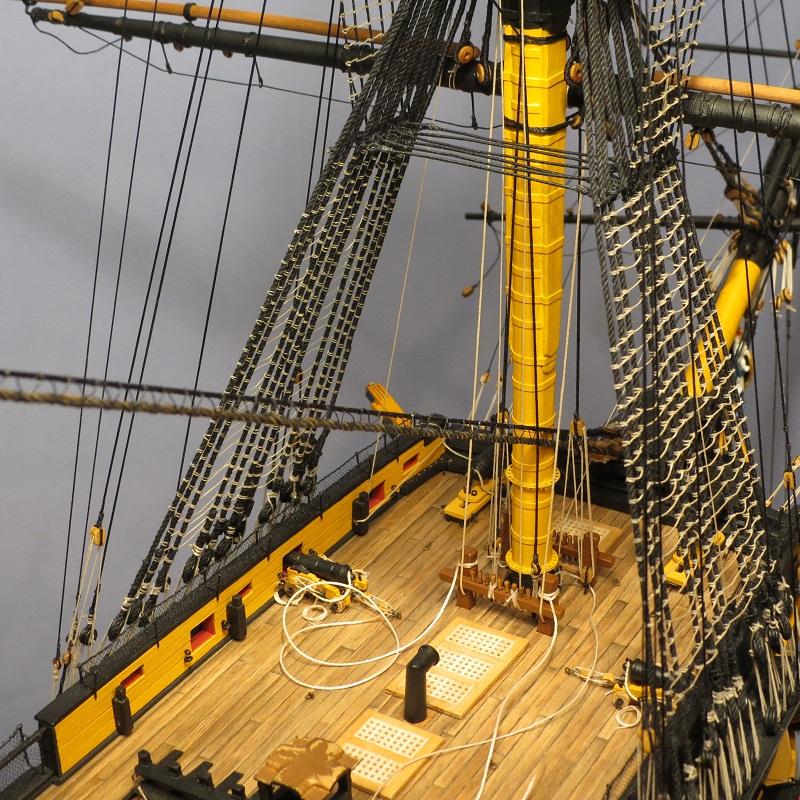
Those of us that have never sailed in a square rigger, (me) would do well to note that the JoTika rigging plan calls for the yards to be down, as might be the case during a refit, prolonged moorage or even in severe gales or storms at sea, lowering the center of gravity of the ship.
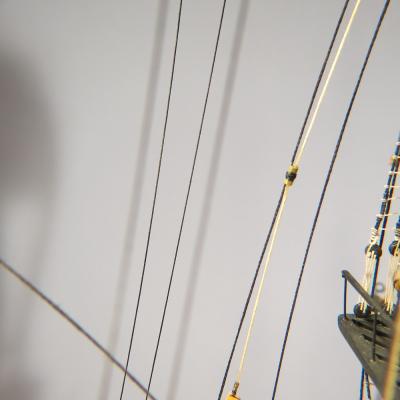
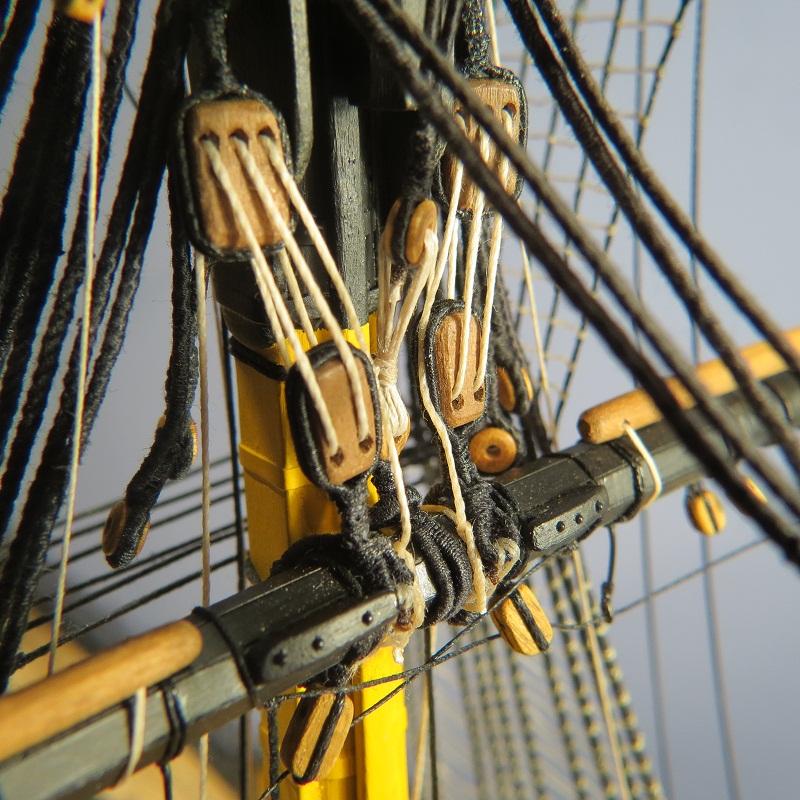
Critiquing my rigging, the upper Jeer blocks of the lower yards should be more tightly adjacent to the tops, allowing slightly more travel to raise the yards. The topmast yards on the other hand, can be raised the full length of the yard tyes forward of the mast, while the tackle for the yard tyes (aft of the mast), needs a scope at least as long as the tyes forward. (photos below)
It is difficult to imagine a ship's crew striking (taking down) the topmast and topgallant mast in the most severe storm conditions and later hoisting the masts, yards and rigging at sea. And we think model rigging is a challenge.
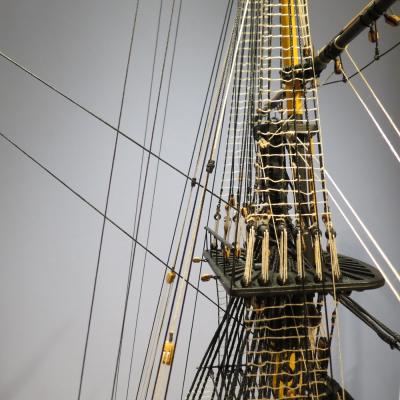
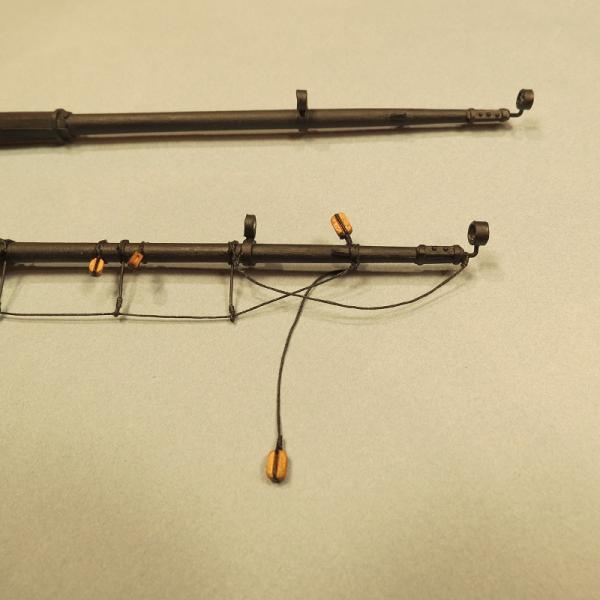
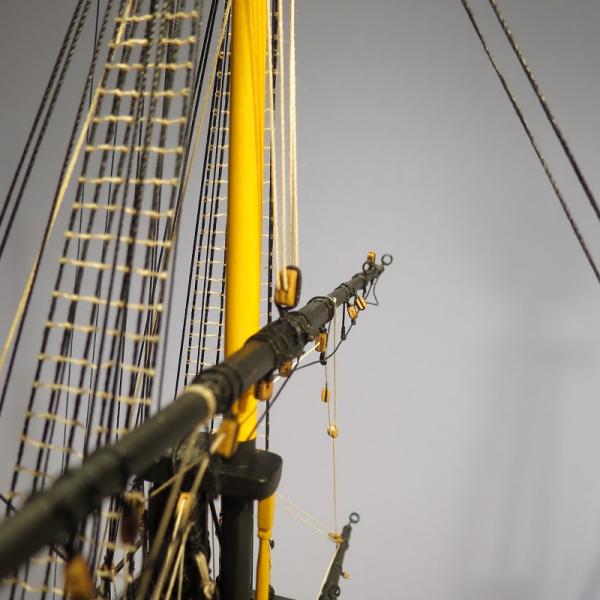
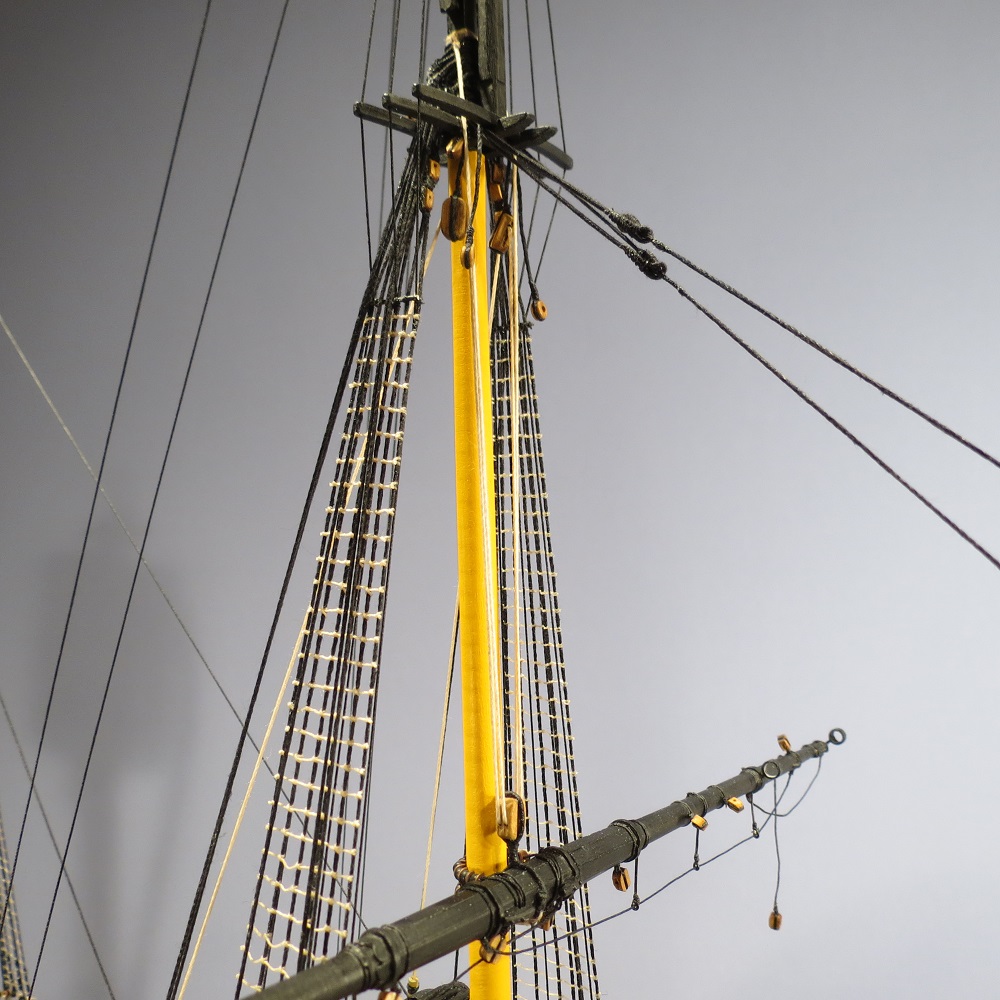
Main topmast yard tyes forward of the mast, showing how far the yard can be raised before bending on the sail.
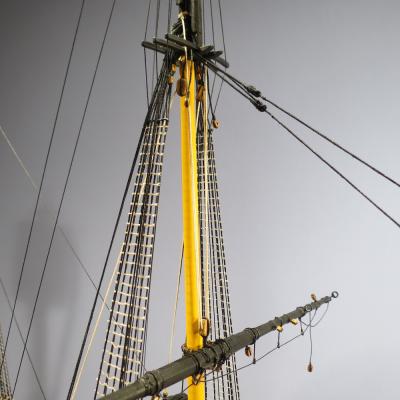
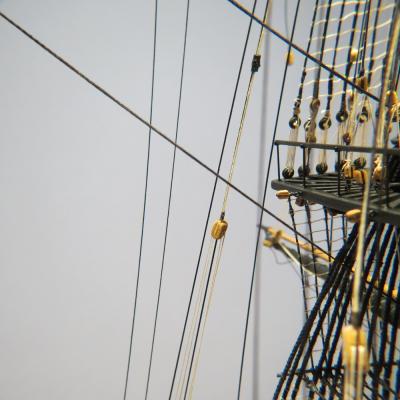
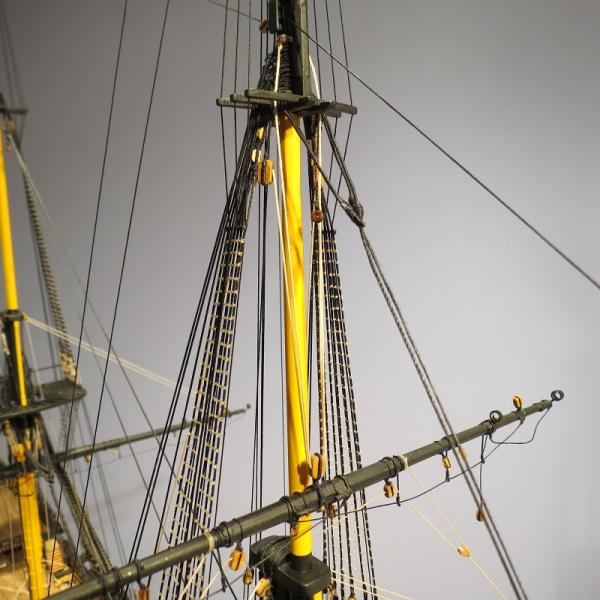
Yard tye tackle aft of the mast.
 And a better view showing the scope of the tackle.
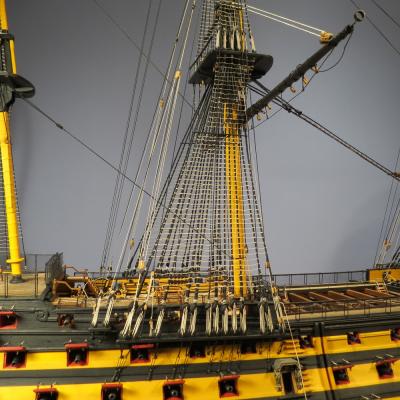
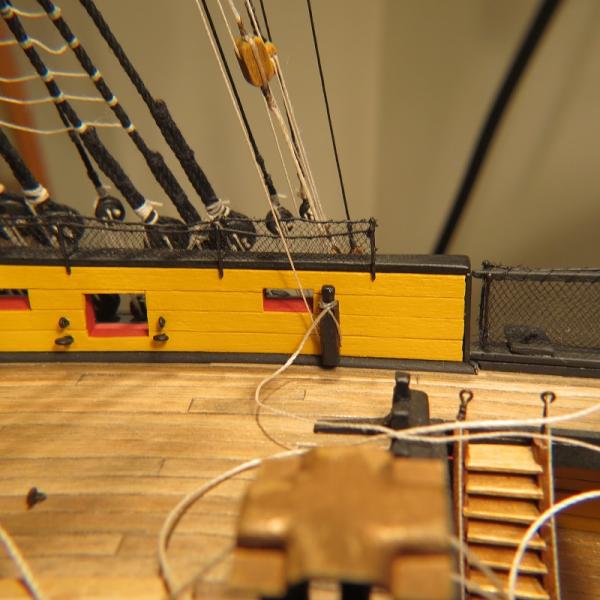
Tackle attached to an eye bolt on the channel.

Main topmast yard tye tackle terminating at kevel just forward from the poop deck ladder.
A better looking shroud truck.

-
Welcome back Kooyu. You've been missed. Recovering the photos helps but so many comments by others and ourselves are lost. I'm looking forward to seeing your innovations, old and new and following your beautiful ship. Gil
-
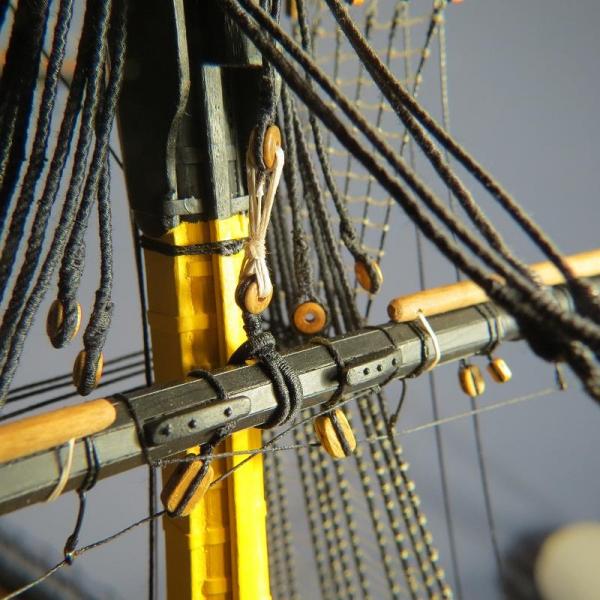
Continuing with the fore topmast yard. The parral was fashioned with brass deviders (partially blackened to simulate wood) and glass beads. The beads showed an unnatural gloss.
A touch of flat clear acrylic toned down the glossy look.
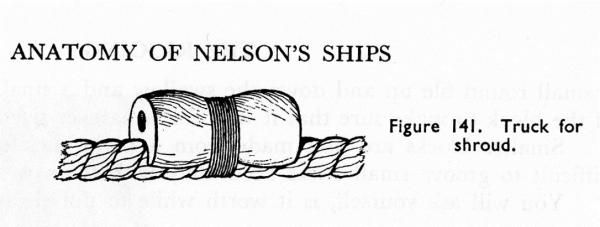
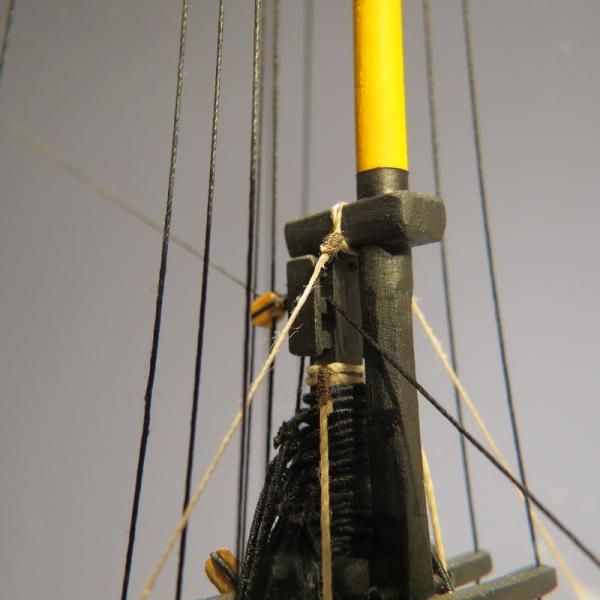
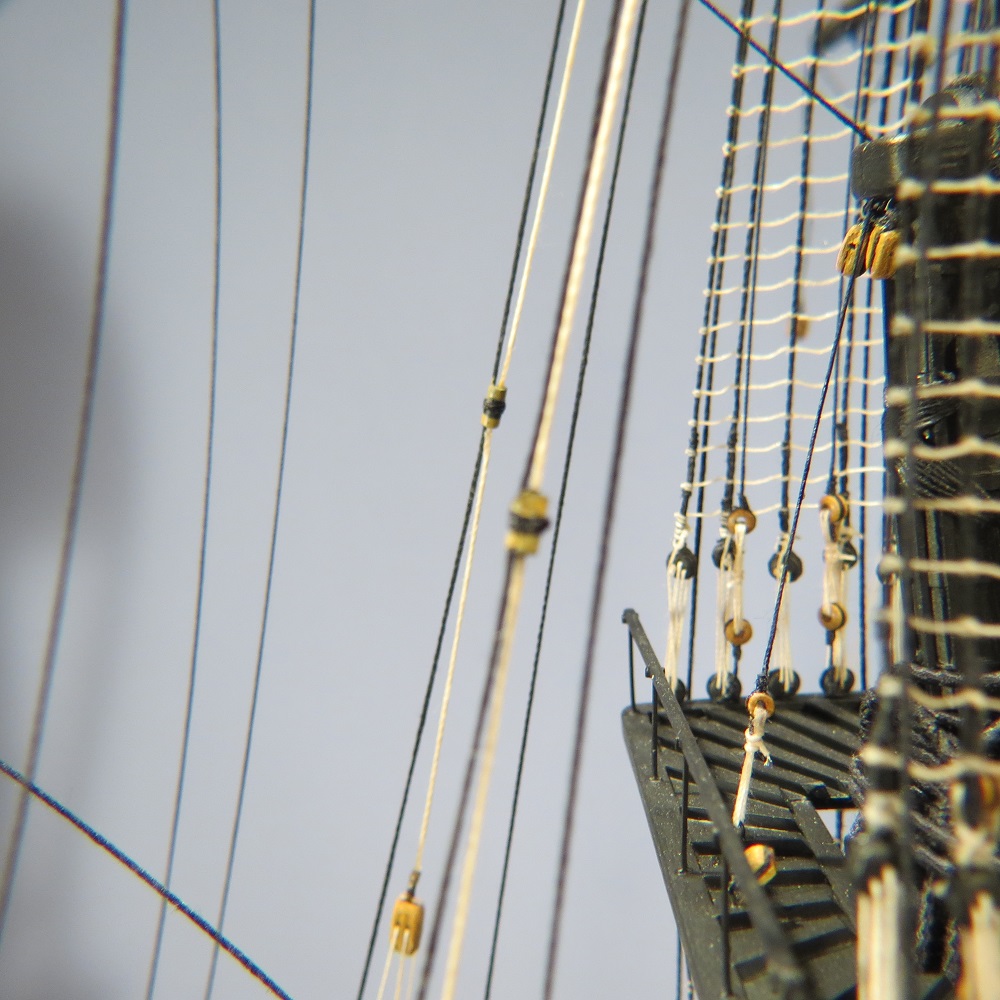
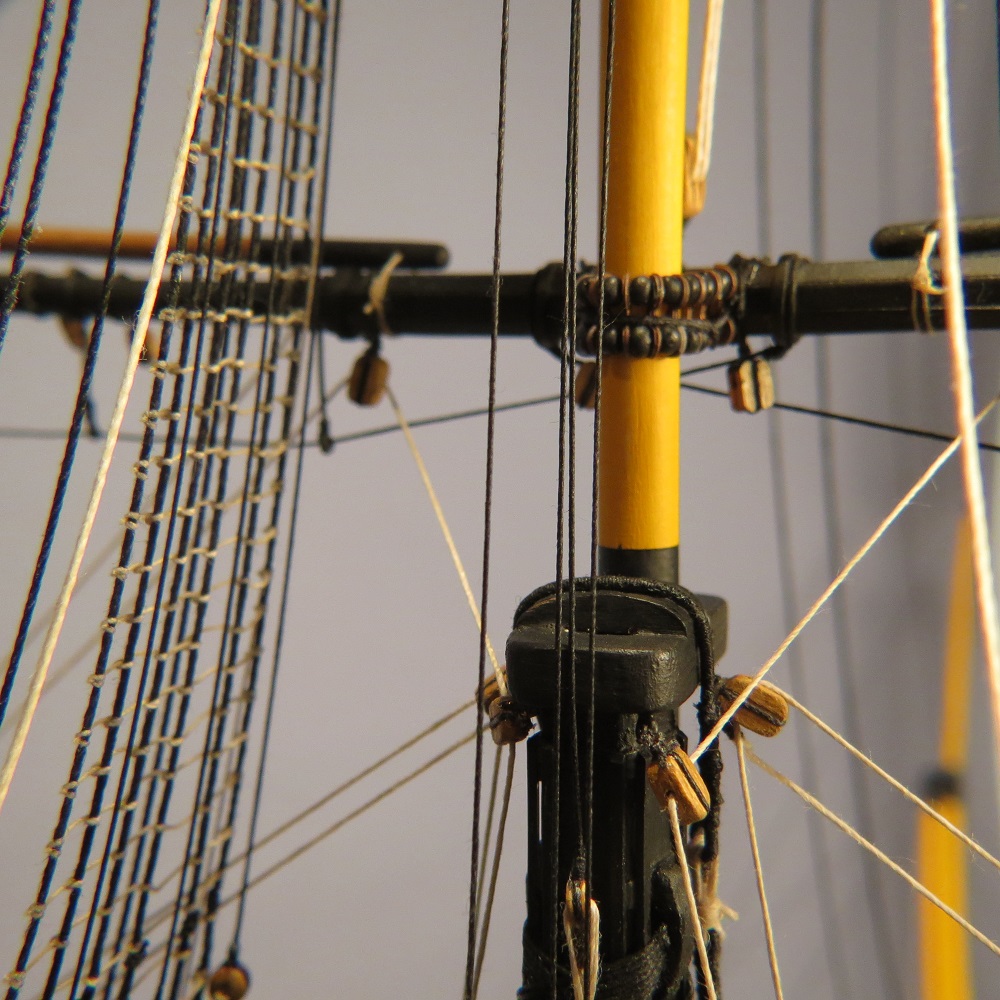
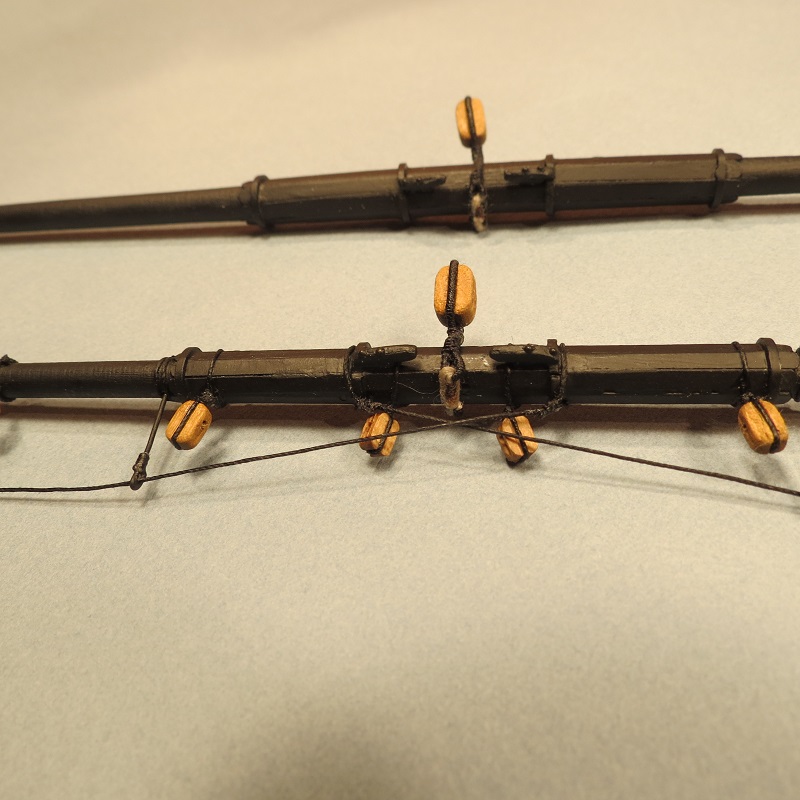
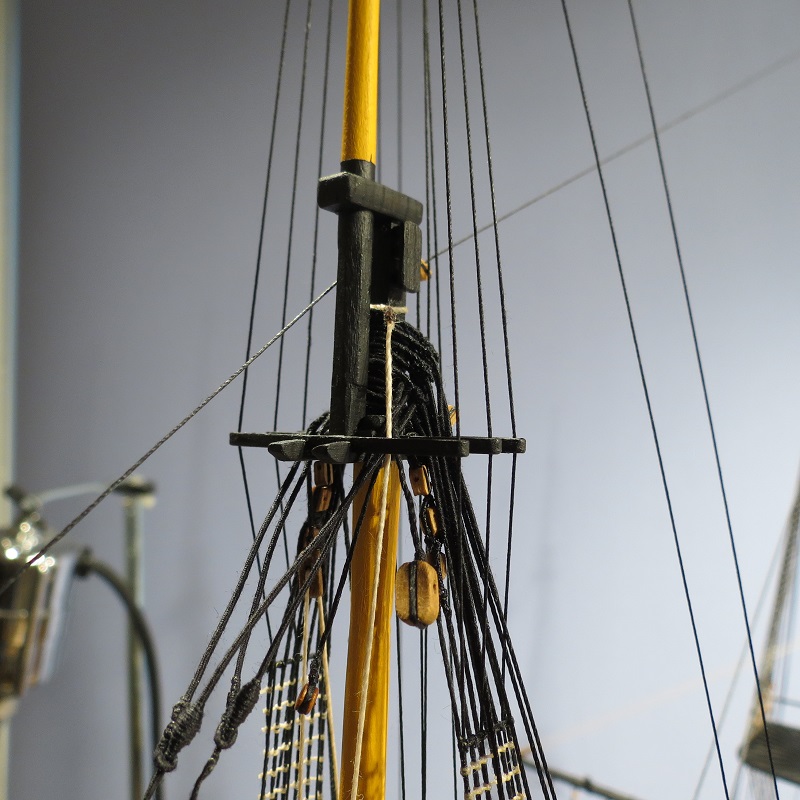
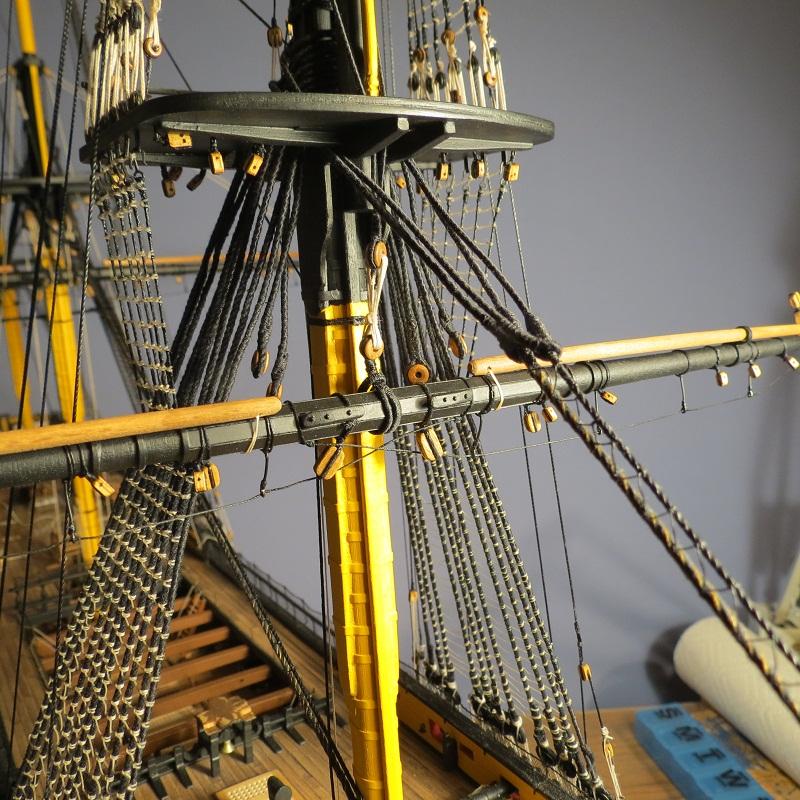
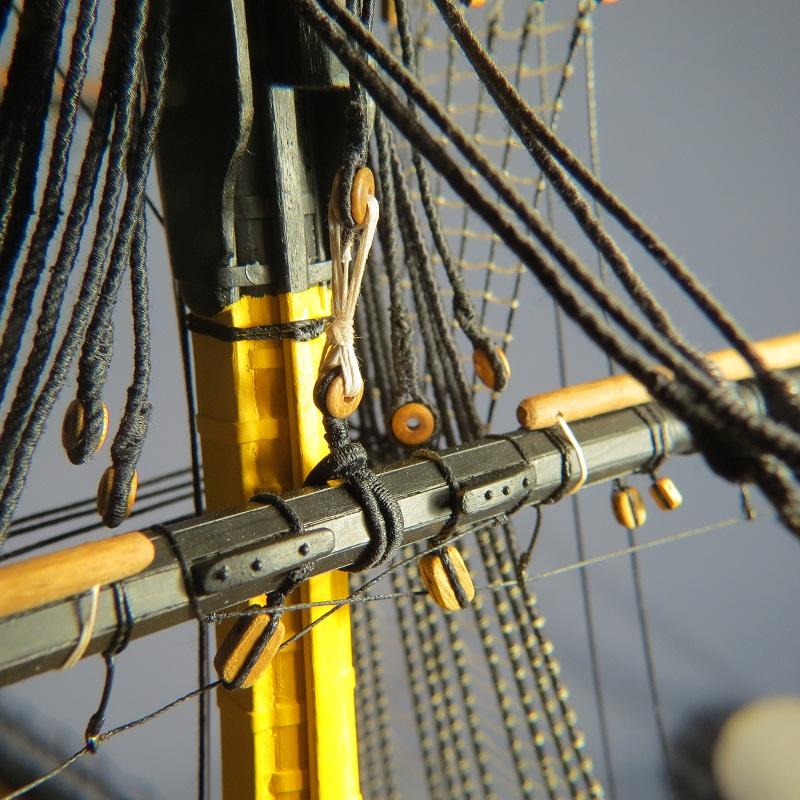
JoTika specifies the topmast yard tie passing through a "shroud truck" before reaching the tackle. I missed that while rigging the yard ties, but solved the problem by making my own shroud trucks. What! You don't know what a shroud truck is? Neither did I. Longridge shows the truck.
I looked in all my 350 photos of the real ship and could not find (or recognize) a truck in the shrouds. What I did find was a sliding block in the topmast yard tie tackle. Instead of the yard tie passing through a shroud truck, the upper block slides up and down on the shroud.
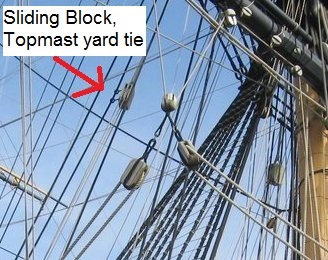
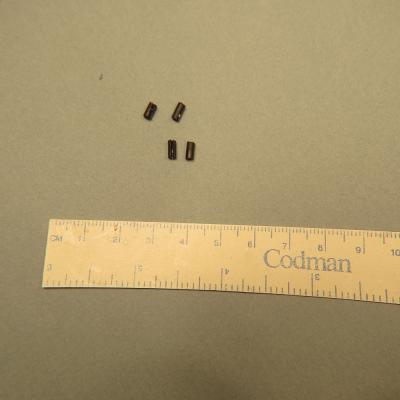
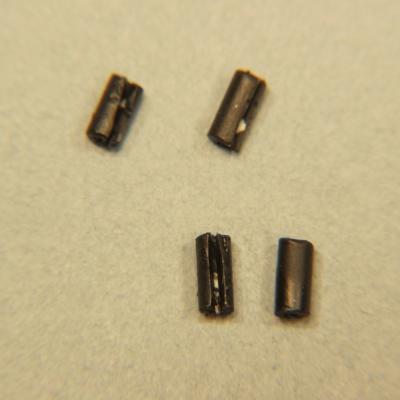
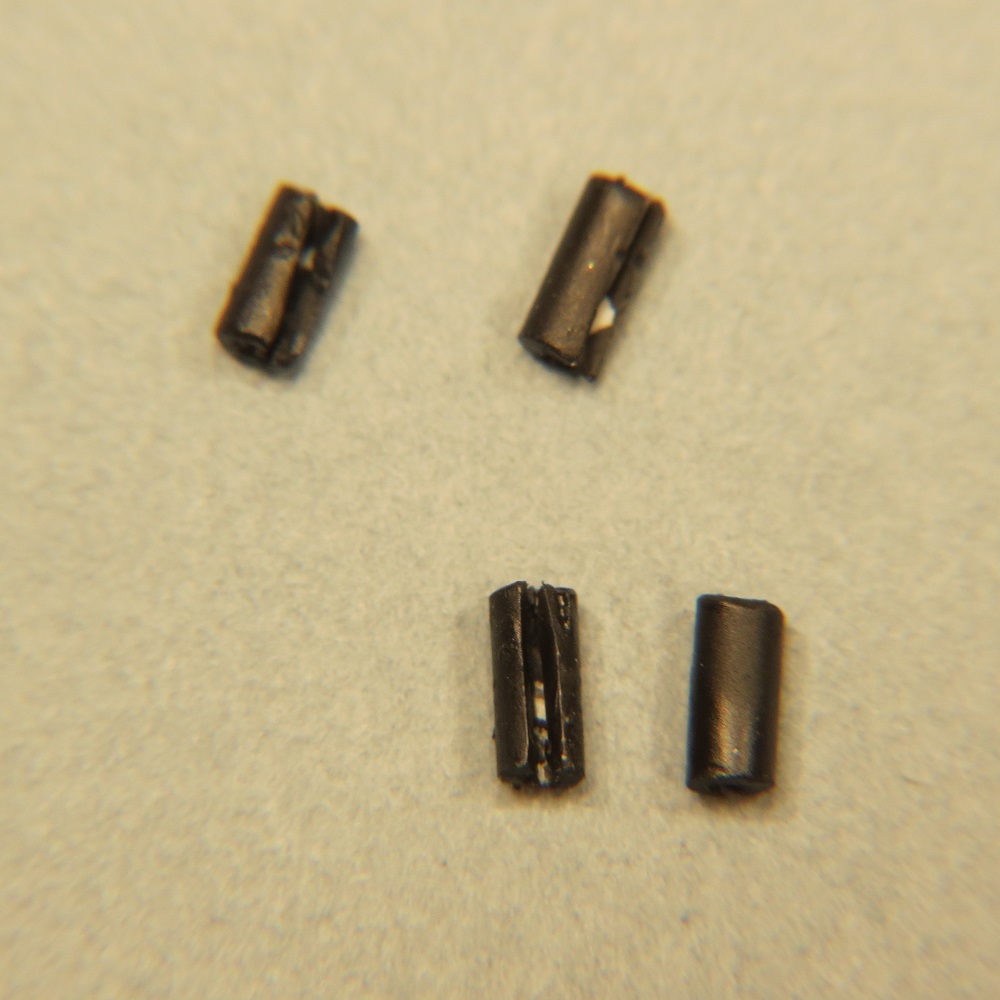
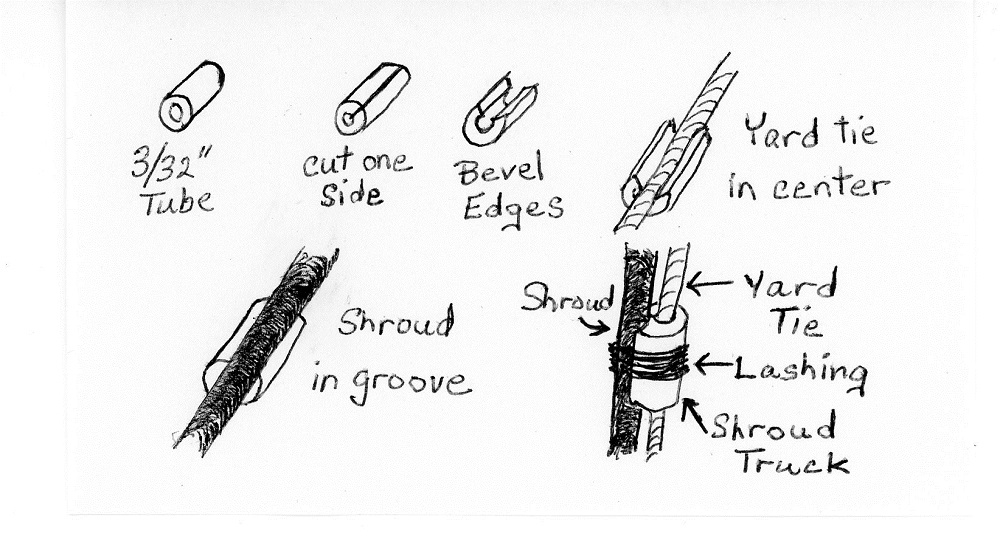
Having no reference as to which was correct, I opted for the simpler shroud truck which seemed more likely to have been used in 1805. David Steel, "The elements and Practice of Rigging and Seamanship, 1794, mentions Shroud Trucks used in the rigging. Perhaps our naval historians will set us straight. Rather than use the castings, which needed to be placed before completing the tackle, I made the shroud trucks from 3/32" O.D. styrene tubing, cutting a slot lengthwise to fit over the yard tie and bevelling the edges in order to lash the truck to the shroud.
A simple drawing (or scratching on a telephone pad) shows the process.

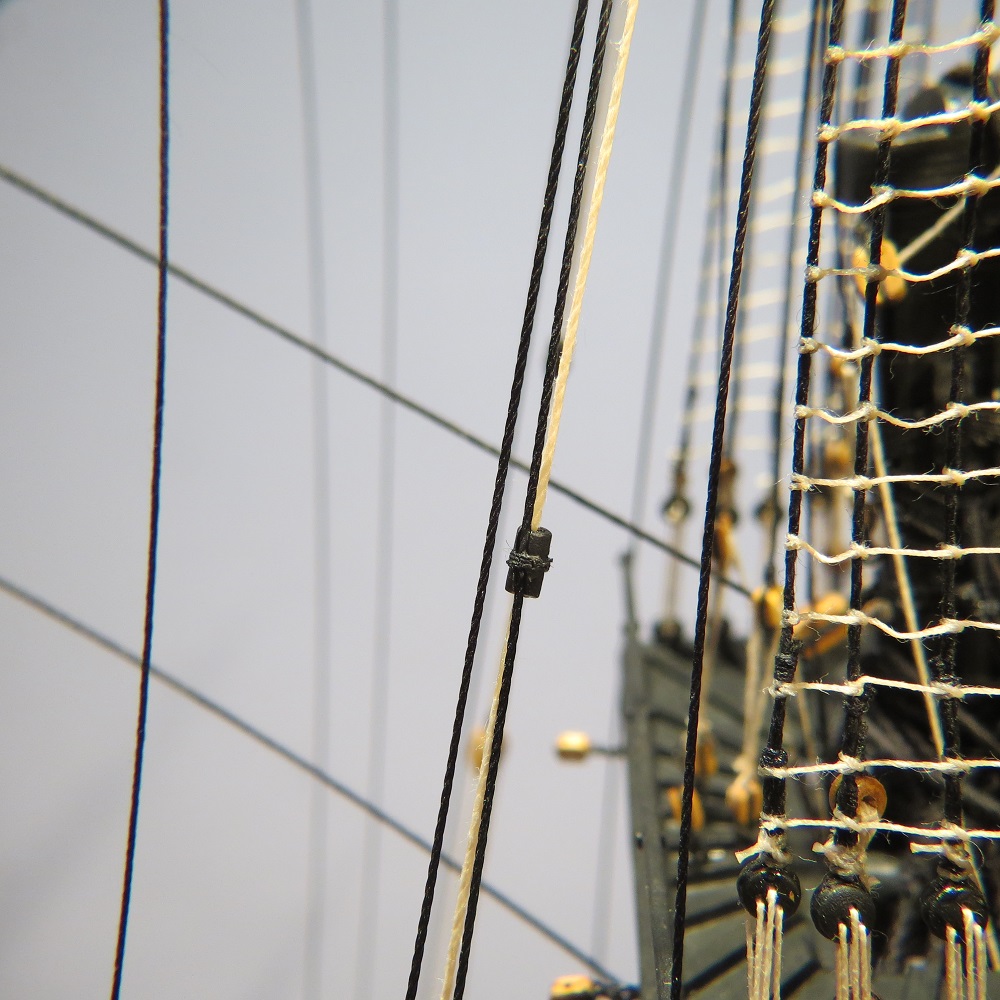
The topmast yard tie passing through the truck which is lashed to the shroud..

This arrangement was likely used to avoid fouling the yard tie with the shrouds in high winds. If left off in a model, I wonder who would notice. But what fun would that be. Cheers, Gil
-
Hi Rob, In my opinion, green or blue masking tape is too thick and course. It works on a real boat, but isn't delicate enough for a model. The tape I use is 3M Fine line tape #218 1/4" wide. Both sides need to be painted or primed or you may get bleeding in the wood under the tape. I lay the tape on and then firmly work my finger along the tape to get a good seal. The tape is thin and narrow and will follow a curve. You can also get it in 1/8" width.
You're making great progress. Cheers, Gil
-
Amfibius, The knots are a given. Around a gazillion I'd guess. However, when you finish your build, they will play classical Russian music and hold learned discussions on European history. On mine, we'll tie knots. I couldn't find your build log. Have you started one? Cheers, Gil
-
Floyd, I decided some time ago that life is so interesting and full of challenges that there wasn't room for a rocker in retirement. However, I never get as much done as I'd like. Some day, I might even learn how to make a R/C sailboat and you can be the professor.
Canoe, or is it Lawrence? The gear diameter is 32mm (1 1/4"). I think the cost from Ahow Models was about $45.
Good luck on your build.
Cheers, Gil
-
Thanks Michael. It does take some time, but it helps to be retired. However, with a real boat, a model ship, raquet sports, grandkids, etc. there is never enough time. But it's better and more fun than sitting in a rocking chair. Don't worry that you've a long way to go. You know better than most that doing something well is a worthy goal. Cheers, Gil
-
Many thanks Ray and Frank. Ray, you certainly did a beautiful job rigging the "Pegasus." I agree that adding any more lines or coils would probably be a distraction. Rigging is my favorite part of modelling, however, your exquisite decks on the "Diana" are beyond me. Nice photo, at the helm. What ship/boat are you steering. Mine is our boat in Prince William Sound, Alaska, among the ice bergs.
Floyd, the stuns'l boom irons were supplied but I thought they were too large. I cut the rings from styrene tubing (page 4 shows the supplied rings along side those from the tubing. On the fore and main lower yards, I used 7/32 " (5.5mm) tubing, while on the fore and main topsail yards, I used 3/16 " (4.8mm) tubing. Tell Carol that we'll have a launching party in the not too distant future.
Cheers, Gil
-
Hi Rob. It will be great fun to see your ship with interior views and lighting develope. With all your references and a previous Victory build, this one should be a classic. It is certainly starting out that way. Warm regards, Gil
-
Thanks Mark for you kind comments. From the look of your Wasa and Sloop of War, it could be "been there, done that." But we do have fun, don't we?
Joe, I picked up ideas from Ed Tosti's remarkable scratch built Victory and the Victory Gallery on the old site. It's great that someone is watching the build logs and we can continue to pass on ideas.
Popeye, Your thoughtful remarks are greatly appreciated. I think all of us who enjoyed the O'Brien series, imagine ourselves as captain of the ships (models) we build. The reality, however, is that without family wealth, I'd have likely been a tar, living "before the mast" and climbing the rat lines. So....I want the rigging to be safe.
Grant, You'll soon pass me by. I'm spending much more time working on the real boat now.
Kevin, I think you will find the stuns'l booms in place in the last two photos. Rigging lines for them is in question. Sometimes, I think we can add so much detail that the beauty and order of the rigging can be lost, rather like background noise in a recording. Perhaps I'll make that decision when I get a bit further along. Looking forward to "visiting" your work station in April/May. Cheers, Gil
-
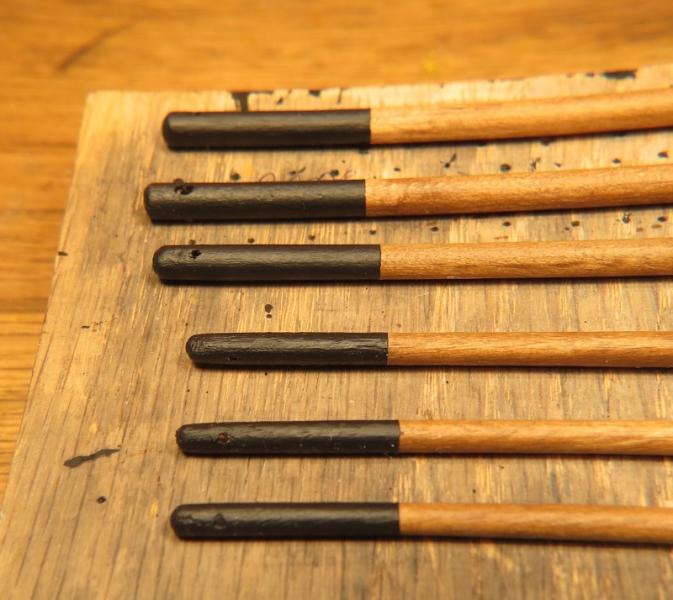
Continuing with the yards and rigging. Private e-mails before the crash have asked about how to obtain clean lines between colors. Here, the stuns'l booms are painted black at the inboard and outboard ends. The process here was sanding to shape the booms, water based stain (which raises the grain), sanding, applying clear flat acrylic to seal the wood, further raising the grain (without some sort of sealing, paint bleed under the masking tape), light sanding, a second coat of acrylic, masking with fine line 3M tape and painting black, two coats.

Rigging the fore topmast yard. Priciple references were McGowen, McKay, Longridge, JoTika plans and a few hundred photographs of HMS Victory. However, one is challenged by the fact that captains, sailing masters and bos'n mates continually changed small aspects of the rigging, even underway. Hence, what you have presented here is my interpretation from several sources. Some of you may well have a different take on the rigging.
Lifting block on the main topmast yard. Fore topmast lifting block stropped with served line. One eye completed with a tail to lash the block to the yard. A second eye to be completed.

Fore topmast lift block ready to lash to the yard.

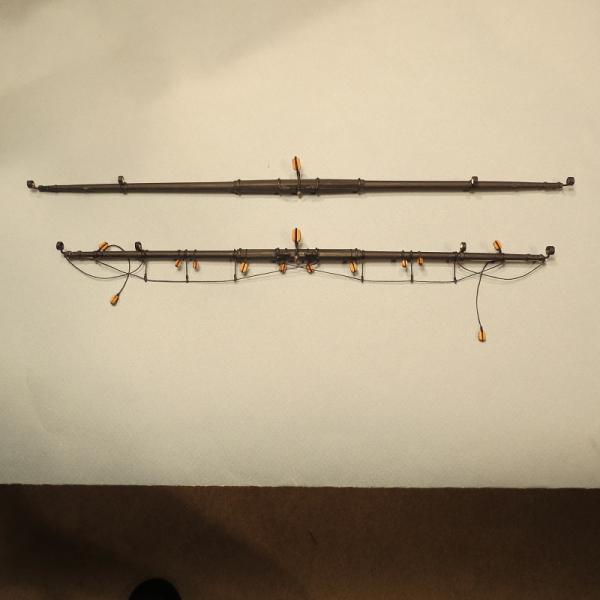
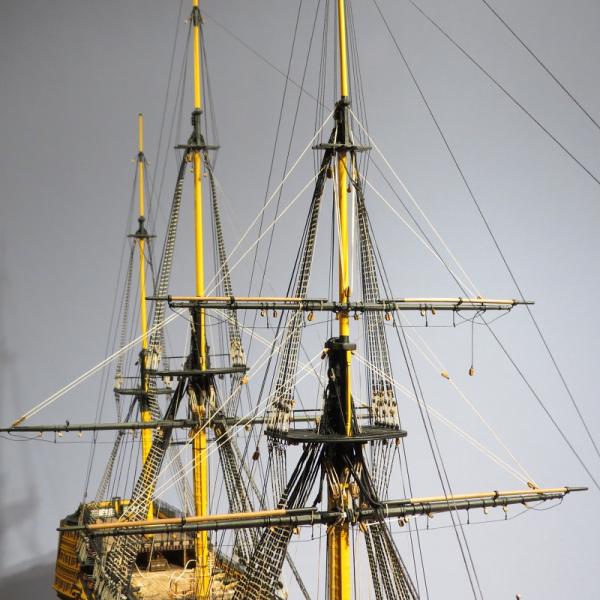
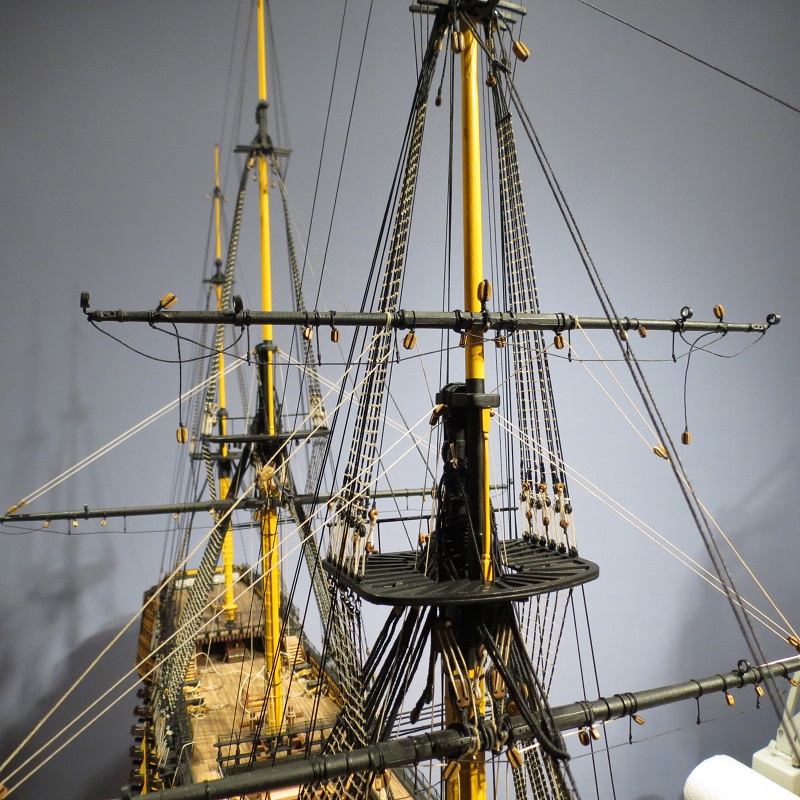
Above: Main topmast yard. Below: Fore topmast yard rigged.

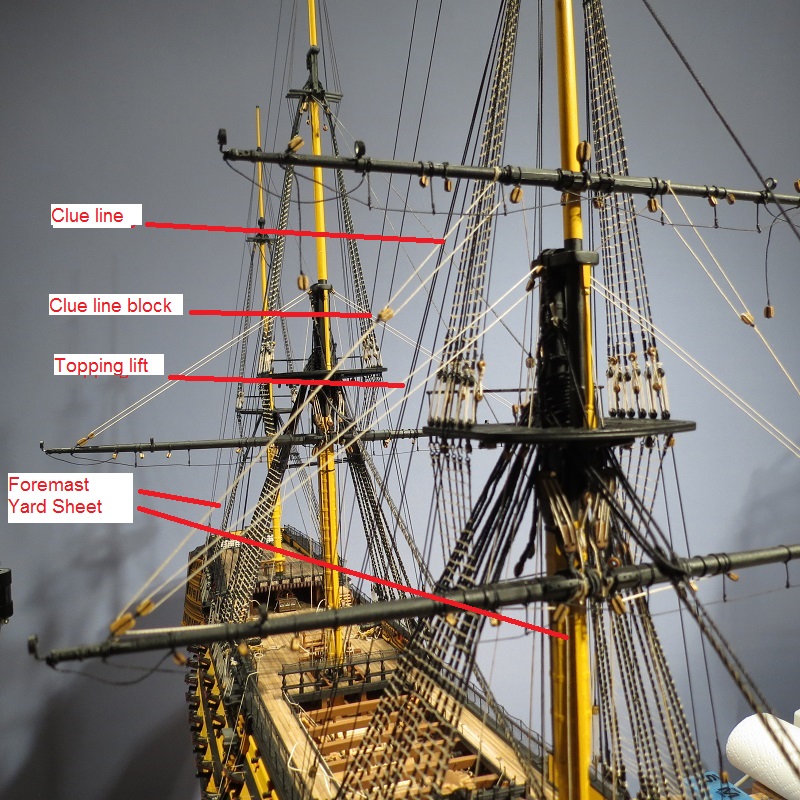
Fore topmast yard "pinned" to fore mast. fore topmast yard sheet and clue line block added.

Clue line originates at lashing on yard, passes to clue line block and returns to block under yard.

Clue line continues from block on yard to block aft and under mast cap.
Clue line terminates at bitts aft of foremast.

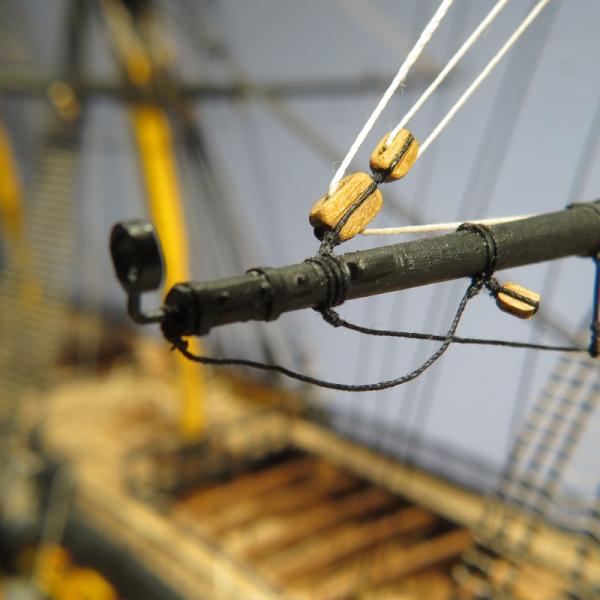
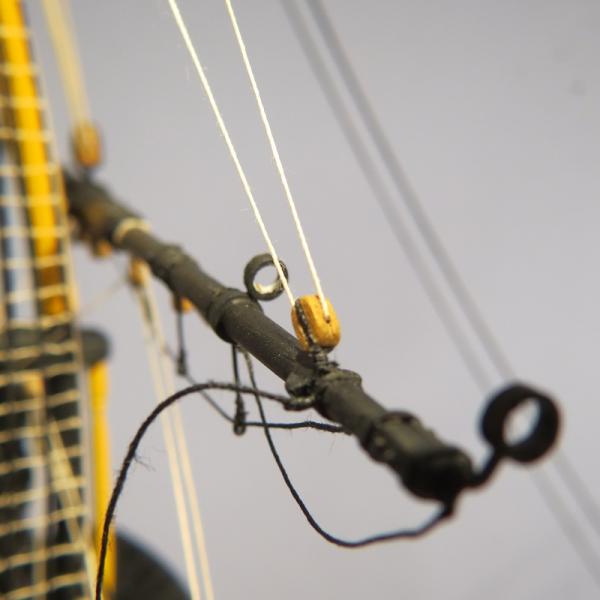
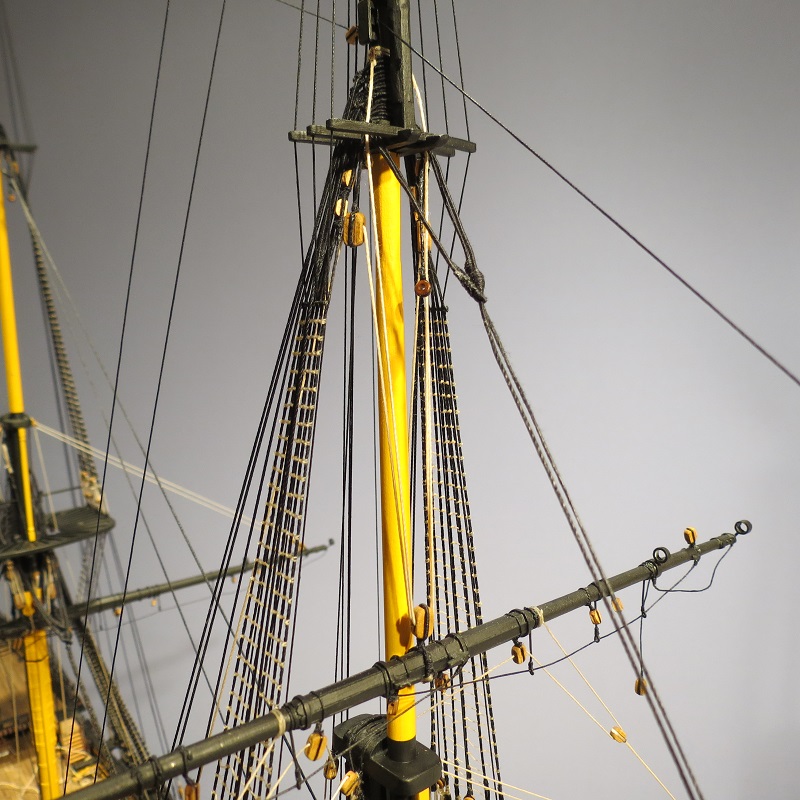
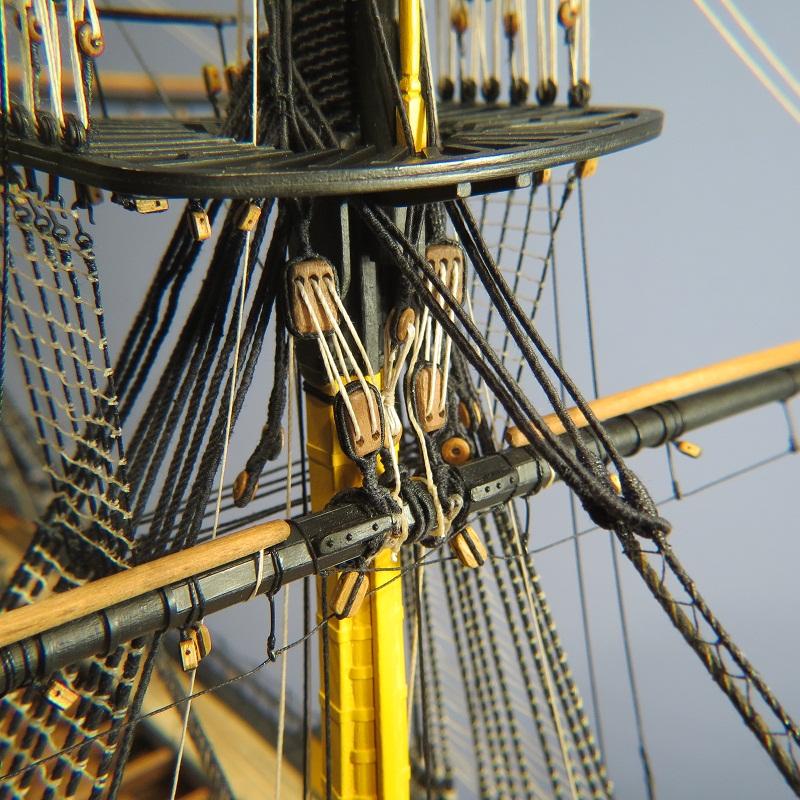
Top mast yard sheet (larger block) and topping lift (smaller block).
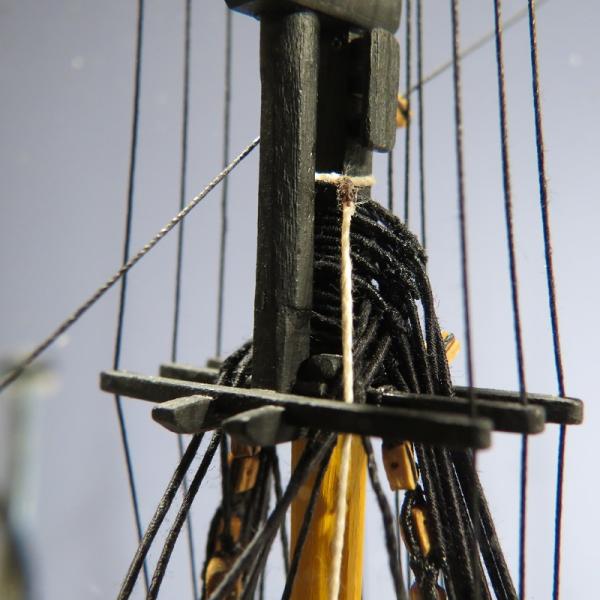
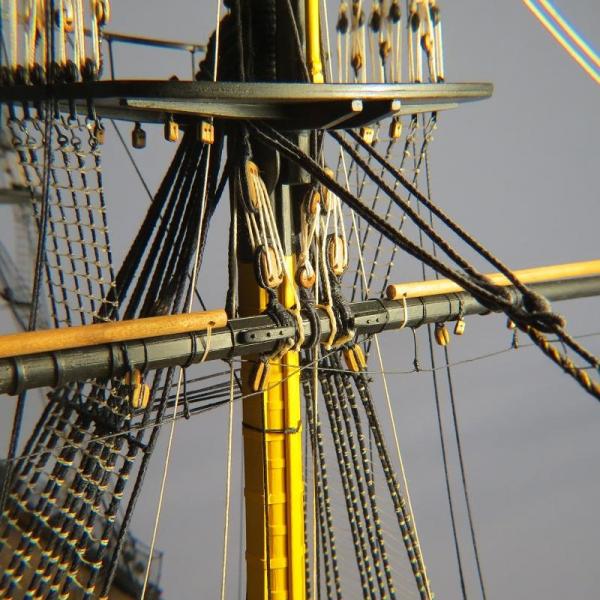
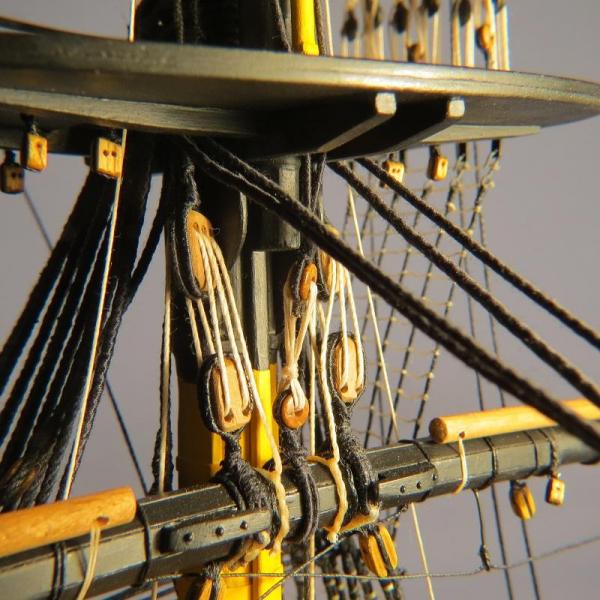
Port yard tie originates at topmast top.
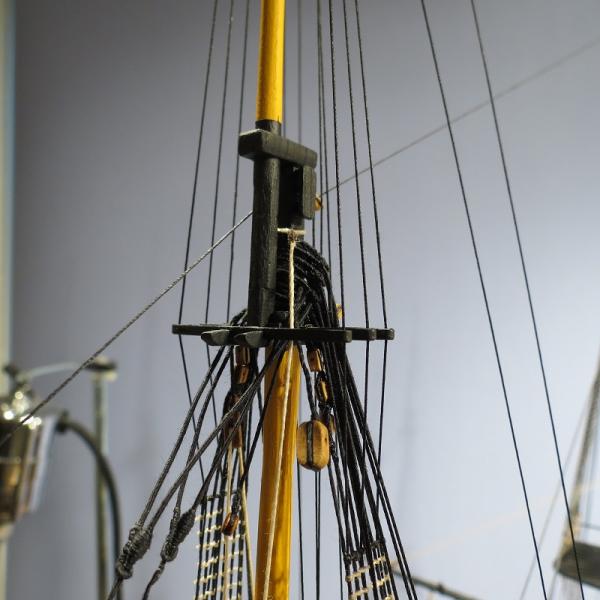
Tie extends to lift block (center of yard) and up to starboard block (on a pennant).
 And then extendstowards the deck to a tackle.
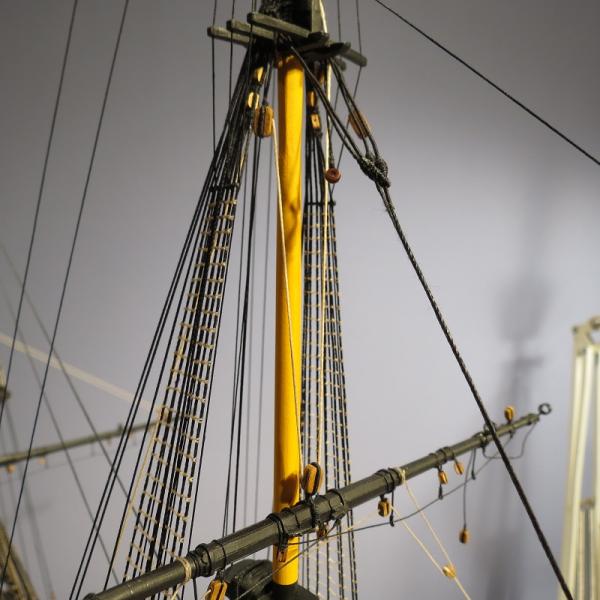
Tie extends to tackle secured at aft end of fore channel.
Termination of port tie tackle
Tackle line secures at kevel opposite the mast.
Starboard topmast yard tie is exact opposite, terminating on the port side.
Tackle for ties seen aft of fore top.
Topping lift originating at topmast cap.
Topping lift through block at end of yard.
Topping lift through lower sister block (in shrouds), then down to shroud cleats.

Yard ties, yard sheets, clue lines and topping lifts rigged. Braces deferred to allow better access for main topmast yard. Parral to be added later. Bunt lines and leach lines to be added later.
- mort stoll, freewheelinguy, Winlich and 1 other
-
4
-
Many thanks to each of you. Popeye, how you can keep track of many build sites and still work on three or four models is beyond me. I admire all your projects. And Mark, the "Licorne" is coming along beautifully. The closest I have come to scratch building is in the rigging where one starts with a dowel. Daniel, when I need a break, I go to your log and enjoy the marvelous innovations you've added at every stage. And thanks Brian, David and Mark (gieb8688). I appreciate your comments, but I wouldn't rely too heavily on the "old geezer." Joe, it was a stretch getting the build log back on line, and a lot of the thoughts from that time probably didn't make it. Eventually, we'll get to the completed models. Cheers, Gil
-
Floyd, It's fun to see the progress on "Lady Caroline." I hate to think that the work shop will become a play house, tool shed or whatever. Or can you take it with you? I'll get a better look at the clipper on Saturday. Cheers, Gil
-
Grant, I've toasted your ship with a wee dram of scotch, to go with your bottle of Chamaigne. Having watched the rebuilding of the stern along with all the other improvements, she has become a most beautiful ship. Congratulations on the rat lines. It's a lot more fun with new and different projects each day. cheers, Gil
-
John and Floyd. You had me worried. For a moment I thought I was reading my obituary. Judy deciided she may use it. WHEN????.........
There is probably a rather thin line between persistance and obsession, but I'll leave that for others to decide. Thank you both for your kind remarks. What better fun than sharing our ideas among friends.
Bob, Your Bluenose is a work of art. A friend of mine was project mgr. of the reconstruction of Bluenose II. How close to the original is Bluenose II ?
Derek and BE: Many thanks and nice to have company on building the Victory. I too wonder about the ratio of purchased kits versus completed models.
Cheers, Gil
-
What fun to see how you are treating the lower decks. Like most of us, I've been focused on organizing and reposting our own build logs, without taking the time to enjoy all the great logs out there. Your computer skills speak for themselves, especially to those of us just emerging from the the dark ages. I look forward to seeing "inside" the lower decks as she progresses and wish I had added interior lighting (If only I had thought of it). Again, thanks for your help in recovering my "old" build log. Cheers, Gil
-
Popeye, always a pleasure to hear from you. Steven and Colin, many thanks and good luck on your builds. And Kevin, thanks for answering Jerry's question. My bulkheads went together in 2008 and I can't remember how easily they fit. Thanks Dave. You'll notice I can't machine the tiny parts like you do so beautifully. If we could combine our skills, it would be great fun. Cheers, Gil
-
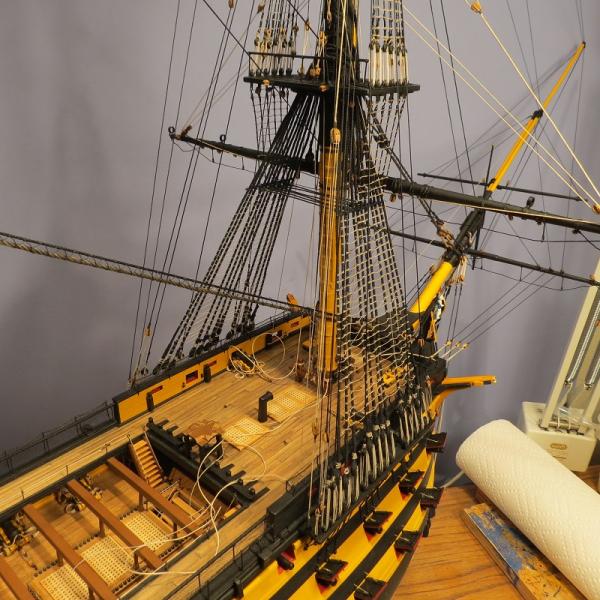
RUNNING RIGGING Continued. New posts
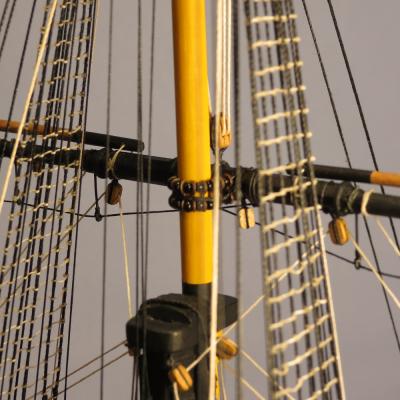
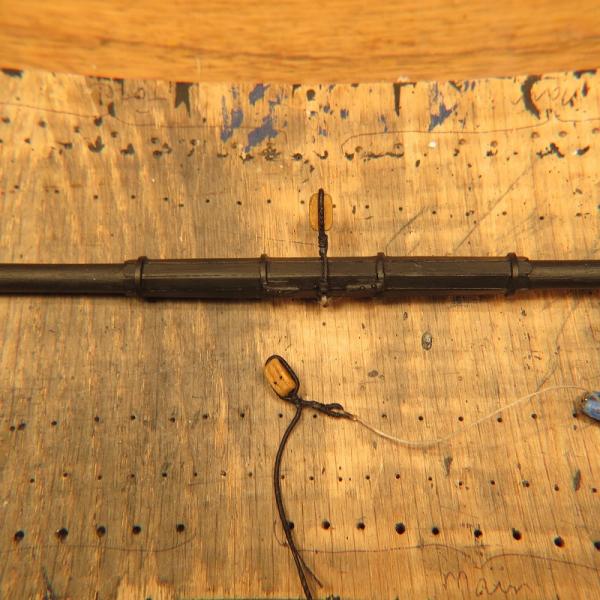
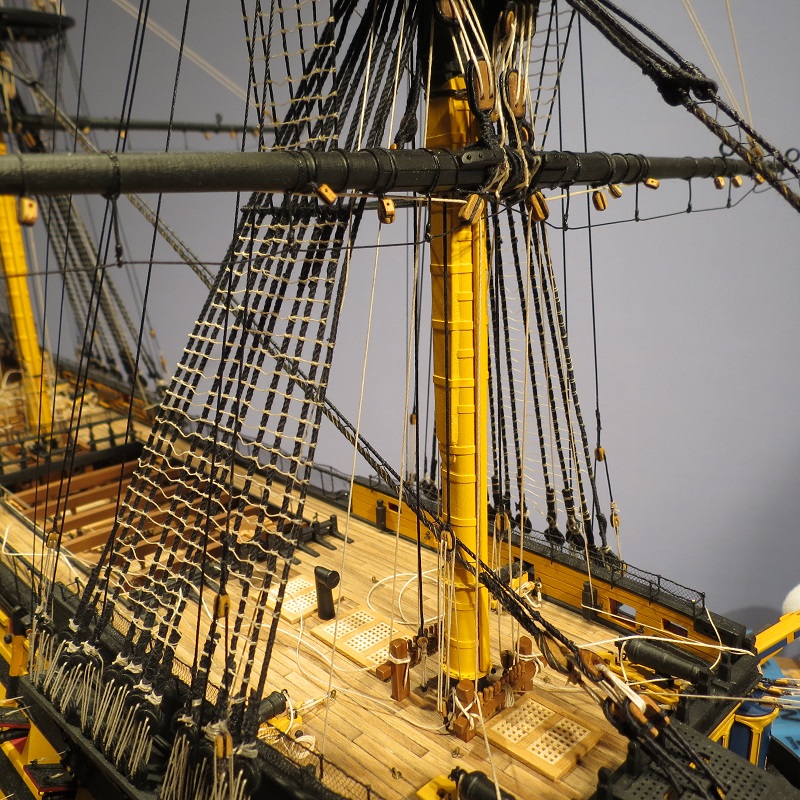
Foremast yard with yard sling. Yard pinned to mast for stability with brass wire drilled into mast and yard, + C/A glue

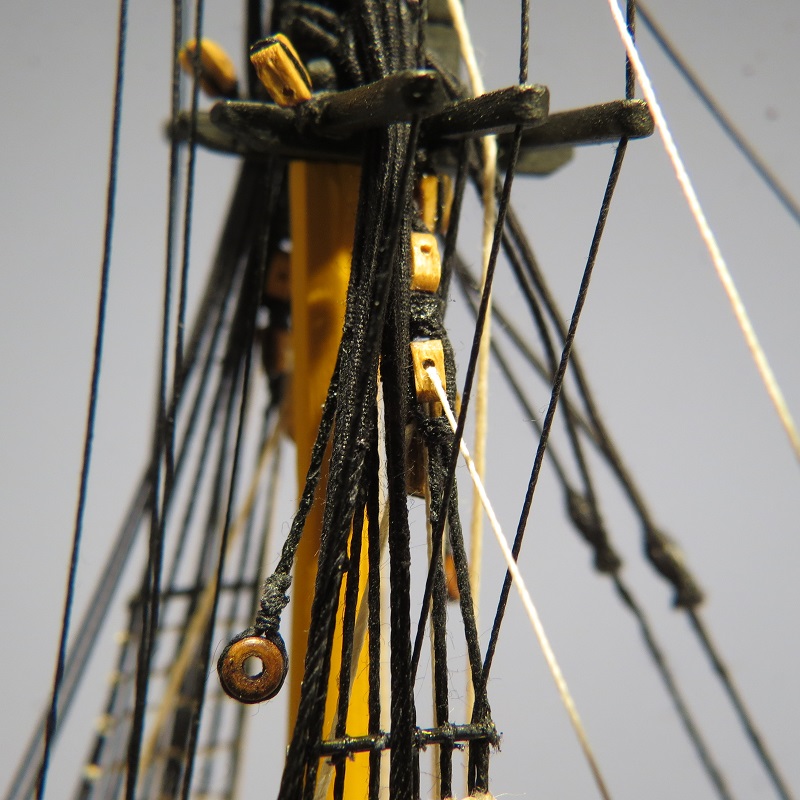
Yard sling plus jeer blocks. Timber hitch on yard leads to upper jeer block, and from blocks leads down to deck. Yard jeer blocks lashed to yard through eyes in tail of double strops.
Truss pendants. Each passes around back of mast, through bullseye lashed to yard on the opposite side and down to deck.
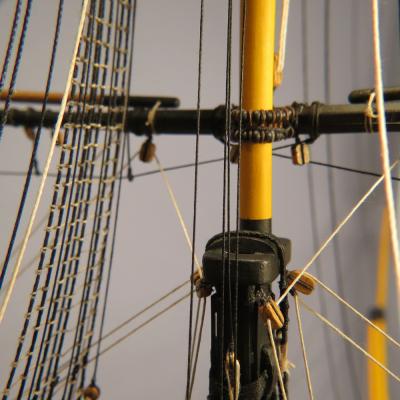
Rigging truss pendants to block and tackle
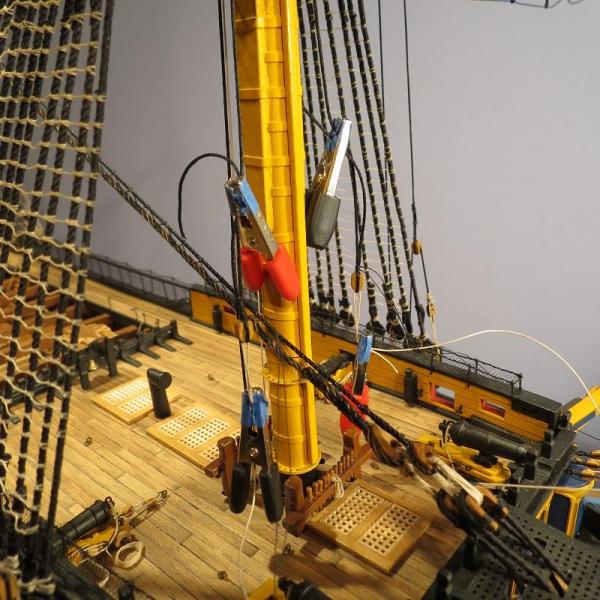
Main mast truss pendants terminate at block and tackle to deck eyebolt and finish at cleat at base of mast. Jeer blocks line terminates through sheeve in the main top bowline bitts just aft of the main mast. Yard topping lift terminate through sheeves in the kevel at bulworks (below forward shroud).

Topping lift.
Foremast yard topping lift

Foremast yard


Jeer blocks line terminates at fore top bowline bitts (aft of fore mast), truss pendants to tackle forward of mast and tooping lift to kevels at bulworks

- dafi, zeptraderUK, Shipyard sid and 1 other
-
4
-
Thanks Joe. I hope you're back to modeling before long.
Harvey, I'm not that clever. I served the stay to just beyond the location of the mouse and then wormed it from there on. Perhaps I should have done what you describe. Gil


HMS Victory by gil middleton - FINISHED - Caldercraft - 1:72
in - Kit build logs for subjects built from 1751 - 1800
Posted
Lawrence, You've certainly not caused any trouble. In fact you helped me discover a part of my build log that I had lost. My thanks to you.
Bob, Thanks. If I should start on the Bluenose, you can be my guide.
Peter and Mark, it's an illusion, but isn't that what it is all about? I do appreciate your comments.
Keith, You're very kind in your assessment. I think we are all picking up ideas from one another and I certainly have my share of mistakes, which I'll point out in the next post. It is fun to see the model morph into something resembling a real ship, or were we simply born 200 years too late.
I will open a general discussion, spinning a few tales of our three years at sea, however, my wife will undergo knee reconstruction this week so I might be sidetracked a bit as a nurse, cook, housekeeper and general "gofer." Cheers, Gil