


gil middleton
-
Posts
308 -
Joined
-
Last visited
Content Type
Profiles
Forums
Gallery
Events
Posts posted by gil middleton
-
-
Thanks you all for visiting and your more than kind comments.
Kevin, it would seem that the Victory is almost done, however, with yard tackles, boats, lanterns, anchors, name plates, stun's'l booms, etc. to go, I would expect another year. Shortly, the dust cover will go on as we turn our attention to preparing our real boat for a five month cruise to Alaska. It's almost like a day job, after the boat has sat out in the weather over the winter. Painting, varnishing, mechanical, safety gear and provisioning, etc., etc. The Victory will come back to life again in October.
Ronald, If I remember, Longridge stated that the main course yard measured 102' in length and 2' diameter at the center. No wonder triple jeer blocks were used to raise the yard.
Sjors, I'm probably not as organized as you. I simply try to work out from midships in order not to trap my hands in the rigging. By completing each yard, with the exception of braces and yard tackles, I tend to keep track of what is done. Of course we could run a contest to see who can find the most mistakes and the most missing lines. I suspect I'd win the contest.
Cheers, Gil
-
Michael, I've been to your build log early on but realized it's been a long time since then. Great fun seeing your innovations with deadeyes and snatch blocks. It is a real challenge building a model of a ship recovered with most of the superstructure lost to the quarterdeck. On the "Victory" I have hundreds of photographs of the real ship for reference. Having never been to Sweden, I'll follow your 'Wasa" with even greater interest. Your model is superb and tells the story so much better than the original. Cheers, Gil
-
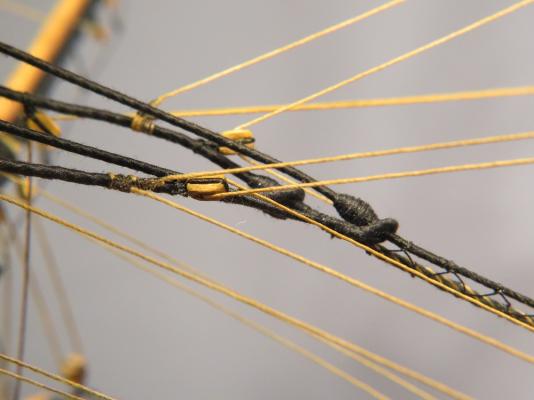
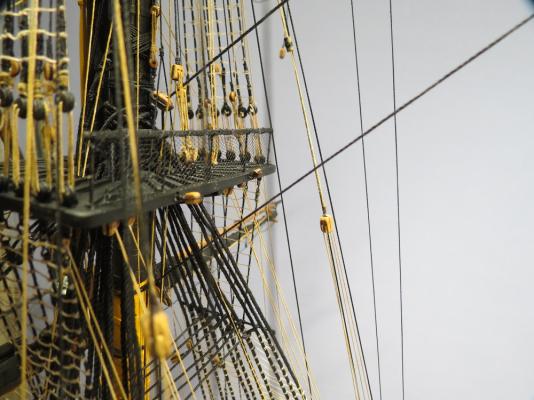
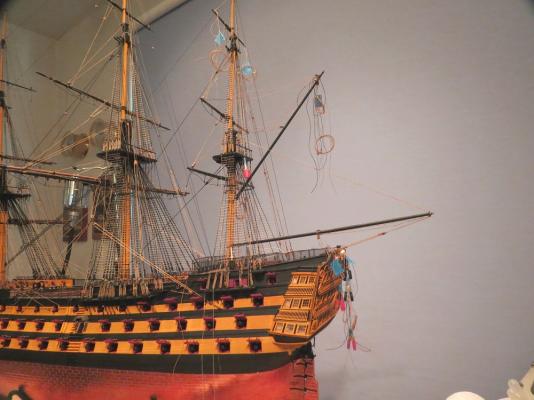
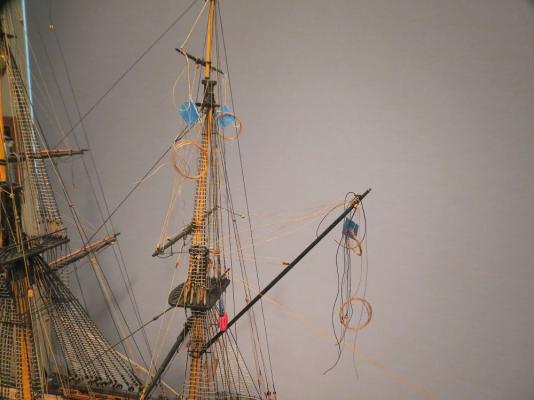
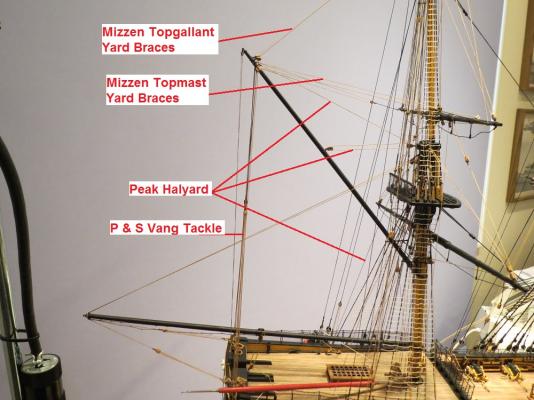
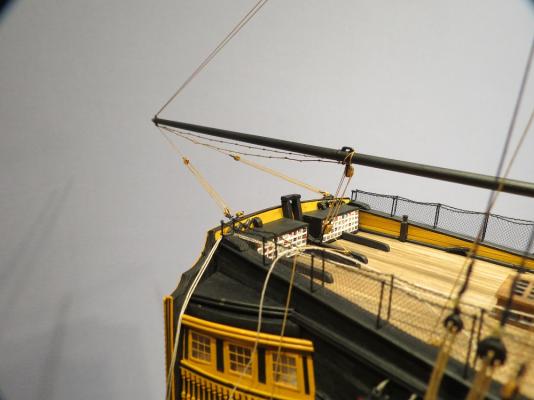
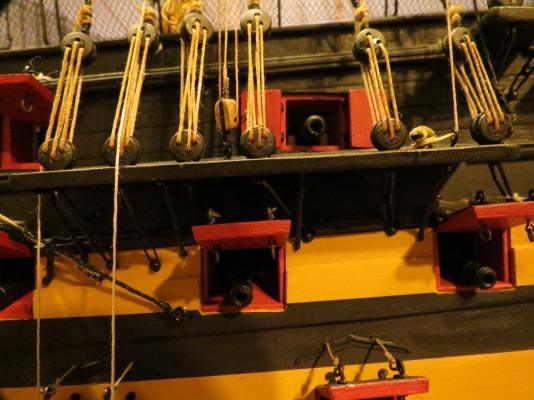
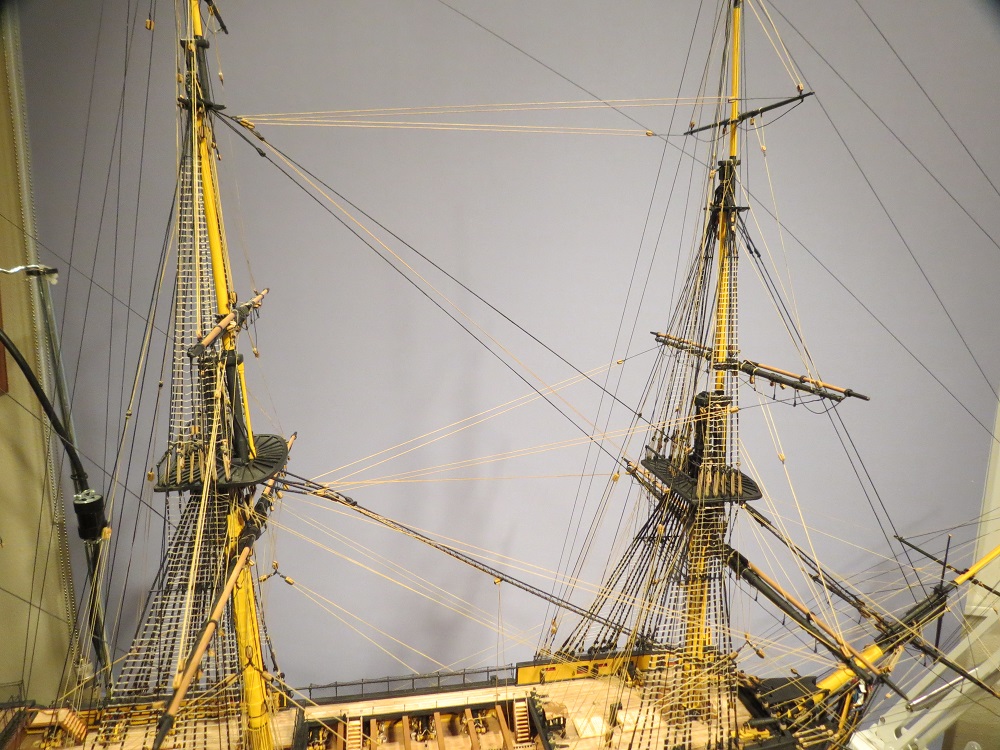
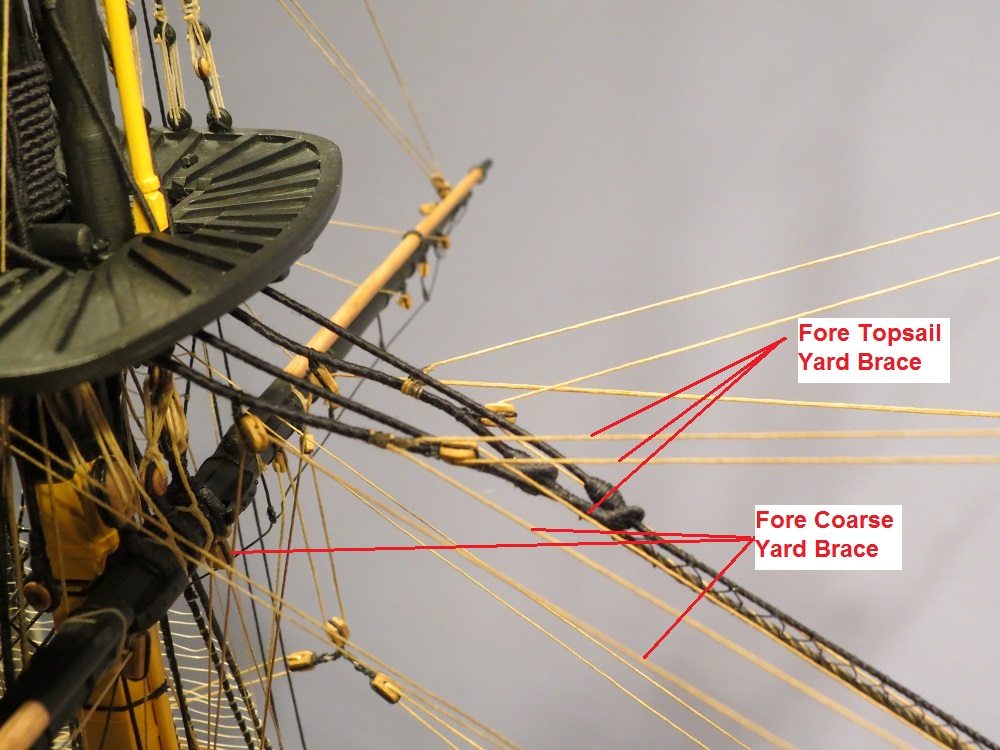
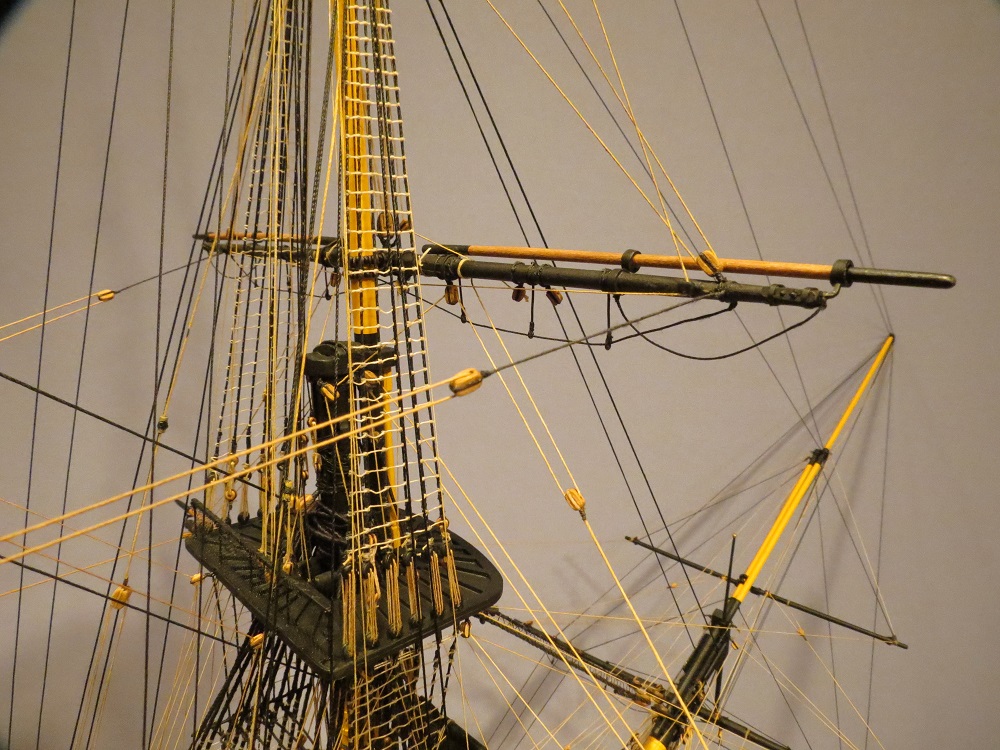
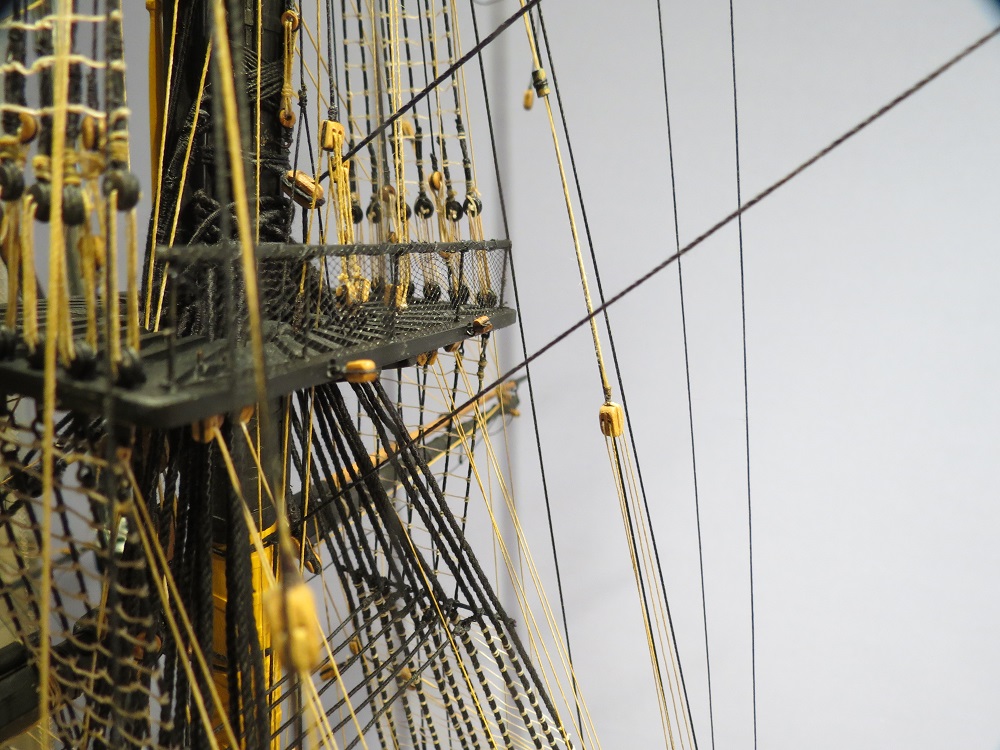
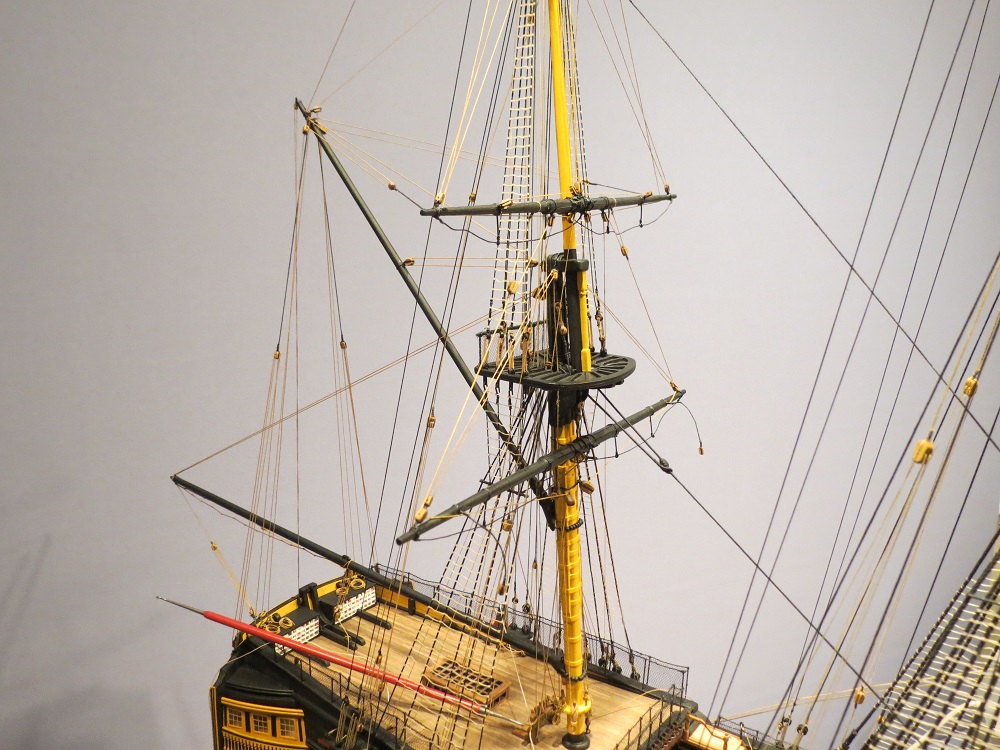
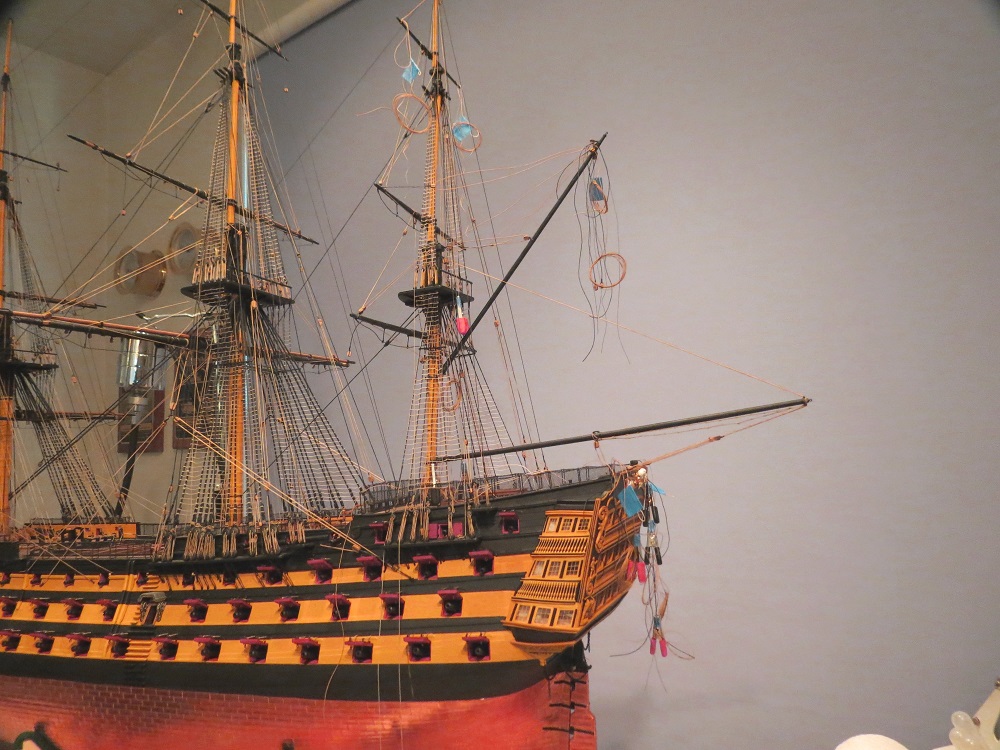
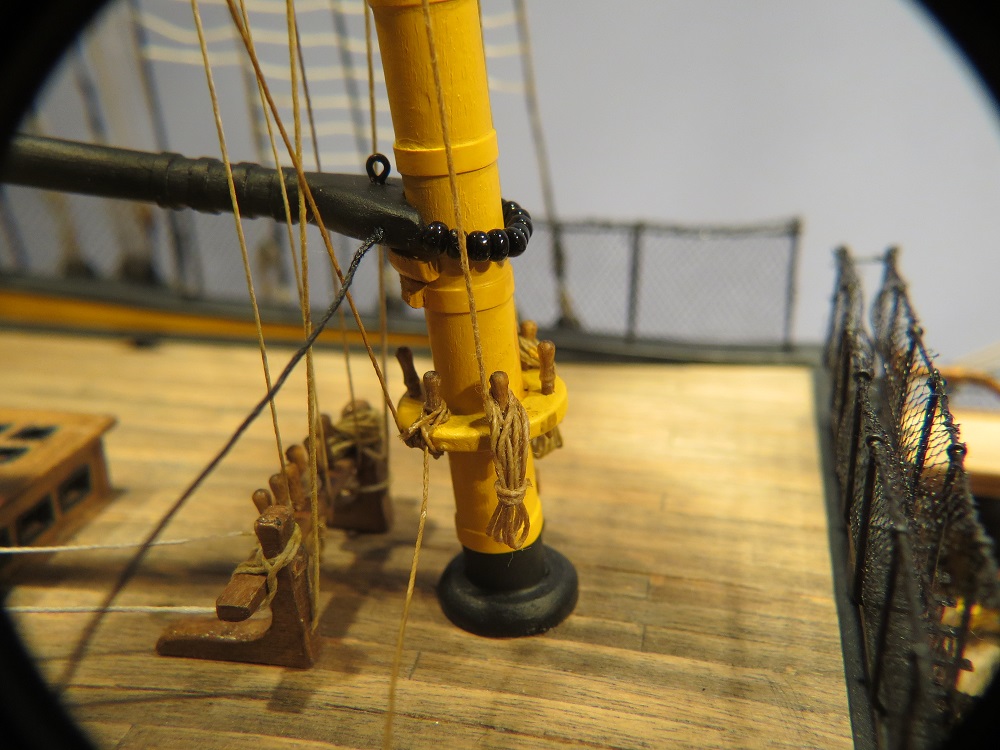
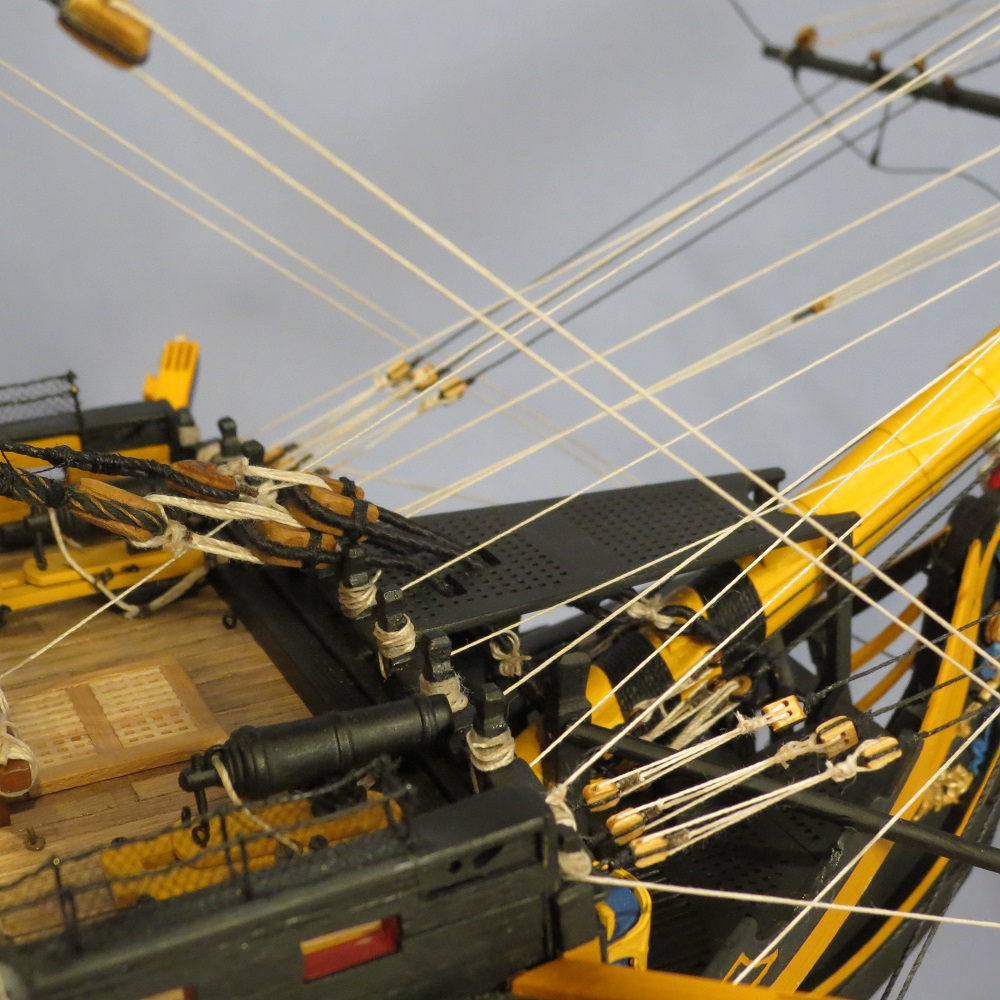
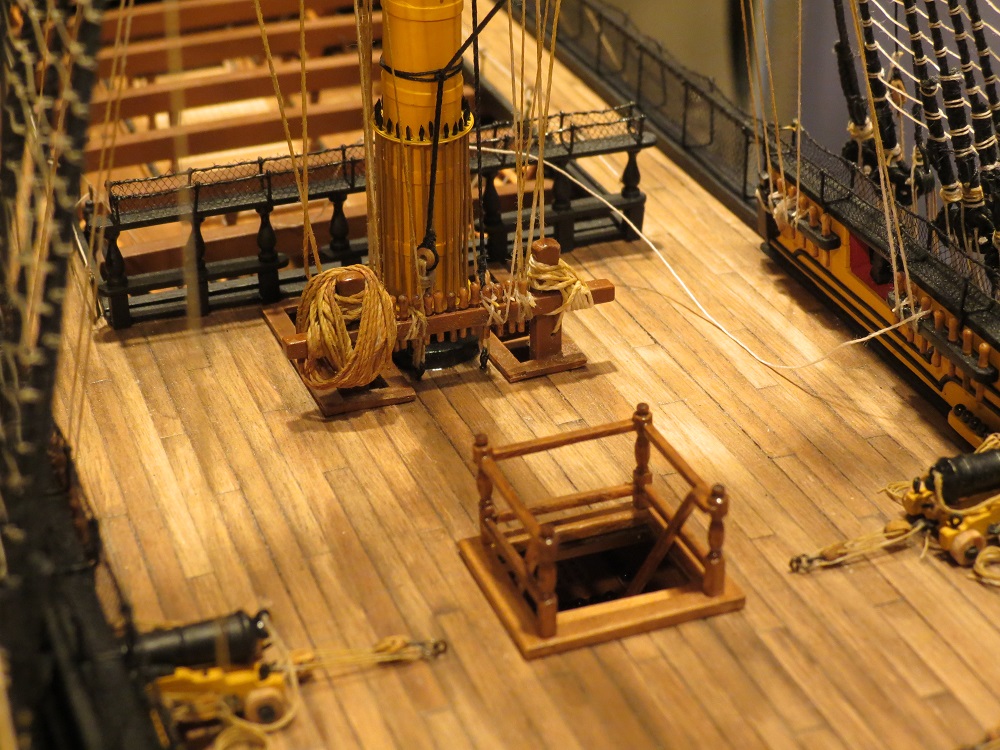
Continuing with the Foremast Yard Braces.
The Fore topgallant yard brace originates at the main topmast stay collar, runs through the block on a pendant from the yard, returns to the block on the topmast stay collar, then through a block at the aft of the foretop and belays to a cleat at the belfry.
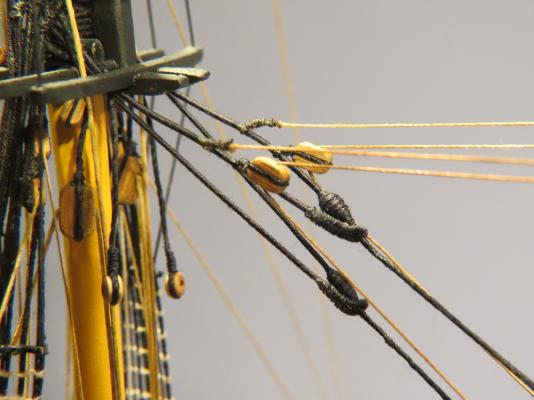
The brace runs from the block on the collar to a block on the aft of the foretop and then to the belfry.
Next on to the mainmast yard braces, with great care to avoid dismasting the ship.
Cheers, Gil
-
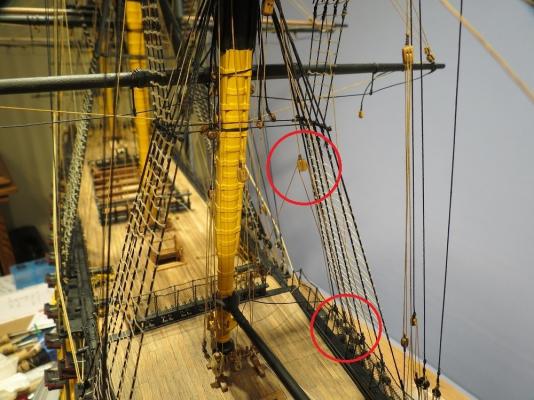
FOREMAST YARD BRACES; in separate posts.
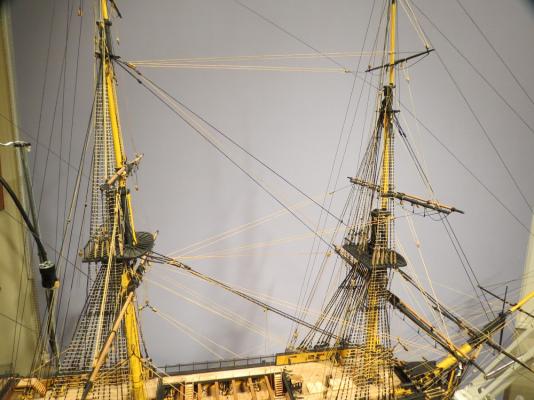
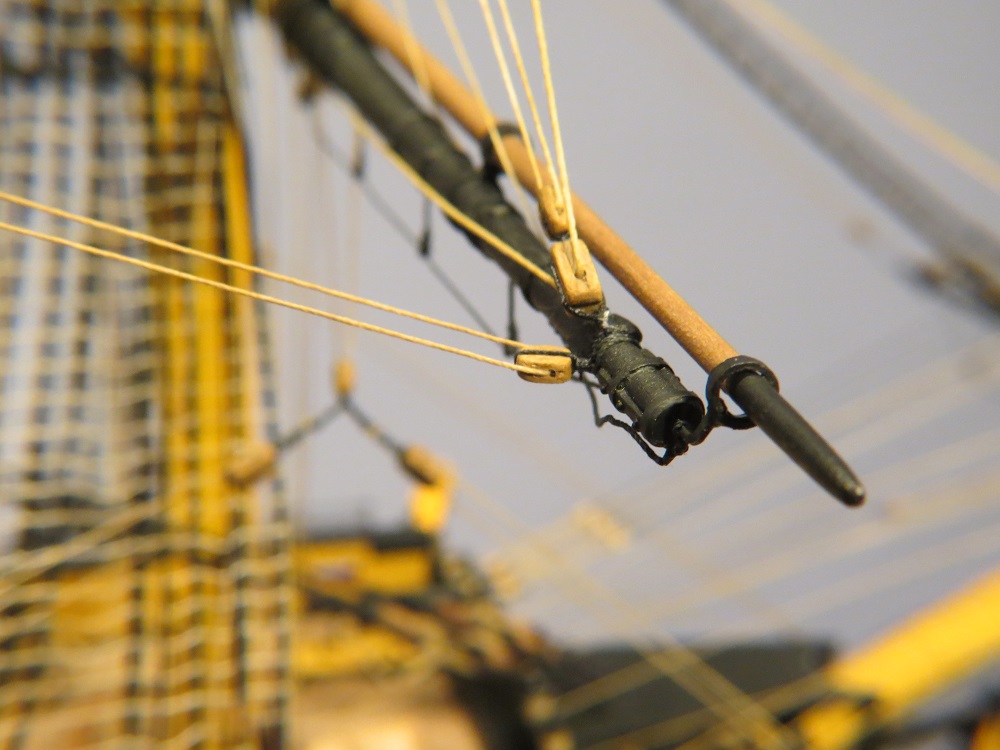
Fore coarse yard brace. Begins from the main stay collar, to the yard pulley, returns to a block on the main stay collar and then down to the fore brace bitts.

Fore coarse yard brace block
Fore topsail yard brace, runs from the main stay collar, through a block from a pendant off the yard, returns to the block on the mainstay collar, then down the main stay and through a block to a block on the first skid beam, belaying to pins on the second skid beam. (As mentioned earlier, different sources show the presence or absence of pendants for the brace blocks).
-
Hi Grant, I'm so glad that you've taken on the yard tackles before I did. Now I can sit back and evaluate your results. As to breaking masts, you're becoming an expert (at repair that is). A couple of near misses though. When you get to the braces, one gets both hands into the rigging and the problem is getting them out without taking everything else with them. Wonderful progress and a beautiful ship. Gil
-
Many thanks Jerry and Joe.
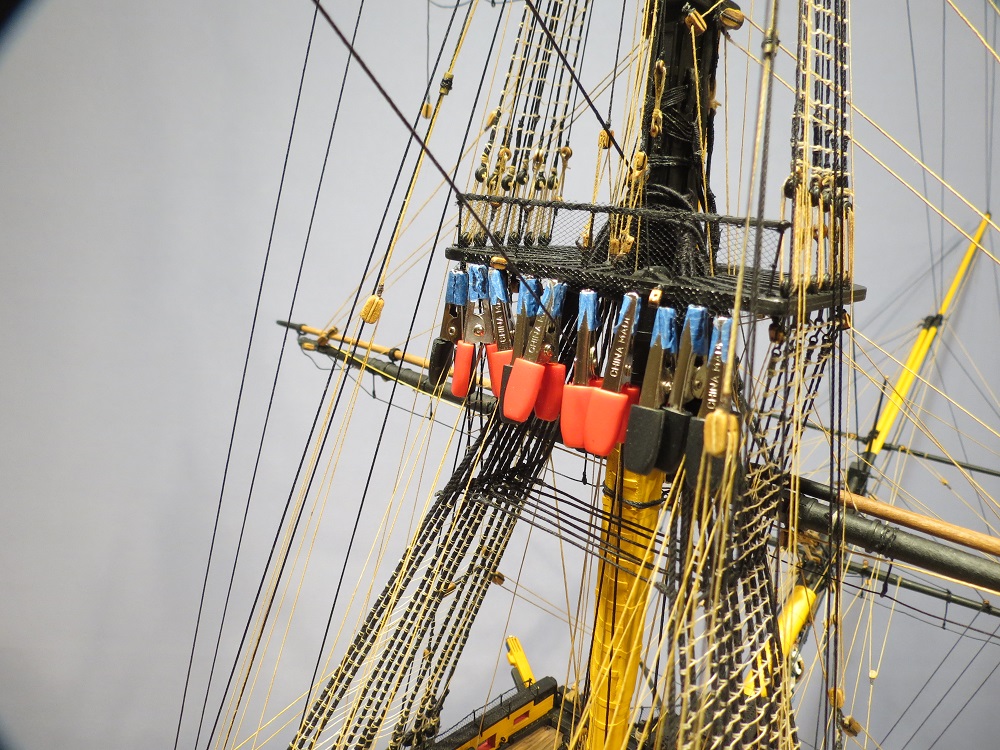
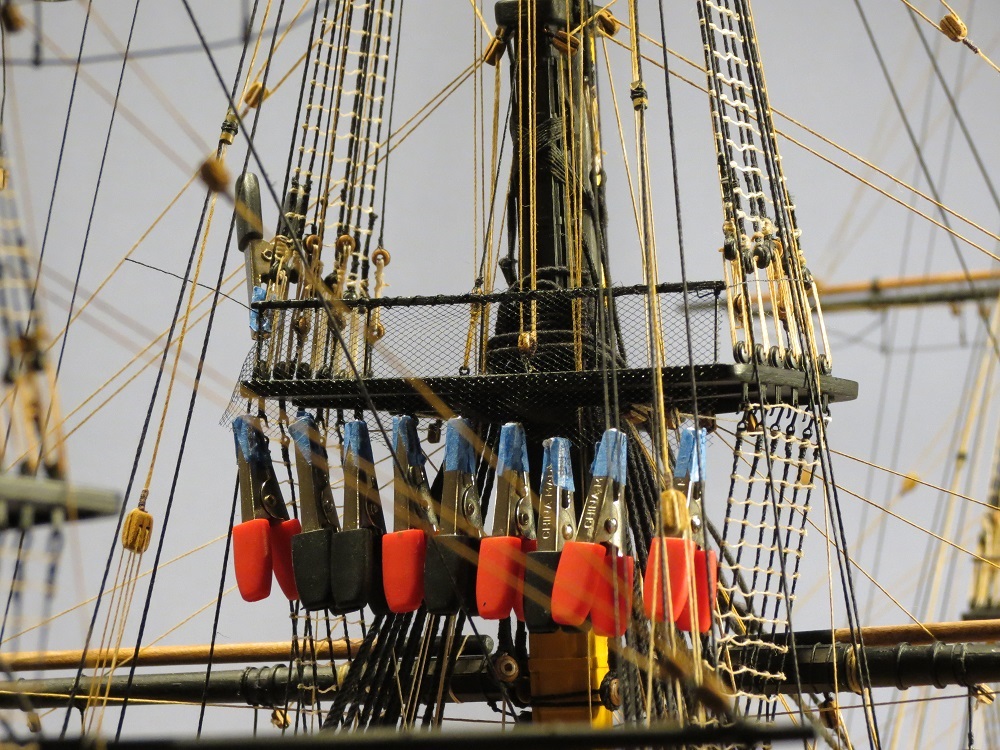
Ronald, I had forgotten where I got the small clips, but found them in the recent Model Expo Catalog. Item # MT1014. 12 for $8.00. I seem to use them for everything.
Bala, We've all learned so much from our peers on this site. It's nice to be able to contribute.
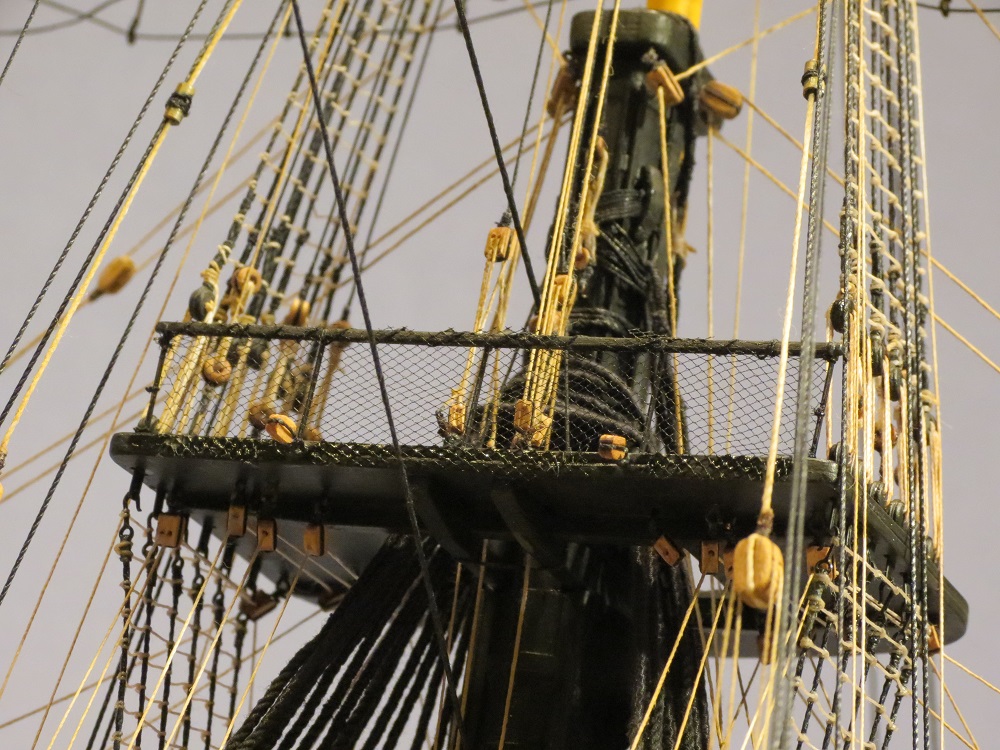
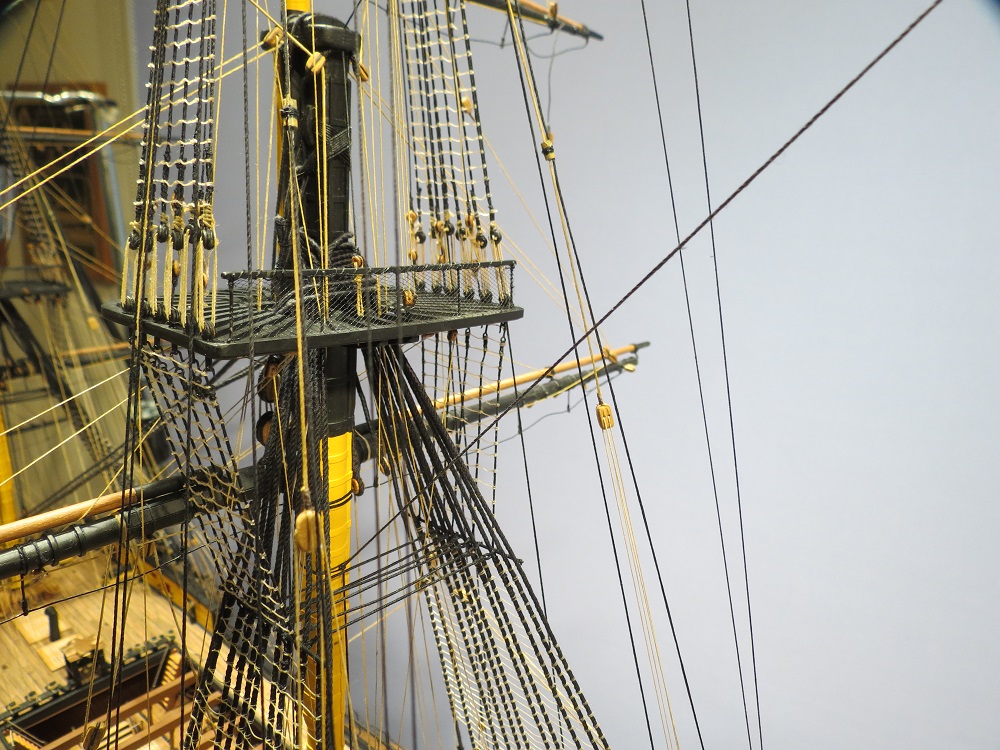
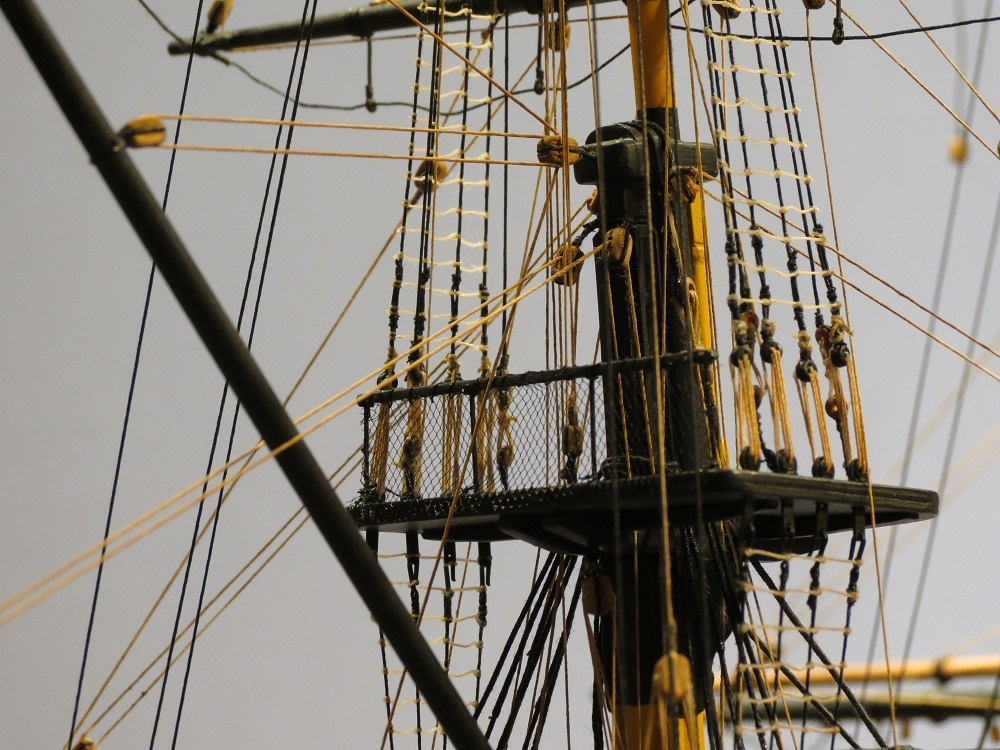
Scott, Good question. I can't give a learned answer, but did see netting in the tops on my photos of the Victory and in McGowan's "HMS Victory, Her Construction, Career and Restoration," drawings by John McKay, p. 170. It made sense, to keep the Royal Marines from falling from the fighting tops. Besides, they look good.
Cheers, Gil
-
Forgive me Ronald. I was simply pulling my own leg, with a rather dumb play on humor. Gil
-
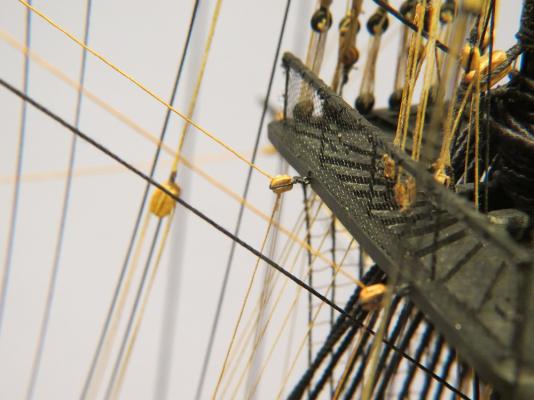
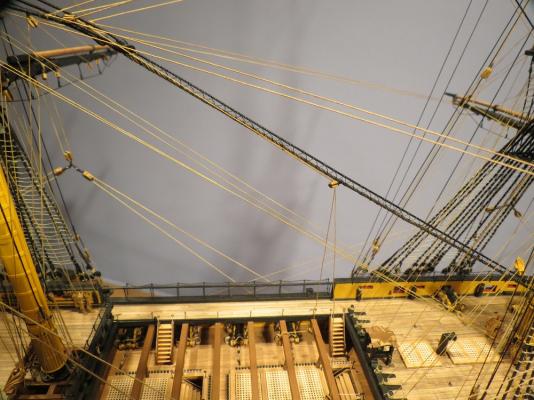
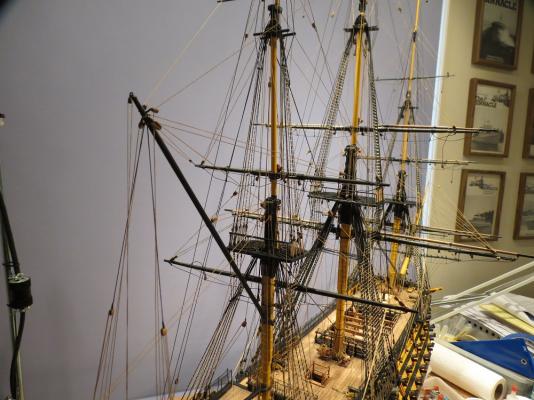
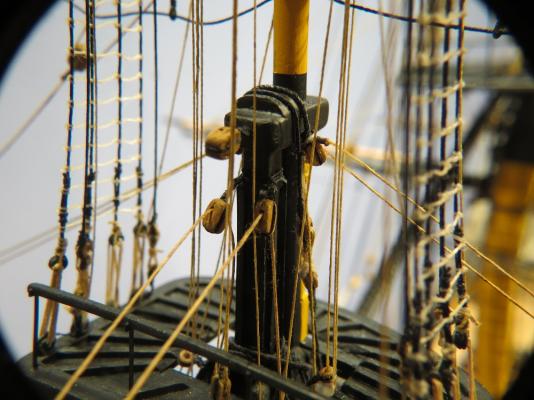
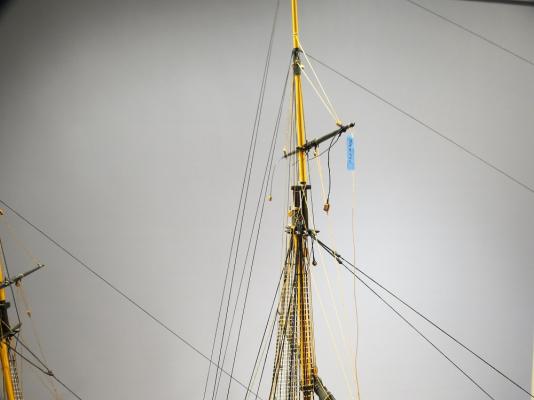
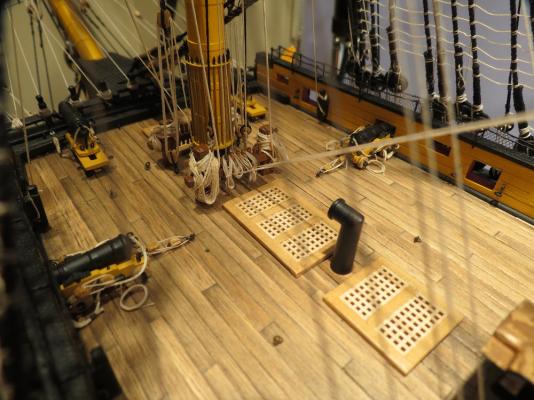
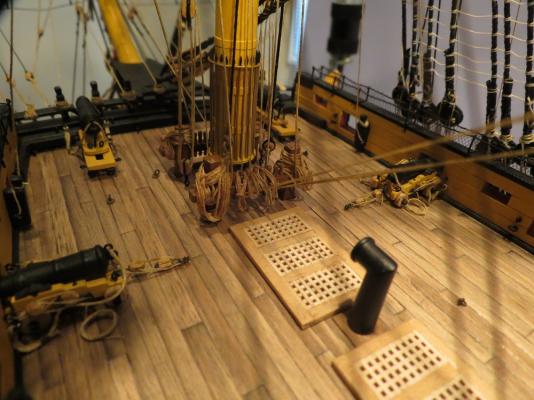
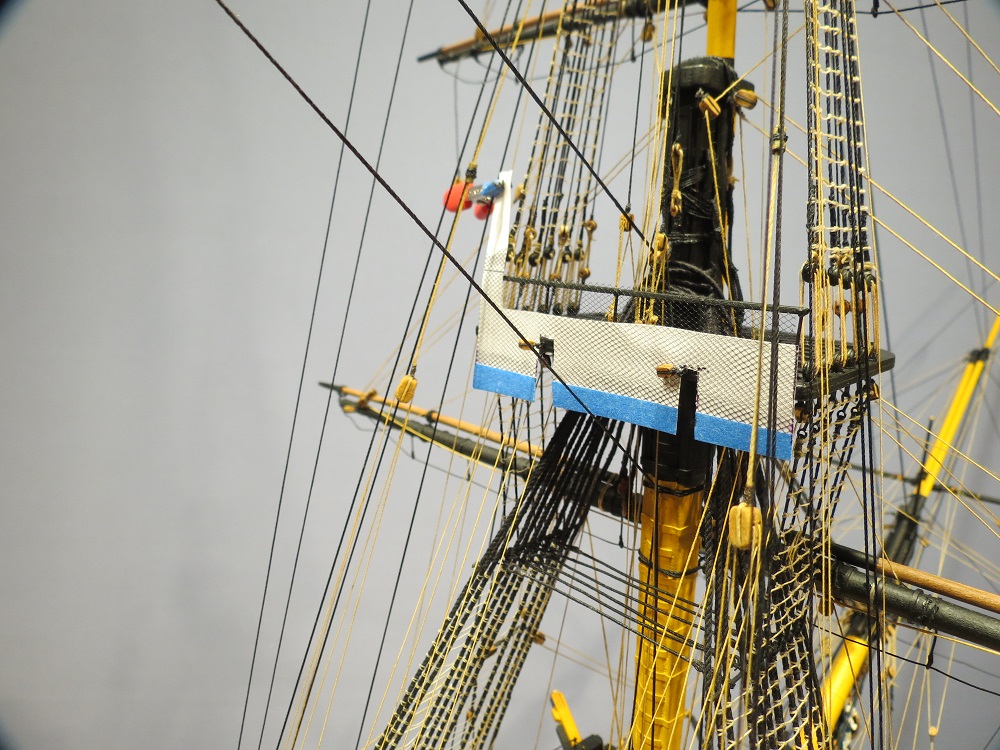
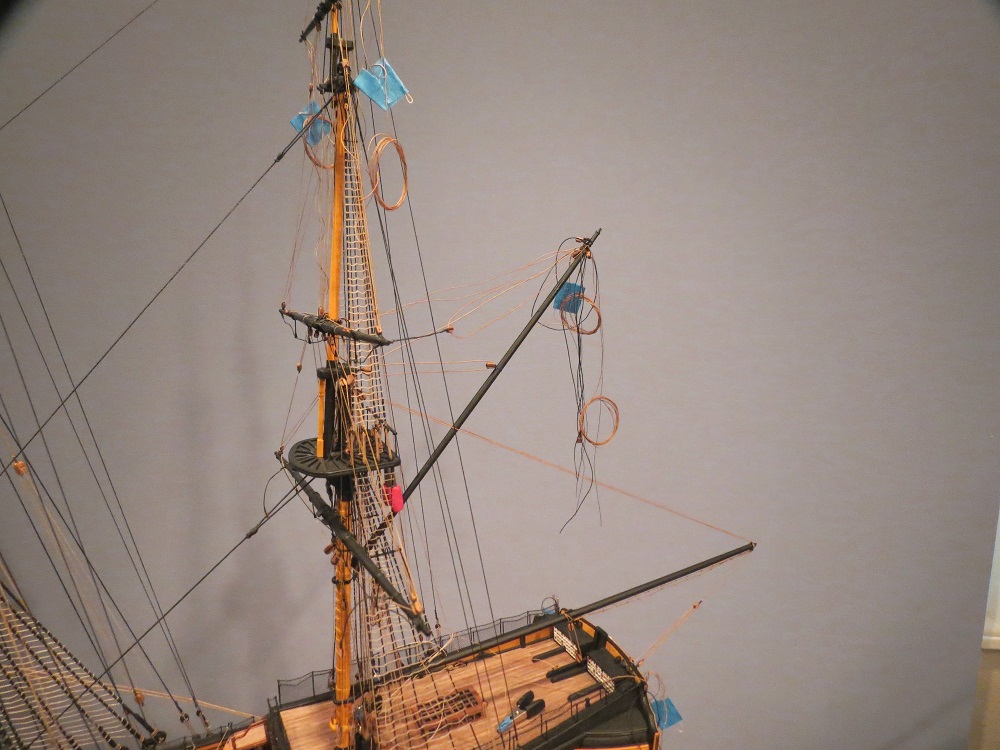
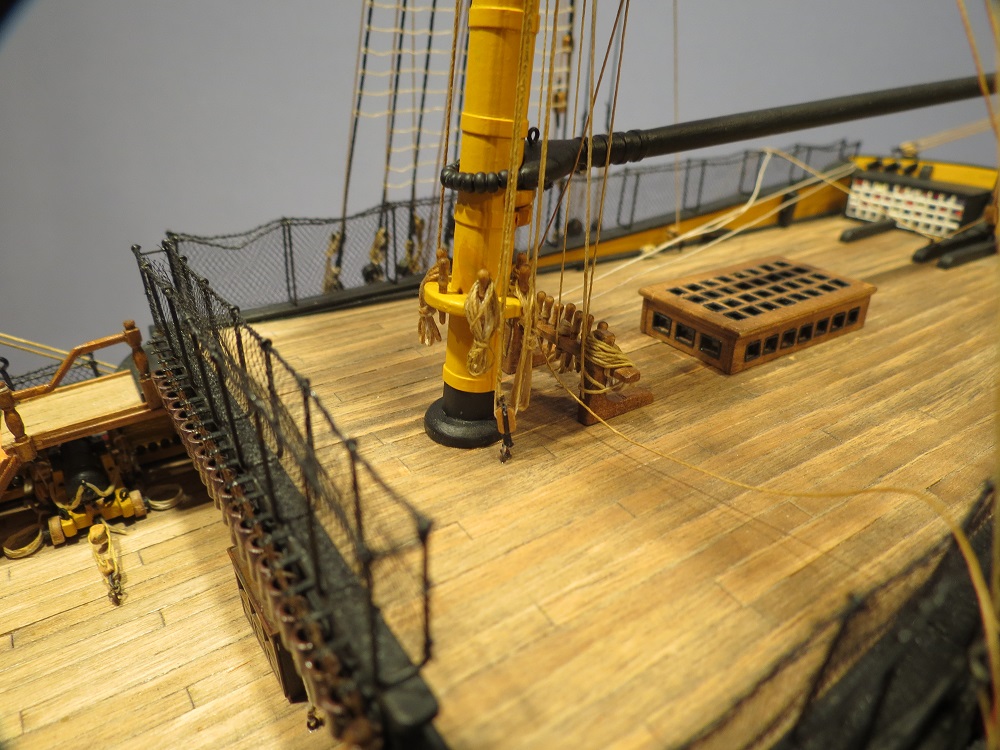
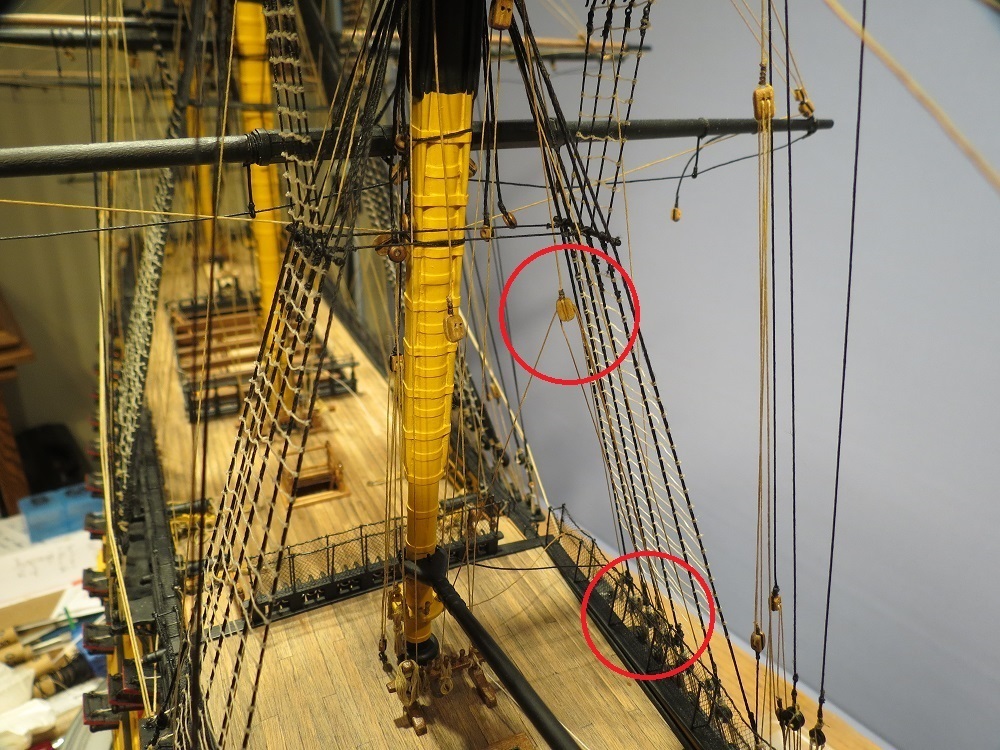
Adding netting to the mast tops. I had delayed this step until the rigging was near completion, knowing that I'd snag it or find some way to destroy it. The same black tulle used for the hammock netting was used for the tops.
Tulle netting measured and glued (C/A) outside the area to be fitted on the mast. Two cuts marked on the bottom to fit over blocks.
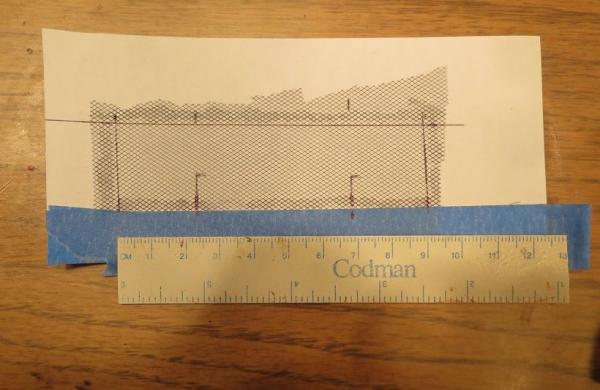
Lacing the netting to the hand rail on the foretop (Similar to the hand rail on the quarterdeck).
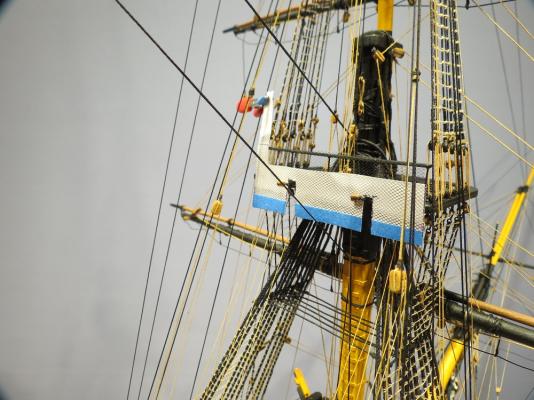
Netting laced on hand rail, lashed to outer stantions and glued (Fast C/A) to the aft end of the foretop.

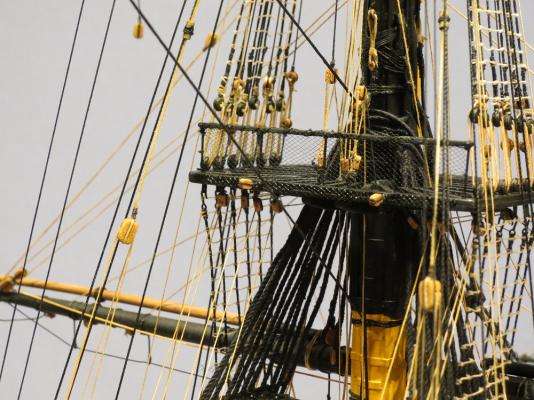
Netting on the maintop

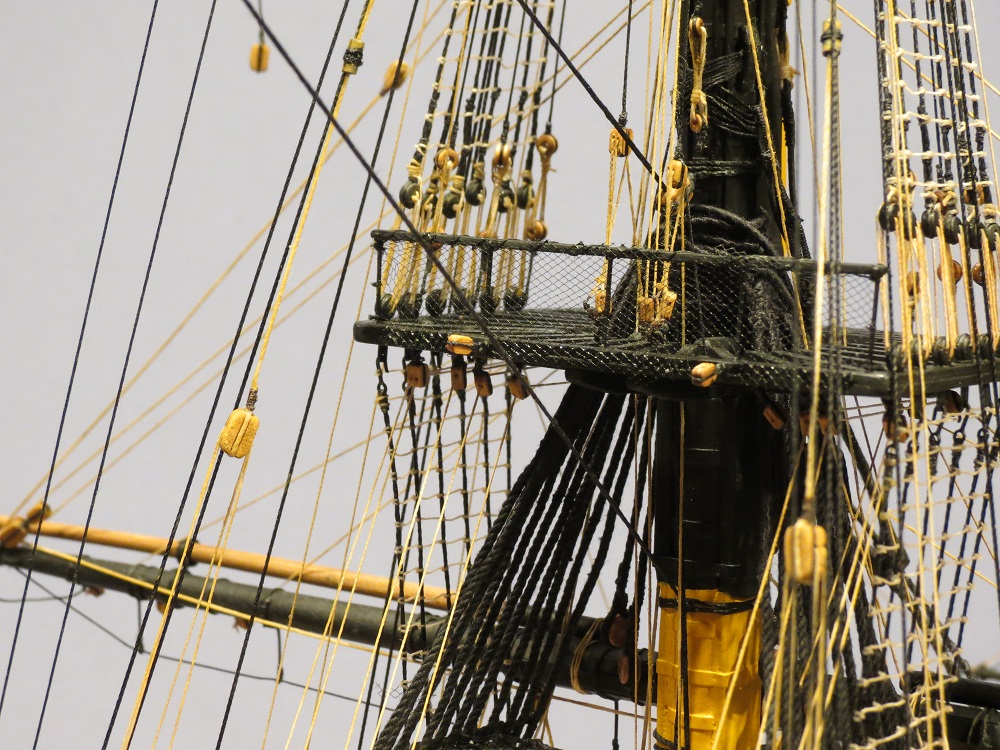
Note the netting is visible on the aft end of the foretop, with a similar appearance on the maintop.
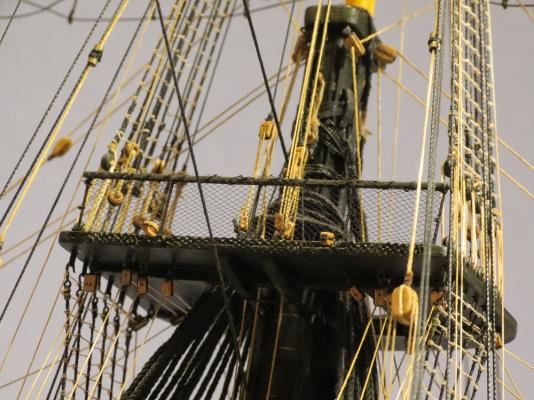
A thin veneer, 3 mm. wide was glued over the exposed netting on the foretop and main top
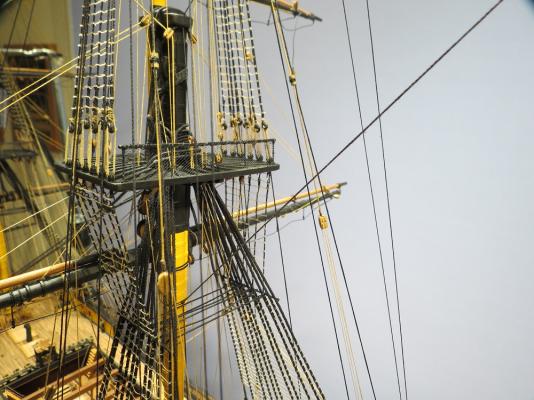
The mizzen top before and after adding the veneer.
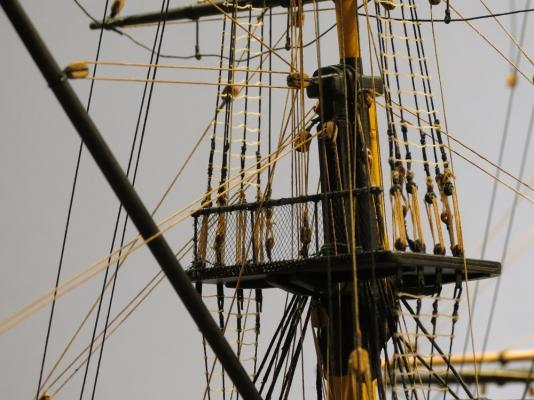
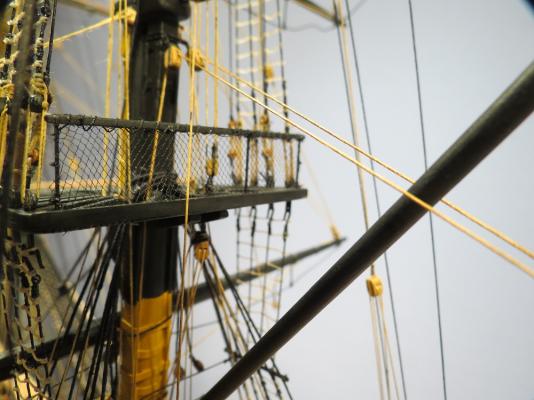
Next step: Adding the yard braces. Cheers, Gil
- canoe21, Remcohe, Blue Ensign and 12 others
-
 15
15
-
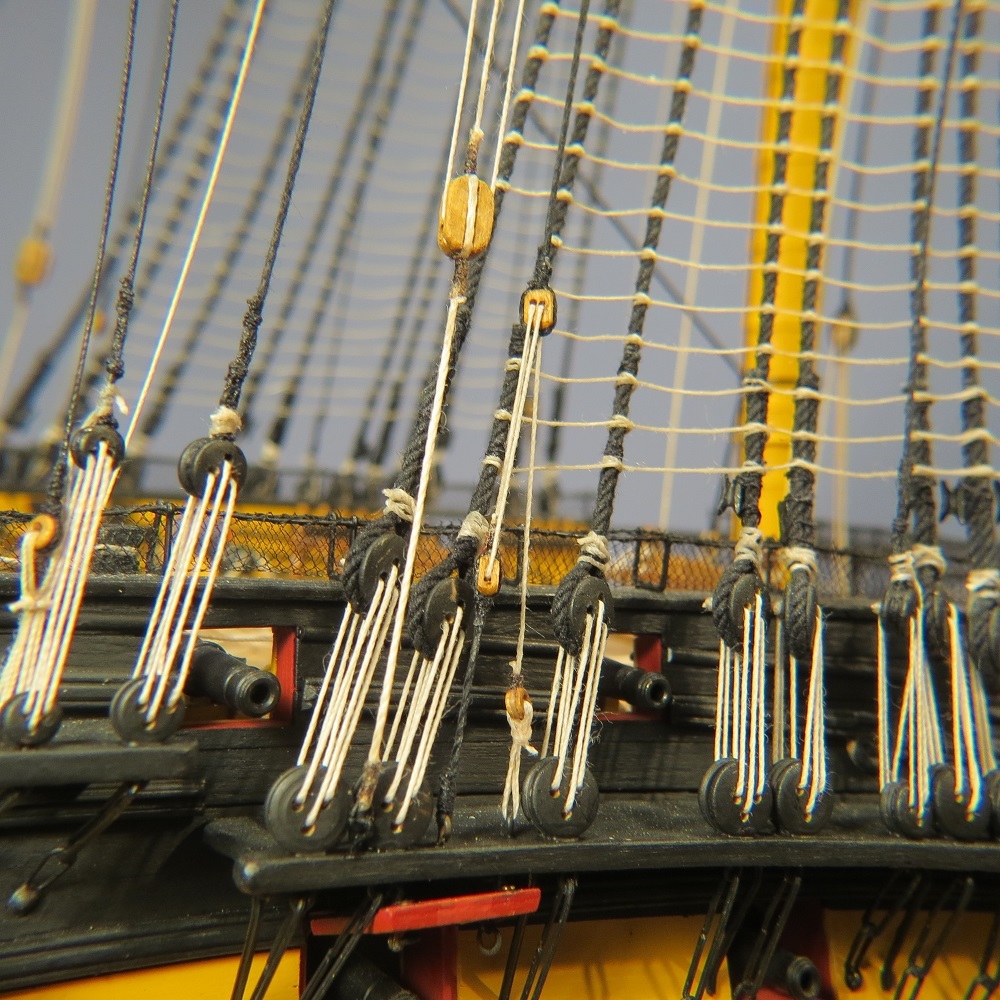
Hi Kevin, It's interesting how our levels of observation run parallel. I hadn't been too concerned about the gun port lanyards but the rope coils really got my attention. After your comments, the lanyards seemed much more prominent., and like you I toned them down to where they fit with the rest of the rigging. Your observations were probably more sensitive than mine. Thanks for the comments. Your Victory looks terrific by the way. Cheers, Gil
-
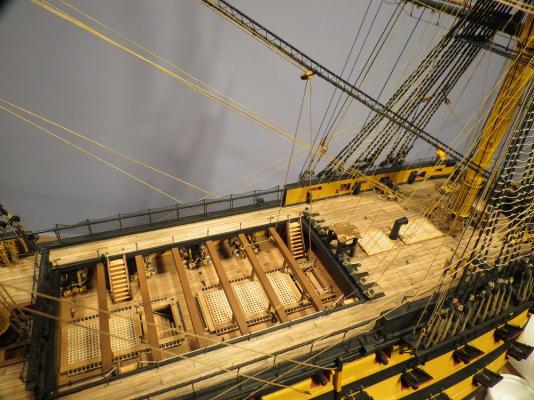
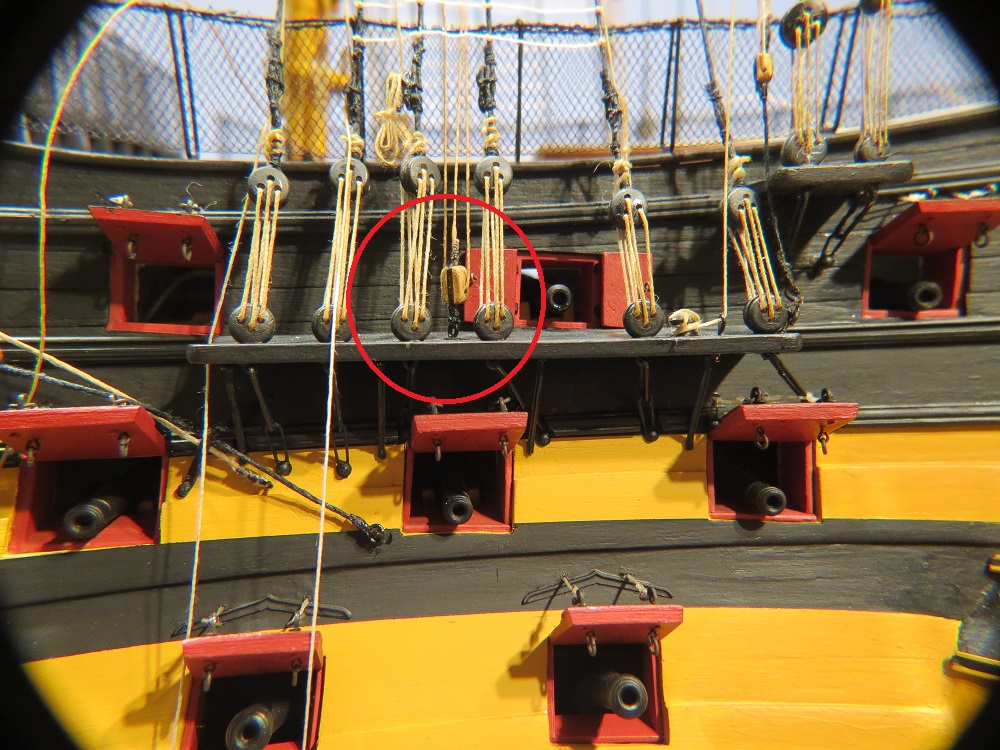
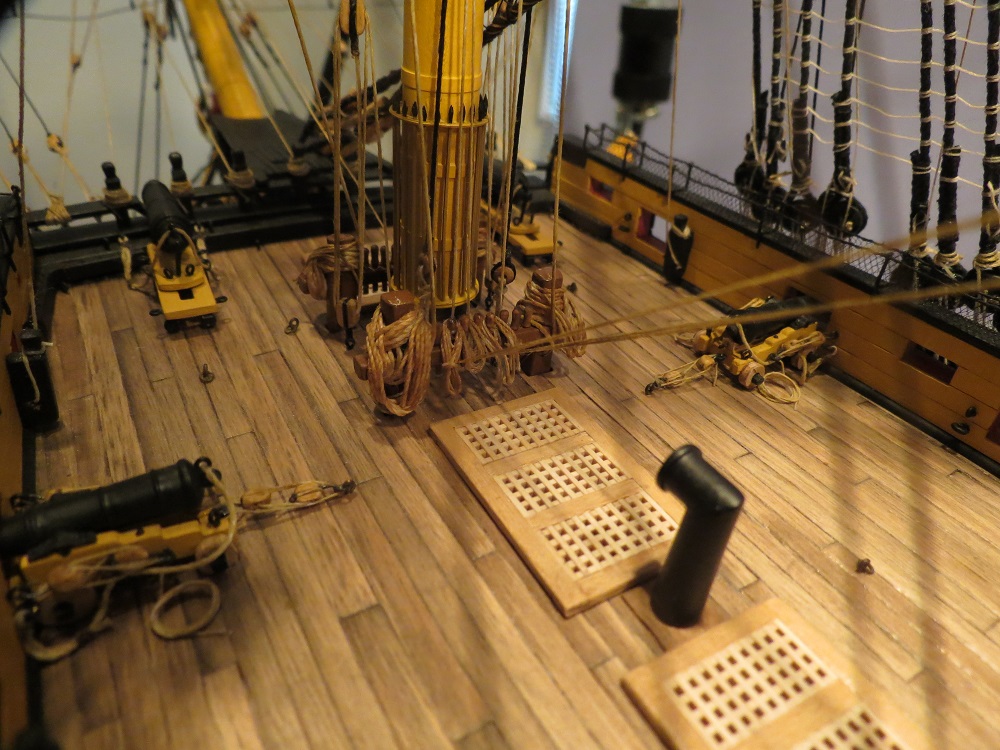
Thanks guys for your kind comments. And Ronald, Kevin explained it well. Too easy you say? Well, there are thirty fully rigged cannons and carriages on the upper gun deck of which only six will ever be seen by human eyes (unless examined by a fiberglass scope, which is highly unlikely in our home). But I'll know they are there. Oh, the fun of modeling.
-
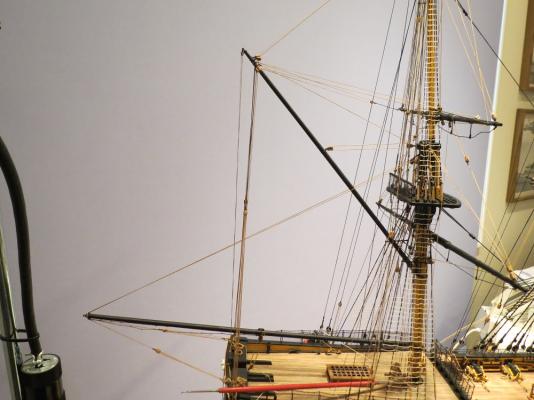
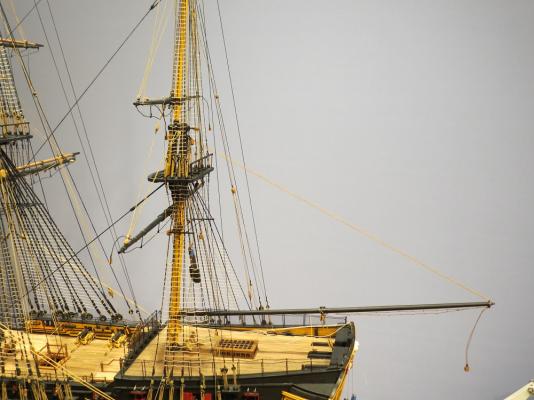
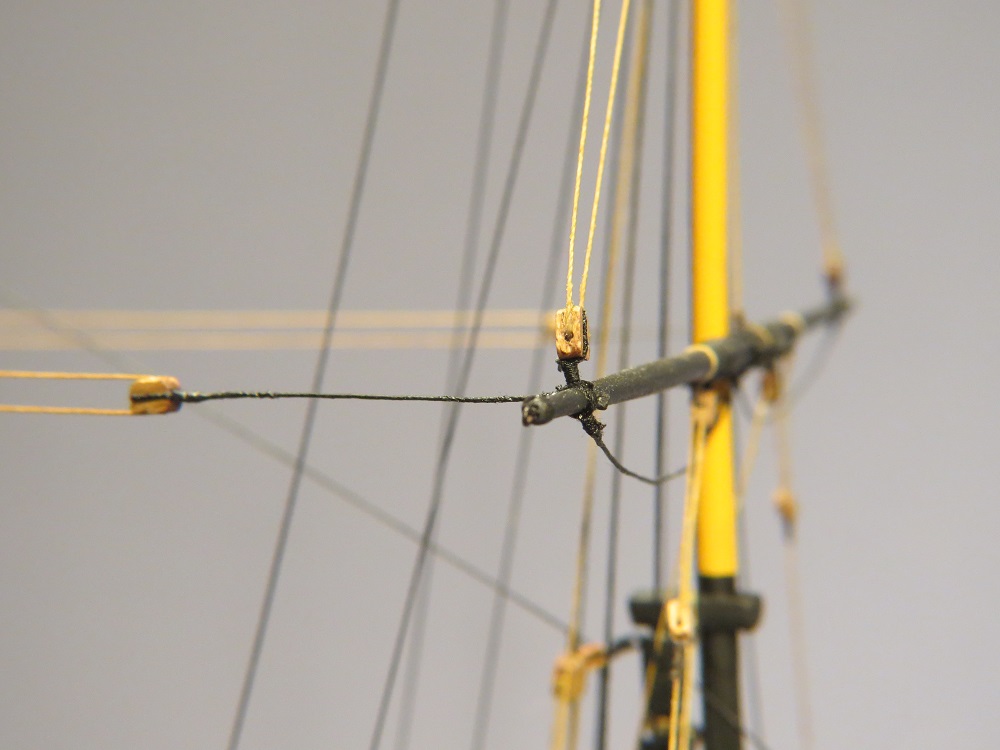
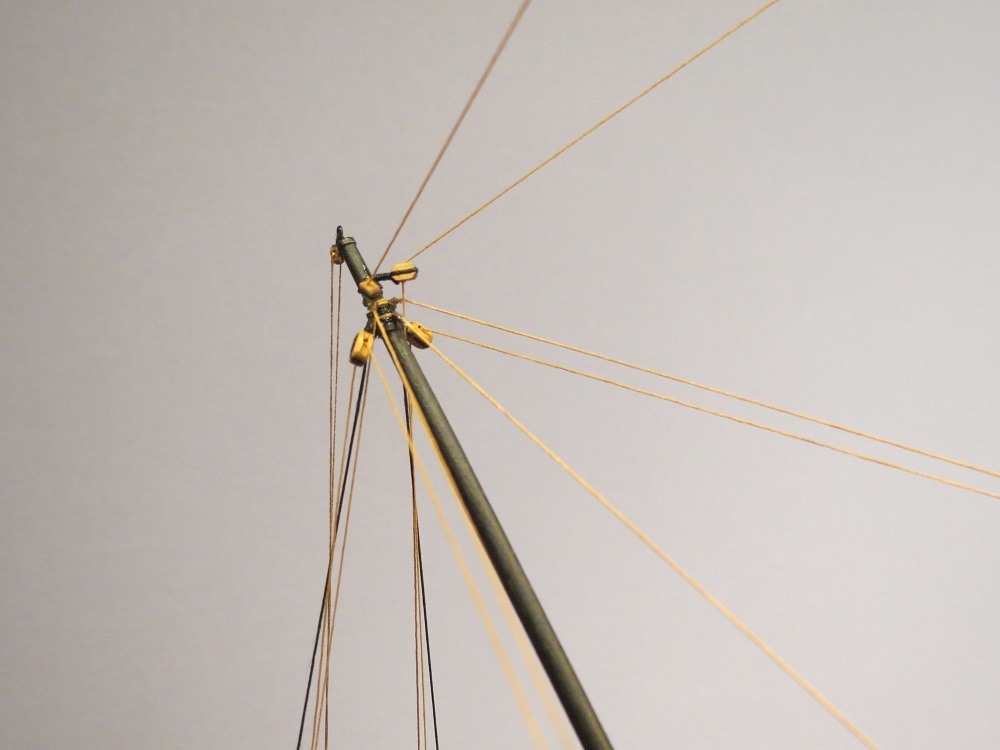
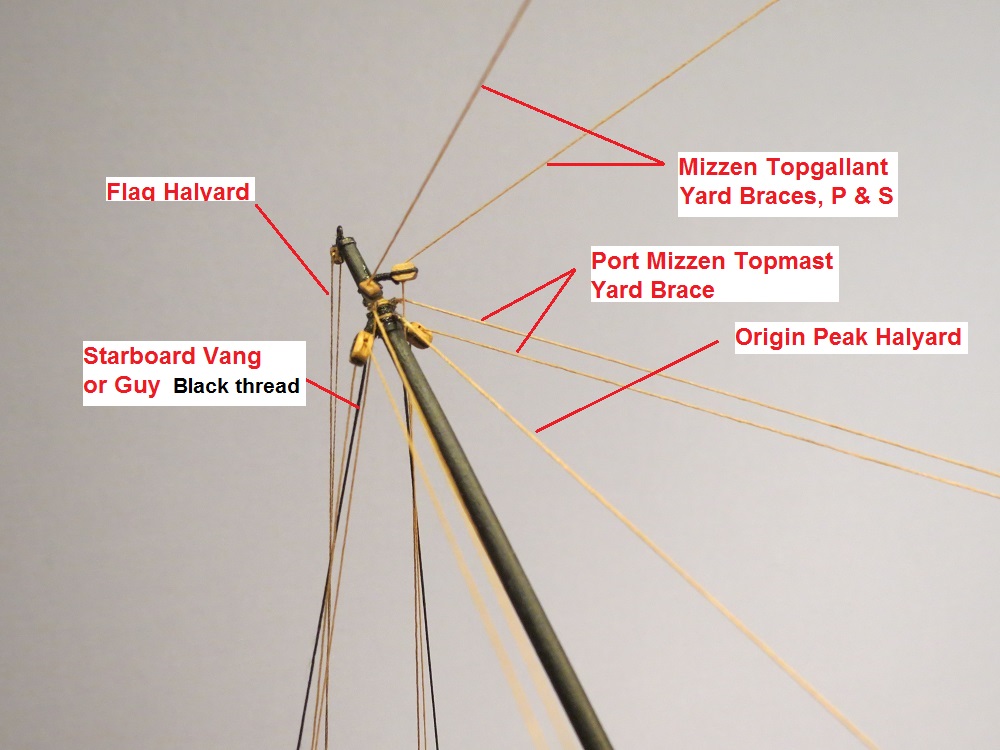
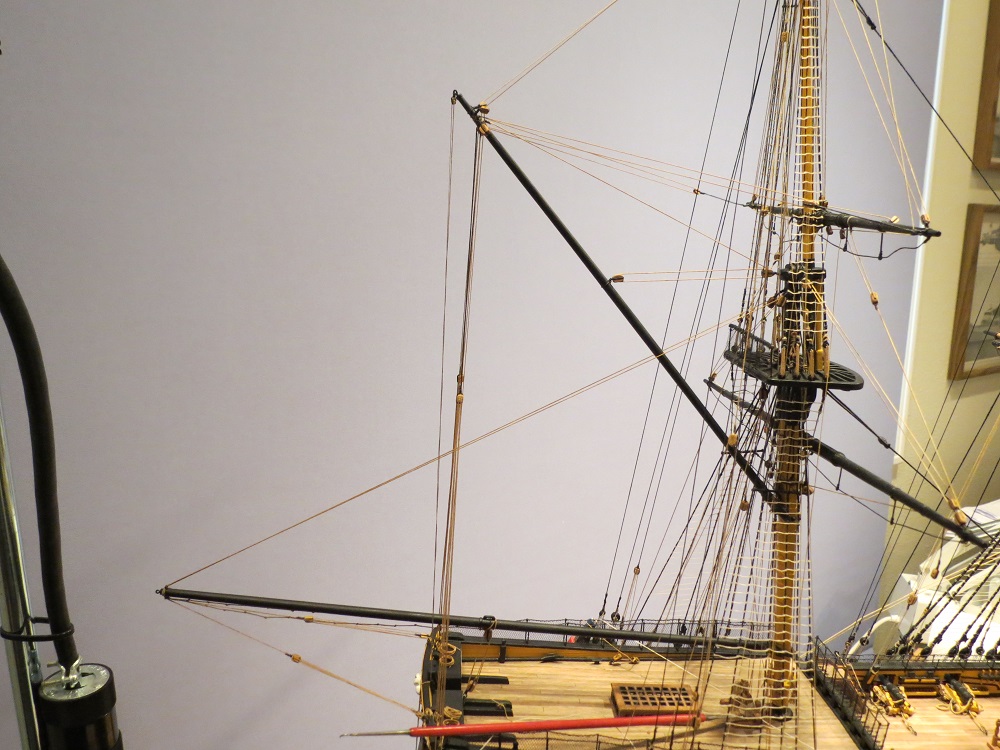
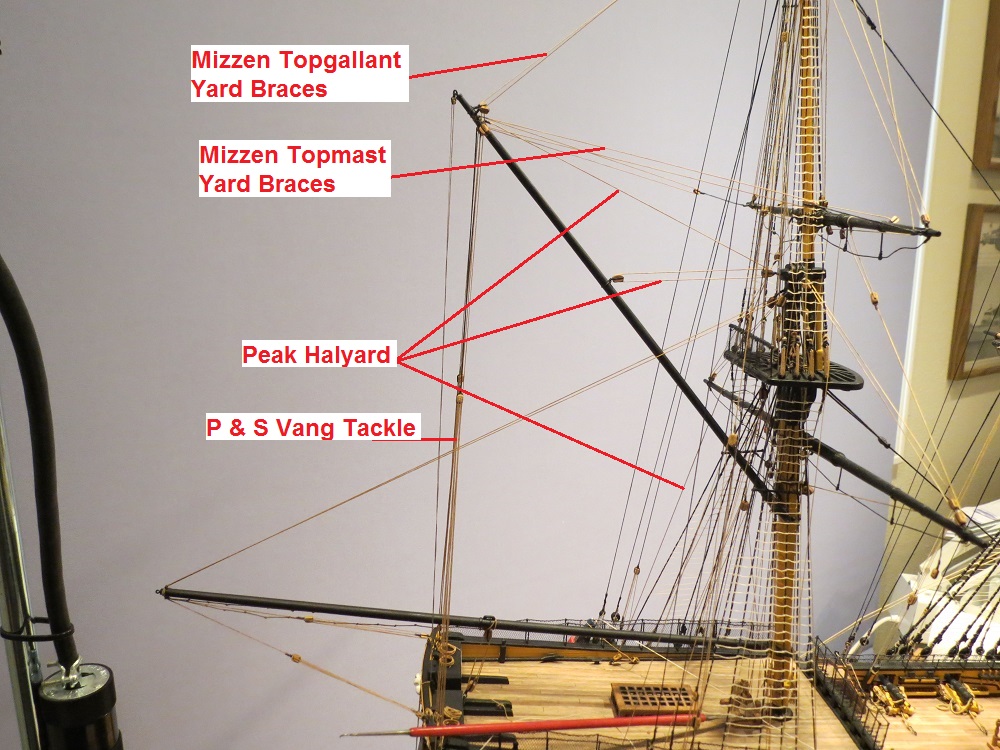
Peak halyard to poop deck, port. Throat halyard similar to starboard.
Looking aft from starboard.
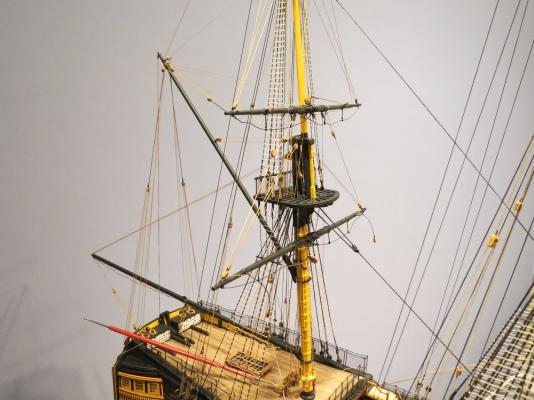
End of driver gaff
Now on with the fun stuff. Gil
- mtaylor, Kevin, mort stoll and 5 others
-
8
-
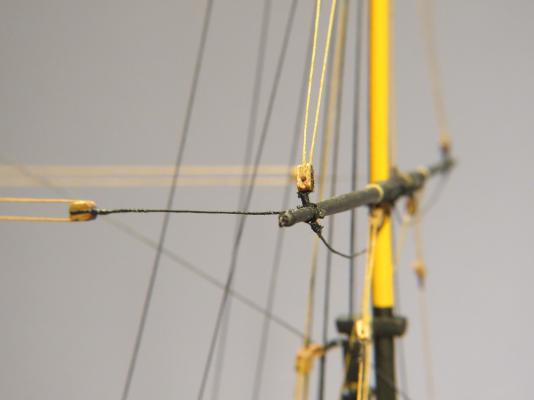
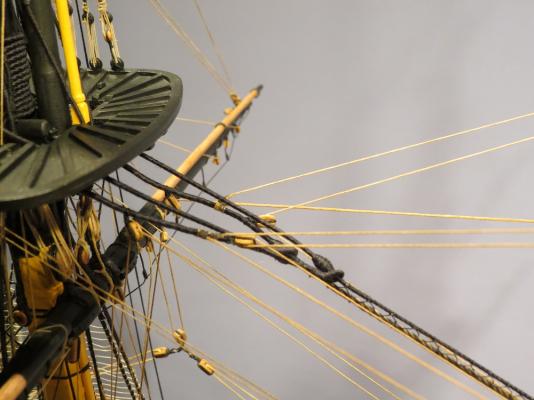
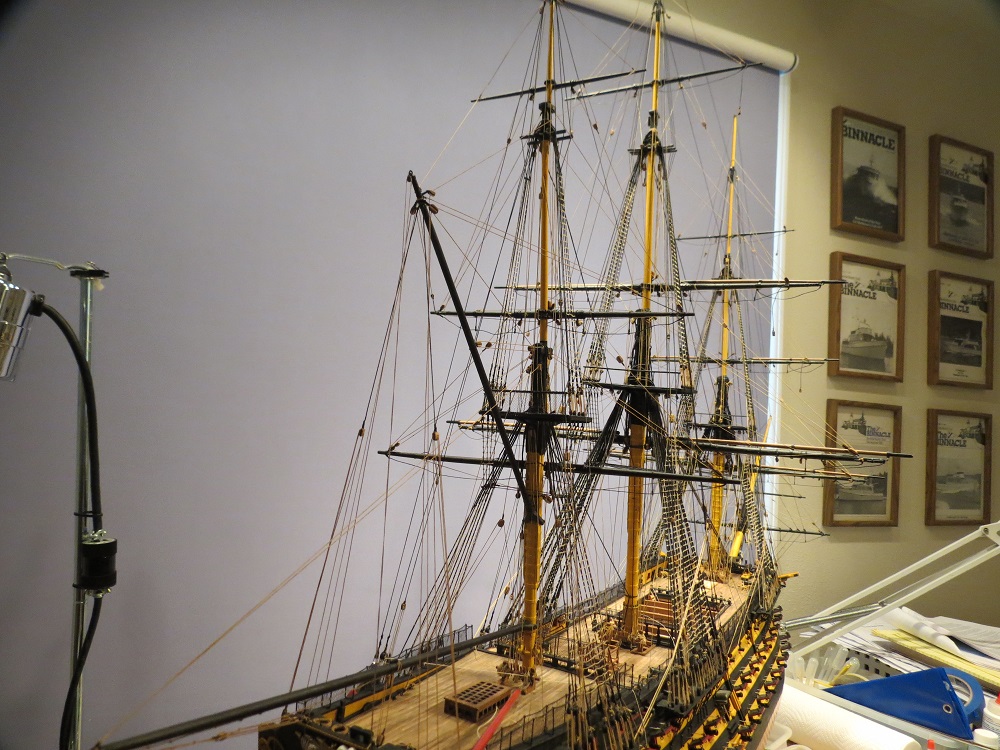
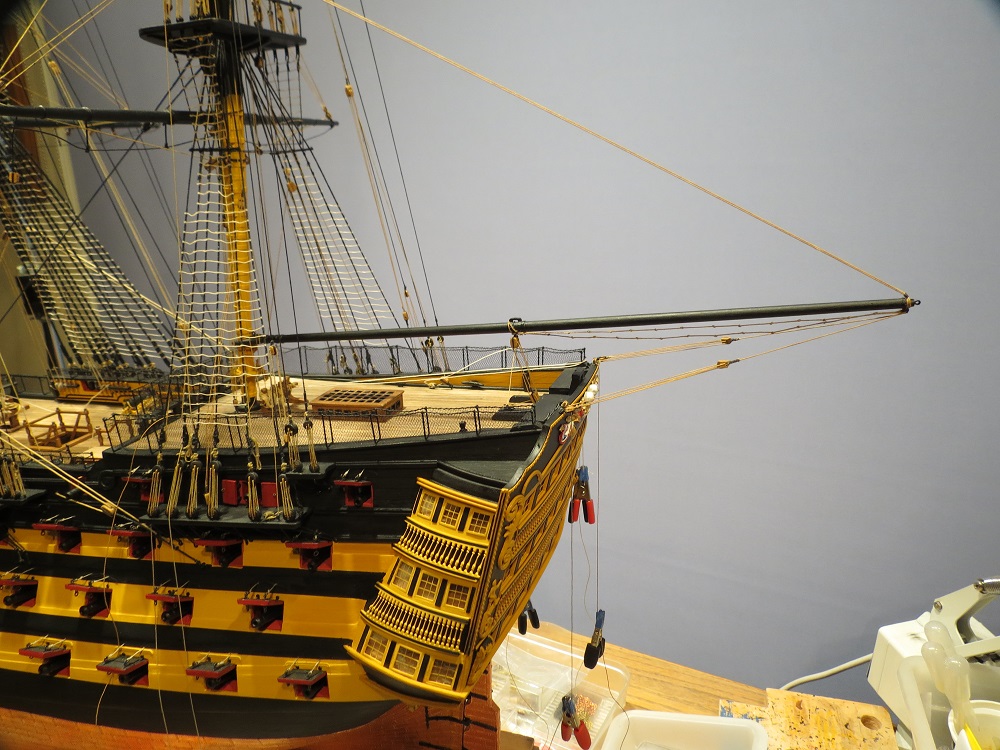
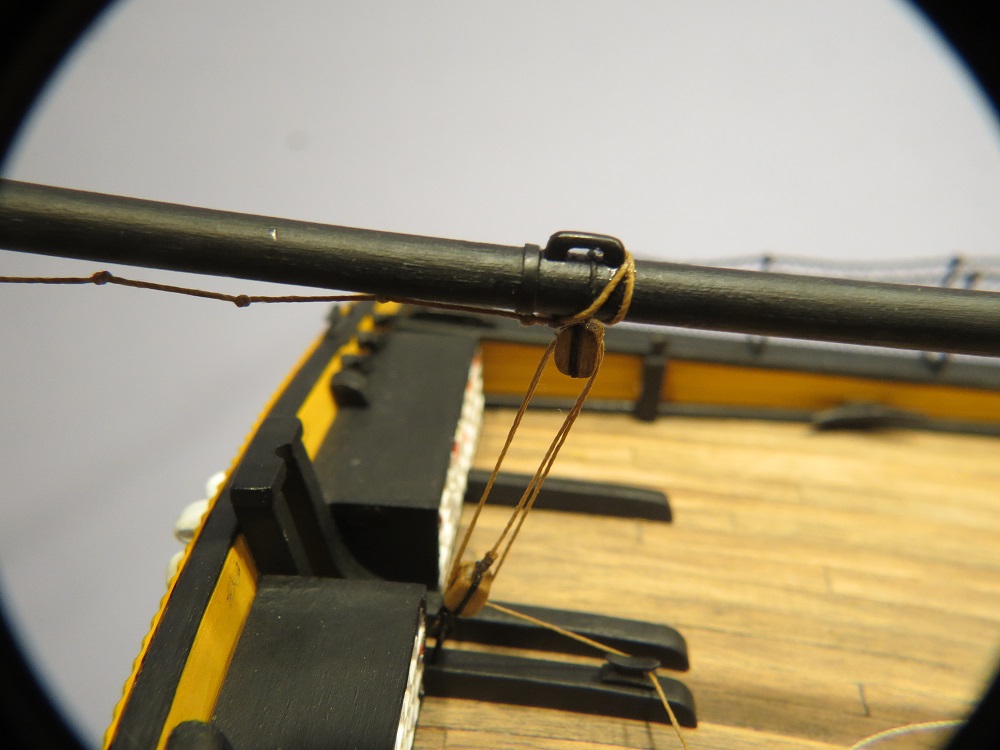
On with the Driver Gaff. Preparing to rig the gaff.

Driver boom and gaff rigged.
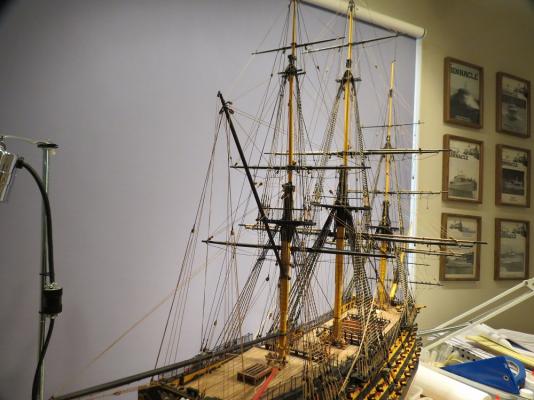
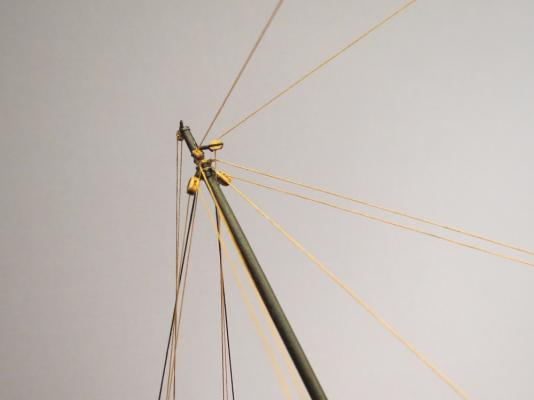
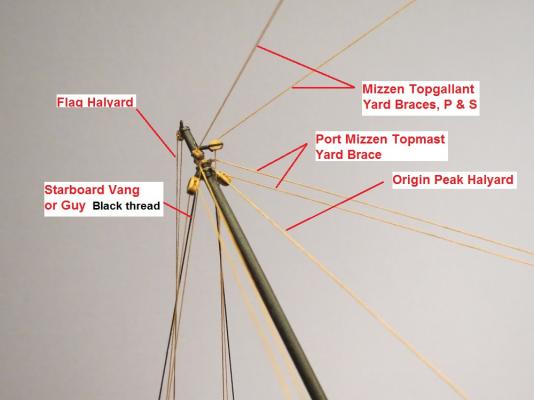
Topgallant and topmast yard braces to blocks on driver gaff. Driver gaff vangs (or guys) with tackle leading to the taffrail.
Cont......in next post.
- dafi, mort stoll, Kevin and 3 others
-
6
-
Peter,
We are looking forward to a five month cruise to Alaska. Early May in Victoria, mid May in Bella Bella / Shearwater. When do you find out your schedule? I've not been to the Old Bella Bella Coast Guard Station.Popeye, Our home is a museum featuring 3 old ships and one old modeler.
Thanks Edwin and Kevin, but Augie and David, be careful what you wish for. You'd get to pay the thousands in shipping costs.
Cheers, Gil
-
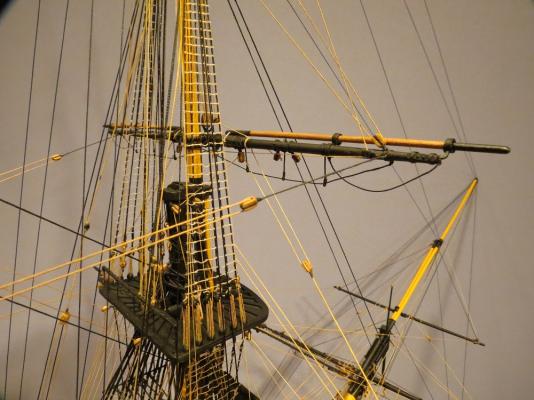
And finishing the driver boom.
Rigging the guy blocks
Parral. Gloss removed with clear flat acrylc.

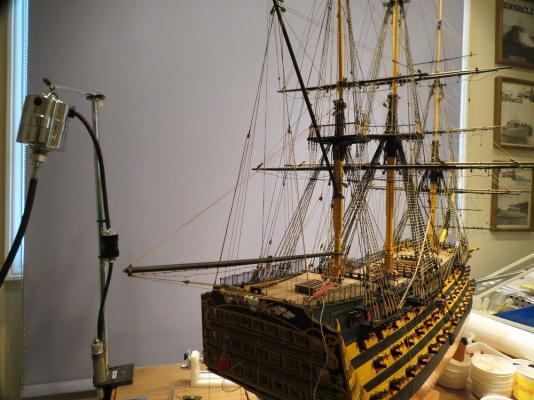
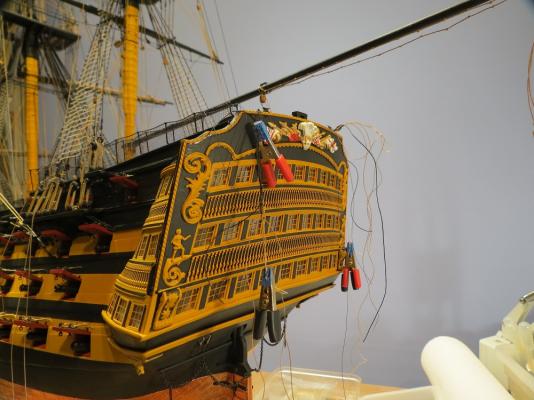
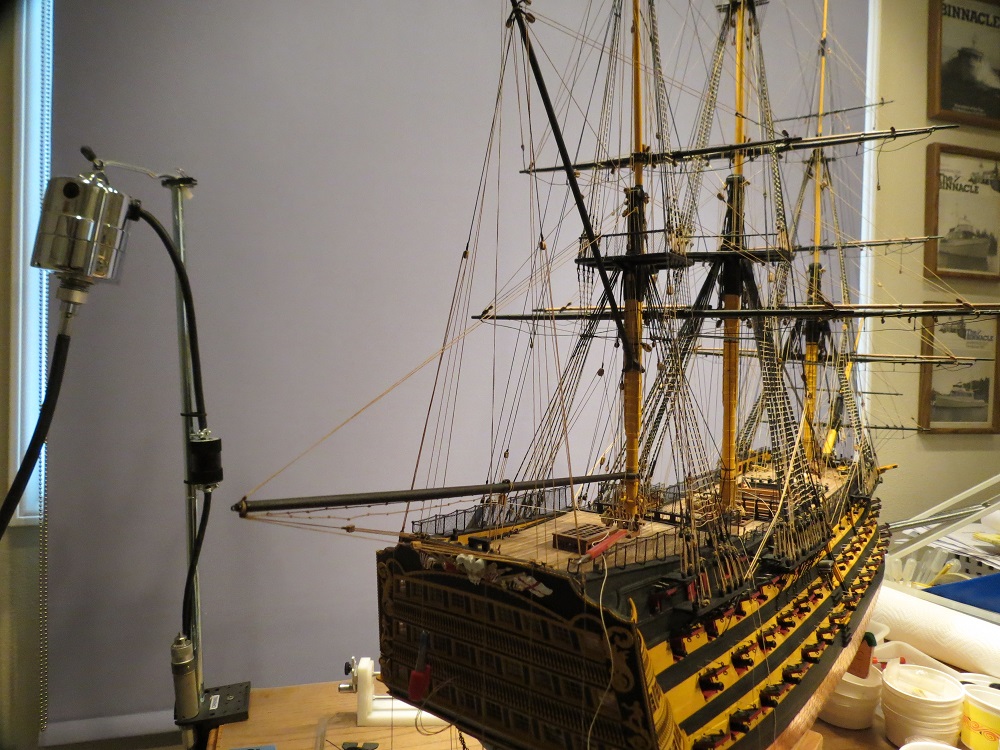
Fully rigged driver boom. The ship has gained about 6 1/2" to reach 55" or about 140 cm. The admiral asks "Where do you plan to dock this ship?" In the living room????

Next, The driver gaff.
-
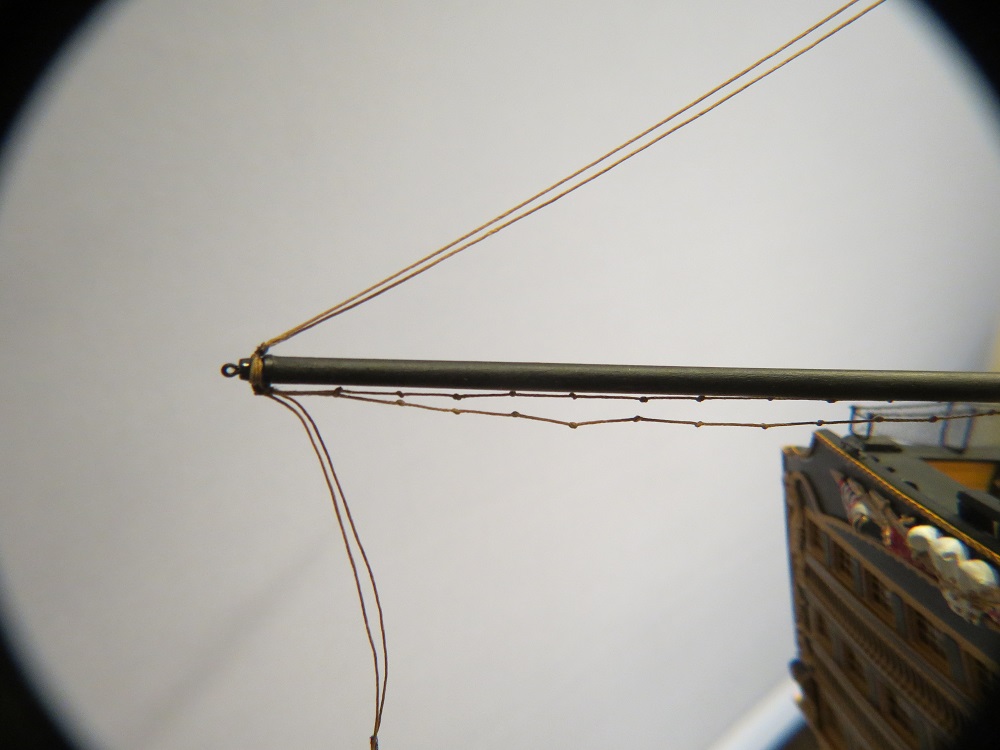
Continuing with the Driver boom.
Lift blocks
Lift tackle
Driver boom lift
Rigging the base for the lift tackle with a tail attached to the **** end of the block.
Attached to the channel

-
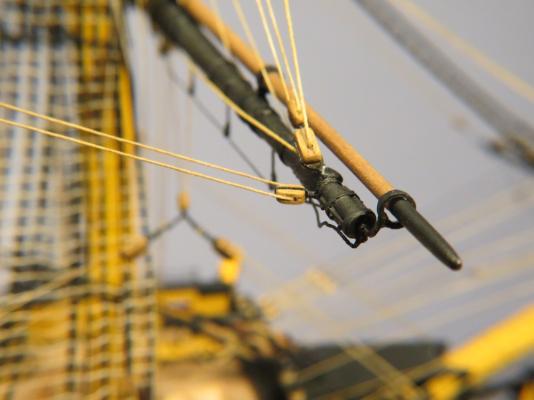
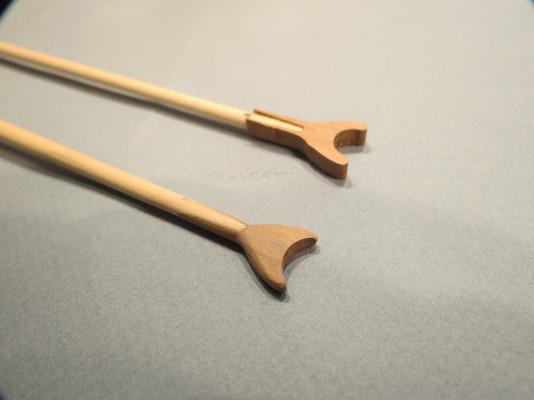
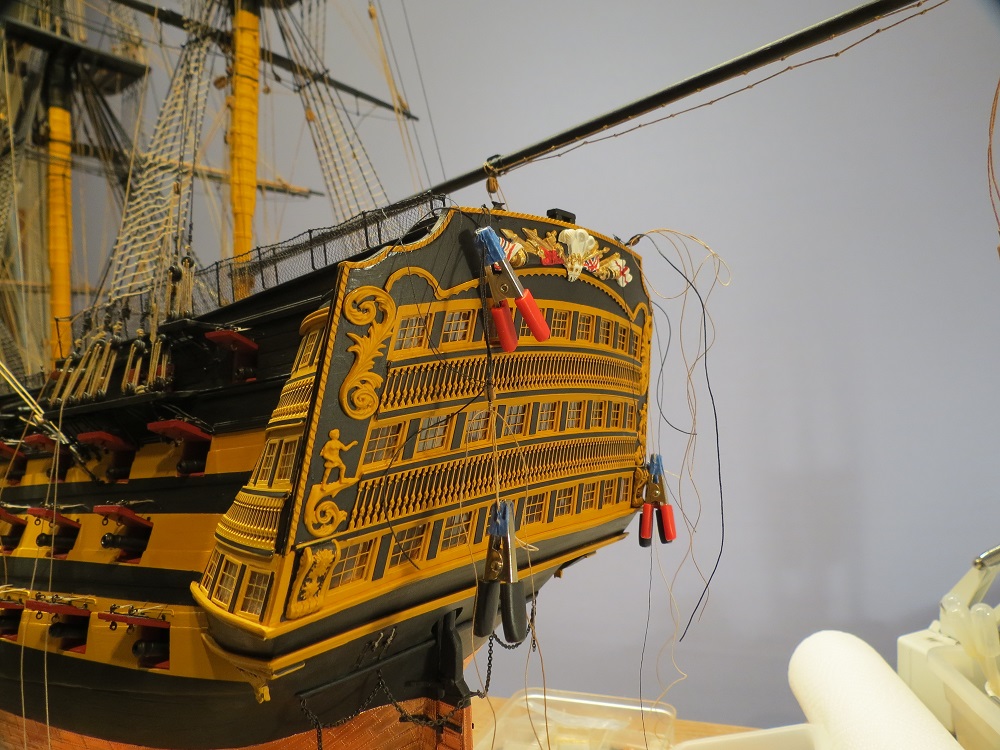
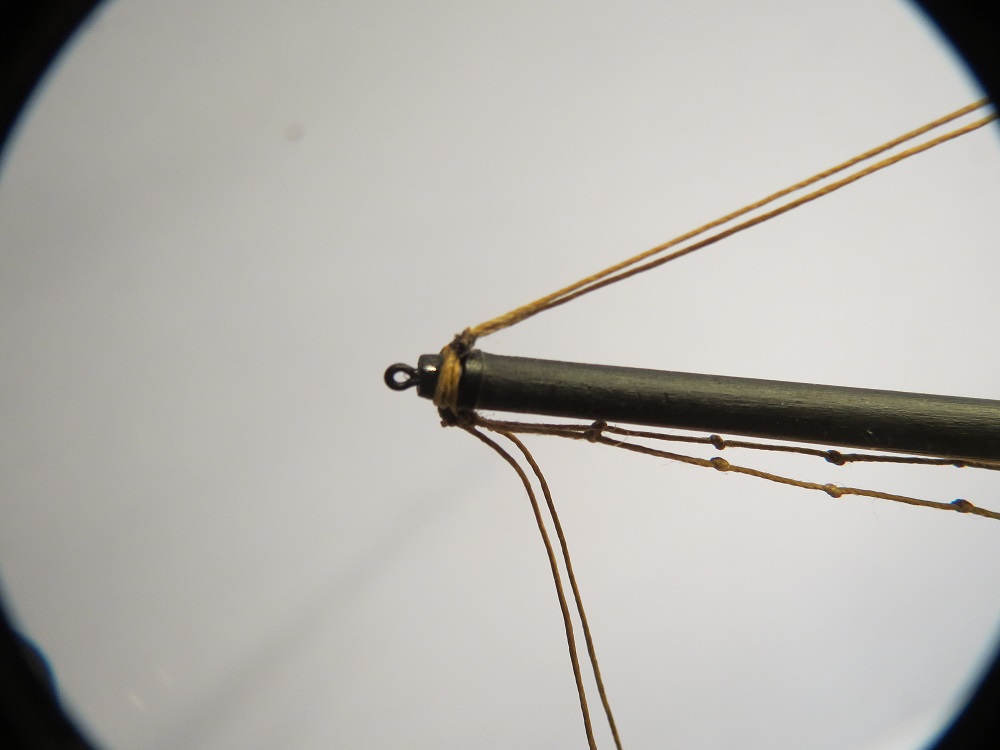
DRIVER BOOM
Driver boom and gaff after sanding to shape.
Boom tapered, saddle fitted and sanded.
"Iron bands" applied. (Styrene strips)
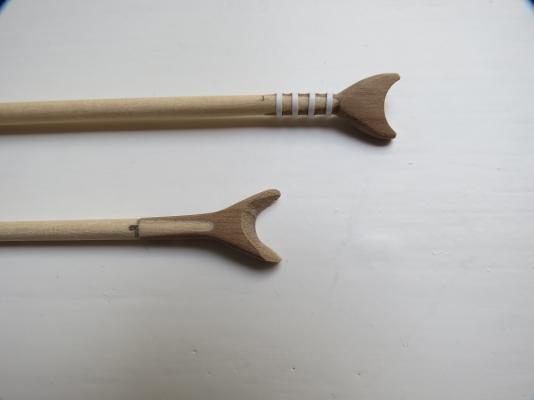
Parral around mizzen mast.

Sheet tackle rigged.

Foot ropes, lifts and guys (vangs) attached at end of boom.


- freewheelinguy, mtaylor, dafi and 1 other
-
4
-
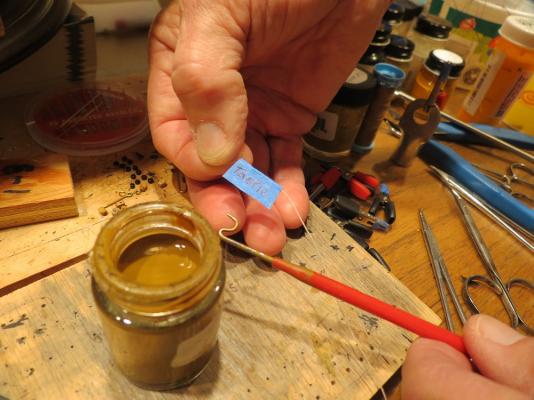
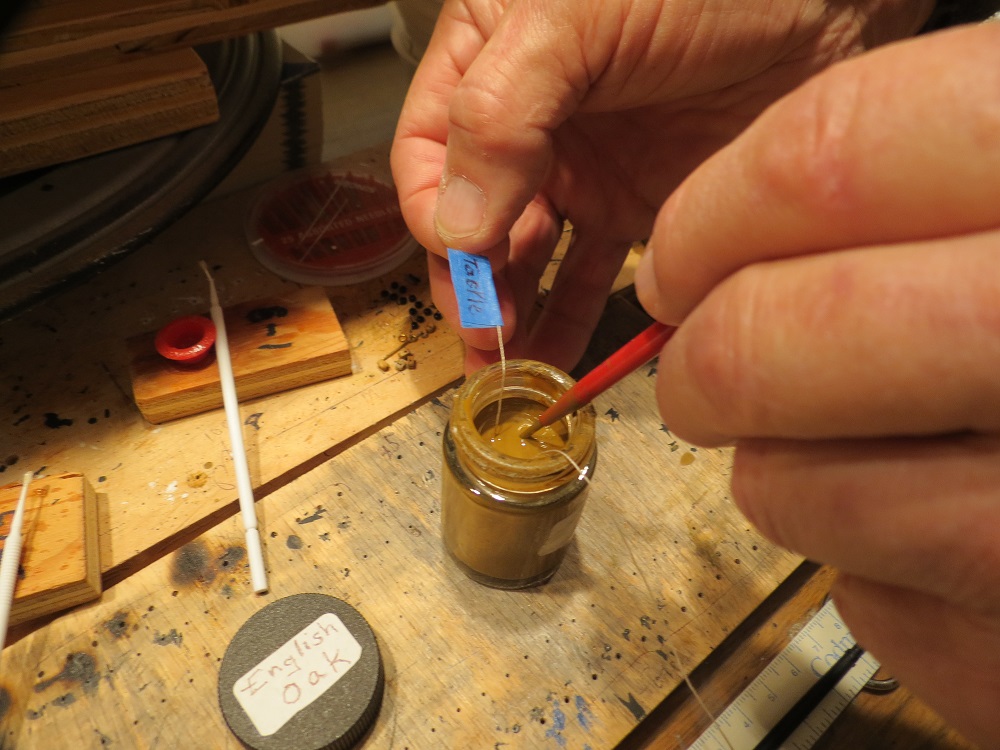
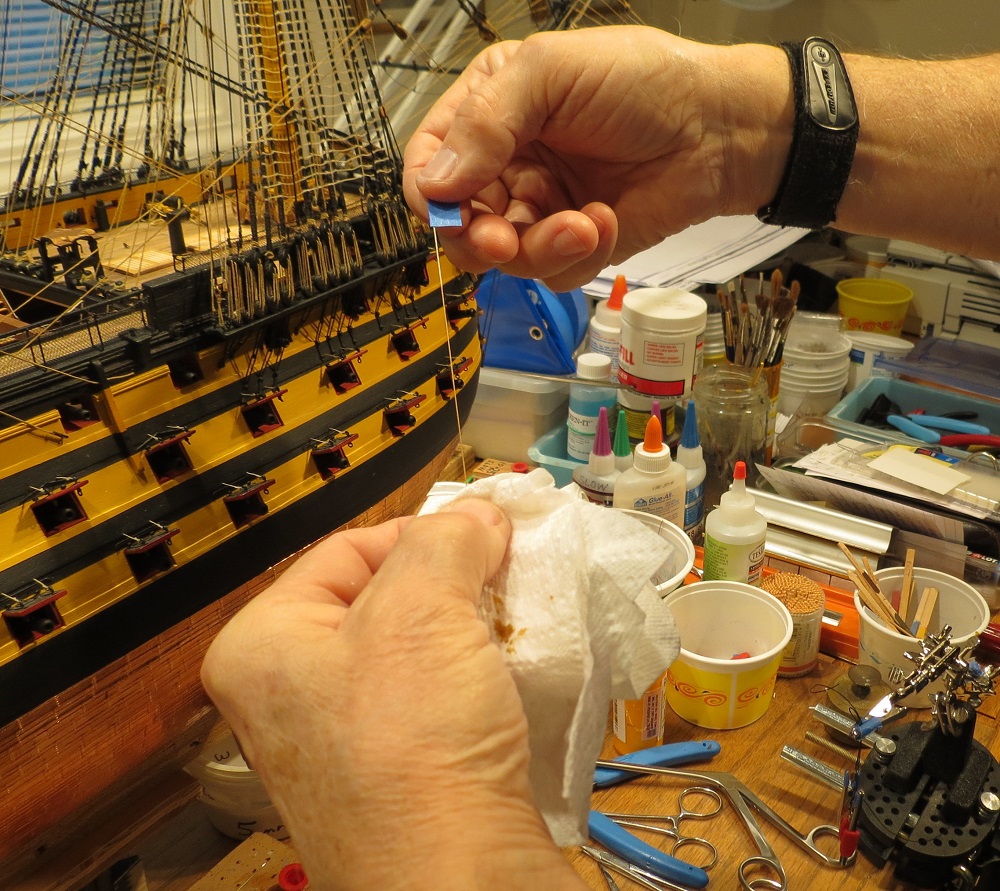
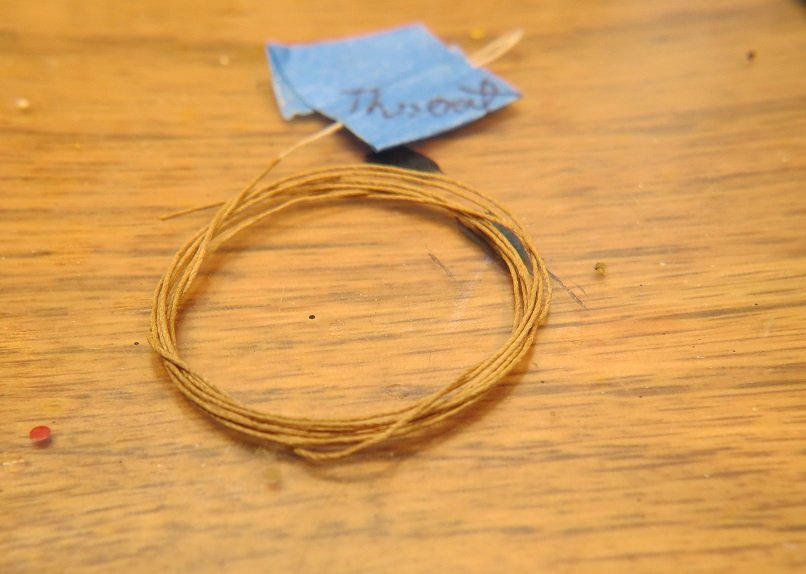
With so little rigging to go (Braces and ropework at the bitts, kevels and pin rails), I elected to use what is perhaps the simplest method of staining the rigging. Roughly measuring the thread for a particular line (in this case the driver boom lift tackle) and using a reverse hook, the line was pulled through the stain (Water based English Oak), allowed a minute or two to penetrate, then gently wiped with paper towel and hung to dry.


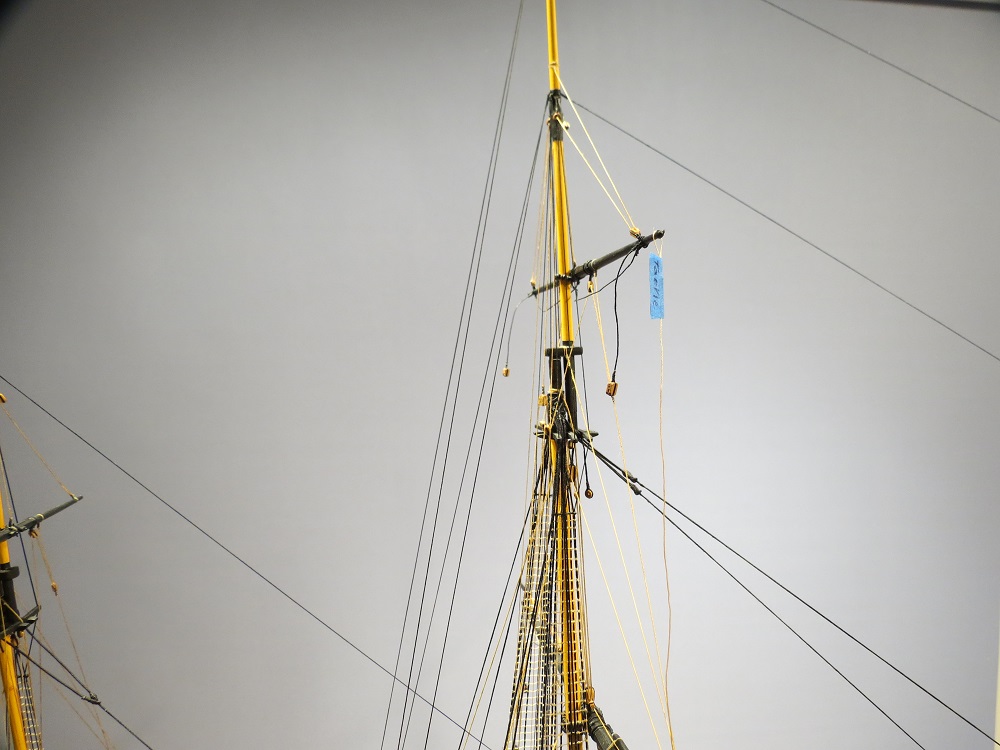
Throat halyard for the driver gaff ready to rig.

- dgbot, freewheelinguy, dafi and 3 others
-
6
-
Thanks Daniel.
Mark, May we never stop learning. Gil
-
Len, Many thanks for adding the link to Bob Wescott's notes on RIT dyes. A great addition to methods to achieve a realistic appearance of ship's lines. I've added it to my "favorites" for future use. Stains do change the feel of the line, although, once the line is set, there is probably little difference. As far along as I am, I'll likely continue with the simplest course. Popeye's comments raises visions of peoples' clothing falling off as threads deteriorate, although Judy assures me that RIT dyes have been used for decades. Forgive me Popeye but I couldn't resist.
Thanks Mark. The white rigging had been bothering me for a long time.
Cheers, Gil
-
Len, I've just spent the last hour enjoying your log from page one. So much thought, planning and care with each step resulting in exceptional detail. Your stern details, carronades, ships boats and masts all show a fine hand. Had I given as much thought and reading (research) as you, I'd still be coppering or working on the hull. What fun to see how you've approached challenges, and without a master plan to show the way. My hat's off to you. So many good ideas for the next one. Cheers. Gil
-
John, I just noticed "C.W. Morgan" and popped in. I love it. Like you, I visited Mystic and of course spent the entire day crawling around the ship. You've done a grand job on the Morgan. While I was there, they were making chain plates. Sorry I didn't get this photo to you a little sooner, but it's probably a bit too big for the model. Cheers, Gil
-
Thanks you all for your support, John, Michael, Alan, dragzz, Floyd Bob and Dave B (D Borgens). And not one of you said "You're crazy."
Grant, I suspect you had the same feelings when you removed the stern. A couple days into the process, "What on earth was I thinking of?" It helped that I had sanded and stained most blocks with water based English Oak (Minwax) so that the brown oak wash didn't adversely affect the blocks. And Len, I do sleep at night, perhaps not so much that she looks better, but that I didn't destroy it. I'm pleased with the result and glad I went to the trouble. And I've taken Popeye's thoughts to heart, staining the lines going forward.
David (dgbot), I've used Minwax stains, but the problem is that lines or rope coils with C/A on them, will not take up stain producing a very mottled appearance. A paint wash covers treated or untreated line. Working in our den, I use only water based paints or stains. I've found that staining lines with English Oak (Minwax; some prefer Fruitwood)) produces a very similar result to Brown Oak Detail Wash (equal parts Brown Oak Wash (Testors), Dust (Polyscale) and Acrylic thinner). We simply have two options for treating lines, staining and a paint wash to get the consistent results I was looking for.
Cheers, Gil
-
At the bow


At the Mizzen
Lots of touch ups to go, but overall I'm pleased with the change. At the work table in incandescent light or daylight, the ship takes on a much more realistic appearance. Are we our worst critics? Probably yes. Will my grandchildren notice or care? Probably not. Cheers, Gil
- freewheelinguy, gjdale, Aussie048 and 7 others
-
10
-
Deadeyes

Main mast

Fore mast
- GTM, augie, freewheelinguy and 7 others
-
10


HMS Victory by gil middleton - FINISHED - Caldercraft - 1:72
in - Kit build logs for subjects built from 1751 - 1800
Posted
Dragzz, I probably can't get to Kamloops by boat, but Edwin, I may just show up one day in Port Alberni. Thanks Kevin and dgbot. Kevin, are you planning to add all those sails? David, regarding the "road to grey hair and shaky fingers," I've already had the grey hair, and then lost most of it. Does that make me too old to join the club?
Archicar (is there another name to use?) There are models of the Victory with sails bent on, but it's a good question. It goes to the decision every modeler must make in deciding how to present the model. Some dislike rigging and present a model with only stumps for masts. I prefer no sails because I think the sails mask the beauty of the rigging and their purpose (or it may be an excuse for my lack of experience in working with sails). However, I do feel that poorly done sails (furled or full) greatly degrade the appearance of a model, and working with sails is an art in itself. To go further, if a model is displayed with full sails, the model needs, or perhaps demands the presence of crew on deck else we envision a ghost ship. Probably haven't helped with your question.
Cheers, Gil