JesseLee
-
Posts
1,694 -
Joined
-
Last visited
Content Type
Profiles
Forums
Gallery
Events
Everything posted by JesseLee
-
 Saw that I had forgot to make the upper hinge parts at the top of the rudder in the black painted area. Made that & got it all on. Al nails are in & rudder is on.
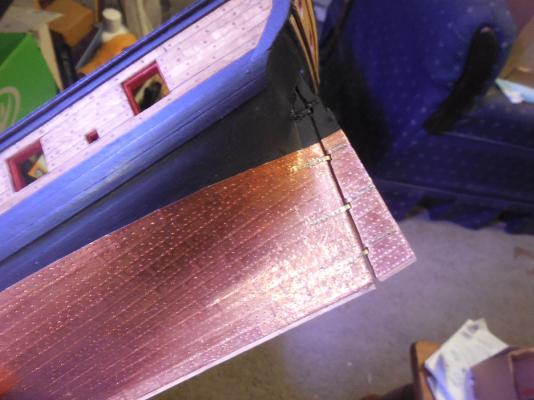
- 1,306 replies
-
- 16
-

-
- syren
- model shipways
- (and 1 more)
-
I can only hope I come anywhere close to doing this good of a job when I get to these steps in the build. I'm studying this for when I get there. Jesse
- 659 replies
-
- 3
-
-
- syren
- model shipways
- (and 1 more)
-
That's a very thoughtful touch. He's gonna love this Dave!
- 209 replies
-
- 8
-
-
- cheerful
- Syren Ship Model Company
- (and 1 more)
-
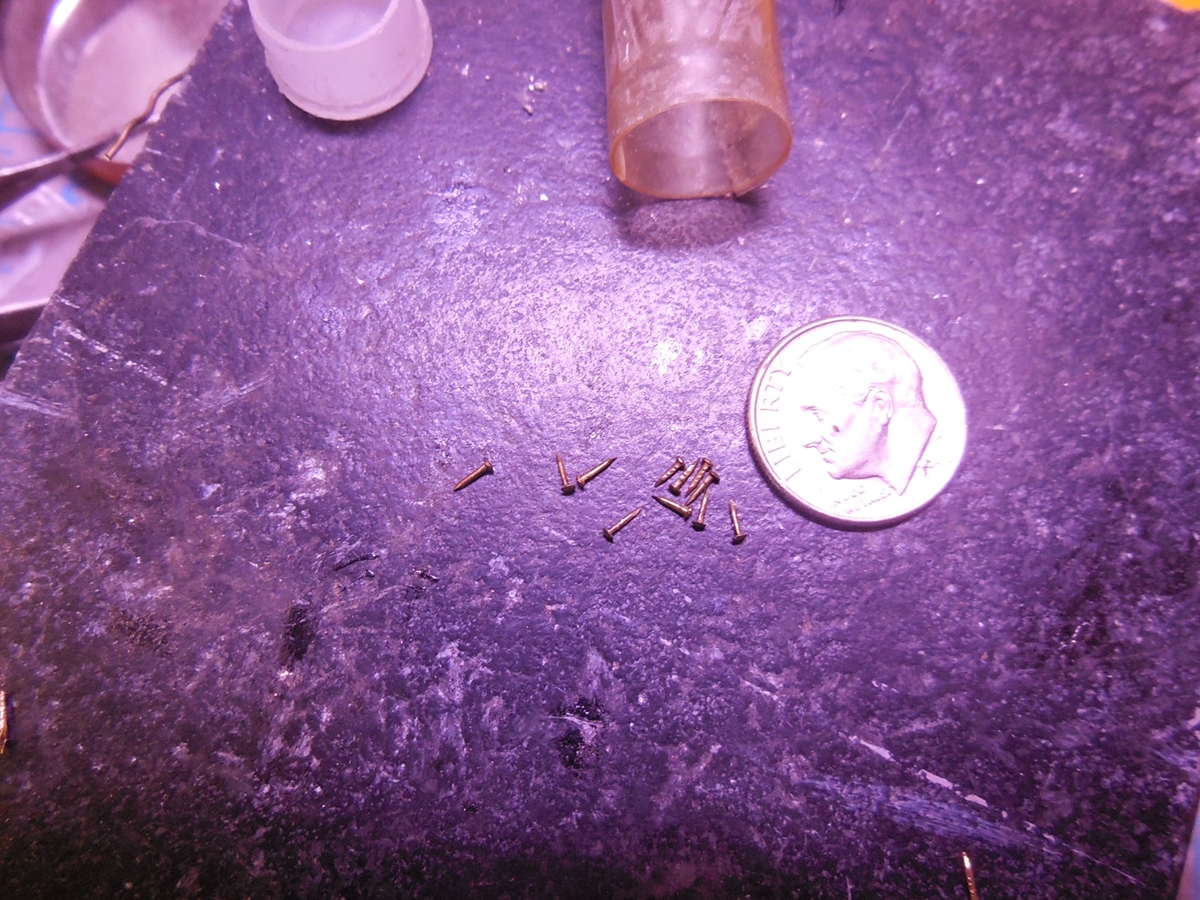
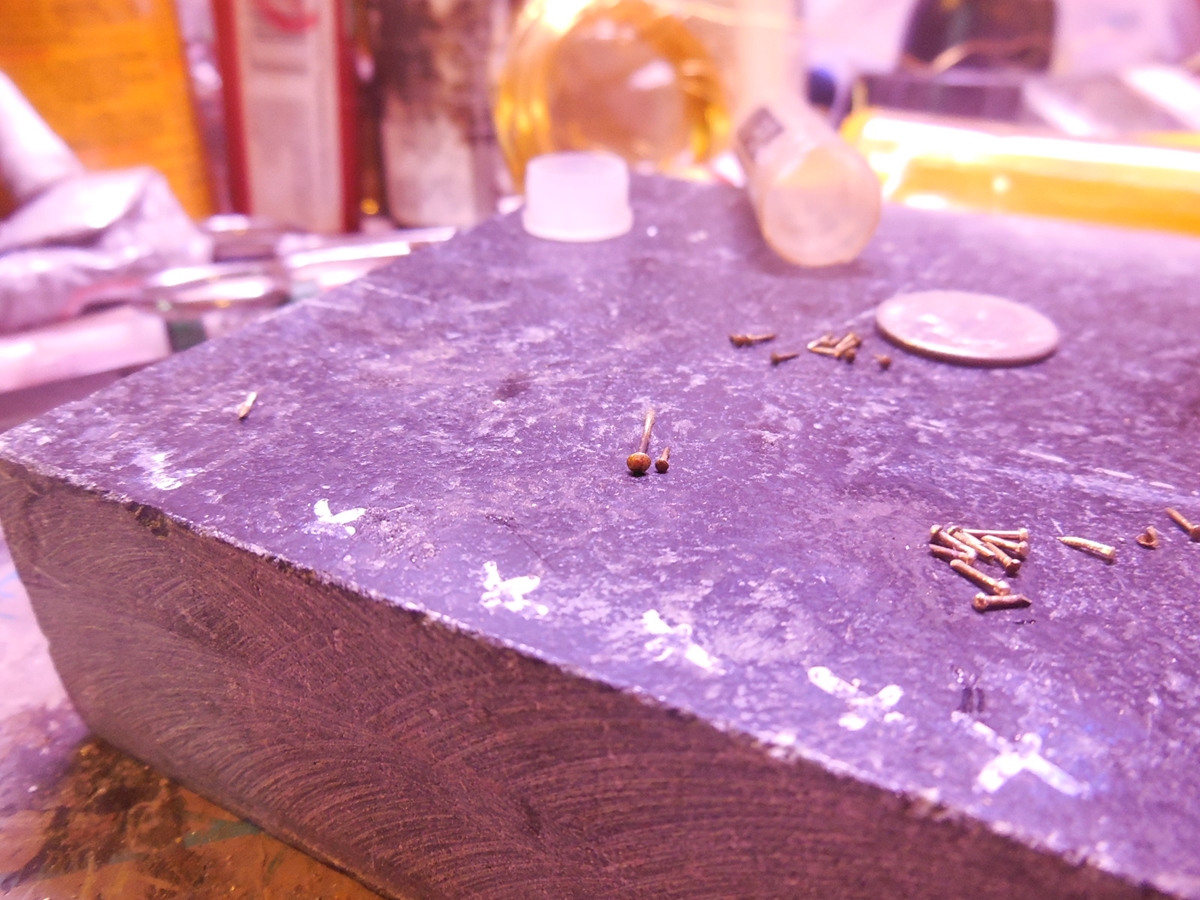
Thanks guys. It almost stumped me....... almost I had these super tiny b brass nails from years ago. I wish I could remember where I got them. There are not enough to finish nailing the gudgeons to the stern. The heads on these are much smaller than anything else I have so I am now in the process of painstakingly filing down bigger nail heads to this much smaller size. Need about 15 more. I think I drilled way too many nail holes.


- 1,306 replies
-
- 27
-
-
- syren
- model shipways
- (and 1 more)
-
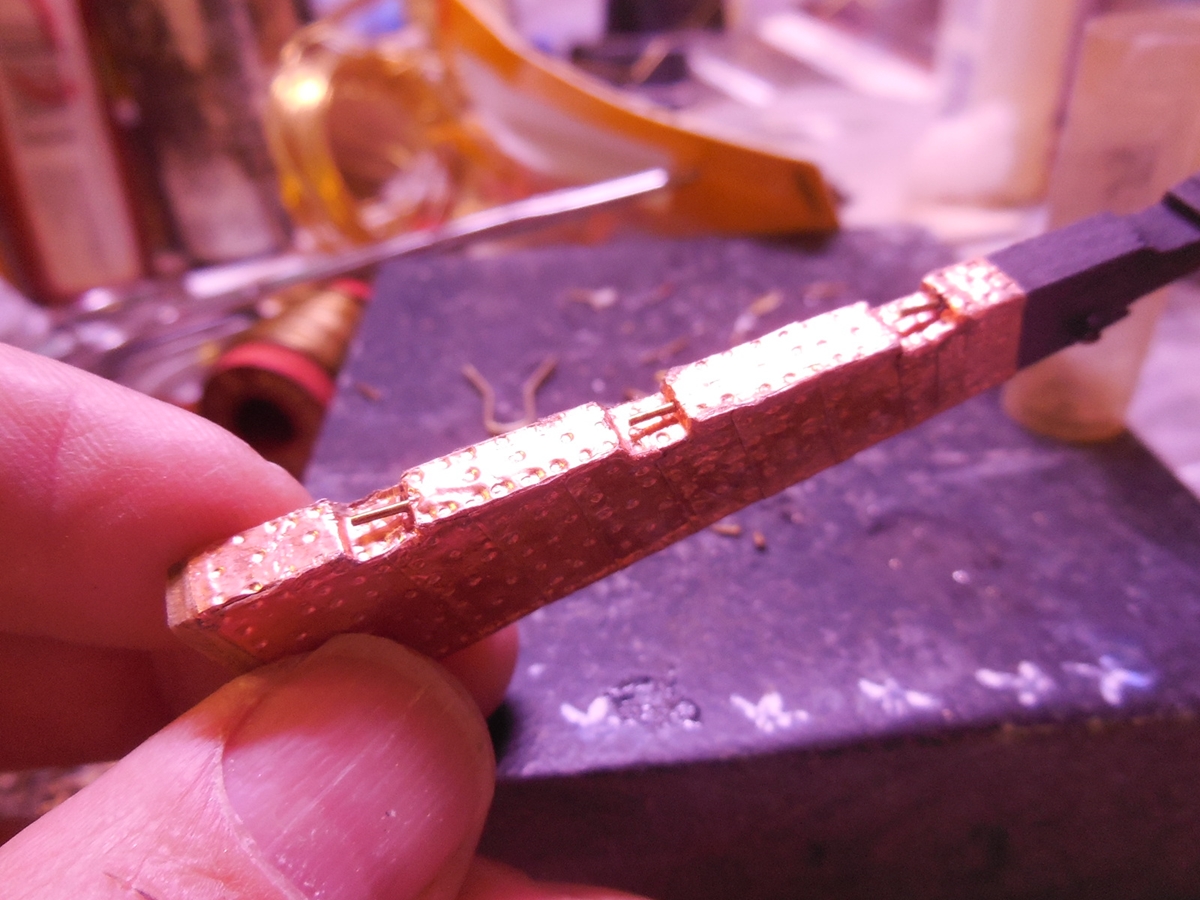
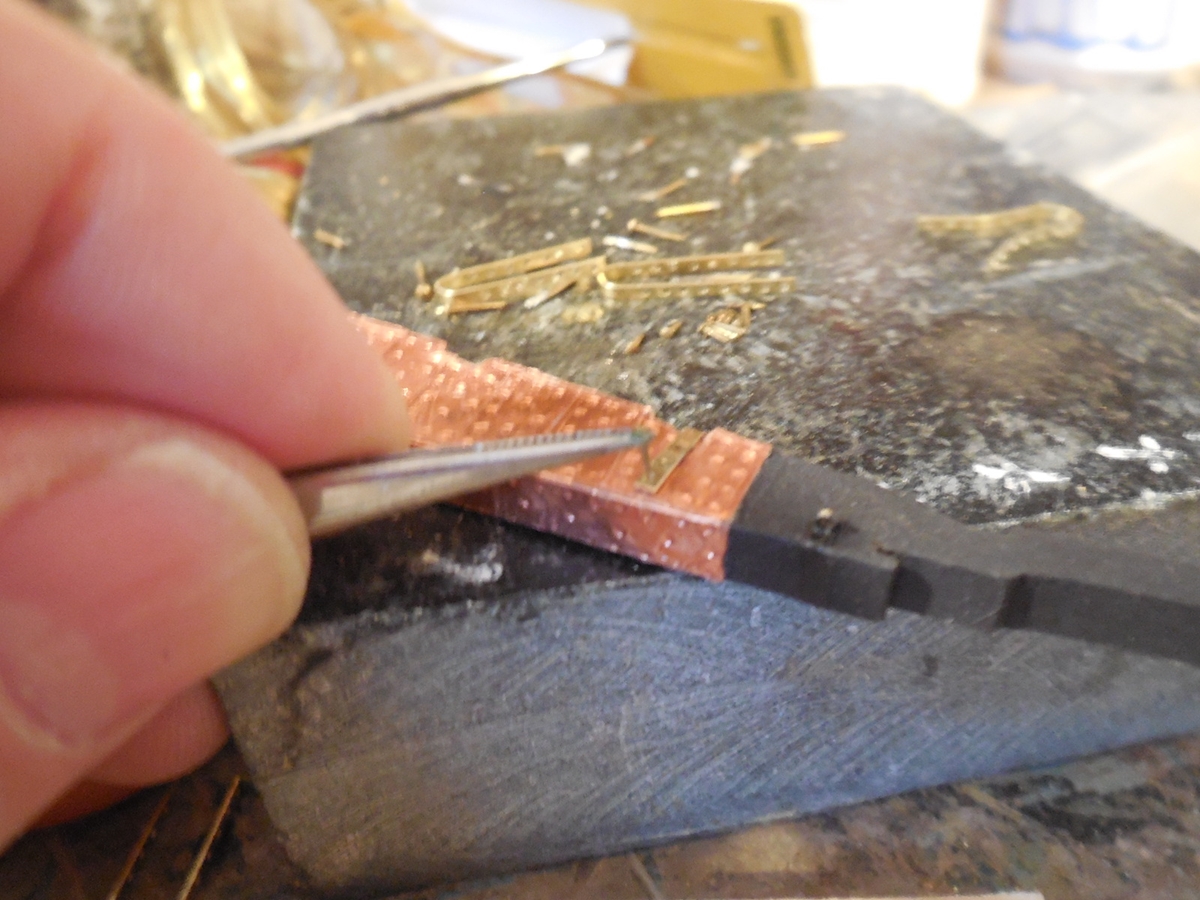
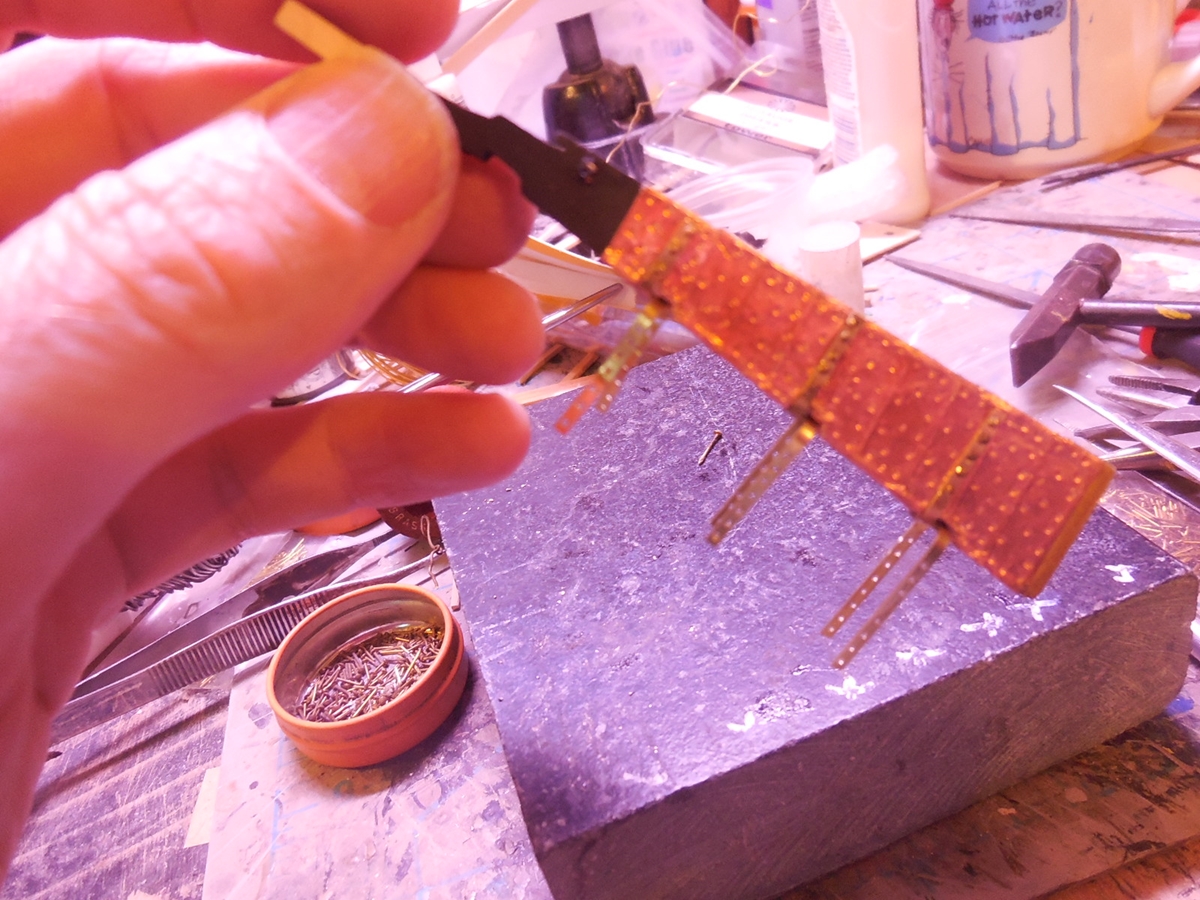
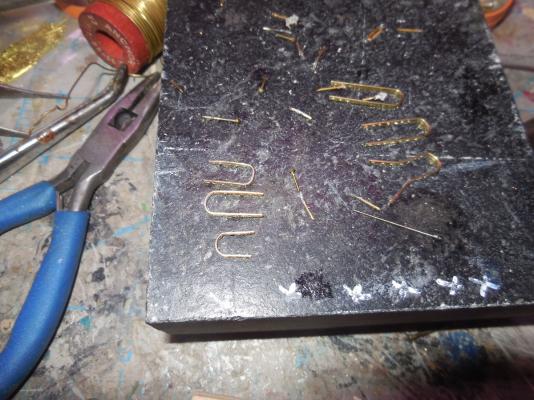
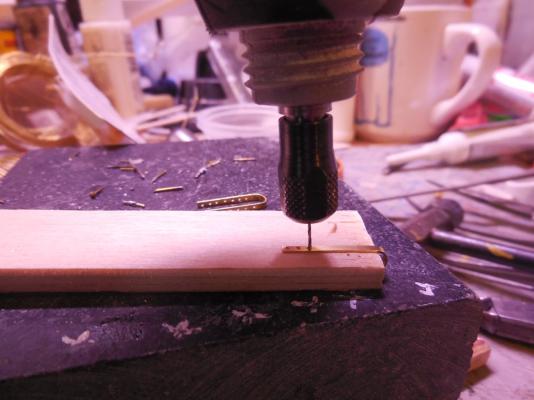
Shaped the pintles & gudgeons. out of a flat brass strip. Drilled holes for pinning to ship. Figured out a way around the soldering. Since the glue wasn't holding the pins on the pintles I made a much longer pin & inserted them up into the wood with CA glue. They are pinned in the notch in the rudder & come straight down laying against the pintles. It looks just like it was attached to the pintle & no one can tell that it goes past the pintle & up into the wood. I did add some CA where they touch in the bend of the pintle. This works well & is very sturdy.

- 1,306 replies
-
- 18
-
-
- syren
- model shipways
- (and 1 more)
-
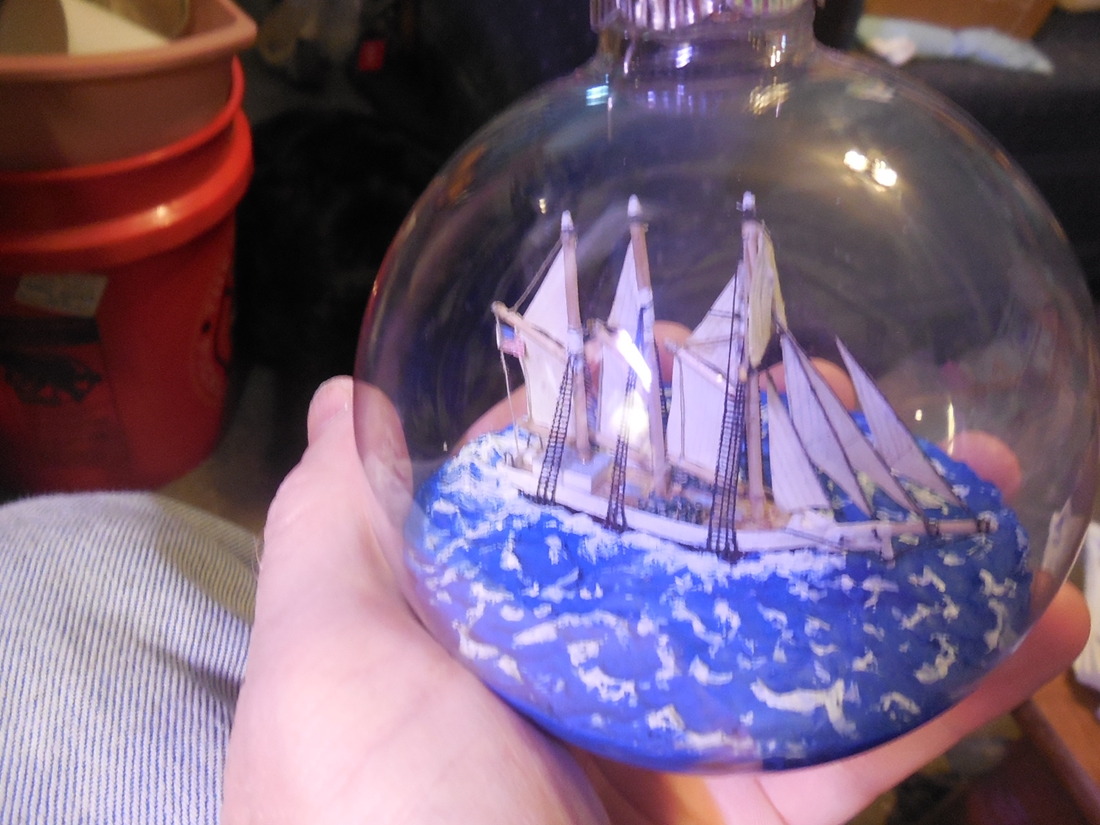
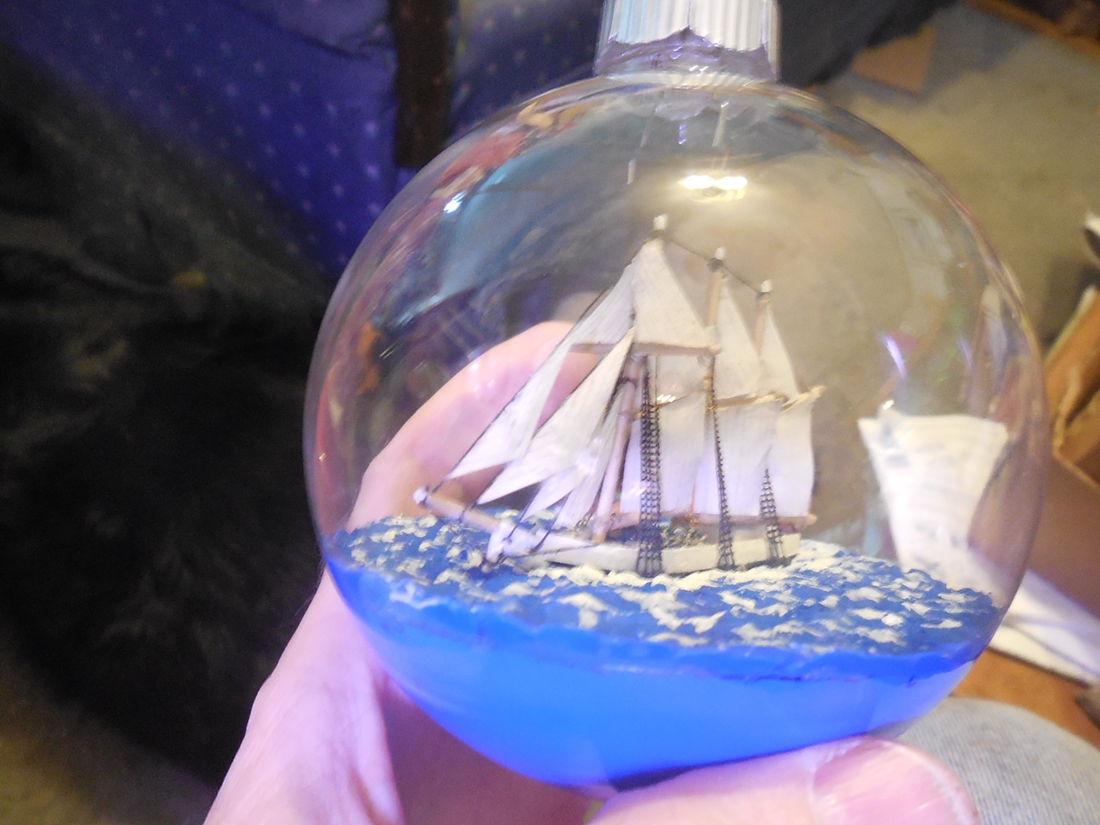
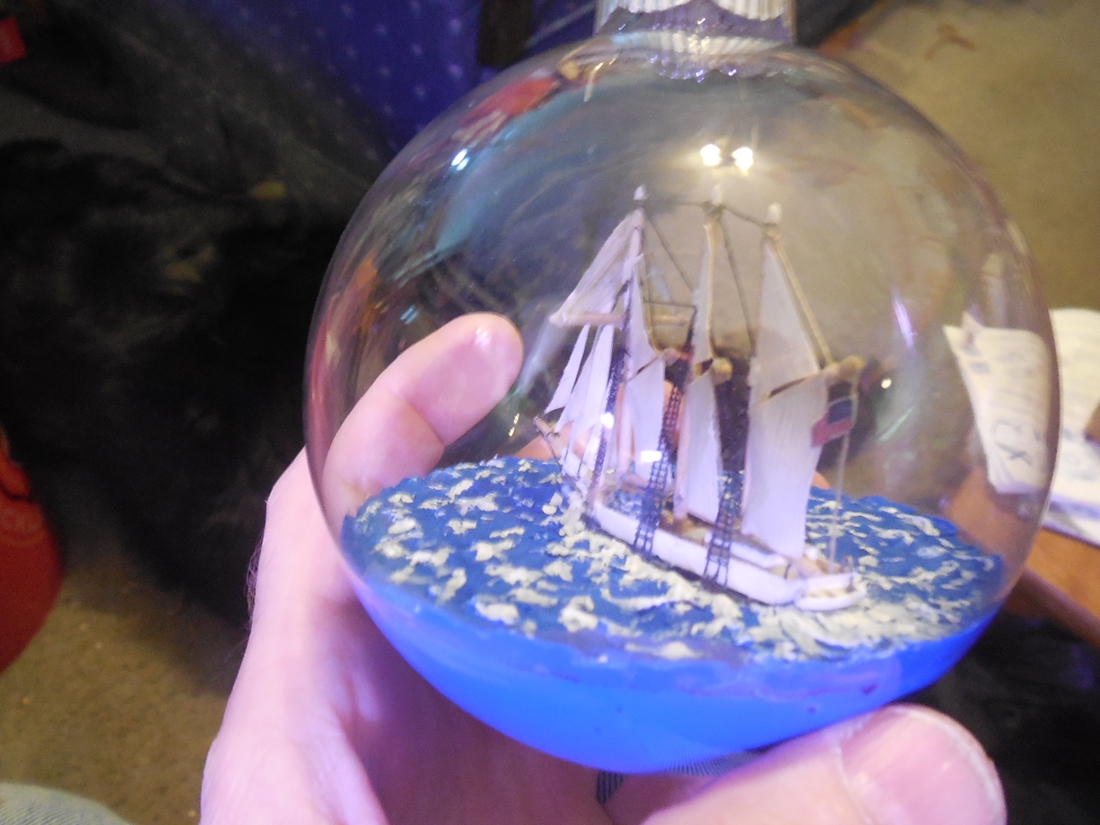
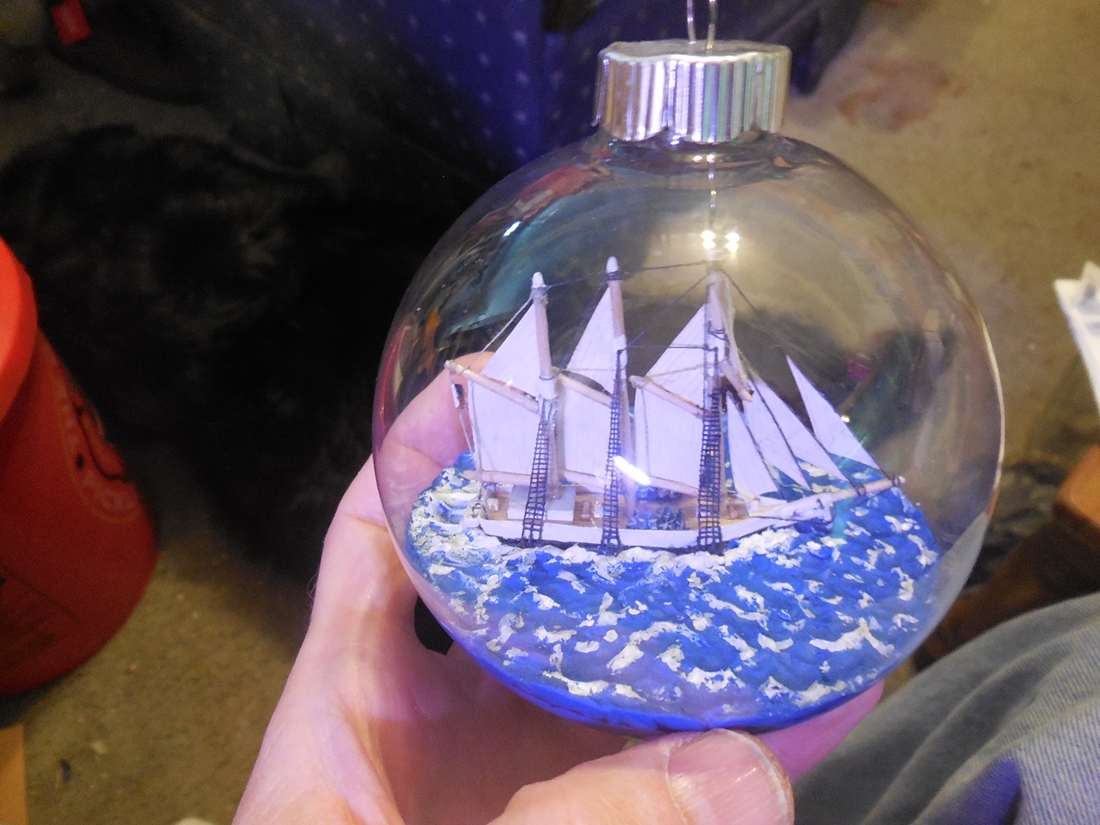
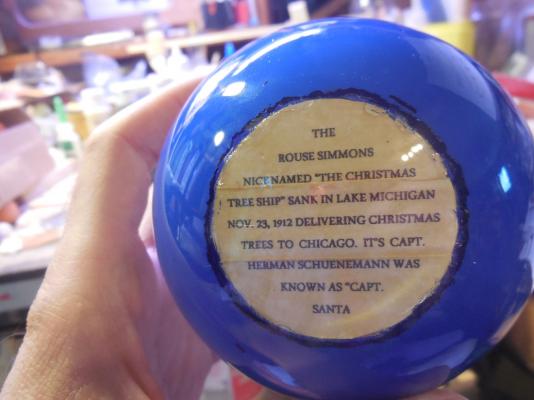
View of bottom label with ship info, finished shot & close-up of Christmas trees on deck. More finished angle shots coming......

- 56 replies
-
- 14
-
-
- rouse simmons
- bottle
- (and 1 more)
-
Thank you everyone for the kind words & encouragement. Used epoxy glue to repair the broken neck then added the cover & hanger wire back on. The glued seam is completely hidden. Finished project pictures to follow......
- 56 replies
-
- 11
-
-
- rouse simmons
- bottle
- (and 1 more)
-
That's some fine work Piet!
-
My instructions say to solder or glue that pin that drops from the pintle & through the gudgeon. Nothing is holding for me. After studying the picture I think I can have the pin come straight down out of the notch in the rudder post. When it is all assembled no one will be able to tell that is coming down out of the wood & is not actually attached to the pintle. It will still work the same. I can still glue it where it touches the pintle on the inside too.
- 1,306 replies
-
- 4
-
-
- syren
- model shipways
- (and 1 more)
-
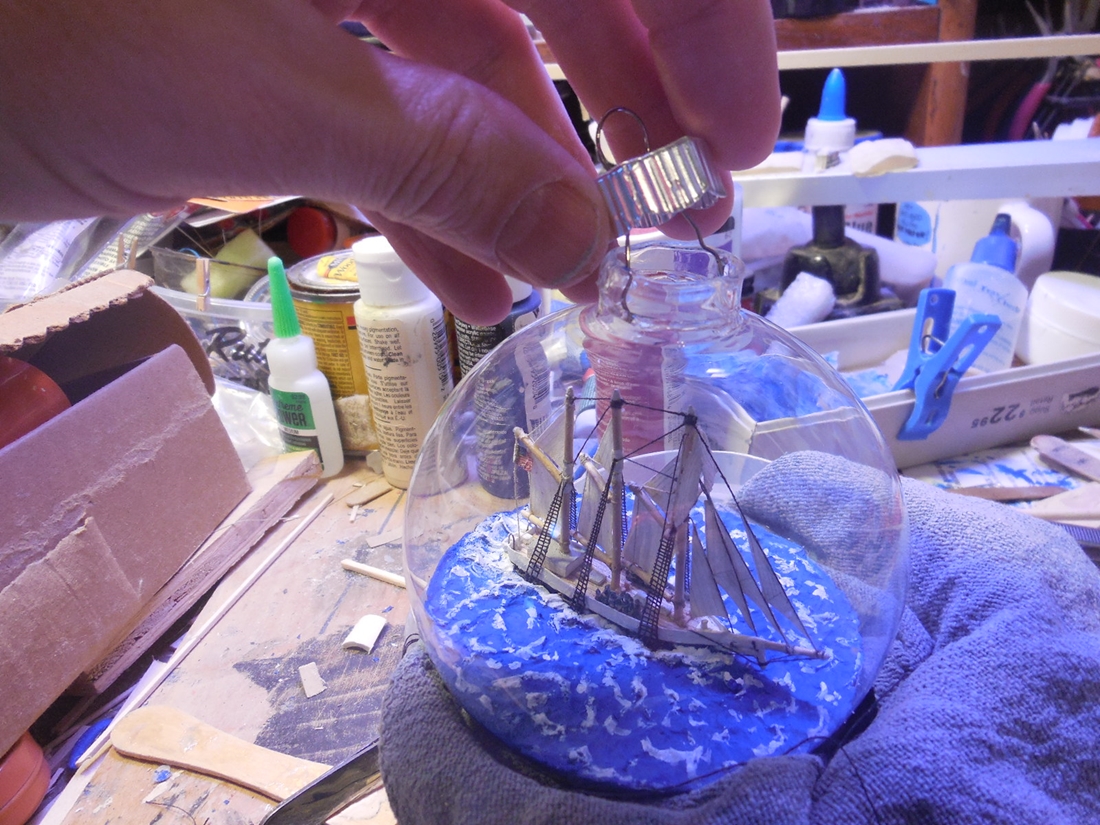
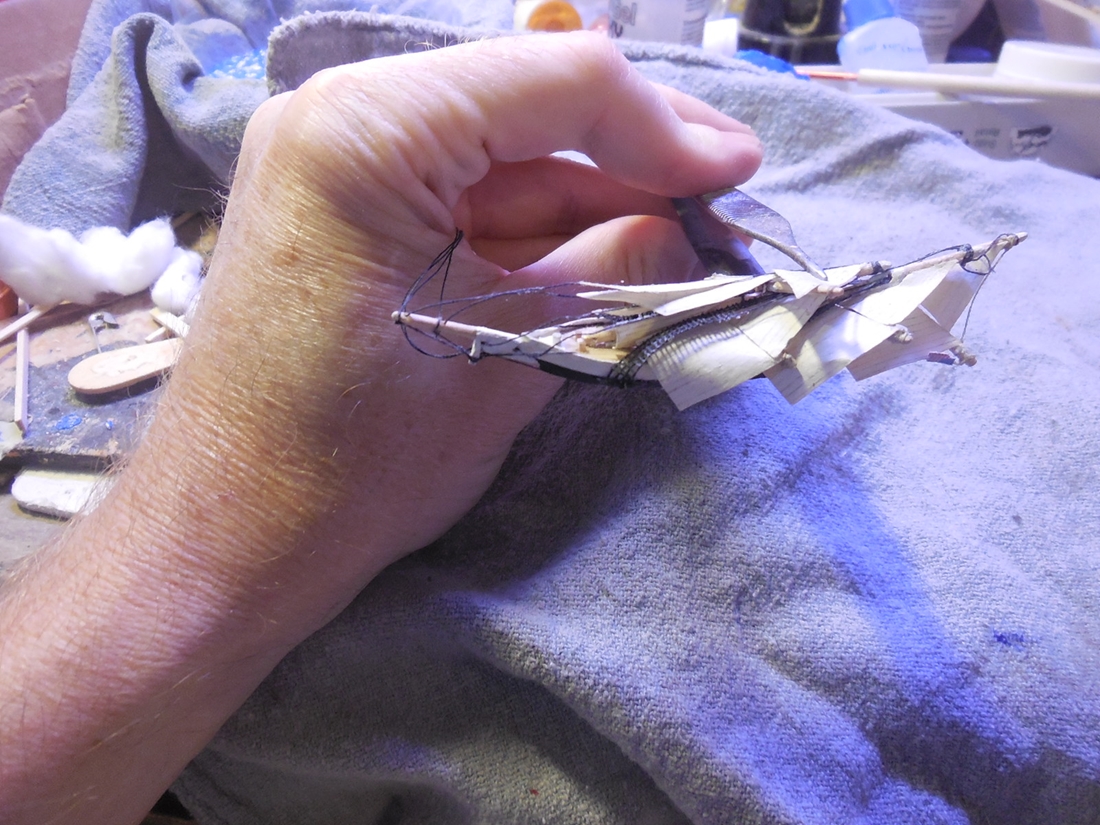
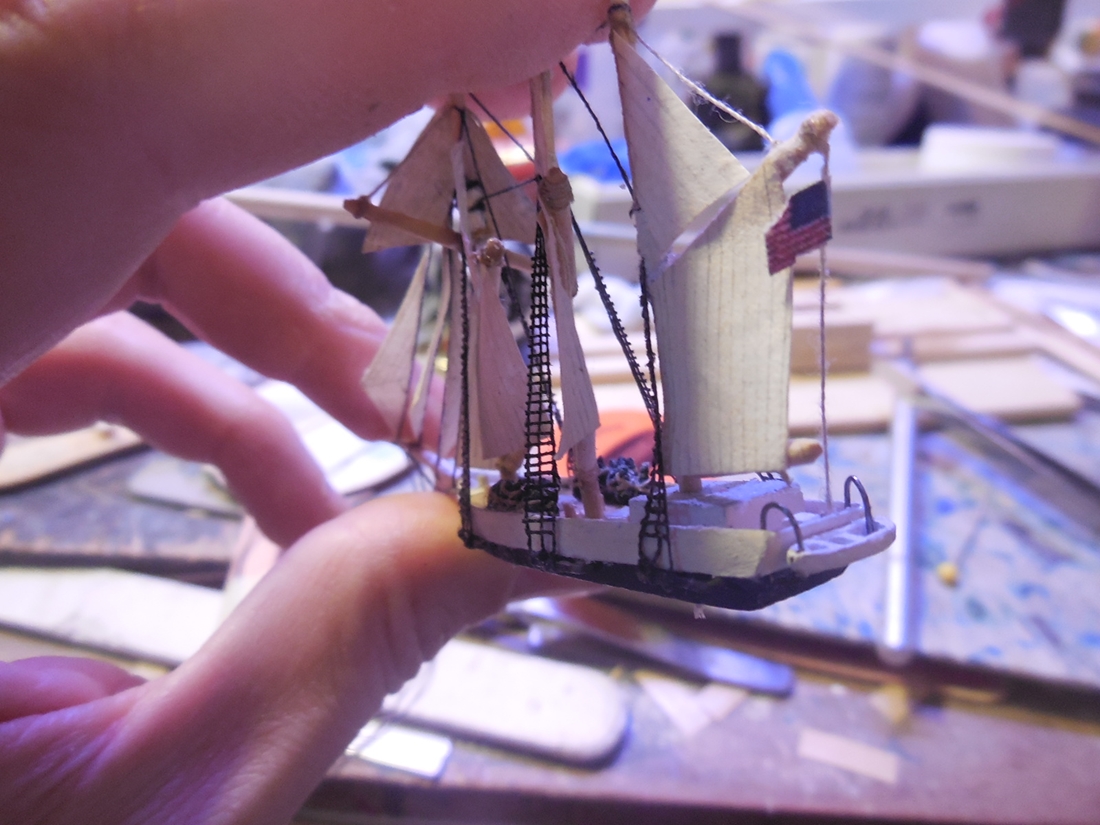
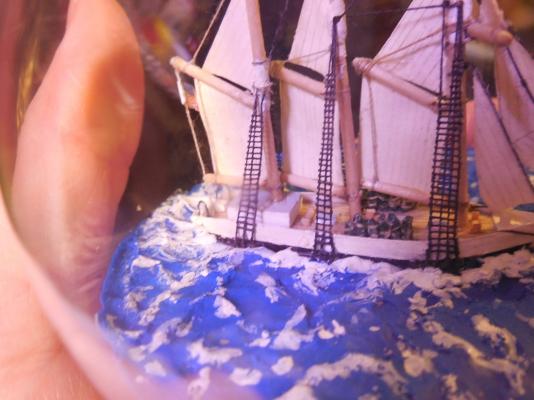
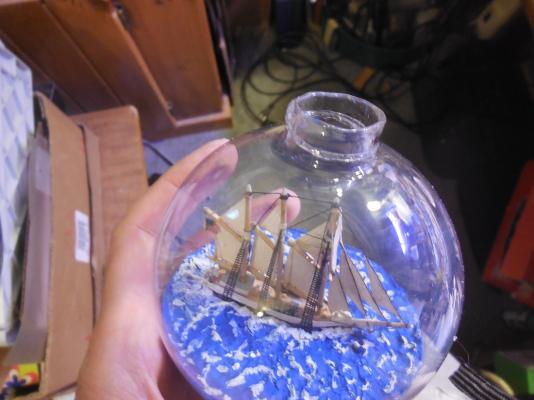
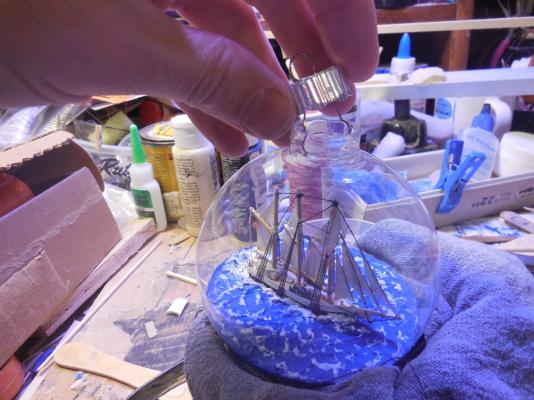
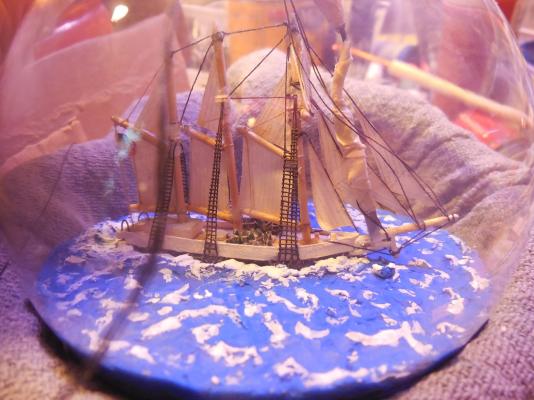
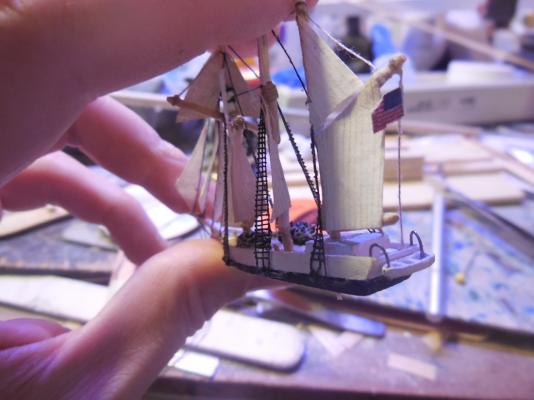
Folded everything down to go through the neck opening. Inserted ship into Christmas ornament, glued down, masts raised, sails straightened, pulled all lines tight & glued them. Taped a narrow hobby knife blade to one of the tools to cut the lines off after the glue dried.


- 56 replies
-
- 13
-
-
- rouse simmons
- bottle
- (and 1 more)
-
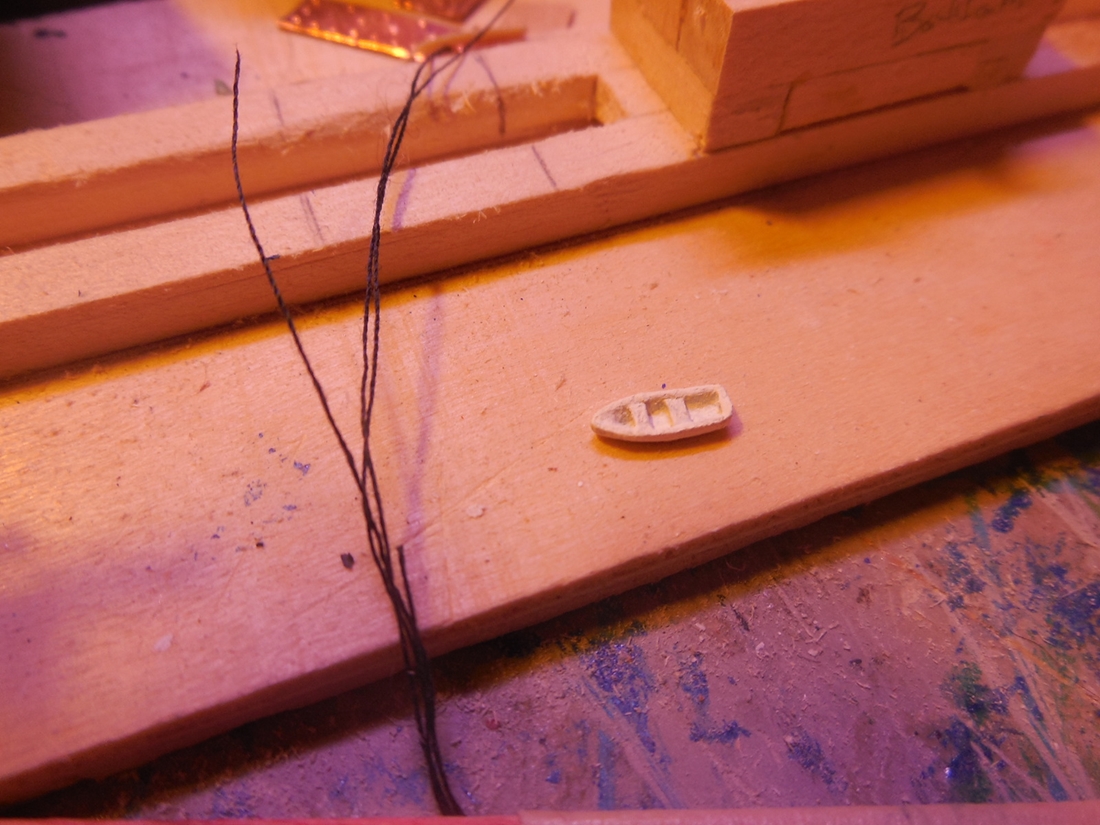
Made the lifeboat & added it to the back of the ship. Added the flag.

- 56 replies
-
- 7
-
-
- rouse simmons
- bottle
- (and 1 more)
-
Thanks for the input. I might try the epoxy. Will it hold something with such a small surface area to be bonded? (22 ga. brass wire). Richard, I'll have to check the Solder-It out. I had something like it called Miracle Weld, a paste that was just like that. It didn't work but that was 15-20 years ago. If you have had good results with the Solder-It I will look into it! Welcome Greg! Thanks for the encouragement. Input is always welcome! Jesse
- 1,306 replies
-
- 3
-
-
- syren
- model shipways
- (and 1 more)
-
Getting frustrated. Need to pin the pintles. Been messing with it for several days. Don't have a soldering torch. Have a cheap iron but that wont work. CA isn't holding. Cant figure out how I'm going to get the pins to permanently hold.
- 1,306 replies
-
- 7
-
-
- syren
- model shipways
- (and 1 more)
-
Thanks everyone for the kind comments, likes & all the birthday wishes! Jesse
- 1,306 replies
-
- 8
-
-
- syren
- model shipways
- (and 1 more)
-
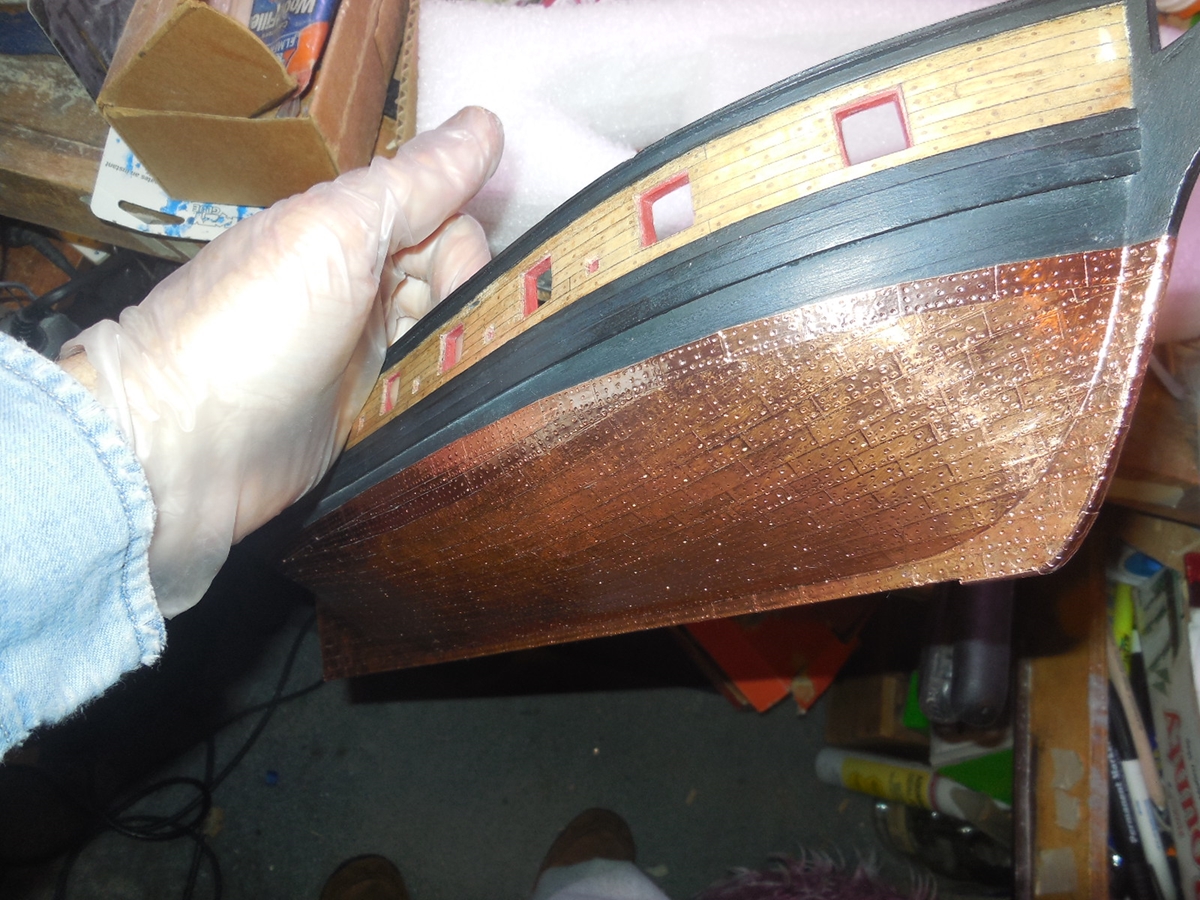
Thanks for the feedback Jason. For now I will try to leave it as it is & try very hard not to snag the corners. The Copper tape doesn't stick as well as it said it would but mine is old. Ready for the pintles & gudgeons. After reading up on Sal's log at this stage seems it was determined that they were most likely bronze rather than copper. Thinking of making mine out of brass & leaving them that way since both the copper plates & brass parts will darken over time.
- 1,306 replies
-
- 8
-
-
- syren
- model shipways
- (and 1 more)
-
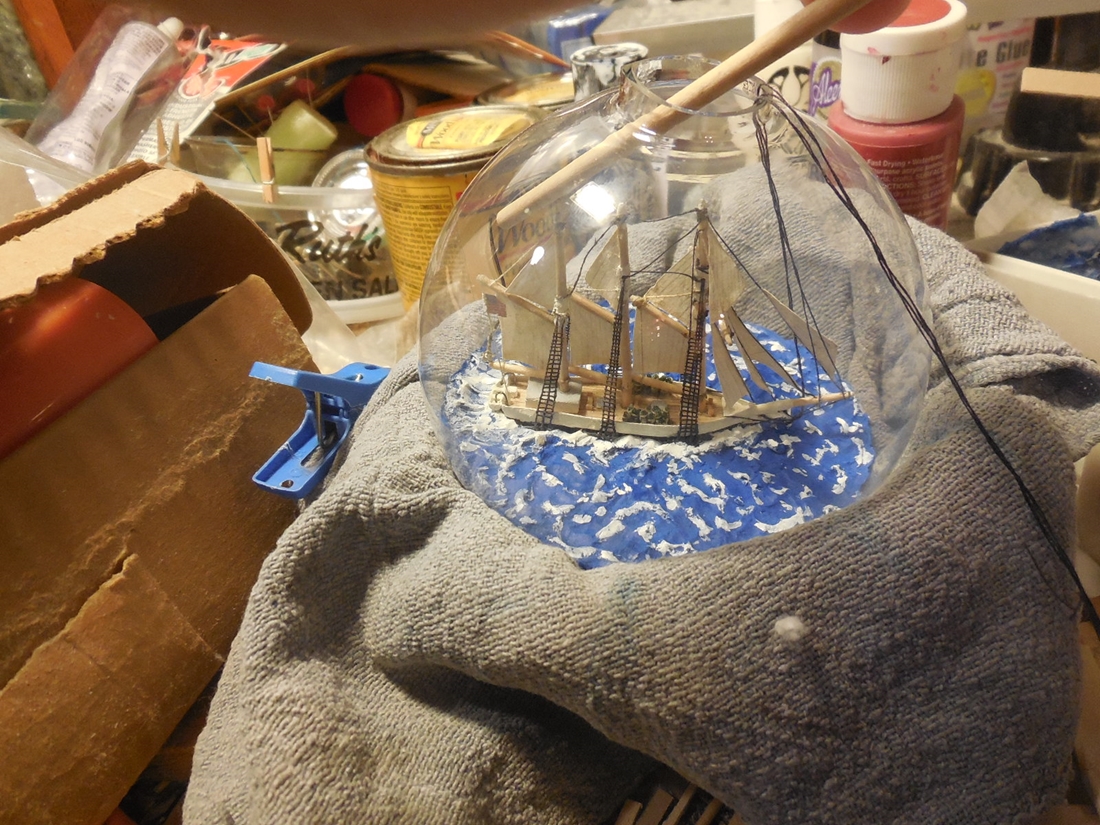
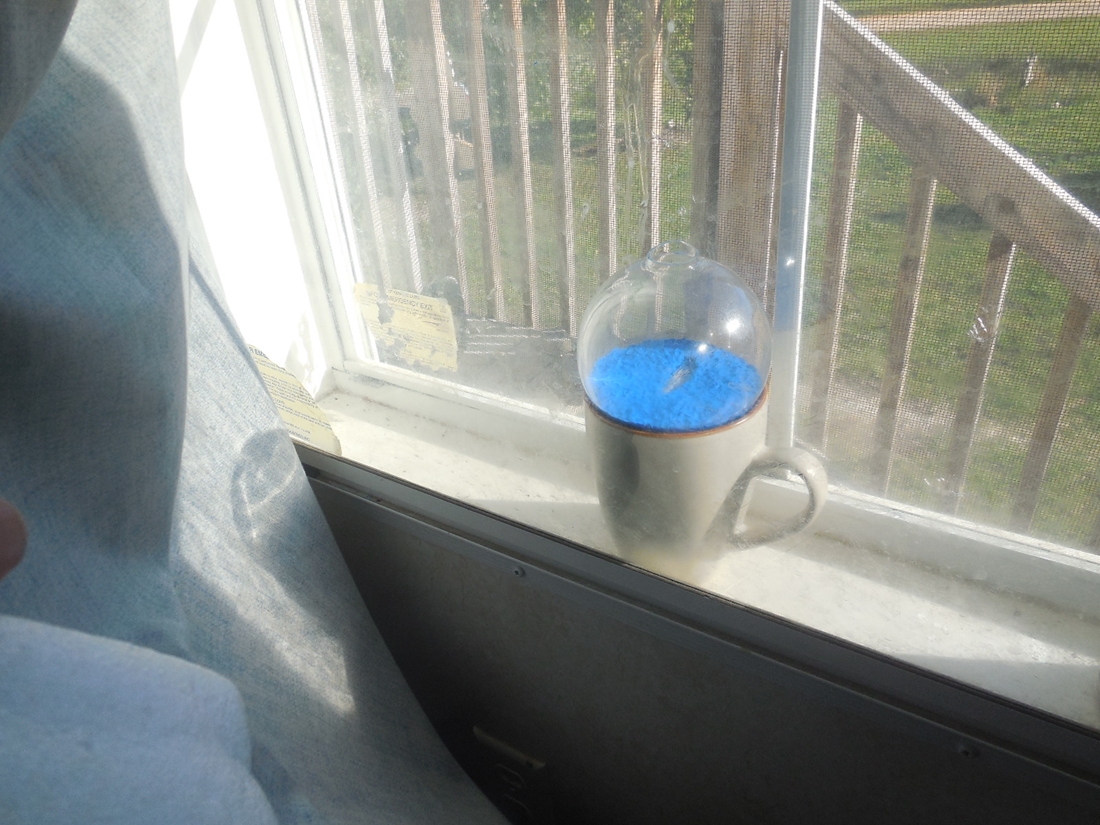
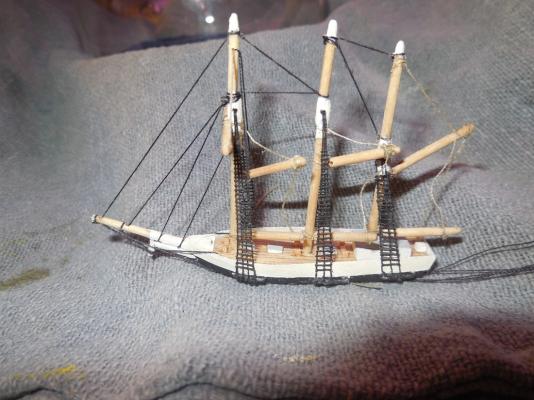
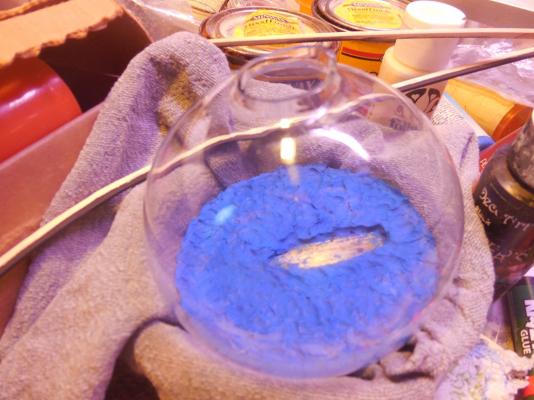
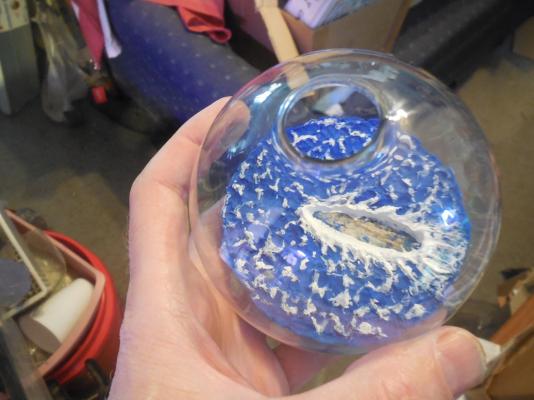
Got a lot of the rigging done. Tried adding ratlines after looking into it. It just about drove me crazy. I used Fray Check to hold them all in place then went back & used very tiny amounts of CA on the ends of each one so that nothing would come loose when folded down to put through the neck. As I posted before my silicone sea didn't work out. I have been told that you can mix the color in it when applying. If I had know that then I would have used that method but since I didn't know it at the time I used Platalina modeling putty. I used as thin a layer as possible for 2 reasons. 1: in the past I found out that the pressure of putting it in & wave forming was enough to break the thin glass sides, 2: Weight. Putty is heavy for a Christmas Tree ornament so I wanted to keep as muck weight as possible out of this. Got a thin layer laid in. Put it in between our double paned windows on a sunny day The sun melted the putty down to the base & softened it so I could form the waves, ripples without much pressure so I wouldn't break through the thin glass sides. I did a lot of white aps because this ship sailed in the rough waters of Lake Michigan & these waters even sunk the ship in the end.

- 56 replies
-
- 10
-
-
- rouse simmons
- bottle
- (and 1 more)
-
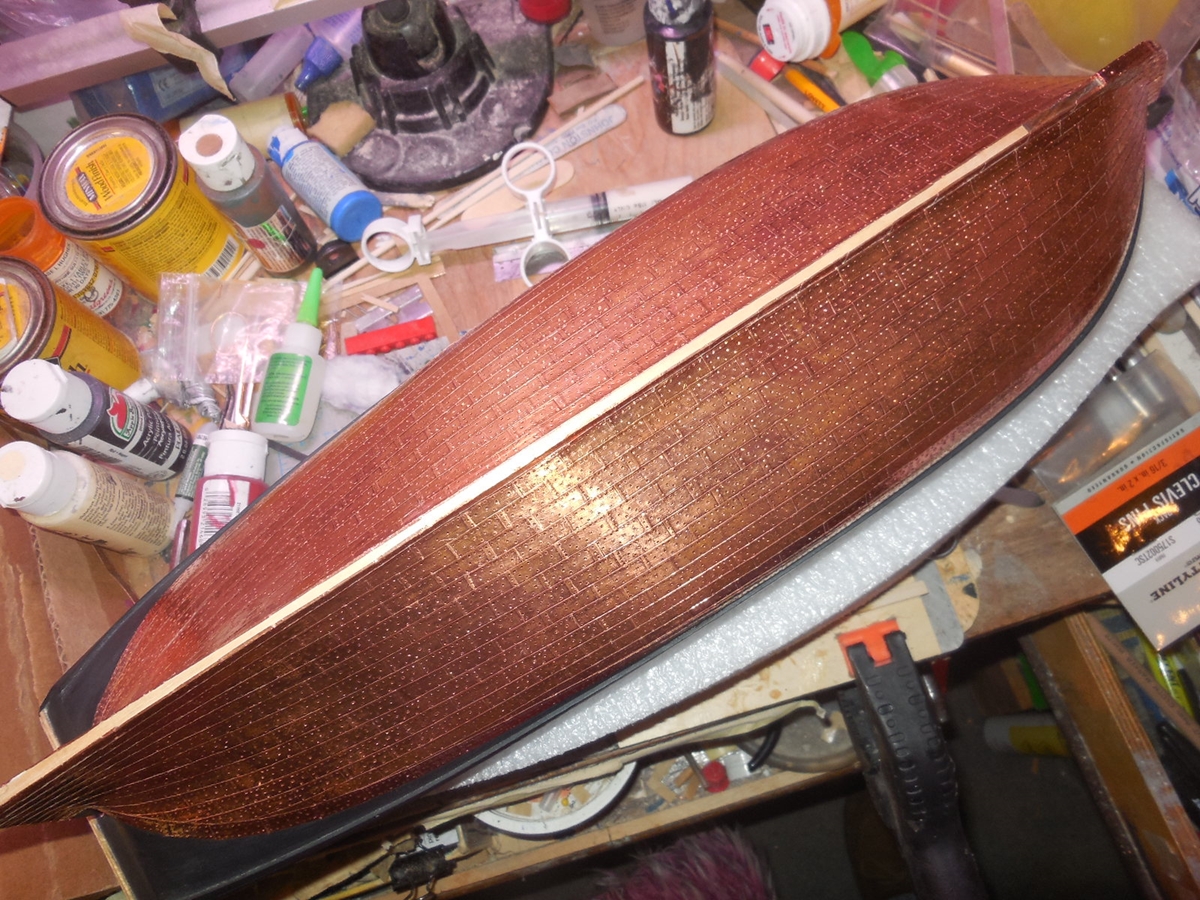
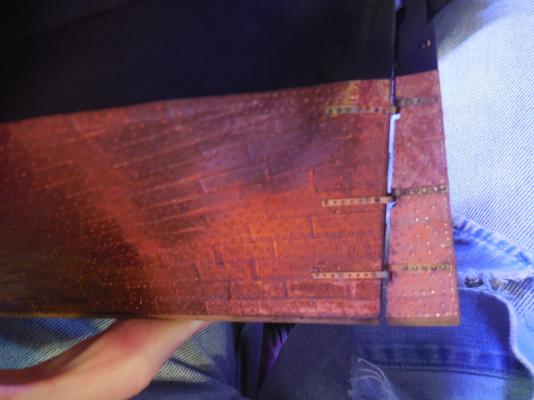
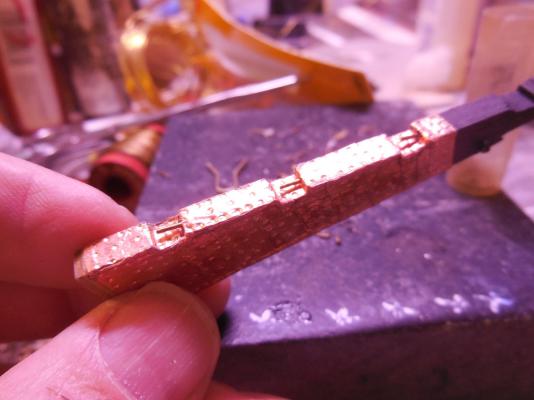
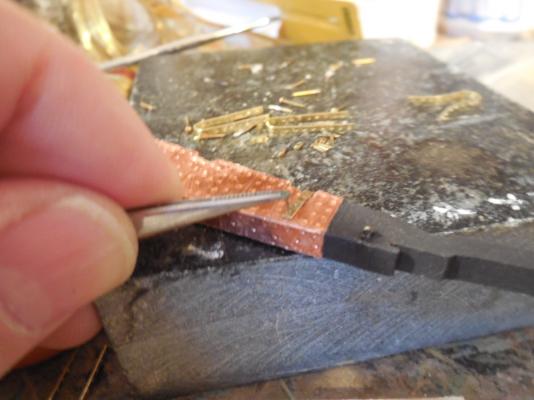
Finally got the coppering done on the hull. added the false keel. Pegged it the same way I did the Cap Rail to make sure it held permanently. Plated & painted the rudder. Added eye bolts for the rudder pendants. used a strip of the copper tape for the iron plate with the eye bolts. Still not sure what I'll do about the copper bottom. I want it to patina at least some. I don't like how bad the corners are snagging & it is impossible to never touch them with your hands as you are working on the ship. Hope no fingerprints show up later. Once the patina starts will it continue if you seal it or will the process stop at that point?


- 1,306 replies
-
- 22
-
-
- syren
- model shipways
- (and 1 more)
-
I don't know if it's patience or insanity........
- 389 replies
-
- 4
-
-
- scottish maid
- artesania latina
- (and 1 more)
-
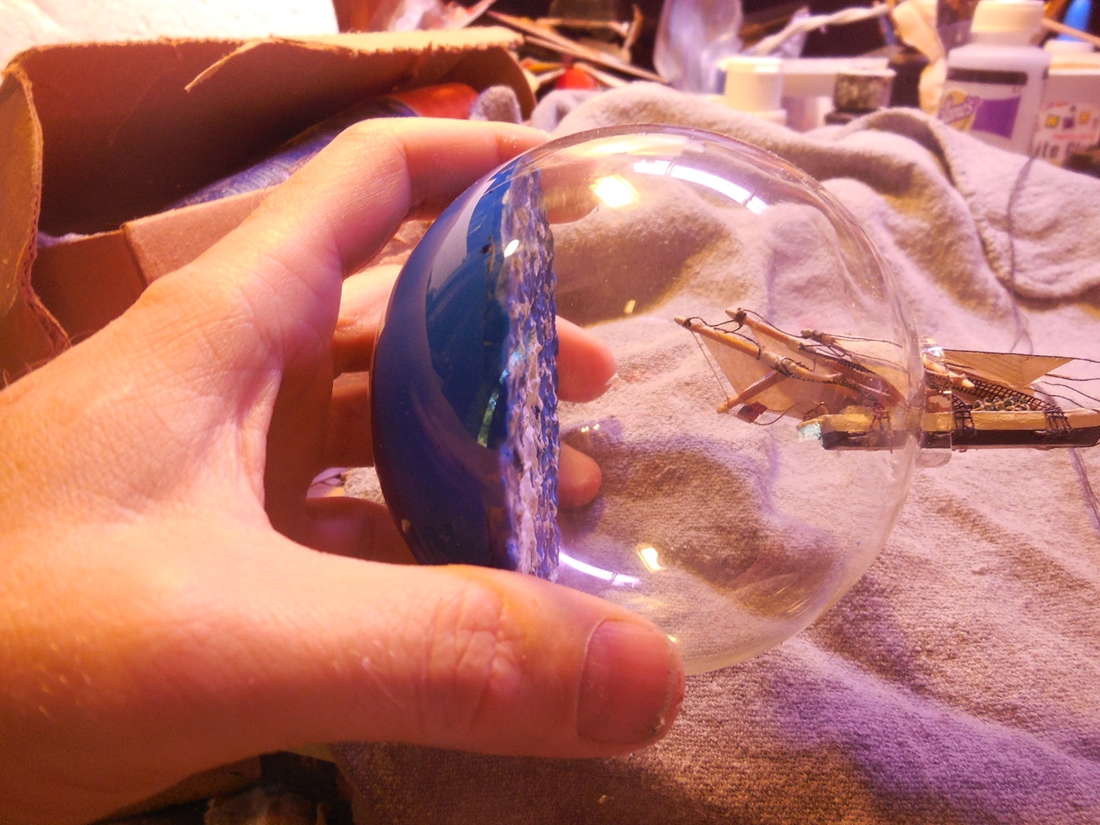
Another thing I did different was I didn't make any kind of jig or base to hold the ship down while I worked on it. Just wanted to try it to see easy or hard it would be this way. I was able to do it but I highly recommend not doing it this way It was much more irritating- especially doing the rigging. After gluing the sea baser in. The !st bulb out of the pack of 4 bought this year was found broken open one morning much like the picture before showed. That was now 5 bulbs broken. Got the 6th one out & for the 6th time started it all over again. Began to wonder if this would be possible at all, Repeated all these steps again & was now needing to figure out what I would do for the sea. After test fitting the ship in the neck - you guessed it- another break. This time it was just the neck itself. Very frustrated I was about to give up. Then I looked at the thin metal decorative cap that goes over the neck that holds the wire for hanging the ornament. When this piece is on it would completely hide this break. I decided I would finish this build & epoxy the neck back on & hide it all with the cap afterwards. The opening was still the same except it had a sharp edge I would need to be very careful with. I went with it......

- 56 replies
-
- 8
-
-
- rouse simmons
- bottle
- (and 1 more)