JesseLee
-
Posts
1,694 -
Joined
-
Last visited
Content Type
Profiles
Forums
Gallery
Events
Everything posted by JesseLee
-
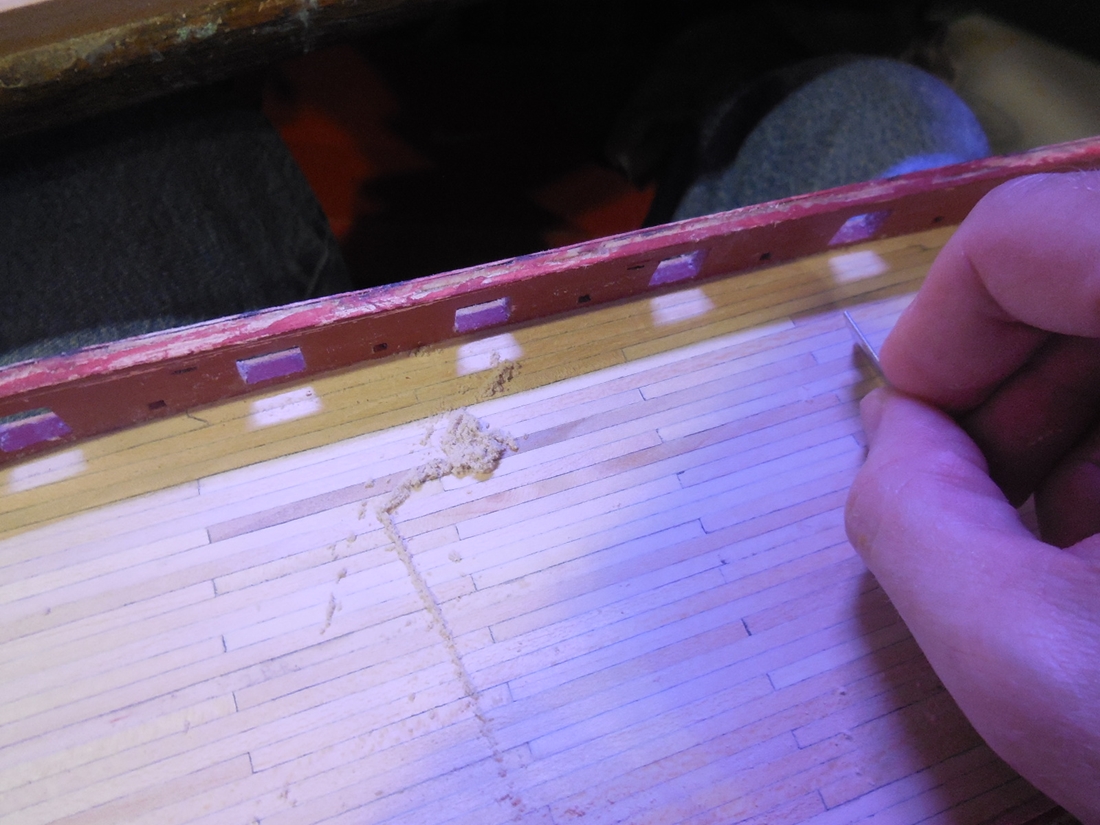
 Thank you everyone for all the kind comments & for all the likes! I changed tree nailing methods. Instead of using toothpicks like I did on the outer hull I went with using a filed syringe needle. I didn't want the tree nails to stand out & look darker on the deck. It worked pretty well, got the results I wanted. I did have a problem with it actually pulling the plug out sometimes & I had to go back over it & fill in where that happened.
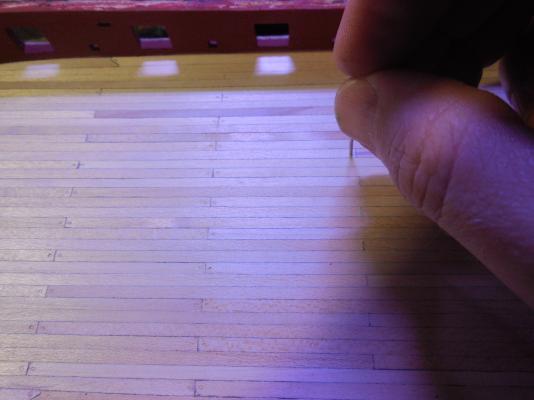
- 1,306 replies
-
- 19
-

-
- syren
- model shipways
- (and 1 more)
-
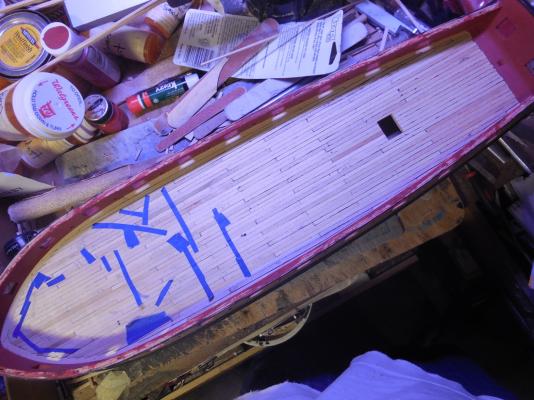
Thank you Chuck, this is a great build! Scraped the deck with a razor blade. Got it all even & smooth but nicked the crap out of my bulwarks in the process! Got a lot of spots to fill & re-paint!


- 1,306 replies
-
- 15
-
-
- syren
- model shipways
- (and 1 more)
-
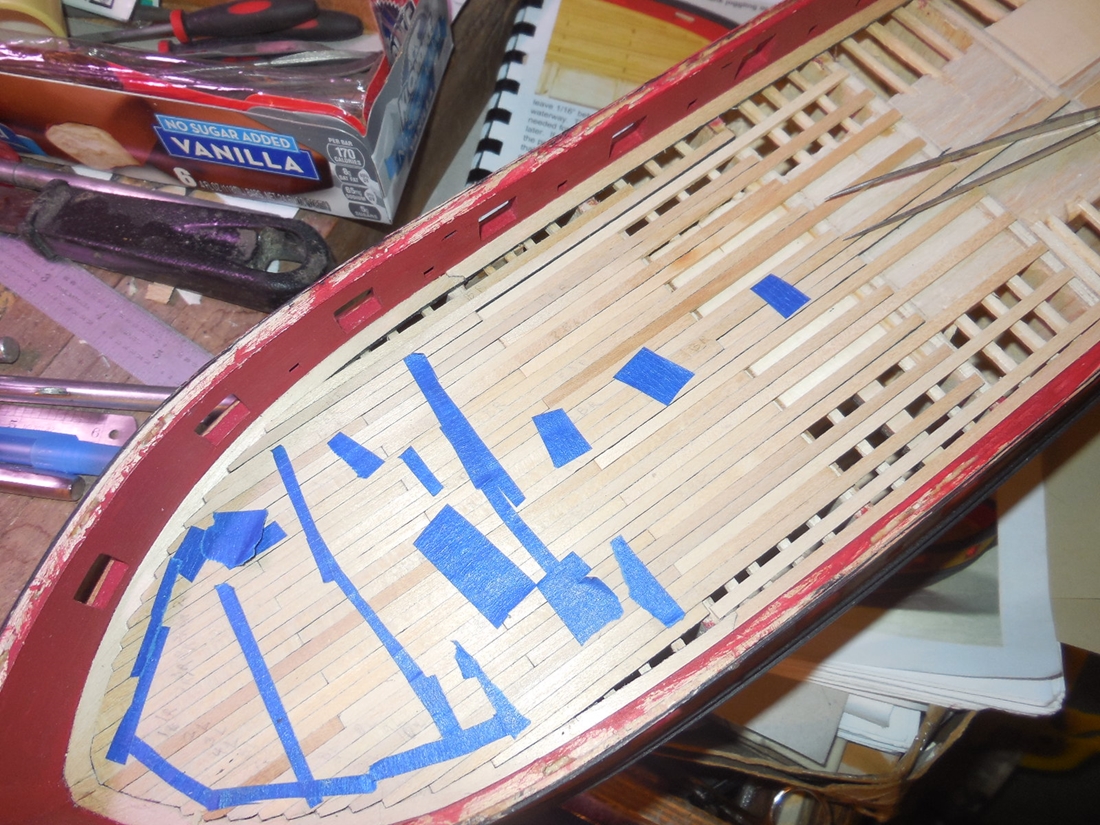
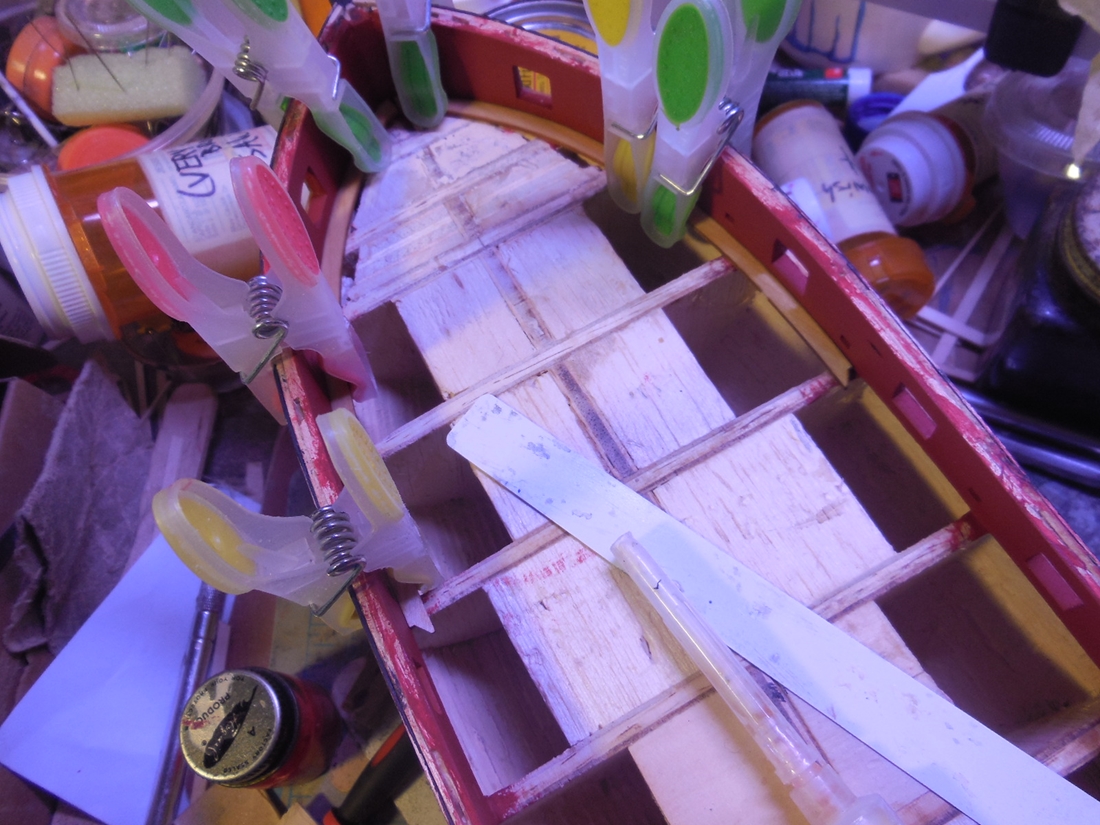
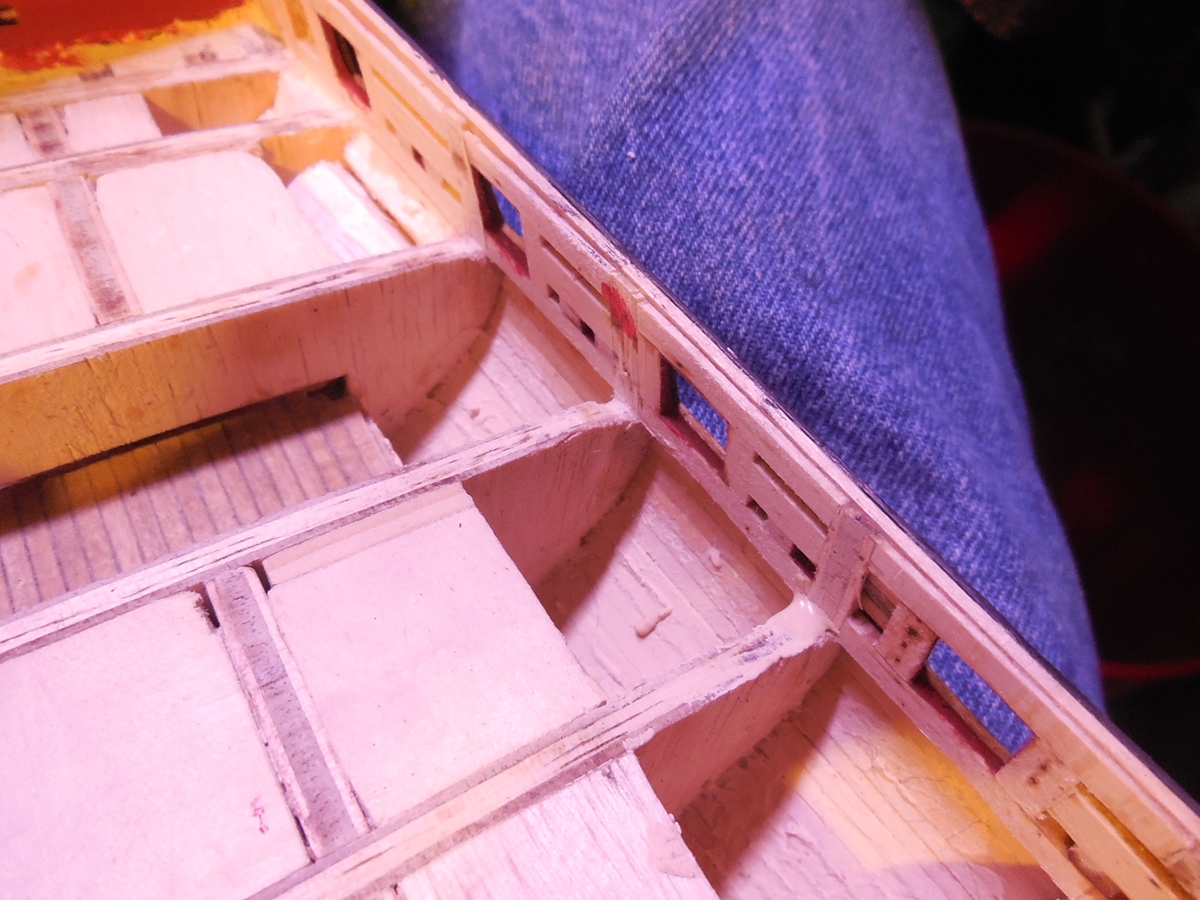
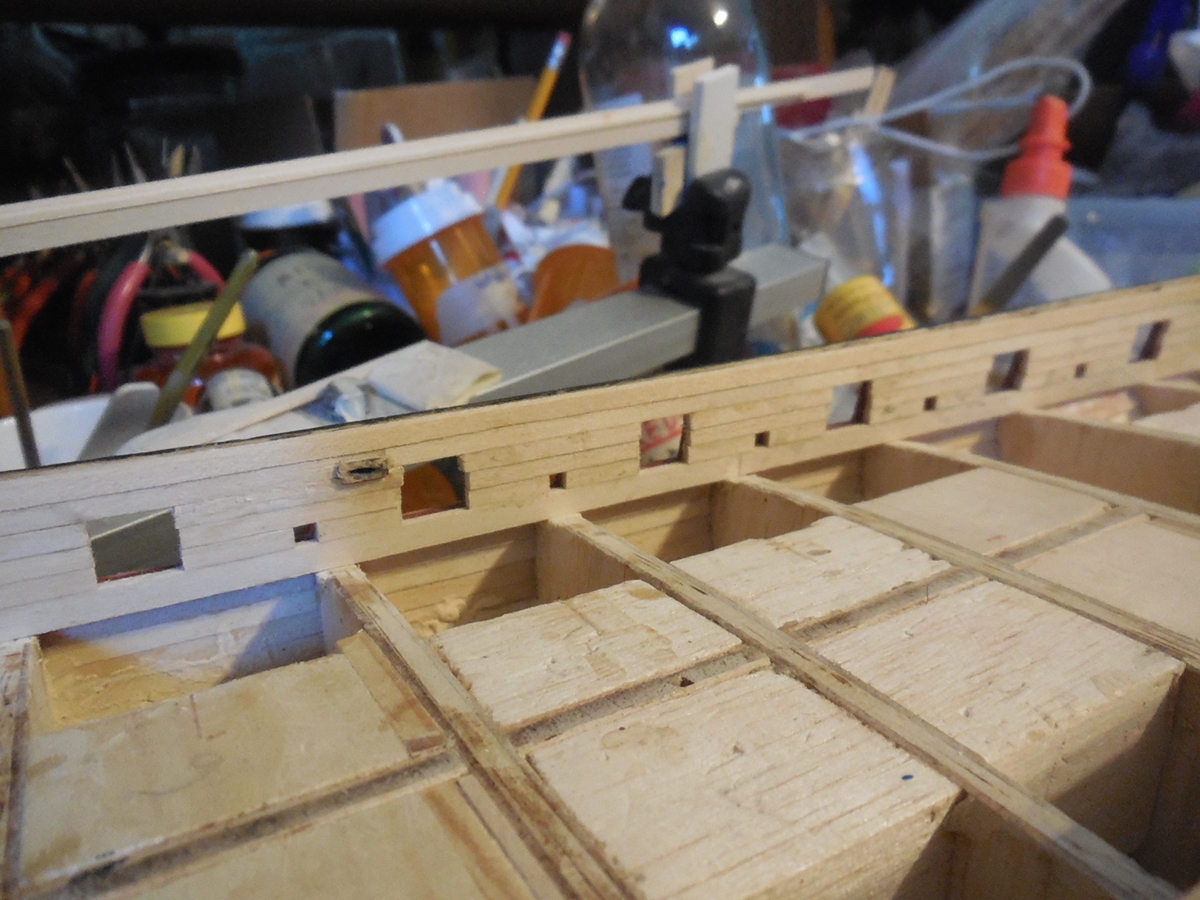
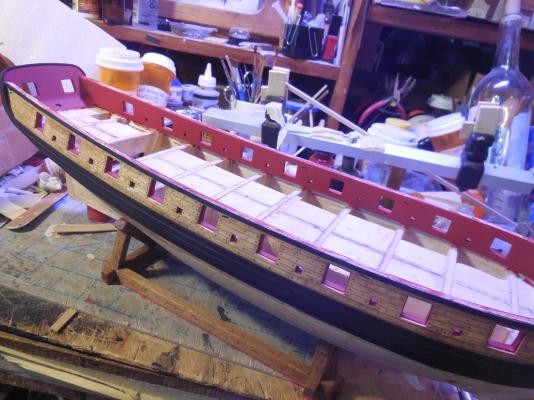
Thanks Carl & George! Now the deck planking. Got the rest of the margin planks down. The thought of joggling had me joggled for a while but I finally decided to go for it. It wasn't as difficult as I thought it would be but did have some goof up's along the way. I studied the instructions & others build logs trying to figure out what butt shift to do. I settled with the one Chuck showed in the instruction manual because it made it much easier for me to have them always lay on the existing bulkheads ( a little confused as to which butt shift this actually is ). I did the caulking the same way I did the outer bulwarks, I used black paint- wiped on like stain to keep it thin. Was very unsure of how well I would get the planking spaced & keep it straight from front to back so I slowly cut it all out & dry fitted the whole deck before I glued anything down - holding a lot of planks in place with strips of masking tape to keep it from popping all out on me. This was the first step in this whole build where I got it right the first time. Didn't have to start over anywhere- it all fit right so I picked each piece back up & glued it back down. The glue must really swell the wood because the glued pieces all fitted tighter than the non-glued dry fitted pieces.

- 1,306 replies
-
- 19
-
-
- syren
- model shipways
- (and 1 more)
-
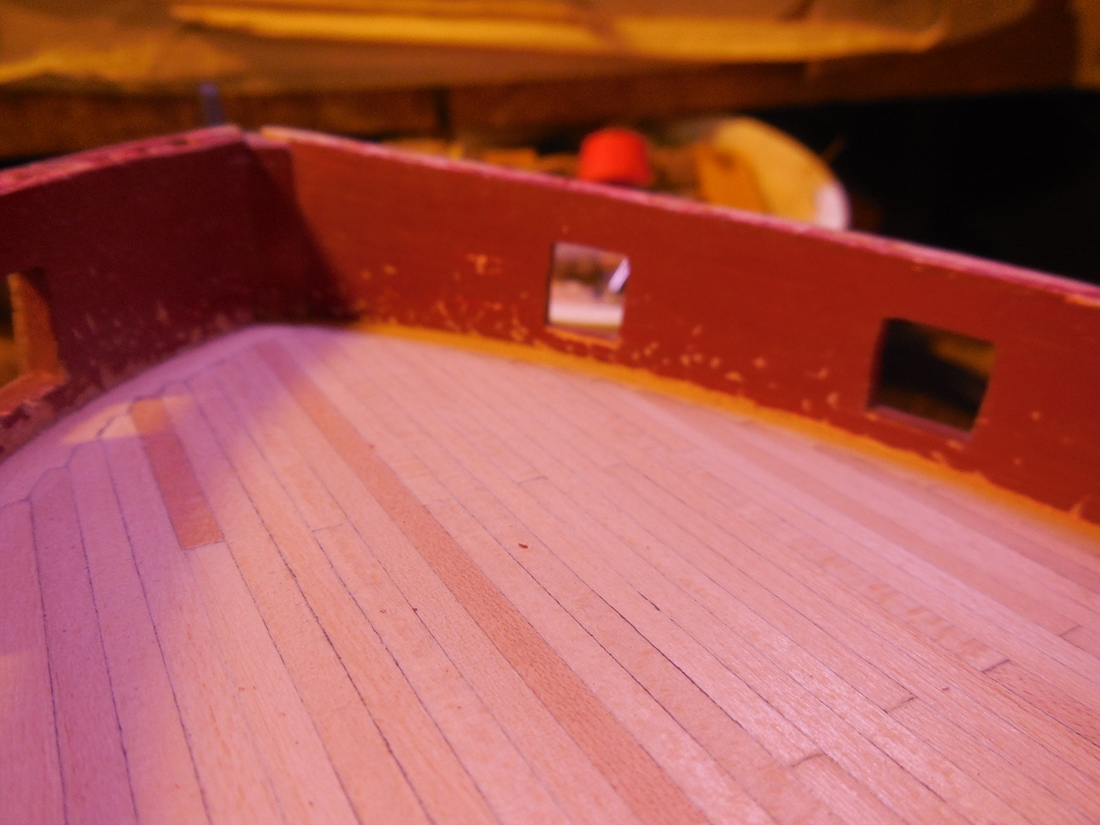
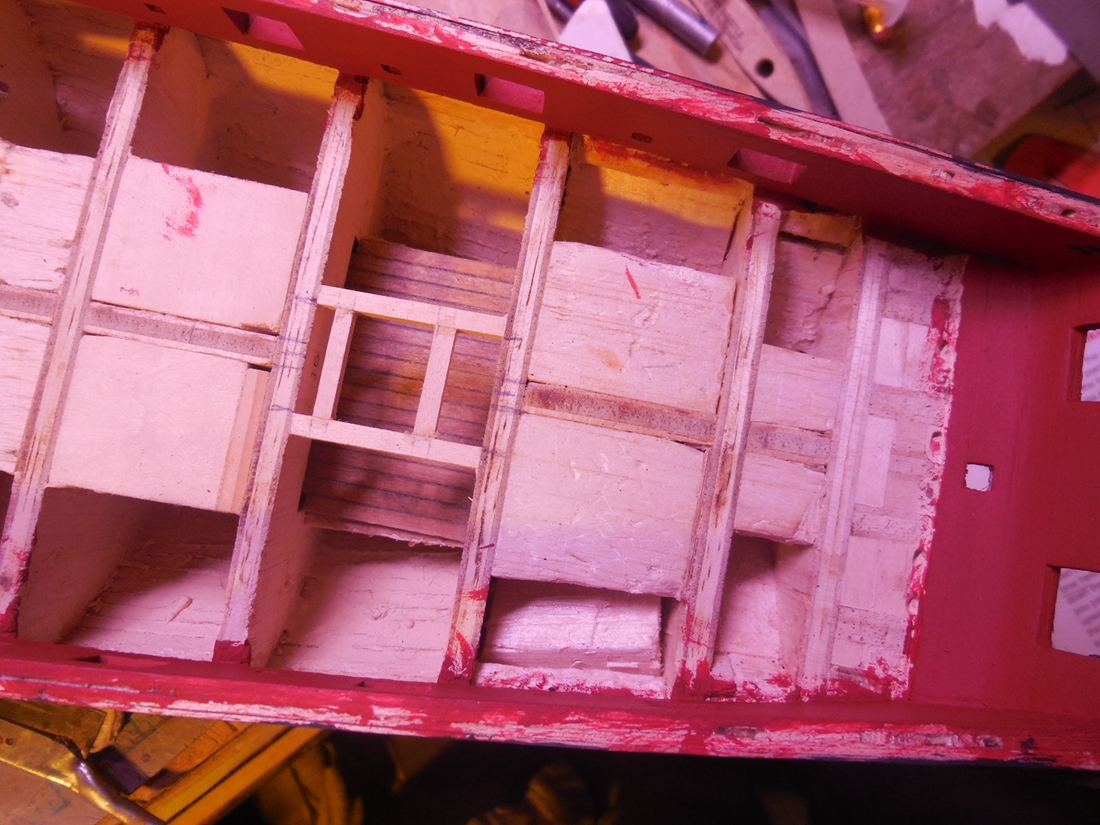
Getting behind on my posting, got a lot of catching up to do. As I stated earlier, I'm going to wait on the cap rail right now but will work it in before too long. Got the inboard bulwarks painted red. Took a clearer shot of the transom molding- that first pic was pretty out of focus. Glued the forward margin planks down & did the companionway framing. My stupid computer wont load the pics in order again but you can tell what's what.


- 1,306 replies
-
- 17
-
-
- syren
- model shipways
- (and 1 more)
-
Looking good!
-
This was one of the many things about this kit & its instructions that I wasn't sure about. I often wondered as I did this build just how much of it was wrong. I should have stopped & asked more questions I guess. I wonder if maybe there should be a hook involved here? No one said anything about it when I posted the pictures.
- 389 replies
-
- 4
-
-
- scottish maid
- artesania latina
- (and 1 more)
-
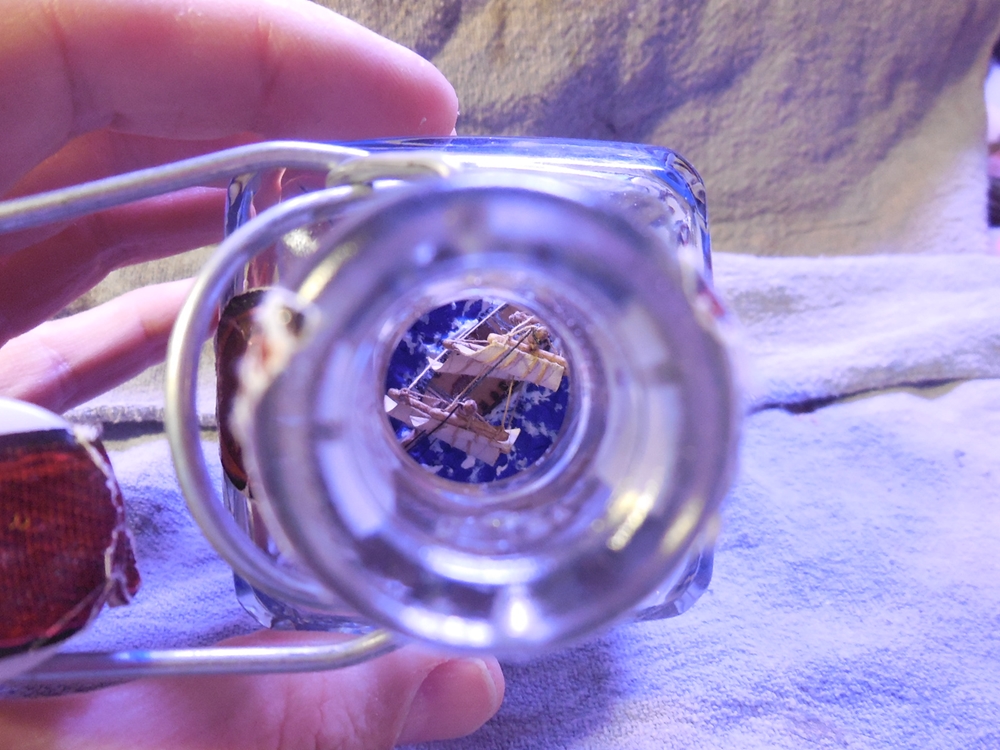
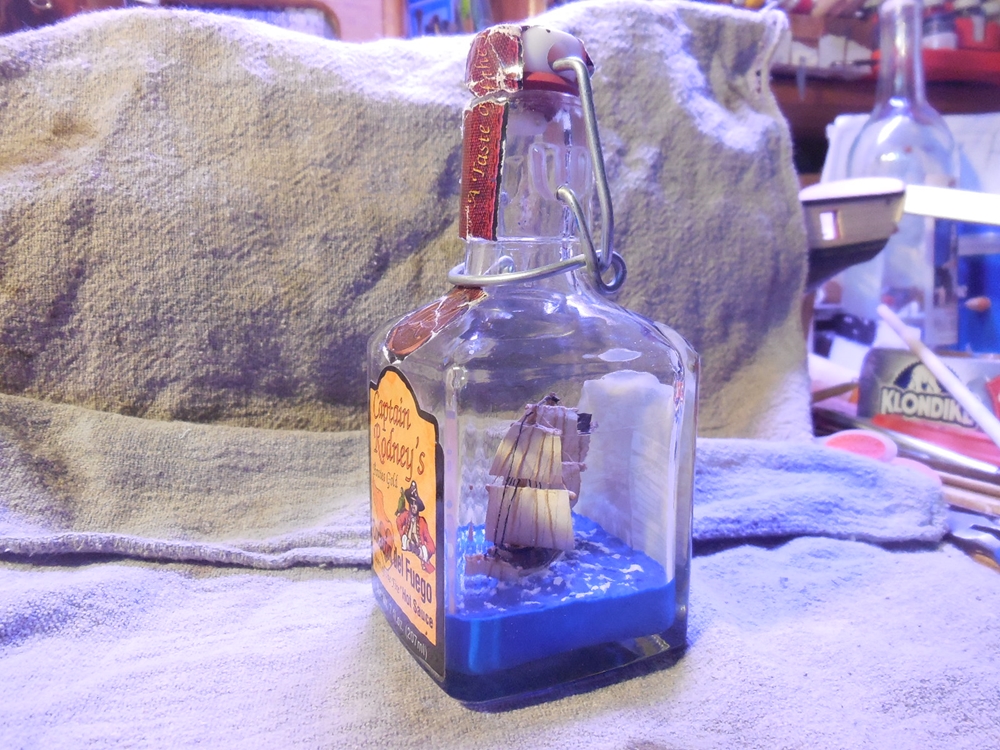
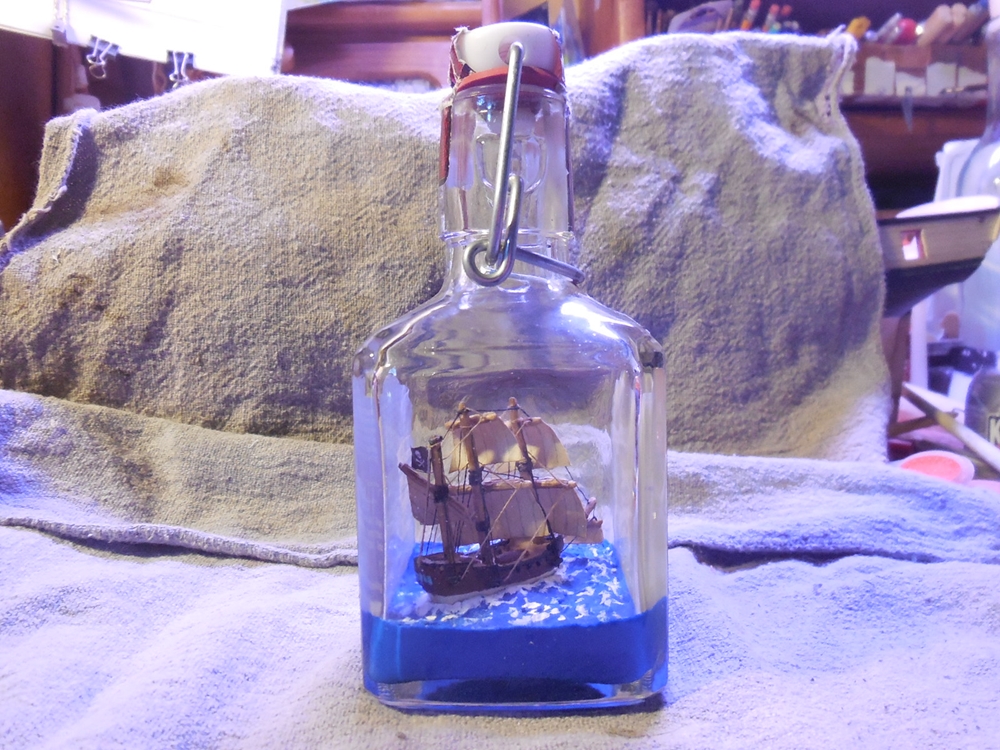
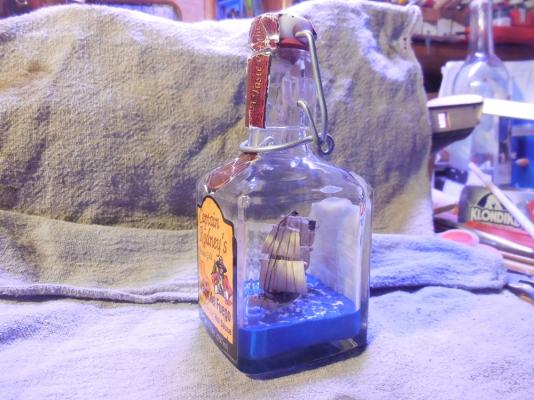
Thanks for the all the comments & likes! Marcus, yes I'm leaving both labels on so it is both one of my hot sauce bottle collection & a SIB. Pictures of the finished build.


- 71 replies
-
- 16
-
-
- pirate ship
- bottle
- (and 1 more)
-
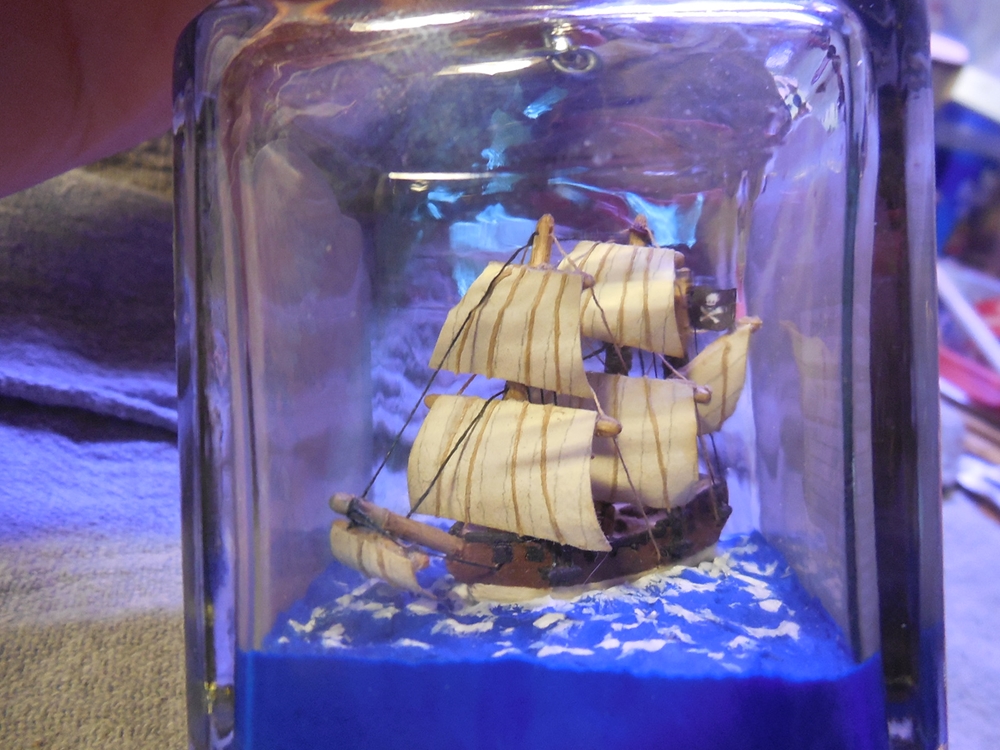
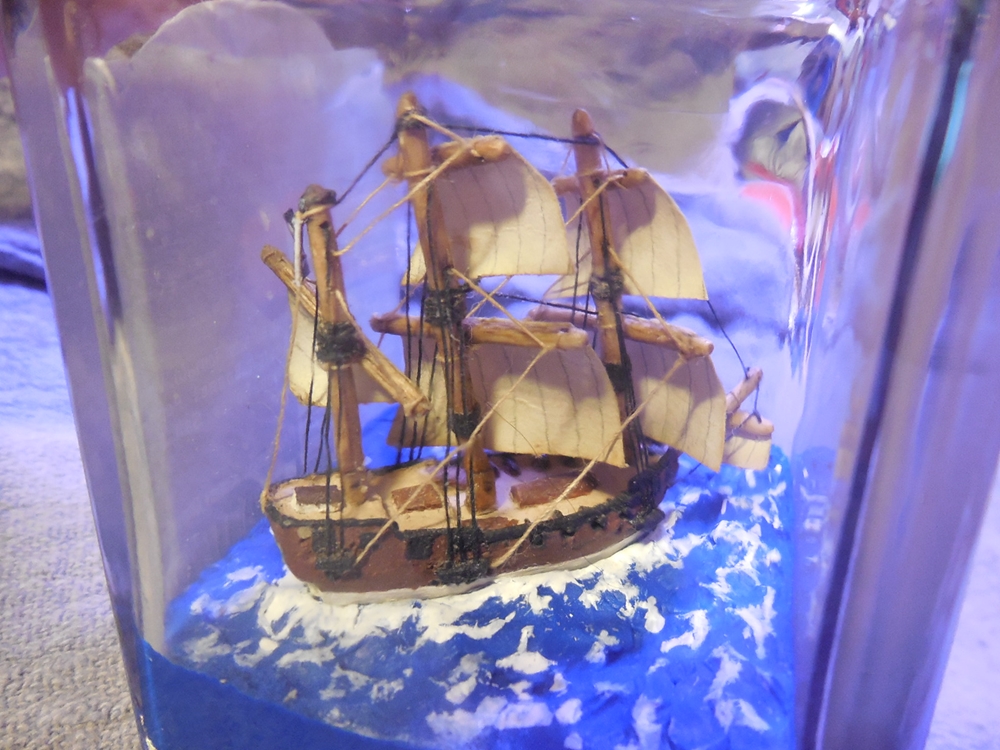
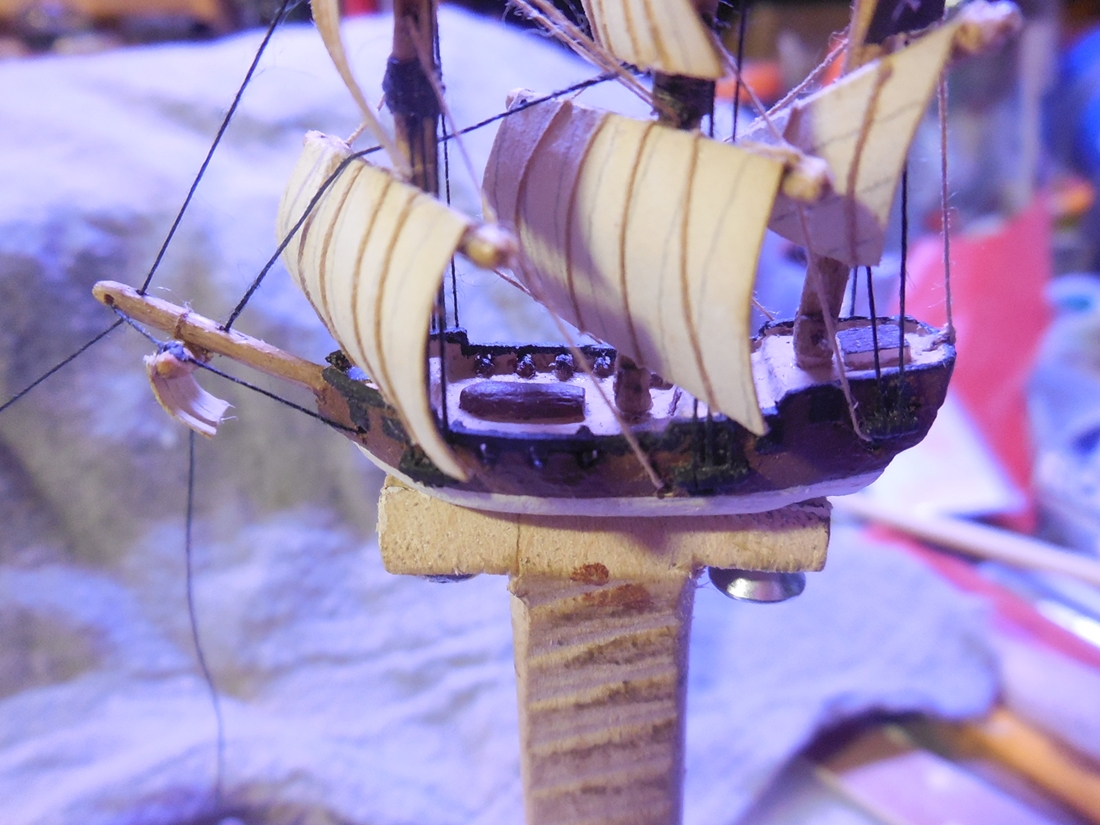
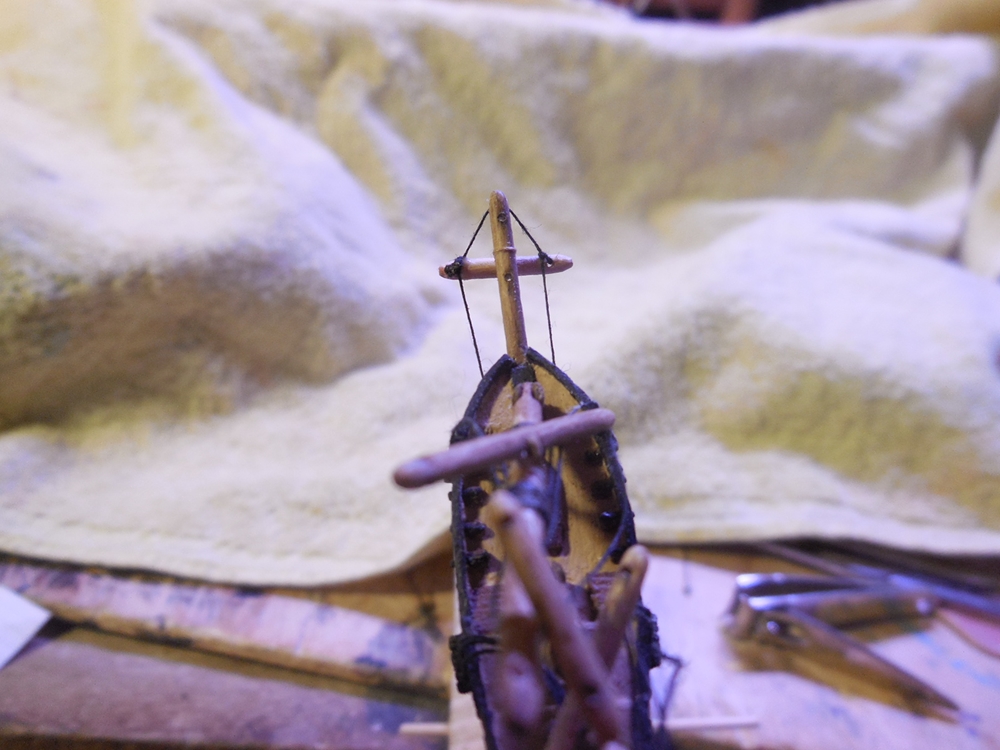
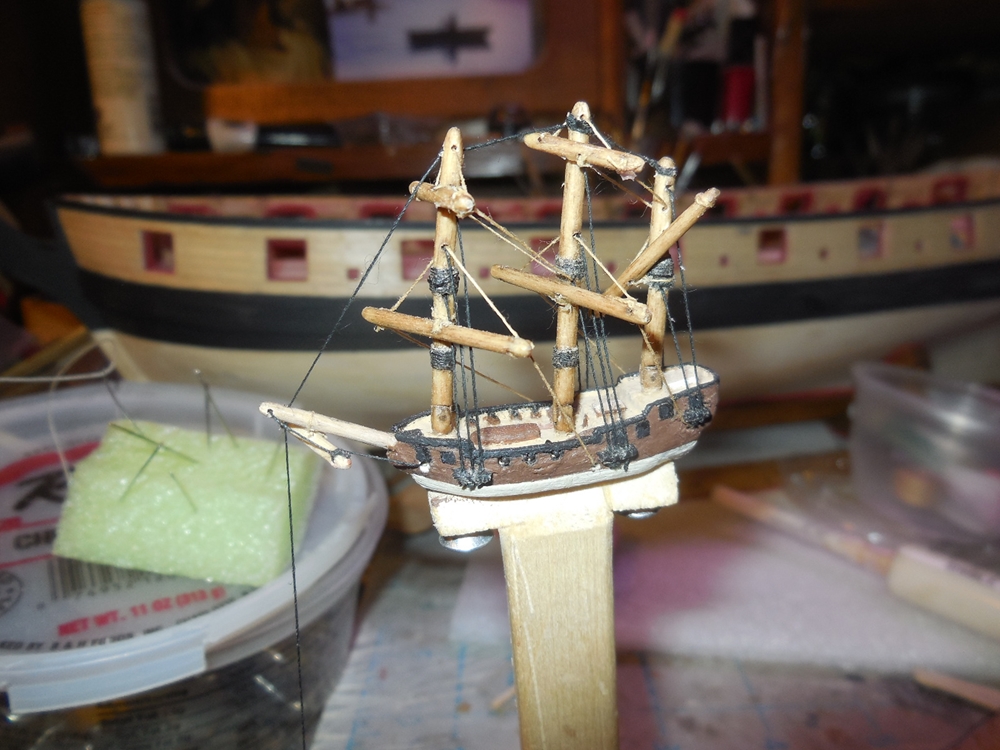
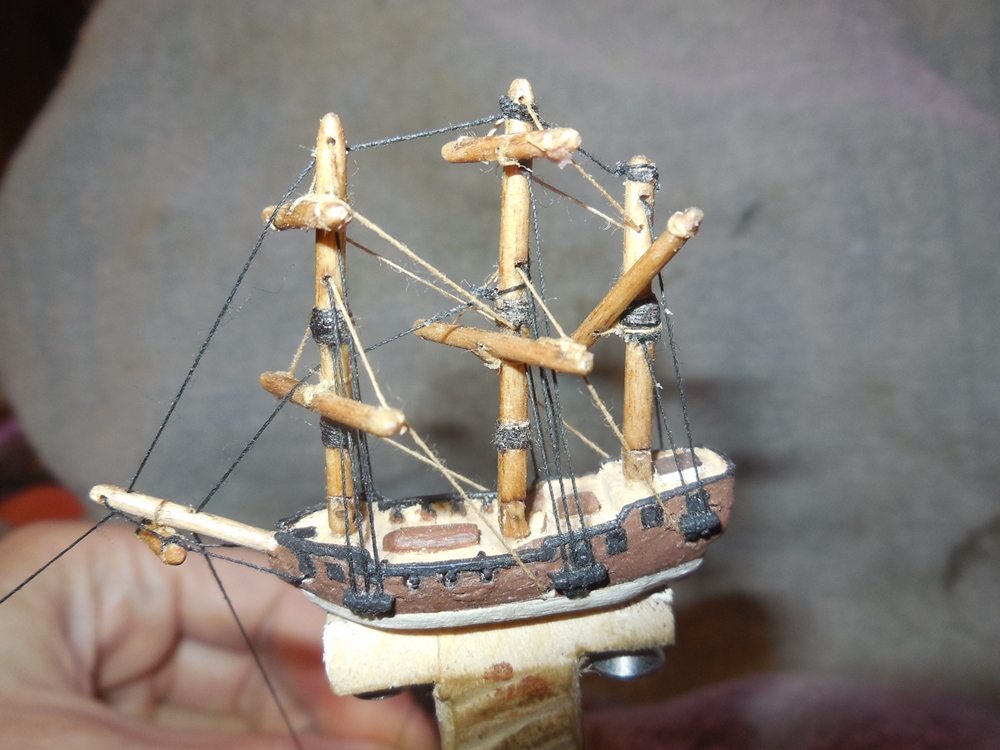
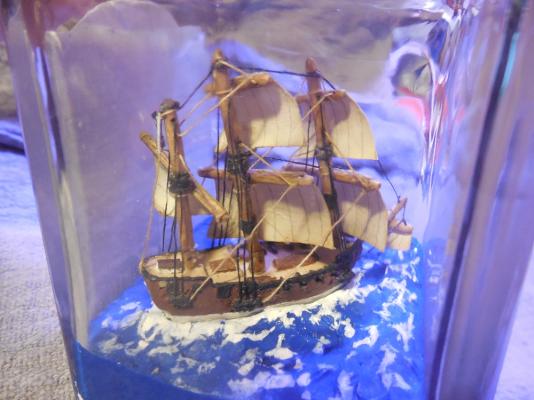
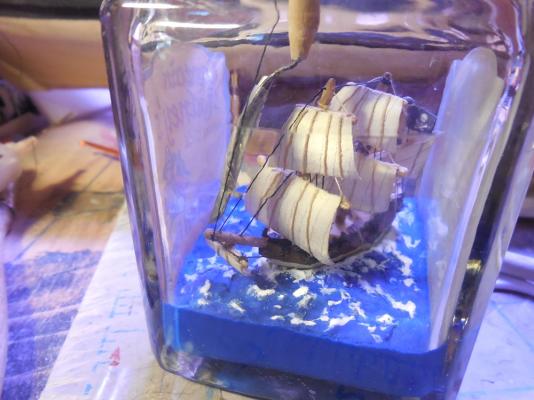
Got the ship in the bottle. Glued it down, raised the masts, glued the lines & cut them off.


- 71 replies
-
- 14
-
-
- pirate ship
- bottle
- (and 1 more)
-
I like the natural over the yellow but I know you will make it look good no matter what you go with!
- 962 replies
-
- 5
-
-
- sovereign of the seas
- ship of the line
- (and 1 more)
-
I used one of these when I was a bench jeweler. They are the best! I could kick myself for not getting one for myself back then!
-
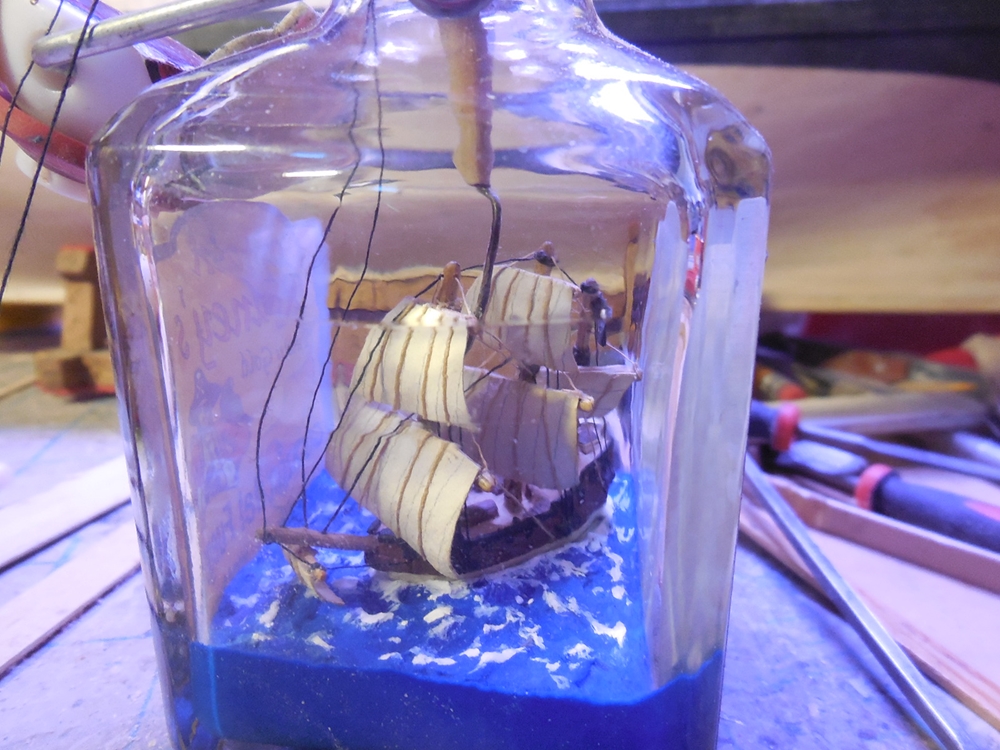
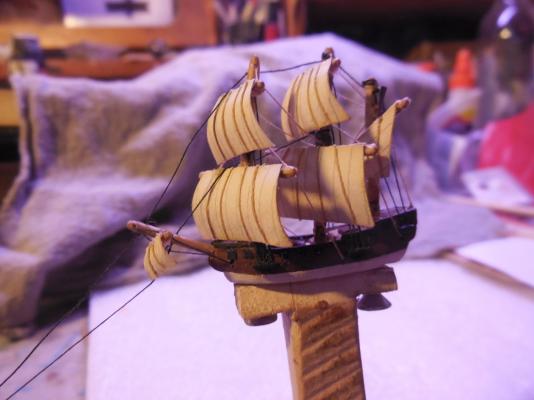
Glued the sails in position. Running all the rigging....


- 71 replies
-
- 18
-
-
- pirate ship
- bottle
- (and 1 more)
-
Looks good Piet! Been trying to figure out the best way to make some blocks. This has showed me a good way to go about it.
-
Like George said, some don't glue them. I think this is so if you don't get them lined up perfectly you can pull it one way or another with rigging such as shroud lines and such. I have always glued mine but as George said again I wouldn't epoxy them just in case you have to undo it for some reason like not being lined up right after the glue dries. Full sails hide more rigging & blocks more open views of the deck from certain angles. No sails or furled sails show more of your other work. It a personal preference. I think with furled sails you kind of get the best of both worlds.
- 389 replies
-
- 3
-
-
- scottish maid
- artesania latina
- (and 1 more)
-
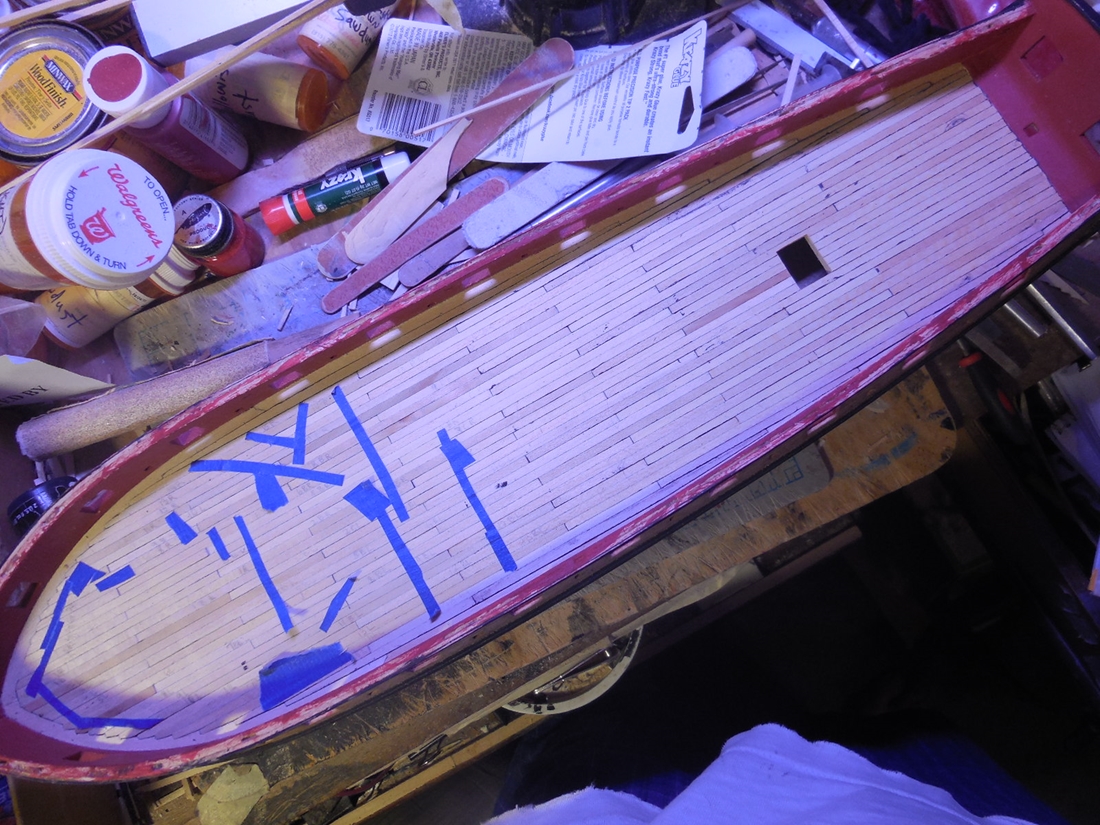
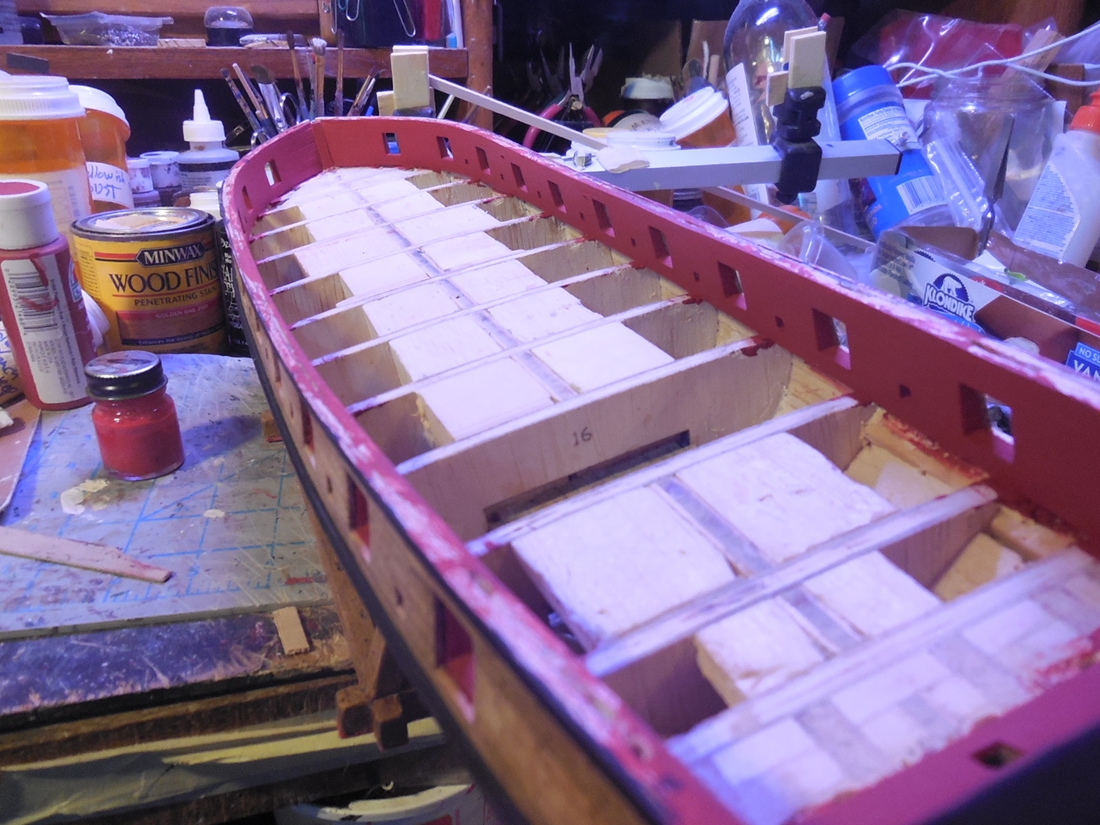
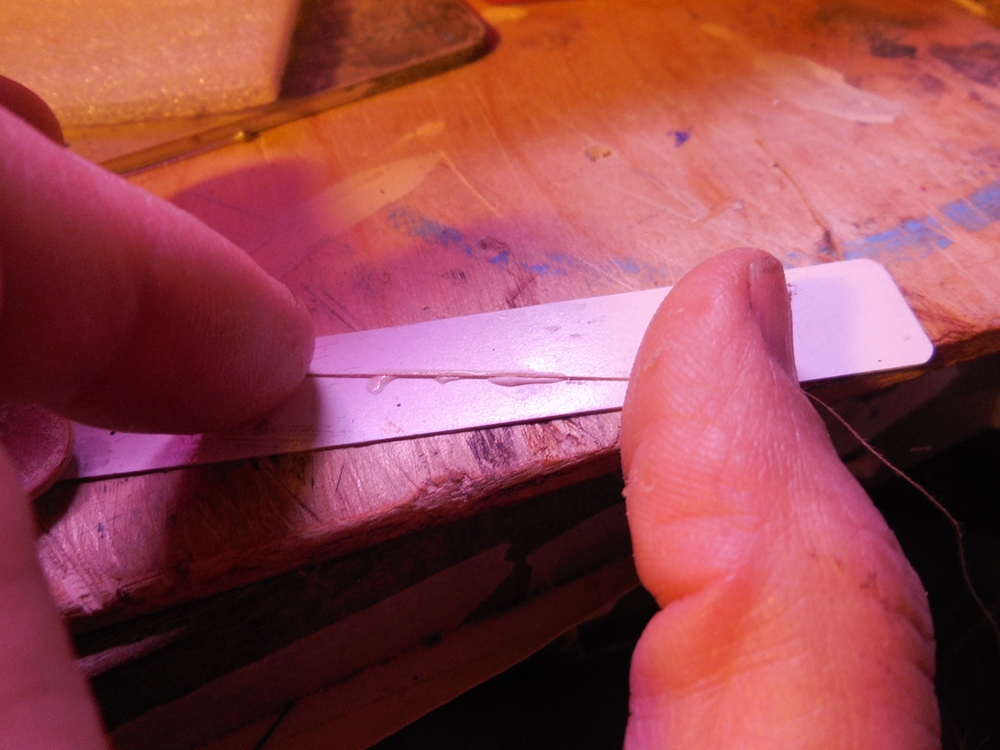
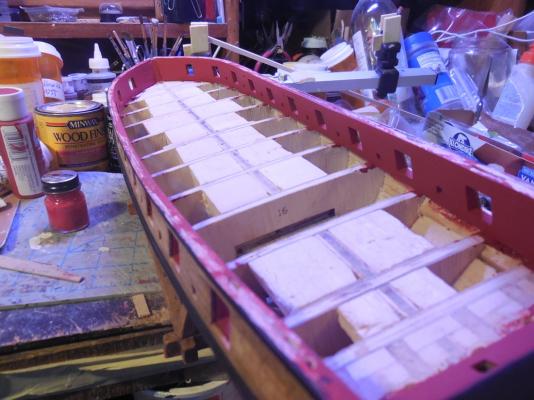
Thinning down the inside bulwarks turned out to be way more involved than I expected. Took a long time & keeping them the same thickness was really fun . I ended up with notches in the bulkheads. Filled them in with wood filler. Planked the inside bulwarks.


- 1,306 replies
-
- 19
-
-
- syren
- model shipways
- (and 1 more)
-
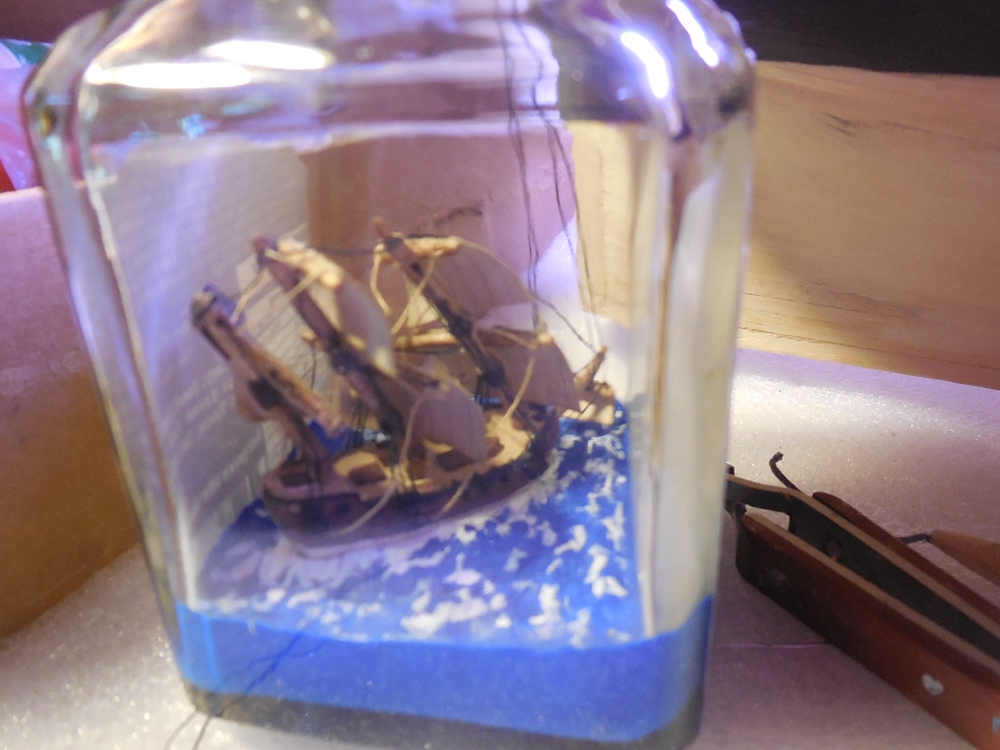
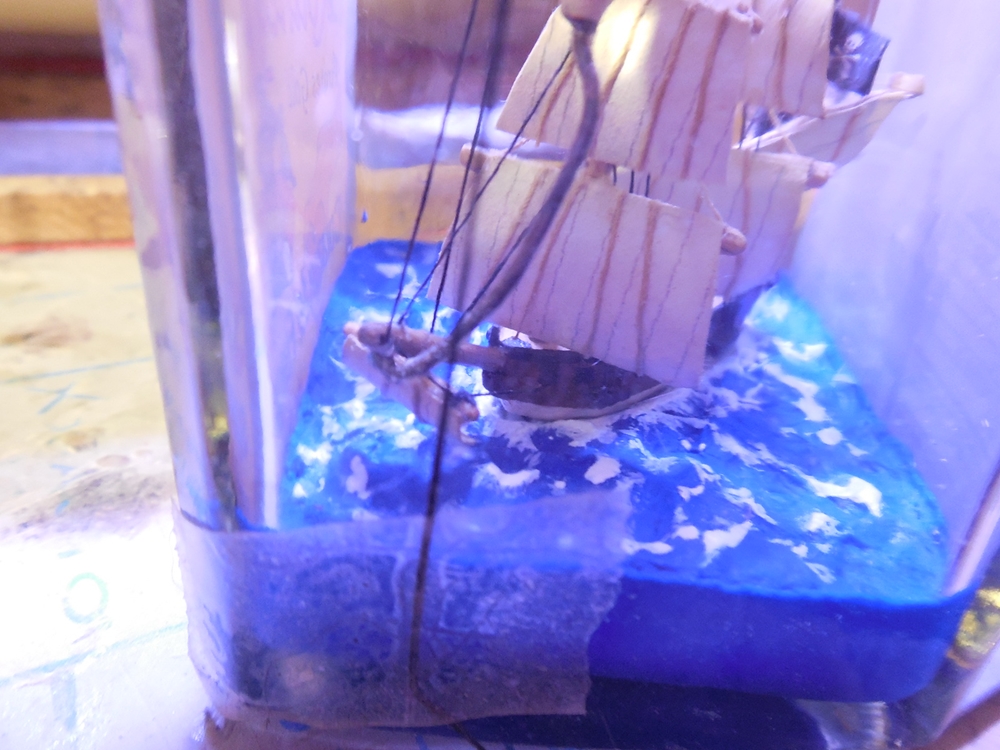
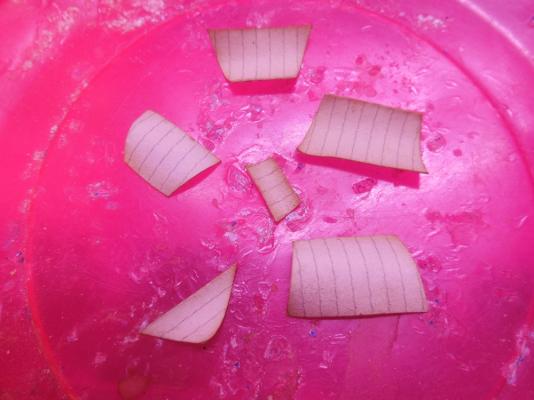
Brushed the dust & stuff off the inside of the bottle. White painted the wave caps. Didn't trust that glue would hold hull down to putty when the rigging is pulled so I wedged wood sticks down in the putty to have something more solid to glue the ship to. Cut out sails. Stained them with coffee. I always do a wash or 2 in baking soda if I use tea of coffee to neutralize the acid in them.


- 71 replies
-
- 10
-
-
- pirate ship
- bottle
- (and 1 more)
-
They look ok to me too. Remember they need to be big enough for the sail material to take up its space & still be loose enough to easily slide up & down the mast.
- 389 replies
-
- 2
-
-
- scottish maid
- artesania latina
- (and 1 more)
-
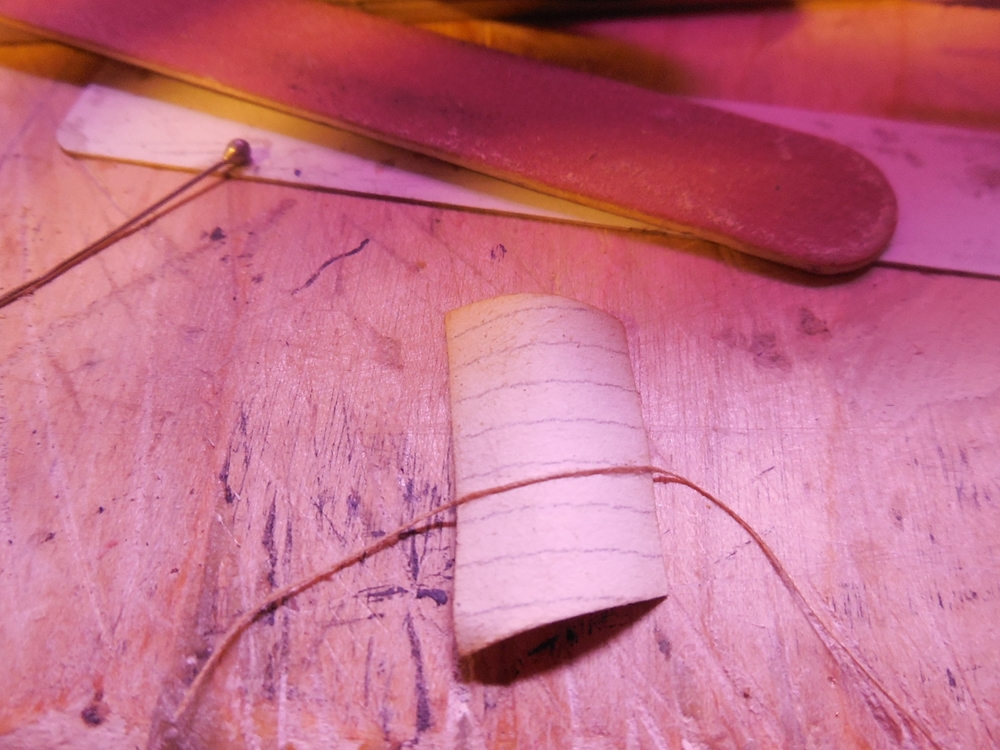
Robb, as for the number of bands I found that different builds had different numbers. So few records I think AL just guessed & whatever you decide to do will be fine. I saw one build that had 10 - 11 for each mast. I somehow ended up with 11 for one mast & 8 for the other. I cannot remember for the life of me why. Most of the details of the Scottish Maid are not really known because all the records were in one place & destroyed in a fire a long time ago in England.
- 389 replies
-
- 2
-
-
- scottish maid
- artesania latina
- (and 1 more)
-
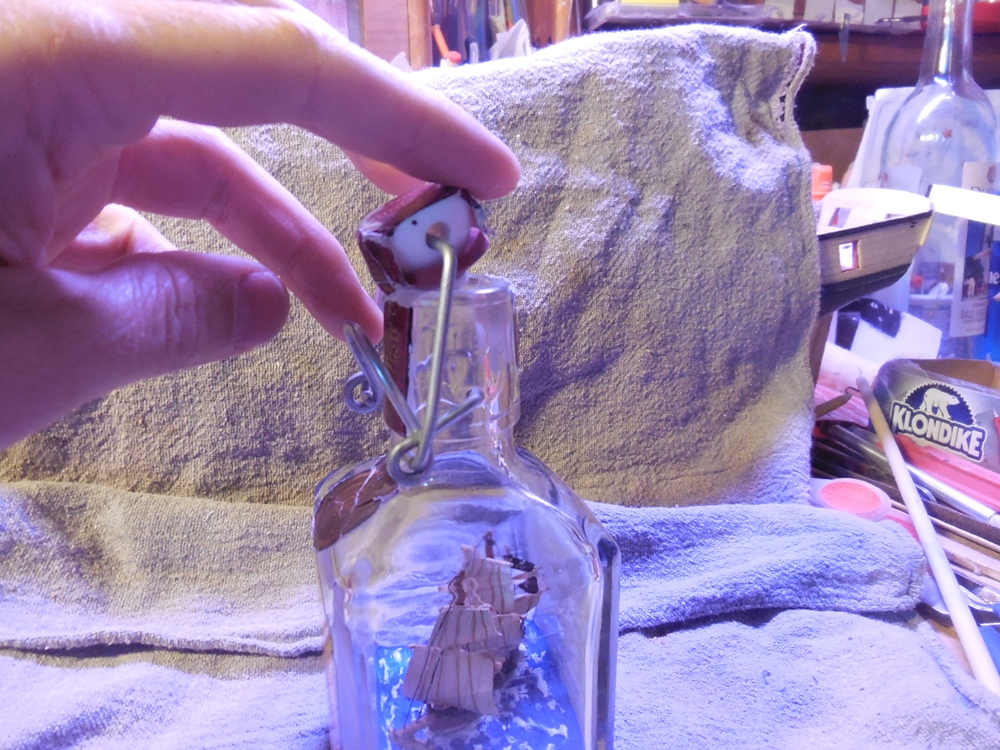
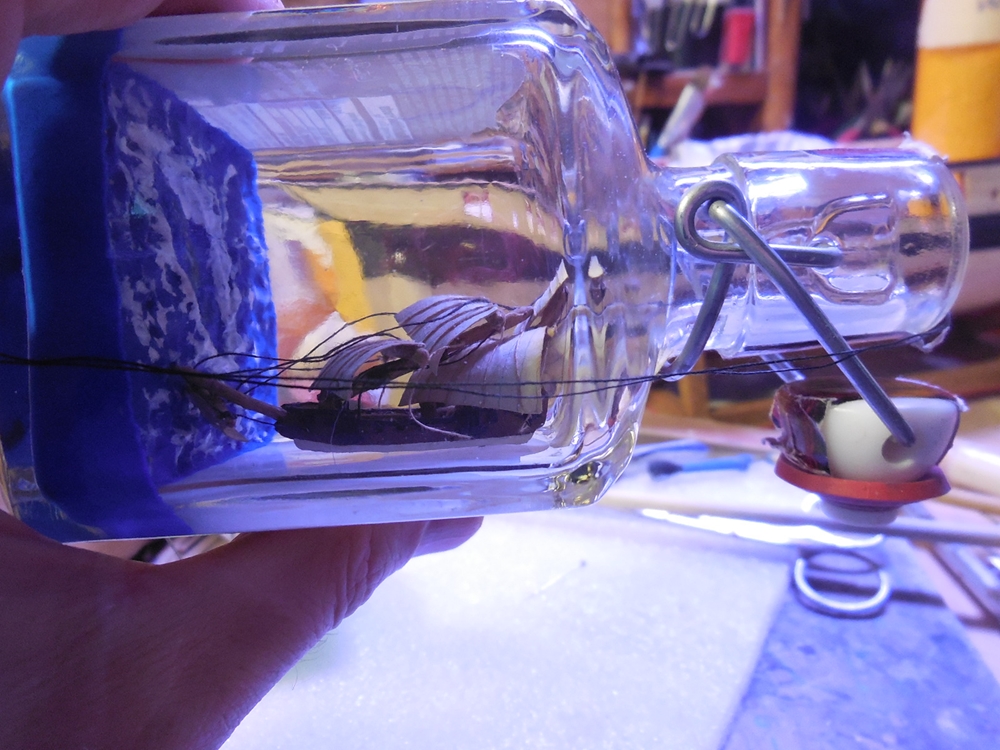
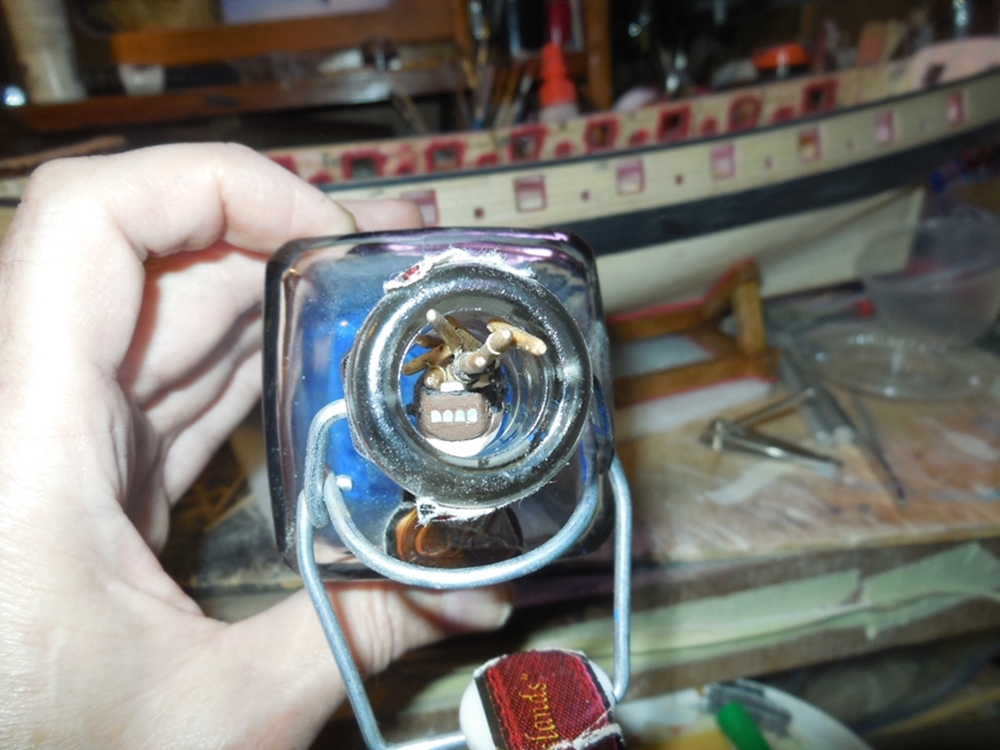
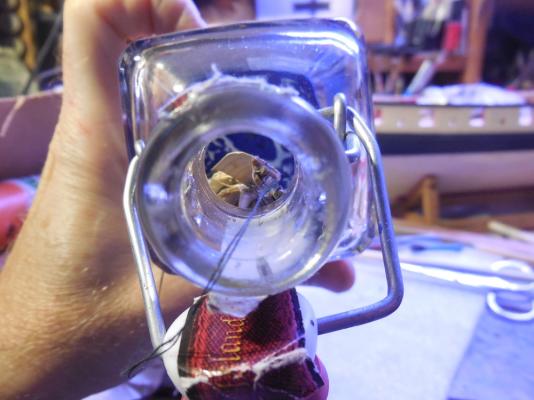
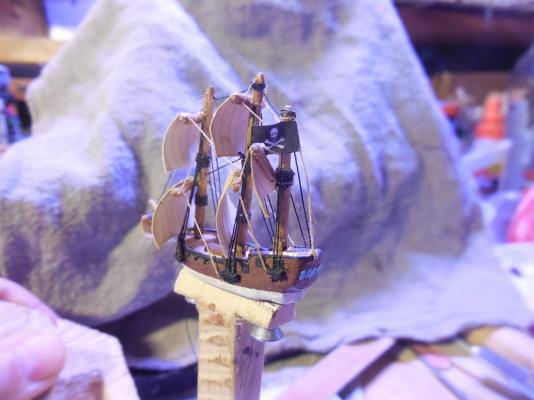
Test fitted ship in bottle neck. Had to make a few adjustments but it fits in fine now.

- 71 replies
-
- 9
-
-
- pirate ship
- bottle
- (and 1 more)
-
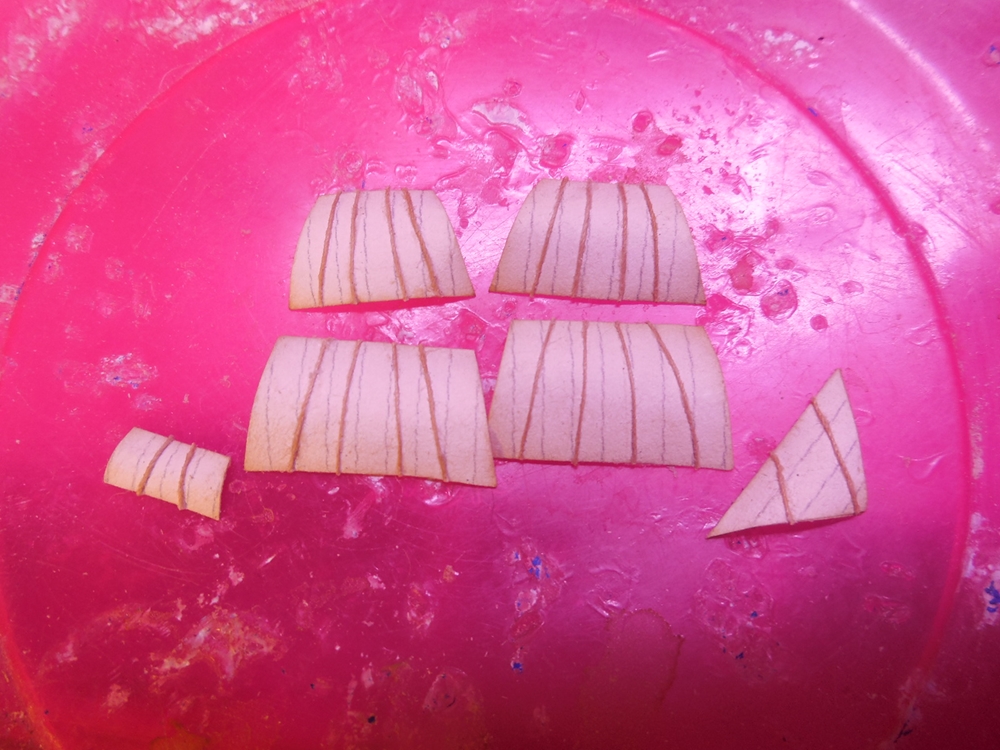
Thank you Michael! When I first got done with them I thought I had over focused on them & messed them up. Turned out to be the best ones I've ever done. I definitely would use much thinner material next time.
- 607 replies
-
- 2
-
-
- scottish maid
- artesania latina
- (and 1 more)
-
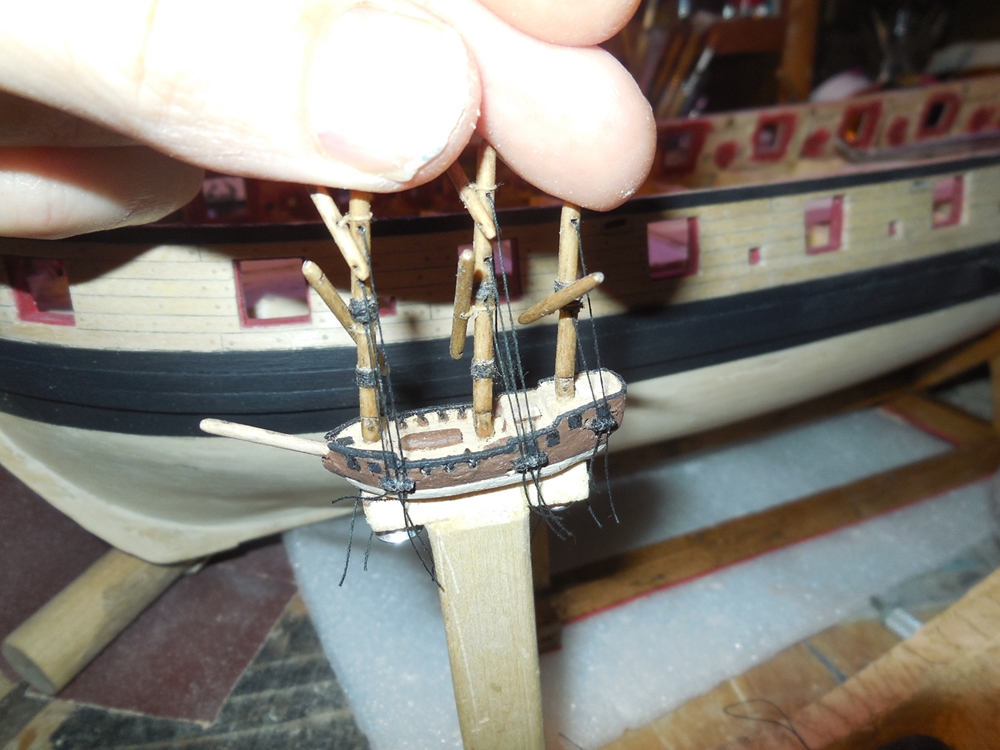
Thanks Patrick & Bob! Yes Patrick, that's my Syren in the background
- 71 replies
-
- 5
-
-
- pirate ship
- bottle
- (and 1 more)