JesseLee
-
Posts
1,694 -
Joined
-
Last visited
Content Type
Profiles
Forums
Gallery
Events
Everything posted by JesseLee
-
 Steve, the sails look absolutely incredible!
- 625 replies
-
- 2
-

-
- bounty launch
- model shipways
- (and 1 more)
-
It is a good Idea. Wish I had thought of that before!
-
Thanks everyone! I wanted to make it look good because this is going in the Wounded Warrior Project auction this spring.
- 33 replies
-
- 3
-
-
- finished
- midwest products
- (and 1 more)
-
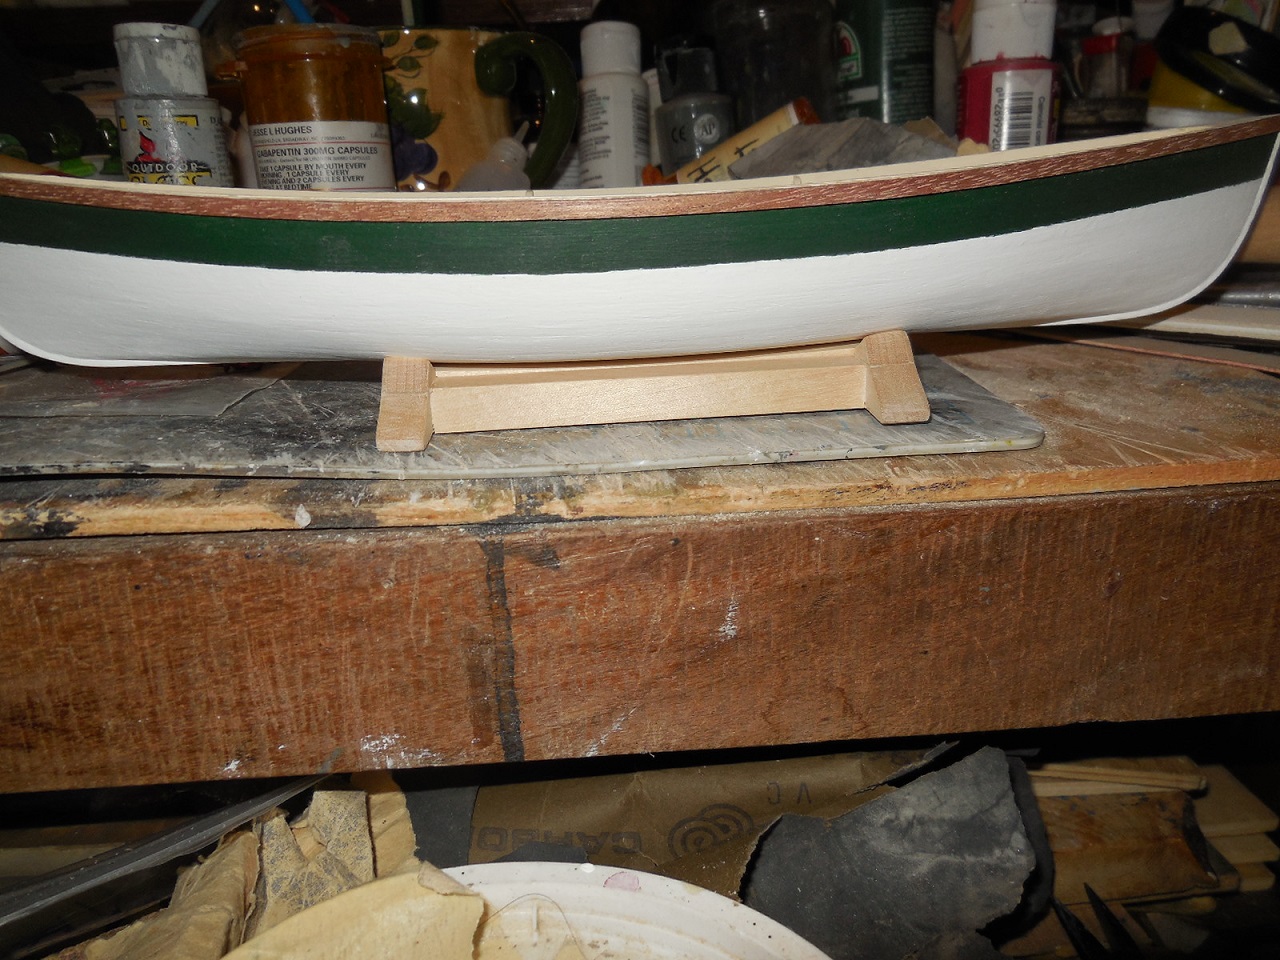
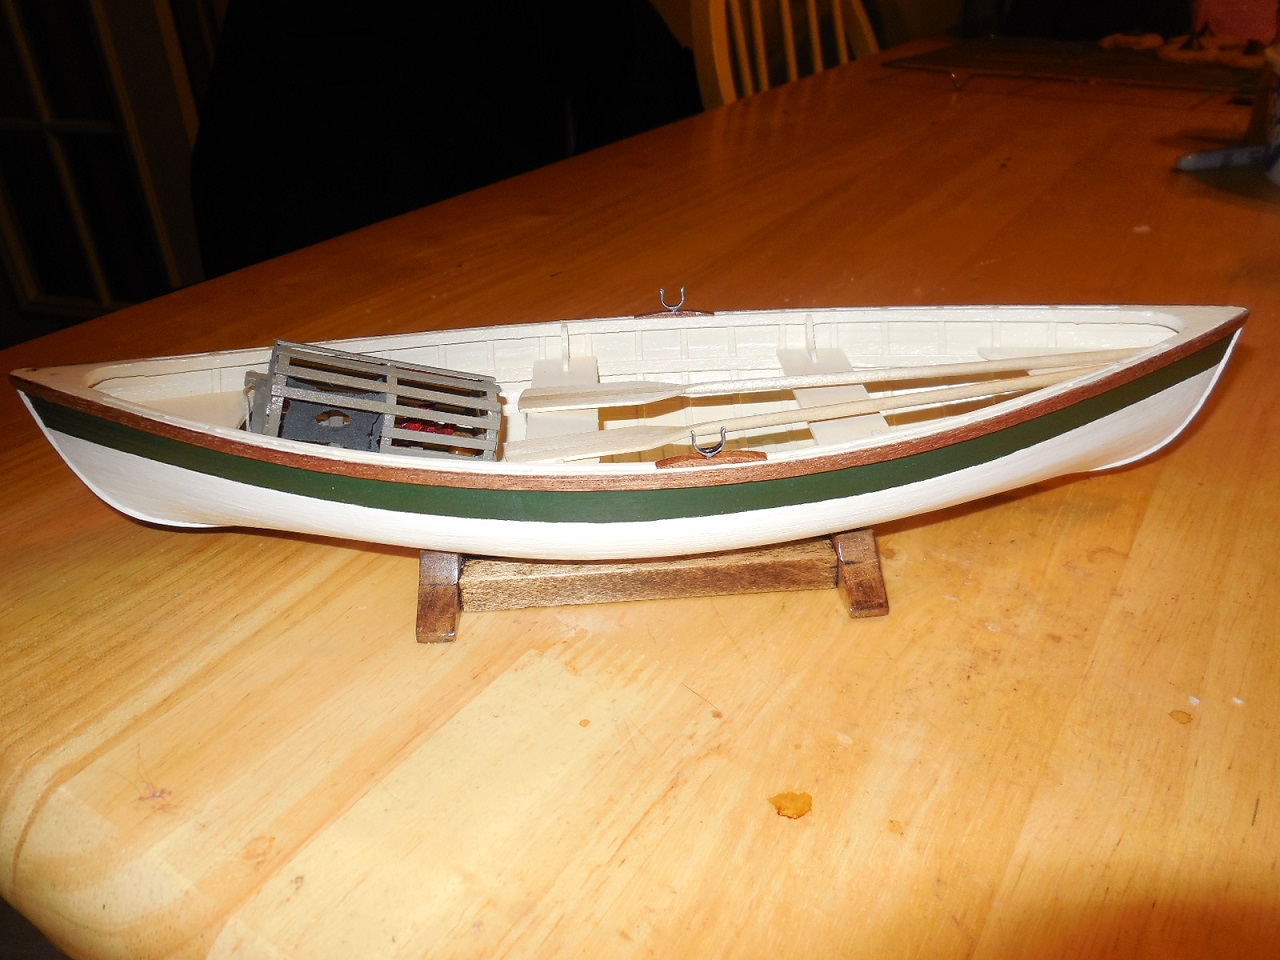
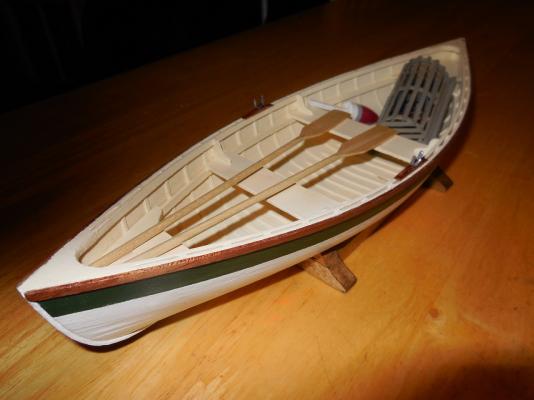
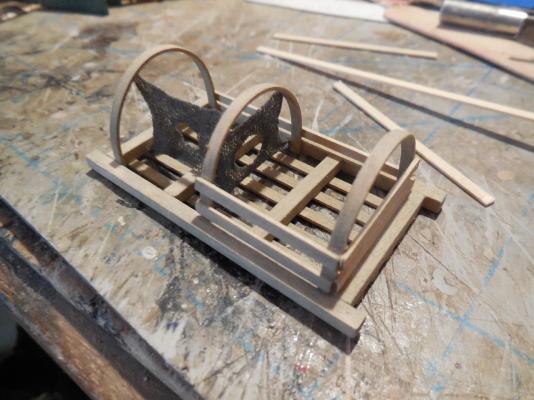
Made a stand for the boat & stained it. Added the rowlock blocks & oar locks. Glued the trap, buoy & oars doen & the Main Peapod is completed.


- 33 replies
-
- 10
-
-
- finished
- midwest products
- (and 1 more)
-
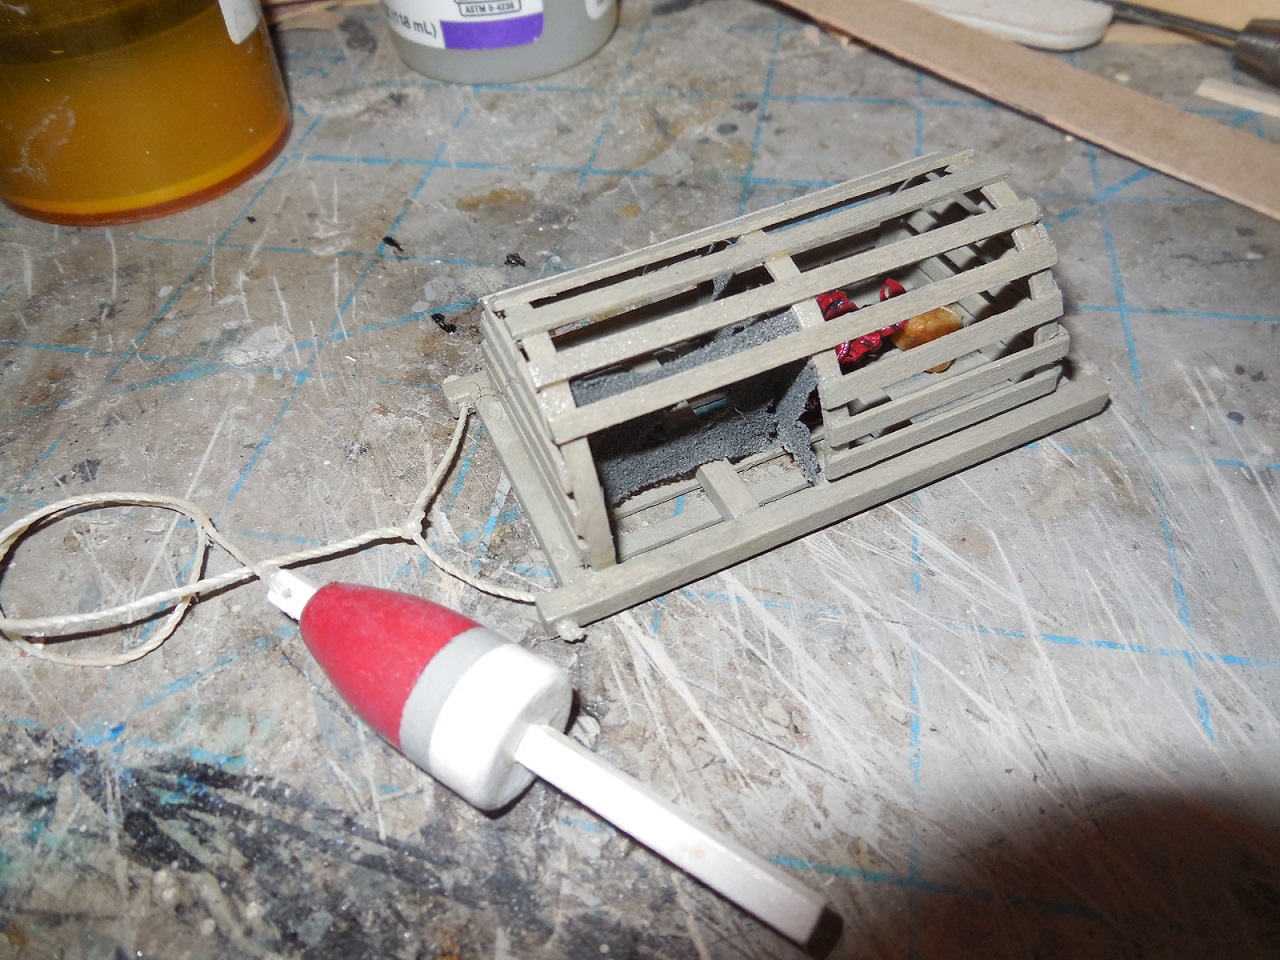
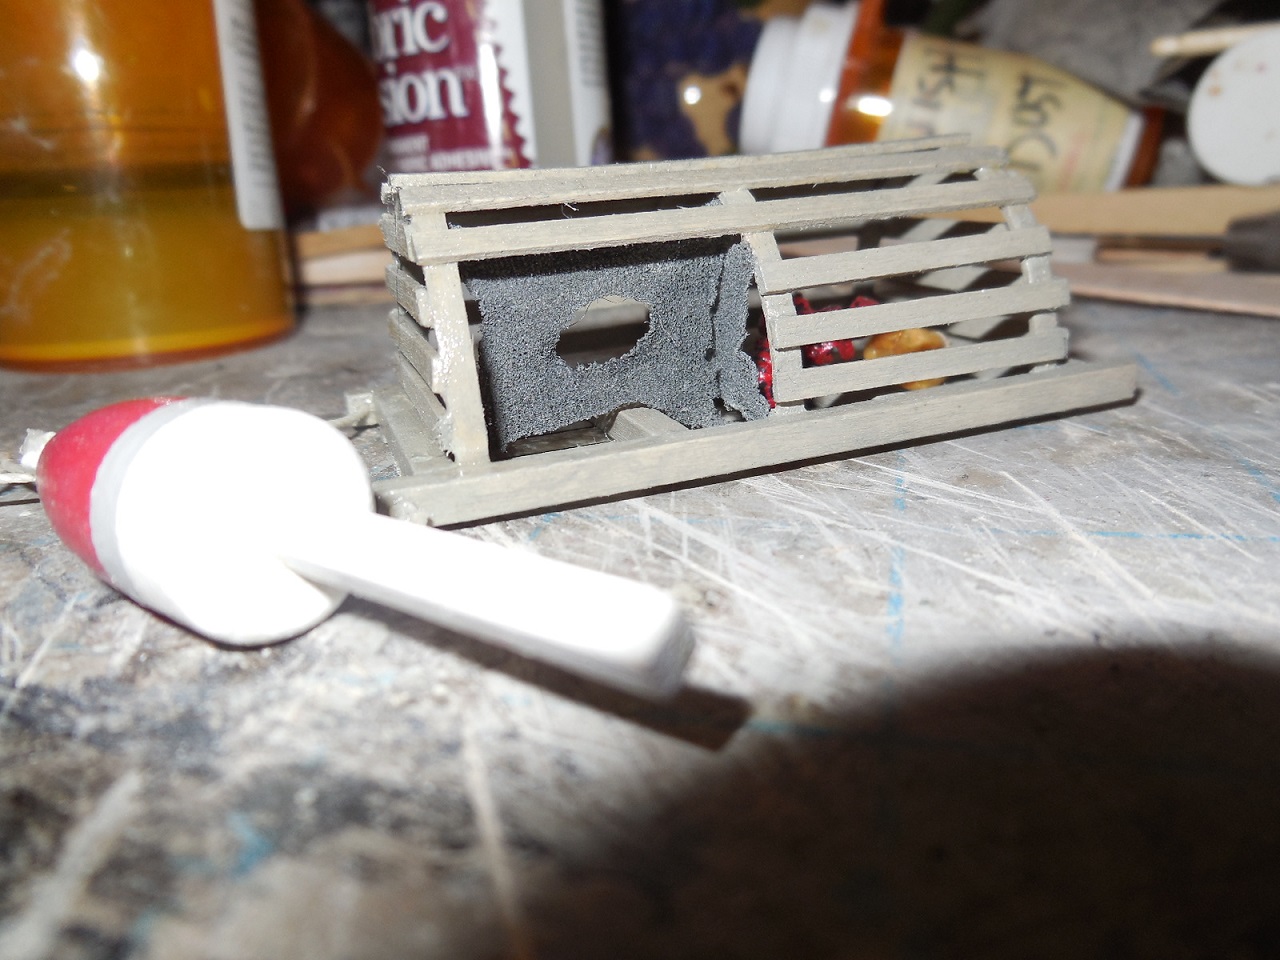
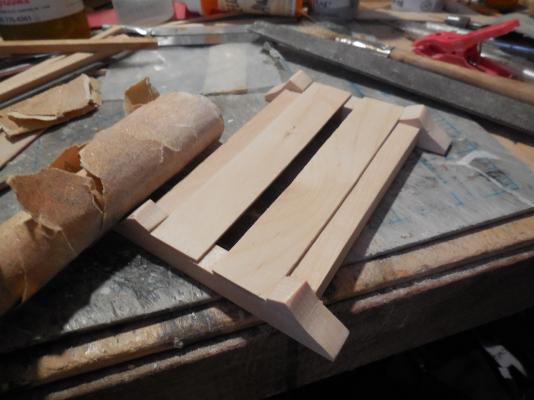
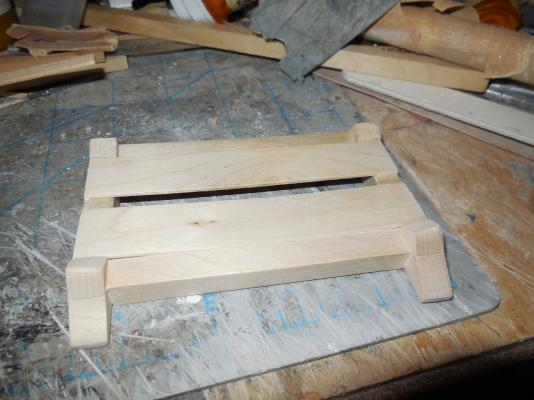
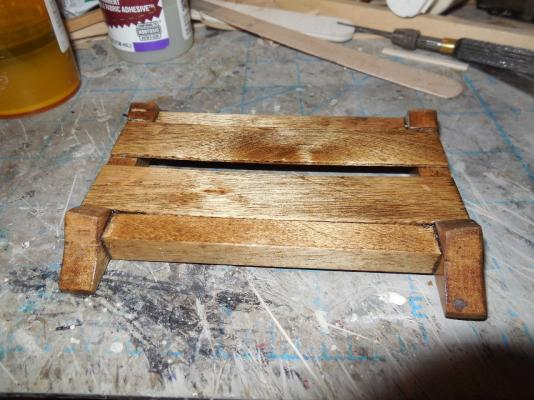
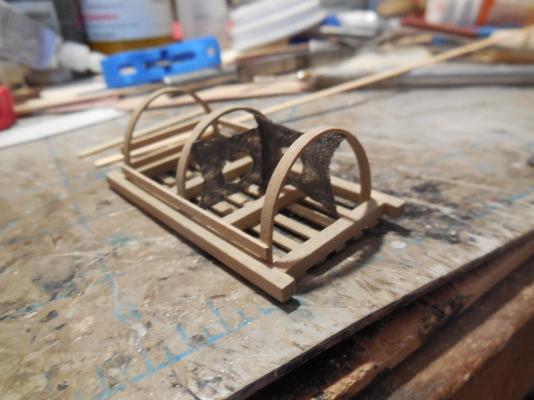
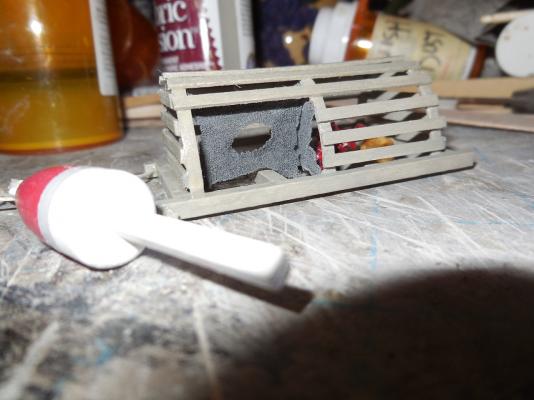
Finished the lobster trap construction & gave it watered down grey washes to give it a weathered wood look. Tied it to the bout & added the 2nd rub rail to the boat....


- 33 replies
-
- 5
-
-
- finished
- midwest products
- (and 1 more)
-
I did a tea& coffee together soak on mine. Just be sure to follow with a baking soda soak if you do anything acidic like tea.
- 625 replies
-
- 2
-
-
- bounty launch
- model shipways
- (and 1 more)
-
Wow! It looks great!
-
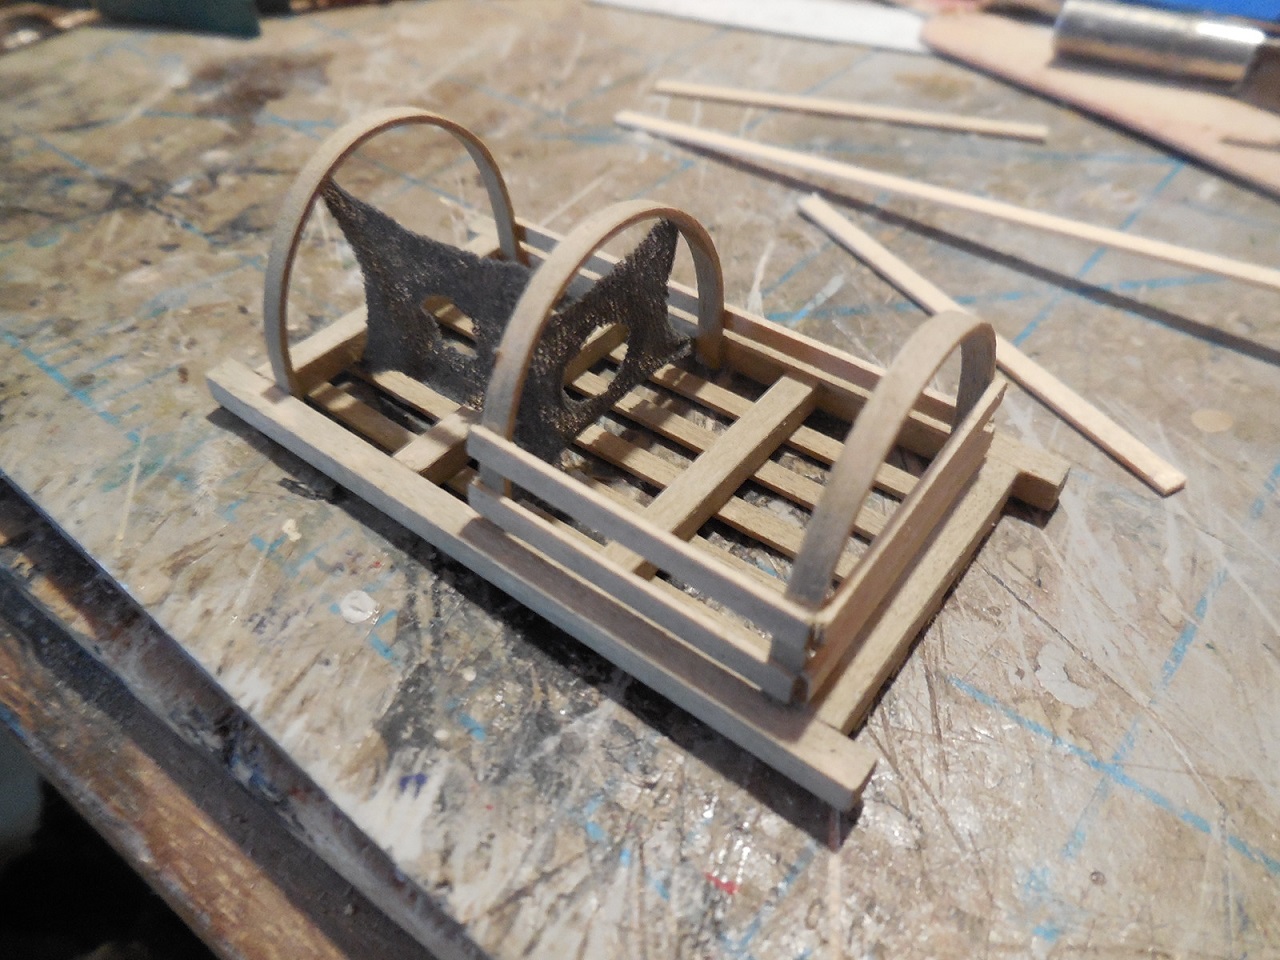
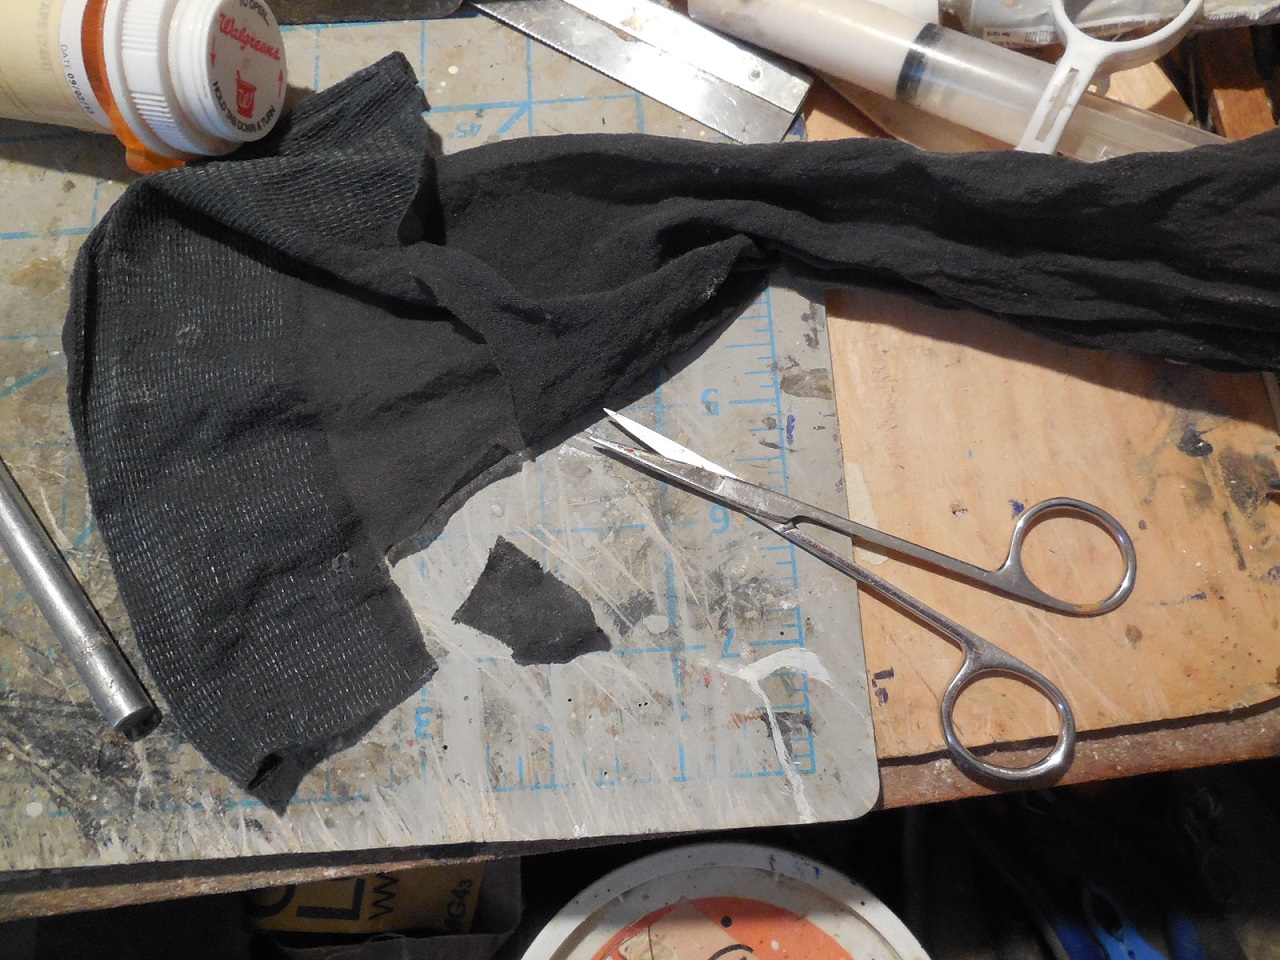
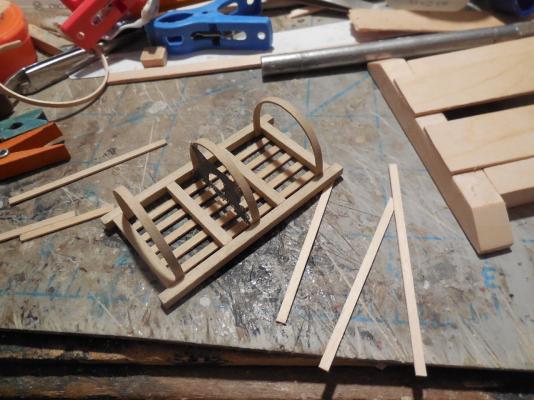
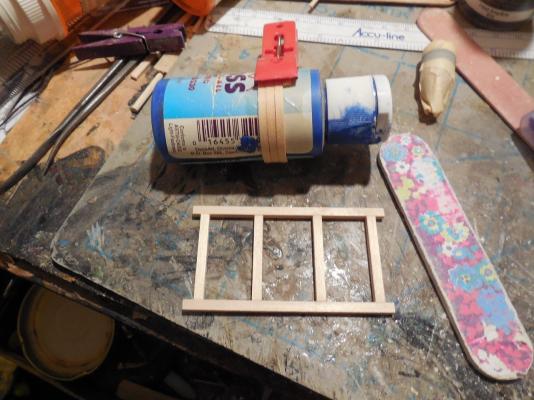
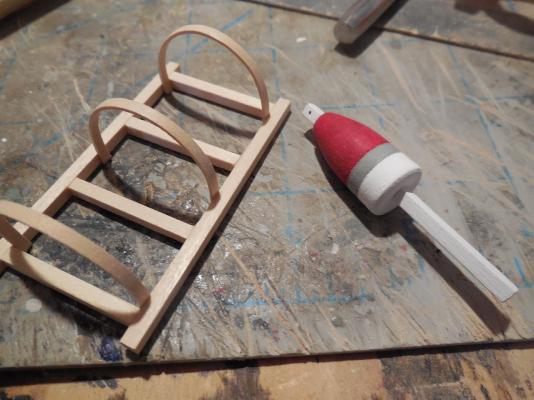
Constructed bottom frame of the lobster trap, bent a plank around a paint bottle to make the hoops for the top of the lobster trap. Started assembly & painting of the buoy. Added a rub rail to one side. One end didn't meet the false keel like it was supposed to so I burnished the end down by rubbing it across the end of my workbench till it touched like it should. Glued hoops on lobster trap. Used an old hose sock to make the netting inside the trap. Cut out first one cut hole, sealed edges with fray check. Stretched out & glued net on.


- 33 replies
-
- 8
-
-
- finished
- midwest products
- (and 1 more)
-
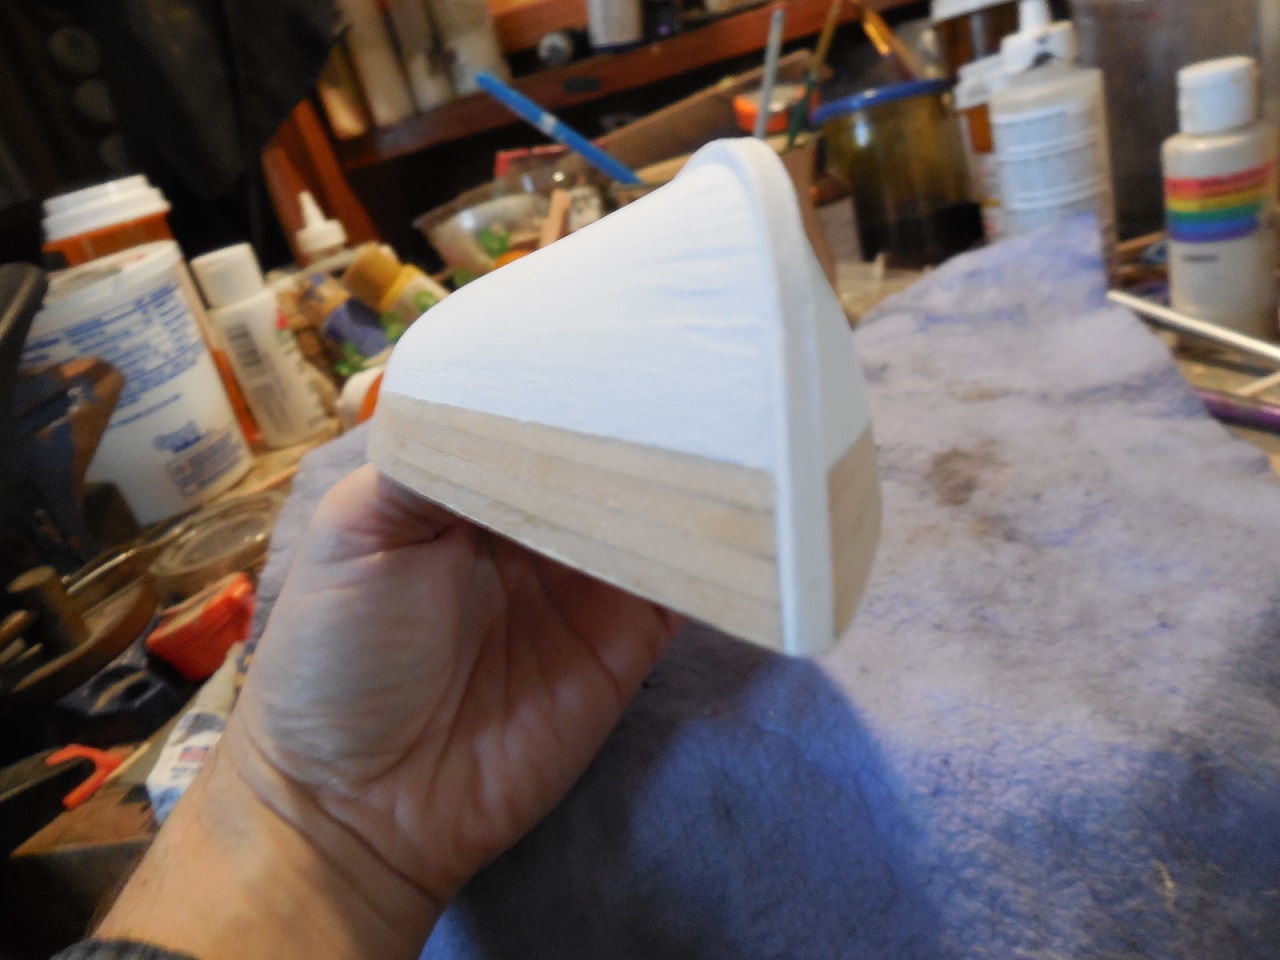
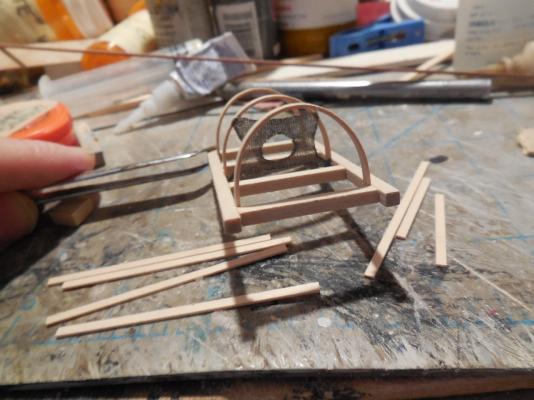
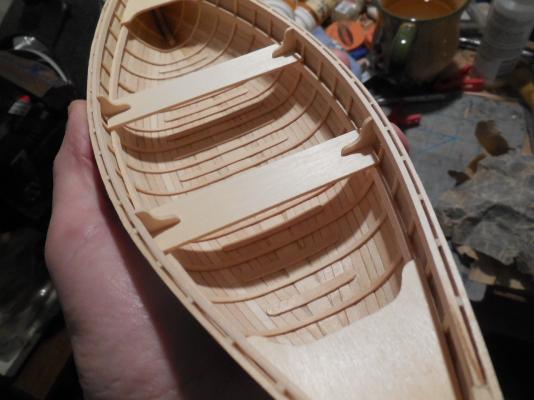
Made a lot of progress. Added the seats, knees & inwales. Got the hull painting started. Started assembling the paddles.


- 33 replies
-
- 8
-
-
- finished
- midwest products
- (and 1 more)
-
Never heard of this before. After doing many searches of its use I found one place that said its first use was in 1951. Does anyone know if this is correct? If so it may explain why it is not shown on models since so many are ships from before the 1950's.
-
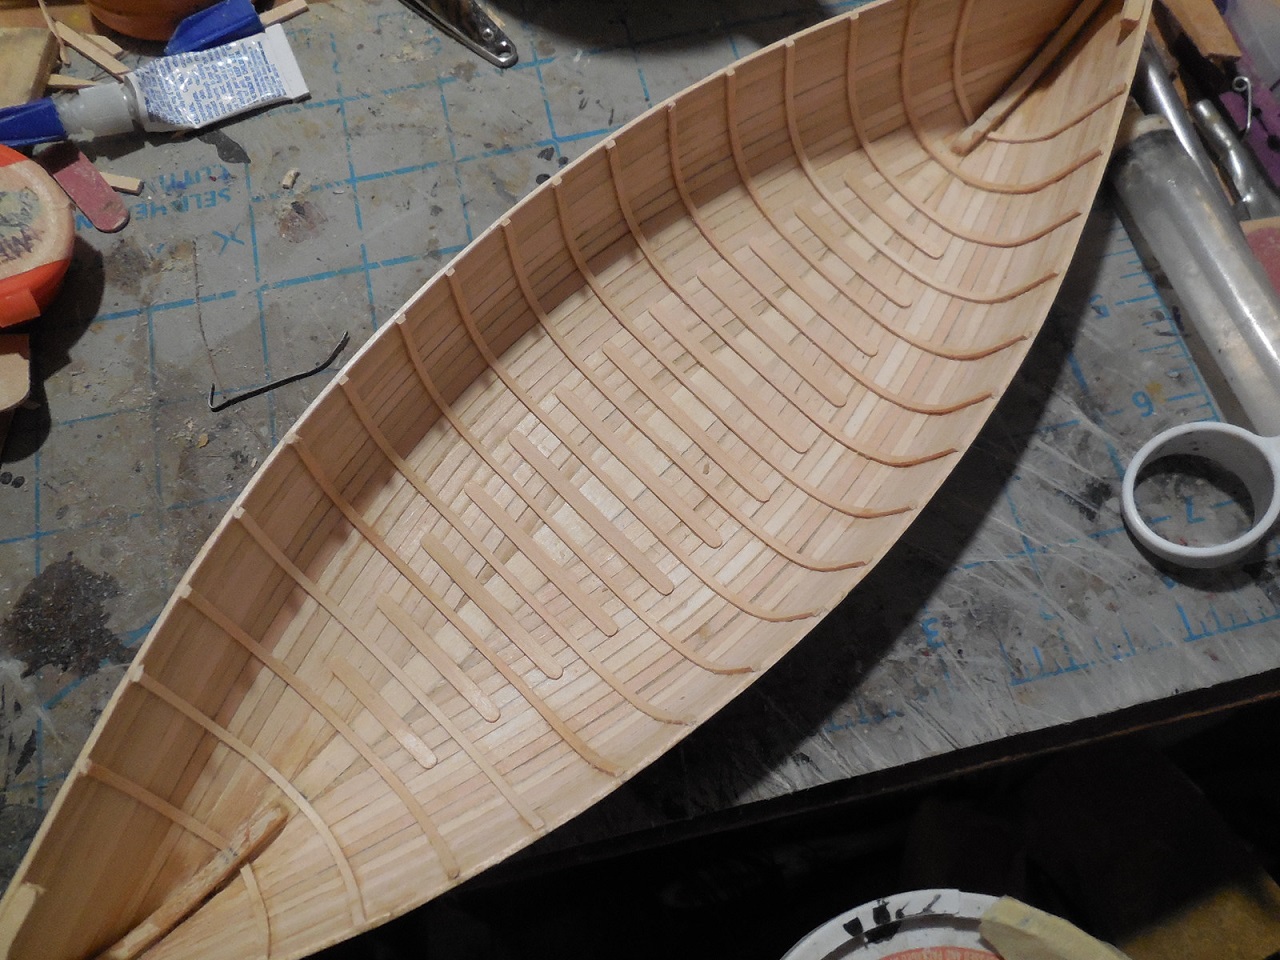
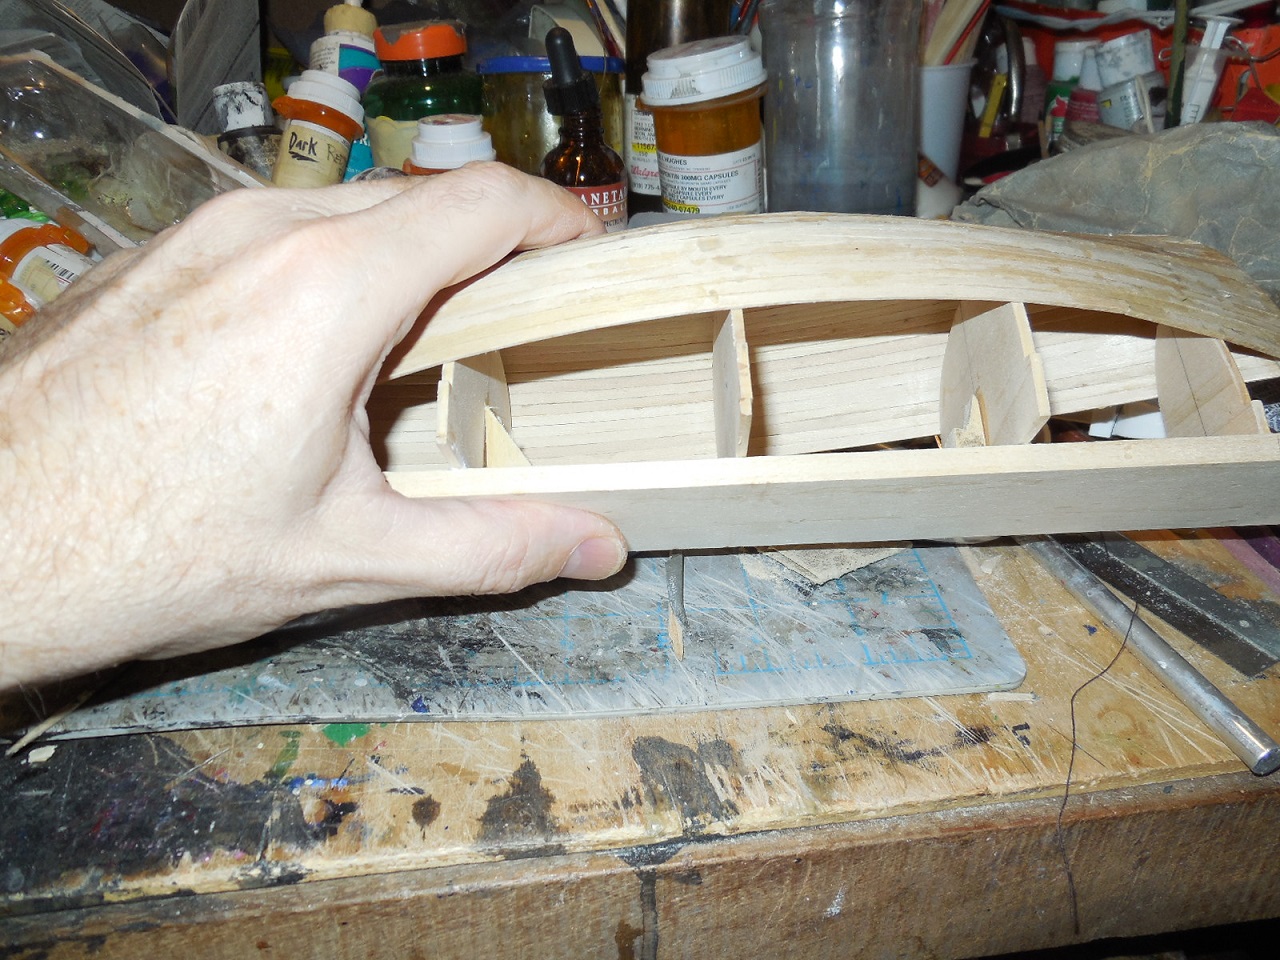
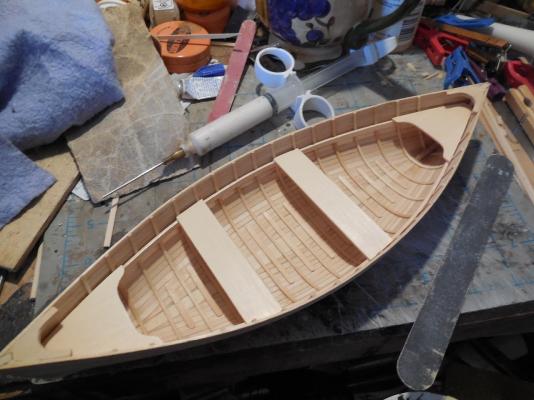
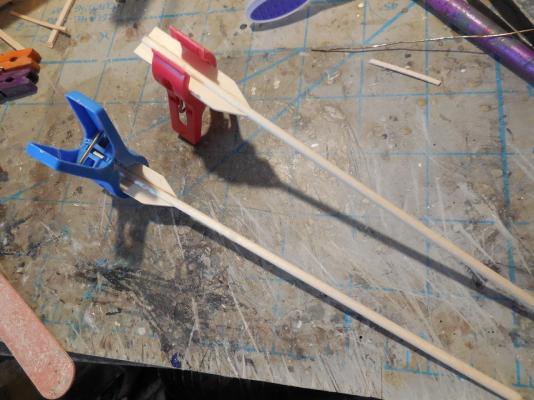
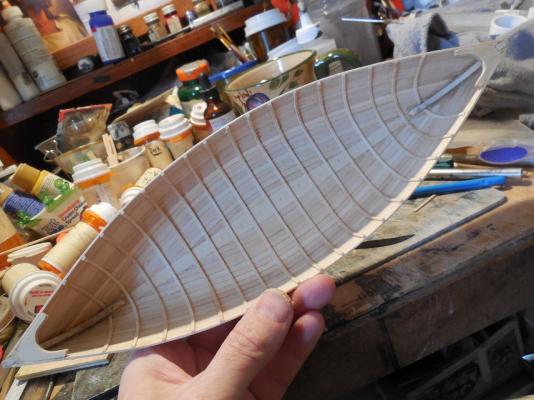
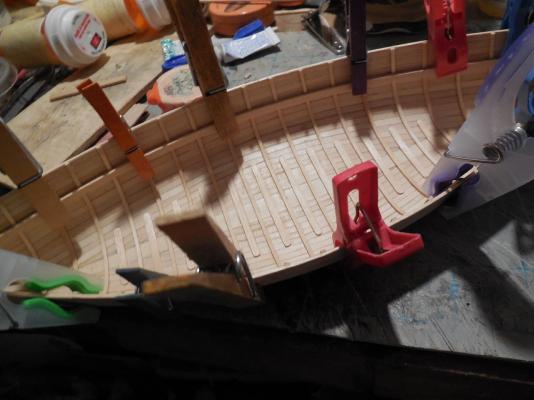
Thanks Russ. Getting those ribs lined up & glued in correctly isn't easy. Got them all done- they are not exactly even but they are off so slightly that it doesn't show & the rest of the construction will make it totally unnoticeable. Added breast hooks to each end. Cut out, shaped & glued on the floor planks. Now I've got the risers clamped waiting for the glue to dry.

- 33 replies
-
- 6
-
-
- finished
- midwest products
- (and 1 more)
-
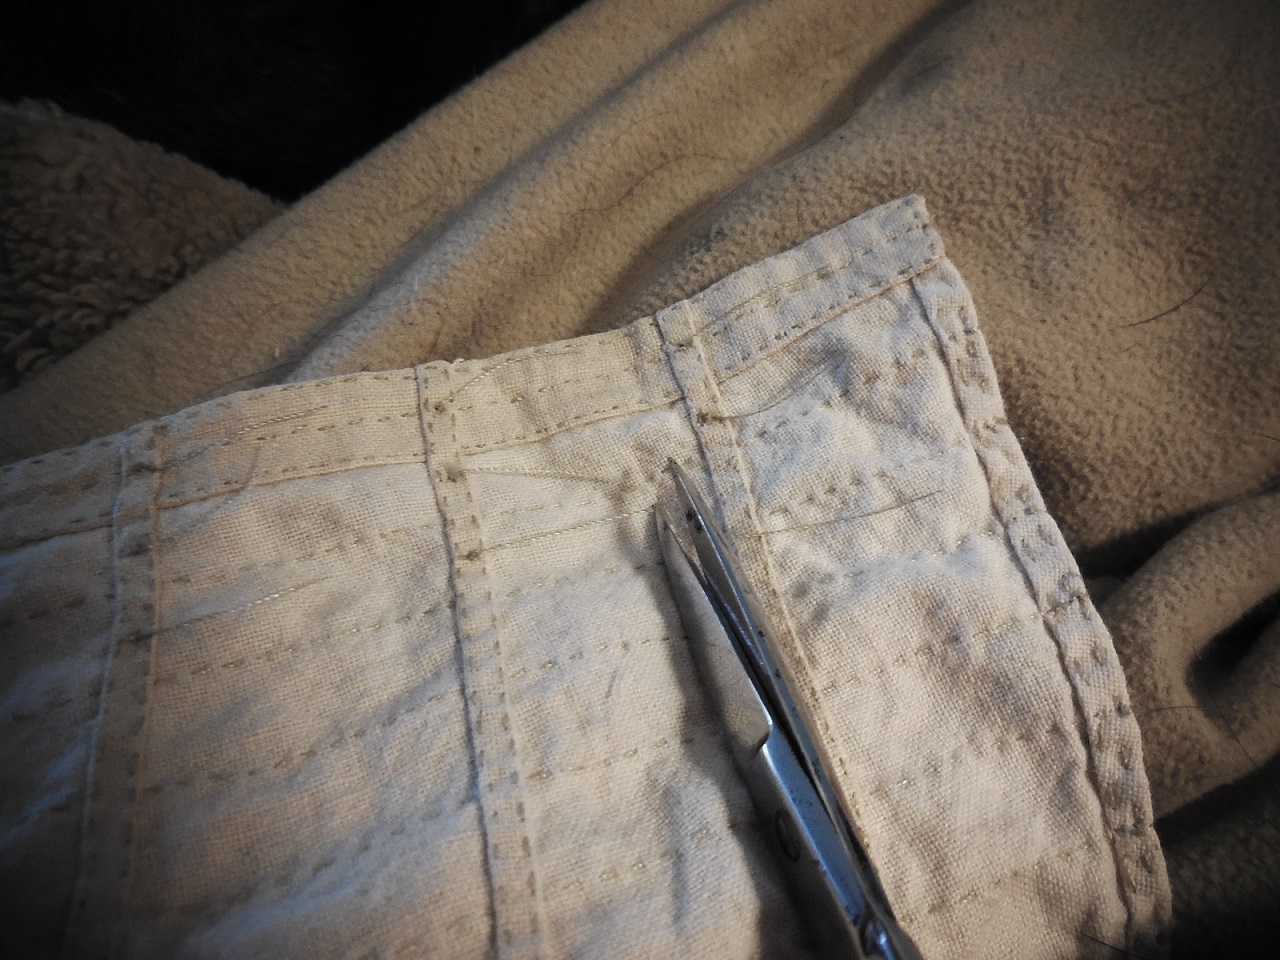
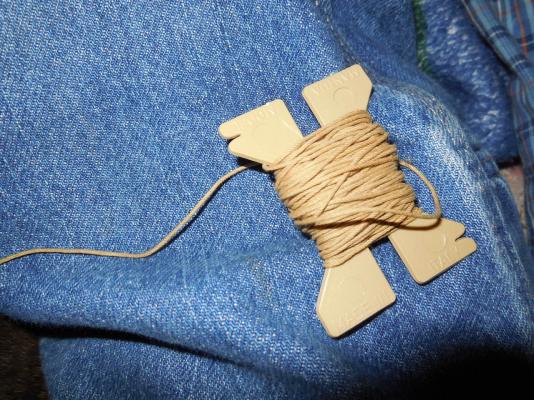
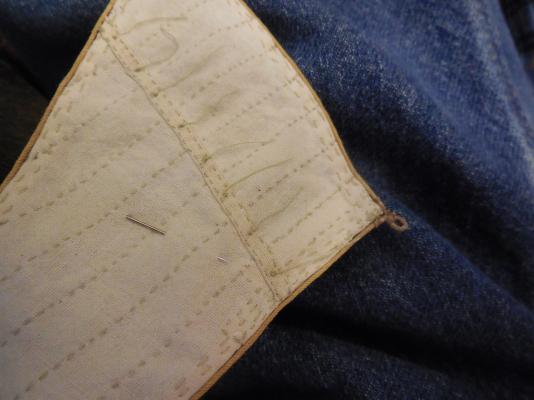
Starting bolt ropes. Had an old spool of rope left over from a build a long time ago. Sewed bolt rope on first sail. Still nine more to go.
- 607 replies
-
- 7
-
-
- scottish maid
- artesania latina
- (and 1 more)
-
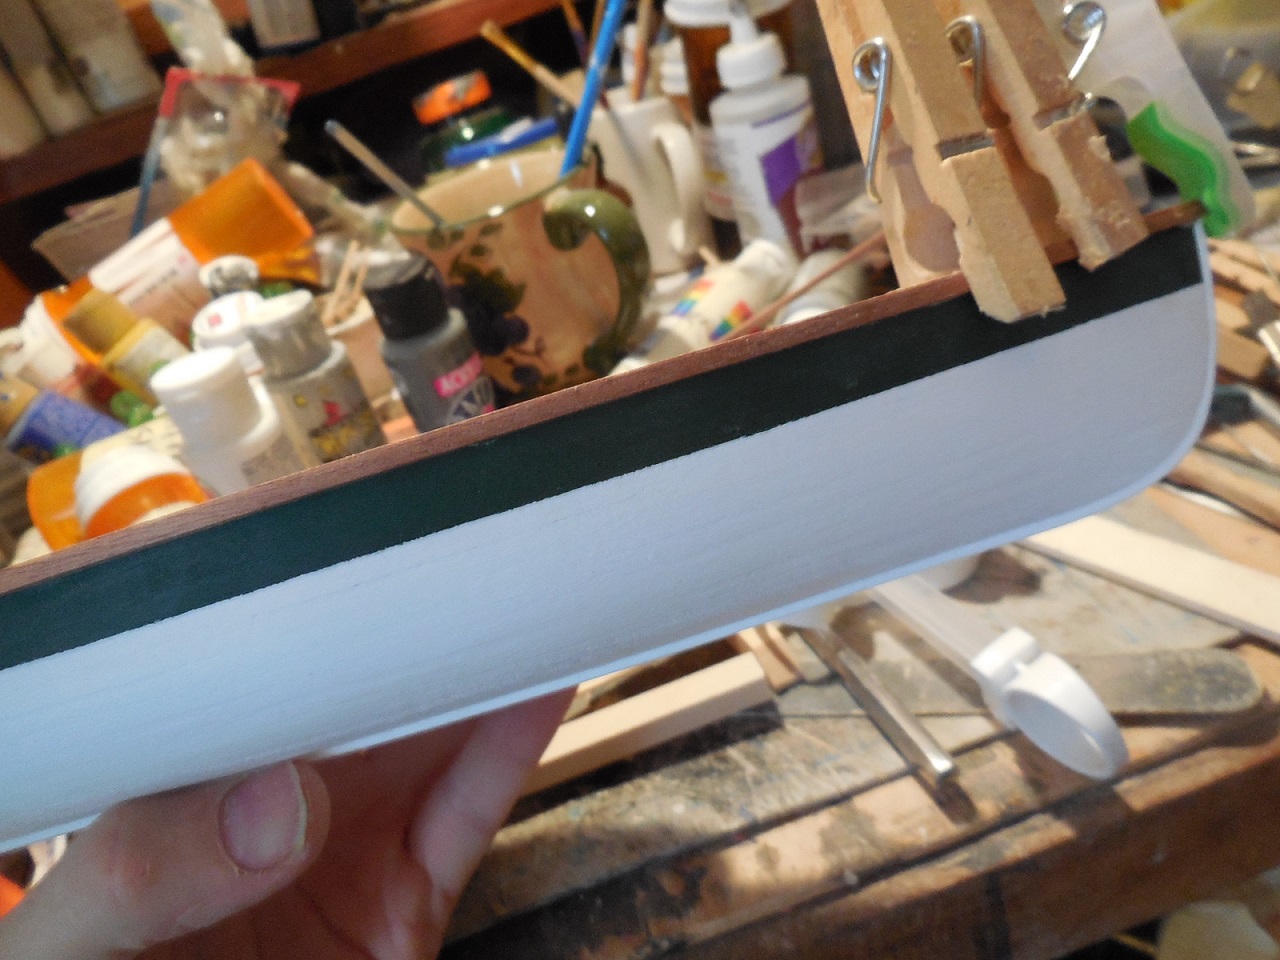
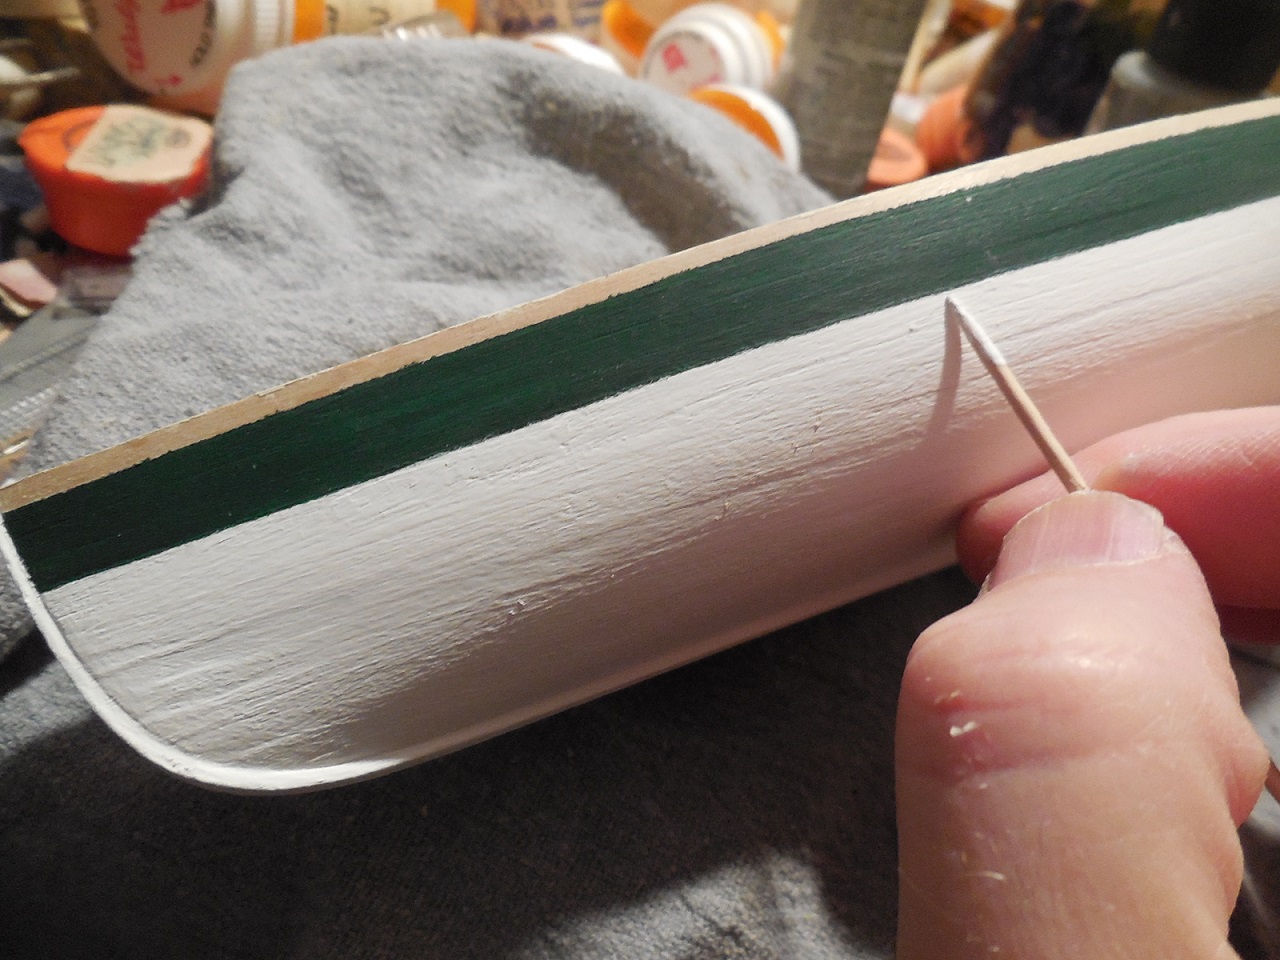
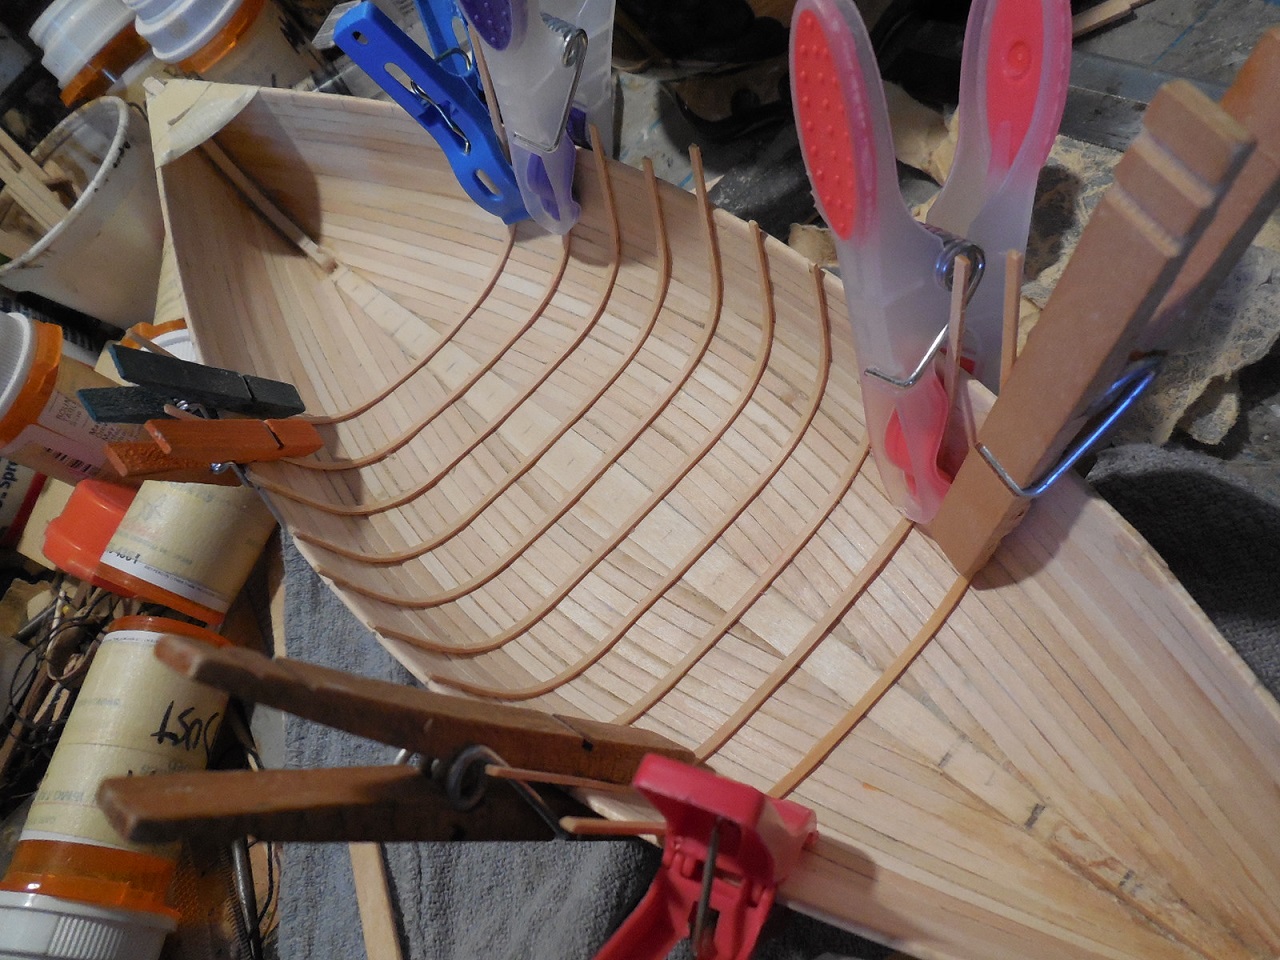
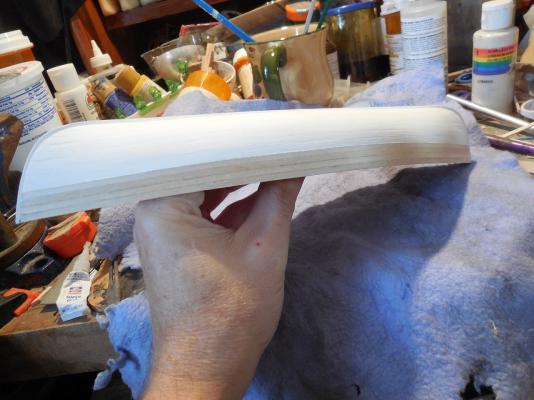
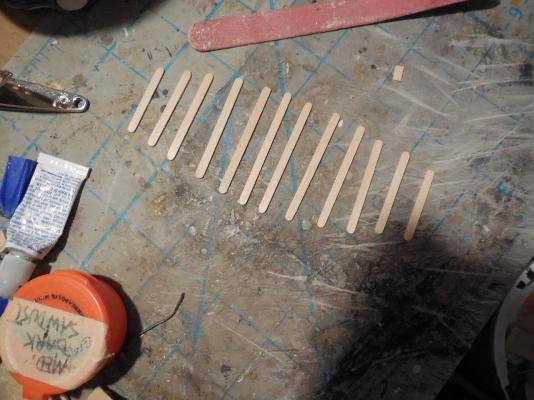
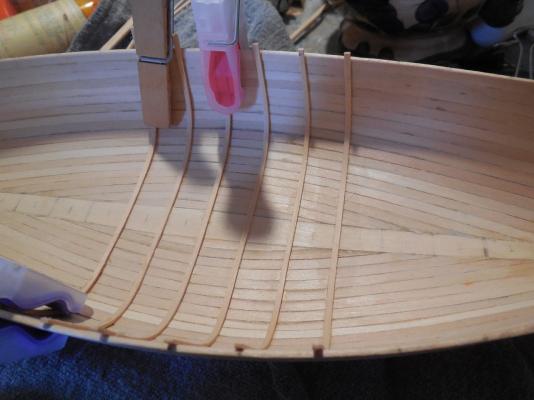
Sanded the edges of the planks down smooth. Added false keel. Soaking strips, bending & gluing ribs in place.

- 33 replies
-
- 5
-
-
- finished
- midwest products
- (and 1 more)
-
I like how you added an extra arm to the clips. Wish I had known this tip before.
-
Thanks for the tip Russ, I will do that
-
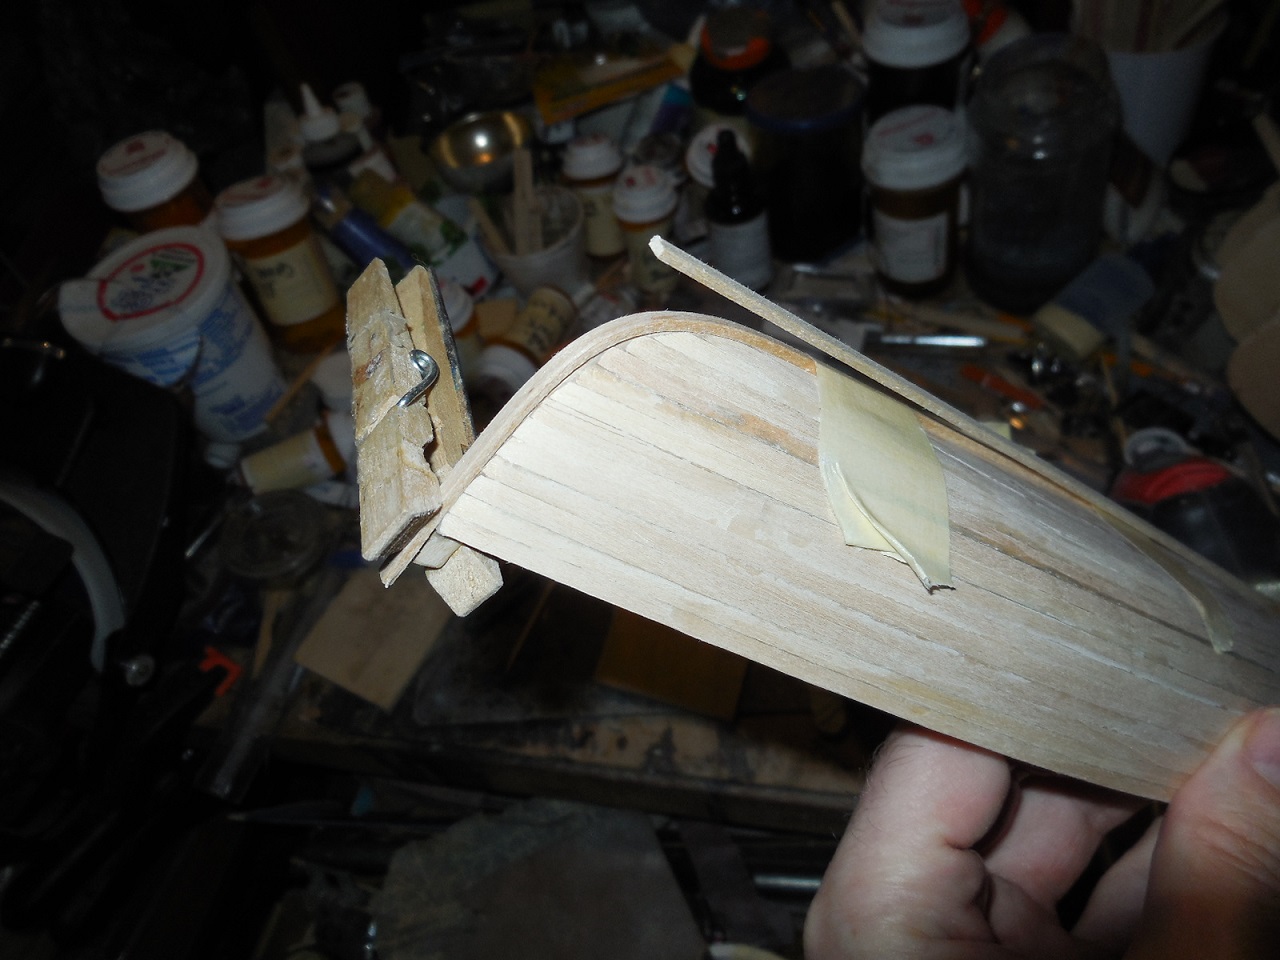
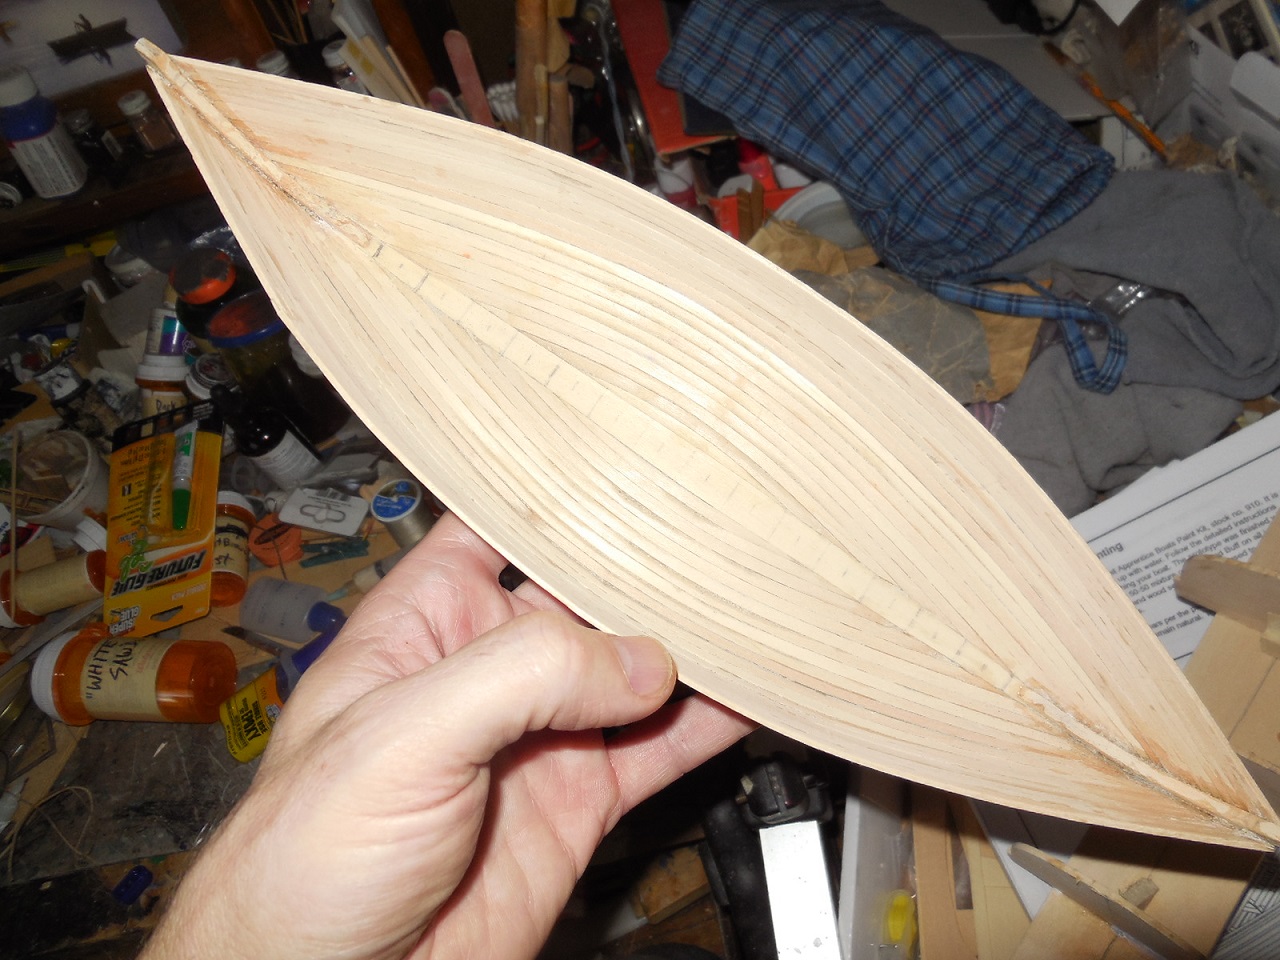
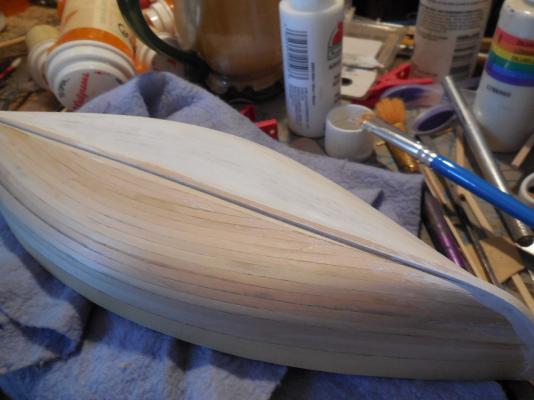
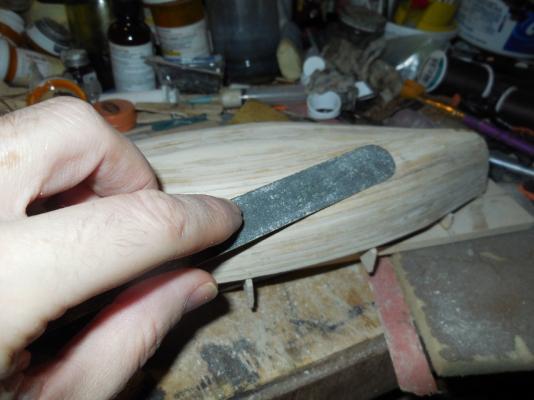
Finished the hull of the boat. When I took it off the jig that formed the shape the sides wanted to pull in making it narrower than it is supposed to be. The wood was pretty stubborn being very stiff & not wanting to be pulled out to its proper shape. Thought about it a while & decided to fit it back over the jig & try to re-wet the planks to see if they would reshape themselves. It was a tight fit & had to stretch the sides open a bit to get it back on. Then I decided on something maybe a little radicle......I filled a coffee cup with water & boiled it in the microwave a few minutes. Then I pored the boiling water onto the hull hoping it would reshape itself & praying that it would not come unglued & fall apart. It worked! I let it sit overnight. The glue held & it now holds it shape much closer to how it should.


- 33 replies
-
- 7
-
-
- finished
- midwest products
- (and 1 more)
-
That's whats great about this hobby. You can do whatever works for you. Its your build & you can do it however you want.
-
Been sick & haven't been in the shipyard much. Will try to post some progress soon. Thanks for dropping in John!
-
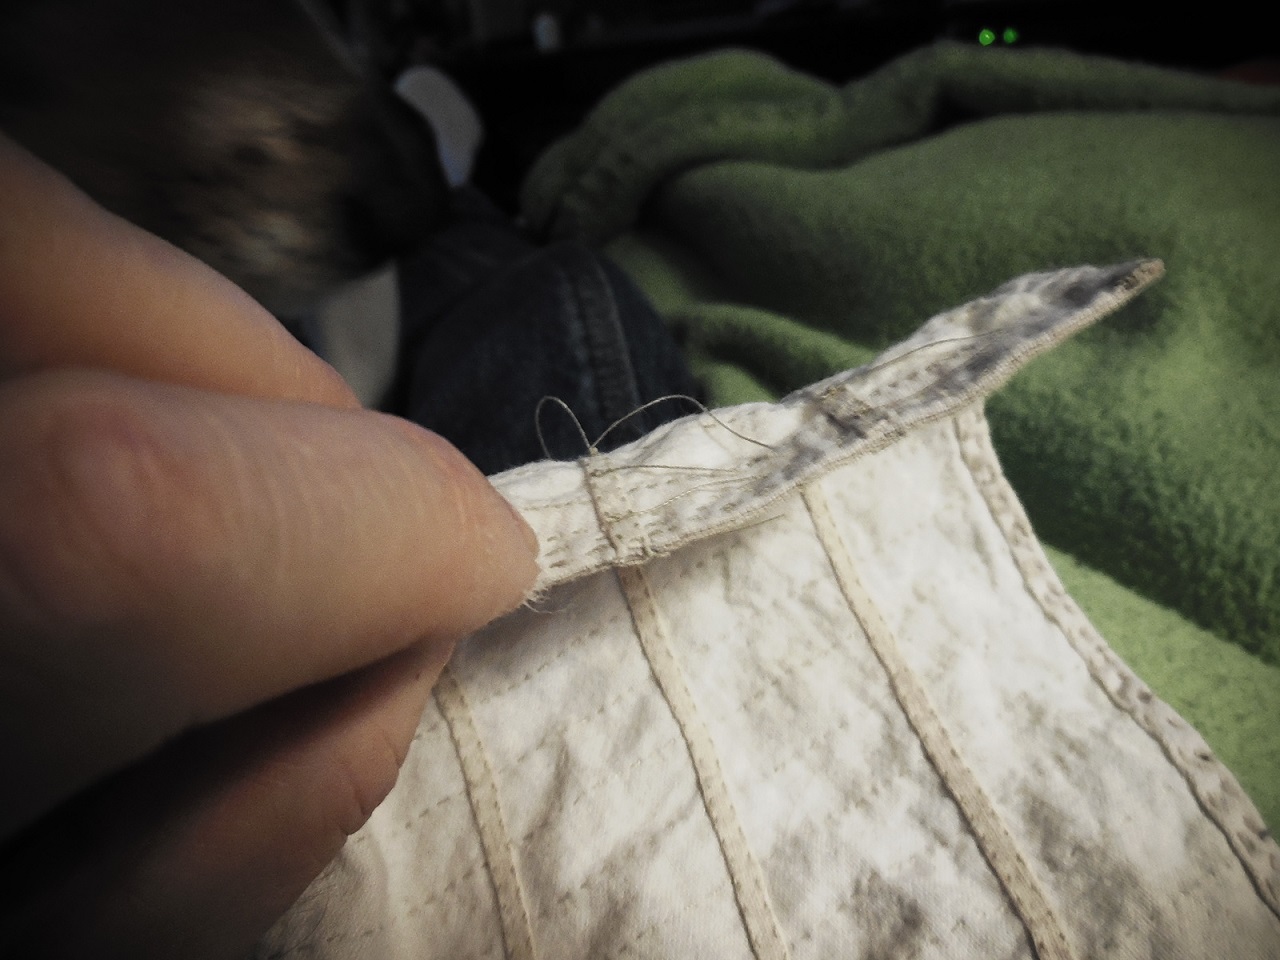
Thanks guys. The only sewing I've ever done was putting my own buttons back on my shirt. Most of my adult years I was single & had to learn. I picked up sail sewing when I started ship modeling. It is mainly just going very very slow. The stitching is really not that even but it is so small & close together most people don't notice.
-
I like the idea of the instructional video. I'd like to see that.
-
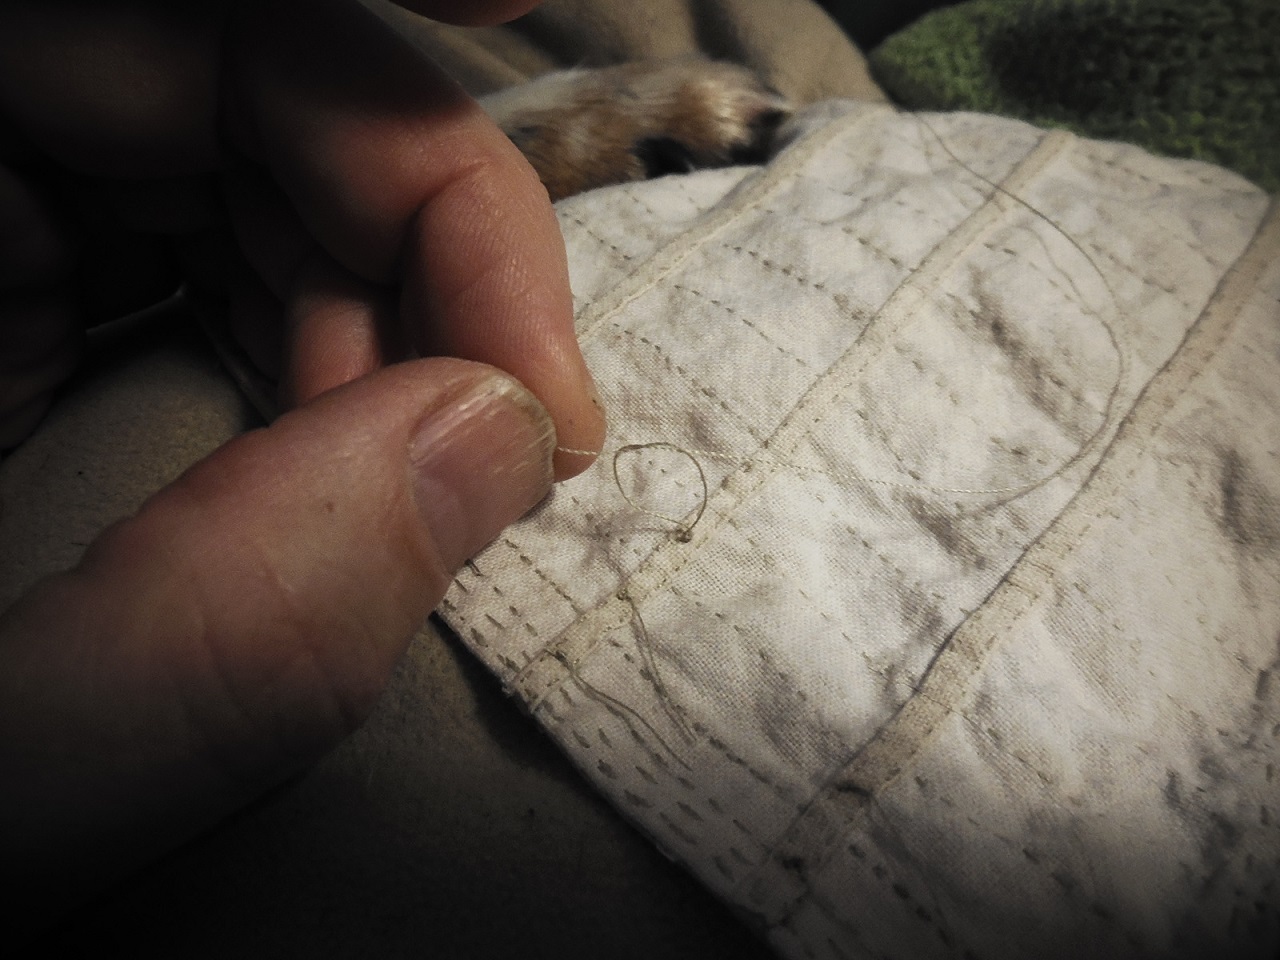
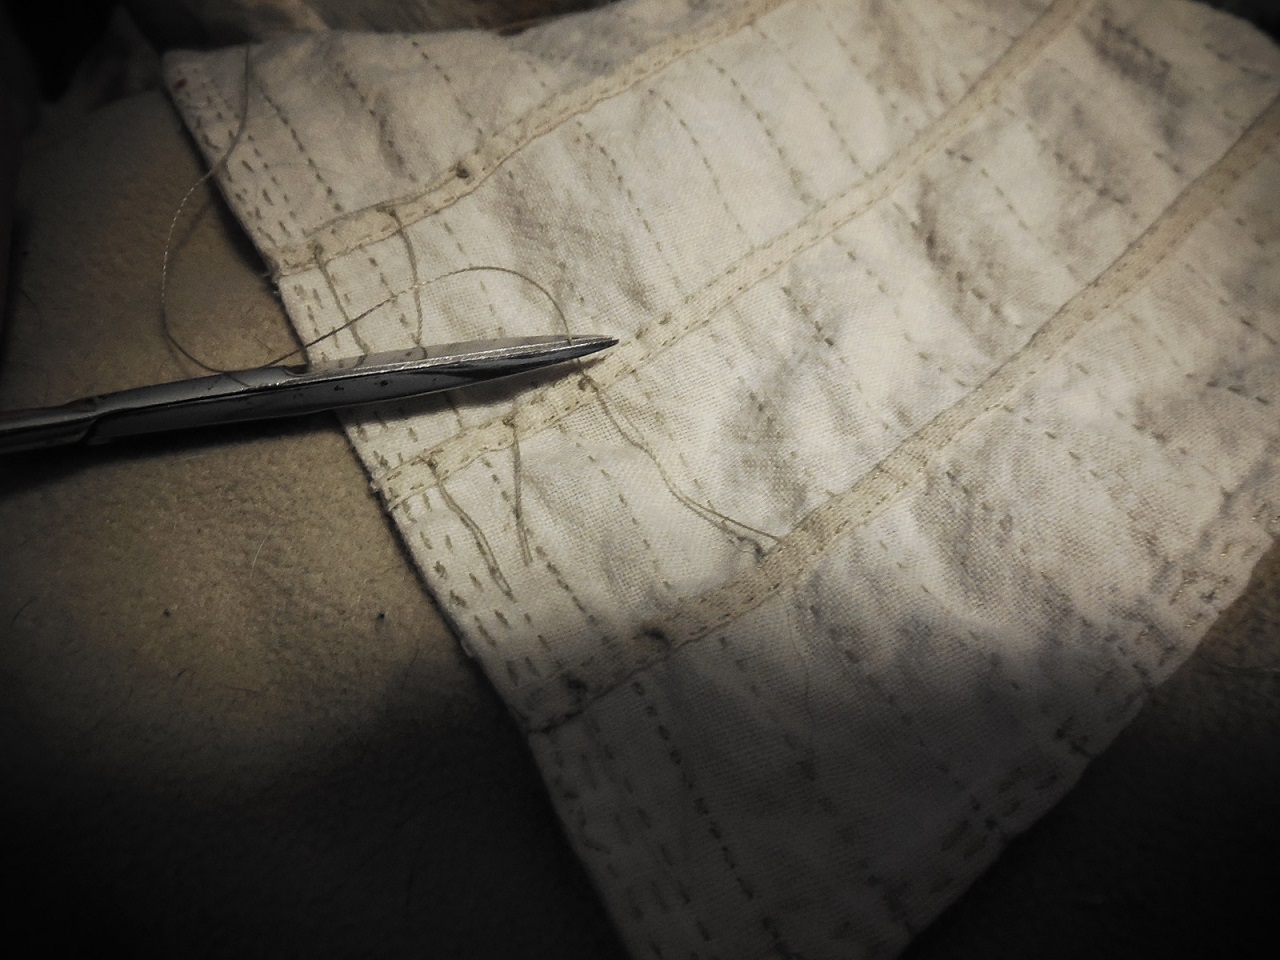
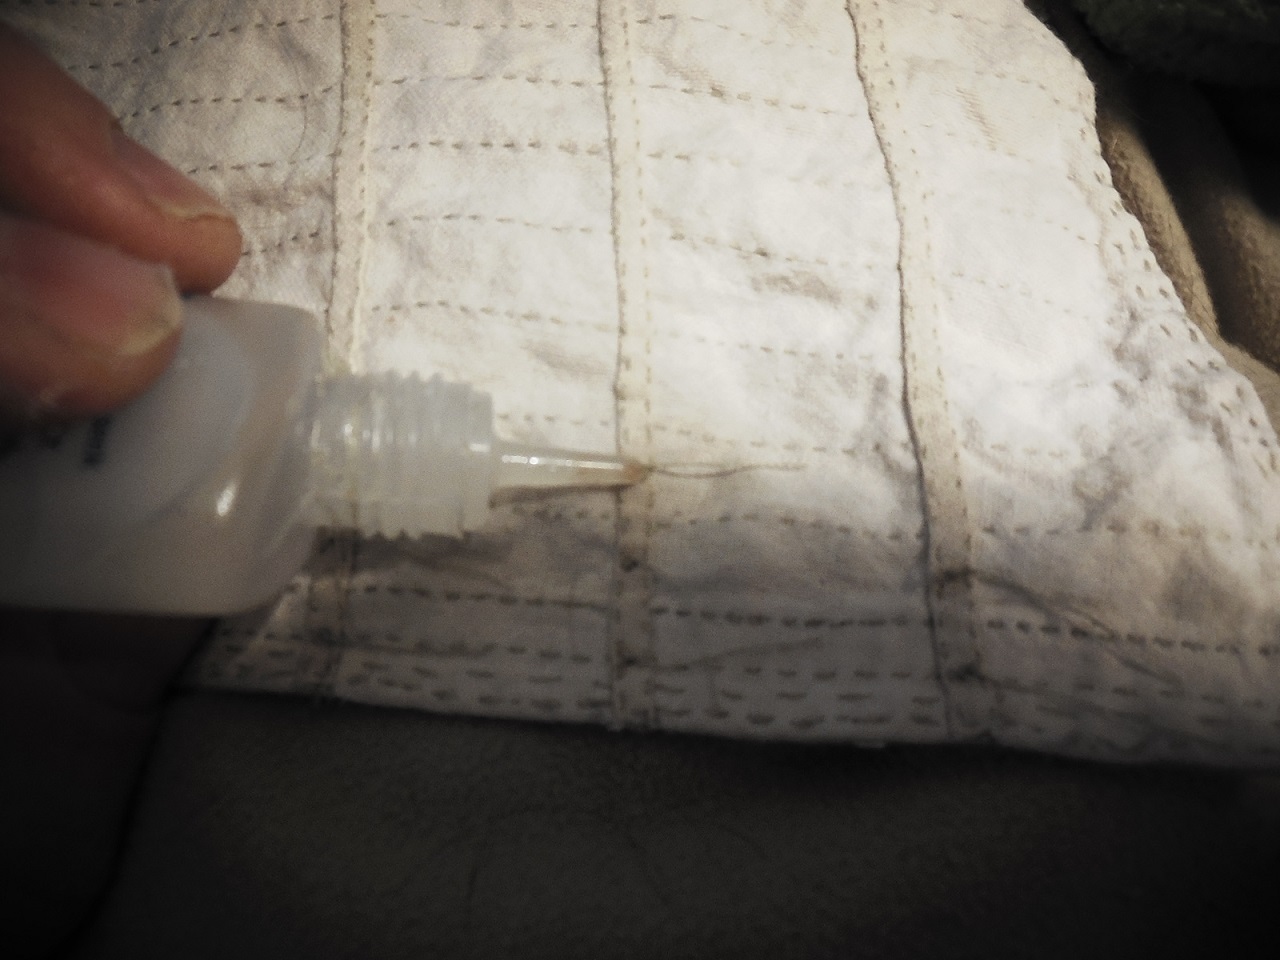
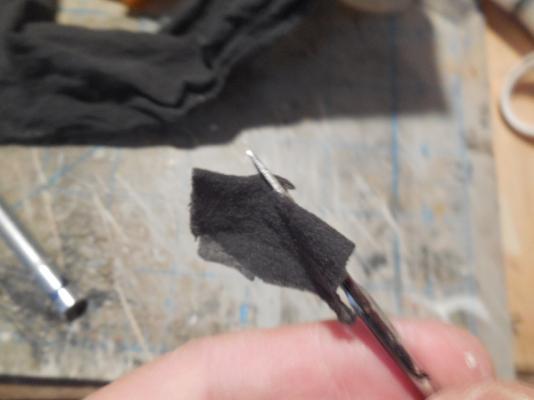
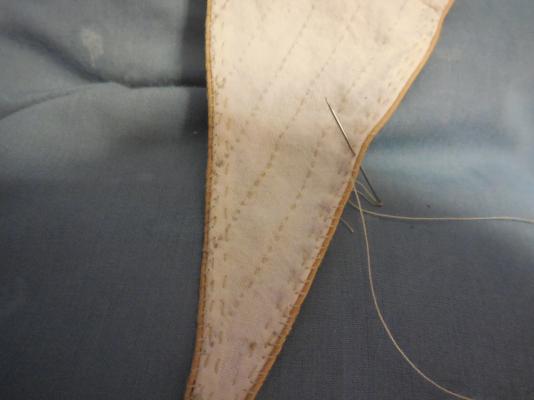
My dog makes a good dark background to show the thread, lol. I now knot the two threads together, do this on each side. I trim off one of the threads & leave one hanging from the knot & trim it to its proper length. I then apply Fray Check to hold to keep anything from unraveling.
- 607 replies
-
- 4
-
-
- scottish maid
- artesania latina
- (and 1 more)