JesseLee
-
Posts
1,694 -
Joined
-
Last visited
Content Type
Profiles
Forums
Gallery
Events
Everything posted by JesseLee
-
 Piet, just caught up with your build. Truly outstanding work!
 -
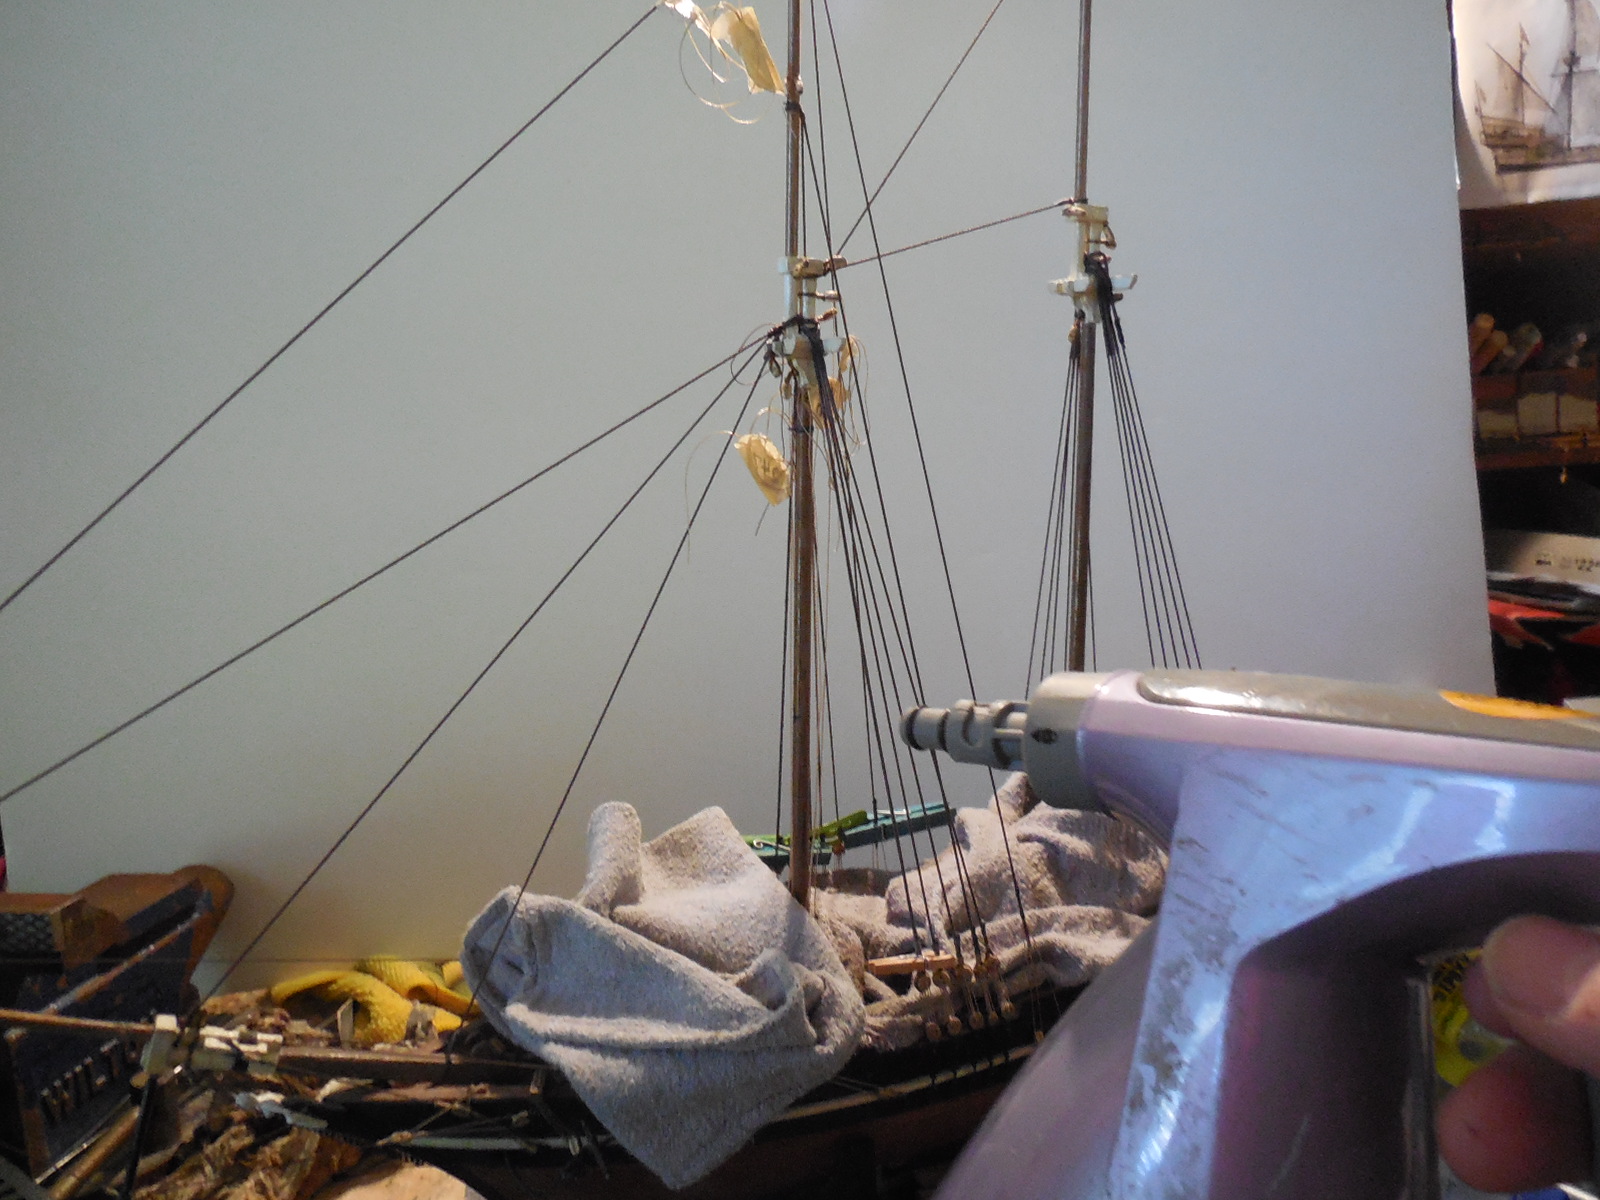
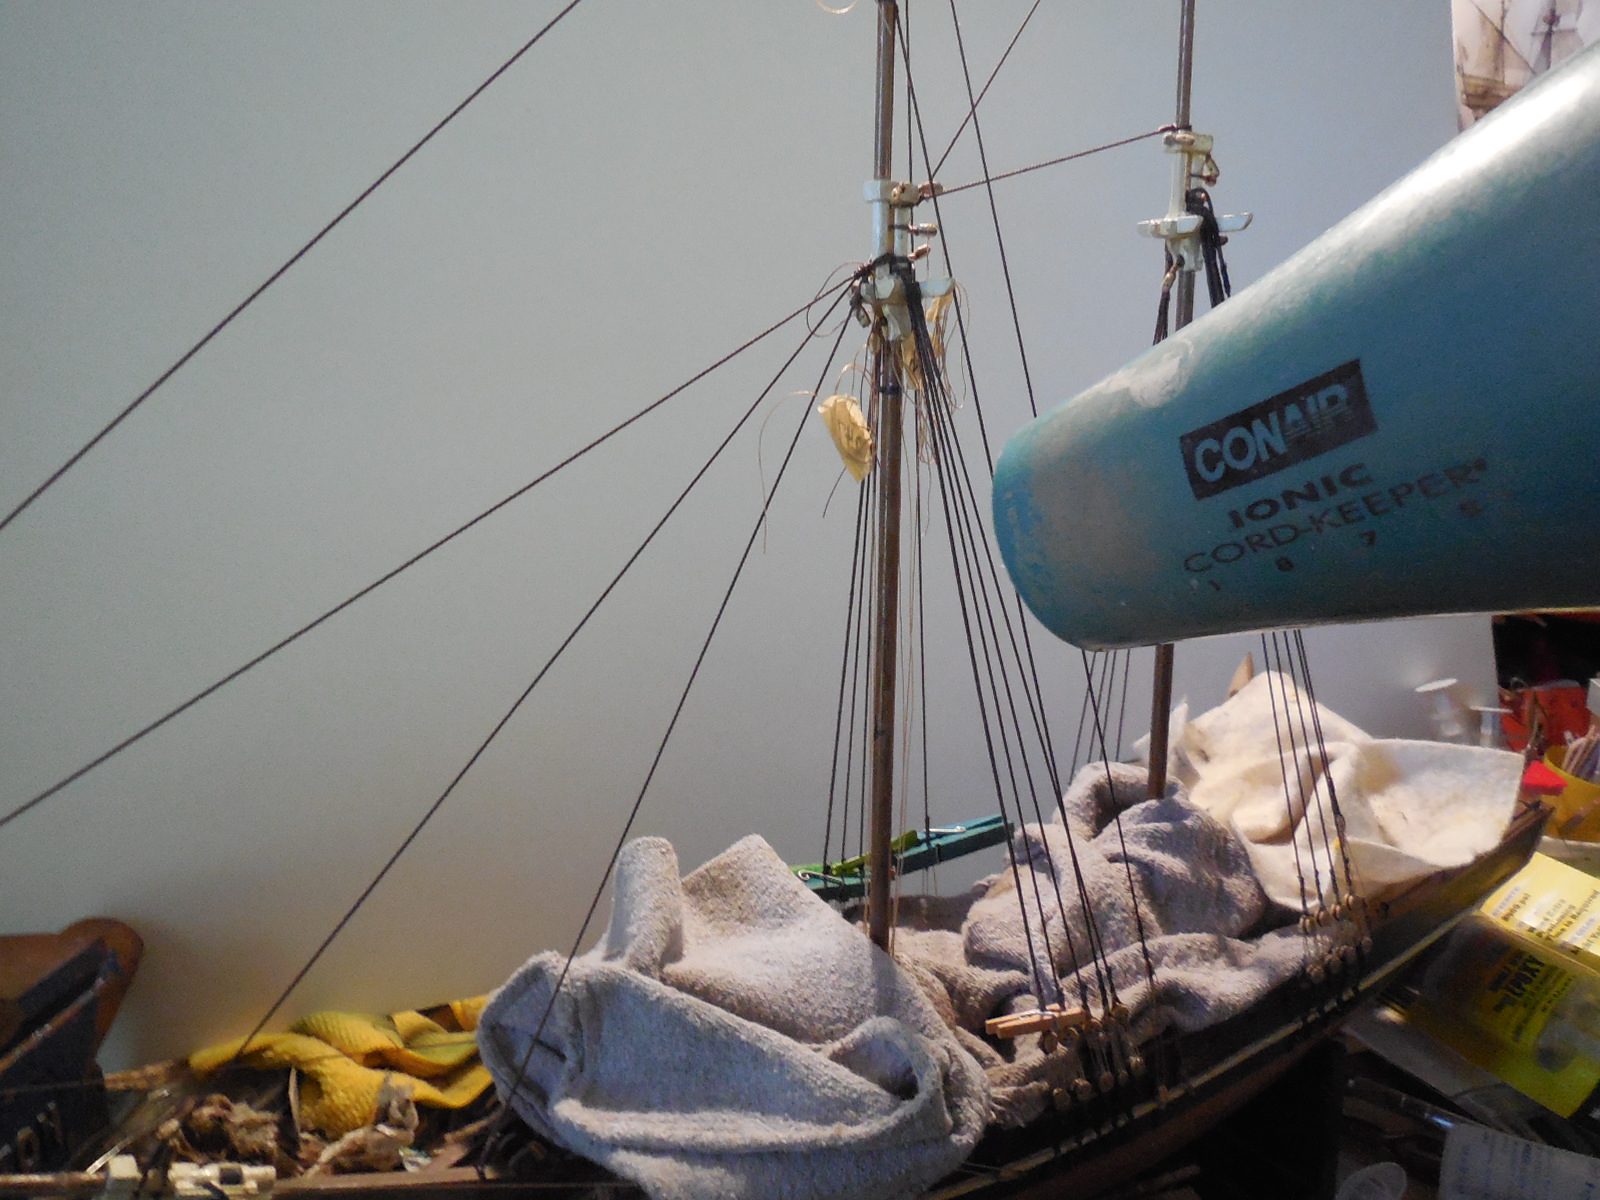
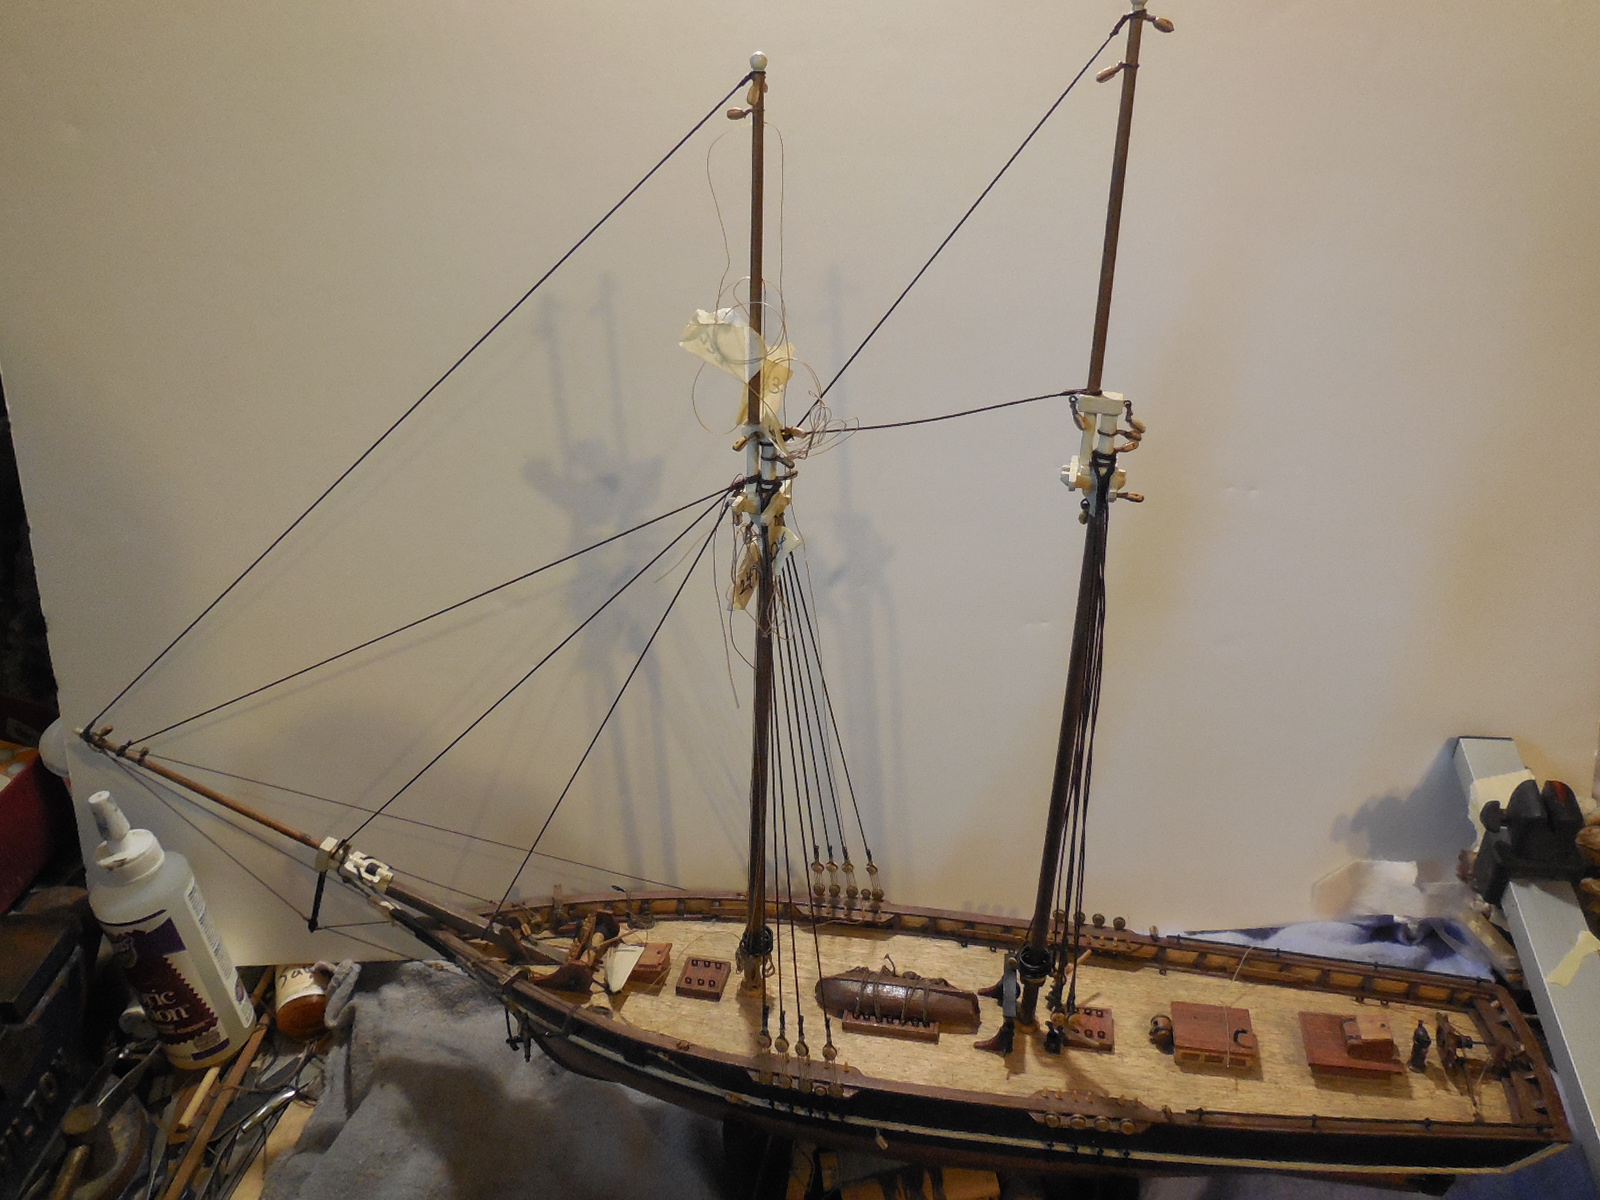
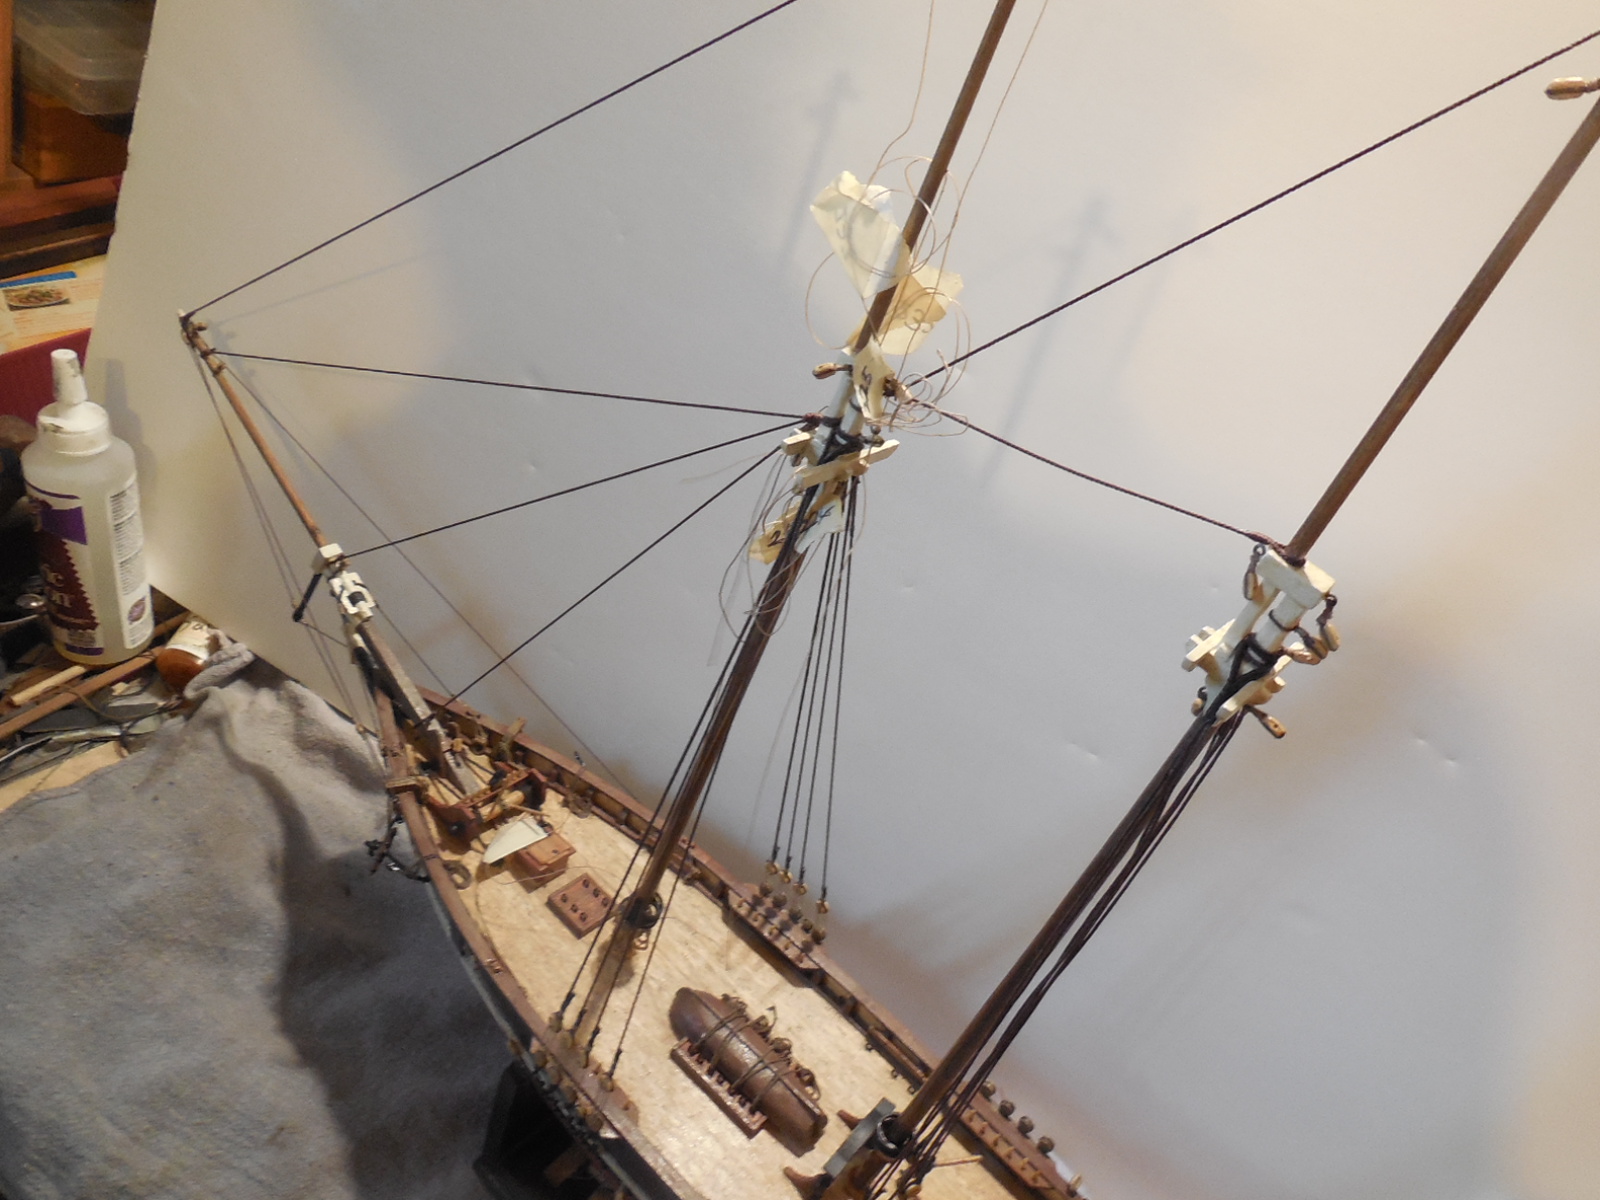
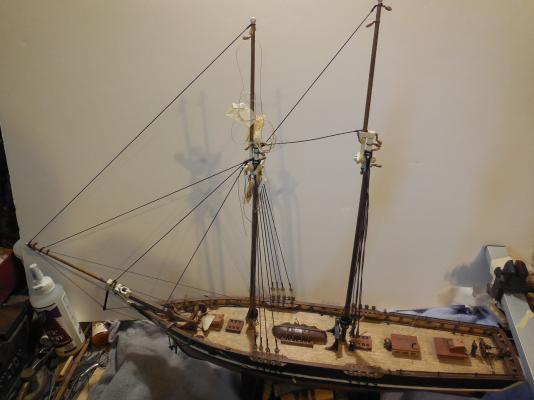
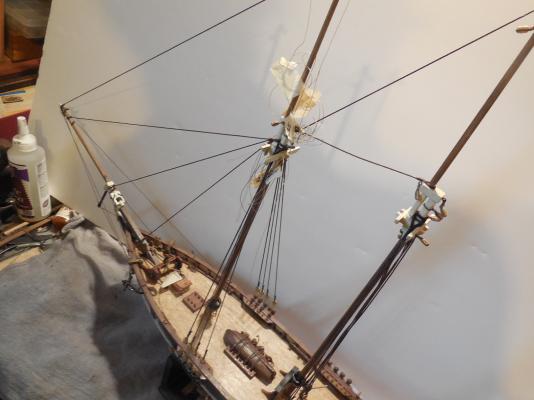
I also found that no mater how snug the previous rigging was, after I add more & it tugs at different angles it seems to change how everything is. Lines that once were snug become slack as things are pulled on in different ways as more rigging is added. This frustrates me to no end. As before, I don't want to keep undoing & re-doing lines every time I turn around. As always, another problem to solve. The answer came from another interest of mine. I love flags. I fly various flags around my house: National, State, POW?MIA, Historical, etc. I have always noticed that when it rains & the rope on the flagpole gets completely soaked the line gets very slack as if the water stretches it. BUT, whet it dries it is even tighter than before it got wet, so much so it is hard to undo the line as if I had tied it way too tight. Seeing this I turn to Google to research it. YES! line will shrink some from getting wet just like washing & drying clothes can shrink then sometimes. I experimented with this & found it does work. It works better if the water is very hot & even better if you dry it faster. I used a steamer (the same one I used to bend my planks for the hull) & then a hair dryer. This can also be done with a mug of boiling water & brushed on the line with a paintbrush. This can be done as many times as necessary as you have line go slack as you do your work.
- 607 replies
-
- 8
-

-
- scottish maid
- artesania latina
- (and 1 more)
-
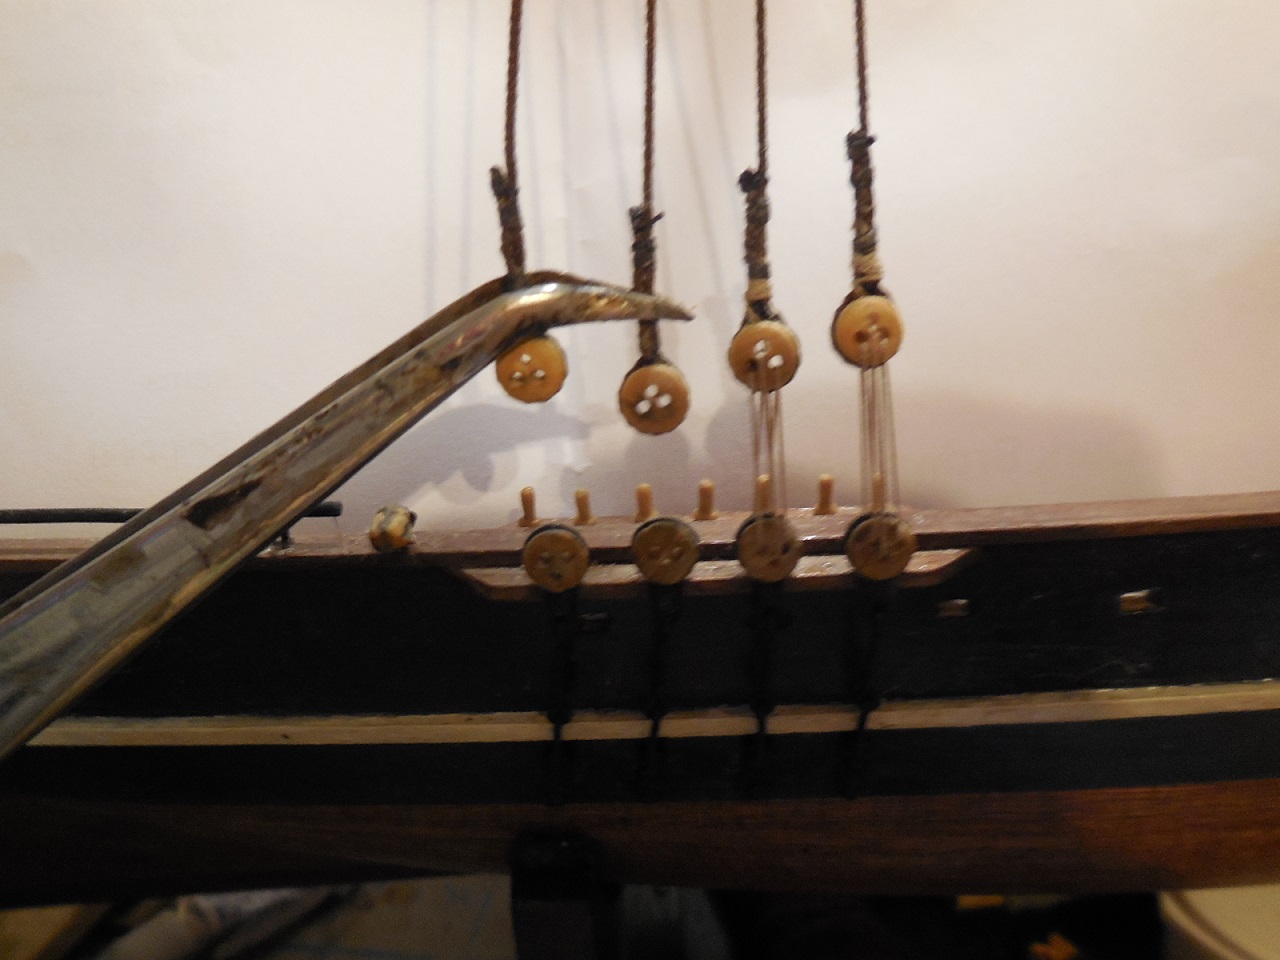
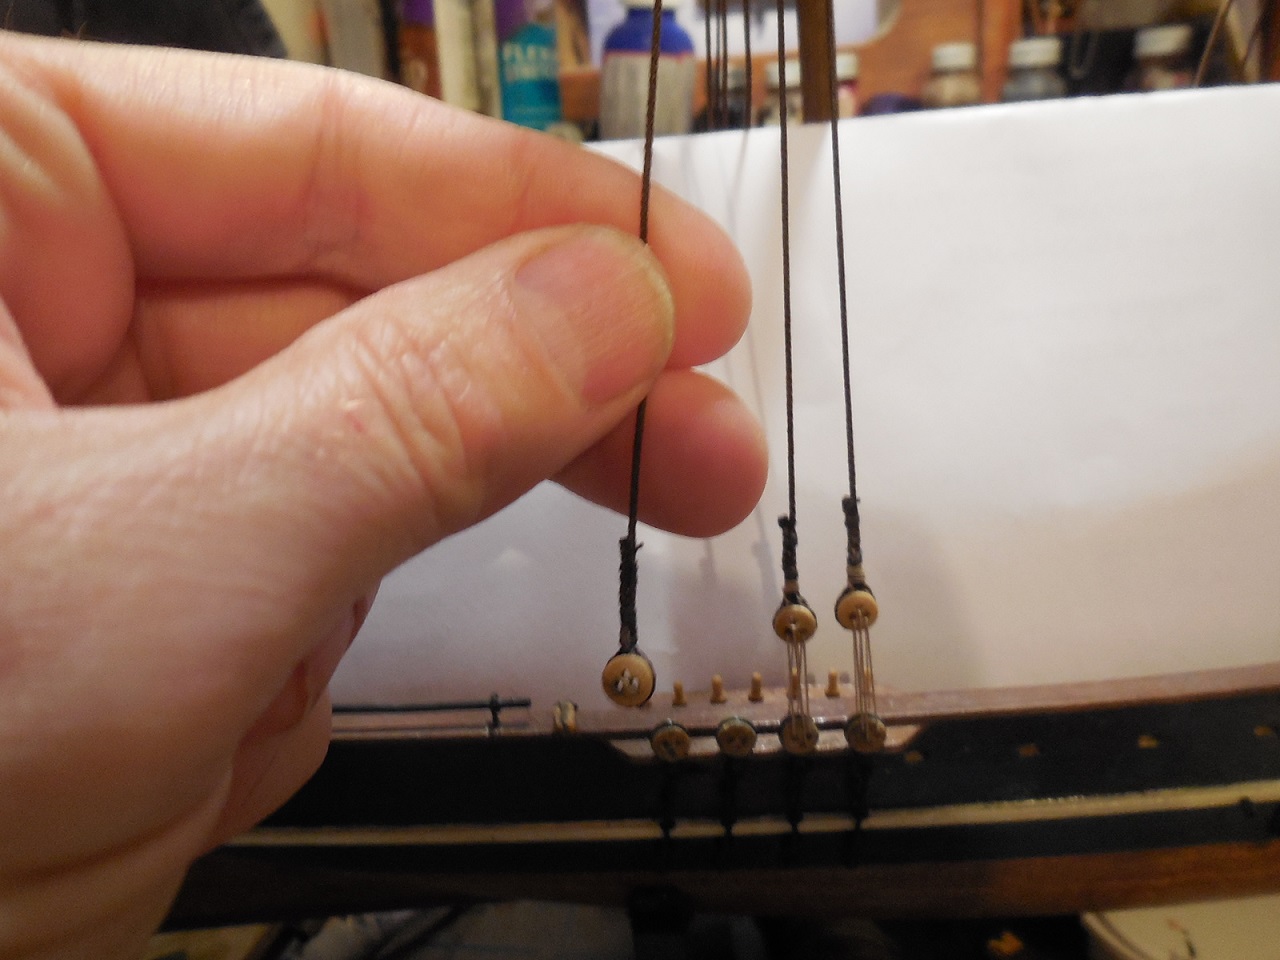
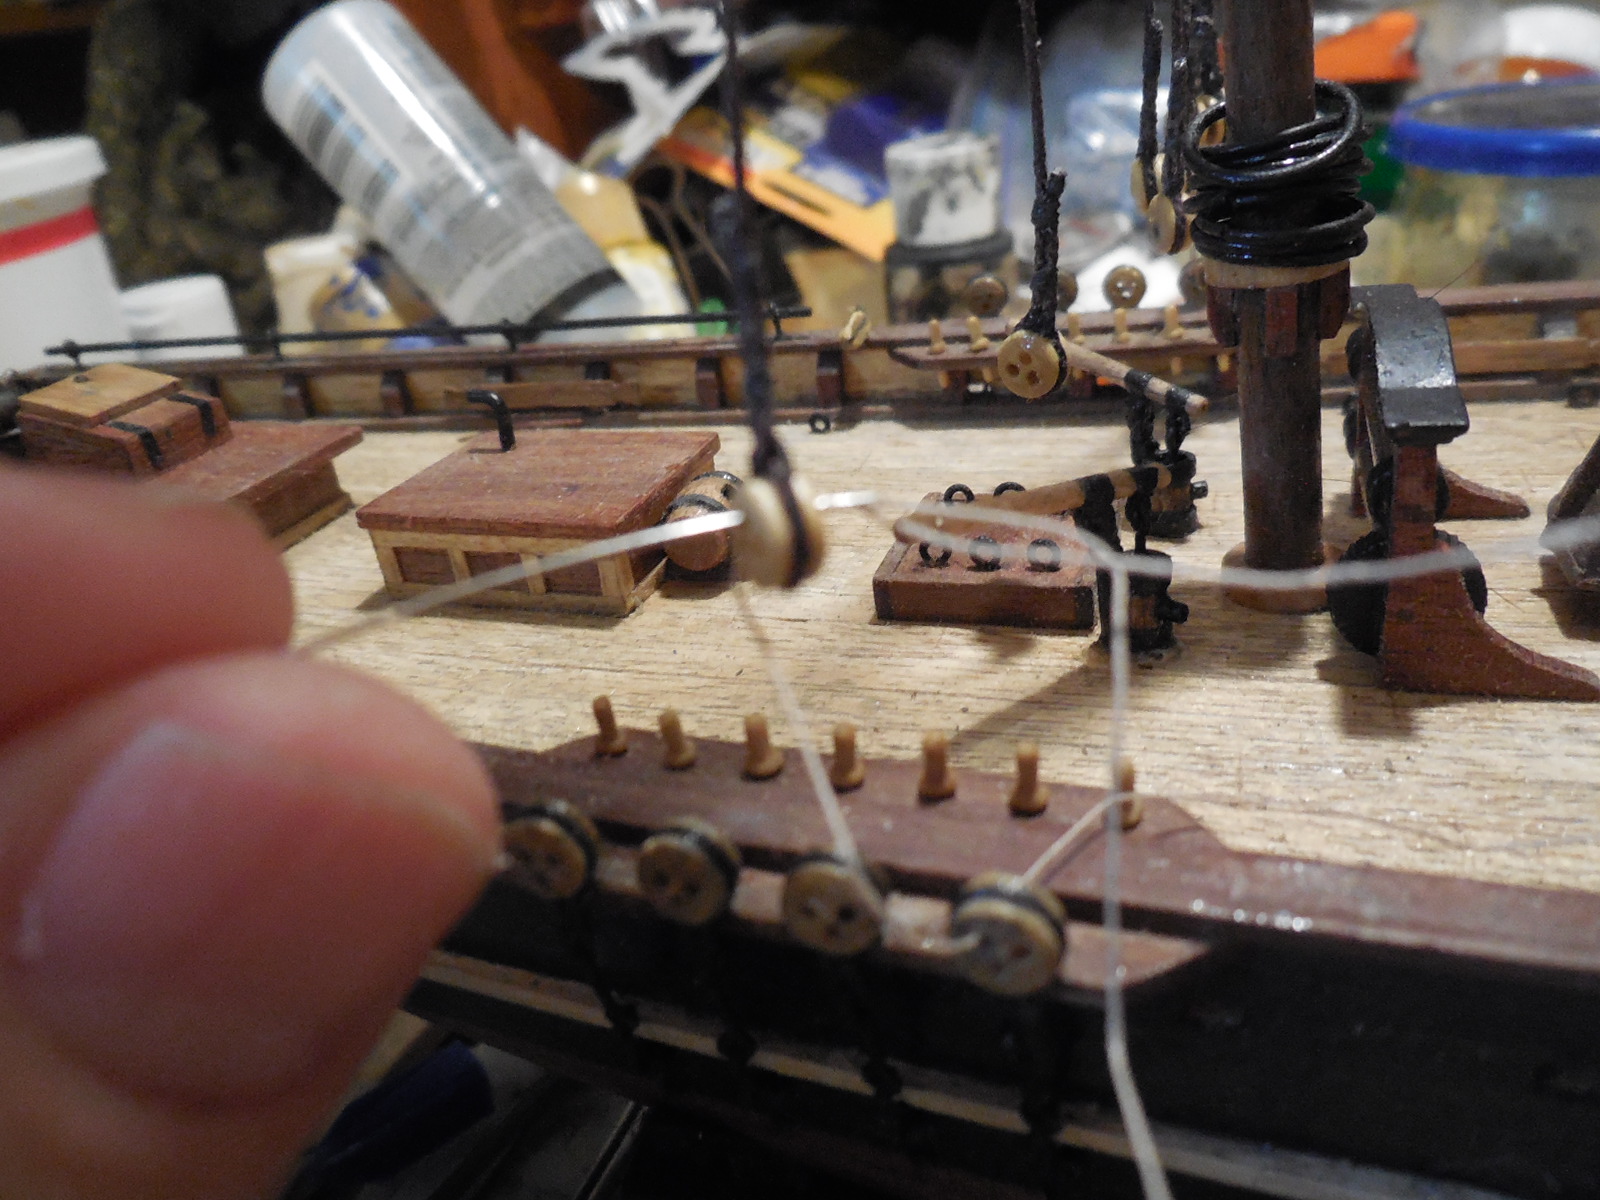
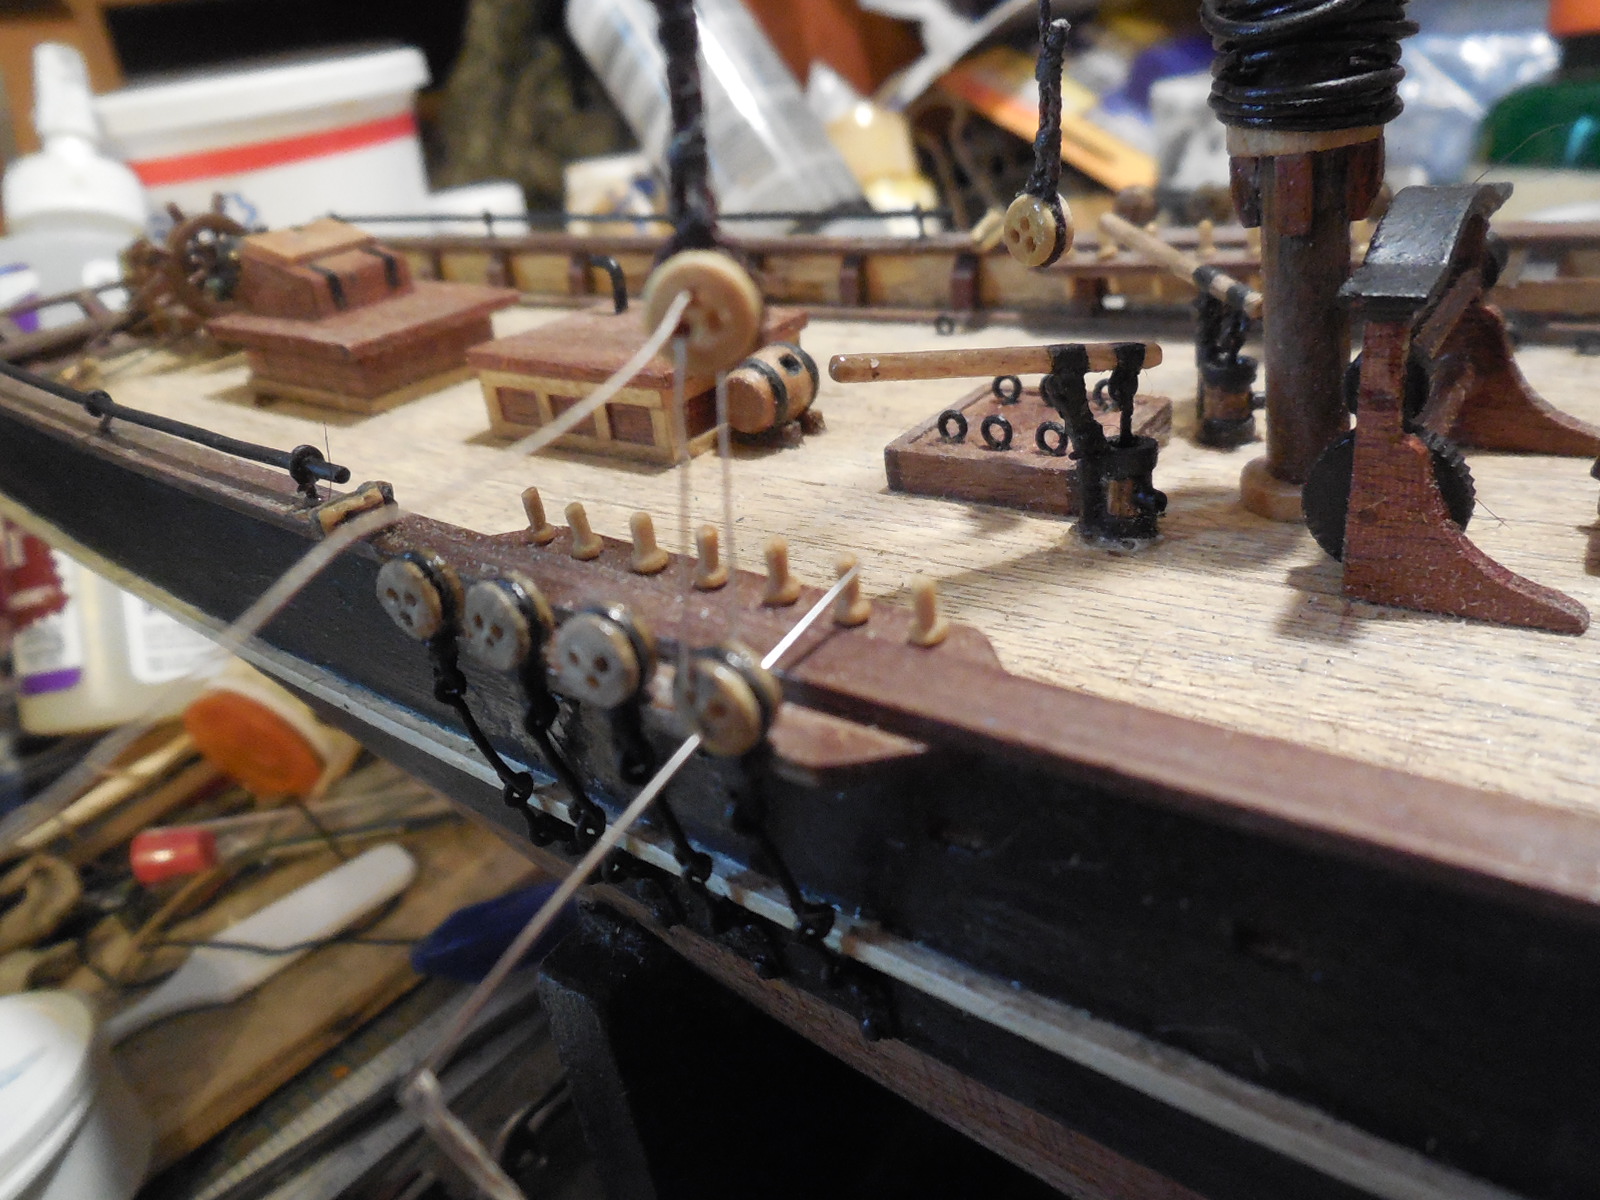
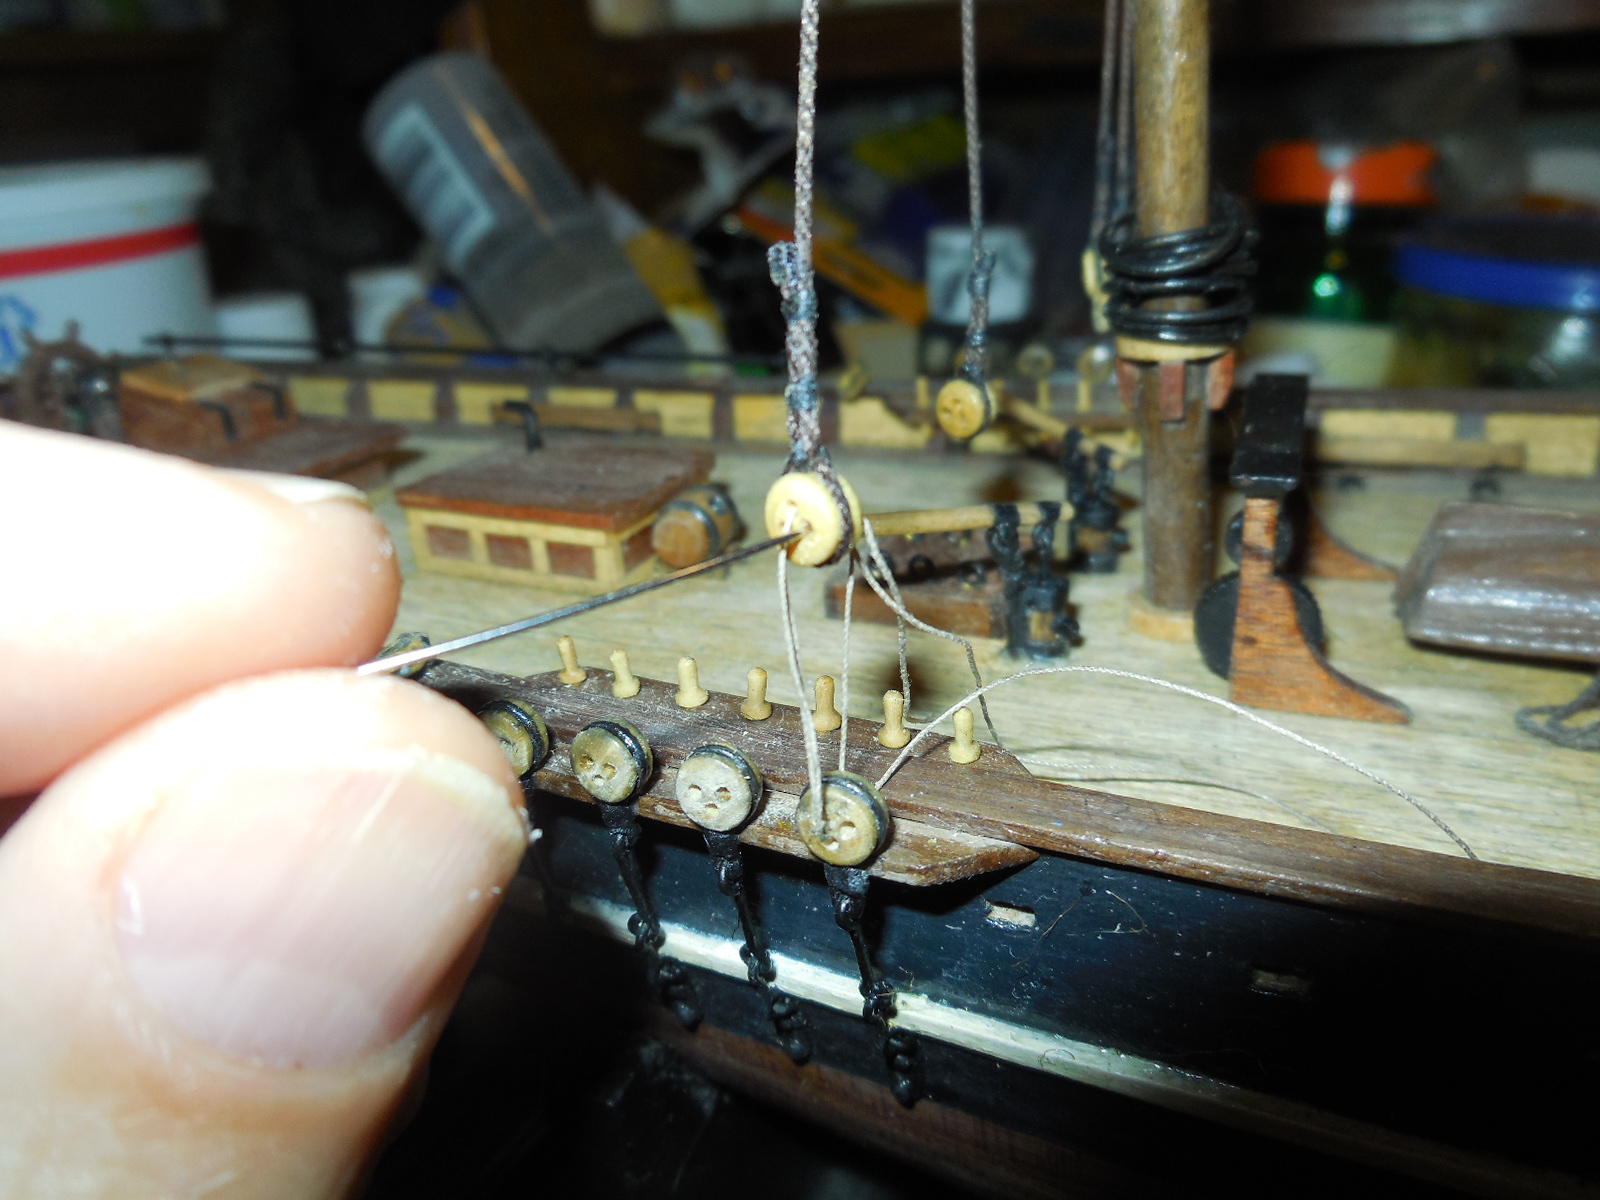
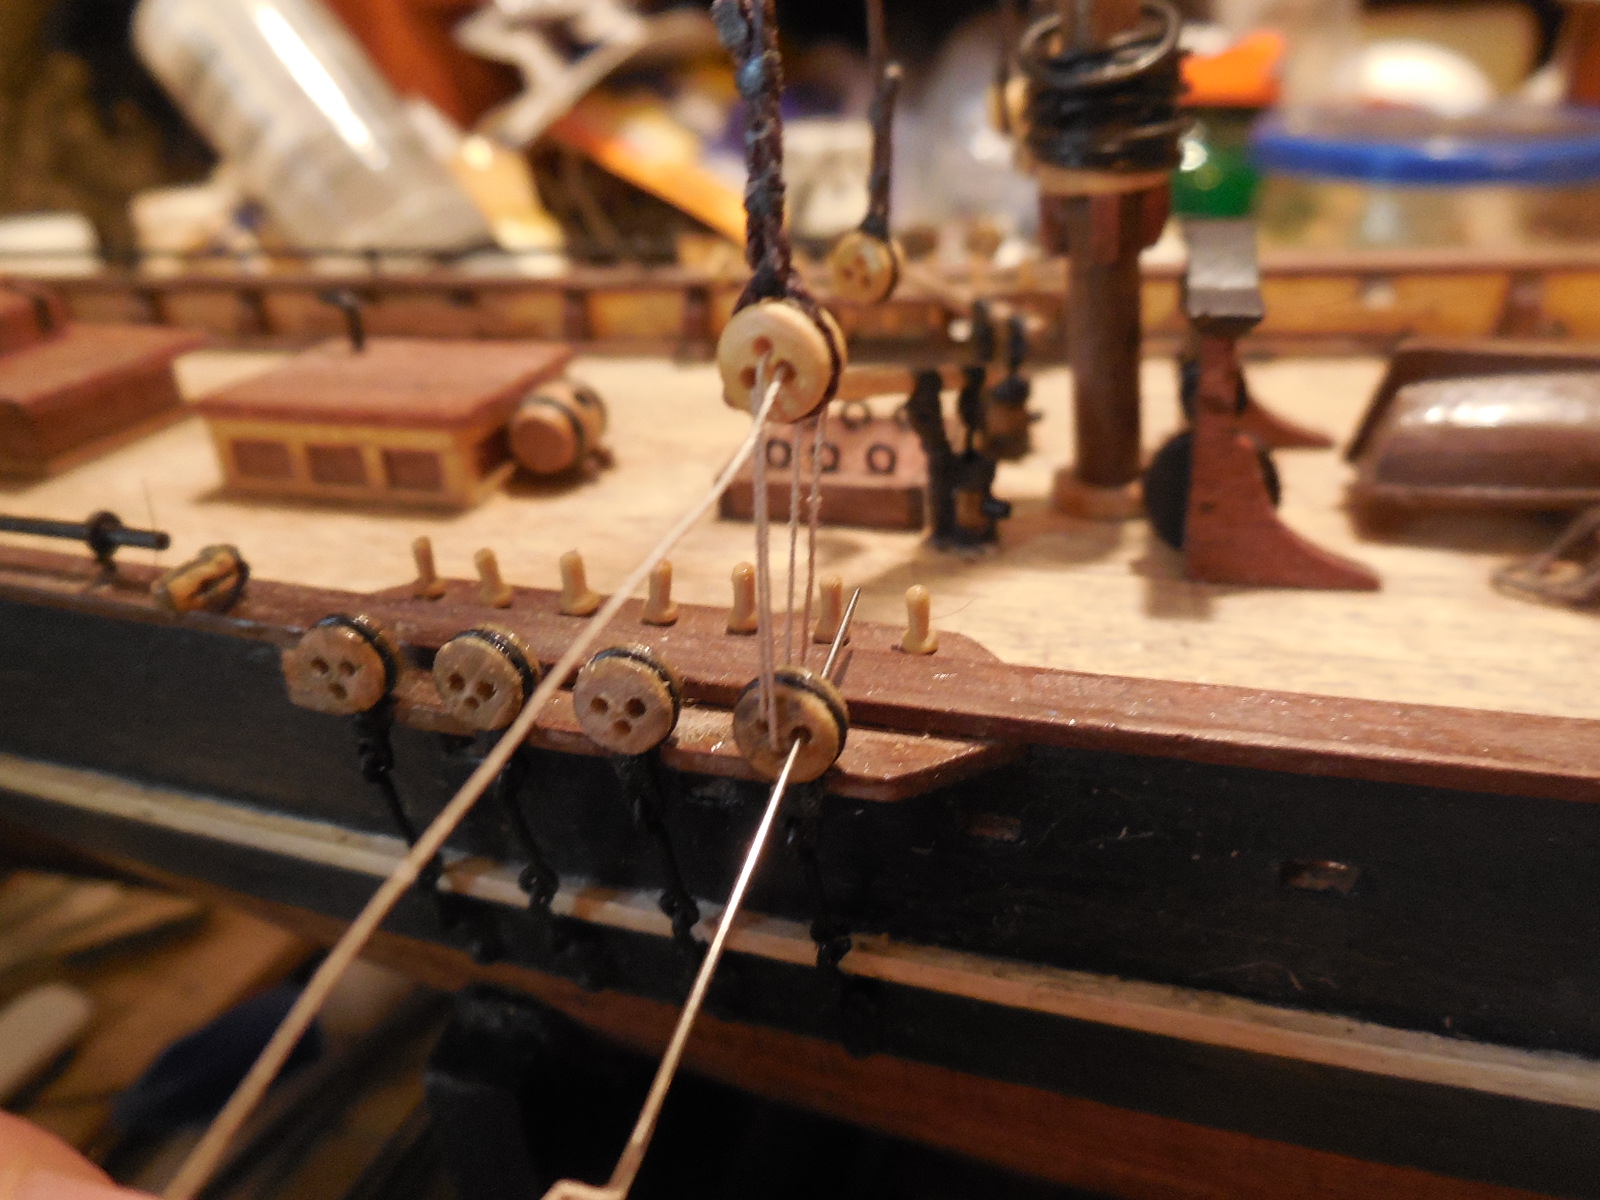
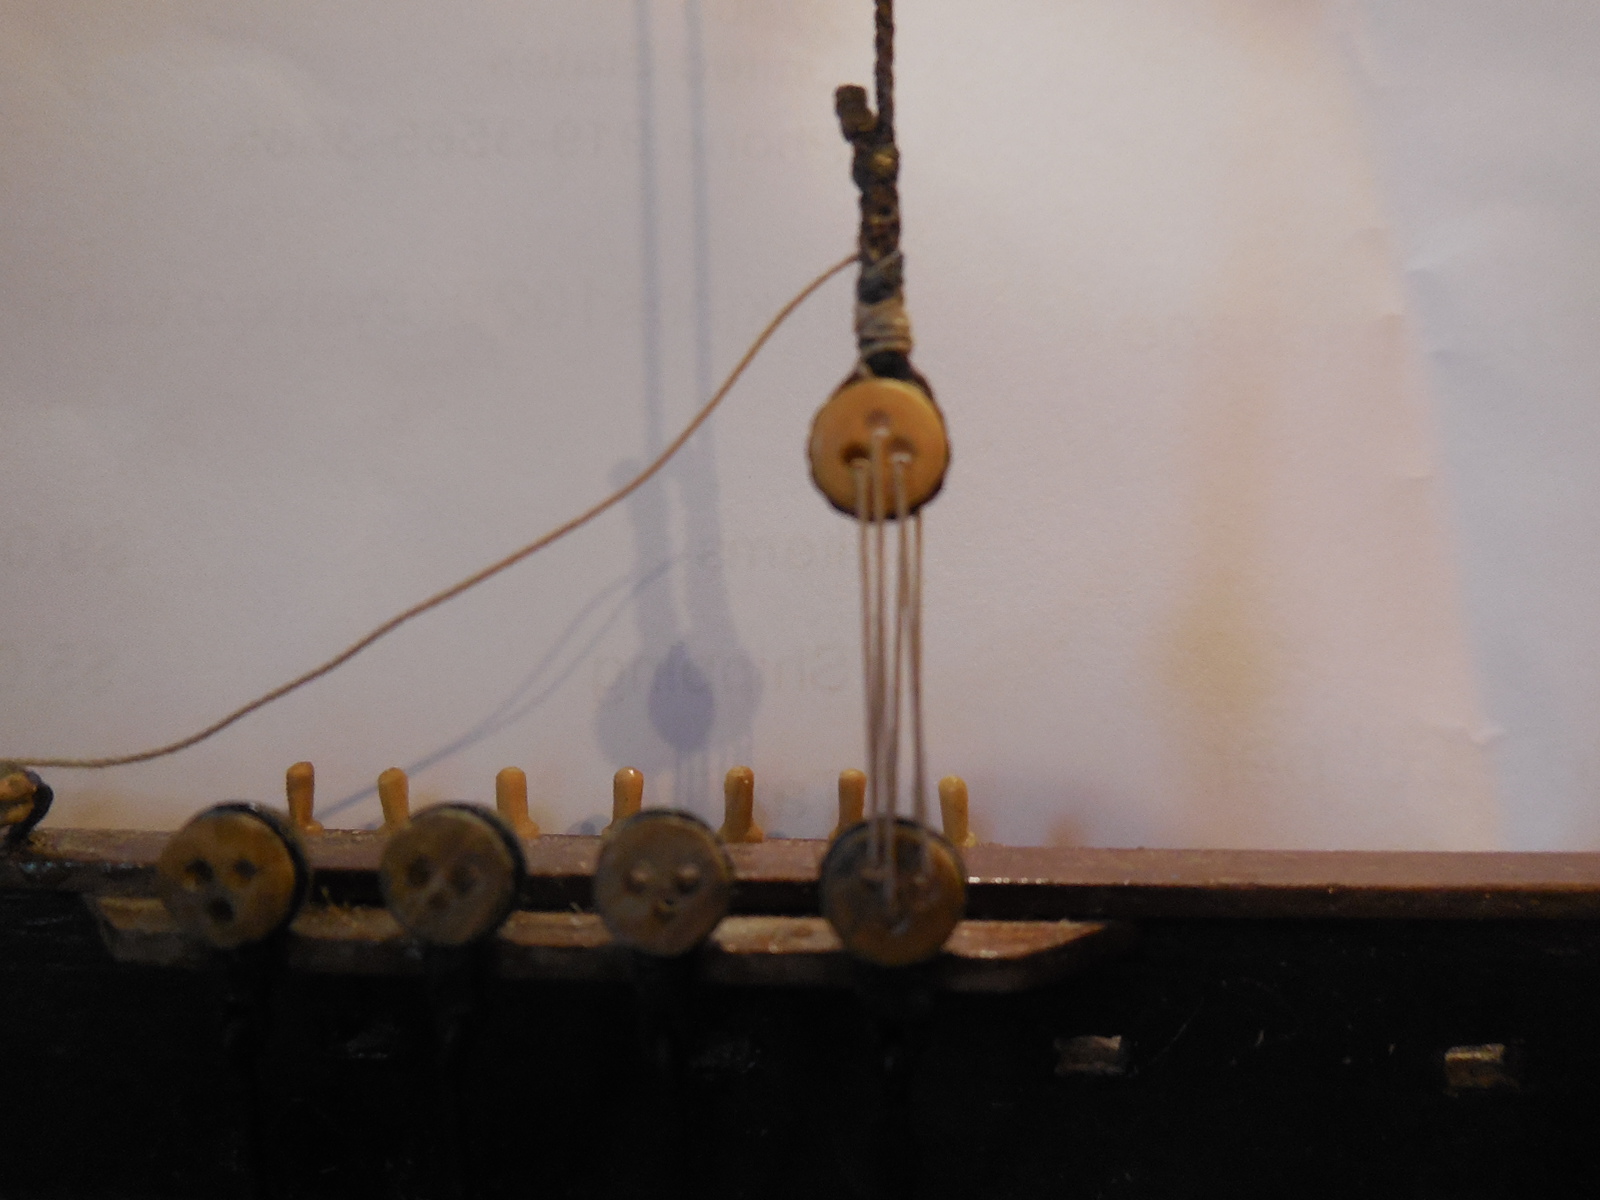
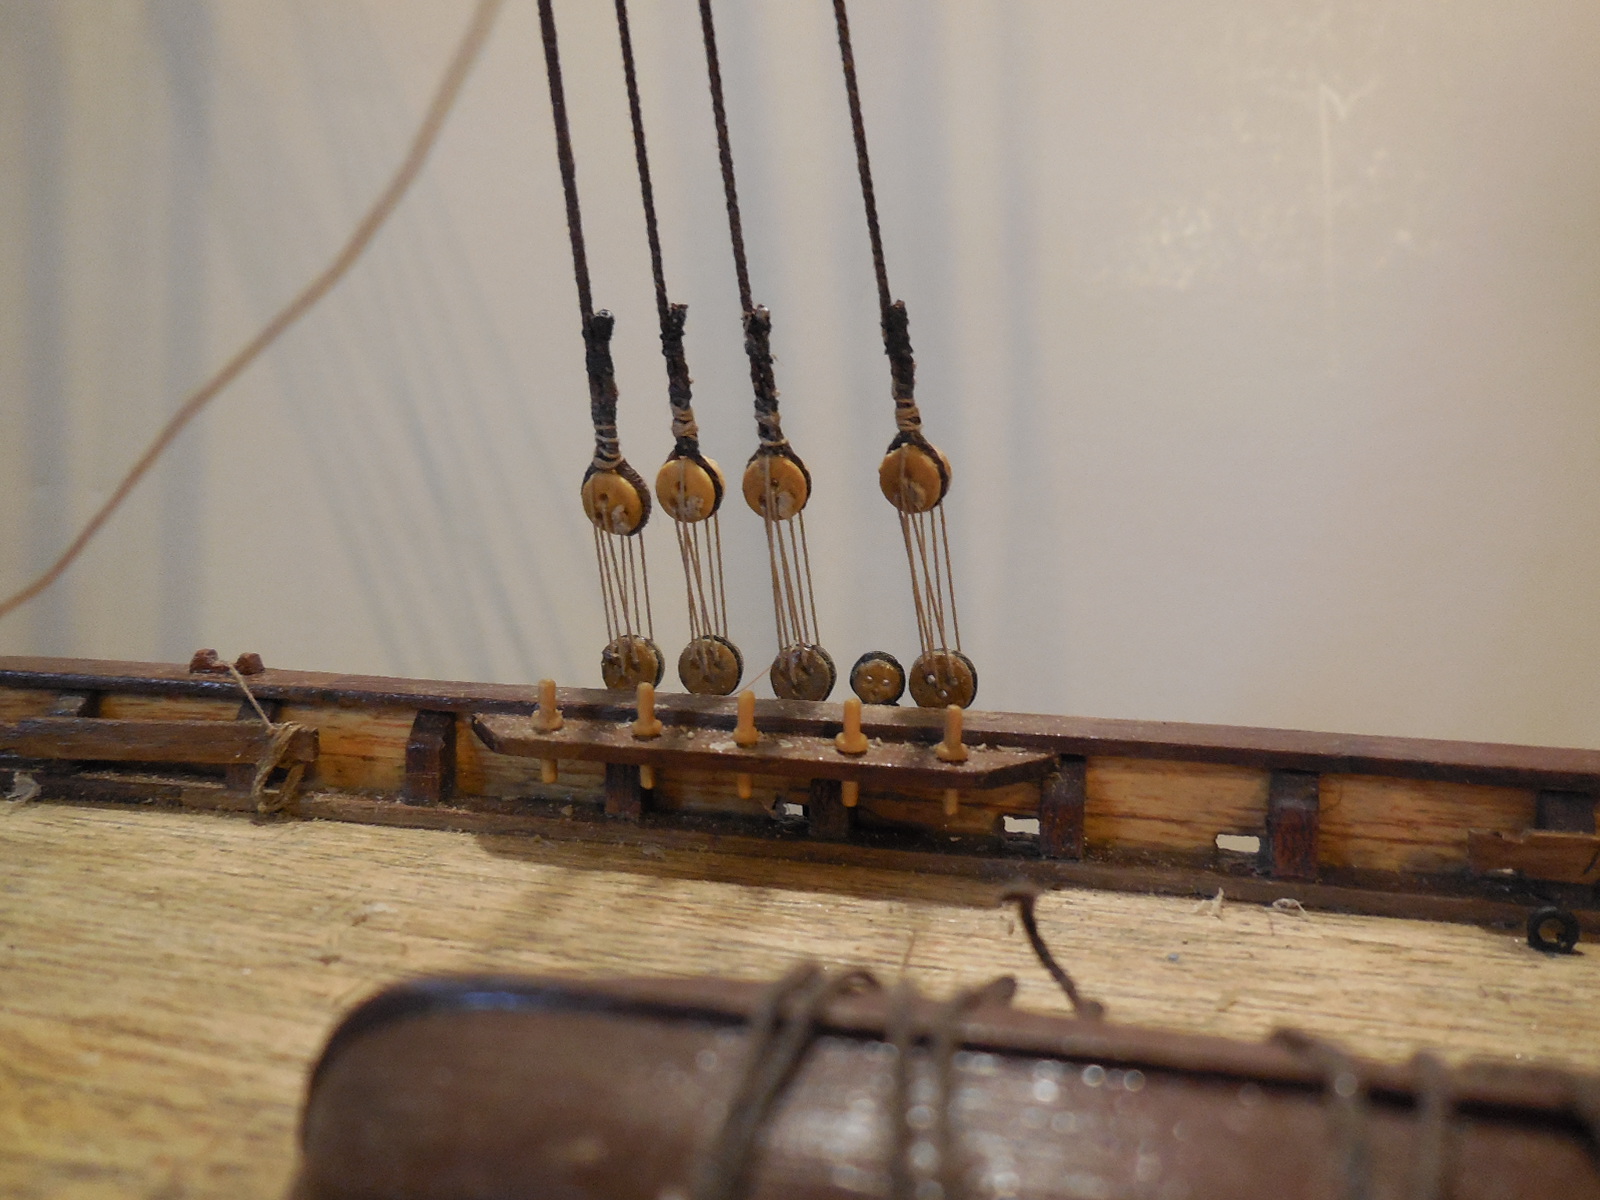
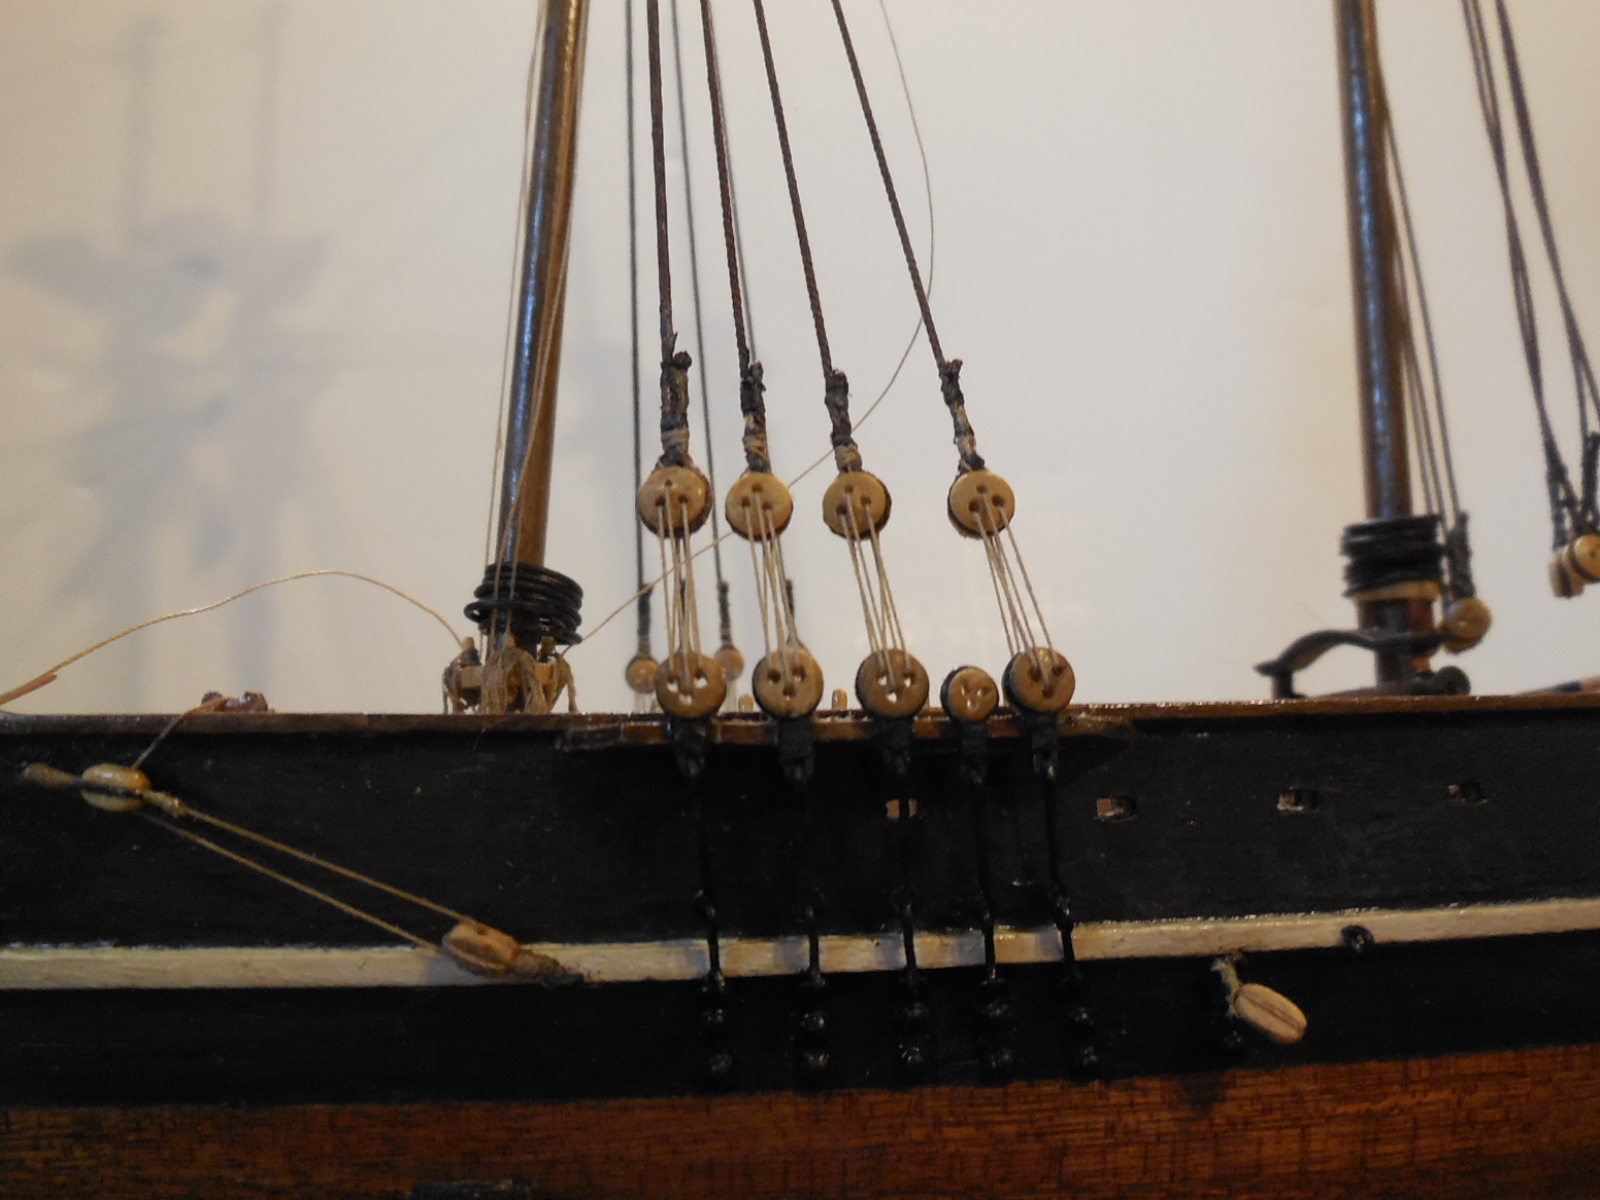
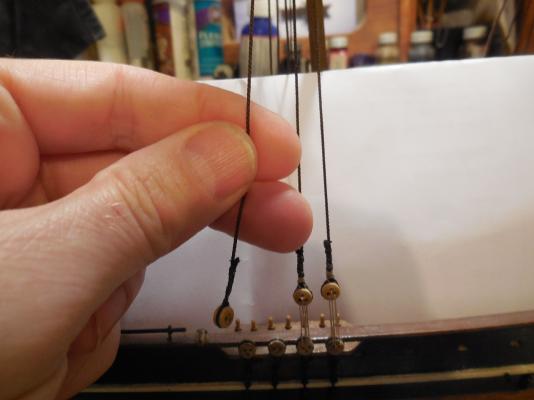
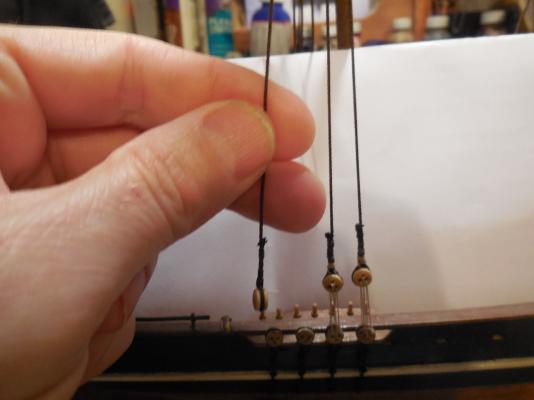
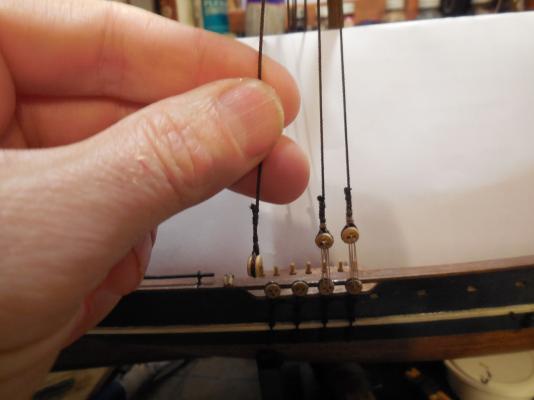
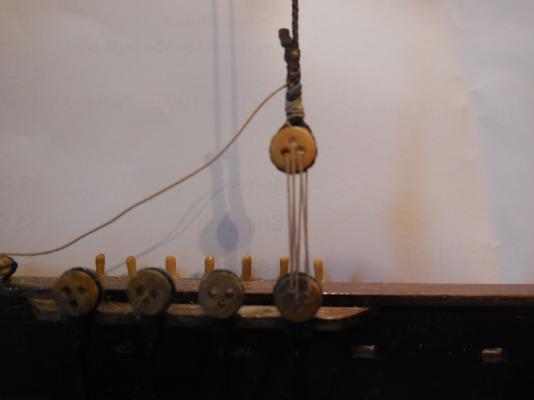
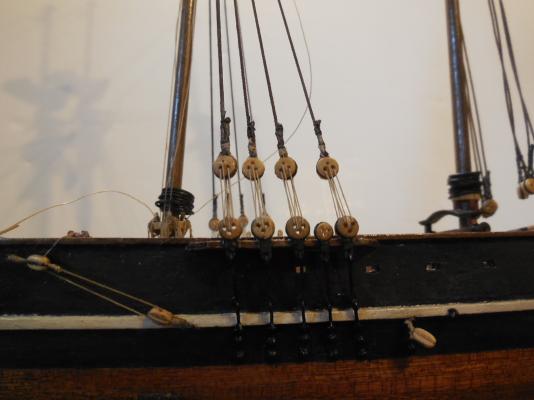
I was debating whether to go on & rig the shroud lanyard lines or to wait & do them later as I think I will have trouble tying the running rigging to the pins that are behind the shrouds but decided to go on & do the lanyards & hope for the best later. When I went to start the shroud lanyard rigging I noticed that even though I had jigs on the shroud deadeyes I still some how didn't have all the shroud lines the right length. Some were too long making the space between the deadeyes where you rig the lanyards too close. Seems half of my build is figuring out how to fix problems. I really didn't want to completely re-do tying the deadeyes. That would have been a lot of undoing & re-doing! I figured out a trick that works very well. I found that if you twist the rope with it's natural twisting that makes up the rope (it tightens itself) the deadeyes raise up some. Do this till your deadeye is where you need it & then loop rig lanyard line. When the lanyard is looped through the deadeye holes this holds the shroud line & keeps it from unwinding back. Note: this only works for very small changes in line length- in this case only a few mm each.


- 607 replies
-
- 4
-
-
- scottish maid
- artesania latina
- (and 1 more)
-
Wow! Looking great! Love that tool chest. I have no clue about the oar lashings.
- 625 replies
-
- 1
-
-
- bounty launch
- model shipways
- (and 1 more)
-
You built the CSS Alabama? I think that is my #1 dream build!
-
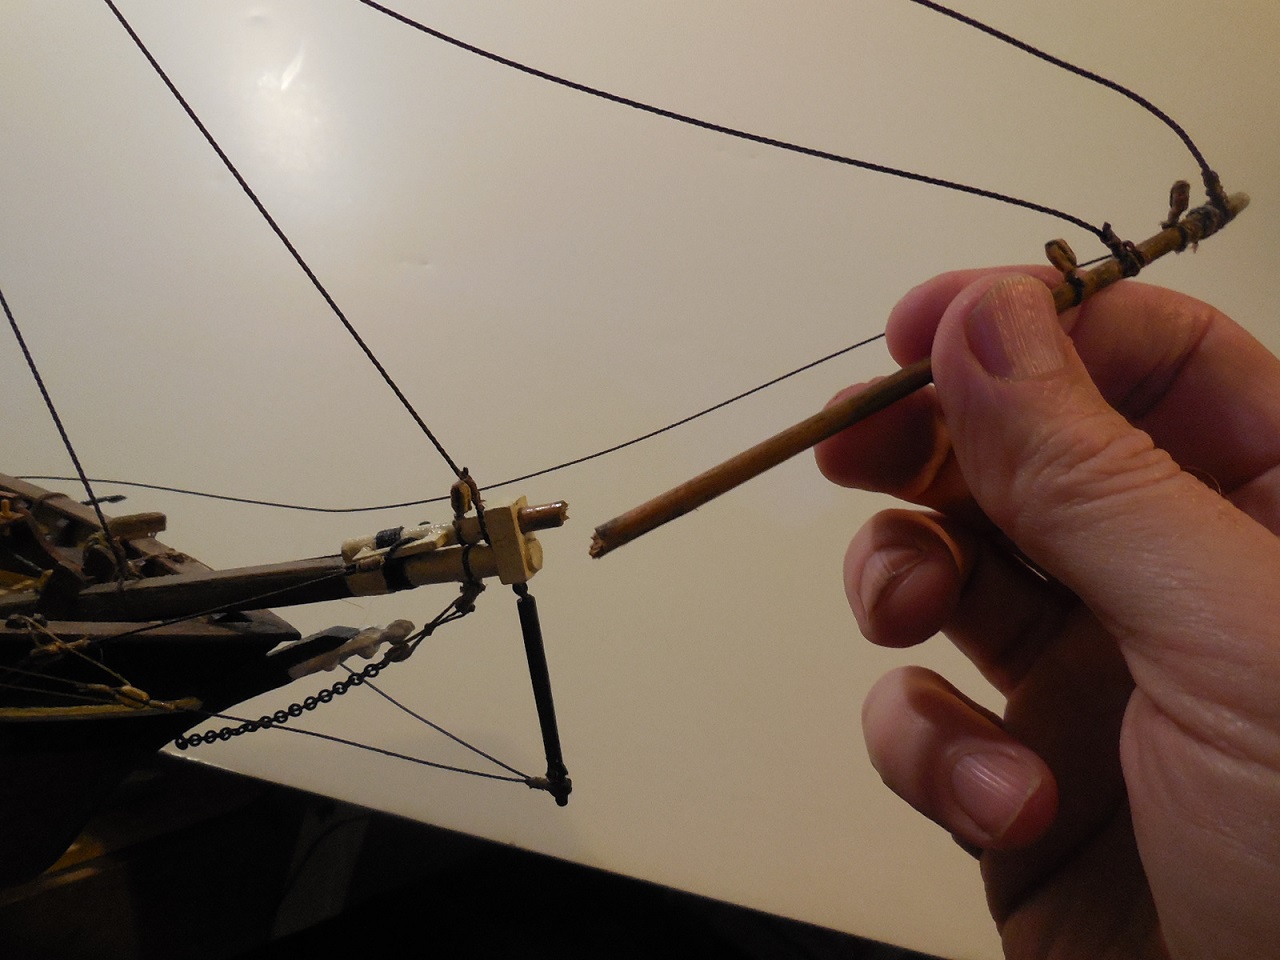
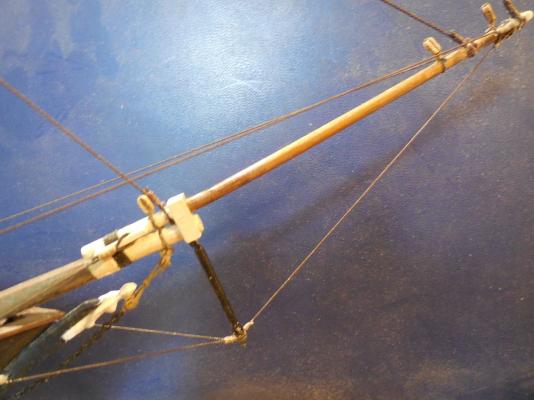
Had a near disaster this weekend. While working on the rigging I picked up the ship to turn it around to the other side & DROPPED IT!!!! BROKE the bowsprit! I just about had a cow! After freaking out a while I pondered the situation, examining the damage. Figured if I could put a metal pin in it I could rejoin it. I used a stainless steel pin & CA glue. It worked, but I wish I had thought to use epoxy instead of CA. Lyme gets in your brain & makes you not think straight sometimes. I tested it for strength & had to re-do 2 lines. There is a faint line showing but I'm ok with it because it is better than having to re-do the bowsprit & re-rig it all. I figure it will be one of many character marks this ship will have.
- 607 replies
-
- 13
-
-
- scottish maid
- artesania latina
- (and 1 more)
-
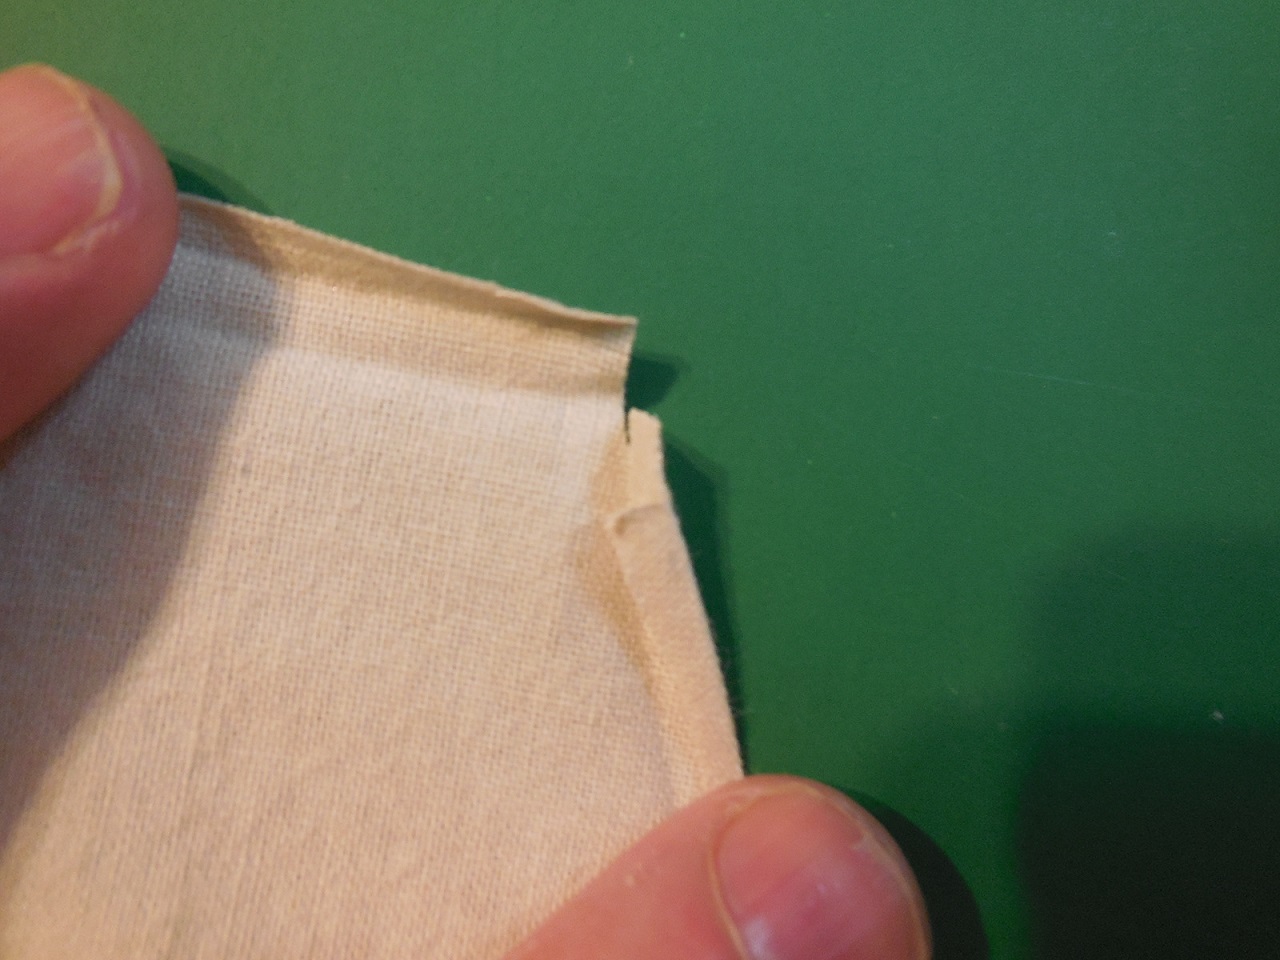
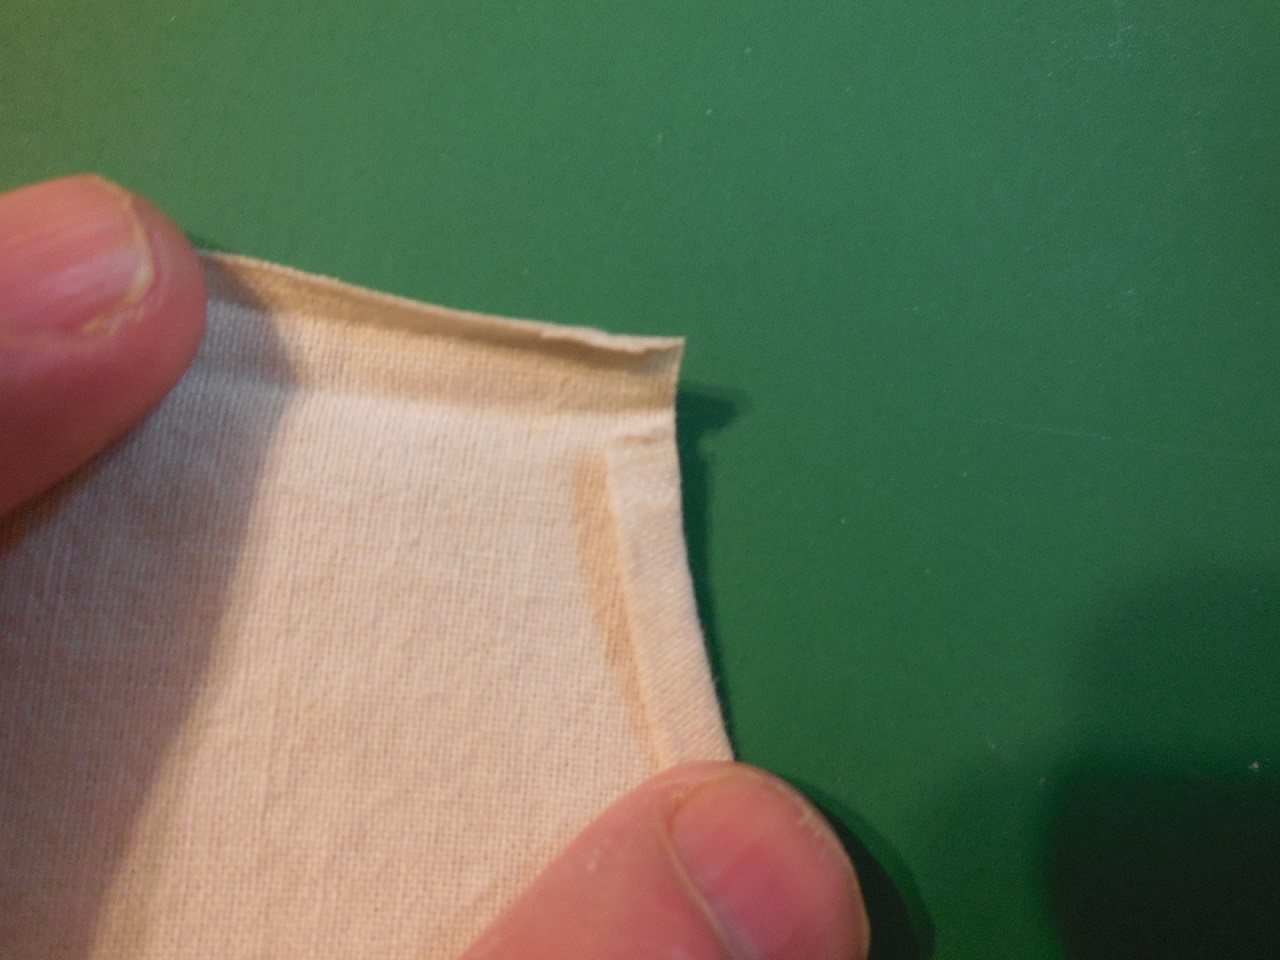
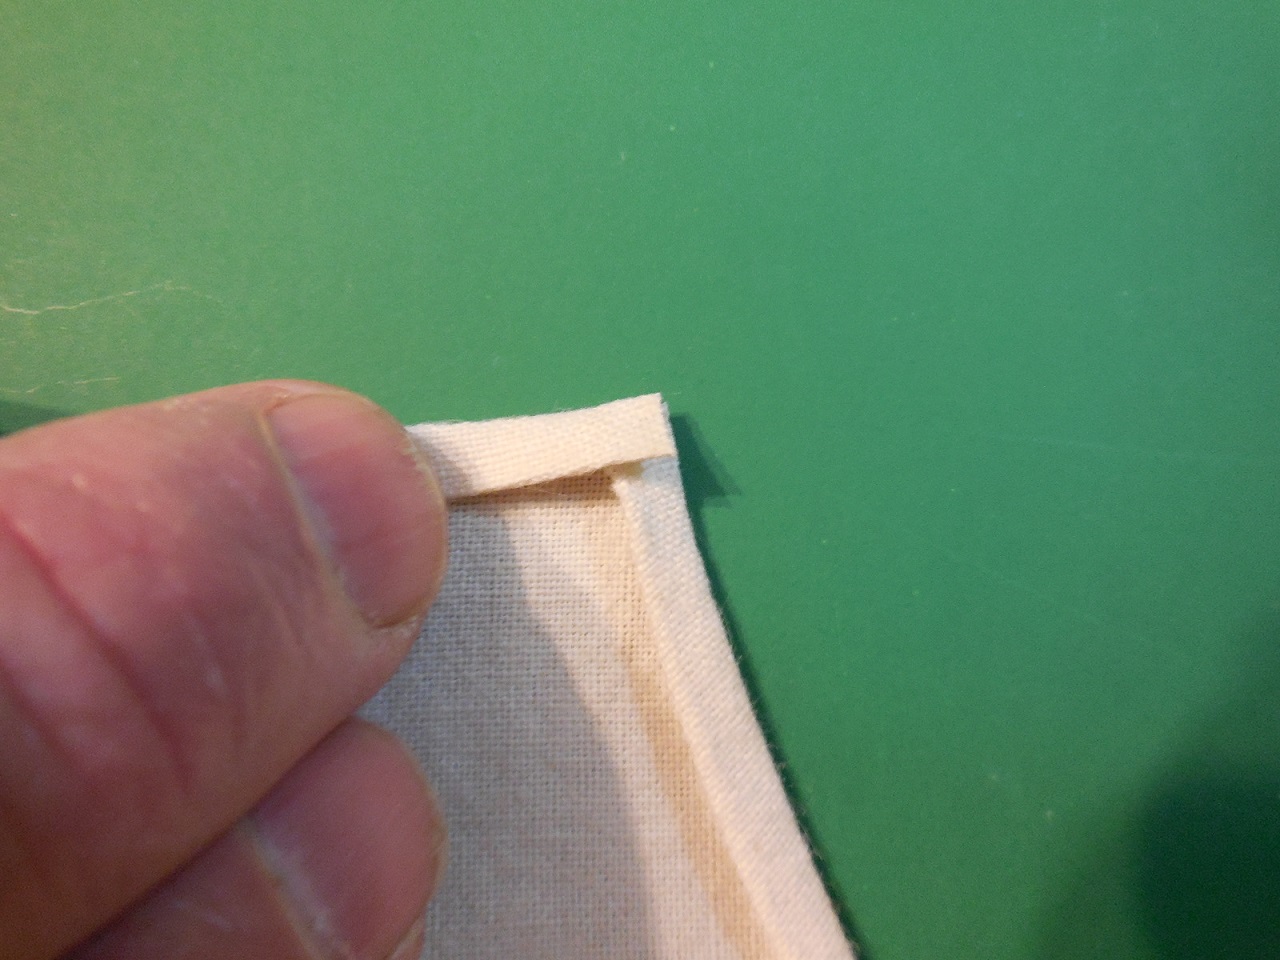
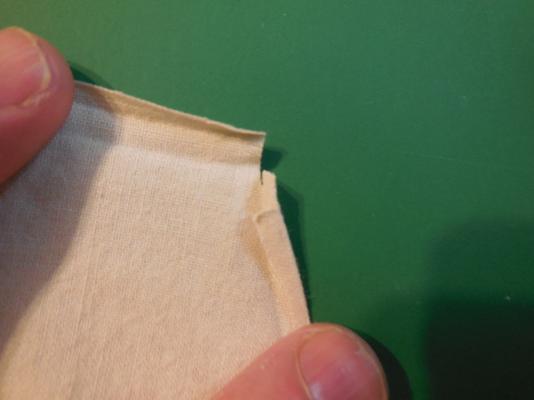
Yes Keith, it's the same stuff I'm using on the rigging. Folding corners can make things too thick from too many layers overlapping each other. I had to figure out by trial & error how to cut out small areas of cloth that were underneath another fold & would never be seen anyway so that when folded up the corner wouldn't be too thick with too many layers of cloth. Its kind of like a folding jig saw puzzle.


- 607 replies
-
- 6
-
-
- scottish maid
- artesania latina
- (and 1 more)
-
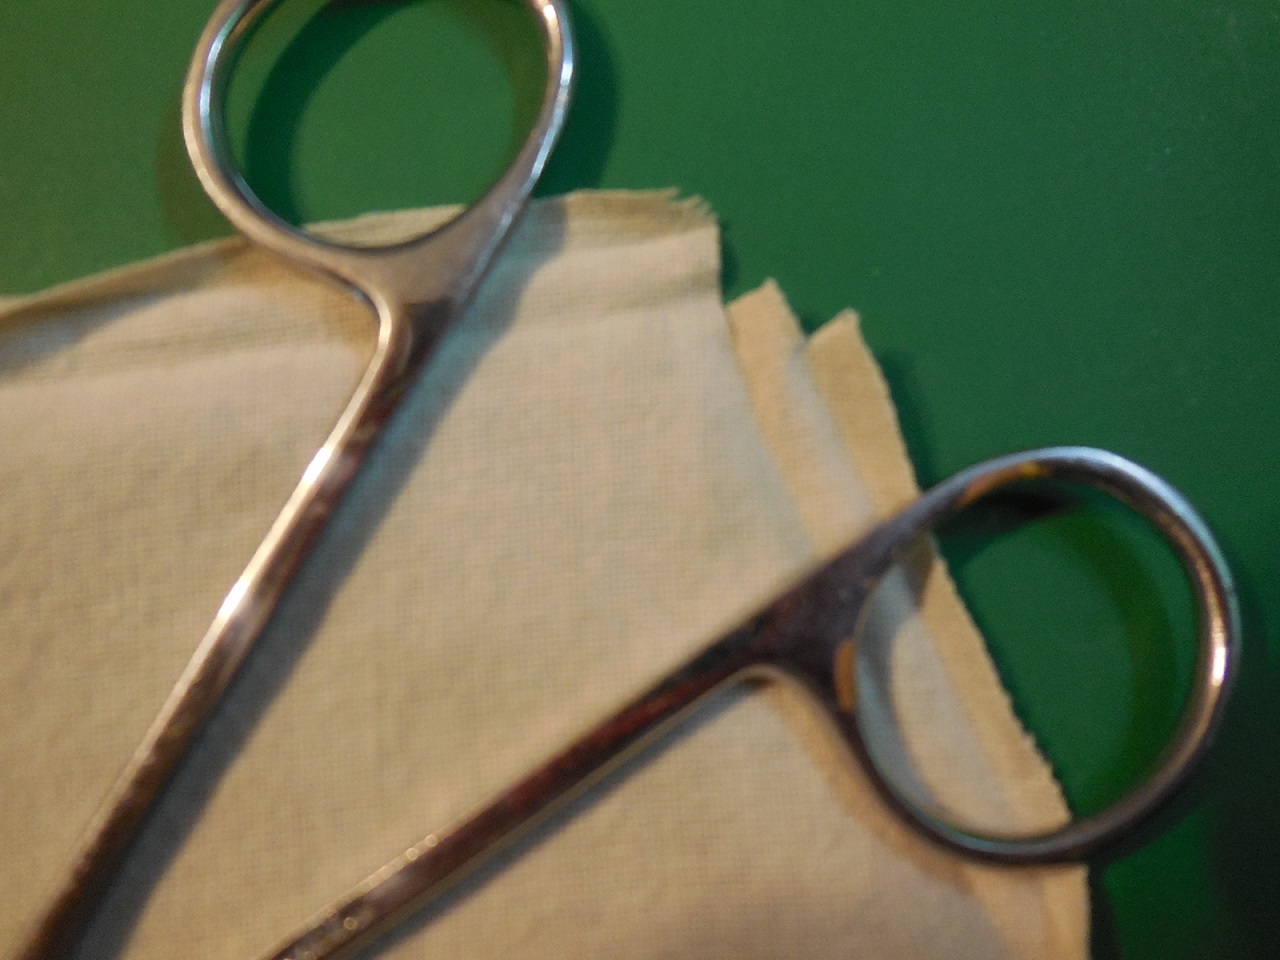
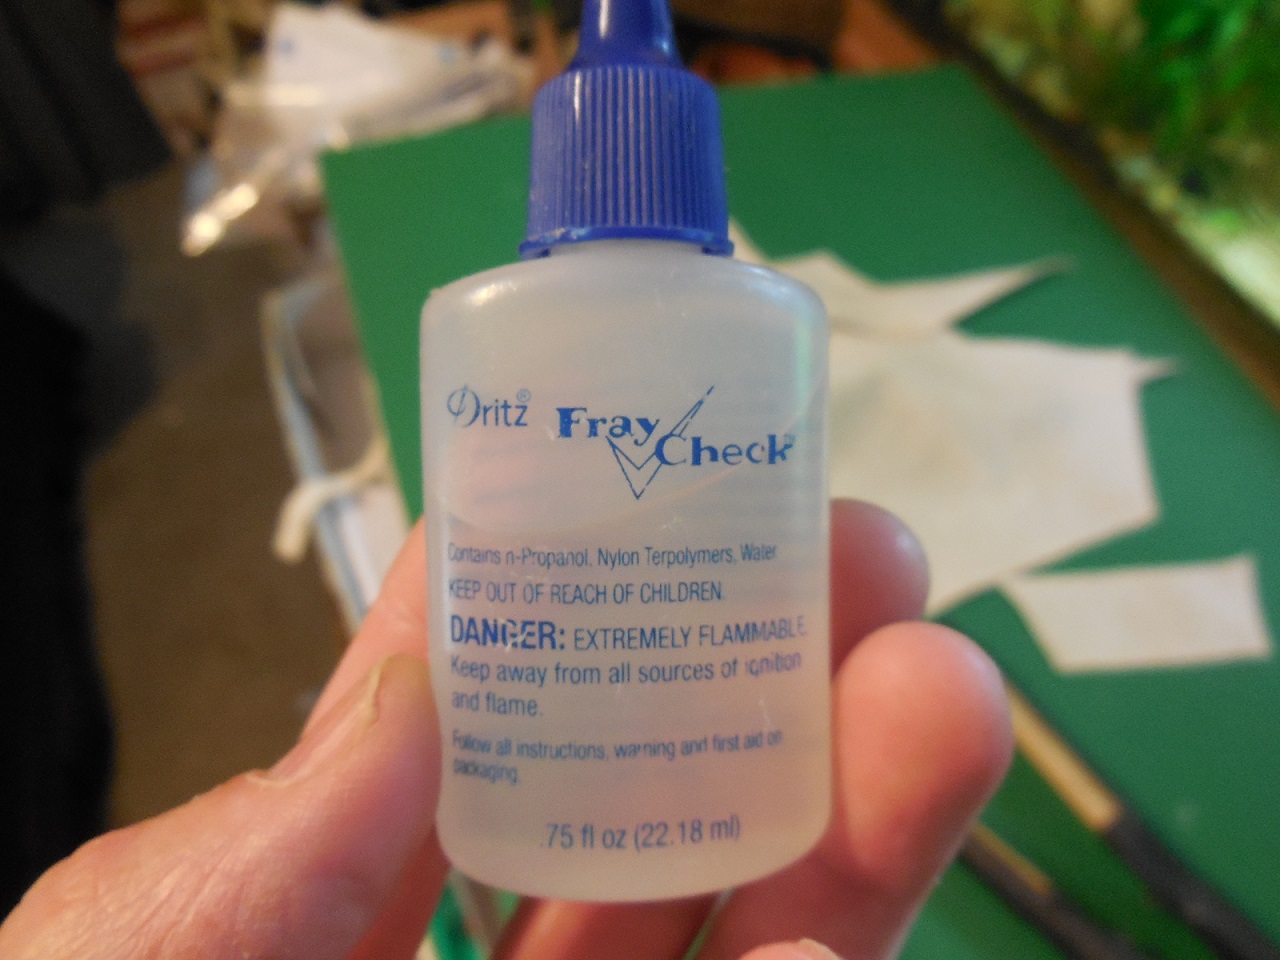
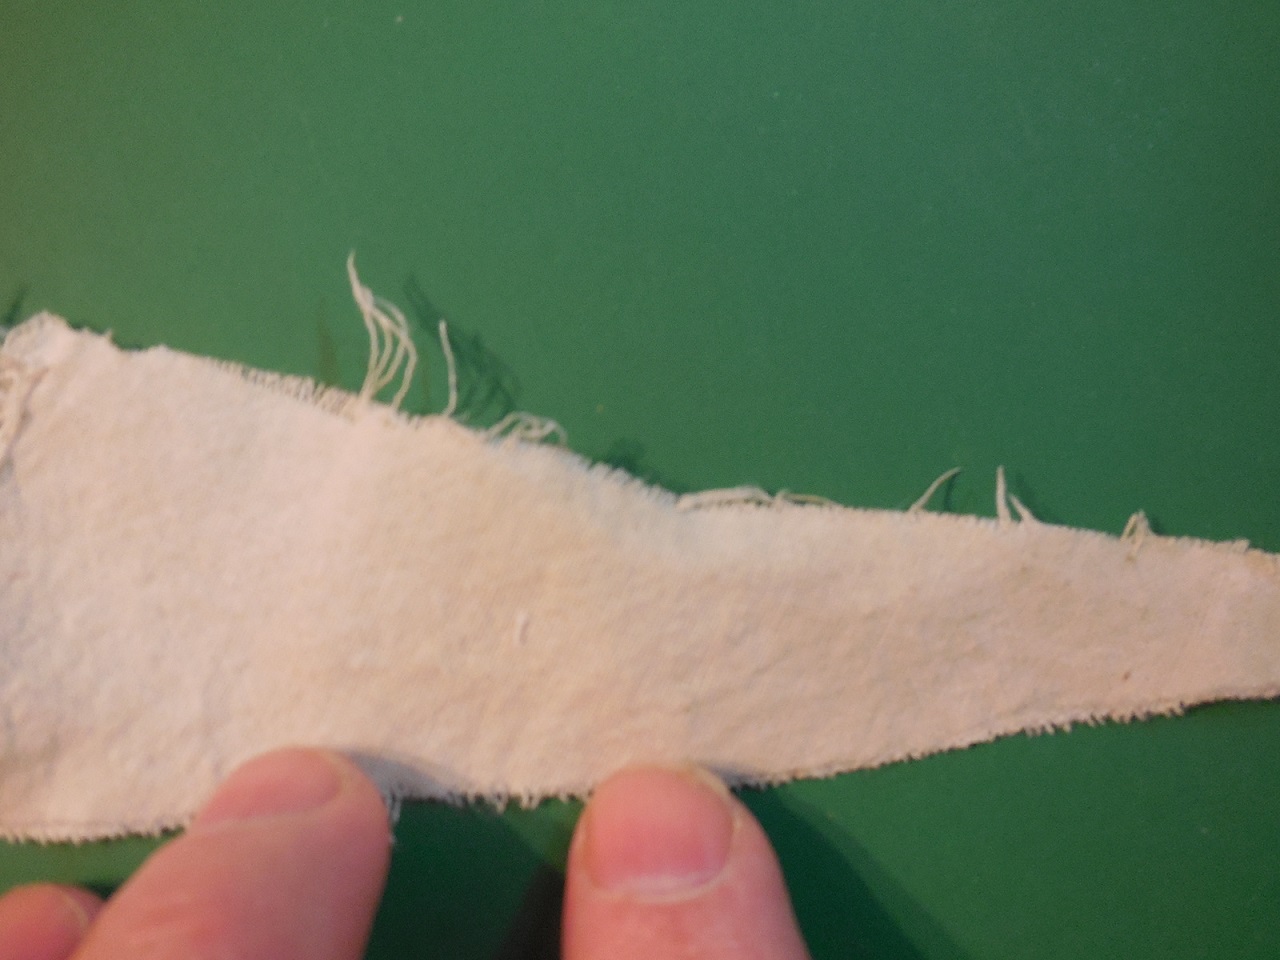
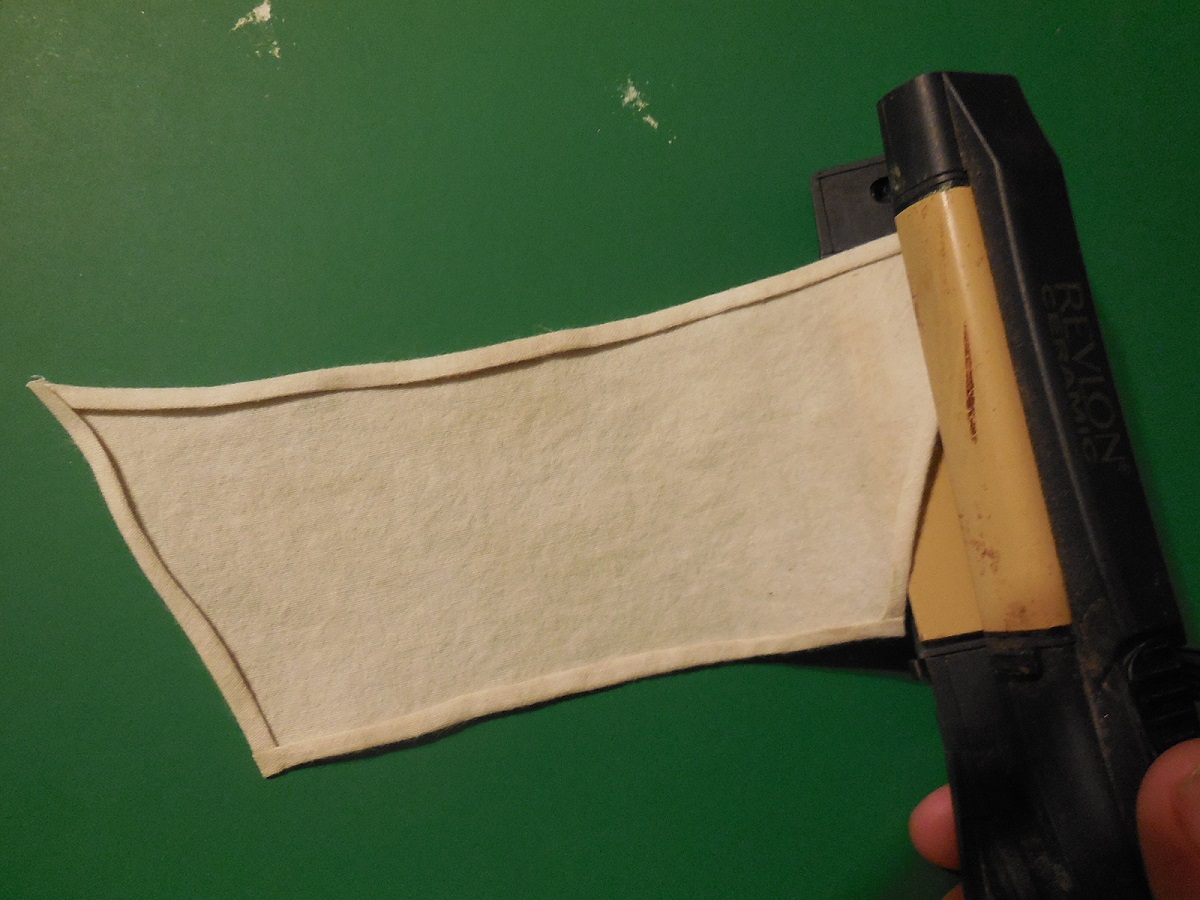
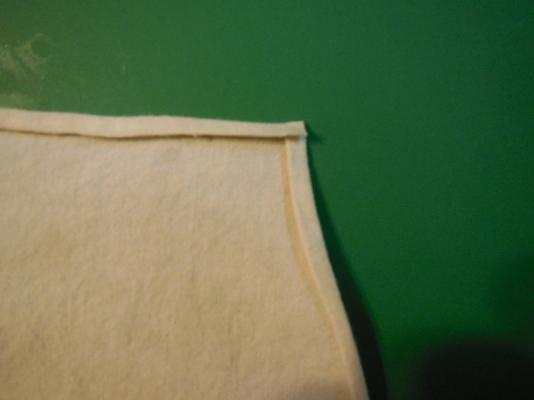
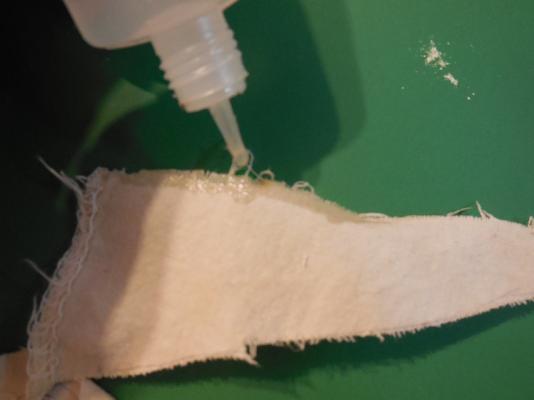
I have been using a product named Fray Check. Found it in the sewing section at Walmart. I have used it on rigging anywhere I've served, seized or tied a knot. With the sail cloth it works just like its name. The edges of the material frays very bad. Trying to sew close to an edge like that wont work well, it frays too much & pulls through. I wet the edges with the Fray Check. When it dries it is transparent. The treated area is slightly stiff but still flexible & you can cut a good edge & when folded under is strong enough to hold stitching.

- 607 replies
-
- 7
-
-
- scottish maid
- artesania latina
- (and 1 more)
-
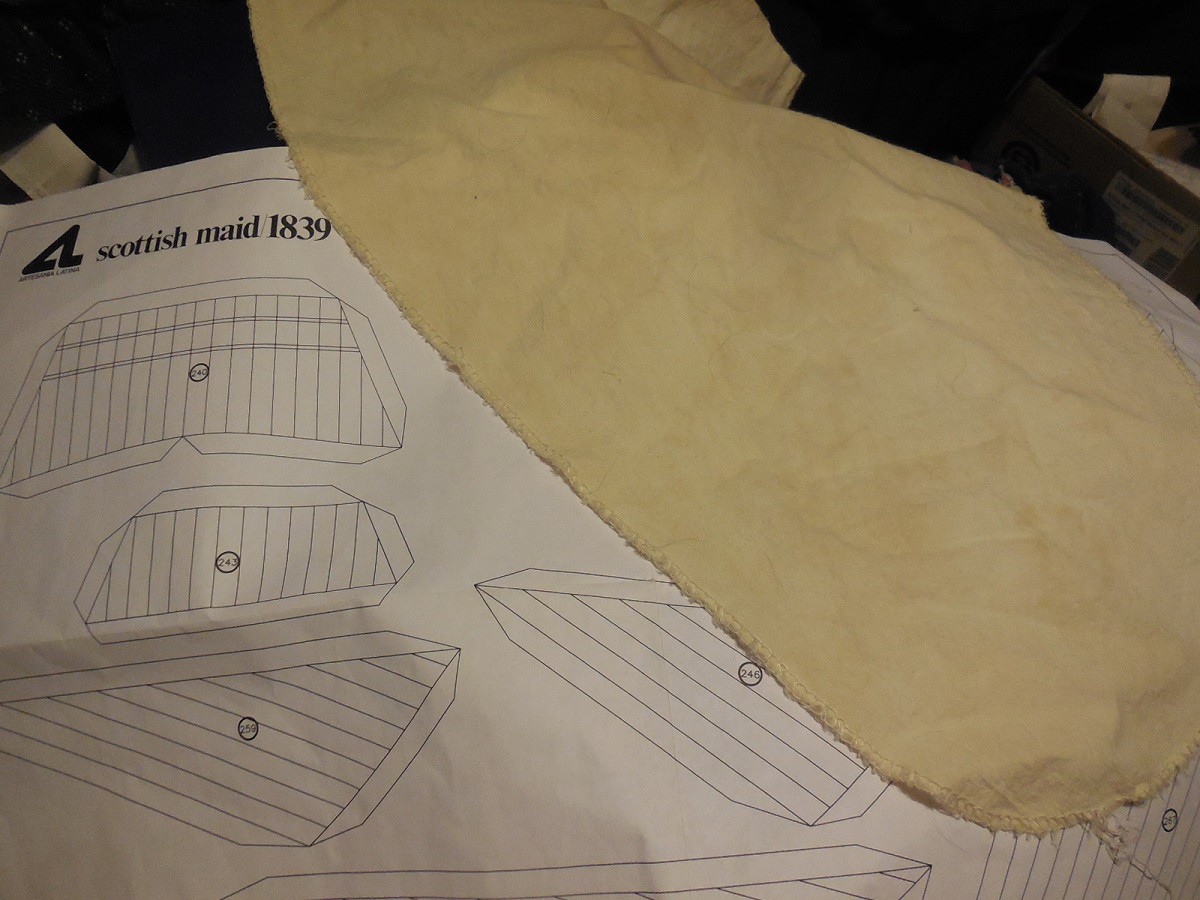
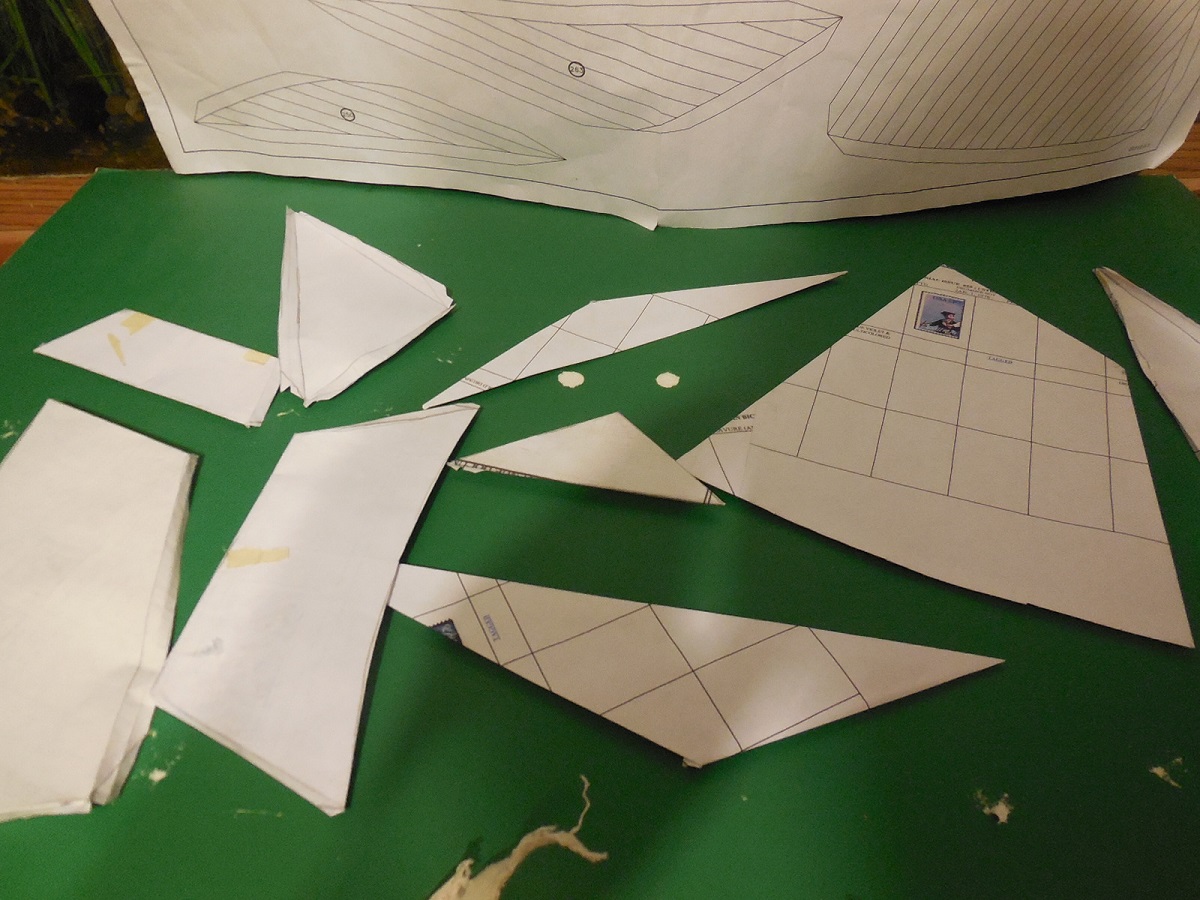
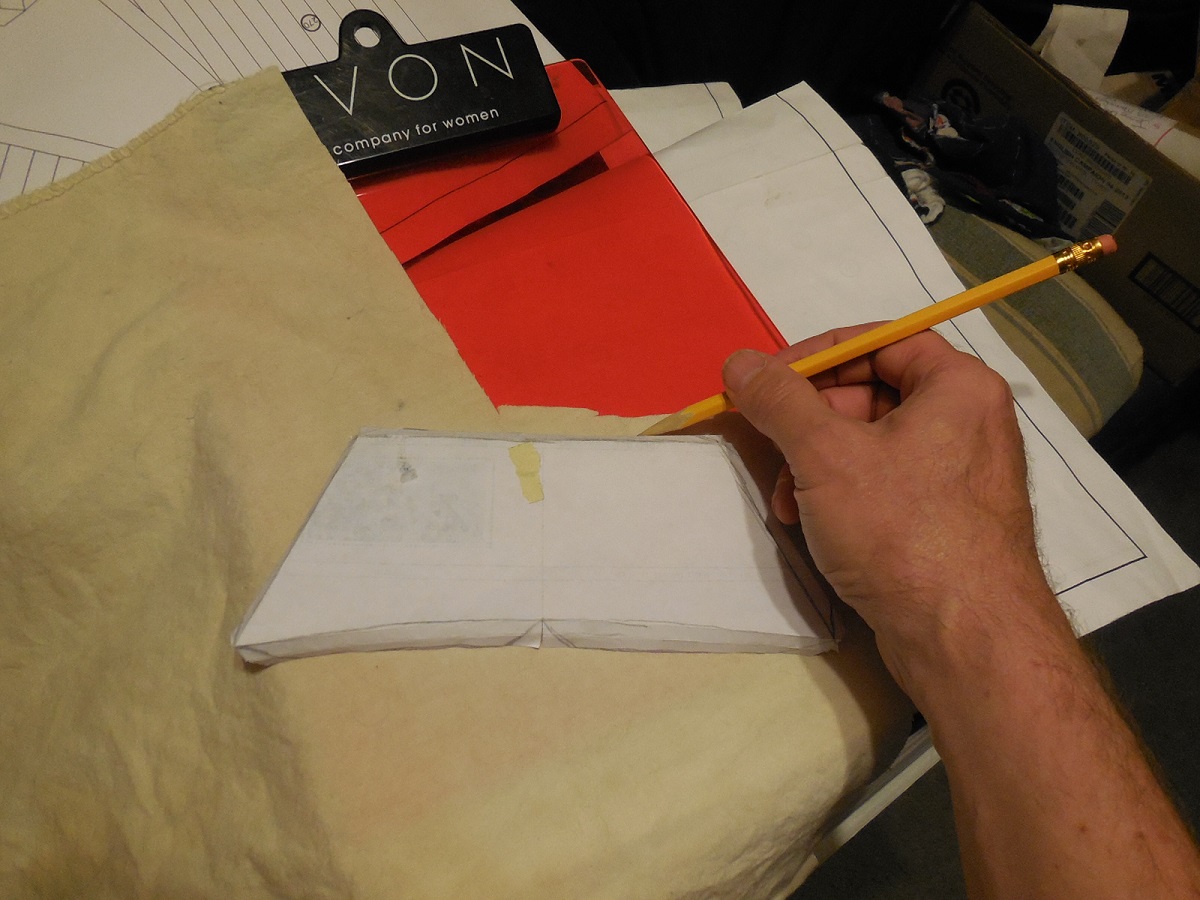
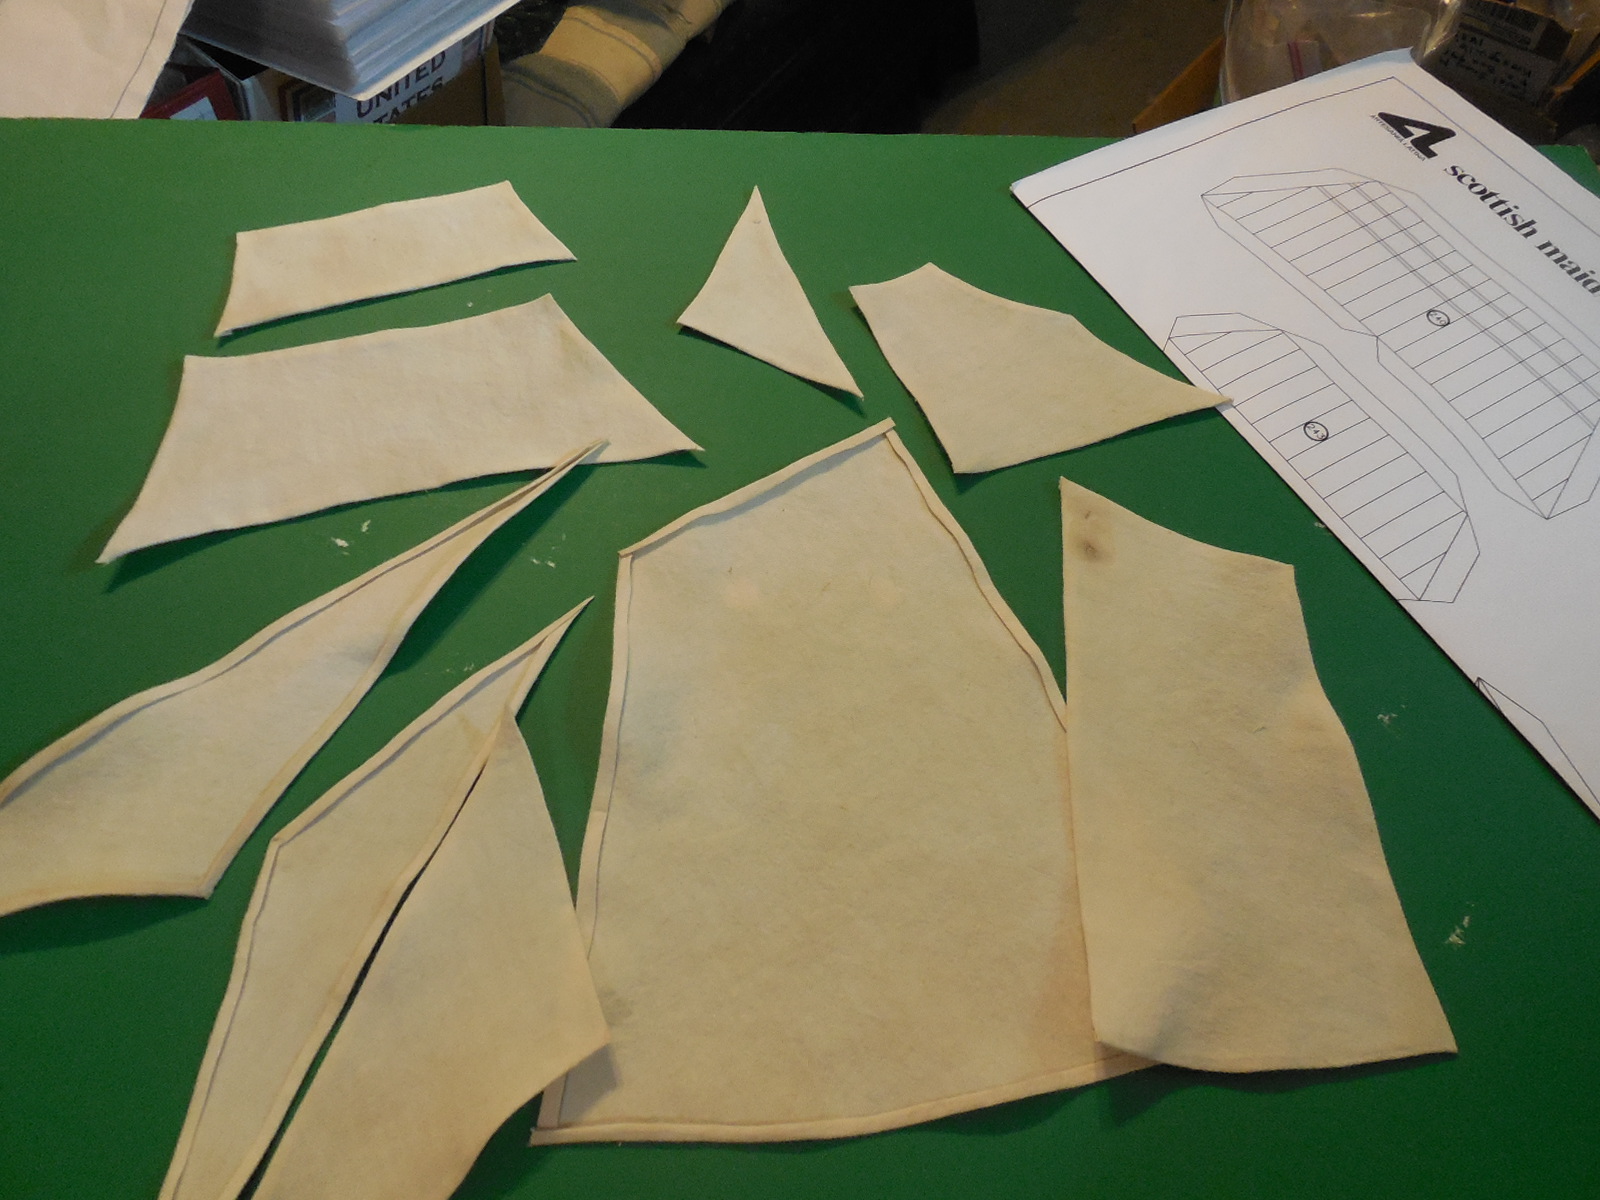
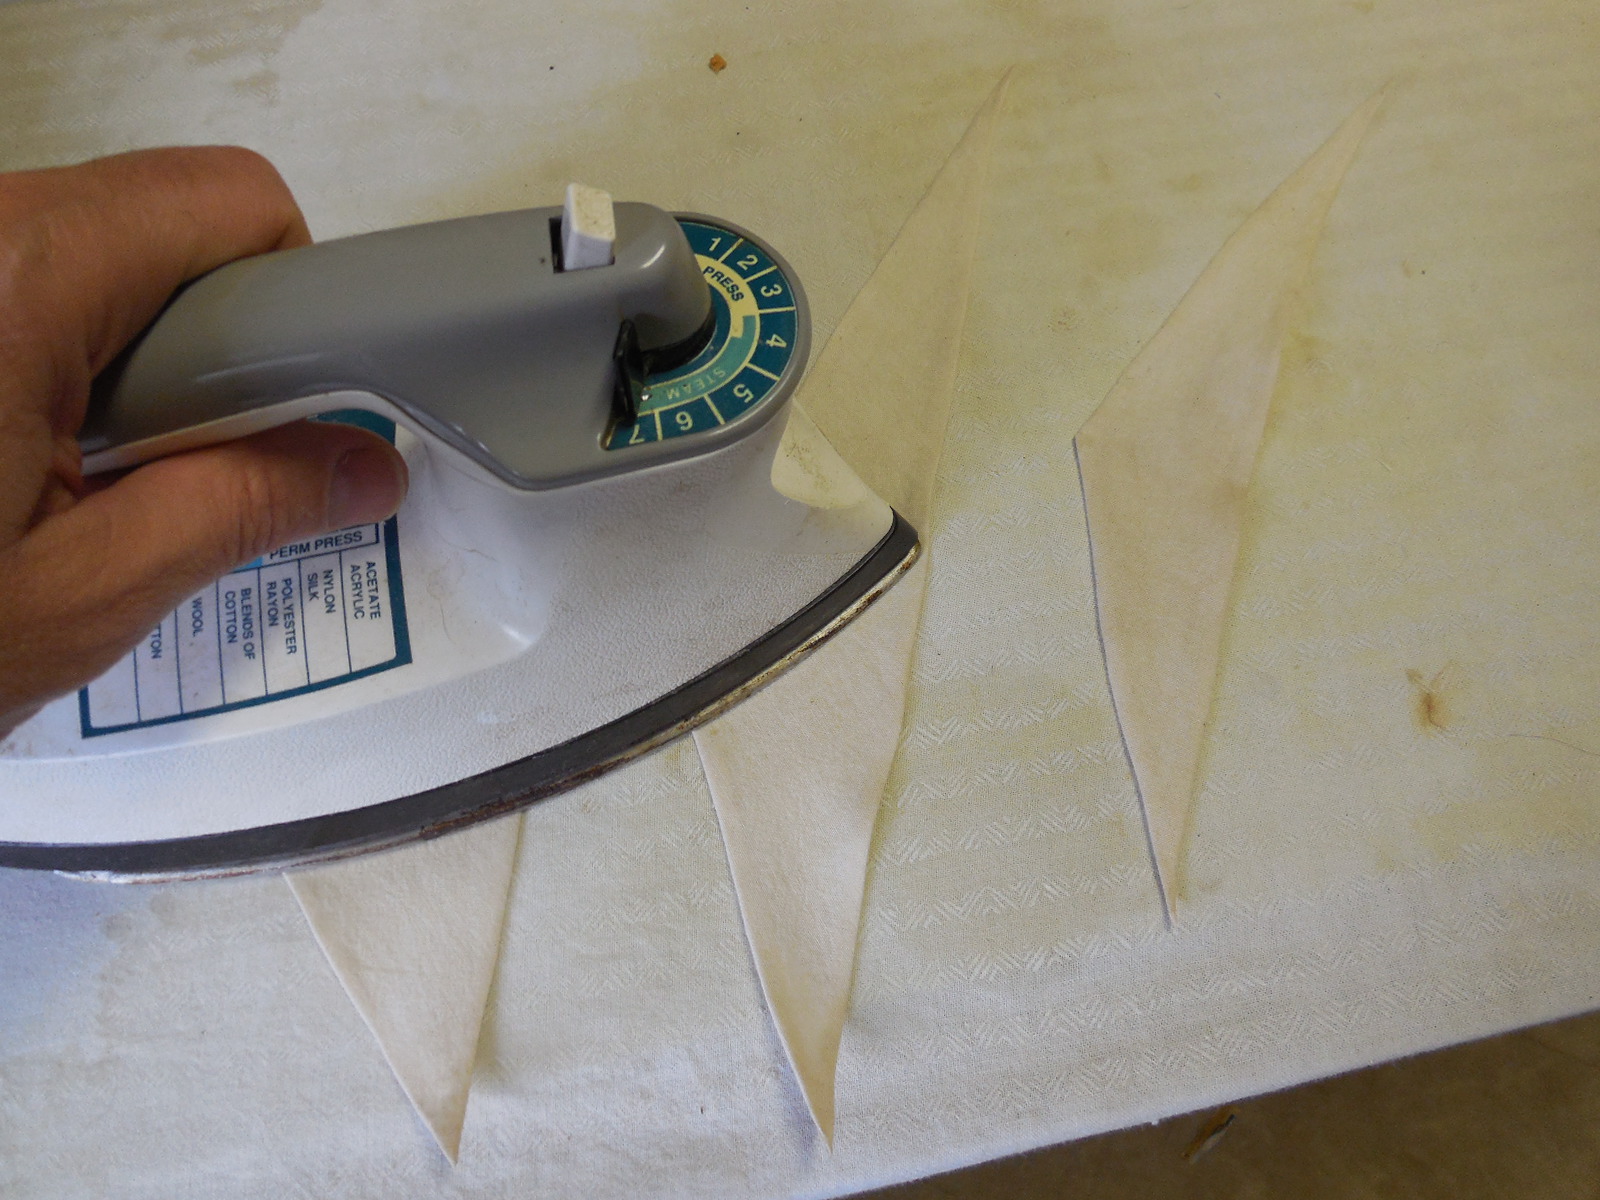
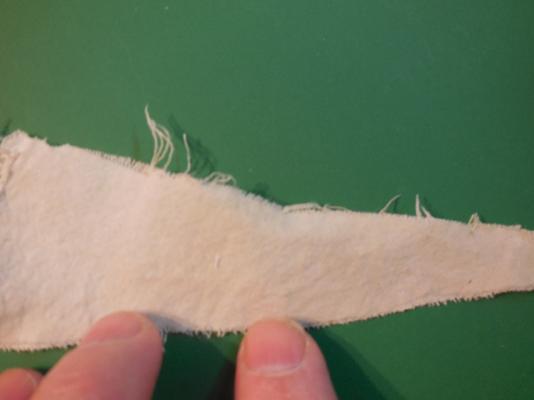
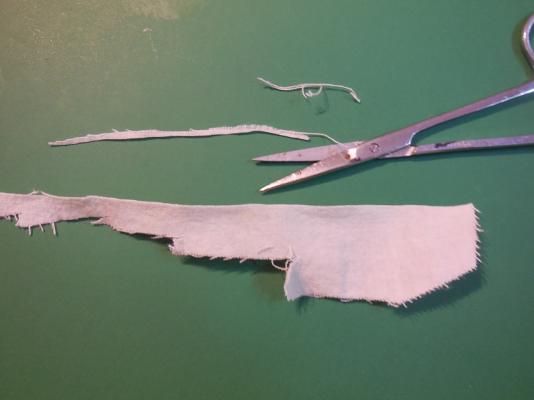
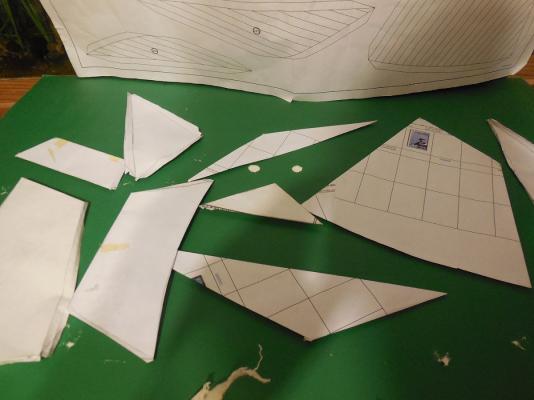
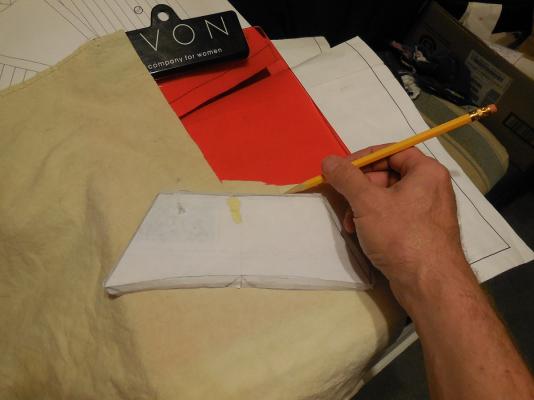
Thanks Alistair & Keith! Keith, since you asked........ I didn't have what I wanted for sail material but found this old ironing board cover that was thinner than a pillowcase so I soaked it in tea & then baking soda. The color came out nice, not too much but just dingy enough to look like old weathered sail material. I traced the sail patterns on scrap paper & cut them out. Figured out the right amount of fold-over around the edges. I redid this 3 times trimming off a little more each time till I had enough to fold under & sew but not overly wide edges. I then traced this on the cloth & cut them out. Folding cloth is not as easy as folding paper & I fought with this step for about a week. Laying them over the sail patterns supplied with the kit often to make sure they will end up being the right sizes. I used an old hair straightener to heat press the folded edges down as I went- constantly re-checking with the patterns & adjusting as needed. When it was all done I took them over to the ironing board to give them an over-all pressing & even things out a bit. I'll be sure to have pics of how I proceed with them. The sewing is not going to be fun for me.


- 607 replies
-
- 7
-
-
- scottish maid
- artesania latina
- (and 1 more)
-
Got all the sails cut out & ironed flat. Have to decide if I want to hand sew them or try a sewing machine. I guess I will stitch the lines. I have read that some have drawn them with pencil but I have never tried that on cloth. Hand stitching will take me a long time but that is how I've always done them in the past.


- 607 replies
-
- 5
-
-
- scottish maid
- artesania latina
- (and 1 more)
-
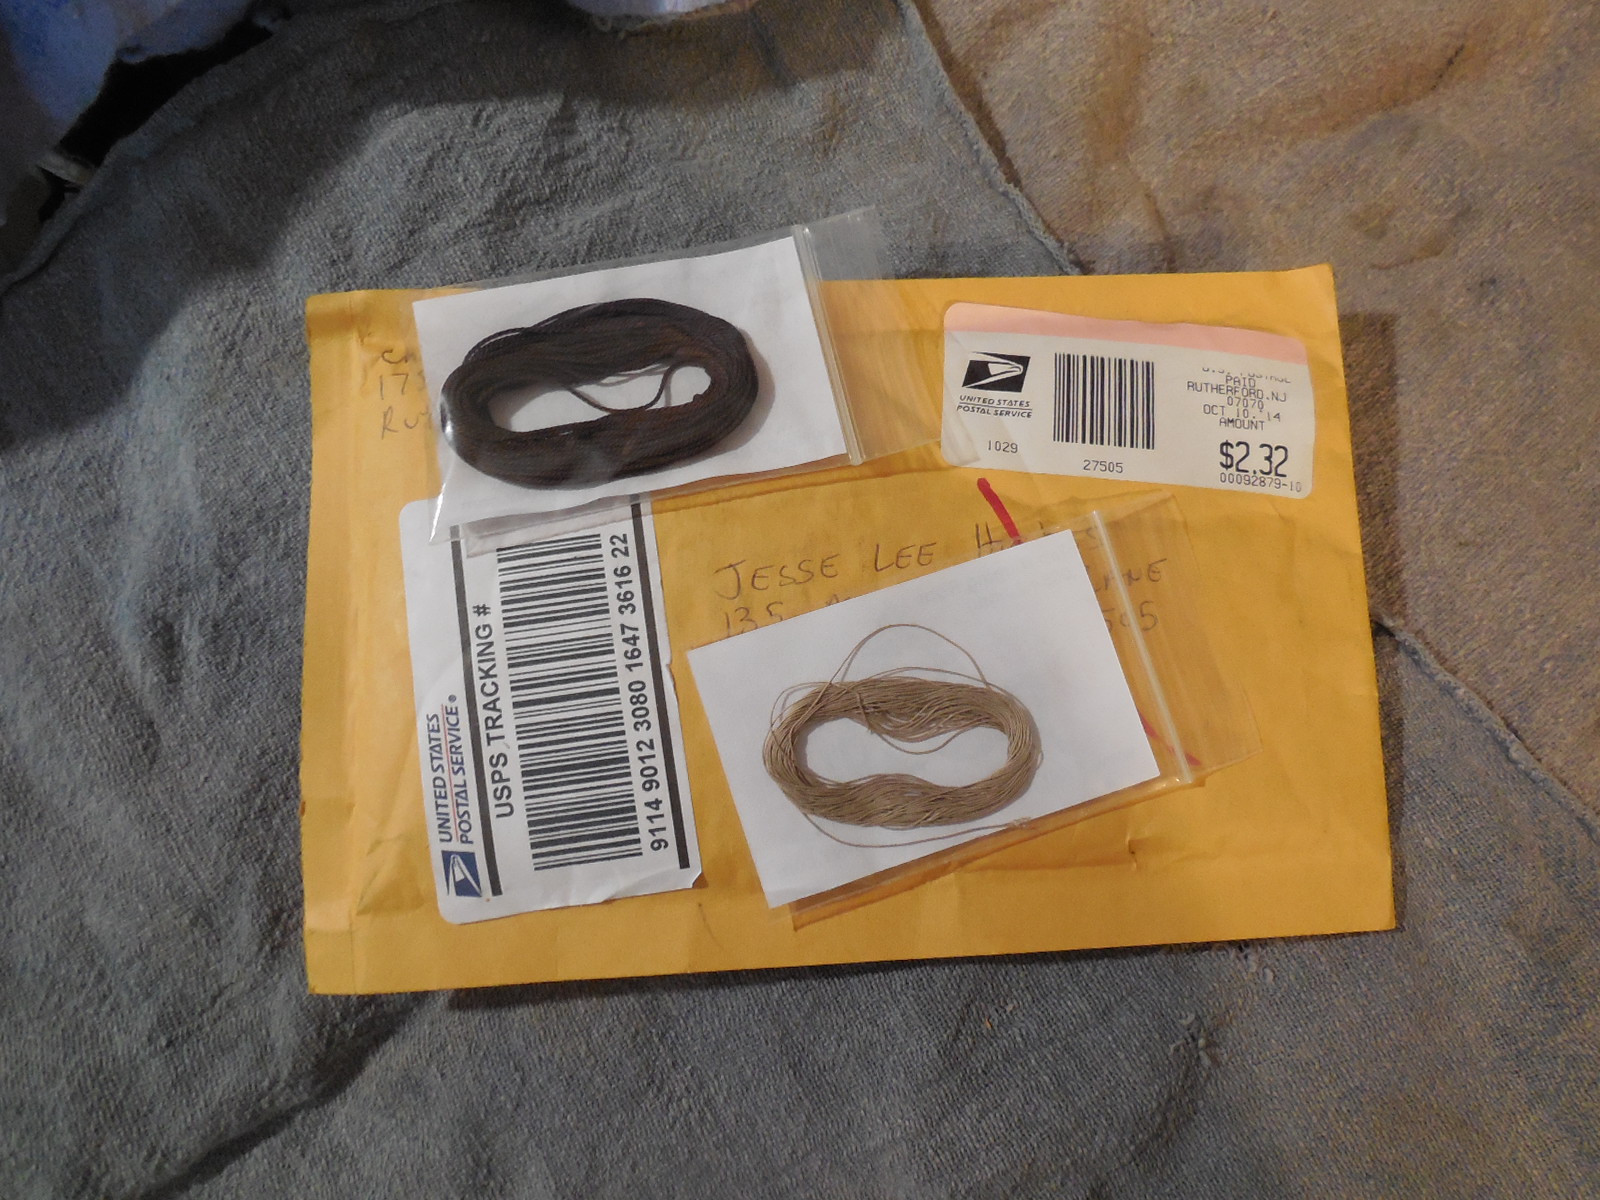
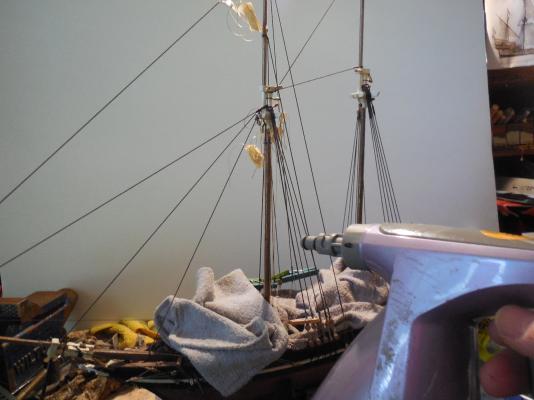
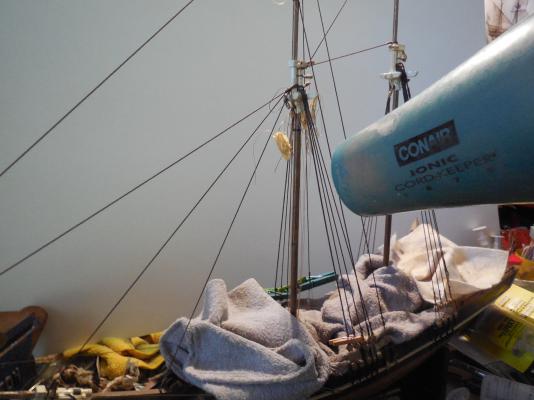
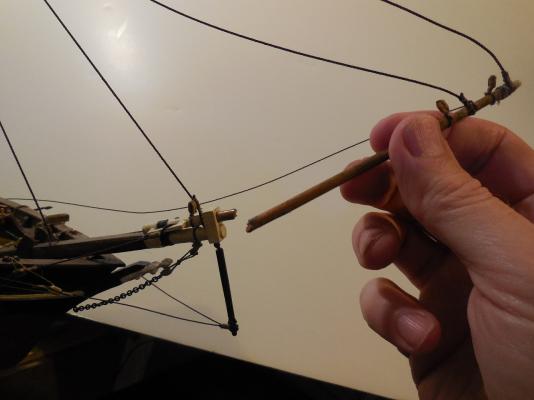
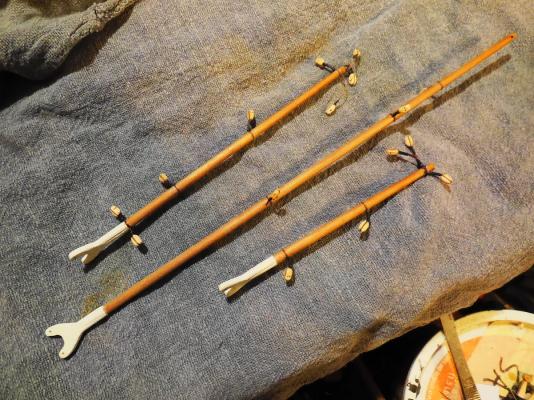
Got my mini rope in from Syren. Now I have enough to finish the standing rigging. The shroud lines took more line than I had figured. Working on the shroud lanyards. Used a sewing needle to make it faster.


- 607 replies
-
- 10
-
-
- scottish maid
- artesania latina
- (and 1 more)
-
Started the standing rigging & realized I didn't have enough heavy rope to complete it. Placed another order with Syren Ship Model Co. for more rope. While waiting for that I have been cutting out sail patterns. Hope to have some pics up soon - been having computer problems- have fought for 2 days just to get online again! grrrrrr!!!!!
-
I like the bristle idea too. Never thought of that!
-
I vote for staining them but it will look fine either way.
- 625 replies
-
- 1
-
-
- bounty launch
- model shipways
- (and 1 more)
-
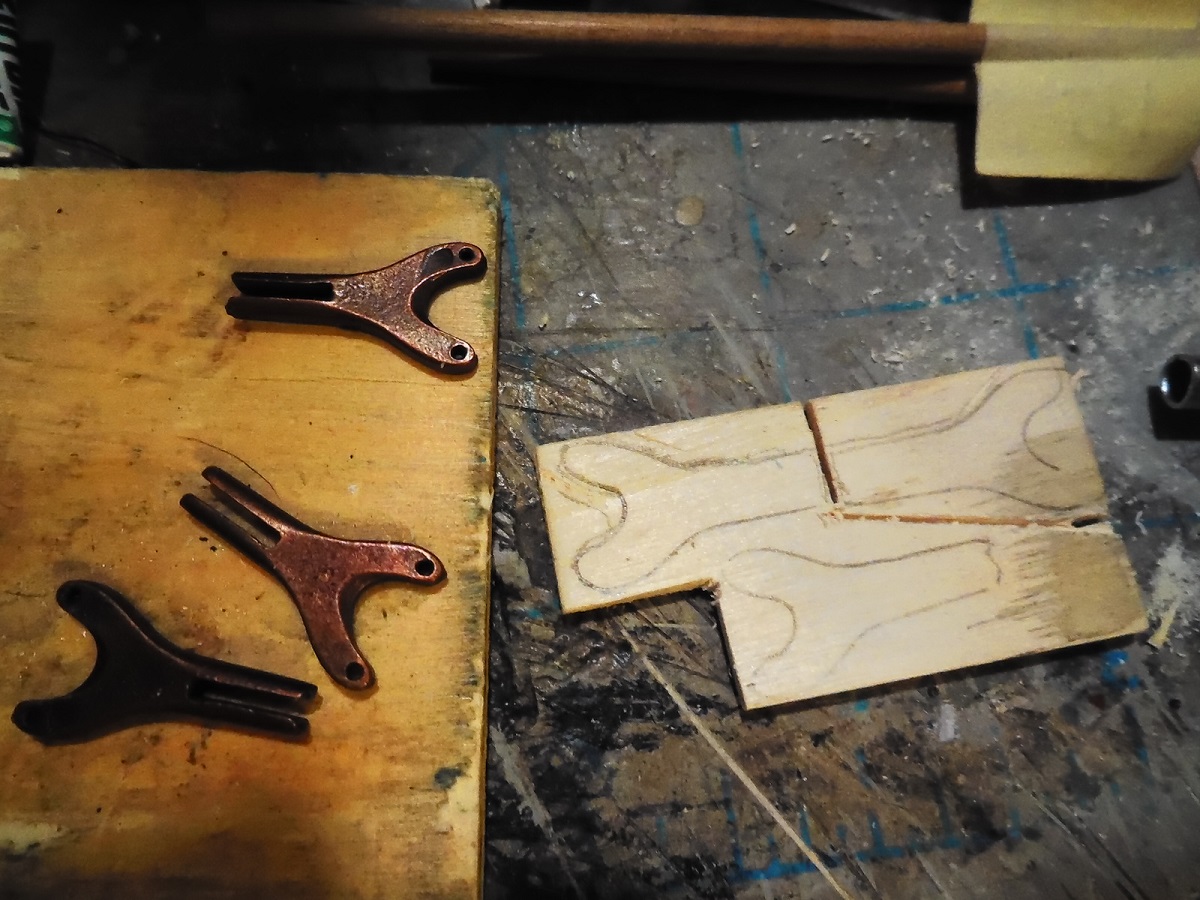
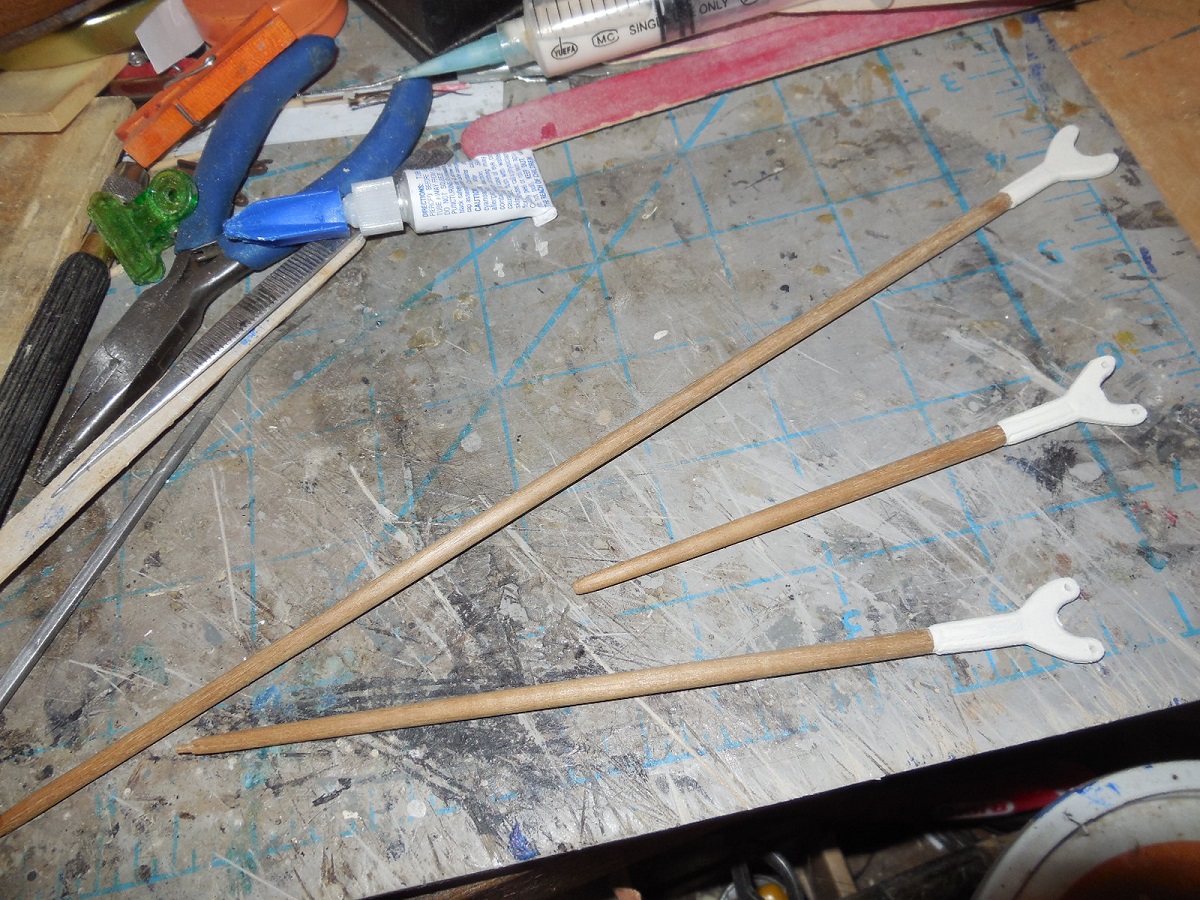
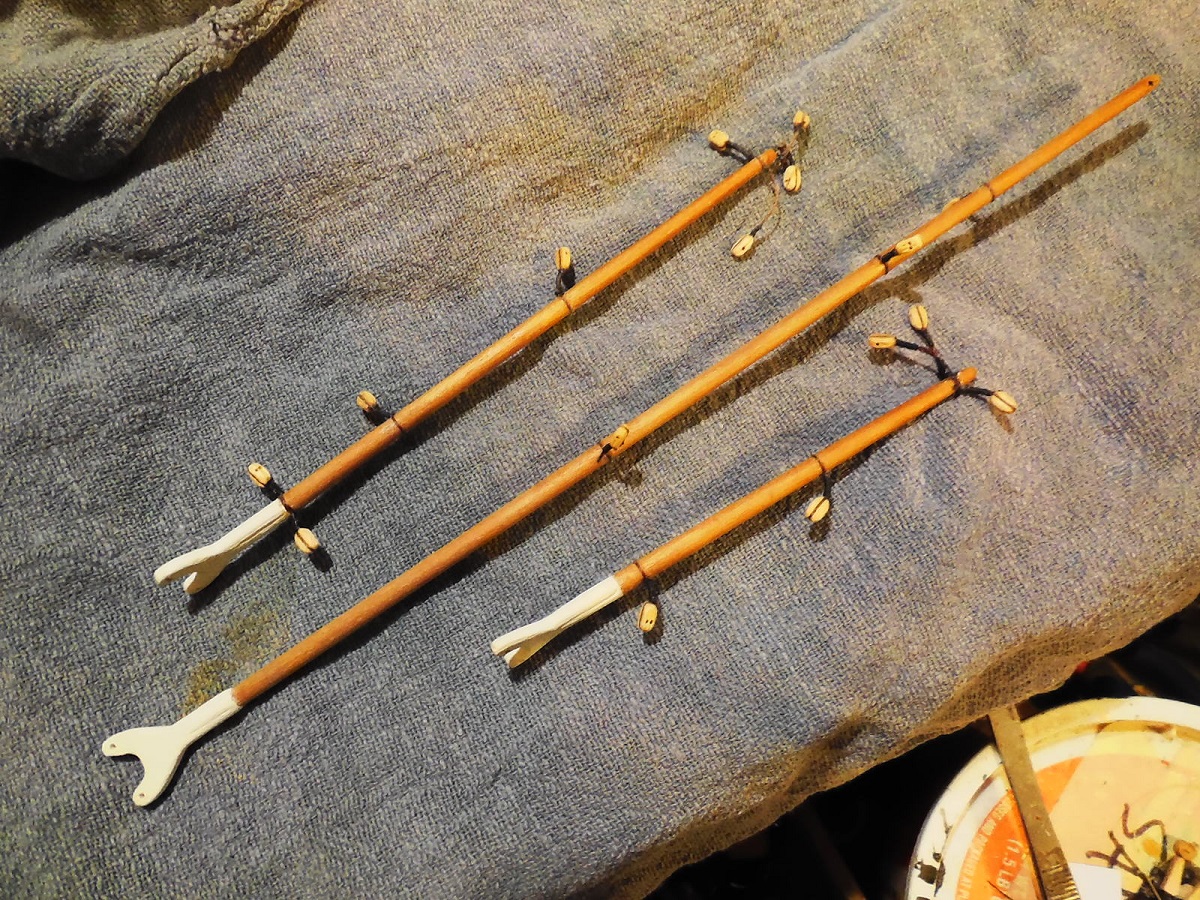
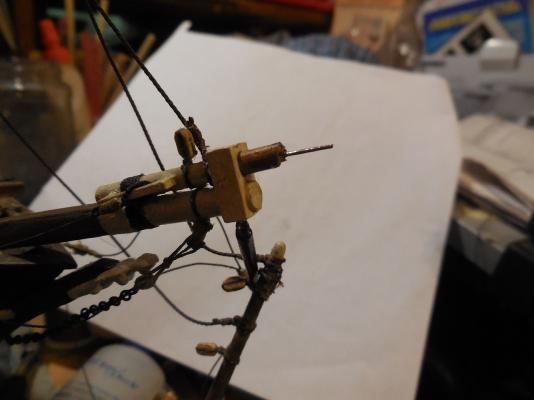
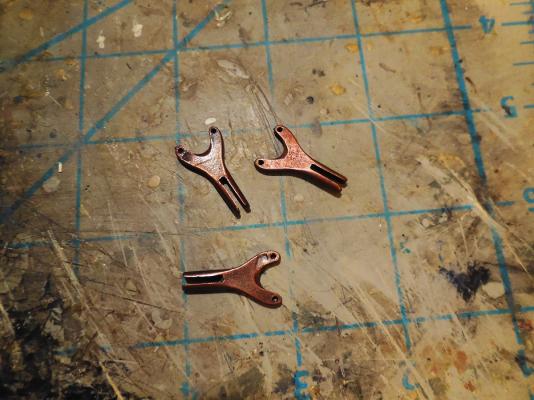
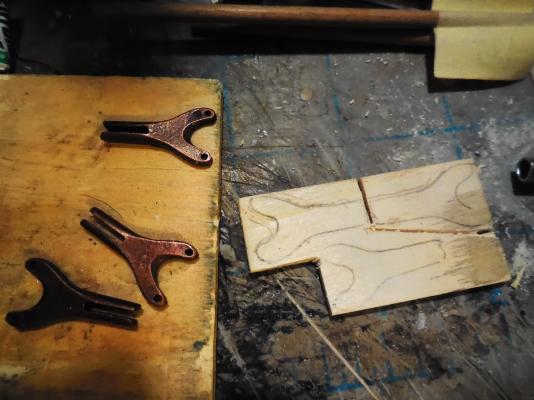
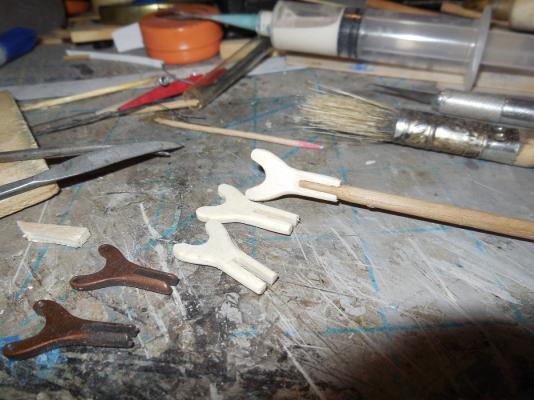
I didn't like the metal jaws supplied with the kit so like a lot of other parts I cast them aside & make them a little better. I glued several thin pieces of wood together to the right thickness. Shaped them up & glued & pined them on the Foremast Gaff, Main mast Gaff & Boom. Added some paint & added the blocks. I will start the standing rigging soon. Sails have to be made soon too. This will most likely be slow, my illness is making everything more difficult for me & things are taking longer than they were.


- 607 replies
-
- 13
-
-
- scottish maid
- artesania latina
- (and 1 more)
-
Mayflower by SawdustDave - Finished
JesseLee replied to SawdustDave's topic in - Build logs for subjects built 1751 - 1800
Just caught up with this log. Nice work so far! Look forward following along for the rest of the build. -
I like the lights too. What a "bright" idea!
-
I recently replaced my string looking thread with Chuck's rope from his Syren Company. It is the best rope I have ever used!
- 569 replies
-
- 1
-
-
- shenandoah
- corel
- (and 1 more)
-
Bore me with the flags? Not at all! I love flags so that step interests me just as much as any other does. Thanks for showing how you shaped them. This will help me out a lot when I get to mine. Well done!
- 555 replies
-
- 3
-
-
- sovereign of the seas
- mantua
- (and 1 more)
-
I don't mind at all Dee Dee. That's what is so great about MSW. Sharing & learning from each other.
-
That's a strong hull now!