.jpg.f26acc9a74319261612561bfa7da1303.jpg)
vaddoc
-
Posts
1,605 -
Joined
-
Last visited
Content Type
Profiles
Forums
Gallery
Events
Everything posted by vaddoc
-
.thumb.jpg.6fd4c1b78768bb3efd745ab810936005.jpg) I hope your treatment is going well Hakan and that a speedy recovery will follow. Nice oars!
I hope your treatment is going well Hakan and that a speedy recovery will follow. Nice oars! -
Heller drills are ok. But in my experience, most if not all mini drills sold on ebay as single sizes (not in a set of 100 assorted drills) are ok. For carbide, I get the cheap ones from alliexpress, they are fine
-
The small Proxxon drill press TBM220 is fantastic. Very accurate, powerful enough, very small footprint. A lovely thing to have, along with a variety of carbide drills.
-
Finally a dedicated work shop
vaddoc replied to barkeater's topic in Modeling tools and Workshop Equipment
Congratulations Richard! Wonderful shipyard. I particularly envy your white painted walls. My garage has dark brick walls and I had to install a ridiculous number of tubes and bulbs to get a half decent light which I was only yesterday thinking is actually not enough. -
Spilling (very long) planks
vaddoc replied to vaddoc's topic in Building, Framing, Planking and plating a ships hull and deck
Absolutely Thomas, however in 1:10 scale, most woods in 2 x 10 mm will resist edge bending except to push a bit fully into contact, spilling must be very close. Edge bending followed by twist along the axis of the strip are much more difficult to convince wood to accept than simple bending into a curve. This spilling method is nice but I d think mostly for planking larger ships. I ve never seen seen this type of dividers before, seems like a useful tool to have and not only for planking. How are they called? -
Spilling (very long) planks
vaddoc replied to vaddoc's topic in Building, Framing, Planking and plating a ships hull and deck
Well Jaager, to my opinion, clinker or carvel does not really make a difference planning the planking. The deciding factor to divide the hull into zones is basically to minimise the curvature of the planks and the aggressiveness of spilling. A batten that runs through the most curved and hollow parts of the hull will be pretty much straight so the planks above and bellow this will be of reasonable curvature. Also, the point where the sternpost meets the transom must be a zone. This combined with eyeballing to make sure it looks good! Maybe also have a look at the Launch log, I ve posted the whole process there but it indeed makes a long and difficult read. -
Spilling (very long) planks
vaddoc replied to vaddoc's topic in Building, Framing, Planking and plating a ships hull and deck
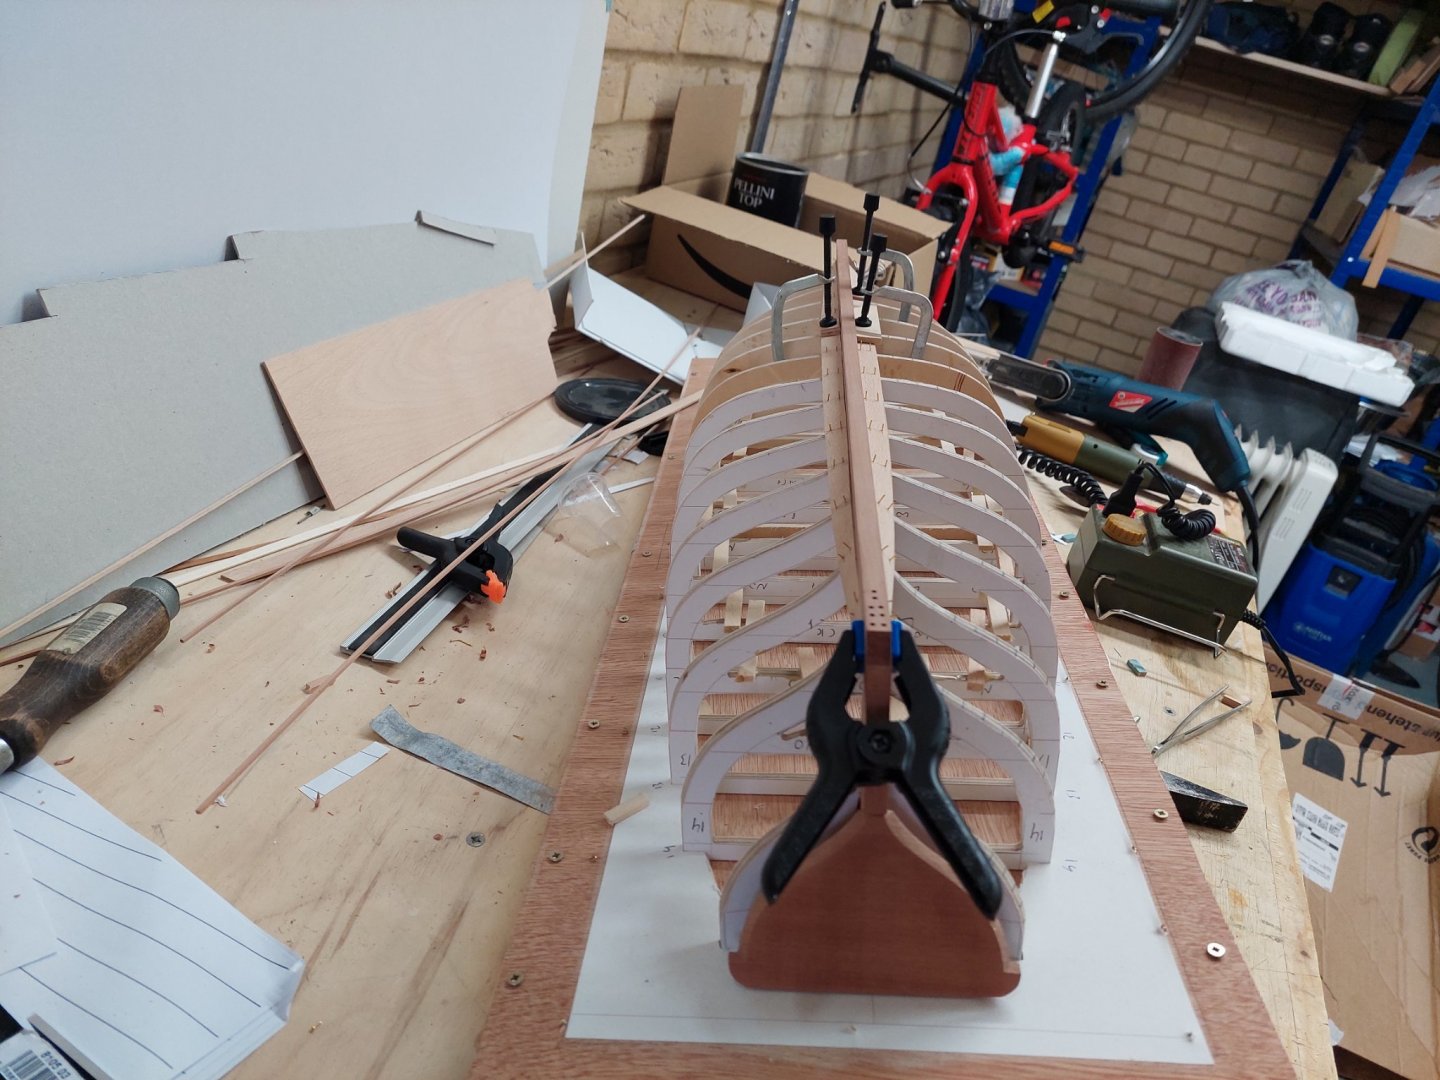
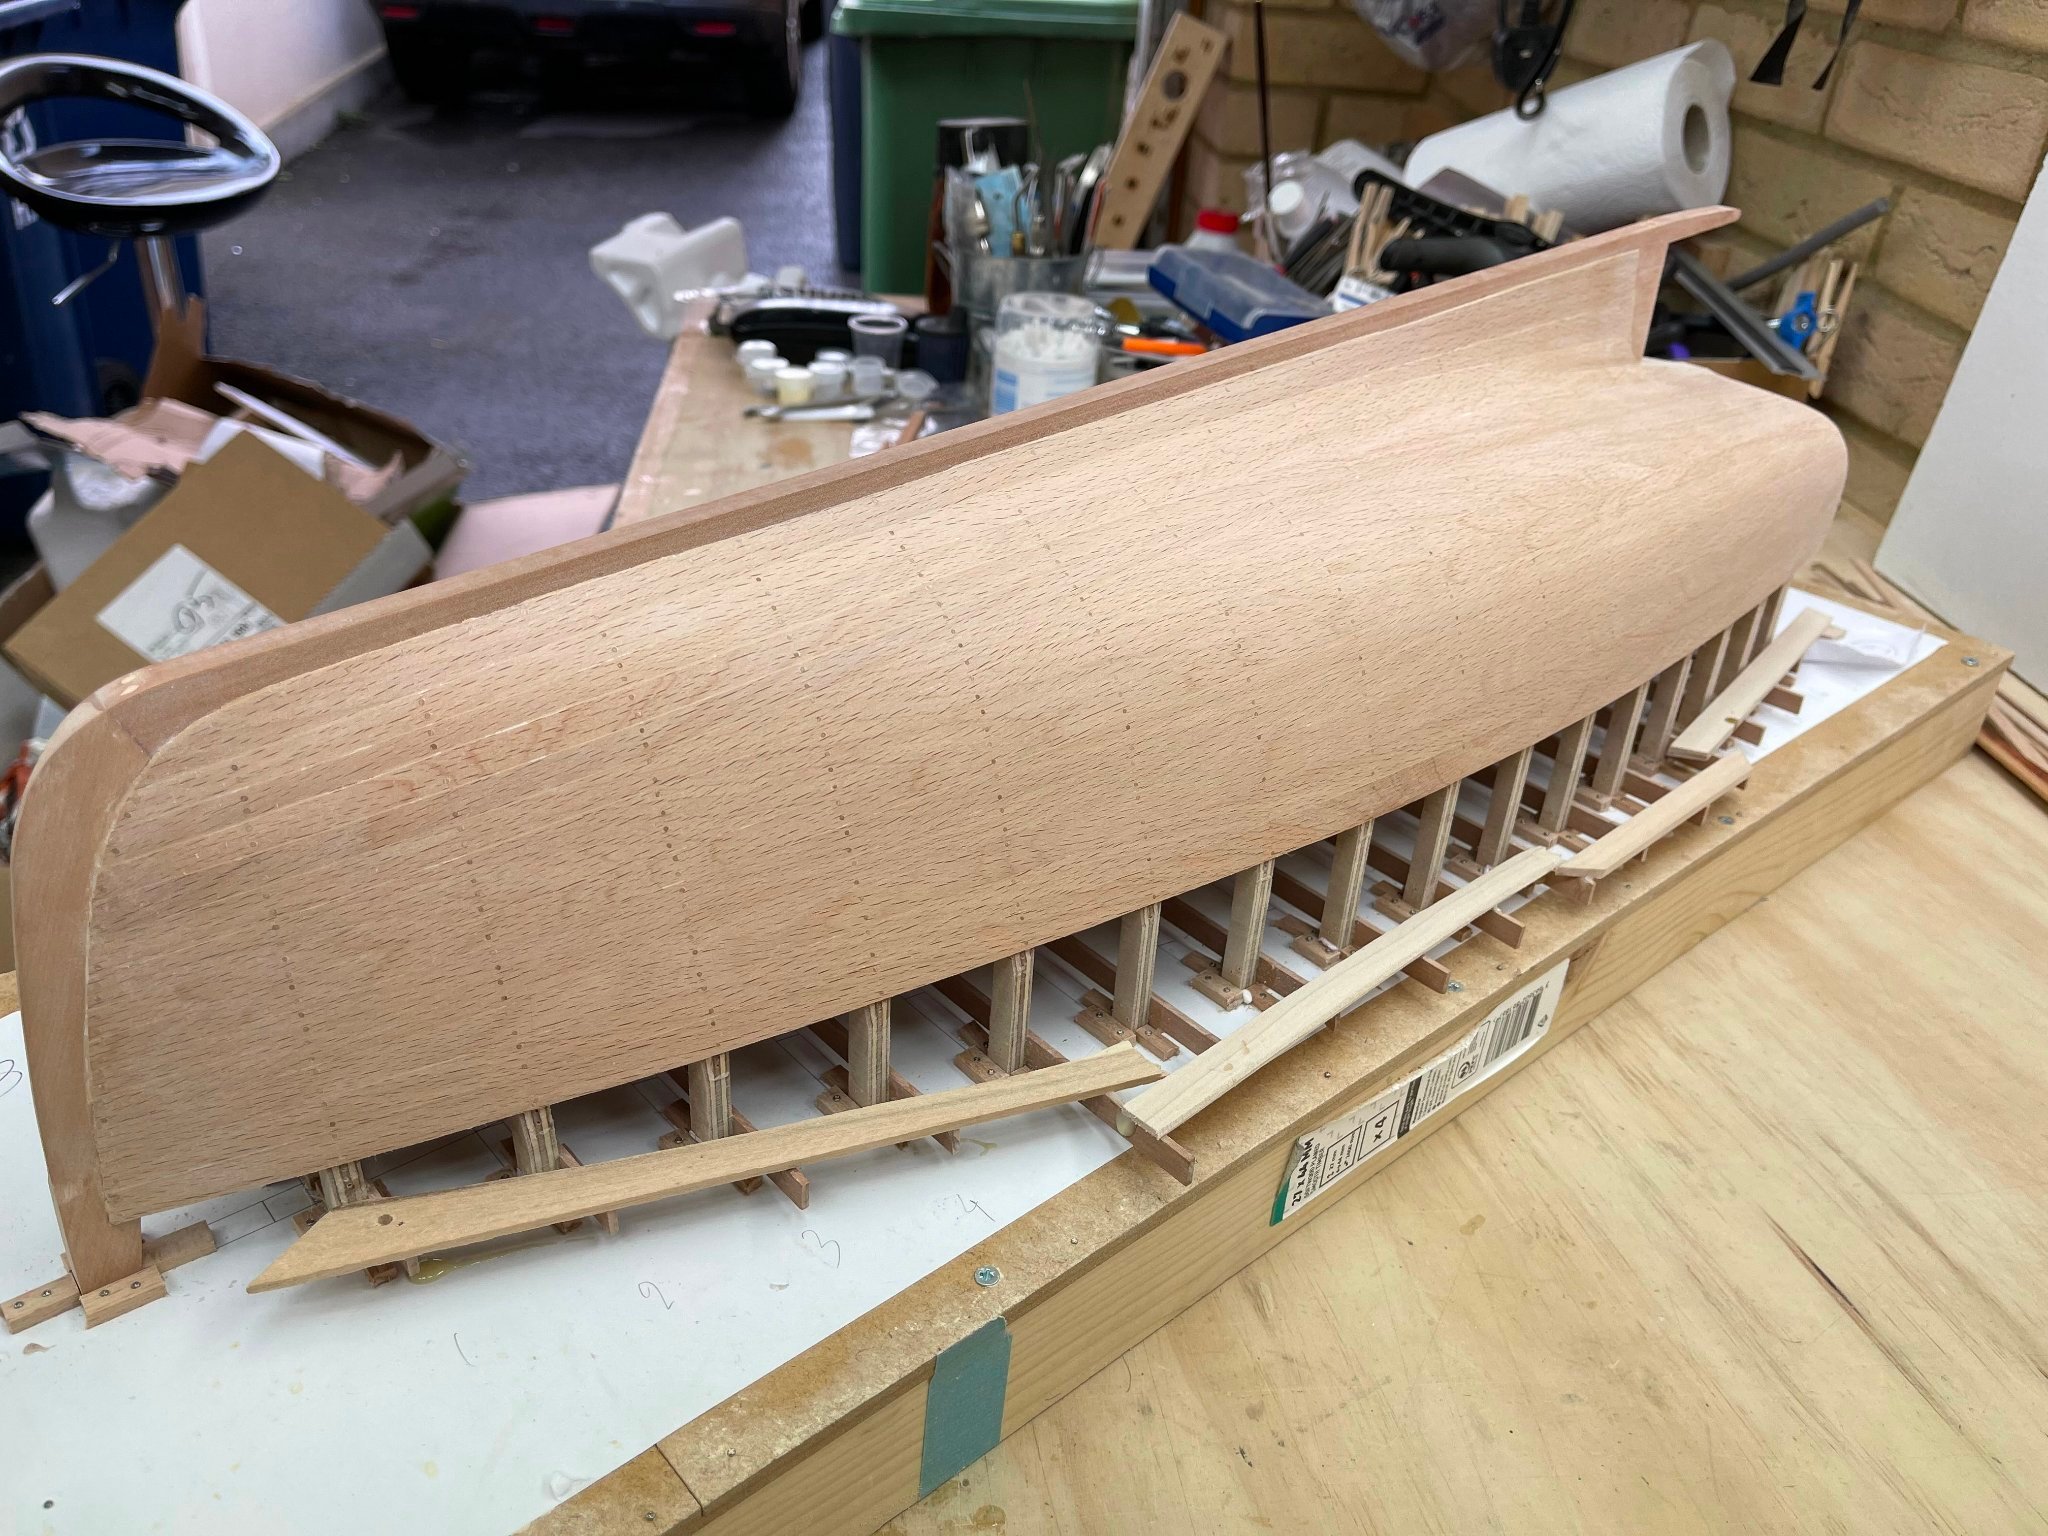
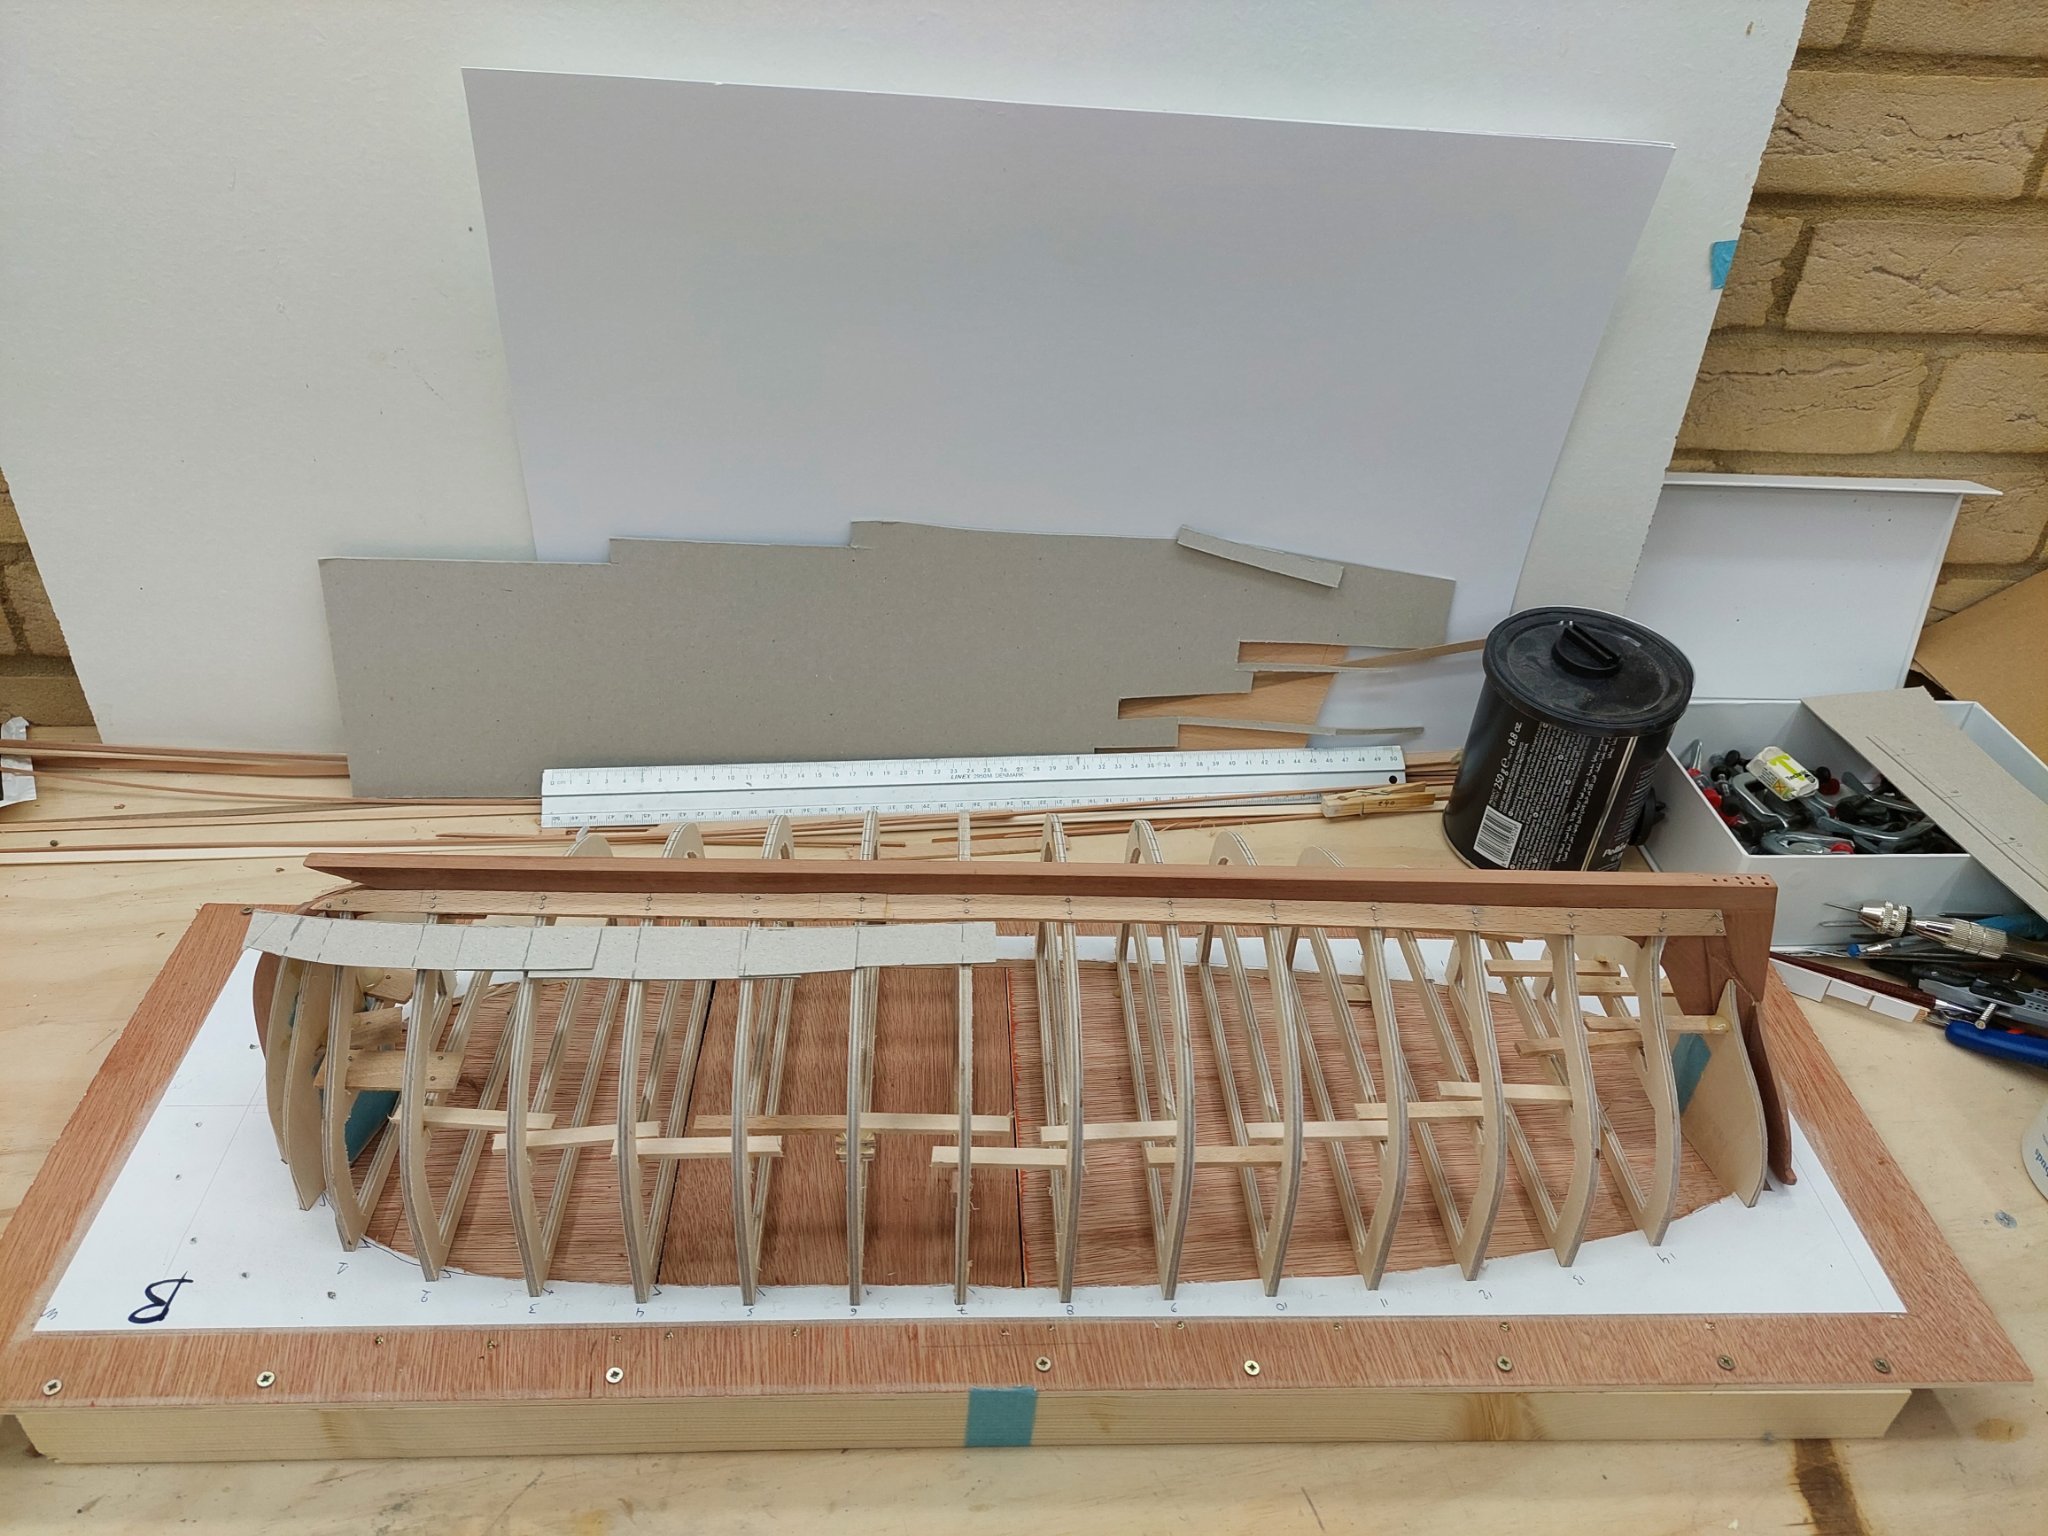
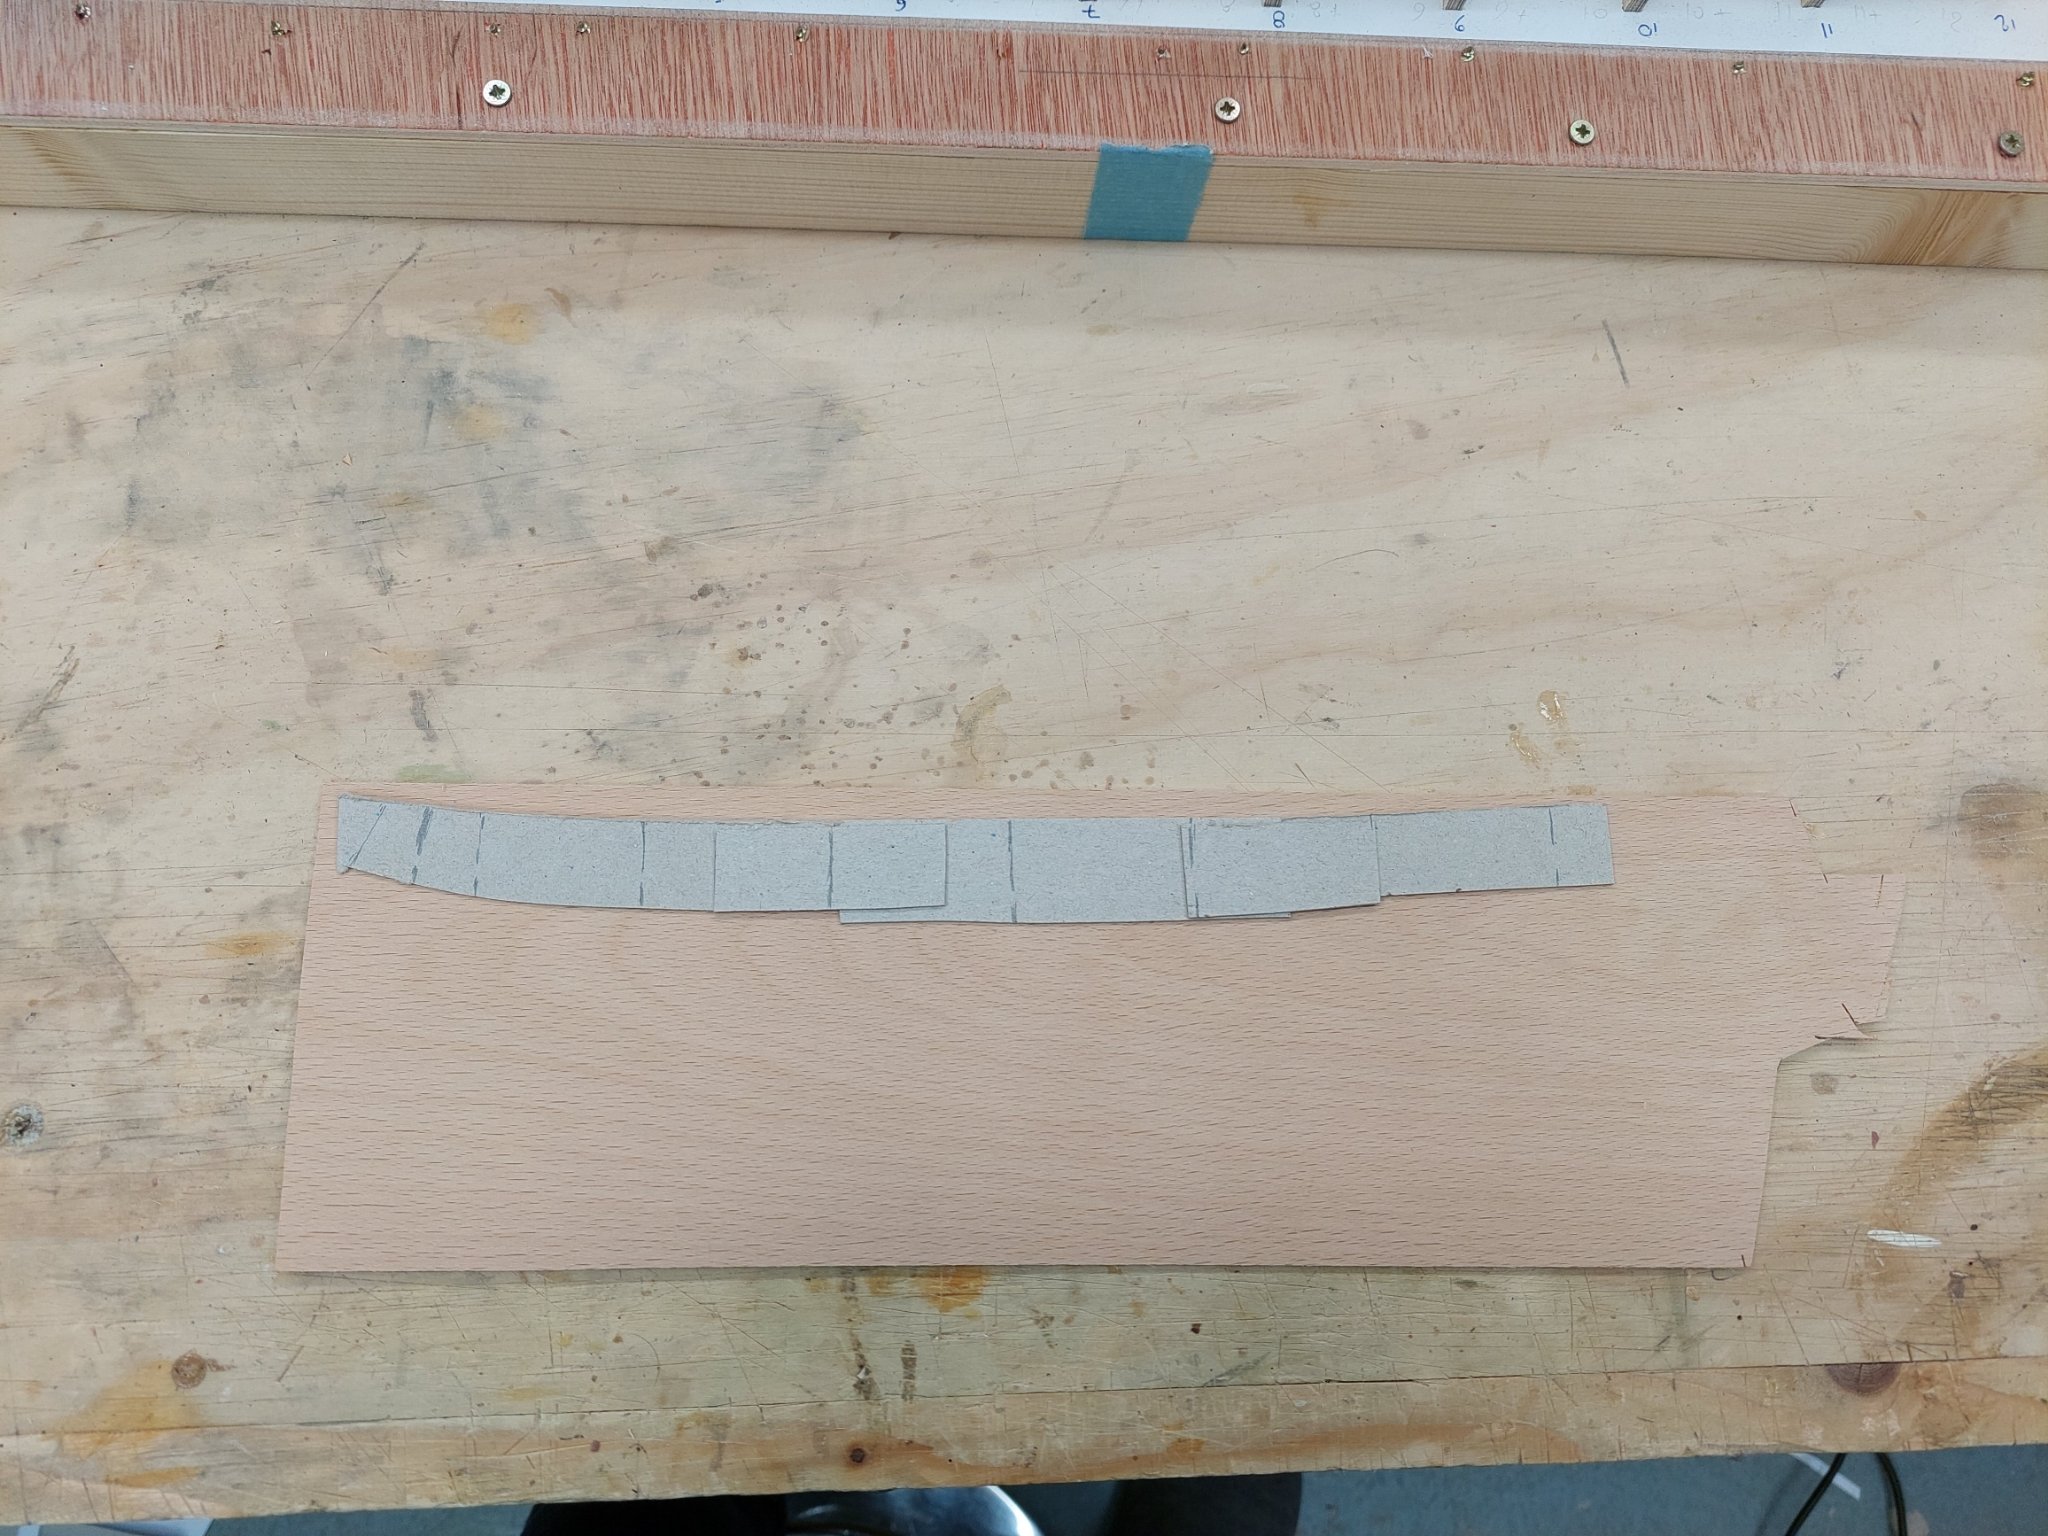
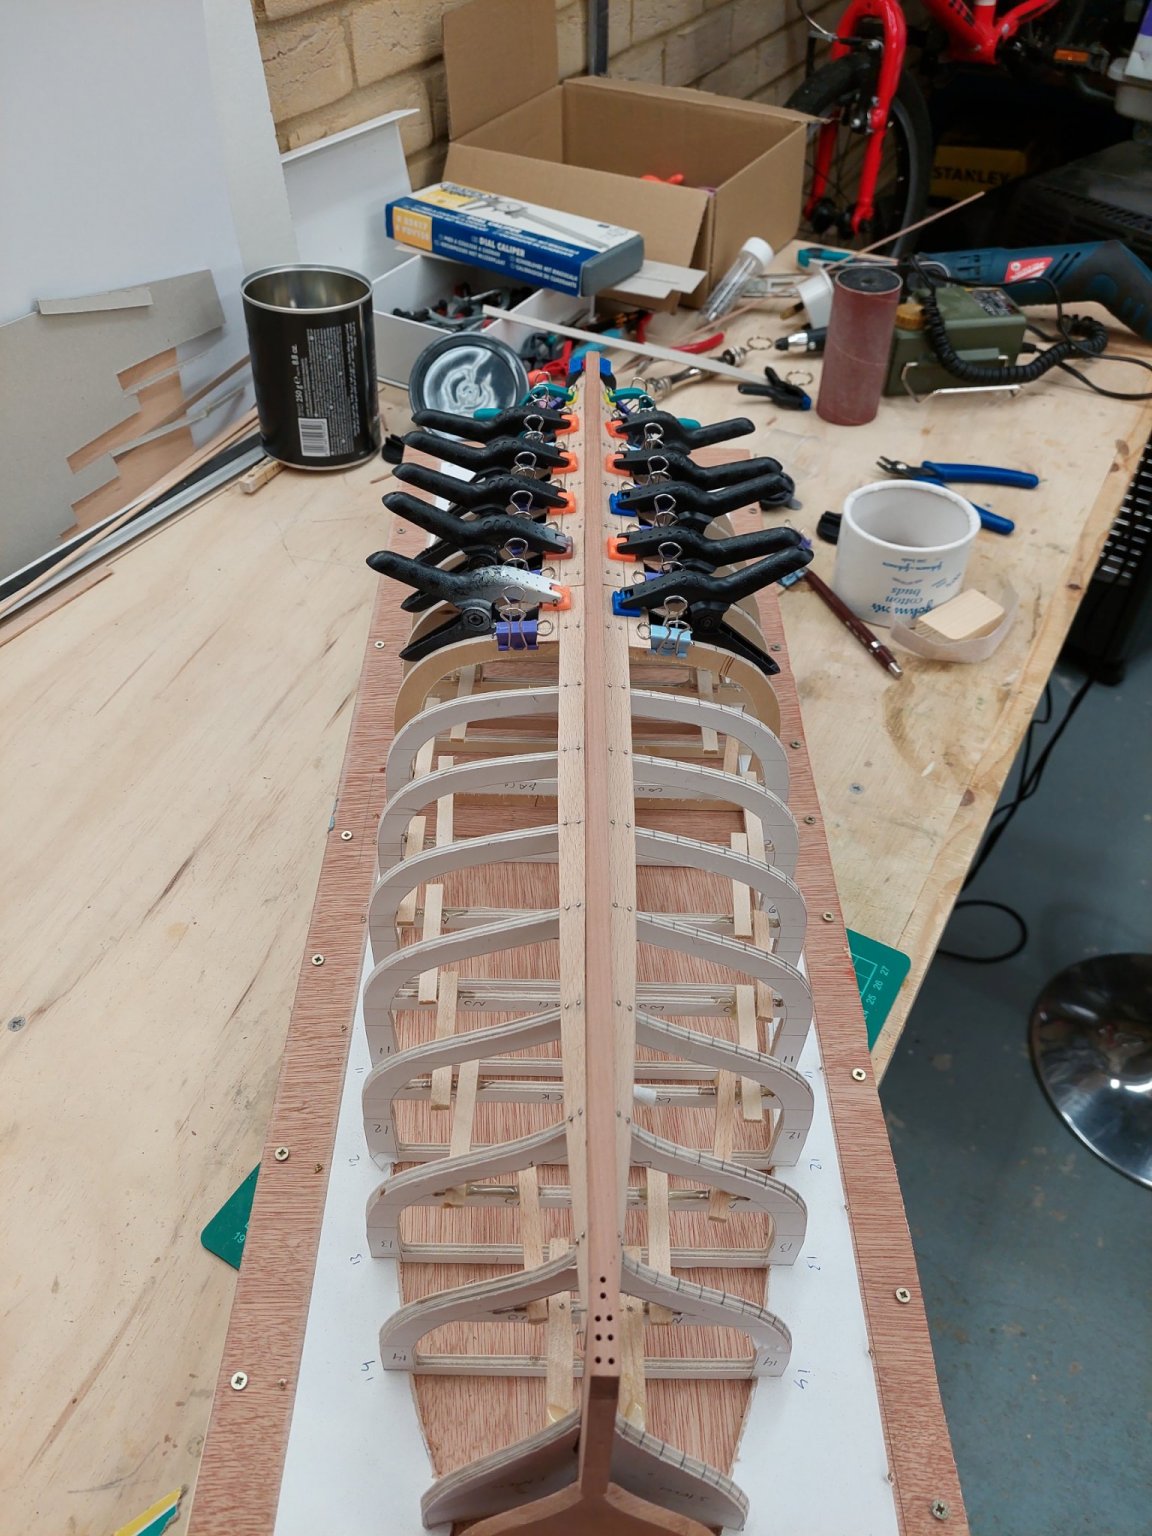
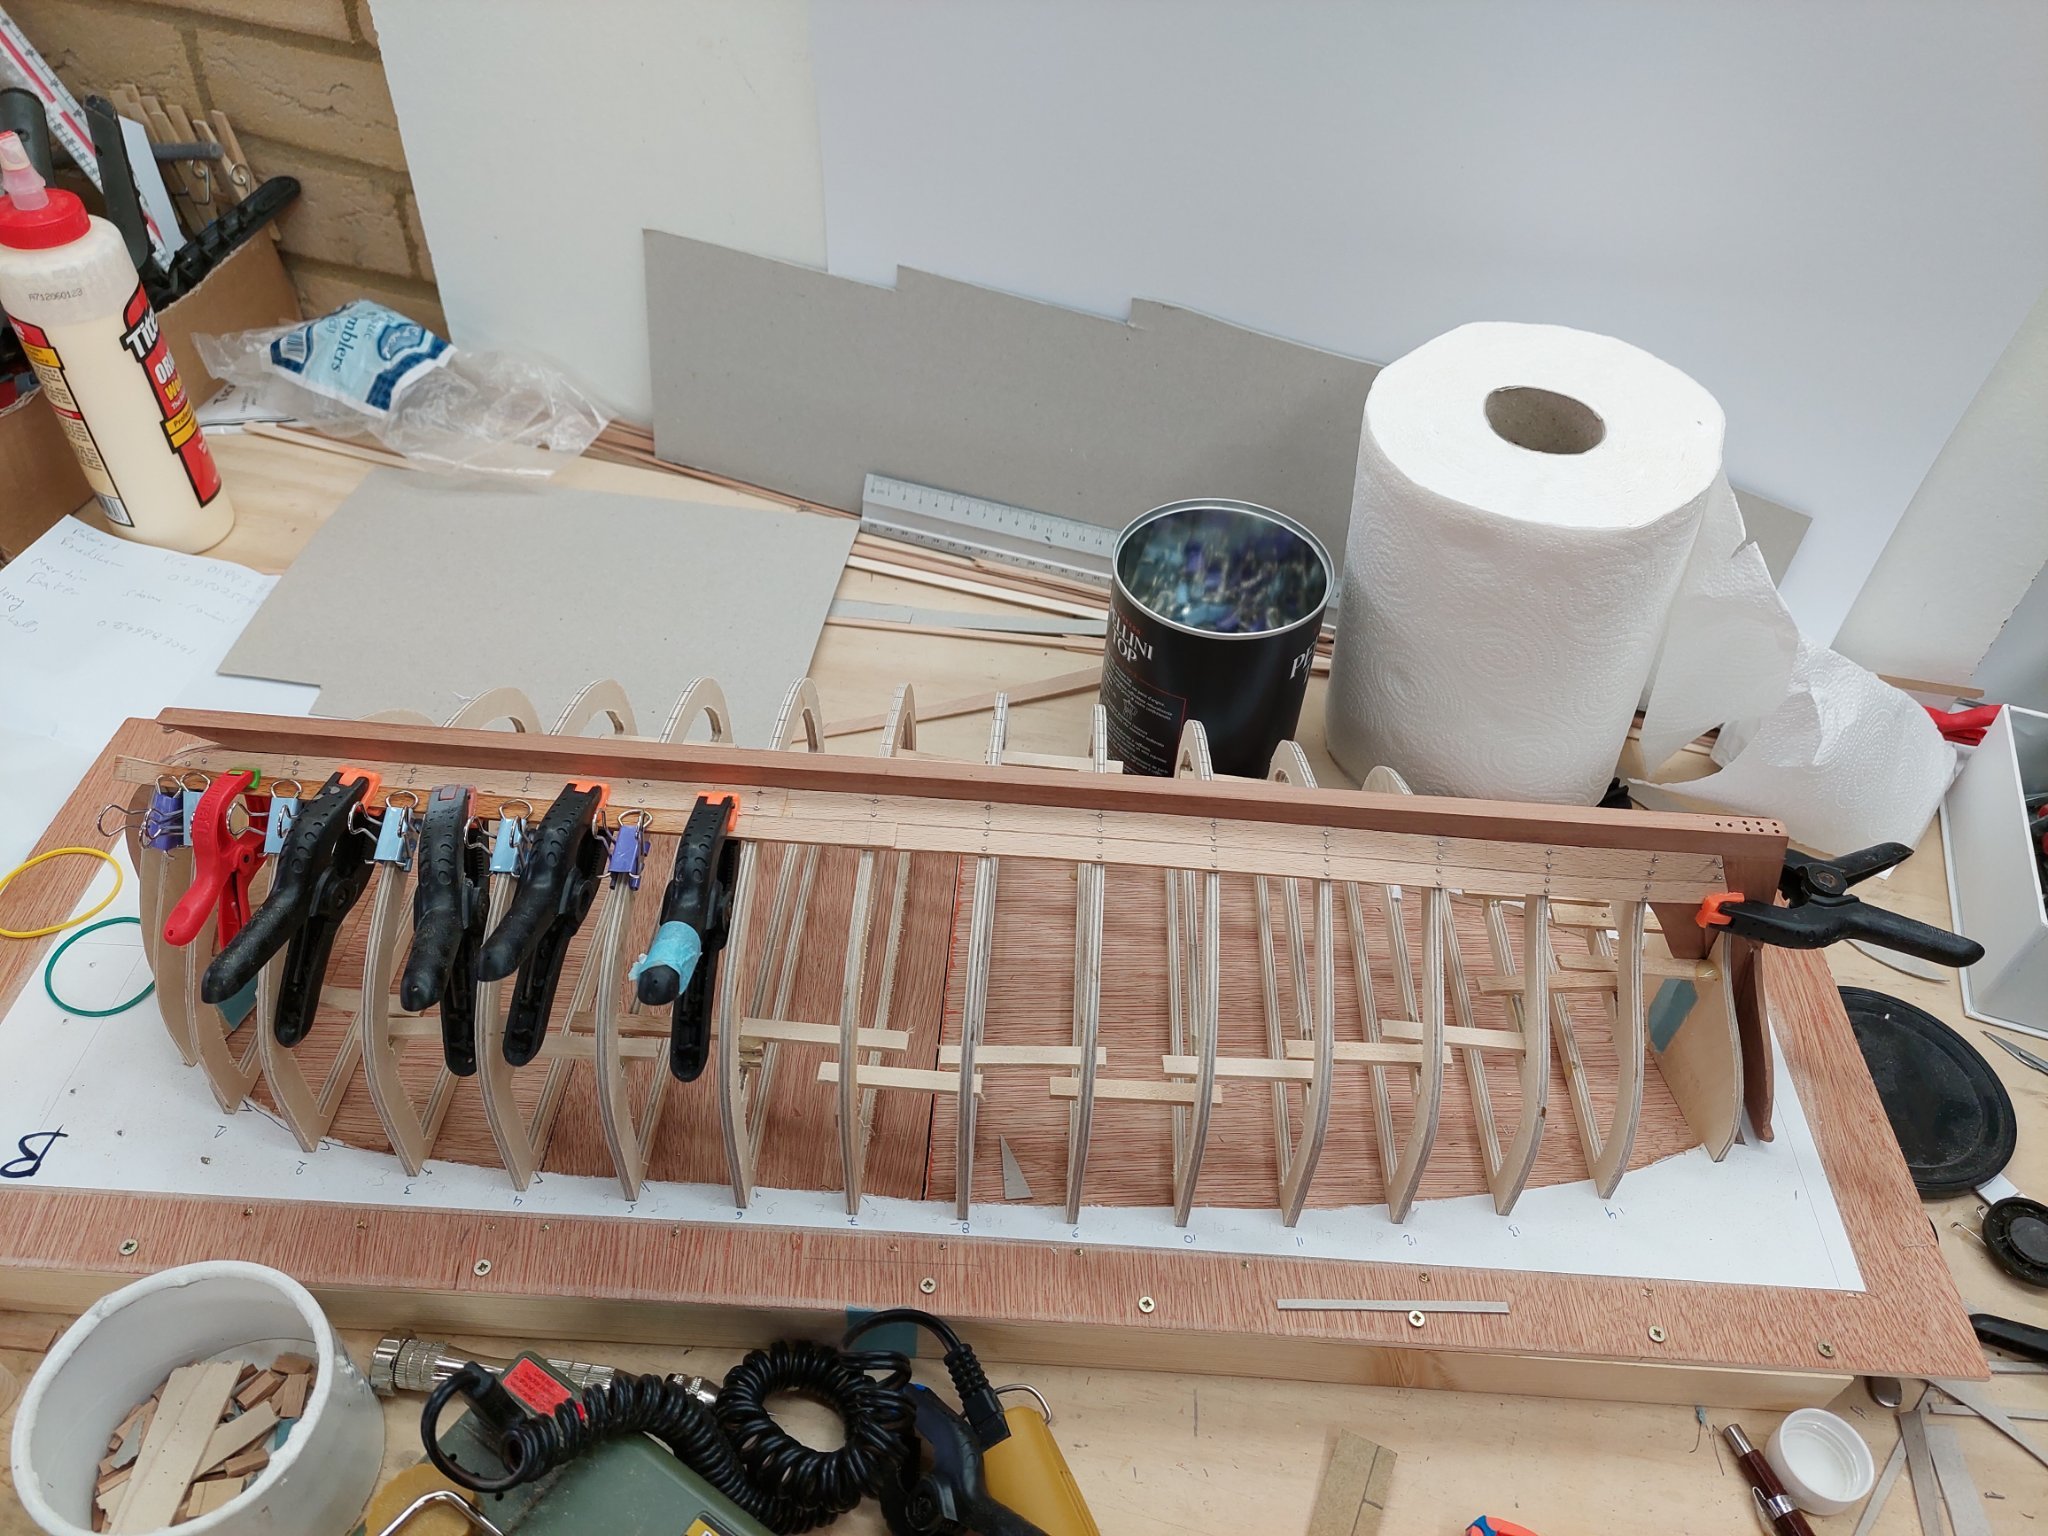
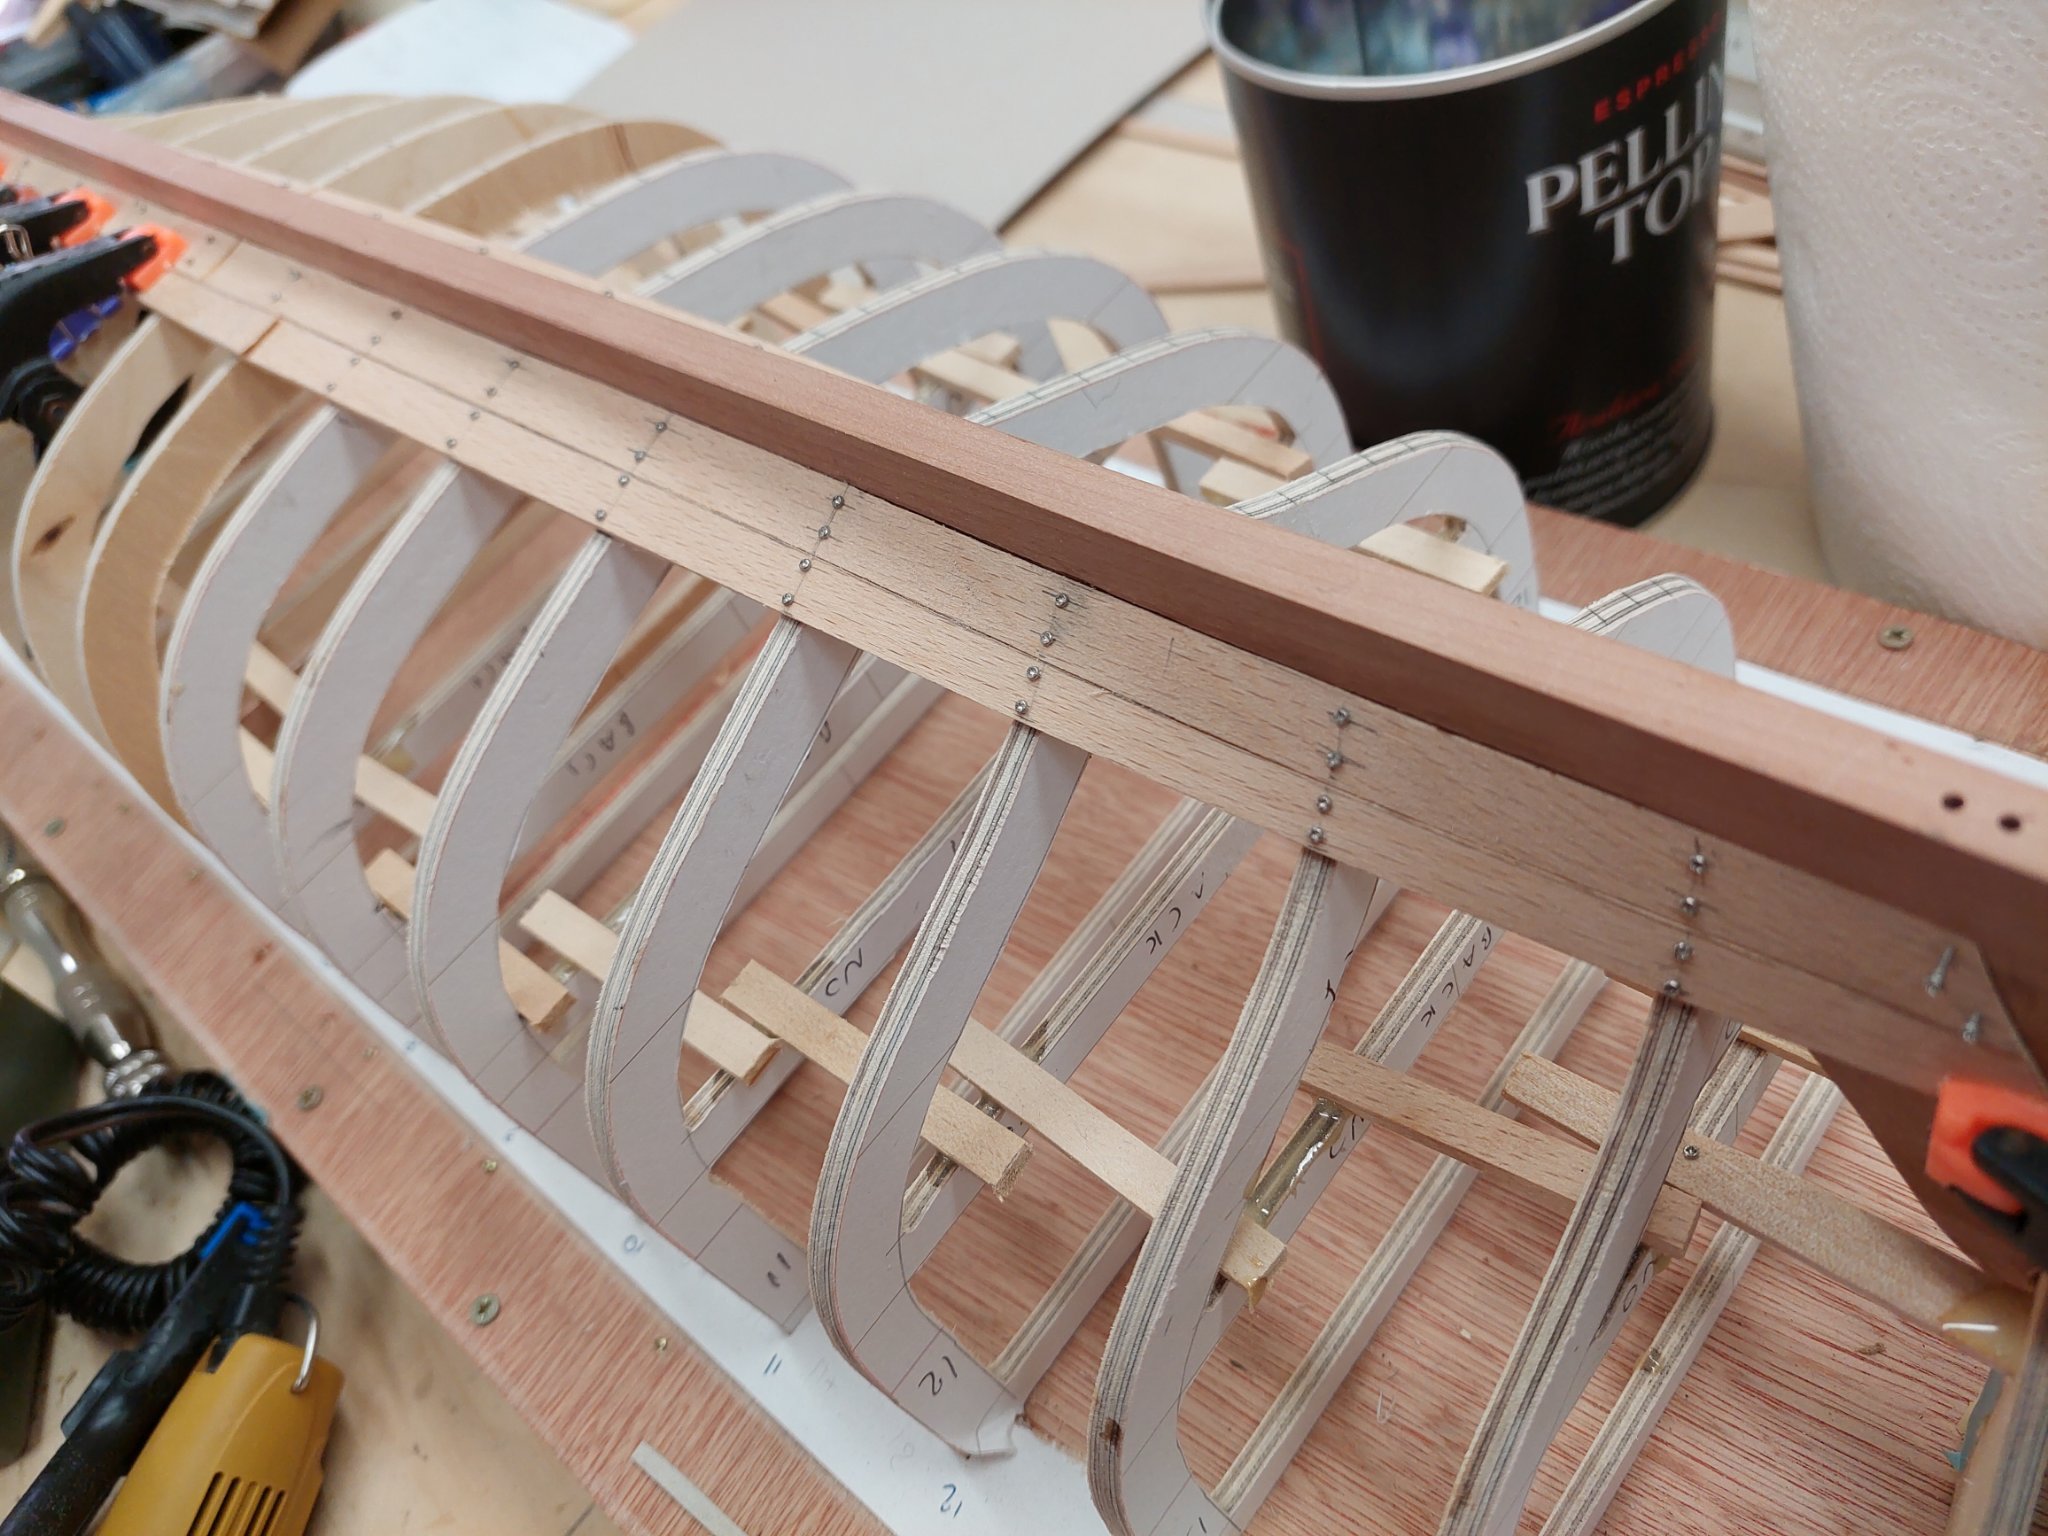
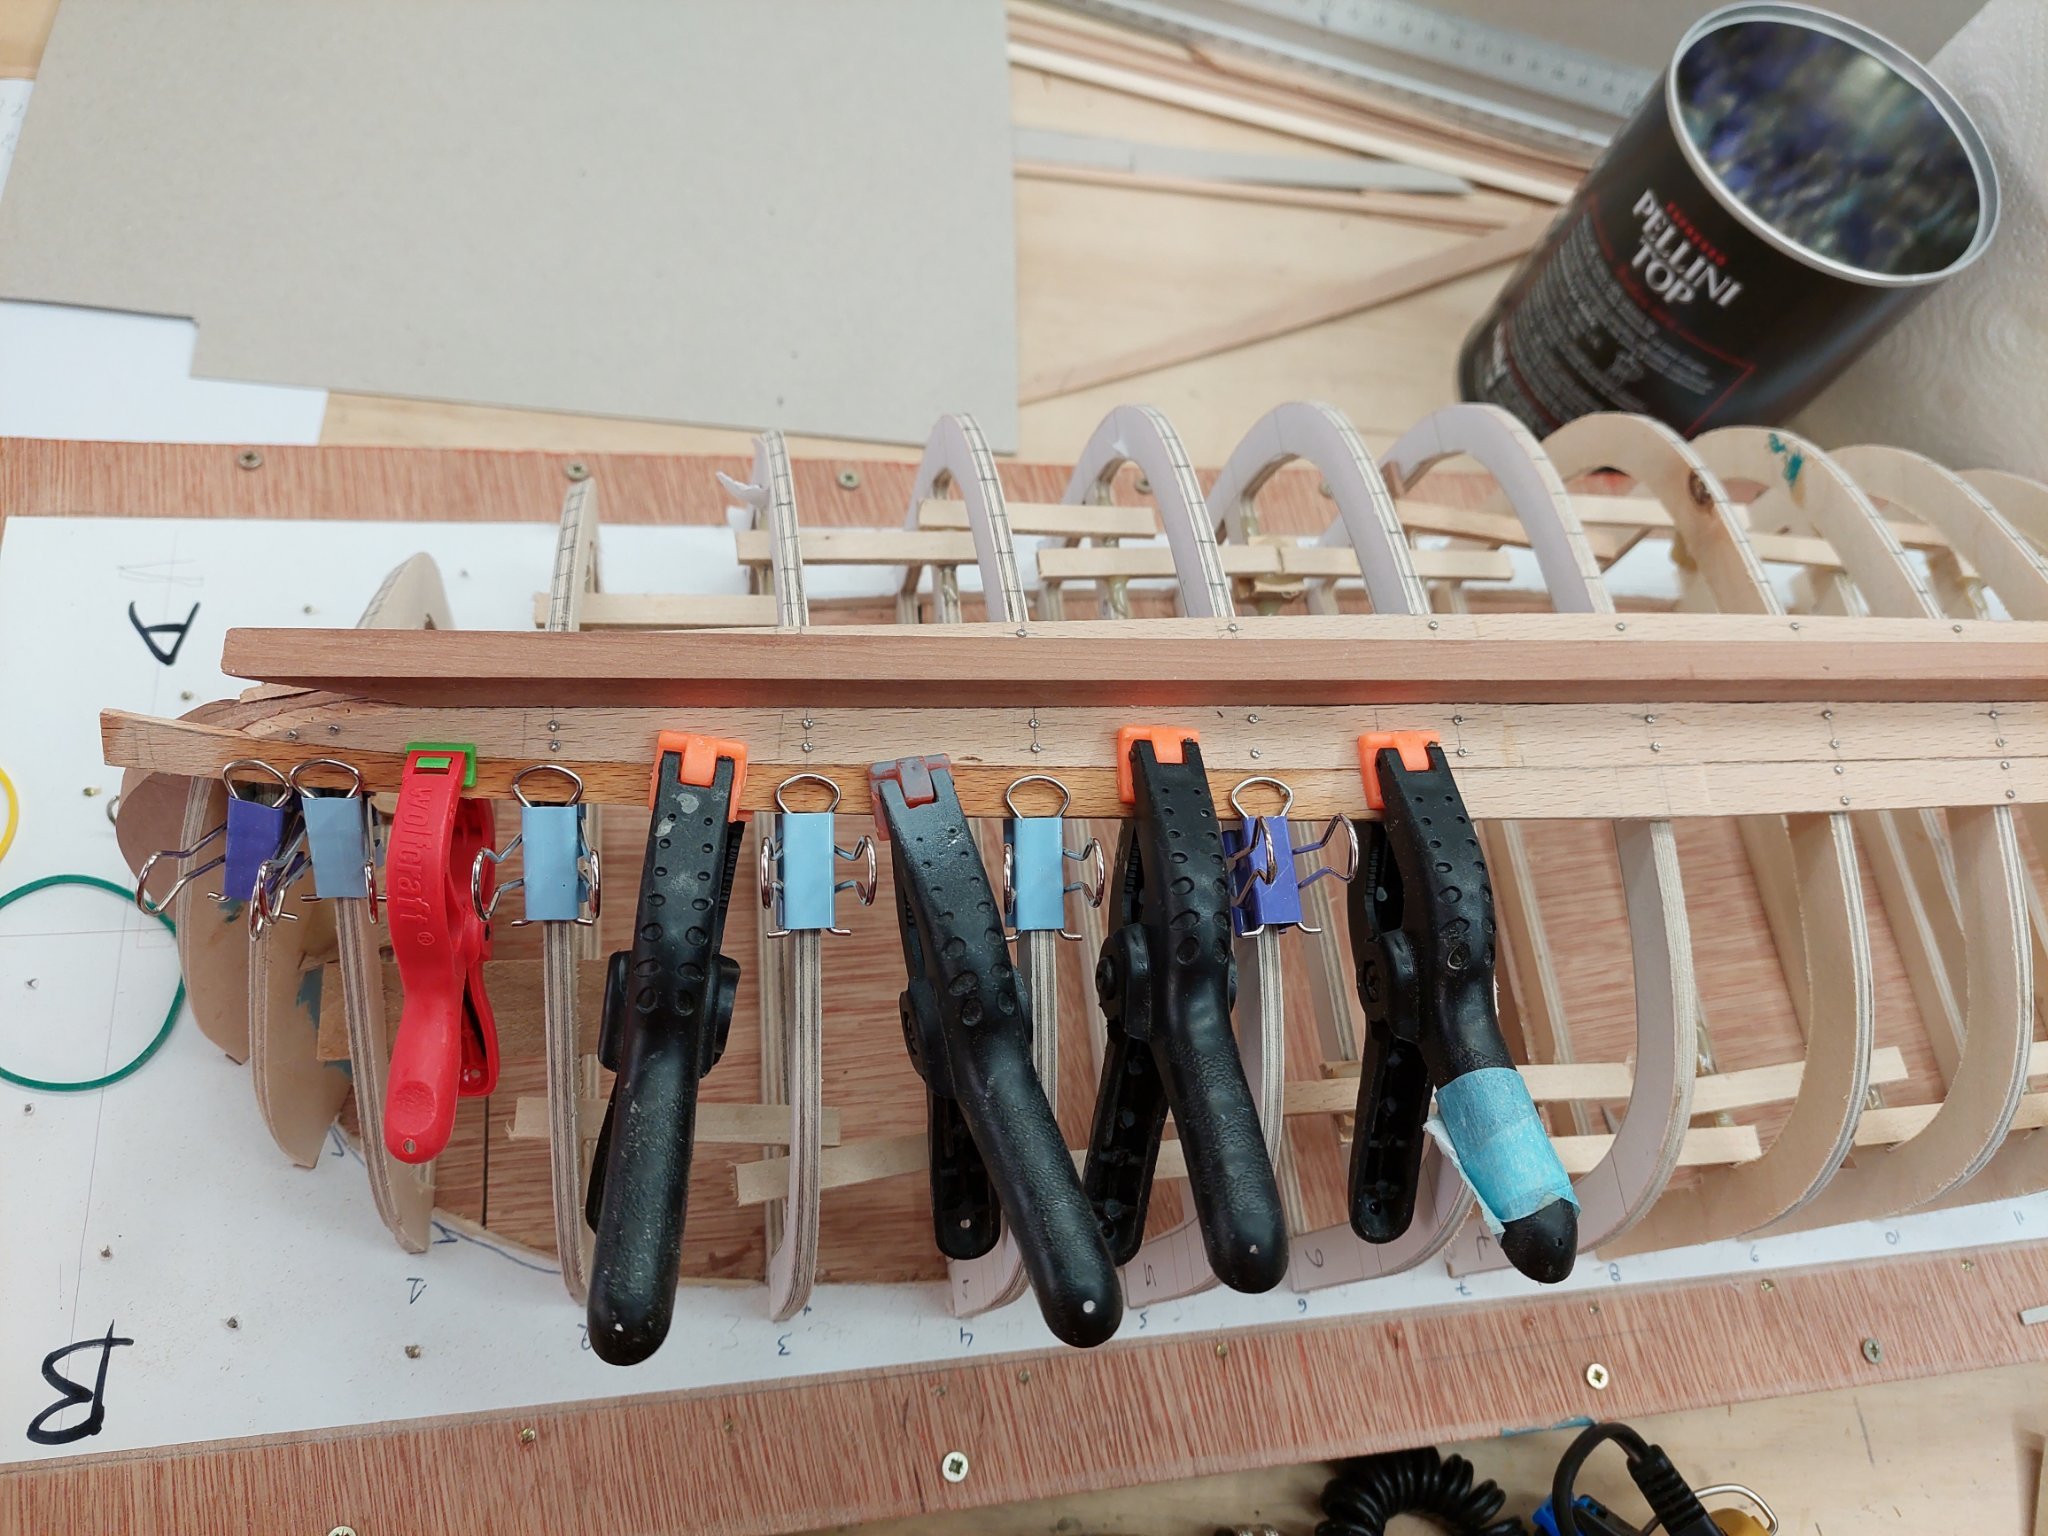
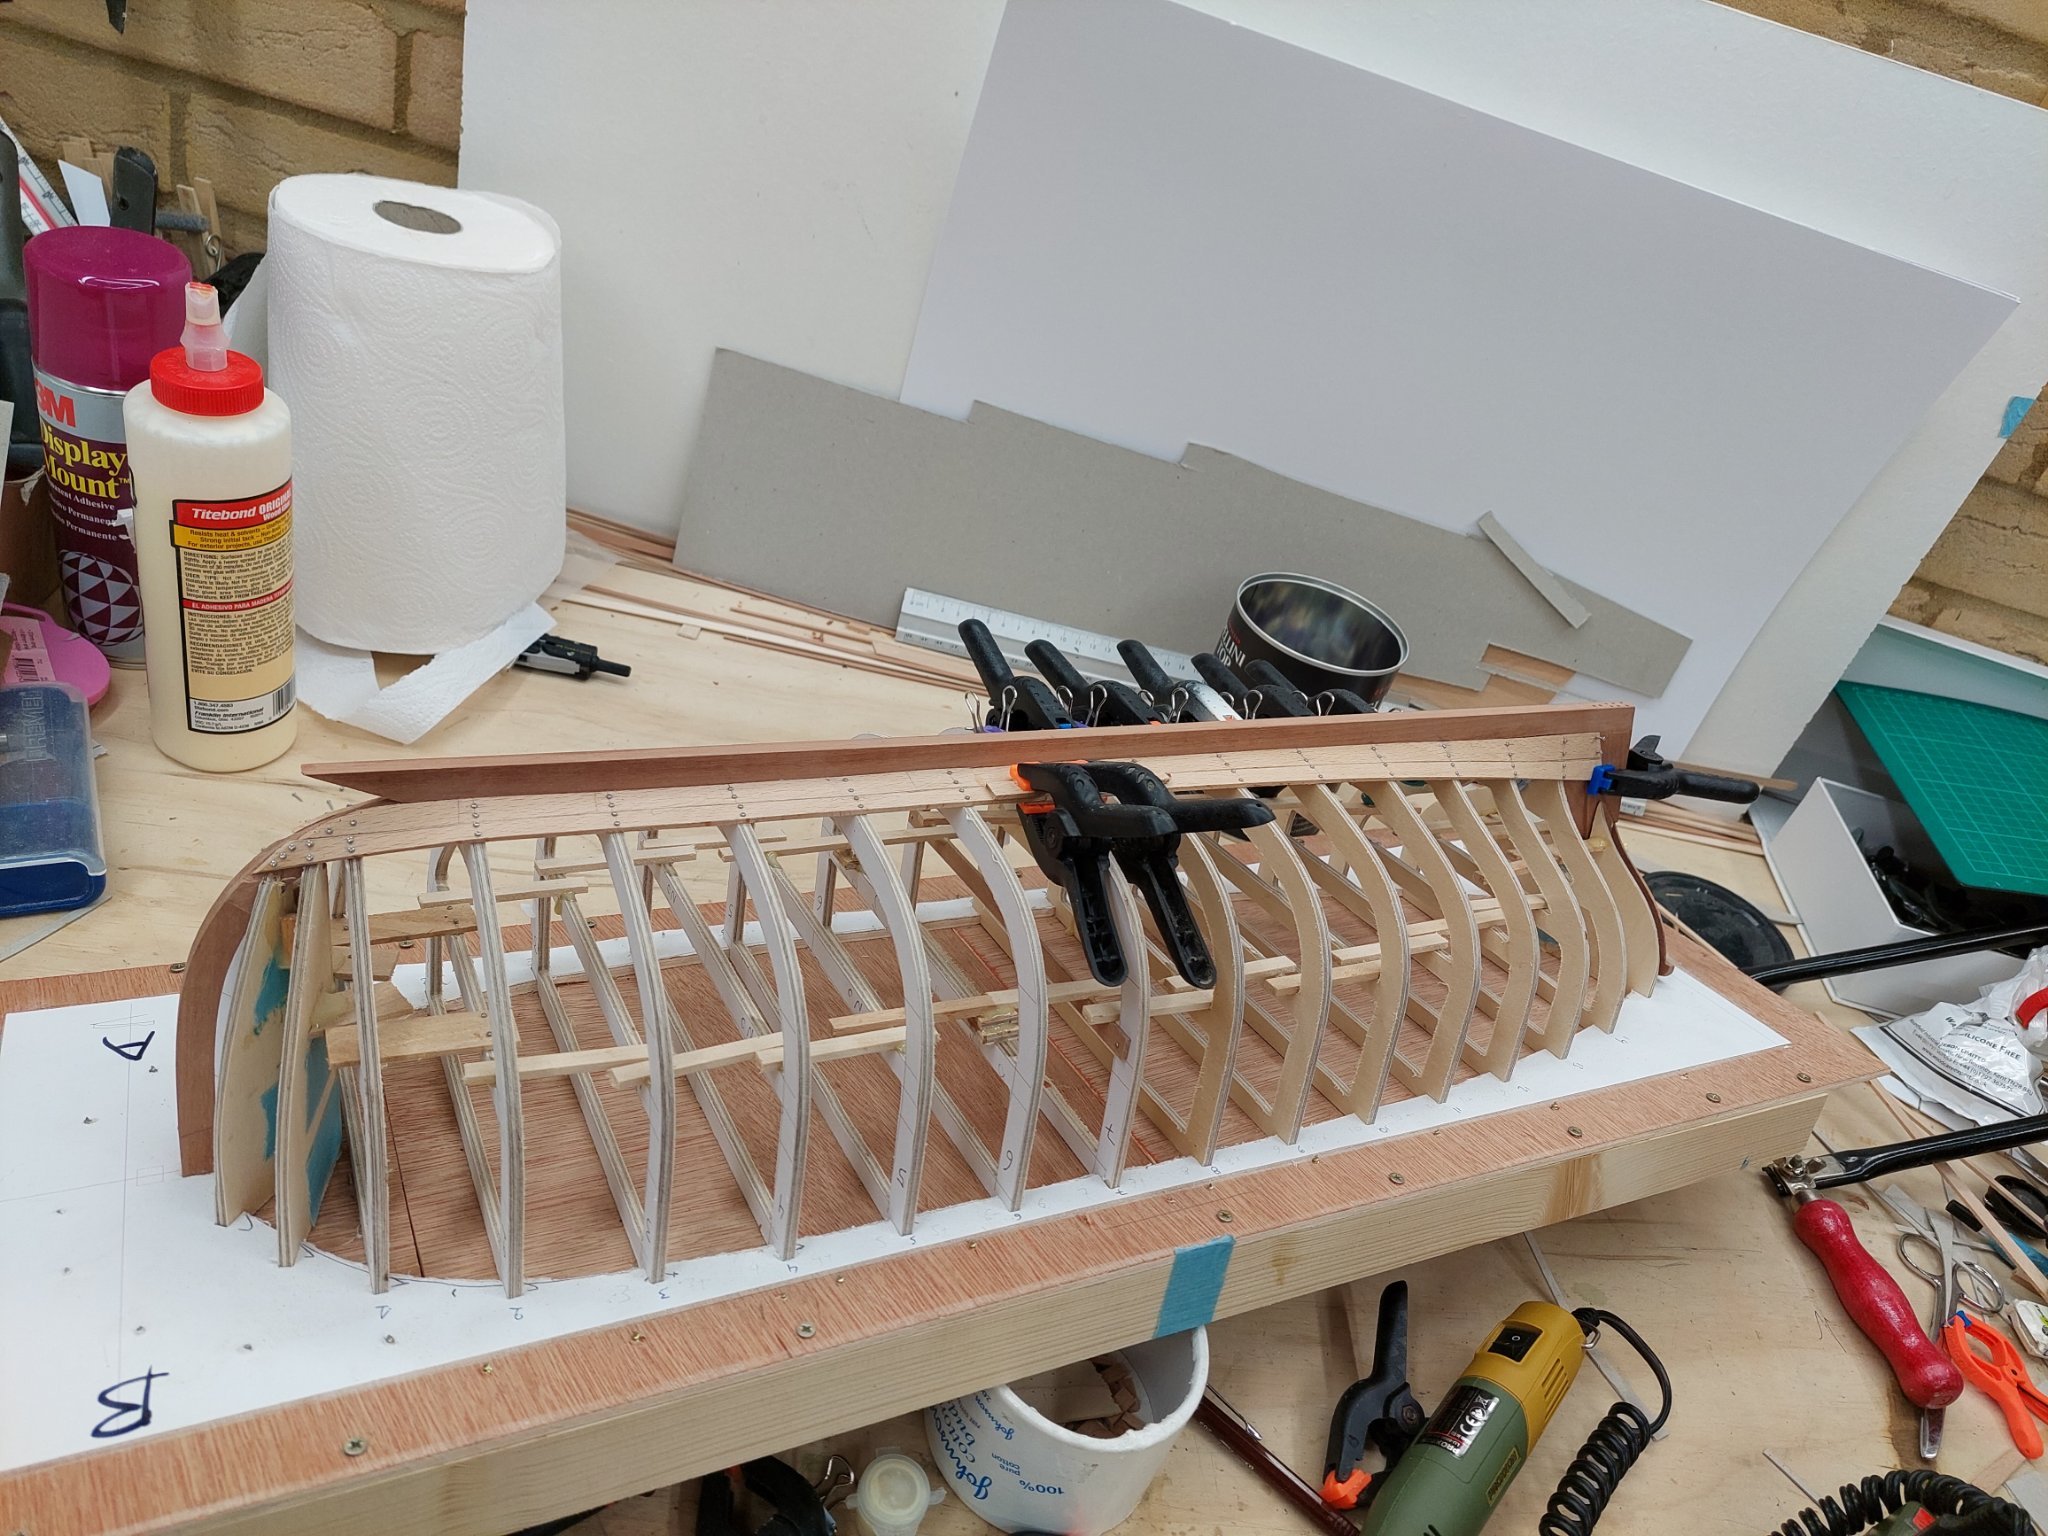
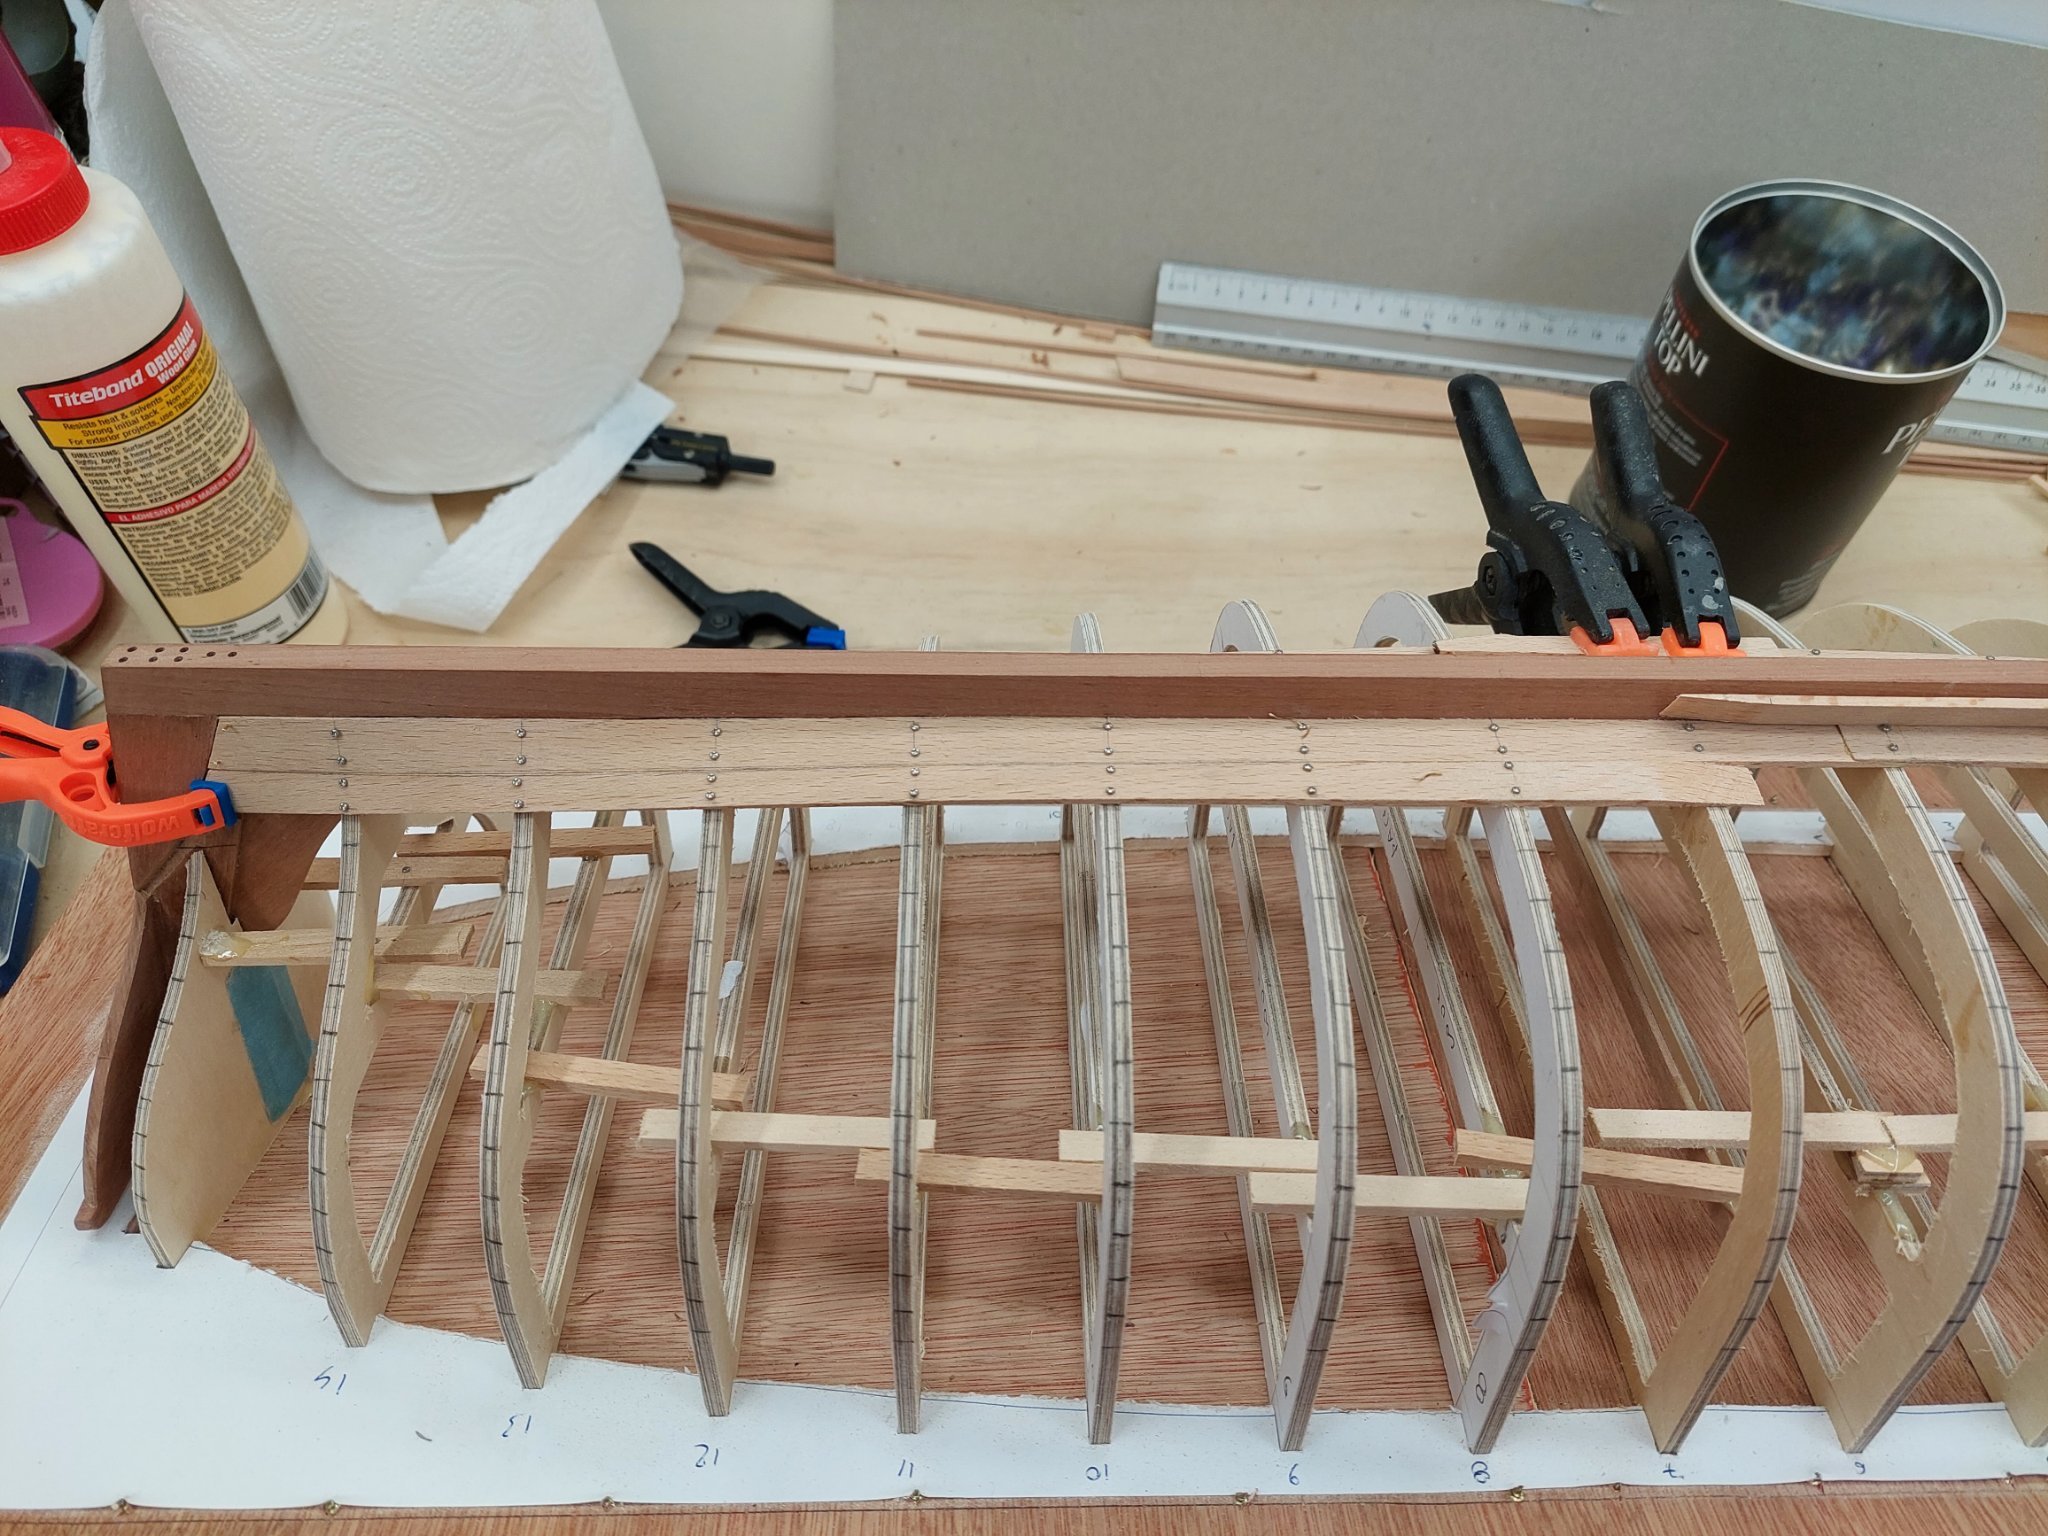
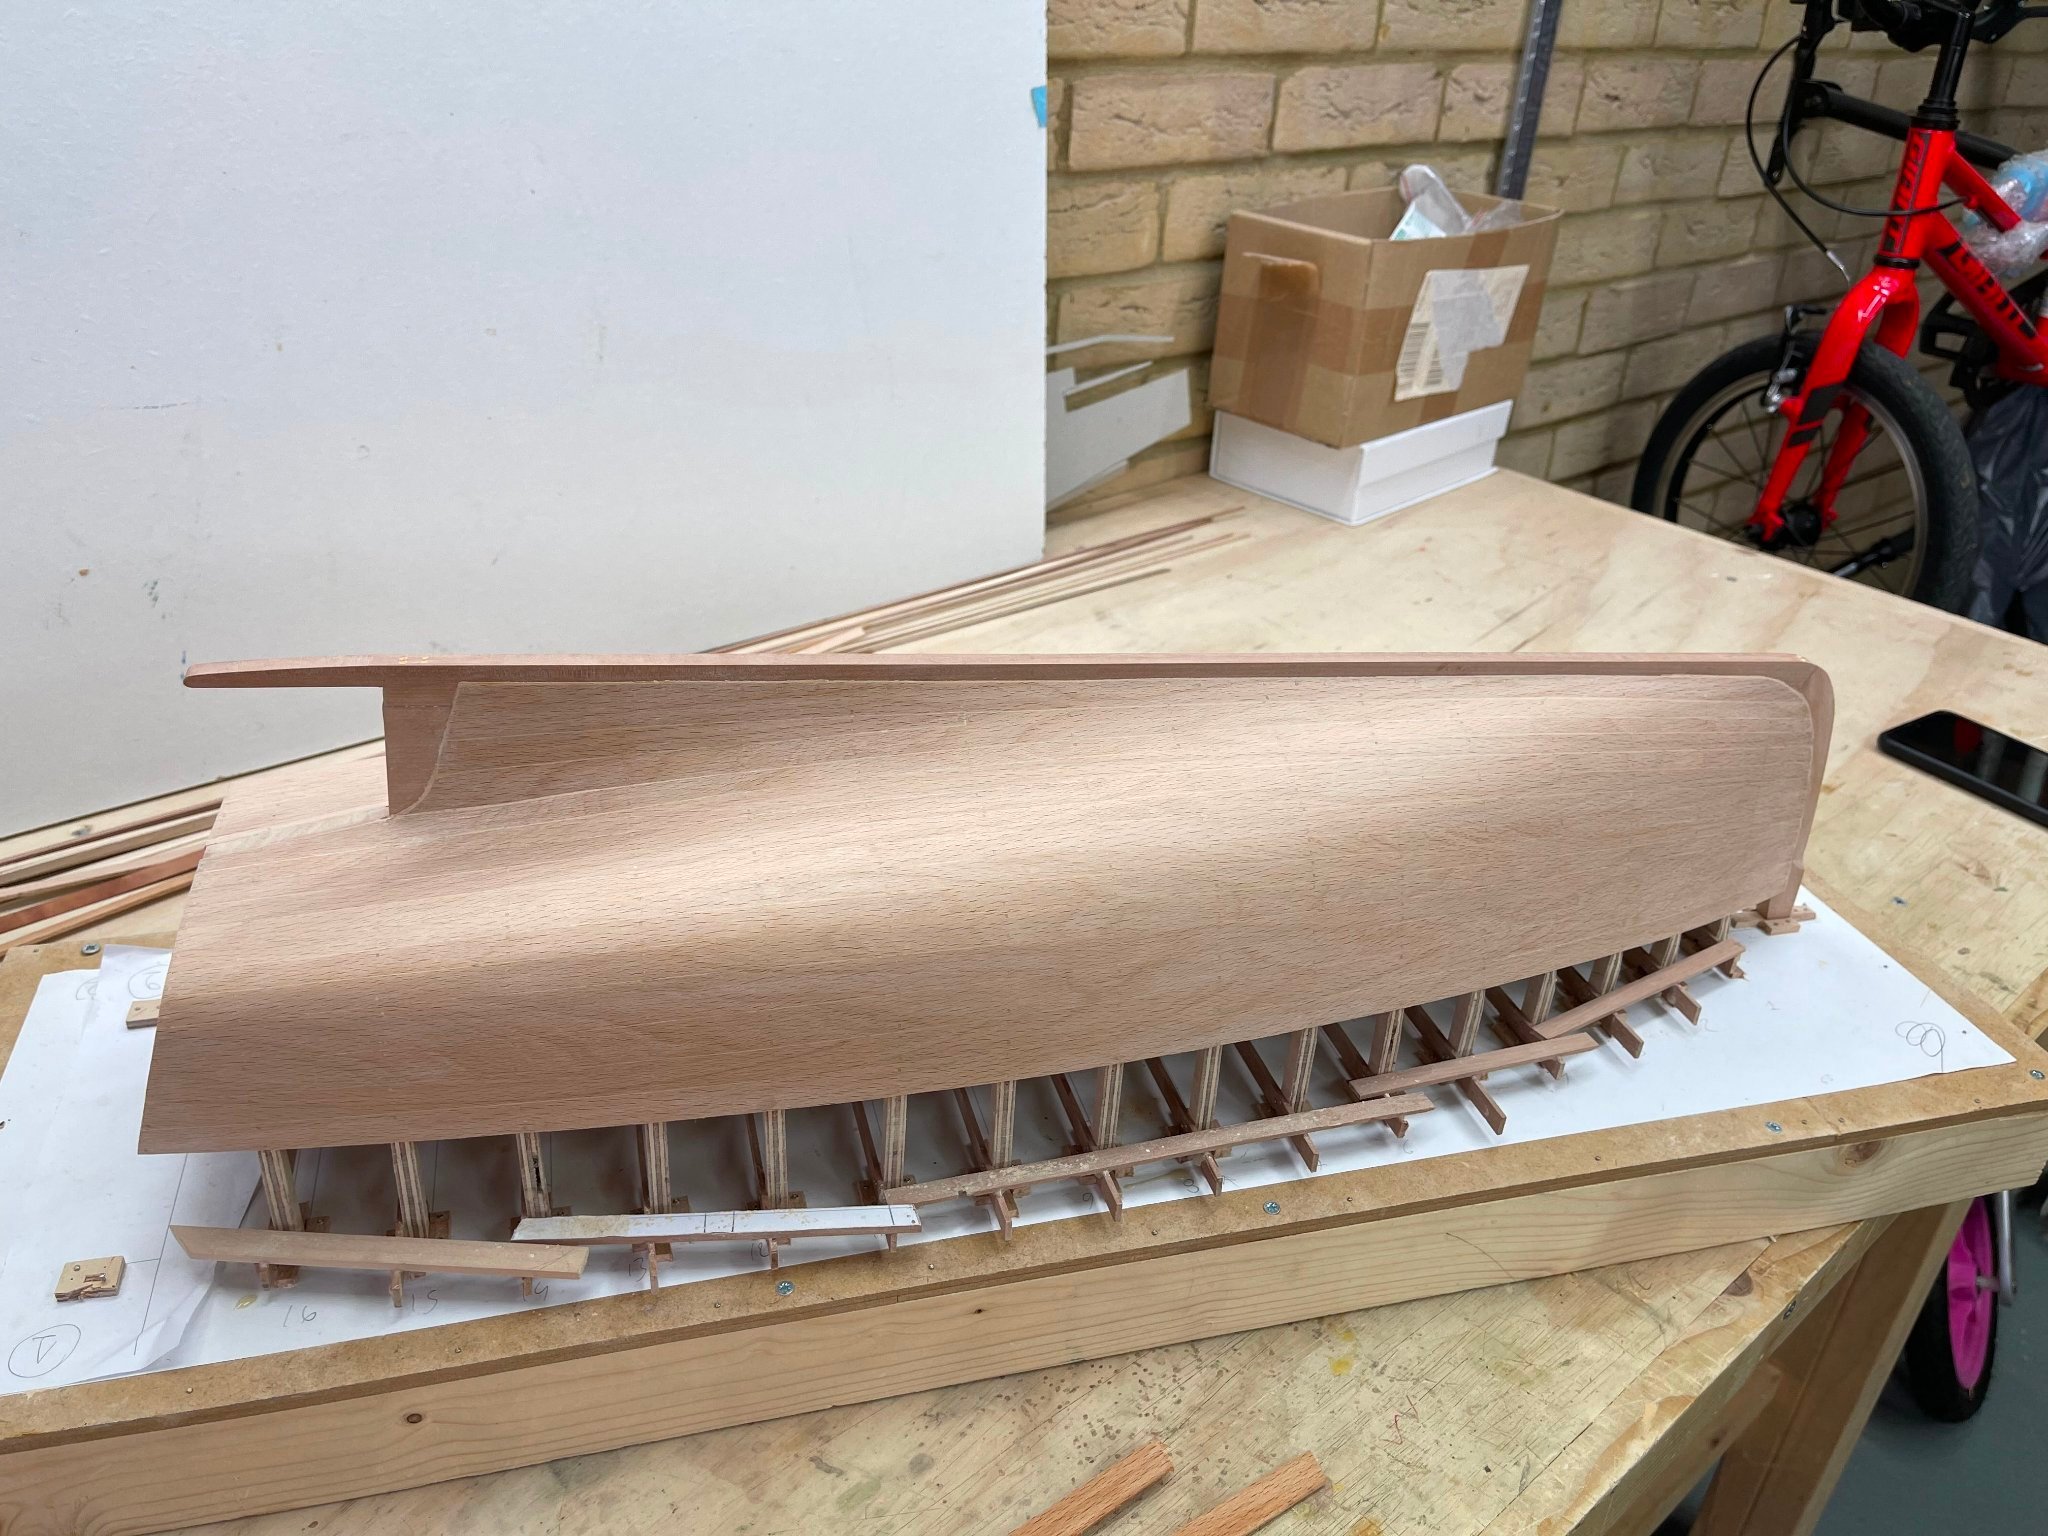
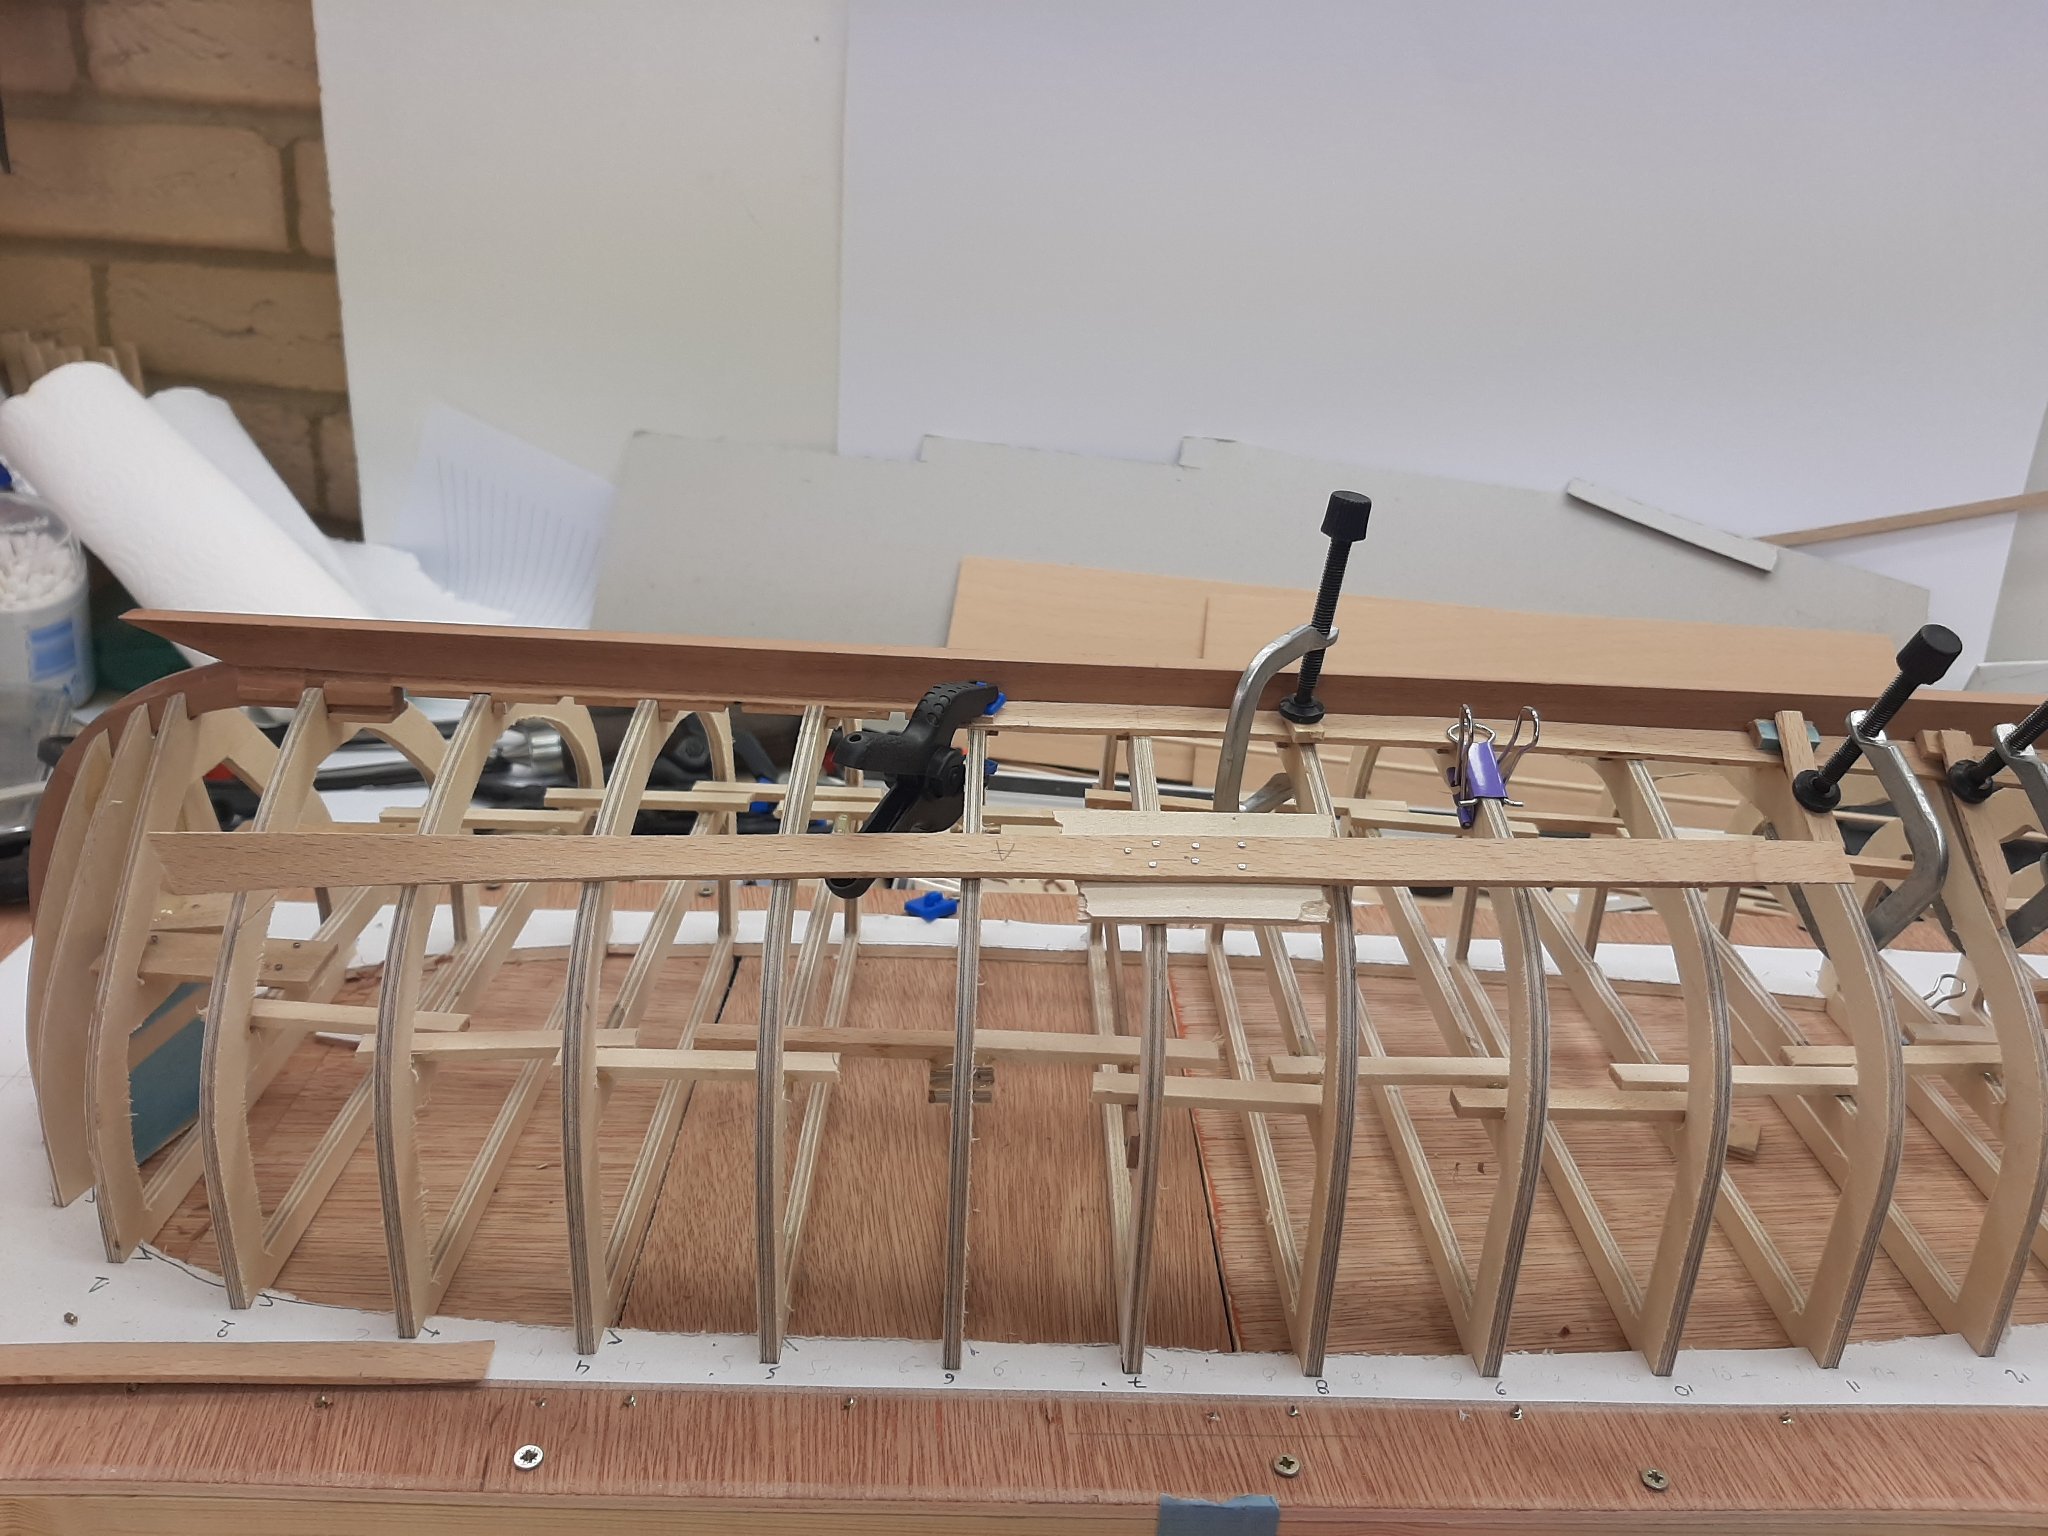
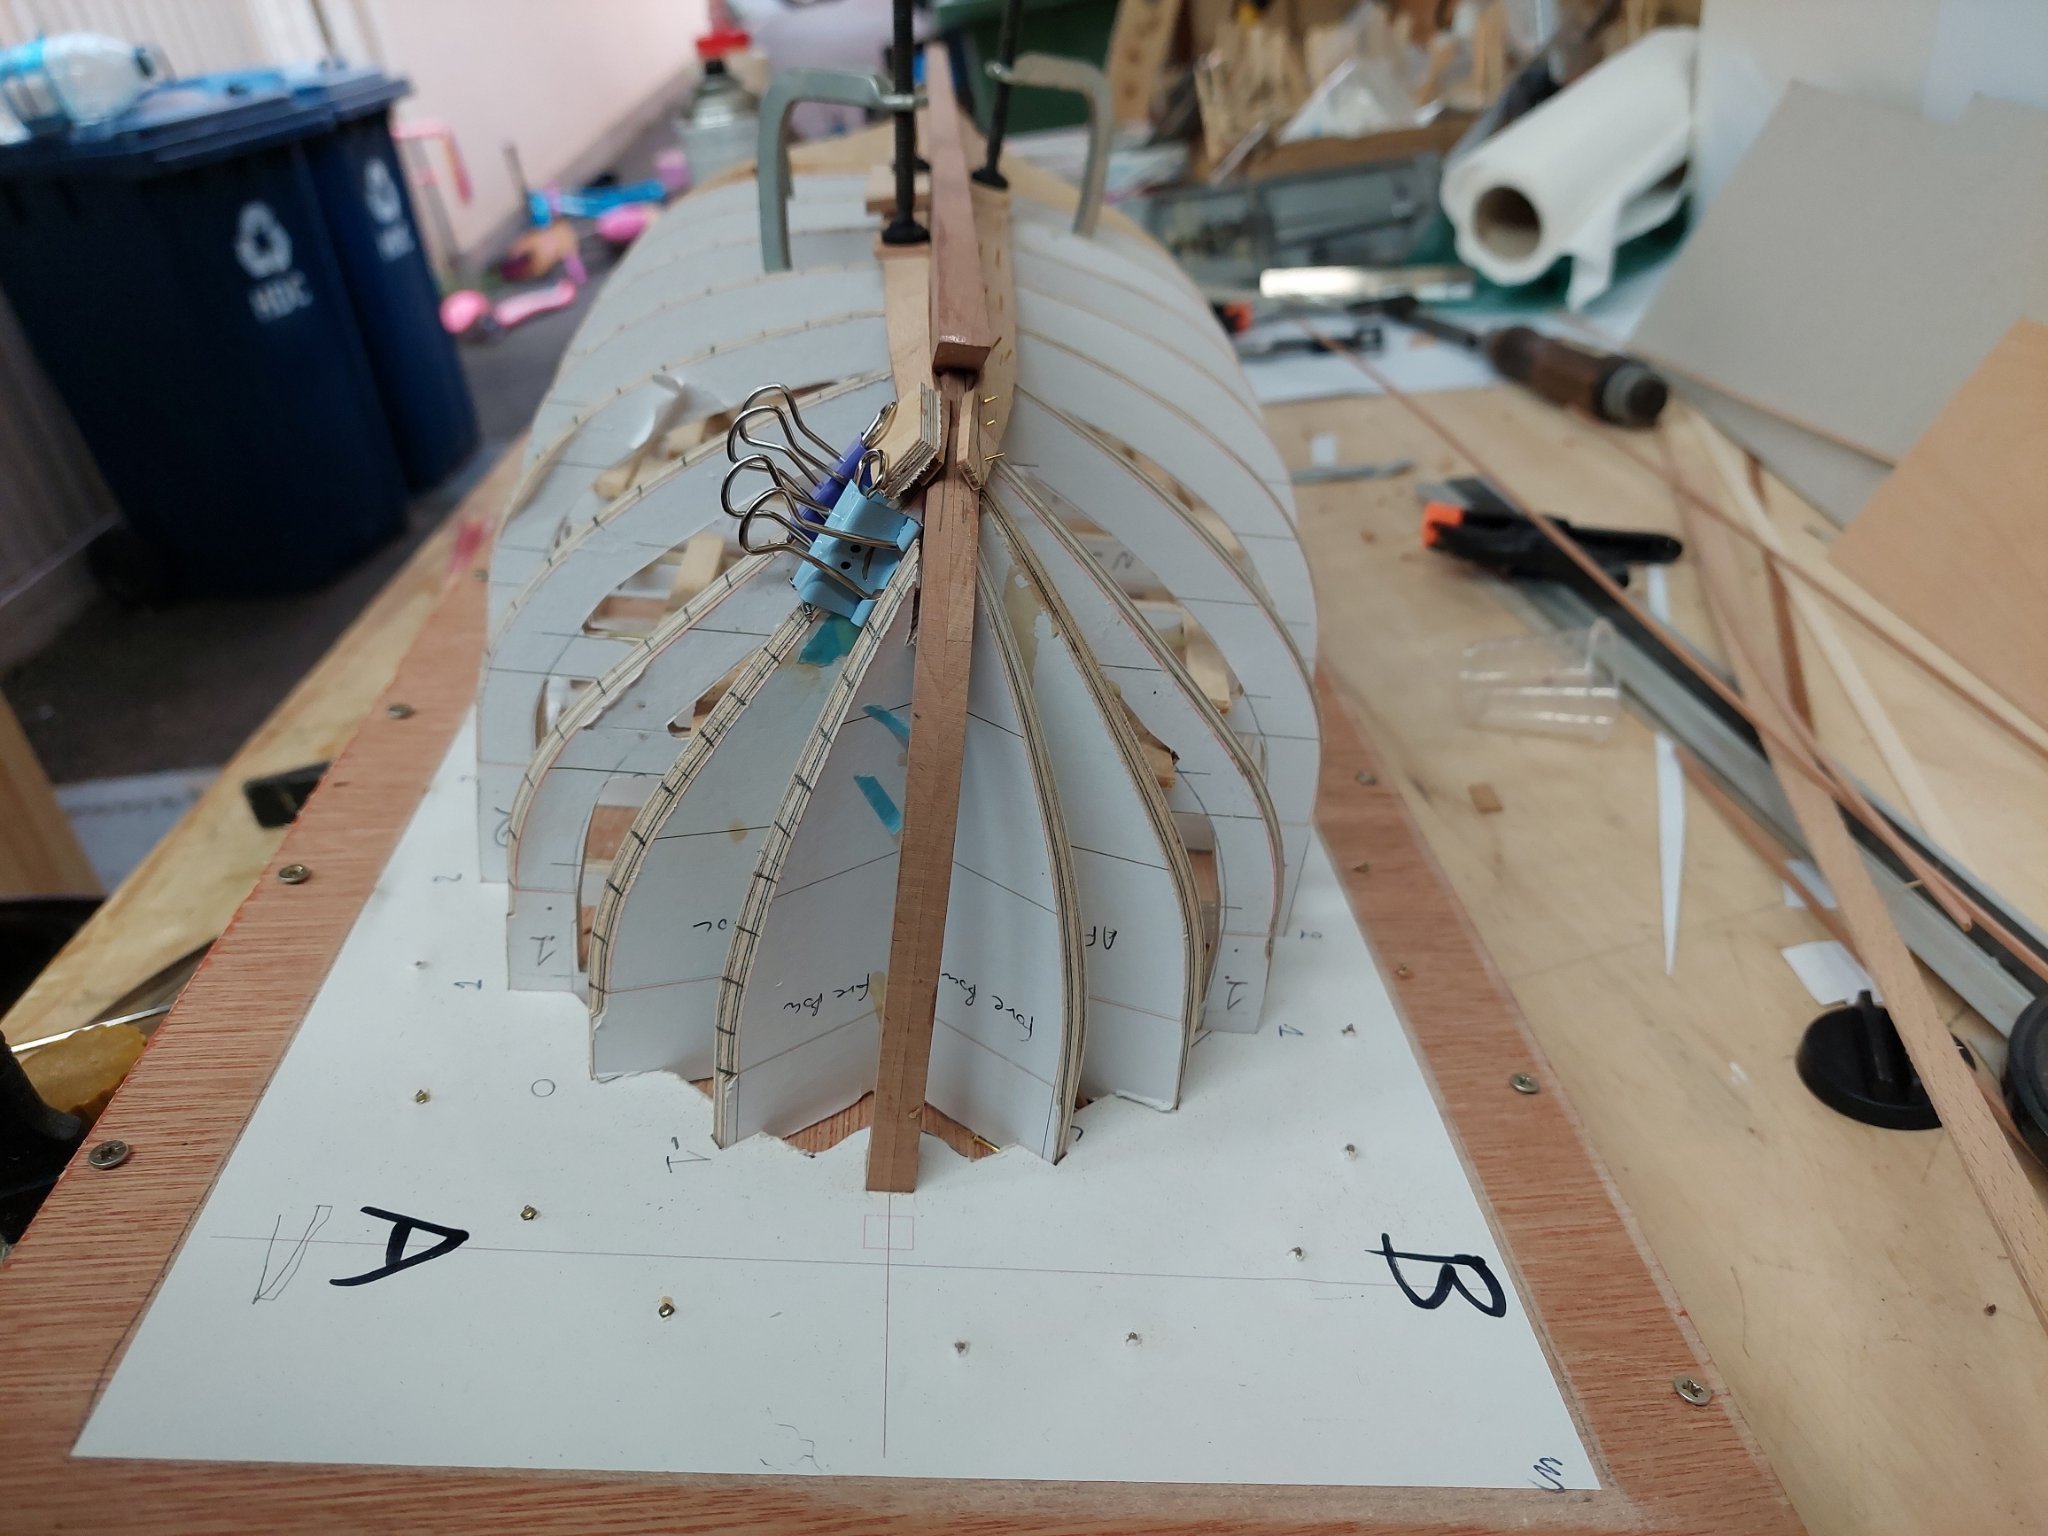
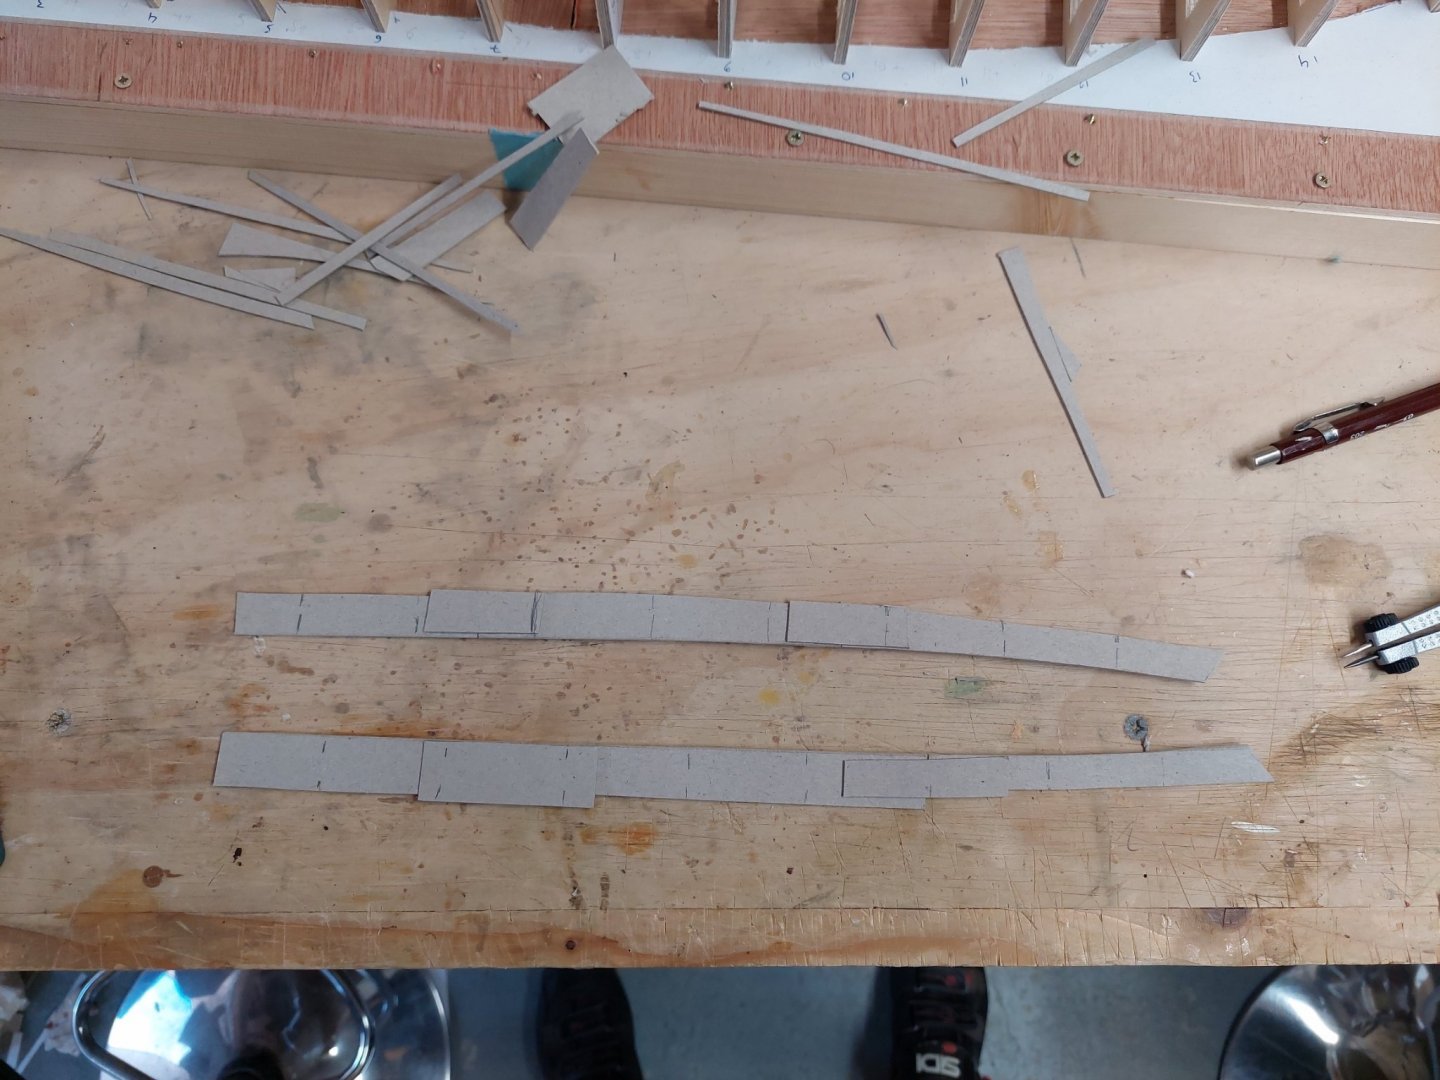
May thanks to all for your like and comments. I have corresponded with @Jaager and I thought it would be best to continue our discussion here. 1- Instead of directly using a compass or mechanical proportional dividers directly on the mold (or for POF frame) edge, use a tick strip so that the actual distance is part of the measurement? Indeed, this can be done and actually I did use card strips on this boat. Anything to get the job done. 2 - One edge of the plank (the outboard edge) is always dead straight. The spilling always done on the edge meeting the previous plank? Not necessarily. Maybe some planks in large ships but never in boats in my experience. The upper edge of the garboard only is indeed supposed to be straight but it does not really need to. However, planning of the planking is dealt with in depth on the launch log! 3 - Divide the area to be planked into two or three zones ( more for a larger vessel). A thin batten that defines an idea plank run at intermediate positions? Absolutely. This boat was divided in three zones. 4 - the subdivisions would be between the battens? Indeed, battens were used to define the zones to ensure fairness of the curves. 5 - A planking fan could be used instead of mechanical dividers? Ordinarily yes but this boat is actually a very difficult one to plank, the fan cannot really be used. 6 - The garboard is the first, but instead of one, you make two identical planks - P & S at the same time? 7 - Each subsequent strake also be made as duplicates with the fine tuning done on the individuals on either side? Port and starboard being planked at the same time in parallel? 8 - The battens would only be needed on one side. I see a madness producer in trying to get symmetry. If the molds are not near identical on each side, then they need to be done over? 6, 7, 8 Indeed, the two sides should theoretically be identical. In my experience they never are. They can be quite close but in this boat I cut a few corners and each plank is individual. But if someone has such a steady hand to make each frame and each pair of planks completely symmetrical, the work would be cut in half. 9 - A jig could be used to locate the mold positions on the plank stock? Sure but it is easy to mark the positions on the card template 10 - Once a plank has been fixed, the open are is measured with a new tick stick and a new (one less) interval be measured? If there is one place where error creep is a certainty, it is with planking. If a gap needs 12 planks to close it, dividing the whole space into 12 segments at the beginning and trying to use them for every plank will not turn out like you expect, hope usually? A new subdivision measurement after each strake will mitigate error creep? Yes, up to a point. Some builders do not like to mark the plank positions, they just do as you suggest and plank away without fully marking each plank beforehand. I think this needs huge experience and an ability to imagine the planks just looking at the frames. I like to mark the run of each plank, as I would like it to go, but I am not fixated on my planning. Some time a plank wants to lie a bit higher or lower than my marking, or to be a bit wider or more narrow-that's fine by me! I also trim or shim the frames if the plank suggests it is needed. This is how the boat looks now-it's mothballed until I finish planking the yawl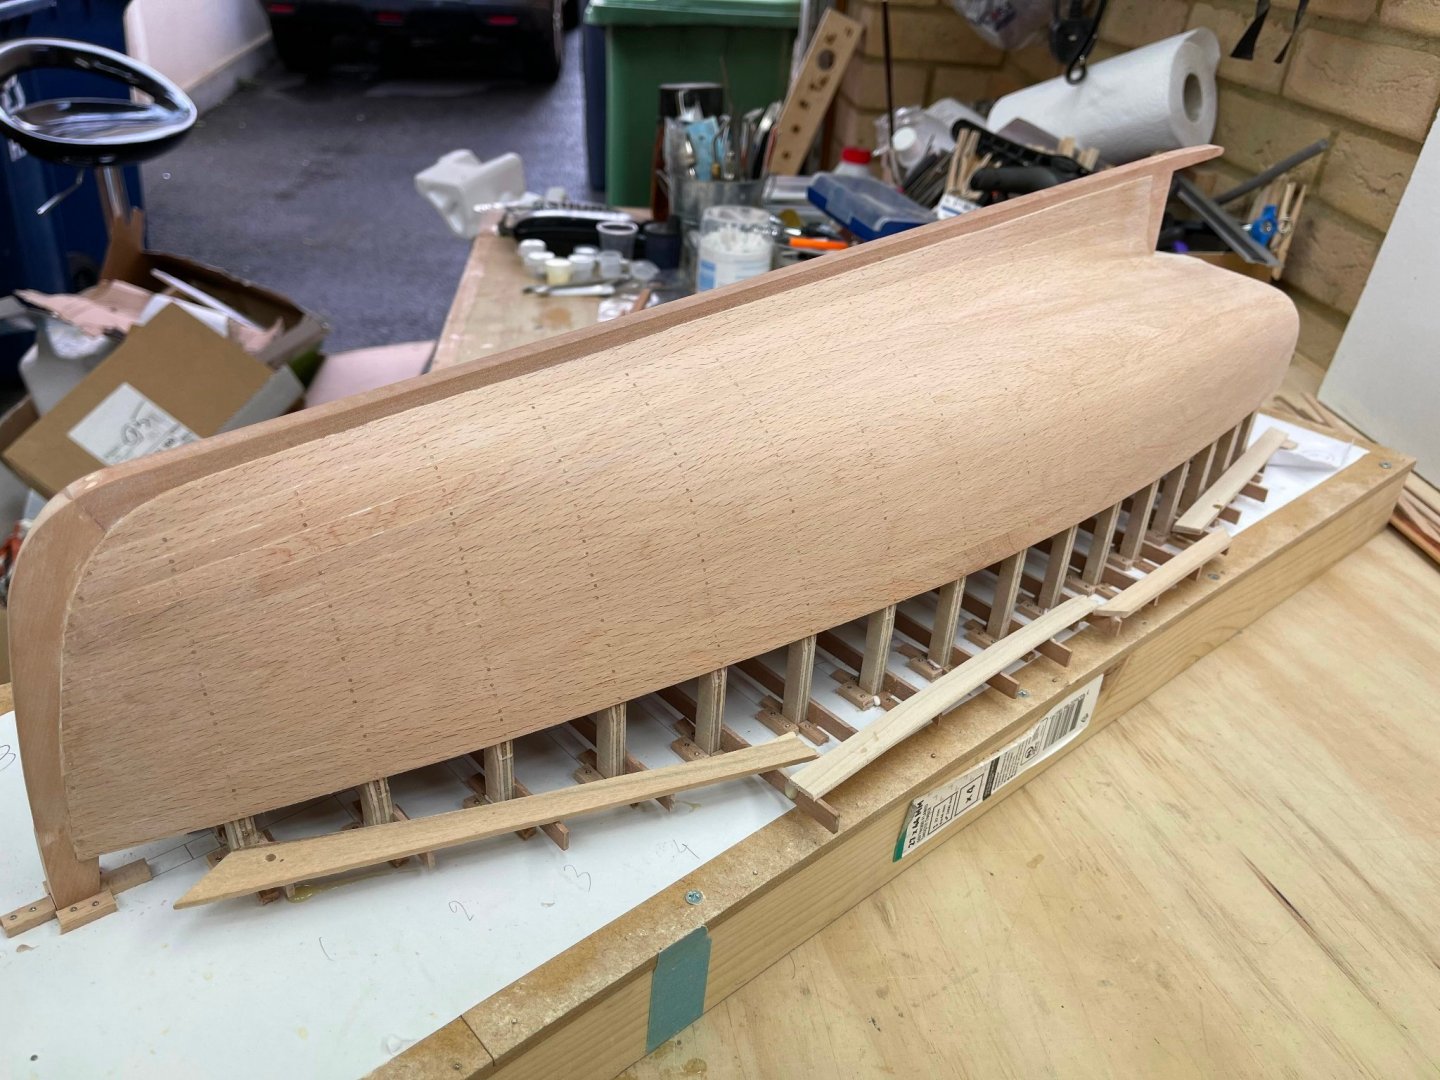
-
Looking good now EG. Time to build it now?
-
Reasonably big job Paul. You ll need to loft the hull somehow, either by hand or CAD. The plans you have are not enough but as this is a simple multichine hull, it might be doable. There is a very recent thread on this. Then to build it, balsa I think is not a good choice and I personally would avoid basswood. But do explore the dark side, scratch building is lots of fun. Have a look on MSW and go for it.
-
I think you are right EG, these ships look elegant but in reality their hulls are fairly simple surfaces and as you have proven can be built in a simplified way. Had not realised till now. Couple of more thoughts The stern line will indeed affect the shape of the surface but it will progressively get flatter the closer to the bow it gets, I see a ripple in your surface near the stern, I think this would need some looking into prior to building-something is not quite right. Another thing, Rhino can do this, probably faster and better, as you have access to it you could have a play with it. I think you ll like it a lot!
-
I now get it EG Essentially, you created the sheer and chine from 2 views. The keel and stern are in the midline. You created the last needed line which is the stern. Then, the software created the 2 surfaces bound within these lines. The issue I see is that these surfaces are bound to be flat, since more lines (frames) are needed to determine how convex or concave the surface will be along its length. The frames that this hull will produce will have 2 straight parts meeting at the chine, with no curvature at all. Still, a complete hull produced relatively fast!
-
This is what it’s like to be a newbie
vaddoc replied to Laggard's topic in Masting, rigging and sails
You just reminded me Justin, putting my finished model with full sails set, out in the open on top of a tall bin, to photograph in the sunshine. Then the wind blew... -
This is what it’s like to be a newbie
vaddoc replied to Laggard's topic in Masting, rigging and sails
Not to worry. Using by mistake a plank that took 3 hours to make as scrap wood or messing up the paint job of a large hull. All part of the fun. -
I am a bit late to the party but Happy Birthday Bob! You seem to be having a cracking 7th decade of life, some of the cracking being your ribs😁. Don't give up on the gaff rigging though, indeed many ropes going everywhere but they do make sense eventually. I went through the same journey with the Deben. Best wishes Vaddoc
-
I had an interesting message from @Jaager, so I ll add a few more thoughts. It seems that Beech which is plentiful this side of the pond, is not as easy to find or as inexpensive in America. I was not aware of this. Now, methylated spirits is ethanol with nasty chemicals added so it cannot be drunk. Jaager suggested that Shellac could be diluted in isopropyl alcohol, this never crossed my mind. For a sealer, I still prefer water based products. As a finish though, it worth a try to see how beech wood likes Shellac. IPA should be more pleasant to work with. Tung oil, as a finish, needs initially to be diluted with mineral spirits. However, I only use it to change the colour of the wood so no need to dilute. In regards to sealing the wood prior to staining, my research so far shows that wood conditioners, recommended prior to staining difficult woods, are essentially varnishes or some type of sealers to close the very large open pores and prevent blotchiness. Indeed, my results on beech were impressive-sealing the wood prior to staining works well. I ll get some shellac and see how this works.
-
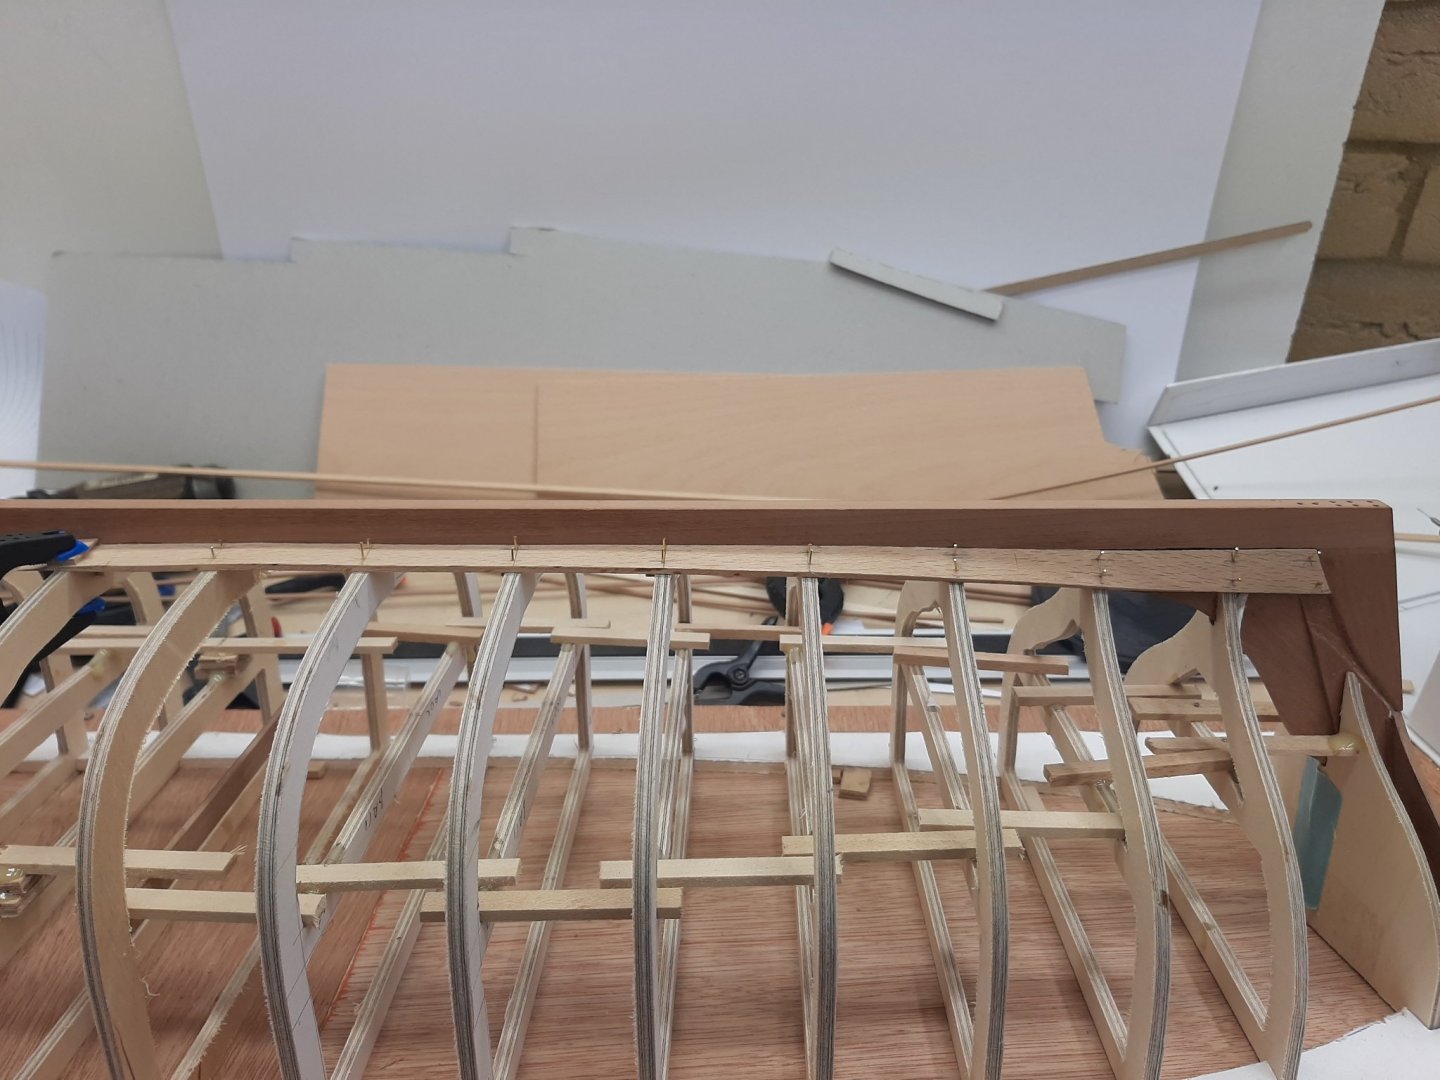
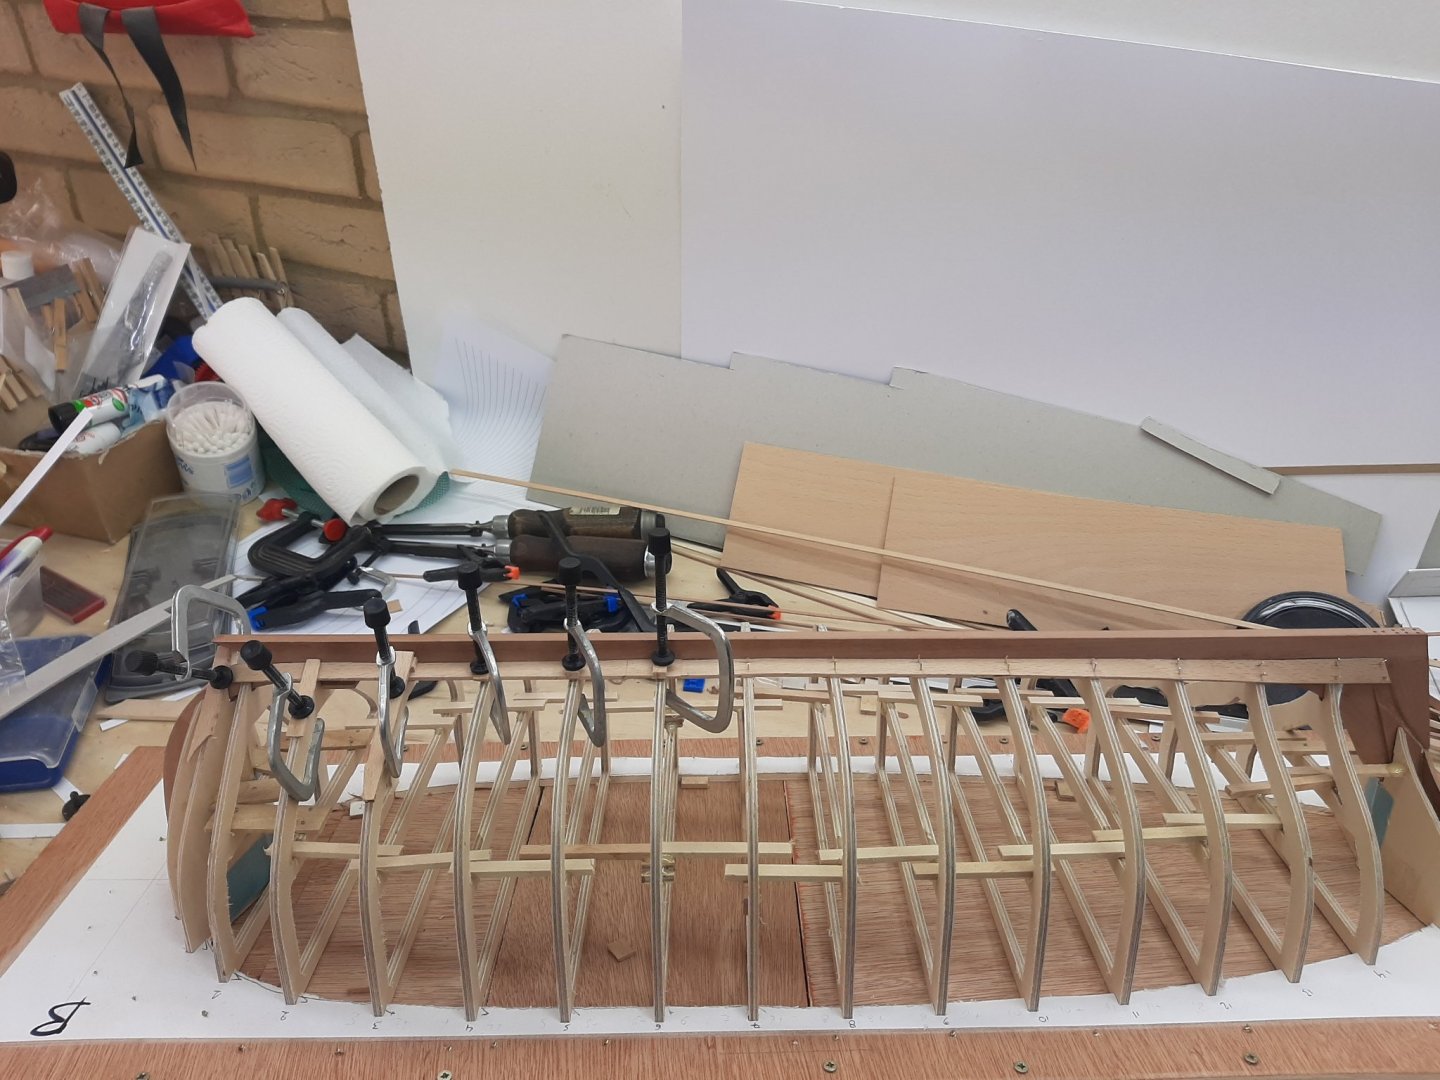
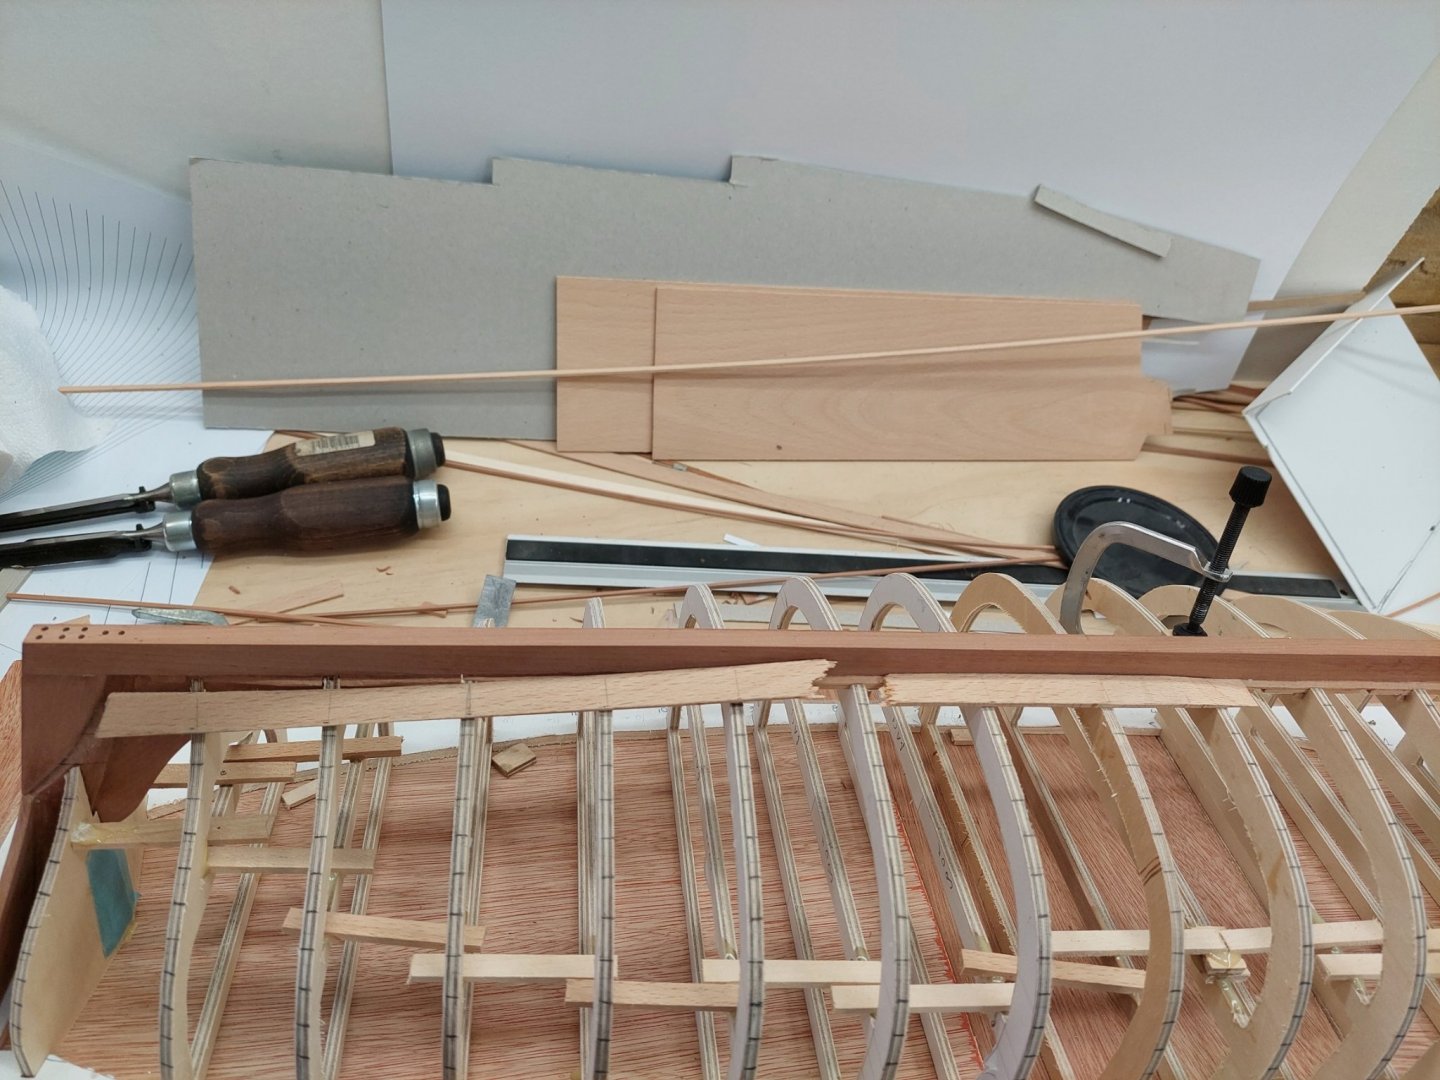
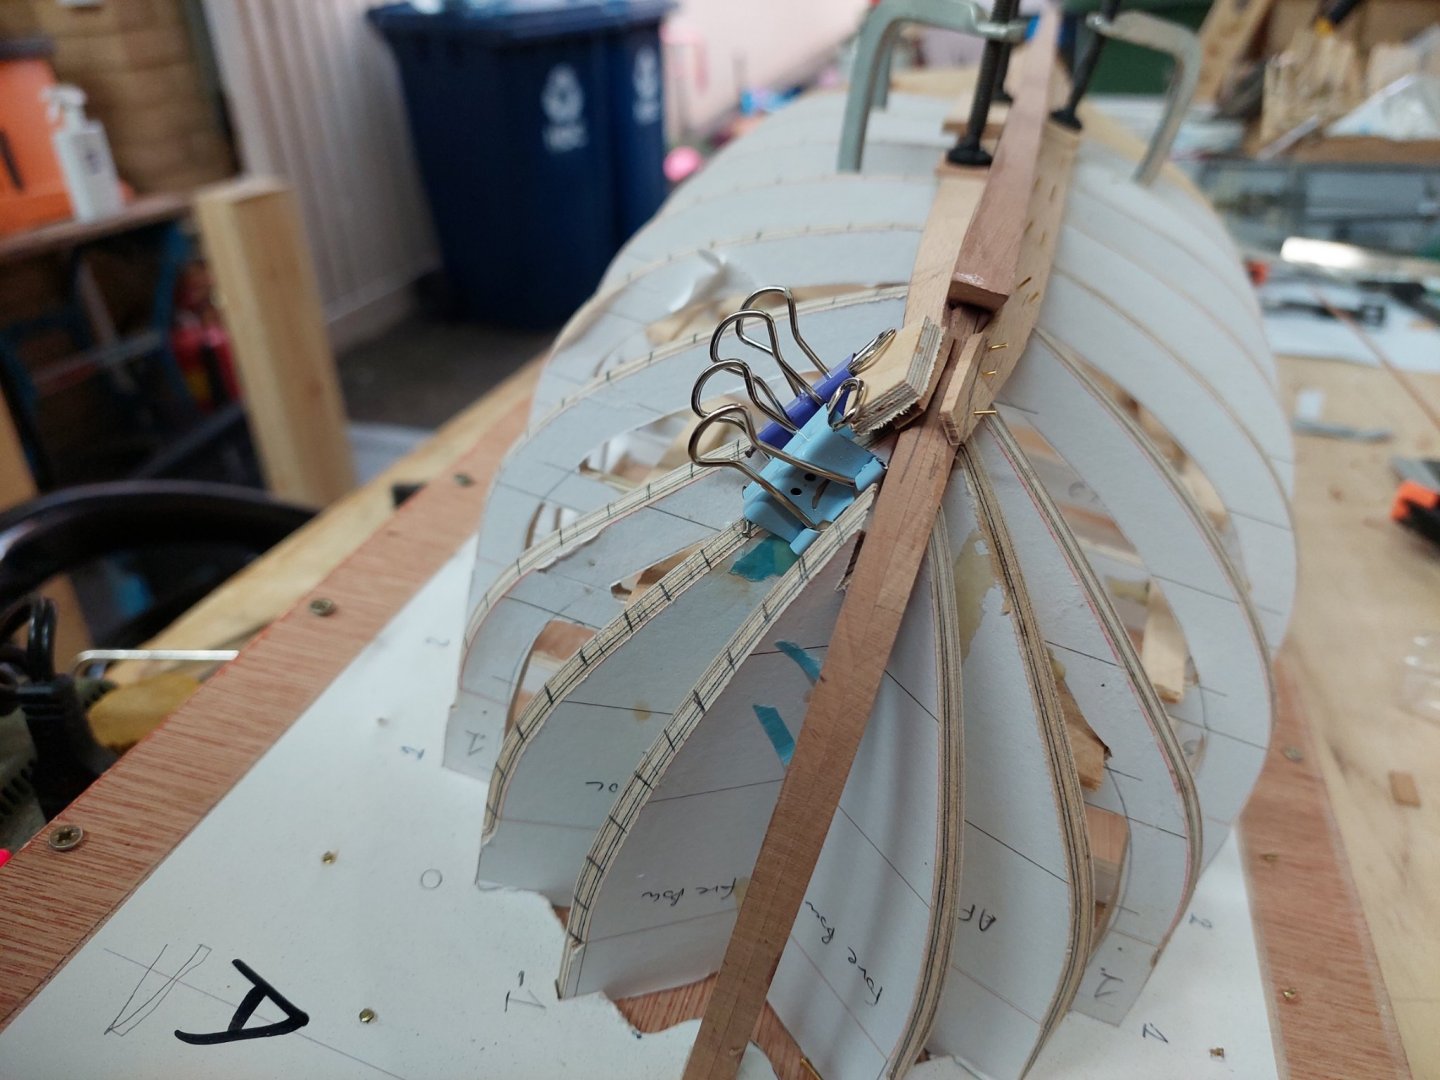
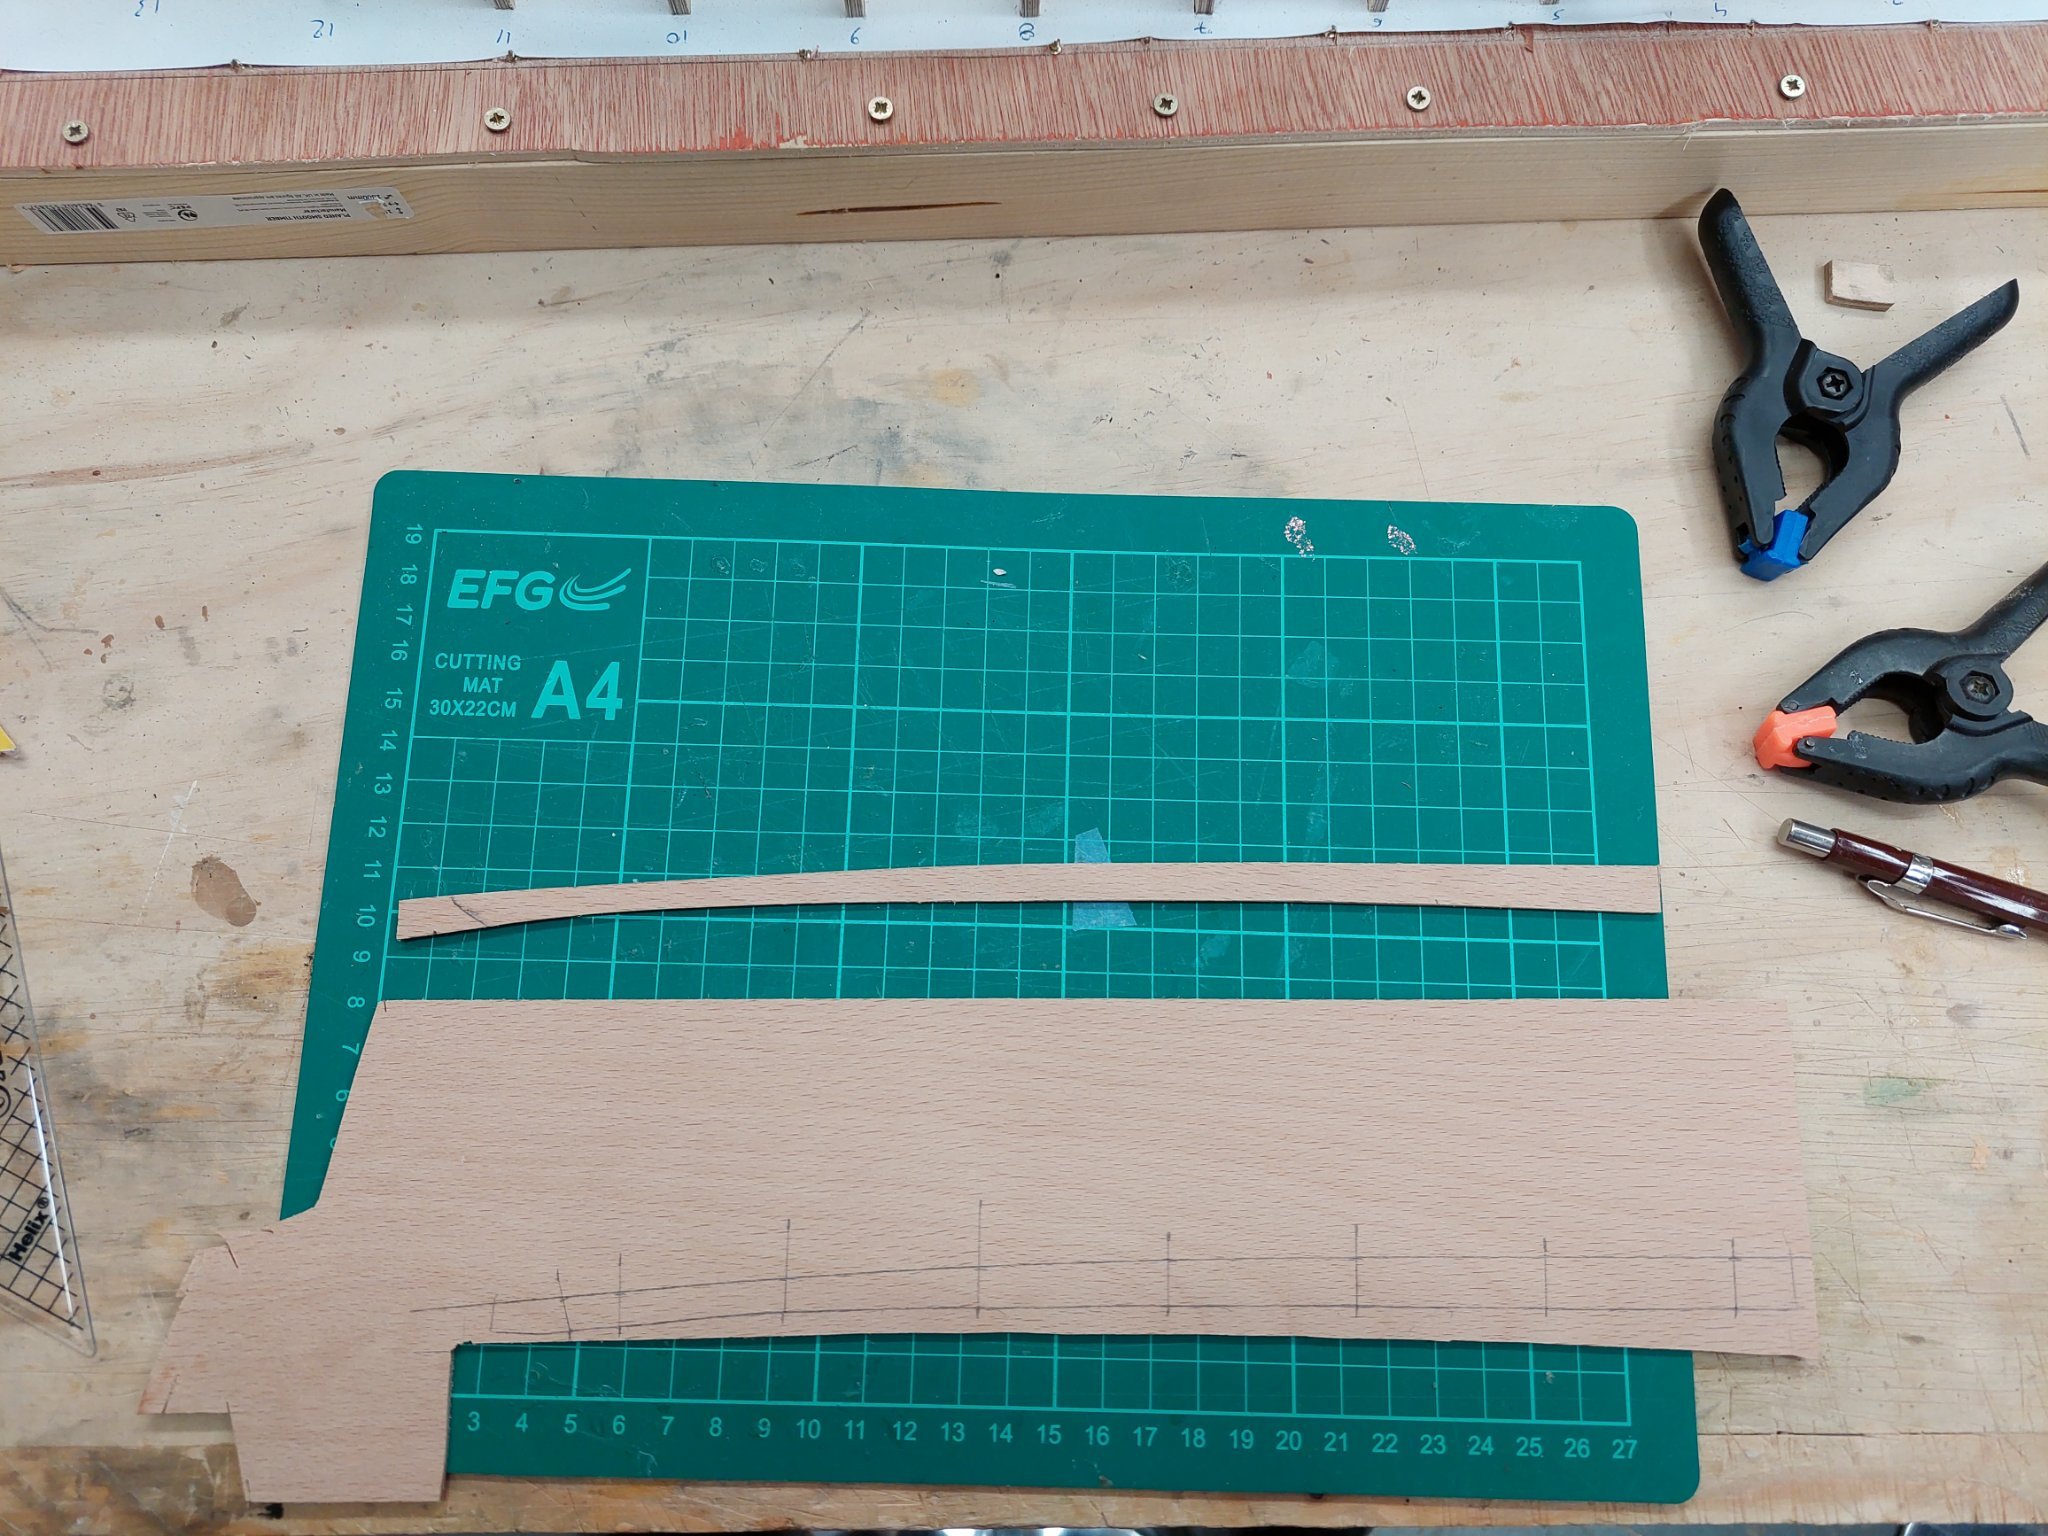
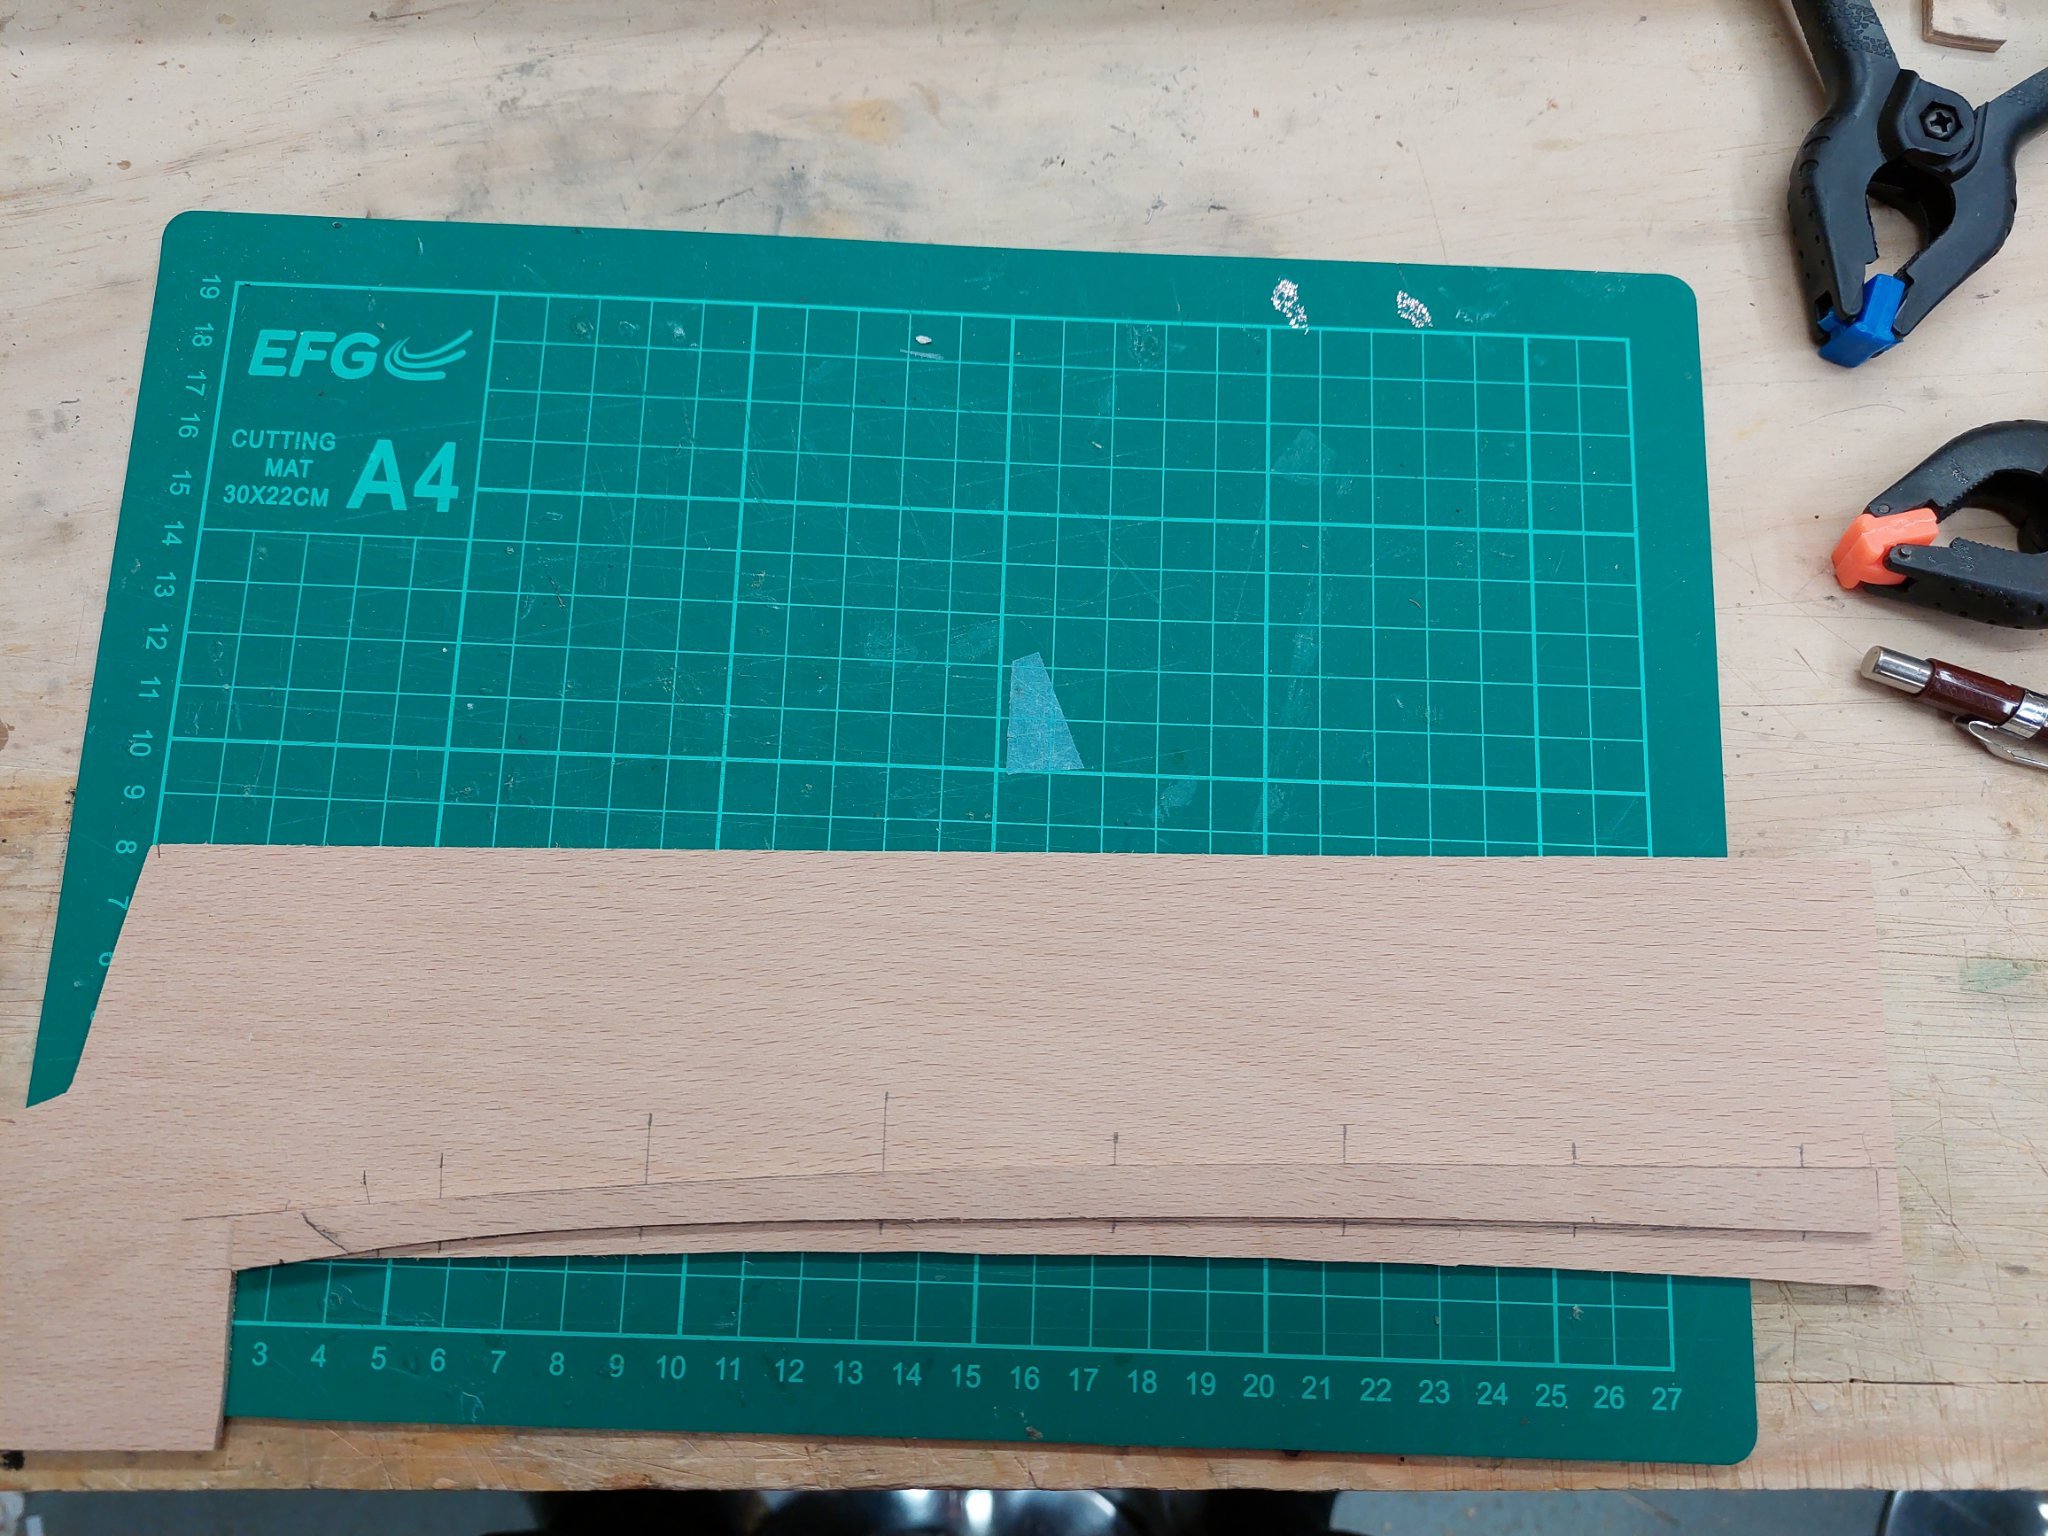
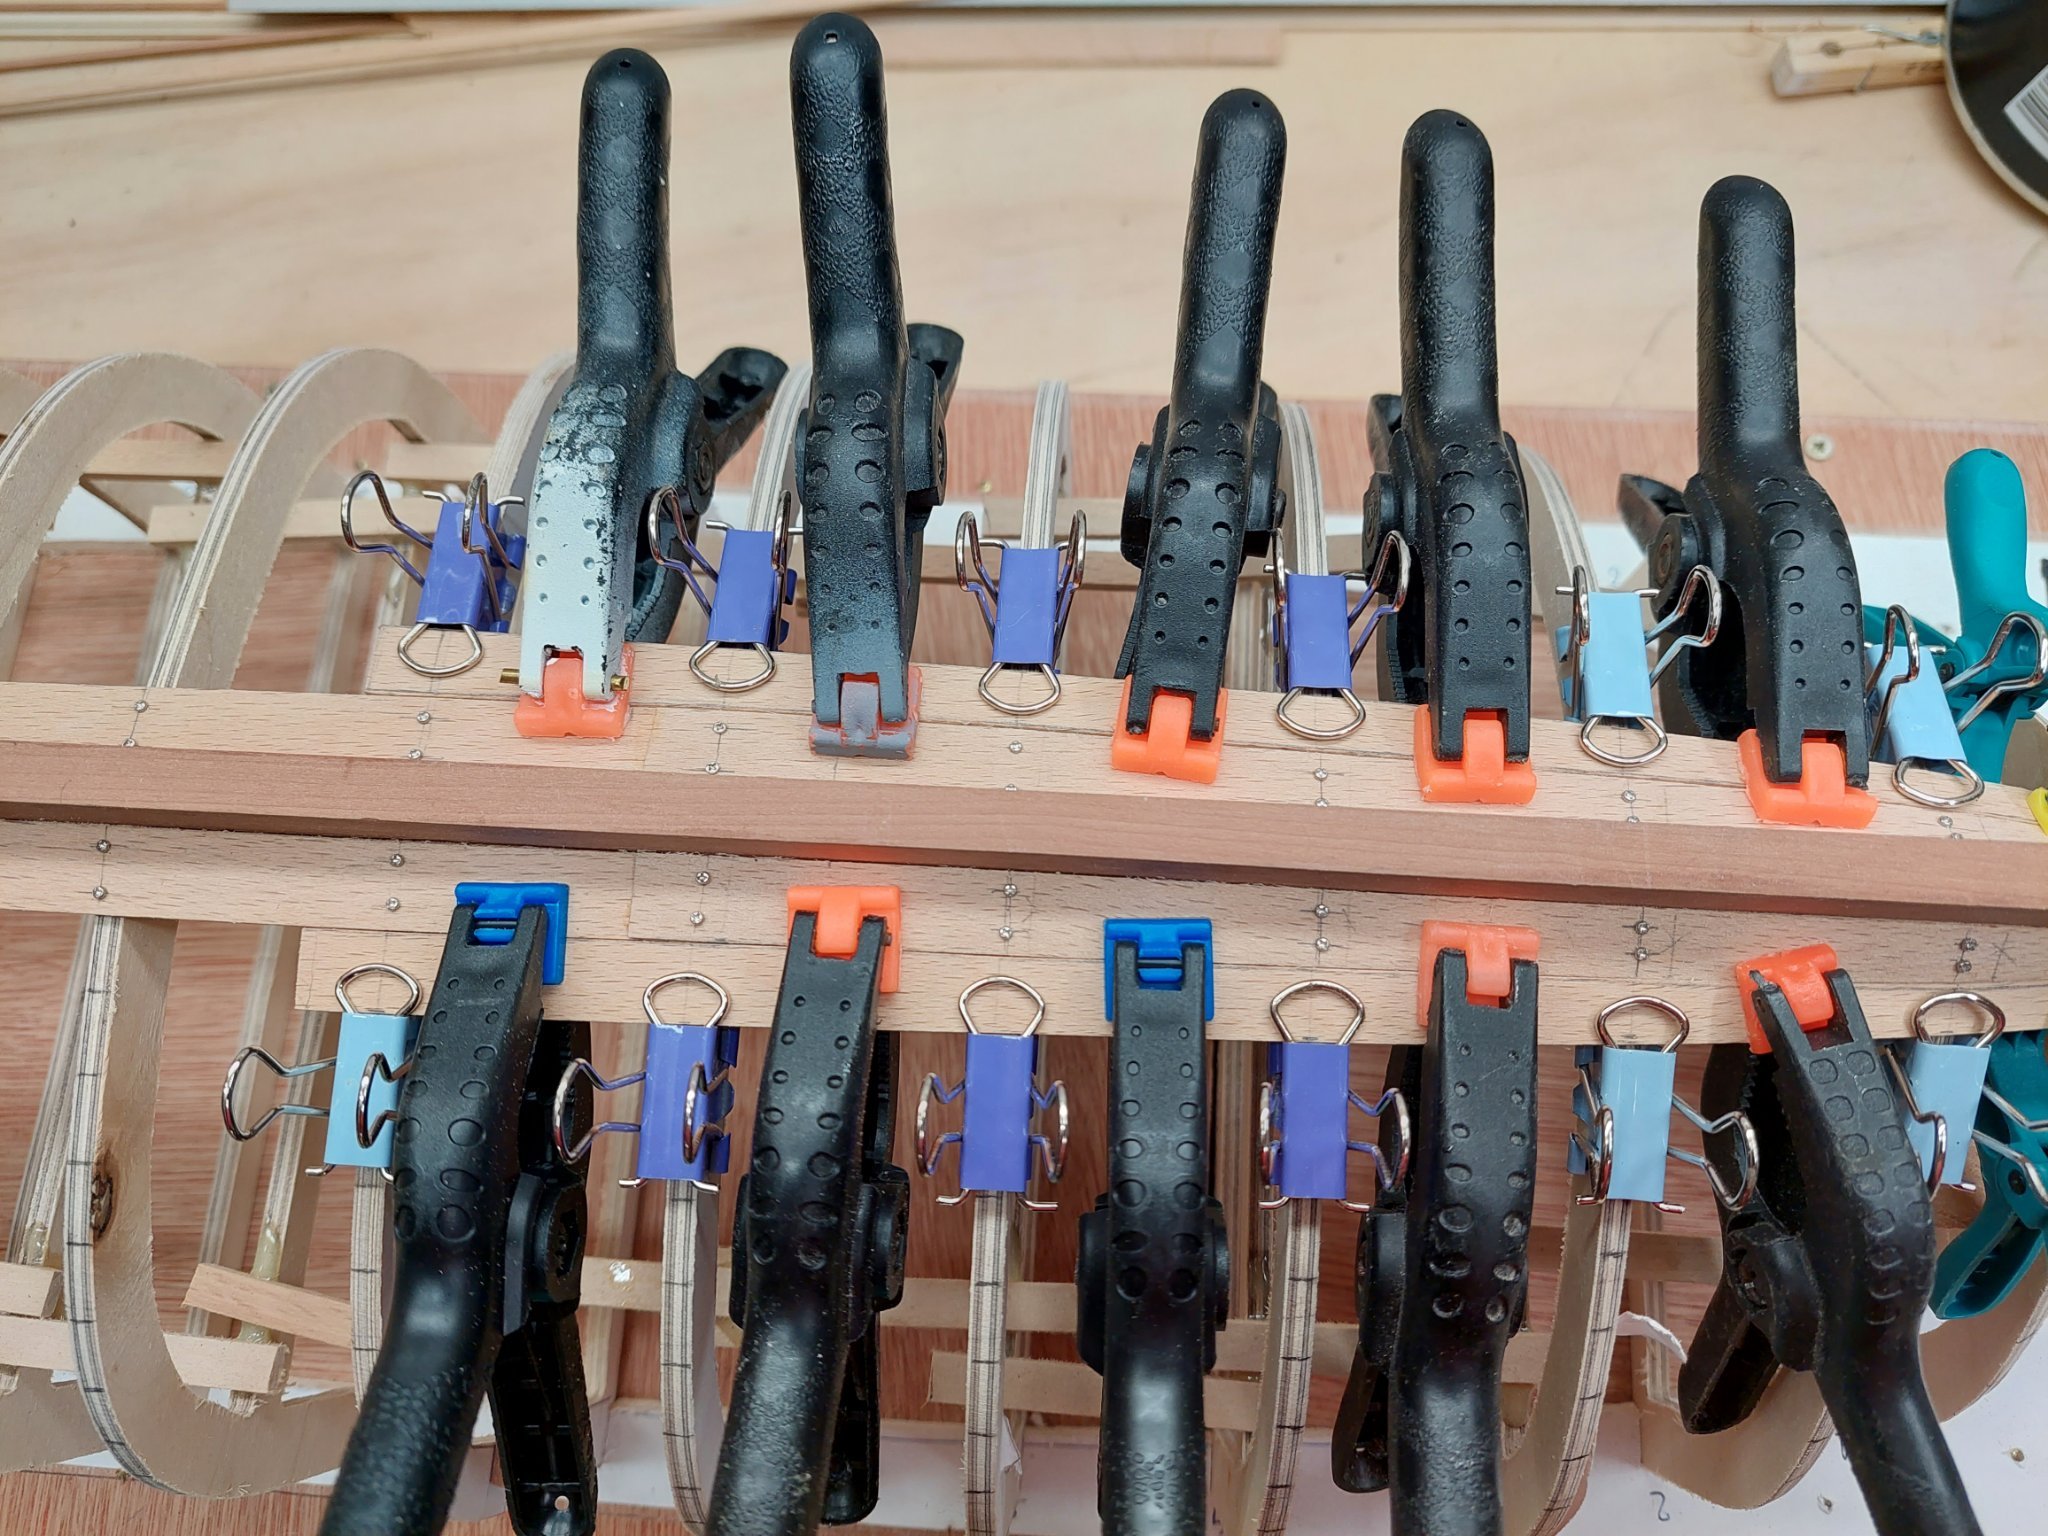
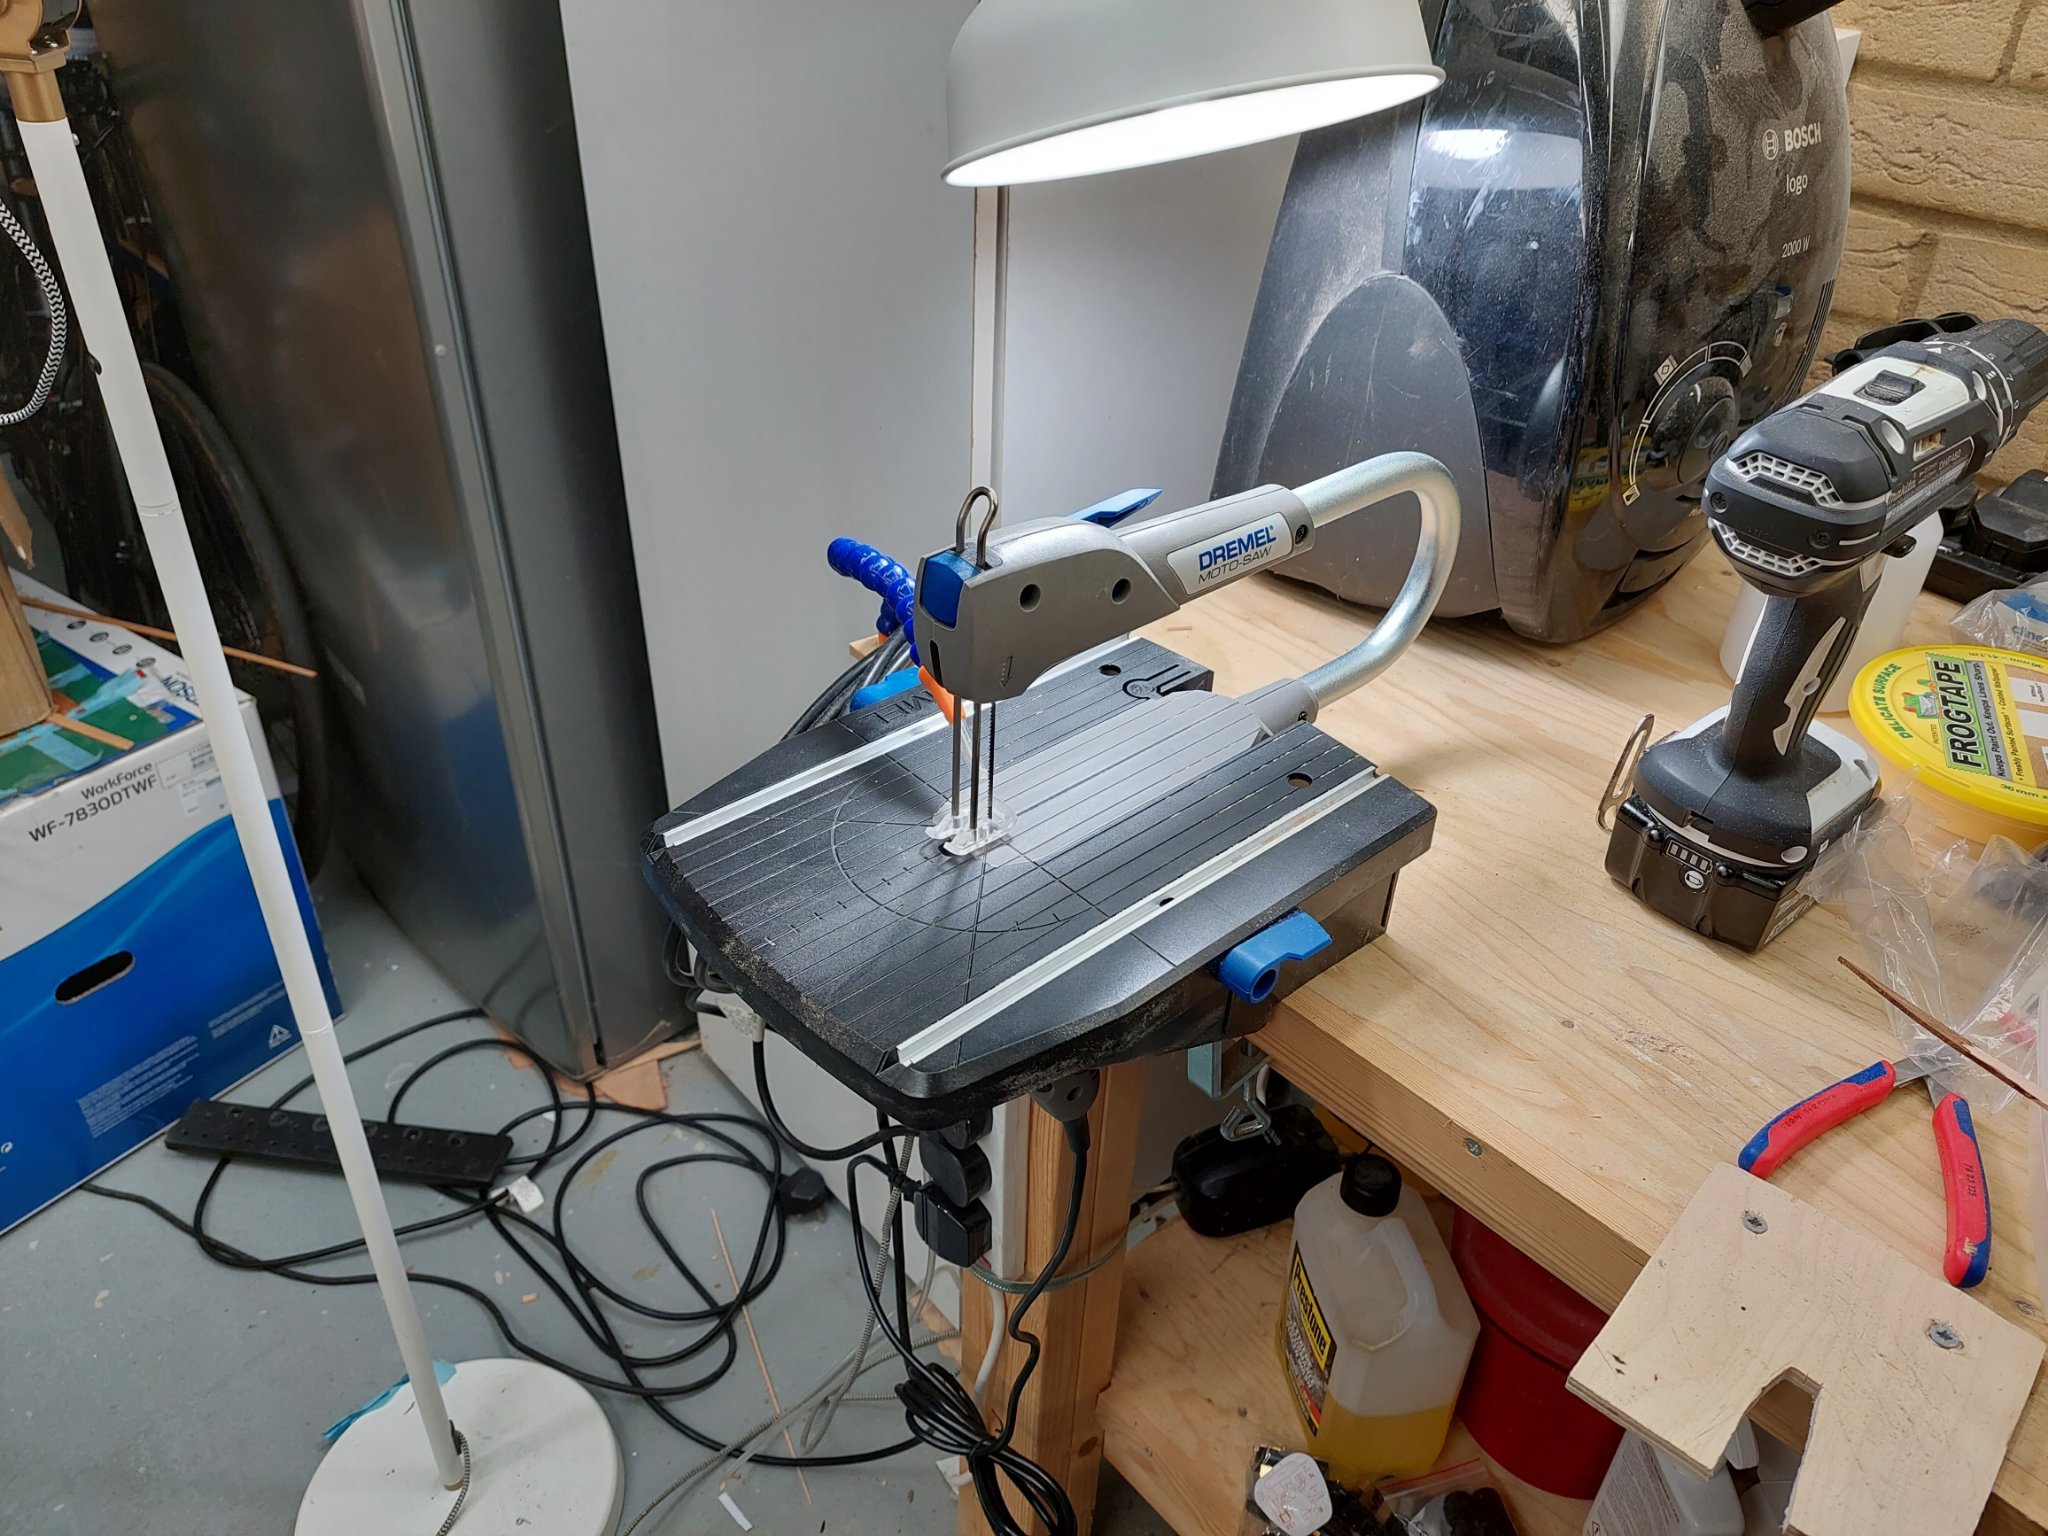
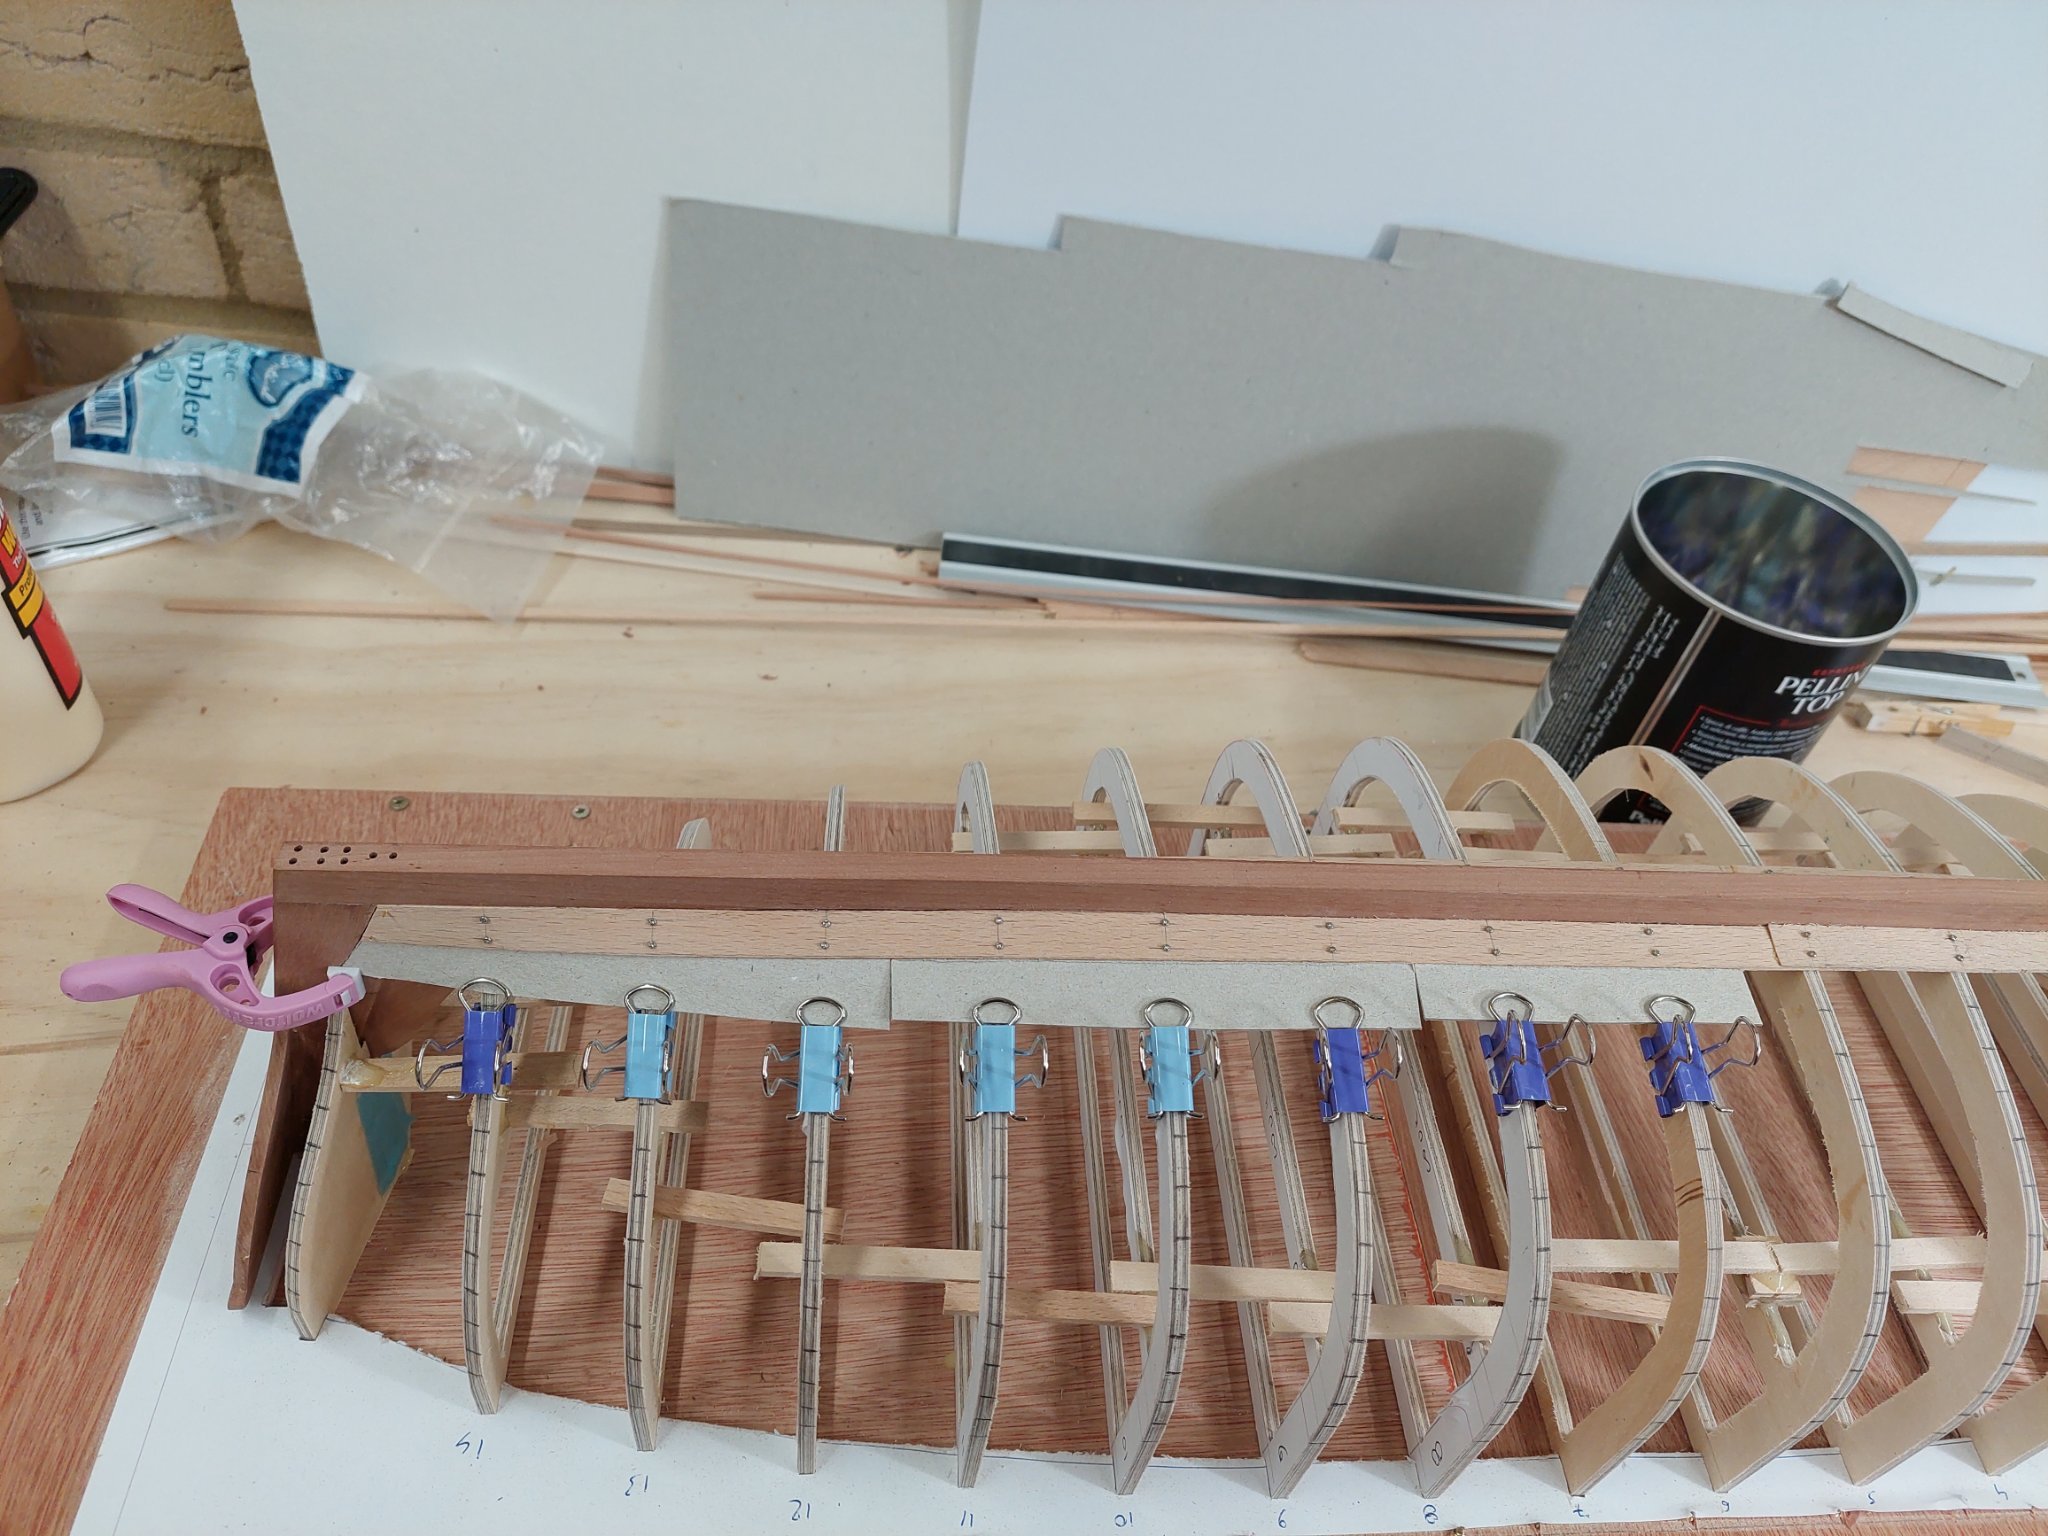
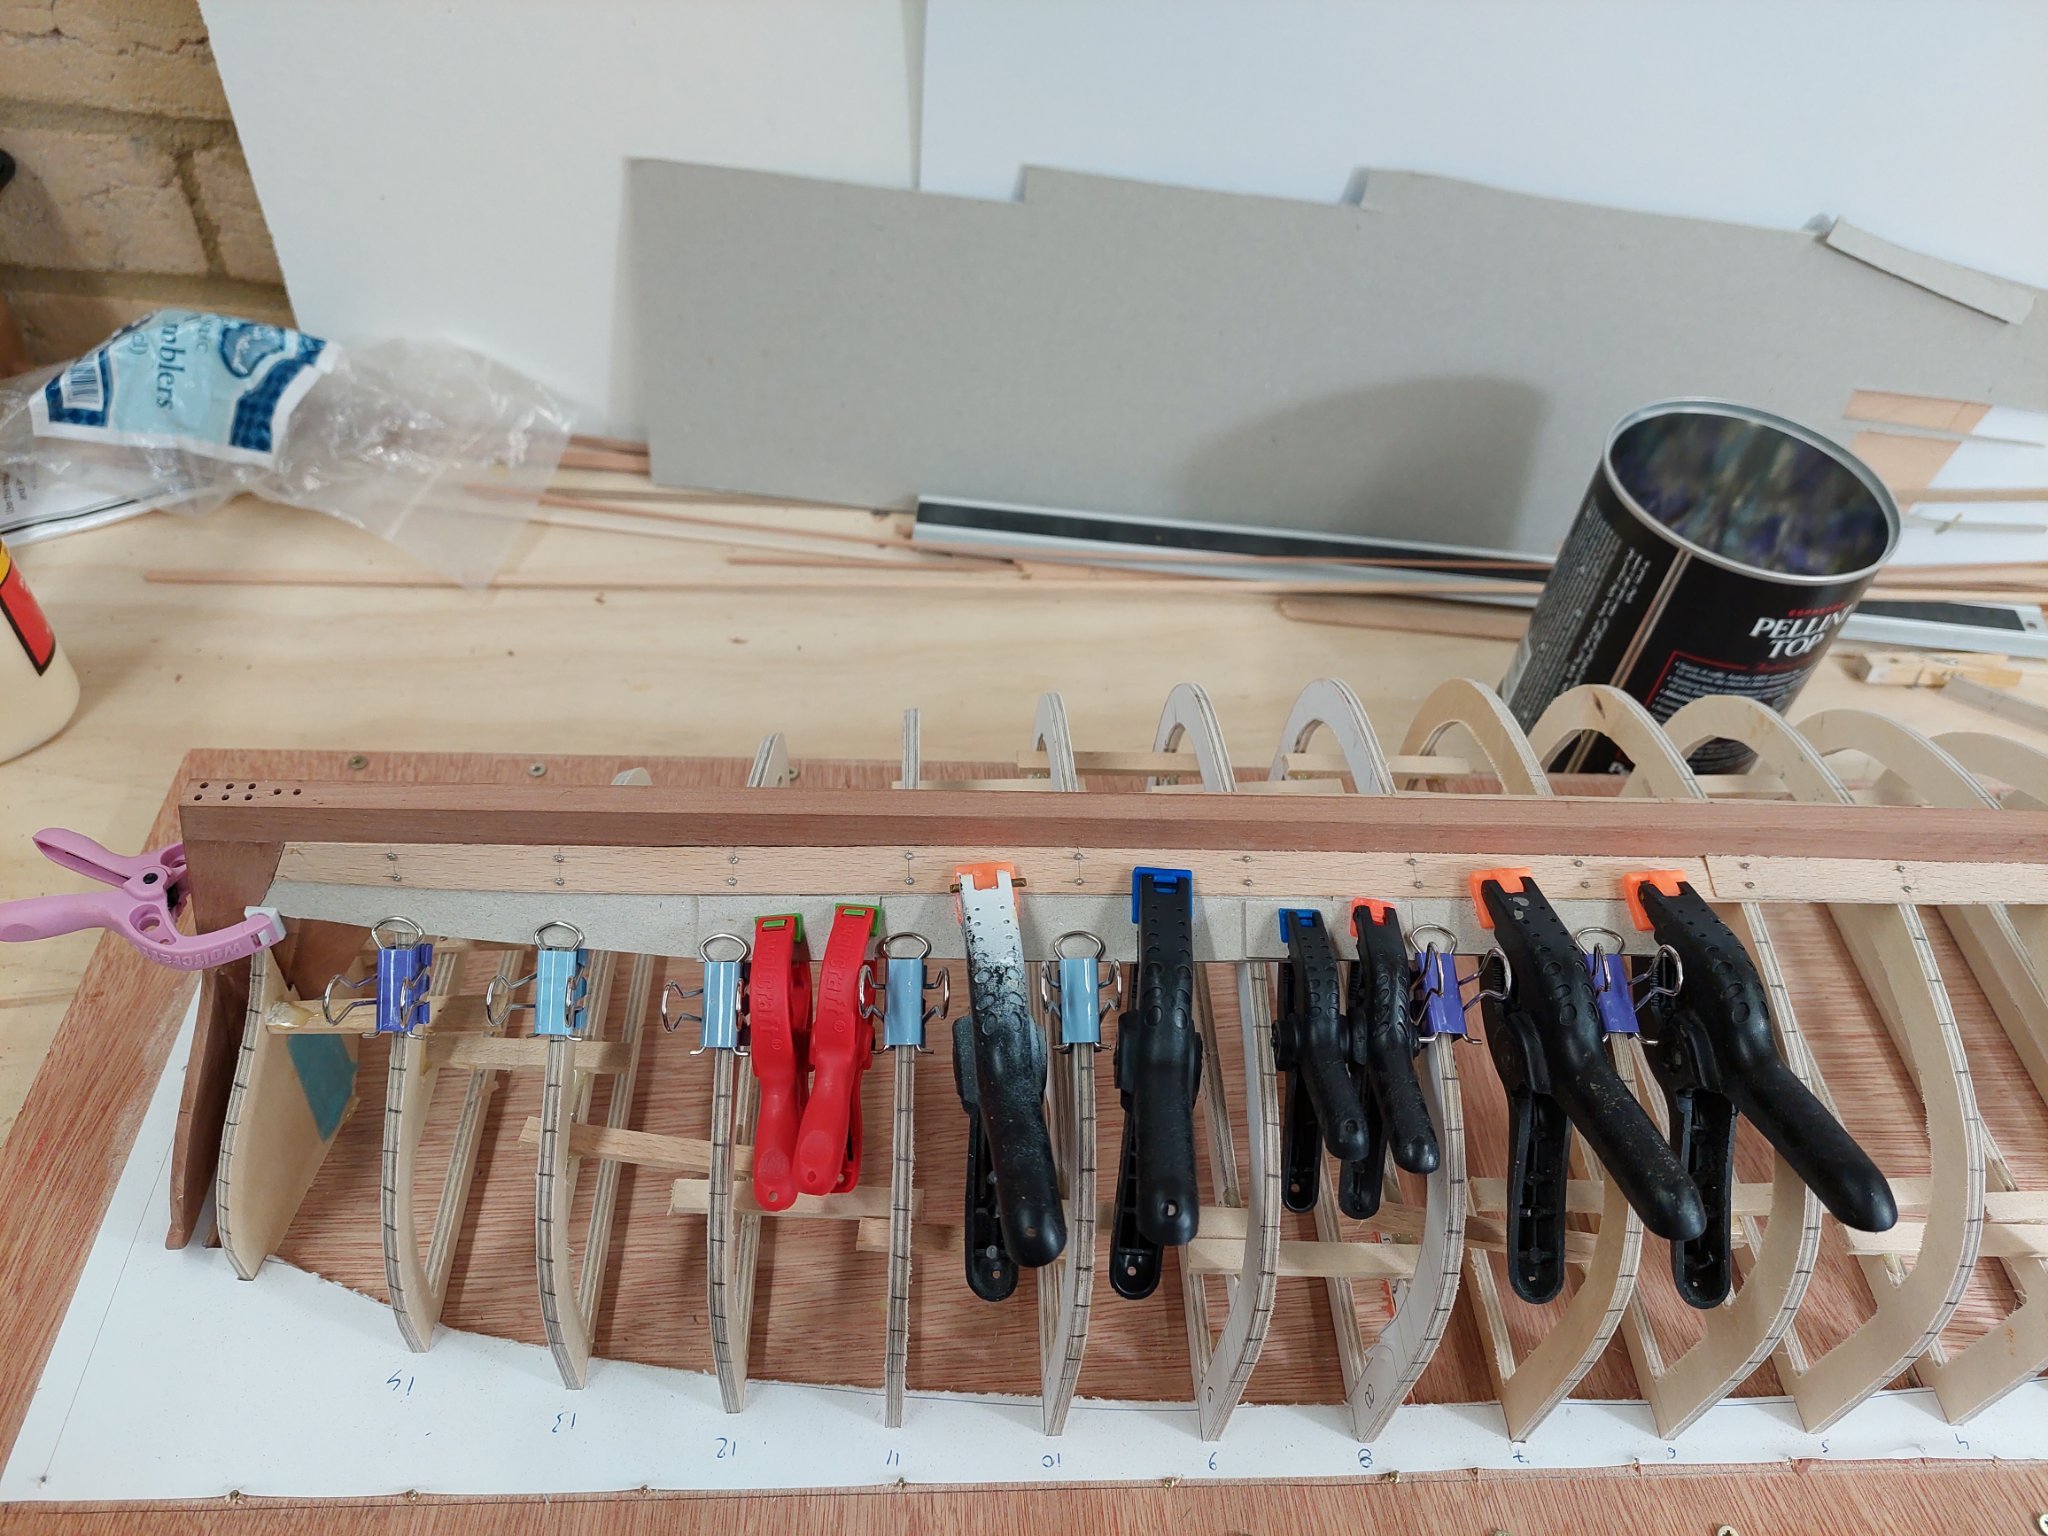
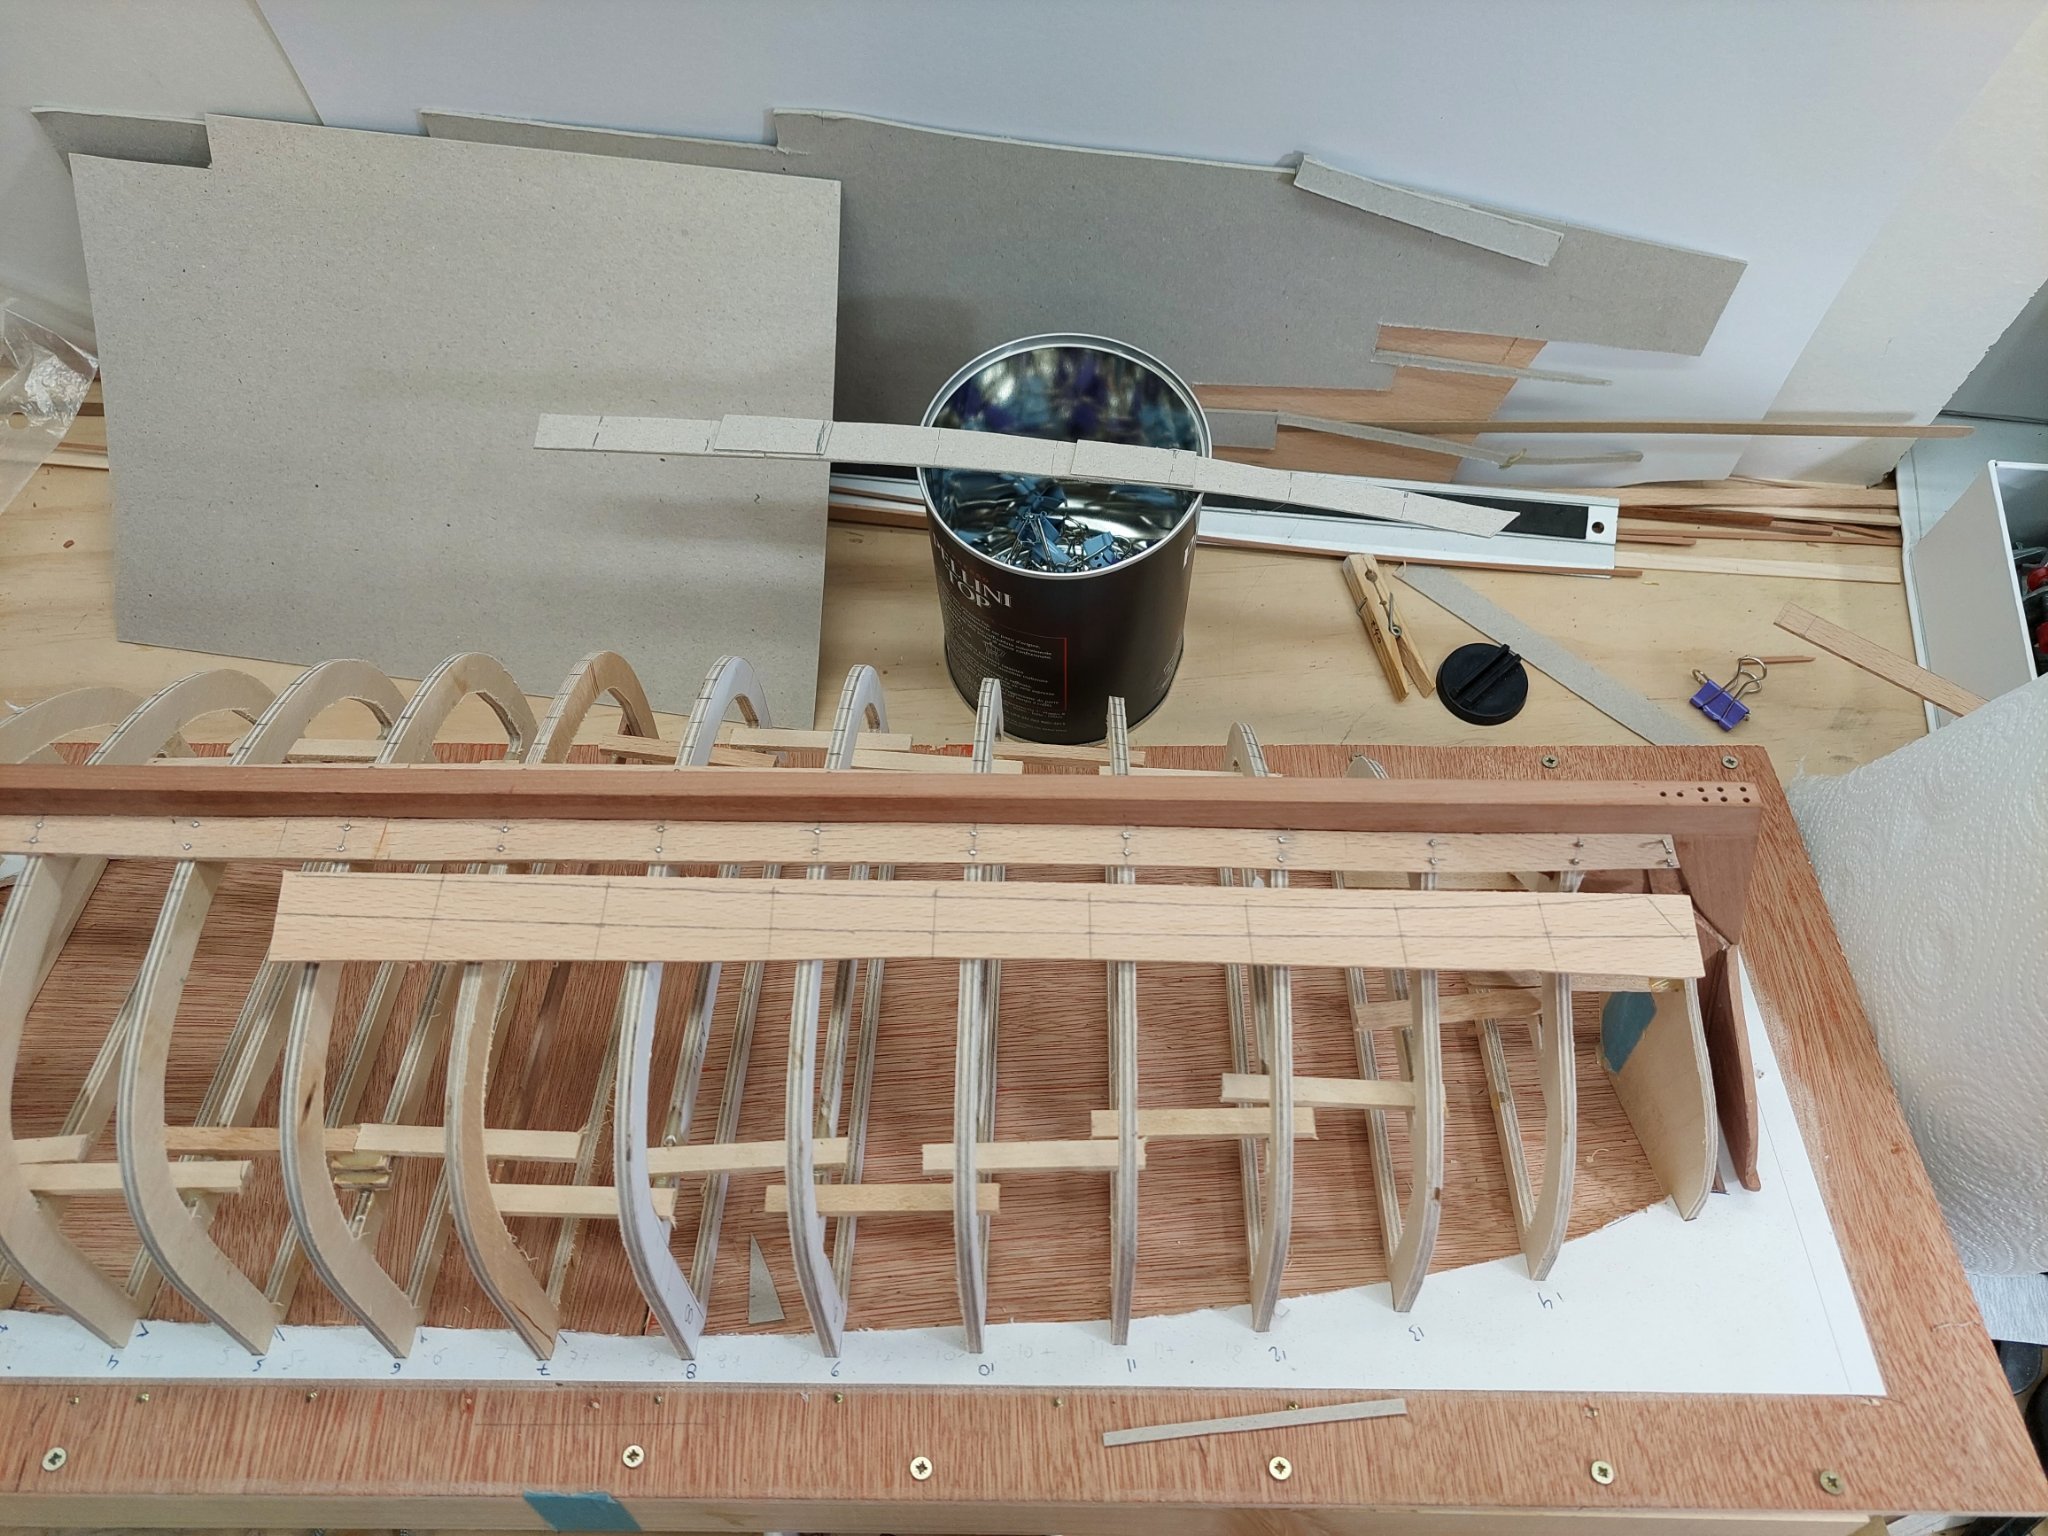
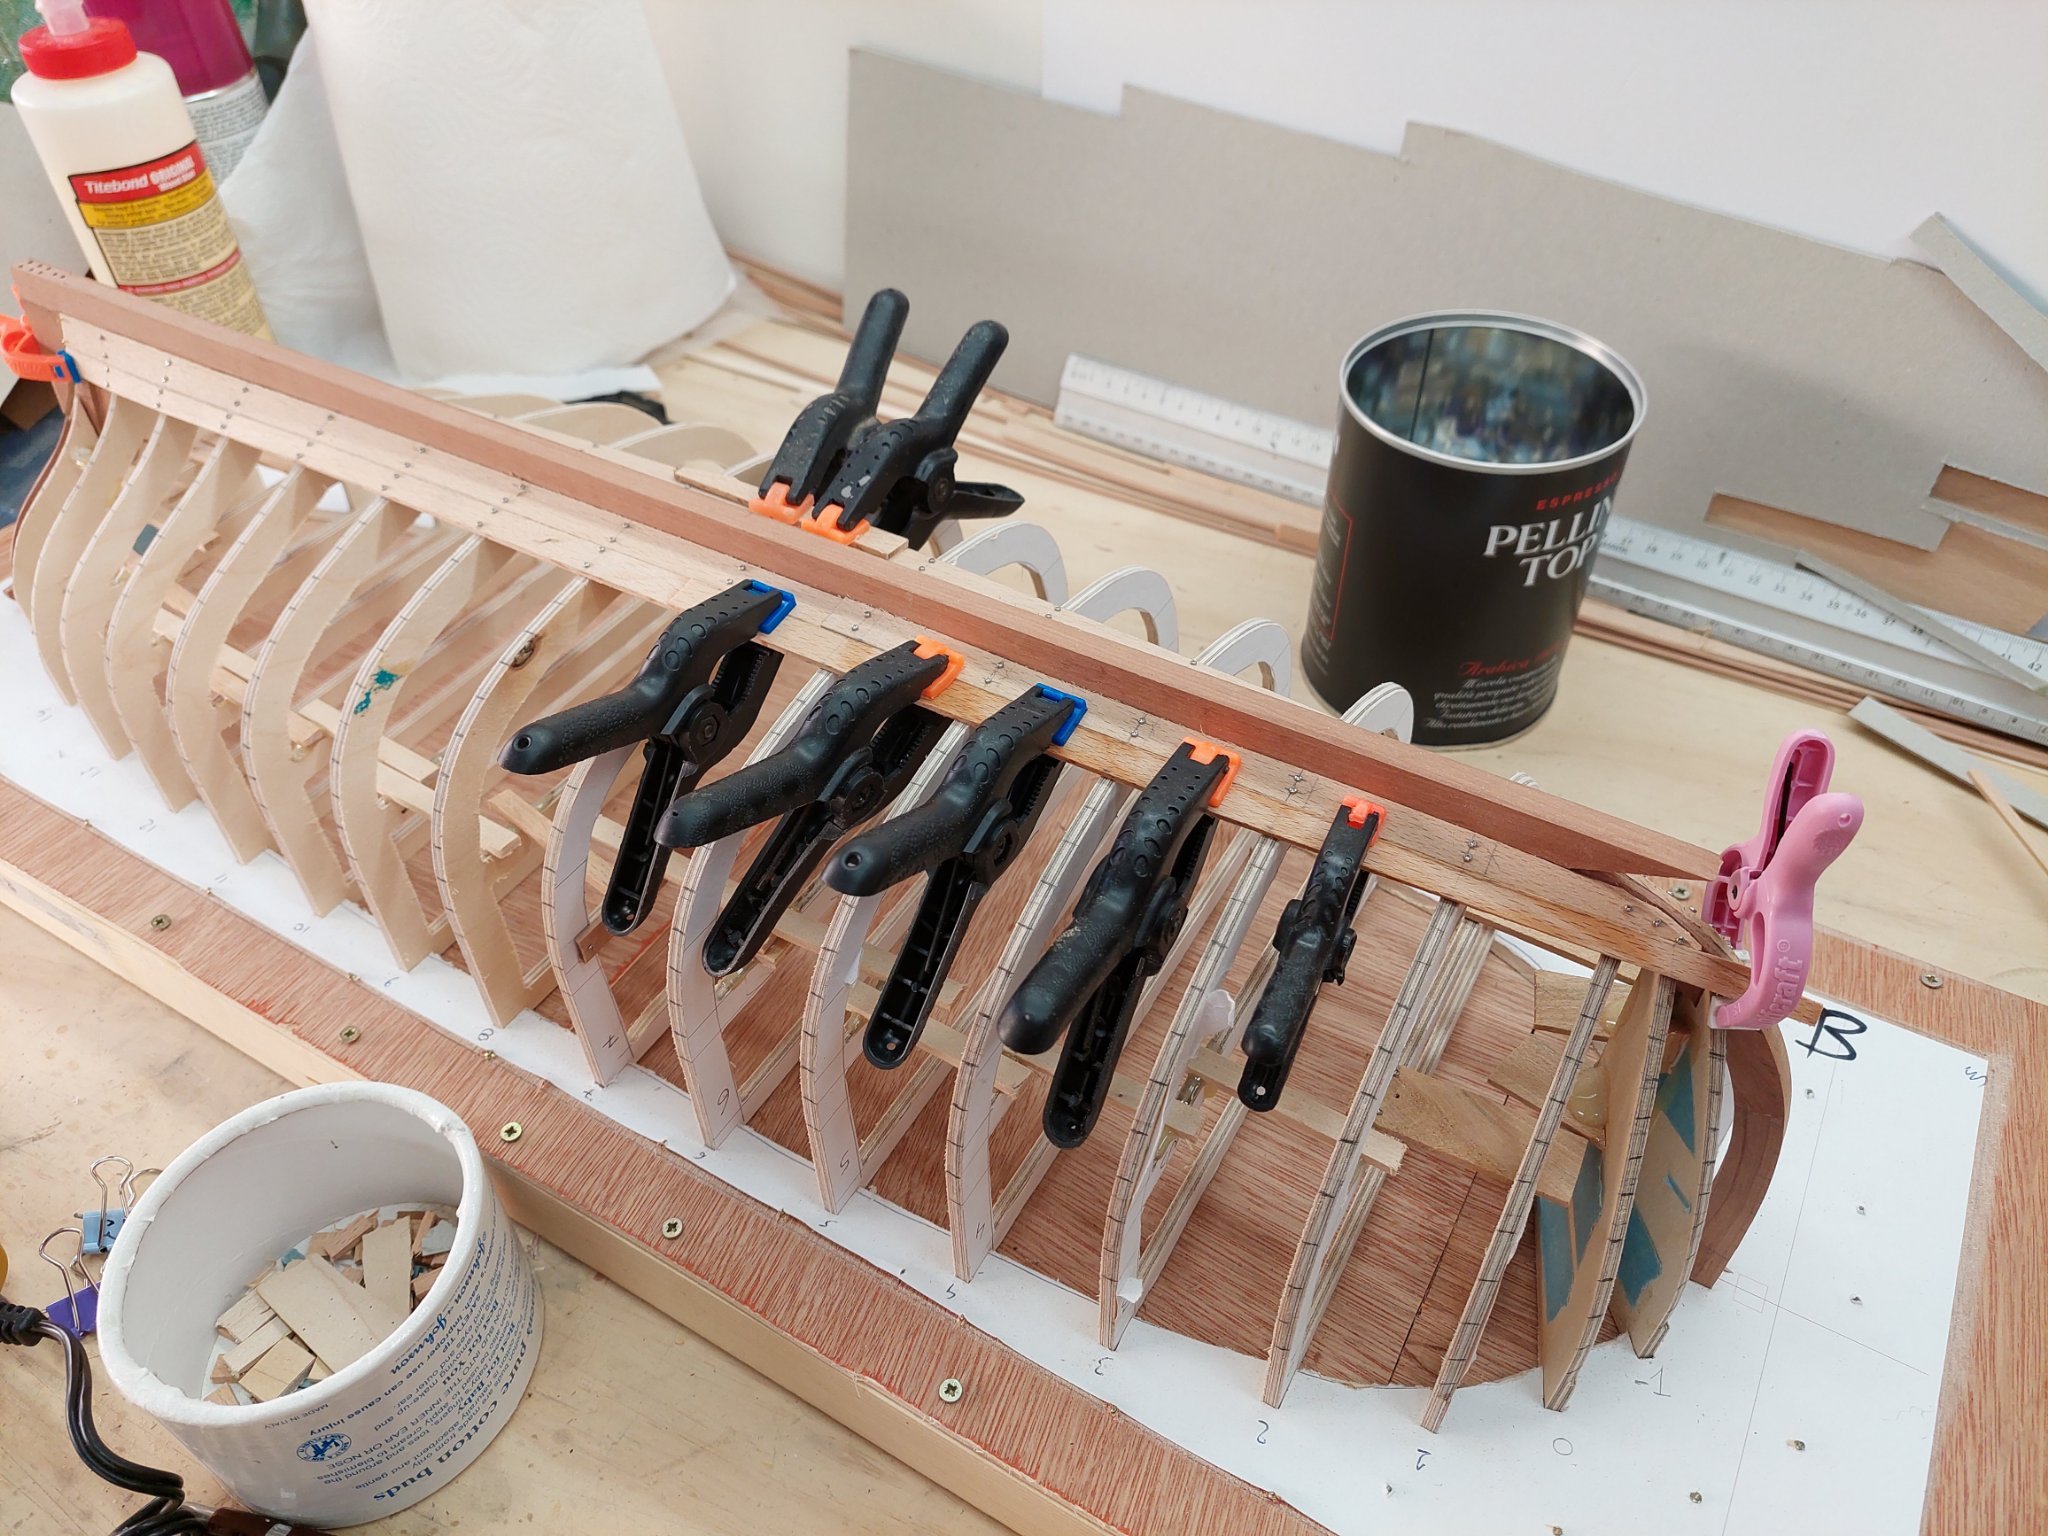
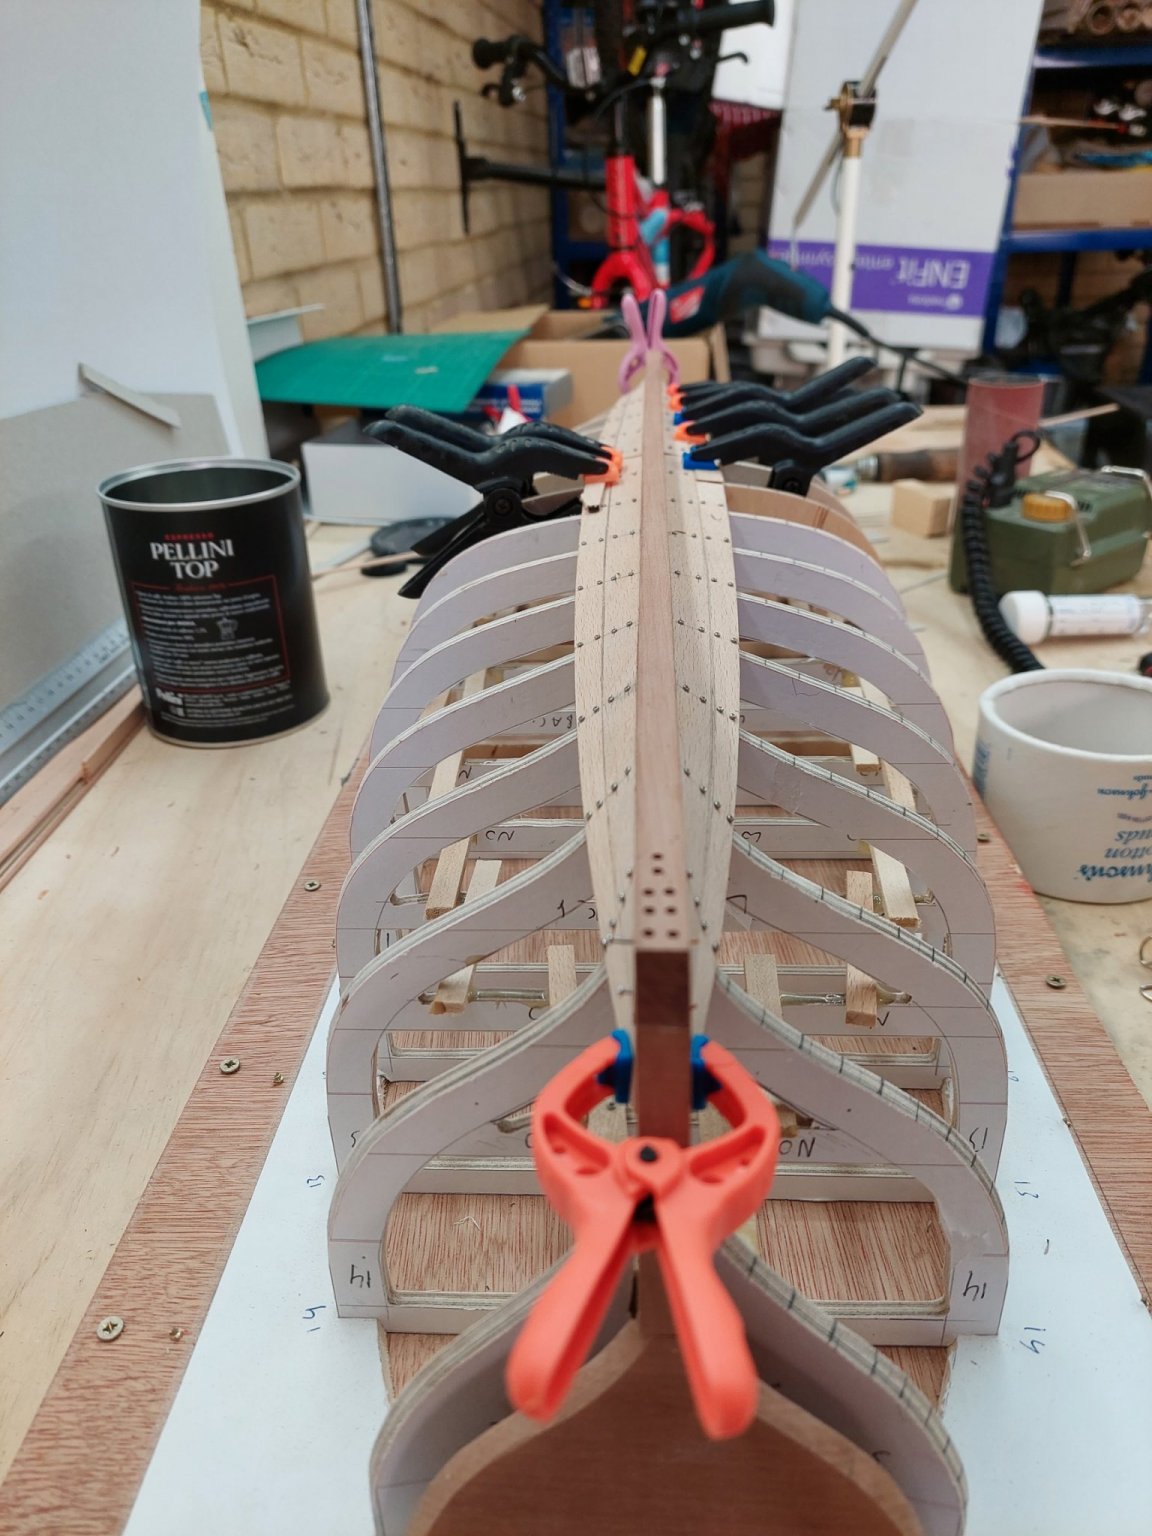
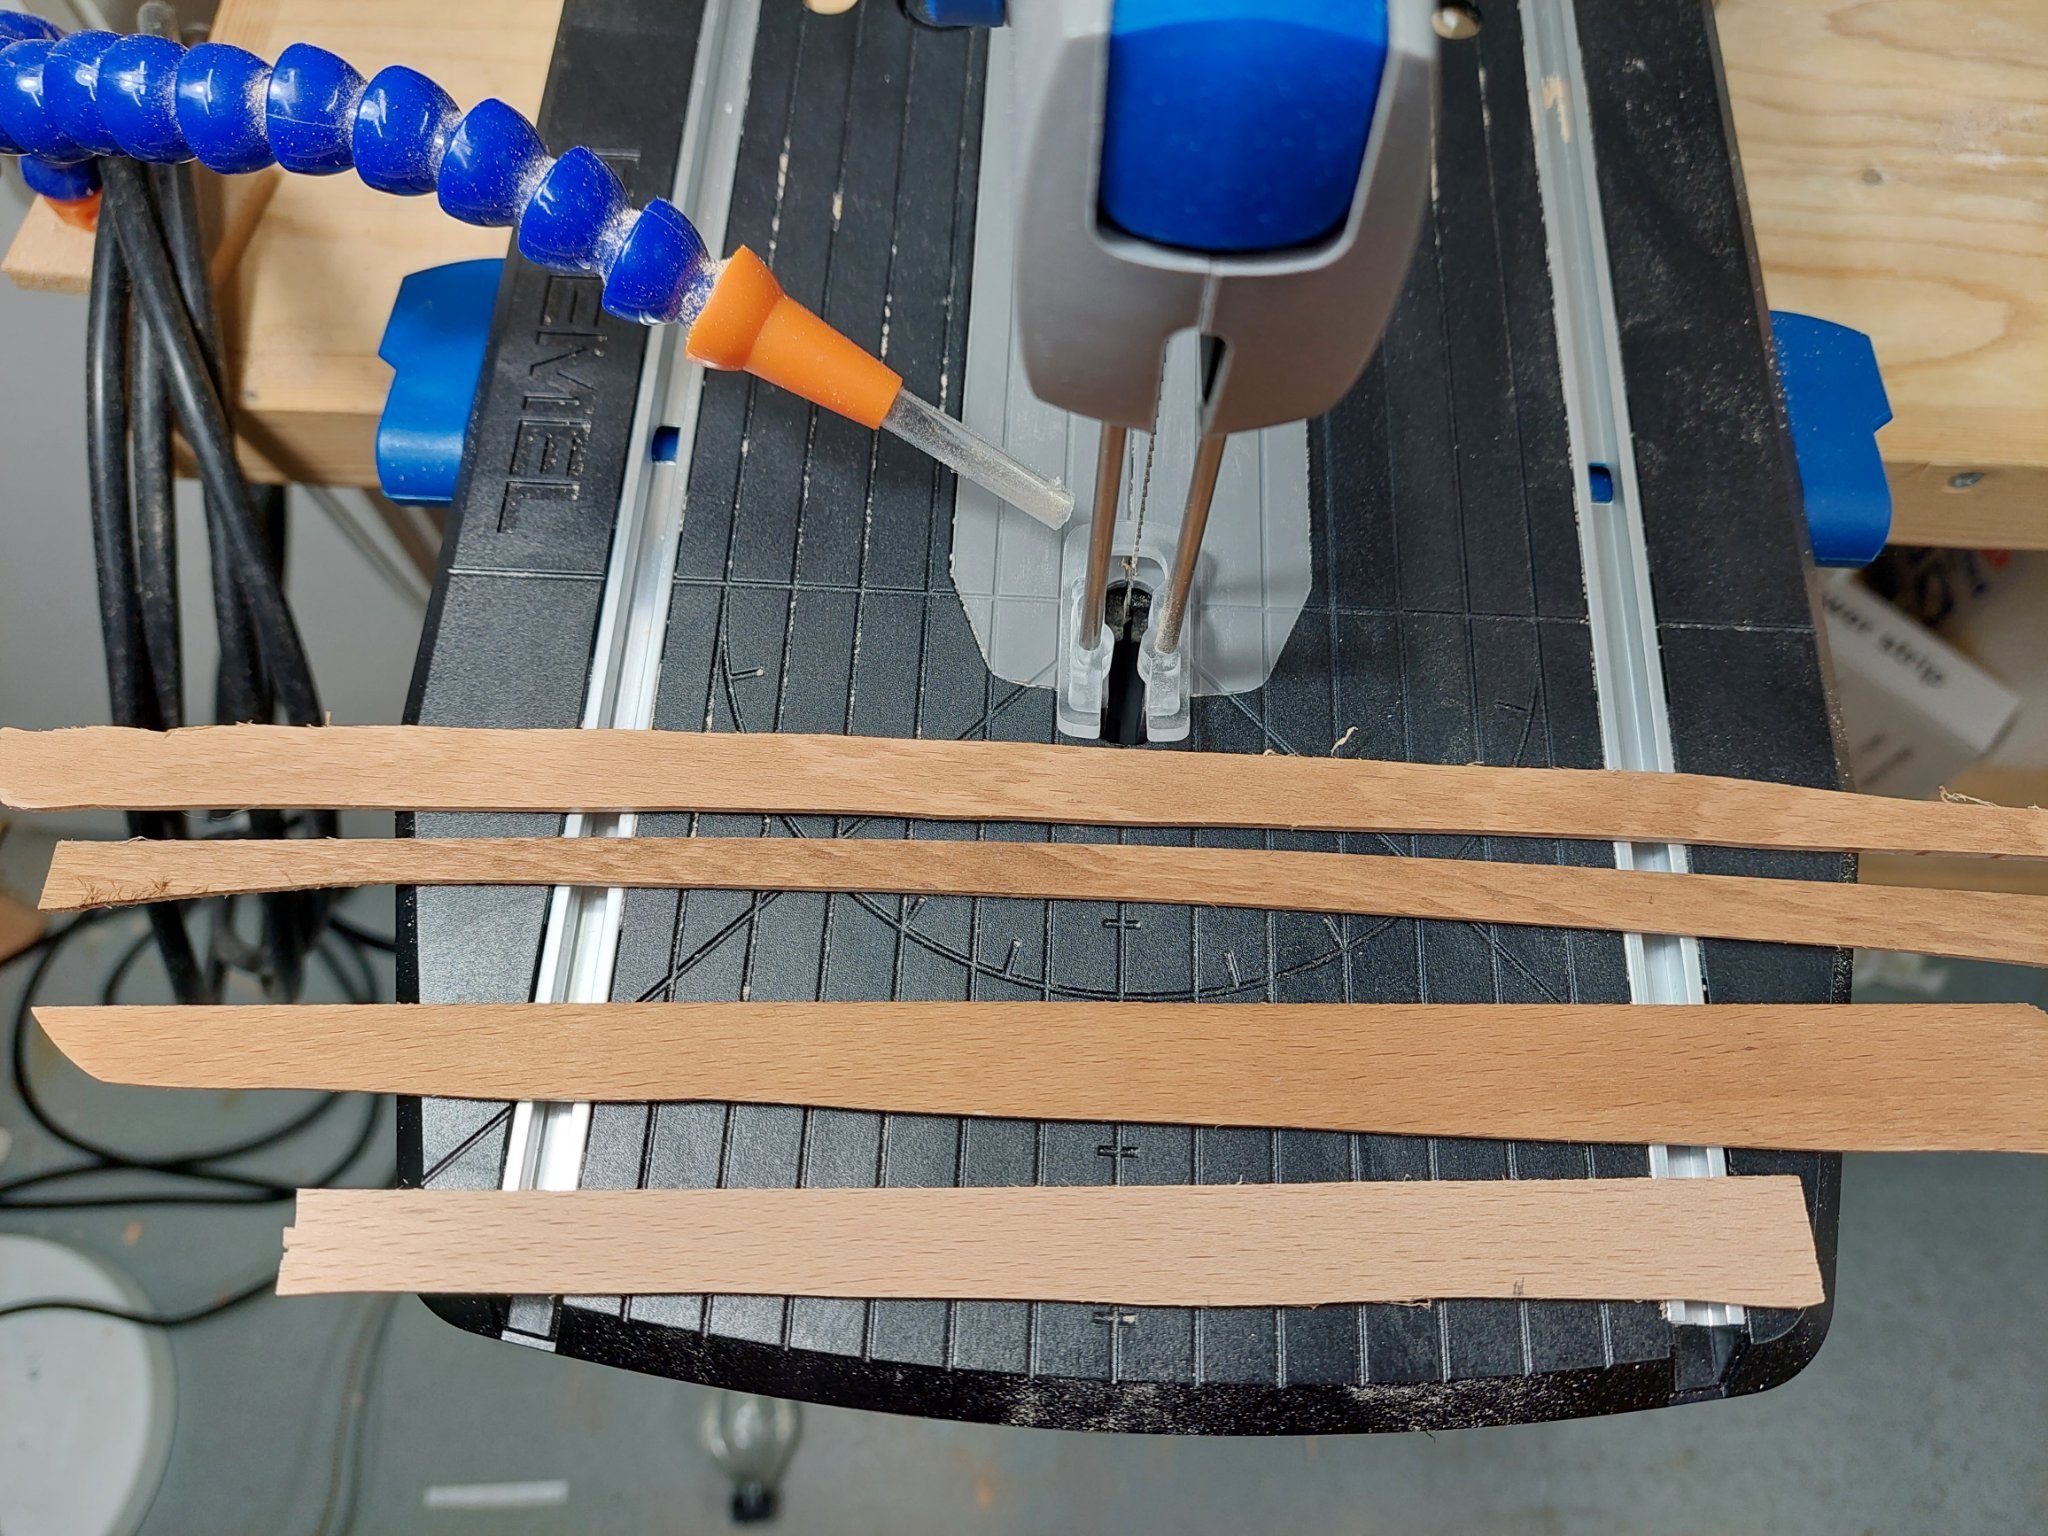
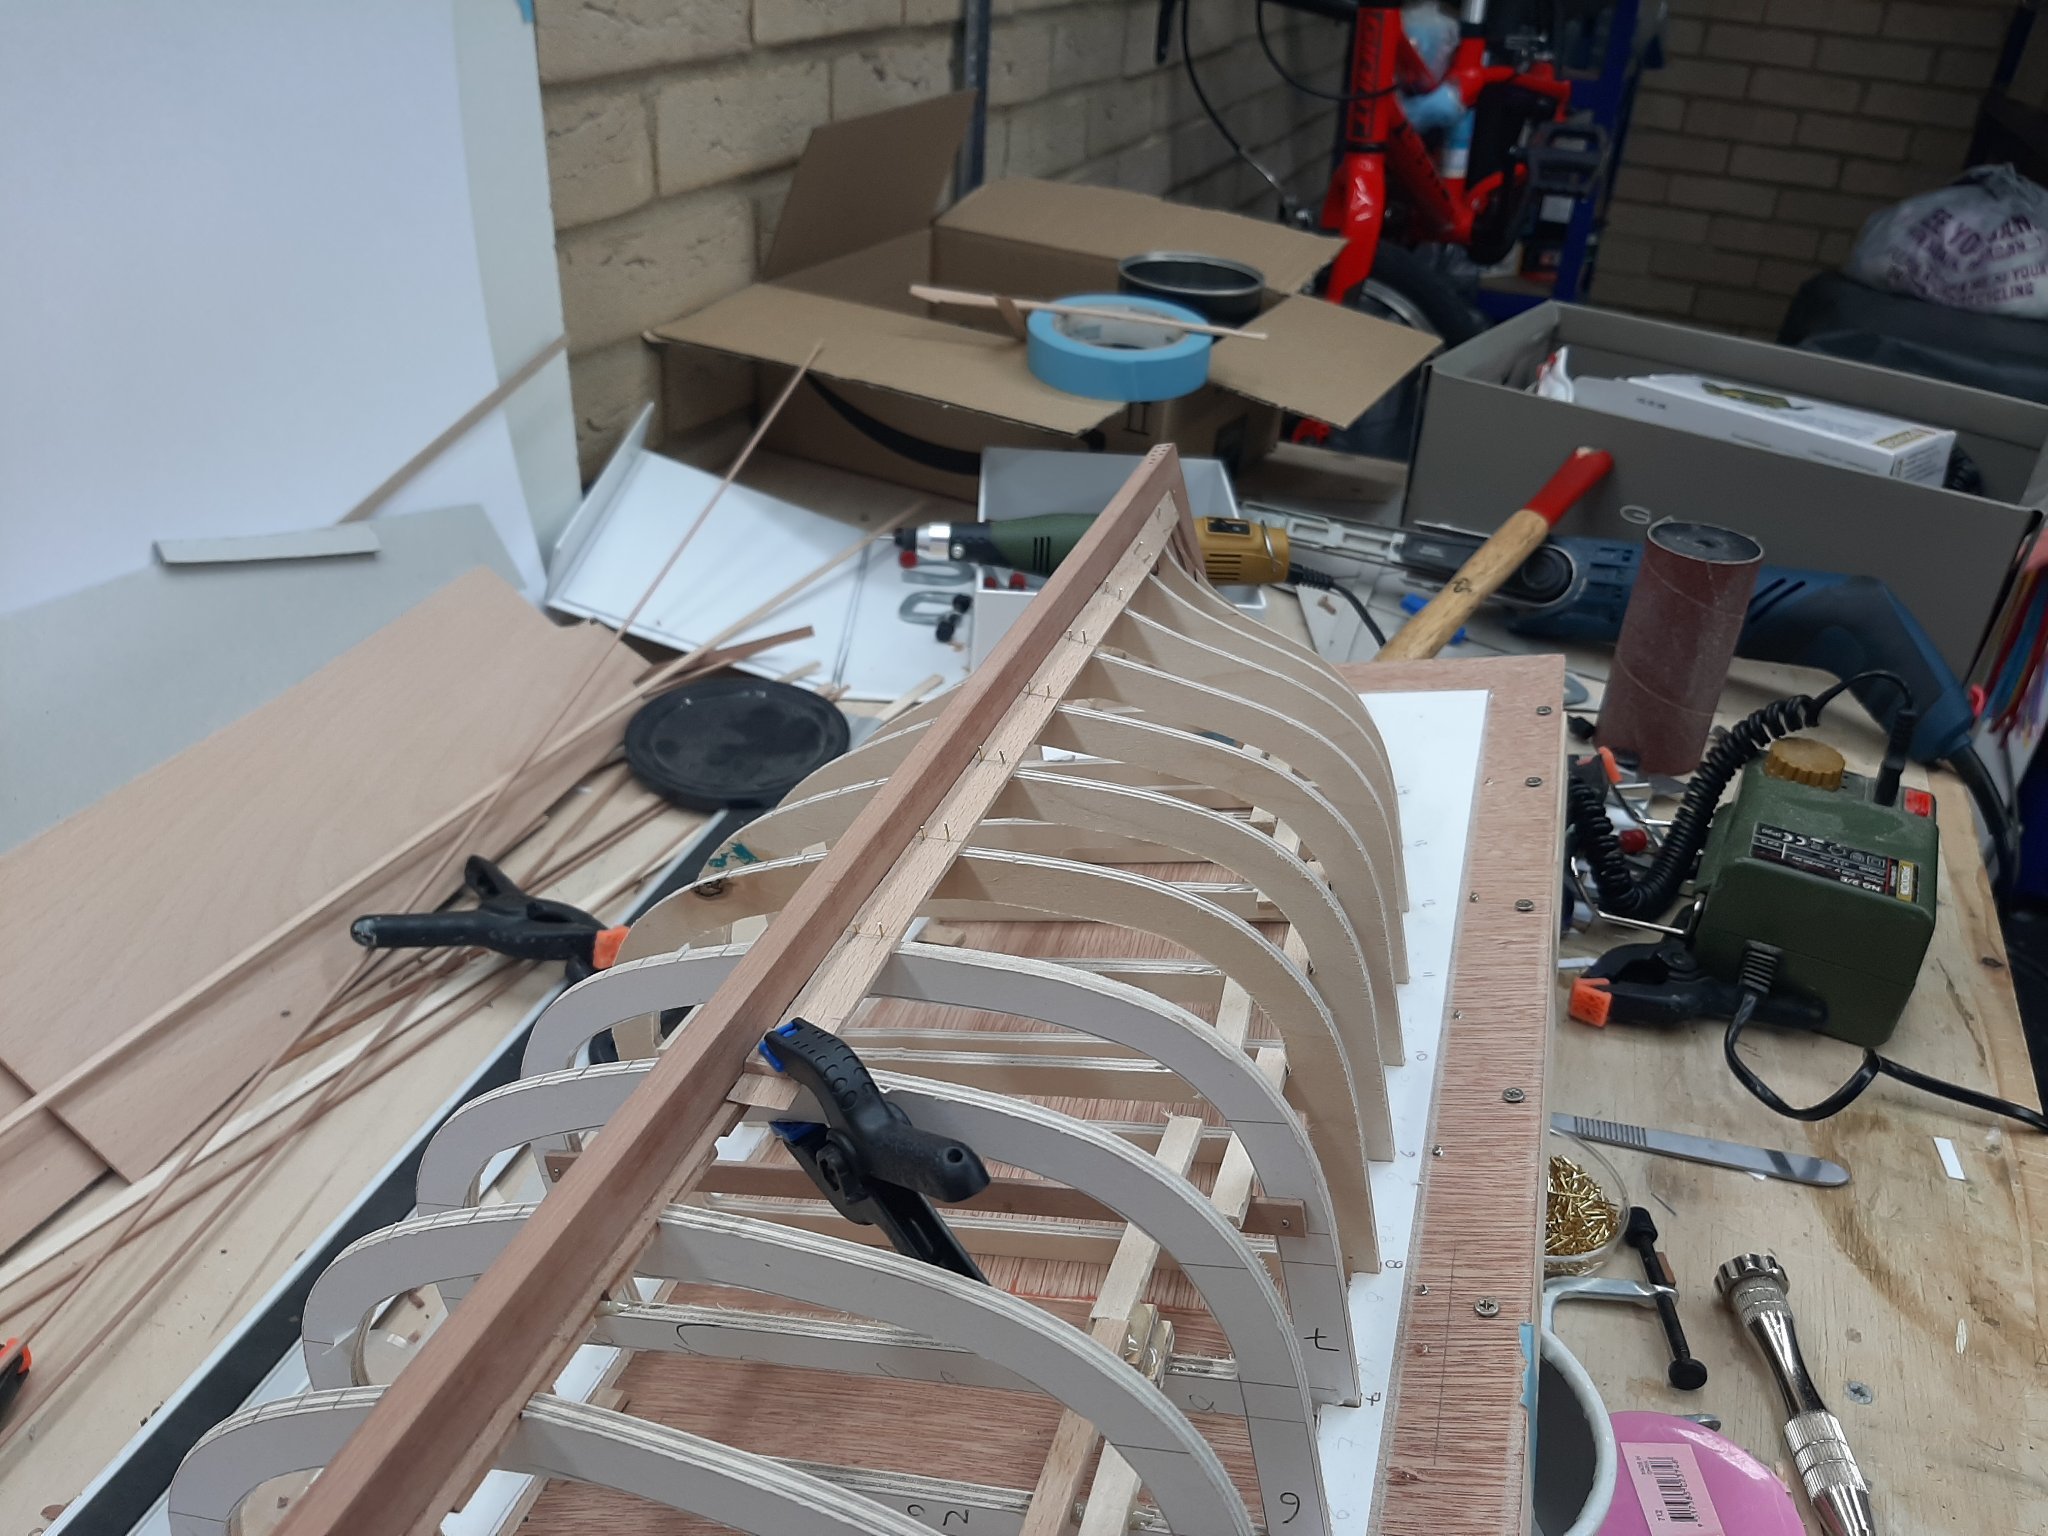
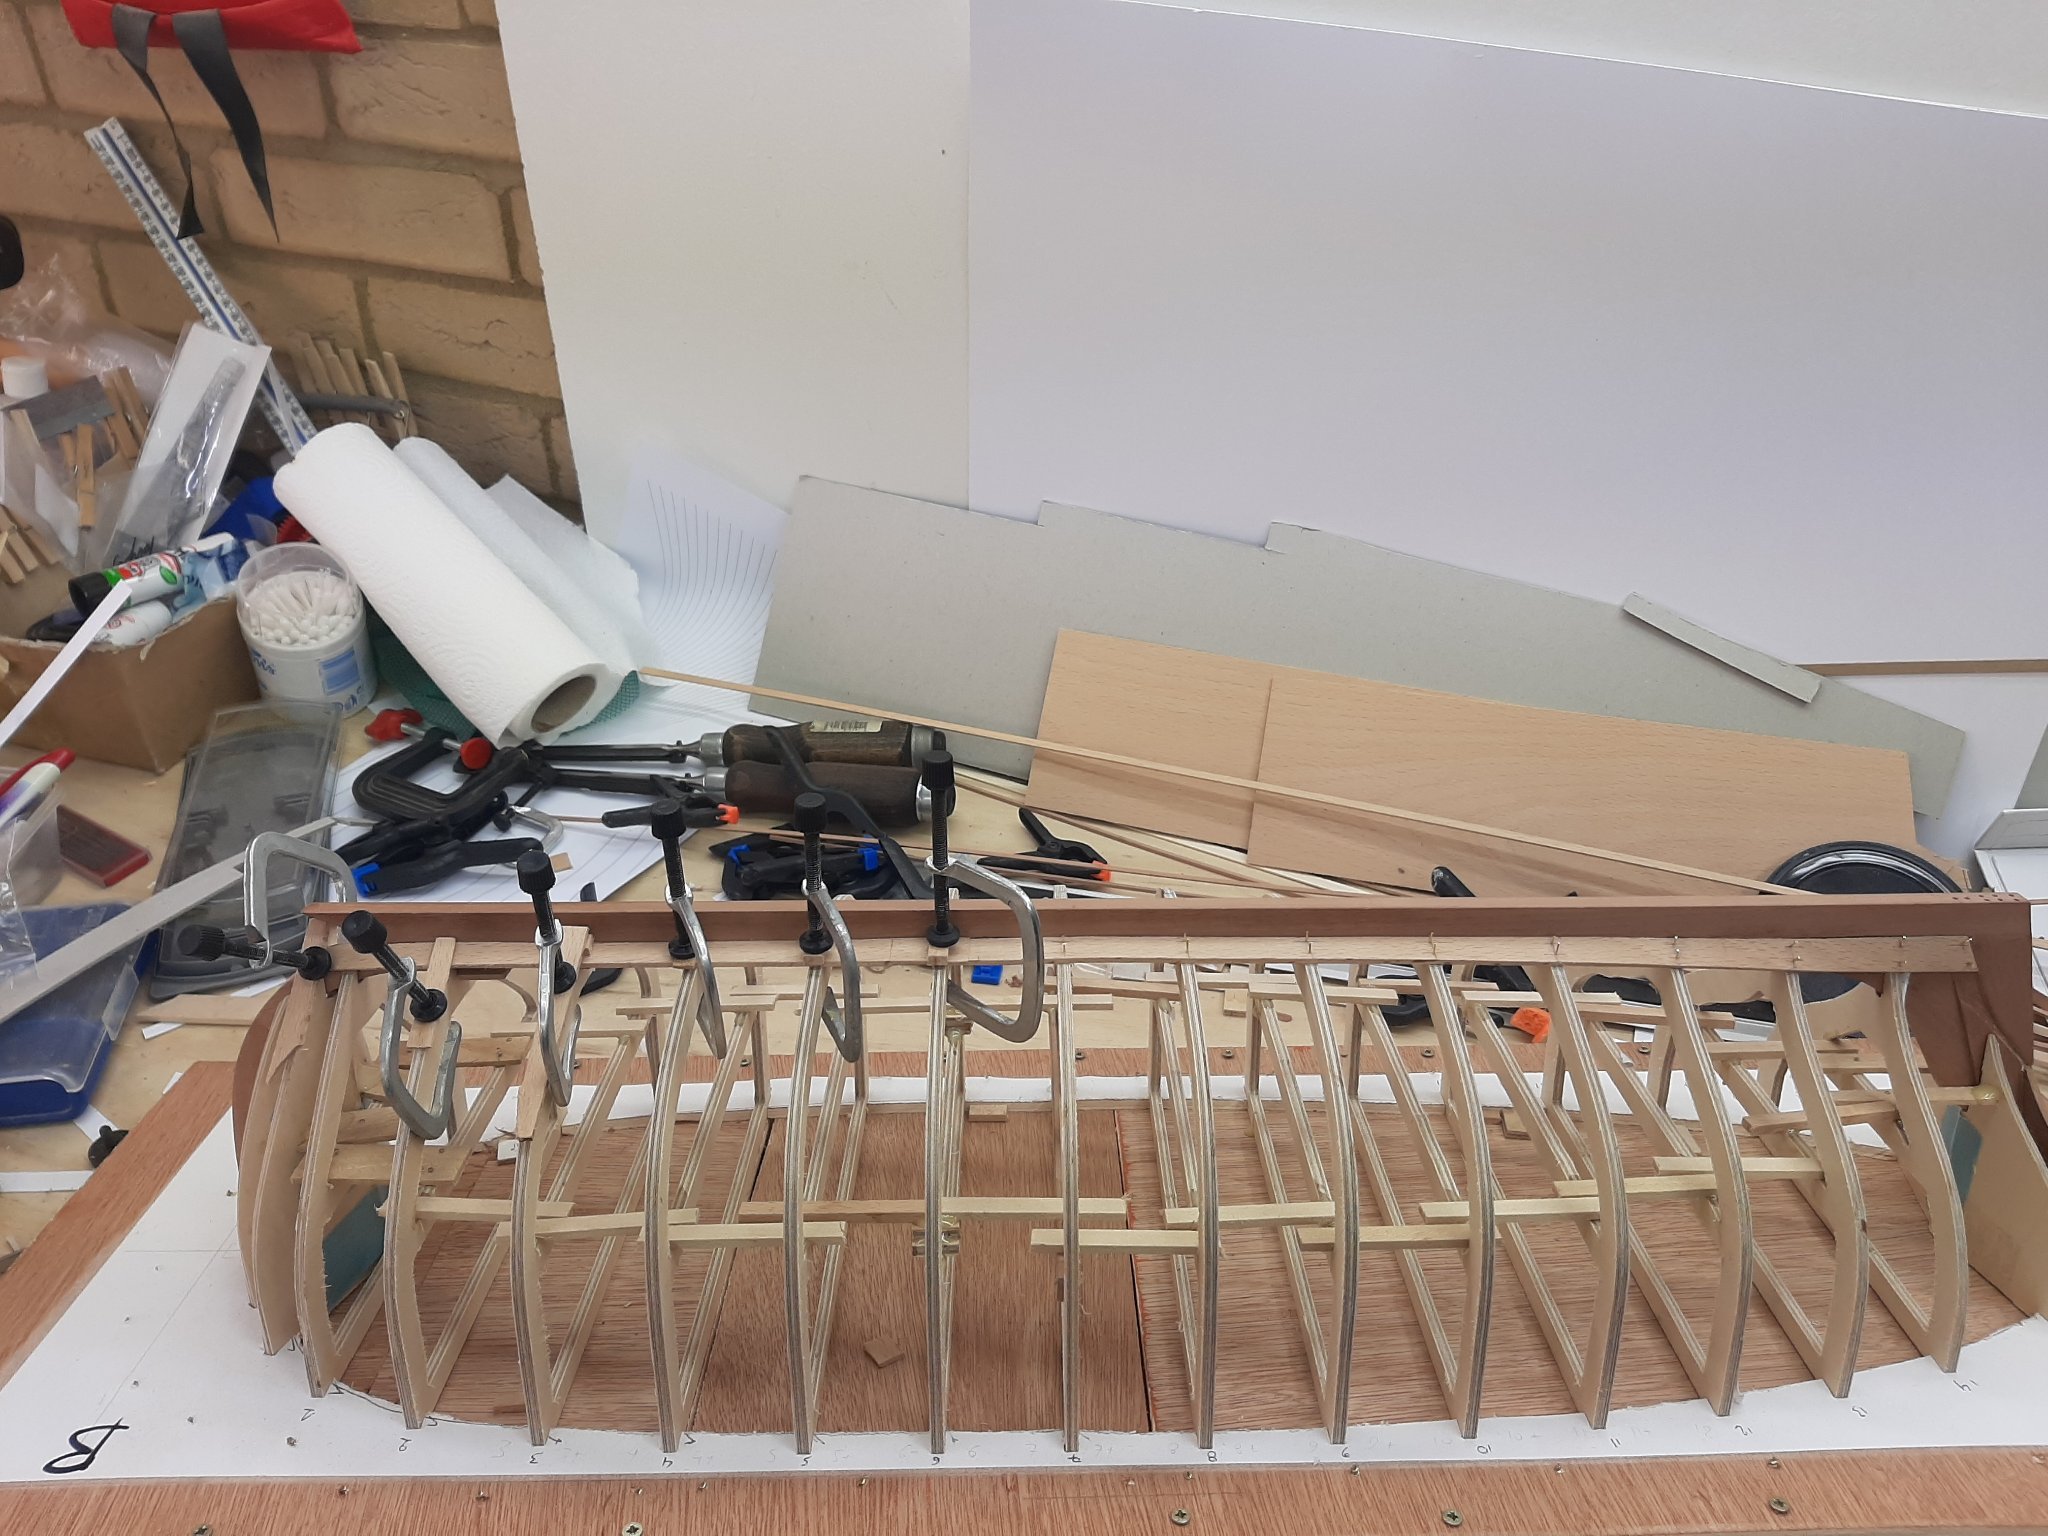
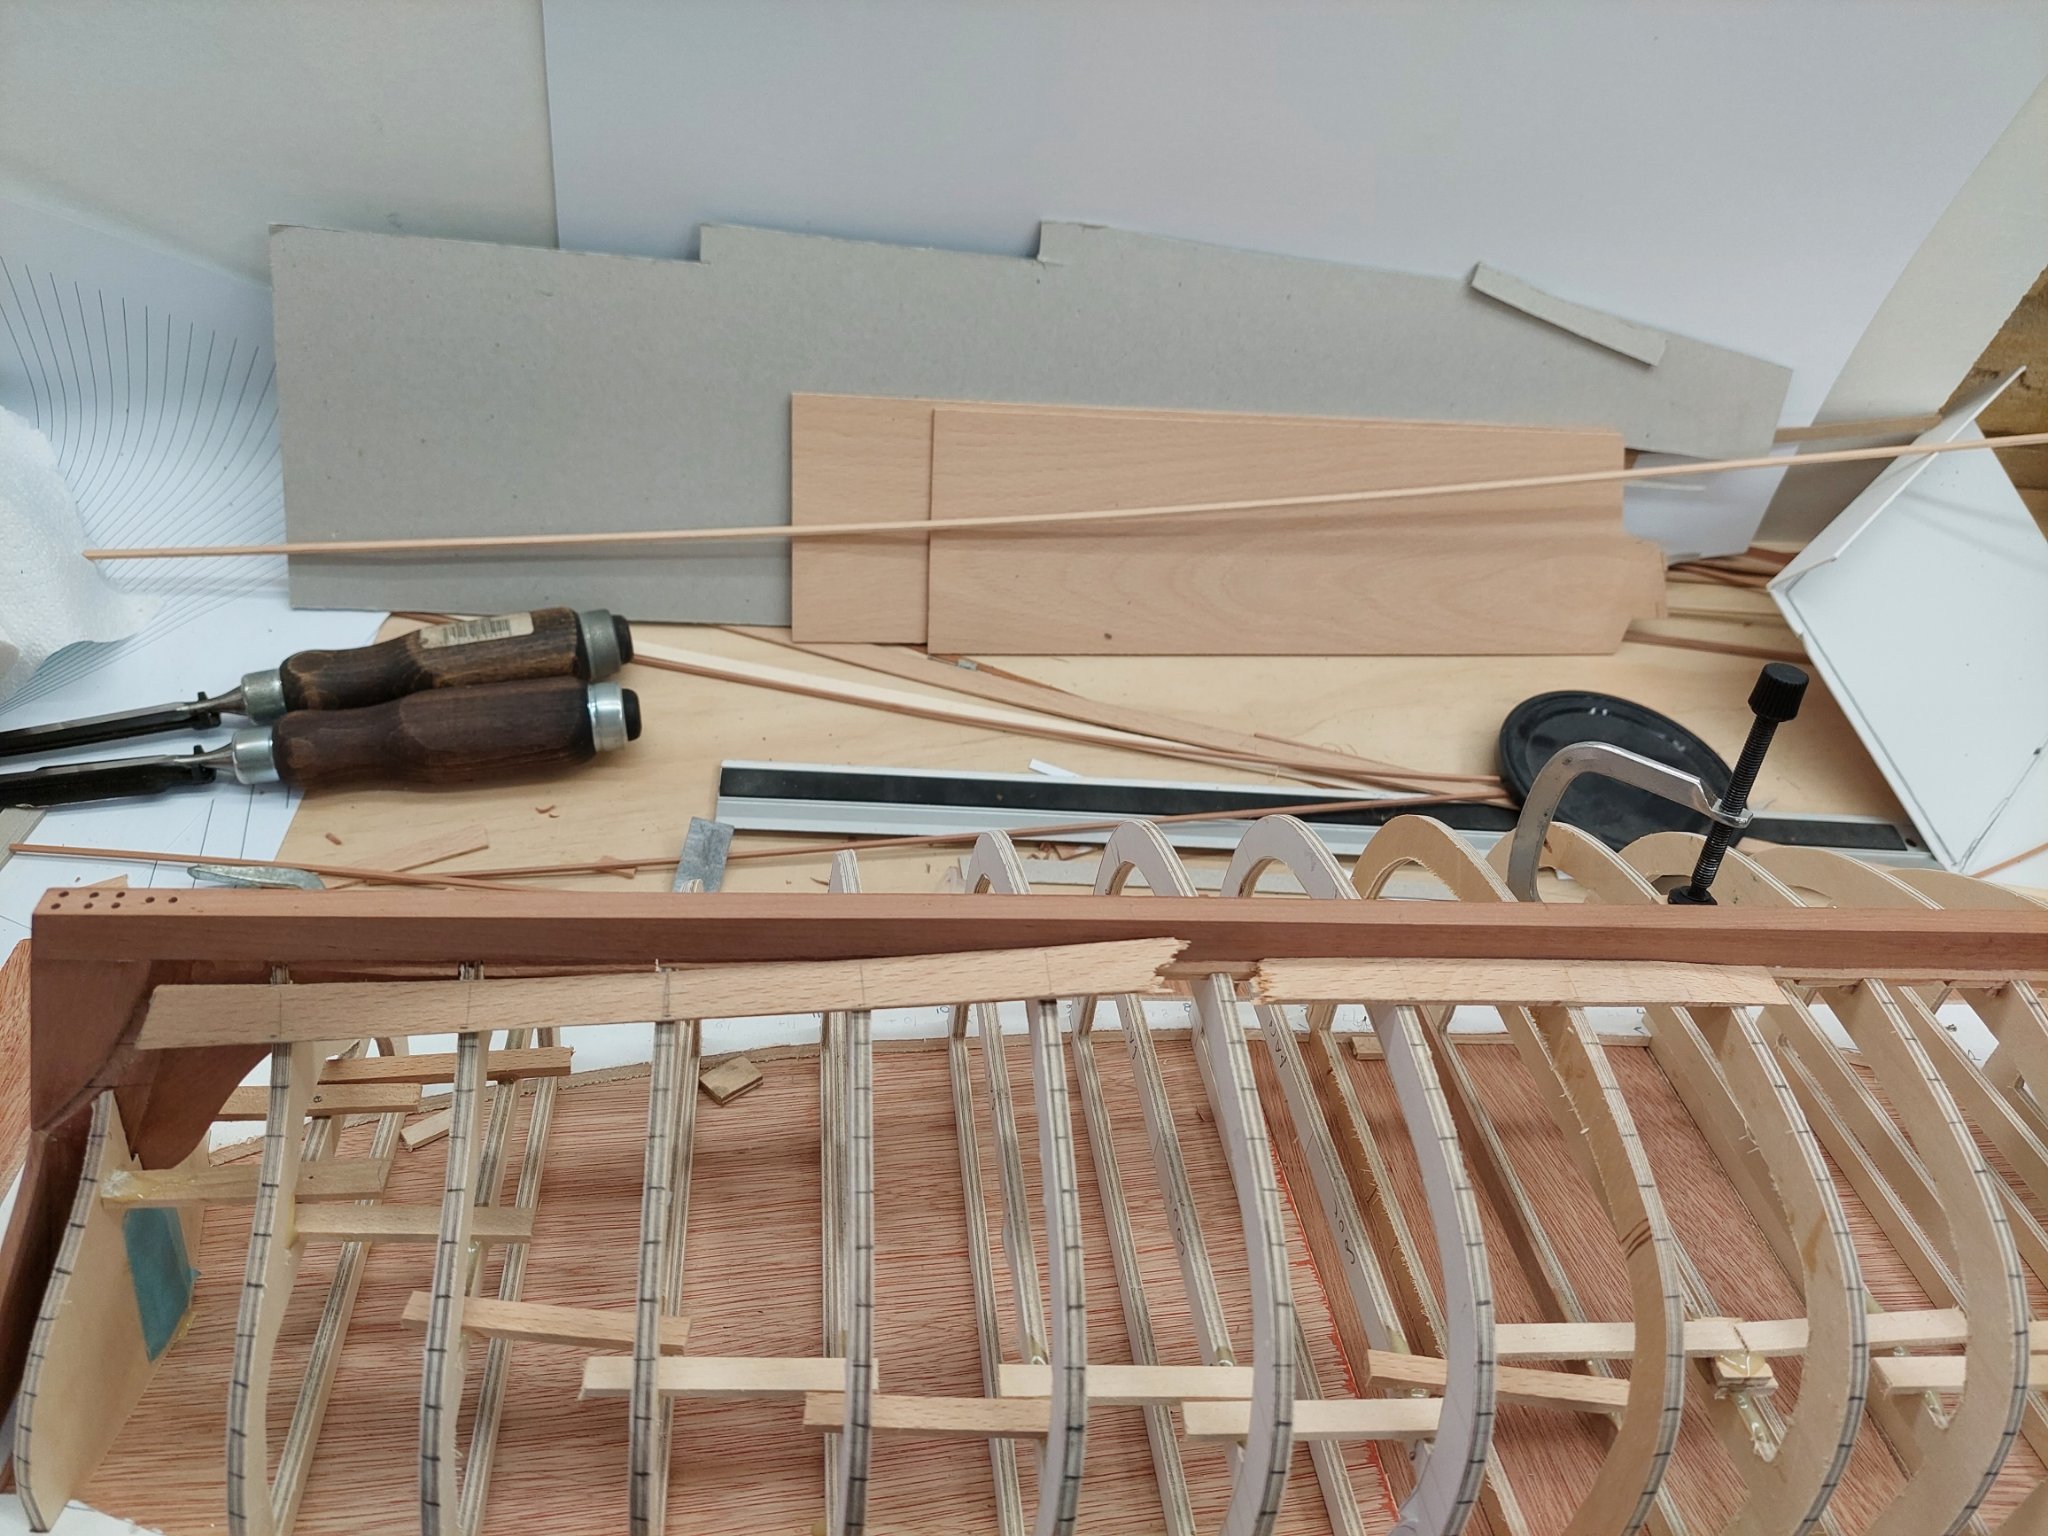
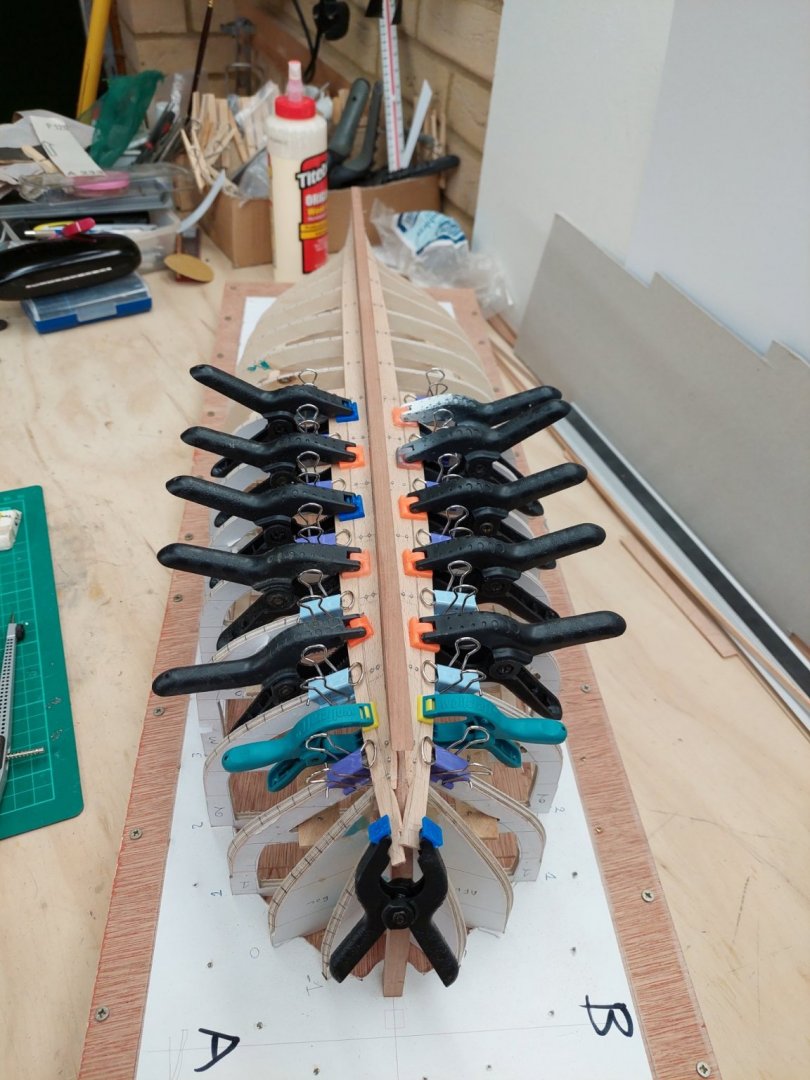
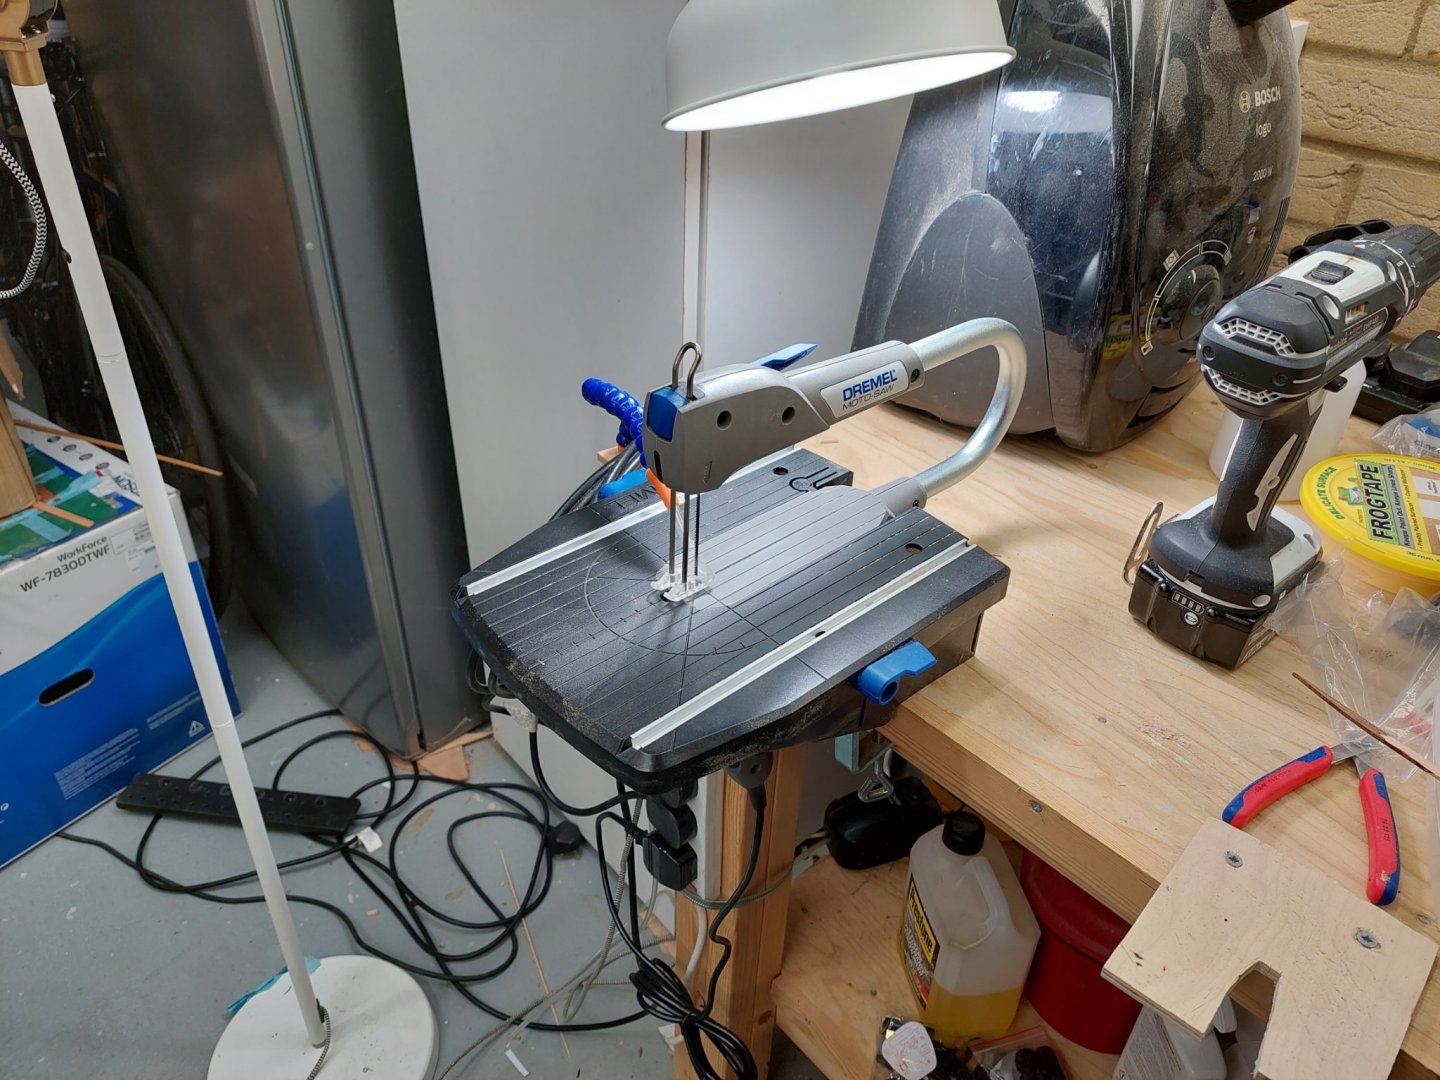
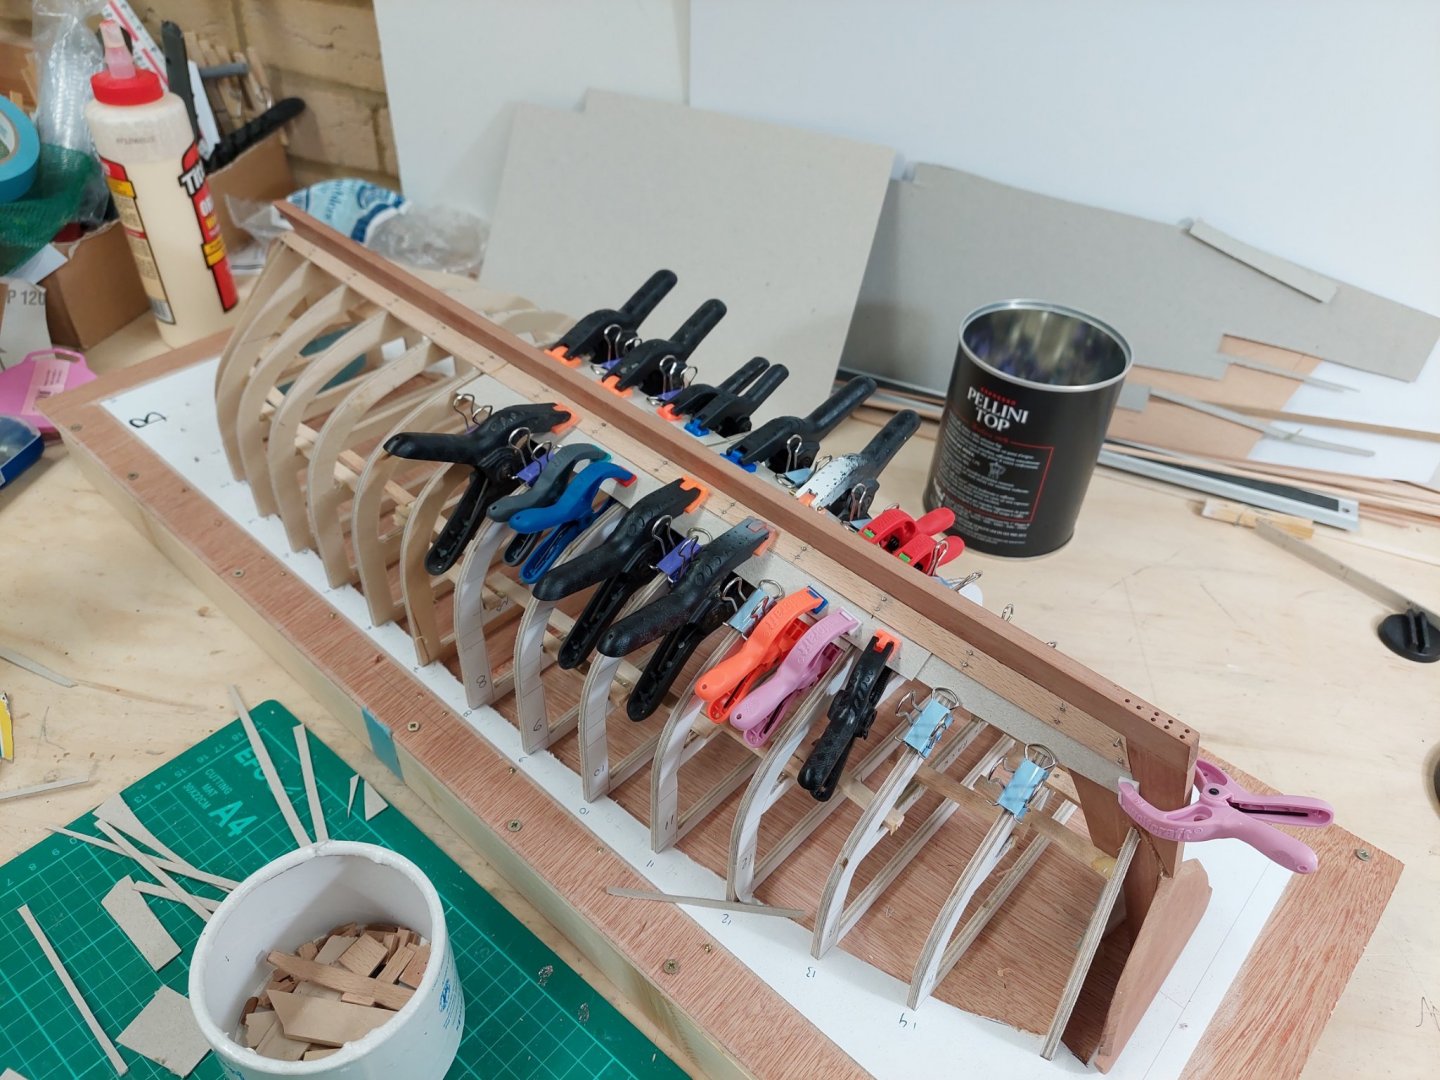
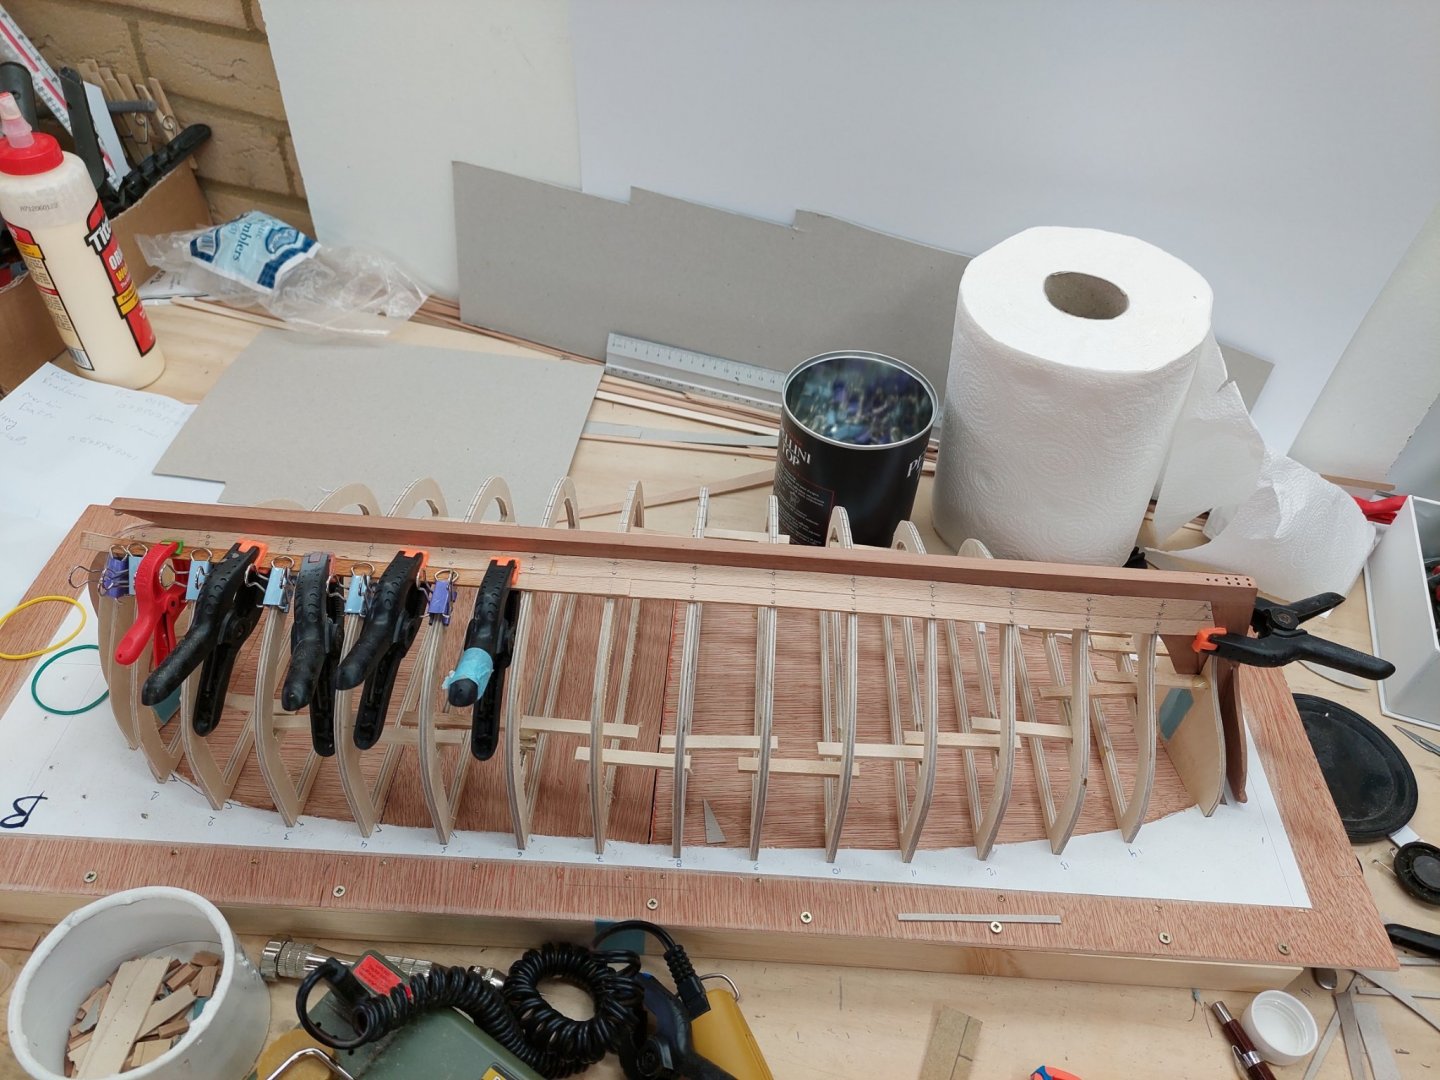
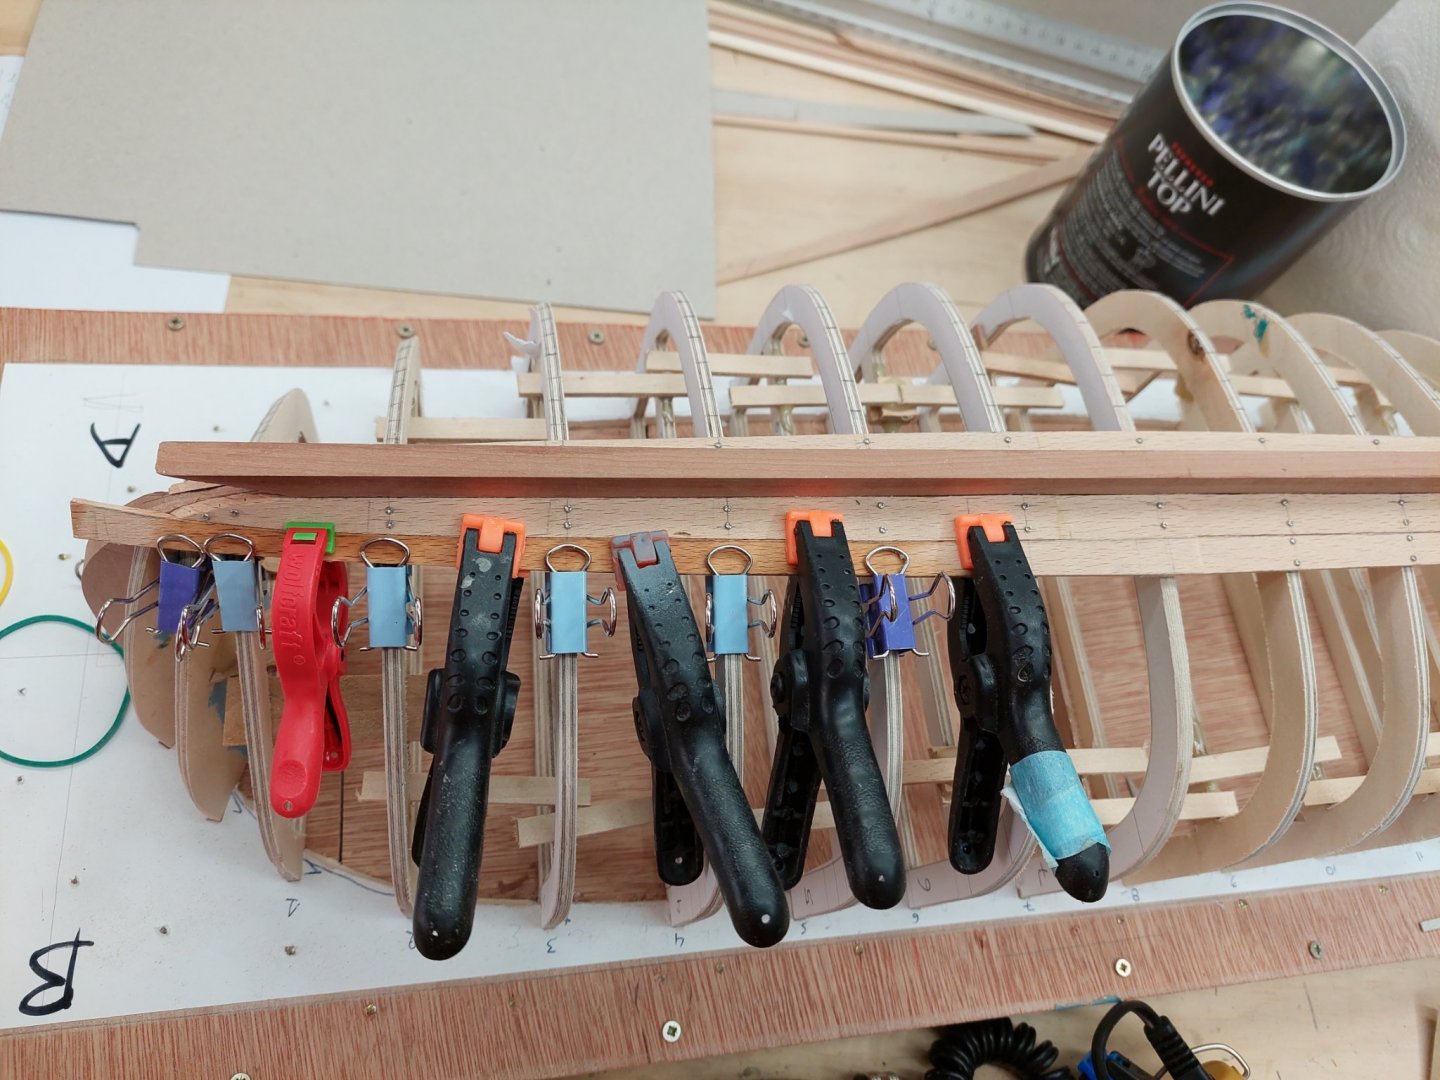
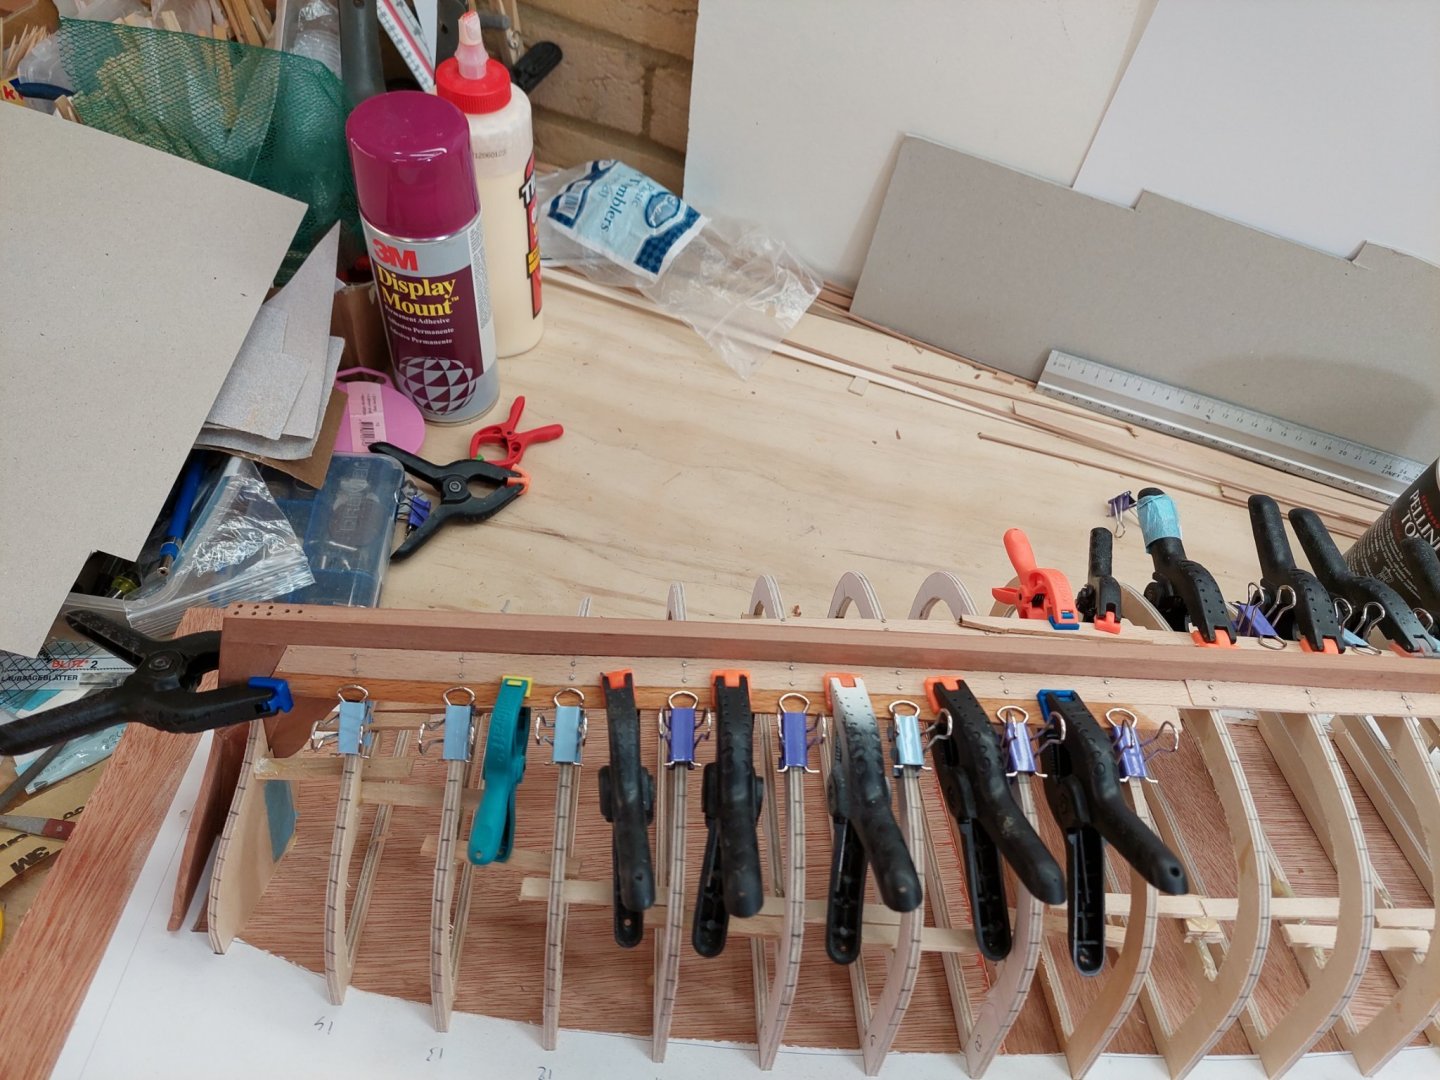
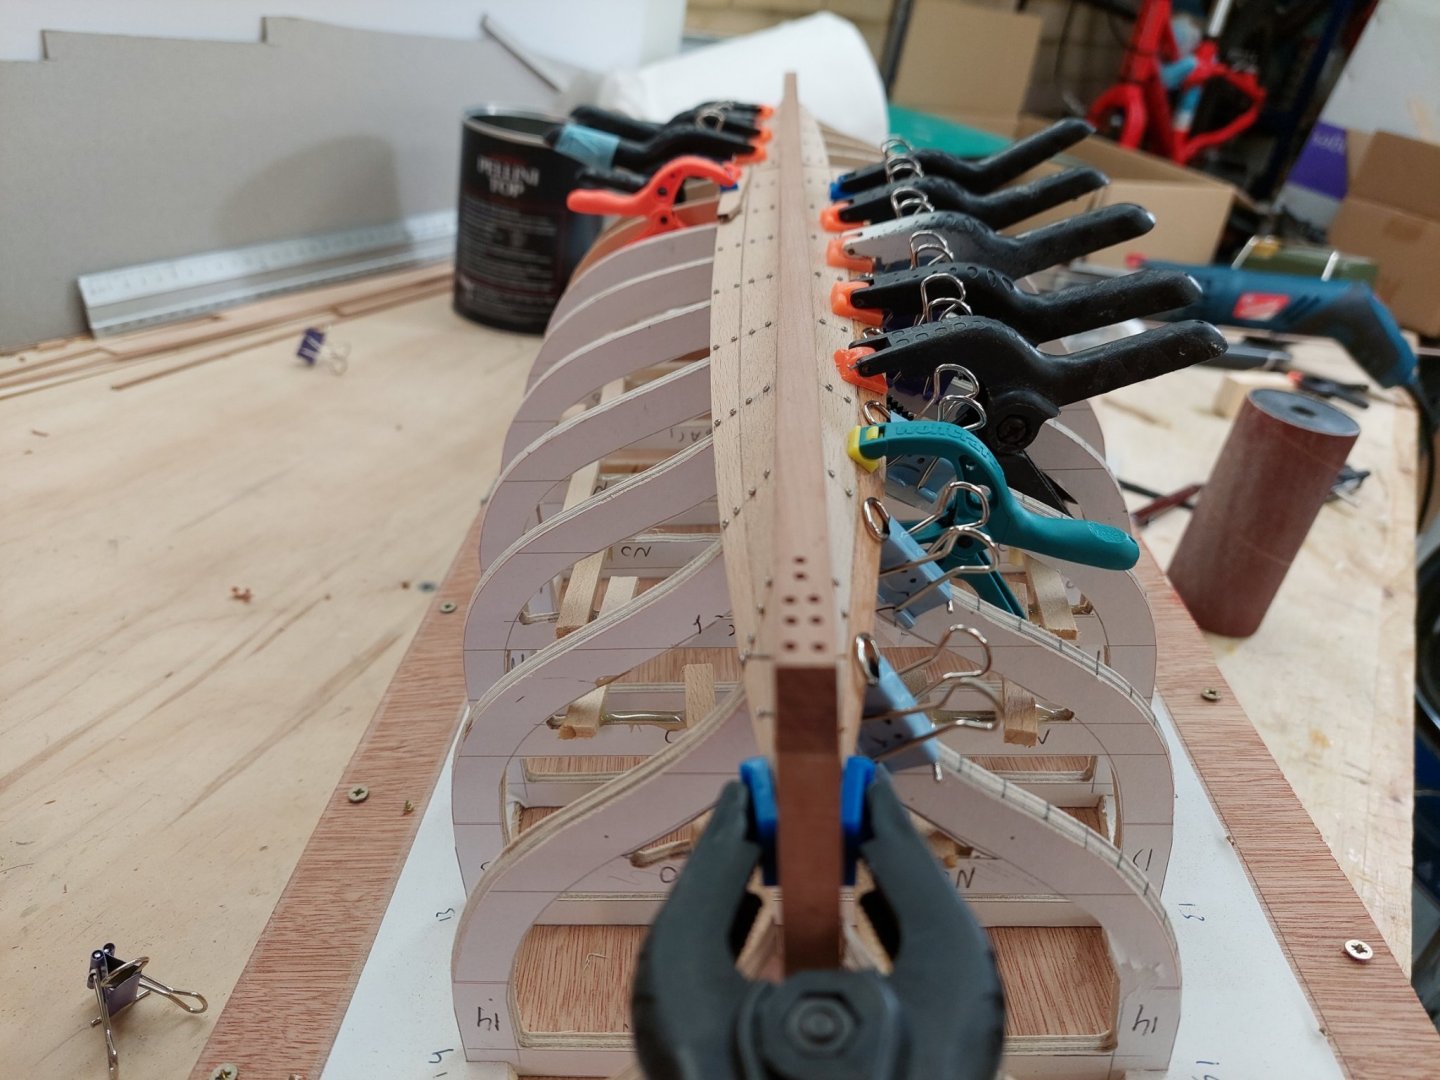
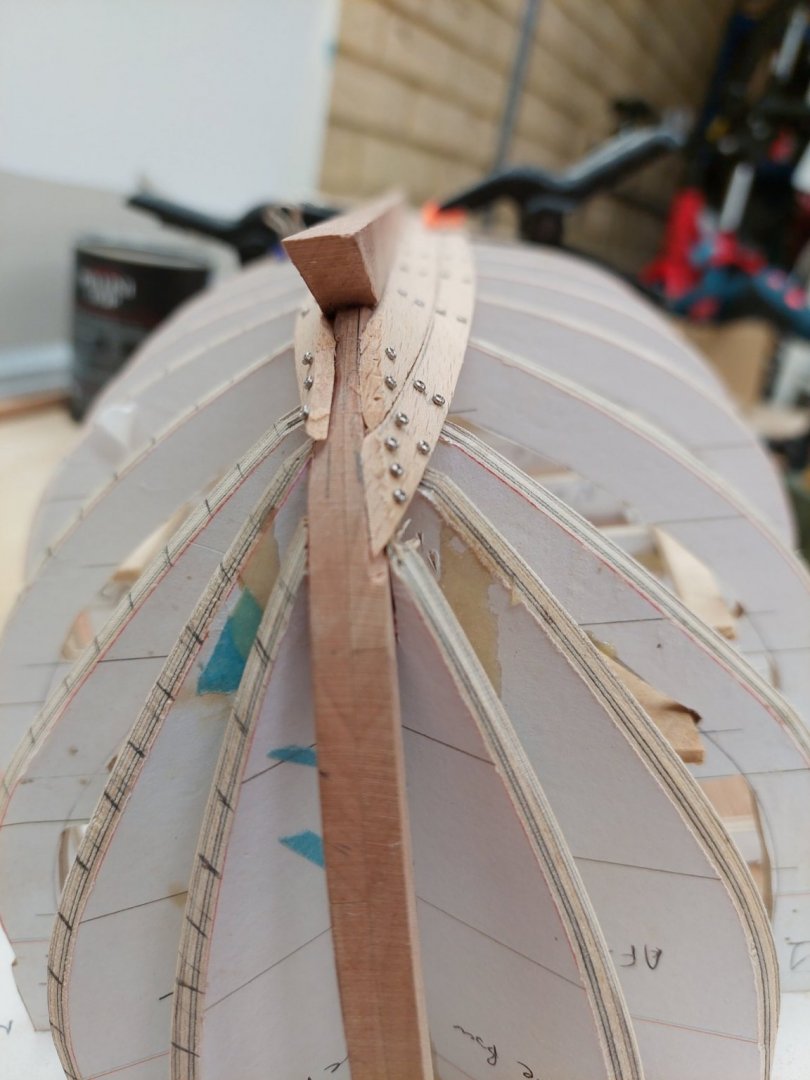
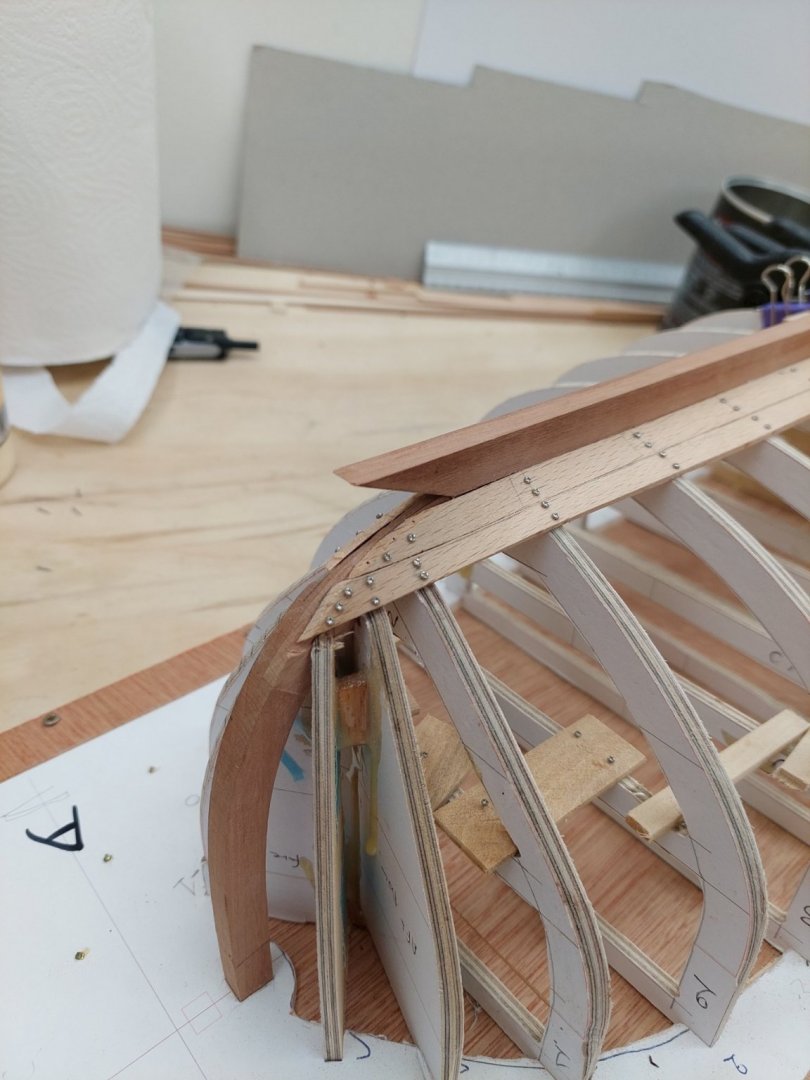
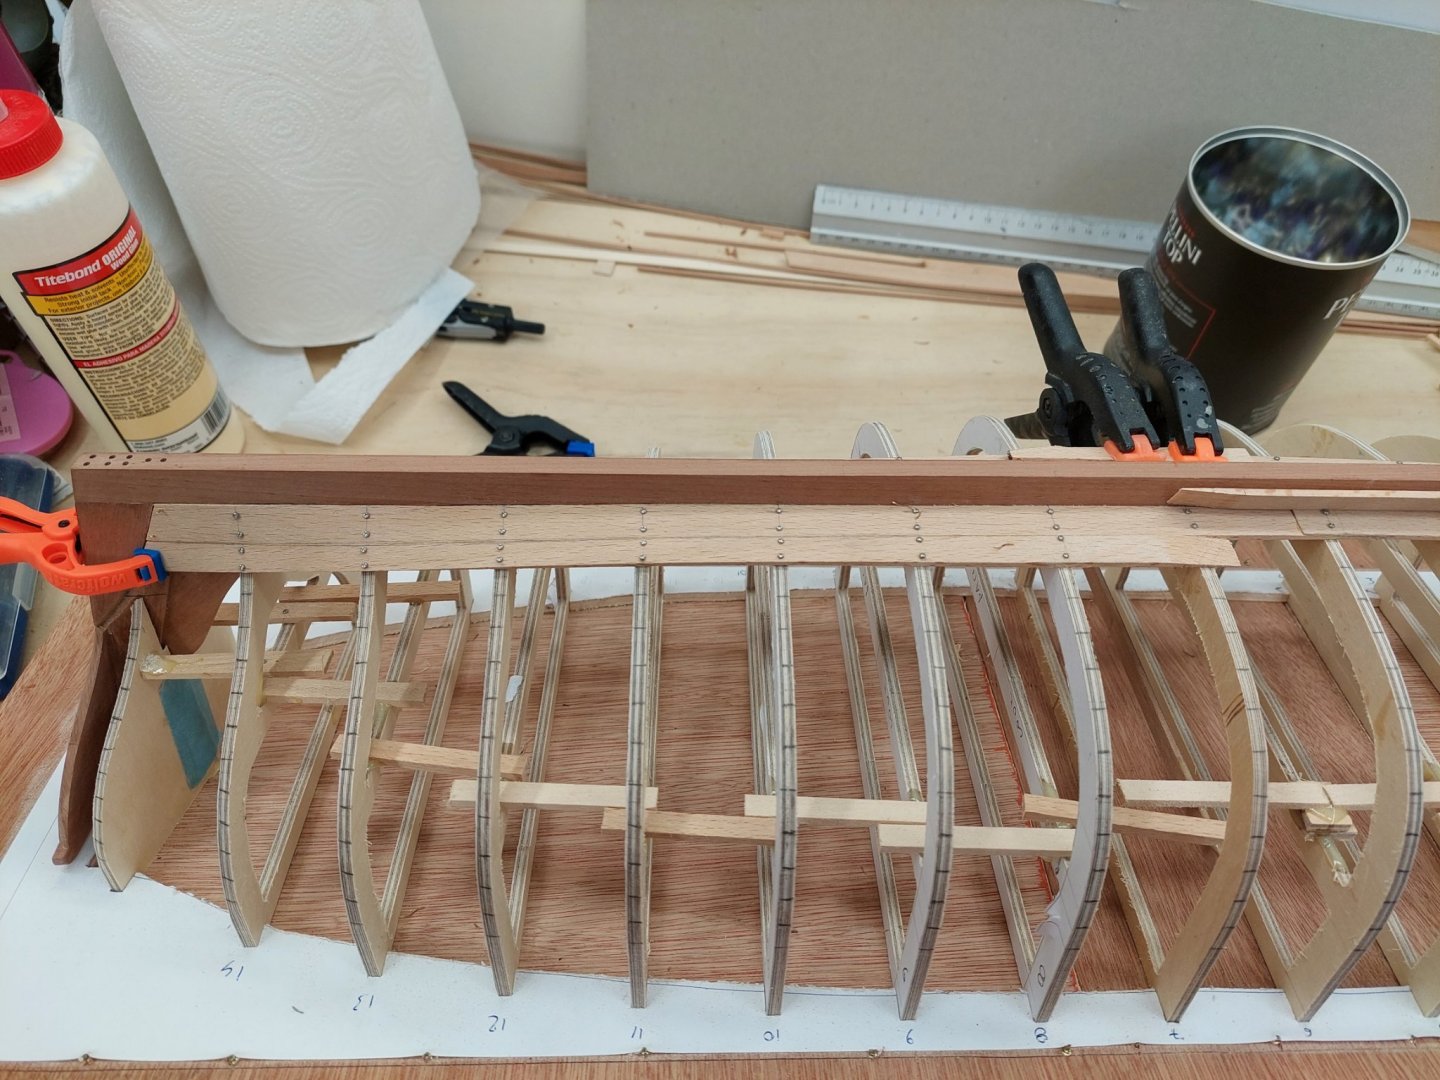
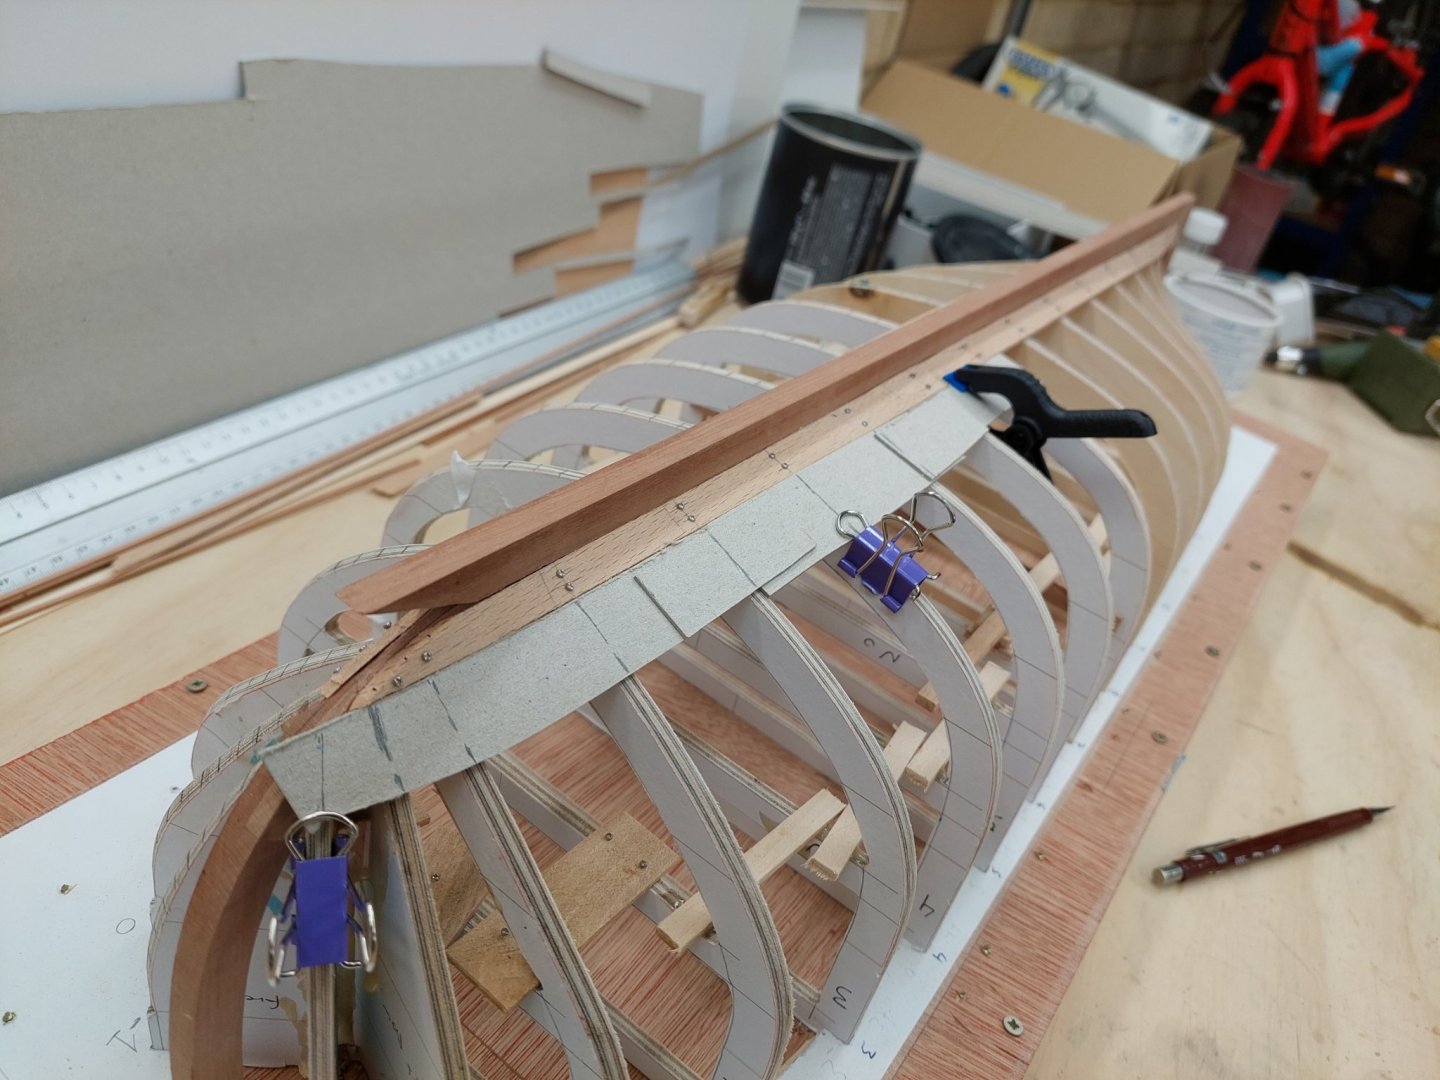
It has been a very long time since my last post, progress is at snail pace but at least things are moving along. I had some equipment issues: My Dremel moto saw suddenly died. It had 8 years of continuous hard use. I opened it, cleaned it, repacked the bearings with grease and put it back together. Still dead. I suspect the brushes are gone but I thought best to get another one. I like it very much due to small footprint and the ability to take side cutting blades. The garboard planks are in place, so I started work on the first broad plank. It is much easier to use scarfed planks than very long single piece ones and I will stagger the scarfs. So here it goes: So far, the time invested on the 3D plans pays off. The distances seem identical on both sides and the two plank halves are identical. Planking continues I switched to 1 mm card, much better than the 2 mm I was using The plank halves are not too curved and I don't think they ll get any worse. They would have needed very narrow blanks. Now, I am paying much more attention cutting the plank in this boat than I did on the Launch. The planks are sanded to line, with the disc sander on the convex edge, with hand on the concave edge. The result is very close fitting planks so far: The twist at the bow is pretty acute, I hope it is not going to get worse. Just wetting the beech though is enough to get the wood to fall into place. Interestingly, I had to trim the second frame a bit for the plank to sit nicely, exactly the same area that I had problem during my lofting. The beauty of the hull slowly starts to emerge I used a sander to trim the bow end of the second plank, much more accurate result It is getting there slowly With the hand held belt sander, the scarfs are very easy to make The bow twist is indeed significant And a final photo, boats are beautiful things. Till next time Vaddoc


- 233 replies
-
- 12
-

-
I truly enjoyed catching up Brian. This is a magnificent model, the mechanical bits and piping are so realistic. Weathering will lift this model to another level. I have no experience with it, I am looking forward to the rest of this journey. Regards Vaddoc
-
You could also spill the planks.

-
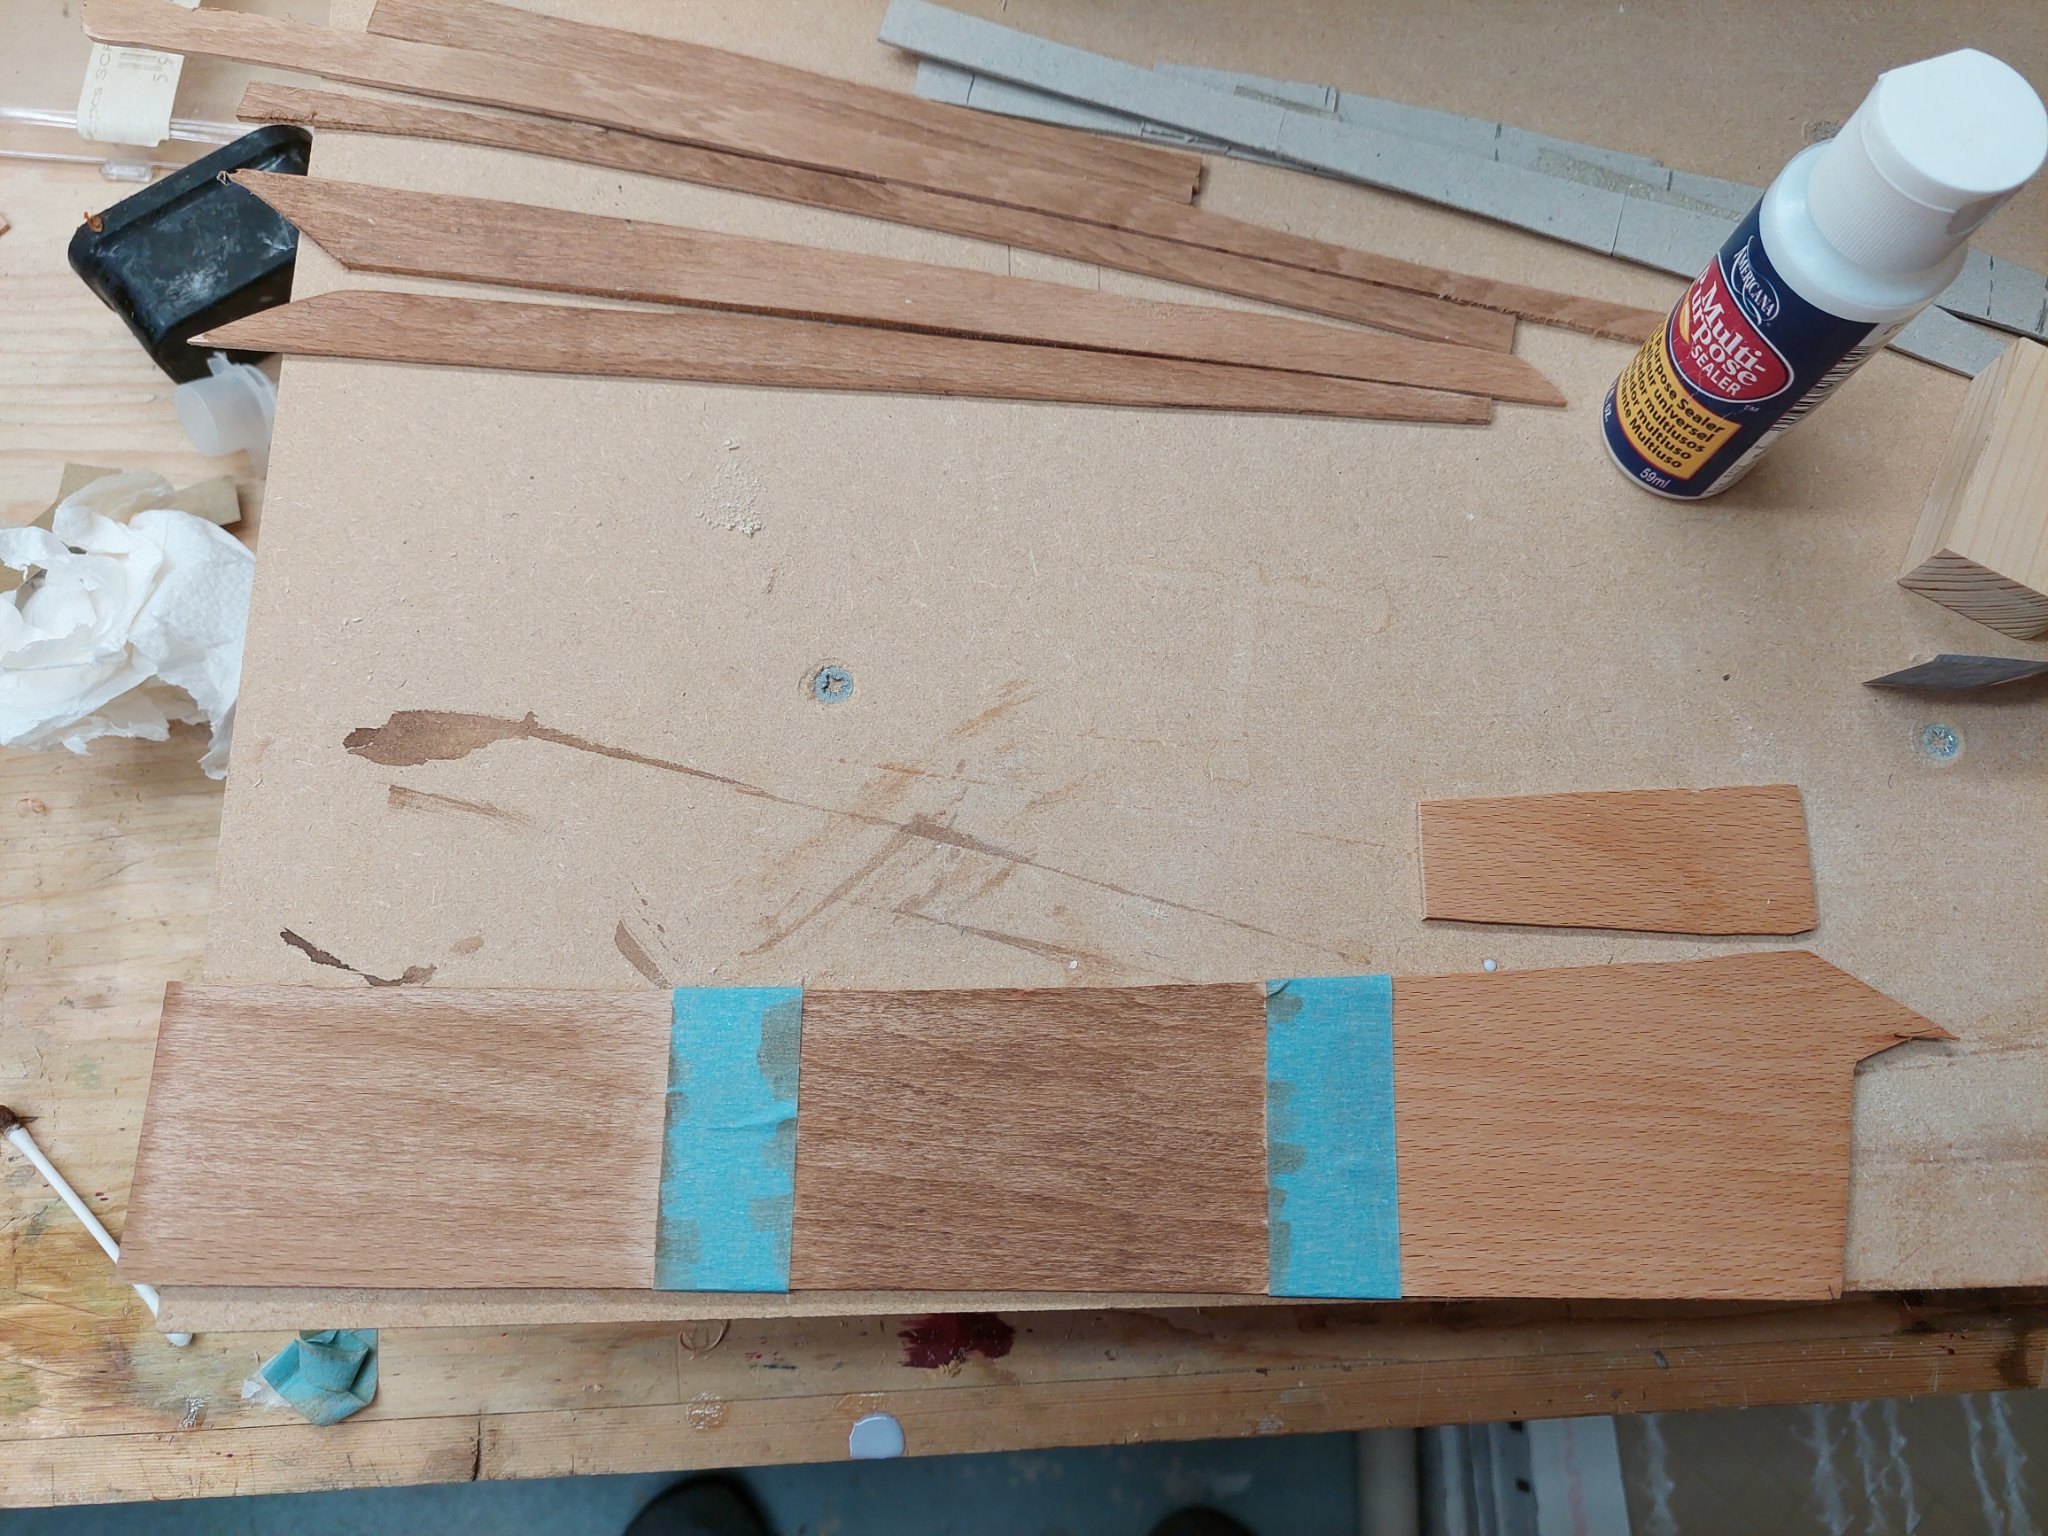
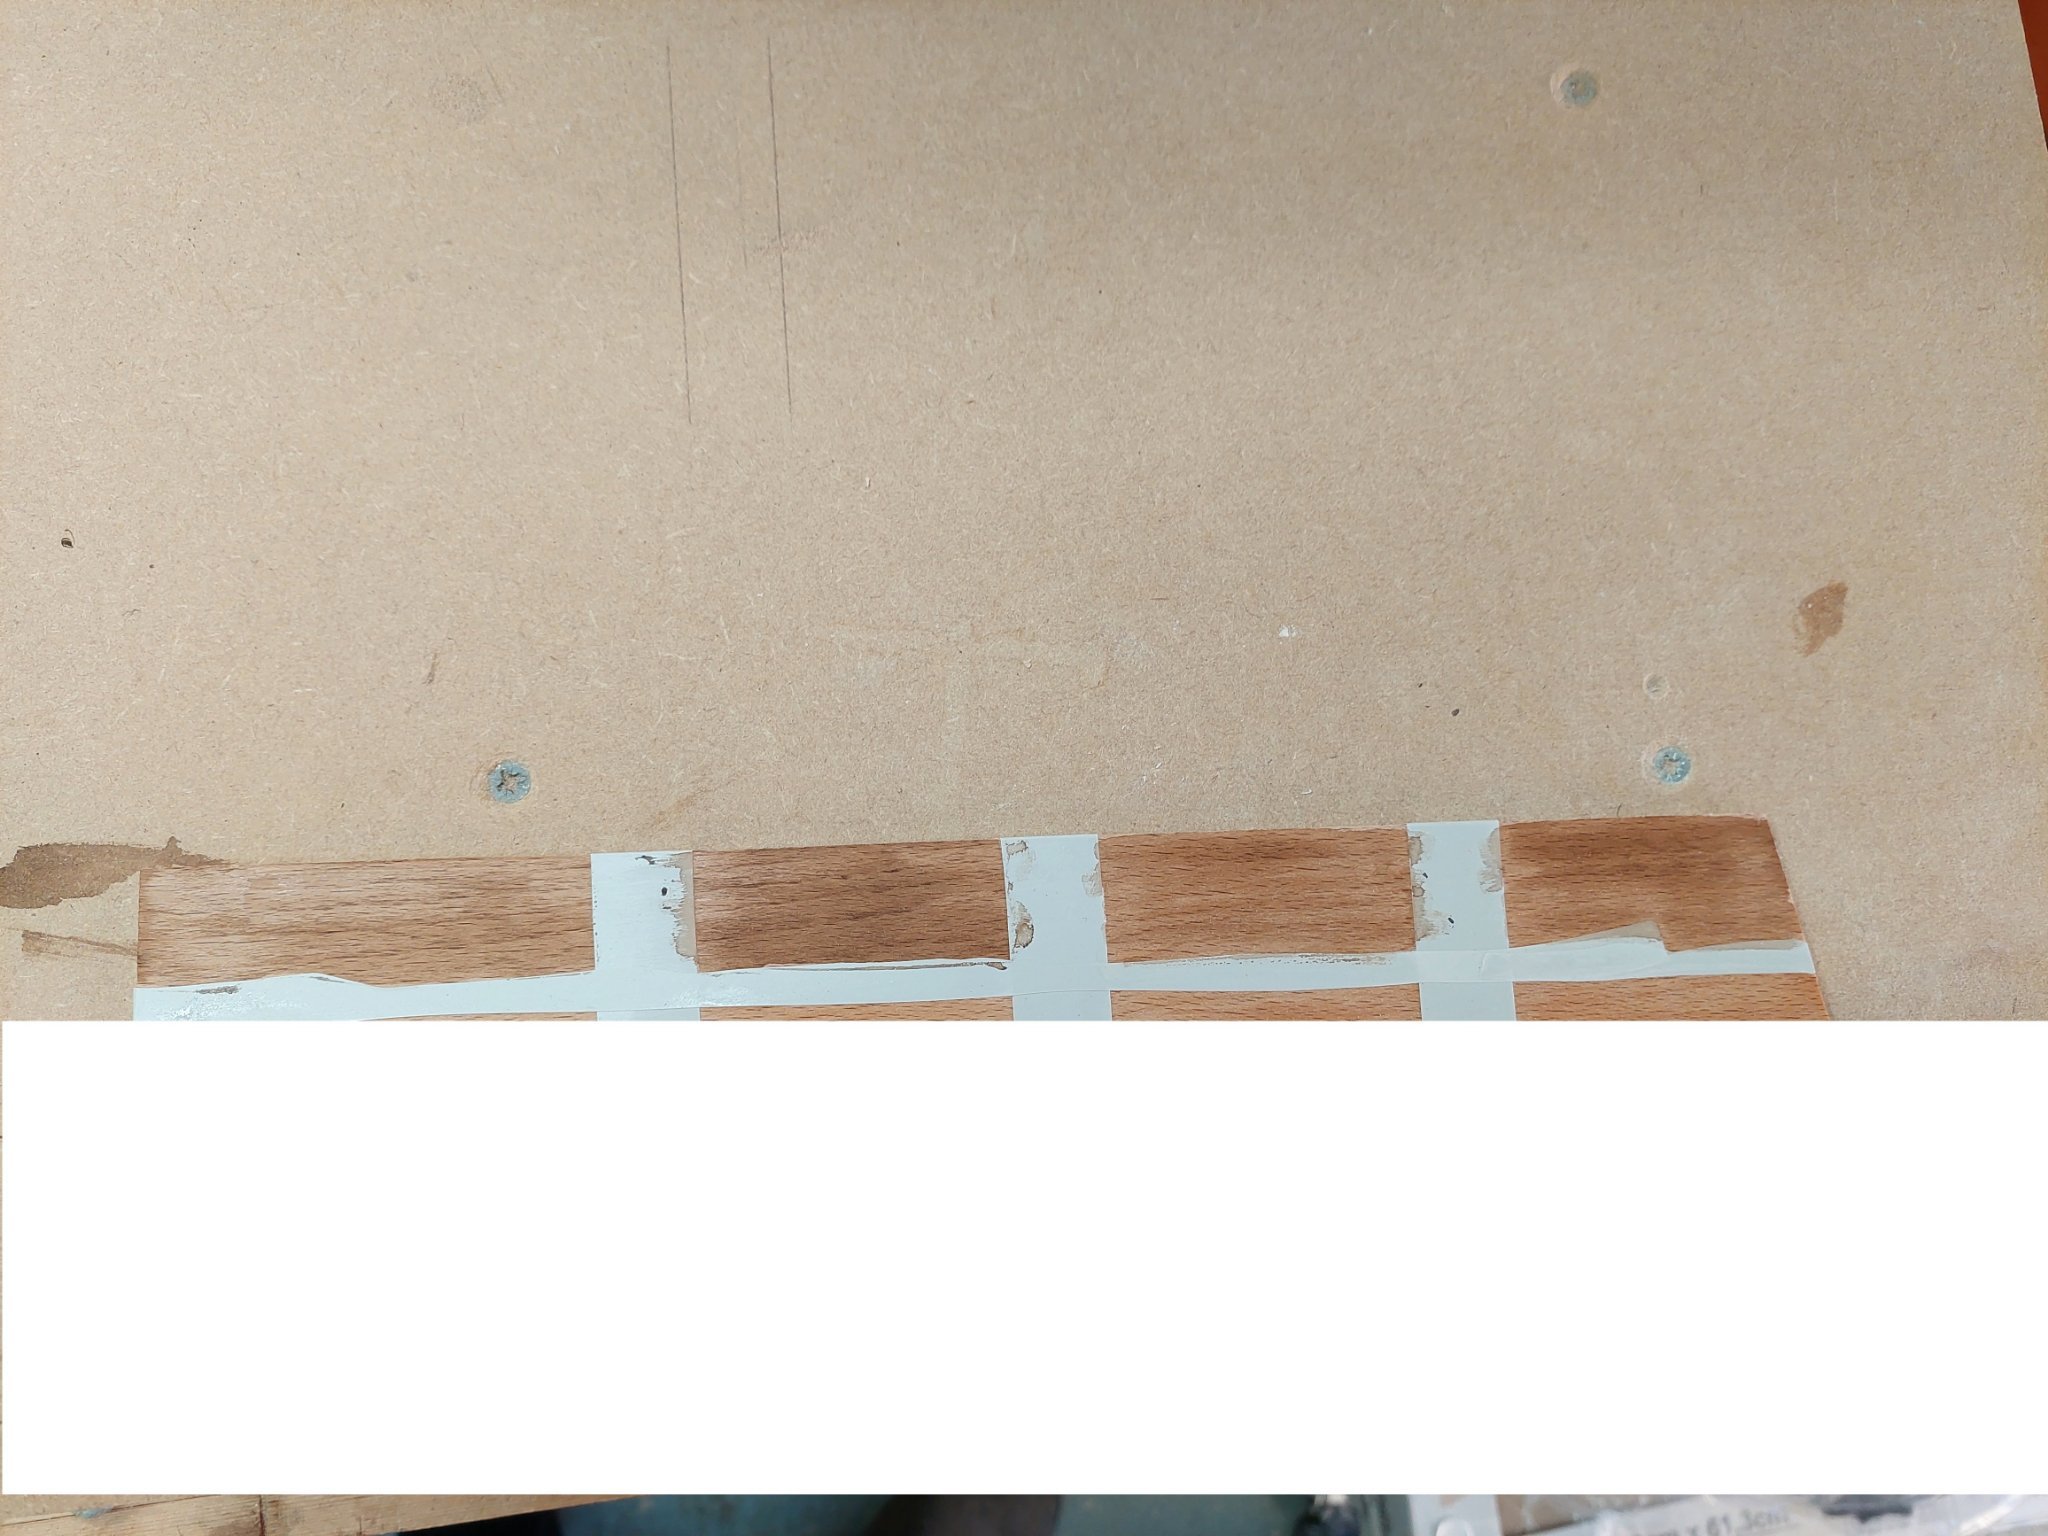
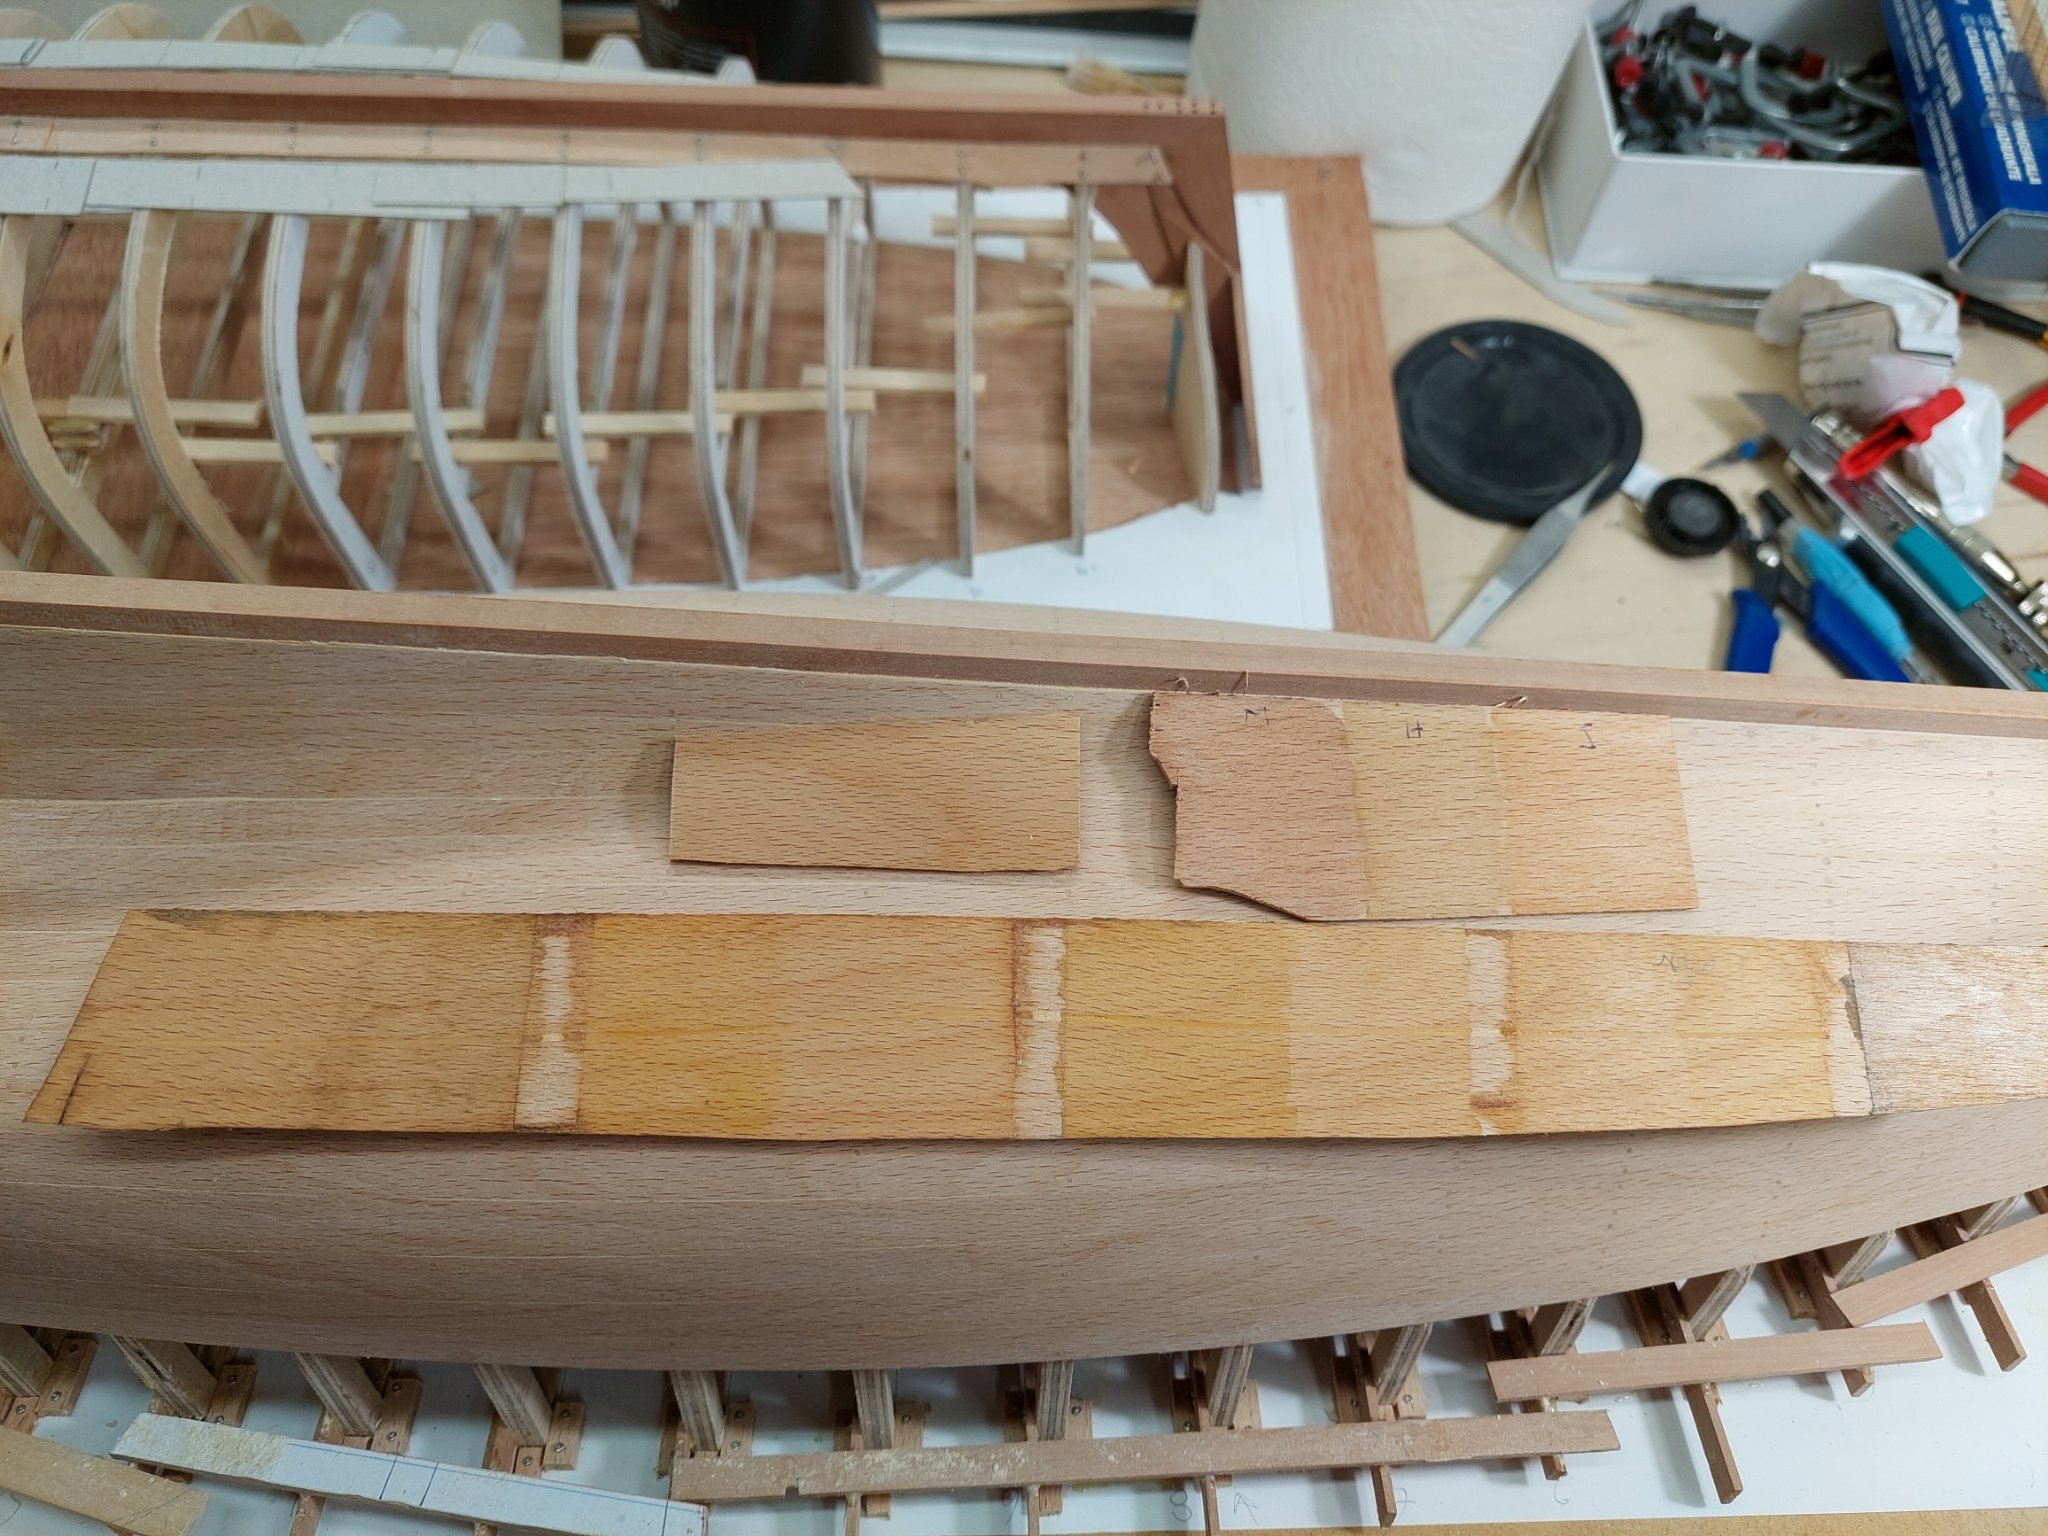
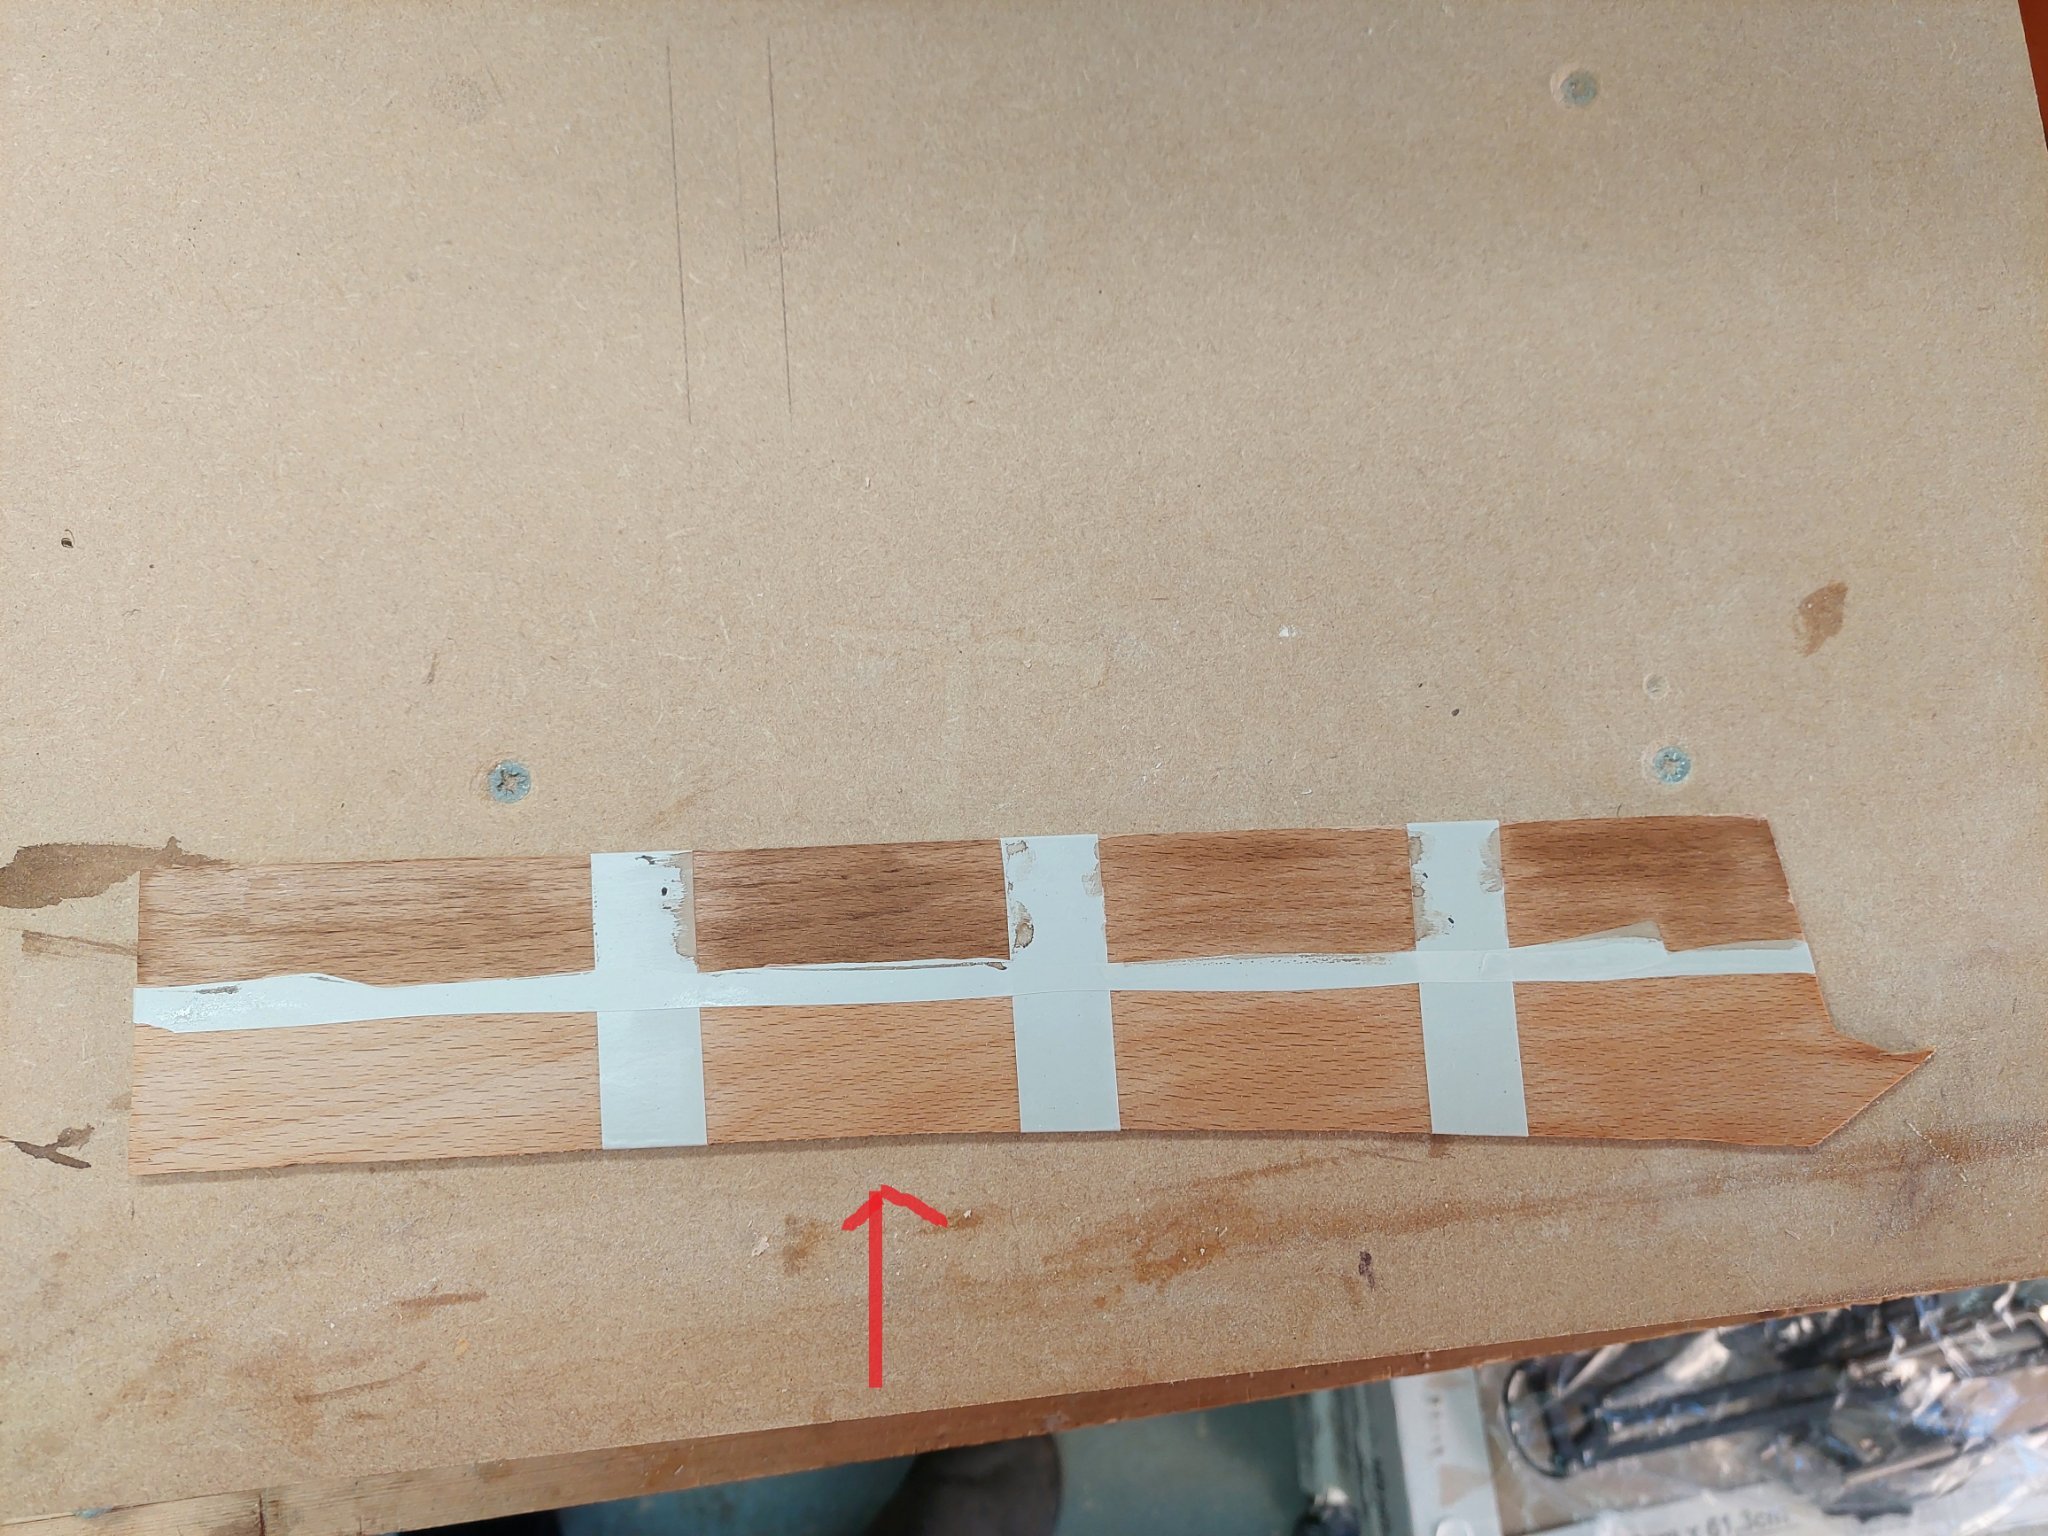
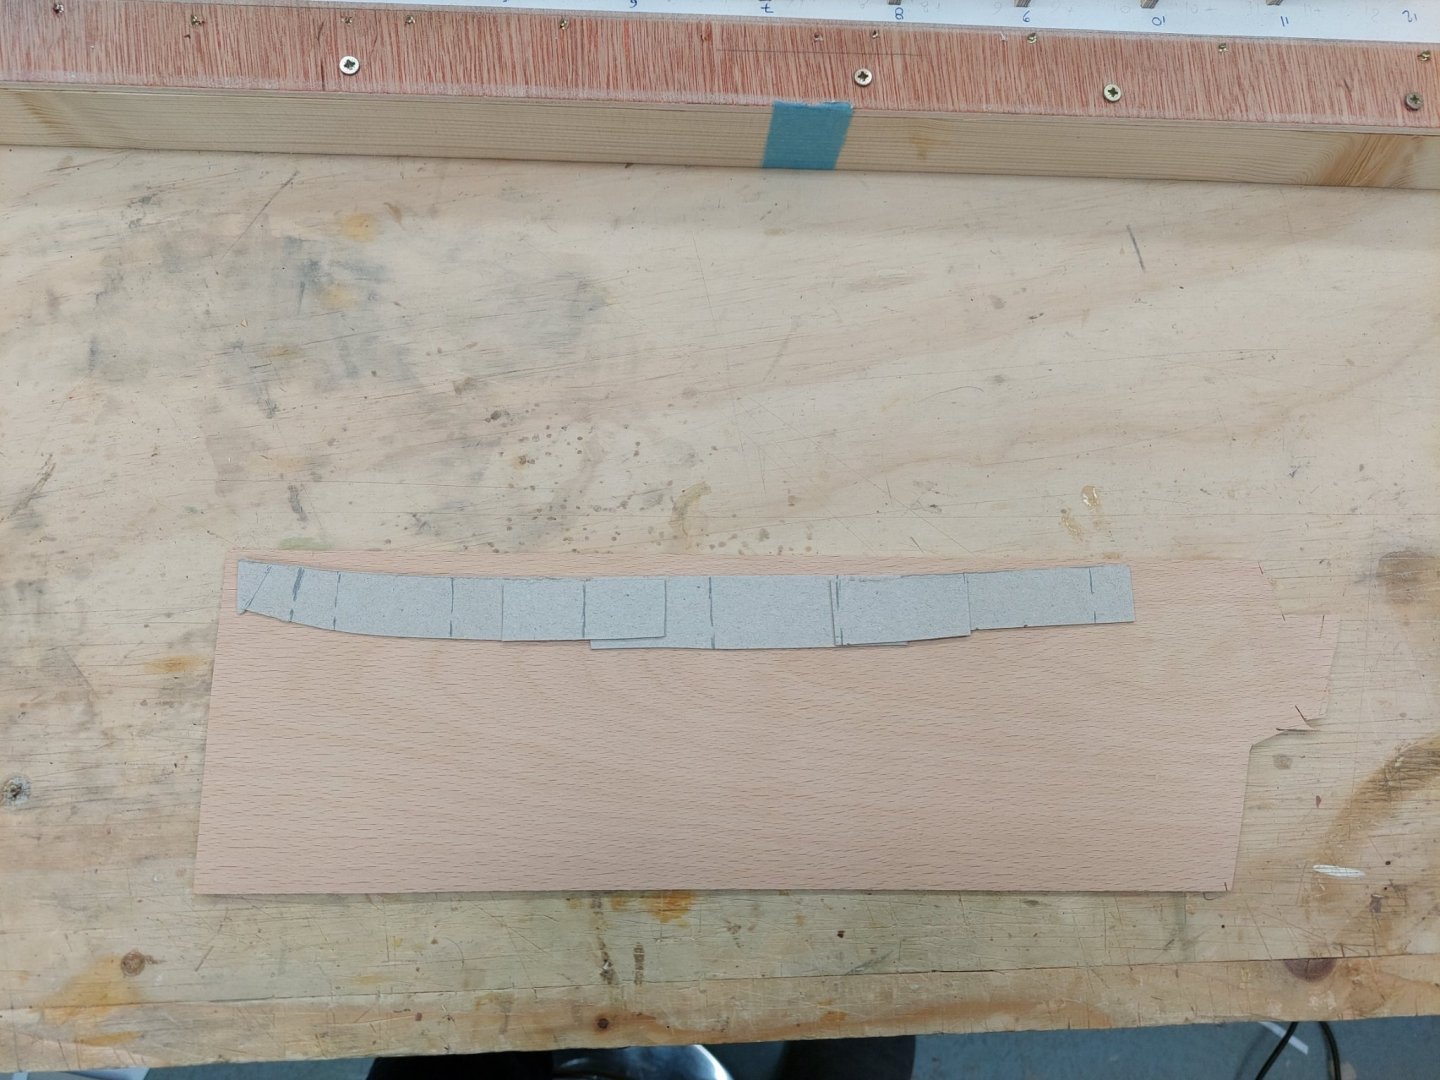
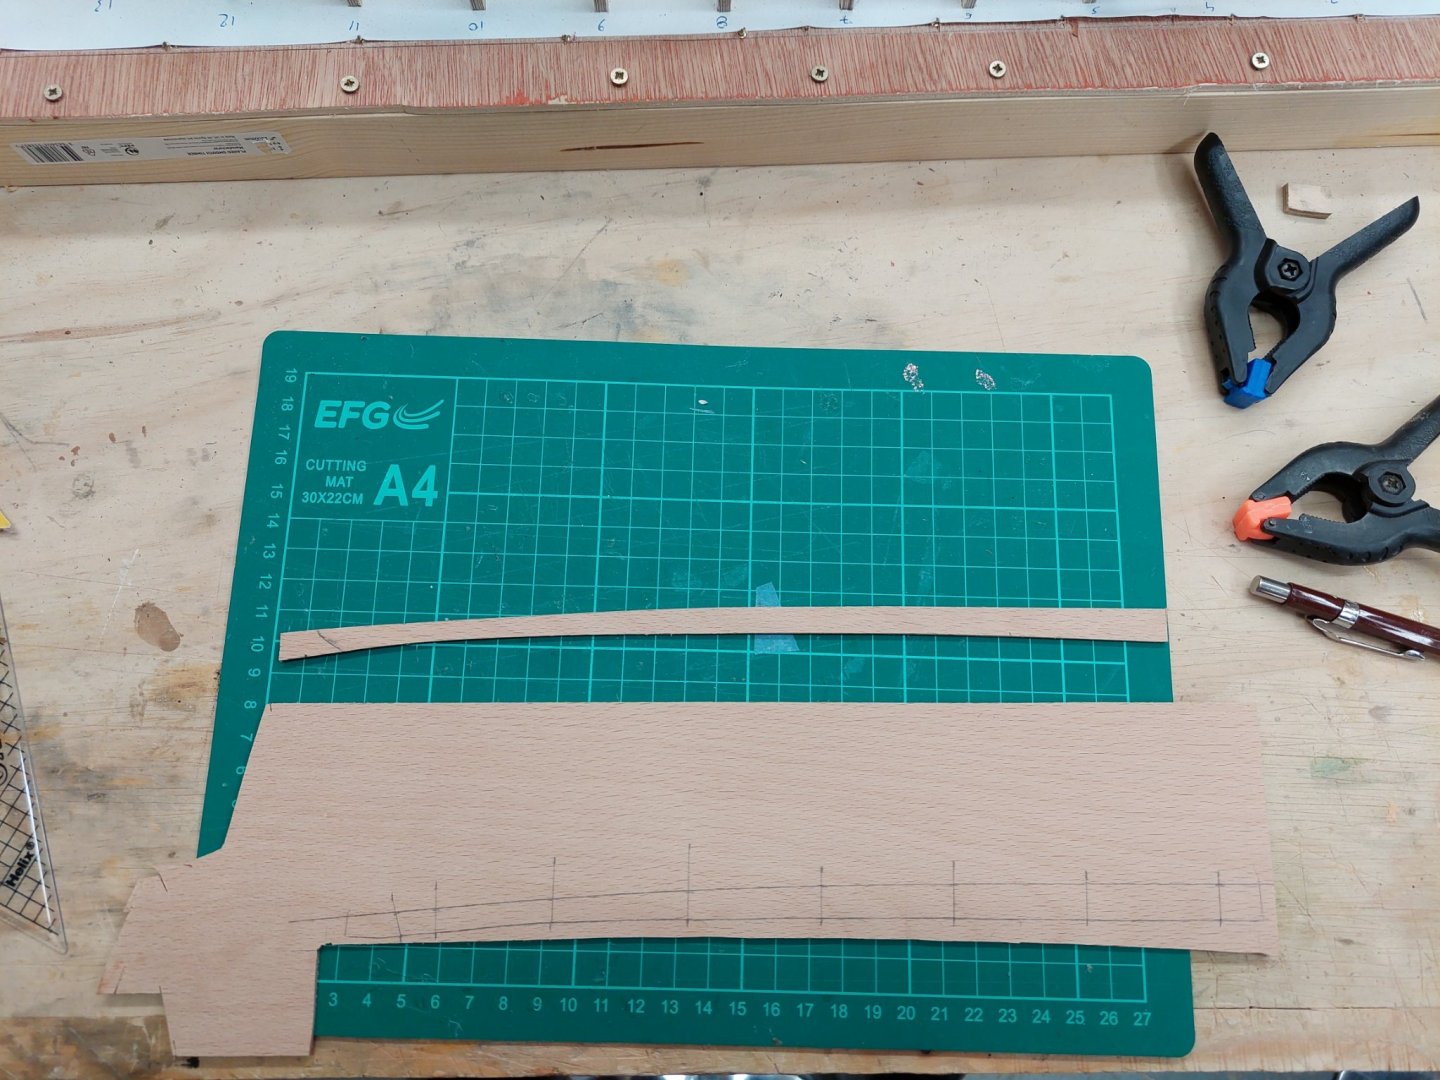
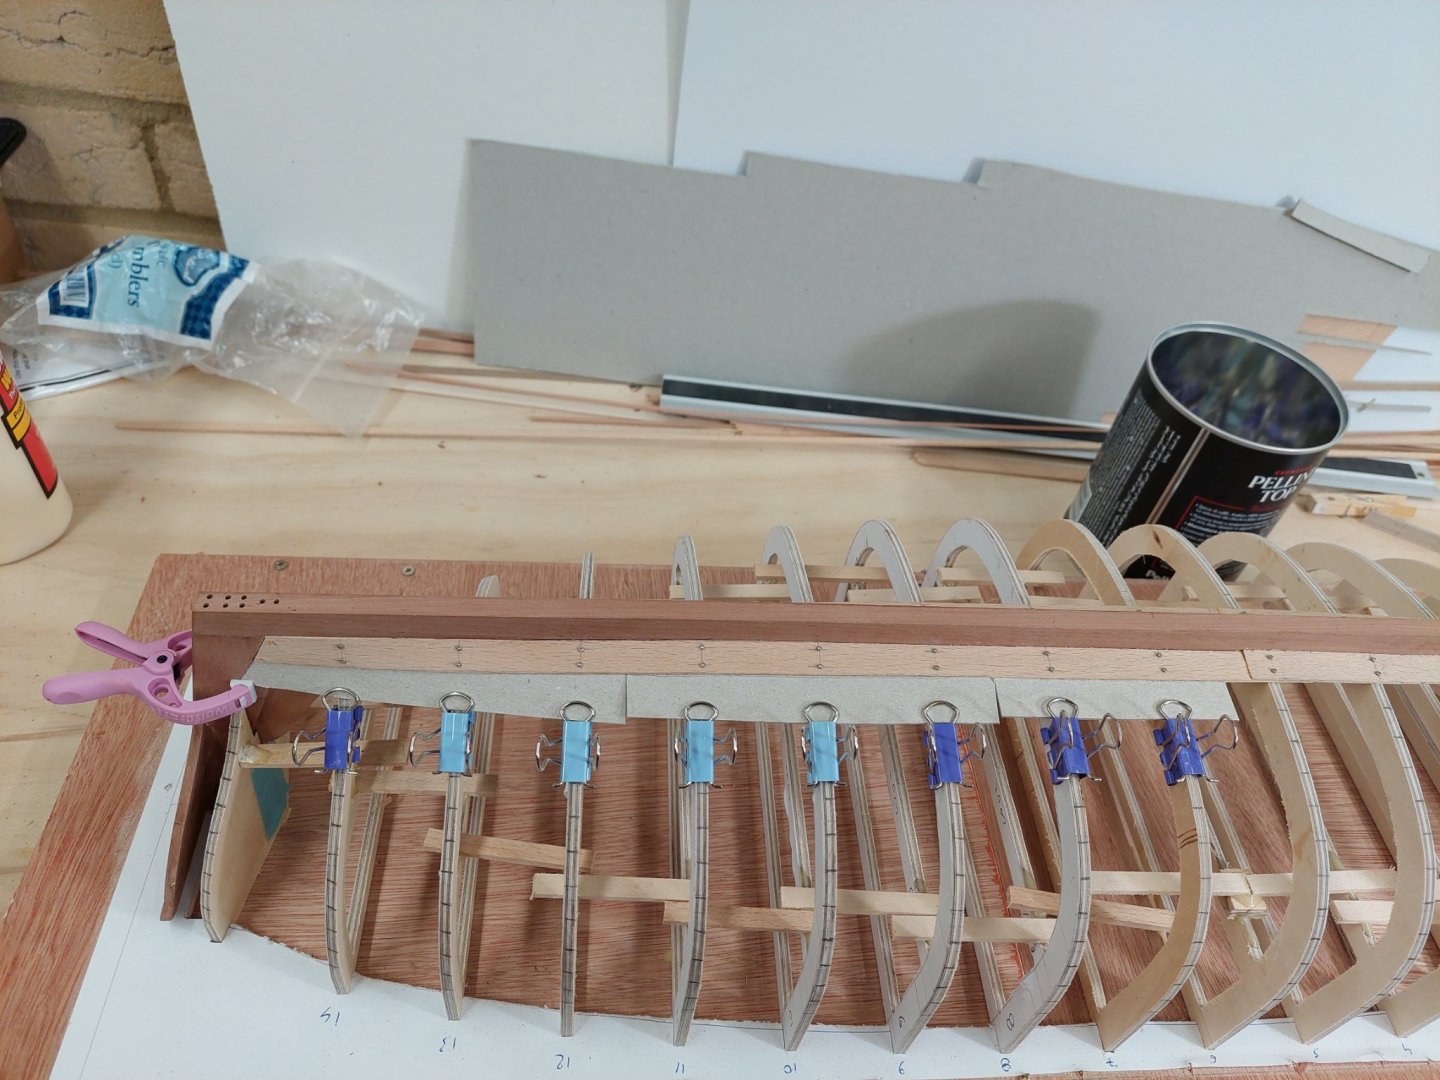
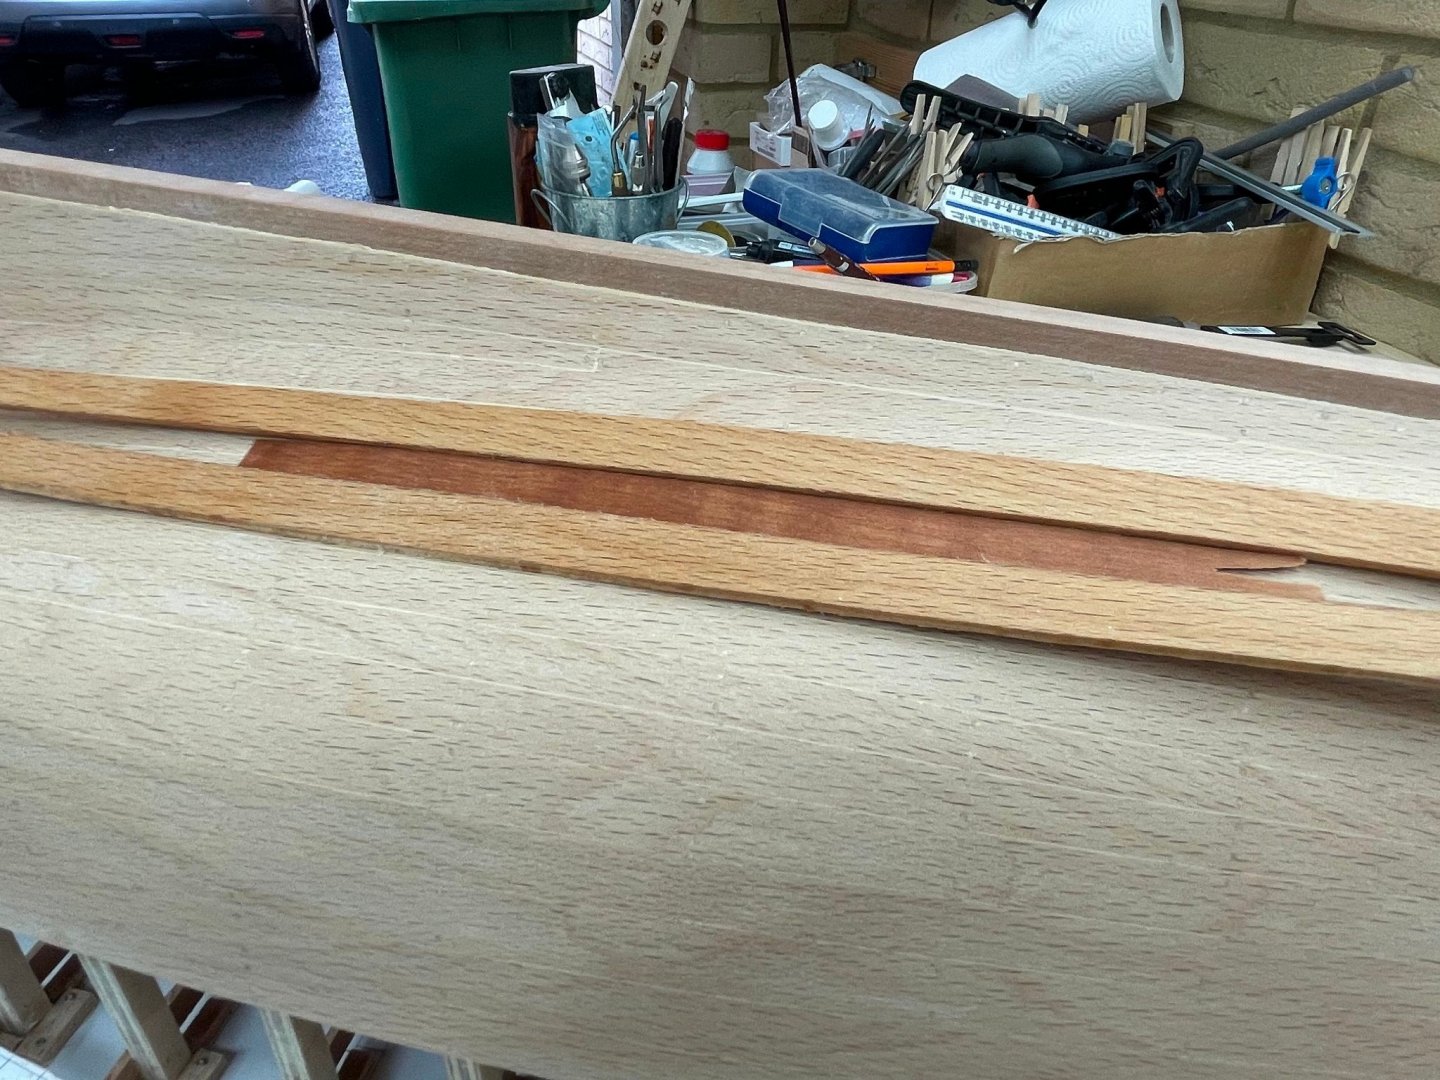
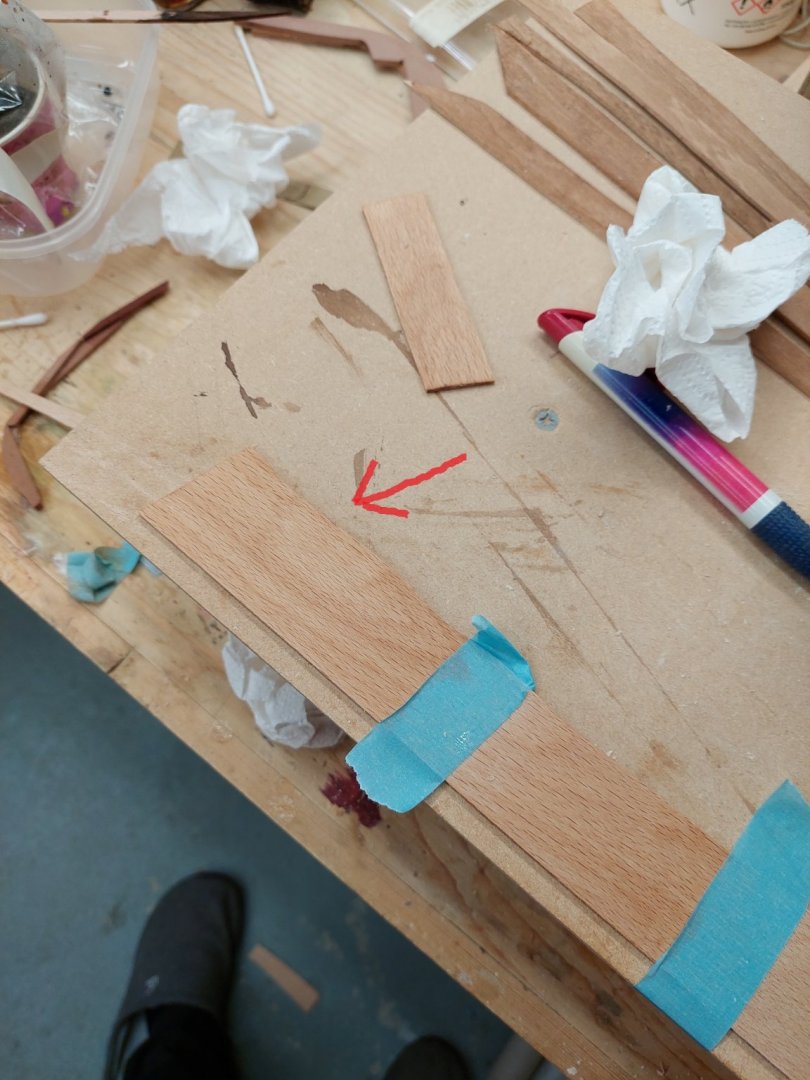
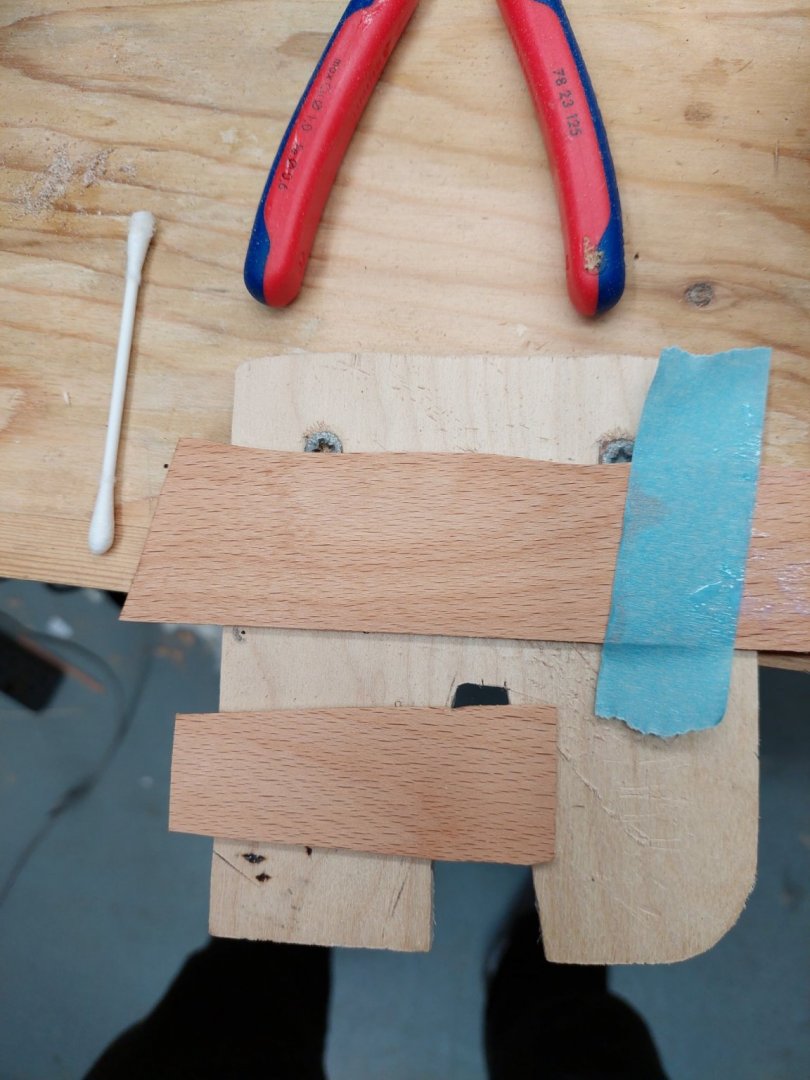
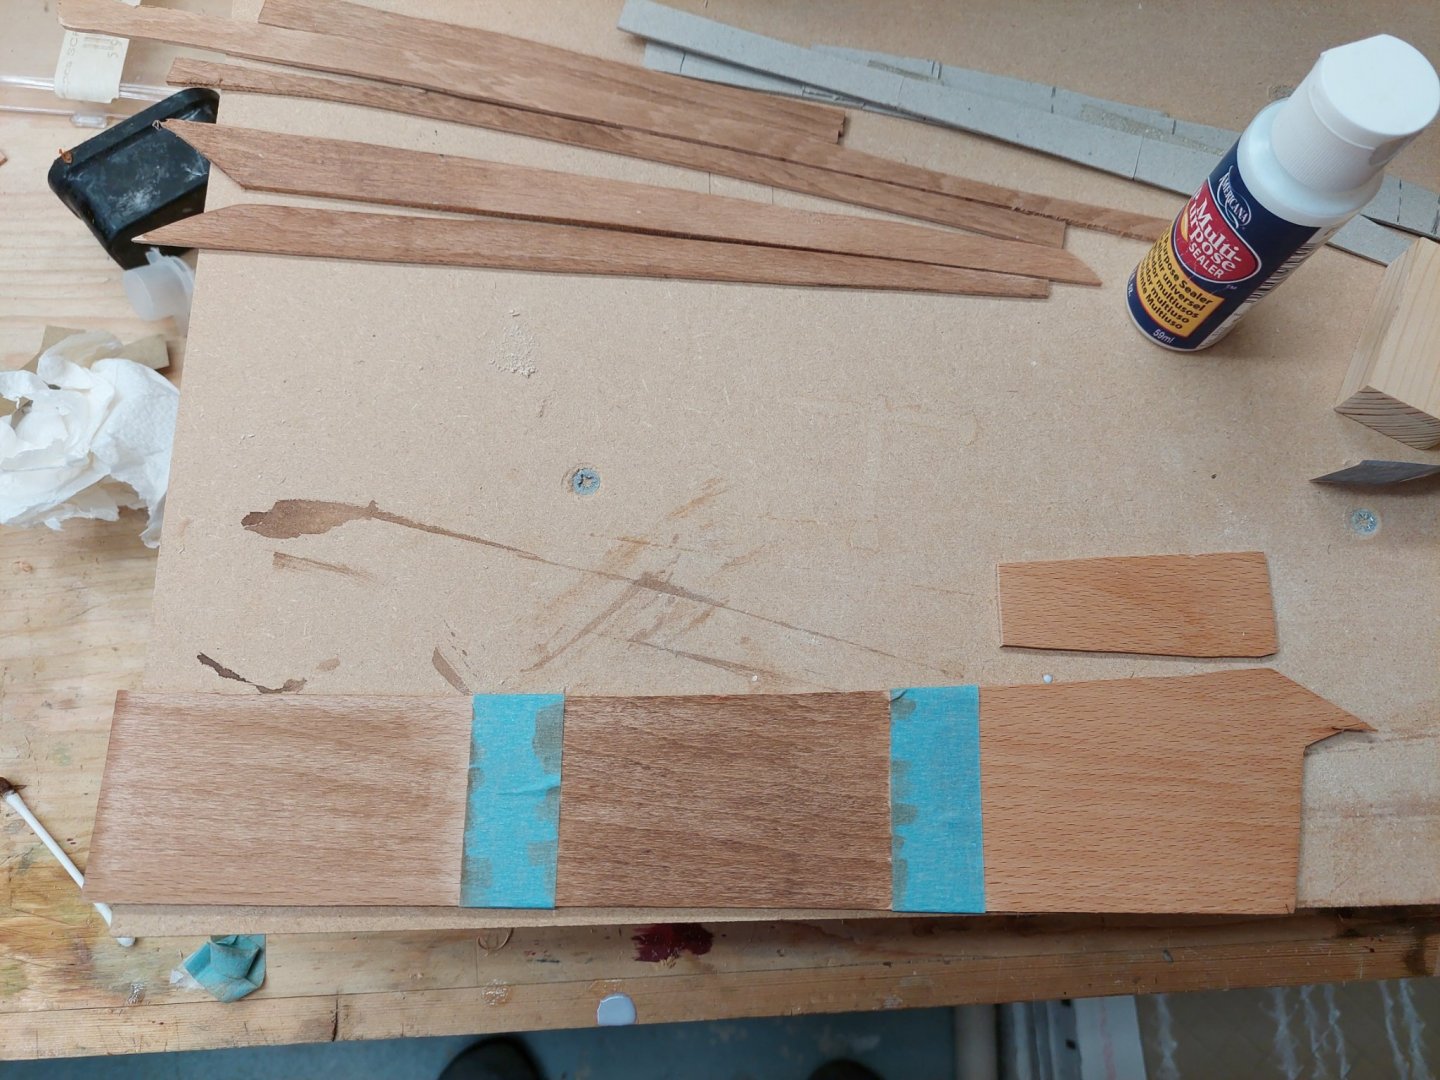
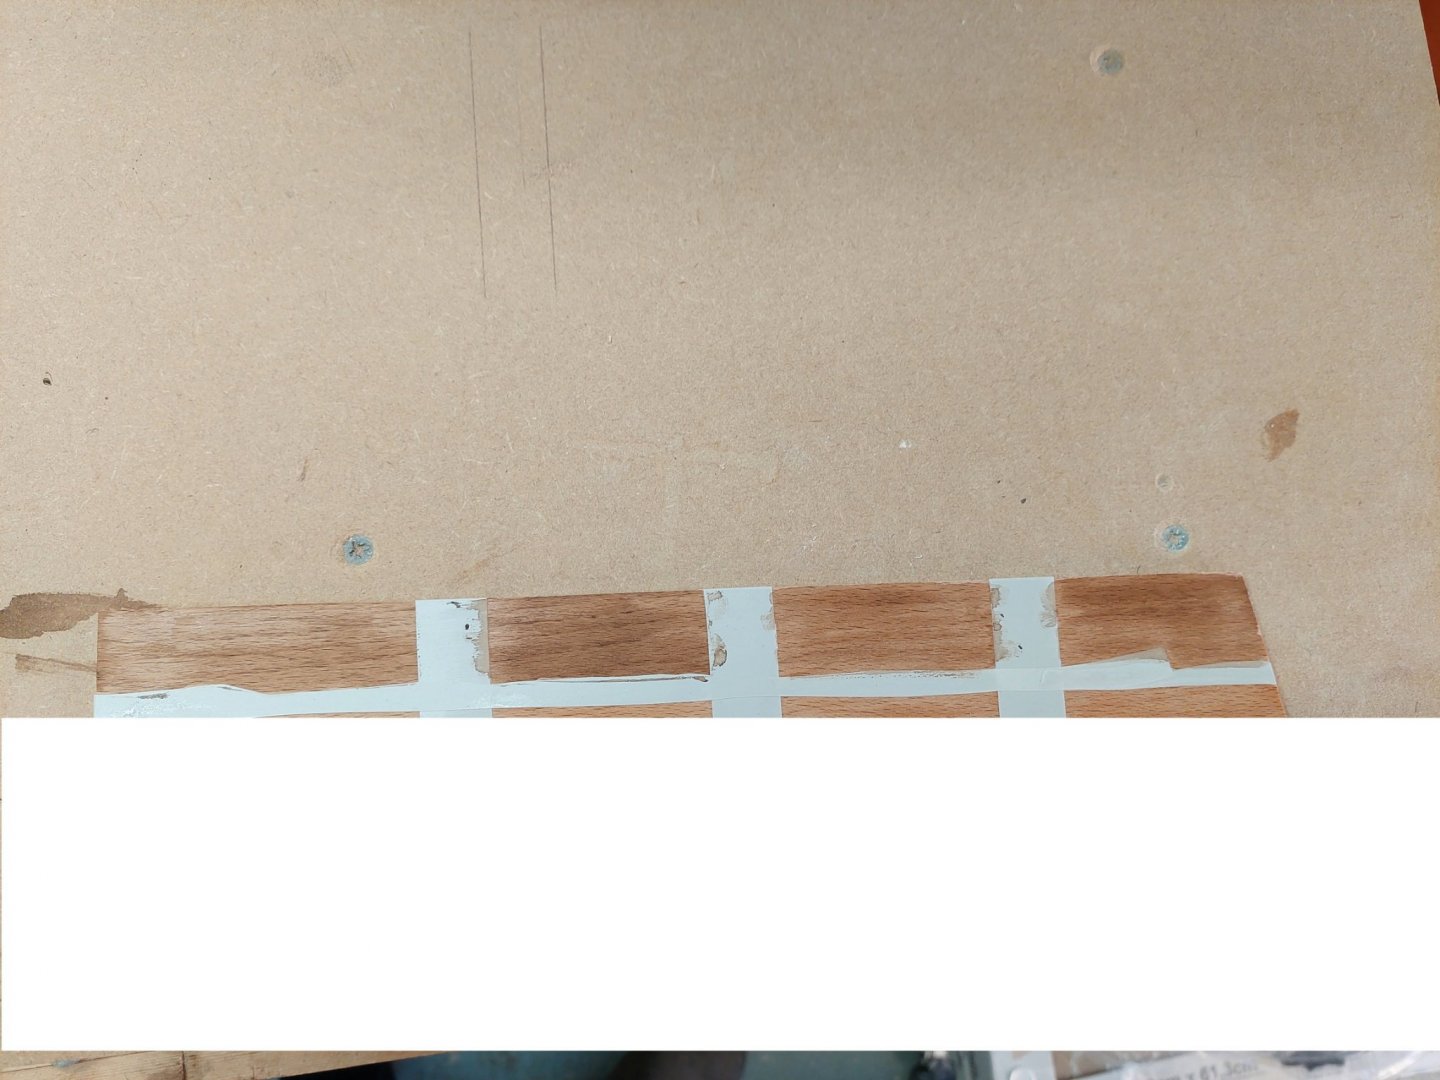
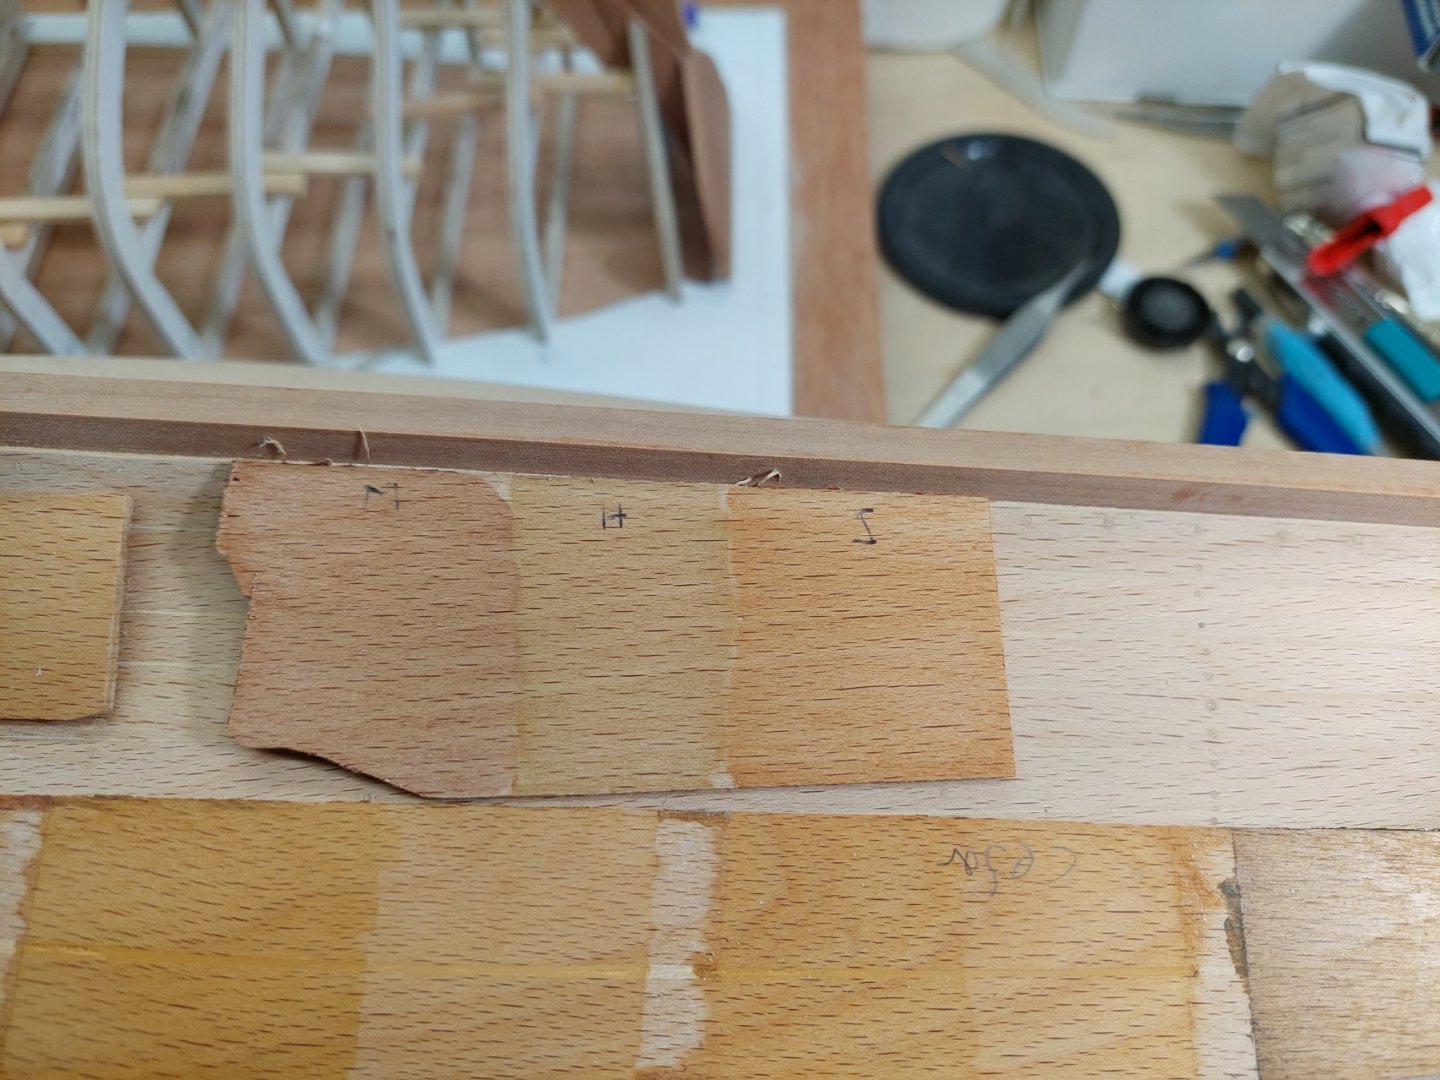
I must admit I very much like beech. It is a very hard wood but it bends beautifully. It holds an edge, glues well, cuts well, sands well. Does not splinter. It is readily available, cheap and available in all sizes with very clean sheets - no knots or blemishes. However, it swells a lot with changes in humidity and has a very distinctive grain. I like the grain for modelling but I think I am the only one... In any case, I ve used beech extensively so far but never for planking. This time, I decided to plank the 2 boats I am currently building in beech. In 1:10 scale, they are quite large. Now, one hull is ready and the other is being planked so I ve been thinking how to finish the thing. I was planning to paint the hulls but it was suggested that it would be a shame to hide the planking so now some kind of clear finish is needed. And here lies the rub. Both the pear and beech wood I ve used are steamed and have a pink hue. The hull is sanded to 400 grit and it really cries for some colour enhancing and finish. The second photo shows the hull against coloured wood - it needs something doing. Beech wood is notorious for resisting any finish. The wood has areas with very large open pores and others that are quite the opposite. Any staining attempt will result in ugly blotchiness. I tried to simply use Tung oil but the results were not good. The photo shows how non-uniformally the oil has coloured the wood - it is the segment on the left, Tung oil straight on raw sanded wood Now, treating the wood with sanding sealer dramatically improves things. I know most people use Shellac, I personally never liked it - I find methylated spirits too toxic. I ve been using a water based sanding sealer which I think is excellent (Decoart-Americana multi purpose sealer). The bottom wood sample was sanded to 400 grit, had a coat of sealer, sanded with 400 grit and then had Tung oil. Much better colour uniformity. So Tung oil needs sealing first. What about changing the colour though? I decided to try Van Dyke crystals. I ve never used the stuff. I applied it directly to sanded wood. Fantastic colour but also dramatic grain inversion, the growth rings really stand out. Now, the next photo is really interesting. The two upper strips have been coated in different strengths dye. The third was first sealed with sanding sealer, then dyed. Fantastic result! The last is just plain beech wood. This was the only time I succeeded dyeing beech wood. All my subsequent attempts were disastrous. Did not matter how many coats of sealer, what grit of sand paper, every time was a massive failure. Photos bellow There is no room for error finishing a hull, especially with a dye which cannot be sanded off. So Van Dyke crystals cannot be considered due to poor reliability and repeatability. Next I tried stains. I had some left over samples of Osmo stains. I had found out from previous experience, that straight onto wood results are not good. However, applied on sanded and sealed wood, results were excellent. In the next photo, sealed wood is on top right (3 different stains), raw wood on the bottom. Very nice, very uniform colour. Perhaps a second coat would enhance it more. However, these stains on the pear wood keel did not look good at all and I did not wanted to treat the 2 woods separately - Too much trouble and room for error. So stains are out for this project but in general: Sand the wood to 320 grit, seal the wood with decoart water based sanding sealer, sand to no more than 320 grit and use Osmo stains. You ll have a good result on this very stubborn wood. So, we are back to Tung oil. I experimented using 2 coats vs 1 coat of sanding sealer and sanding to 320 vs 400 grit. The best outcome was with using one coat of sealer and sanding to 320 grit. 400 grit seamed to seal the wood too much. Even if something goes wrong, this thick Tung oil does not soak deep onto sealed wood and can be sanded off or stained over. In due course I ll seal the hull, Tung oil it and see what happens. I l try to post a photo in this thread. I hope this will be of some help to others, especially as there is very little info on this subject on the net. Best wishes Vaddoc


-
Very interesting Egilman. Even with a complete table of offsets, drafting a hull is a big job. I am taking a sit in the back, curious to see how you ll fill the gaps between the different views you ve included in your 3D box.
-
Kev, just get a few pieces of wood and a few products and try. There will be some cost involved as Tung oil, Shellac, methylated spirits, sanding sealers, WOP, varnishes, sprays, brushes etc may not be prohibitely expensive but they do add up. However, experimenting will be the only way to find out what you like and how things work. Also, not all woods work the same with the same finish so check the wood you are actually using. For example, pear wood works great with Tung oil, the beech I am currently using seems it does not. All part of the same journey. Vaddoc
-
+1 for all the above. Especially compass and calliper are in constant use. However, I do love my 1 m long steel ruler!
-
Try 3M 618 sand paper. Amazing stuff, I only use this for many years now. It is silicon carbide (not aluminum oxide), has some anticlog technology that works very well and it is very robust. It is not cheap and needs a bit of googling. Typical 3M high quality. 120 removes wood in a controlled way, 180, 240, 320 and 400 leave the wood so smooth that it reflects light. I cut sheets of all grades into thin strips and use them with a solid flat backing, or sometimes a flexible one - as needed
-
Getting a straight line with a V chisel is to my experience very difficult. It will end up wavy-especially in large scales. Repeated cuts with a very sharp chisel, up to 6 mm for straight, 3 mm for curves, then deepening the grove without touching the edge of the rabet, works much better for me.
-
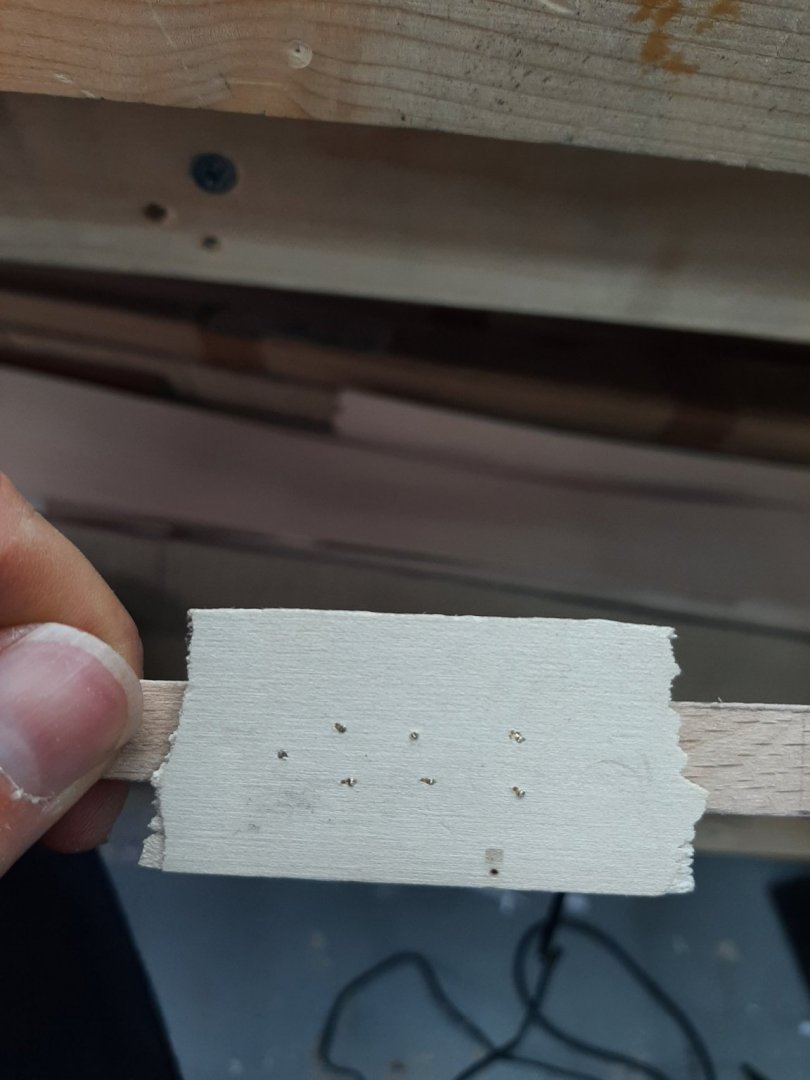
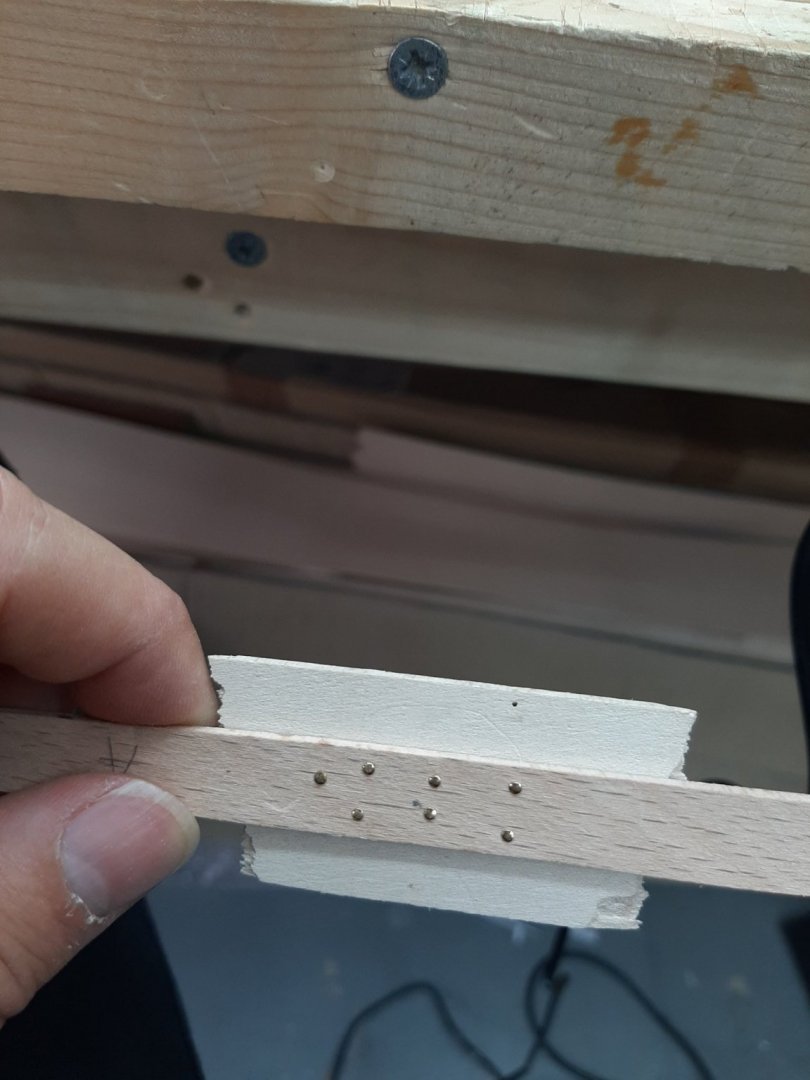
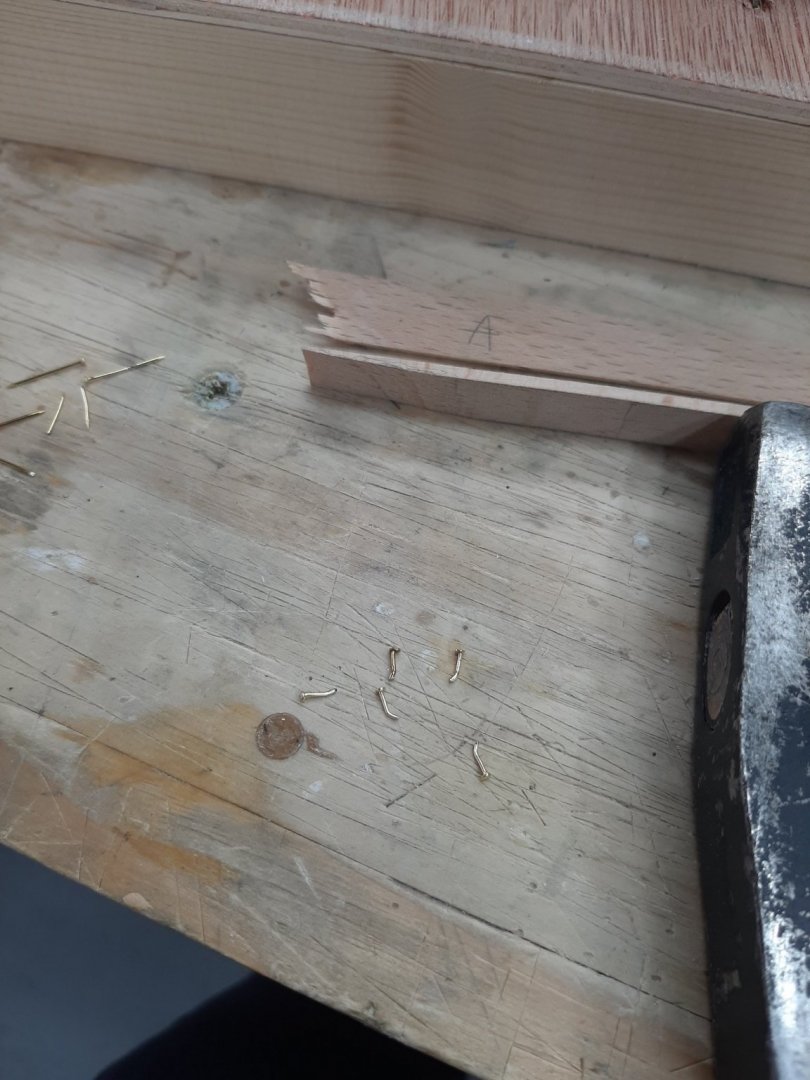
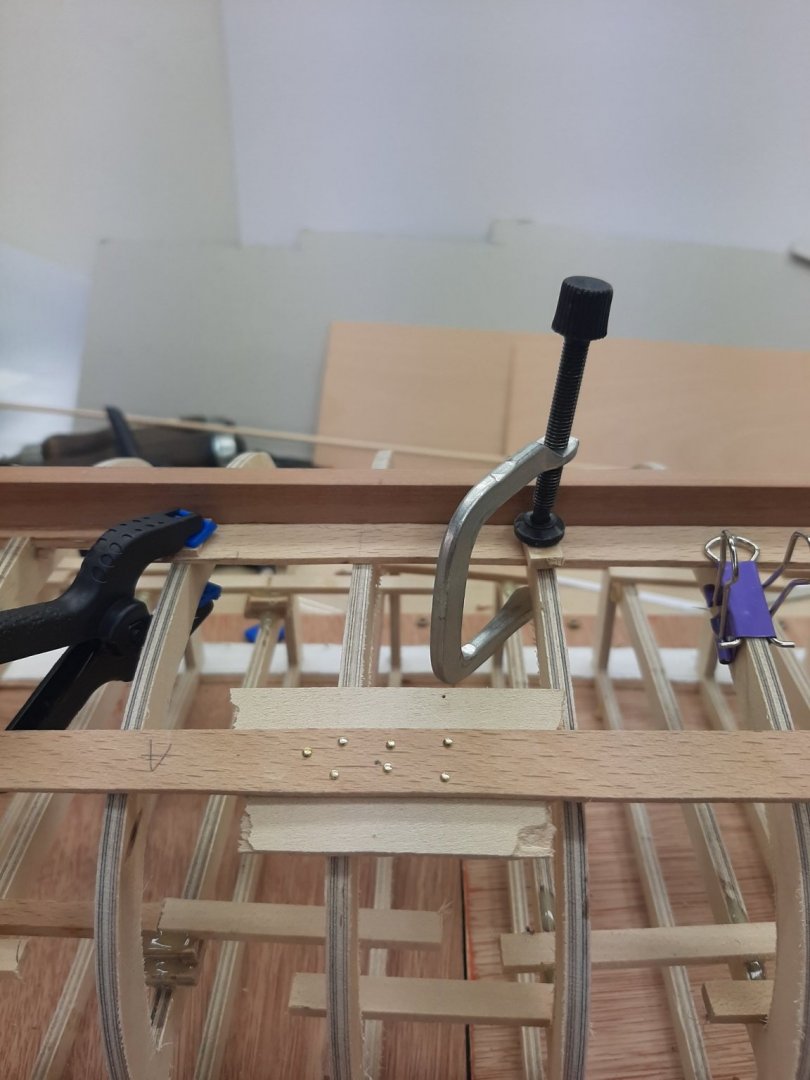
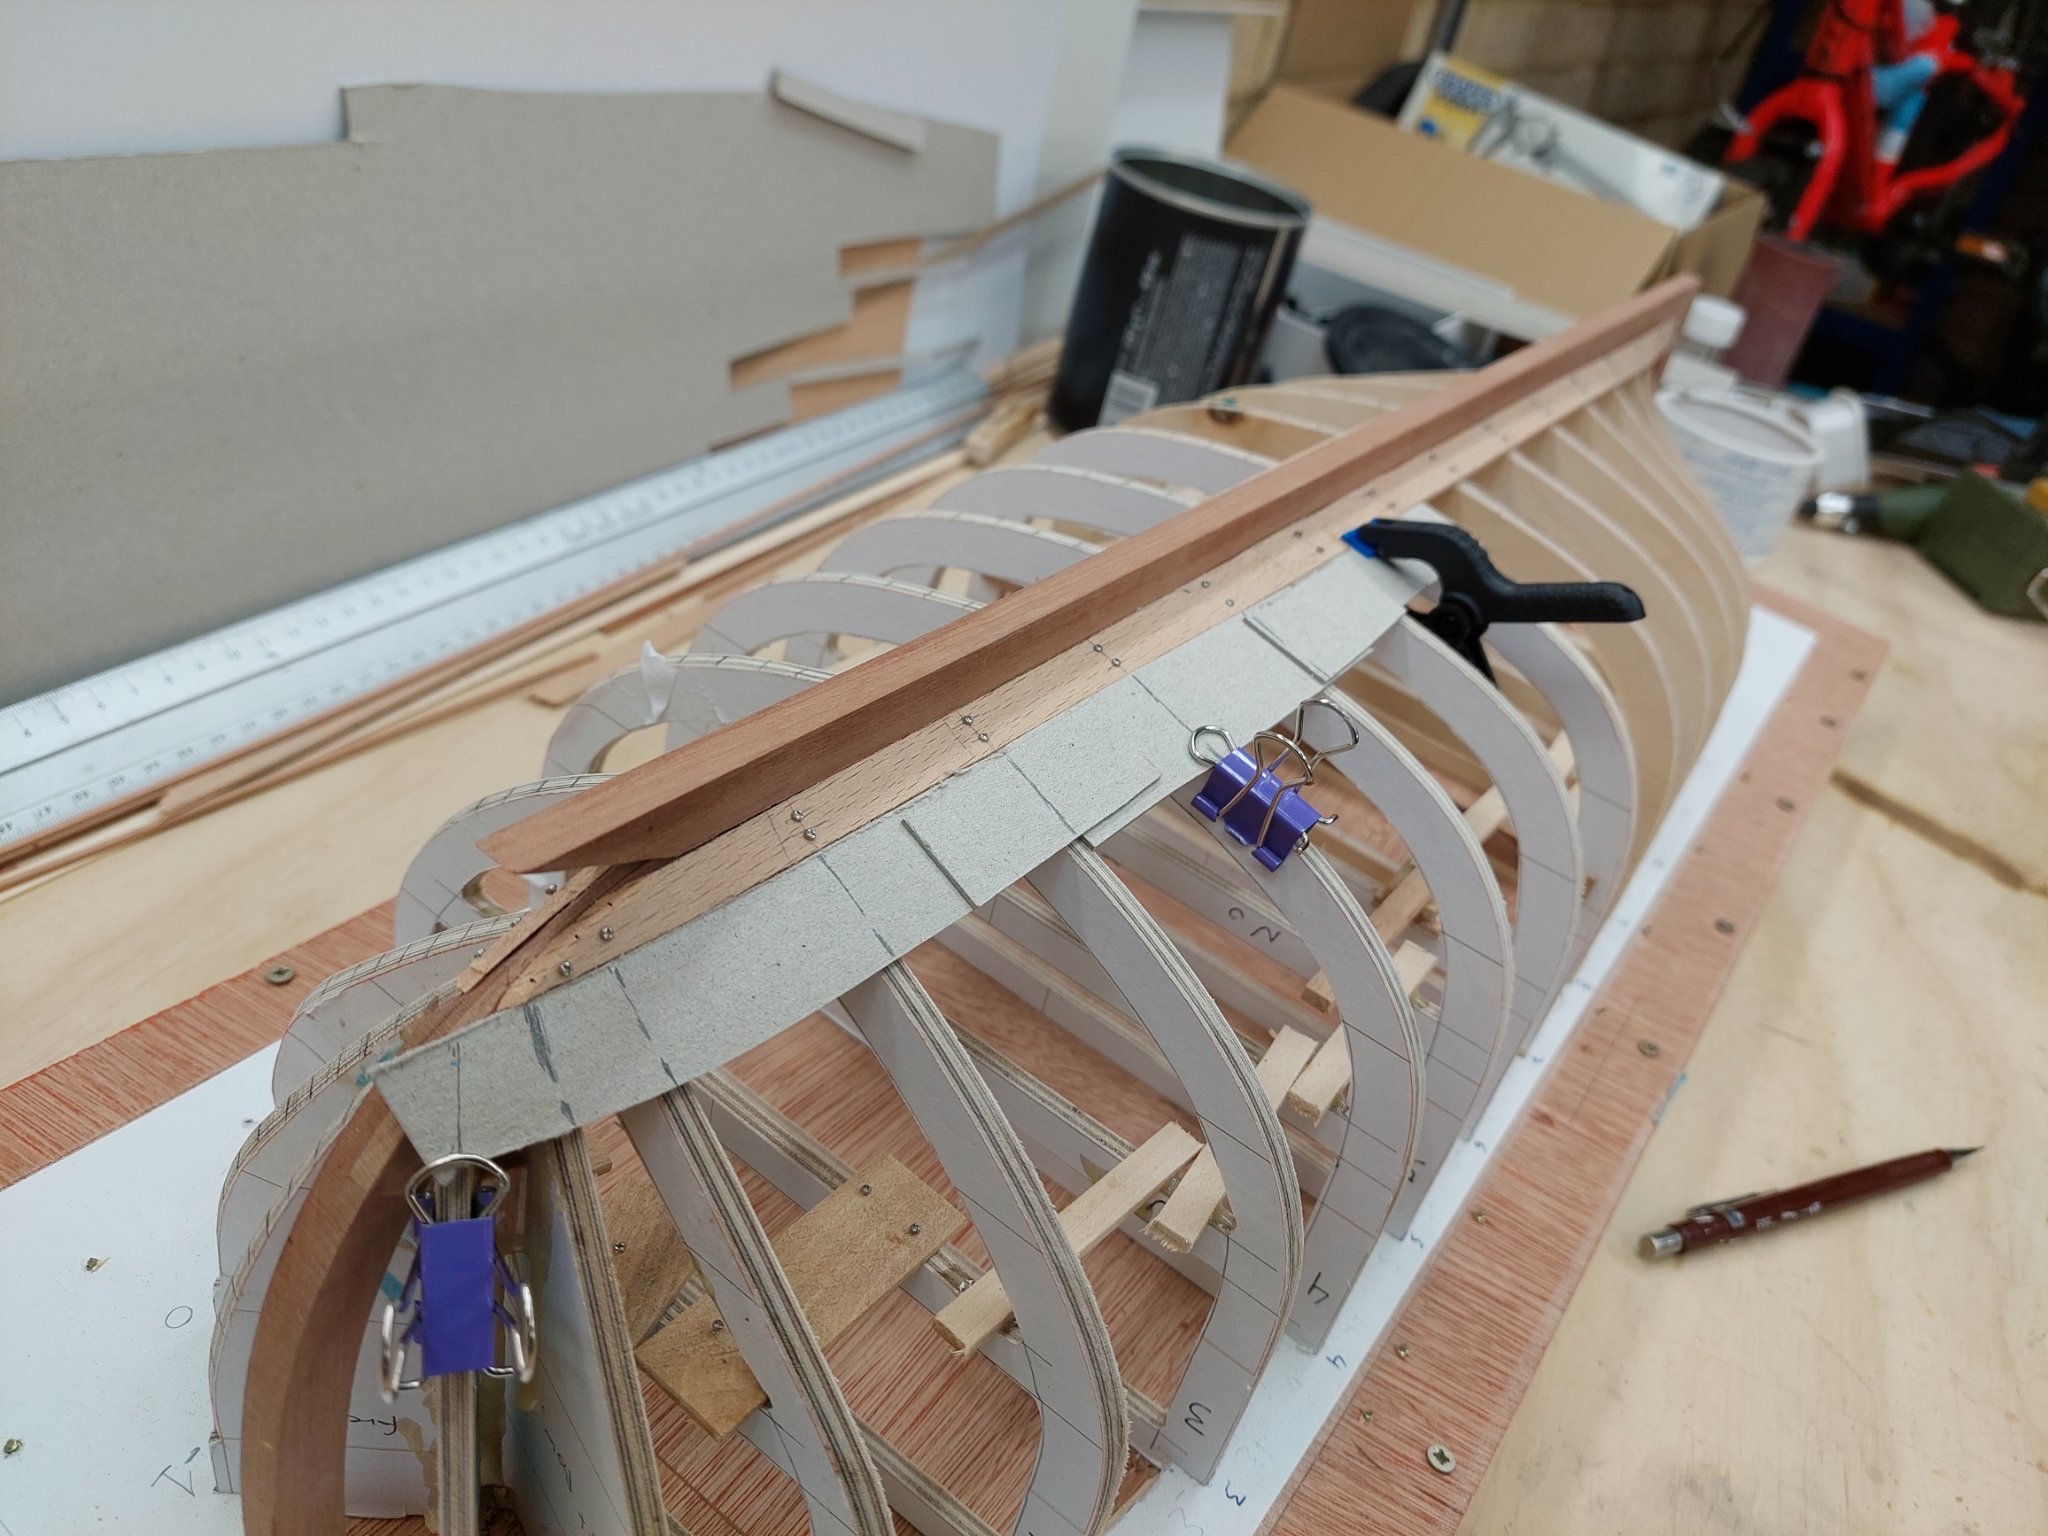
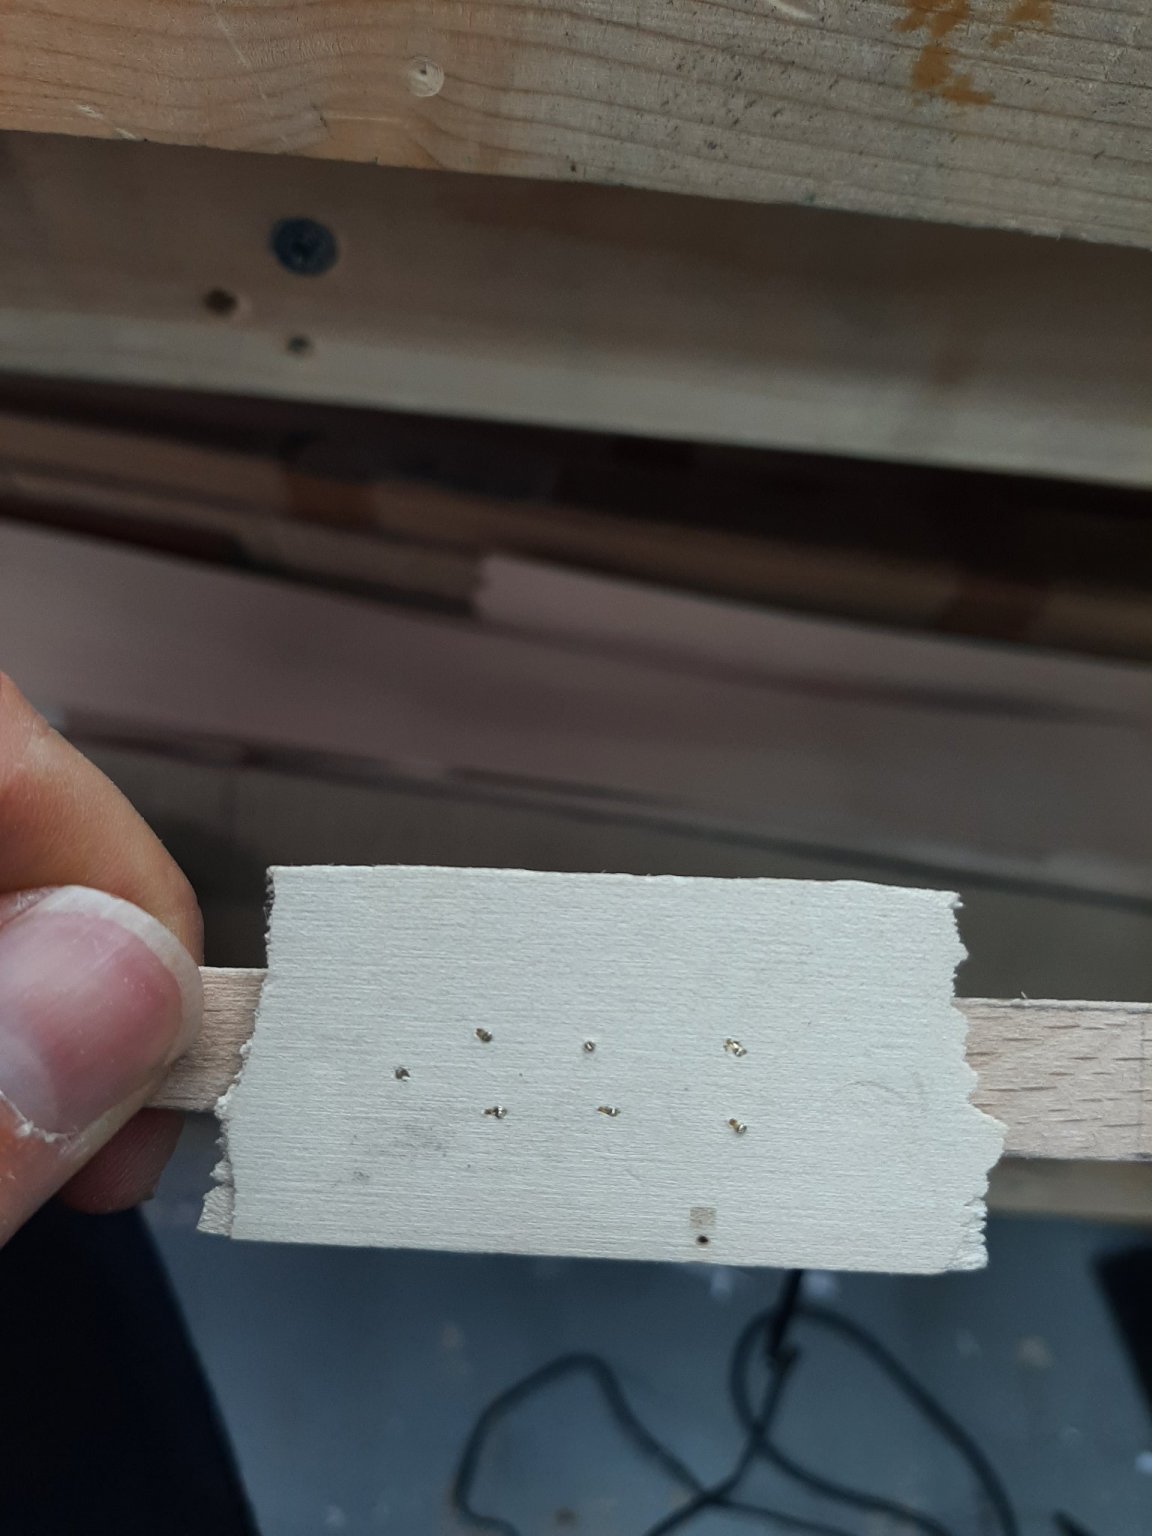
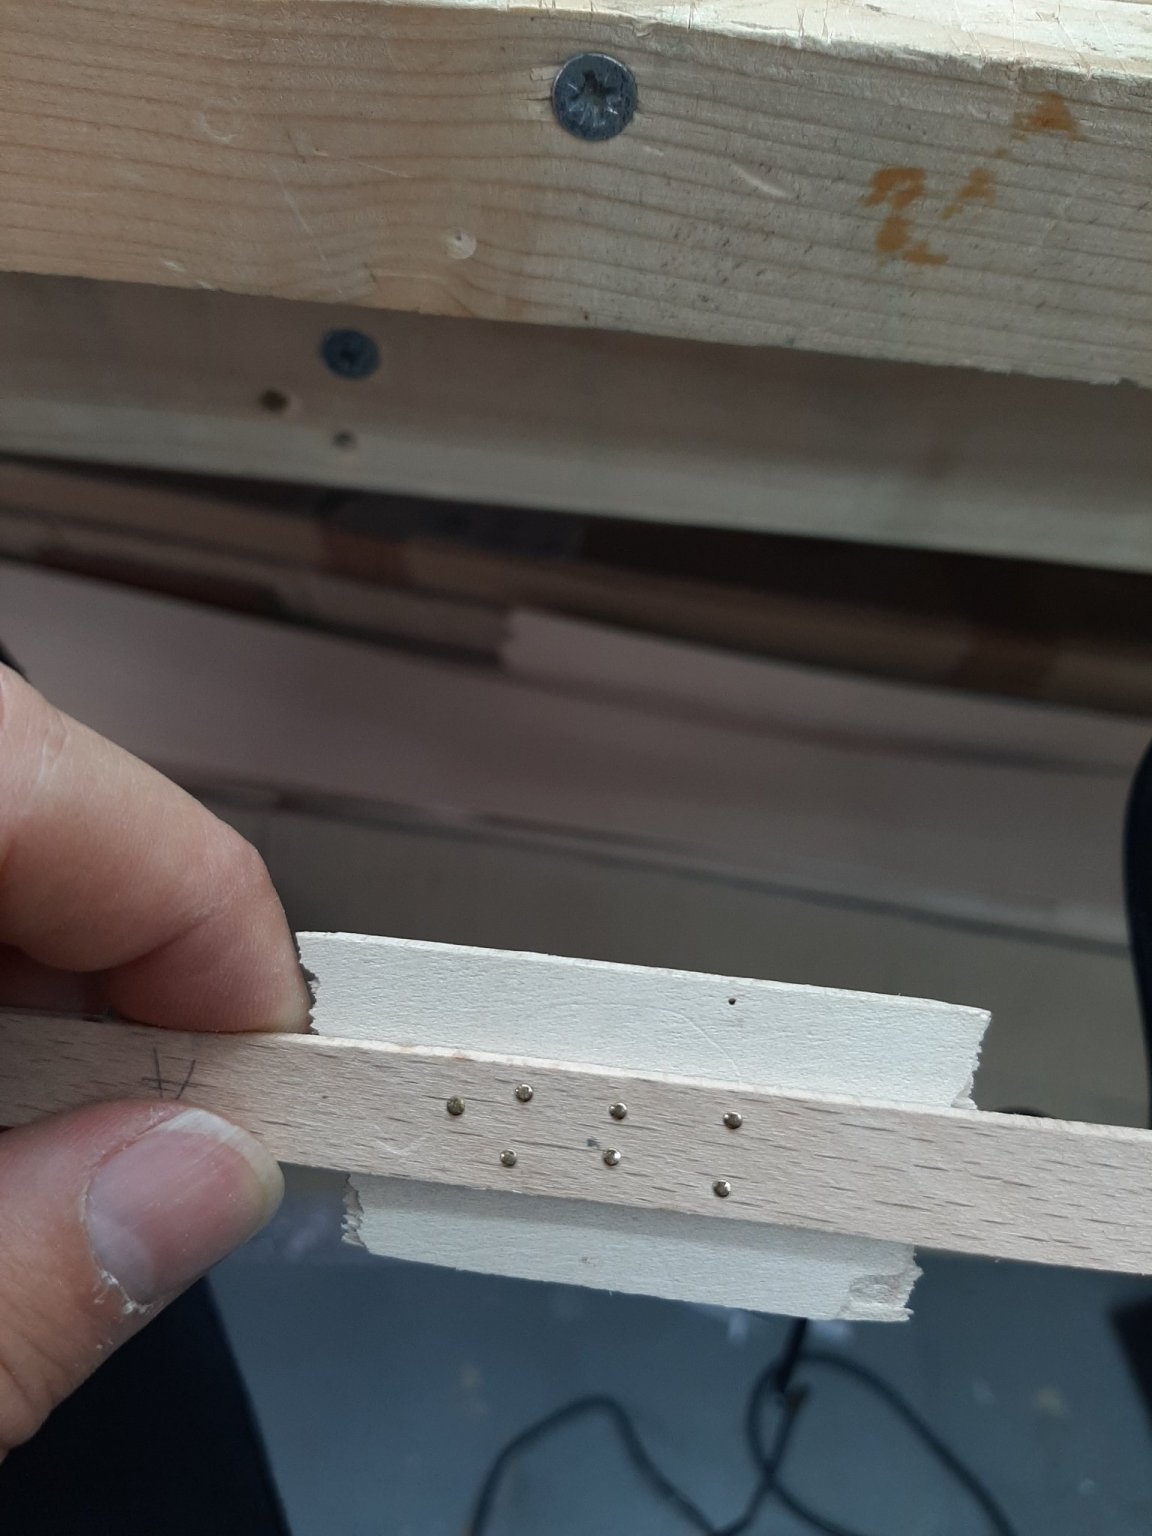
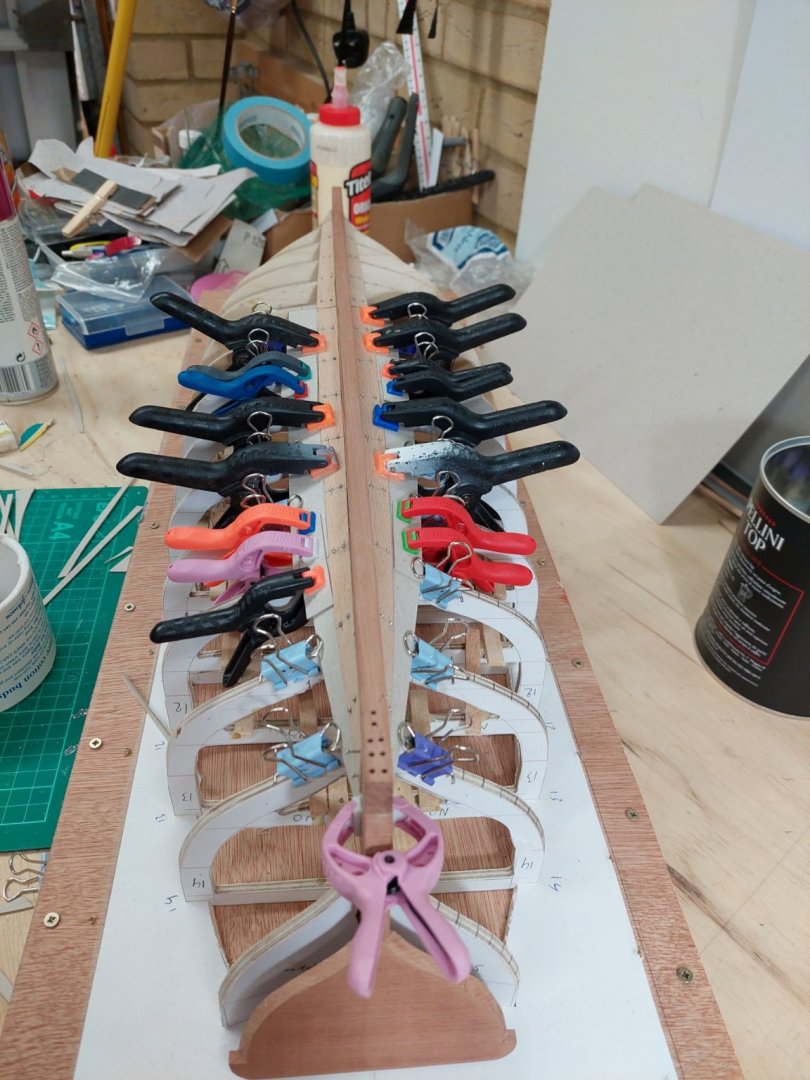
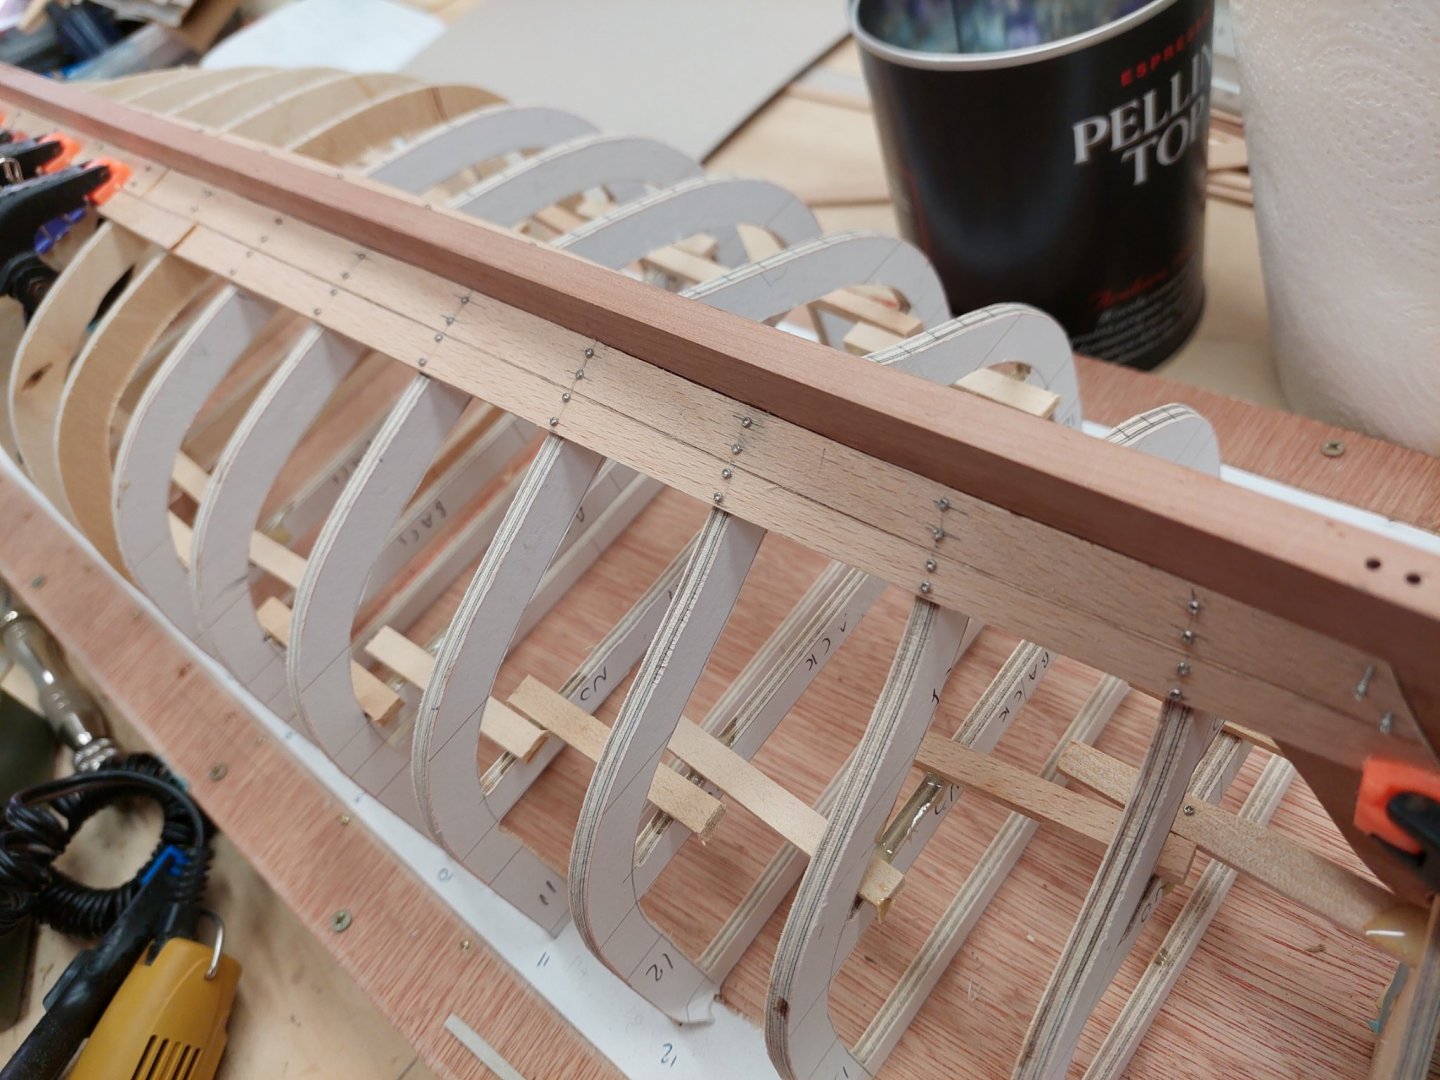
Dear all It has been 2 months since my last post, I have not had the time to work on the boat or even to catch up with your logs. I will try to though, in the meantime I do hope that you are doing well! Today though I did visit the shipyard and did some work-and had a nasty surprise. I am still not certain how I will secure the planks, whether I ll use threaded brass wire, treenails or bras pins. I experimented with 0.55 mm brass pins, nailed against a steel surface. The tips bend exactly as they should and hold the planks very securely. I think however the pin heads are out of scale. I finished the starboard garboard, the planks are secured with brass pins 0.6 mm through 0,5 mm pilot holes. The scarf is glued for now but some form of reinforcement nailing or screwing will go on. As I am not sure what I will use to fasten the planks to the ribs, I just cut the pins leaving a length so I can pull them out later as these are the temporary frames. Then I started work on the port side. Disaster... A few days ago, I needed a small piece of wood so I just broke a segment from a scrap piece I found on the bench. yep, that was the plank! I used the broken pieces to recreate the plank and thankfully, with a bit of sanding it came out fine. Then, I secured it in place The ends at the bow will need to be trimmed, I think I ve put the nails very close to the trimming line-we ll see. Till next time vaddoc