catopower
-
Posts
1,915 -
Joined
-
Last visited
Content Type
Profiles
Forums
Gallery
Events
Everything posted by catopower
-
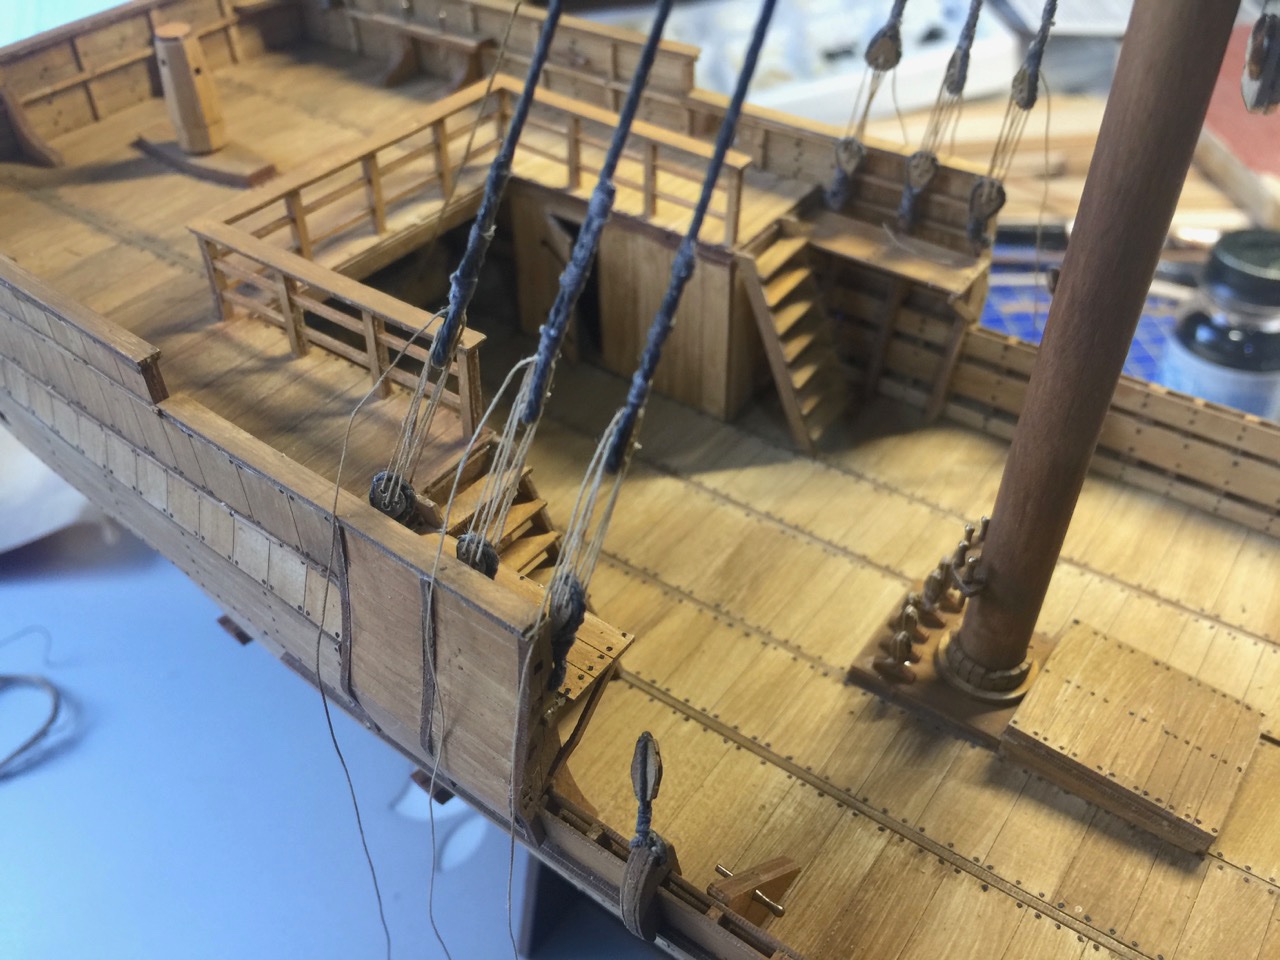
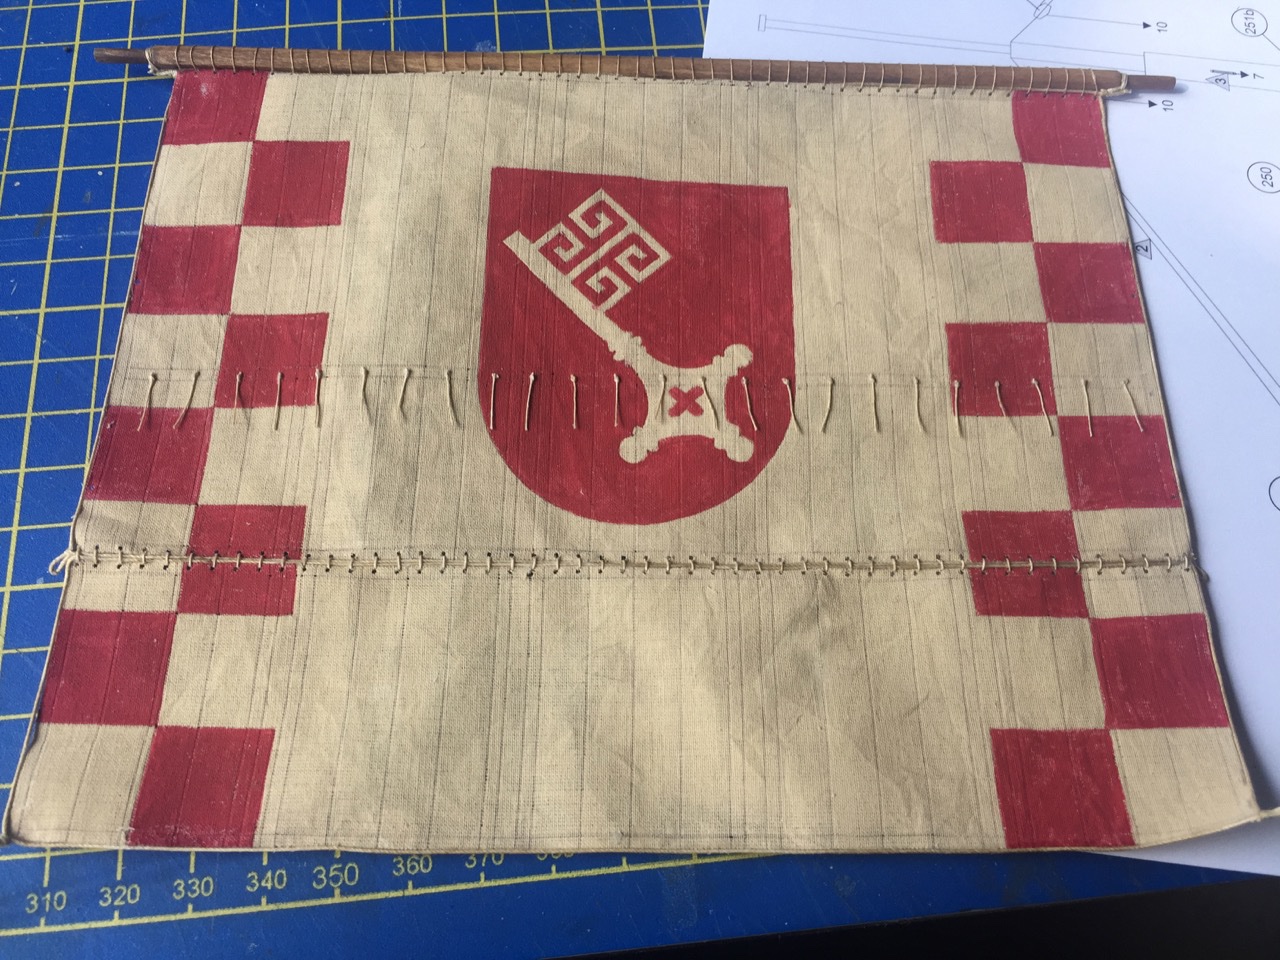
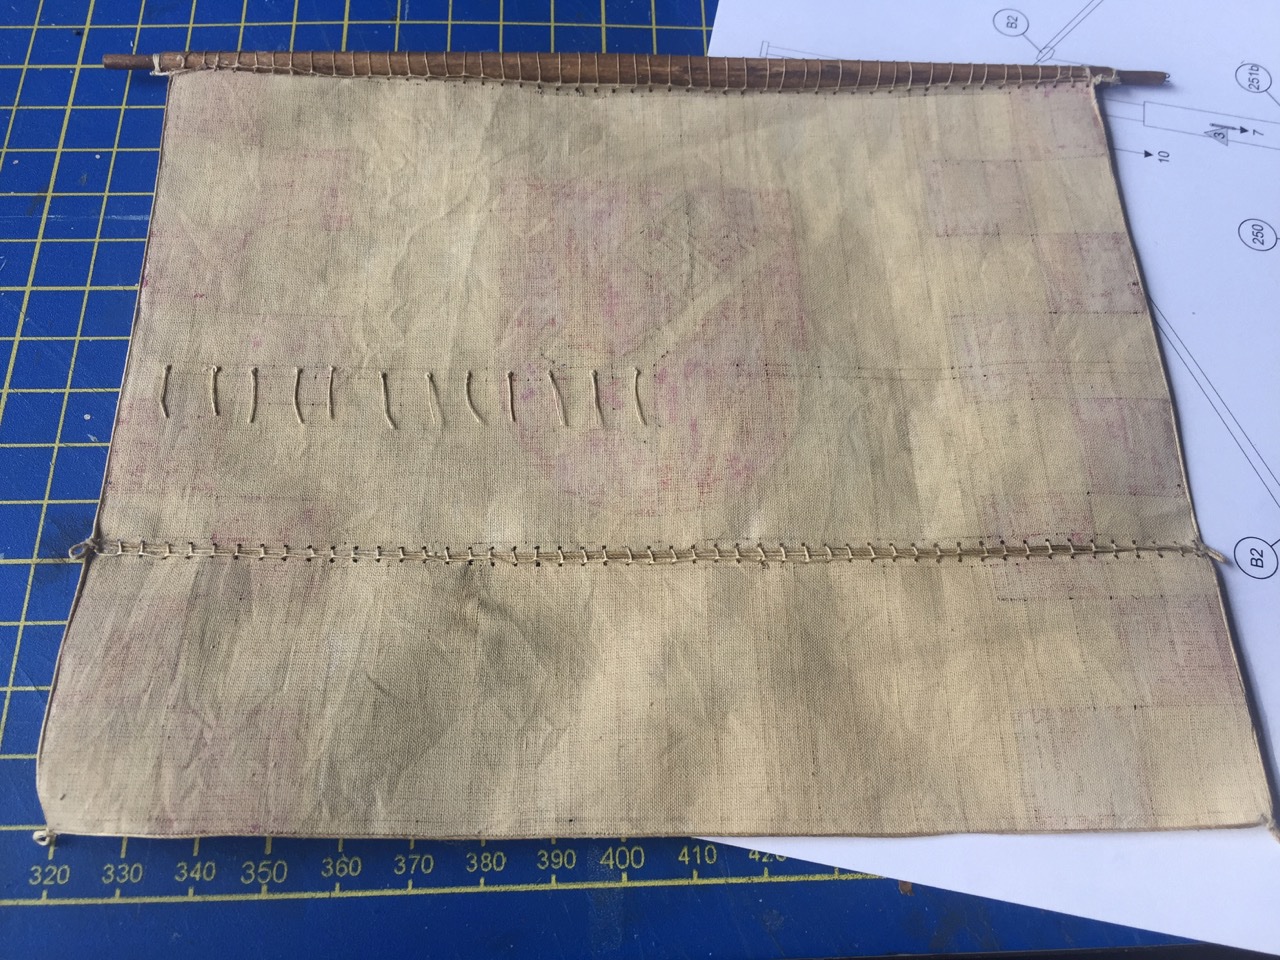
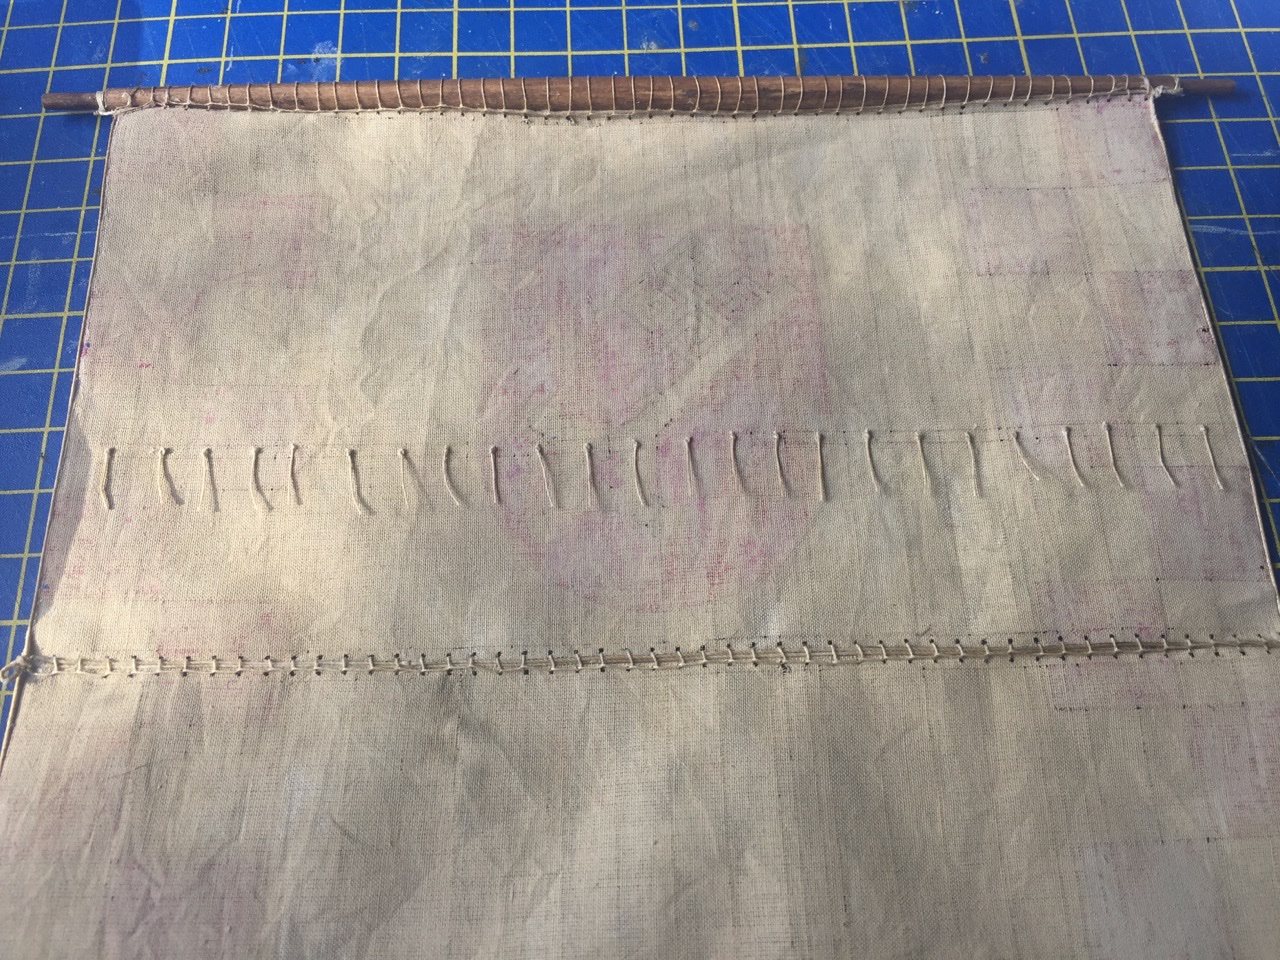
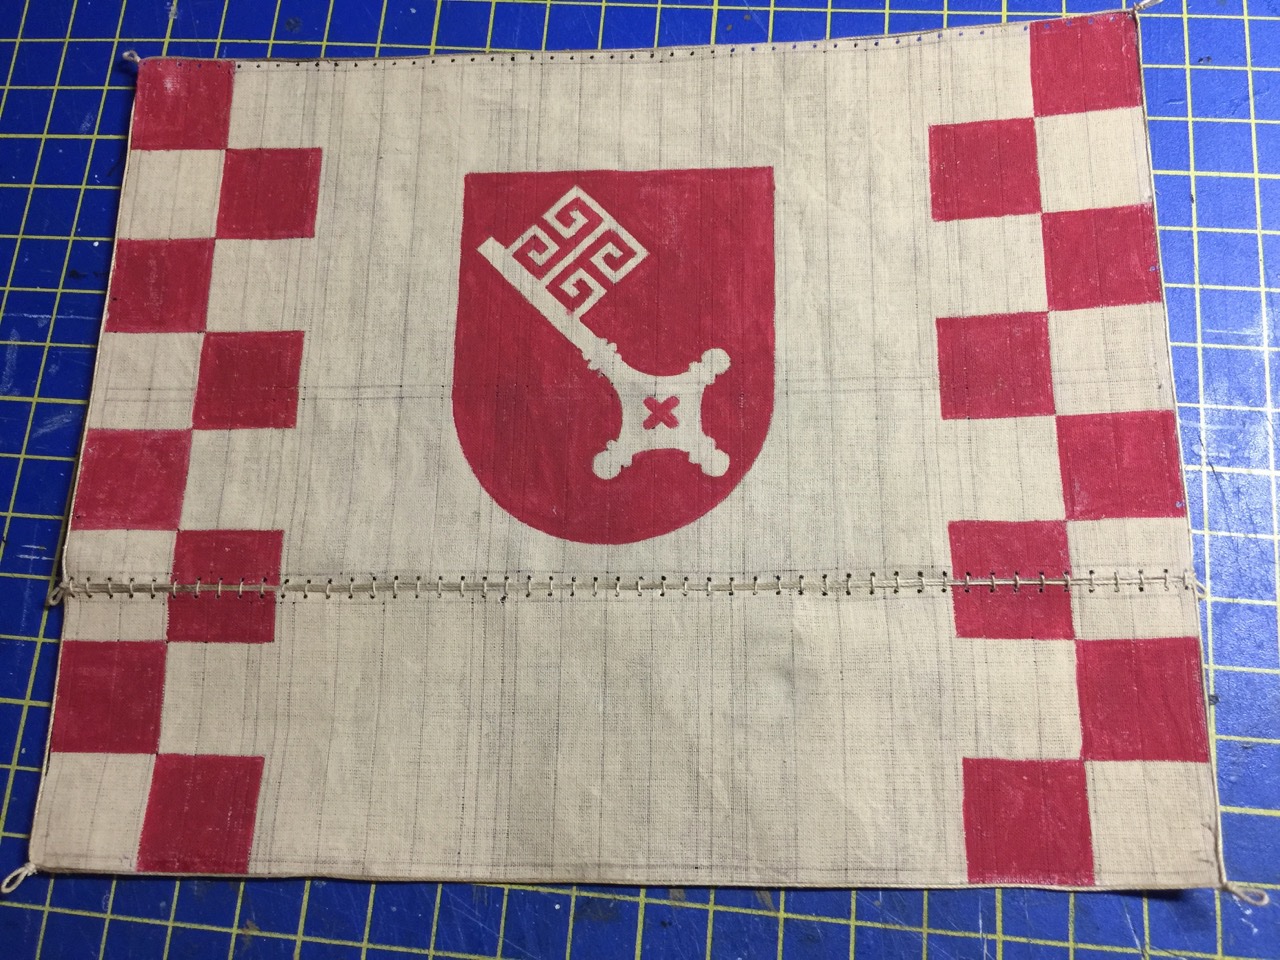
 Hi Moab, thanks for the nice comments. I'm well into the rigging, but it's been a while since I've done any rigging work - Japanese boats have very little, if any. So, I'm not really accustomed to doing this kind of work these days. And it feels like the more I do, the more that's left to do. Kind of reminds me of one of those school math problems: Joe owes Ted $50. Ted agrees to let Joe make monthly payments equal to half of the remaining balance. How long before the debt is paid??? You can probably see a few loose lines, unused blocks, etc. There's still a little ways to go, but I kind of pooped out and didn't get anything done today. Still, we're oh-so-close to the end of this build! The one thing that's conceivably out of place are the bright new flags at the stern, given how well worn the rest of the ship looks. But, the kind of material the flags are made from feel a bit like plastic, rather than simple paper. I didn't think I could "fade" them effectively. However, I can justify them by noting that the flags were brand new, just purchased by the captain for this voyage. Anyway, they're not like the sail, which has to be kept up in all kinds of weather. Flags can be washed too. Won't be long now – stay tuned!


- 175 replies
-
- 8
-

-
- hanse kogge
- shipyard
- (and 1 more)
-
Hi Chuck, I used to make my own model rope from linen line. I had the crudest ropewalk ever (I could have probably won a contest), but it worked okay for me. Also tried to build a fancy motorized ropewalk, but had problems with it. I suppose I'll just get Chuck's Rope Rocket at some point myself. On wax, I tried conservator's wax, but I must not be using it correctly. It's Renaissance Micro-Crystalline Wax Polish. It goes on squishy and stays squishy, and it has a strong odor. I know people have been advising against beeswax, but it works well for me. And, so far, I haven't seen any model rigging degradation. The oldest model I have used it on is about 25 years old. So, I figure it will do.
- 175 replies
-
- 2
-
-
- hanse kogge
- shipyard
- (and 1 more)
-
Thanks Chuck, Hey, are you planning to use the kit supplied rigging line? That's what I'm using here. It's real linen line, but that makes it a little fuzzy, so I'm using a lot of beeswax on it. It also results in stiffer line, and I think the linen line is helping to keep the "twisties" to a minimum. Overall, I kind of like the aged look of the rigging line. Or, maybe it just reminds me of my 'old days' of ship modeling, before Syren rope, morope, etc.
- 175 replies
-
- 2
-
-
- hanse kogge
- shipyard
- (and 1 more)
-
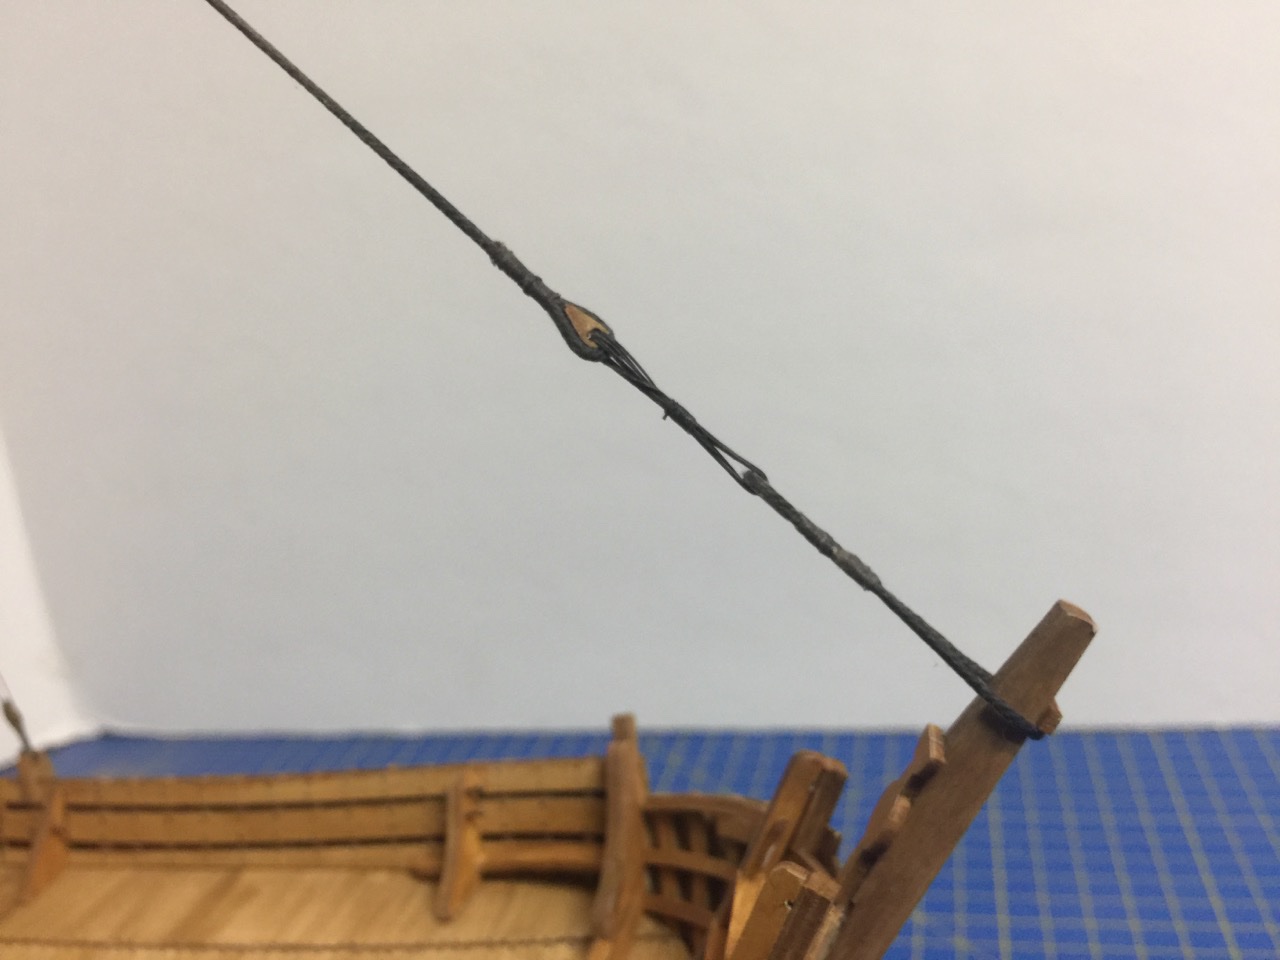
Druxey, okay, very pun-ney! 😄 Steven, yes, as Druxey pointed out, it's a clip. I often use those to keep tension on loose lines that I'm working on. In this case the halliard for the main (the only) yardarm. The halliard is wrapped around the windlass, and through a sheave hole (fake, as there's no actual sheave), and this also keeps the line from falling back out of that hole. But, the clip is also left over from using the halliard as a plumb line to help me gauge that the mast is straight.
- 175 replies
-
- 1
-
-
- hanse kogge
- shipyard
- (and 1 more)
-
Well, I took some time today... to get the stays in place. And, it didn't feel right posting without any photos. So, here we go...

- 175 replies
-
- 12
-
-
- hanse kogge
- shipyard
- (and 1 more)
-
Work continues, and I've done quite a bit. 'But, I'm at the stage of rigging, where it seems that I have little to show for all the time I've spent on the build lately. I've been working on the main stay, the backstays, added brace pendants to the main yard, working on the lift pendants, added blocks all over... Still, nothing worthy of posting an update photo! Still, I predict in another week or so, I'll be wrapping up the rigging of the Hanse Kogge von Bremen model. Stay tuned...
- 175 replies
-
- 4
-
-
- hanse kogge
- shipyard
- (and 1 more)
-
Hi Mark, yes I do that with my wooden blocks too. But, wooden blocks stay open and these seem to close up again after I clean the holes. So, the stiffened line just buckles instead of passing through. I thought about using a needle threader, but I haven't needed to use one in many years, and I didn't want to make a special trip to the store just to fine one. I've found that, in general, if I use my own laminated computer printer paper to build up parts, I don't have this problem. But, parts made from thicker card stock, not just paper, tend to have a squishy, fibrous interior. They also often buckle, crush, or delaminate unless you stiffen them with something. Druxey, thanks for the nice comments. I try to be neat, but sometimes the parts fight me, and they often win...
- 175 replies
-
- 3
-
-
- hanse kogge
- shipyard
- (and 1 more)
-
It's great that they make the blocks and deadeyes in wood. The card blocks are actually very nice, but I just had to make sure to shoot them with thin CA to harden them up – the innards are otherwise too squishy and close up the holes, so I can't push the rigging line through them. I'm surprised you mention using Syren blocks, since they're an 18th century style blocks and the cog is 14th century. Do you think they're more fitting than the kit stuff? I'm not sure what 14th century blocks are supposed to look like, but these kit block certainly have an "old-style" look to them.
- 130 replies
-
- 3
-
-
- wütender hund
- hanseatic
- (and 2 more)
-
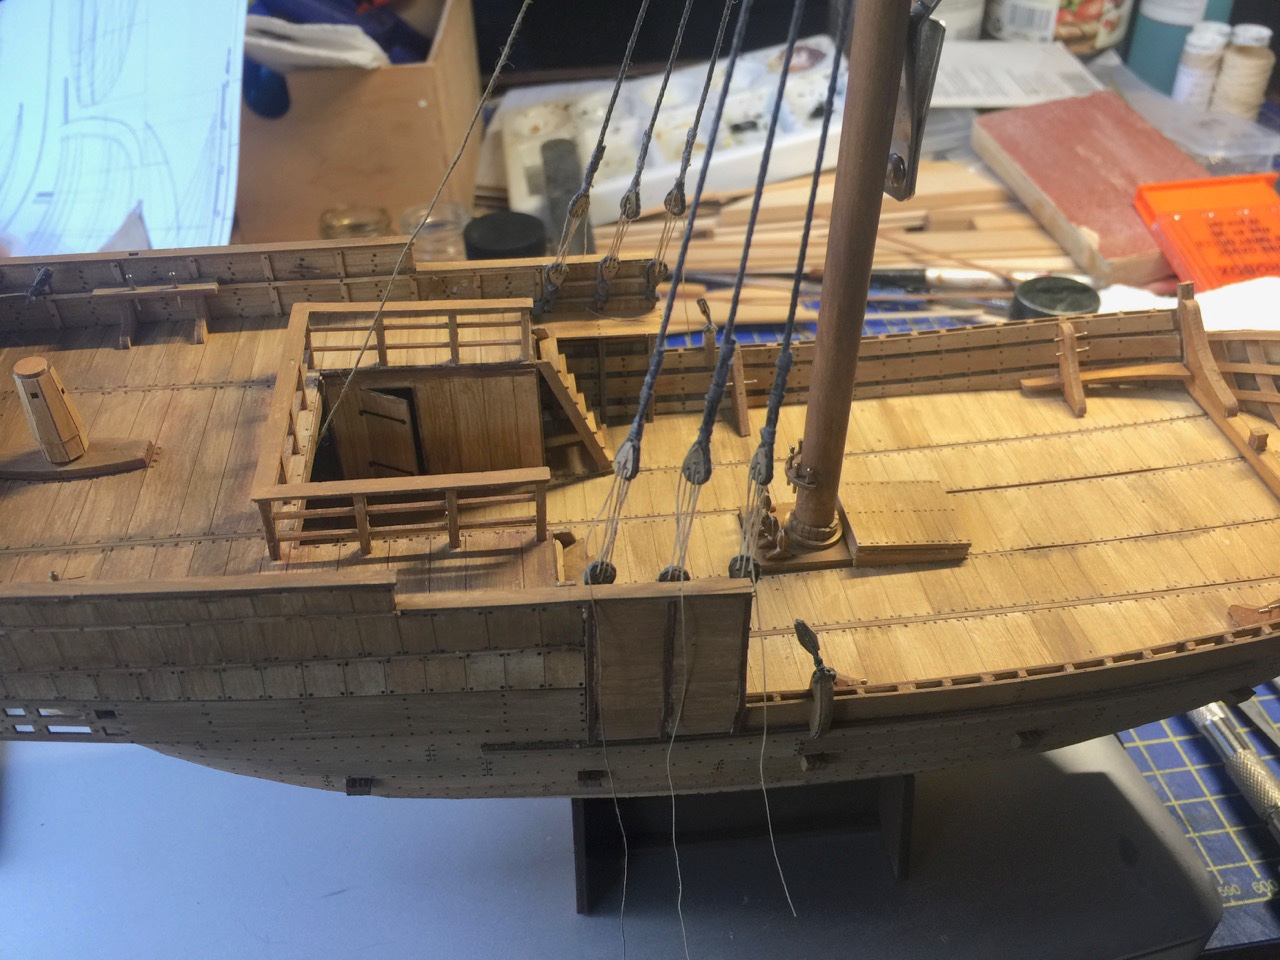
More progress... While working on the sail, I was also working on adding the shrouds to the mast. Today, I finally finished seizing the ends around the deadeyes, and started the process of reeving the lanyards through the deadeyes. The actual forestay will replace that white line, and I also have to rig a pair of backstays after the shrouds are complete. One issue I ran into is that the holes in the cardboard deadeyes close up from the soft cardboard material. I tried running a need through them to open them up, and I tried drilling them out. Problem is that they close up again – at least enough to keep the rigging line from threading easily through the holes. I finally use some thin CA on the deadeyes, which hardened the cardboard. Then, I could drill them out and the holes pretty much stayed clear. However, I did run the needle through them just before threading the line through. This worked like a charm. The only trick is that it was hard to reach the lower deadeyes and drill them out. I had to hold a block of wood behind them as I drilled out the holes. It was the only way I could get leverage on them. If you look closely, you might notice that I also added some of the blocks and cleats to the deck and hull. Still more of those to do. Of course, I still have to secure those shroud lanyards.
- 175 replies
-
- 9
-
-
- hanse kogge
- shipyard
- (and 1 more)
-
Chuck, good luck with that warping – it's definitely weird. Hopefully, it straightens out once it's fastened into place. By the way, I'm working on the rigging now on my Cog 'o' Card. Was just wondering, did Shipyard make some laser-cut wooden blocks for your kit? Or did they stick with their laser-cut card blocks?
- 130 replies
-
- 2
-
-
- wütender hund
- hanseatic
- (and 2 more)
-
Hi Chuck, yes that's all there is to them. I used Aleene's tacky glue. It seemed the safest bet.
- 175 replies
-
- 2
-
-
- hanse kogge
- shipyard
- (and 1 more)
-
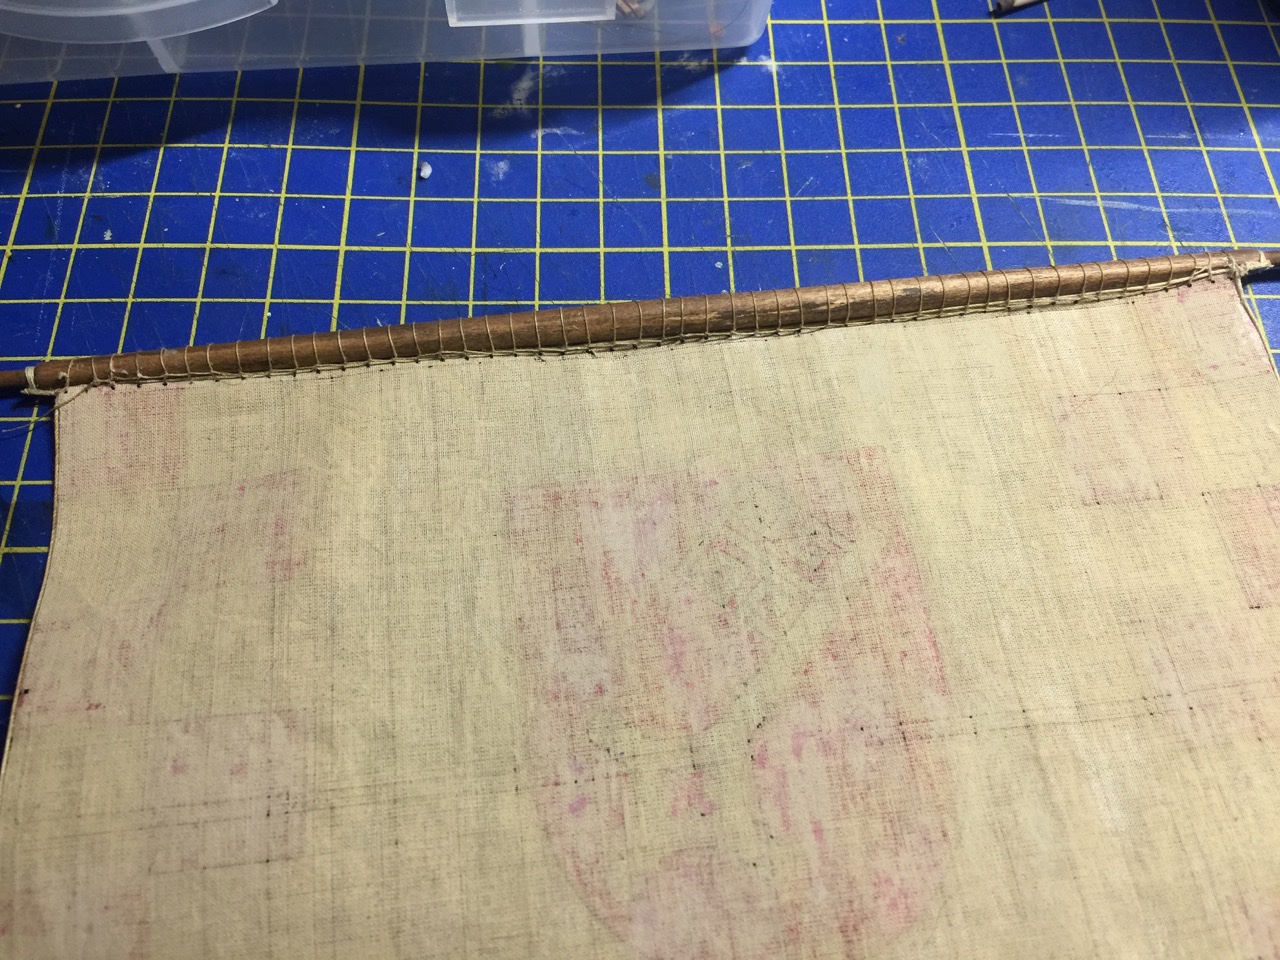
I added most of the reefing points on the sail yesterday and finished them up today. Also, started a block stropping production. There are three sizes of block in this kit, all laser-cut from card stock. Lastly, I added the shrouds, and I'm now adding the upper deadeyes. I don't have any photos of that part yet, but here are some photos of the sail with the reef points going on. This method of attaching reefing points actually has some advantages. It's not difficult to do and since they're glued on, they "hang" perfectly. Threaded reefing points have a tendency to float unrealistically, and you have to treat them with some kind of glue and maybe some ironing to get the correct results.
- 175 replies
-
- 4
-
-
- hanse kogge
- shipyard
- (and 1 more)
-
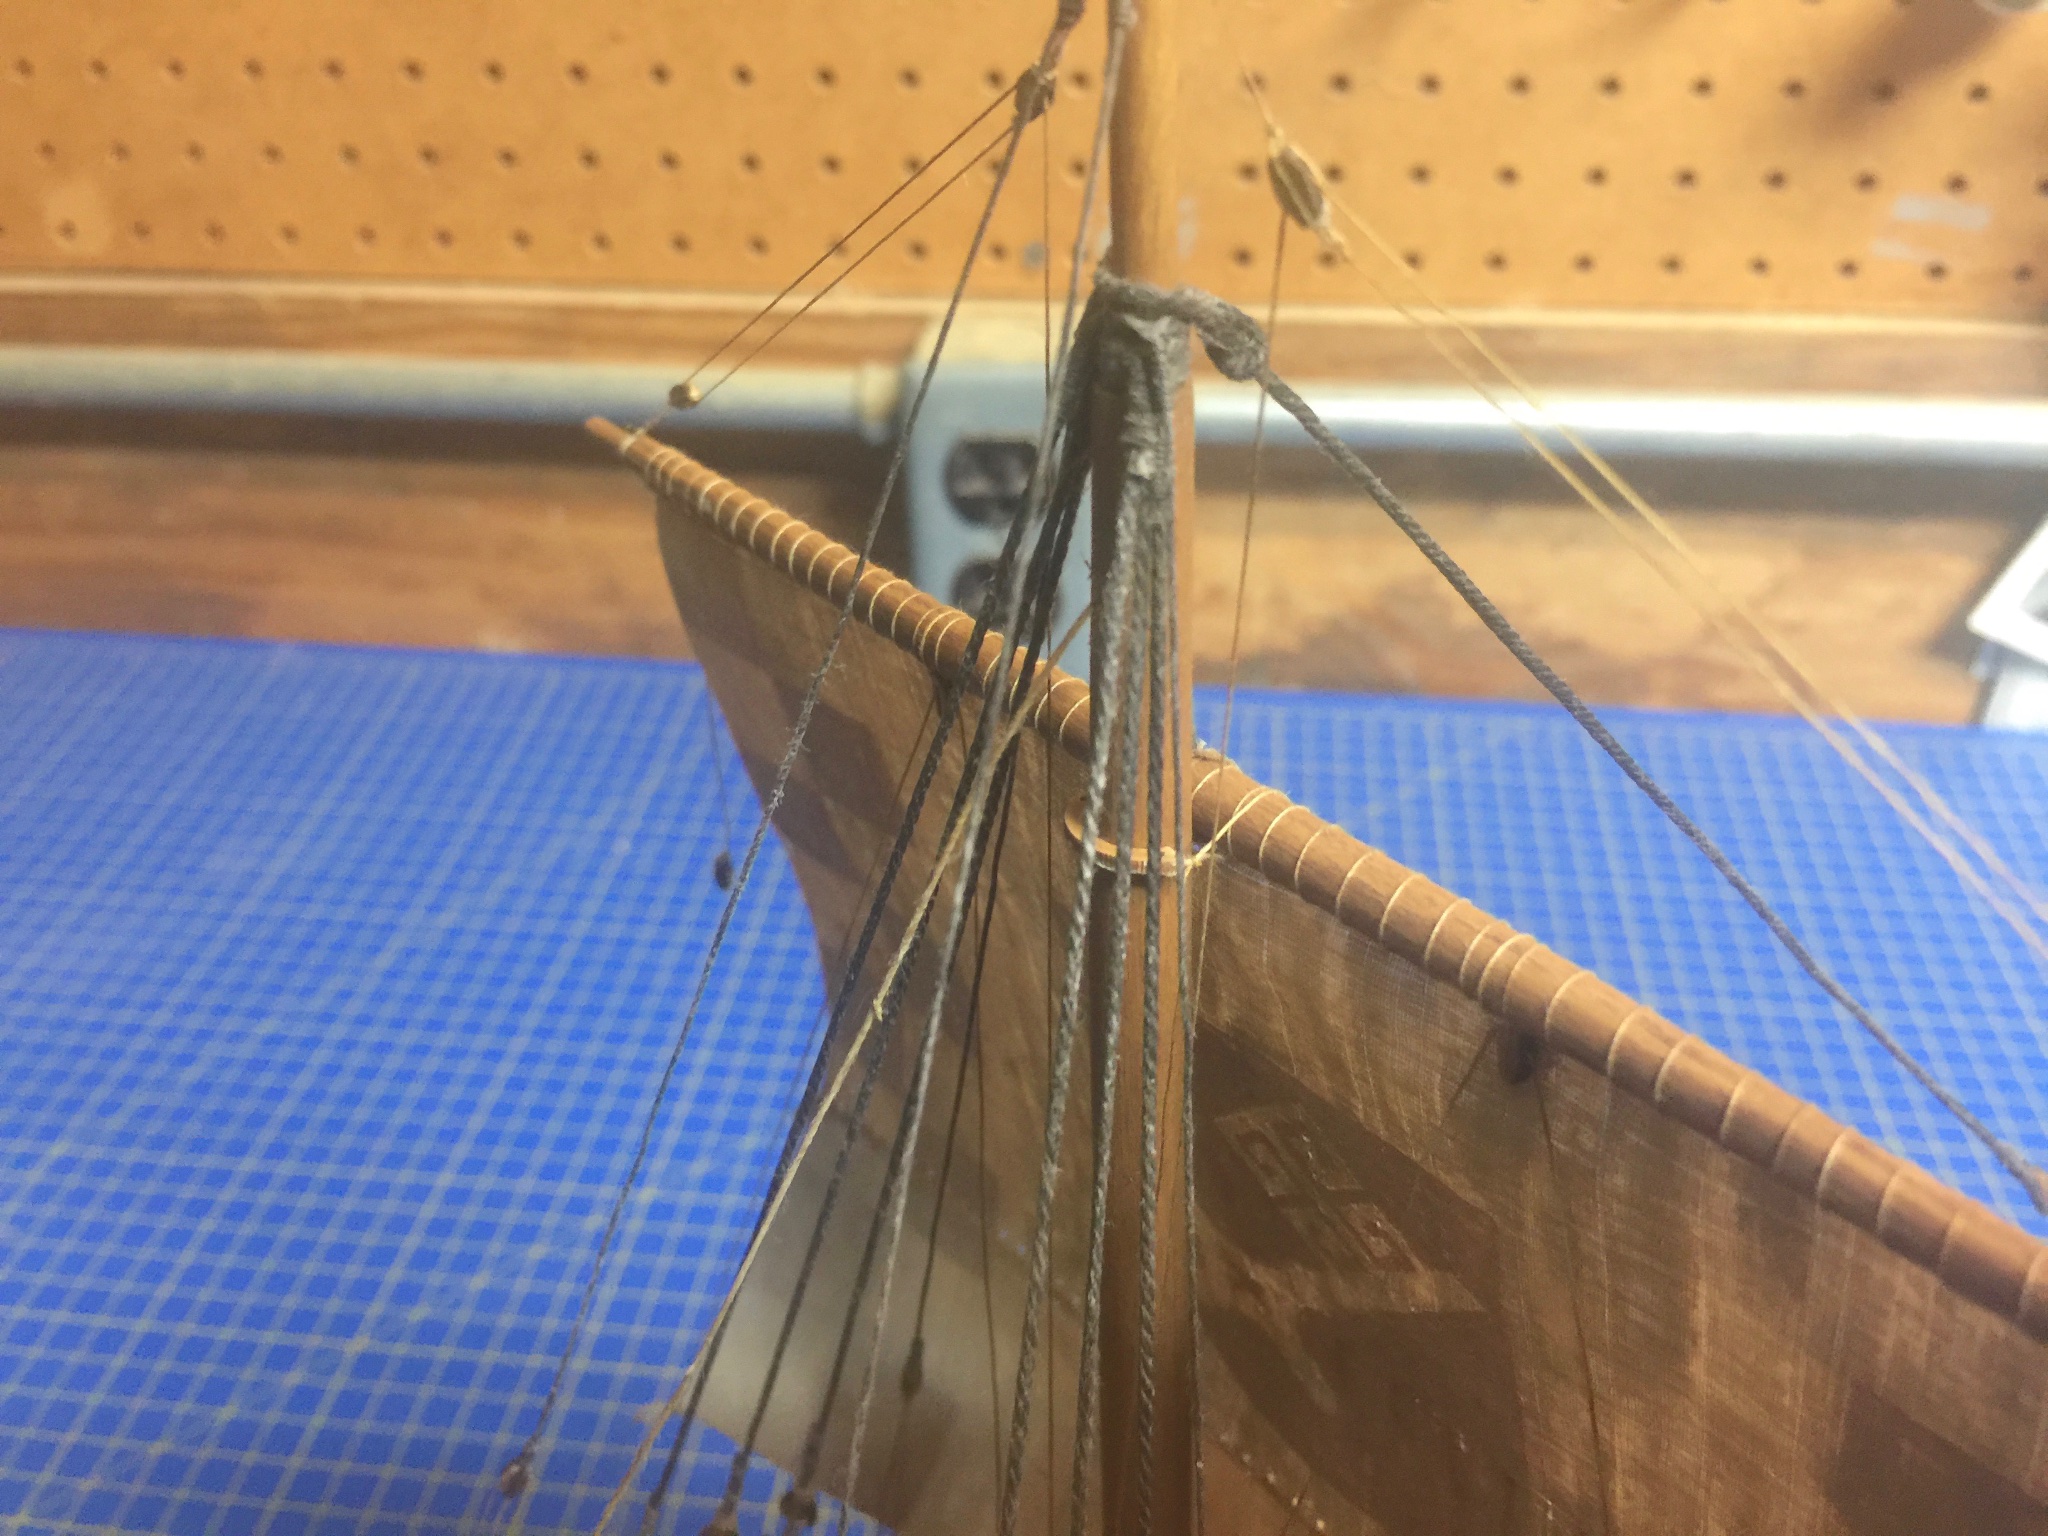
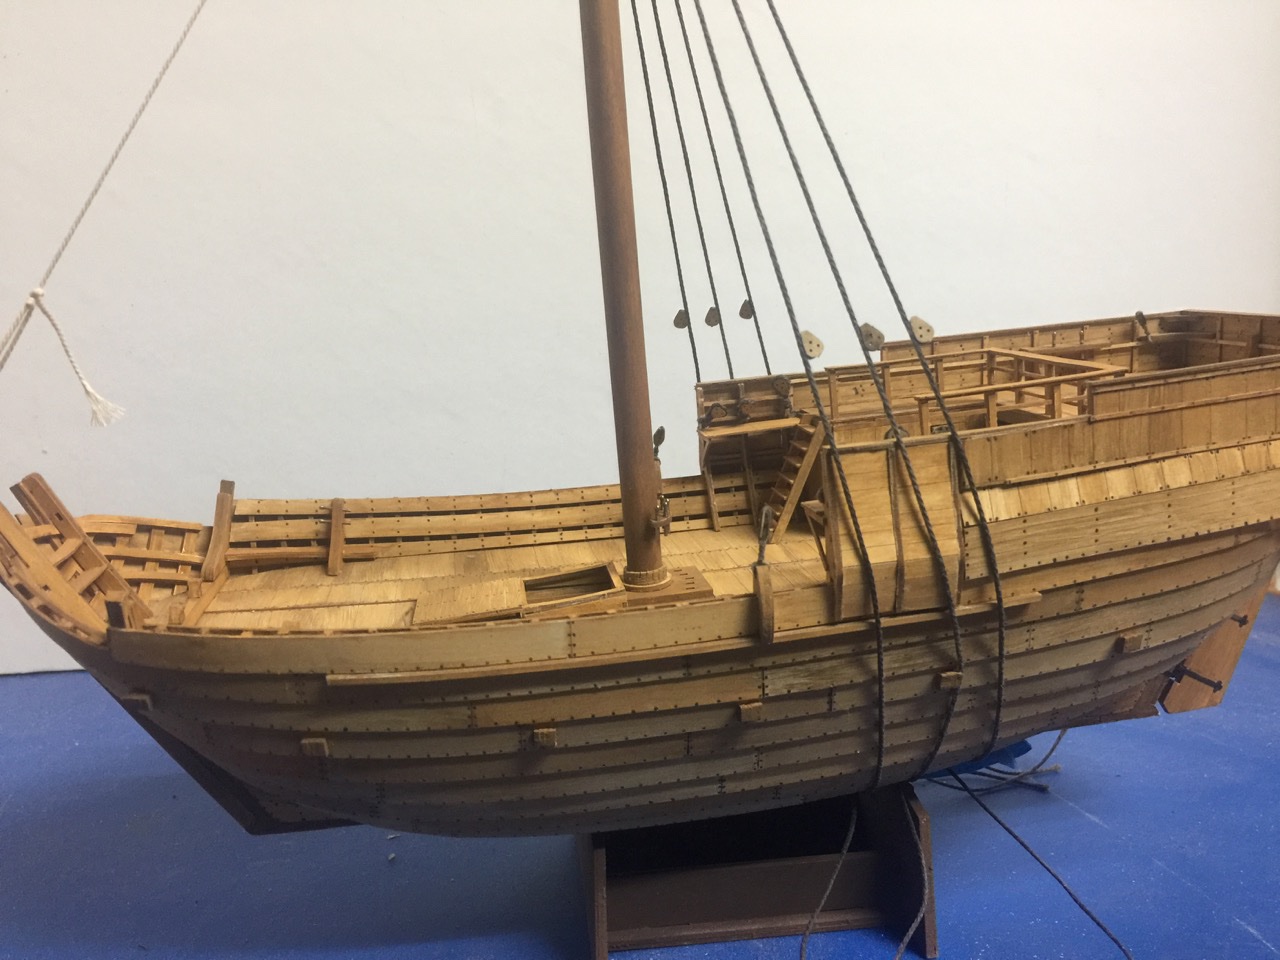
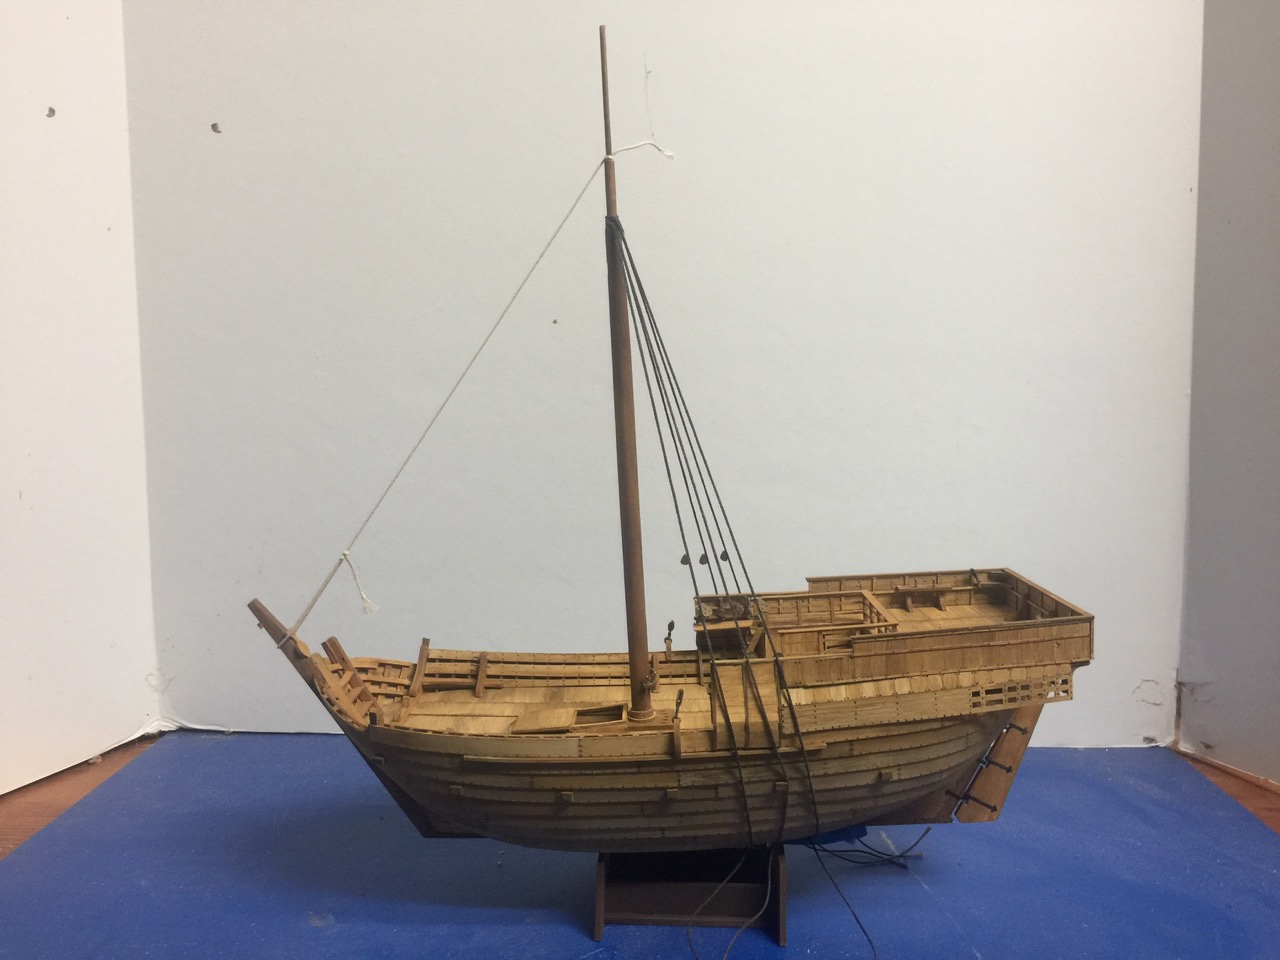
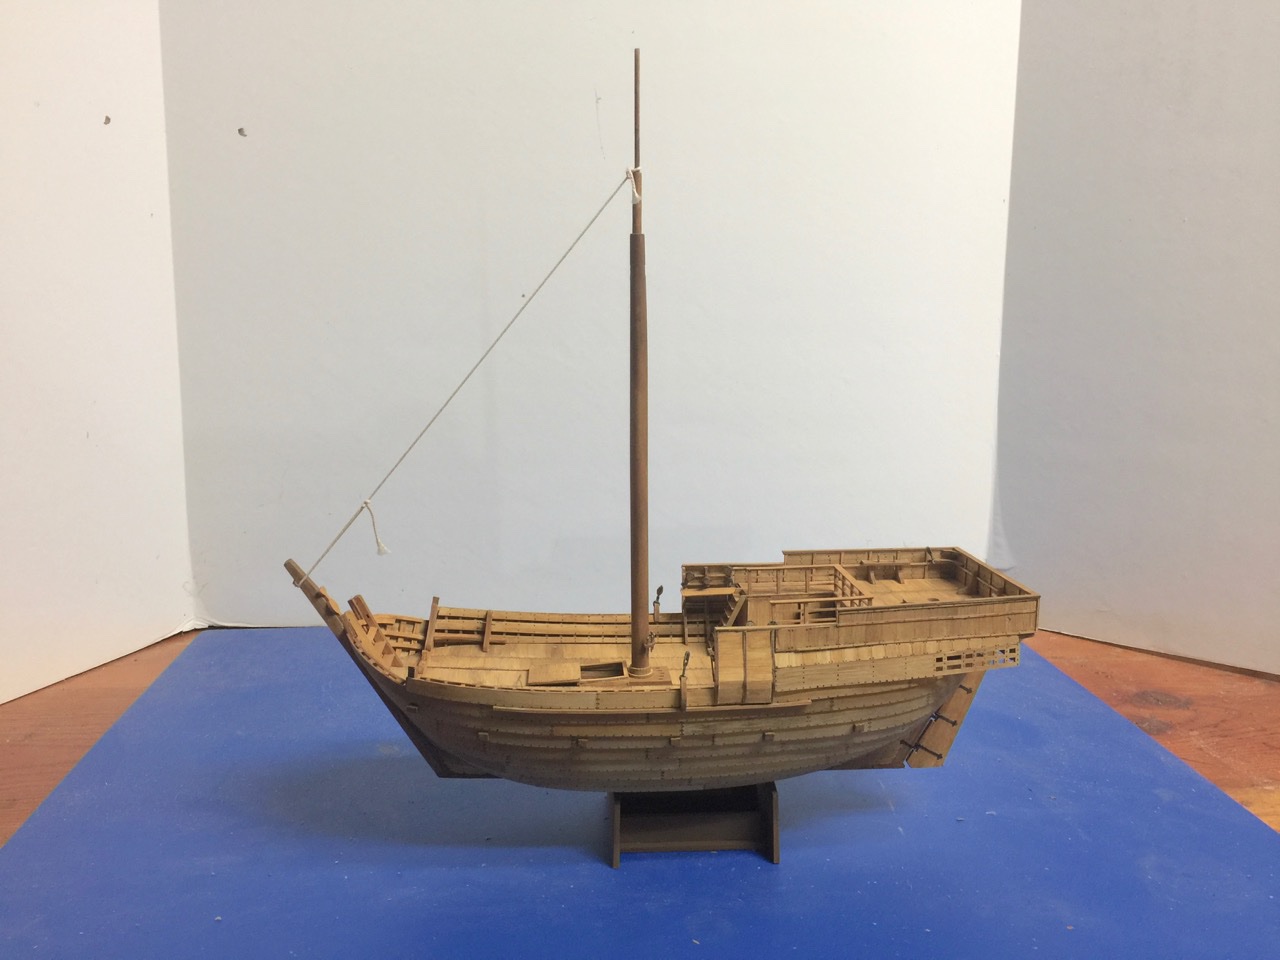
This seems like a minor update, but switching gears to woodworking and rigging is a milestone for me on this project. Since my last post, I finished making the mast and shaping the yardarm. With the yardarm done, I laced the sail to it. Like lacing the bonnet to the main sail, it took a little while. But, the results were good and I'm happy with how it went. I'm now preparing the rigging line for the next step, which is to add the shrouds to the mast. This includes attaching the shrouds, turning each around a deadeye, and then reeving the lanyards through the deadeyes to secure them into place. Of course, I need to have the mast in place to add the shrouds, so that is now all set. You can see the model rigged with a temporary forestay, which is to help in the tensioning of the shroud lanyards. Looks like I'm also ready to add the reefing points to the sail. The kit instructions simplify this task a bit by attaching separate pieces of riggign line to both sides of the sail. I don't know that this is actually easier or better than just using a sewing needle to poke holes in the sail and threading the reefing points through them, but I'm happy to try out the method that's shown in the instructions.
- 175 replies
-
- 3
-
-
- hanse kogge
- shipyard
- (and 1 more)
-
Hey Chuck, Don't know how it is on the wooden kit, but on the card kit, don't add the rudder until the build is done. The straps are just too delicate and any small bump can knock the rudder loose and tear out hinges. My rudder has taken quite a beating 🤨
- 130 replies
-
- 1
-
-
- wütender hund
- hanseatic
- (and 2 more)
-
Chuck, more nice work. Did you make the bug or was it included in the kit? It's all looking great. Did you run into the same issue that I did on discovering the bow support structure thingies late in the build?
- 130 replies
-
- 2
-
-
- wütender hund
- hanseatic
- (and 2 more)
-
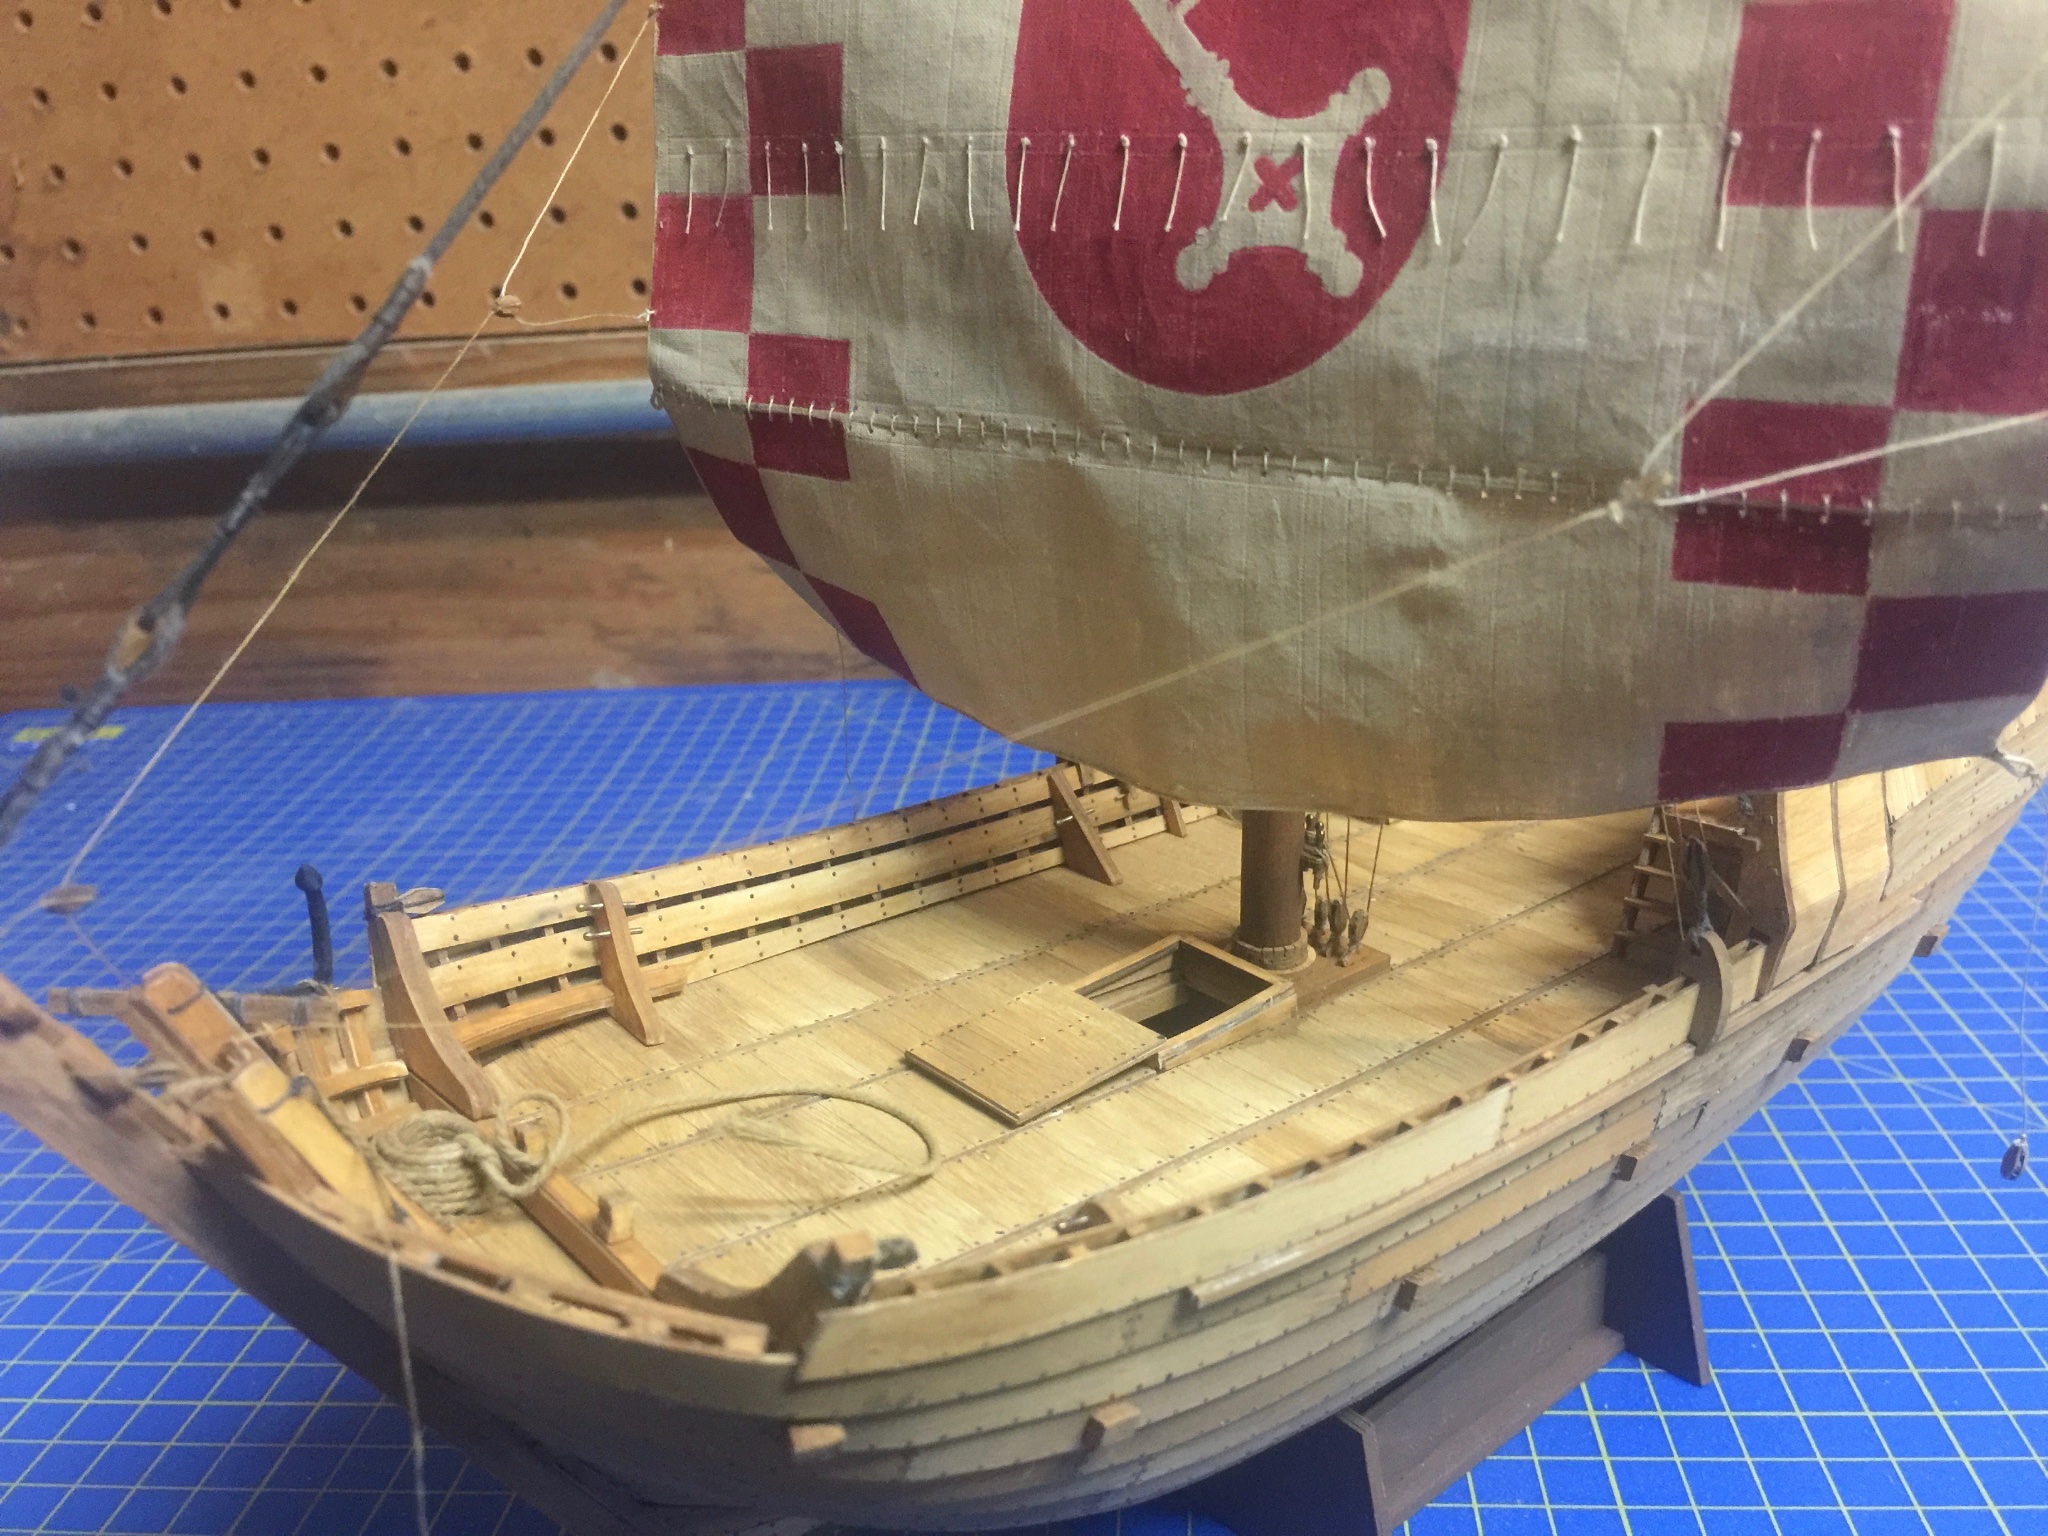
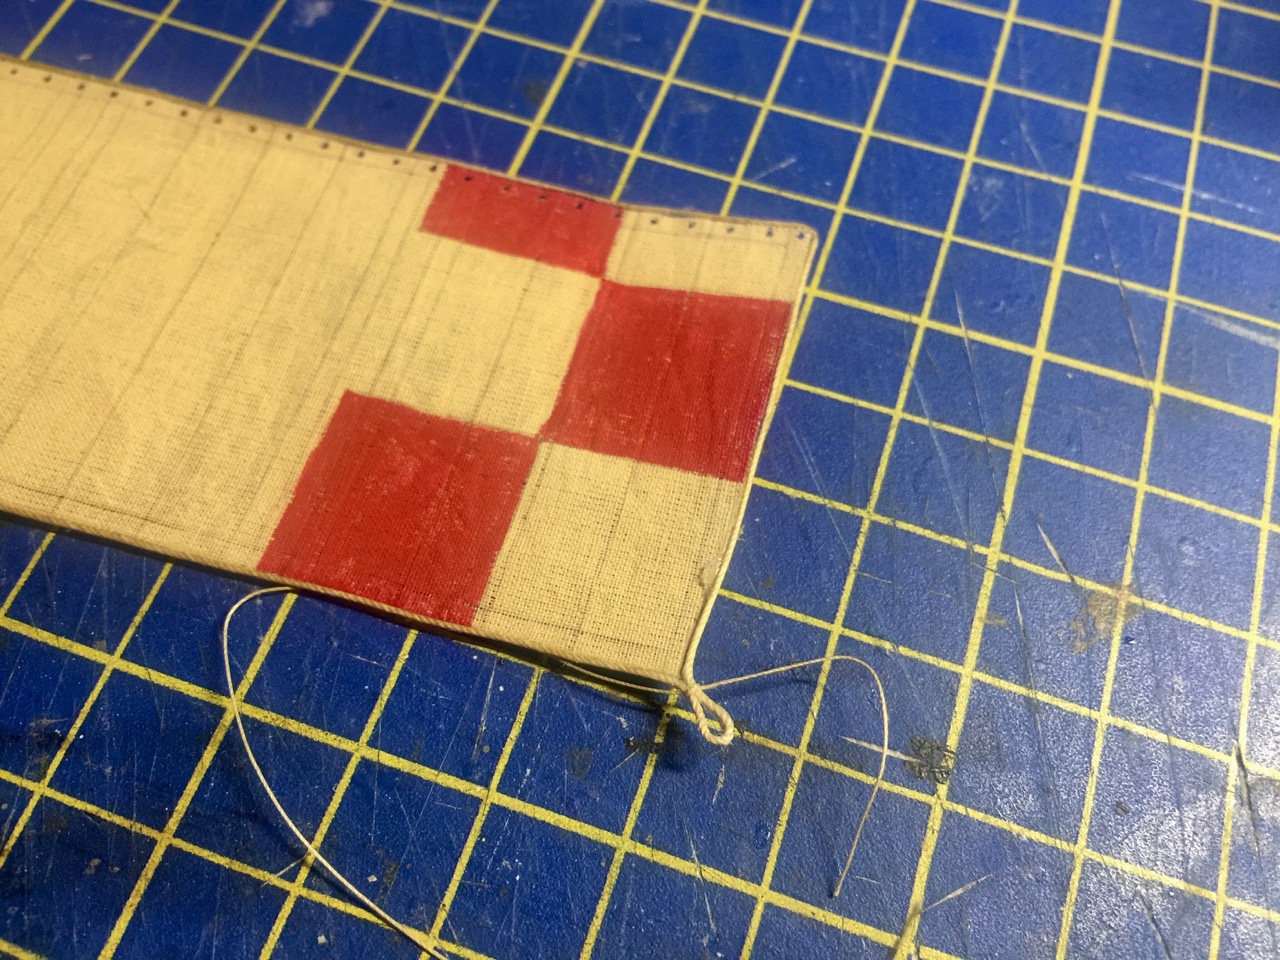
Thank you Steven, Druxey. I've been particularly enjoying this part of the build, mostly because the sail provided in the kit does turn out so nicely. It's painted according to the kit's instructions and I think the laced bonnet is a nice detail too. I've been dragging my fee on a rigging project, so I think this is going to help me get back into a proper rigging mode. At least I hope!
- 175 replies
-
- 1
-
-
- hanse kogge
- shipyard
- (and 1 more)
-
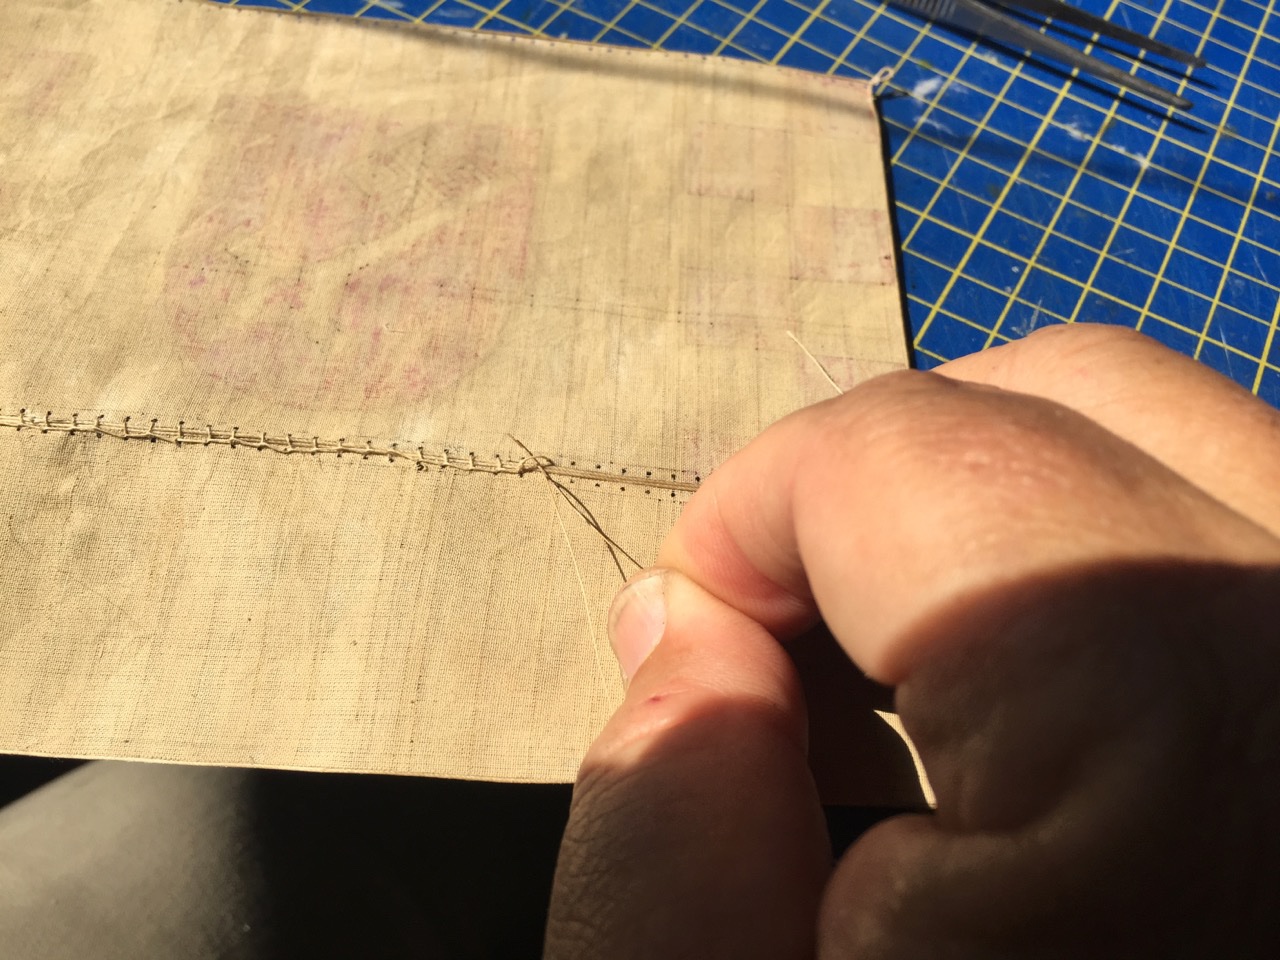
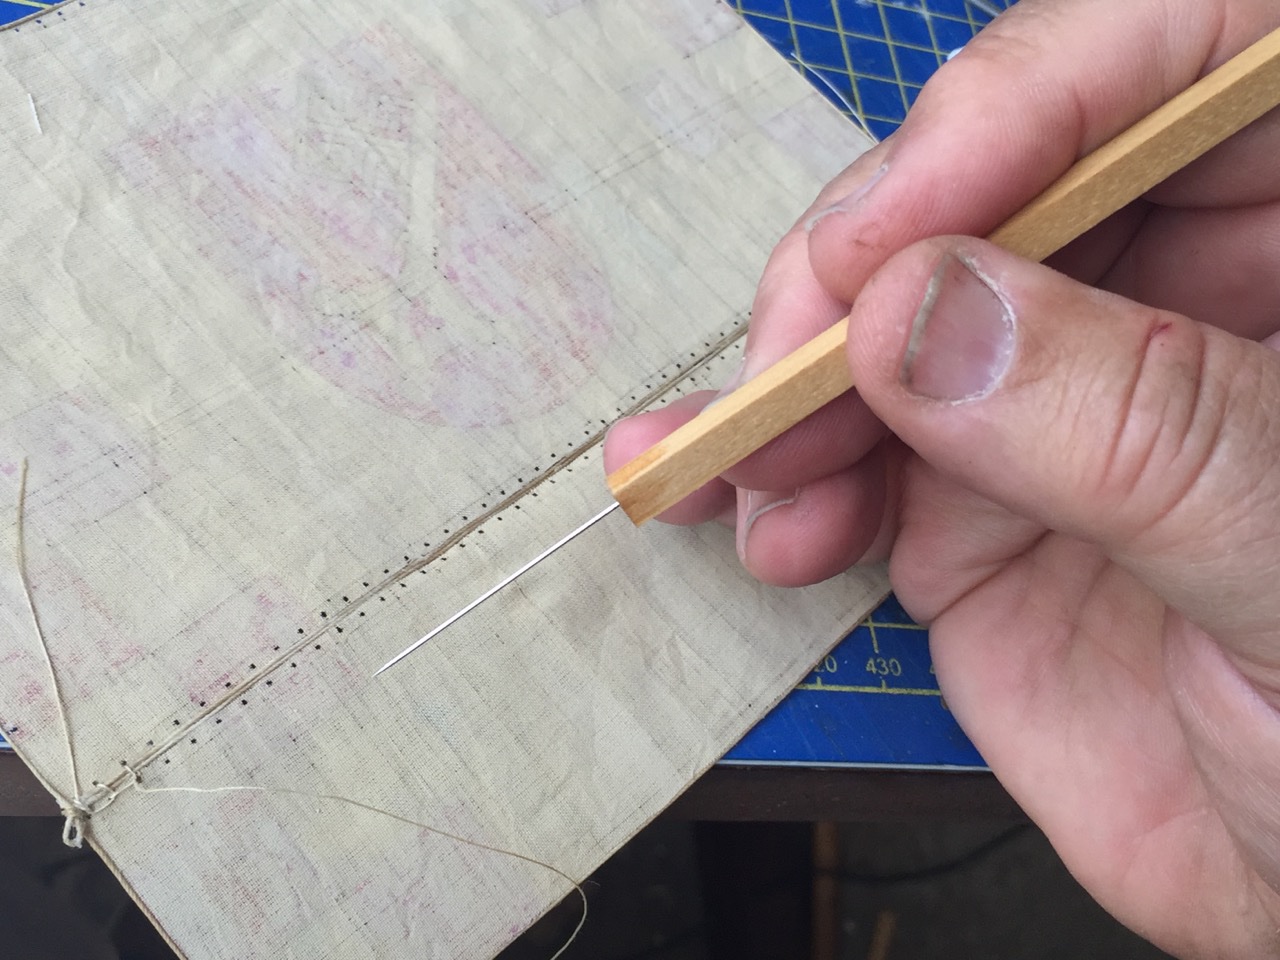
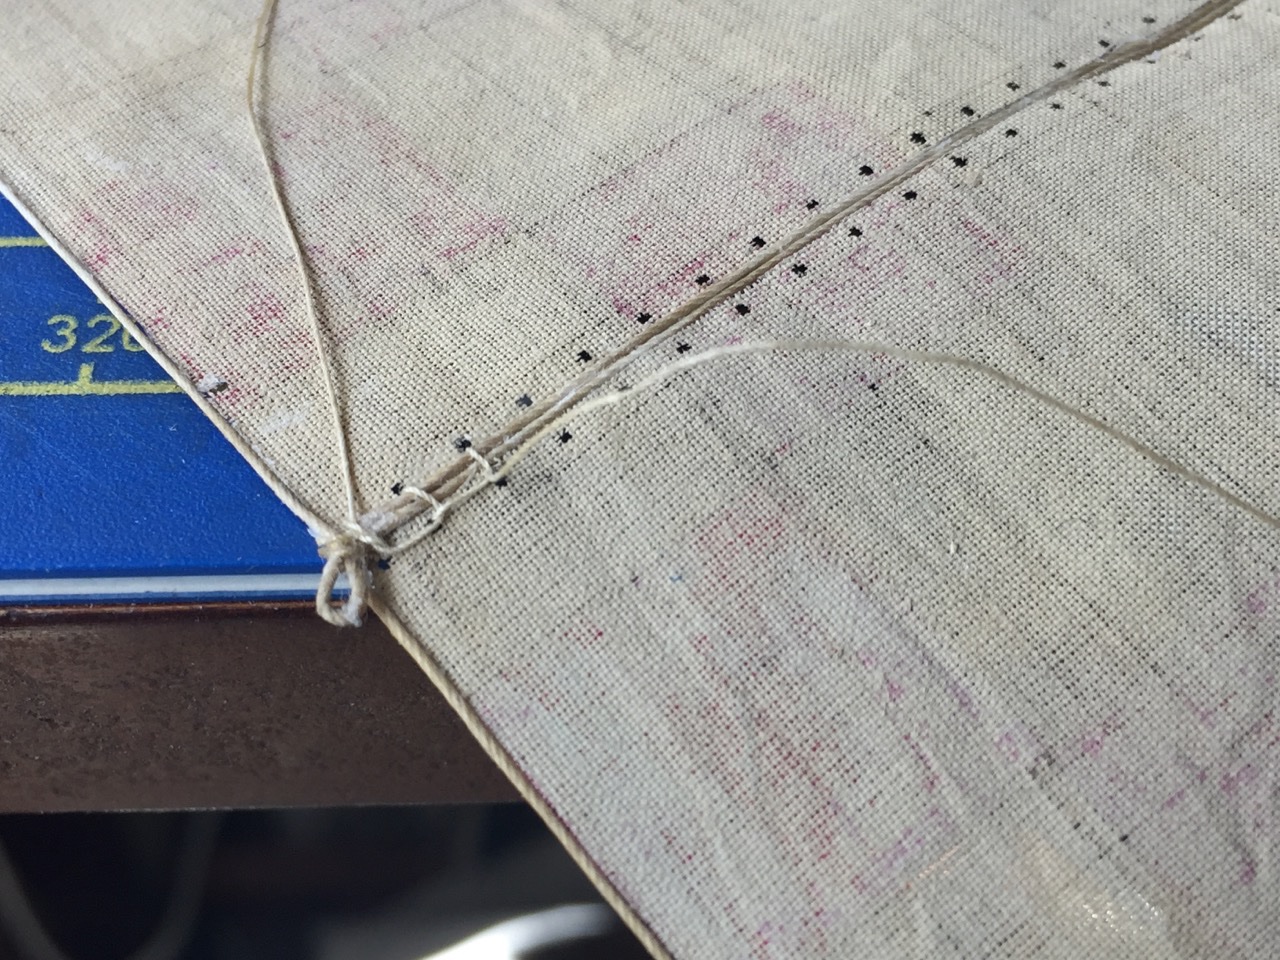
Well, today, I laced the bonnet to the main sail. Took quite a while. Felt a little burned out, like when I'm tying ratlines for an hour. But, it's done, and I'm pretty happy with it. I found it necessary to poke open some of those holes with a sewing needle, so I decided to make a new "Ship Modeler's Marlin Spike" with a sewing needle glued into a wooden handle. Later, I ground open the eye of a needle and glued it into the other end of the handle to use as a kind of line grabber. And the laced bonnet in place... Now, I just need to shape the yard and then lace the sail to it. Should be able to do that and to step the mast and start with the standing rigging this weekend. By the way, for those wondering about my Woody Joe Kitamaebune model, in between steps, I'm building up the sail from individual panels. I'll be posting something on that build log soon. I'm pretty determined to get both these projects done very soon. I have a third small project that's I didn't create a build log for, but it's close to being done too, though I'd started it a few years ago. I'll post photos in the gallery of it when it's done.
- 175 replies
-
- 7
-
-

-
- hanse kogge
- shipyard
- (and 1 more)
-
Rope-where to go since Syren is no longer making it?
catopower replied to bear's topic in Masting, rigging and sails
Getting back to the original topic, which is about what sources there are for finished rope, I have to say this looks very nice. Thanks for the post MESSIS. -
Chuck, that's the way the sails came. The holes are nice and clean and I think I might be able to run the rigging line through them pretty well without having to enlarge them. Of course, I'll dip the tip of the line in CA first to harden it and then cut it sharp. But, I don't think they're really any larger than the diameter of a small sewing needle. I guess we'll see how they look when line is laced through them.
- 175 replies
-
- 3
-
-
- hanse kogge
- shipyard
- (and 1 more)
-
Working on the sails a bit today. Finished adding the boltropes. The line for this is just glued around the edges of the sail and bonnet. Shipyard does a very good job with sails. It seems that they laser-etch the seam lines into the cloth. My HMS Alert kit was the same way, and I was really happy with the results I was getting from working with the sails for that model. I'm looking forward to lacing the bonnet into place and lacing the sail to the yard. I just have to finish shaping the yard first.


- 175 replies
-
- 4
-
-
- hanse kogge
- shipyard
- (and 1 more)
-
Unfortunately, I seem to have misplaced my double secret decoder ring... I guess I have to start looking for specially marked cereal boxes again.]] Well, it's actually just a mast with couple shoulders for seating of shrouds and such. I think it's just that the change in mast diameters at the shoulder is a bit extreme. That, and maybe the "blocky" shape of the mast.
- 175 replies
-
- 3
-
-
- hanse kogge
- shipyard
- (and 1 more)
-
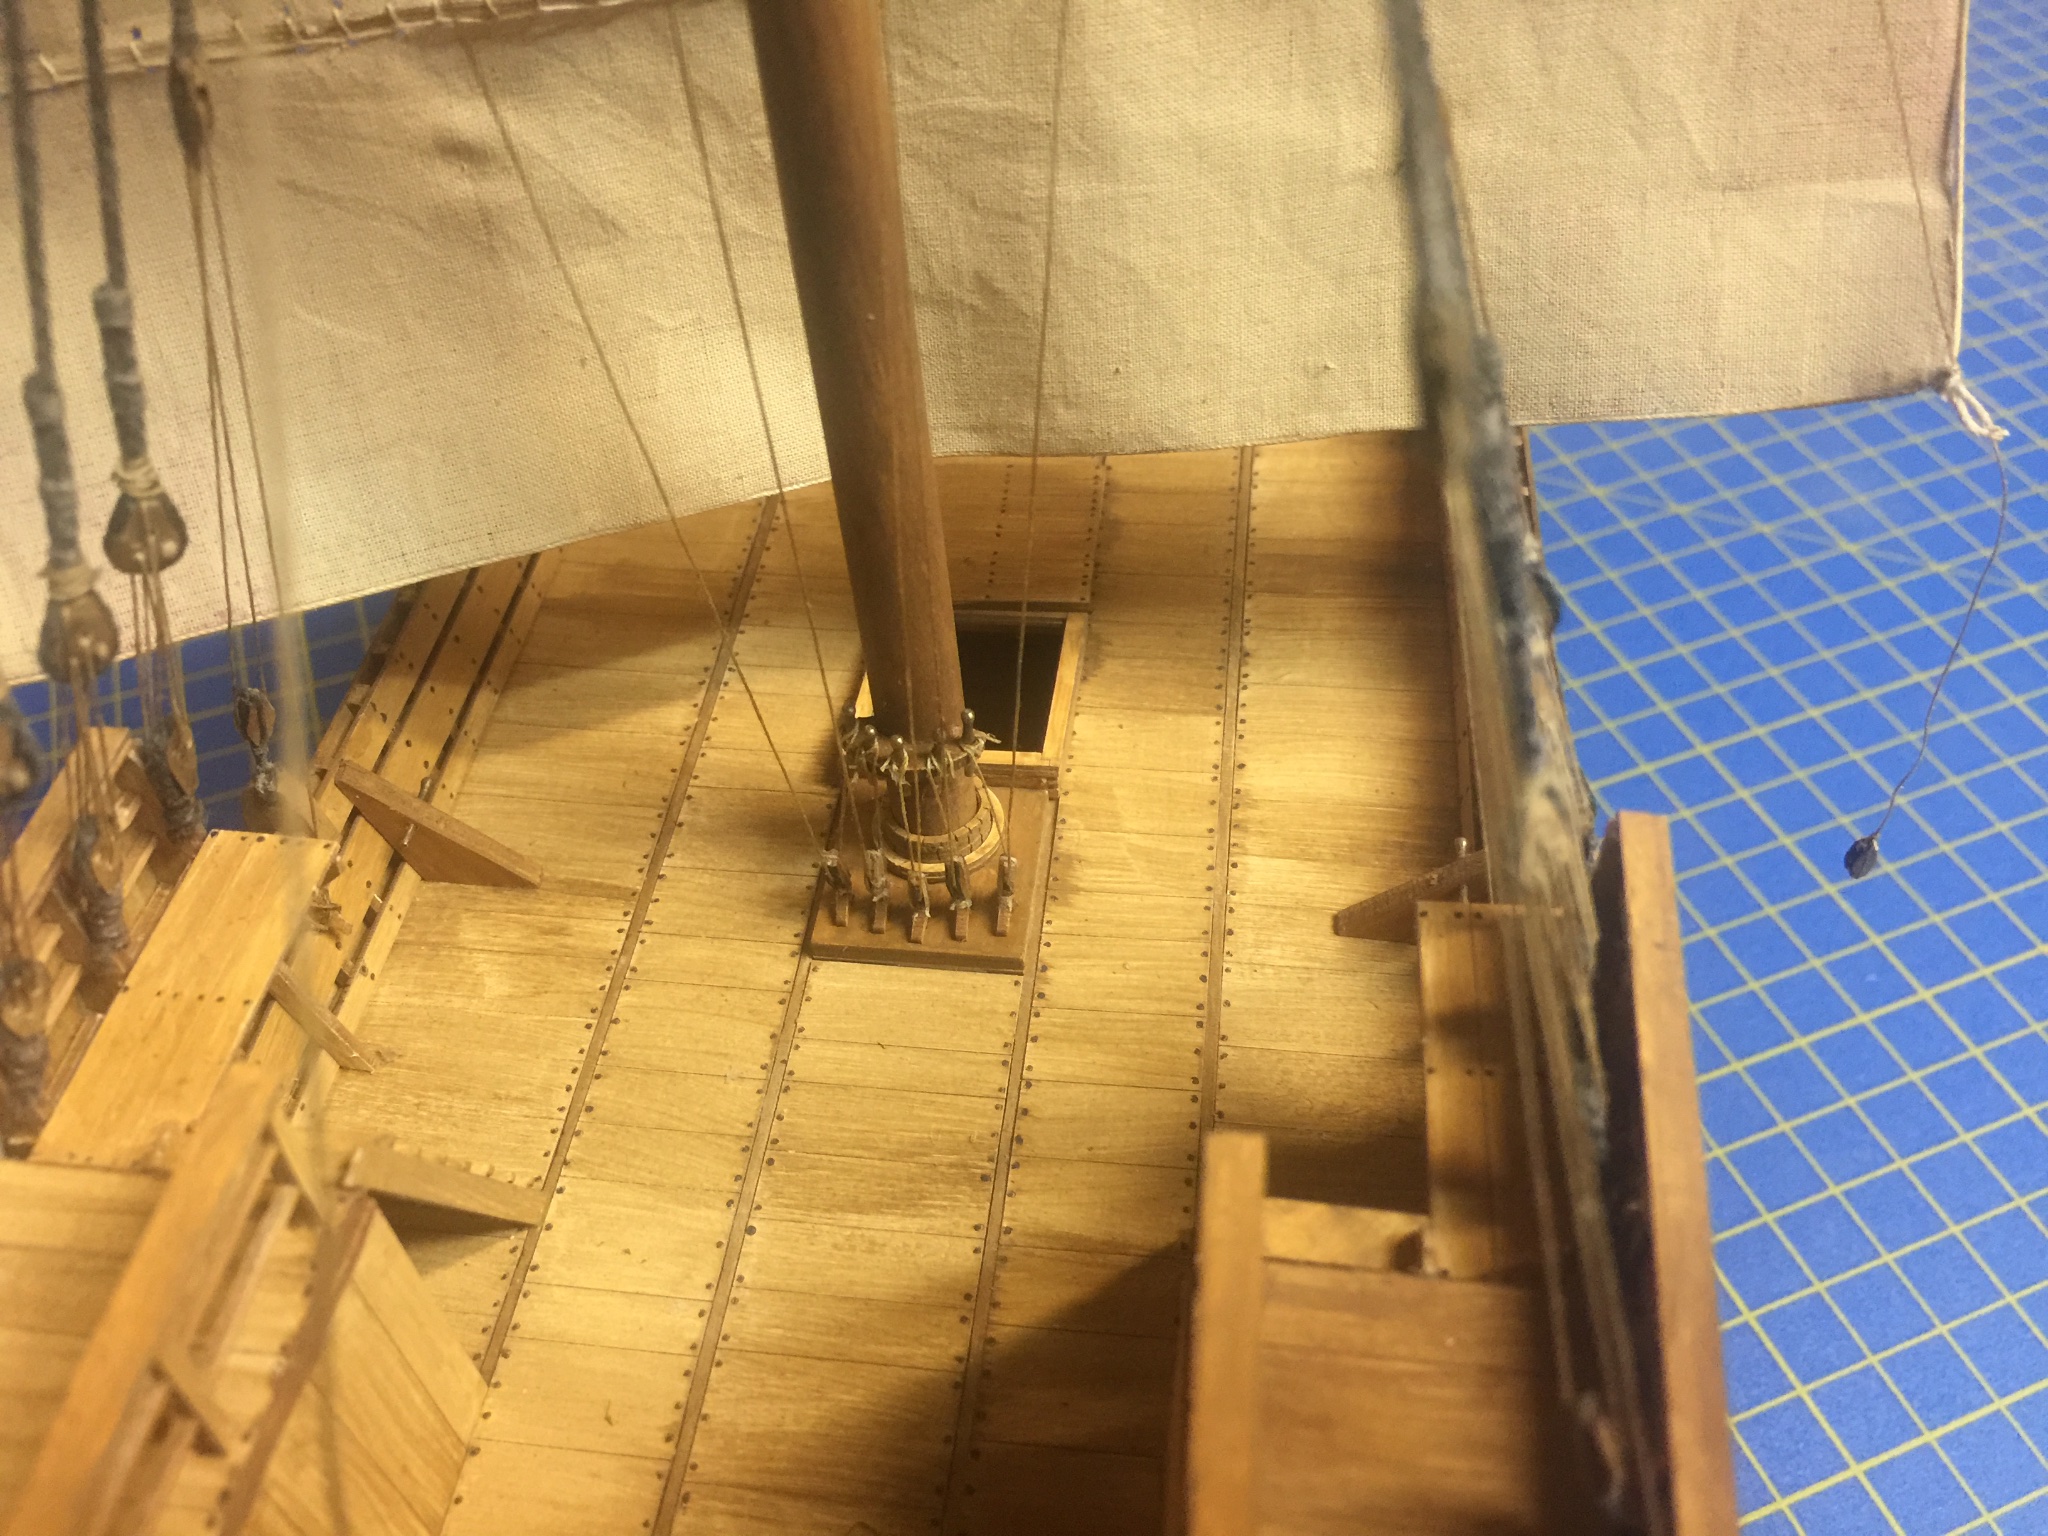
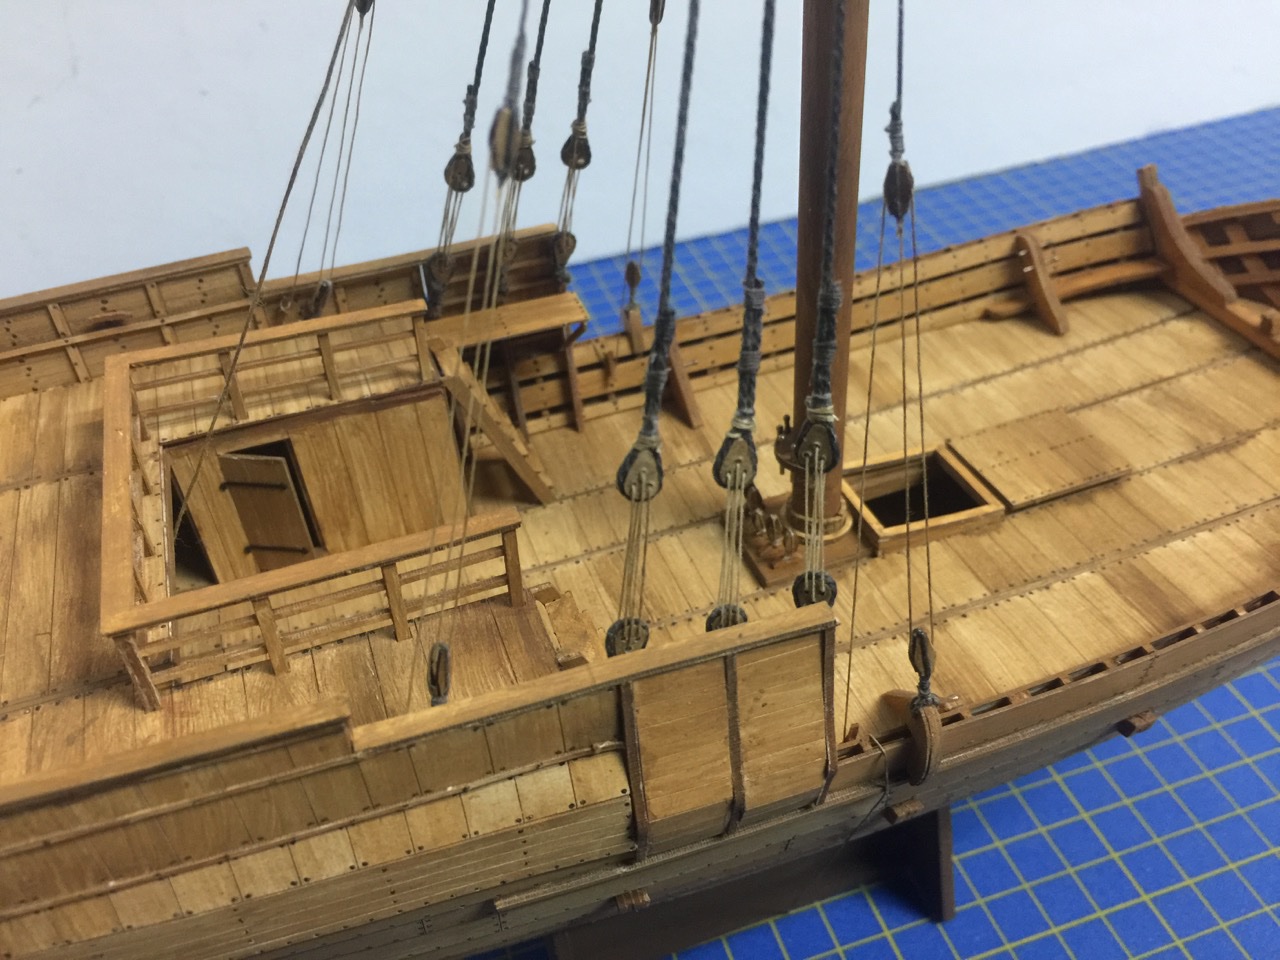
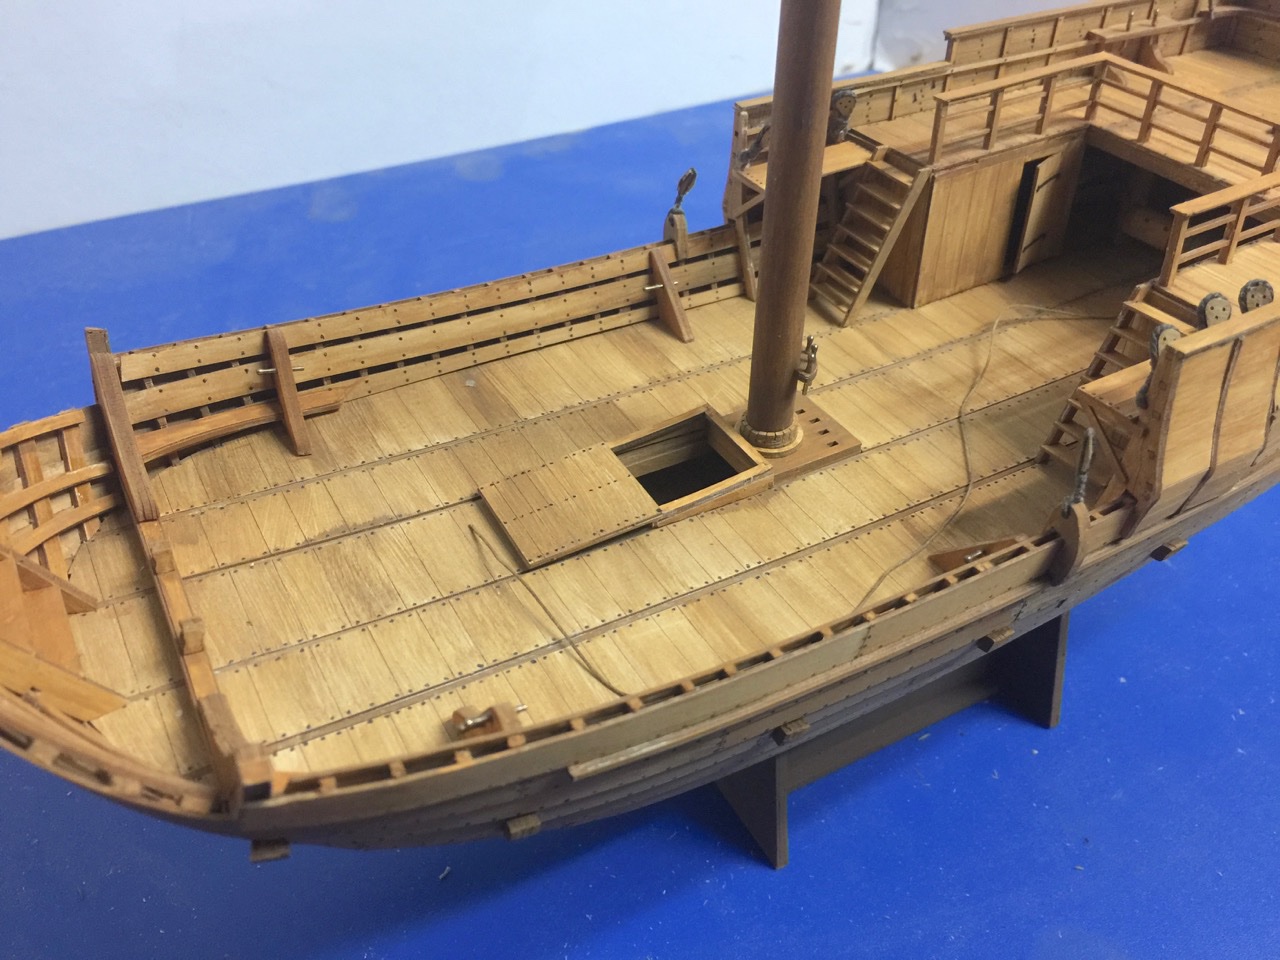
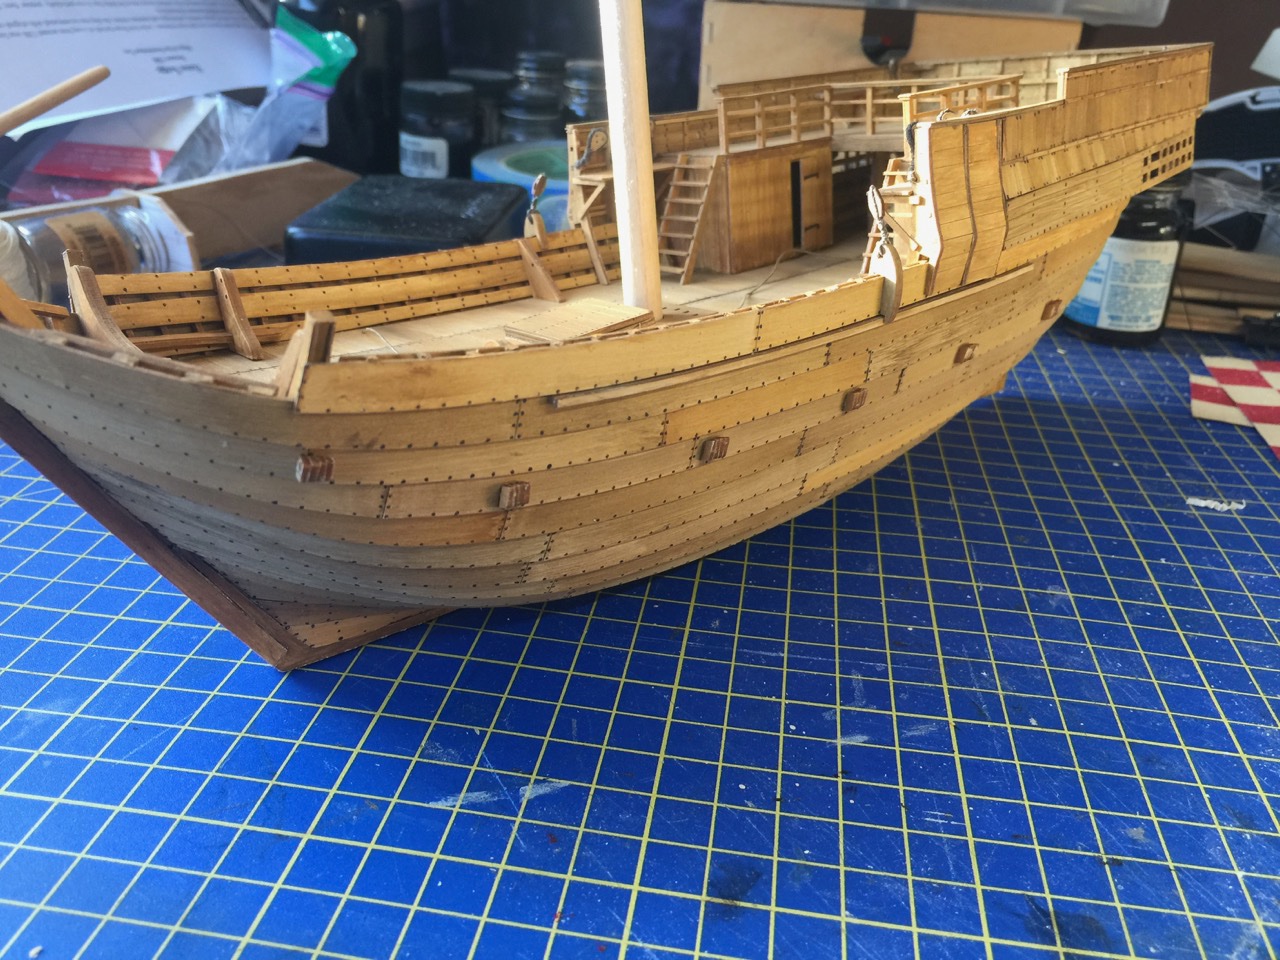
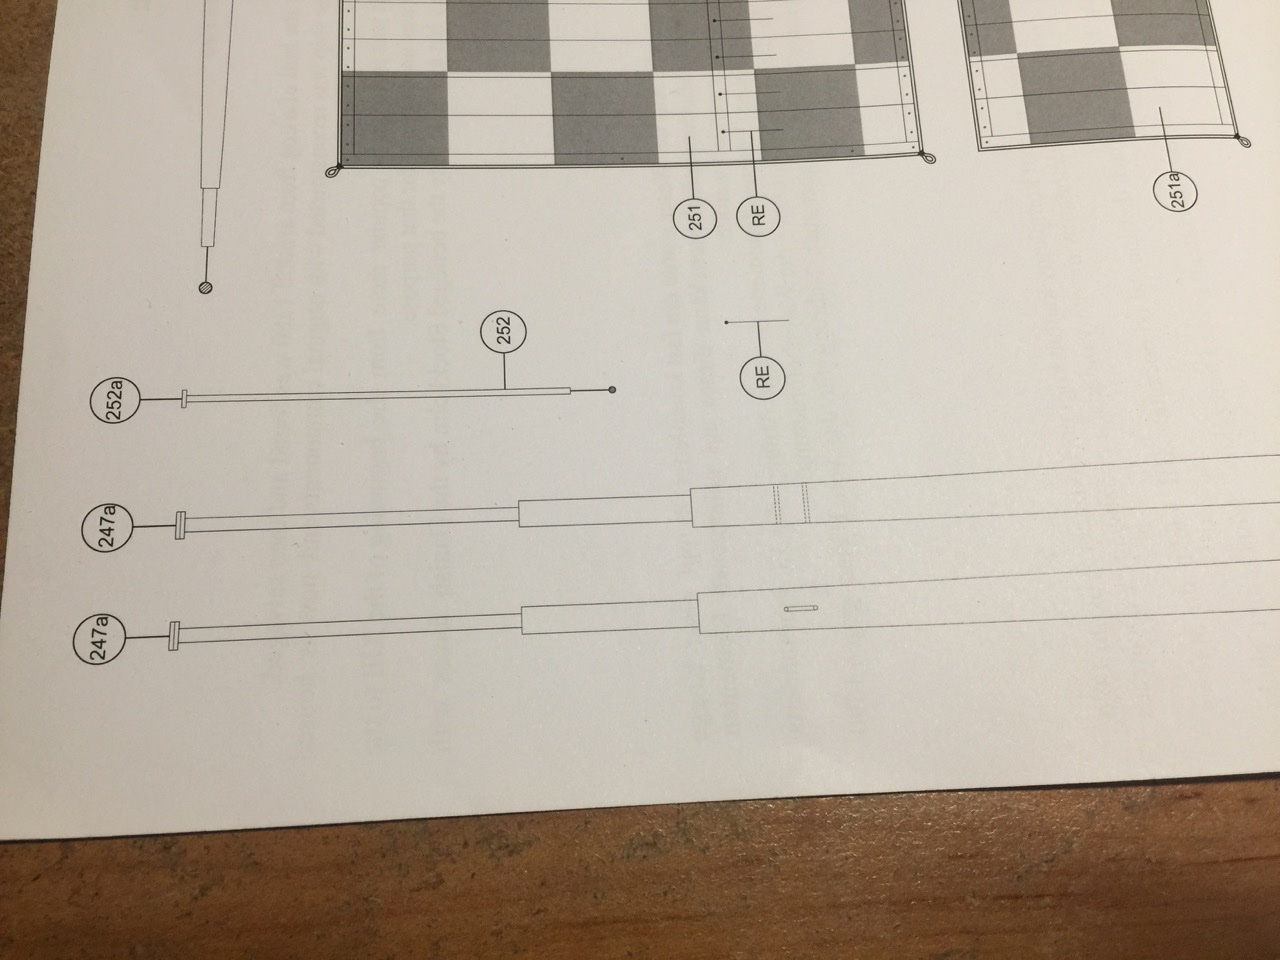
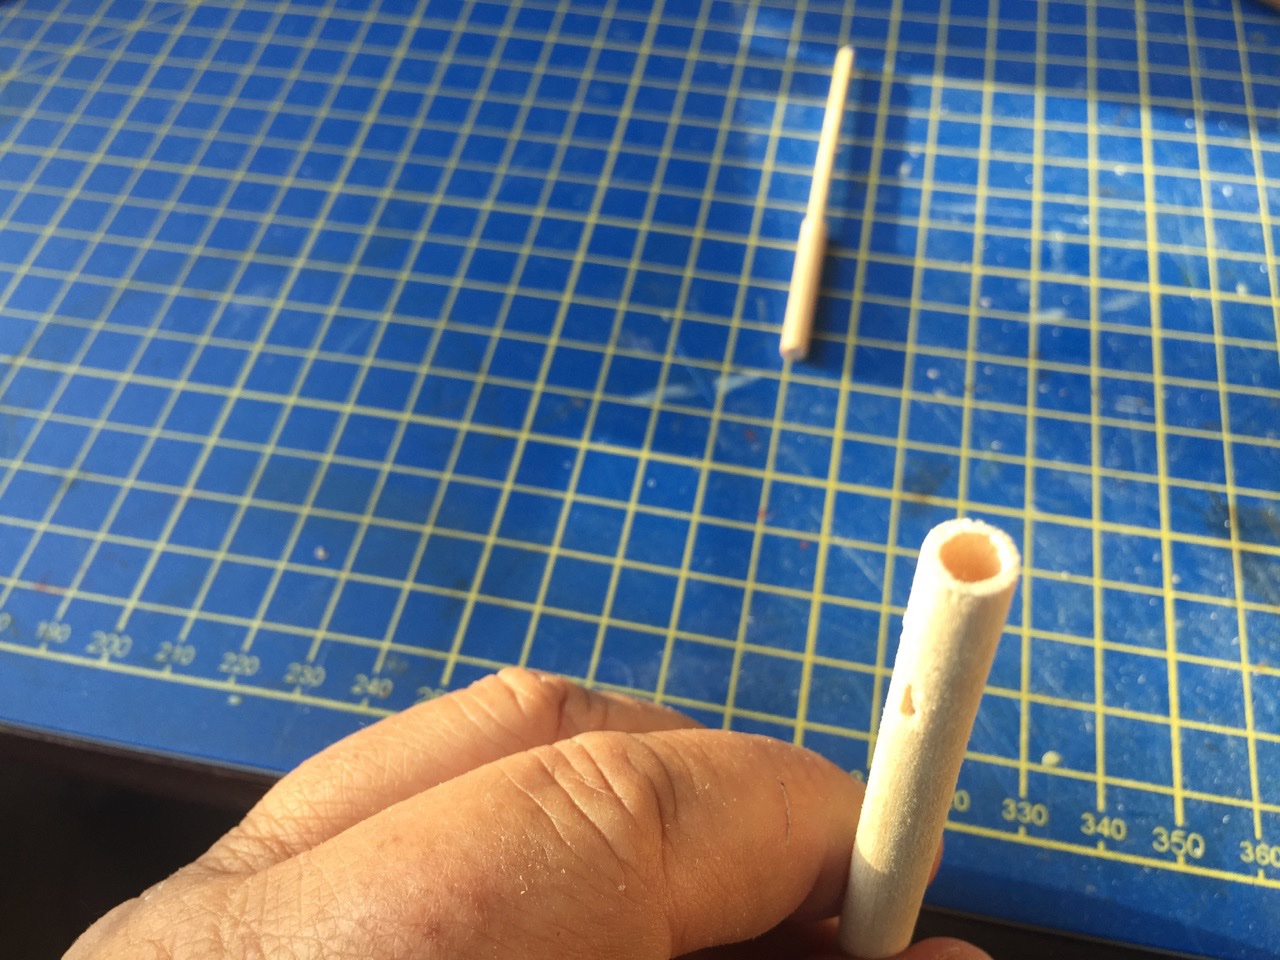
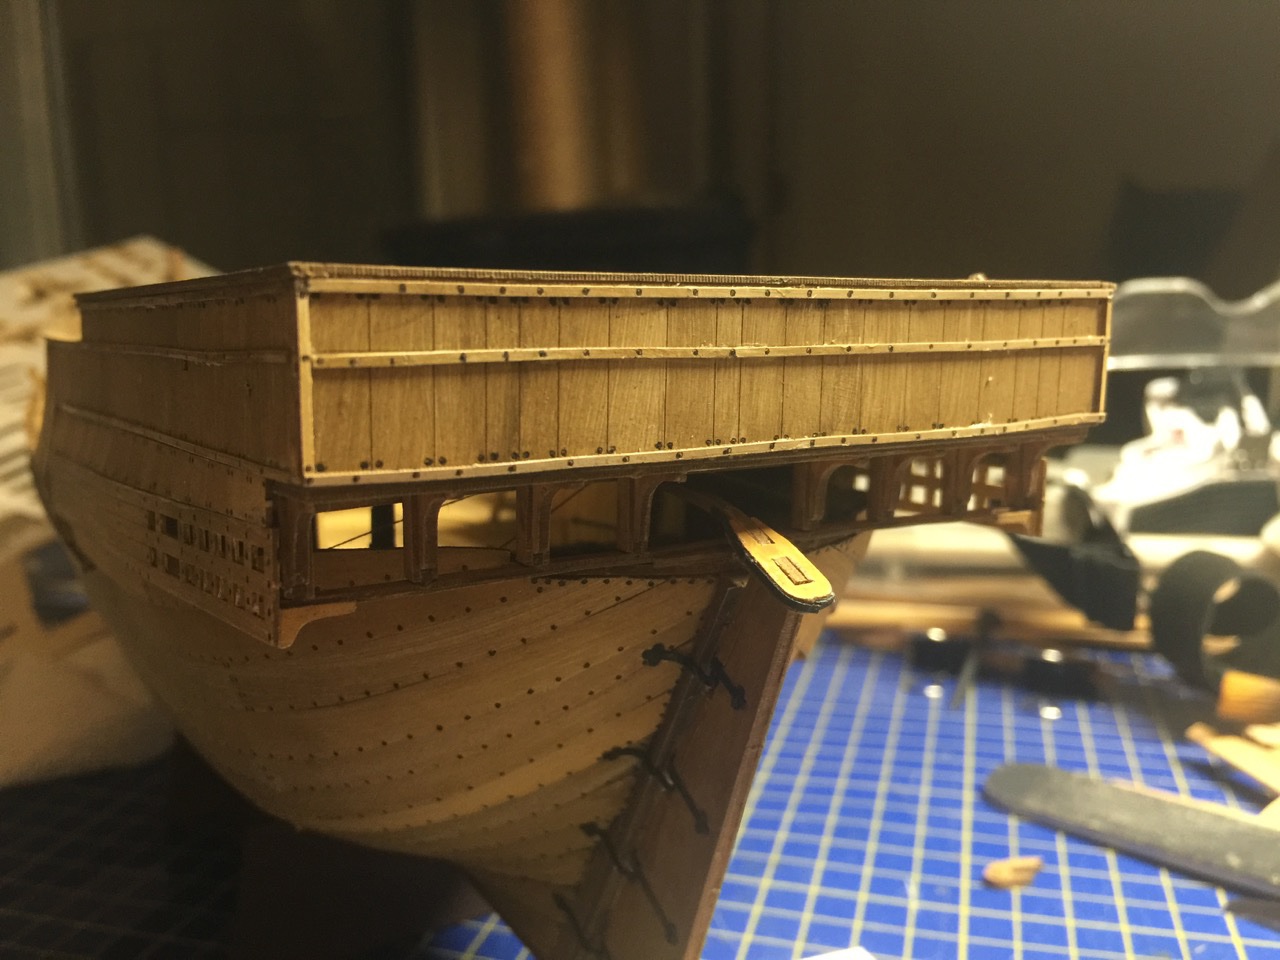
Well, at least I'm at the point where I don't think I have to worry about mislabeled parts, etc. I managed to get those fiddly beam ends together and mounted. Unfortunately, the insructions don't really make it clear about the pieces for the forward most set. For those, each piece is a slightly different size, so that the final assembly has a certain angle to it. Problem is, they don't point out that the pieces have to be stacked in one order for one side and a different order for the opposite side. Me, not being smart enough to think about this in advance, managed to stack both sets the same way. So, I ended up with two "left shoes", as it were. I managed to deconstruct one of them and re-assemble it in the proper order. Wasn't ideal, but it worked out okay. You can see the layering in the "beams" glued into place below. I'm going to paint these to try to hide that layered appearance. You can also see the base of the mast, which I test fit into place. The mast is supposed to have three distctively different diameters to it. Rather than turning down a single piece or trying to otherwise cut the dowel to shape, I went the route of drilling out the ends of the lower pieces and fitting the upper masts into place. I've done something similar in order on antoerh model in order to join two different kinds of wood into a single mast, and it worked out well enough, so I tried it here. Of course, I still have to stain the wood, though I think the instructions call for painting it. Also there's a mast truck I need to mount at the top, mast coat at the base, and a spider band. Those are all provided as laser-cut card stock.


- 175 replies
-
- 7
-
-
- hanse kogge
- shipyard
- (and 1 more)
-
I saw someone had posted a questions elsewhere about a Black Pearl kit. It was a Revell plastic kit and had the official Disney logo on it and all. Does the Zveza kit actually have Disney licensing?
-
Chuck, I'm also now at the stage where I am understanding why you decided to add real beams through the hull planks. I think I'm going to be okay with the kit's built-up beam ends, but it's a lot of little bits. Shipyard recently came out with a third wooden cog model kit. It's the Hanse Kogge von Bremen – same as the laser-cut card model I'm working on. But, interestingly enough, it's noticeably more expensive than the other wooden cog kits. Please keep going on your build – It keeps pushing me along to finish mine! And thanks! 😁
- 130 replies
-
- 1
-
-
- wütender hund
- hanseatic
- (and 2 more)
-
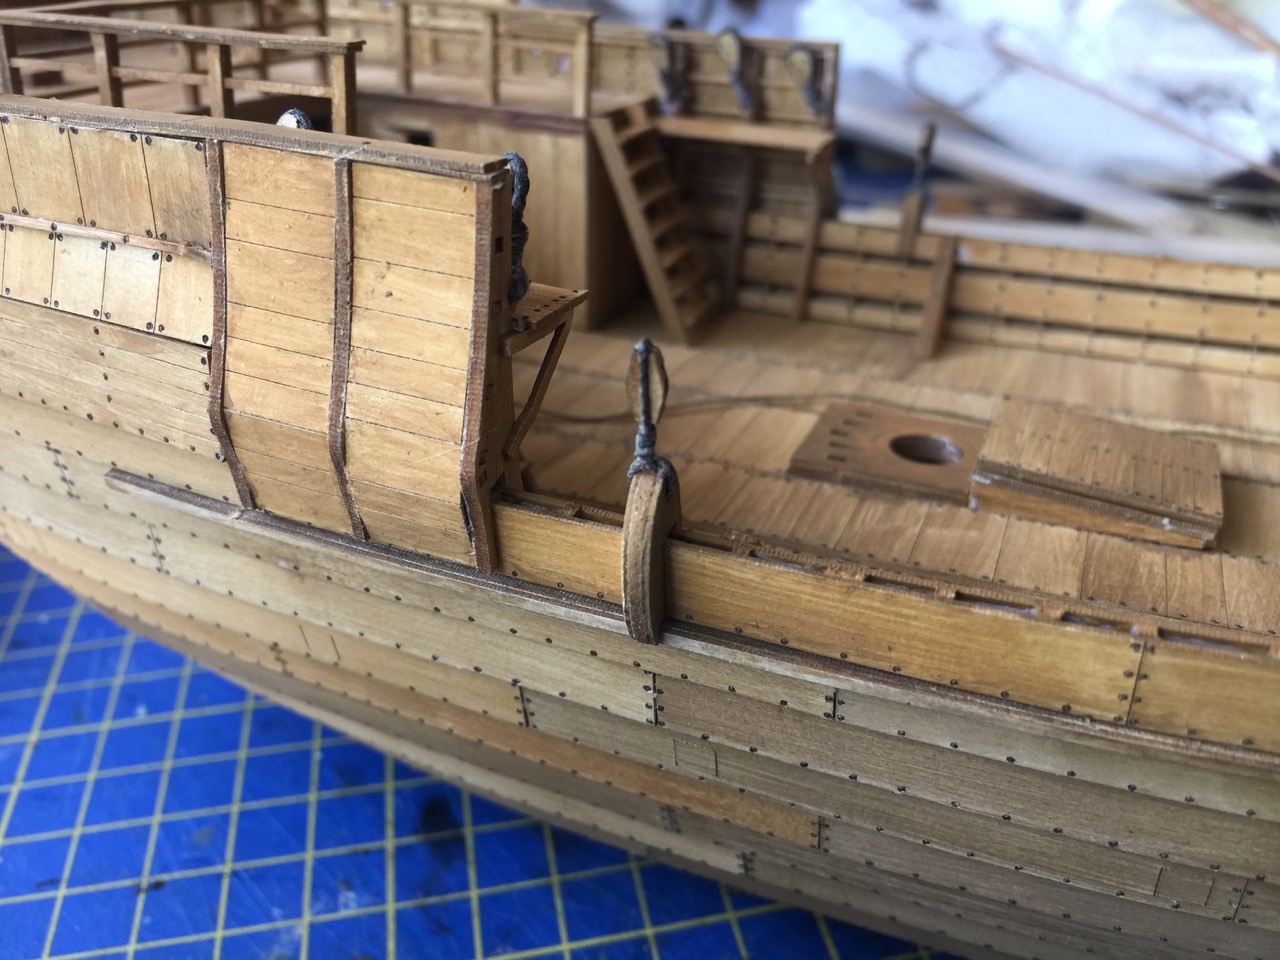
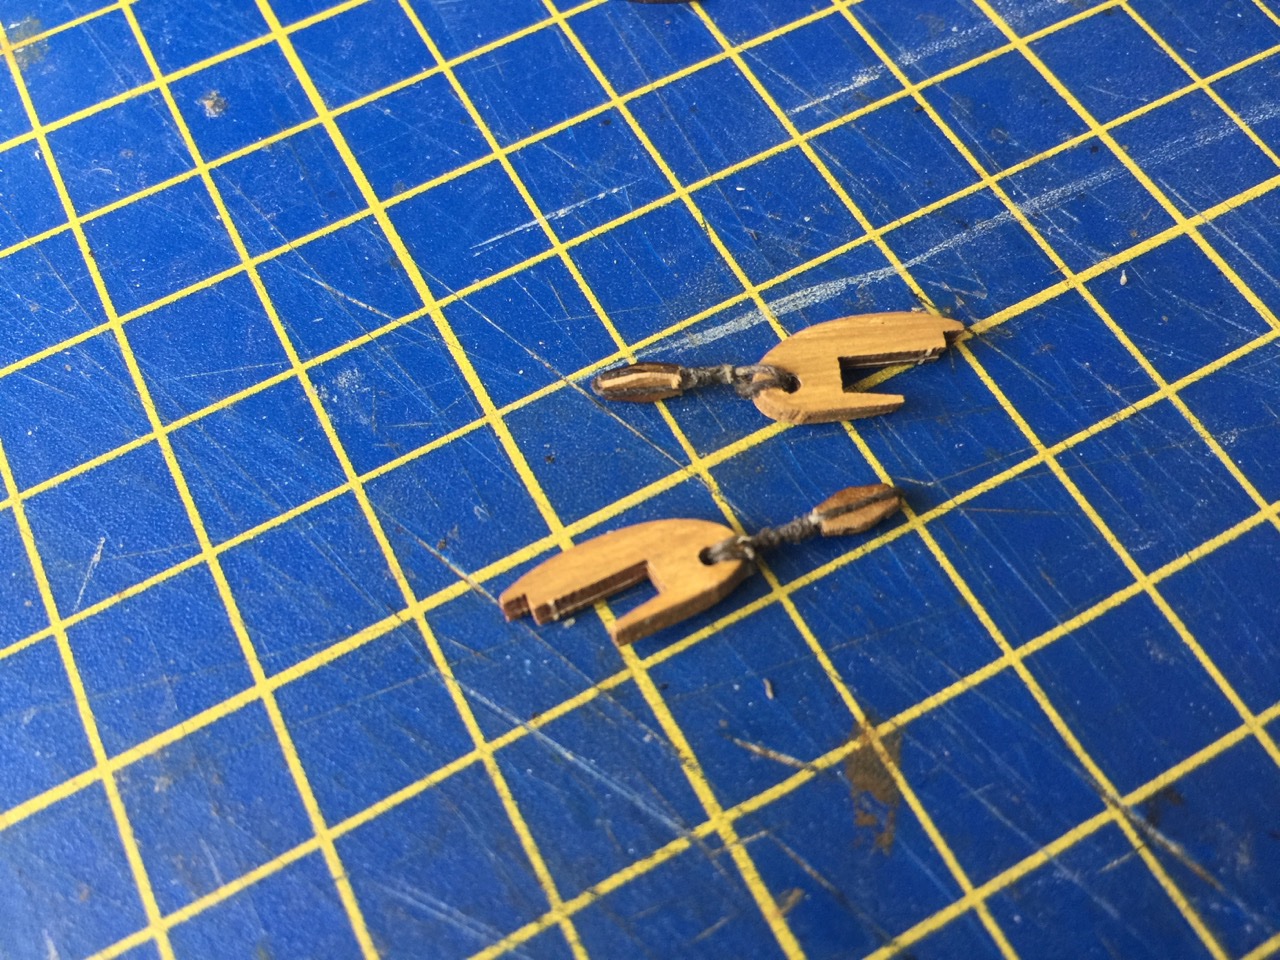
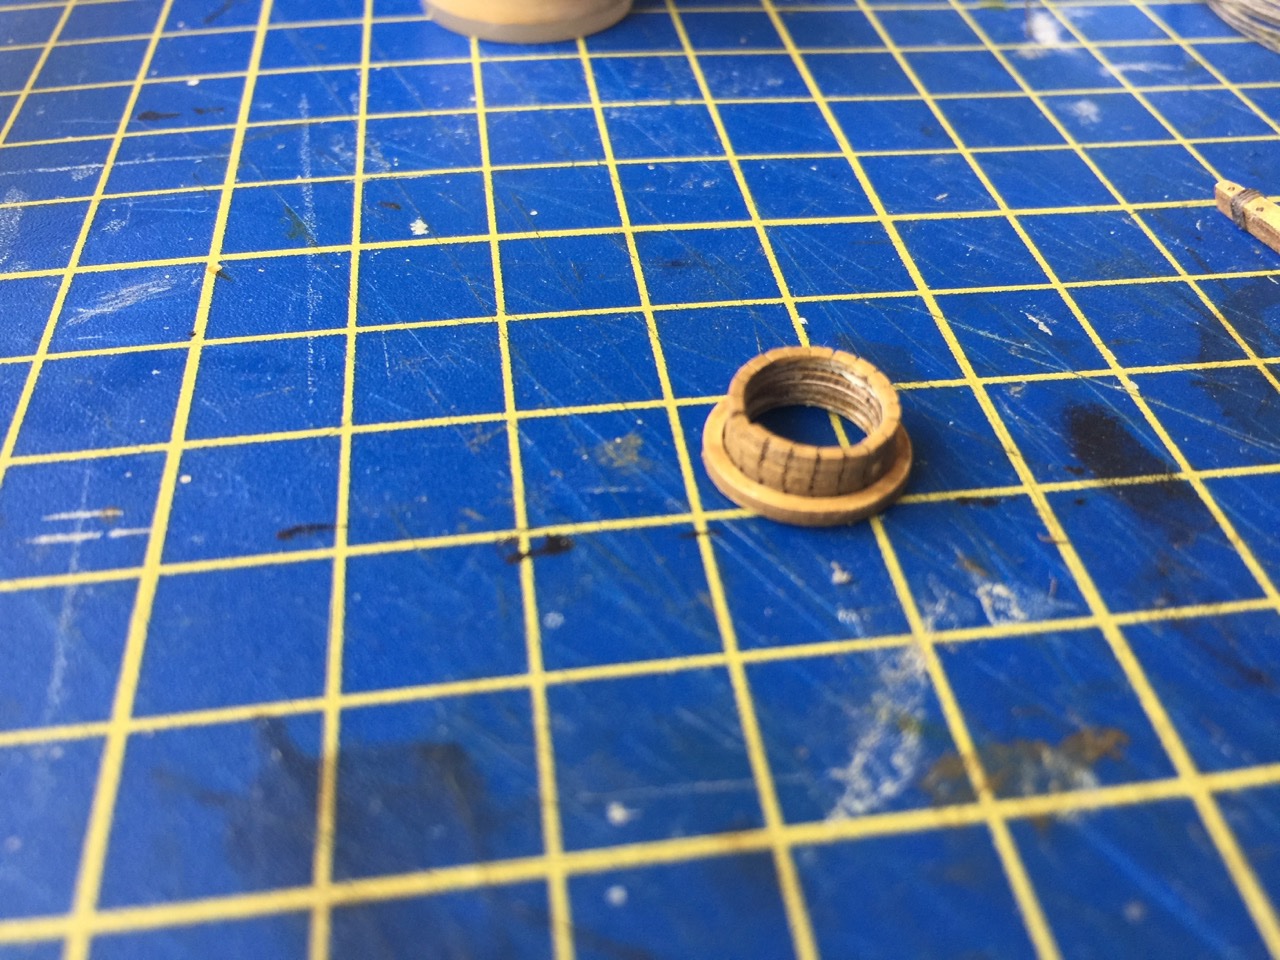
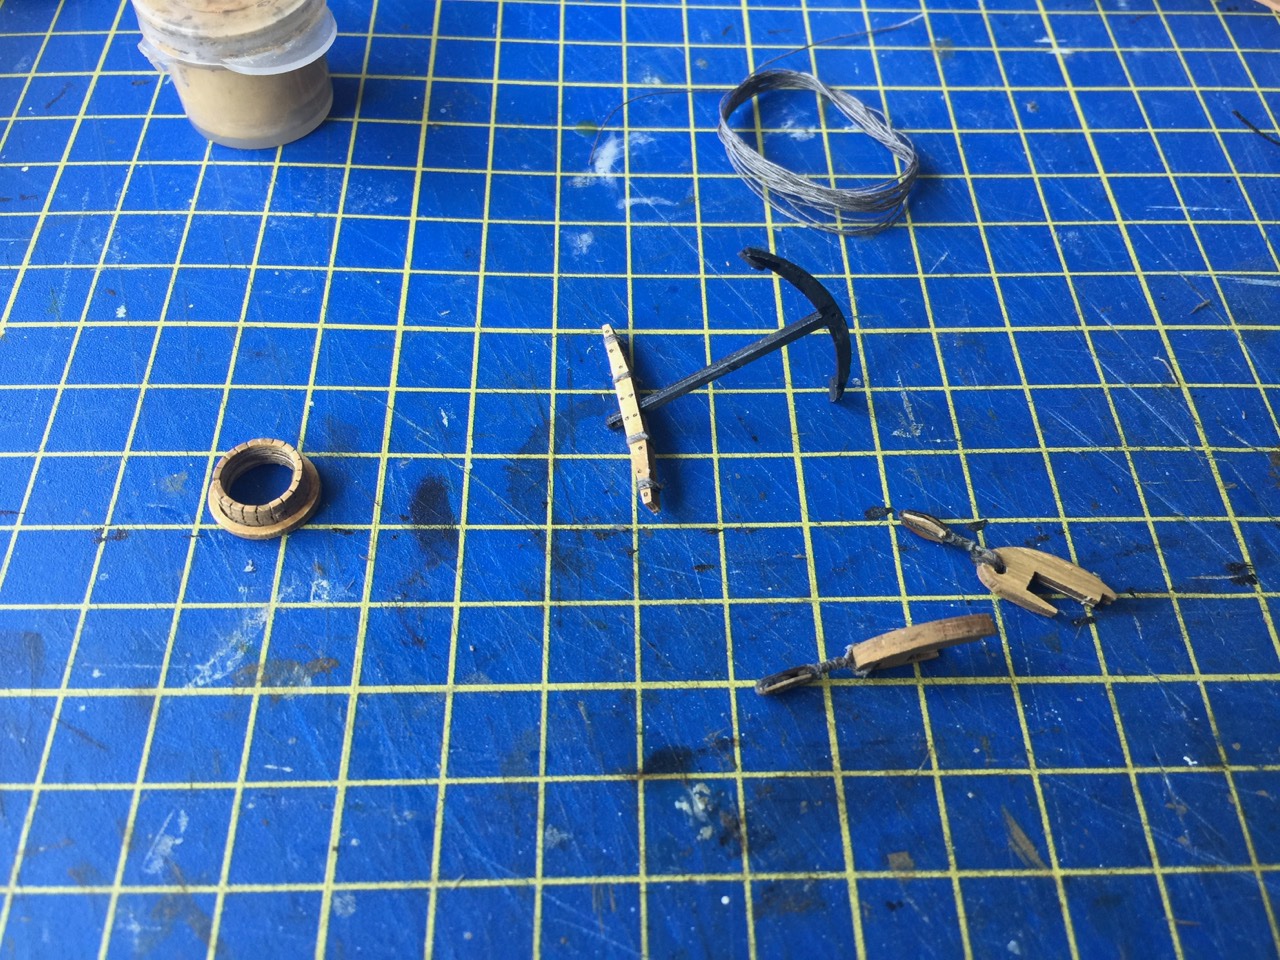
Trying to make regular progress on the Bremen Cog. More doo-dads done and I started dying the line for the sail. The Shipyard kits include linen rigging line. It's very nice, but it's white. So, I've started staining more of it, most just enough to deal with current steps. I think I'm caught up on the "extra" parts I'm finding. I did discover that the instructions completely missed one set of parts that I found still on the parts sheets. These are what I might just call trim pieces or battens that fit on the aft side of the stern castle. The parts can be seen in some of the instruction photos, but they're never labeled to show you where they go. And as for the doo-dads, here are mast coat, anchor, and some pieces that mount to the hull for the attachment of the backstays. It's really pretty interesting how detail oriented these kits are. More so than most wooden kits I've seen (except for maybe the wooden versions of these cogs). If you look closely at the mast coat, it's actually built up from several laser-cut hoops. Most are cut and lined up so that they look the coat is made up many wedges, though mine look like they're leaning a little. But, the top hoop is laser engraved on the top face, so that it looks like the ends of the wedges. The engraving make this piece pretty delicate. Two larger hoops at the bottom complete the assembly. In all, the mast coat is made up of 8 pieces, and an expert modeler would have gotten the laser-cut details lined up perfectly so that the wedges didn't lean like mine do.
- 175 replies
-
- 9
-
-
- hanse kogge
- shipyard
- (and 1 more)