HOLIDAY DONATION DRIVE - SUPPORT MSW - DO YOUR PART TO KEEP THIS GREAT FORUM GOING! (89 donations so far out of 49,000 members - C'mon guys!)
×

catopower
-
Posts
1,896 -
Joined
-
Last visited
Content Type
Profiles
Forums
Gallery
Events
Everything posted by catopower
-
 Hey vossiewulf, it's been a long time since I've done any serving on any model. I'll definitely post my results. Probably in a week or two. Chuck mostly seems to be building at 1/4" scale and larger, so heavier thread would make more sense. I've seen the serving you've been doing on your blog – Excellent job you're doing with your build, by the way – and it's looks amazing. Are you using CA glue to secure the ends of the served area? I'll try the fly-tying thread, but I expect I'll only be serving the shrouds and stays. Is there a certain brand and size you're using? I've got Uni-Thread 6/0 here.
 -
Today, I check Chuck's store and it's open. I was able to see that he does carry 4mm deadeyes, so I went ahead and ordered some. I guess I will wait until they arrive before I decide if I will use the 4mm or 5mm deadeyes on this model, but I'm happy to do so. I'm still sanding off the laser-char before I assemble my Serve-O-Matic, which is just as well. I plan on using fly-tying line to serve the shrouds. I haven't done this in a long time and discovered I can't find any in my supplies. The store I used to get it from is gone now, so I went ahead and ordered some online. Won't be here until next week. Meanwhile, there was plenty of work adding blocks to the yards. Also, I need to go ahead and finish the topgallant masts, so I still have lots to work on here.
-
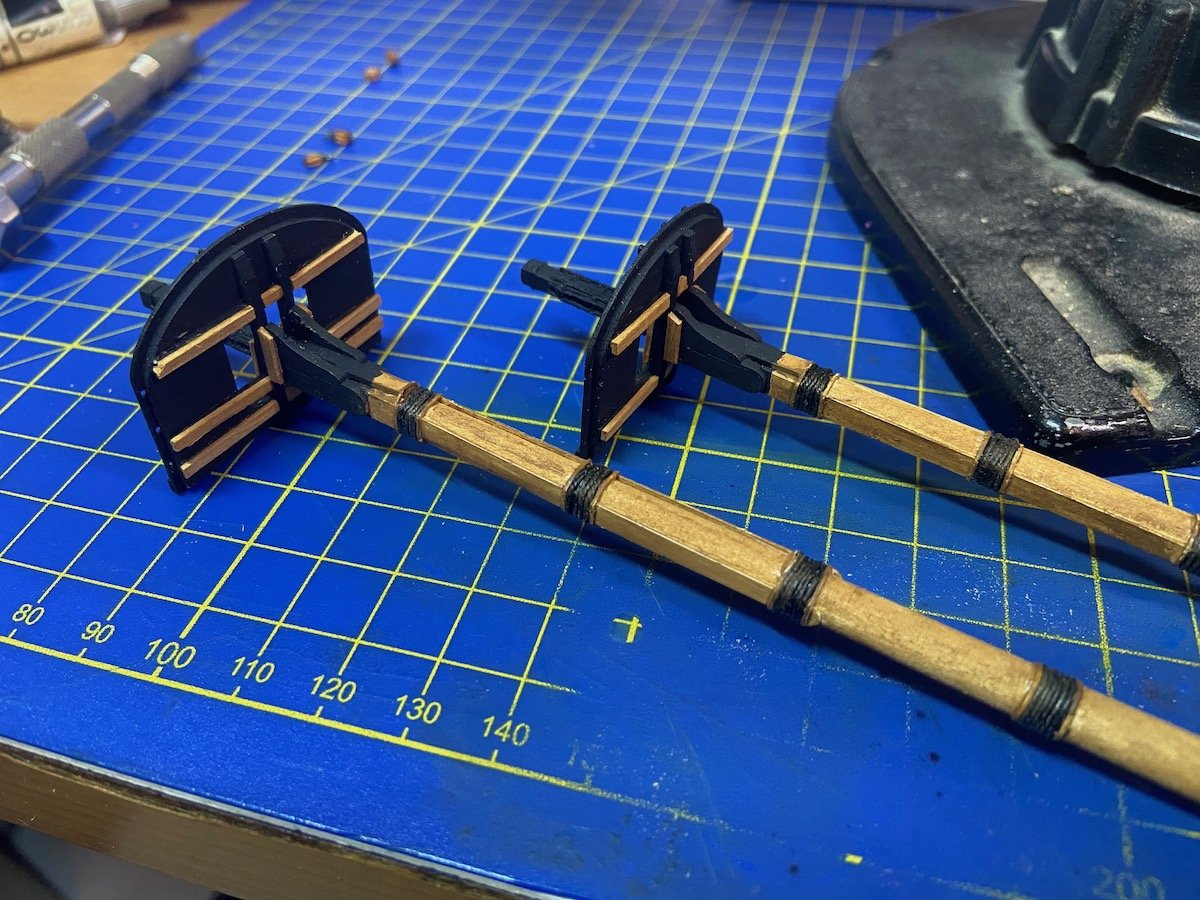
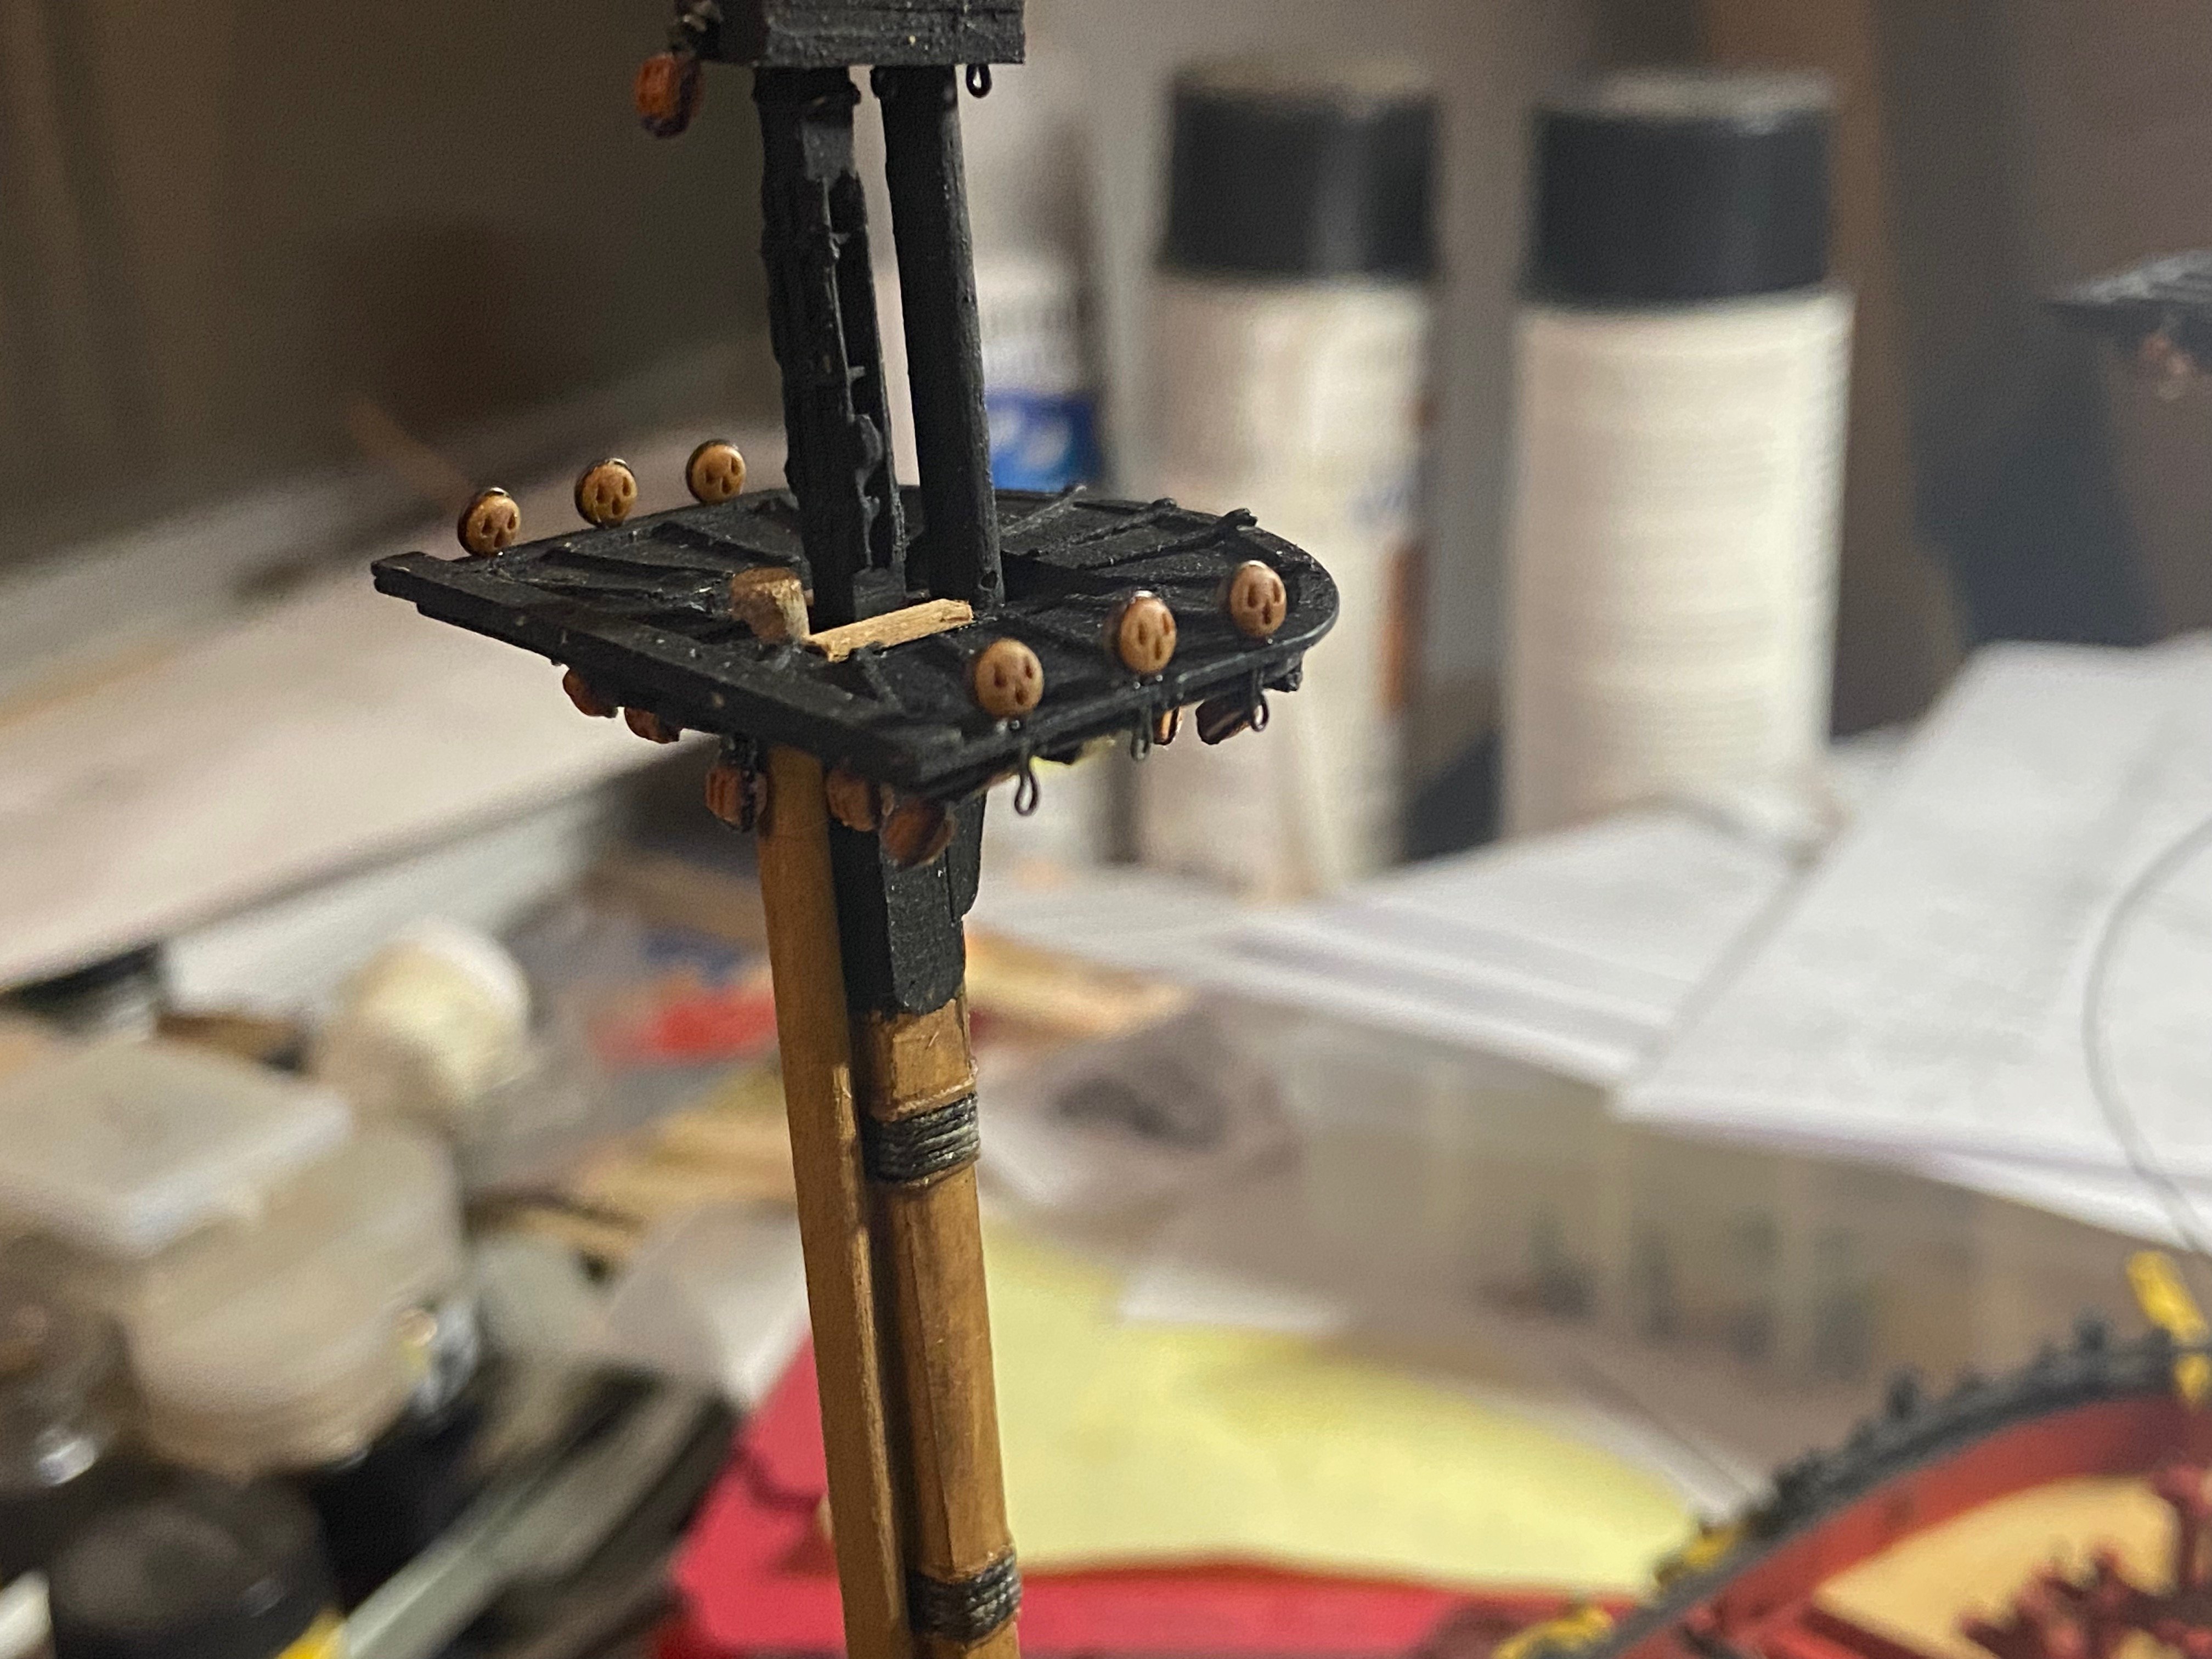
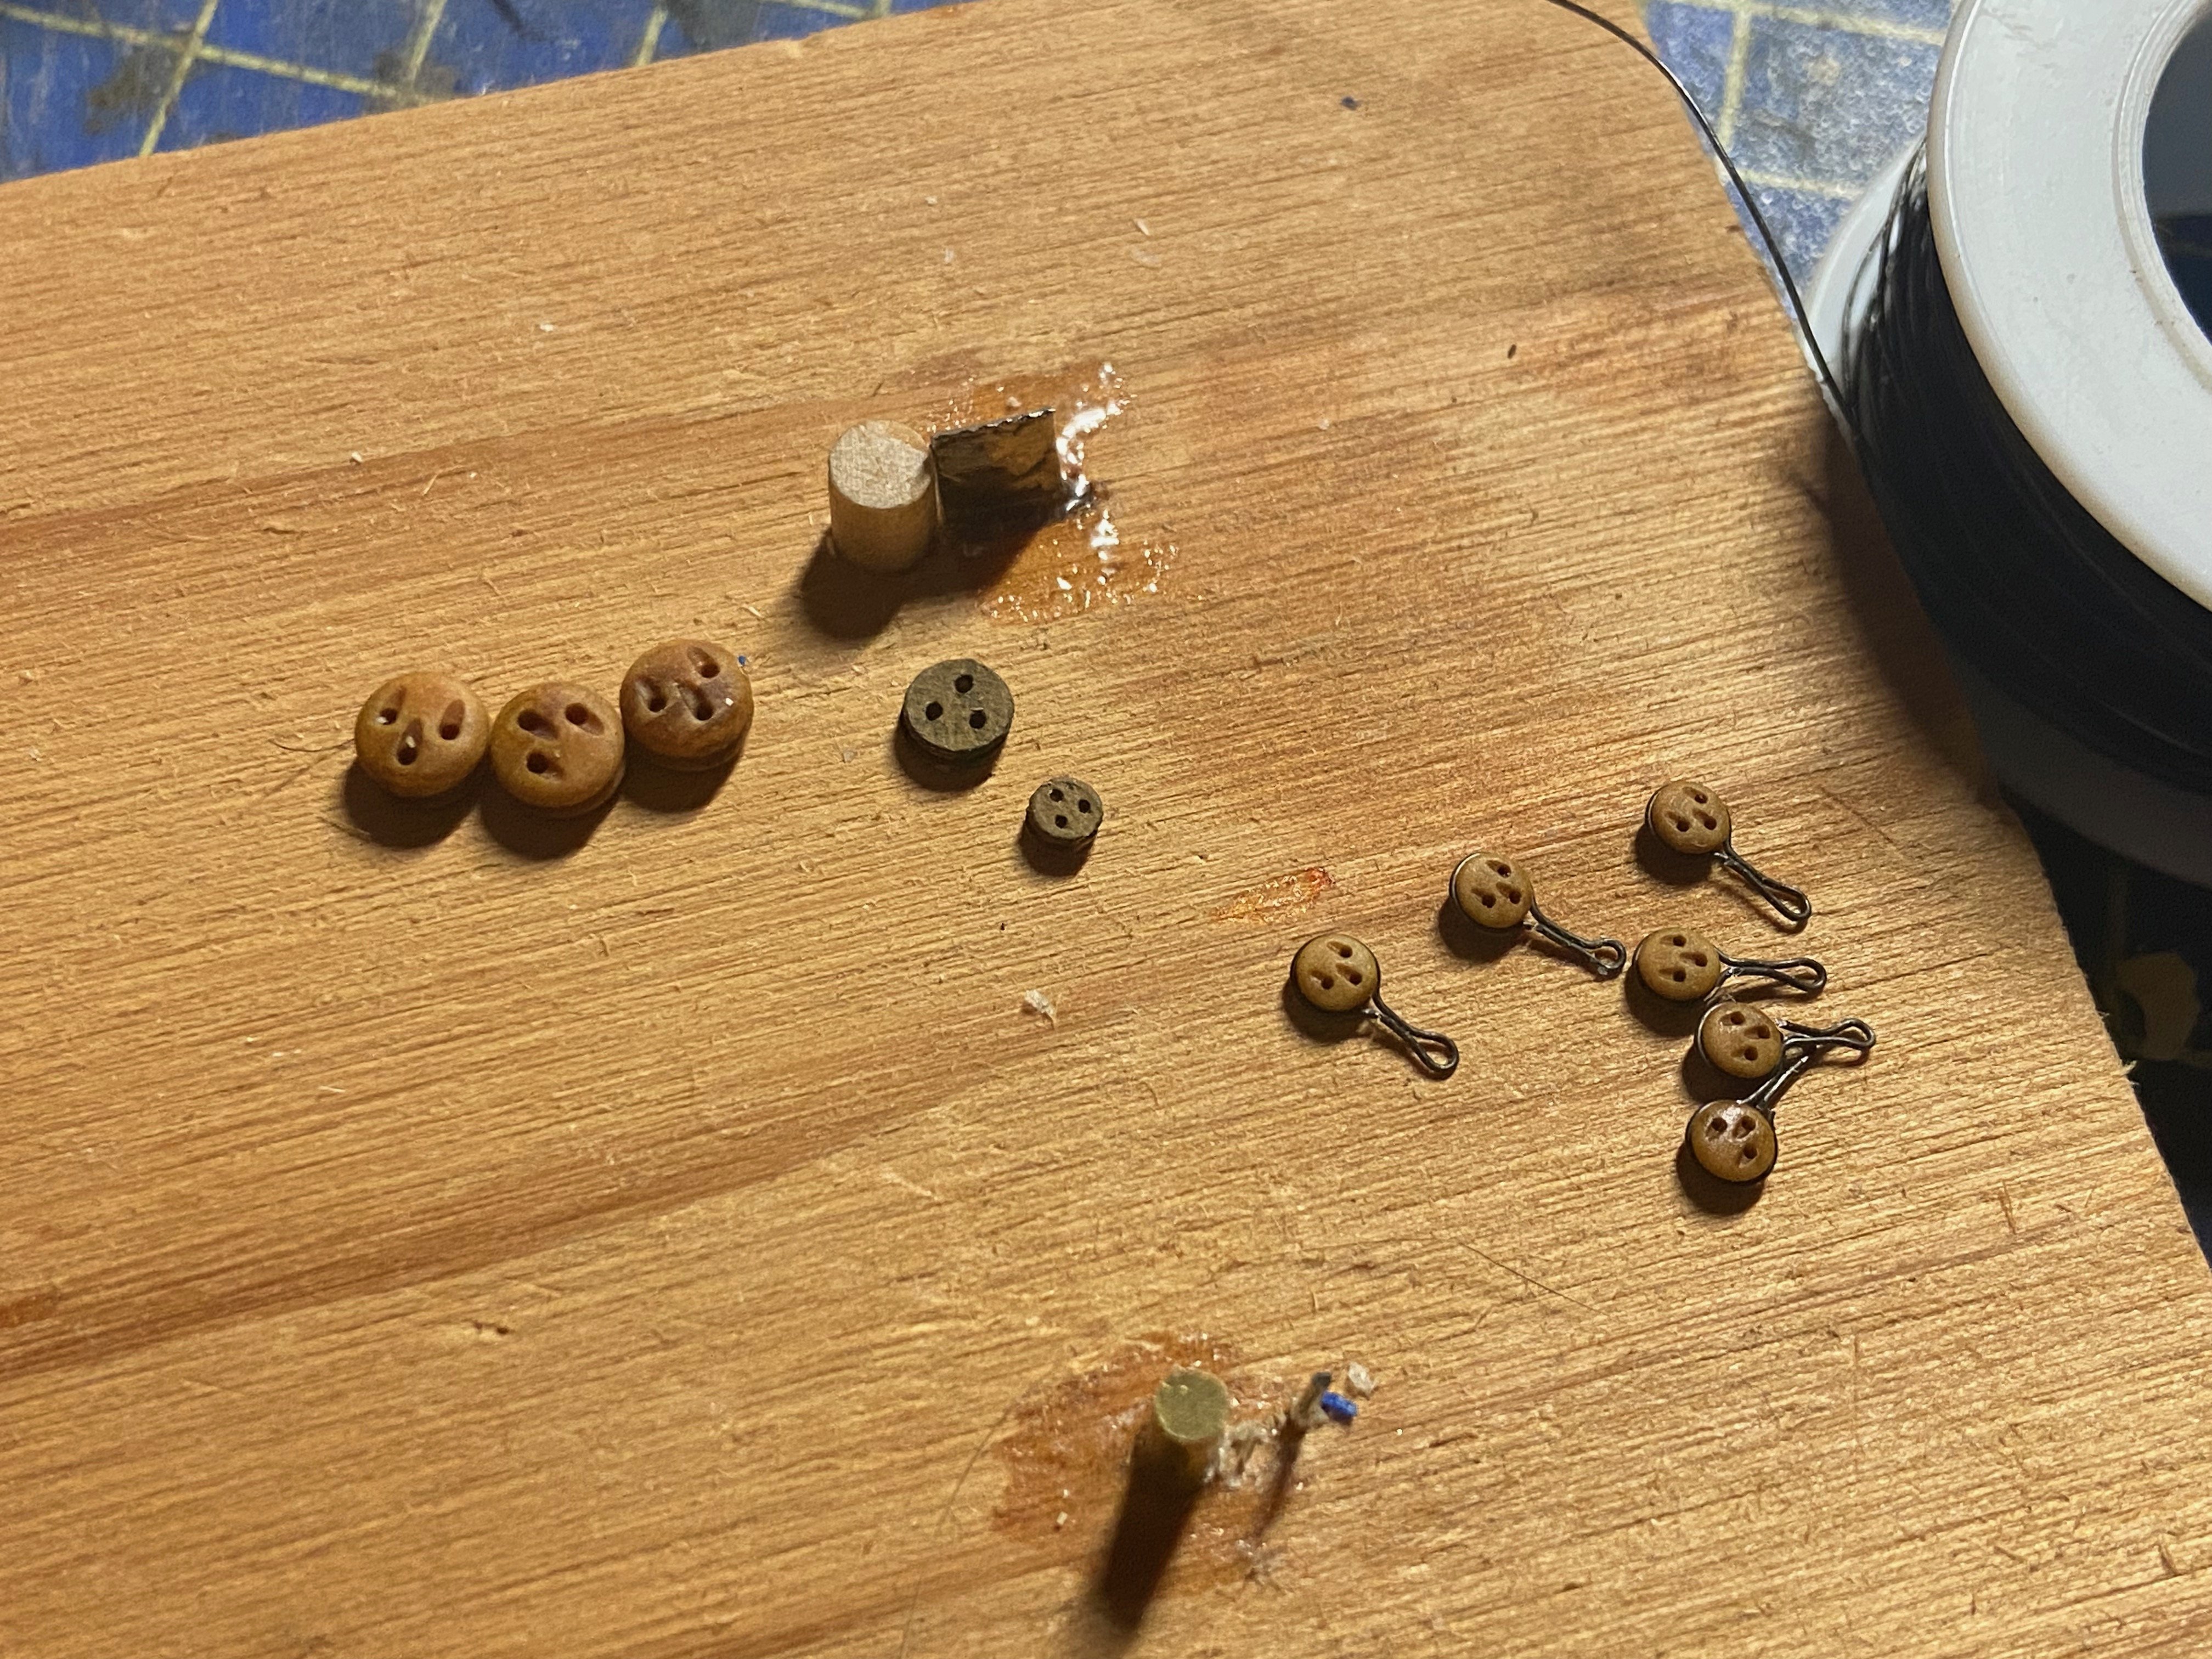
Merry Christmas all! I took a couple weeks to work on some other stuff, but then got back to my HMS Wolf build. I decided to take a look at using Chuck's (Syren Ship Model Company) new resin deadeyes. I don't love the idea of using resin parts on my wooden ship models, but my paper models are really multi-media models anyway, as I'm using wood for masts, yards and blocks, metal cannon barrels... so why not resin deadeyes that so beautiful? You can see them here, along with a couple of the cardboard deadeyes from the kit. Below, you can see how the model looked like, or would look like, with cardboard deadeyes... And then, compare that to how it looks with Chuck's resin, 3D-printed deadeyes. The larger deadeyes are 5mm diameter, and they look a bit big in comparison to the cardboard ones, which are also labeled 5mm, but are closer to 4.5mm. I wish there were 4mm deadeyes available from Chuck's store, but it's currently "Closed for Maintenance", so I have no way to see if he makes them in this size. I'd consider substituting the 5mm ones with 4mm ones if he makes them. If not, these will do. Certainly the 3mm deadeyes on the mast tops look really good. I'm very happy with them! For Christmas, I decided to get myself a new serving tool, which I intend to use with this model. So, I have a brand new Serve-O-Matic that I'll be assembling this week. In the meantime, I'm putting together a rigging table, so my line sizes should be more accurate than using sizes provided solely from the kit plans. Also, I have plenty of work to do on fixing blocks to the yards, and adding those mast cleats I mentioned a few posts back.


- 108 replies
-
- 11
-

-
Congratulations on your completed Alert build, Mike! That's a great looking model. I built a paper model in 1/96 scale, years ago, and now you have me thinking about doing another in a larger scale. 🤔
- 34 replies
-
- 2
-
-
- Alert
- Vanguard Models
- (and 1 more)
-
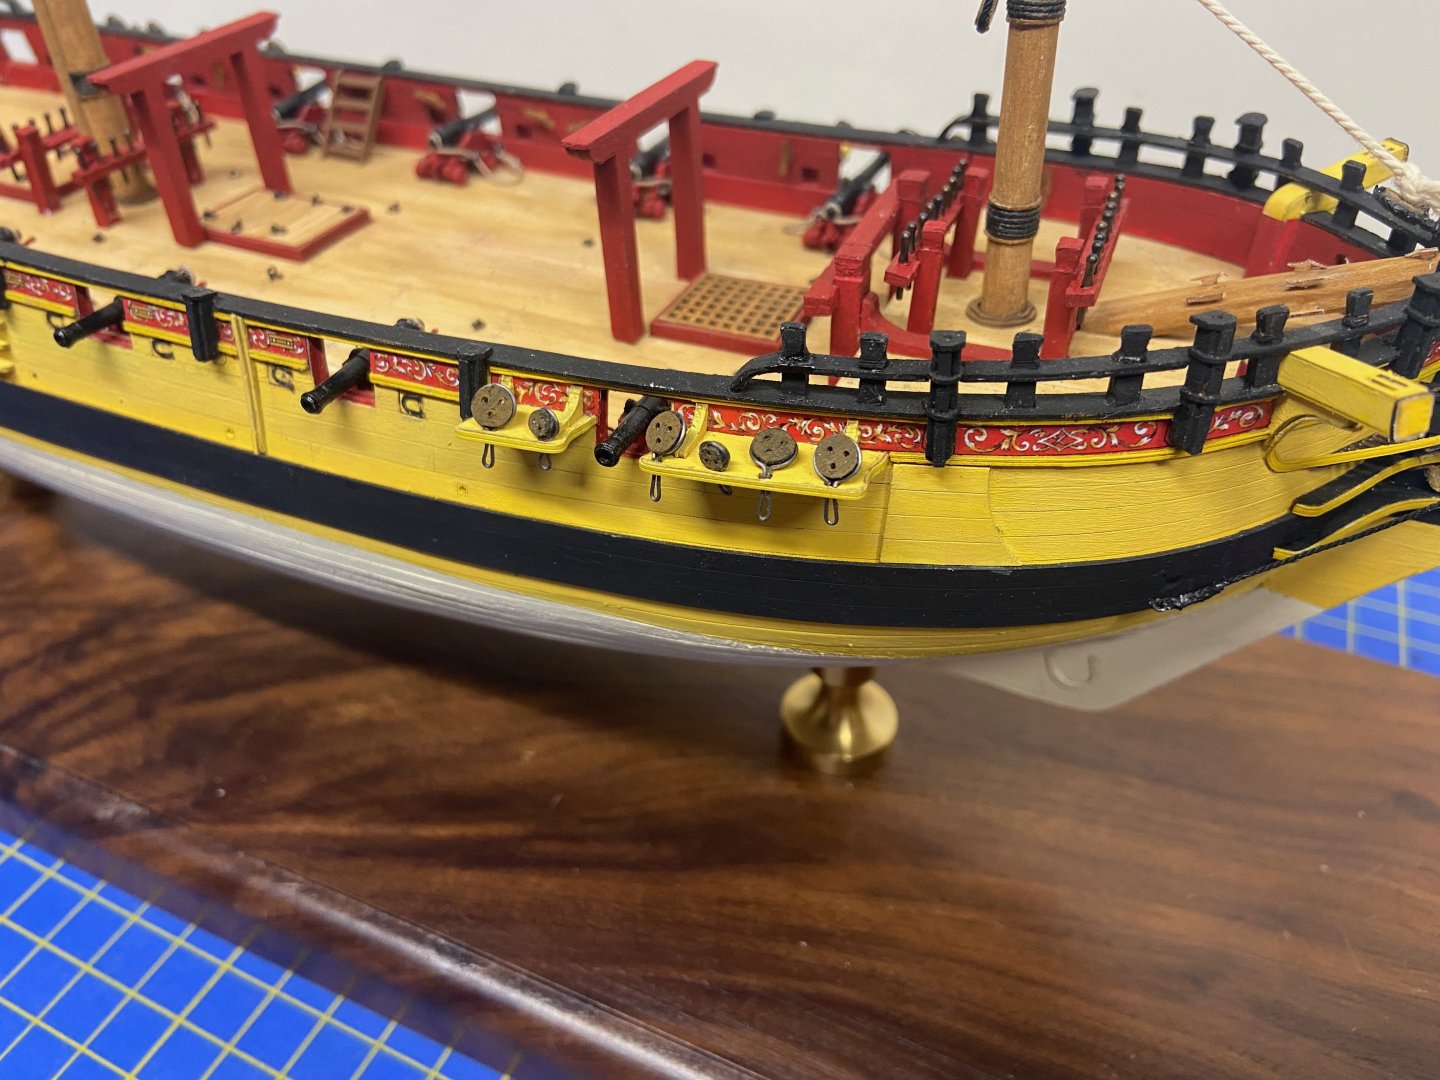
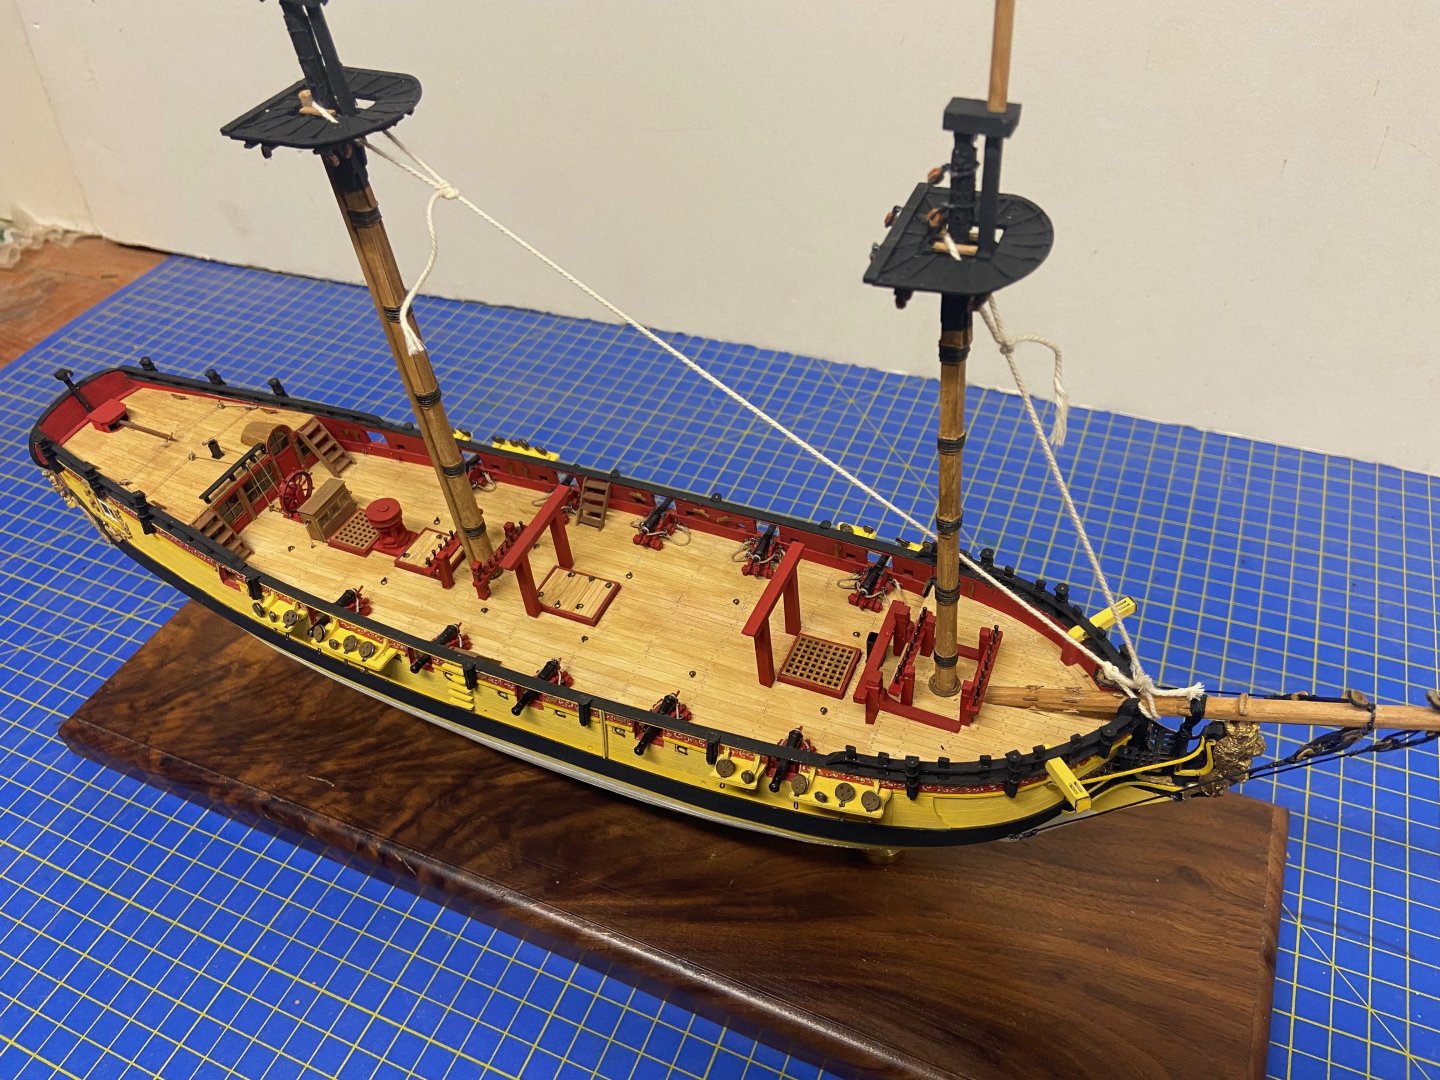
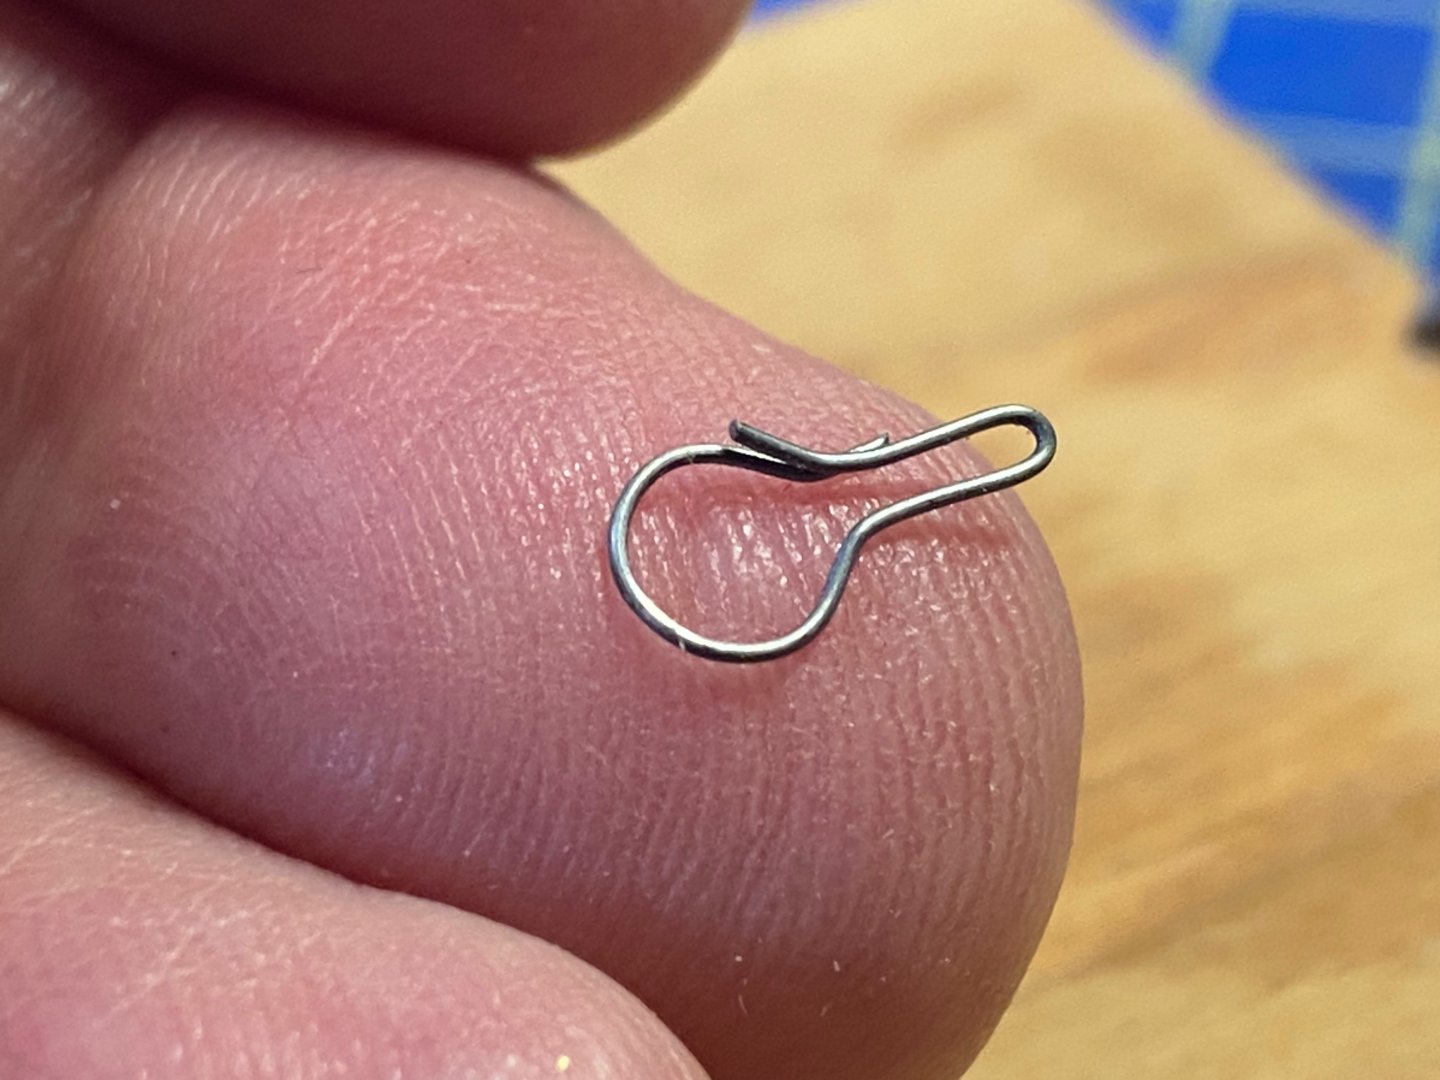
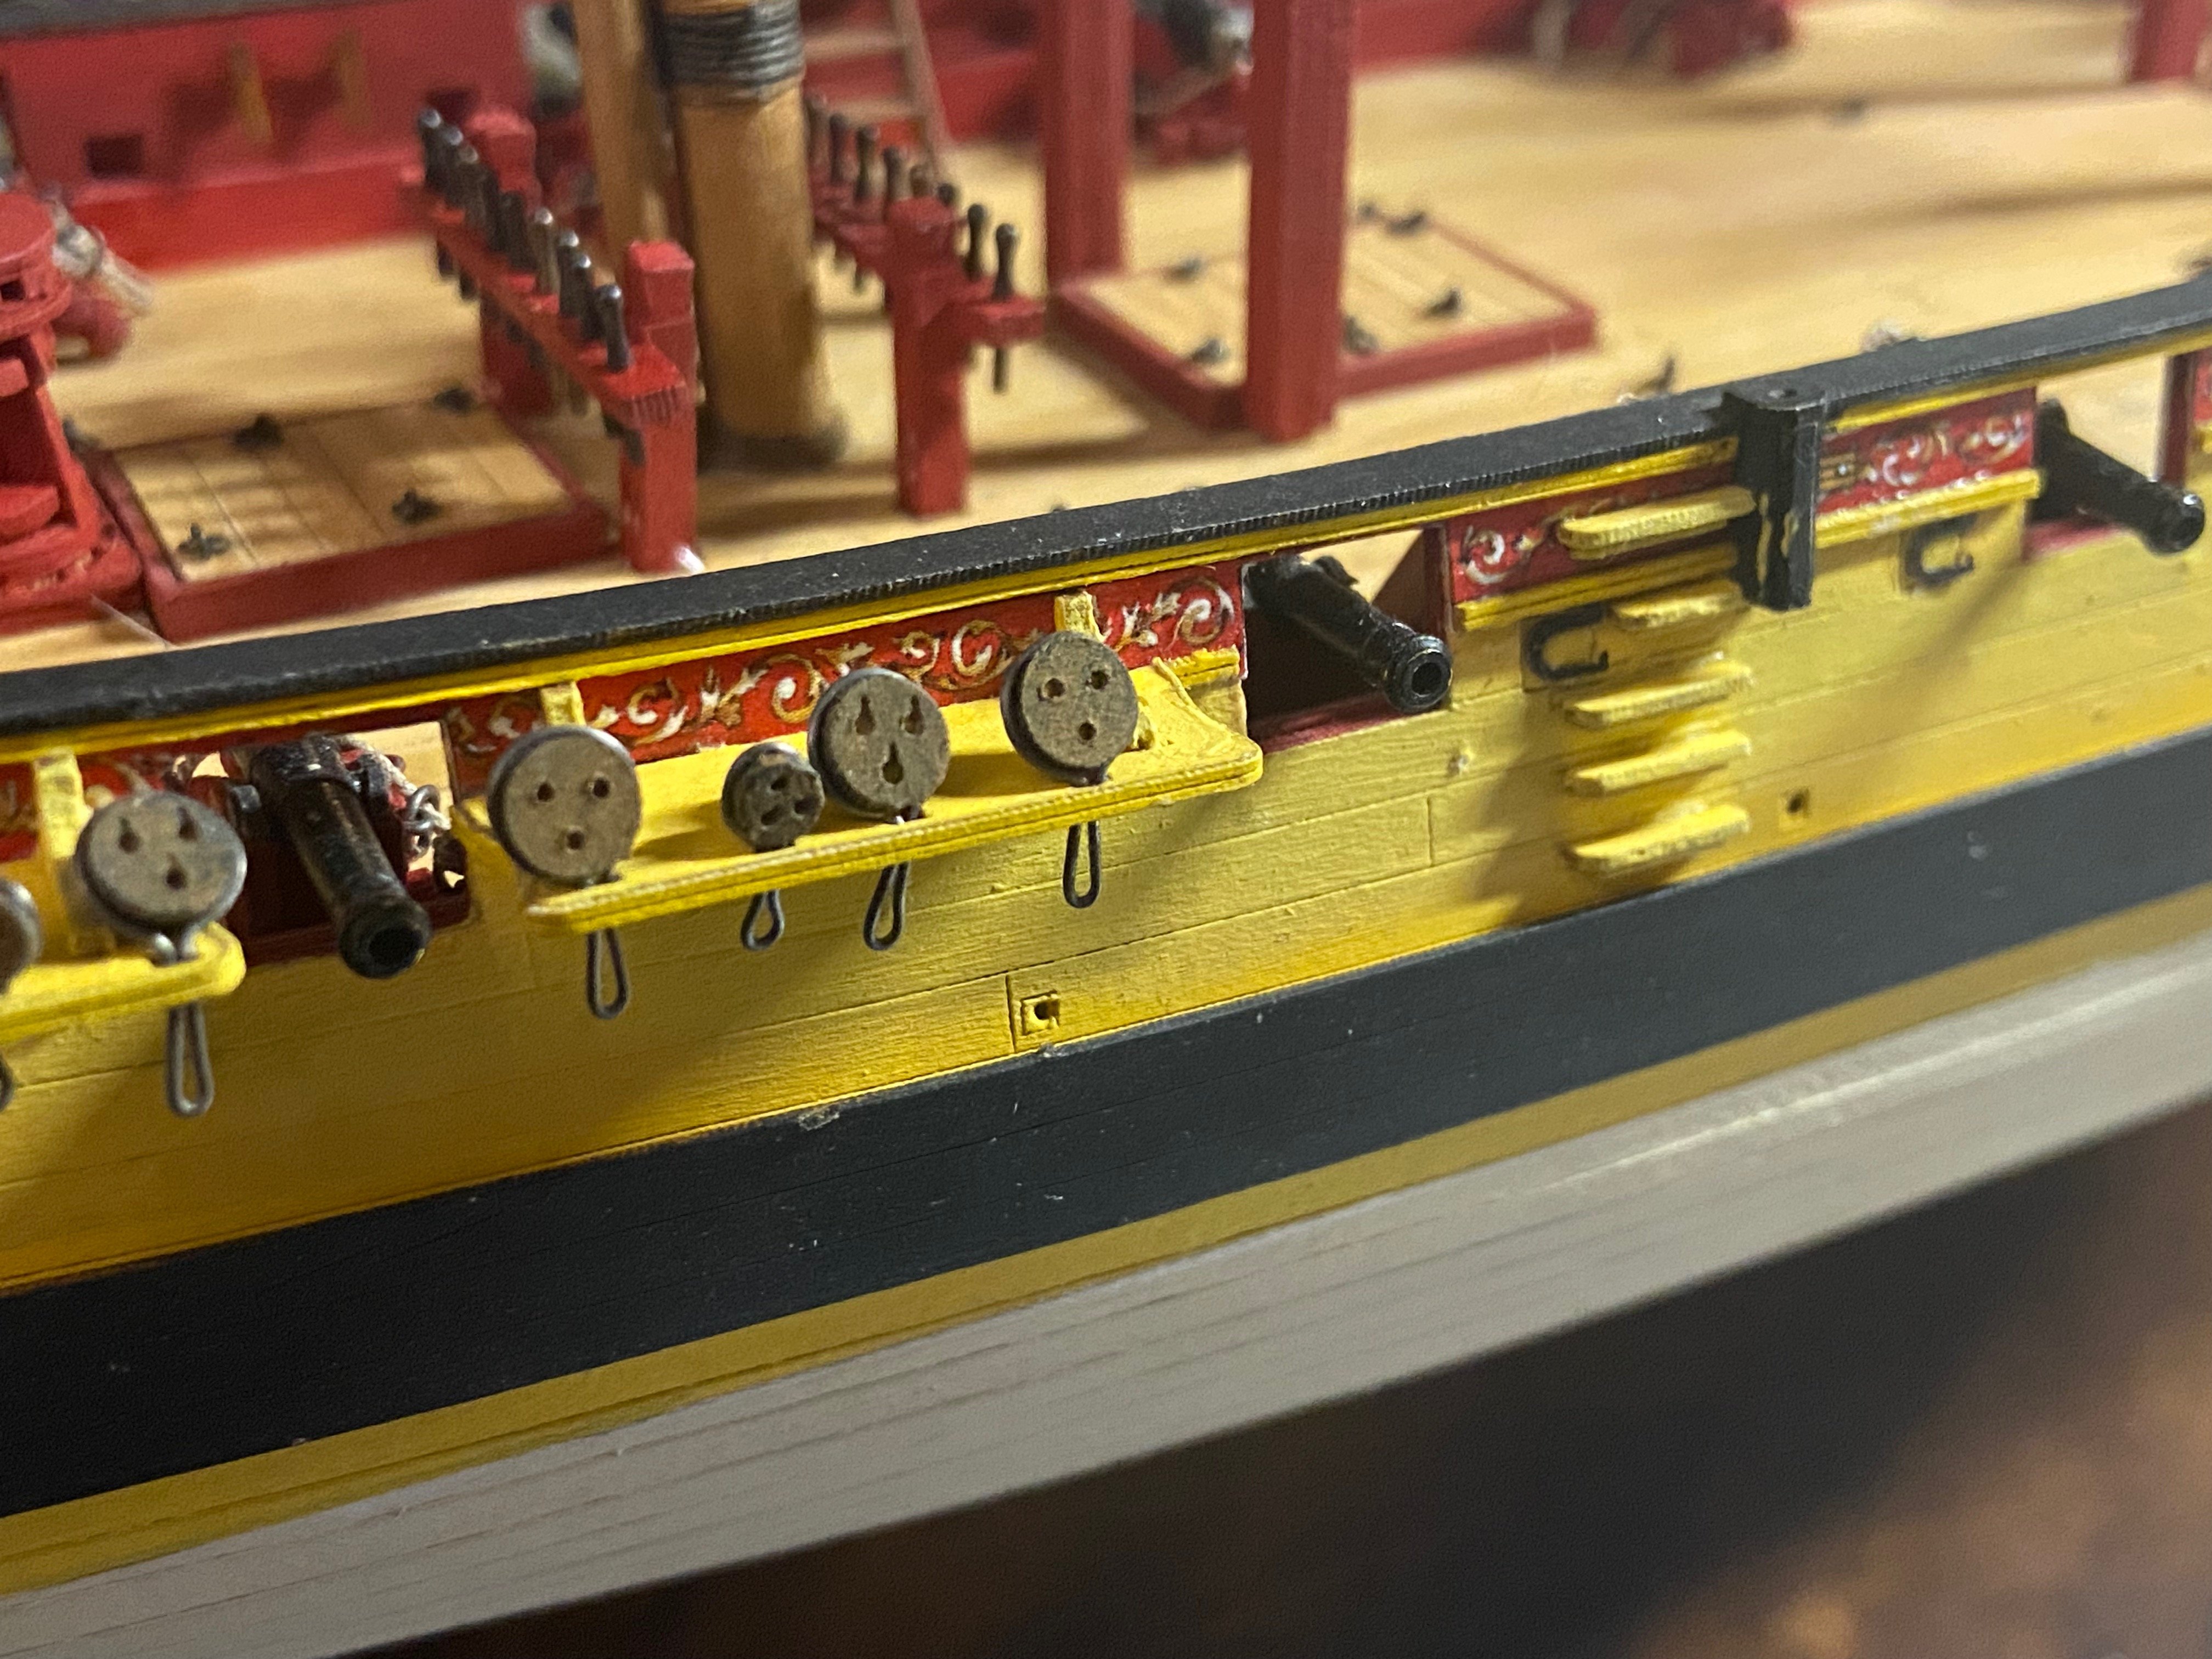
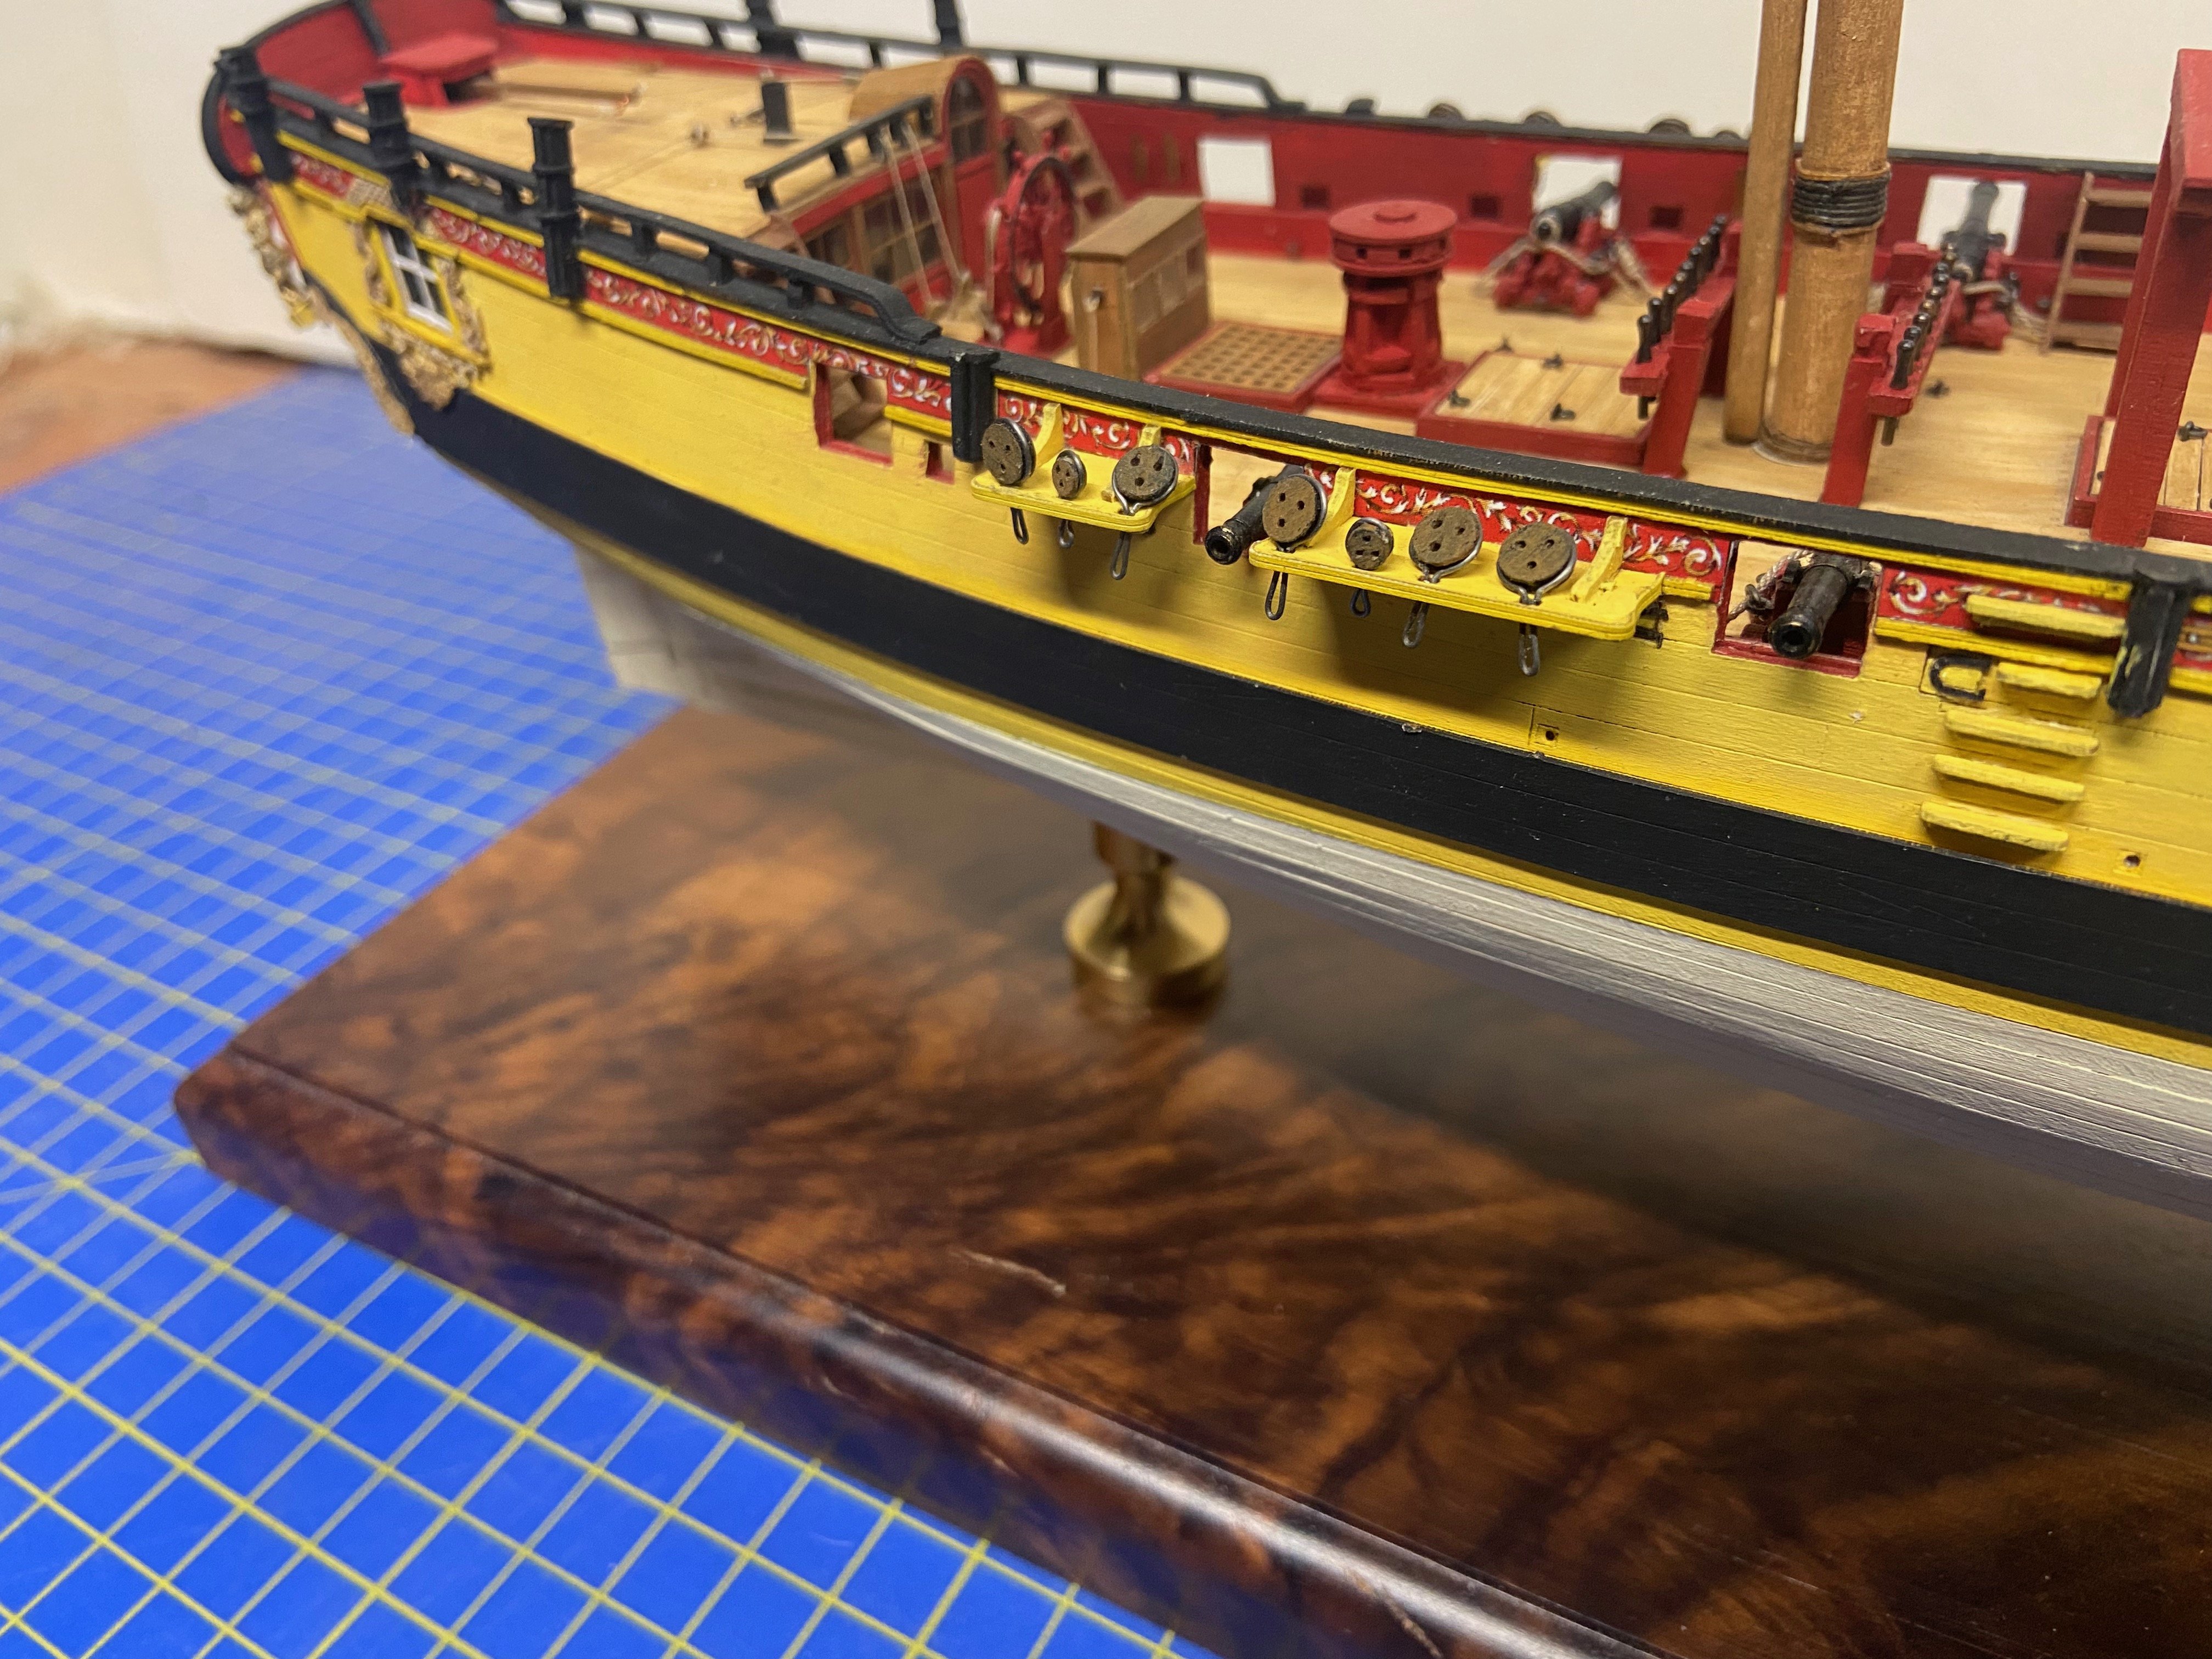
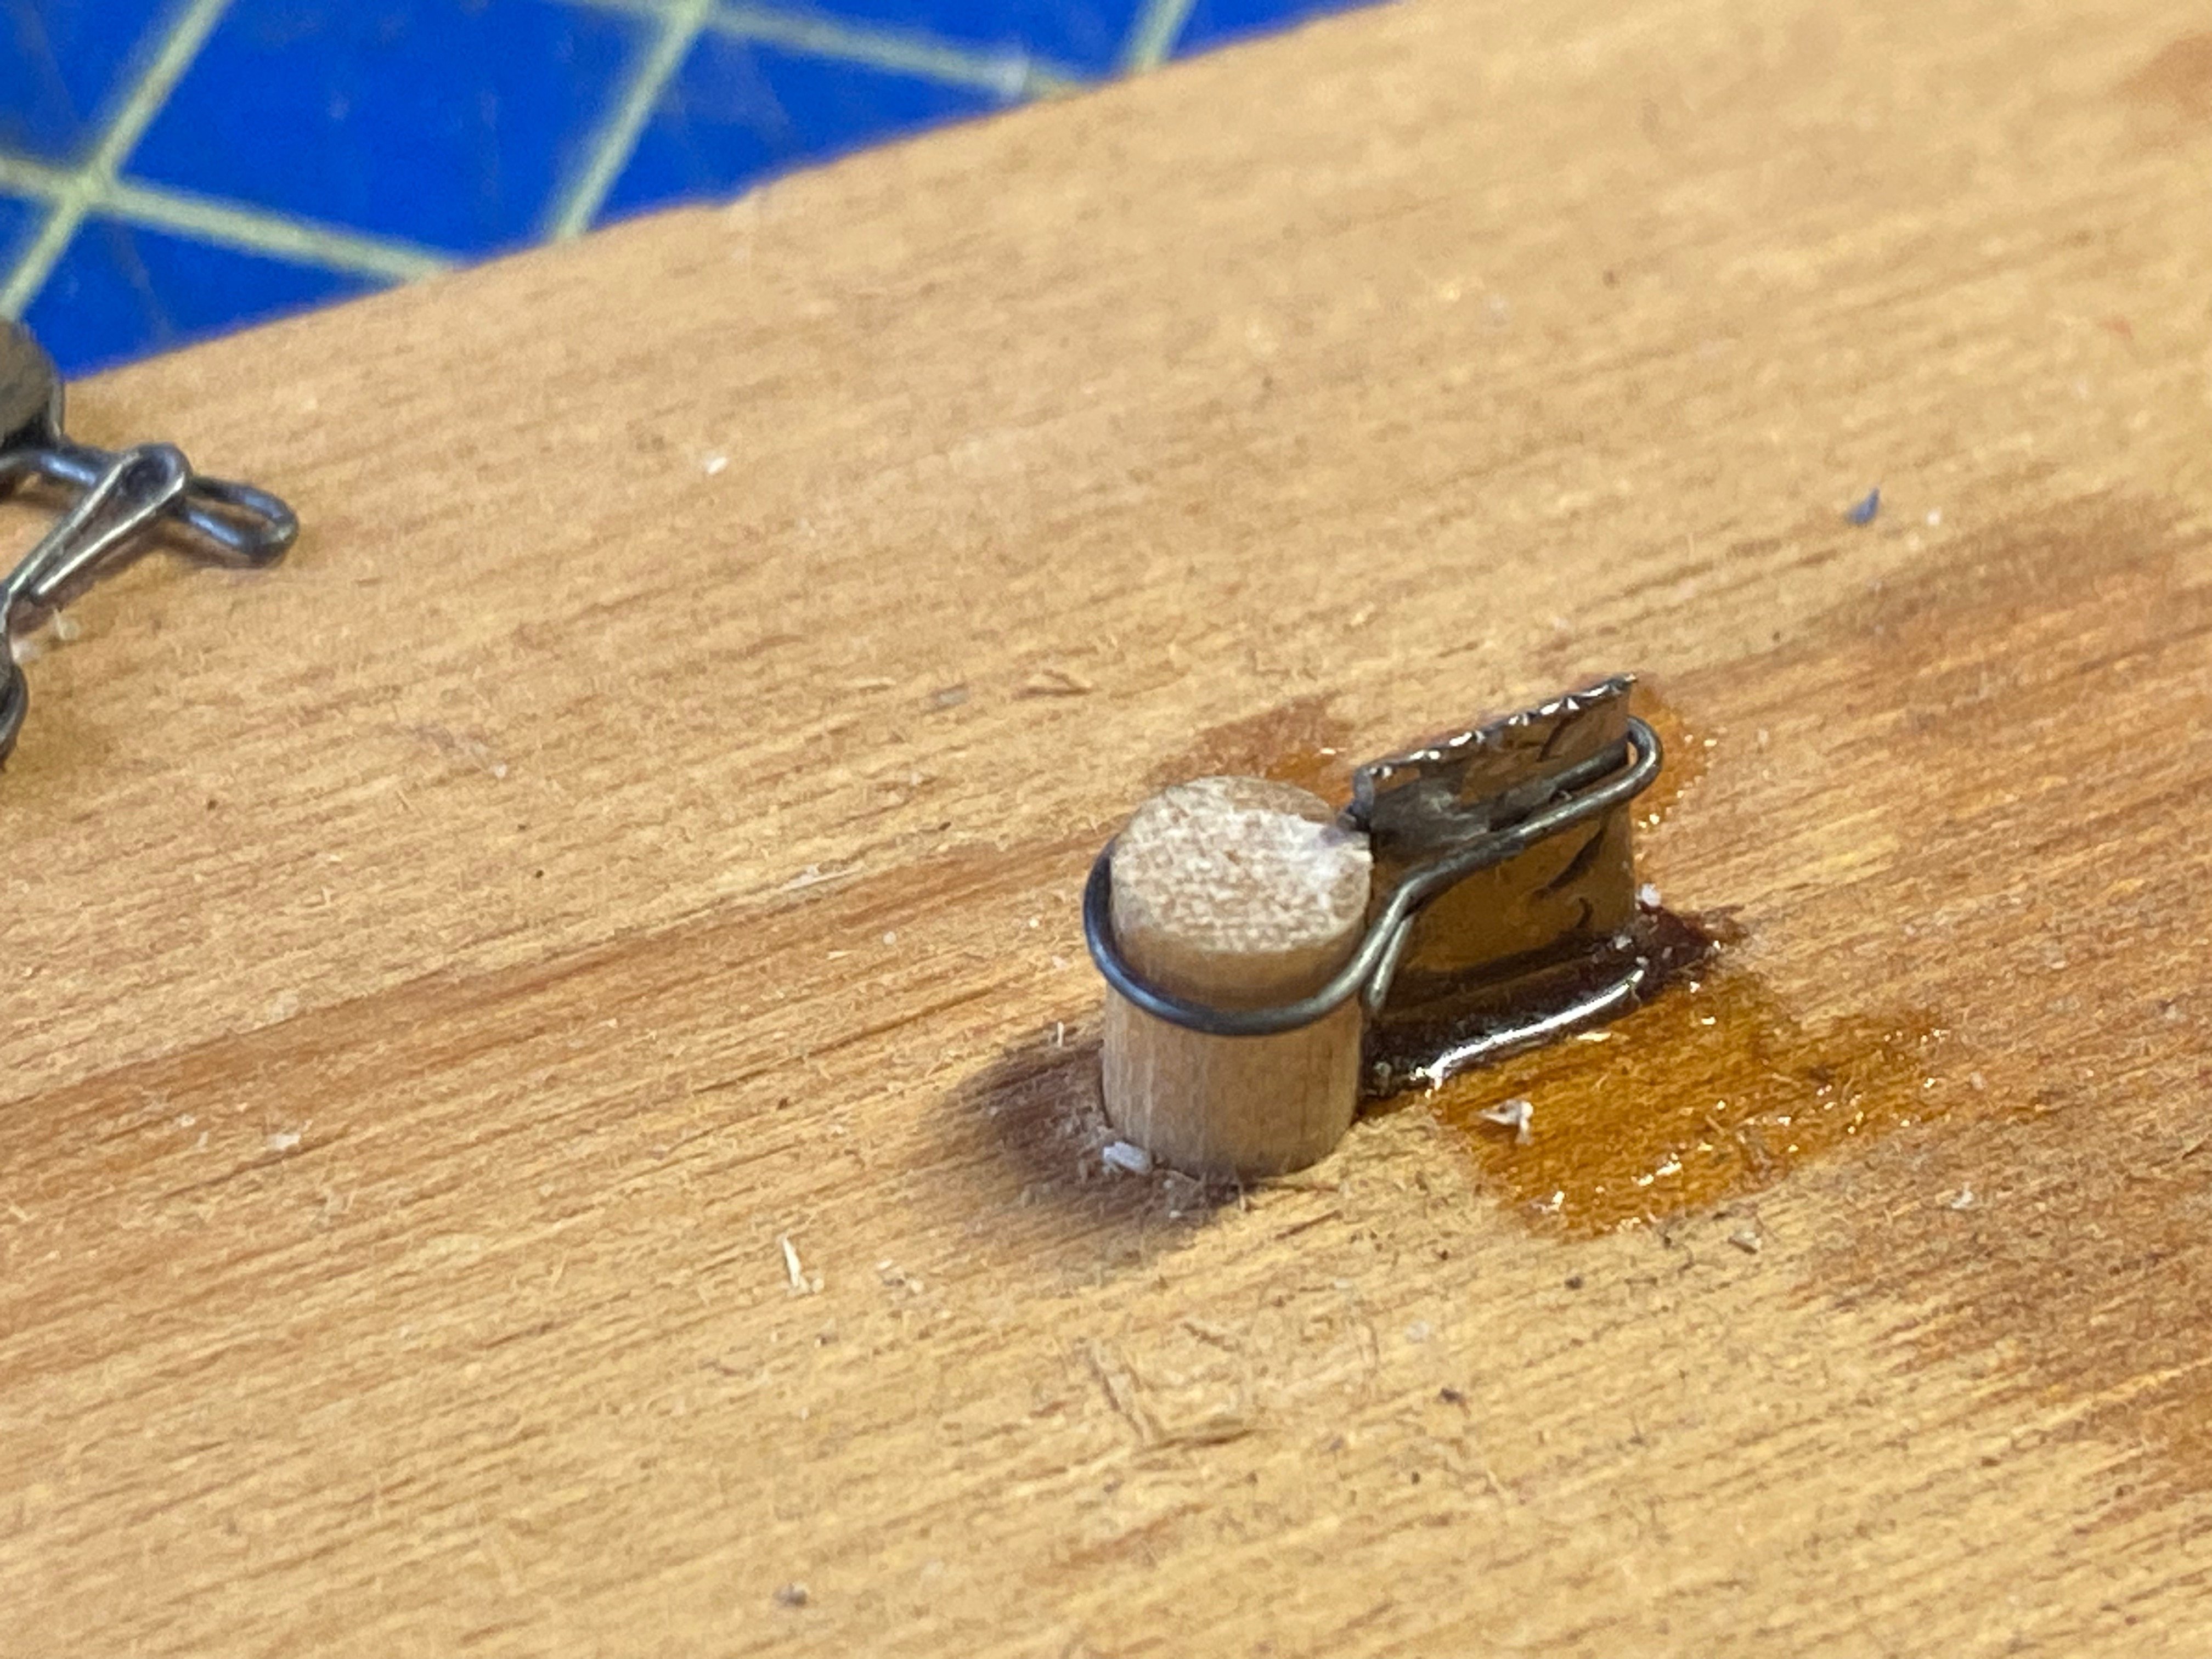
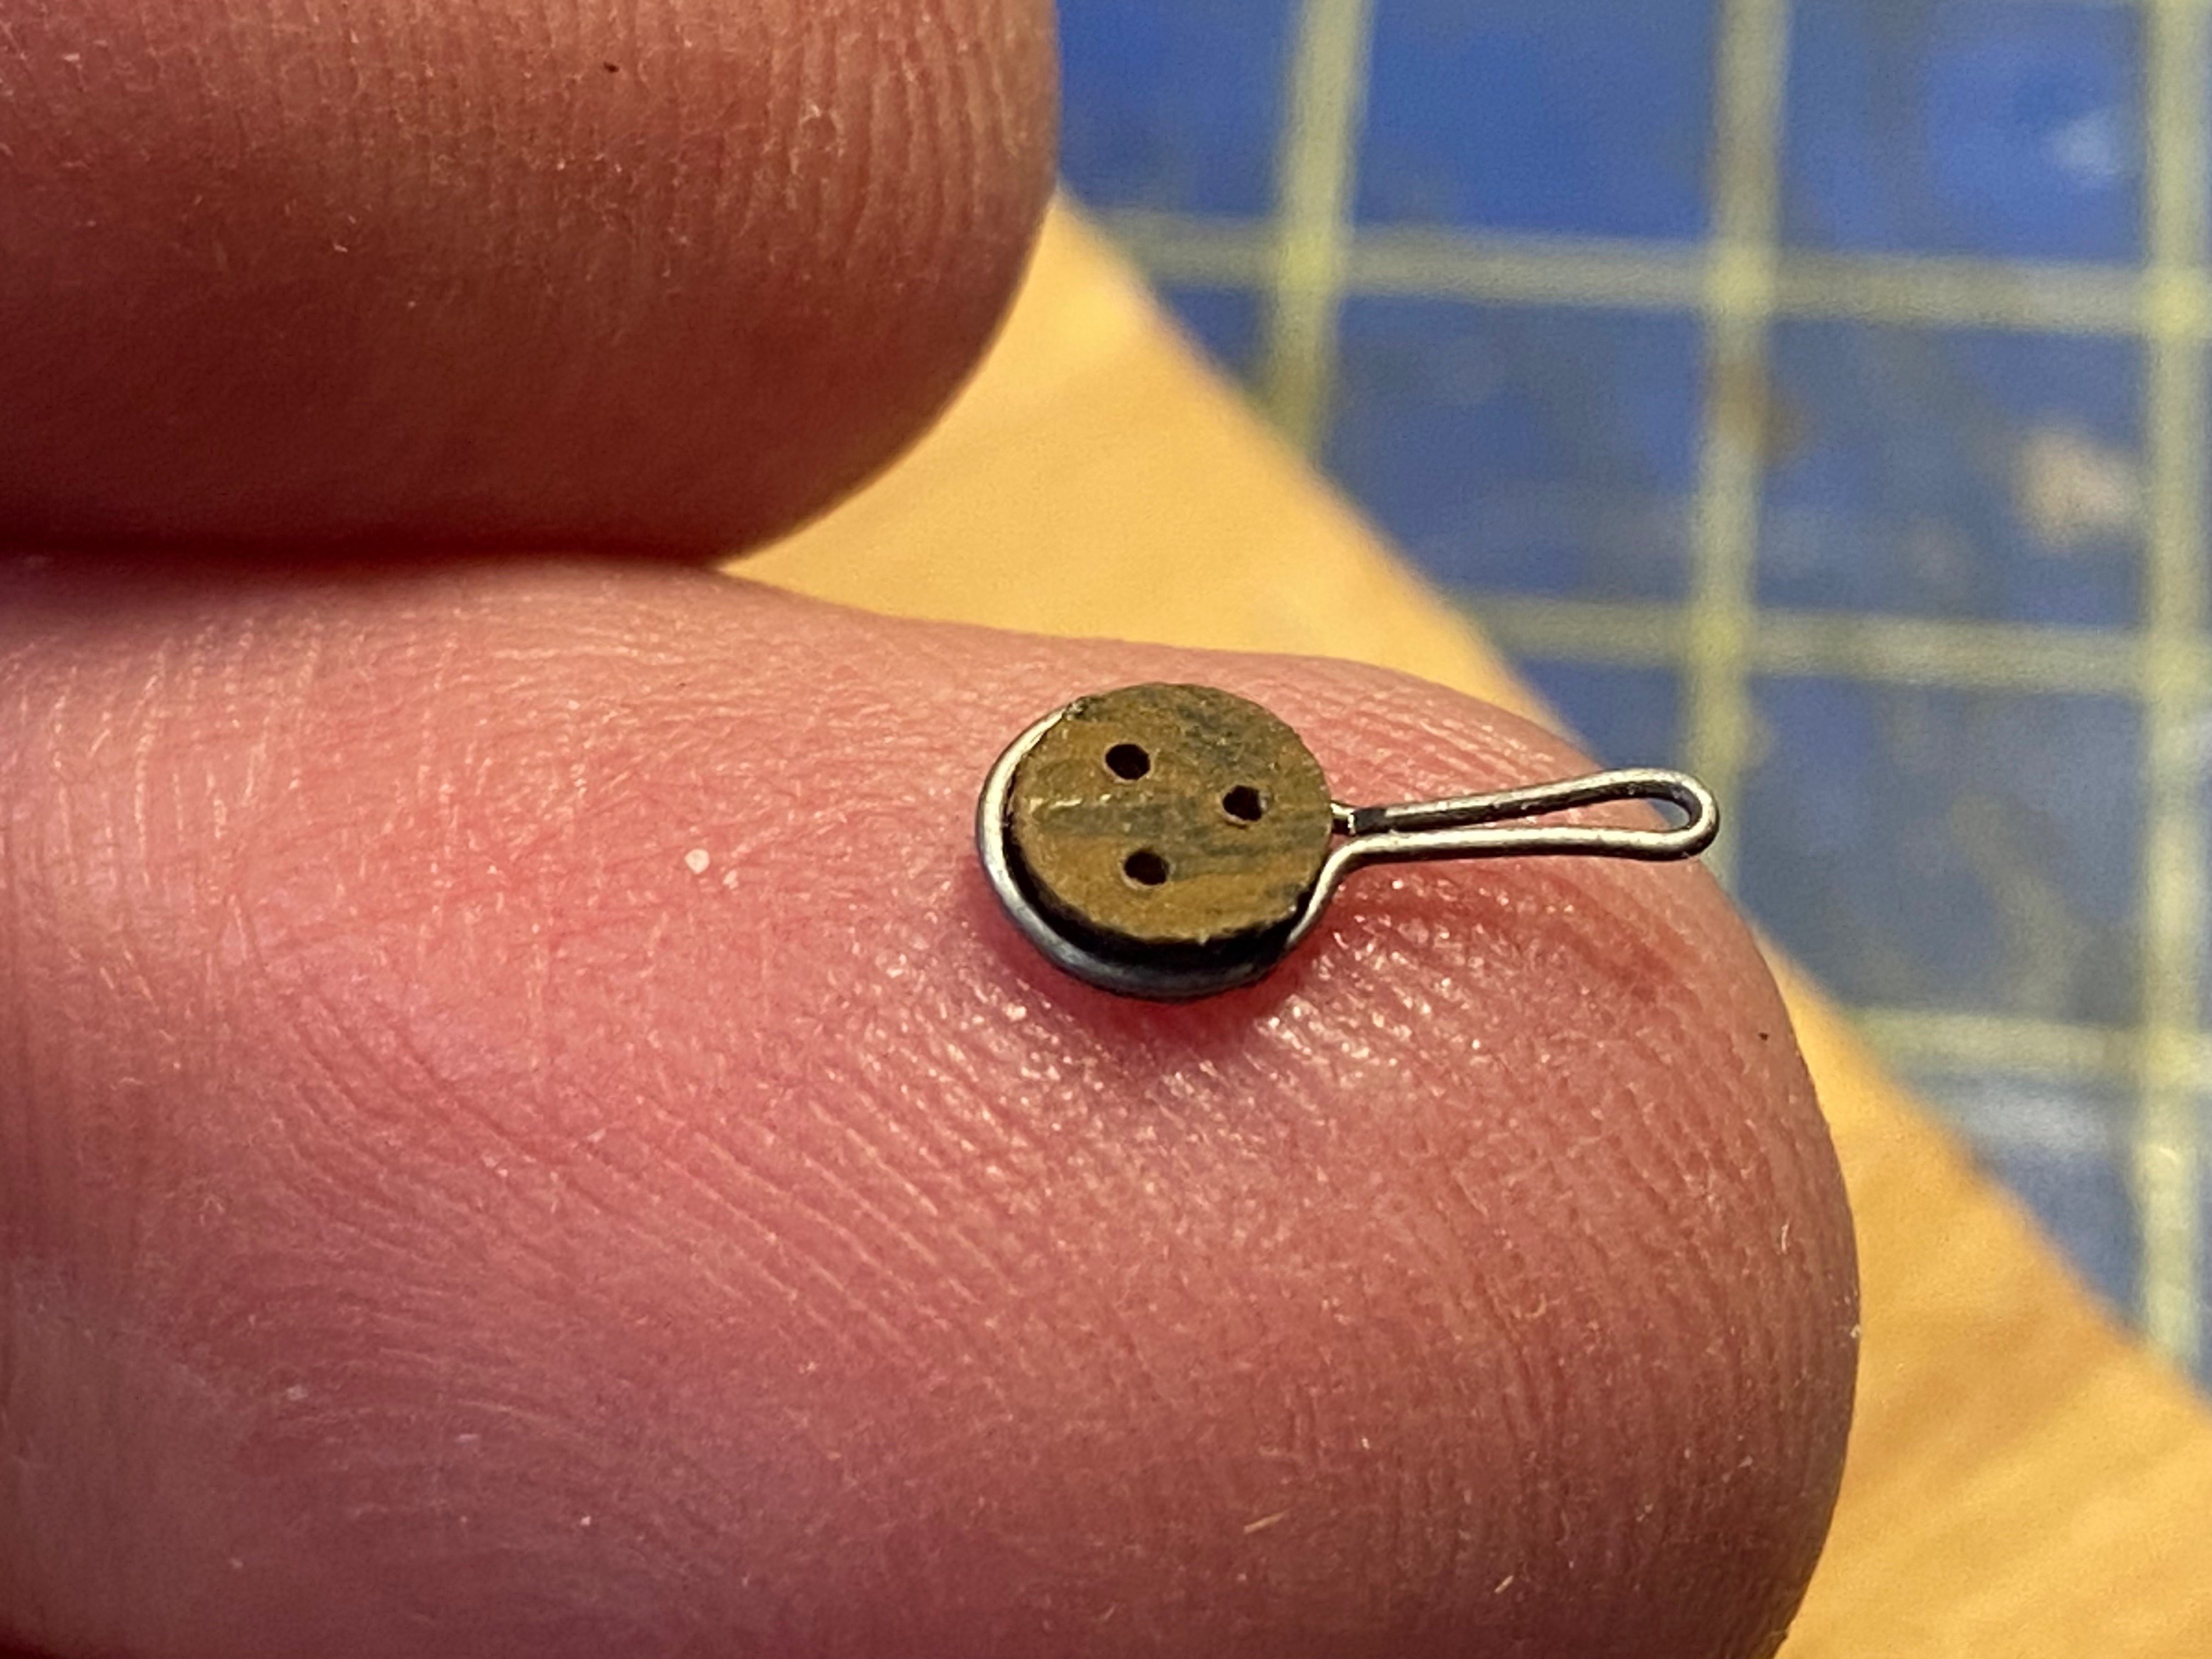
This weekend, I finally made progress stropping deadeyes. I made my own fixtures for this, as you can see in the photos. A wire is is wrapped around it, and I use small, bent nose pliers to squeeze the wire around the post and metal plate. The excess wire is then cut off and the deadeye is fitted inside. In the last photos, you can see the masts are temporarily installed. I drill out the base of masts so I could glue in a section of a straight pin into each. The pin will push into the center backbone of the model when the masts are inserted into place. This helps hold the masts in place. The instructions call for installing temporary stays, which you can see in at least one photo. These white lines will be removed later. For now, these will provide the main support for the masts while I work on the shrouds and on getting the correct angle for the chainplates, which attach to the deadeye stropping and secure the deadeyes agains the pull of the shrouds, which will also get installed later.


-
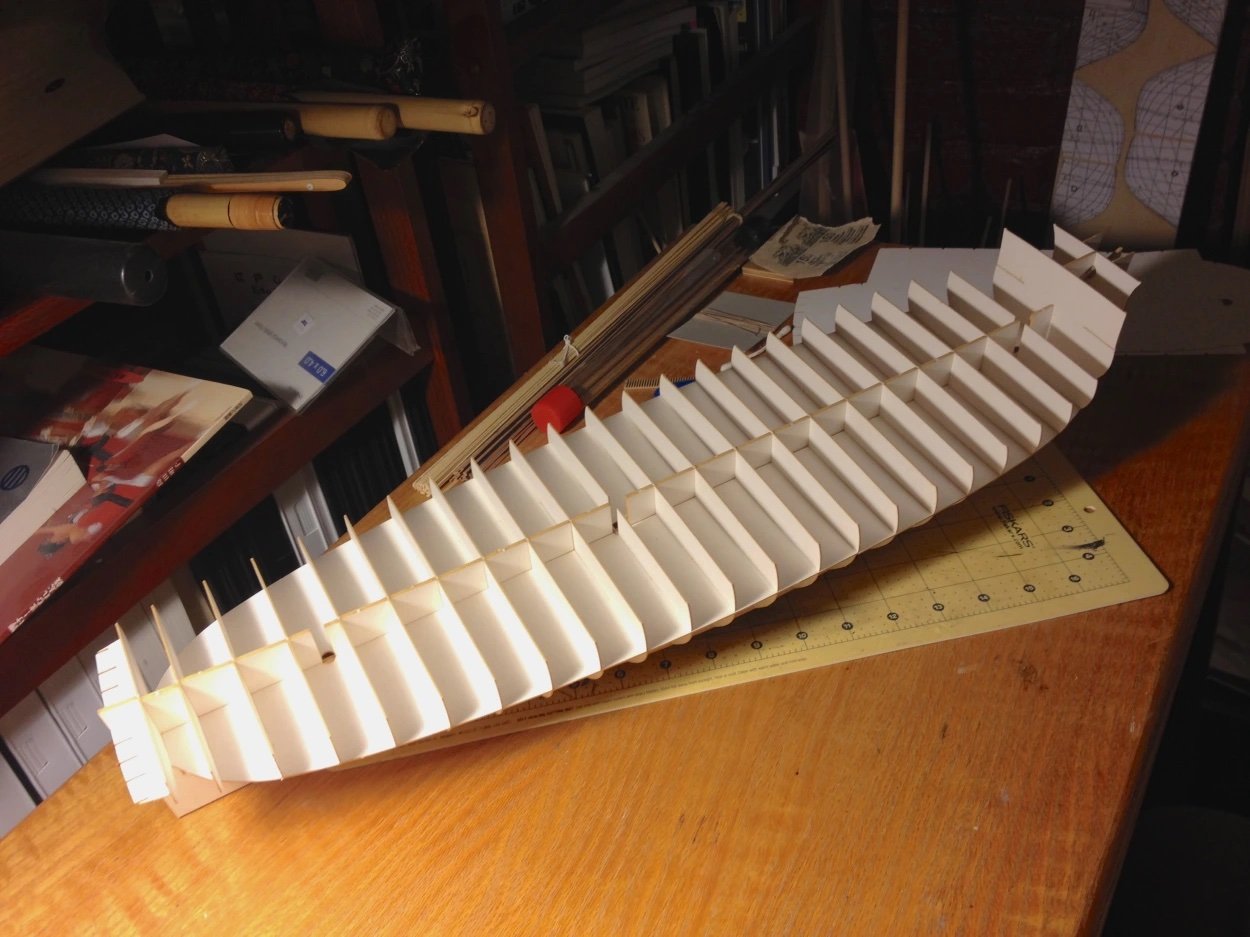
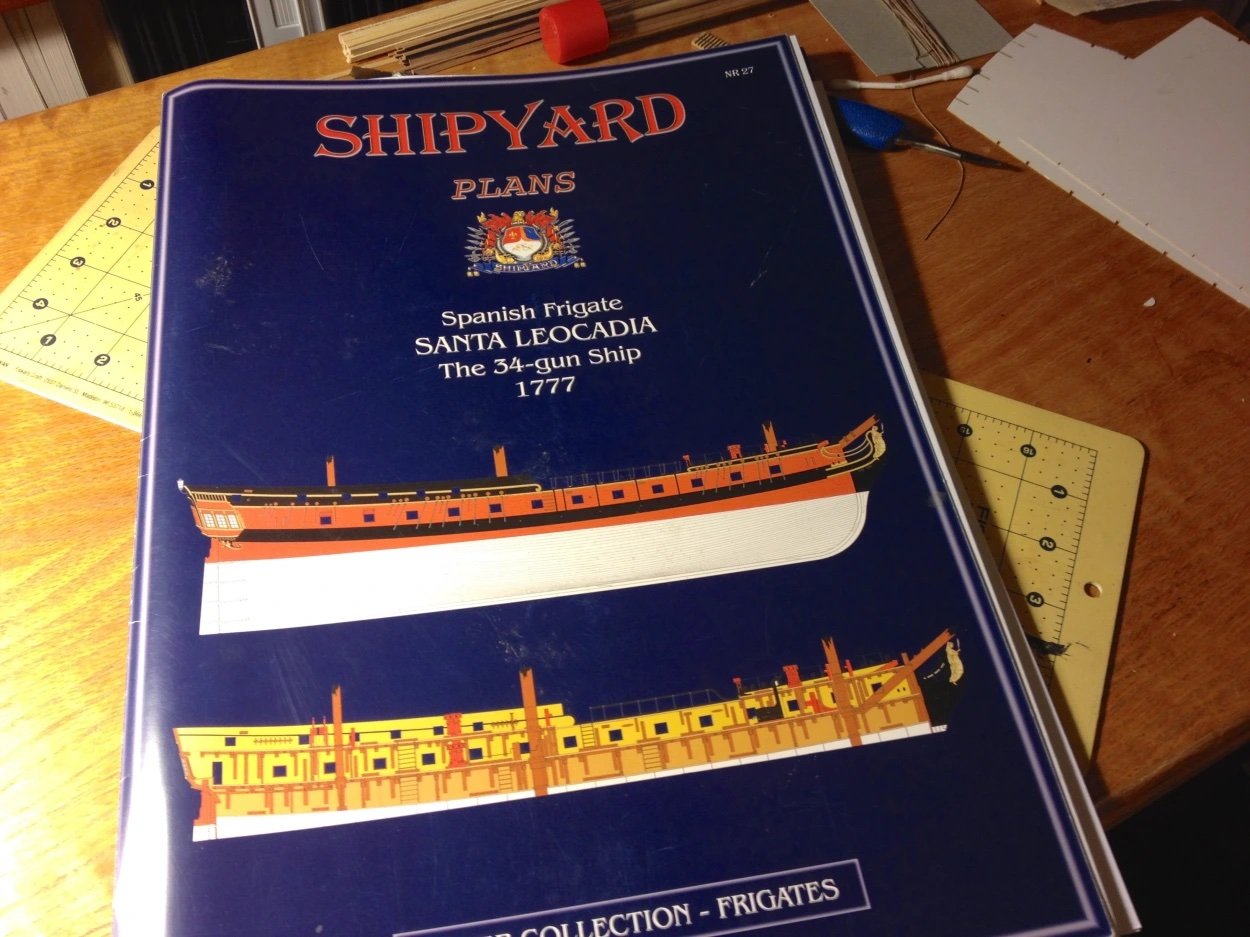
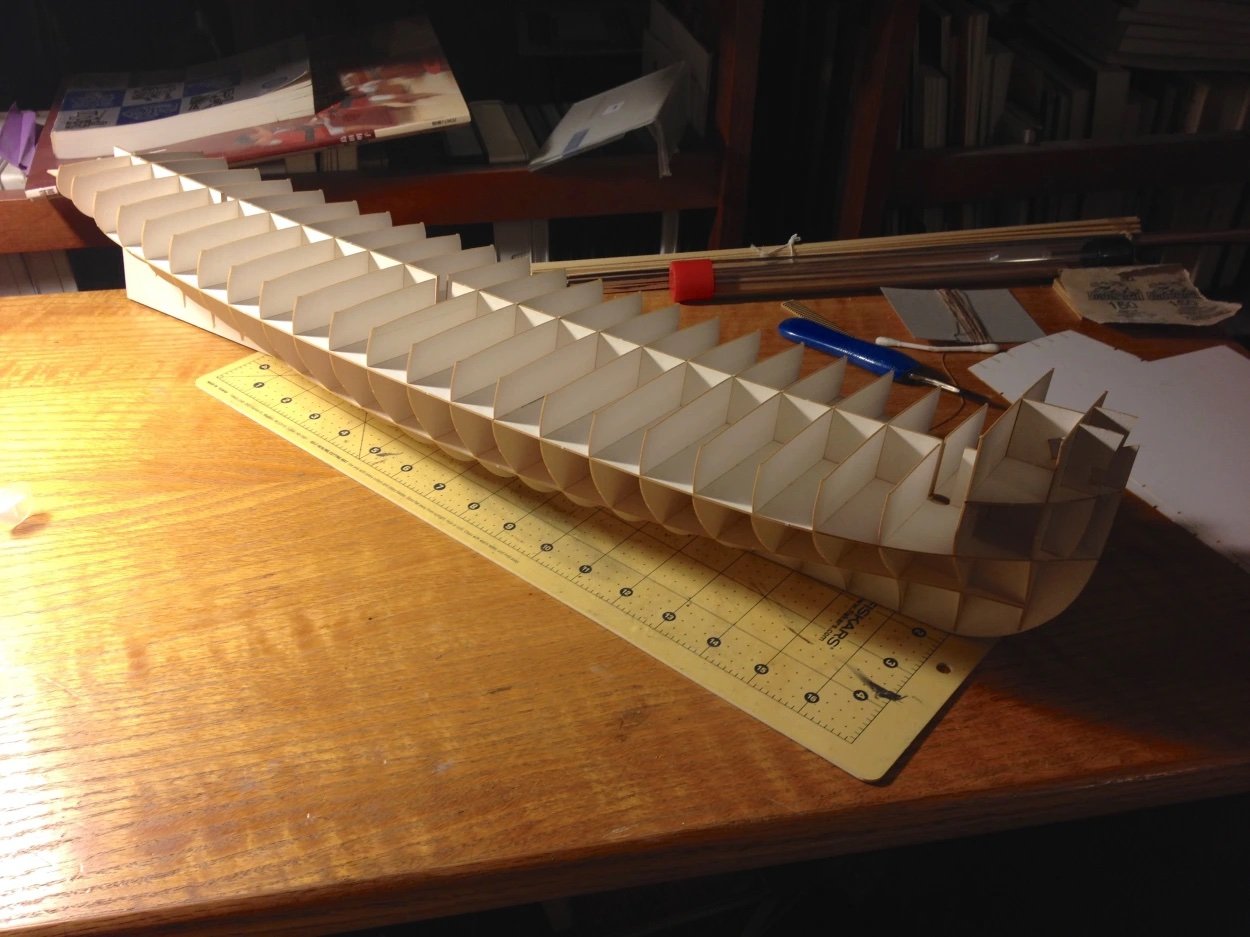
By the way, here is one of the Super Modeler Plan Sets and the beginnings of the Spanish 34-gun frigate Santa Leocadia. I put together this much of the hull several years ago, to see how it goes together, but I didn't have any of the paper model experience or skills necessary to take on a task of this sort. It's really a set of scratch builder plans, with some parts provided to start off on the model. Shipyard re-released a 1/96-scale paper model kit of this same ship. I have that too. In many cases, I should be able to scan and scale up any parts I may need for this 1/72 scale model. So, I could try to take this on. As I already mentioned, I also have the super plans set for HMS Enterprize as well. This is almost identical to HMS Mercury, of which Shipyard also makes a big 1/72 scale kit, but it's something like $450. Still, all the parts are laser cut, and I wouldn't be risking this rare sper plans set. Anyway, just thought I'd share. HMS Wolf construction continues...

-
Jeff, they're not very different from Seahorse kits, and you've obviously done a terrific job with that U.S. Revenue Cutter of yours!
-
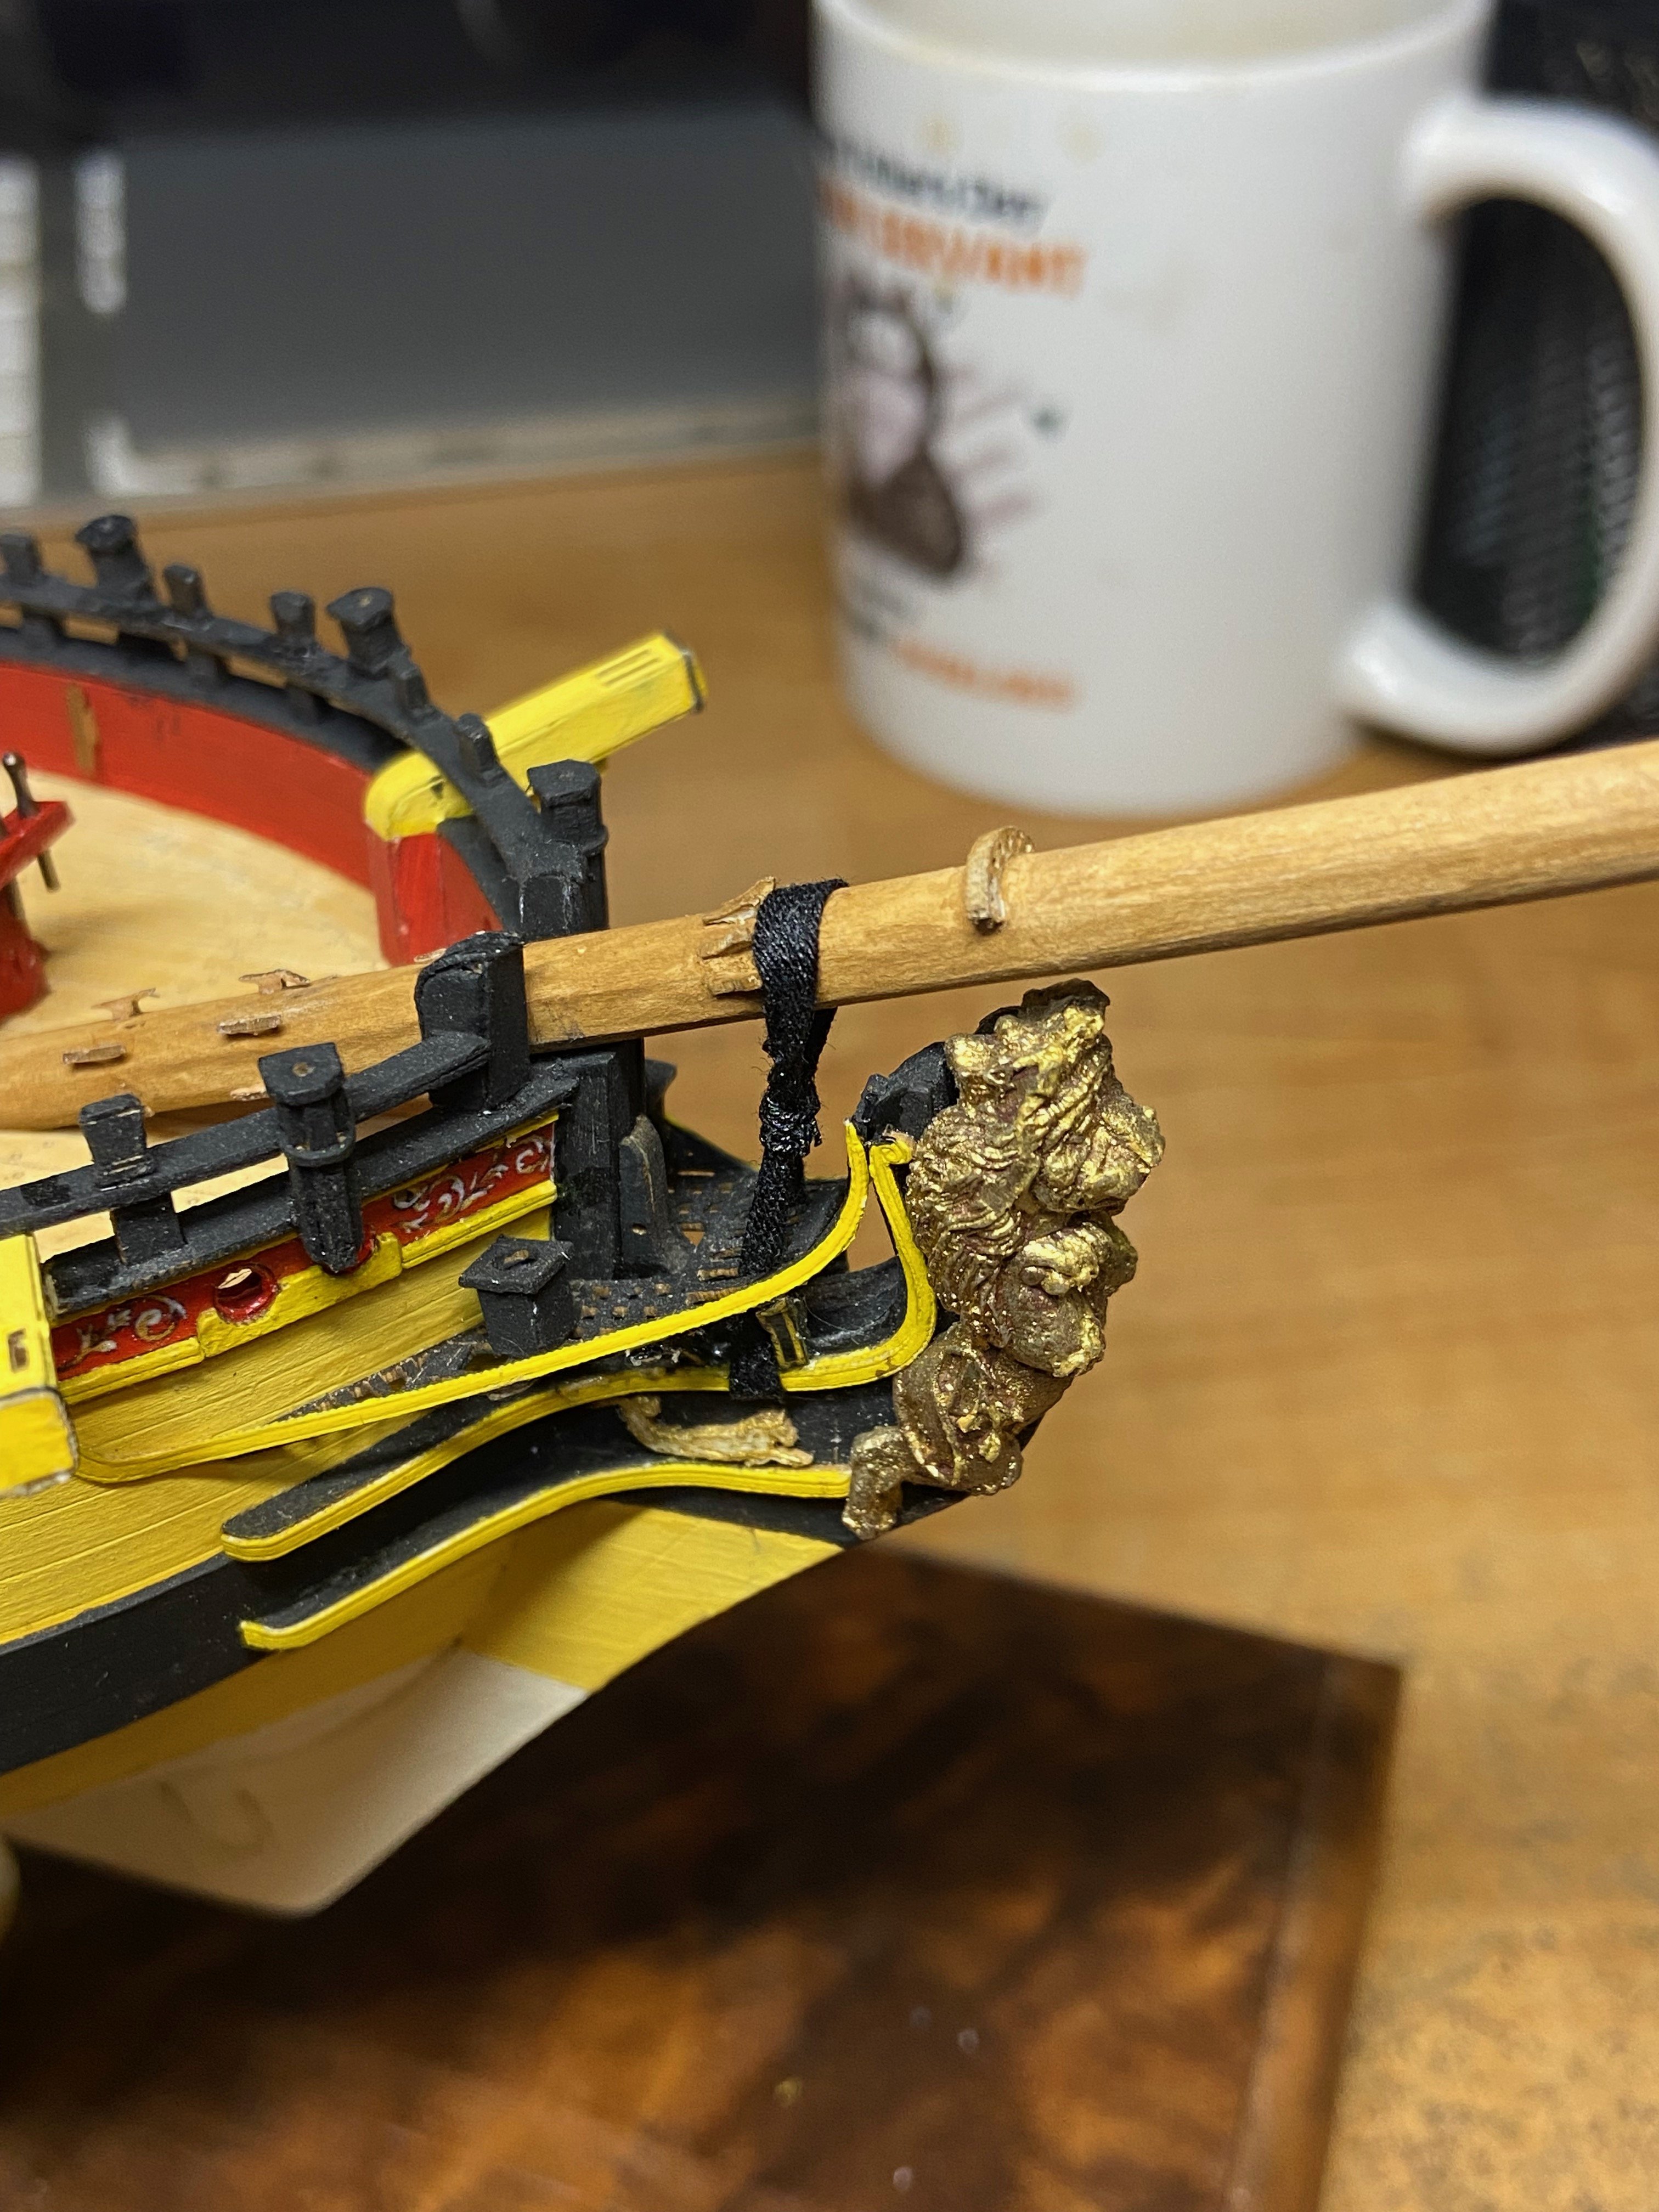
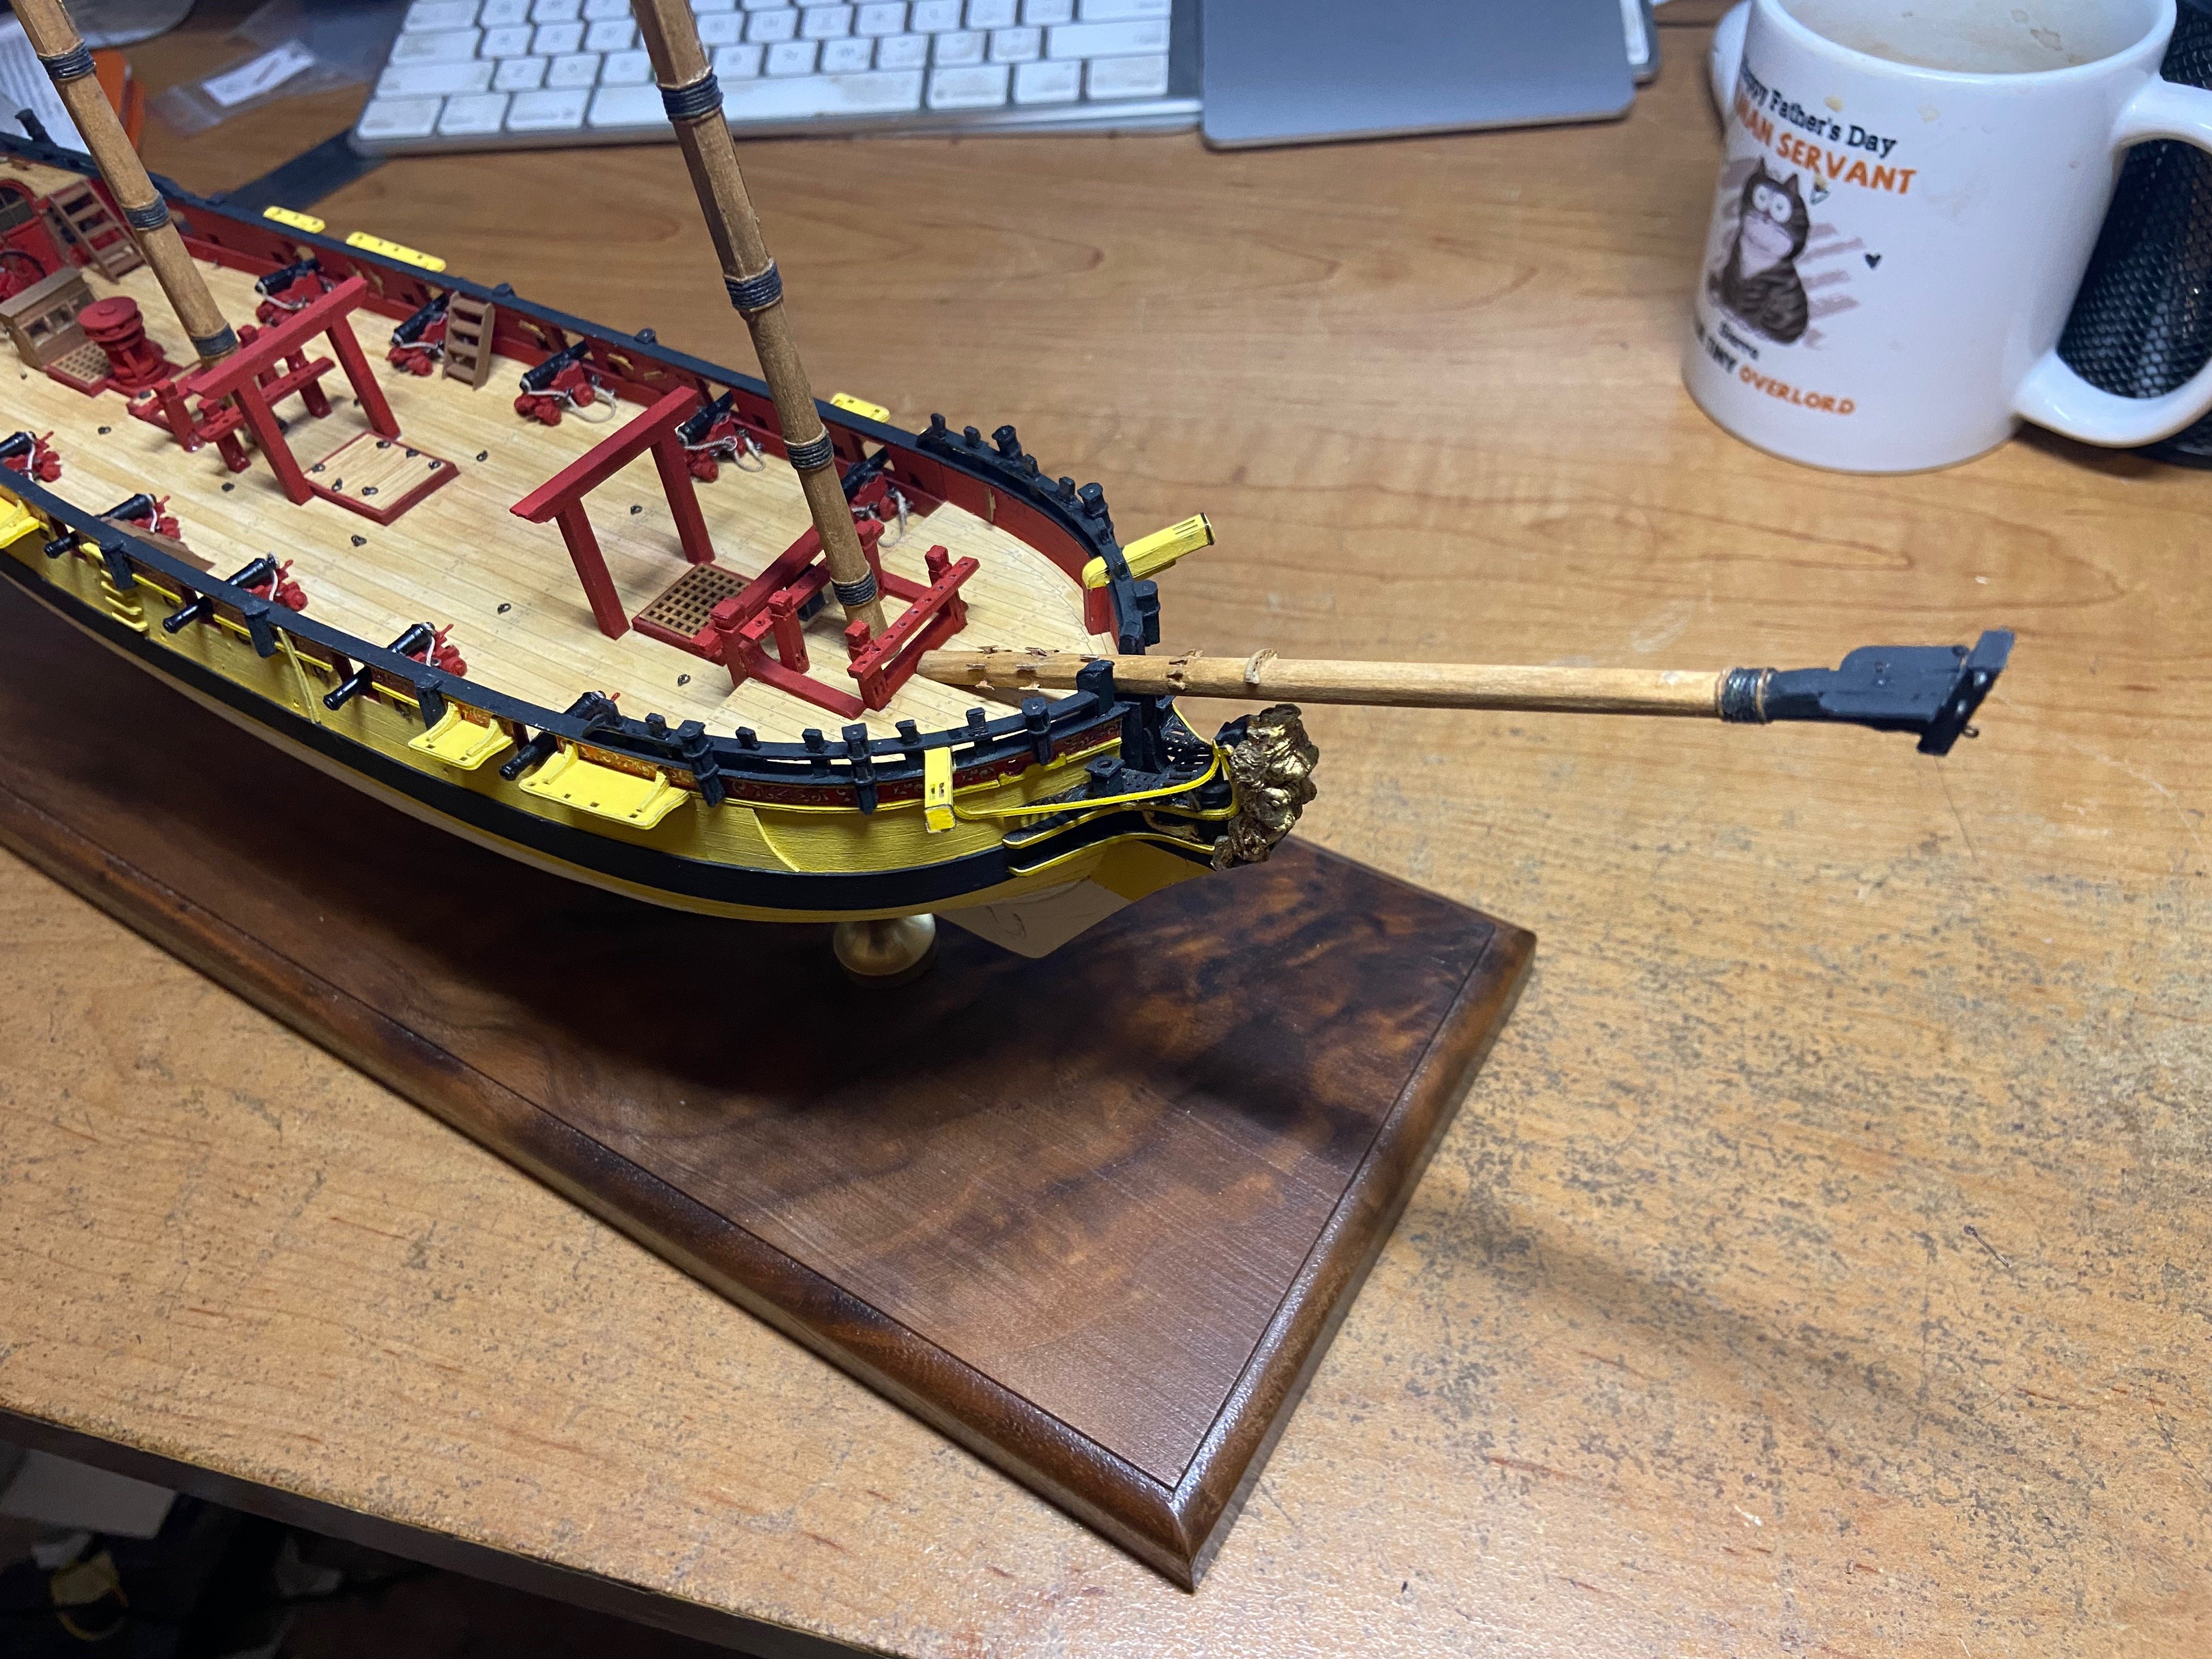
Today is Saturday, and our ship model club, The South Bay Model Shipwrights, met at our usual location at the Game Kastle shop in Santa Clara, CA, at the south end of the San Francisco Bay. It was a good meeting, and we have four out of the seven people out of the members in attendance that have built paper models. Three of us have built, or are building paper ship models. Maybe it was that, or I don't know what, but I've just gotten so jazzed up about these Shipyard laser-cut kits that I'm just so ready to go out and get another one or two, so I can start working on them as soon as HMS Wolf is done. And, that's coming from someone who loves building wooden sailing ship models. I actually have two of Shipyards "Super Modeler Plans" sets. These are plans for scratch building models, but they include all the laser-cut frameworks for the hull, as well as the inner hull covering, decks and planking, inner bulwarks pieces, to start the model. The idea is that the modeler can then use materials of his or her choice to cover the model with a final planking layer, then scratch build all their own details, armament, masts and spars, etc. I'm absolutely itching to try building ones of these. But, they are limited edition sets, 150 of each were made, and I have HMS Enterprize no. 47 of 150 and Spanish Frigate Santa Leocadia no. 100 of 125 copies. When I start these, that's it, they're gone, and I really don't want to screw them up or leave them unfinished. They are made to be built at 1/72 scale, like my HMS Wolf kit, and I even have extra detail parts sets that were produced for them by GPM, which includes cannon carriages, hatch coamings, capstans, ship's wheel, mast tops, galley stove, and various cross bitts. I kind of feel like I should maybe build Shipyard's HMS Mercury kit first. It's not cheap, but it is complete, and might give me a better handle on building these "semi-kits". In the meantime, I'm now working on rigging the yard arms on HMS Wolf. So, here are some pics of that.

.thumb.jpeg.eeca65e8564286858b350a82c3d02505.jpeg)
.thumb.jpeg.816ce841d56d4e45dcda72dc4144f3cb.jpeg)
- 108 replies
-
- 11
-

-
-
I'll throw in here... There WERE kits of the colonial schooner Hannah. I guess if you count The Lumberyard "kits" there still is. Also, then, there's the privateer Oliver Cromwell and the Lexington. If you want to creep into other ships that fought during the revolution, but not necessarily American, but "on our side" there are a few kits of French ships as well, such as l'Hermione, Le Cerf, and Le Coureur.
-
An amazing looking kit! Thanks for the look inside James! For those that are interested, Ages of Sail just got these in stock on Friday, and they are shipping them out as of today.
-
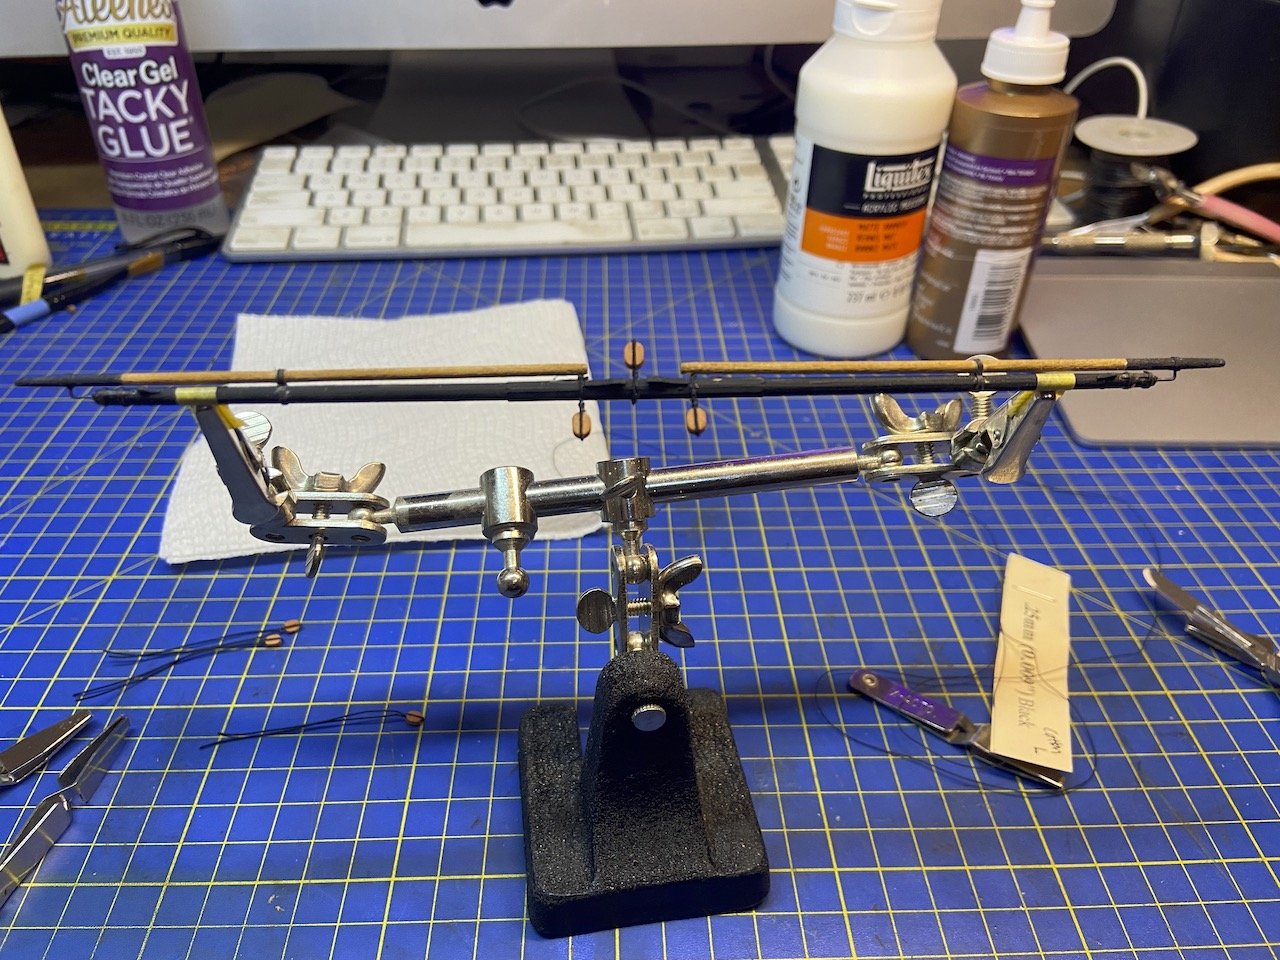
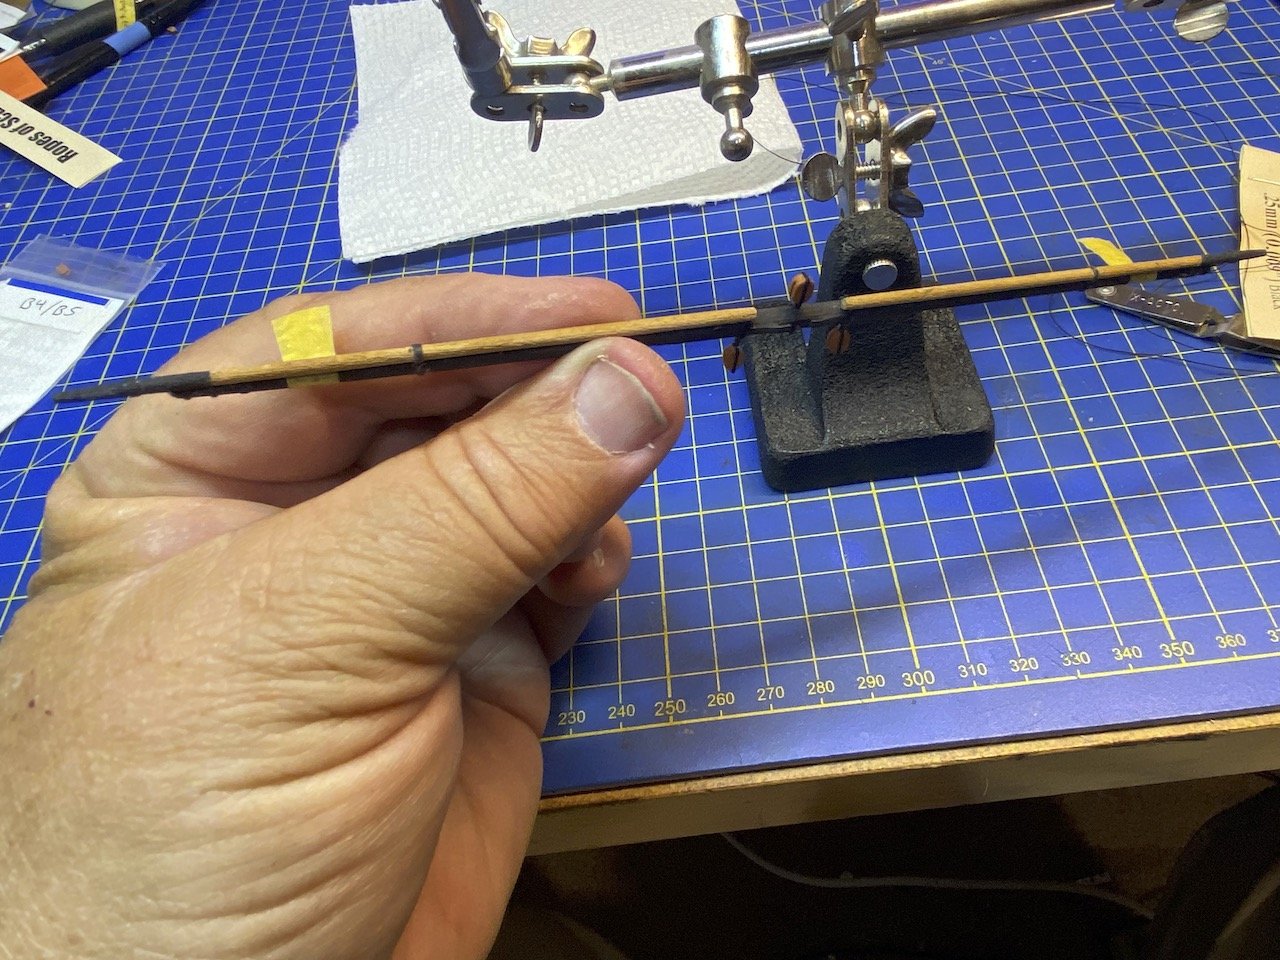
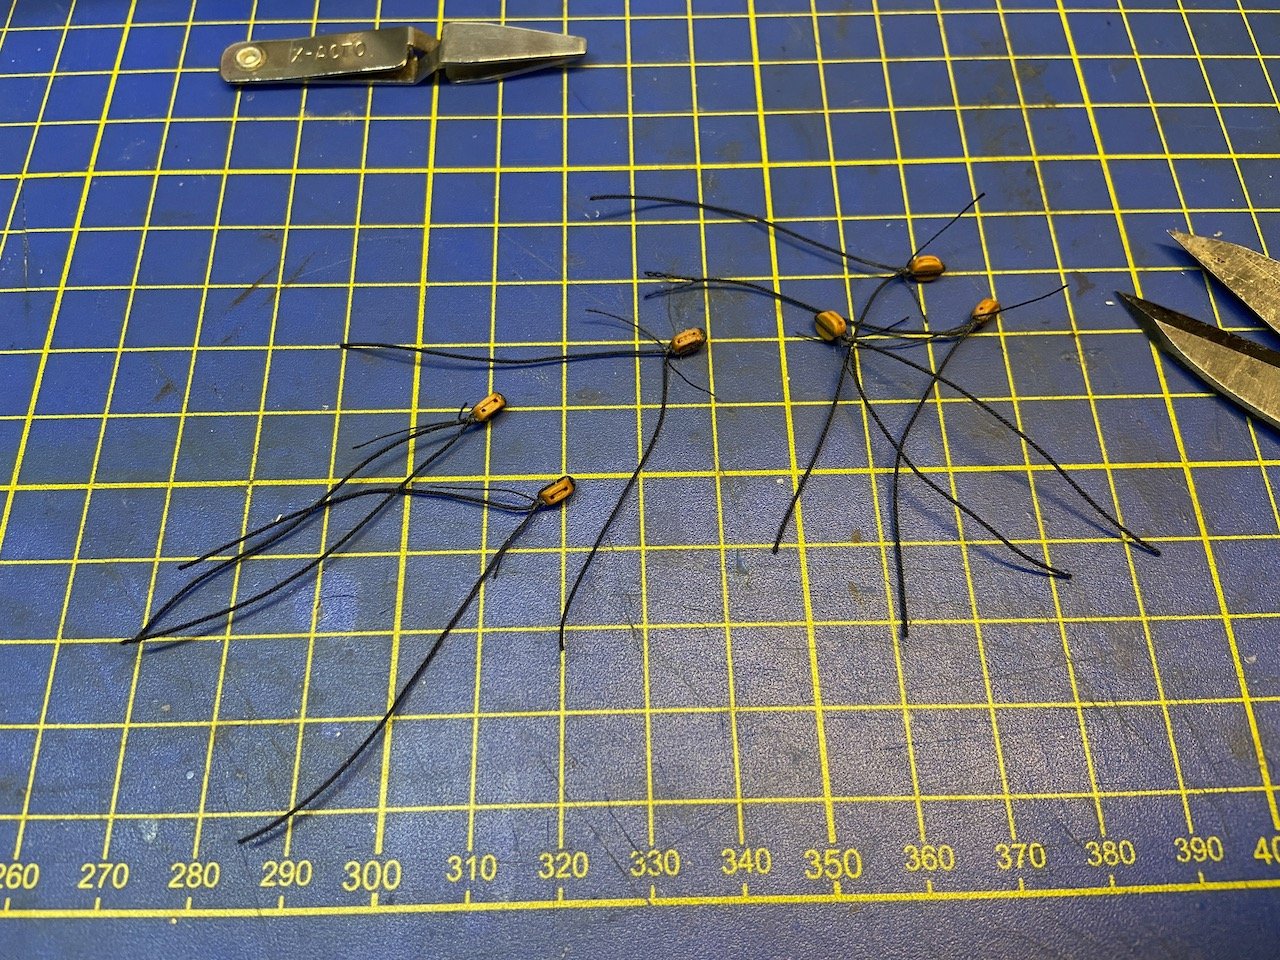
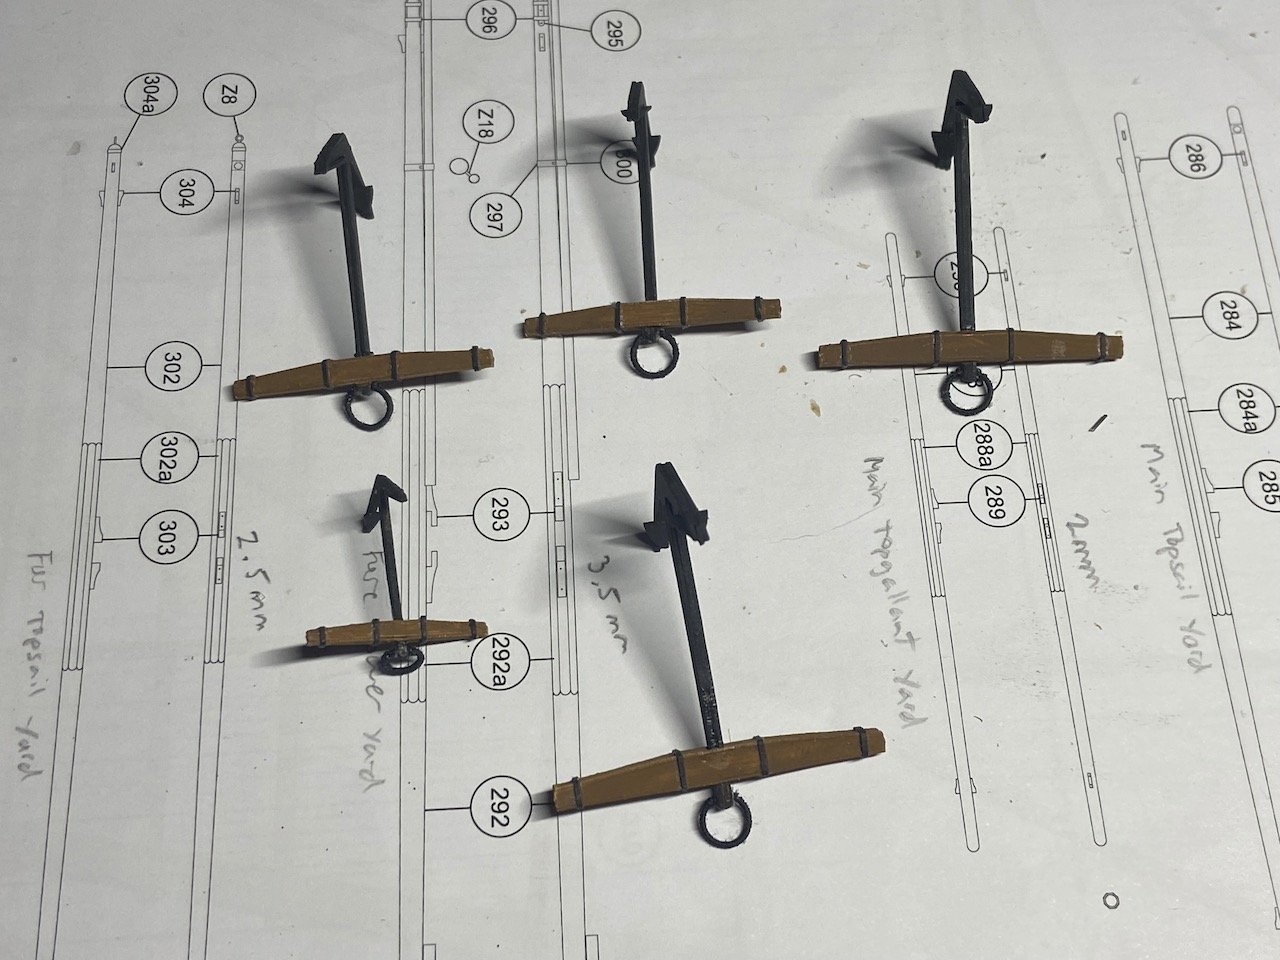
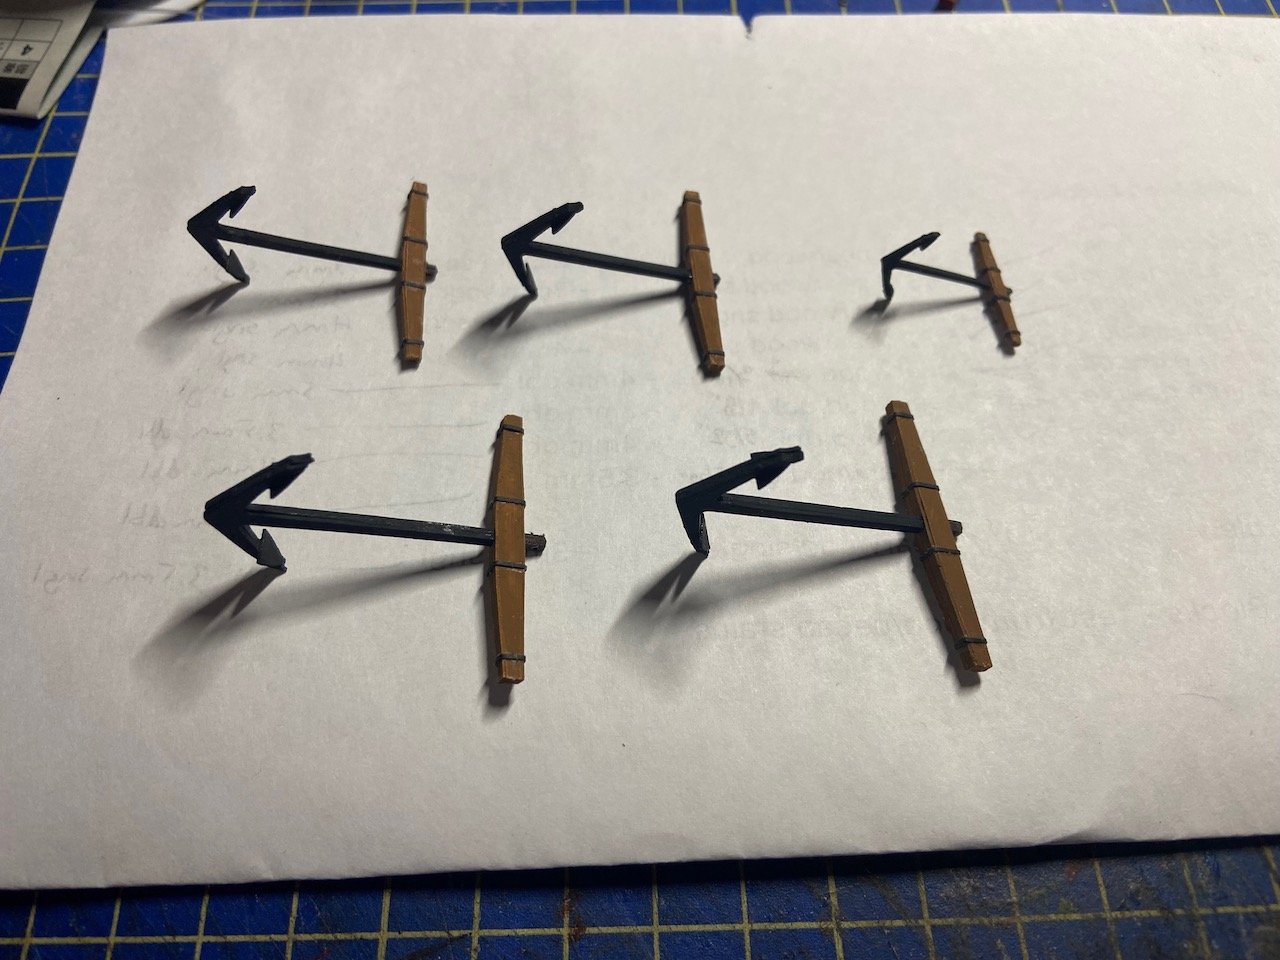
Not much of a roll, I'm afraid. Hit some speed bumps with work. But, I thought I'd show at least SOME progress here. Made the stuns'l booms and mounted them on the fore lower yard. All the 'iron' bands here are just paper strips wrapped around the spars. The hard part here is that the paper strips are made for spars that are of an exact size. I didn't want to make these parts too weak, so they're slightly thicker than they should be. As a result, the bands don't go all the way around the spars the way they should. In one case, they stop where the wire for the boom iron "attaches". In reality, the wire passes into the boom itself, making for a secure fit. In another location, they stop in the gap between the boom and the yard, so you can't really tell there's any gap. Like I said, not a LOT of progress, but at least I'm not going backwards any more... at least not at the moment! Anyway, that's the last of the "yard work", though I can now start rigging them, which will be a nice change. Edit: One more thing to add is that I finished the detailing of the anchors, adding the rings and wrapping them. I was considering just using the kit parts, but I was feeling party inspired and partly put to shame by the beautiful work that was done on a build of Shipyard's 1/72-scale HMS Mercury kit by a shipmodeler that goes by the screen name Bonden on his website here: https://www.karton-im-wind.de/nicht-von-pappe-doch/hms-mercury/der-baubericht/ Hopefully, I'll get some time over the holidays to press forward on the Wolf.
-
Hi Jeff, Thanks for the nice comments! It's feels good to be able to provide a little inspiration, even if I'm often in need of some myself! Lovely job on your revenue cutter by the way. A similar revenue cutter was the first ship model I'd ever completed. Thanks Druxey, Speeding into the abyss, perhaps... 😳
-
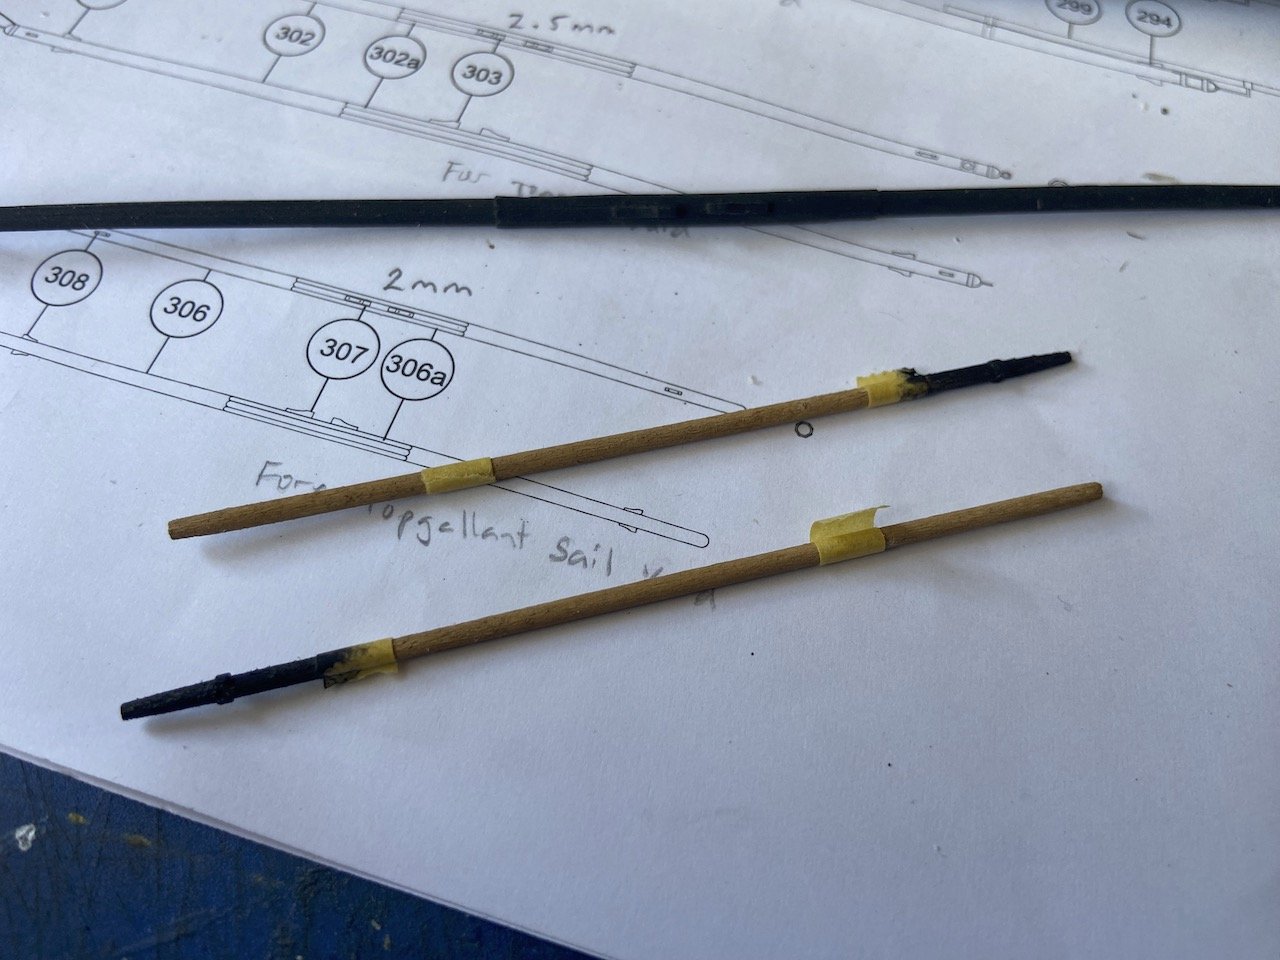
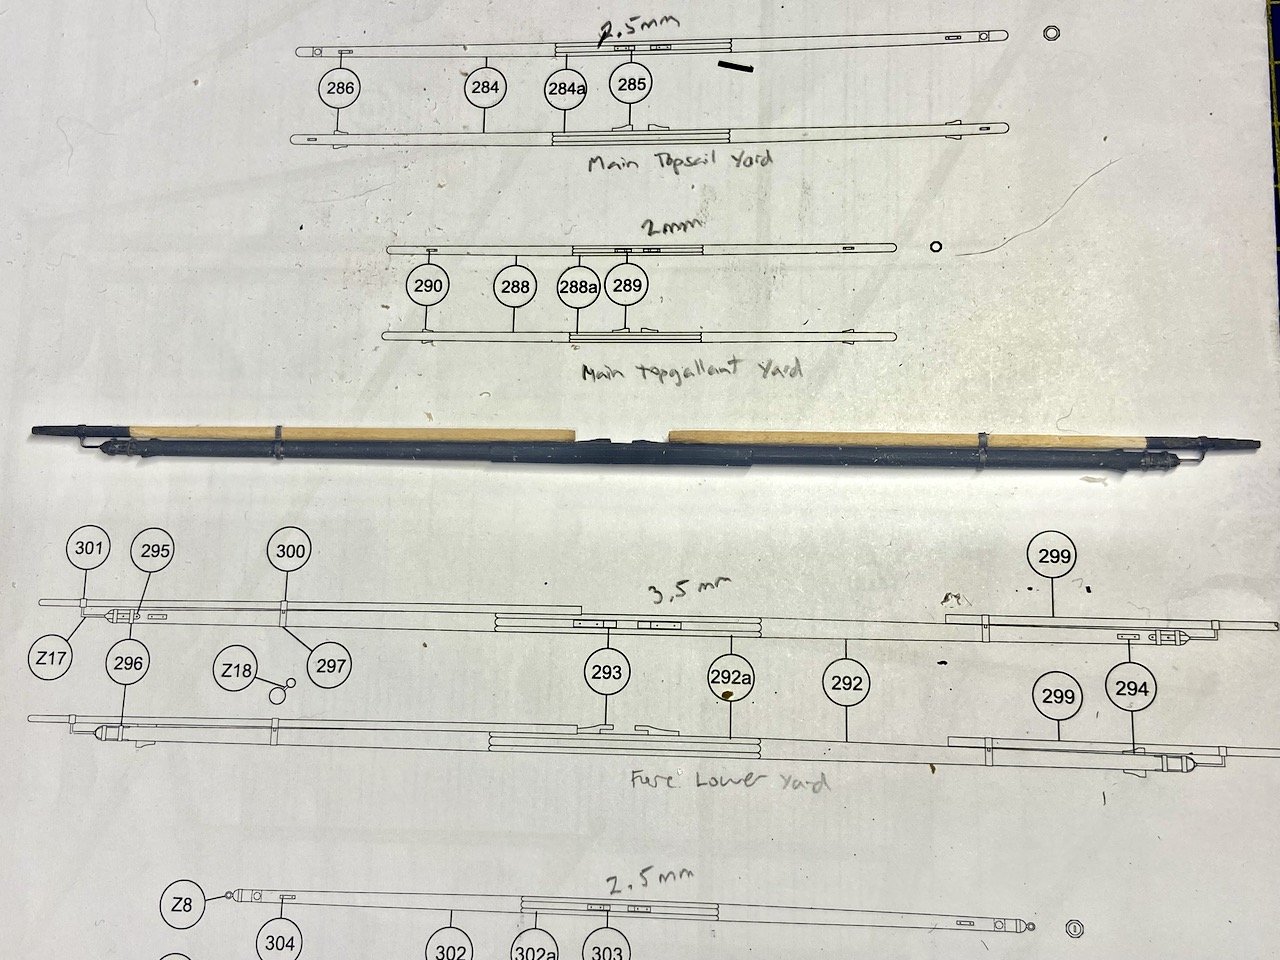
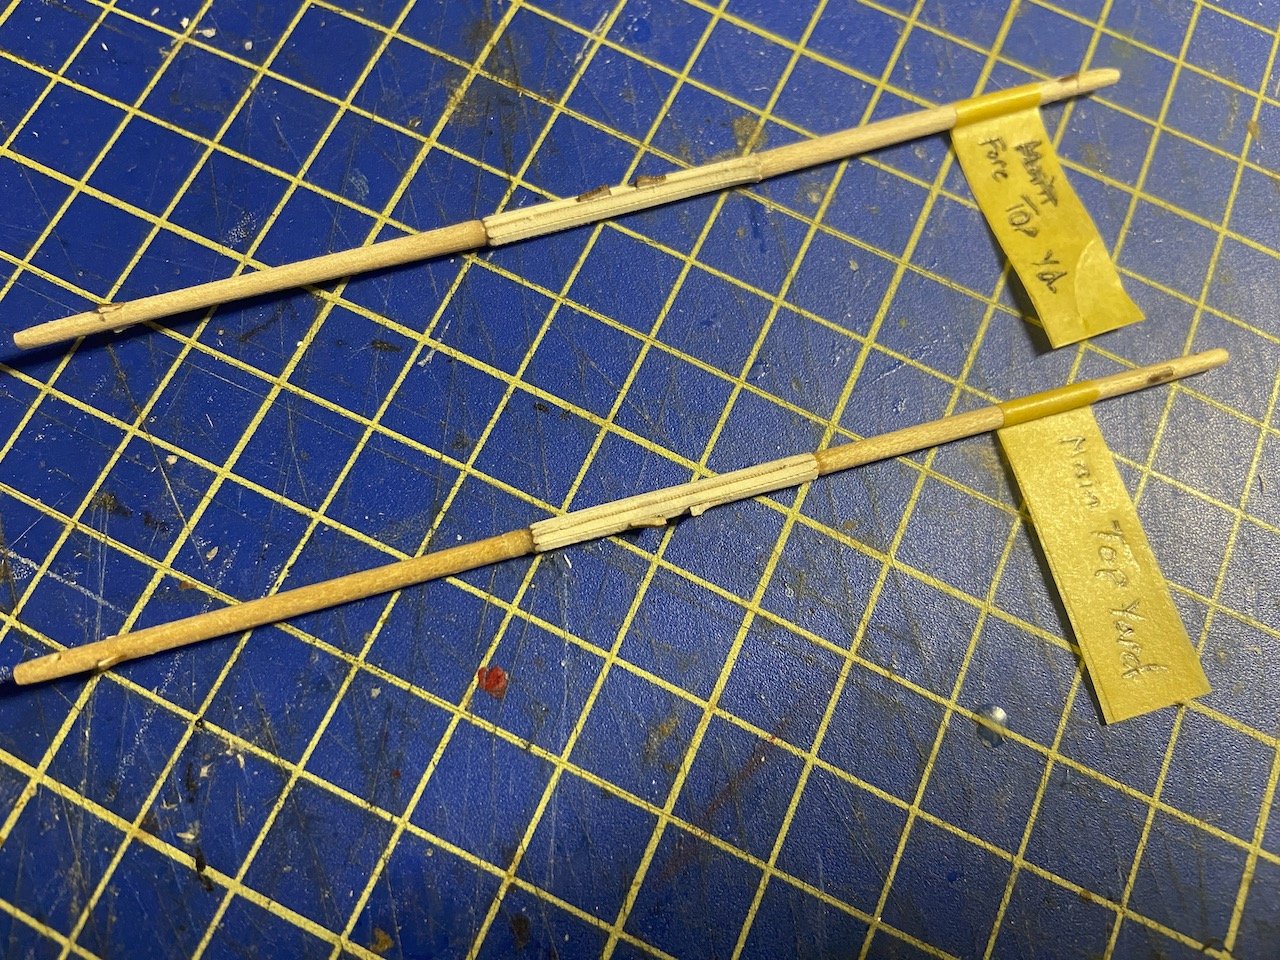
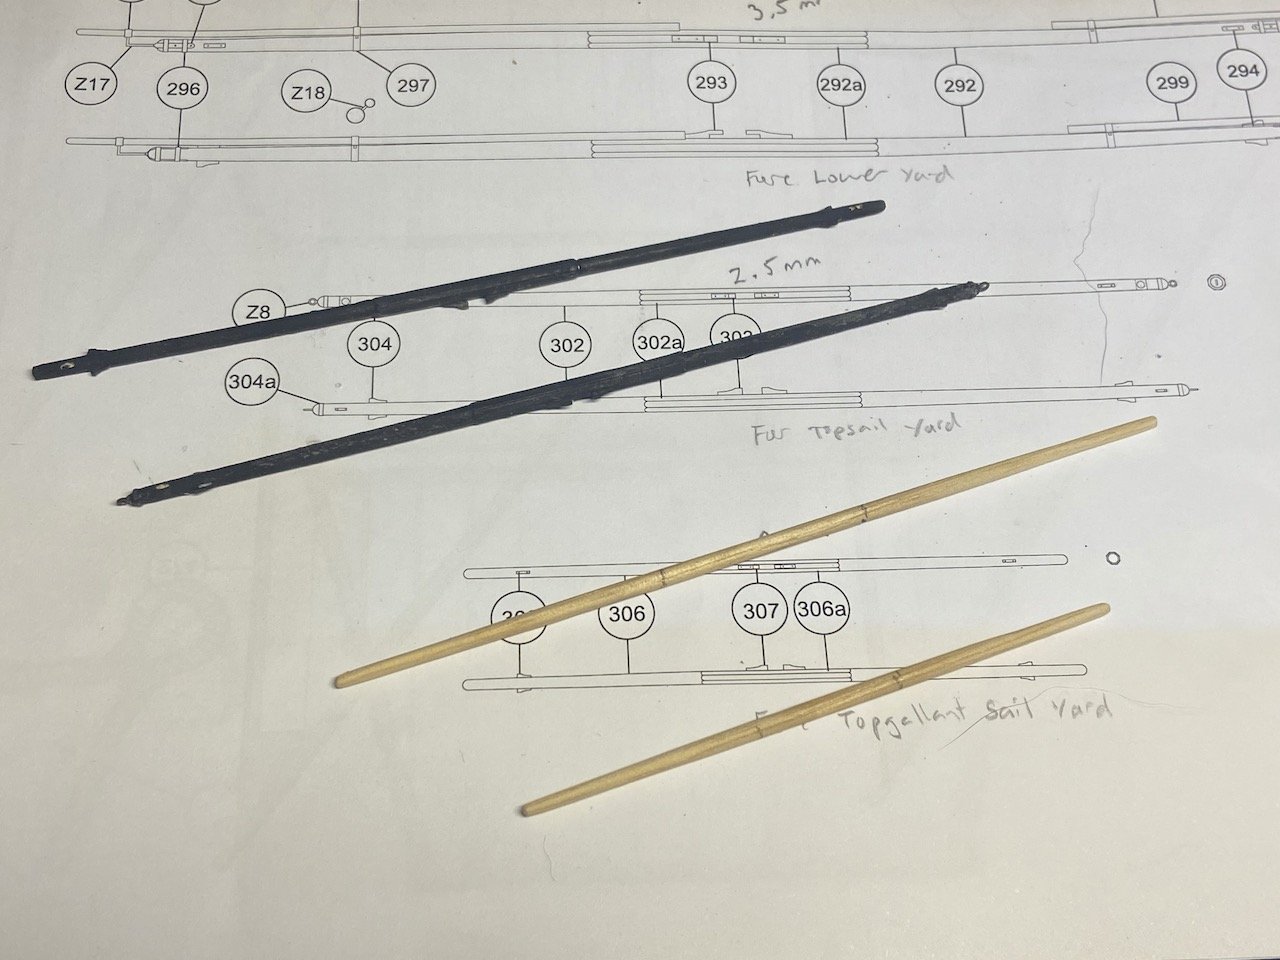
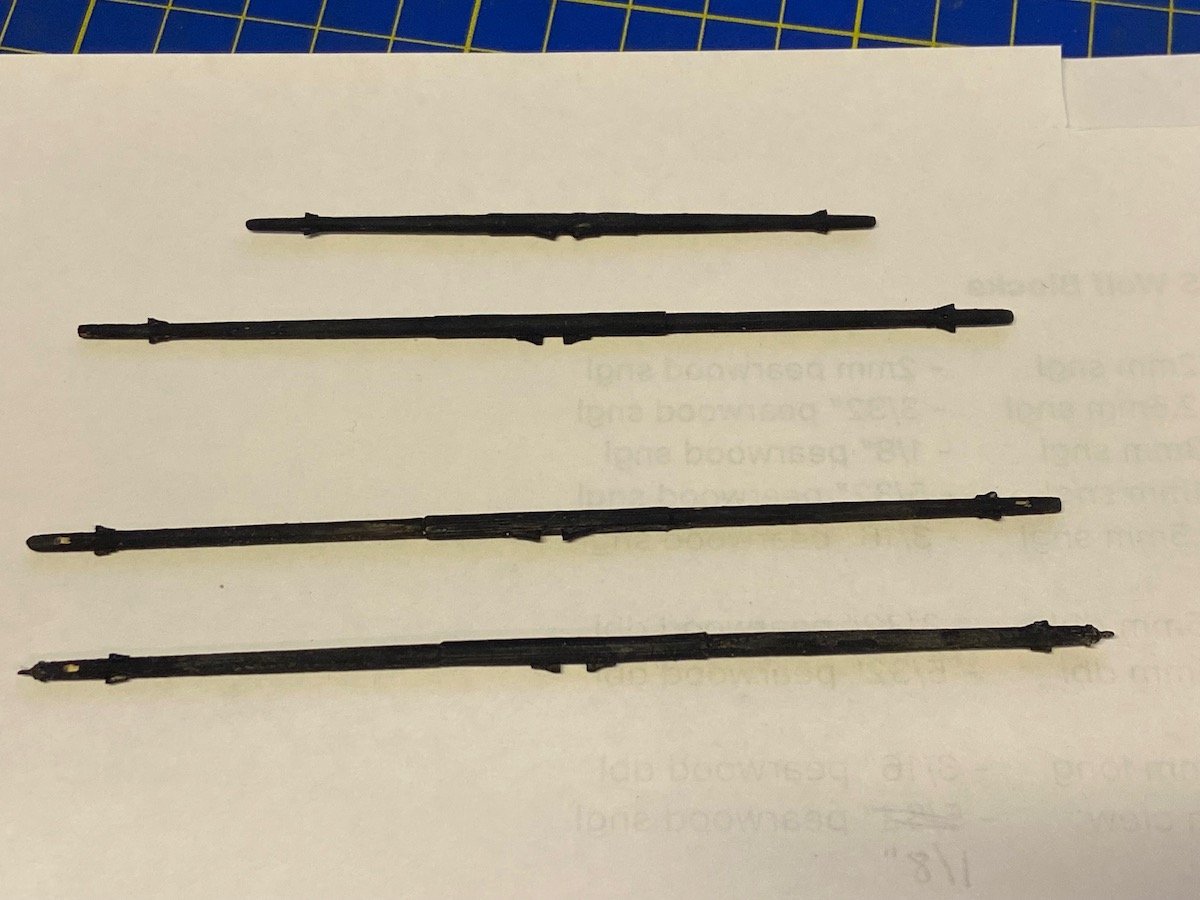
I really want to get going on rigging the lower deadeyes, but I found myself on a roll with the yard making and the anchors. As of my last post, I had all the yards done, except the topsail yards and the two spritsail yards, so I decided to finish up these last four yards. Below are the two topsail yards. Below are the two topsail yards, now painted, and the two spritsail yards below them, still under contruction. Because you really can't see the octagonal sections of these small yards after they're painted, I decided not to fit the laser-cut parts for the octagonal sections, using plain paper instead. This way, I don't have to thin these yards any further to get the pre-cut parts fit. It looks a little messy, as I soaked these and the other laser-cut parts with thin CA glue. Above these, you can see the anchor stocks in production. All of the new yards are completed and painted now, though they'll require a tiny bit more paint touch up. This isn't exactly the last of the yard construction work to do. I still have to add the stu'n'sl booms to the lower fore yard. Anchors done now, sans the rings, which I'll add next. Really enjoying the model progress now.

-
Greg, just now caught your work on the 1/48-scale Phantom. I have a fondness for American pilot boats. The old 1/8" scale solid-hull Phantom was my first ever build, and it made me fall in love with wooden ship modeling. I was surprised to see the new 1/4" scale kit, and immediately thought about ordering one, but I have lots of projects I should finish. Enjoying reading your posts. Beautiful job you're doing!
-
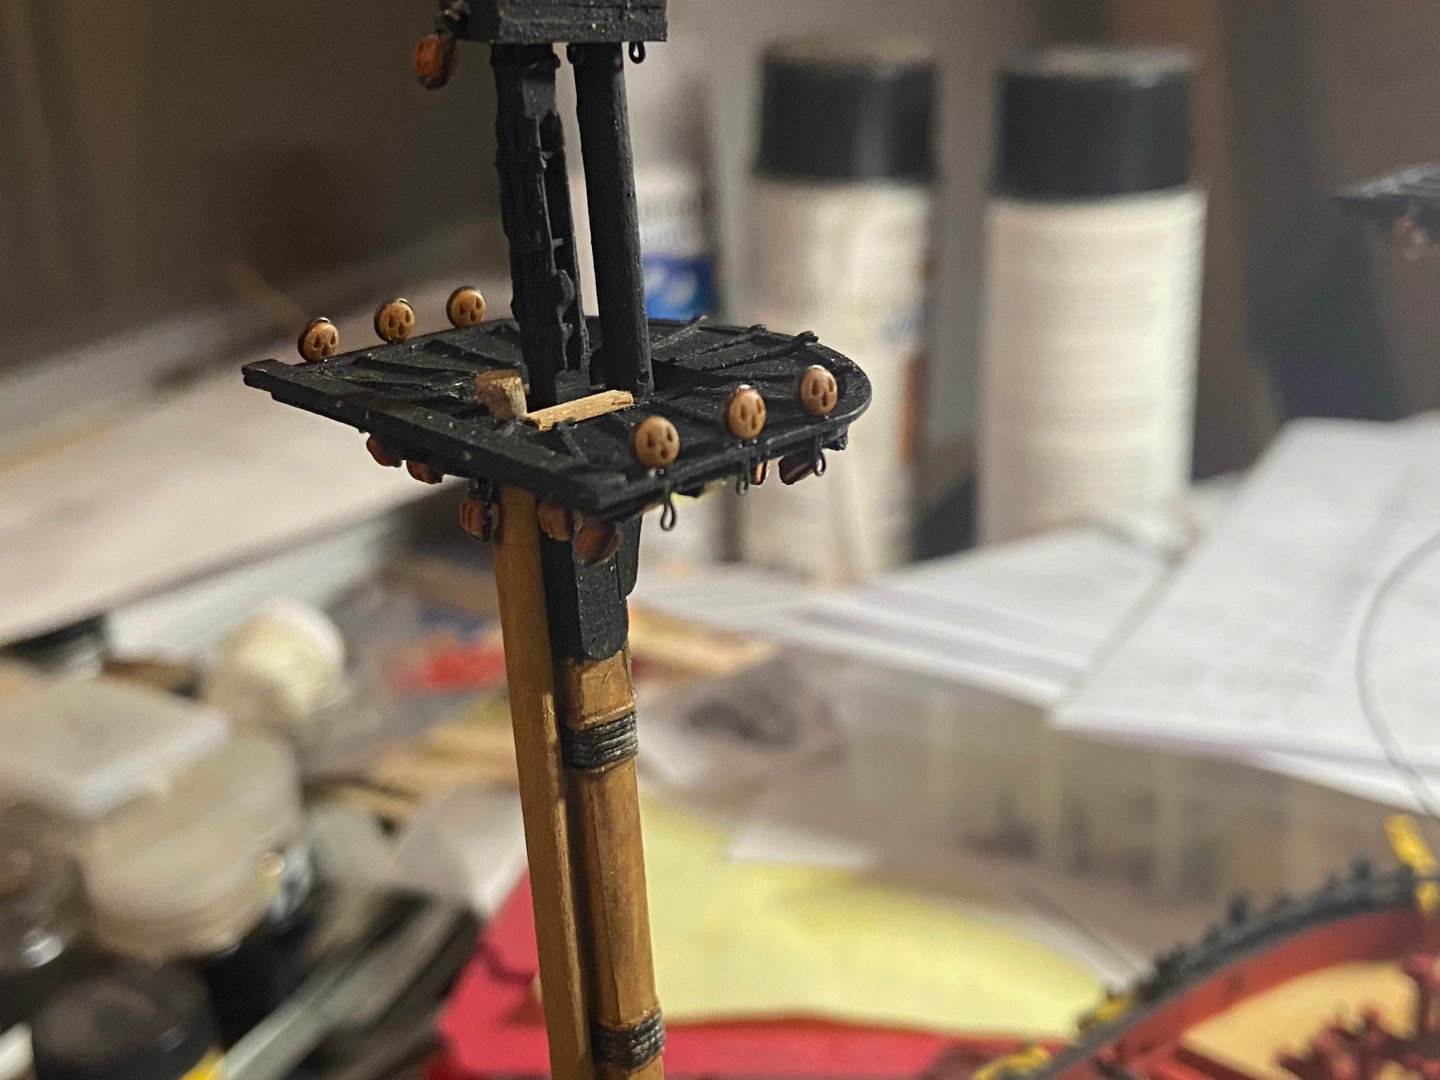
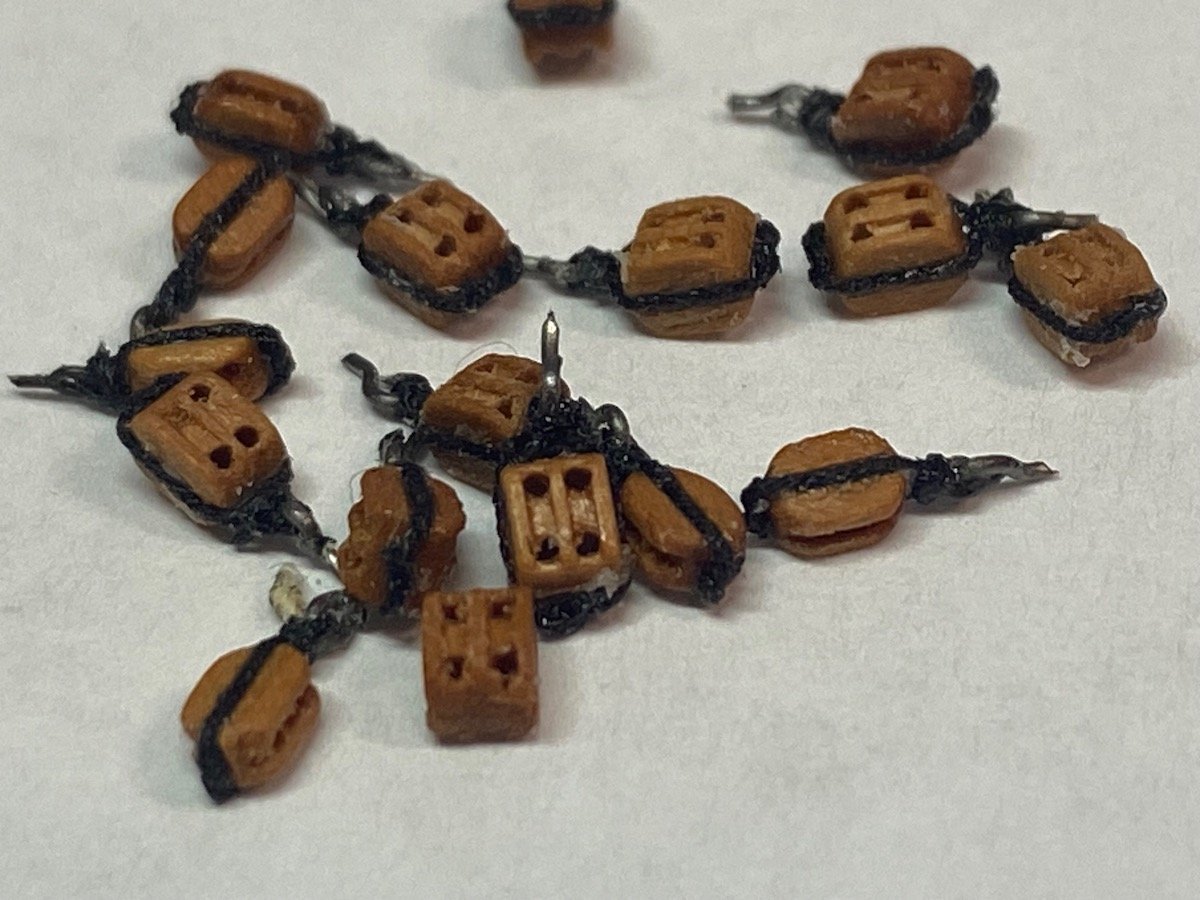
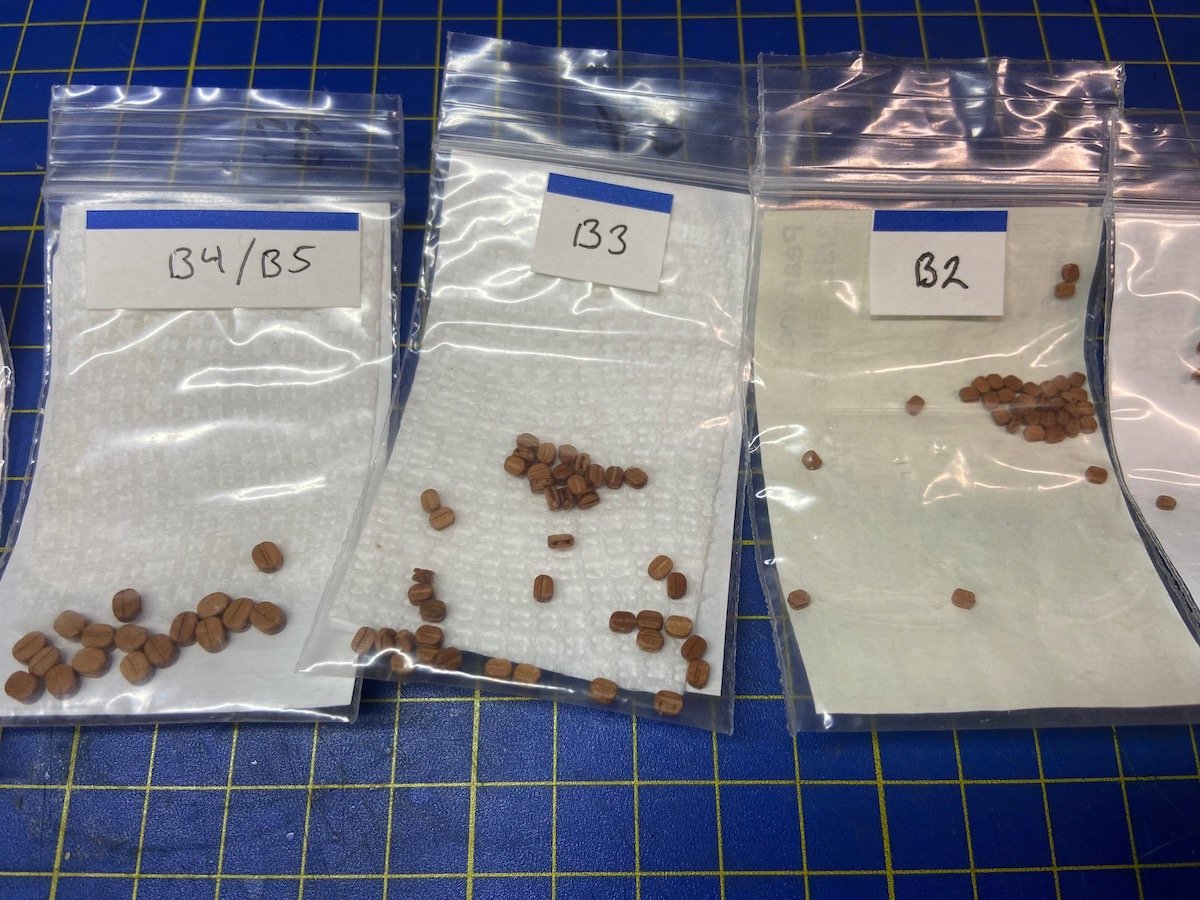
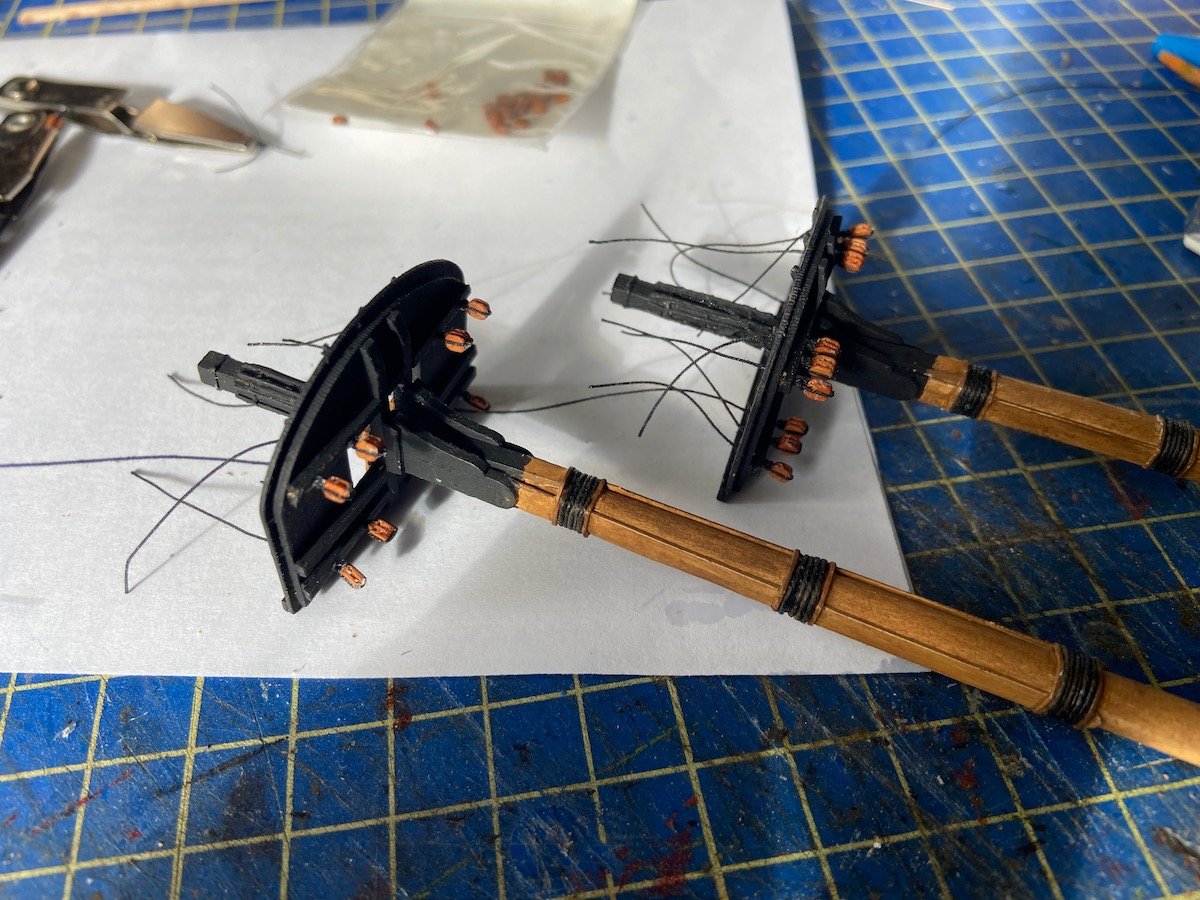
Two weeks later, and I haven't made much progress, though I've been working on the model pretty regularly. I've rigged a bunch of the paper blocks I made, and found that I really don't like the way they look. I just can't make and rig them to my satisfaction. So... switched back to wooden blocks again! I figure I have enough of Chuck's old pear wood blocks to rig this model. Maybe. I have large quantities of various sizes, but of course, small quantities of the sizes I really need the most. Still, I think I should be able to manage. I've since sorted these out and labeled bags of blocks using the kit's own identifiers... I added blocks to the undersides of the mast tops and found two problems. First, since I attached these blocks to eyebolts, they hung down lower than they should. Second, in assigning the blocks their kit identifiers, I erred on the side of using larger blocks, since the holes are so darned small. Bad choice, as I found the blocks looked way too large. So, I removed the blocks from the mast tops, and downsized the block choices. I decided to not use eyebolts this time, and just stropping the blocks and simply left on long tail to run through holes I would drill in the mast tops. These tails would be glued into place and the excess line trimmed off. But, first, I felt I needed to reinforce the tops a bit, after removing the eyebolts from them, along with extra bits of the cardboard mastops that were still attached to them. So, I just cut some thin wood strips and glued them to the bottom side of the affected cross trees... Once pained the added structure is unnoticeable, and provided a solid support to drill new holes through. The newer blocks were then glued into place, and they look MUCH better now, and I'm really happy with how these turned out. Now, I can move on FINALLY!
- 108 replies
-
- 10
-
-
-
Don't know how I missed this. Very nice build, very inspiring! I have this kit, actually, plus the larger, rare 1/72-scale partial kit that was included along with the full plans set from Shipyard. I'd better finish my Shipyard HMS Wolf build first!
-
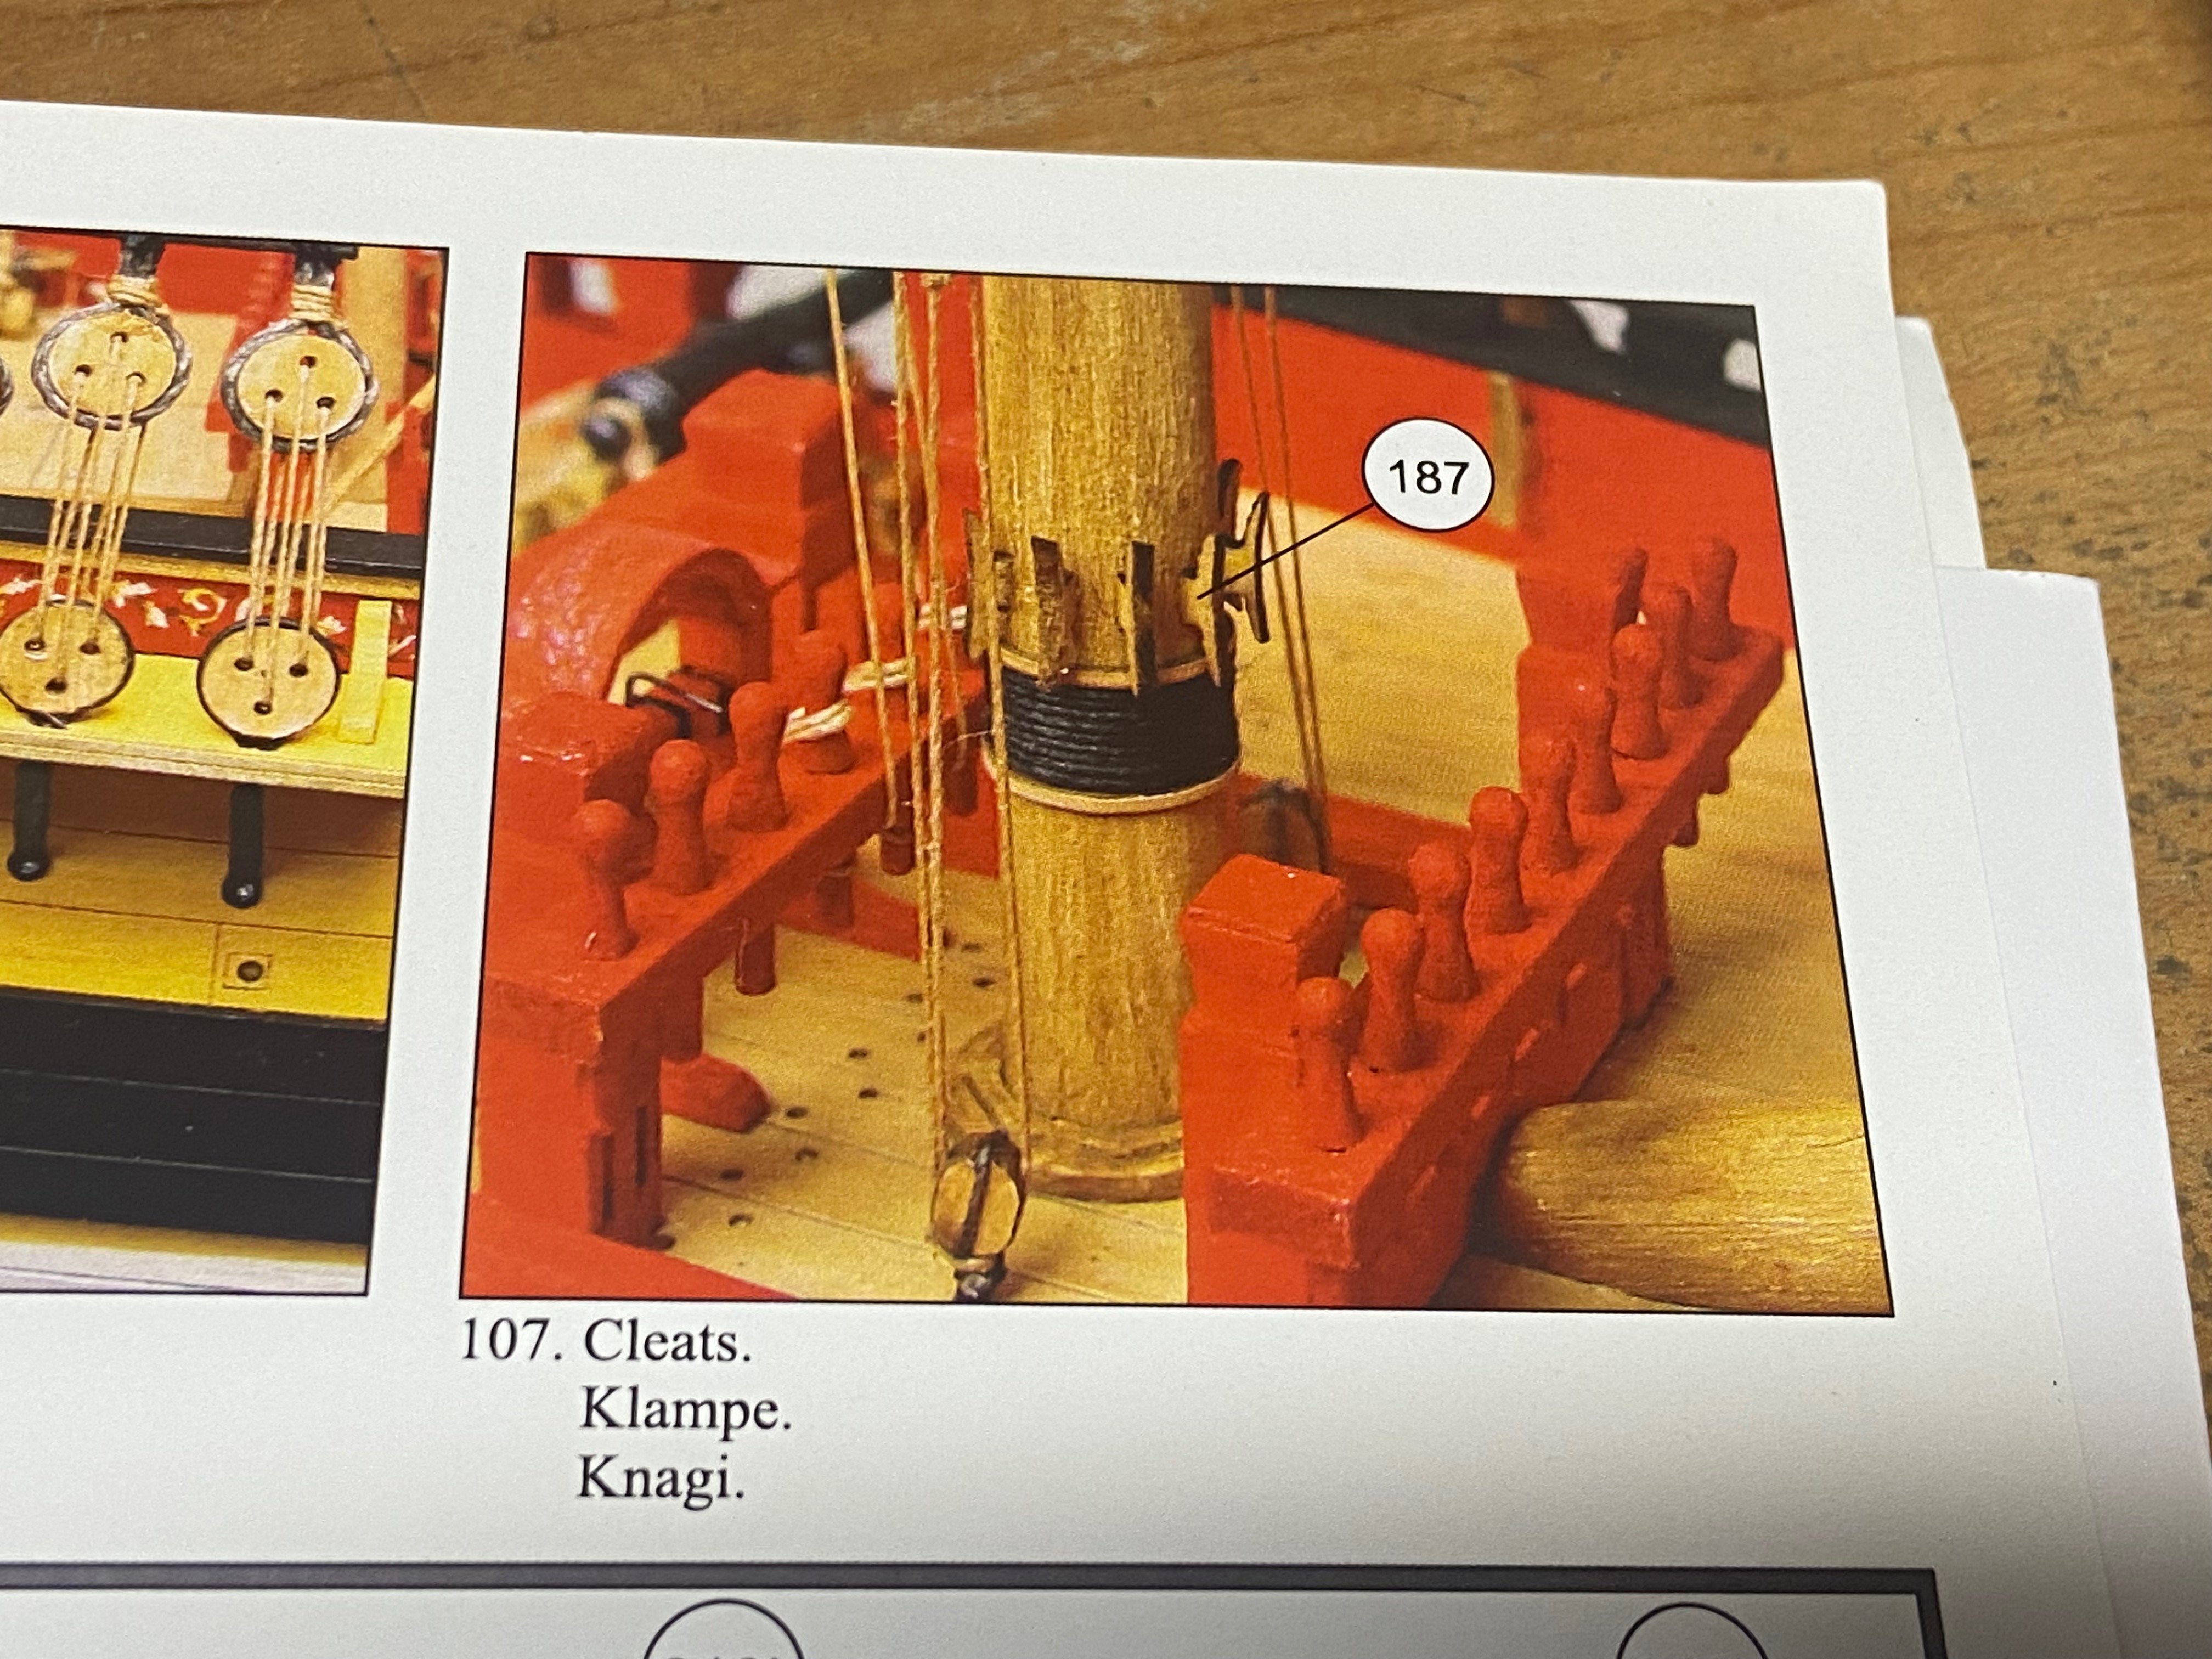
Druxey, My penchant for staring at a model and the plans for long periods of time, repeatedly, may have delayed my progress on this model, but it has helped me in some ways. The masts are off the model and I just added a stay collar to the foremast that isn't well documented. The cleats will be easy to add at this stage. After that, I can spend more time repeatedly staring at all the plan pages to see what other items I might otherwise miss.
-
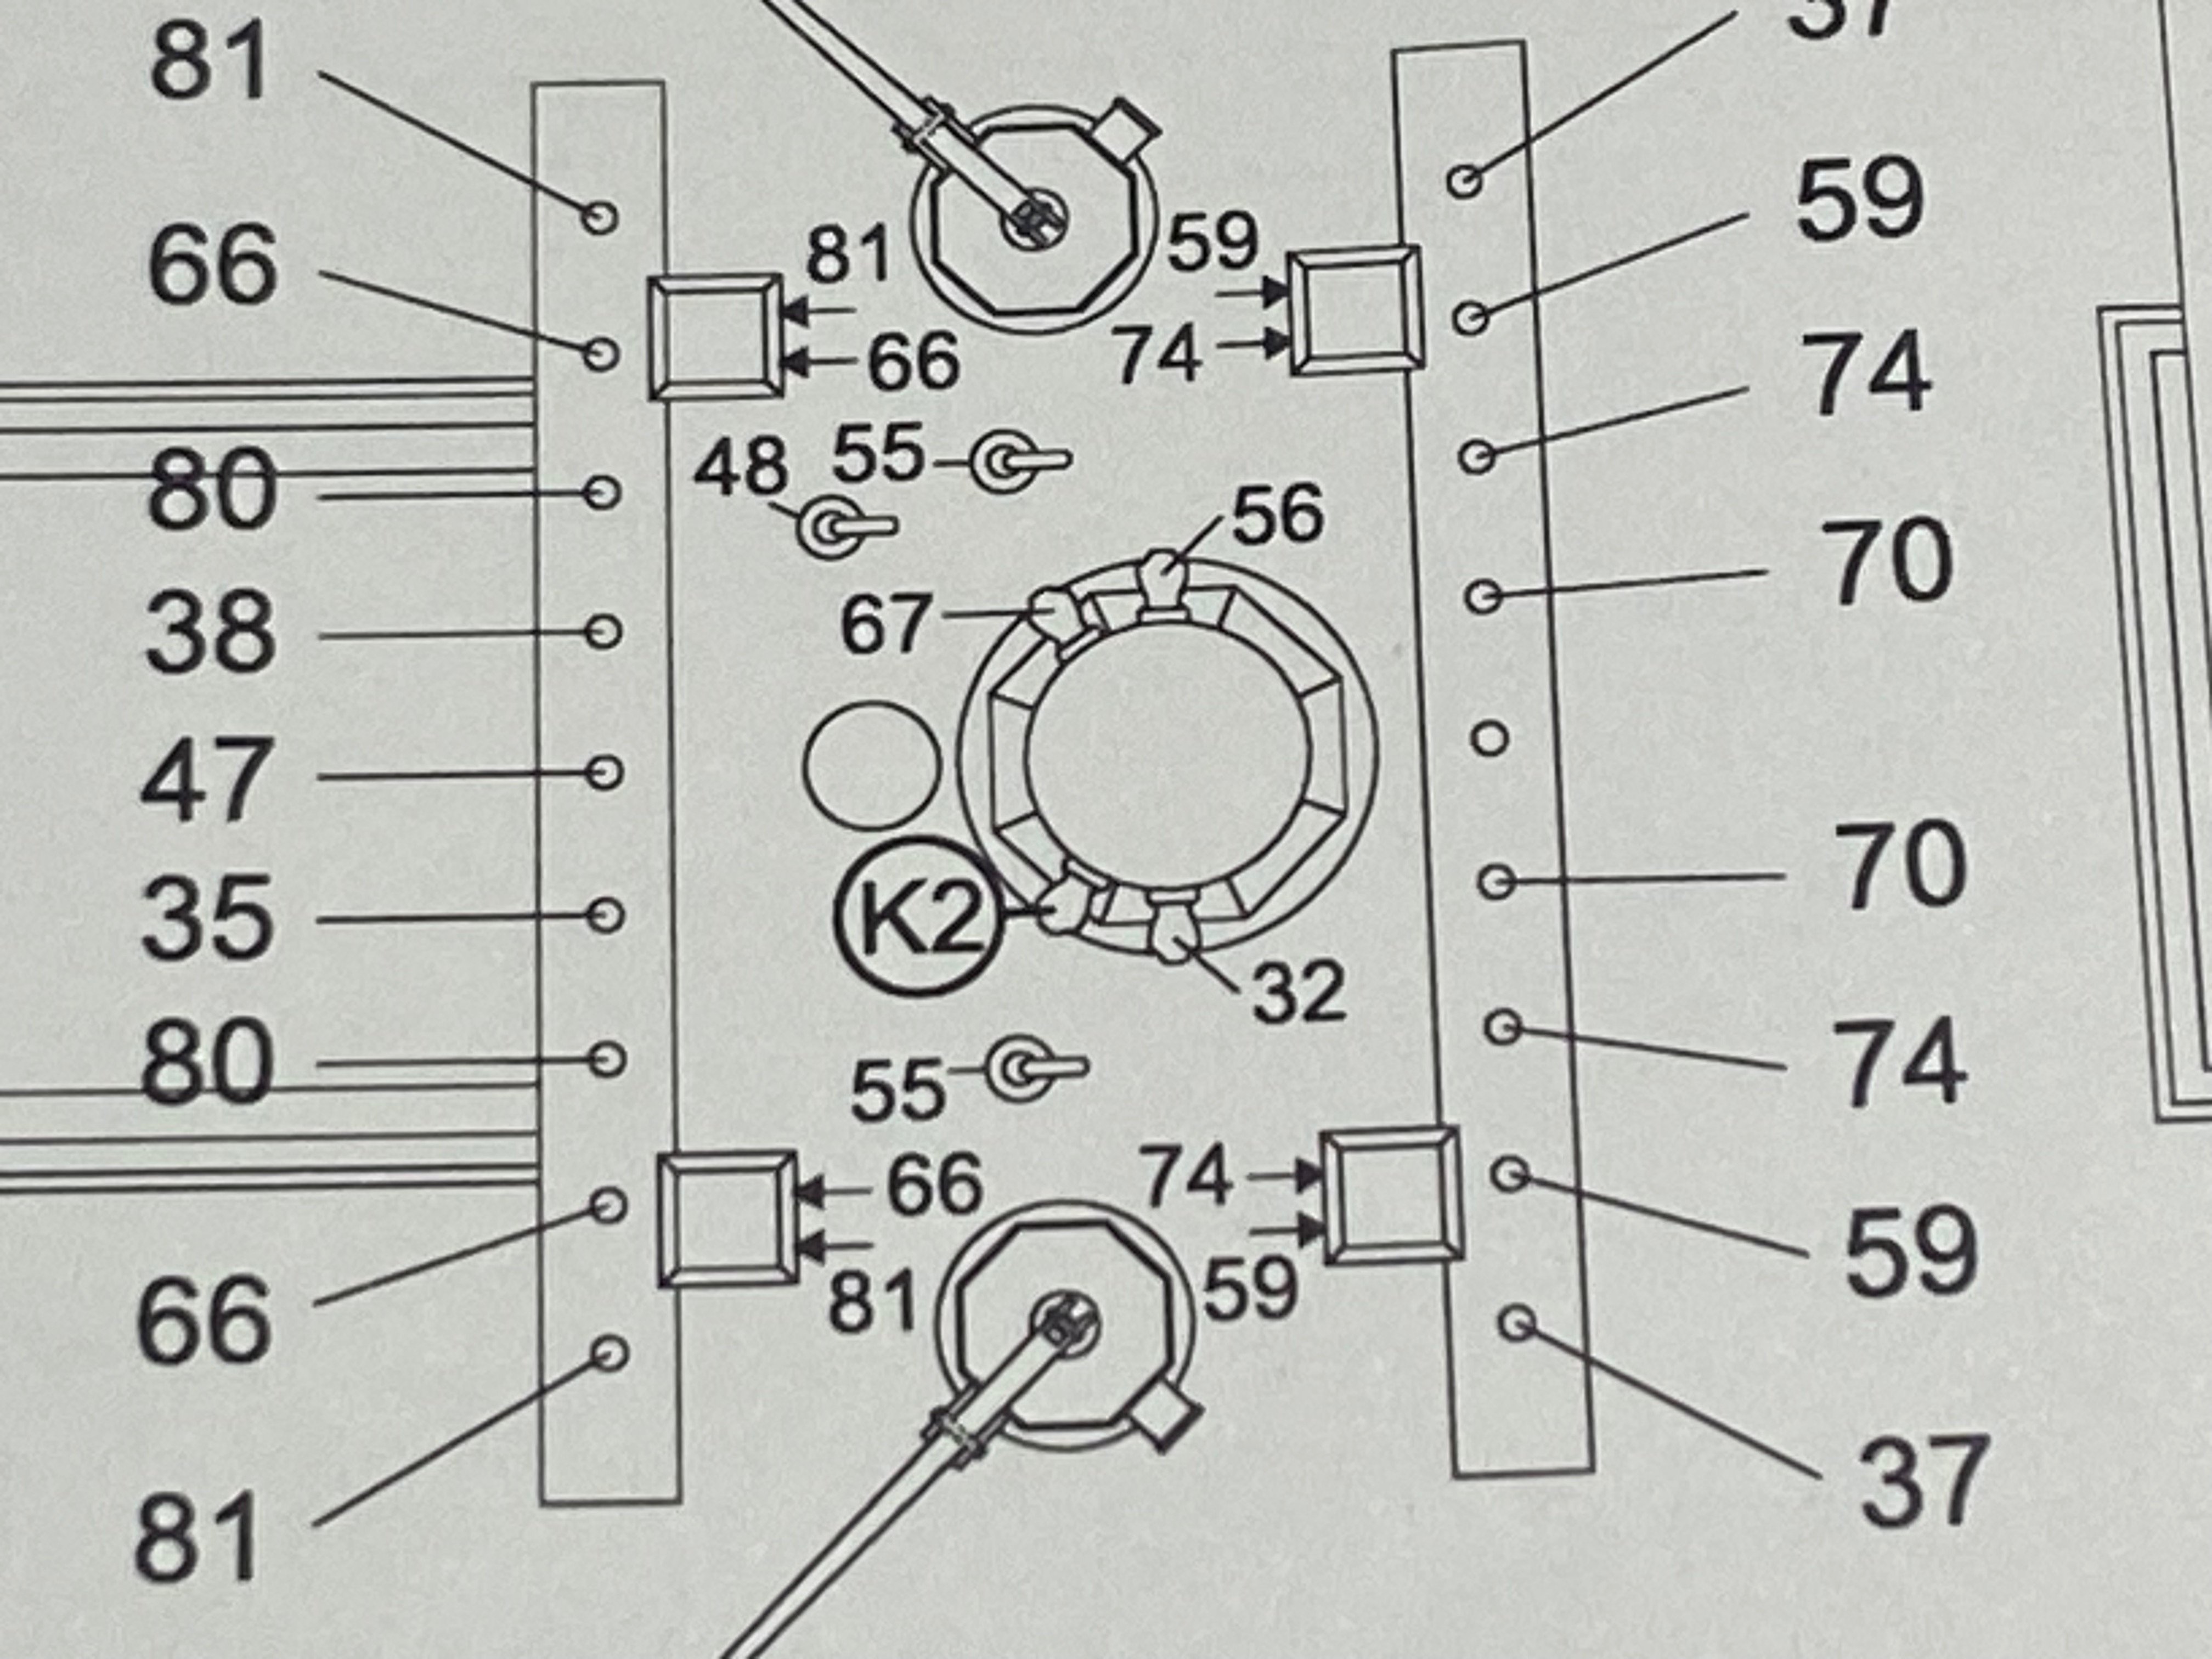
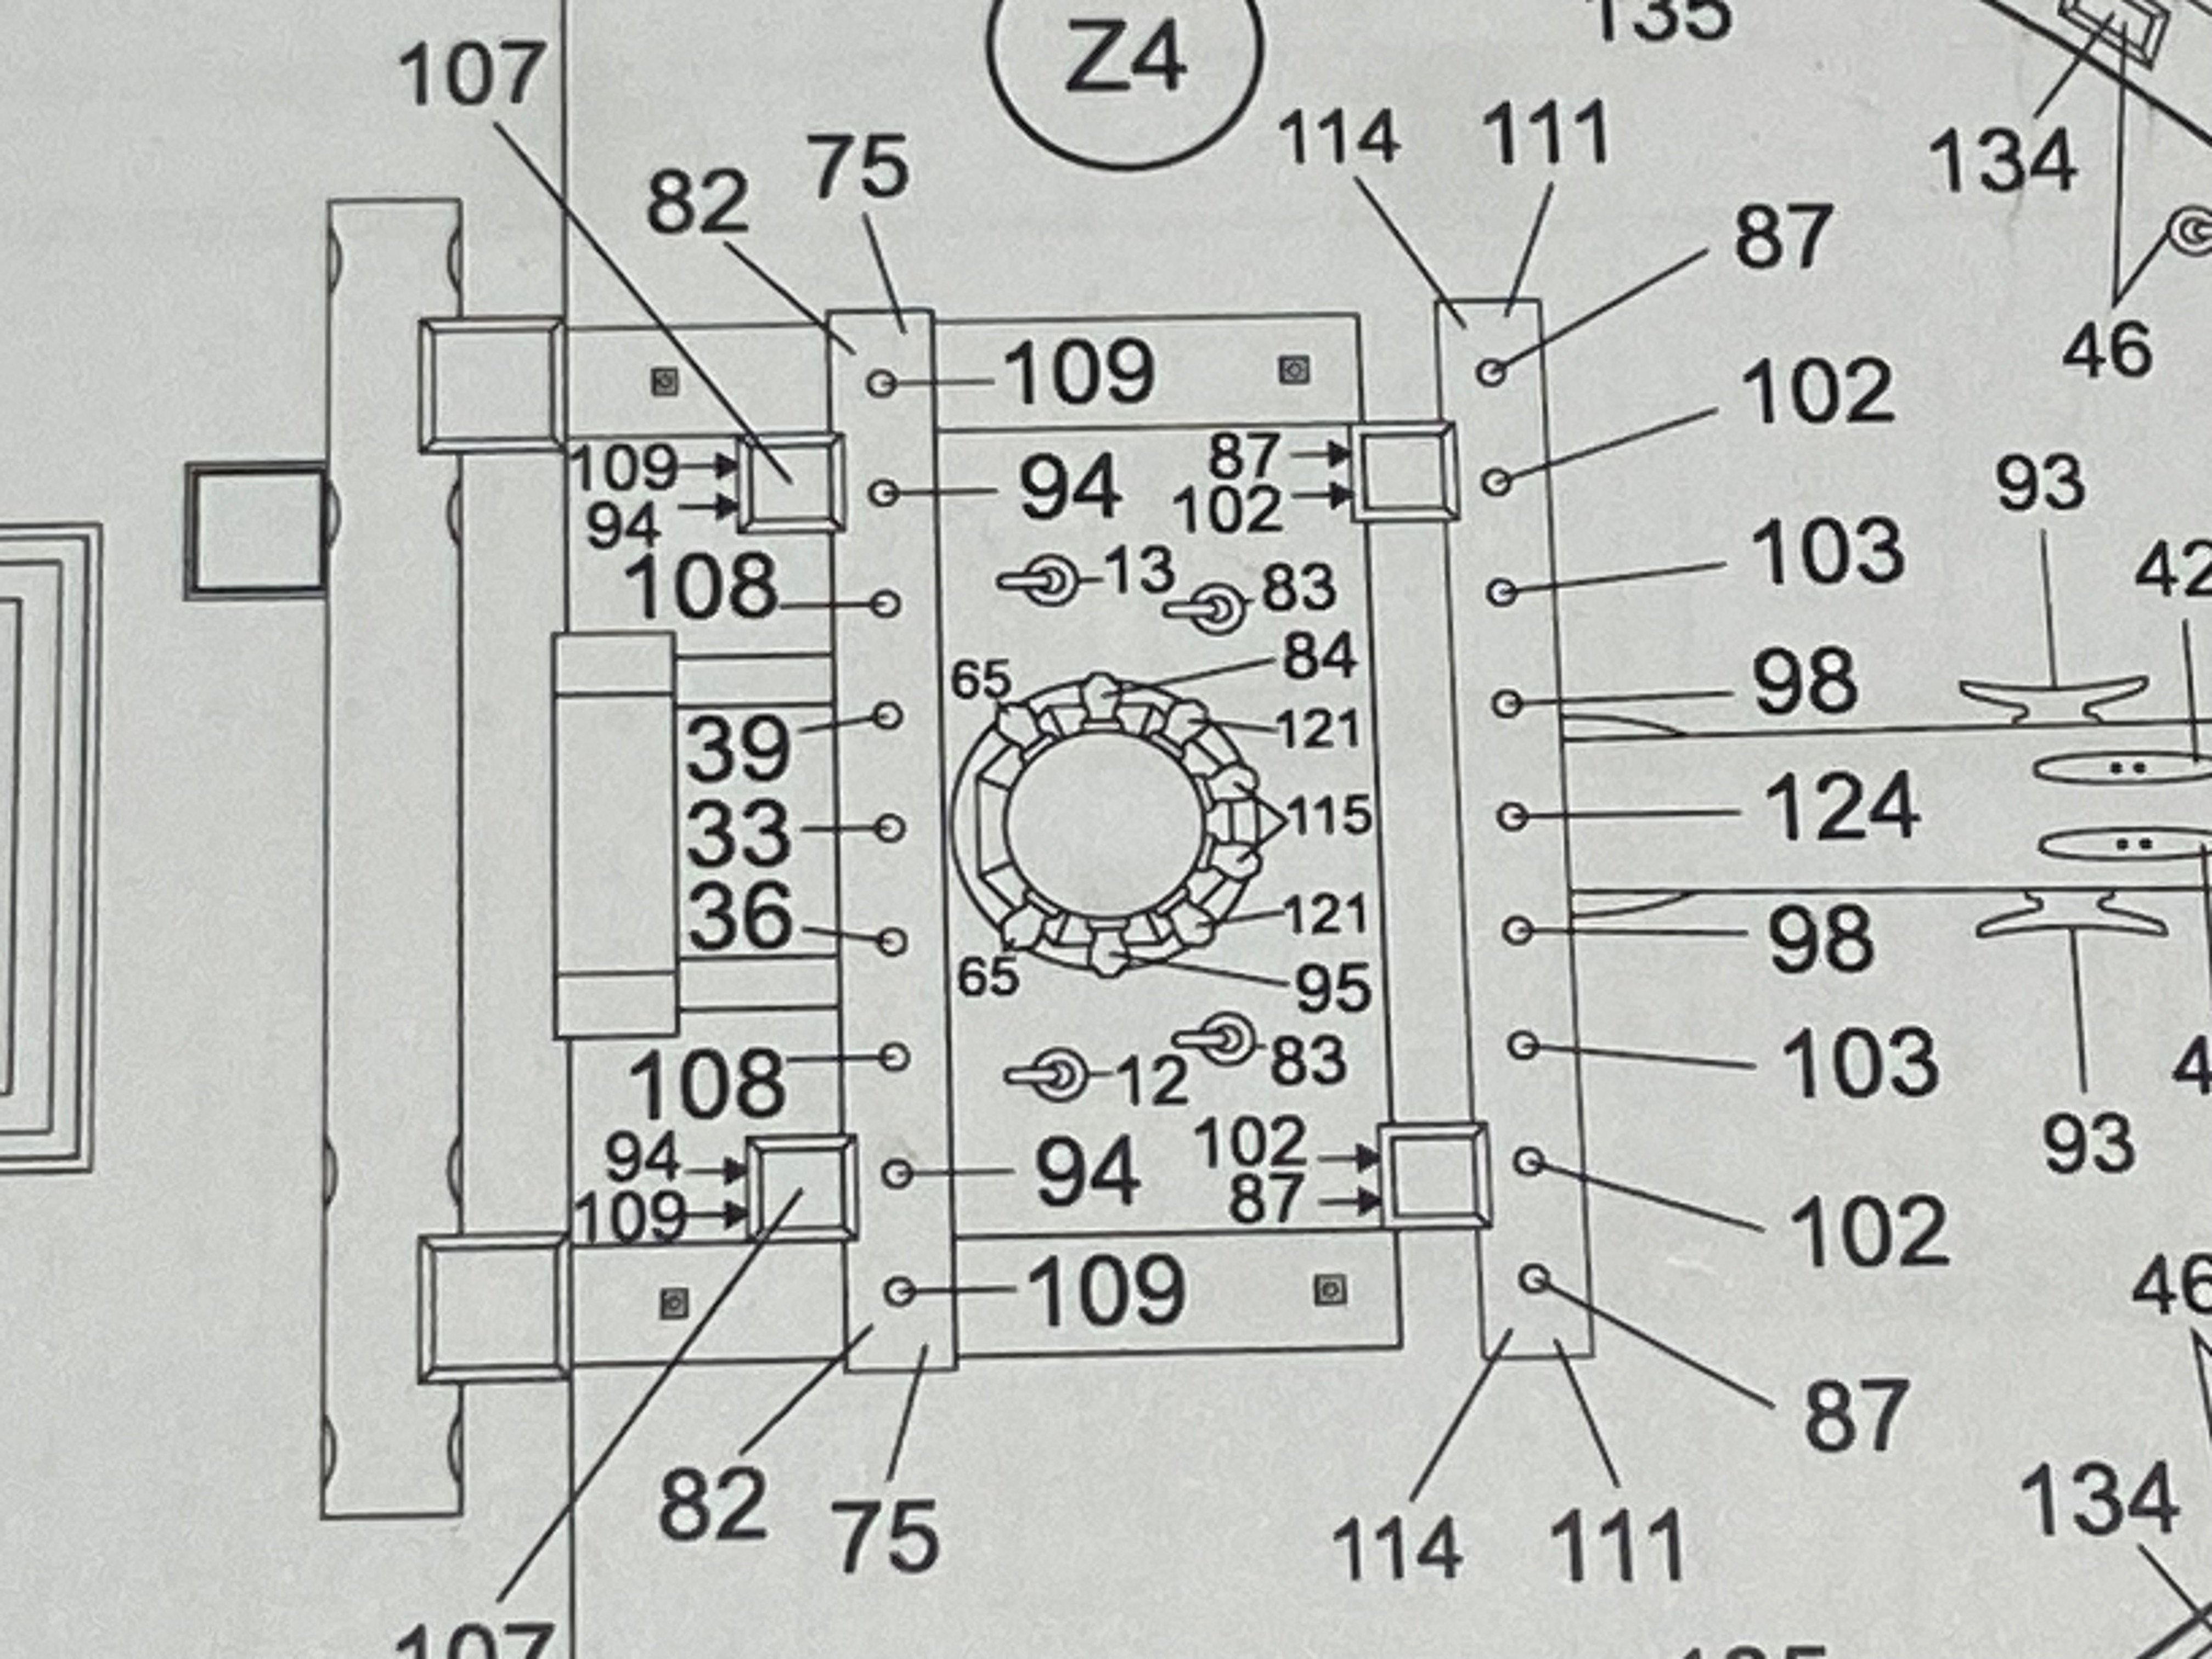
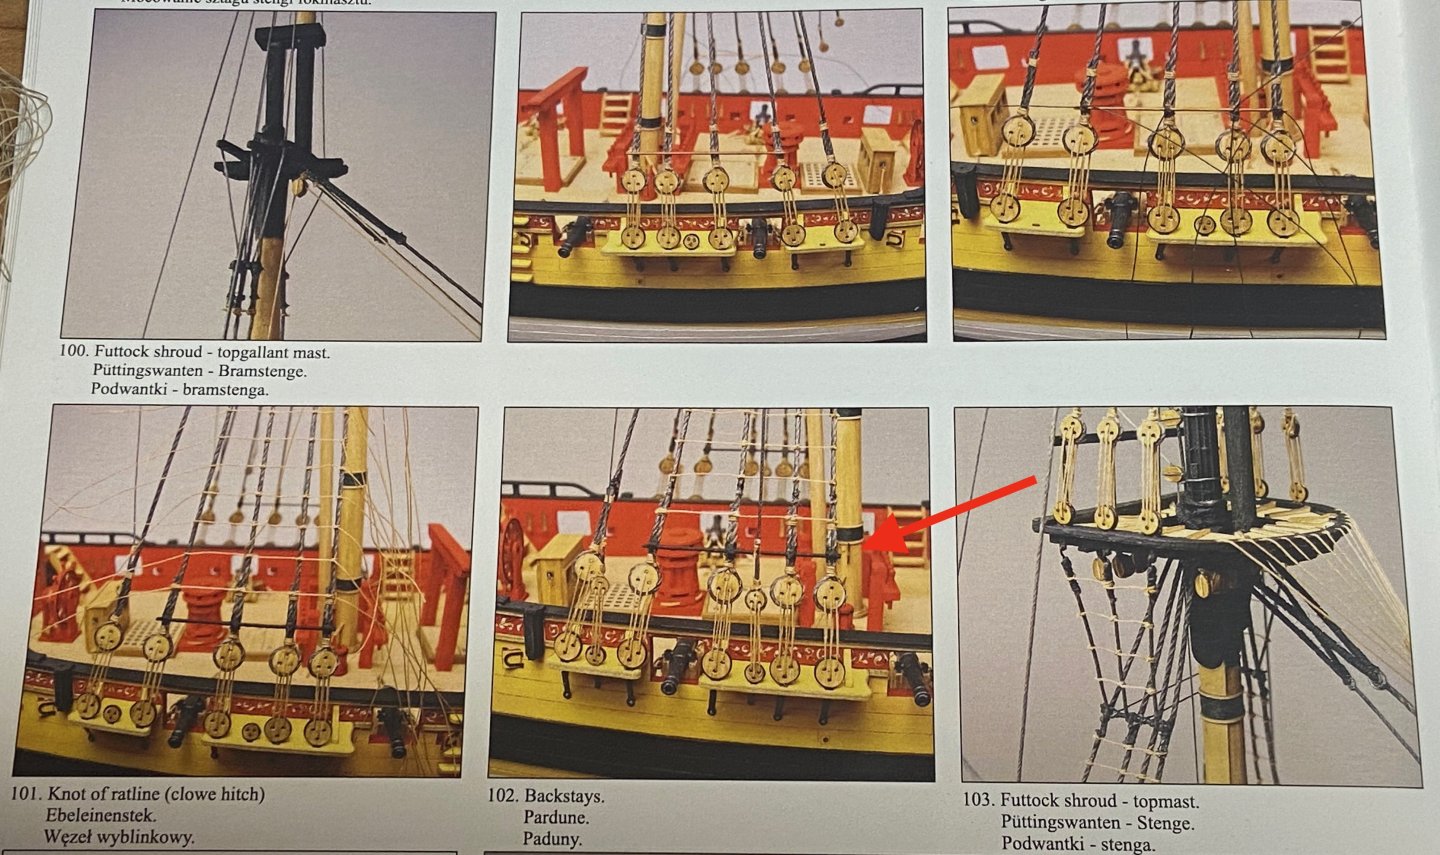
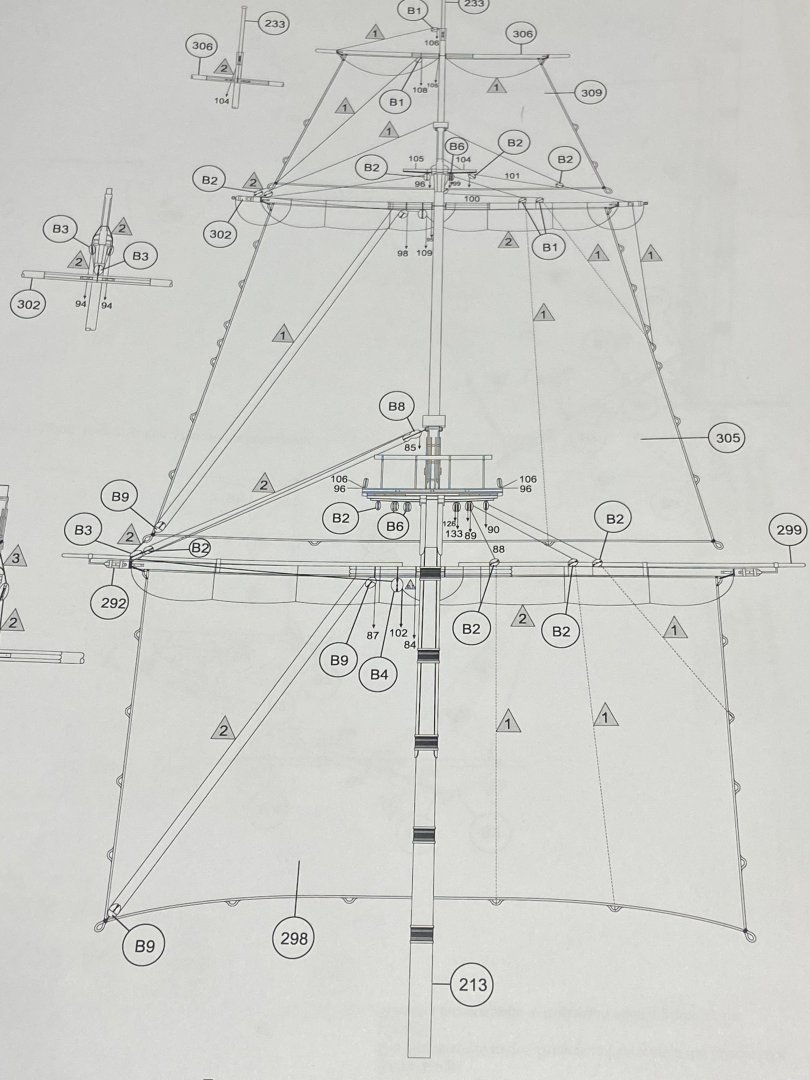
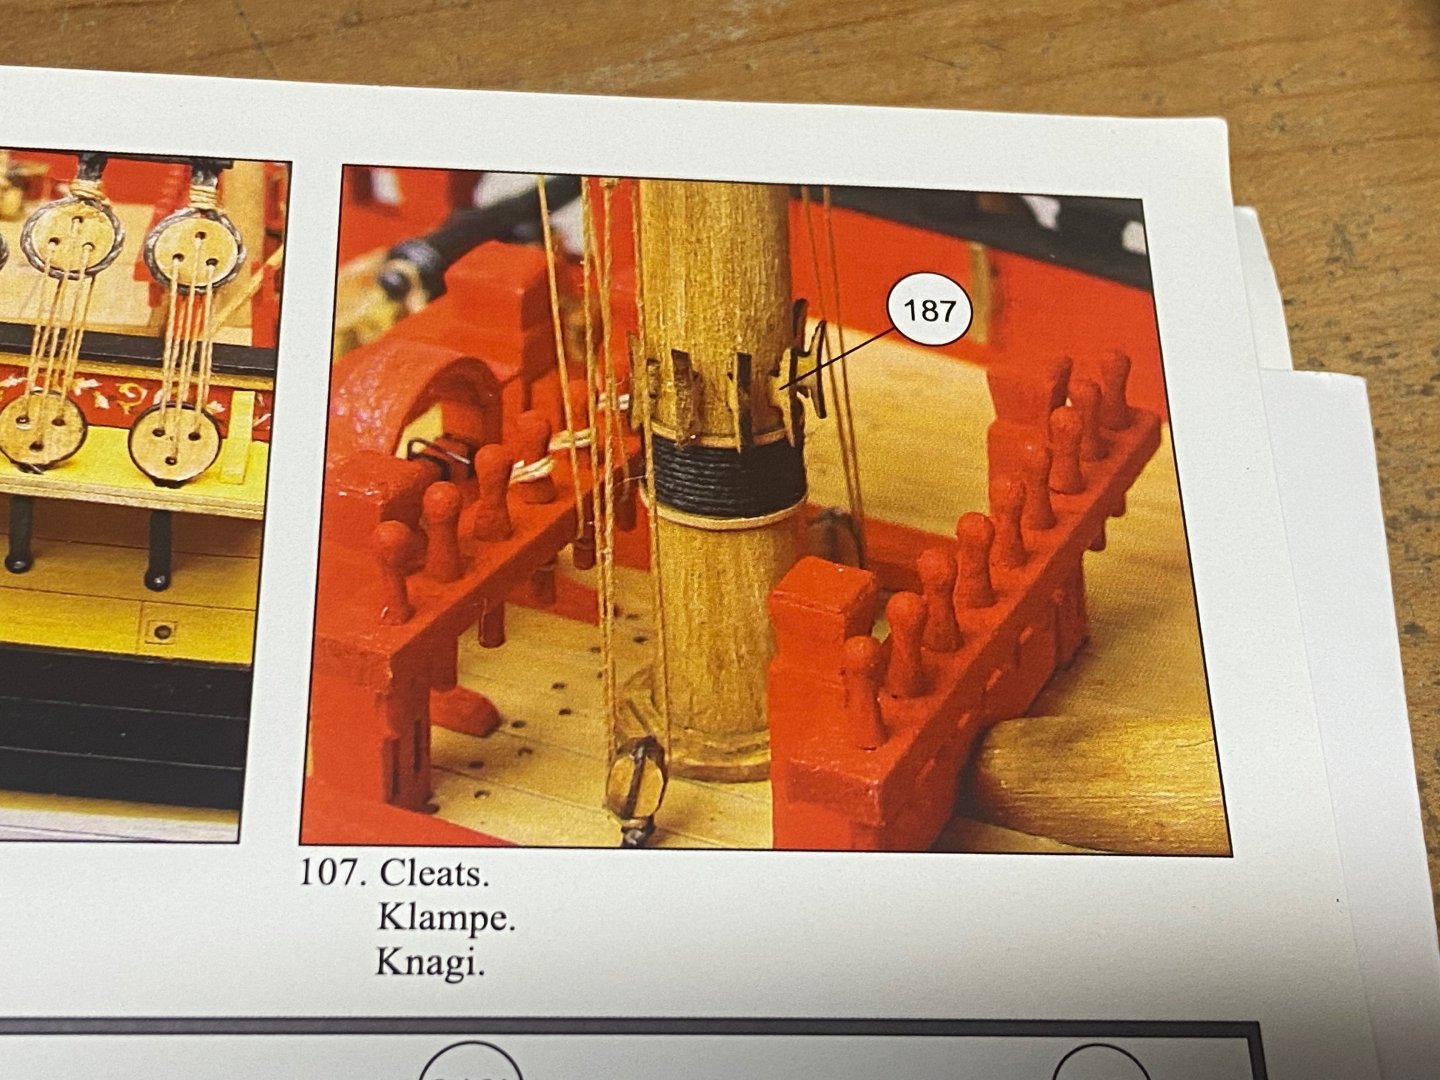
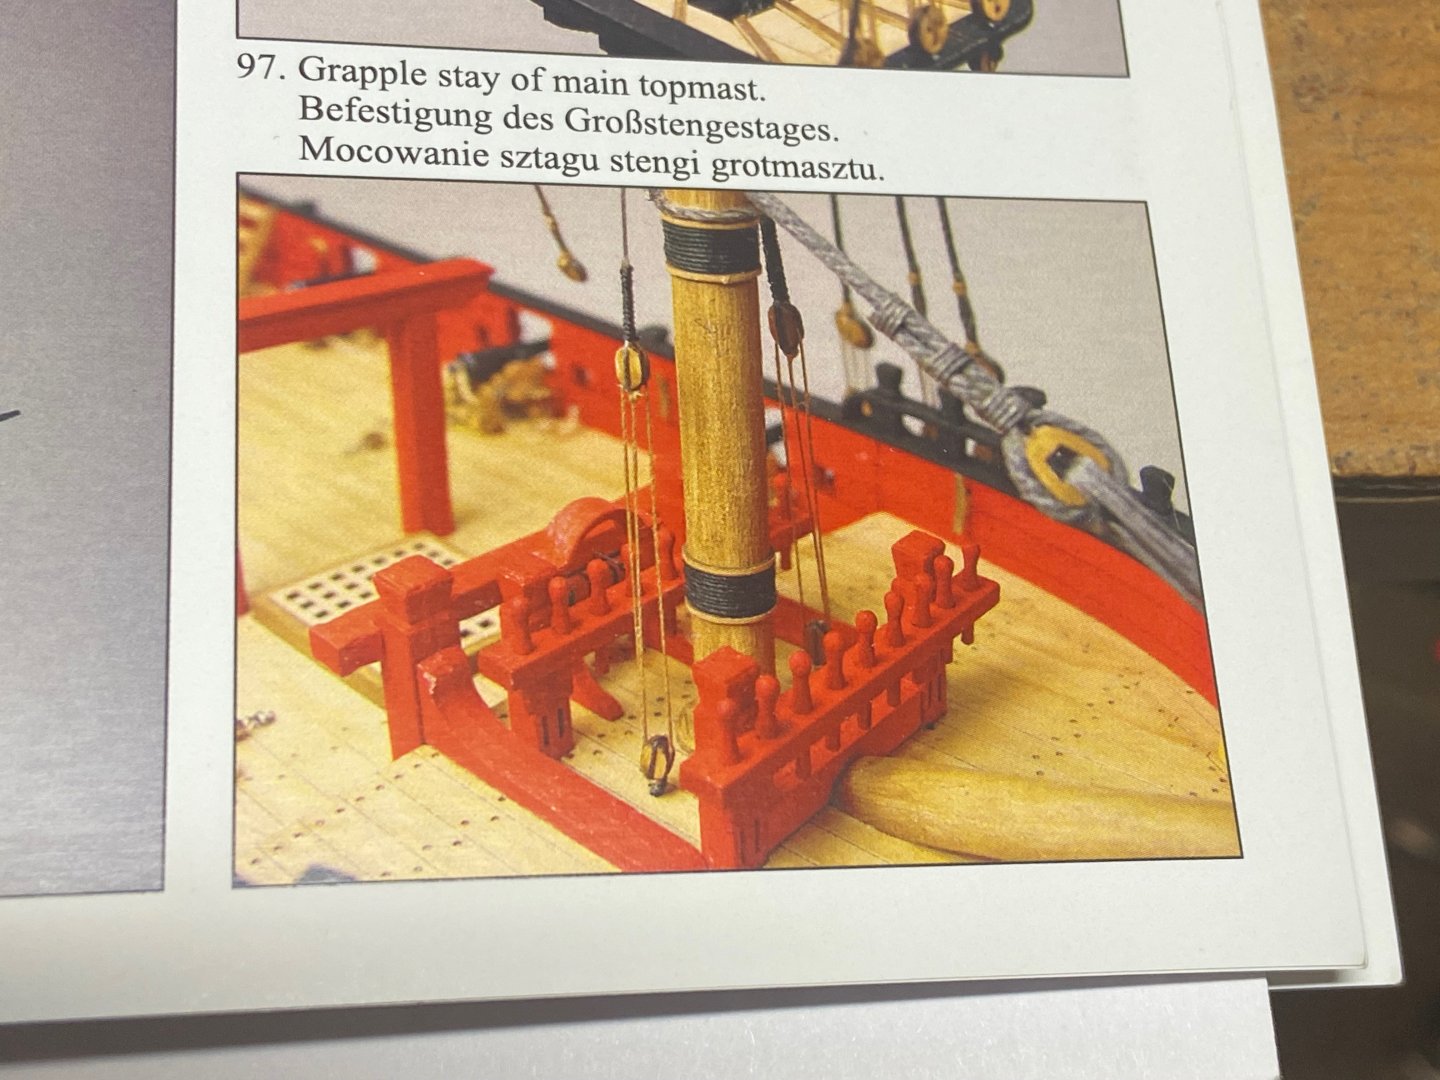
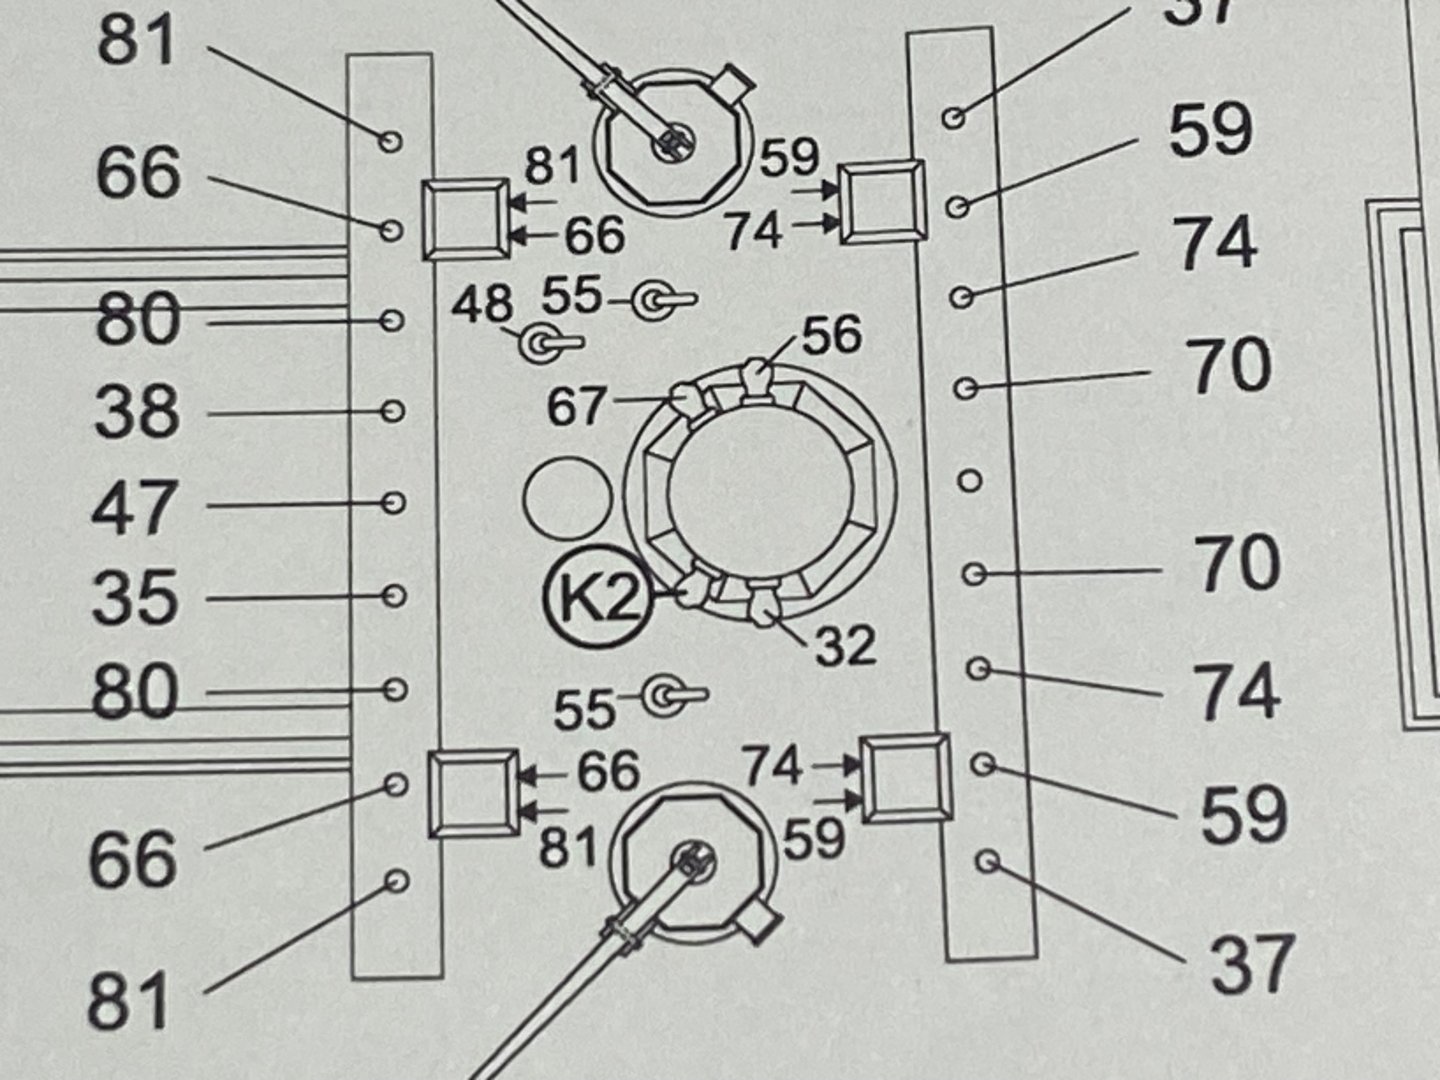
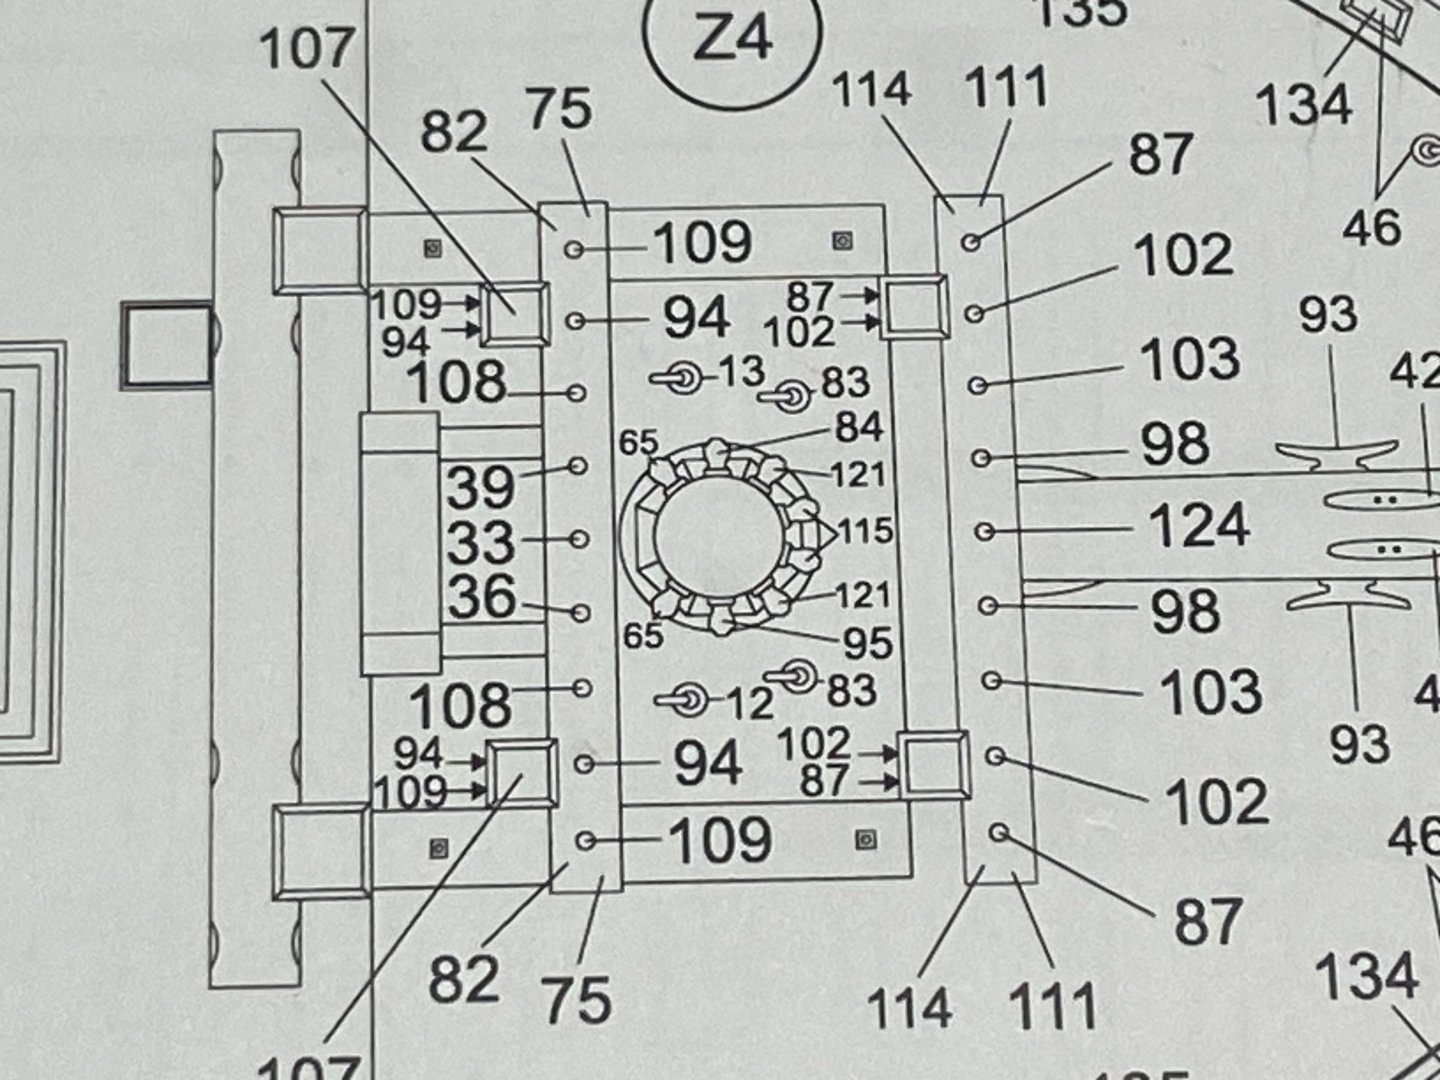
Some minor progress is being made on rigging HMS Wolf... But, in the meantime, I'm trying to plan out other preparatory work on the masts, and discovered probably the most egregious of the instruction shortcomings of this Shipyard kit. Note the instructions below showing the shrouds at the mainmast. Note specifically that you can see the mainmast in the photos, beginning with the two unnumbered photos to the right of photo 100. Next, photo 102, you can also see the mainmast, and all looks normal. But then, in photo 103, there suddenly appears a small mark, which I've added a red arrow to point out. That mark is one of four cleats that apparently needed to be added to the mainmast, but this is never shown anywhere. The plan views don't show them either... Now, this is actually the foremast that I'm showing here, but the mainmast is drawn the same way, without cleats shown. Then, on a later page of the instructions, there is one photo that shows the cleats installed on the foremast, but not before showing the foremast installed with no cleats... Very strange, as the bowsprit is shown without any cleats installed either, but the shrouds are installed, as well as the mainstay. And, now the cleats suddenly appear many steps later... This was the first indication in the instructions that cleats are supposed to be added at the base of the masts. How many cleats are there? You might be able to guess from the above photos that there are 8 on the foremast and 4 on the mainmast. As for the plans, the only indication that these cleats are required are in the belaying plan. Fortunately, a close examination gives us the actual numbers of cleats needed on the mainmast... And on the foremast... This project certainly requires a lot of study to pull the info needed from the plans and instructions. Fortunately, all the info seems to be there. It just takes a bit of work to pull it all out. I suppose it shouldn't be a surprise. Most kits come up short when it comes to the instructions. However, I am a bit surprised that some of these things aren't even shown in any of the plans. Well, excepting possibly the belaying plan. This is just one example of a shortcoming of the instructions/plans, but I've only found one other so far. And, all in all, this has been a very enjoyable project. I'm sure my own errors will completely overshadow any kit errors... And, with that said, I've just spotted one of my own errors regarding the pin rail just abaft the foremast. I have it reversed, but may leave it. Oh well, more on that later.

-
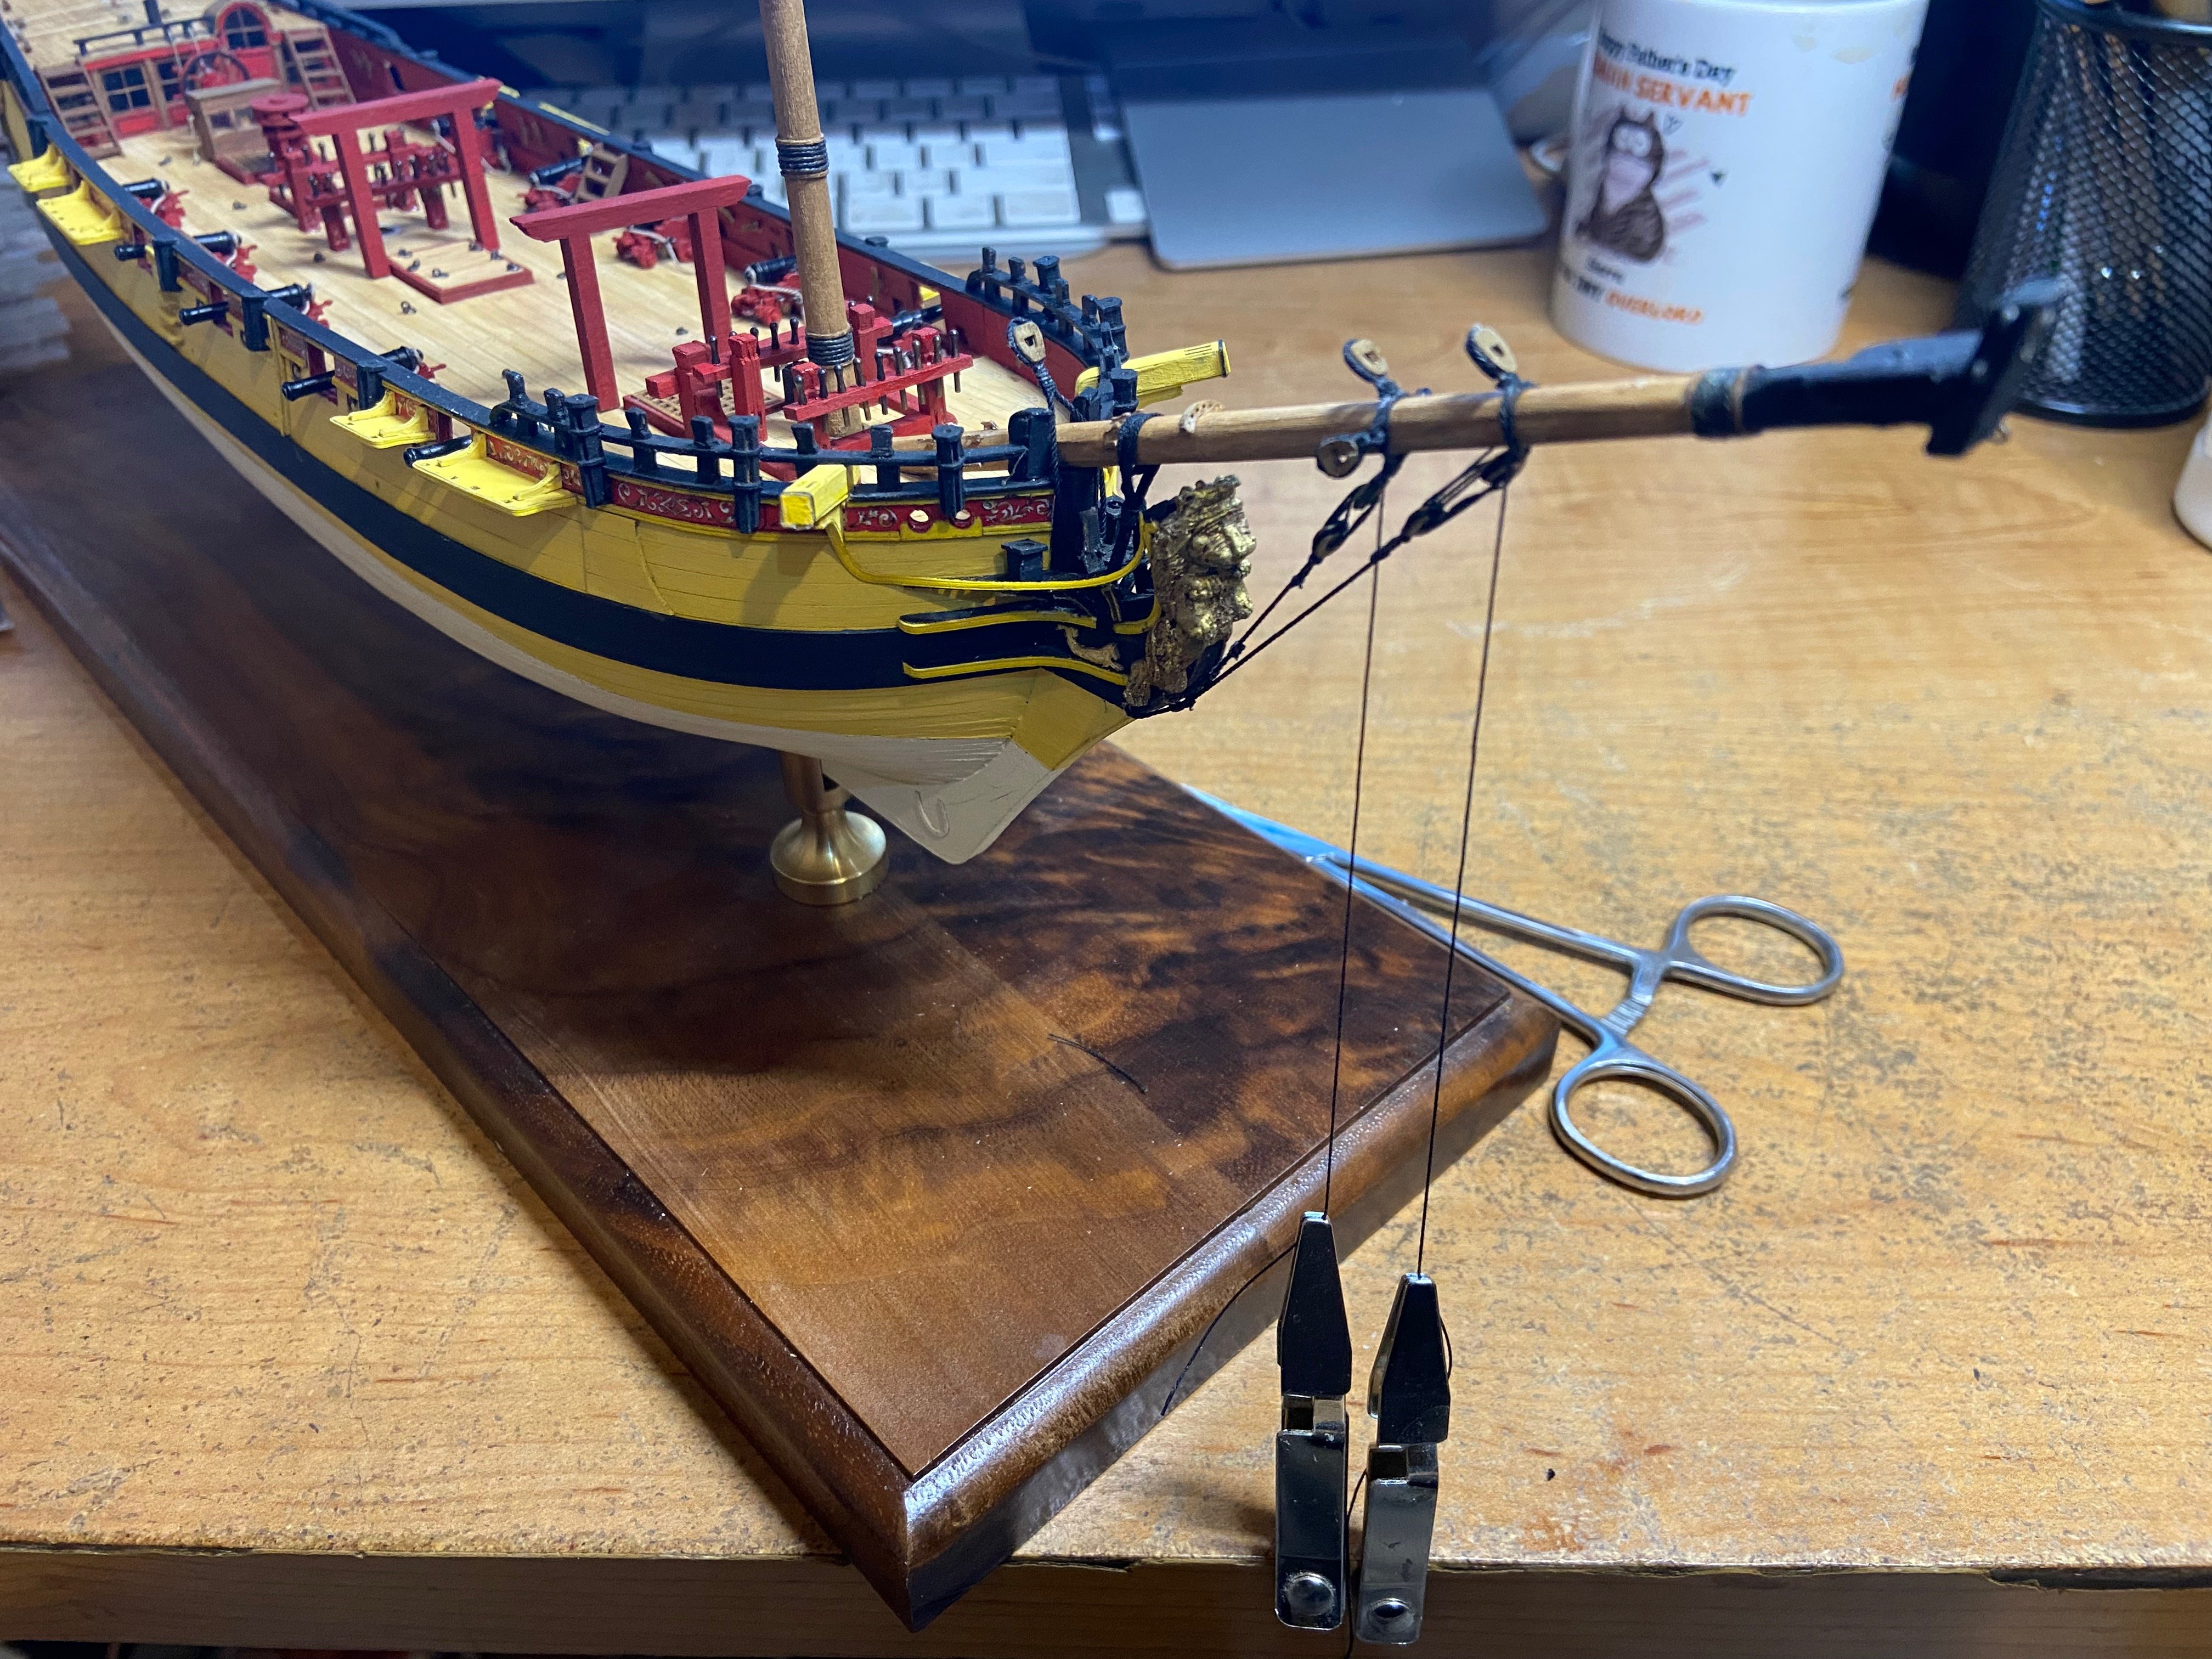
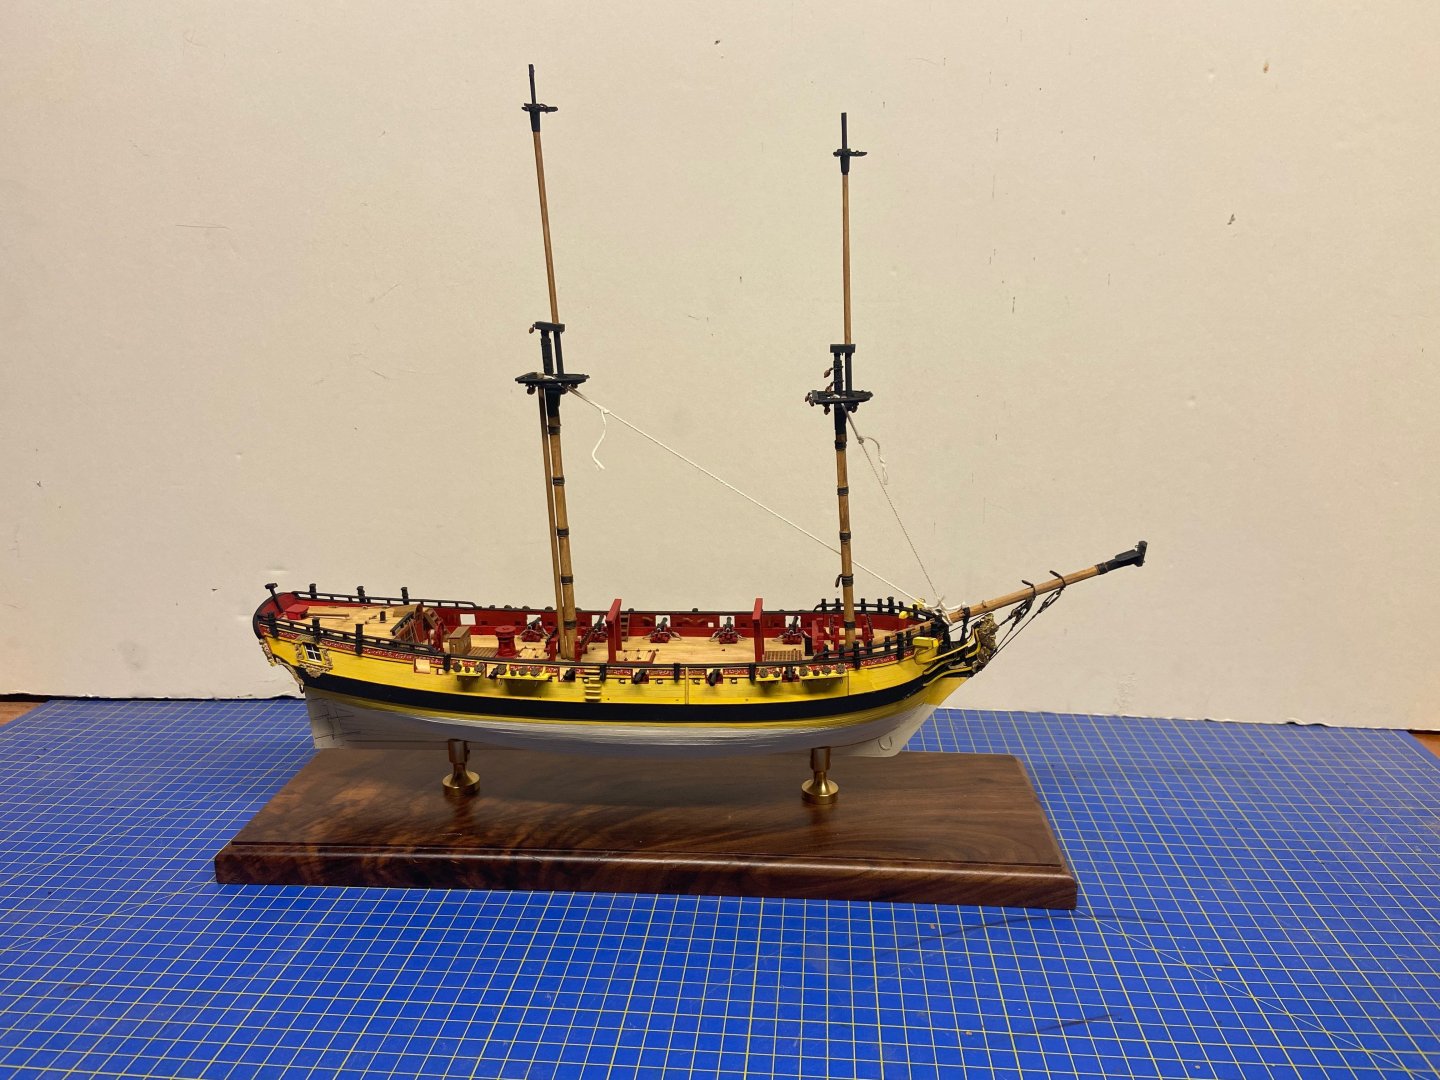
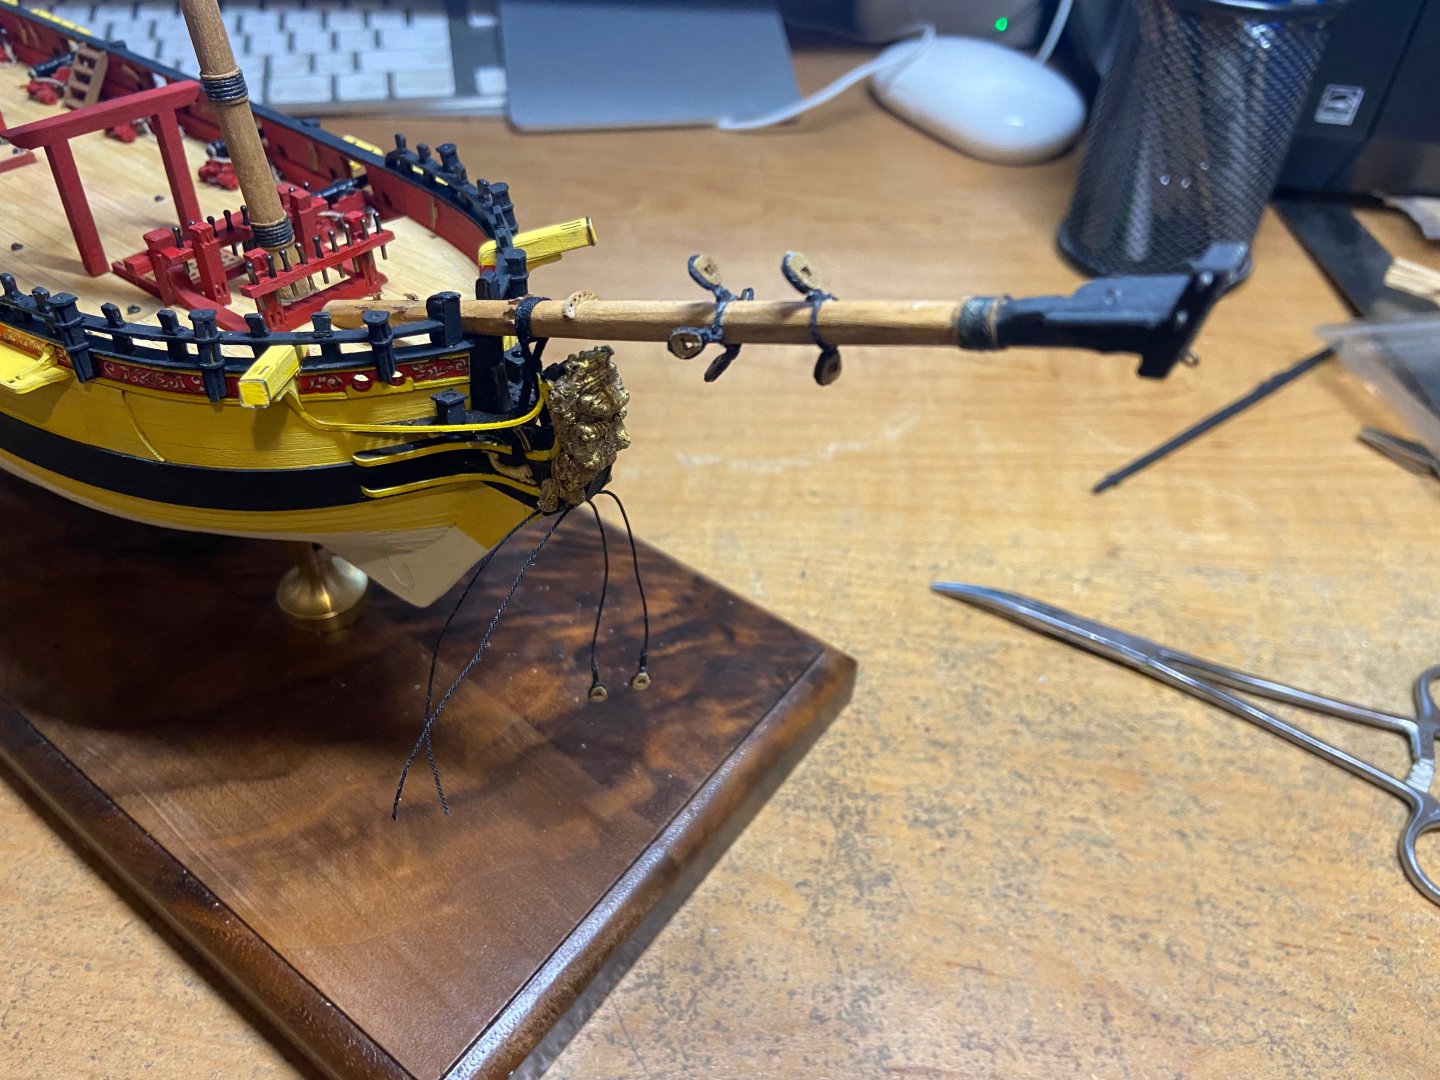
Well, I'm not sure if it's the time change, the shorter days, colder weather, or what... But, I've been finding myself more motivated to get back to the completion of HMS Wolf. Perhaps it has something to do with the restarting of a ship model group in the San Francsico North Bay? I don't know. But, it's good to be working on this project again... HMS Wolf is now out that small case I had it in, all the deck furniture except the gallows structures has been permanently fixed to the deck, as well as the bowsprit itself. I ended up not adding the little belfry, as it's very much crammed in behind the foremast, between the aft pinrail and the riding bitts. I'll have to figure out what to about the ship's bell. I'm inclined to mount it from a stand on top of the binnacle box, if that seems reasonable. While it's not shown in the photo above, I went back and installed the belaying pins. My kit included brass belaying pins. I'm not sure, but I think Shipyard has since gone with 3D printed belaying pins. Mine, being brass, were treated with BlueJacket's Brass Brown metal toner. Gammoning rope has been added, and stay collars added to the bowsprit. This may not seem like much, but it's the first time I've been really motivated to work on rigging for a long time. I did have the rigging on the Charles yacht, but it was a lot simpler that this smaller scale brig-rigged snow. I think I'm going to go ahead and rig those bobstays. Then, I can get started dealing with the deadeyes and chainplates, which are weirdly mounted on Shipyard kits.


-
Unknown Royal Yacht kit.
catopower replied to Lucius Molchany's topic in - Kit build logs for subjects built from 1751 - 1800
I didn't say it was banned because it was Chinese. Perhaps I should have just said it was likely one of the banned manufacturers, but I think 90% are from China. If I'm wrong, that's great news! -
Unknown Royal Yacht kit.
catopower replied to Lucius Molchany's topic in - Kit build logs for subjects built from 1751 - 1800
Yes, definitely NOT a Mamoli kit for various reasons. Gregory, unfortunately, that looks like an exact match – look at the mounted figure atop the stem. I say unfortunately, because this is likely a banned Chinese kit. Should have been obvious from the start looking at the Chinese characters on the plans. -
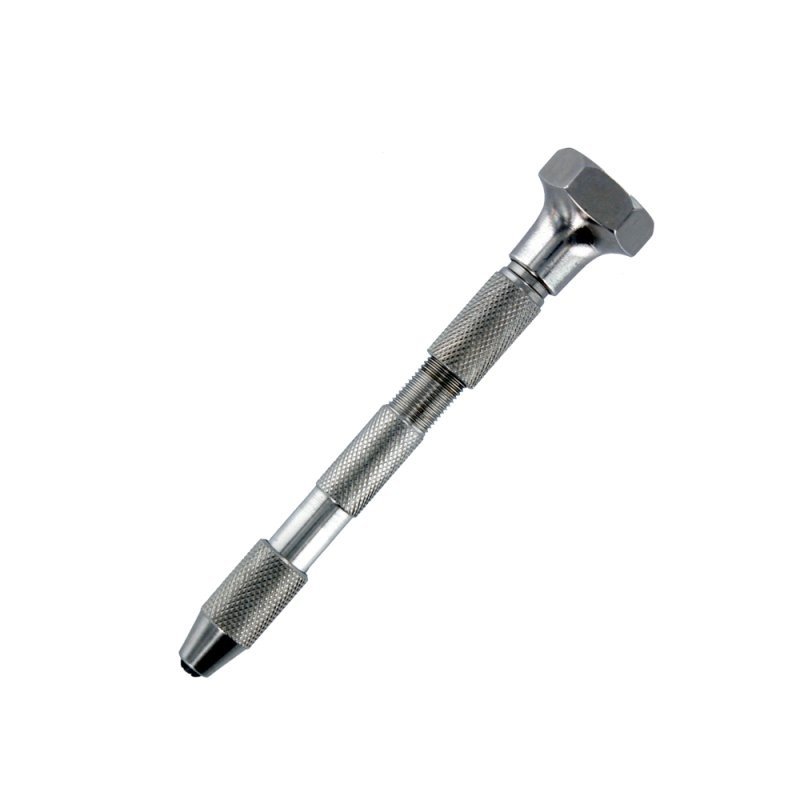
I think it's kind of funny how this thread has gone from the OP asking about his pin vise, to recommendations of drill presses. Personally, like Chuck, I am very happy using a pin vise. My preferred variety is the swivel headed type. Quality varies with these things. My go to is one sold by ModelCraft Tools. I have a few of them, with each set up with a common drill bit size, so I can swap pin vises without having to change the drill bits all the time. In any case, I have no trouble using drill bits as small as #80. I have drill presses, and there is a place for the power tools, but nothing replaces the ease of use of a basic pin vise.
-
As I recall, the old AL instructions were pretty generic. All the build info is derived from the plan sheets.
-
@TJM I see there are two versions of QCAD available. Are you using the regular QCAD Professional or is the QCAD/CAM version?


.jpeg.8dd761538fd0ccc1cf45cf952c1fffab.jpeg)
.jpeg.6c66c41ccb295ea68cd8d756721ec244.jpeg)