HOLIDAY DONATION DRIVE - SUPPORT MSW - DO YOUR PART TO KEEP THIS GREAT FORUM GOING! (Only 75 donations so far out of 49,000 members - C'mon guys!)
×

md1400cs
-
Posts
2,839 -
Joined
-
Last visited
Content Type
Profiles
Forums
Gallery
Events
Everything posted by md1400cs
-
 Nigel, I have been meaning to respond. You are much too kind. Your words, from such an artist as yourself, are wonderful. Thanks so much. I've actually finished them. I'll post some pics. Regards, Michael
 -
Karl, Thank you. Nice of you to visit. I have been, silently, following your Billings Vasa - Nice (:-) Regards, MIchael
-
Joachim, Capt. Steve, Matti, Mark, Dave, Nigel, Frank, Lawrence, B.E. Thanks for all of your very nice remarks. And a big thanks to all of you who clicked Like This, so nice of you to also let me know of your appreciation. I have been away for a few days and plan on getting back to the shipyard this week. Again thanks. Regards, Michael
-
Matti, Nice update on your masts. You captured the multi piece construction very realistically. What did you use for the mast wrappings? Regards, MIchael
-
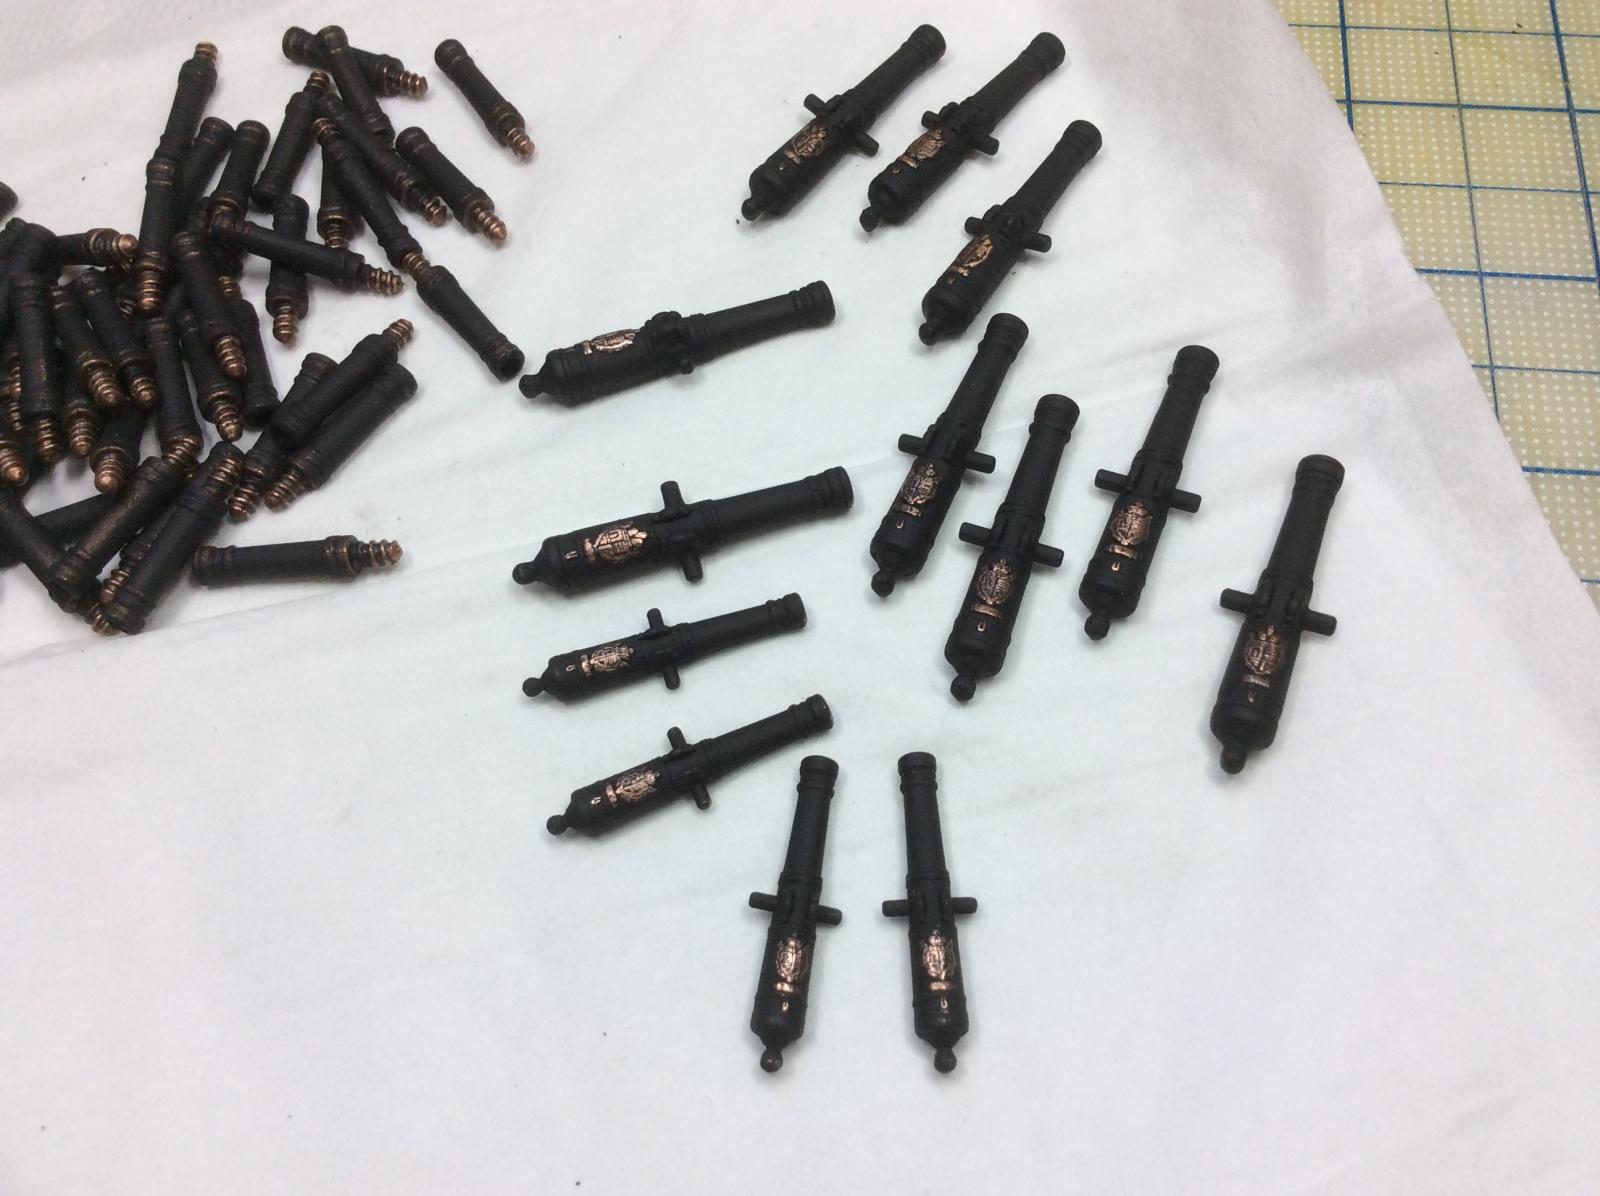
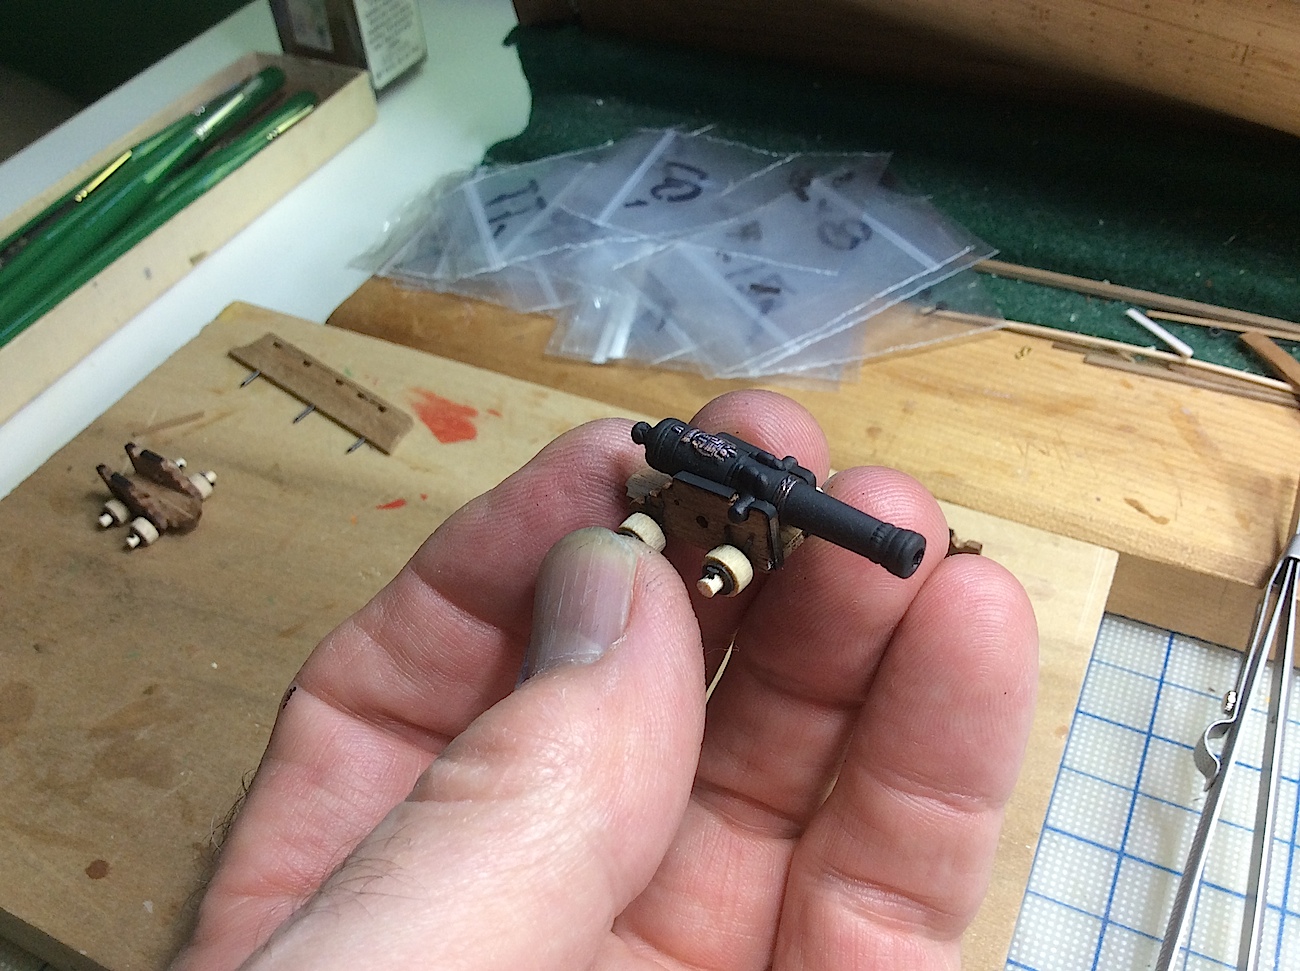
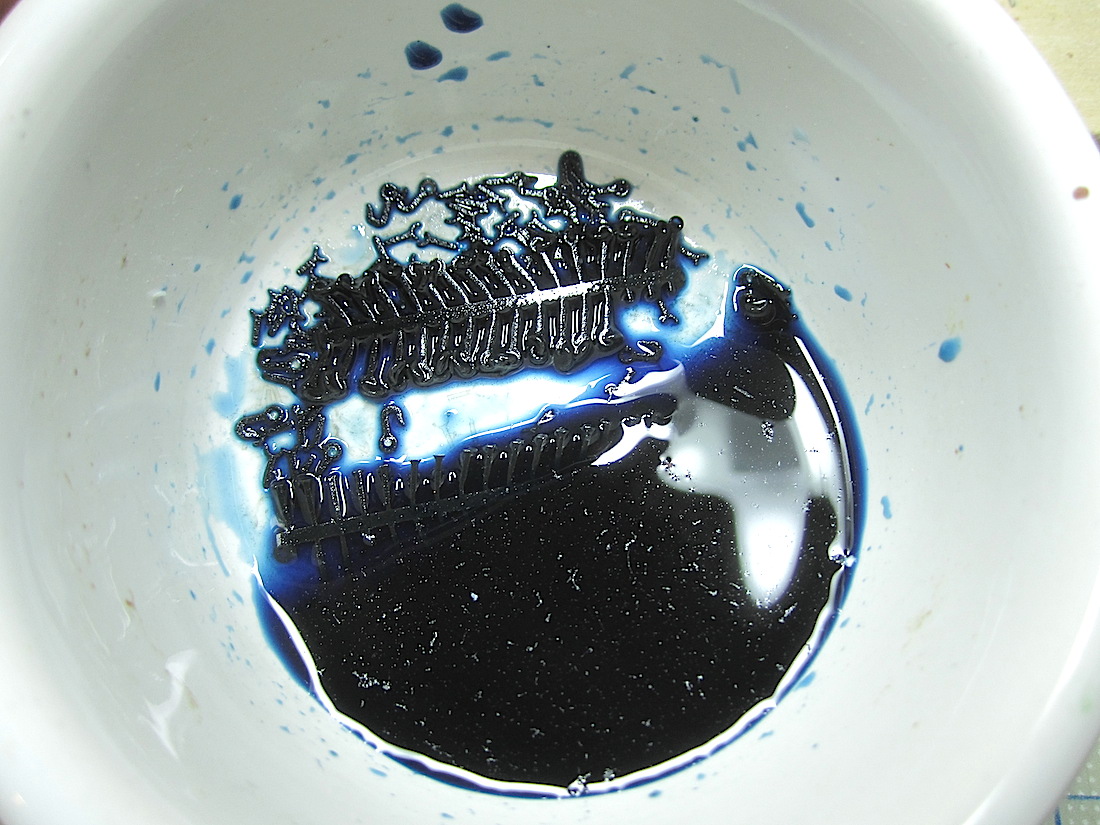
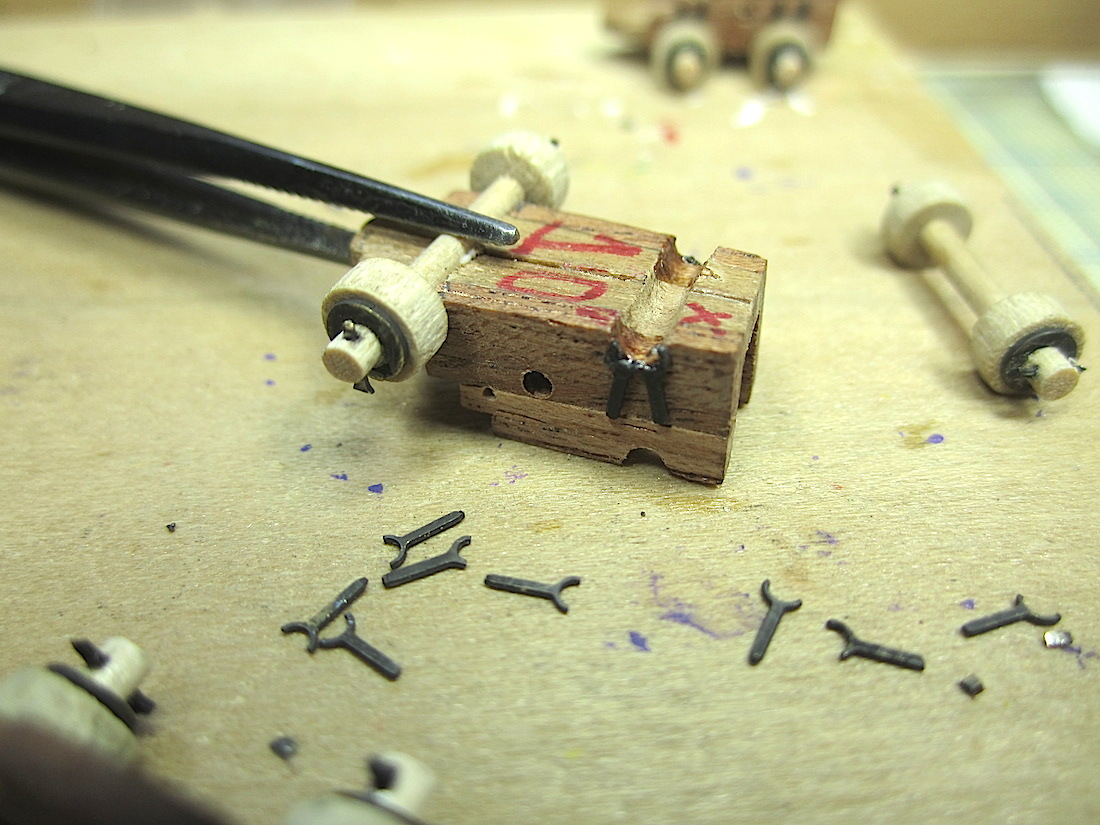
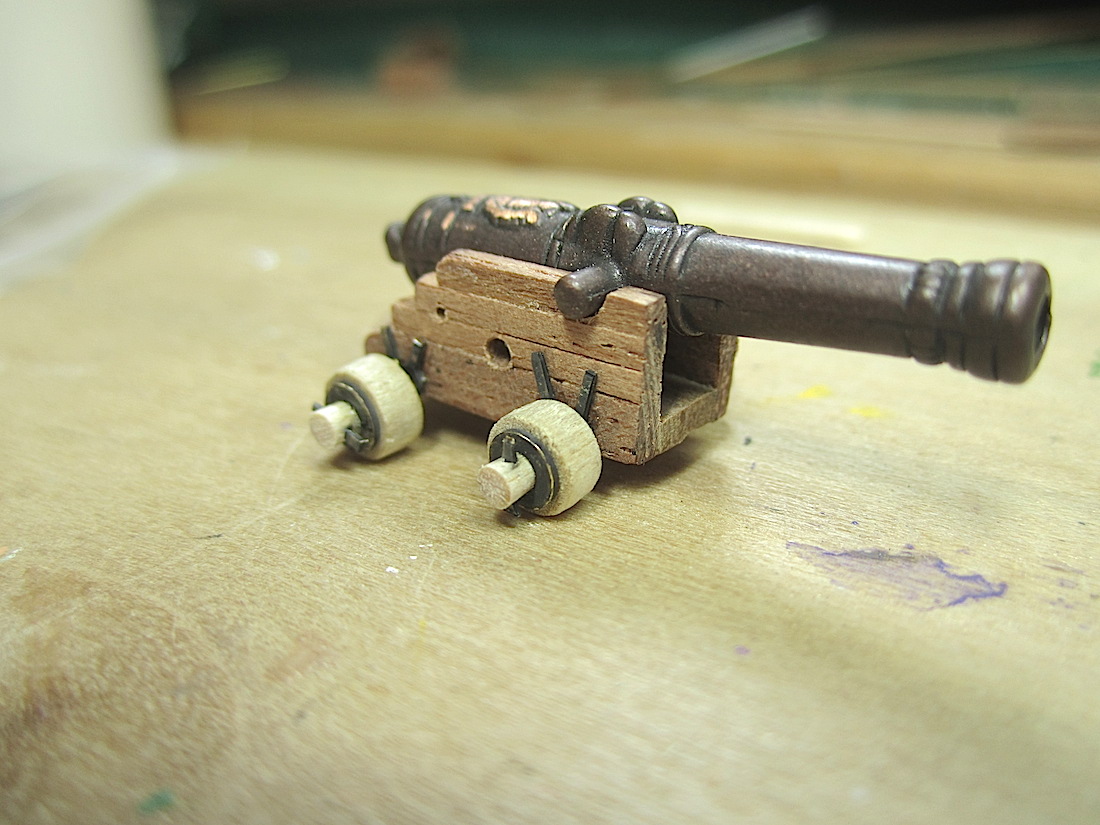
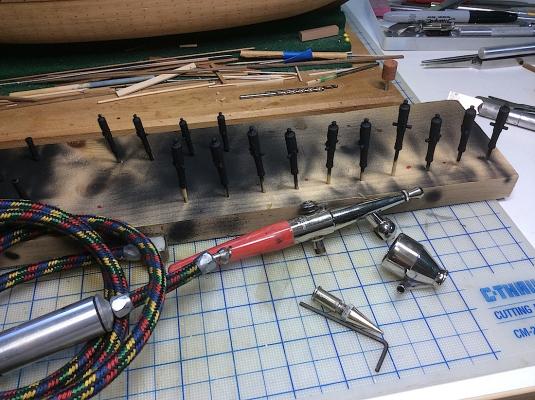
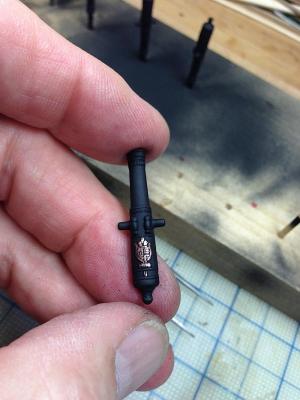
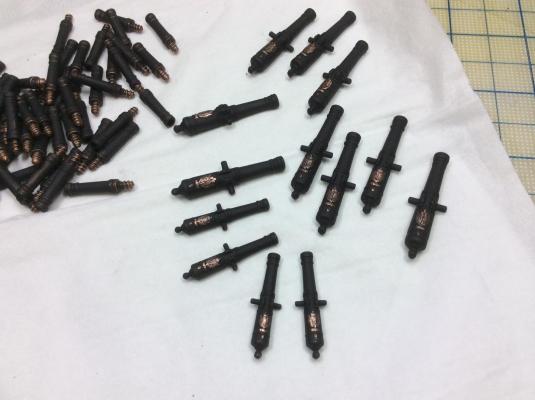
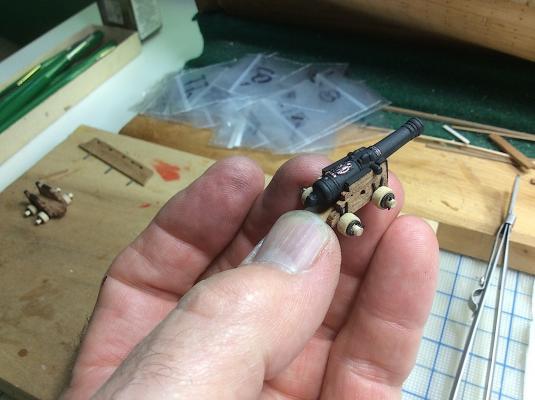
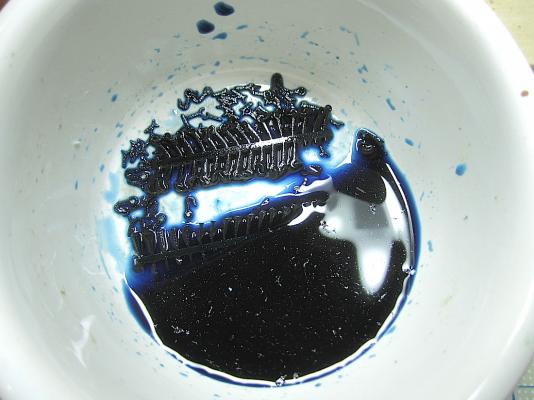
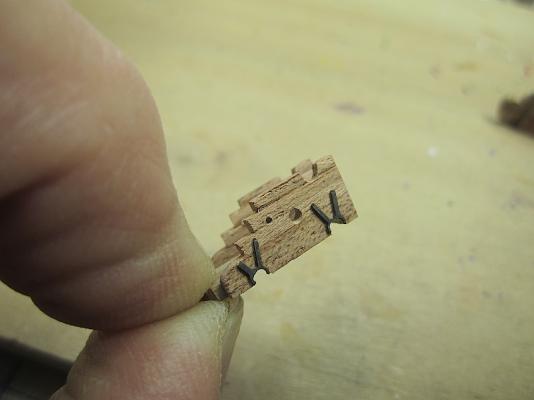
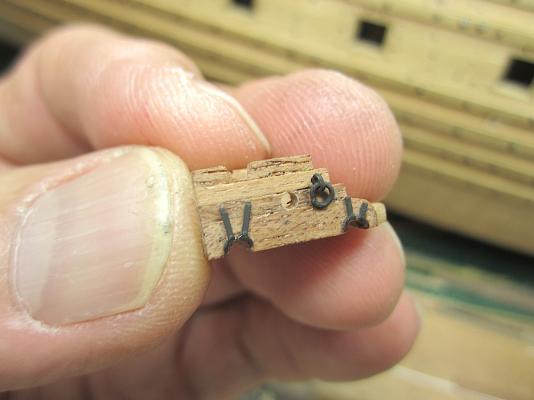
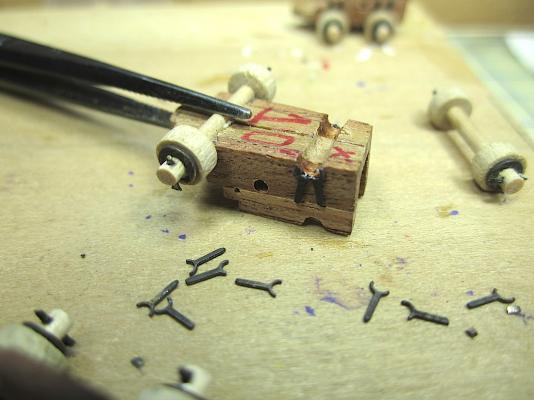
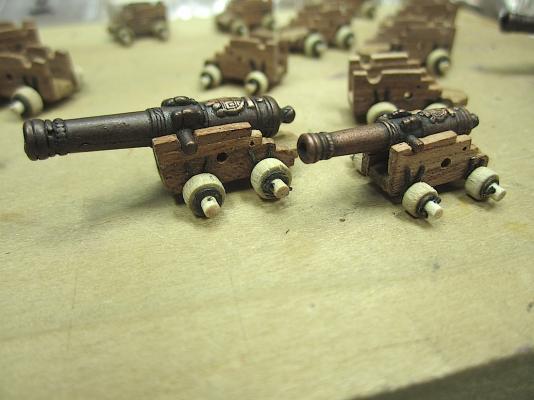
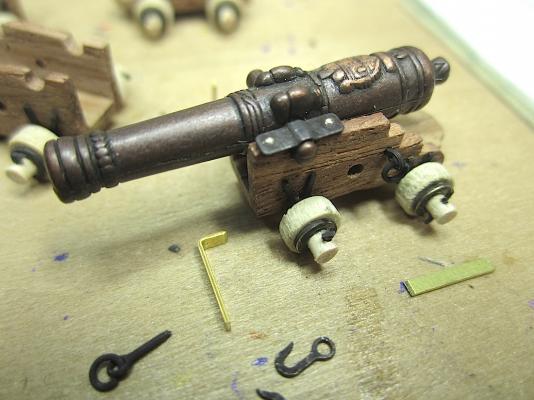
Hi Mates, Still working on those carriages. Here is a minor update. First pic. is of the upper and leading edge carriage metal frames after I chemically darkened the brass pieces. As I mentioned earlier each four piece set is specific a particular one of the 14 carriage. I then glued all of the pieces. Subsequently realized that the black chemical process did not allow the glue to adhere to the carriages. I had not washed off each small piece for fear of having them go down the drain, so glued them directly. Instructions do say "wash off" Hmmmm I then needed to scape off the glue sides to re-adhere the small parts. It would have been probably easier to paint them. Though I feared that over time the paint would peel off. Next was painting the cannon barrels. I initially chose a water-based paint made specifically for airbrushing. BIG mistake. Paint would not adhere after drying. I knew of this potential but was rushing myself. So after scrubbing off the first attempt at painting, I then used an enamel paint that needed to be thinned and was a bit messy at cleanup, but looks excellent. Next was scraping the emblems to bring out their details. Next steps will be to attach the cannons and add the upper restraining hinges, then on to the ropes/blocks. Again, thanks so much for visiting it is so appreciated. Regards, Michael


-
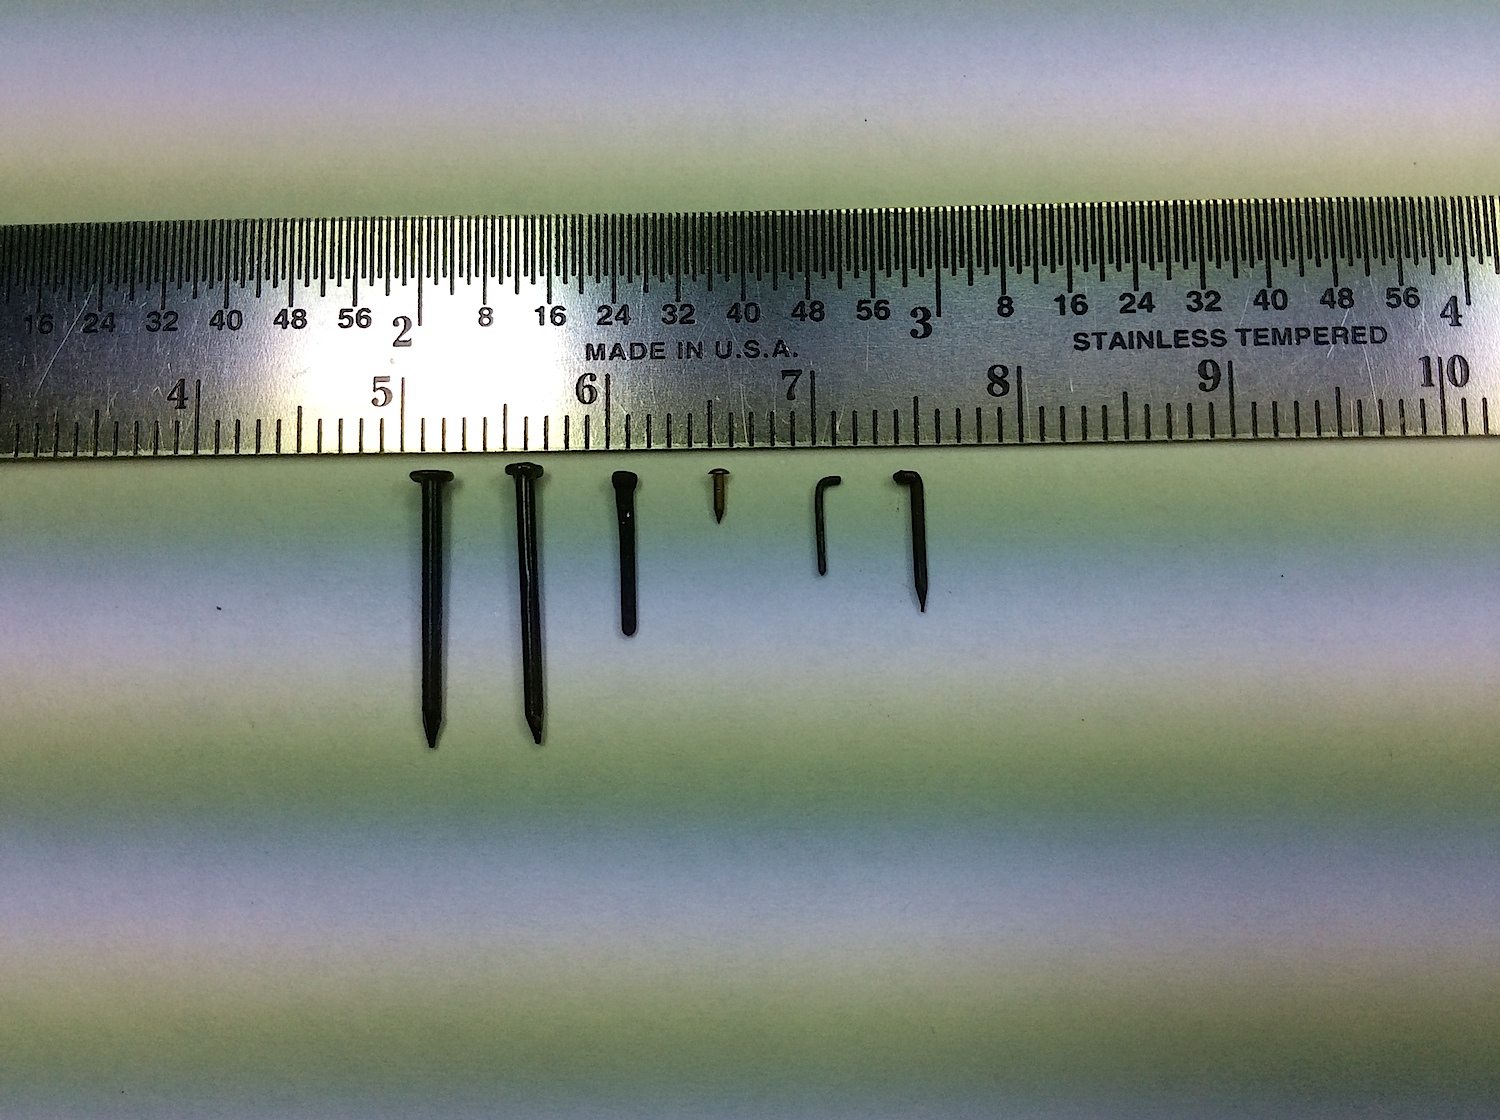
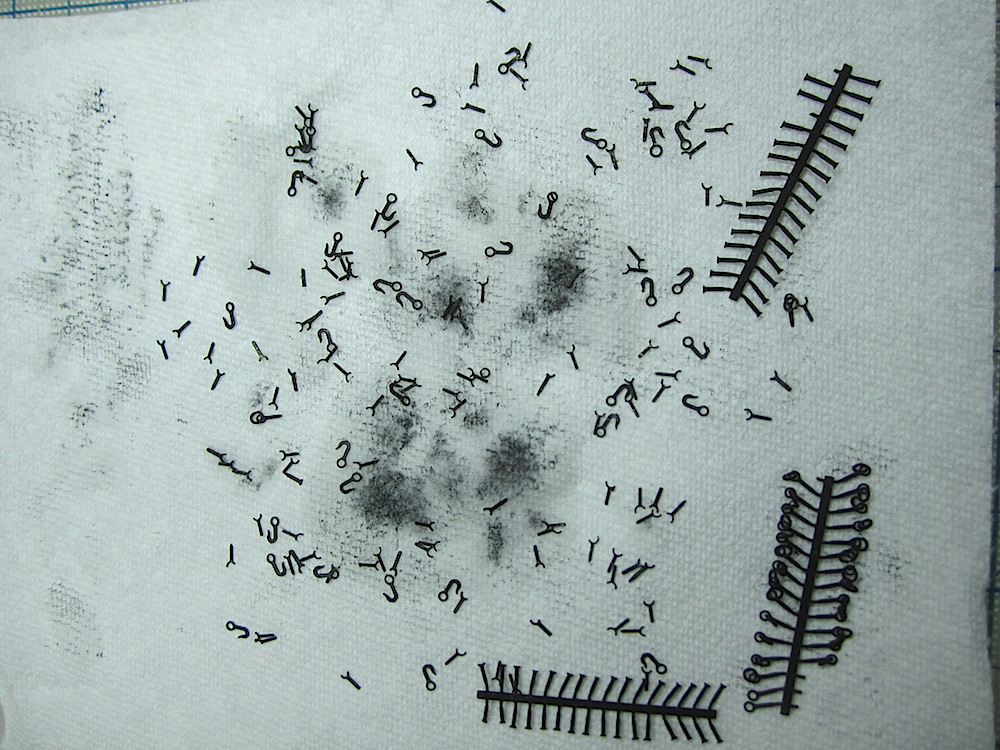
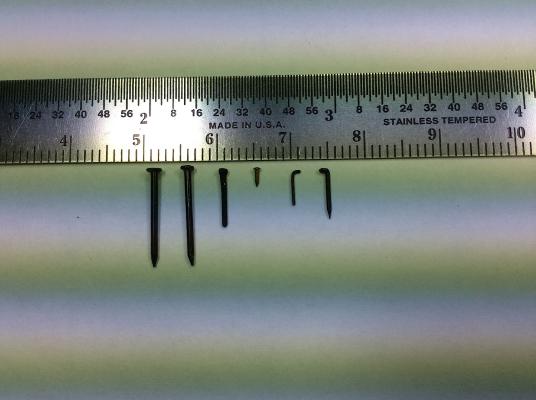
Jadzo, Thanks for your kind comment, and thank you for following my build. Very nice of you. Here are all of the nails that I have used on this build. I sourced these through Model Expo and Micromark. The third nail from the left is brass that I chemically turned to black. I hope that this is helpful. Regards, Michael
-
GTM, BEAUTIFUL work. Your cannons, carriages and corresponding blocks and ropes are so well replicated. You have also given me some ideas. Thank You (:-) Michael
-
Lawrence, Thank you. Its always nice when you visit. Appreciate your very nice thoughts. Michael.
-
Zy, Welcome back. Good news about your dad, thanks for sharing. Even better about you not disappearing (:-) Ship looking very good indeed. Michael
-
Frank, Thanks always appreciate your kind visits. Michael
-
Frank, Your cannons look great. I also like your rope details. Your vertical pulleys are so well replicated. Nice details. Looking very good. Michael
-
Frank, Thanks so much. I have seen some of your other beautiful ships, so coming from you this is a very nice compliment. These postings keep me trying to improve my skills (:-) Michael
-
Nigel, Thank you for your advice. I have installed all of the axles so too late. Your, so simple but too "out of the box" for me, suggestion will stay in the memory bank for next time. And as always so much appreciate your posts and very kind thoughts. Michael
-
Ferit, OK (:-) may have missed it, but thanks for stopping by. Michael
-
Matti, thanks for your nice thoughts. I'm happy that you visited, I had not heard from you in such a long time. Very nice. Michael
-
Joachim, Hello again. Very happy that you visited. I have missed your own build updates and now understand. Welcome back. I hope that everything at home is again ship-shape for you. I appreciate your comments as well Michael
-
JanV, Good luck with your home sale. It is always nice to look forward to having more space. Also your hobby room will be organized as you want it to be. Nice rudder work (:-) MIchael
-
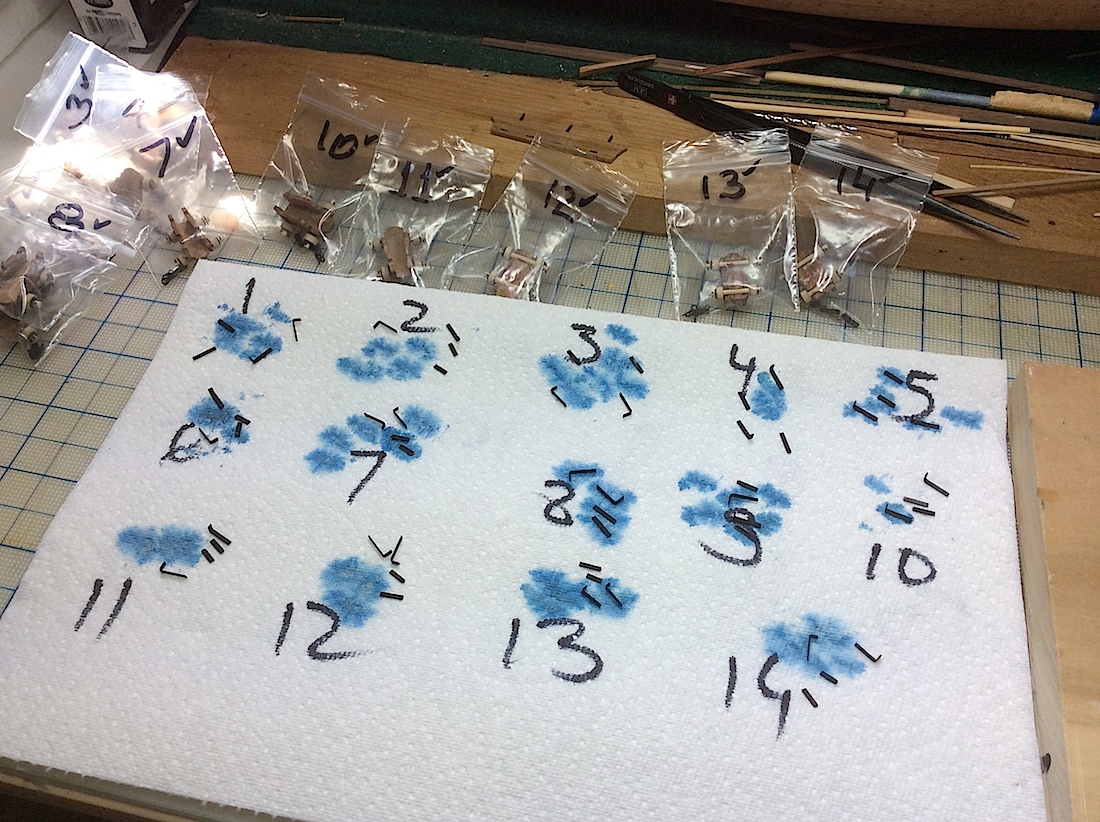
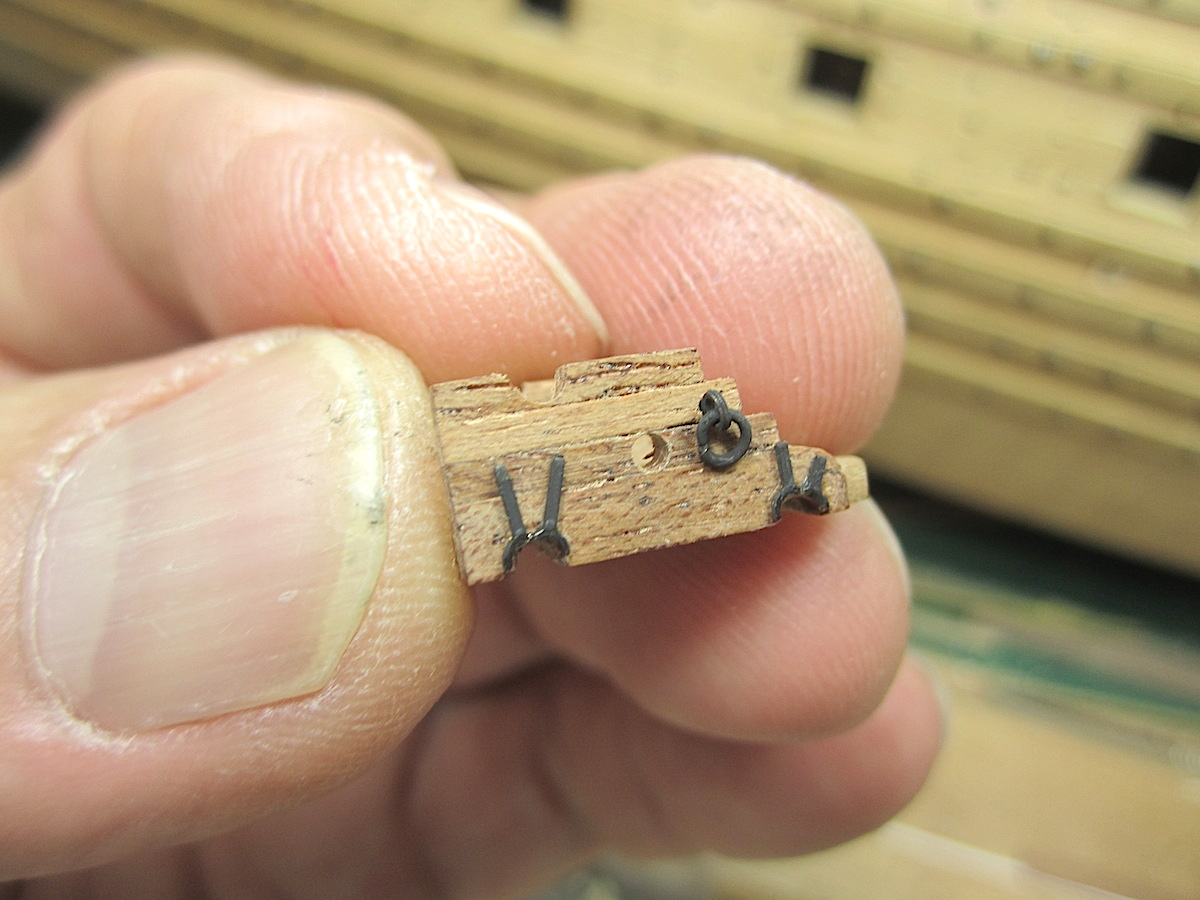
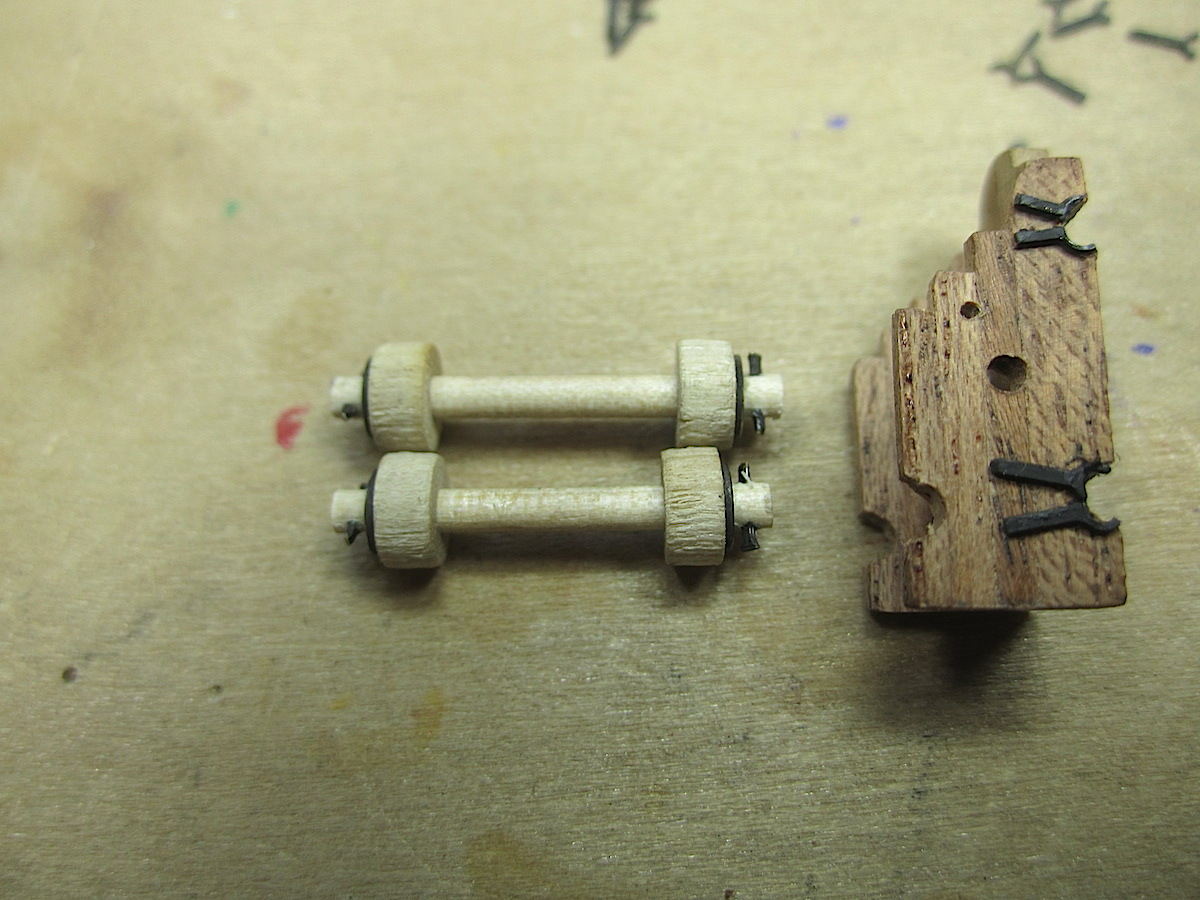
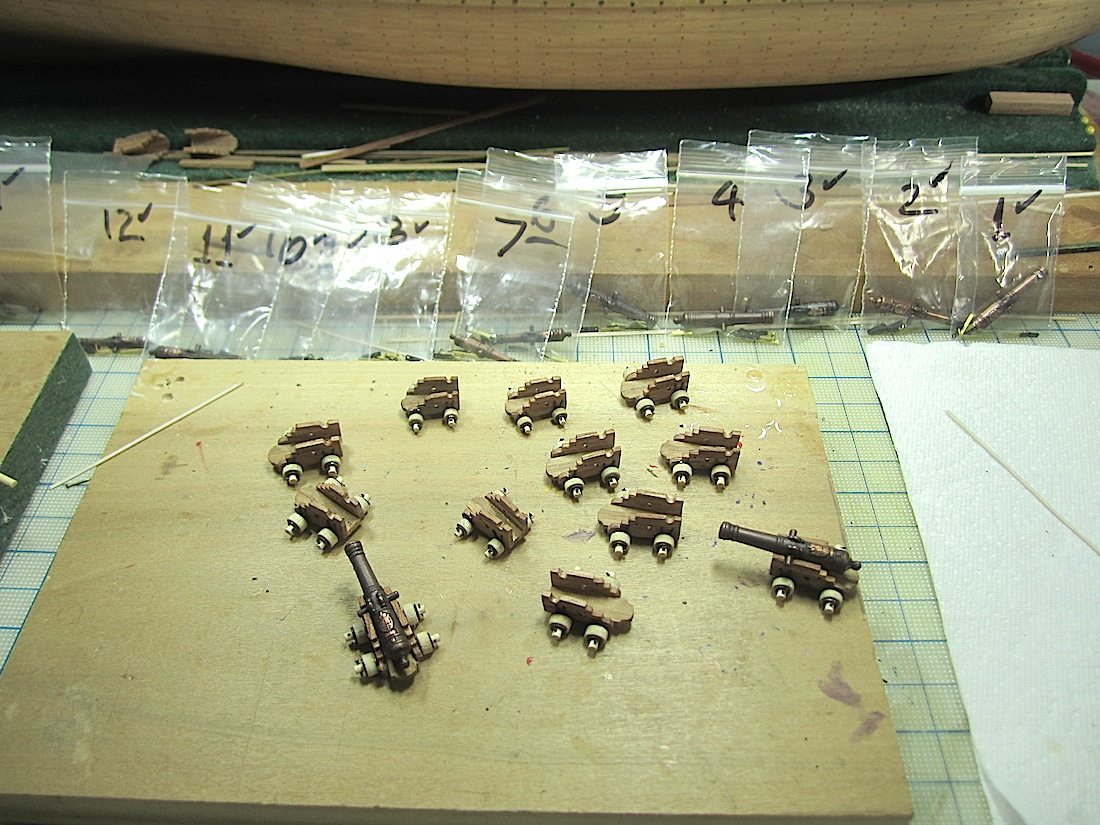
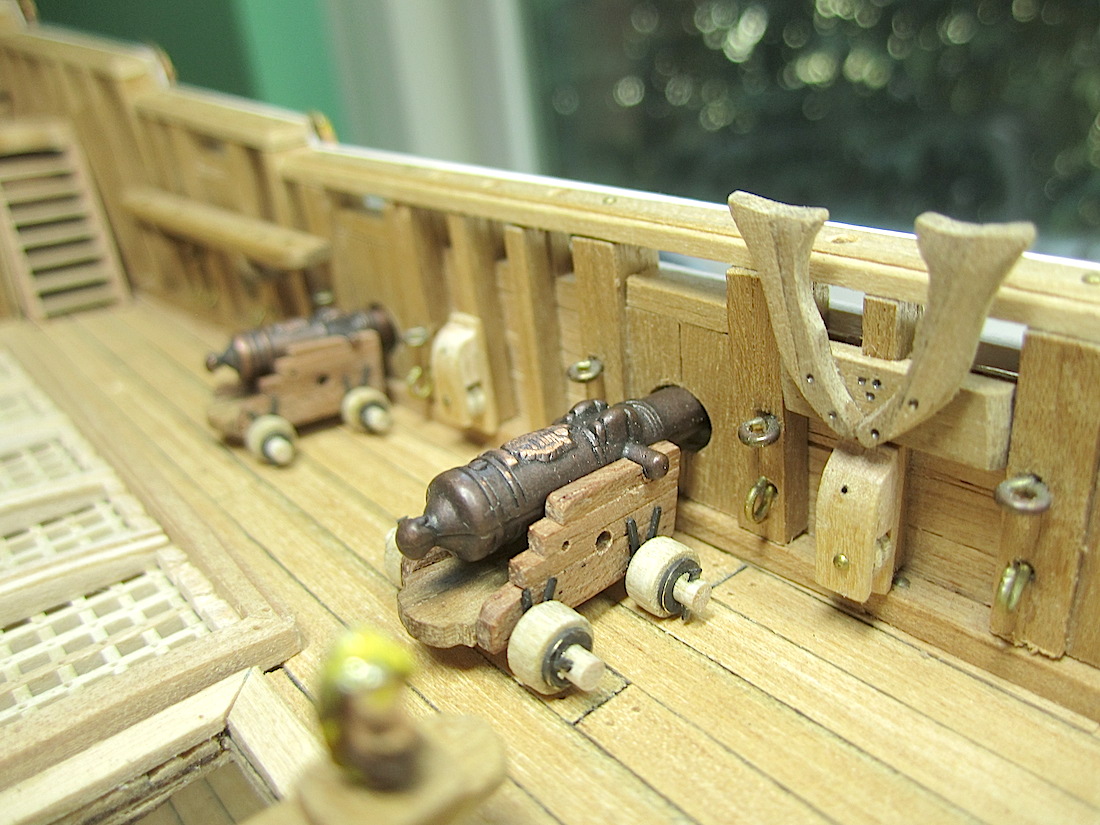
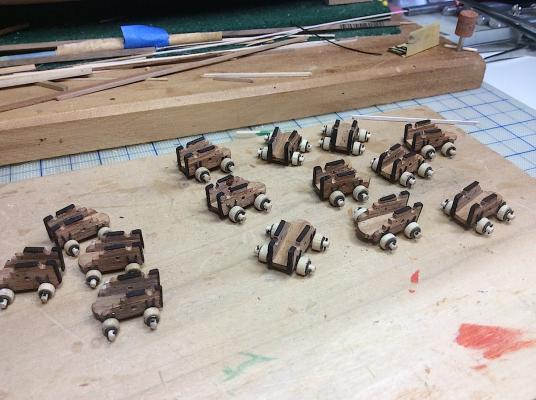
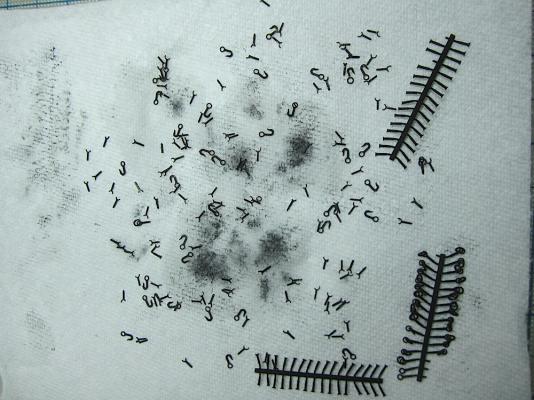
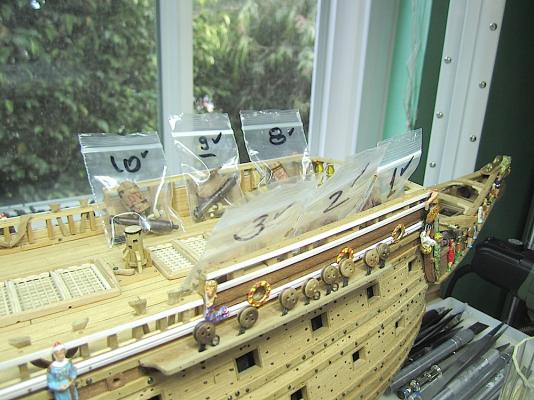
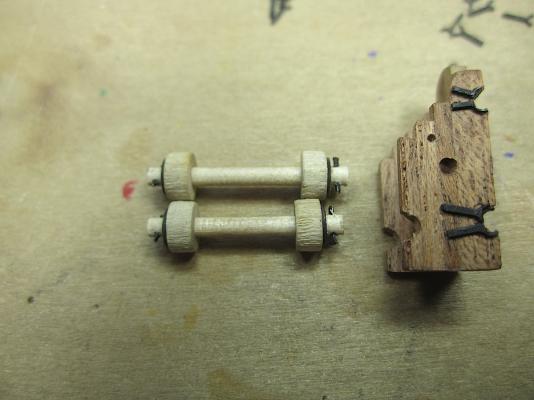
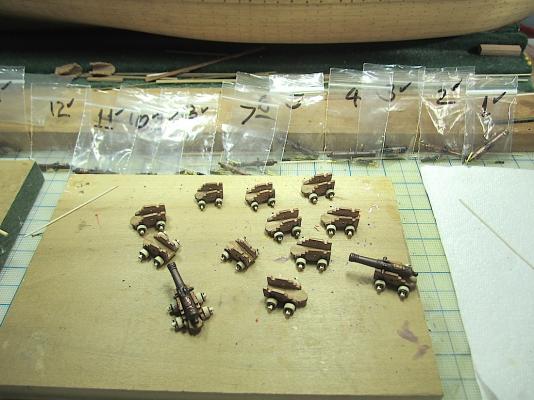
Hi Mates, Here is an update on the cannons, very laborious, but moving along. The carriage wheels are finally completed and installed. Some notes; As you may have noted from previous posts I used small rings with stems to create the axle braces, cutting the ring parts. I cut and adjusted all 112 individually, then glued them with a tiny bit of Gorilla white wood glue. Once they "set", I then added CA glue at the very bottoms for permanent adhesion. Note the shinny bits at the axle groove tips. The wheels will hide these smears. Each carriage had to be size adjusted for my inconsistent cannon deck port heights. Hmmm. So numbered each one, after adjusting the carriage heights, and slipped their corresponding parts into small zip packs. Next step is to blacken the metal upper frames which are presently still bright brass. I want to use the chemical, but think that painting might be faster because I need to airbrush all of the cannons (including the lower and upper "dummies" black. So I might do this all at once. I haven't used my Paasche in so many years, I was surprised to find my air pump still working (:-) This will be followed by drilling small holes at the bottom center of each carriage to allow for a set nail when attached to the deck. Lastly, the blocks, hooks and ropes will be attached. PS: I think that my axle pins are too far away from the washer Drat !! Michael


-
Nigel, Your work just keeps getting more and more beautiful as you go along. Michael
-
what is the ideal modelling table?
md1400cs replied to AON's topic in Modeling tools and Workshop Equipment
A table at which my sweetheart won't start dusting and arranging items all over the place. Michael -
Ulises, Do you have a connection to "Pandora's Box", you sure opened one.? I thought that I would spend a few minutes here, but got totally involved in the back and forth well worded and thoughtful diplomatic posts. Very enlightening thread. PS: PayPal is awesome IMO. I can't remember the last time that I actually wrote a check. Love electronic banking as well IMO. MIchael
-
Mark, Excellent work. Your rigging details are so nice. Your ship is really coming along. Nice update. Michael
-
Nick, Happy to have looked in on your Mirage. Looks excellent. Beautiful hull, bow planking. Nice. Michael
-
Ulises, I've been away and just catching up. Whoa, you are moving along at a very fast pace. Your shipyard must be filled with workers (:-) Your start looks excellent. Nice work. I have always loved this beautiful ship, but it has always intimidated me. Now that I have learned, and improved my skills, and now after following yours I am very tempted to put one under my table. Brian was mentioning something about an improved kit. Is yours the current issue? Also are the metal pieces well replicated? Is the instructions book very good? I think that the photos used for the kit box are of an improved example built an outside party. Do you know something about this? (lo siento por todas las preguntas mi amigo) SORRY for all the questions my friend. Nature Coast hobbies has it listed at $699 USD. I'm tempted to order one, that seems super cheap. Yours looks as though it will be a beautiful example of this super detailed ship. I'm enjoying your updates. Thanks in advance, Michael
- 786 replies
-
- 1
-

-
- Royal Louis
- Finished
- (and 1 more)