Supplies of the Ship Modeler's Handbook are running out. Get your copy NOW before they are gone! Click on photo to order.
×

md1400cs
-
Posts
2,836 -
Joined
-
Last visited
Content Type
Profiles
Forums
Gallery
Events
Everything posted by md1400cs
-
 Karl, Most of us are waiting for the upcoming Vasa rigging bible Vasa II. Fred is hoping - by the end of this year, we shall see (:-) In any case this will be the "last word" regarding all of our rigging questions. Ulises is right check the link. Fred Hocker has listed all of the chapters that will be in the Vasa II book. Your work looks excellent by-the-way. Michael
 -
Rodger, Been thinking about your build and found this. FYI, though I think that your build details suggest that you have good source material. But just a thought. http://www.amazon.com/Mississippi-Steamboat-Era-Historic-Photographs-ebook/dp/B00A73AQGS/ref=sr_1_1?s=books&ie=UTF8&qid=1408471778&sr=1-1&keywords=mississippi+steamboats Also available at ModelExpo Regards, Michael
-
Roger, Beautiful exacting work. Glad I found your build. I will follow along. Enjoy your R&R, we have certainly all felt that way. Much better to continue when your positive emotions are feeling "it". Helps to produce much nicer work. And it stays fun. Regards, Michael
-
Frank, As usual thanks for your visit and kind words. Michael
-
Joachim, Again thanks for your continued encouragement and support. I have learned a lot from you Michael
-
Edwin, You are so kind with your super compliment. Thanks so much, so appreciated. Michael
-
ROYAL CAROLINE 1749 by Doris - 1:40 - CARD
md1400cs replied to DORIS's topic in - Build logs for subjects built 1501 - 1750
Doris, Such a beautiful work of absolute perfection. You are an amazing artist (:-) Regards, Michael- 883 replies
-
- 1
-

-
- royal caroline
- ship of the line
- (and 1 more)
-
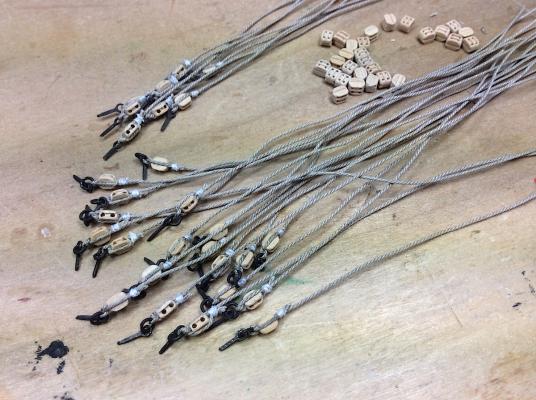
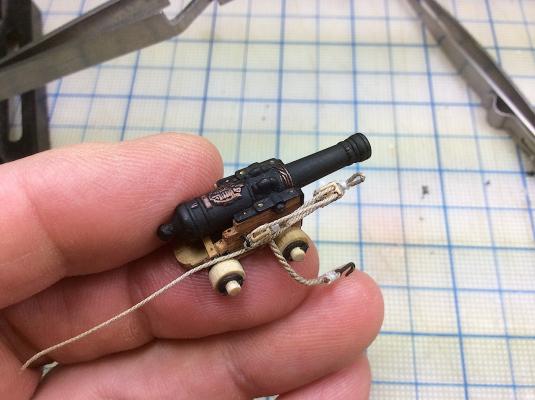
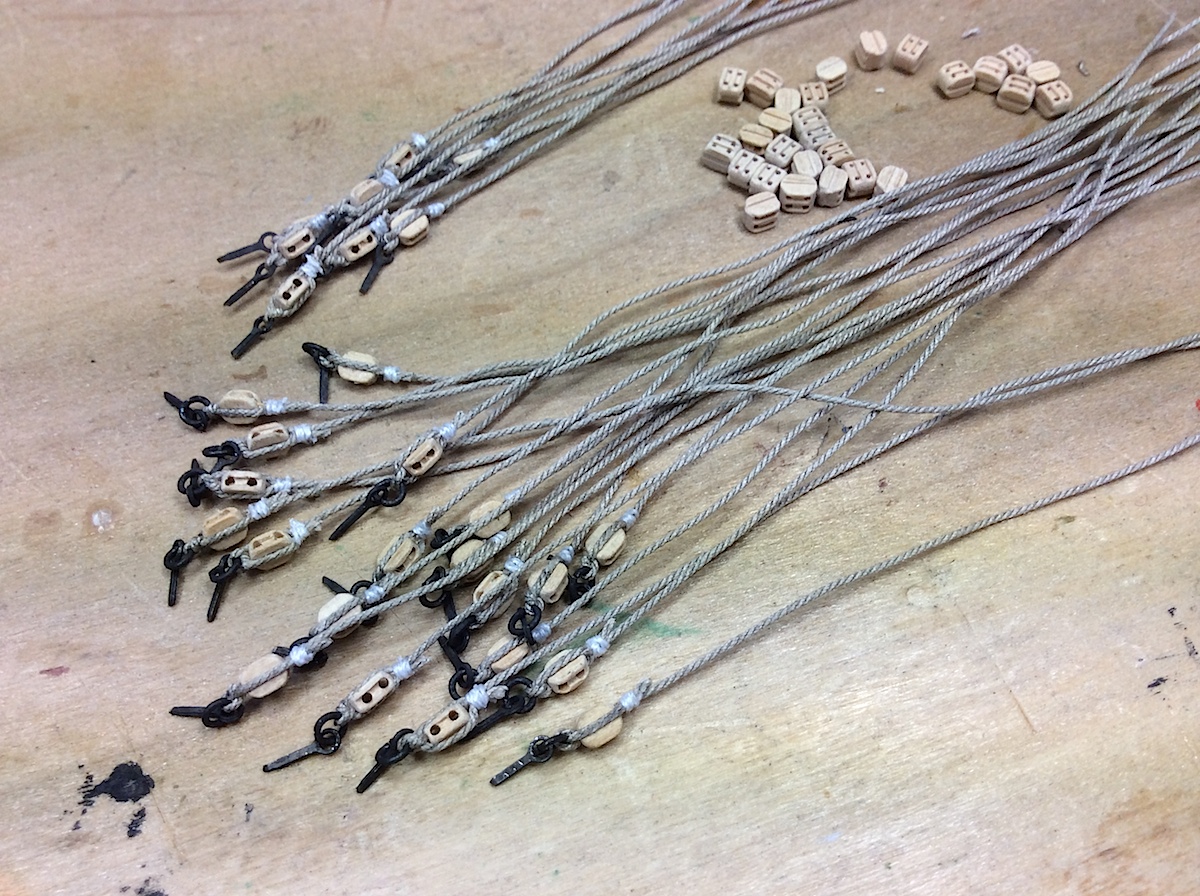
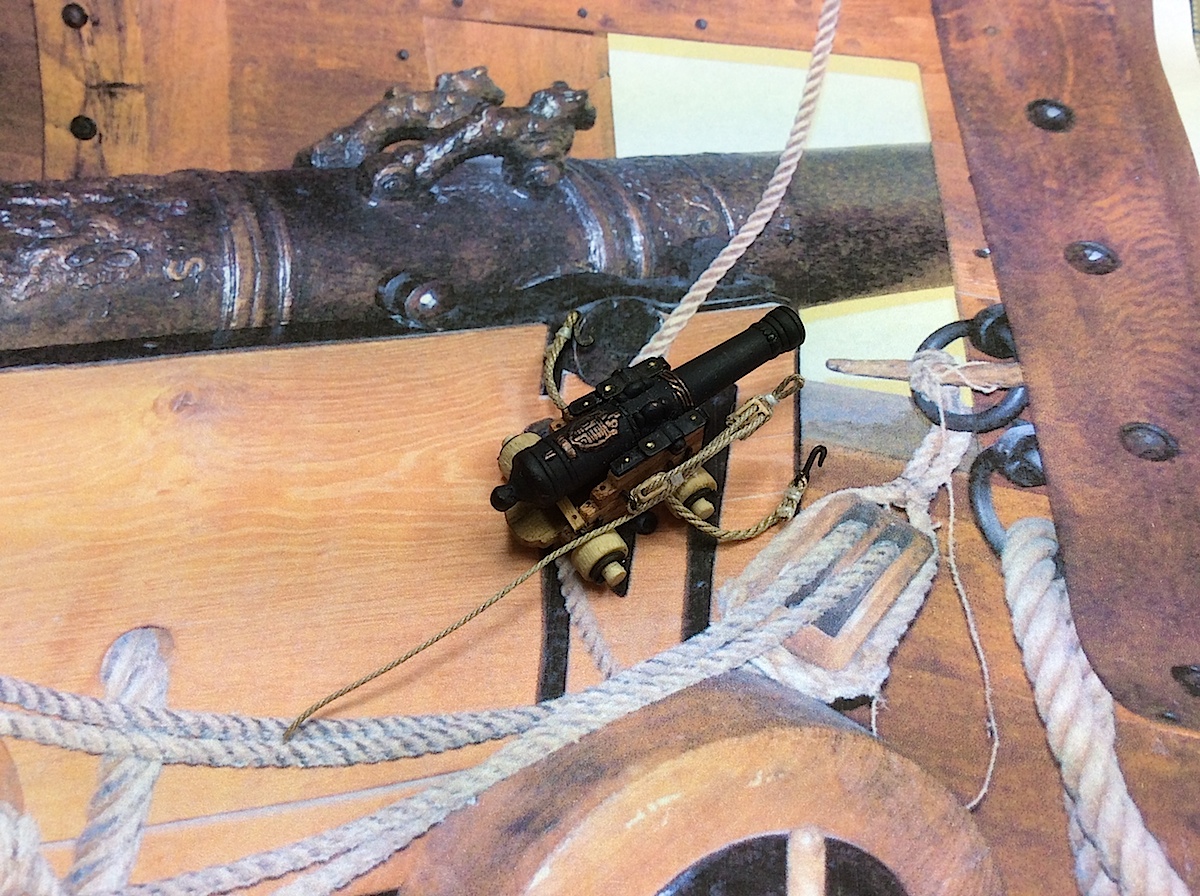
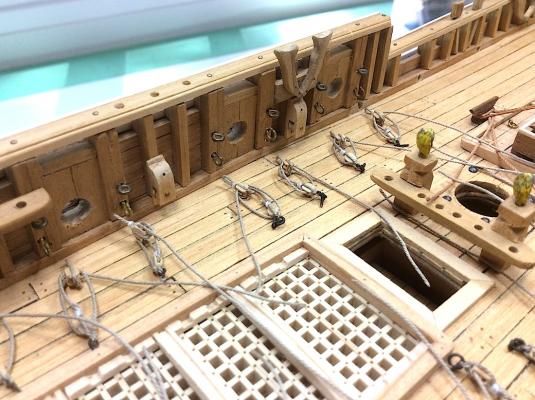
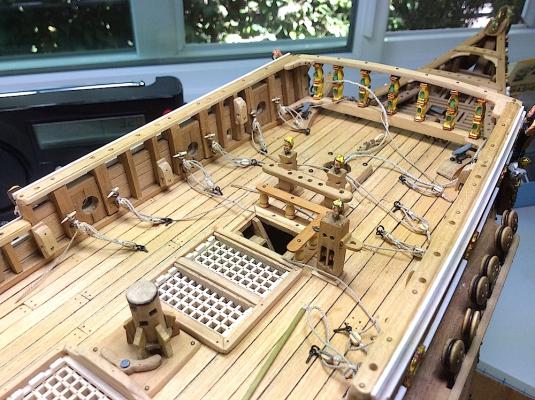
Hi Mates, Continuing onward with the carriage ropes and tackles installation. After trying to install one completely assembled carriage with ropes attached, I found it to be too cumbersome and a pain in the @#&. That wasn’t going to work very well. Space was so limited and I needed to also, just below the upper blocks attach the hooks for the carriage stops. Too messy hmmm…. So, plan B; I completed all the rope/block assemblies for the14 carriages. Then chose to attach those to the weather deck first. Made a small hook so basic but so perfect ha ah… Sliding in the cannons, then attaching the pins to each side of the carriages will be a breeze (I think). I can then adjust the ropes and tackles for a tight fit. Have not decided how to display the left over rope lengths. The Vasa museum sort of hangs the excess on hooks near the rear of each carriage side. I’m short on length of the carriages, as they had to be shortened (Corel kit weather deck too narrow). As noted from the just previous post, I wanted to emulate the 1/10th assembly with the use of small wooden pins. Used tooth pics. The results are acceptable, but I find that the scaling is a bit “off” My error, but still achieved the intent. Again thanks for dropping by and the Likes and comments always a pleasure. Regards, Michael


-
Joachim, Very nice build. Looks excellent. That one was The famous one. PS: That book I mentioned is about vampires, so if that is not your style of storytelling.....Little mention of the workings of the ship. It is used as a setting. Though Martin does a nice job of describing what life on the Mississippi must have been like in the 1850's. Michael
-
Joachim, Very very first class. I noticed a Mississippi steamer box. Built or waiting in line? I have one of those on my "romantic times" wish list for later on.....I can just imagine how amazing your build would be of this very detailed type of boat. I'm currently reading a novel, which mostly takes place aboard one of these boats in the 1850s (George RR Martin Fefre Dream) I, along with ten's of millions, am waiting for his sixth book in the A Song of Ice and Fire series.....So in the meantime reading an old book of his. There may be a few dead people on board as well. Regards, Michael
-
Frank, Nice work on those hinges. Doors will look great once installed. Regards, Michael
-
Joachim, Nice detailed updated work, I also love your "shipyard" wonderful looking space. How nice that must be (:-) Michael
-
Mark, Glad that some of my themes were useful for your build. Our hobby is very symbiotic. You might call these folks. https://www.billingboatsusa.com/search?orderby=position&controller=search&orderway=desc&search_query=wasa (Hmmm their Vasa is sure cheap) I had the same idea as you, and I did find a company that sold the plastic bits separately within their plastic frames as single sets. I decided against it and removed the link from my "favs. Nor do I remember the retailer's name. It could be that Billings sells those, see link. A call might be the answer. You can identify the needed sets by downloading a pdf of the instructions from here. There are two parts located at the first and last row. The plastic bits are noted and numbered easy to see what you may want. http://www.billingboats.com/download.html Cheers, Michael
-
Mark, Such a beautifully finished masterpiece. A treat for the eyes, but then ALL of your builds are masterpieces. With the Vasa you also captured all the very difficult and complex details. Especially, and including the almost impossible white scalloping details of the stern galleries. Big congrats to you ...just lovely..... PS: It would be fun to see what you could do with Corel's Vasa..hmmmmm (:-) PS2 Your SOS is The one that I aspire to, but not "quite there yet". Michael
-
Kostas, Came across your build. So lucky to have found this. Awesome build and to think that this is your first build, well ....Oscar winning build (:-) Regards Michael
- 76 replies
-
- 1
-
-
- san juan nepomuceno
- artesania latina
- (and 2 more)
-
Nice Frank.... Lot's of space, that is a premium for many of us based on pics that have been shared. Great exhaust/dust setup. Really first class, except for that square heavy glass box. Is that a TV (:-) (:-) Haven't seen one of those kind in years ha ha..... Regards, Michael
-
JanV, BRILLIANT idea.... MIchael
-
B.E, Thank you. Your art is one of those to which I wish to aspire. Thanks (:-) Michael
-
Ferit, Thanks so much for your encouraging words. Still learning, but it's feeling good so far. Michael
-
Ulises, Nice progress. You are working at very good pace. She'll probably be masted before Dia de los Muertos. ha ha Su Amigo, Michael
- 786 replies
-
- 1
-
-
- Royal Louis
- Finished
- (and 1 more)
-
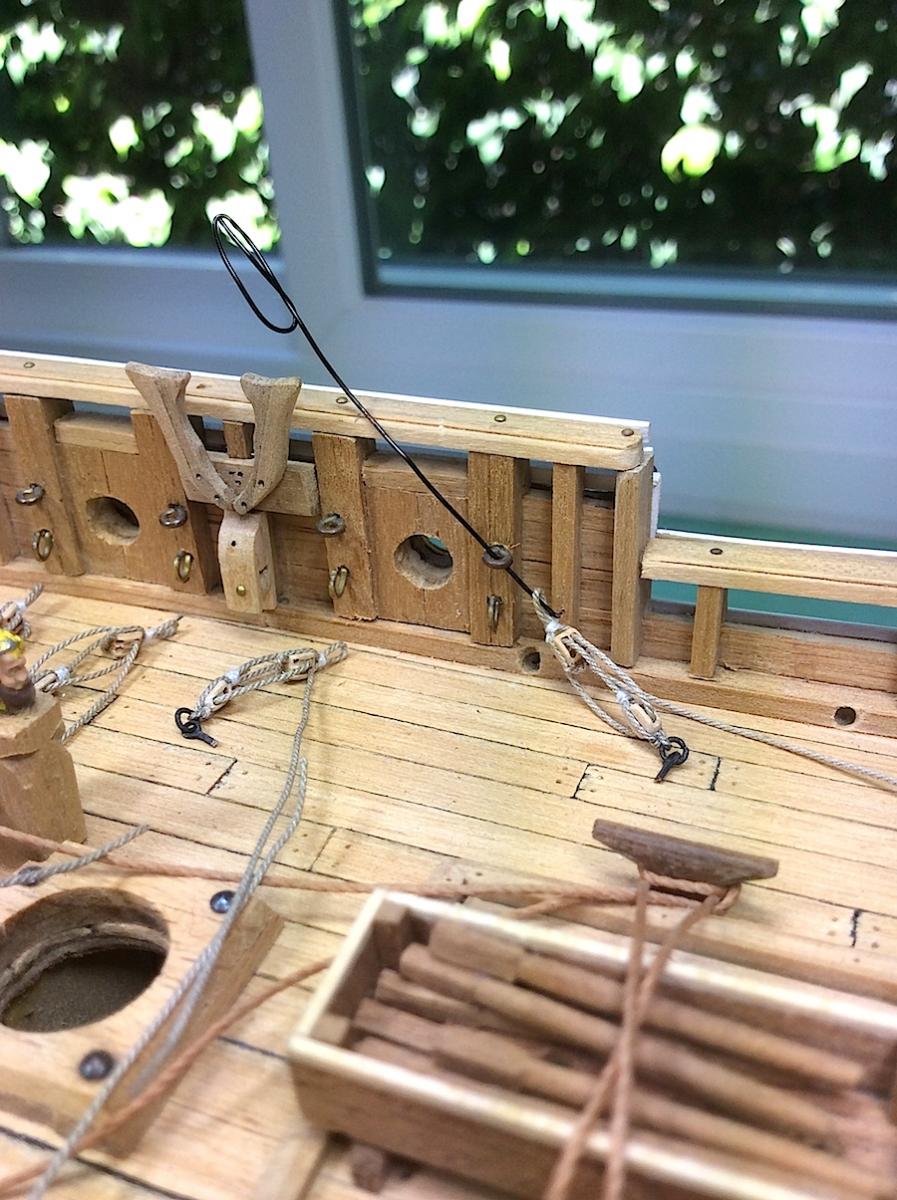
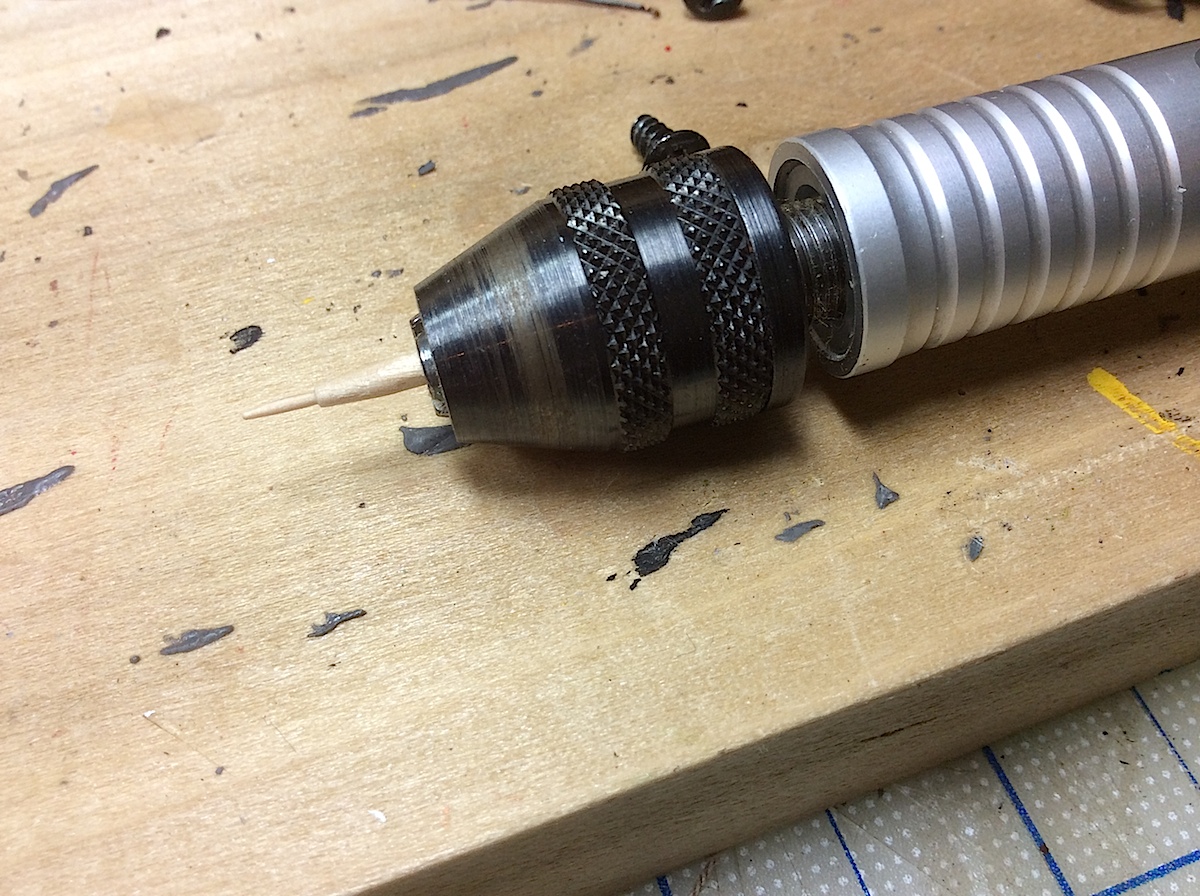
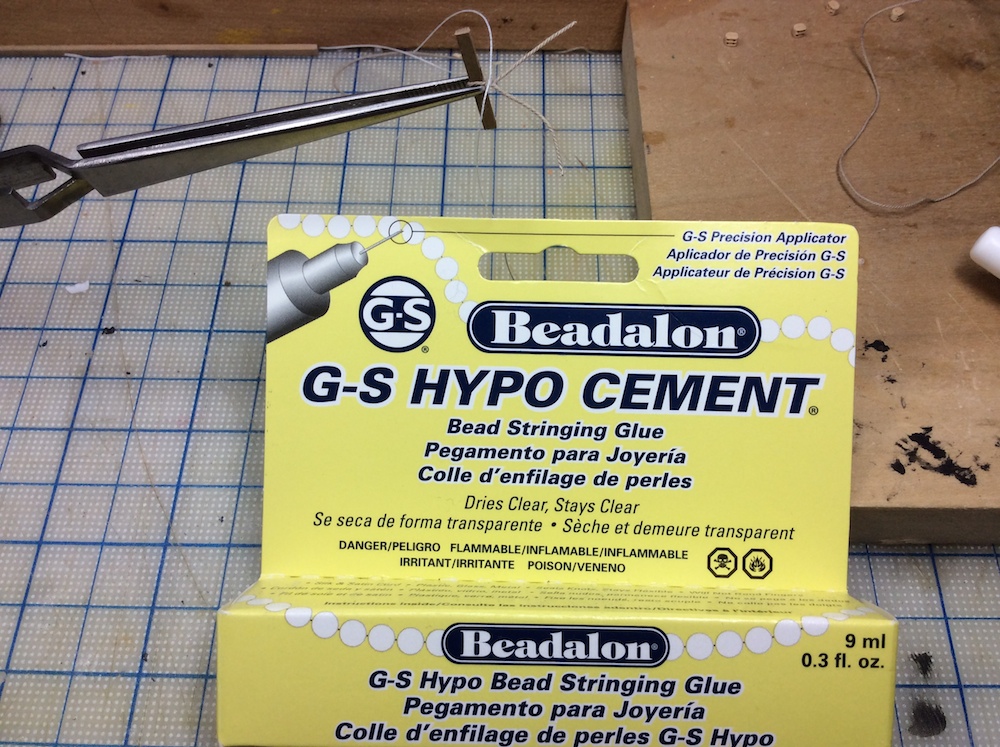
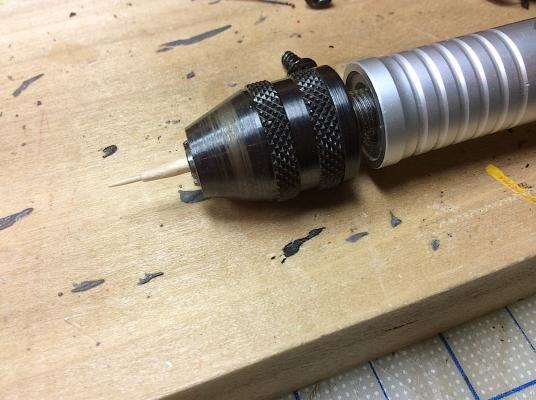
Dave, Thanks for your visit and kind words. I do not use CA. I have found it to be difficult to use when working with ropes. I instead use, with excellent results, GS Hypo Cement. I discovered this following Ferit's beautiful Berlin (AlphaUrsaeMinoris) This glue dries clear and is, for-all-intense-and-purposes, invisible. The applicator has a tiny needle-point (perfect), and its cap also has a needle that inserts back into its shaft for closing. This allows the glue to always come out when needed. AND this product dries quickly, but most importantly is super friendly to your fingers. CA, by comparison for this task is a mess. For threading the pulleys I add a small drop to the end of a rope, twist my thumb and forefinger creating a straight rope tip. After the glue dries pulleys are easily threaded. The pulley pic is just after application; it will dry totally clear and create a super firm bond. I can easily trim the ends right down to the buds without fear of knots coming apart. Highly recommended. Super find!!!! Thanks Ferit. Regards, Michael


-
Frank, Nice work on the davit. Thanks for posting the measurements. I went back to check mine and, as I thought looking at Landström's drawing, mine are too short. I will use your measurements and re-cut mine. I will also follow your lead and only install one. Nice research. PS: regarding mounting it Hmmmmm Mark is certainly right (:-) but in your case very understandable. Regards, Michael
-
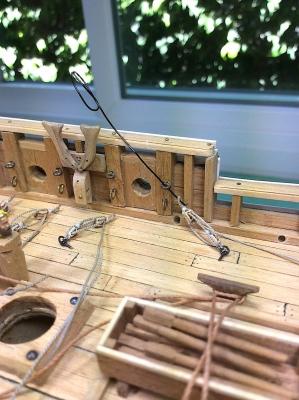
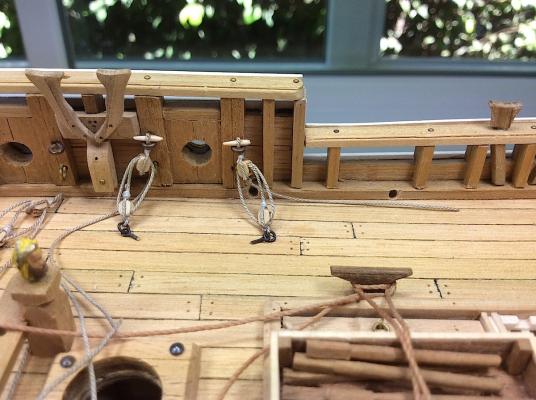
Hi Mates, A small update. Finally working on the carriage pulleys and ropes. What I thought would be monotonous has in fact been fun. I worked out, I think, a way of attaching the double pulleys to the weather deck in the same fashion as seen on the Vasa museum carriage reconstruction. I will work with bits of toothpick ends to fashion the braces. Kudos to Syrene for Chucks excellent ropes and pulleys (:-) Thanks so much for all of the "likes"as I slowly move forward...... Regards, Michael