HOLIDAY DONATION DRIVE - SUPPORT MSW - DO YOUR PART TO KEEP THIS GREAT FORUM GOING! (Only 20 donations so far - C'mon guys!)
×

md1400cs
-
Posts
2,839 -
Joined
-
Last visited
Content Type
Profiles
Forums
Gallery
Events
Everything posted by md1400cs
-
 Nigel, Thanks again. I will keep this jig, I was going to toss it. You are right i would certainly regret it. As they say,why re-invent the wheel again and again. Michael
 -
Frank, Thanks much appreciated. Yes Nigel's help was brilliant. Michael
-
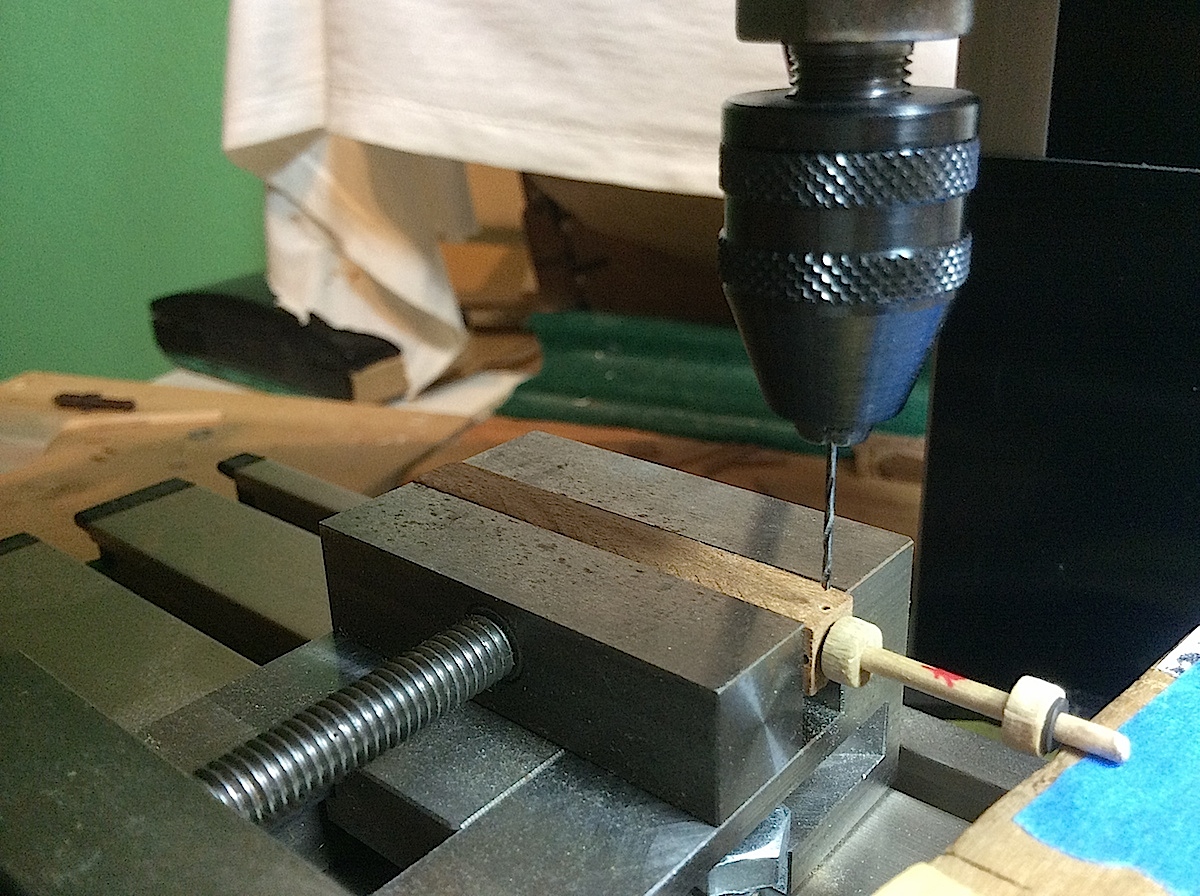
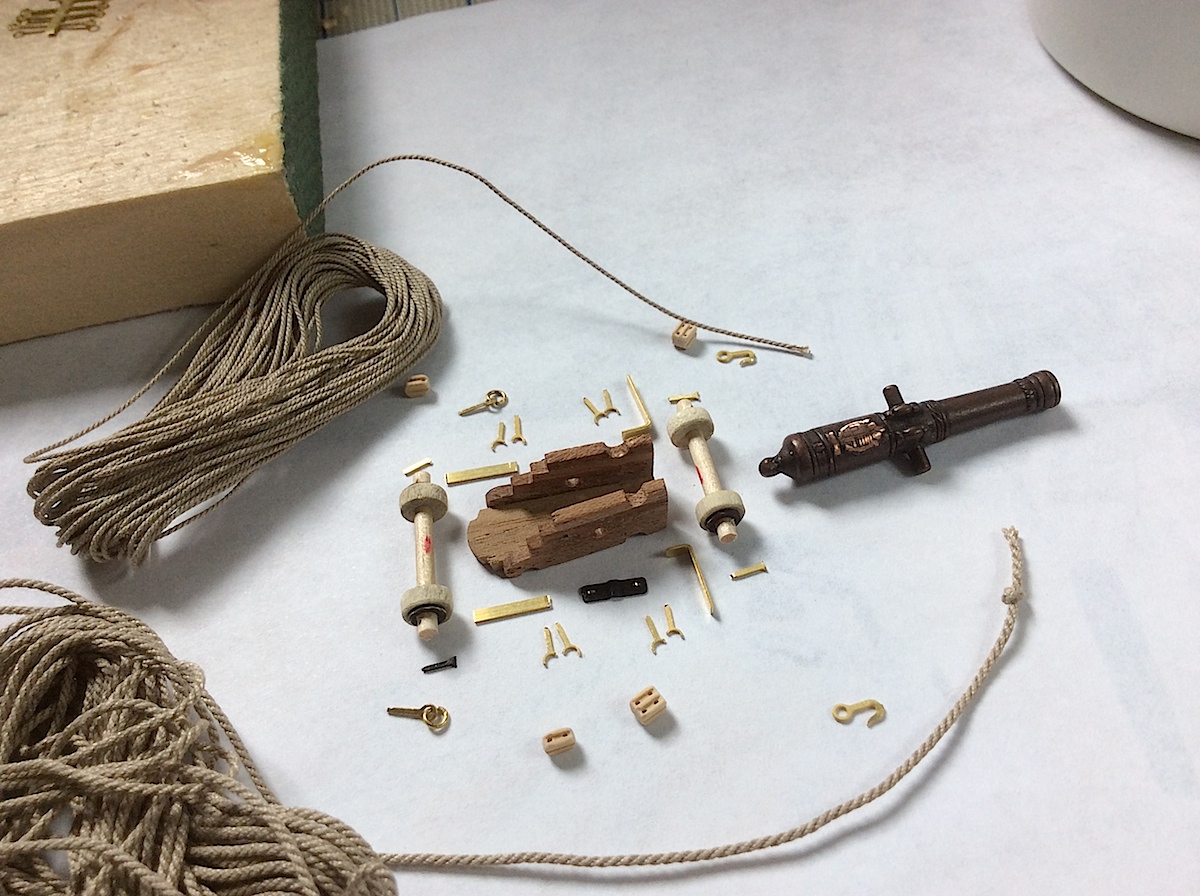
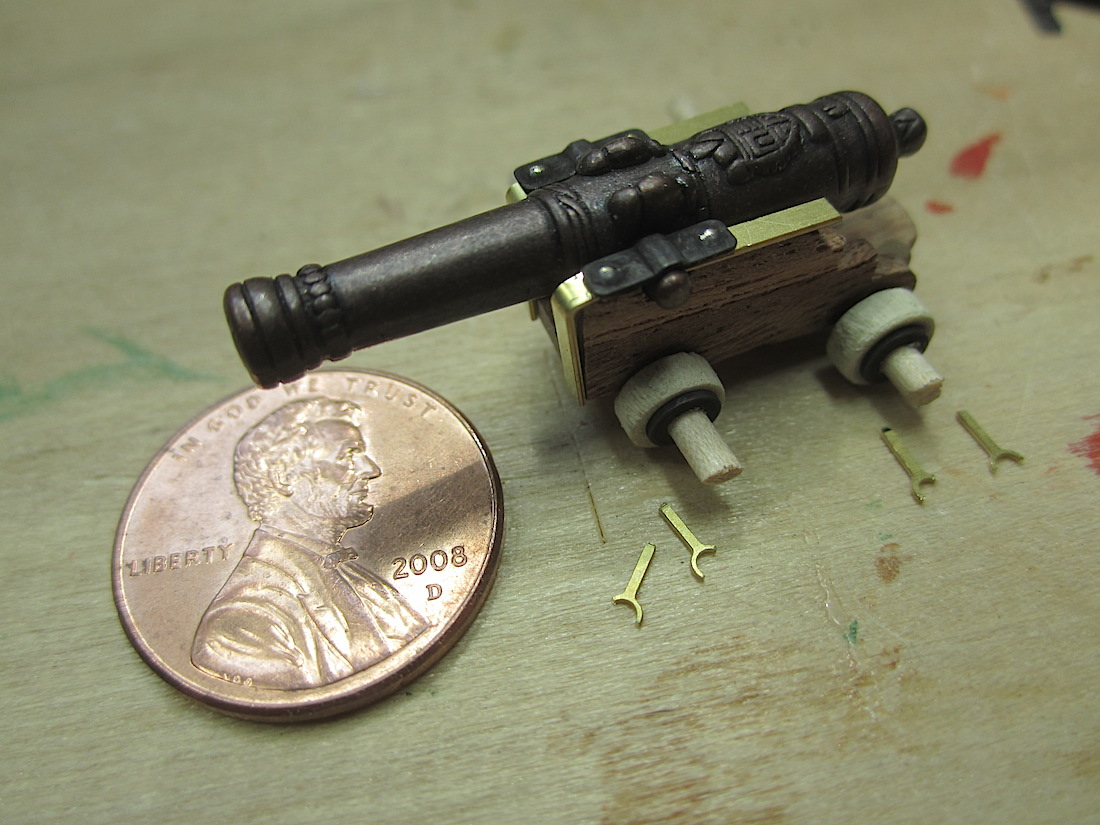
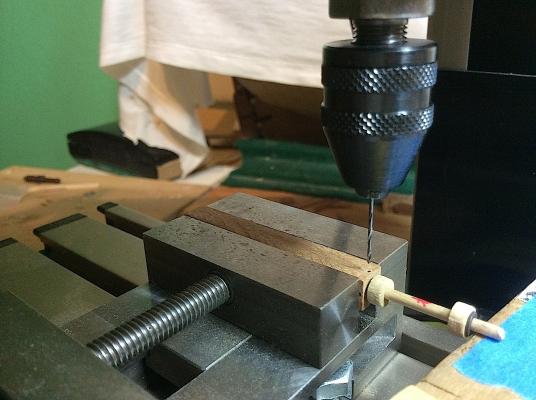
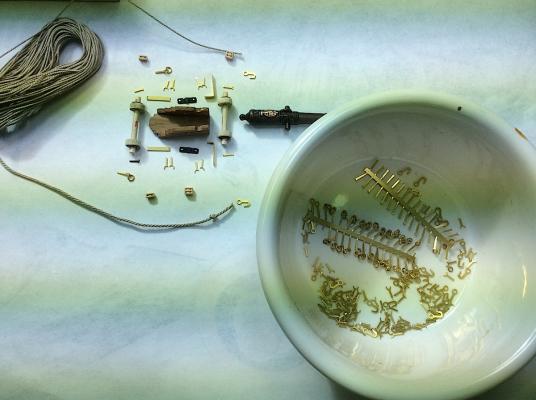
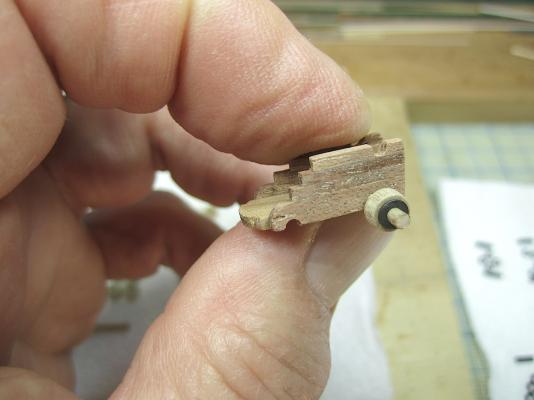
Hi Mates, Still plodding along with carriages putting all of the bits together. It turns out that each assembled cannon will have just shy of 50 parts including the 10 parts that make up the wood carriage itself. So 50 X 14 carriages; Hmmmm 700 bits, I hope that this obsessiveness "pays off" (:-) I think that it will. Next step is putting all of those brass bits into the blackening caldron then assembling them one at a time. Thought the right angled and lengthy brass bits that attach to the upper and front edges of each carriage will have to be "blackened" carriage by carriage, as the bits are specifically sized to each carriage that have, it turns out, minor variations in size here and there. My error for the lack of standardized forward thinking. So throwing all 56 of those bits into the caldron would turn into a minor puzzle on the backside. Please note that the method employed for drilling the axle hole stop pins was an absolutely Brilliant suggestion from Nigel, the sage that he is. Worked effortlessly. Once set up, the twenty-eight axles were drilled in less than fifteen minutes. That in-and-of-itself saved me lots of mental wear-and-tear. Thanks my friend..... FYI: the red markings on the axles were so that I knew that I had adjusted the front and rear track widths, and the tips were OK to be drilled, and the longer left-over bits Dremel'd off. Also regarding the Proxxon Milling tool, I did purchase a Proxxon chuck. I have sooo many tiny drill bits so this attachment becomes a one size fits all helper. It will accept the tiniest of bits and keep them super straight during use. Highly recommended part. Again thanks so much for dropping by always so appreciated. Regards, Michael

-
Juergen, Thanks so much for dropping by, as well as your kinds words, all very encouraging, especially coming from such an artist as yourself. I have been following your Leopard - such first-rate work (:-) Regards, Michael
-
Beautiful work. Your next build should be "a piece of cake" by comparison. This is the most intimidating model ship (imo). I've always been so in awe of builders of this one. Very nice build. It's also a gorgeous ship, one which I have had the privilege of boarding back in the mid 90s. Super nice work Grant. Michael
-
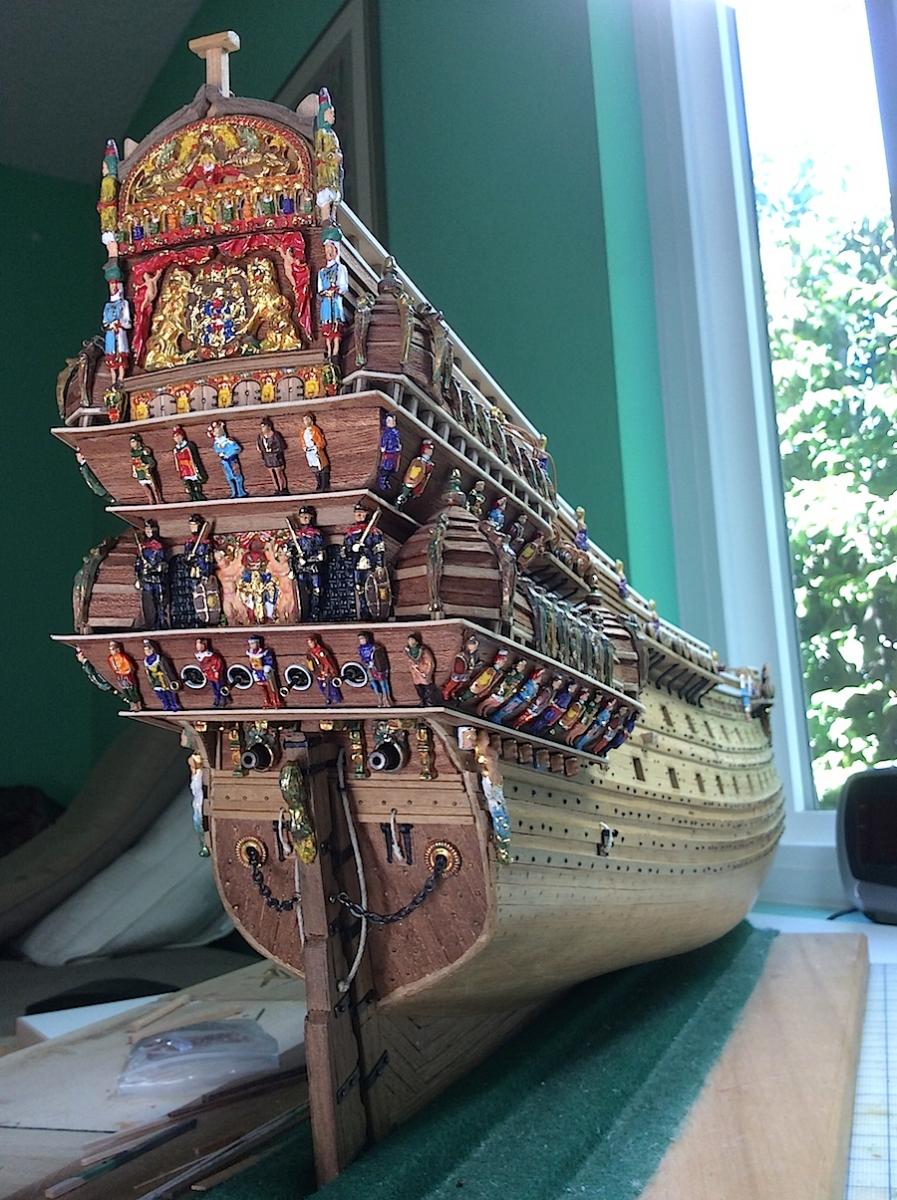
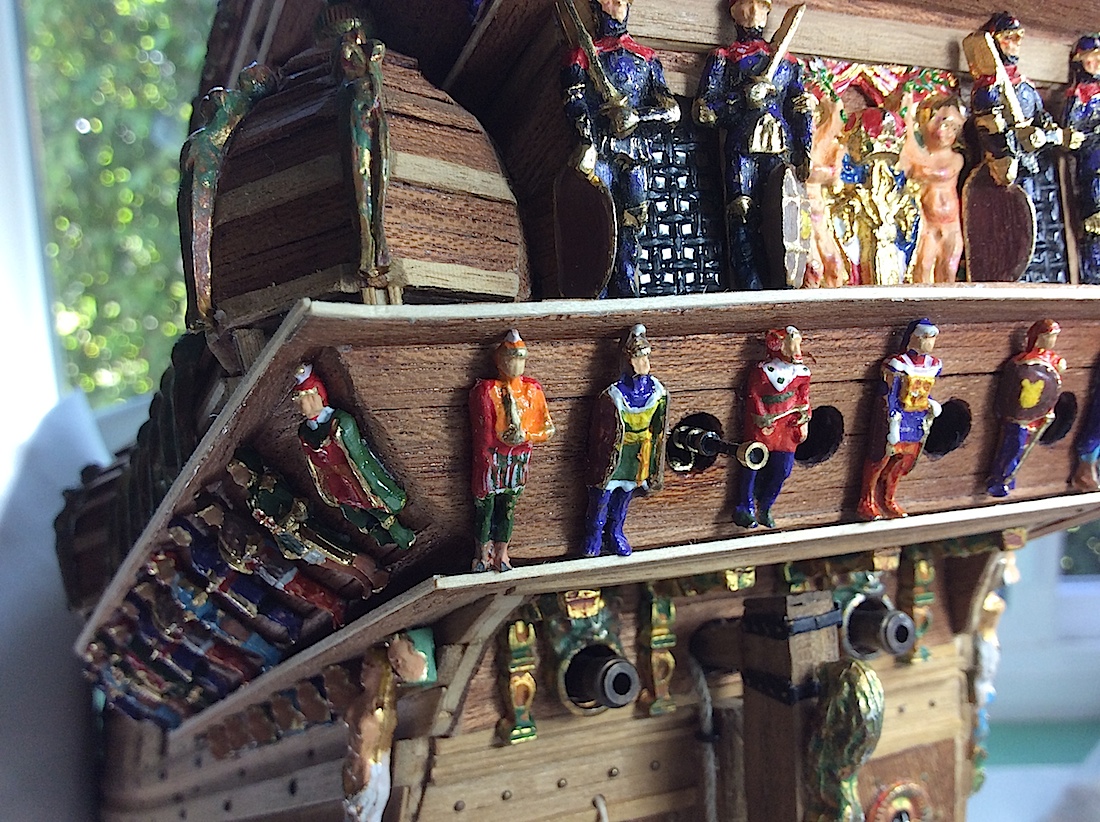
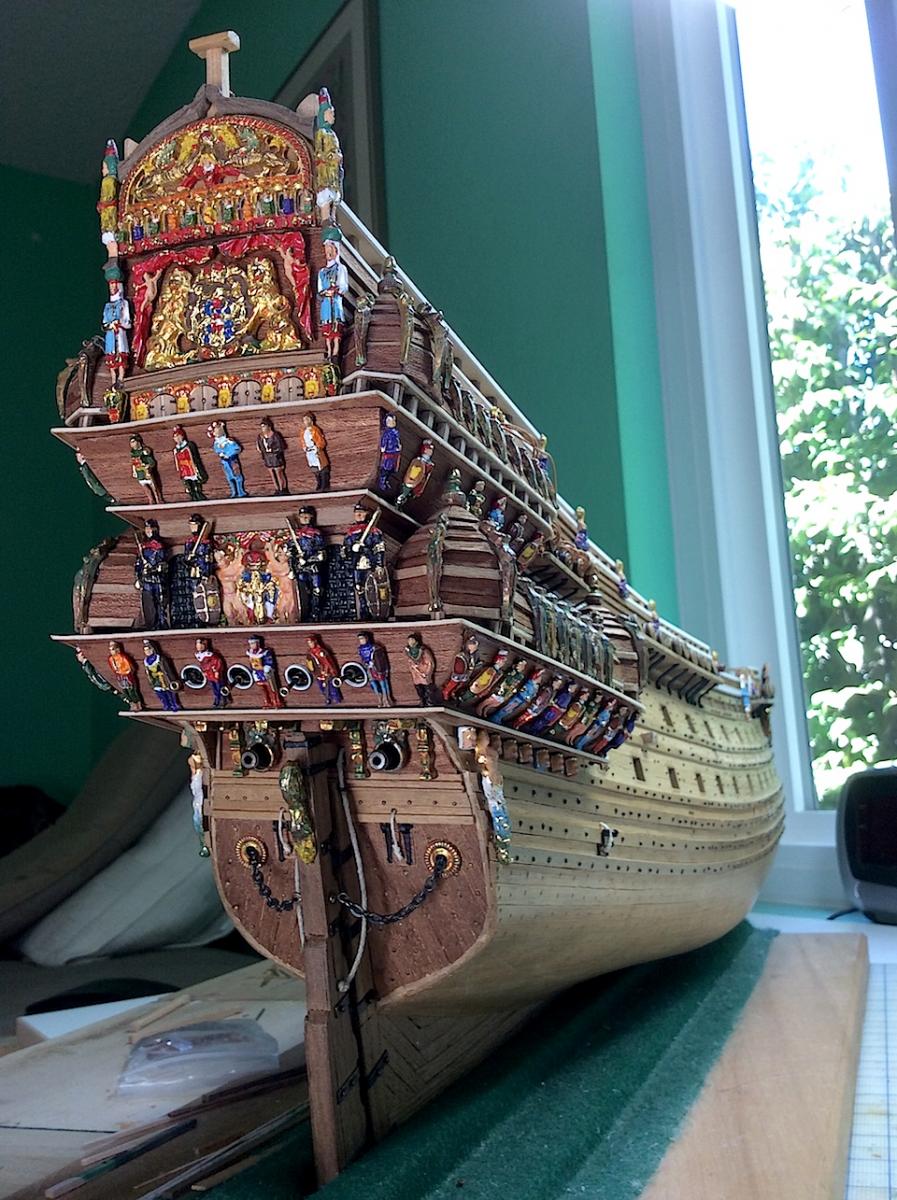
Jay, (:-) Thanks for the two pics. Yes I am, as best I can, incorporating the figures. My source kit is Corel, and the figures are not very accurate, but offer a nice touch none-the-less. Here are some pics, including my continued work with the carriages. I have visited the Vasa Museum, wonderfulexperience walking into the 1600s. ----------------------- Mark, very nice of you to comment, much appreciated. Michael


-
Ulises, A BIG Congratulations. Beautiful project. Your attention to details, especially the rigging and the sails help make this Vasa very special. Muy bien hecho. It has been fun following your build as well as sharing back and forth. I will look forward to following your French ship. A much more complicated ship that I have always admired. Sincerely, Michael
-
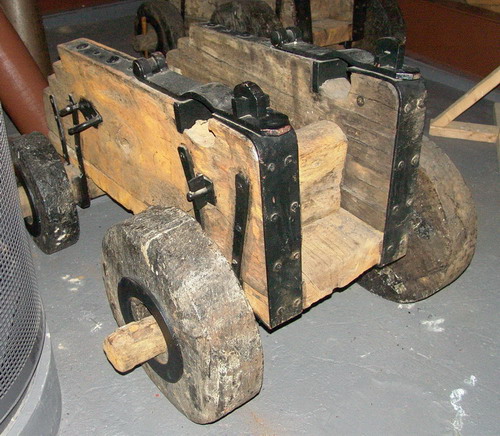
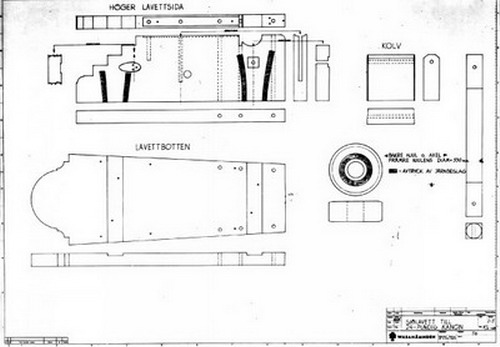
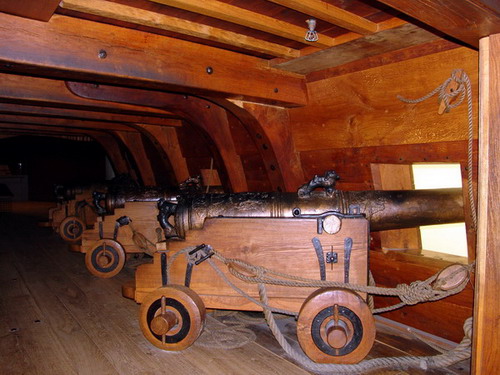
Nils, Thanks so much for your response. I am, by the way, very familiar with your astonishing work. Your splint looks perfect. I will try this, though my skills may preclude this option. Regarding the washer. It appears as though the Vasa did in fact have these. Note the photos, as well as the carriage reproduction from the Vaset Museum. --------------------- Jay, No I'm working on the Vasa as she was in 1628. Short existence as it was. Note the Vasa orthographic carriage views. I appreciate your input, very nice of you. Regards, Michael

-
Karl, Thanks. I did just order some small drill bits from Amazon. The wire seems to be the overwhelming idea. Thanks for your input. Michael
-
Allen, Thanks so much. I had not visited the museum site in a long time. BIG improvements. The section on just the cannon barrels themselves is super excellent. Michael
-
B.E. Thanks, I will follow your suggestion as well, good thought thanks Michale
-
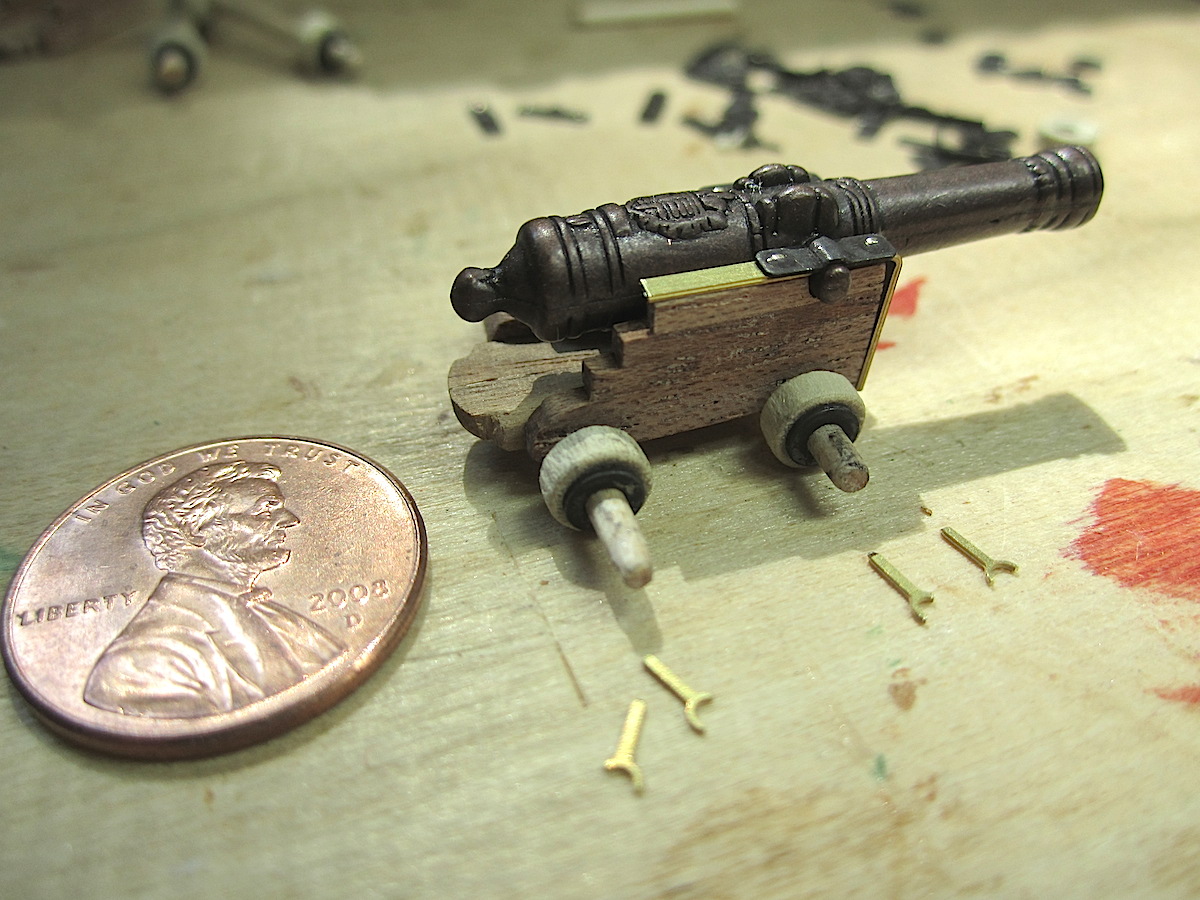
Carl, I did think of this, and it may have to be the solution, though I assume that the original types of pegs were made of wood? In any case its a very very small detail issue, but since I am spending a bit too much time with the carriages - just pushing the extra correctness, may paint the stops to appear wood-like. Thanks for your input. Michael
-
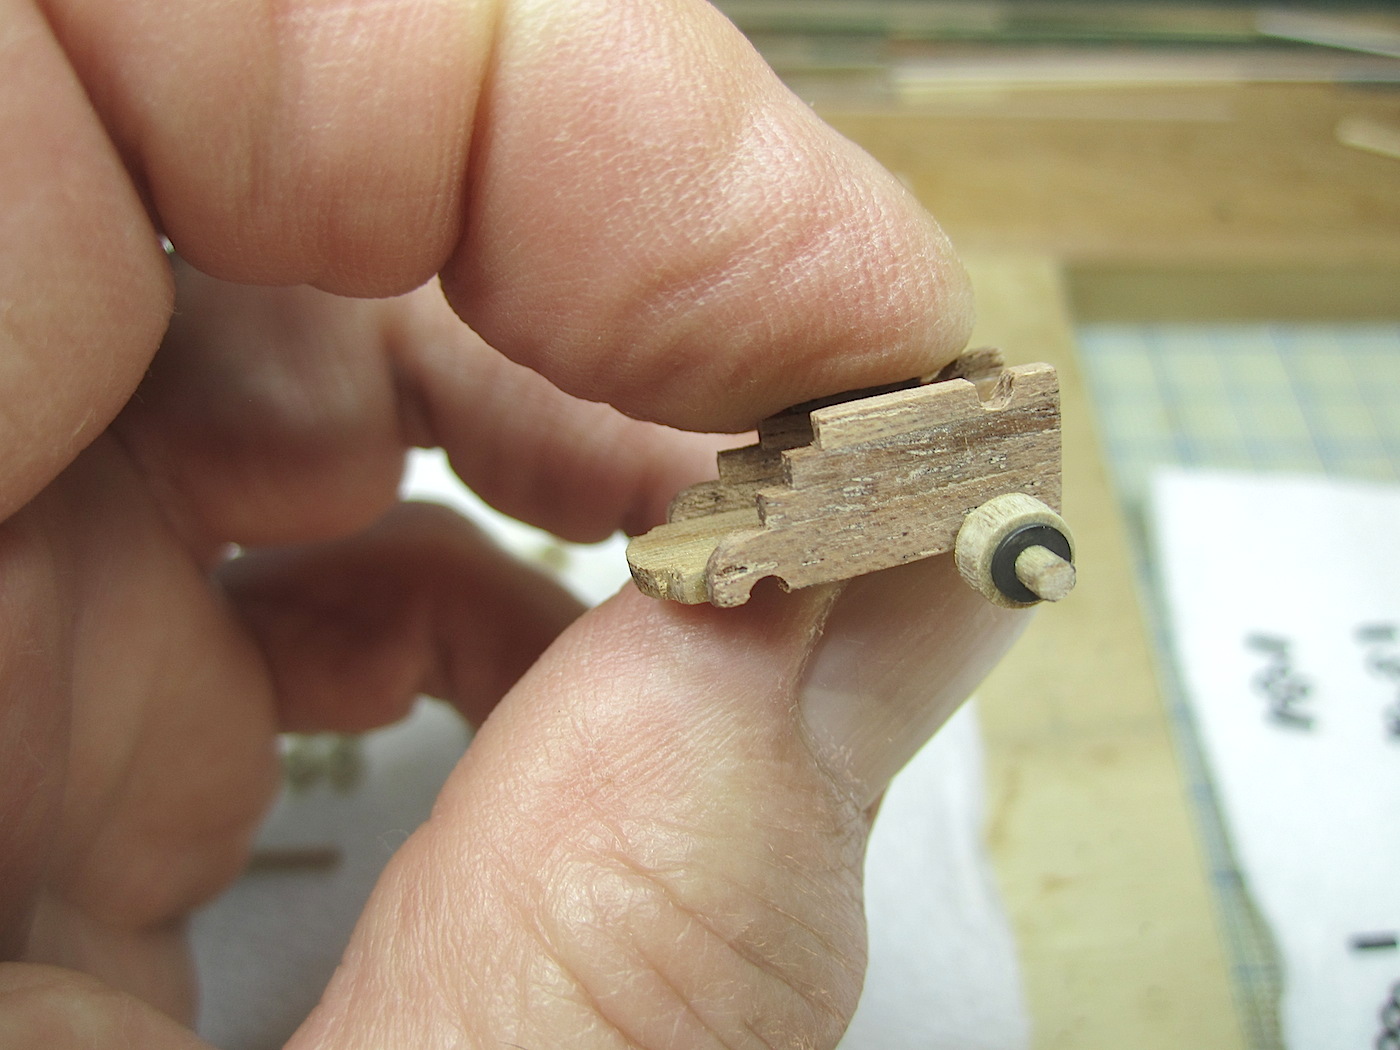
Hi Mates, Still working, very slowly, on the carriages. This post is in the form of a question. Would any of you kind soles have a "perfect" idea on how I might replicate the axle stops so that the wheels won't fall off? The small pieces that I am using for the axle supports that attach vertically to the carriage are a bit too wide to be added to the axles as keys. Any suggestions would be appreciated. I do know that most who are kind enough to drop-in do so silently, but any ideas that have worked for you would be a treat. This is my first attempt at gun carriages. Michael


-
Hi Mates, Still working, very slowly, on the carriages. This post is in the form of a question. Would any of you kind soles have a "perfect" idea on how I might replicate the axle stops so that the wheels won't fall off? The small pieces that I am using for the axle supports that attach vertically to the carriage are a bit too wide to be added to the axles as keys. Any suggestions would be appreciated. I do know that most, who are kind enough to drop-in do so silently, but any ideas that have worked for you would be a treat. I will also post this in the general section. Michael

-
I'm certainly thinking of that guy, centuries ago, who turned a block of marble turned into a Pietà. Now we have the artist who will turn blocks of wood into a masterpiece. I will follow with bated breath. Nigel your work and visions are such a pleasure to follow. Hope that this post finds you well,and comfortable (:-) Michael
-
Mark, Thanks good call. I have in fact spent a lot of time looking at some of these models. Thanks for sharing.
-
Yea you guys got hit very hard for sure, including all of the deaths in Reseda (which was the Actual epicenter). In SM over 200 buildings were red tagged. We had minor drywall damage, but a LOT of stuff fell. We are a bit nervous, and with our son living in Berkeley Hmmm. Fate is the Hunter (great book by the way (:-)
- 2,250 replies
-
- 1
-

-
- model shipways
- Charles W Morgan
- (and 1 more)
-
Here is an other model builder. If you are interested, as you scroll down, be sure to click on the small pics to enlarge them. the details are well, impressive. http://www.craftsmanshipmuseum.com/park.htm
-
Well John, You sure have had your share of earthquakes. And as you know living in Santa Monica for so many years, so have I. Regarding travel plans to So Cal, you must have insider info, if you plan on postponing your trip?? (:-) Michael
- 2,250 replies
-
- 2
-
-
- model shipways
- Charles W Morgan
- (and 1 more)
-
Mark, Welcome back, your masts are looking very good. Nice work MIchsel
-
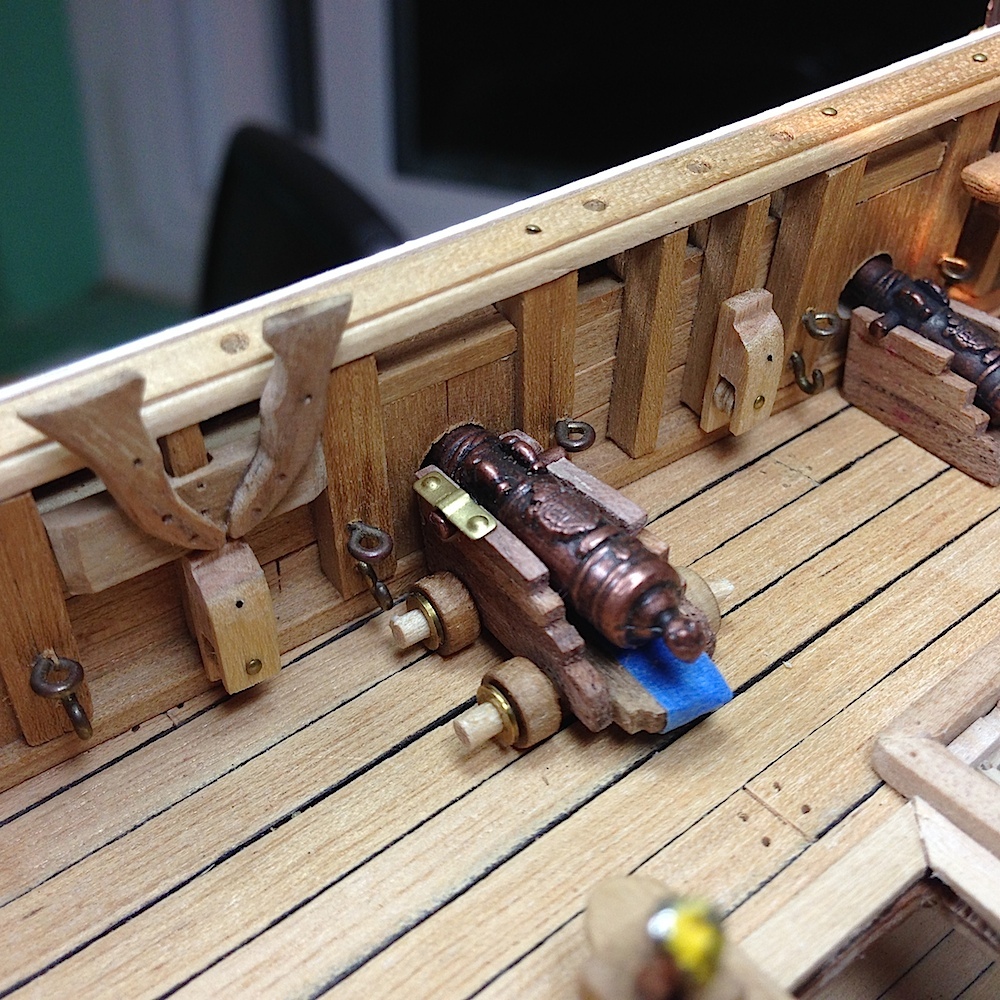
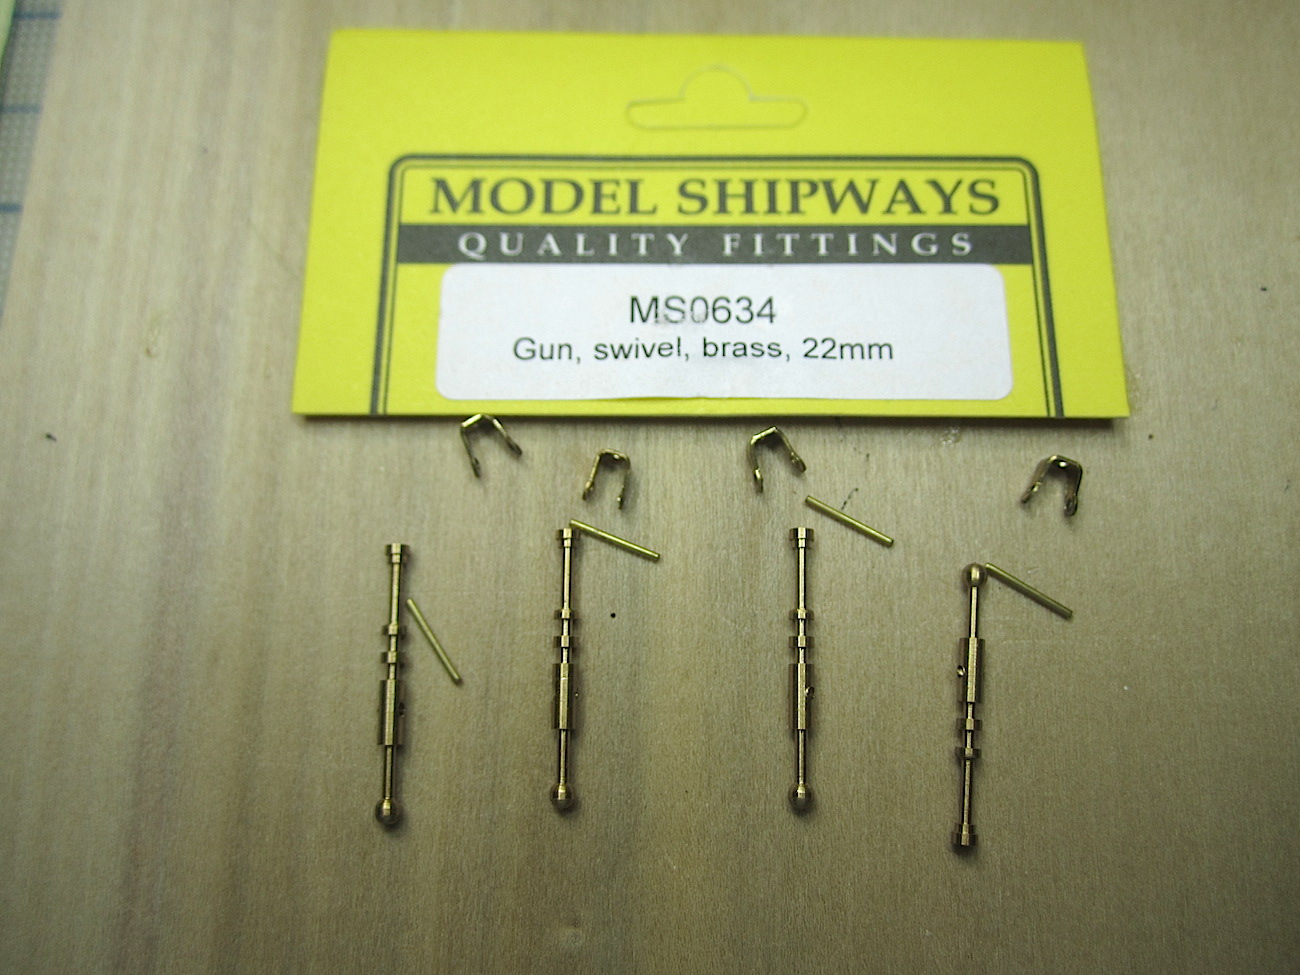
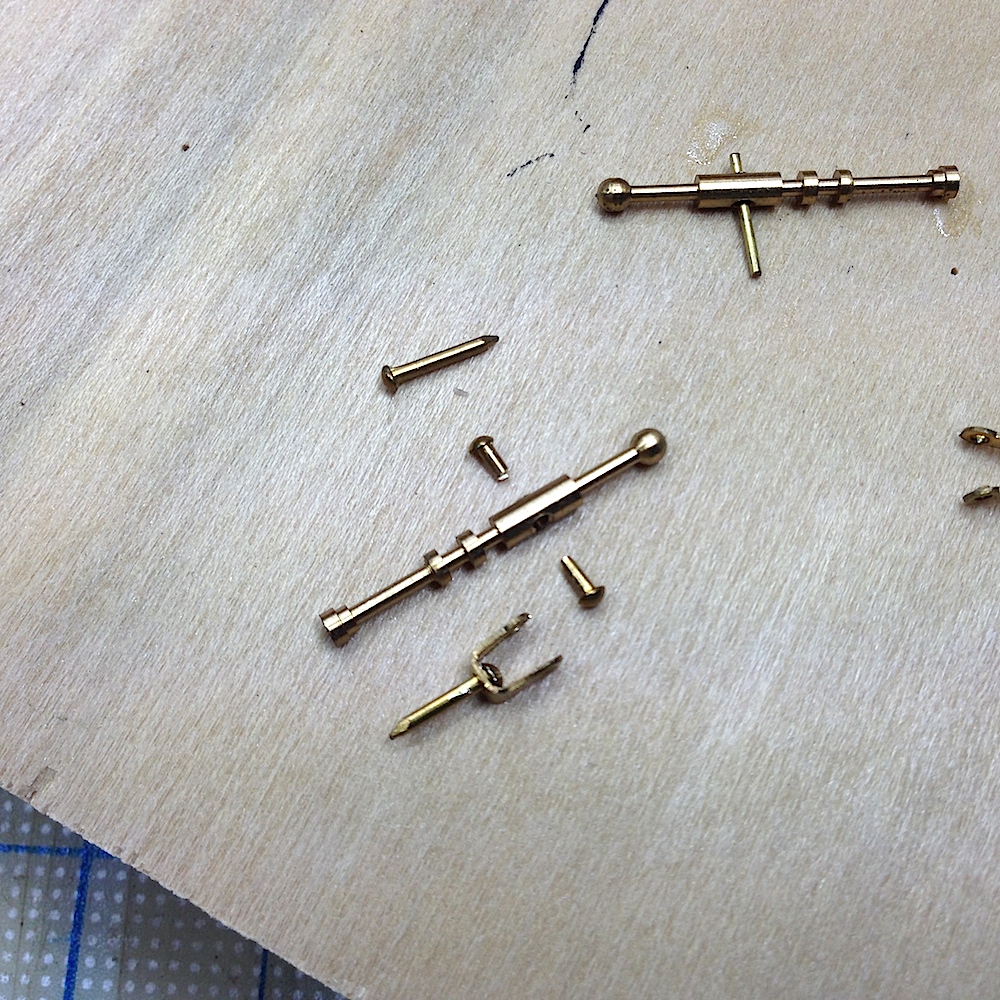
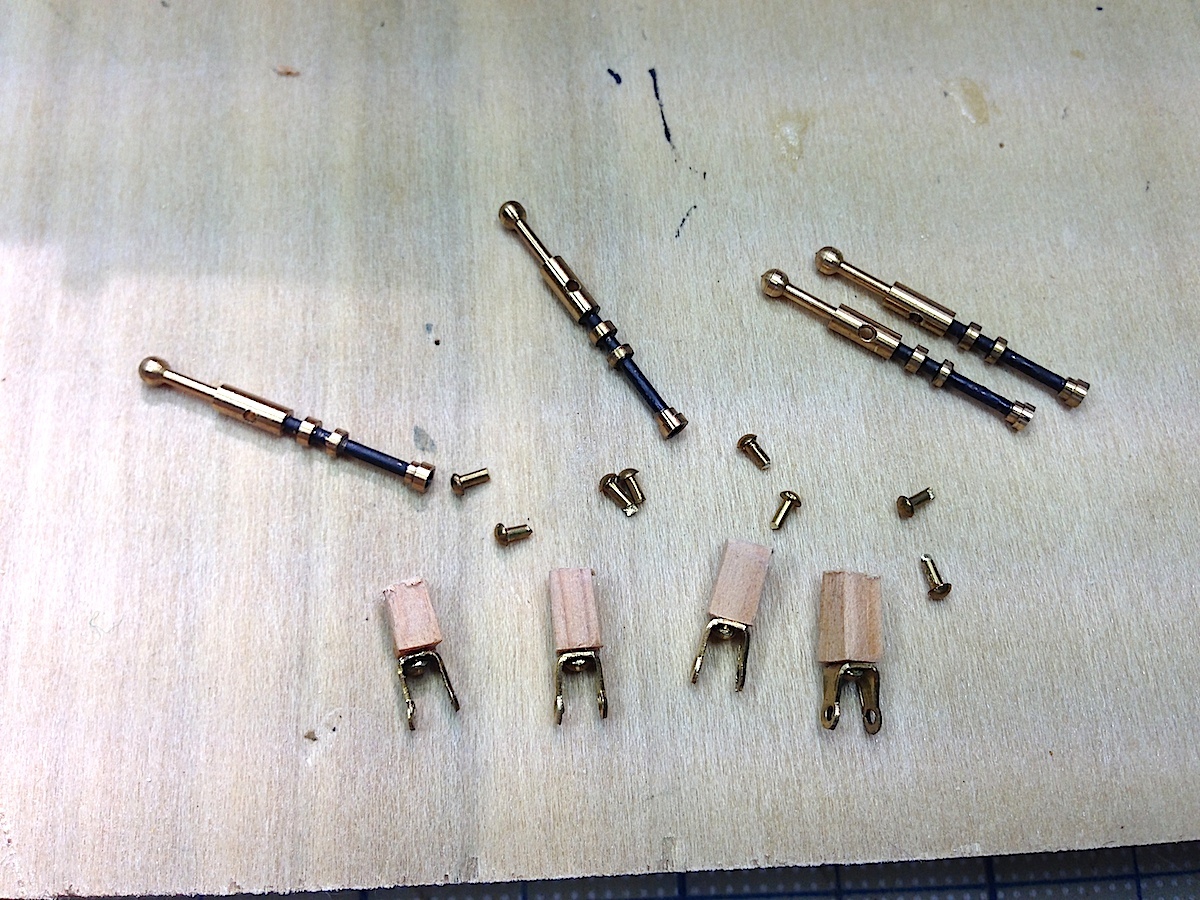
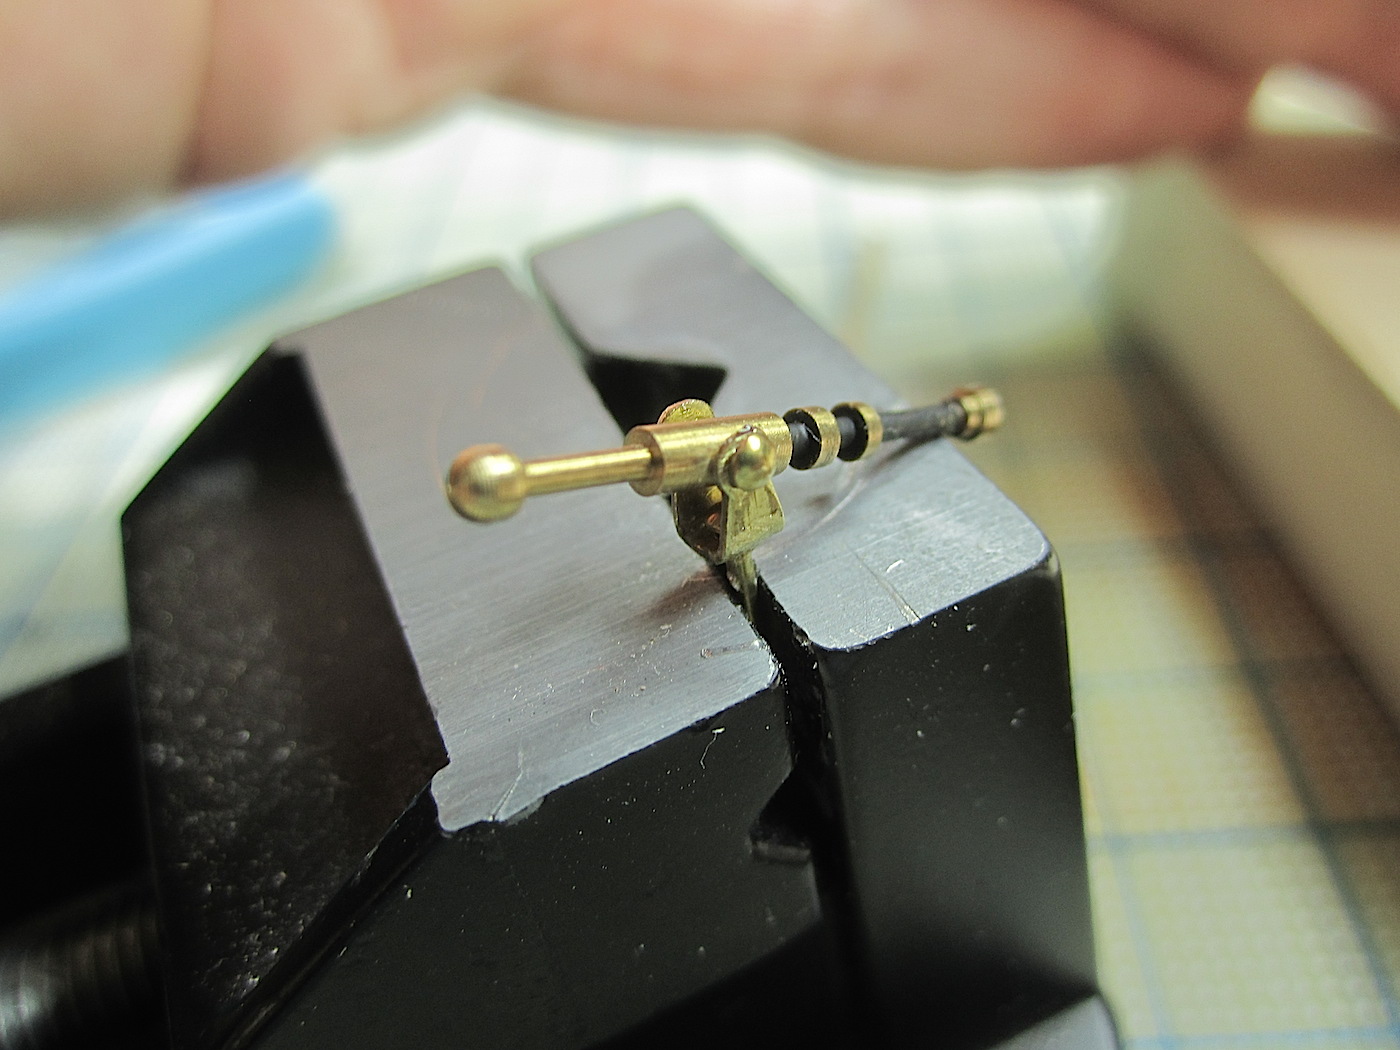
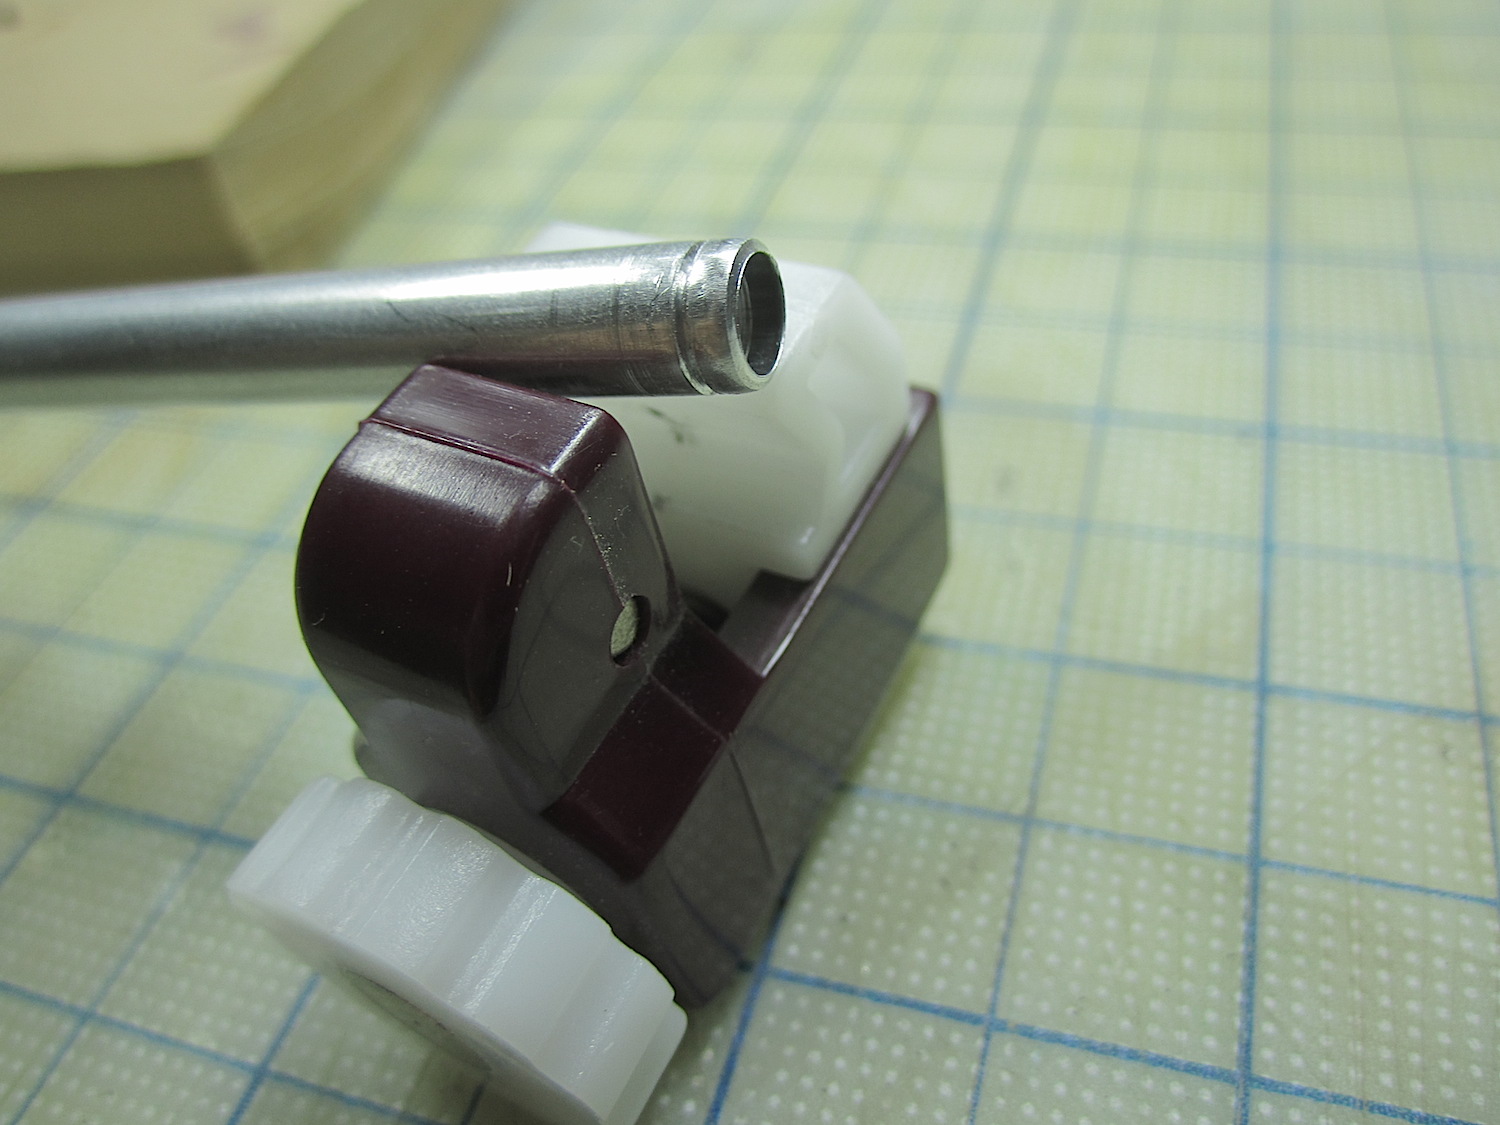
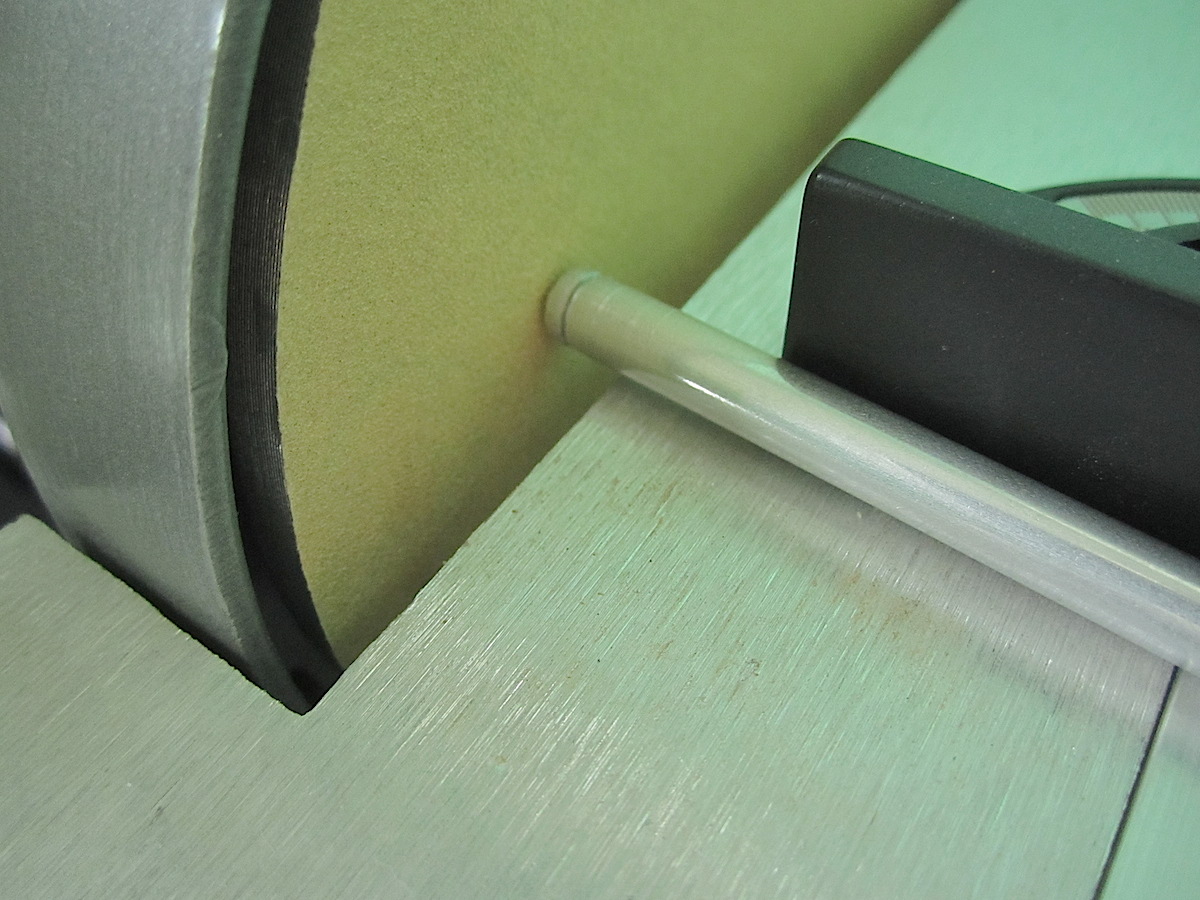
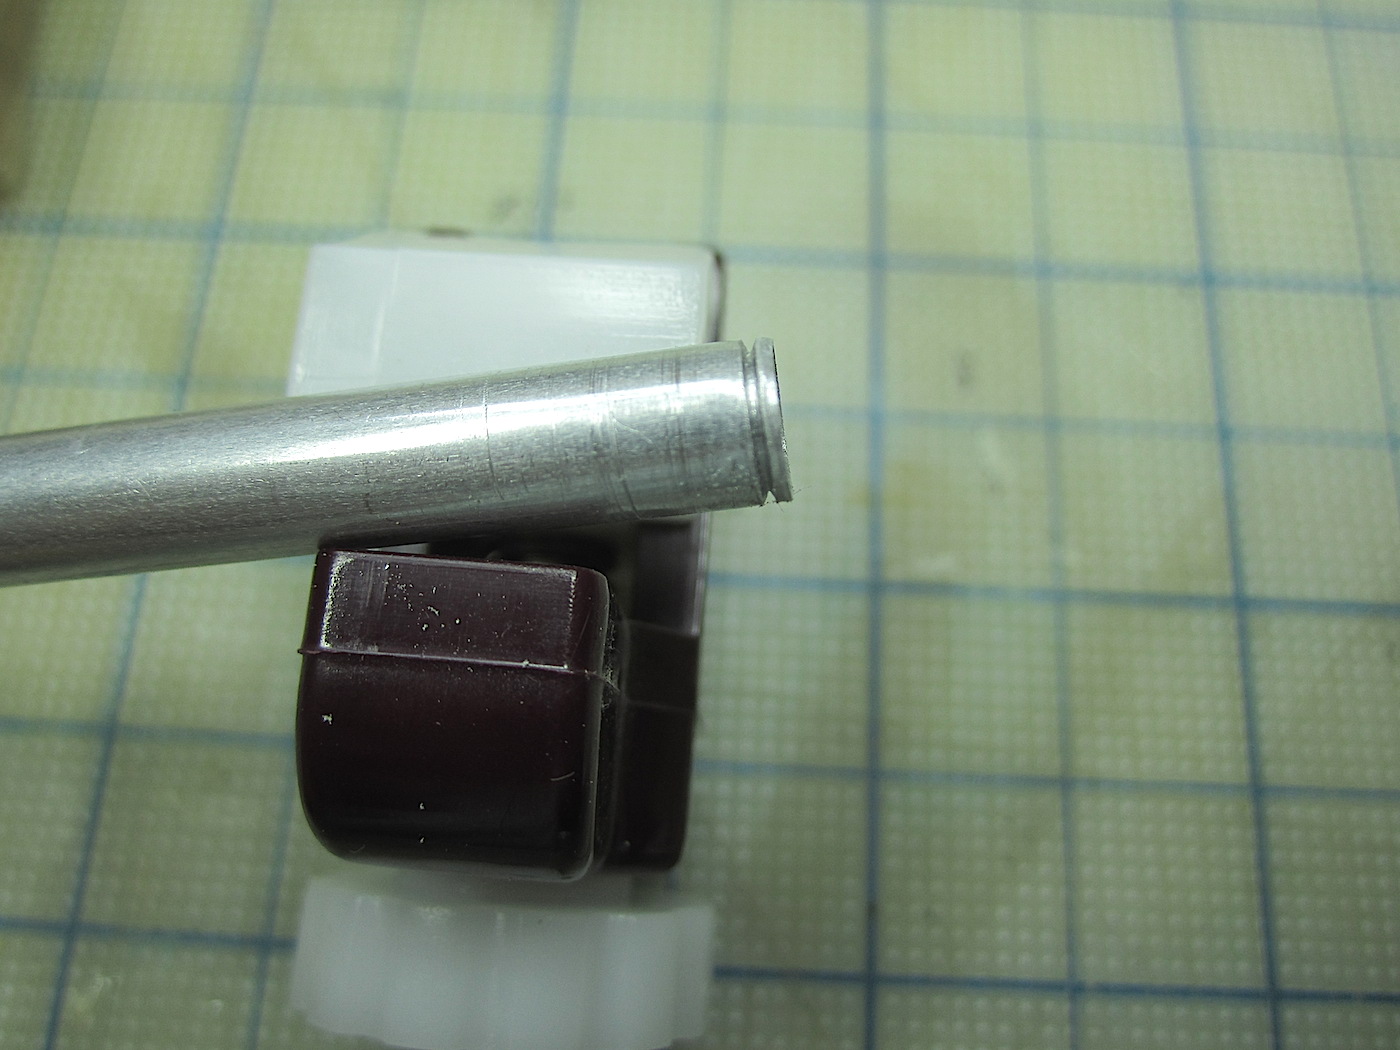
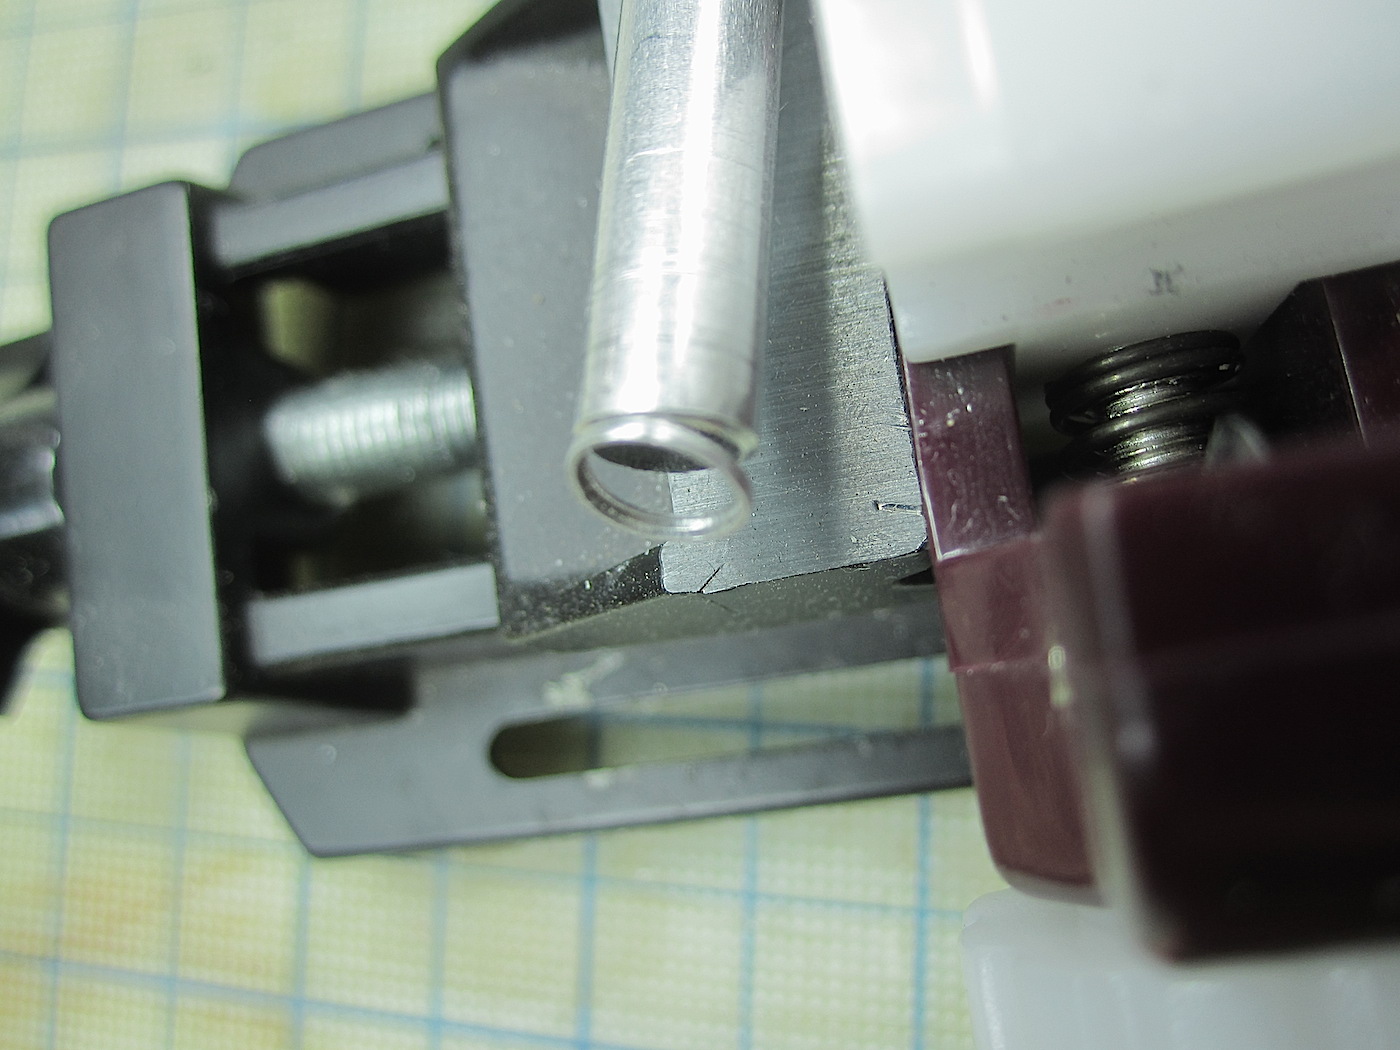
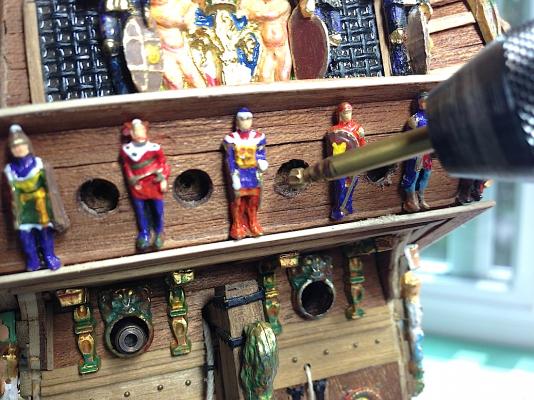
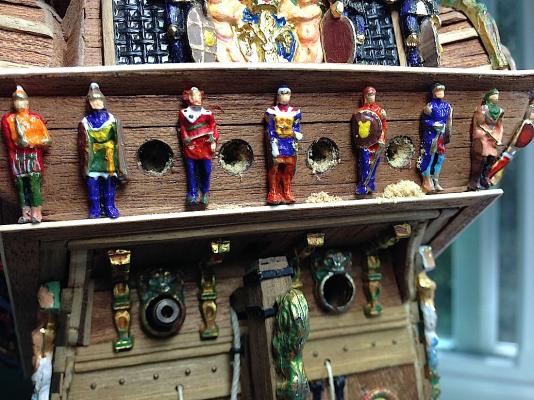
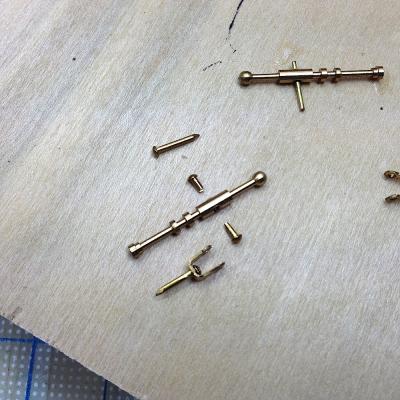
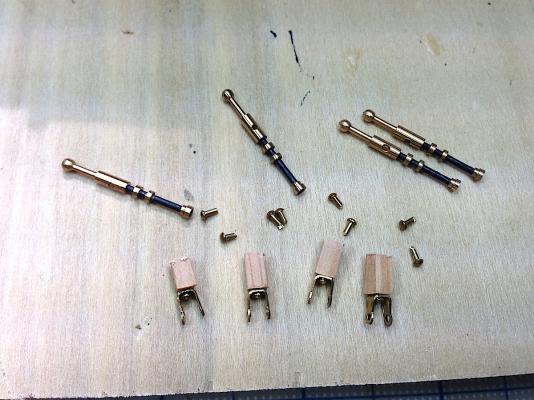
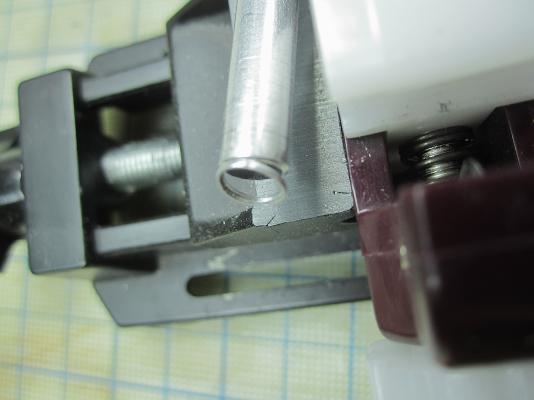
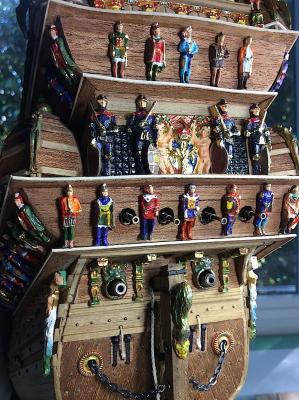
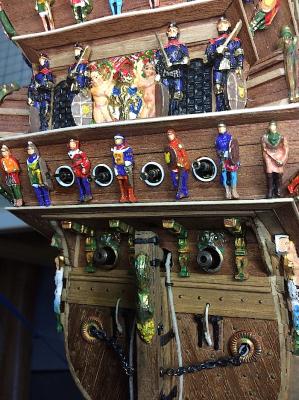
Hi Mates, I took a detour from the carriages to install four swivel guns at the stern. According to Landström these would have eventually been mounted. Needed to deepen the shallow openings a bit more, easy enough. Then prepared the guns by modifying the mounting pins using small brass nails. I flattened the round heads as well. You will note that I made small wood mounting bits, but it turns out that, what do they say? "You can't put a square peg into a round hole". They did not fit. Luckily the guns were easy to insert and "mount" in a believable fashion without the use of wooden bits. Next, I used an aluminum tube to make the four small decorative rings. I used that material because of its softness, and the rings were to be painted in any case. Fairly simple used a rod cutter for an initial deep groove, then on to the sander to thin the tip. Lastly back to the cutter for a couple of delicate turns, a bit of detailing and then paint. --------------------- OK back to the carriages. As always thanks for dropping by. Regards, Michael


-
Elegant build Peter, looking very nice. Michael
-
Here is a supplier in California who carries all European manufacturers. I have ordered fittings from them, but not a kit. Their website navigation is a primordial mess, but they stock what you are looking for. http://www.agesofsail.com/ecommerce/ Michael