HOLIDAY DONATION DRIVE - SUPPORT MSW - DO YOUR PART TO KEEP THIS GREAT FORUM GOING! (Only 72 donations so far out of 49,000 members - Can we at least get 100? C'mon guys!)
×


overdale
-
Posts
354 -
Joined
-
Last visited
Content Type
Profiles
Forums
Gallery
Events
Everything posted by overdale
-
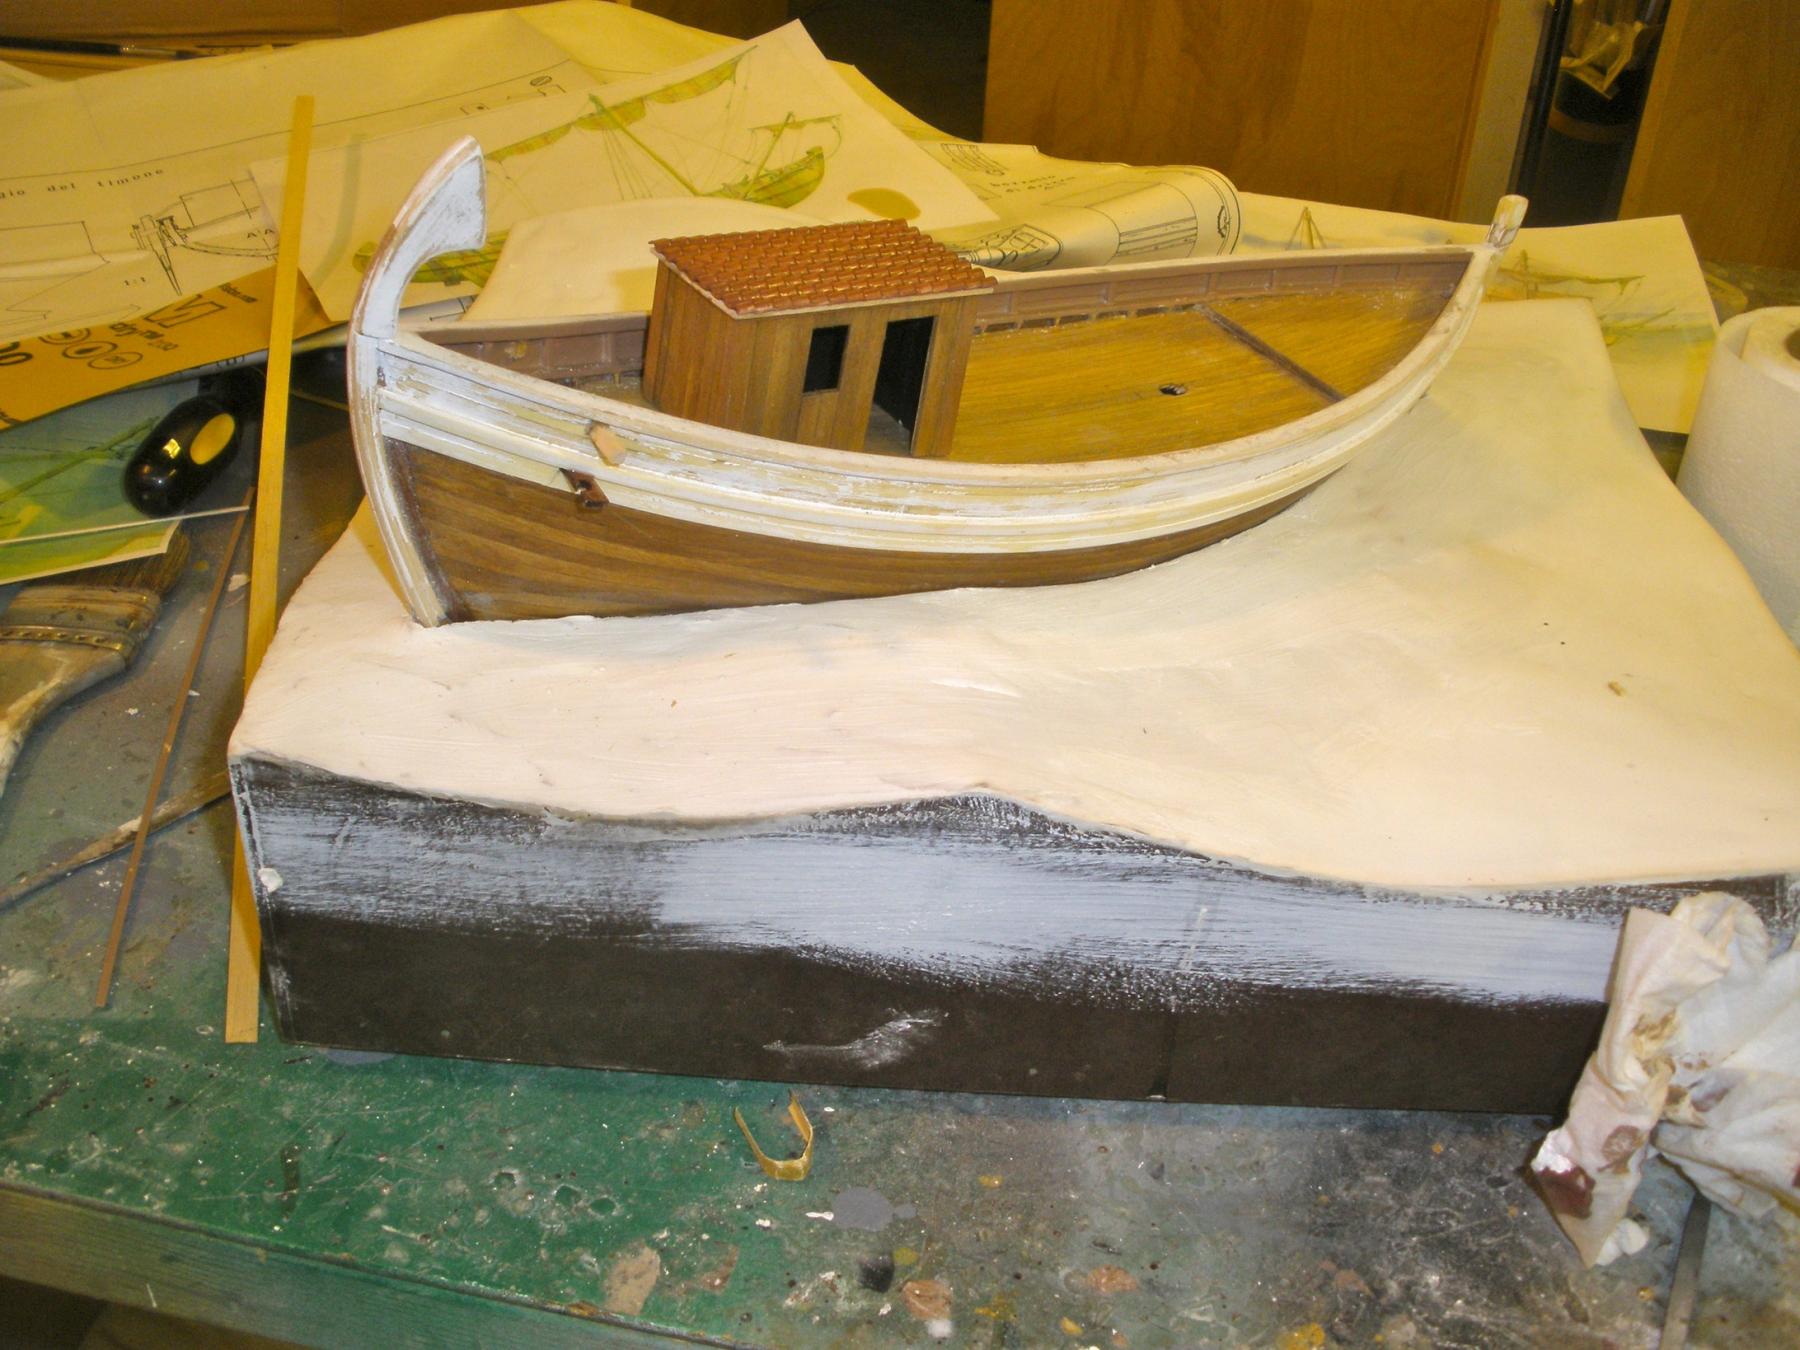
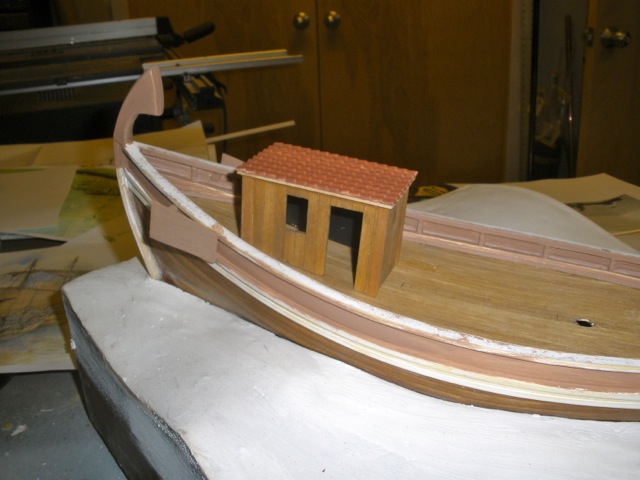
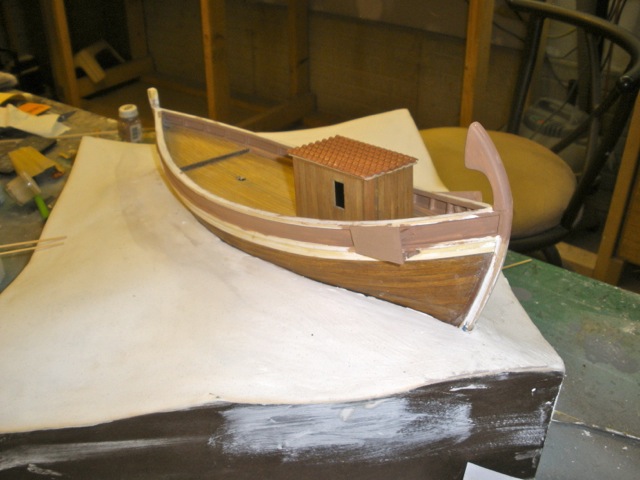
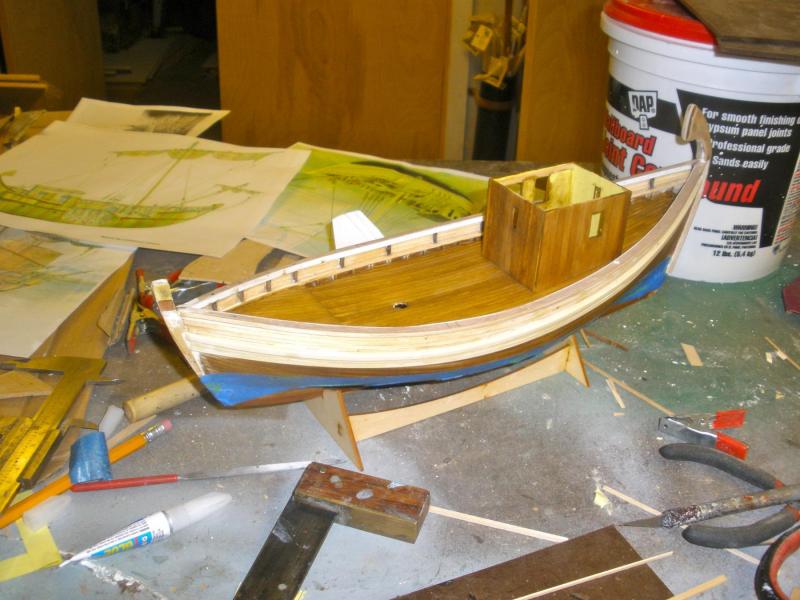
 A lot of contemporary images show a tiled roof, in fact, more than a wooden one, so I went with the flow, but of course, it's anyone's guess. I'lll see how it looks when it's painted. I can always change it. Dan.
 -
Started the painting.
-
Added the rudder boards and started undercoat paint.
-
Wow, thanks Steven, that's amazing.. My estimate was just a guess. Maybe I should go out and buy a lottery ticket while I'm on such a lucky streak Dan
-
Thanks Steven. I was also surprised to find than many traditional mediterranean fishing boats today have similar features.
-
My guess would be that most of the time, planks would be wetter than decks and the wet treenails would swell making them tighter.
-
Hi Piet, welcome aboard.! I enjoyed watching your submarine build and remember thinking at the time "I wonder if I'll ever get to do a submarine model" I too have a Dutch maritime connection. My late father in law was a 'Nederlander' and was an engineering officer in the Dutch Merchant Marine. He took a real pride in his nation's maritime heritage. I had a look at the Pacific Cross Roads site and you are right, their stuff is remarkable. Dan.
-
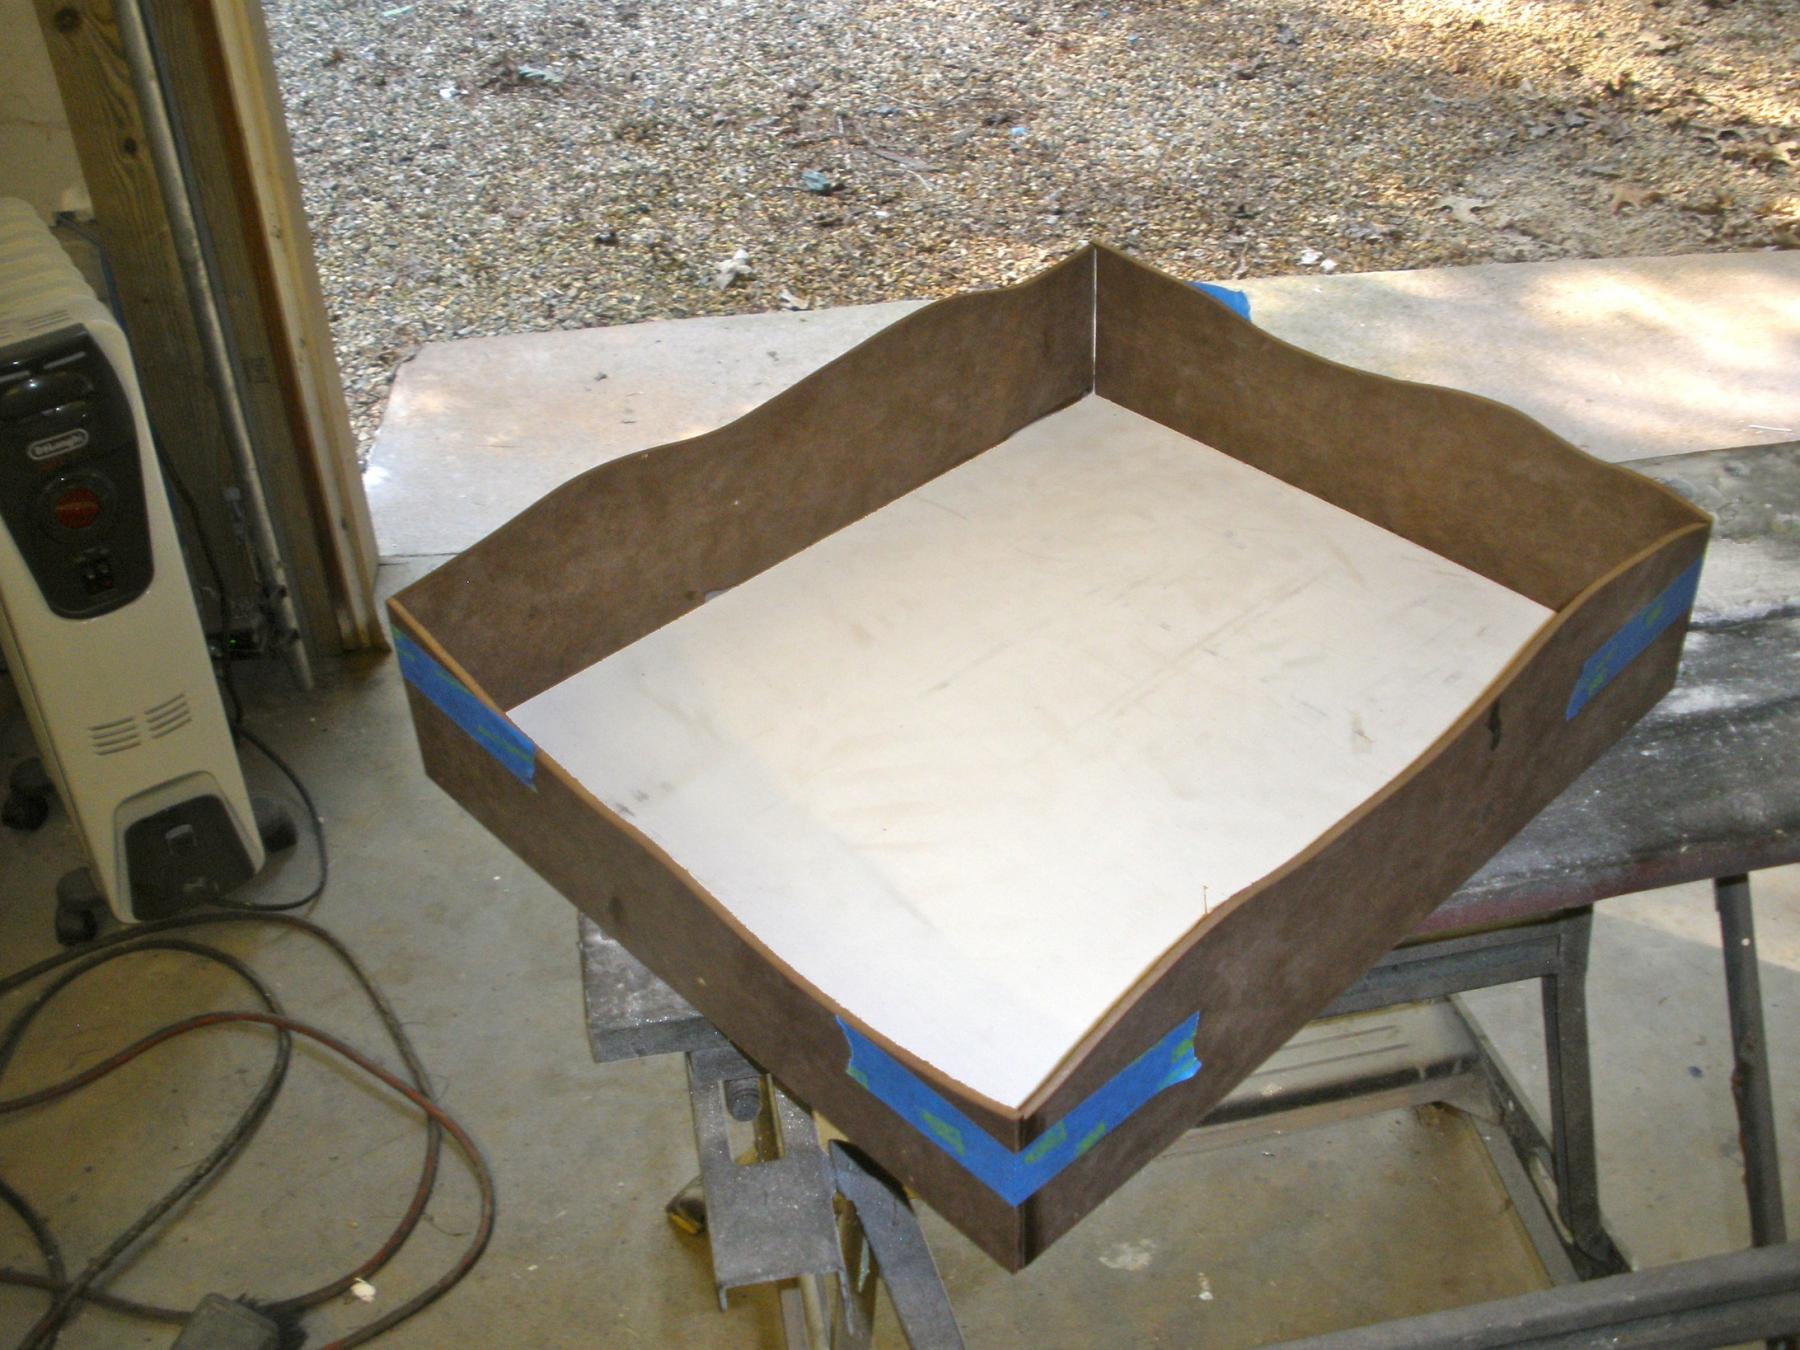
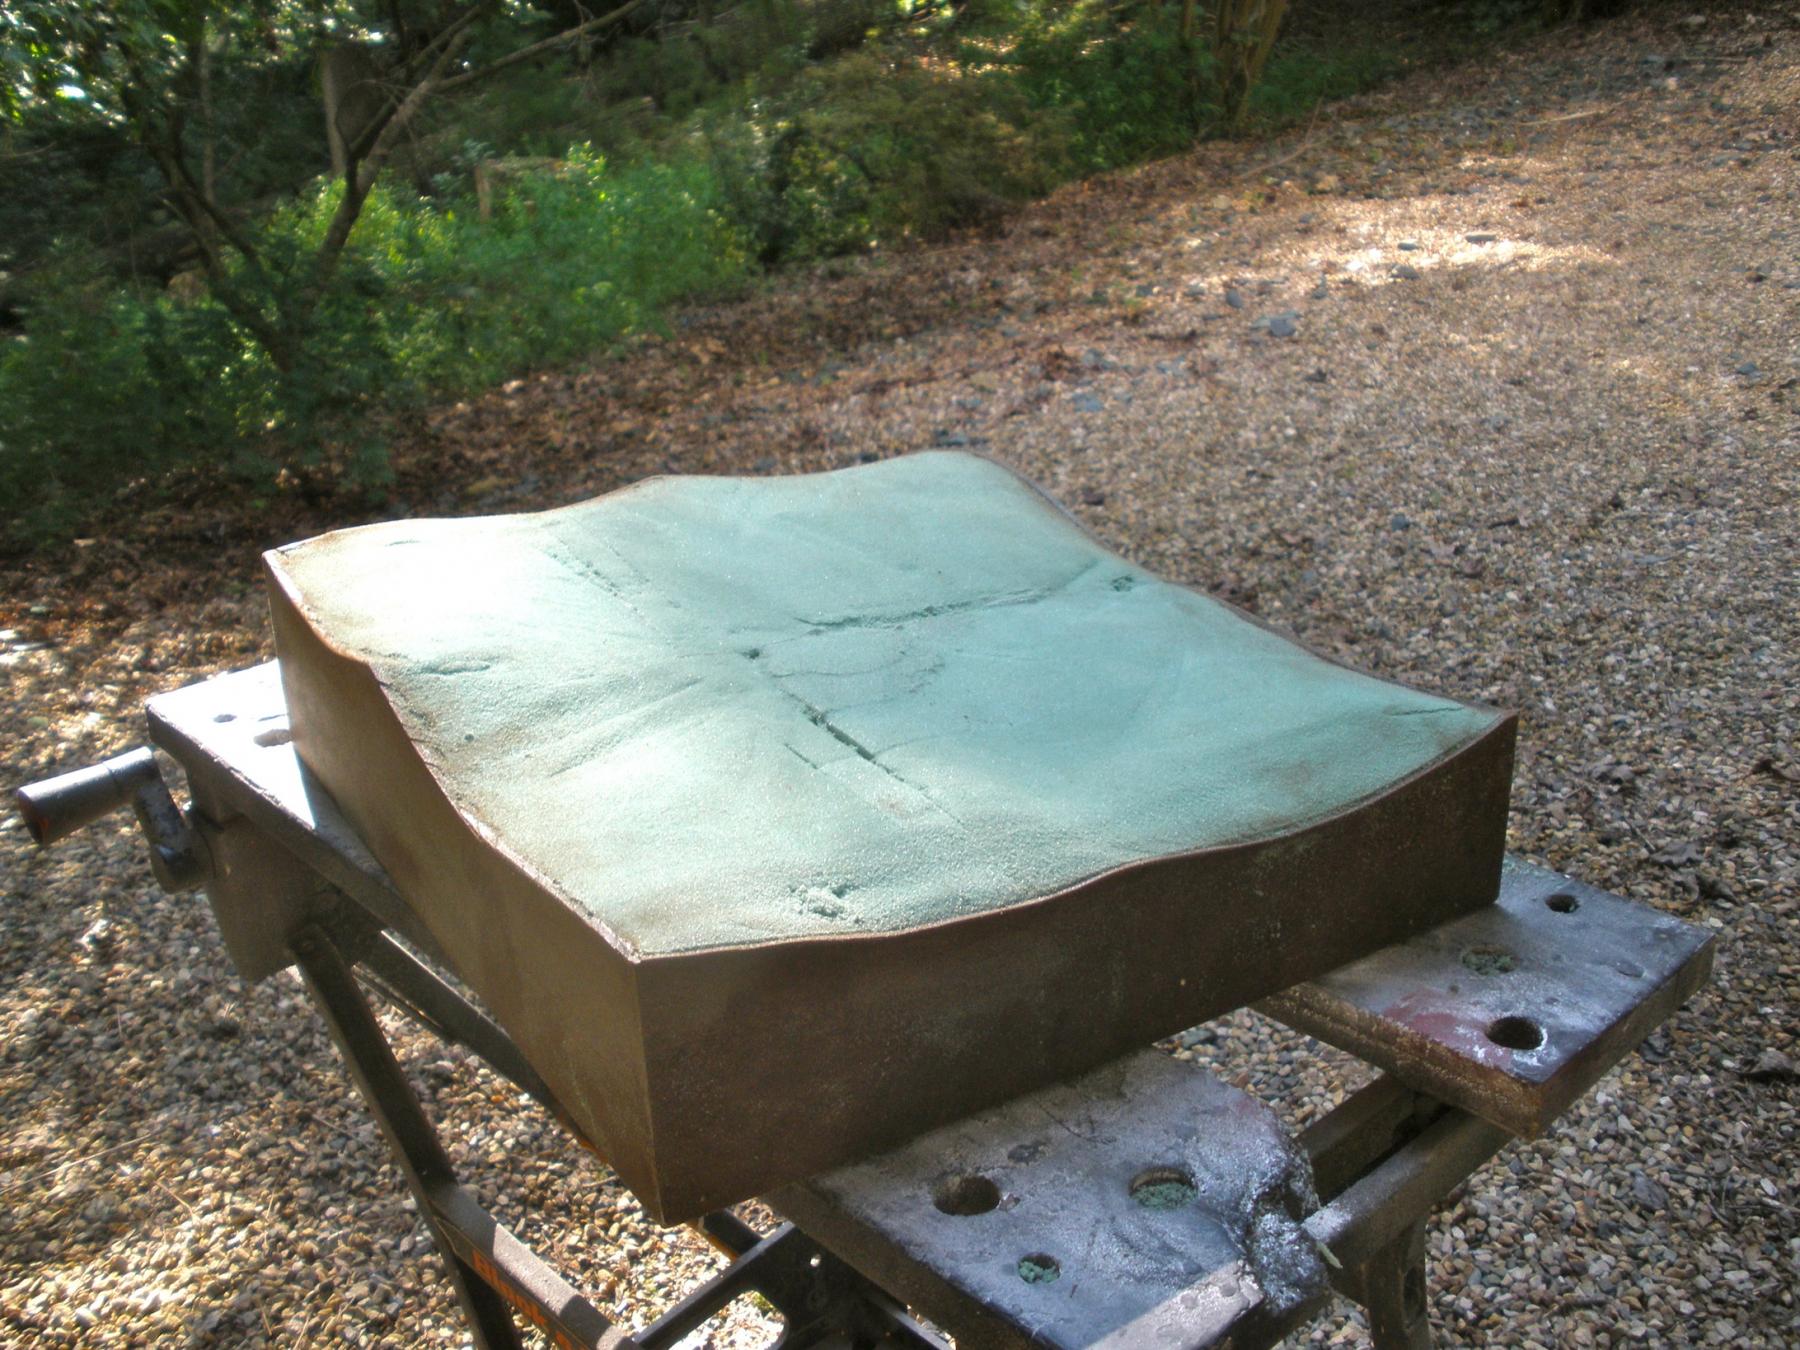
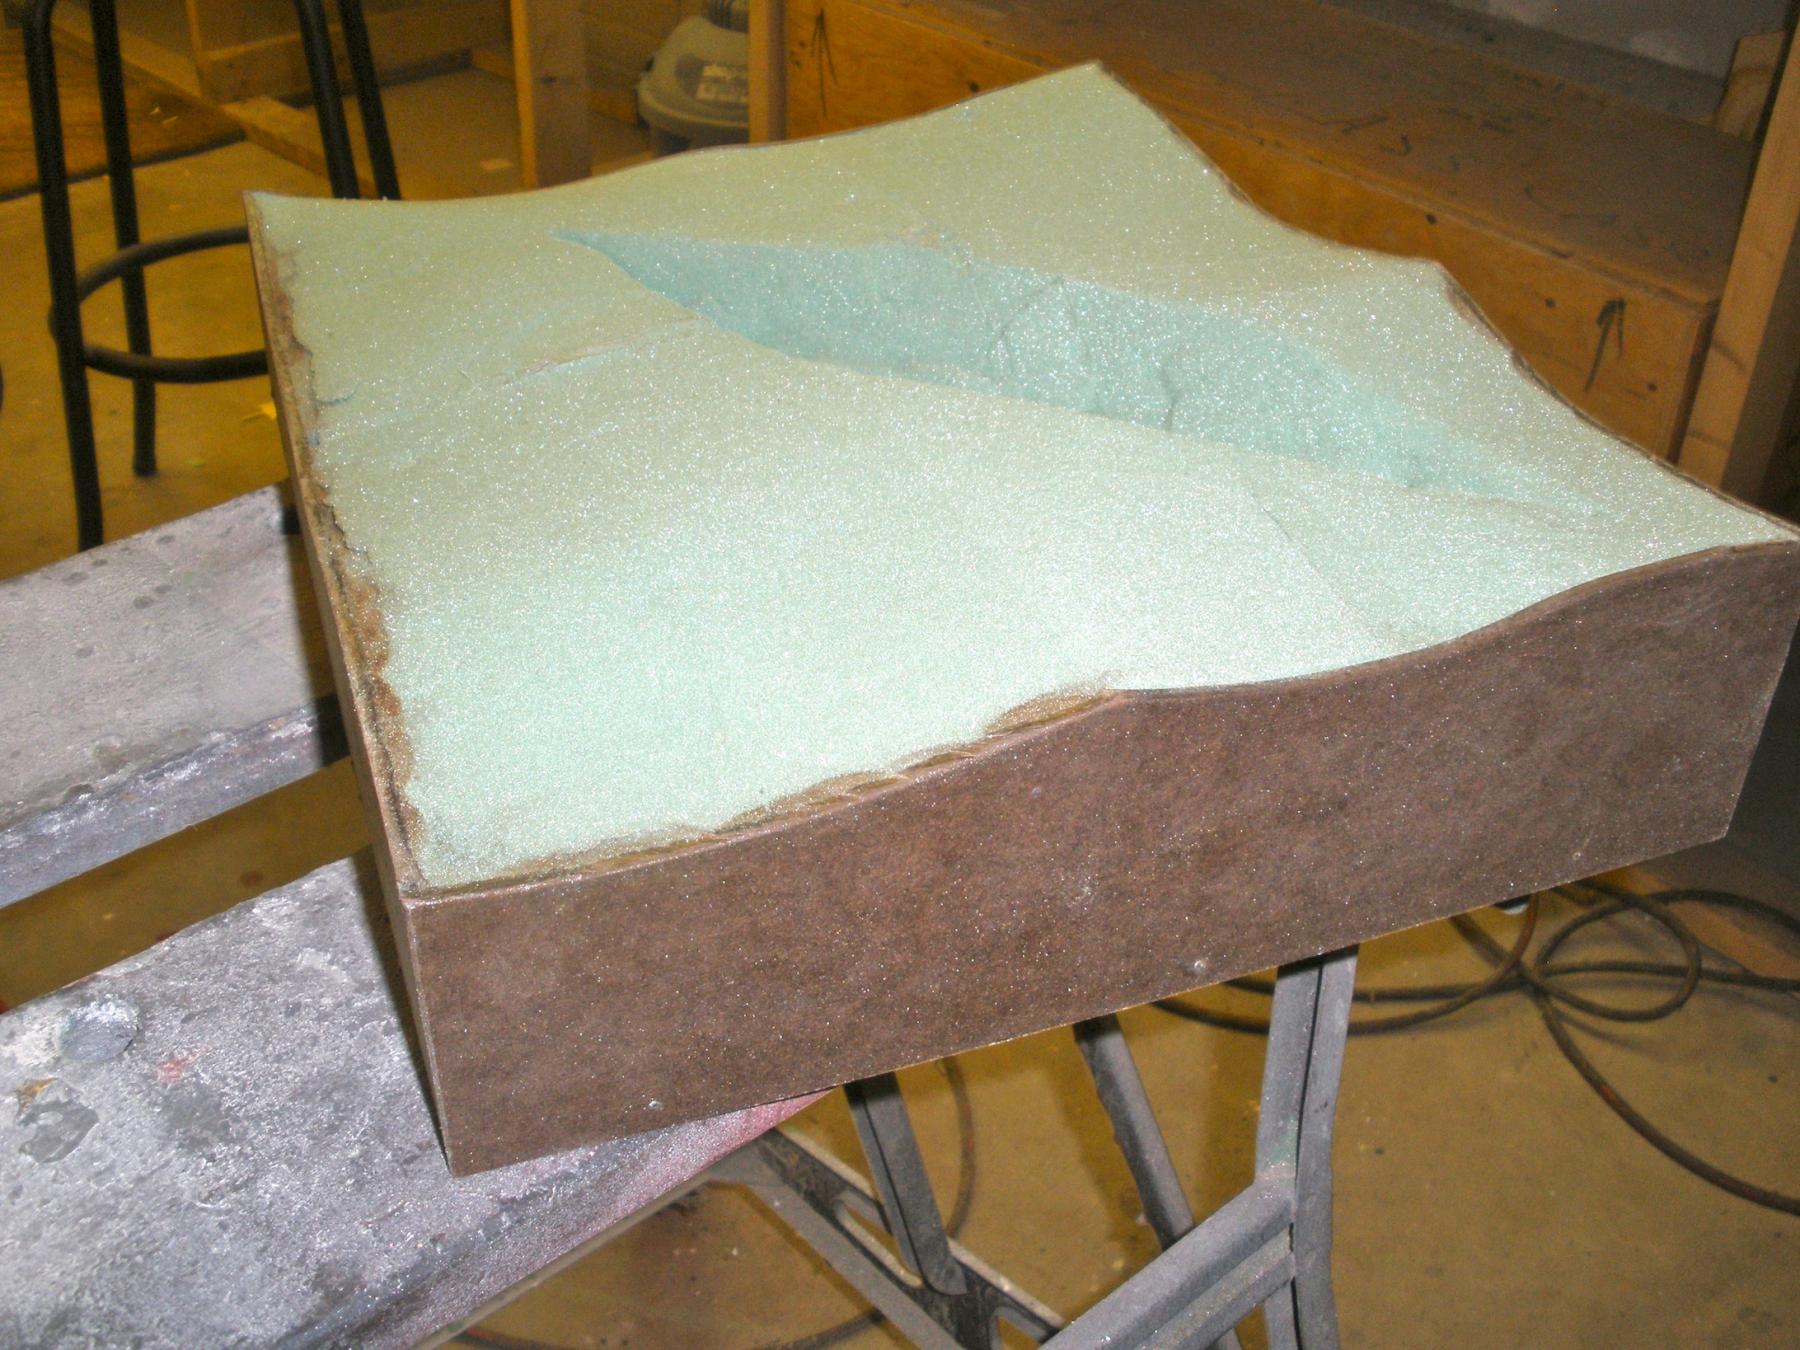
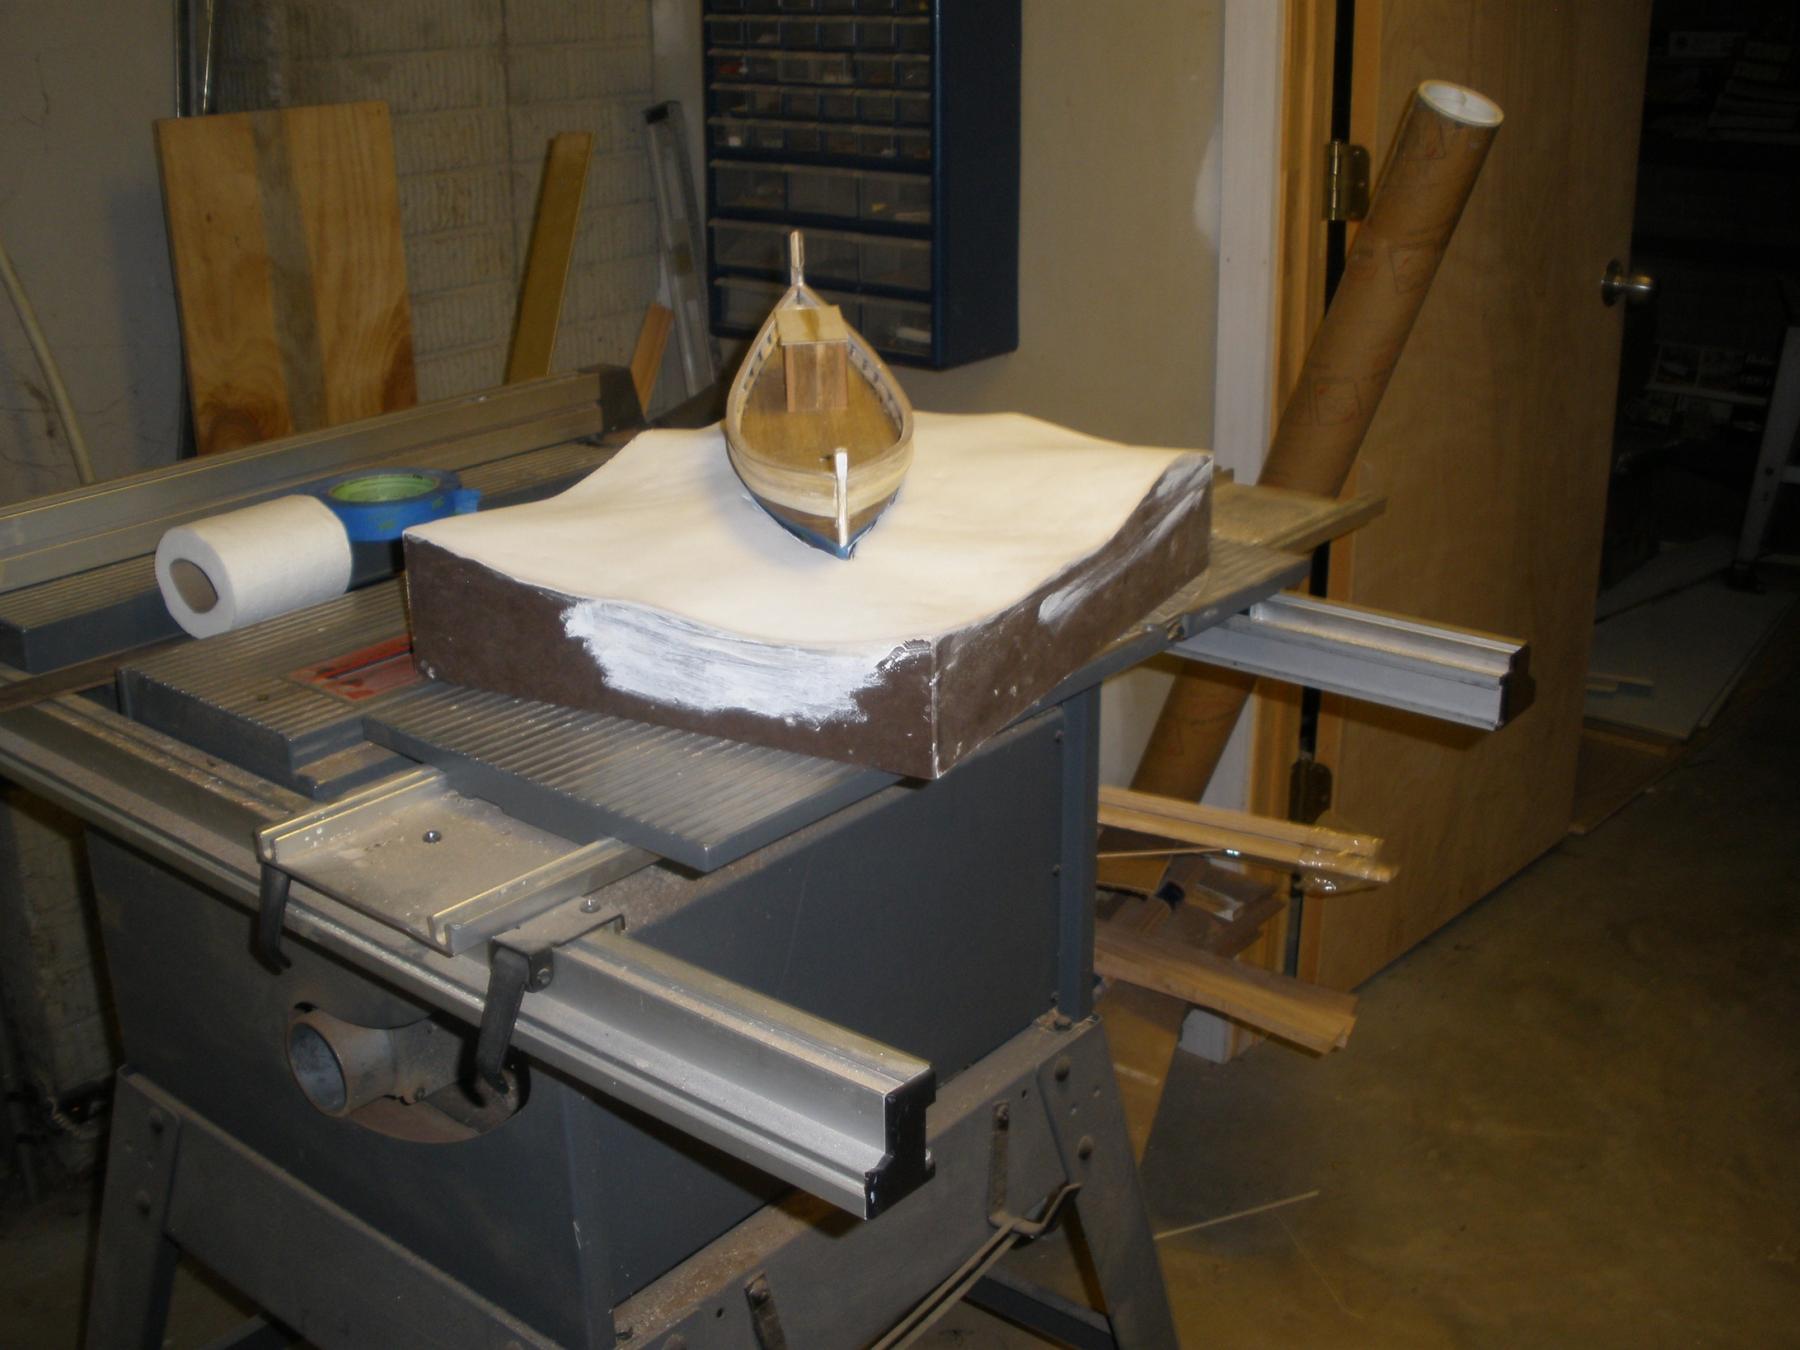
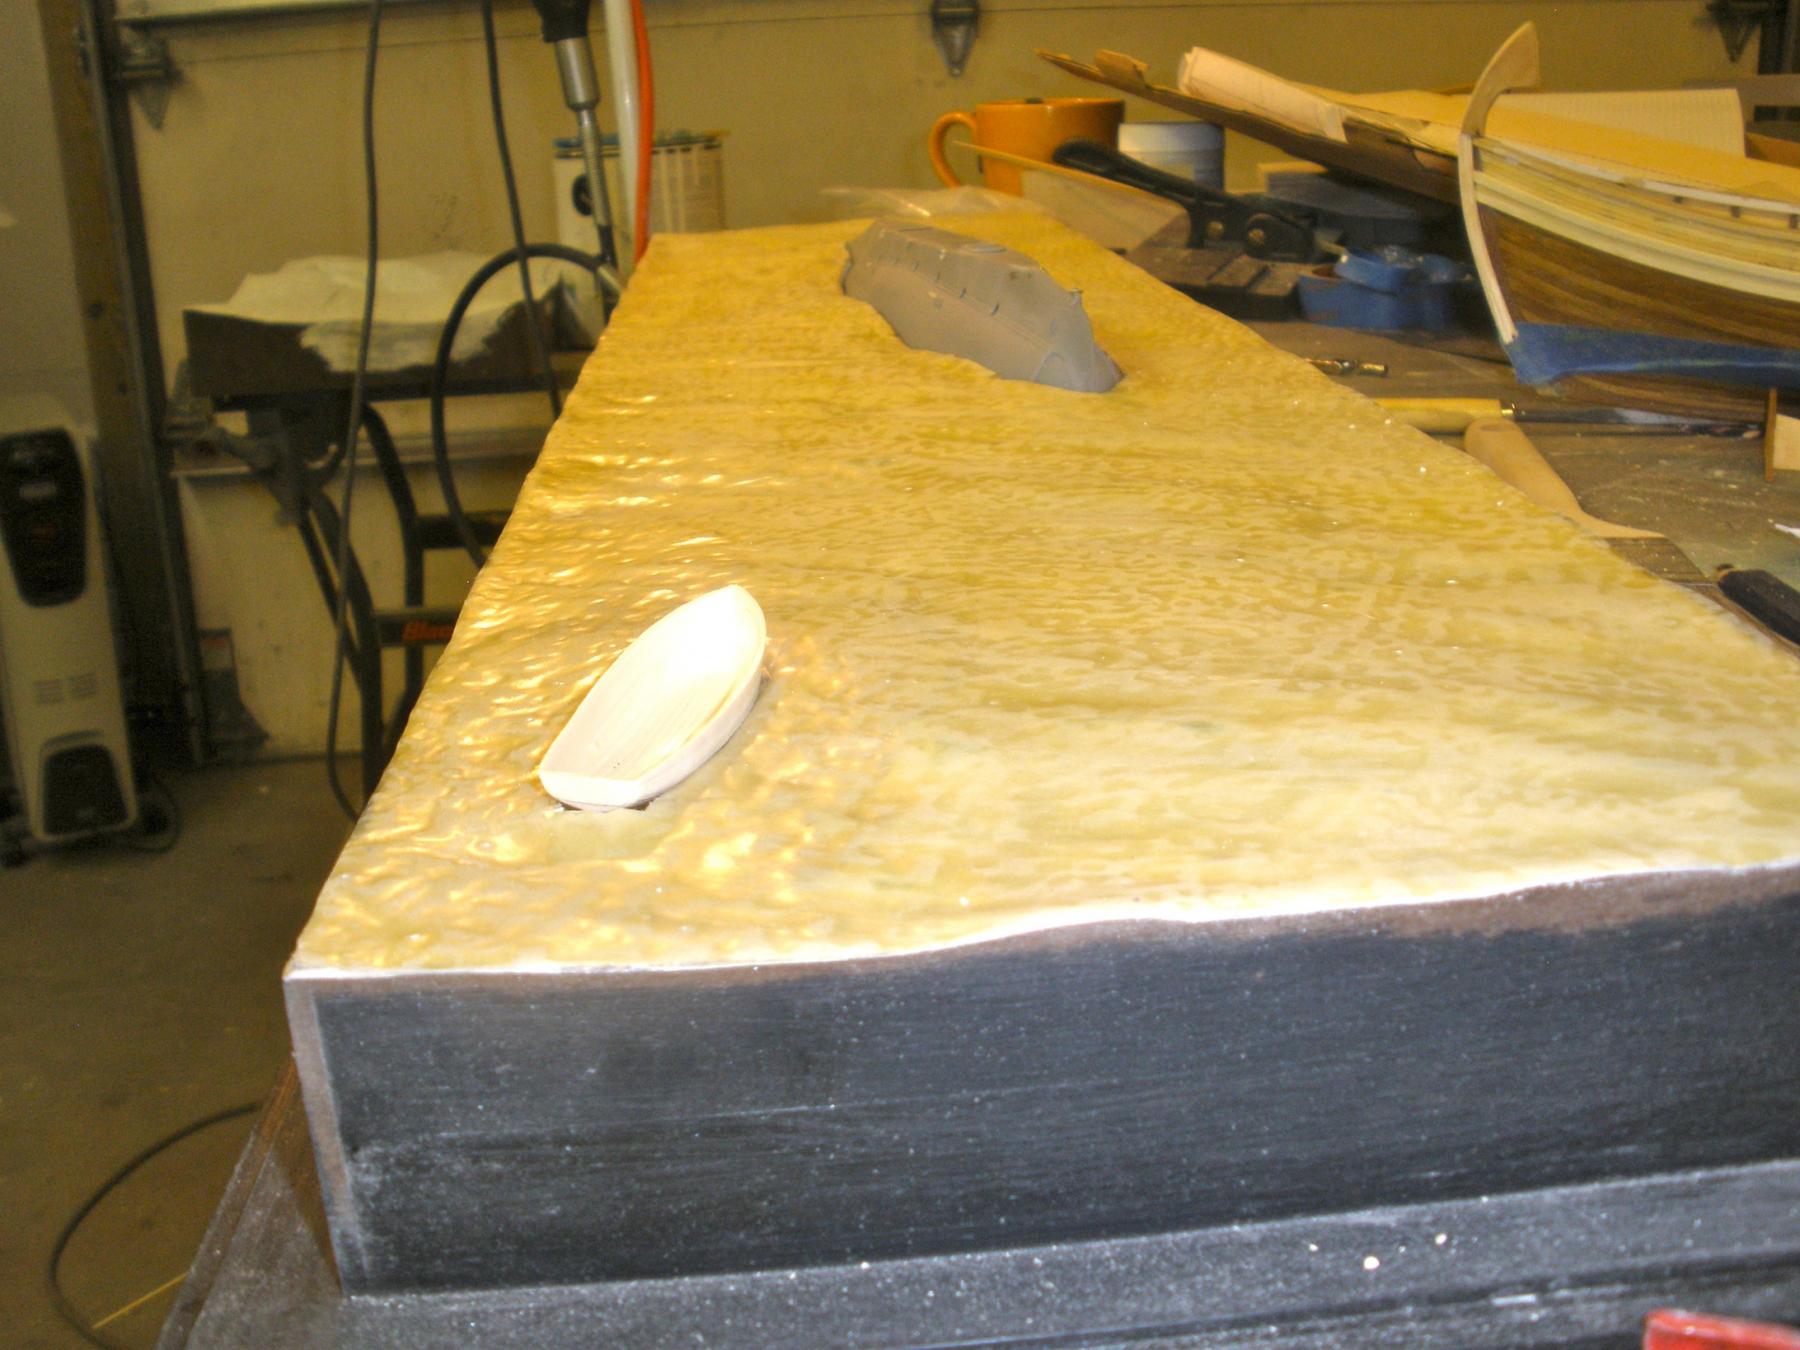
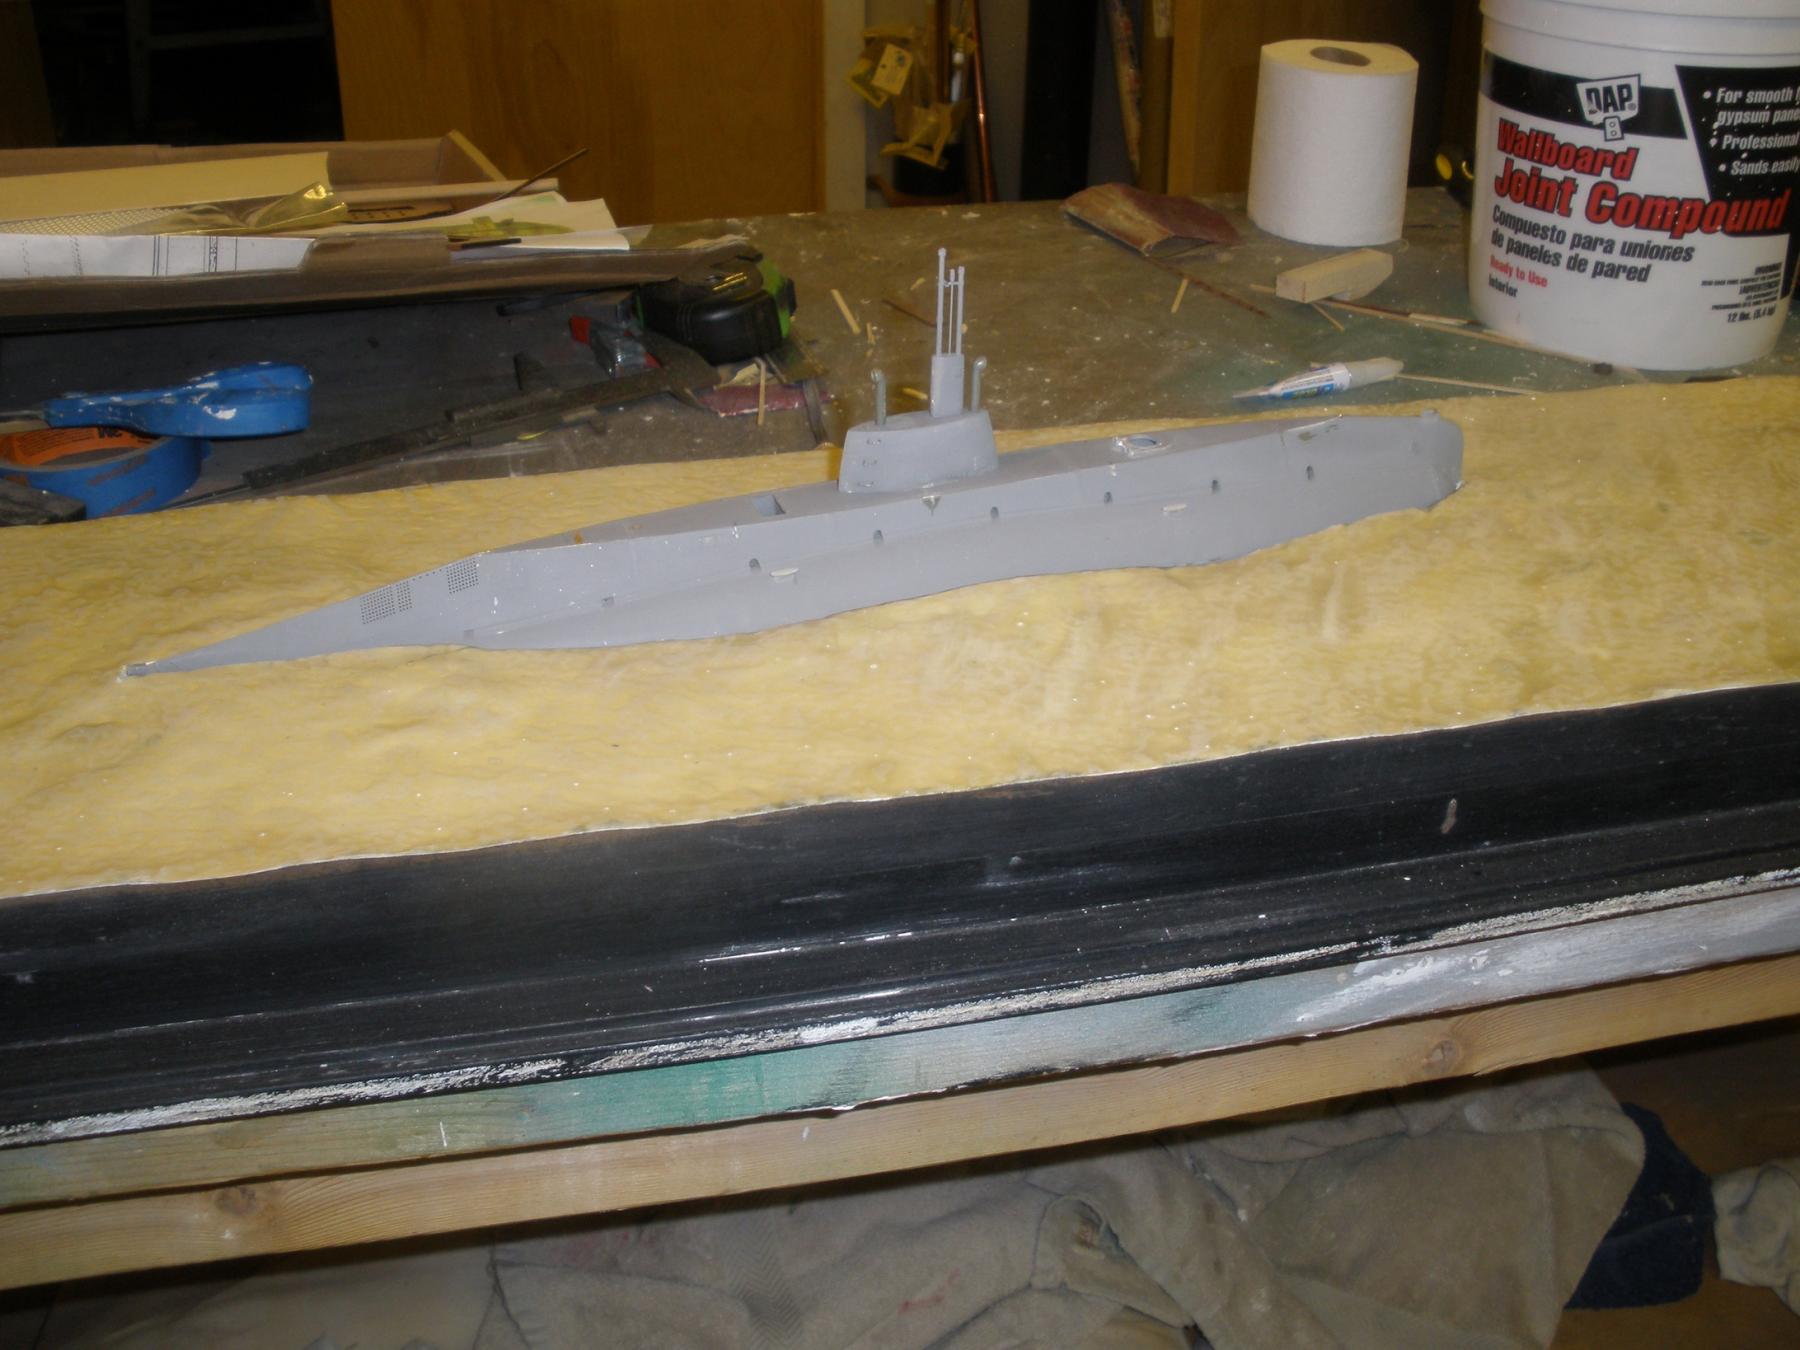
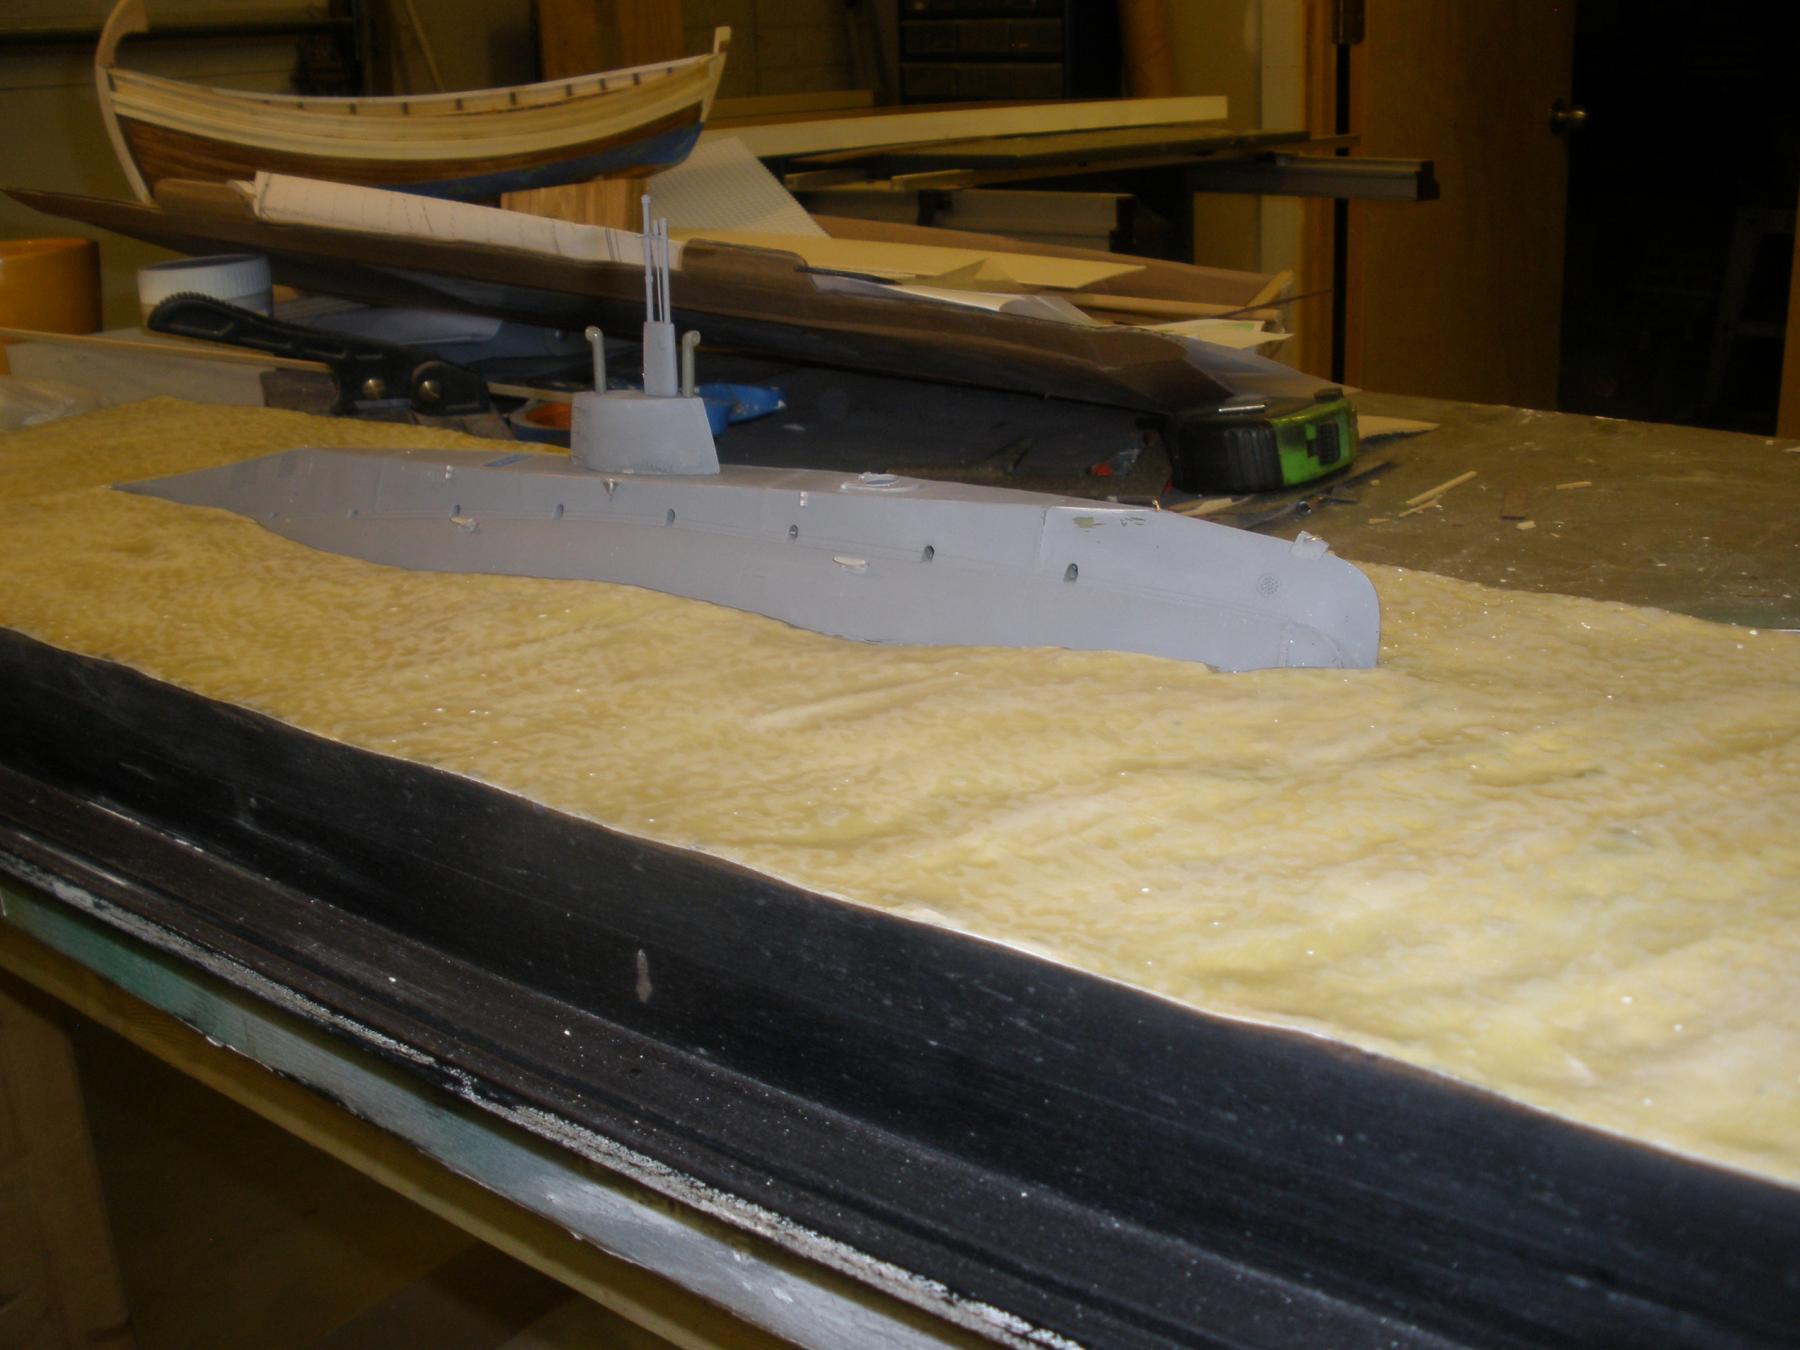
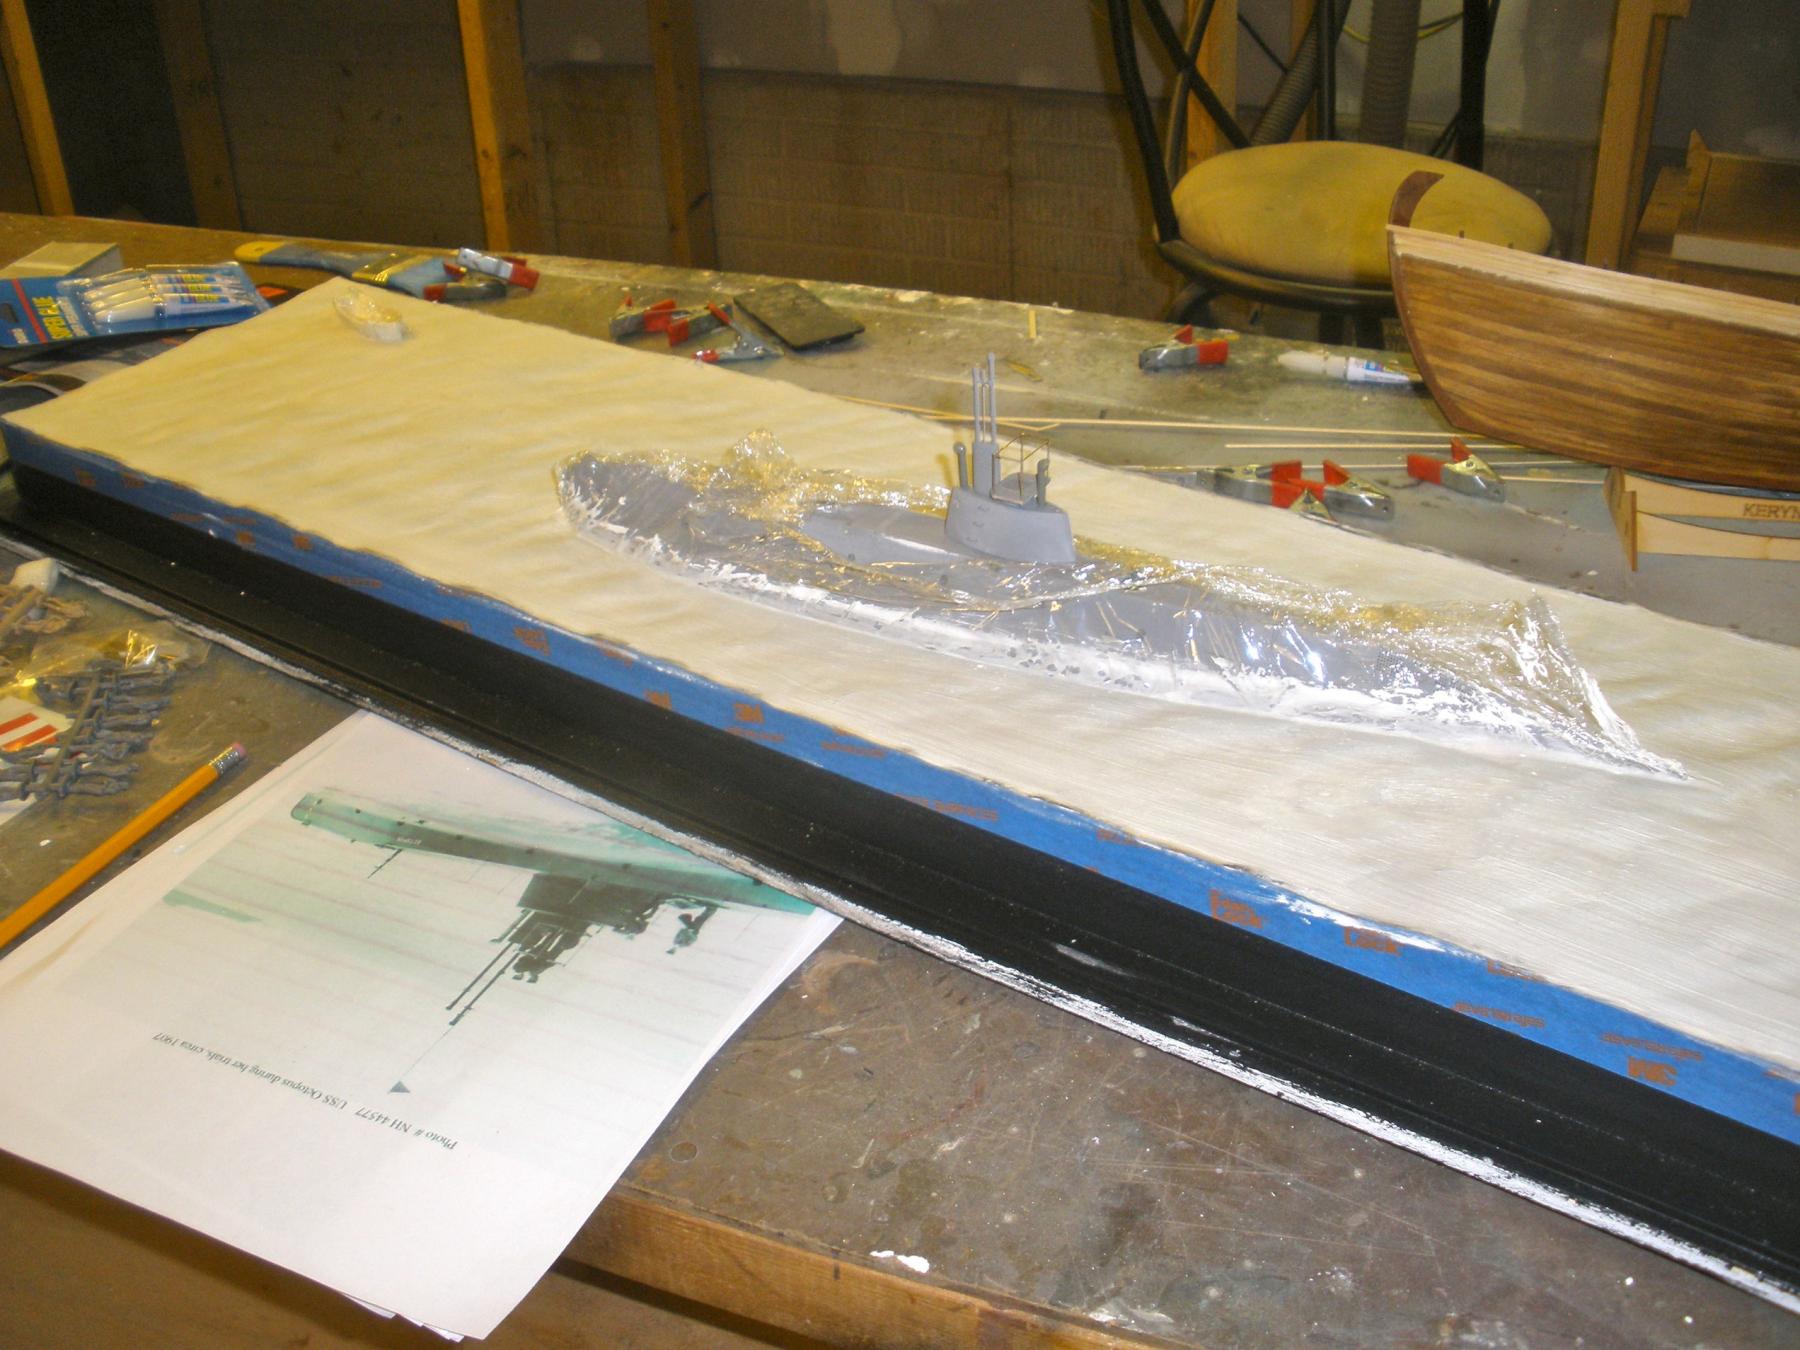
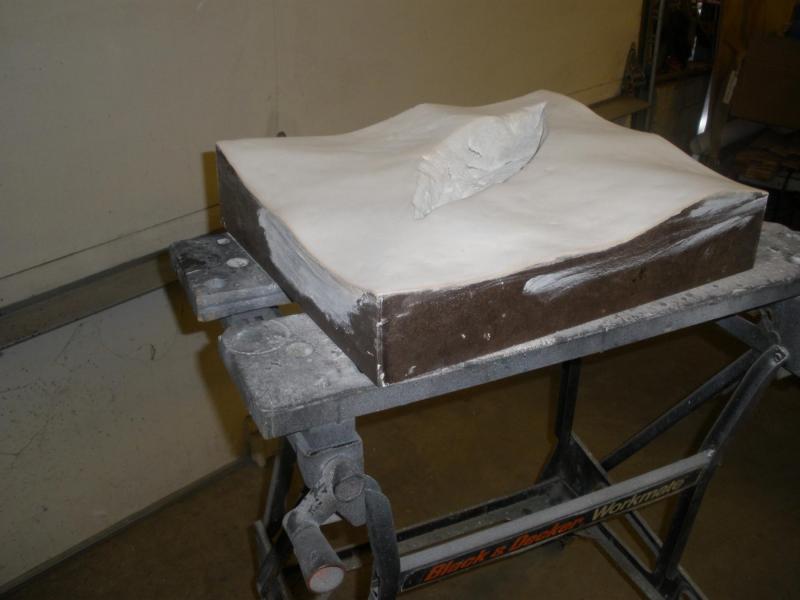
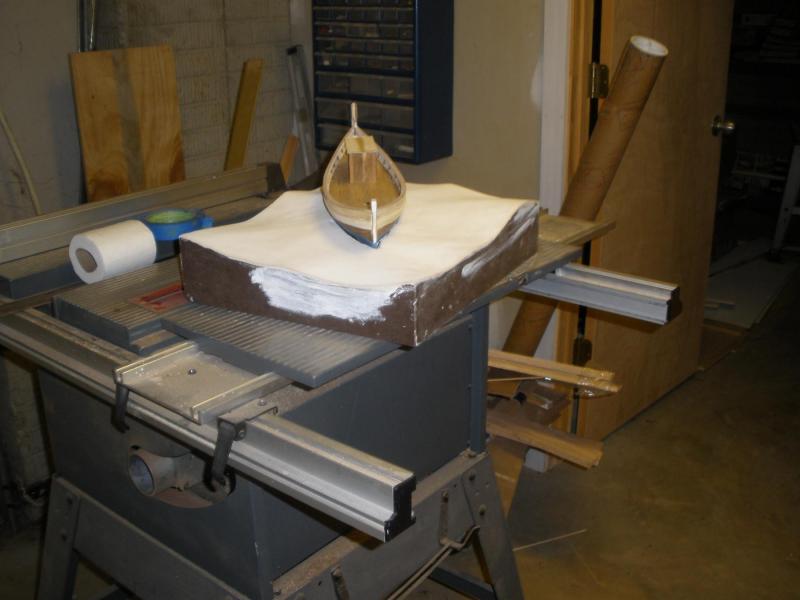
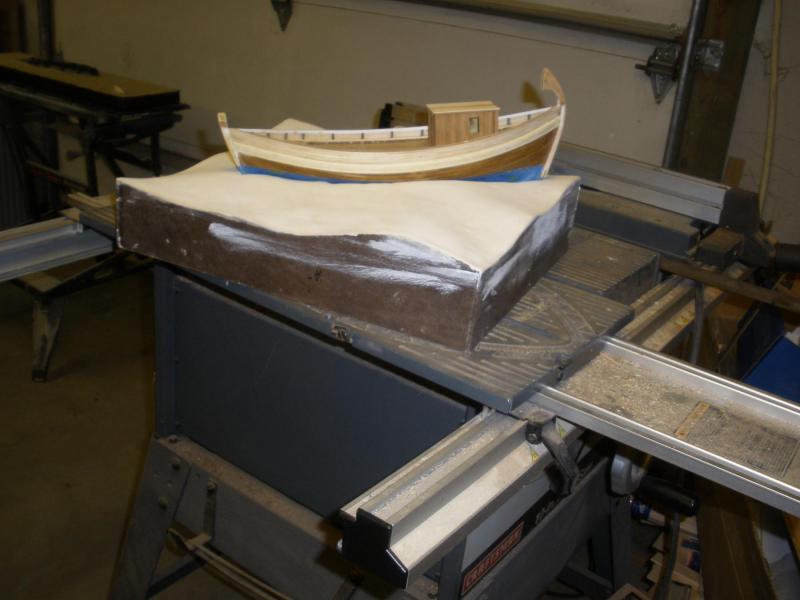
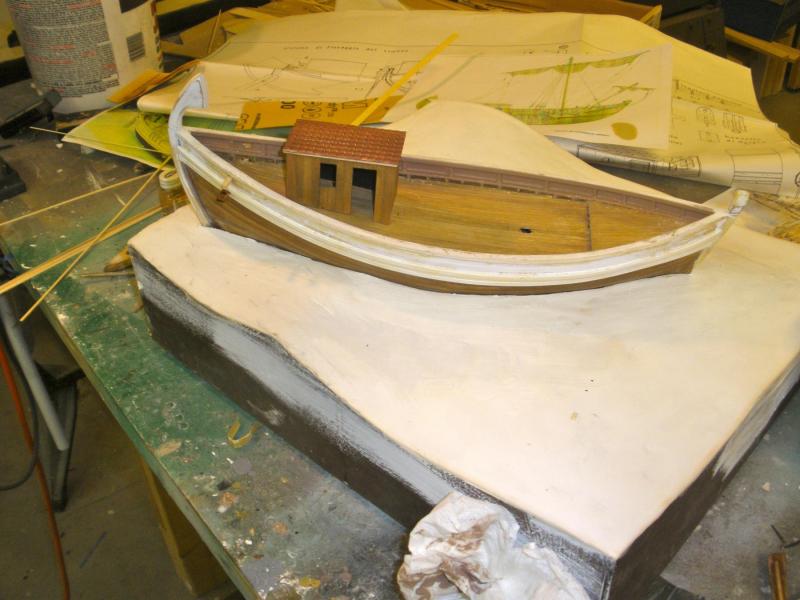
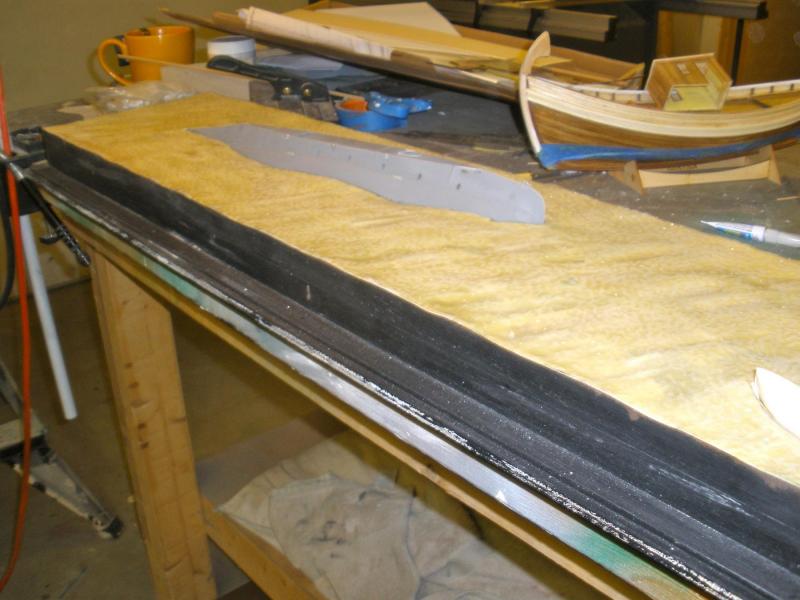
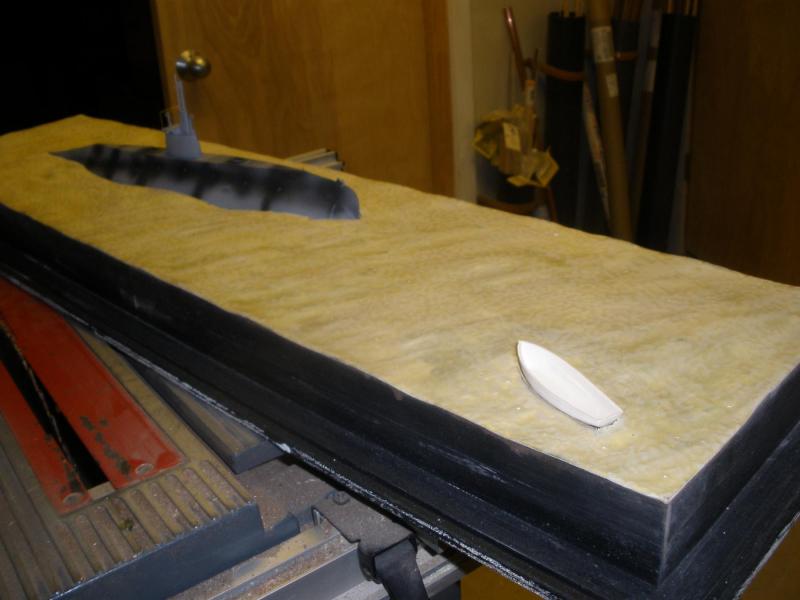
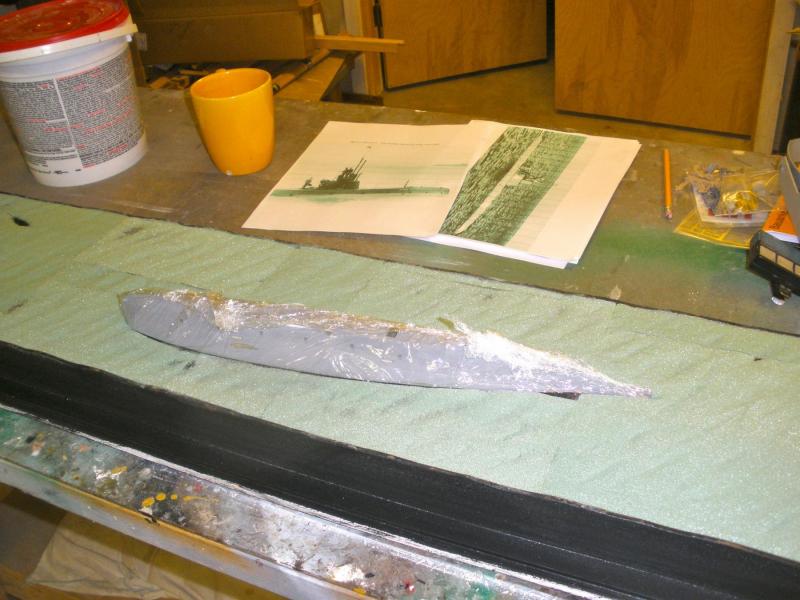
On to the water base. A simple masonite box was made with the wave pattern cut into all four sides. The box was filled with urethane foam.. Then carved to follow the wave lines. A hole cut out for the hull. The waves were covered in spackle and smoothed. They will eventually be covered in glass fiber. The rudder oar posts were added and the tile roof test fitted.


-
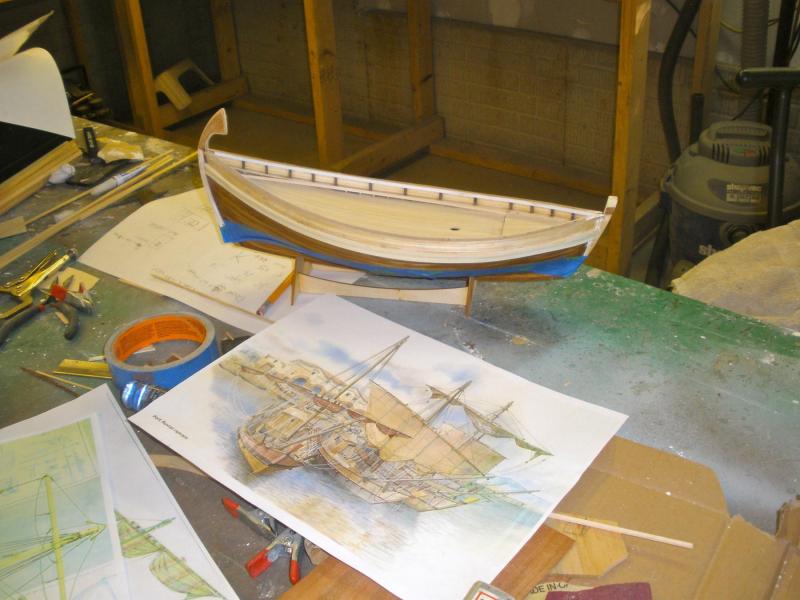
I had made a start a year or two back but was sidetracked by other work as usual. I built the deck house first to get an idea of the rest of deck layout.
-
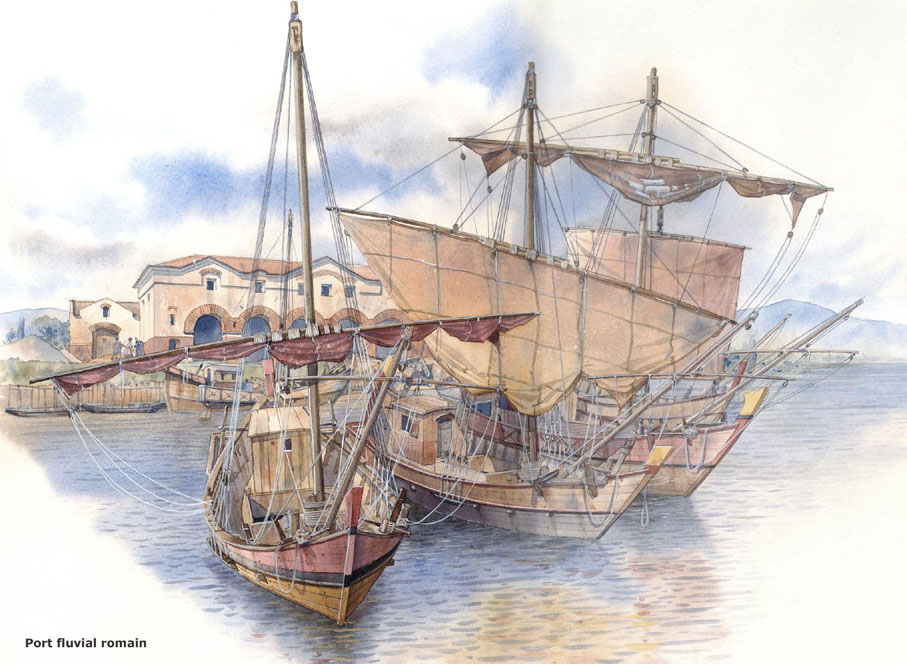
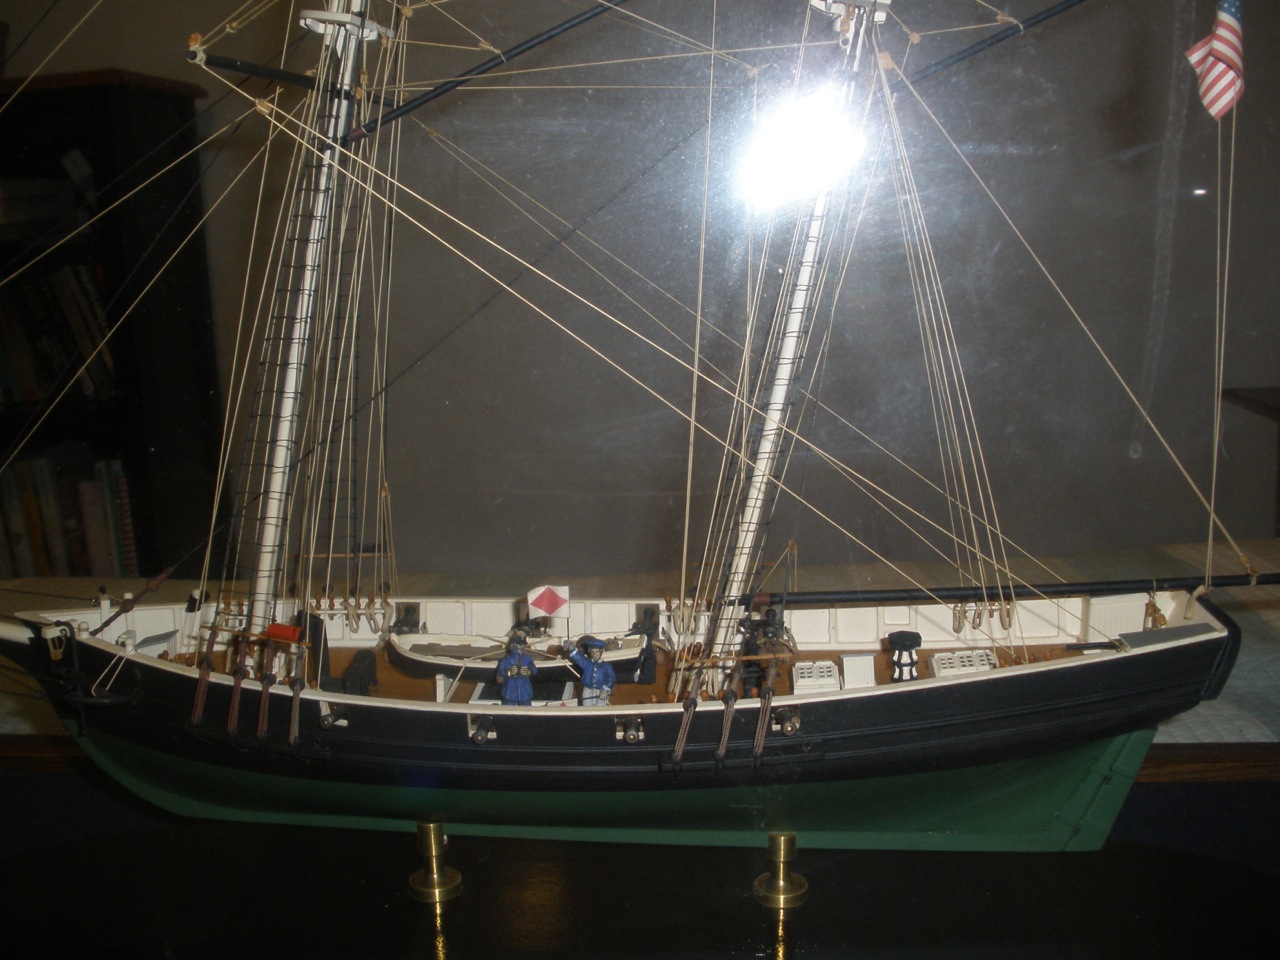
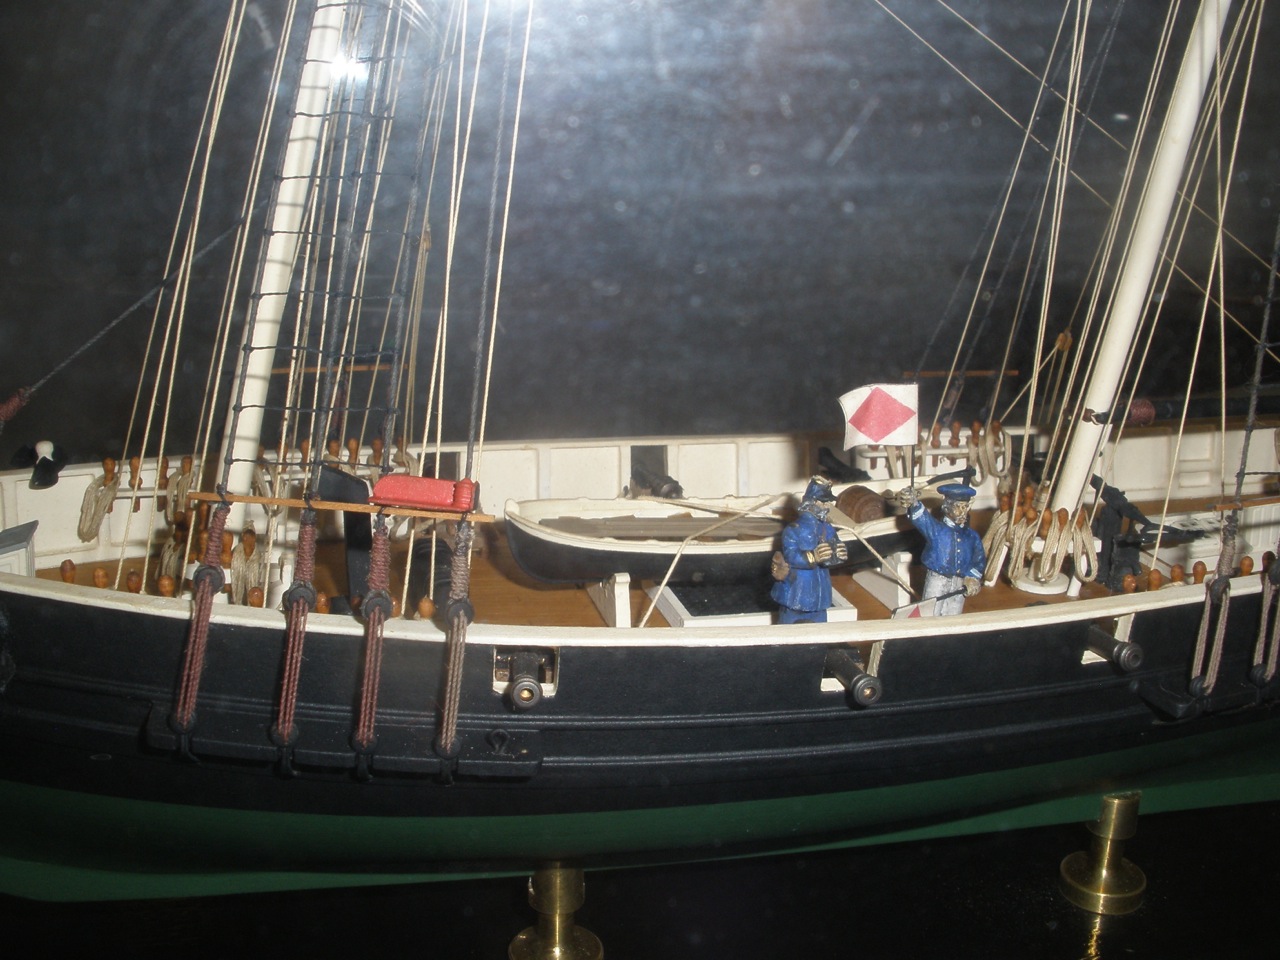
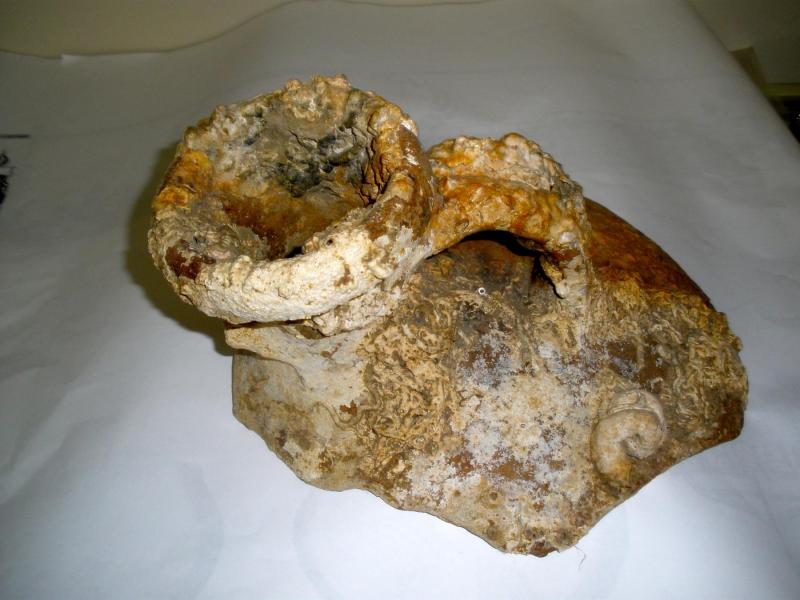
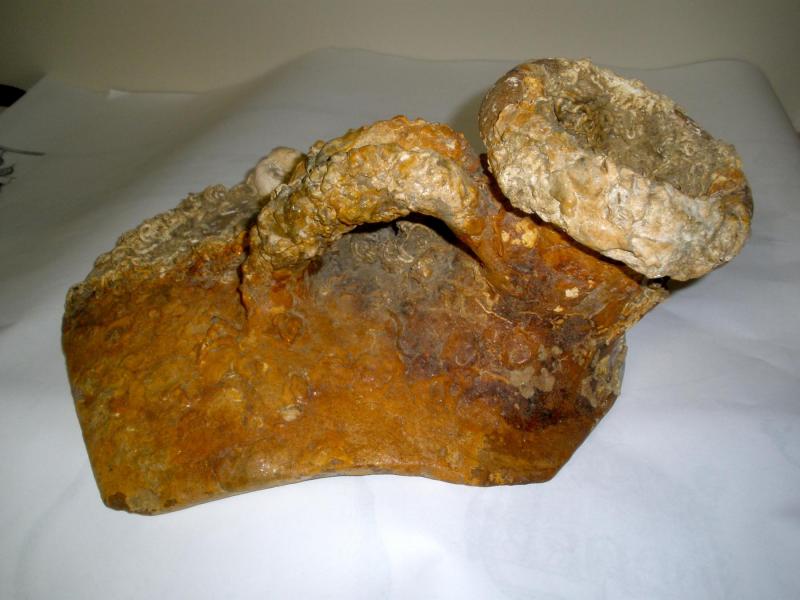
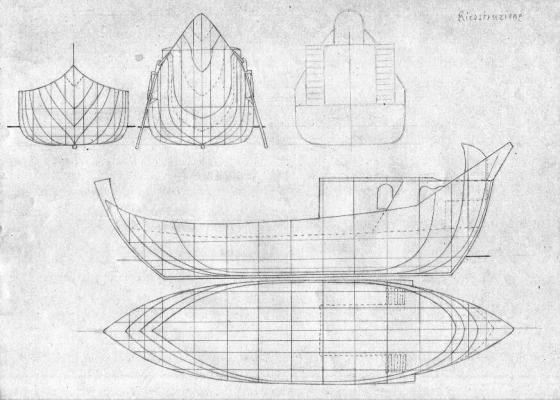
I have been the proud possessor of a large chunk of an ancient Roman Amphora. The storage jars the Romans used to transport everything from wine to fish sauce and olive oil to the four corners of their vast empire. It came to me quite a few years ago at the very dawn of ebay when it really was just an online flea market and not the commercial juggernaut it is today. A guy in Ohio was clearing out his garage and put it on line along with a lot of other 'junk'. I bought it for the princely sum of 25 bucks, not knowing if it was genuine or not but I just liked it. I asked him where he got it and he told me he was a retired mailman and a little old french lady on his route had left a box of junk out for the garbage collection and the amphora piece was inside. He asked her if he could have it for his fish tank and she told him to take it. She also told him that it was found by her brother in the 50's. He was a diver in the French navy and found the amphora on the mediterranean sea bed during an exercise and took it for a souvenir for her. The mailman took it home, dropped it into his fish tank where it promptly killed his entire collection of marine fish! He had it lying in his garage ever since. I have a collection of genuine shipwreck artifacts and I thought that it would still look good even if it was a fake. The package arrived and judging by the extensive marine growth encrusting it, I was fairly sure it was real. To be certain, I took it to a museum marine archaeologist client I had worked with in the past and after consulting a catalog of amphora types and styles, he certified it was 2nd century Roman. When I am not working on other people's projects, I build model ships to display with an artifact from the wreck of that ship and the amphora was next on my list. You scan see from the photos where the line of sea growth stops where a section was buried in the sand. Here is a photo of one in situ. Apparently it is a 'Gallic' pattern from Gaul, modern day France which would fit with the circumstances of it's history. There are not too many things known about the thousands of Roman merchant vessels plying the coasts of the empire. Their lines and content went largely unrecorded except for what can be supposed from their remains. My research brought me to a set of drawings made by an Italian amateur marine archaeological society and a couple of other sources which gave me enough for an attempt at a small coastal vessel by not building from one source, but taking information from all the sources and combining it. I think this is the most likely impression and based most of my model on it.


-
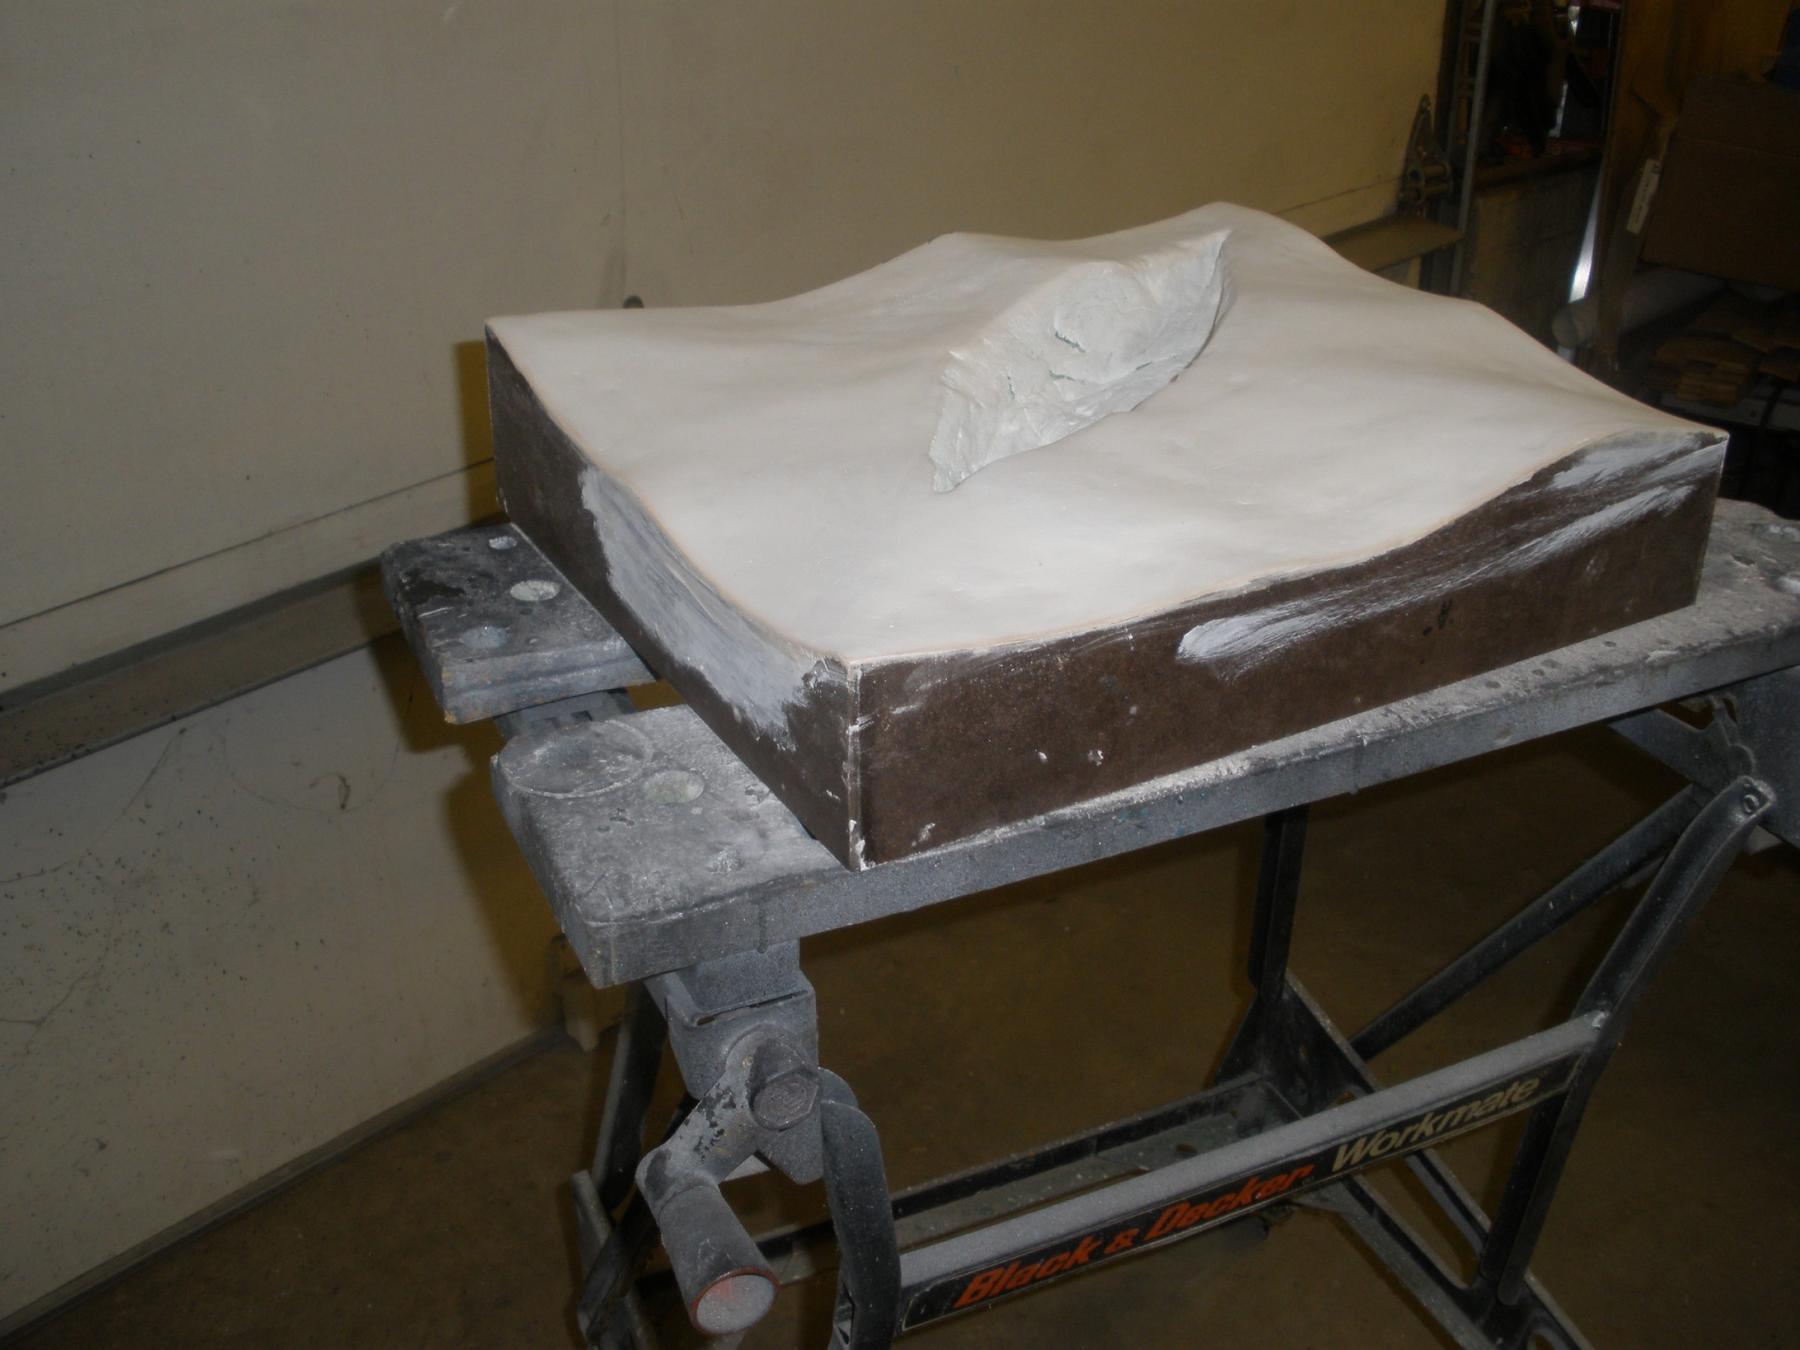
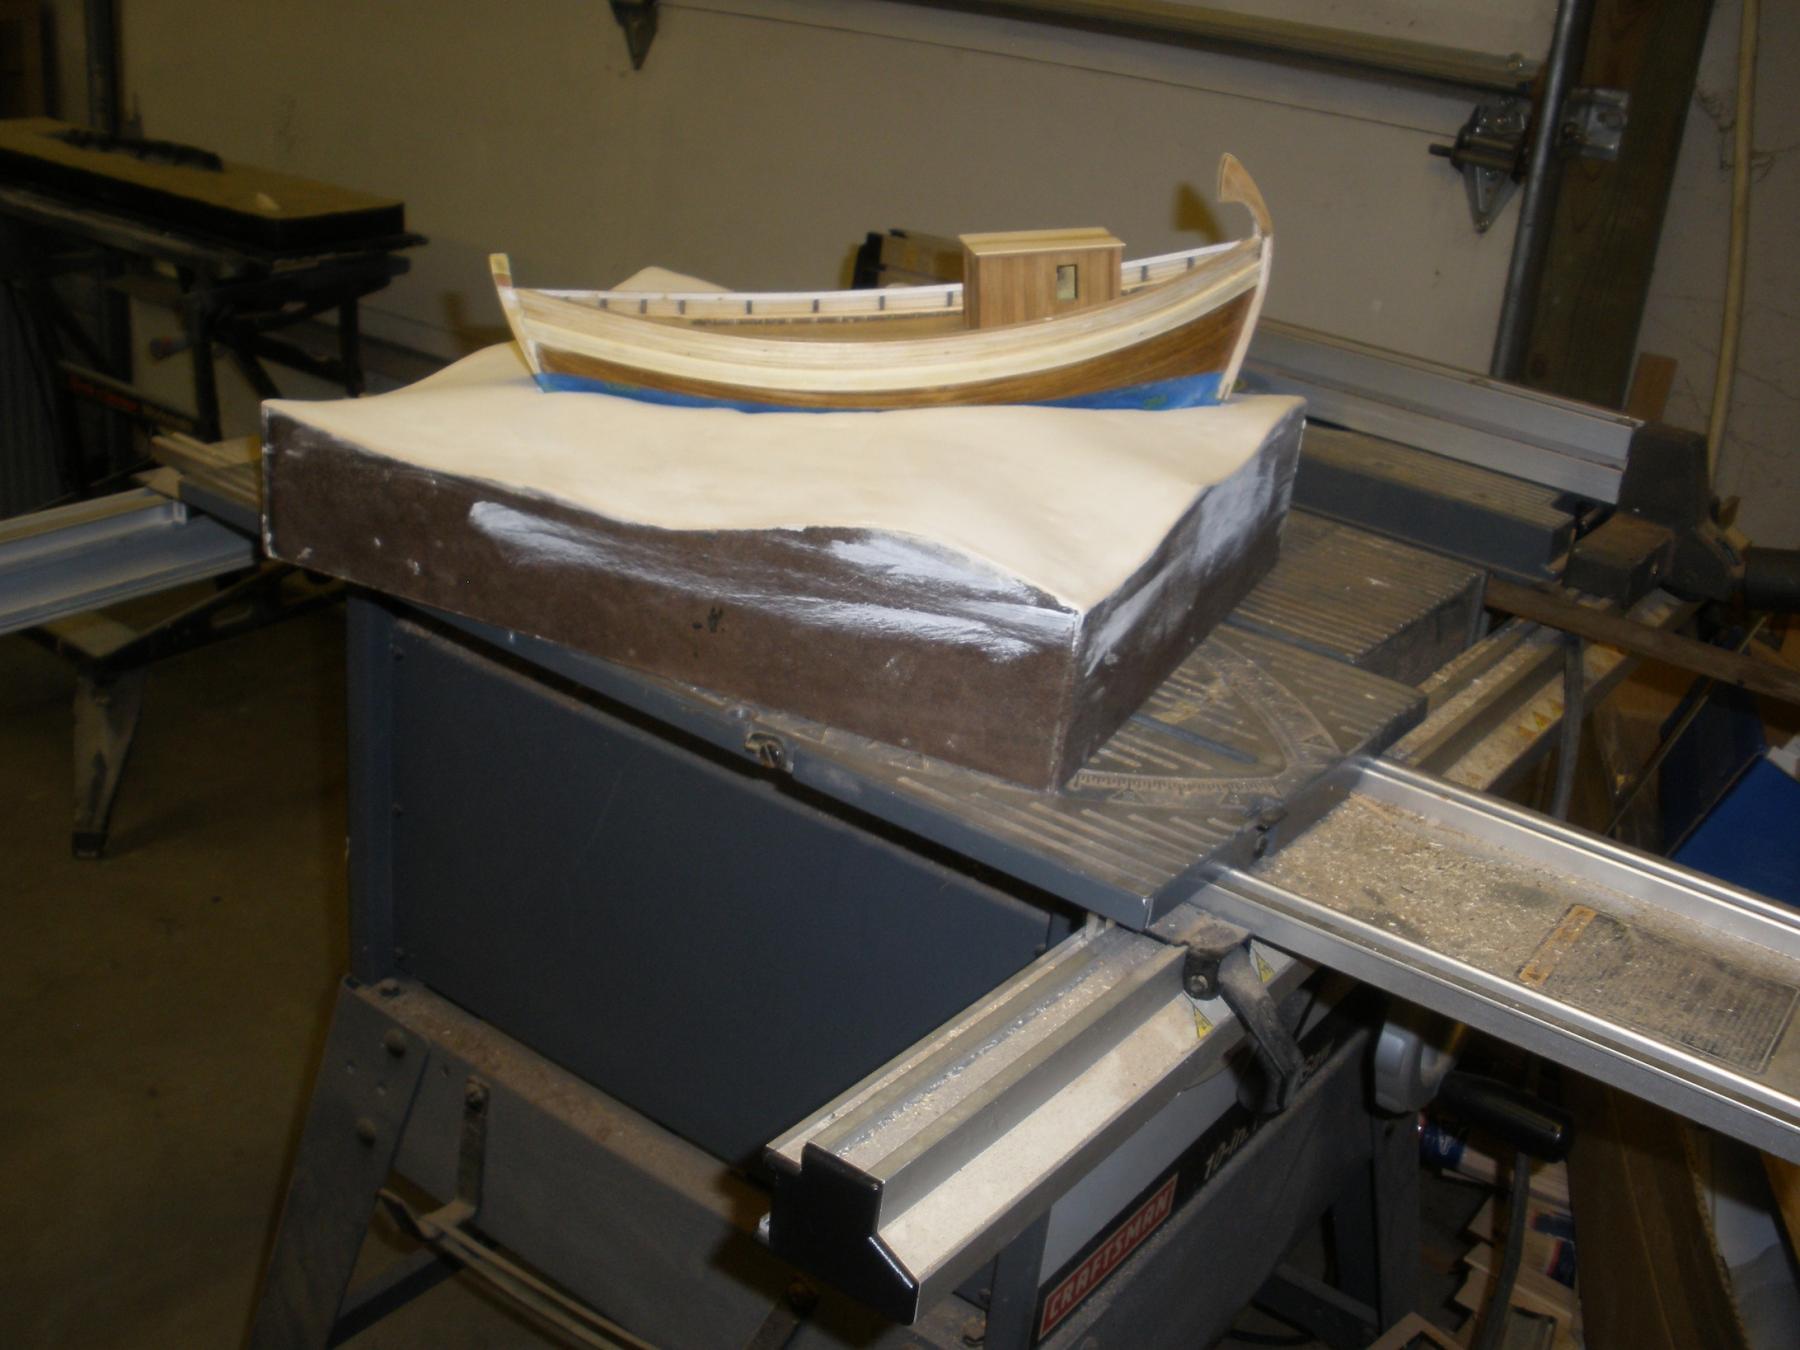
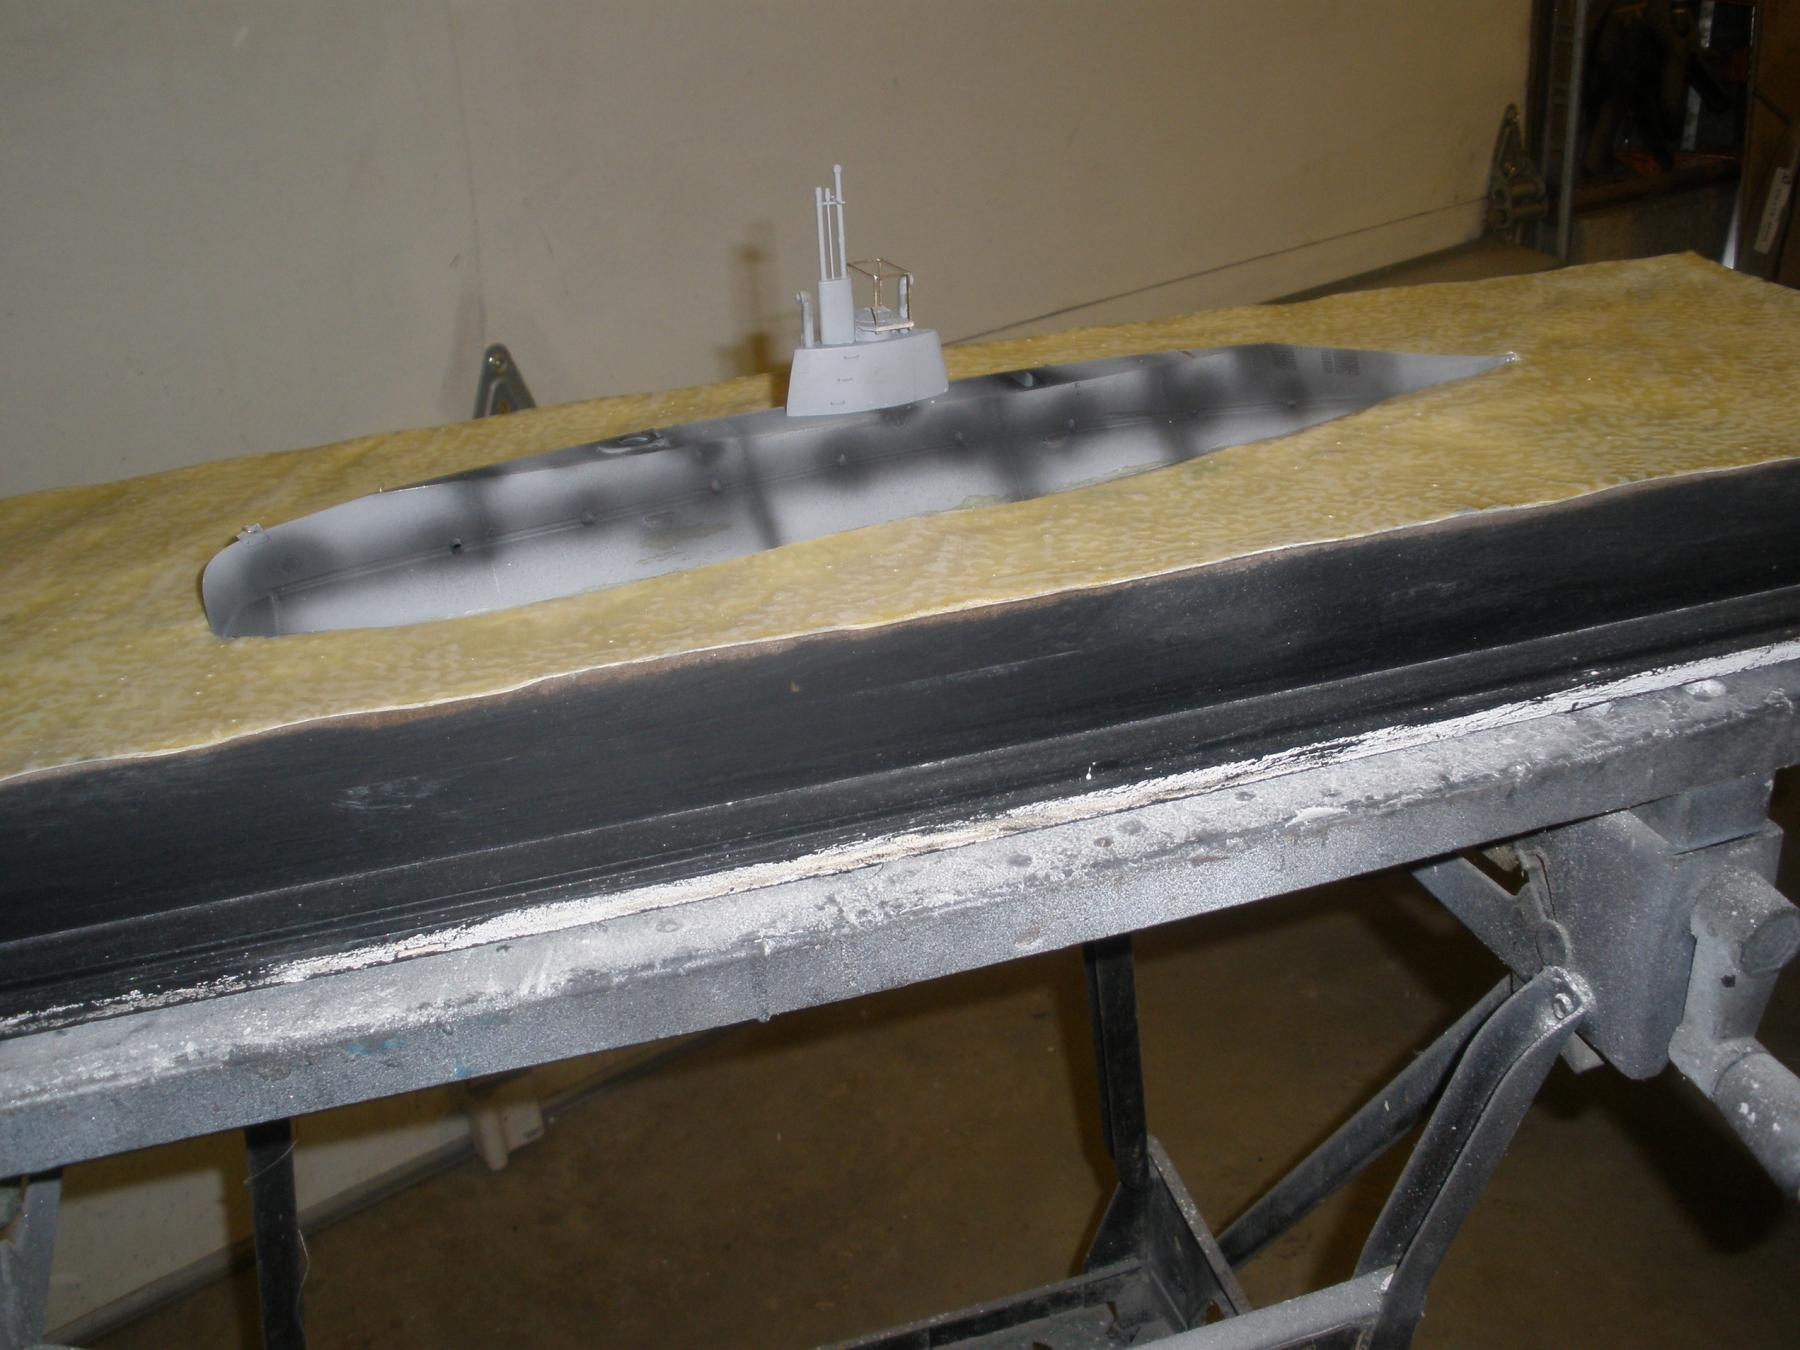
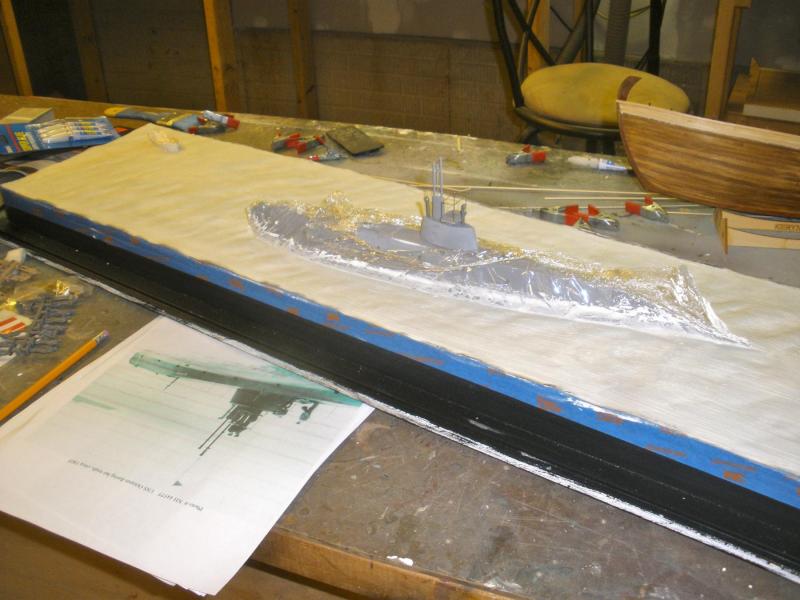
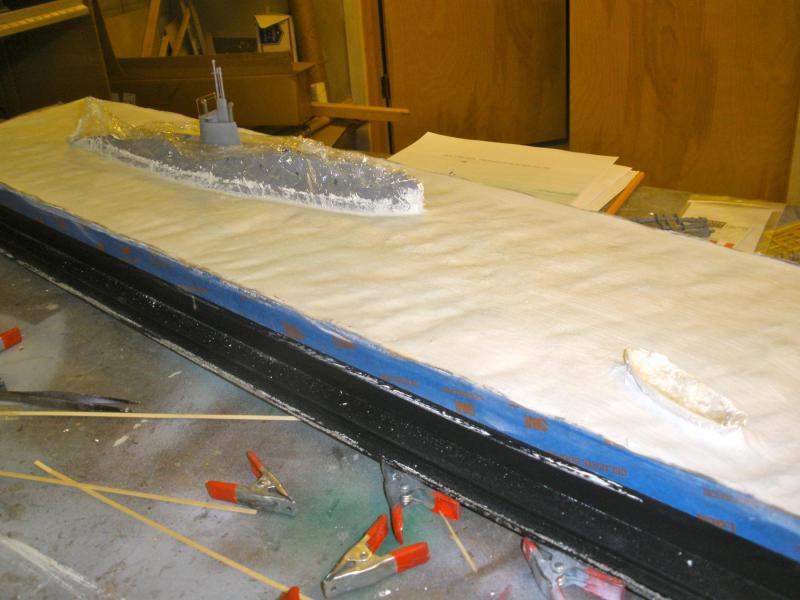
After the addition of a little spackle here and there the water was sanded smooth and covered in glass fiber.


-
Hi Keith, they do make very nice models and I agree, the whole area of early submarines is very neglected by kit makers. A pity considering how interesting they look compared to the modern subs. Dan.
-
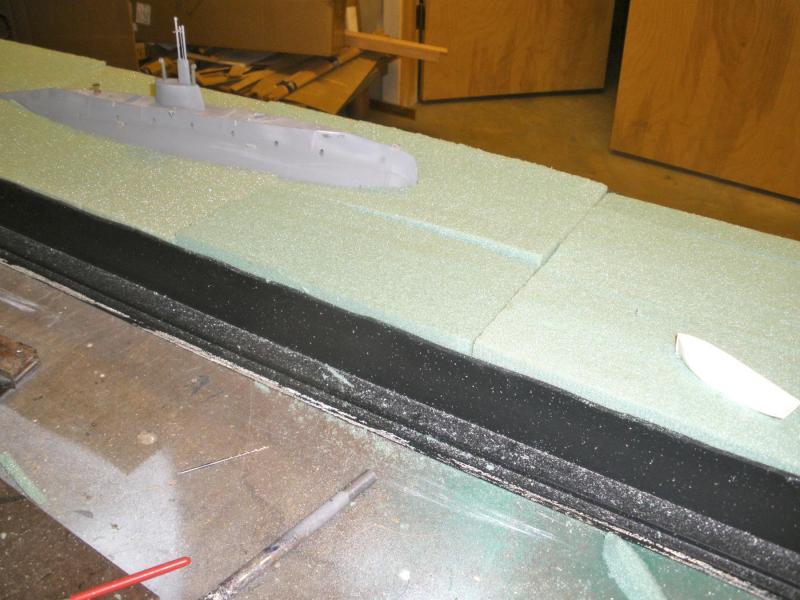
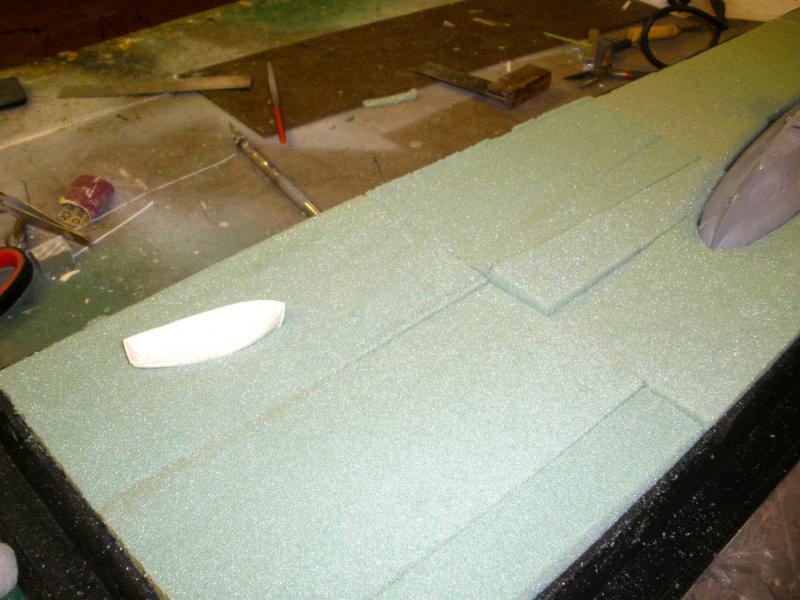
Then on to the water baseboard.


-
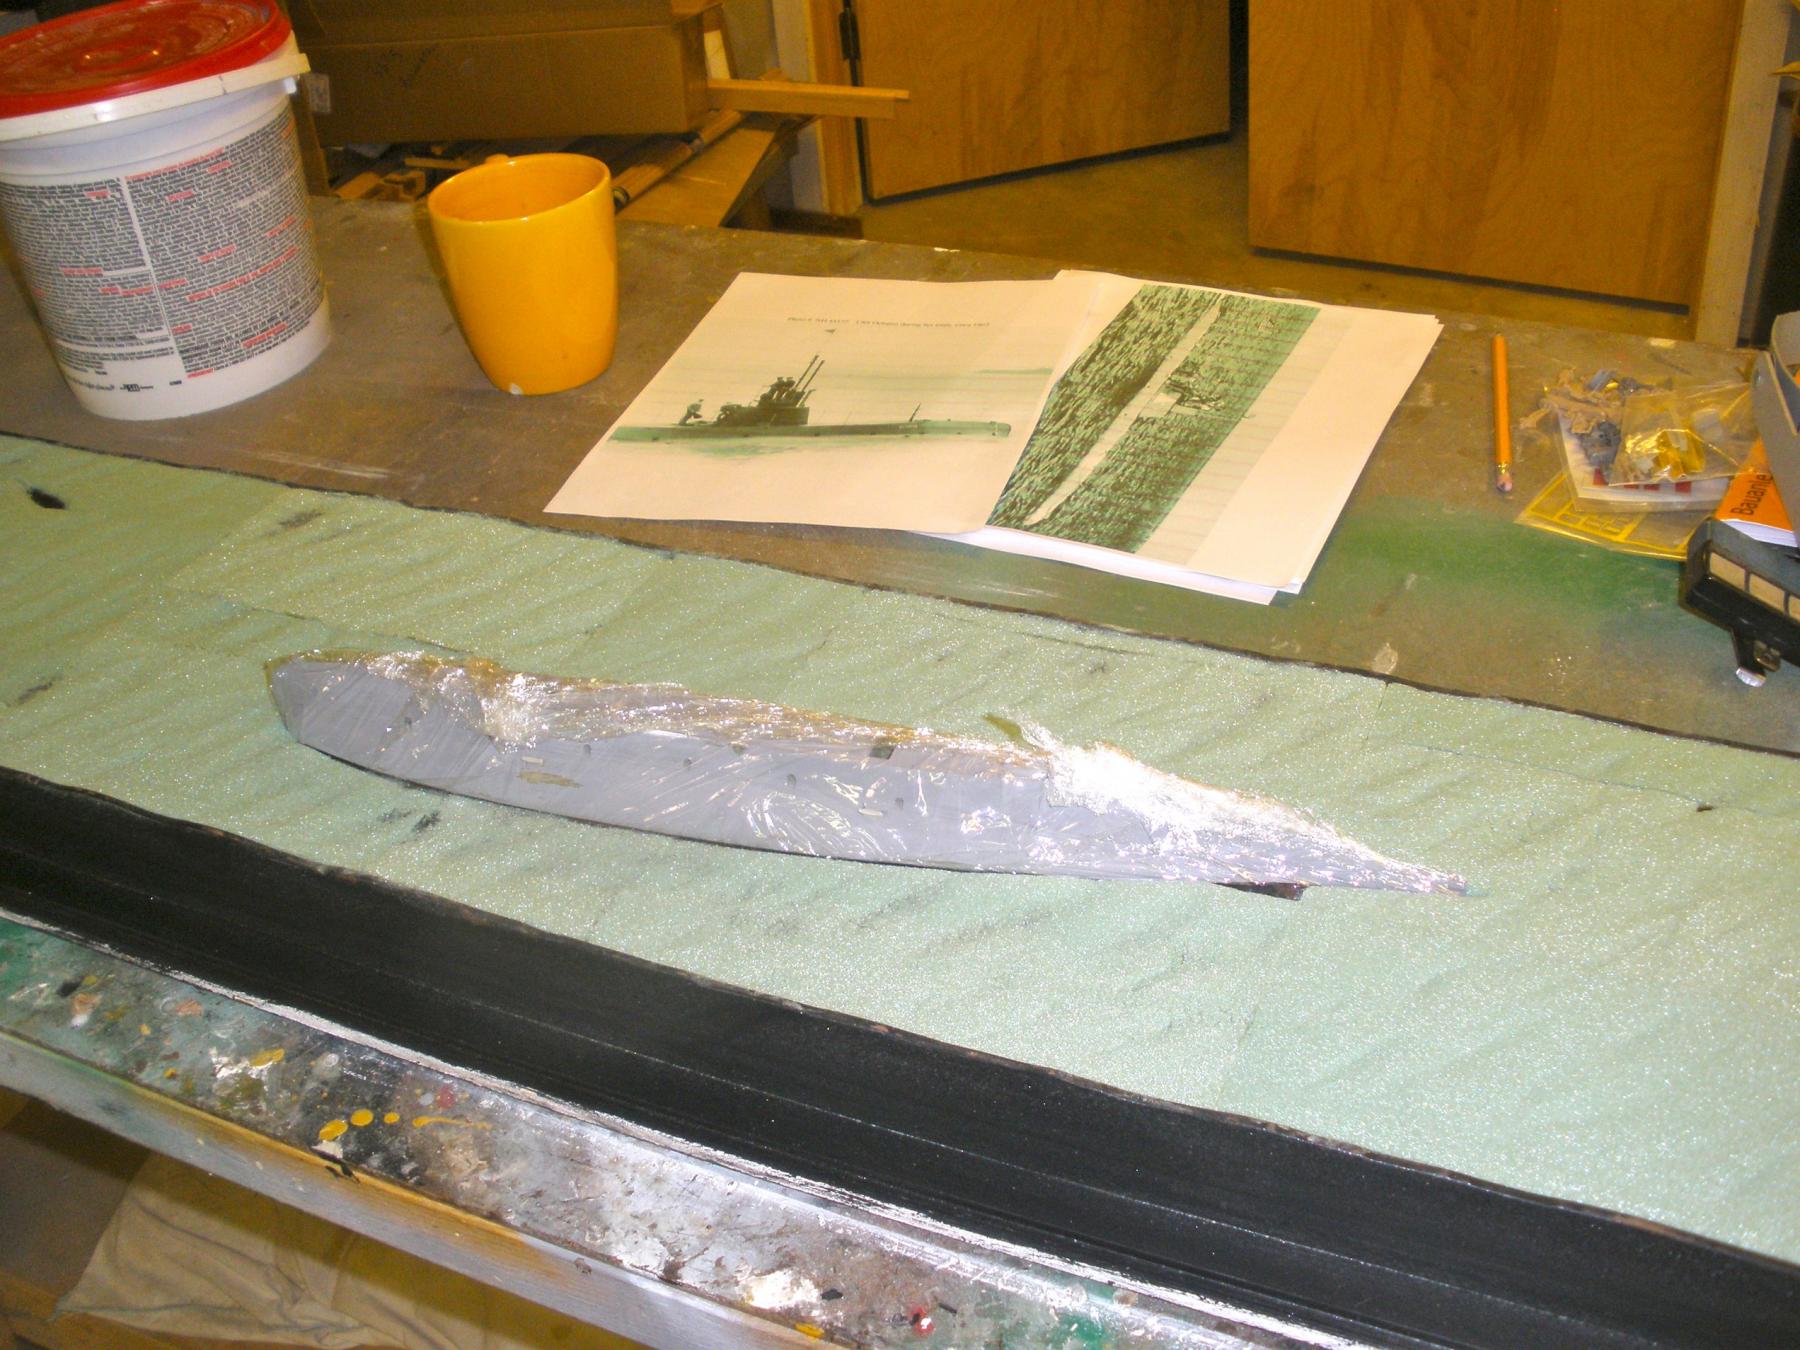
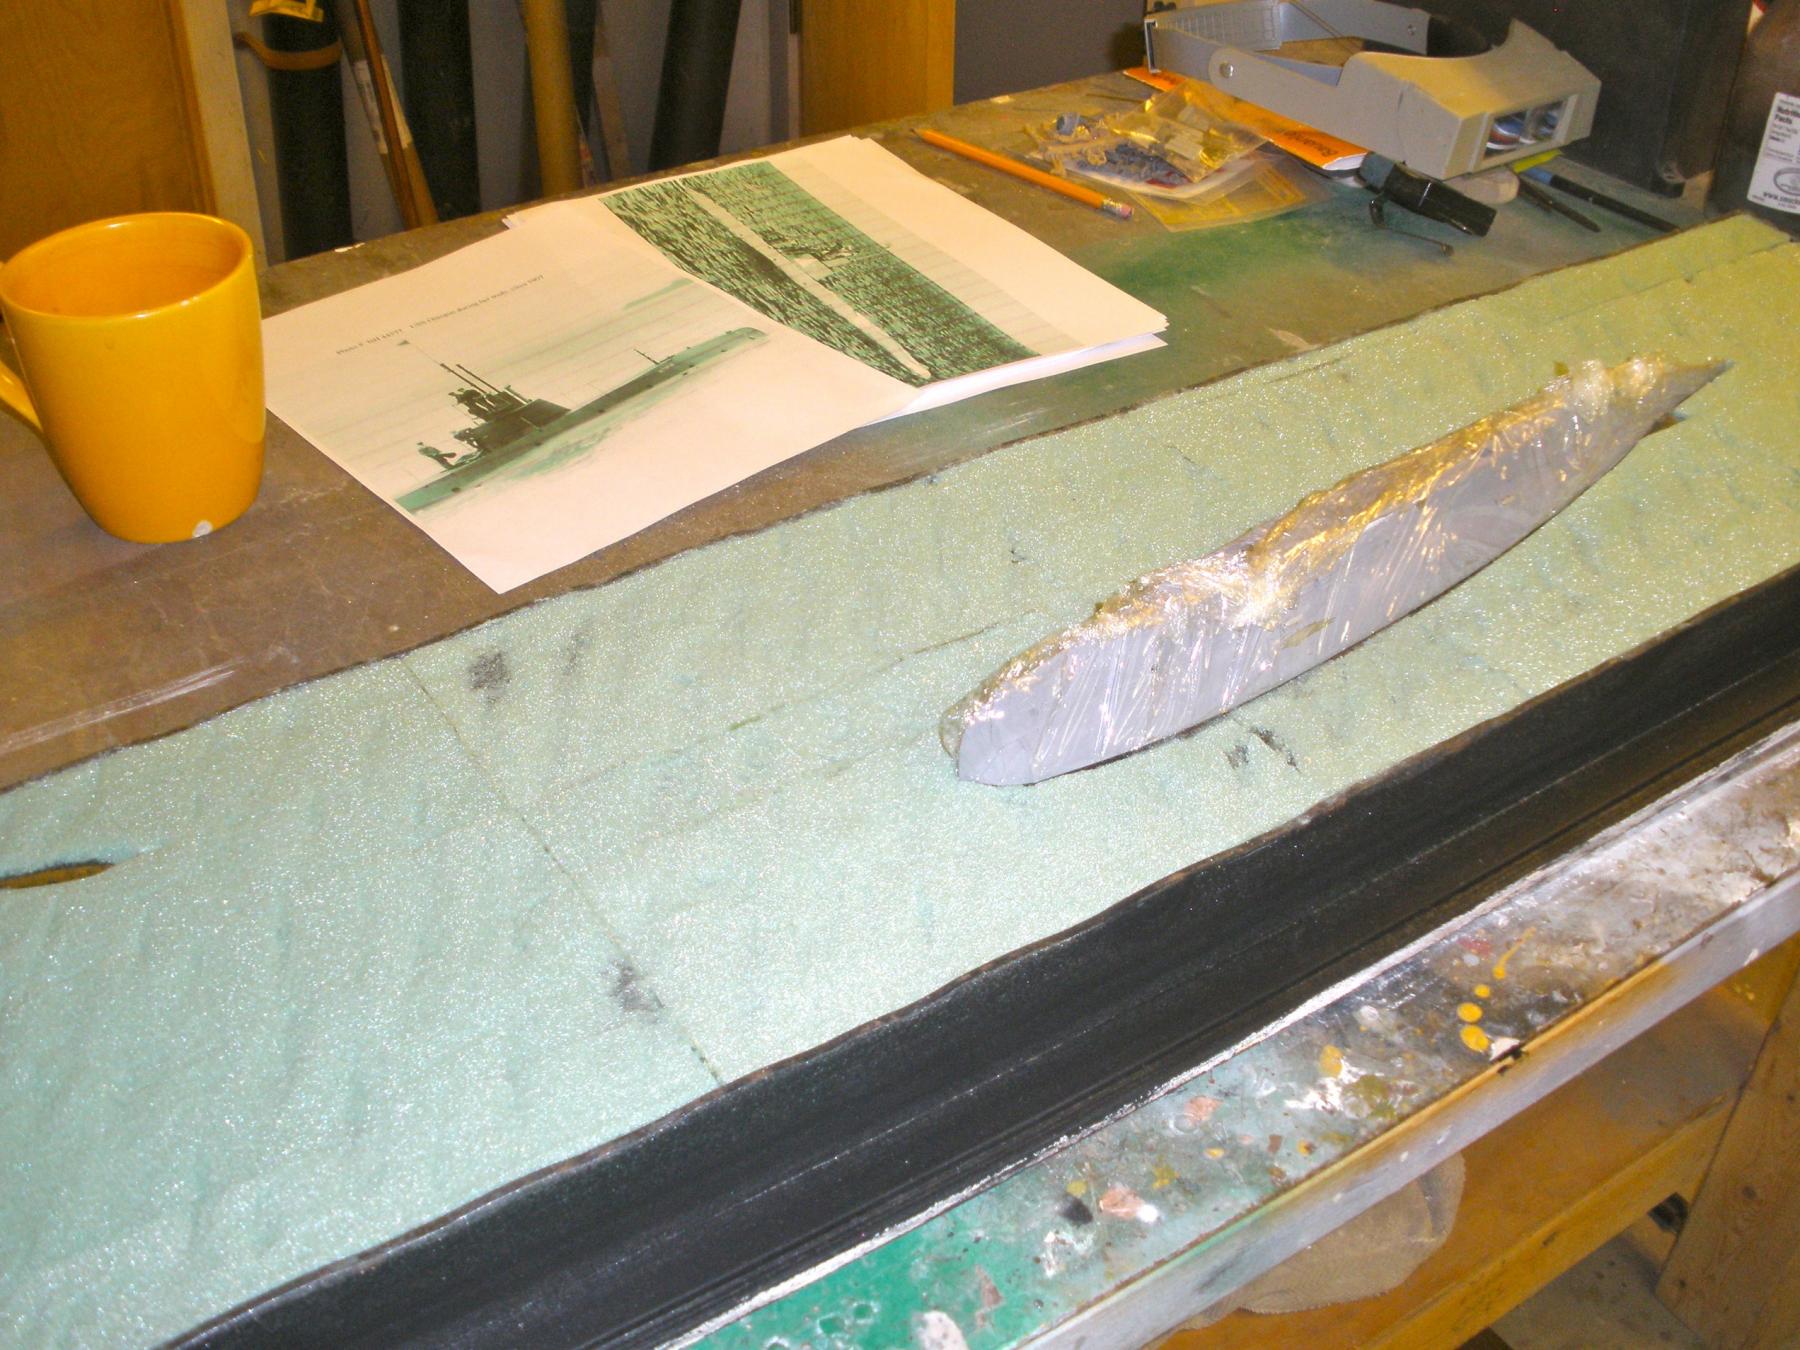
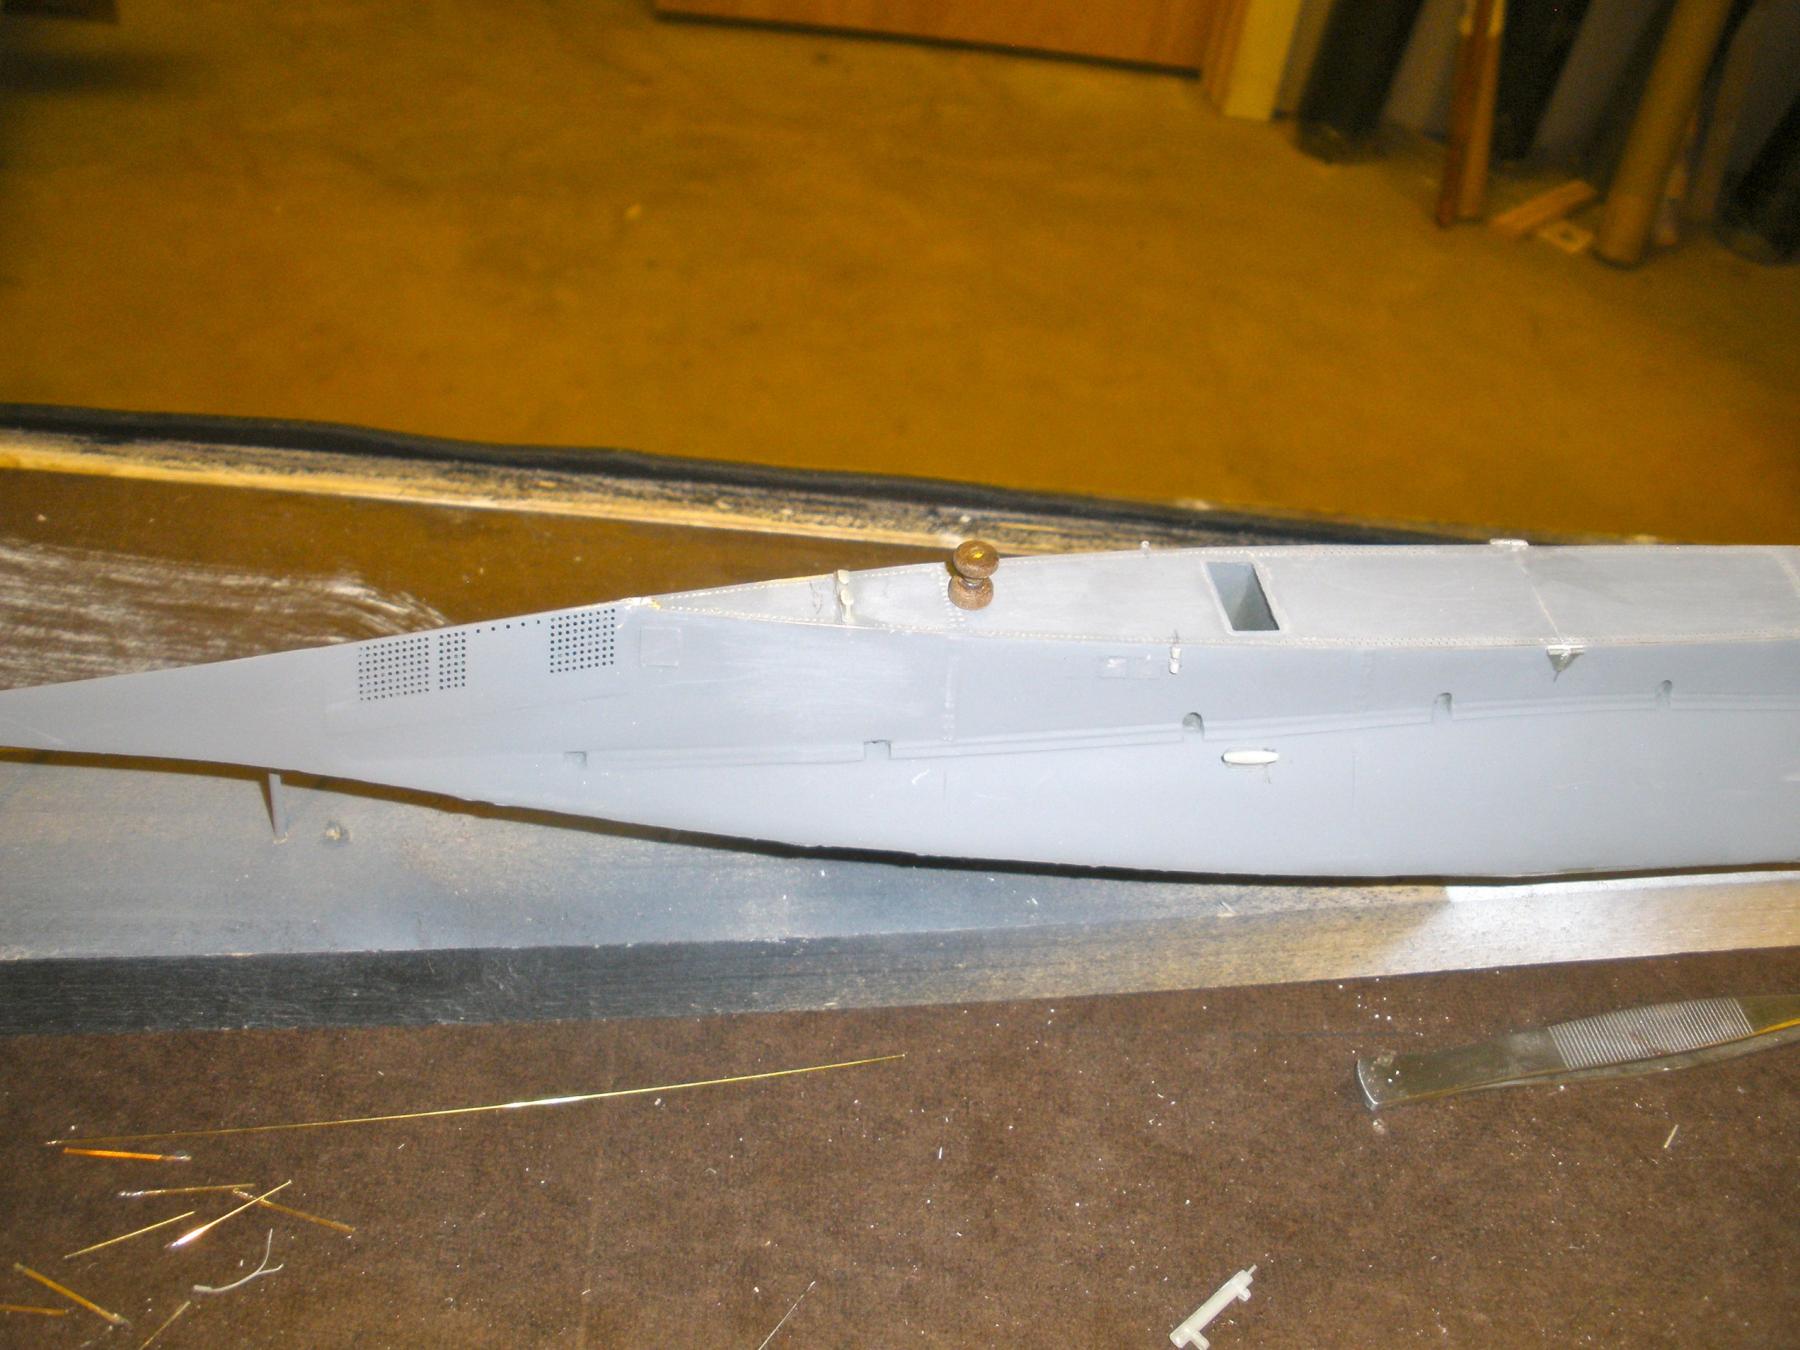
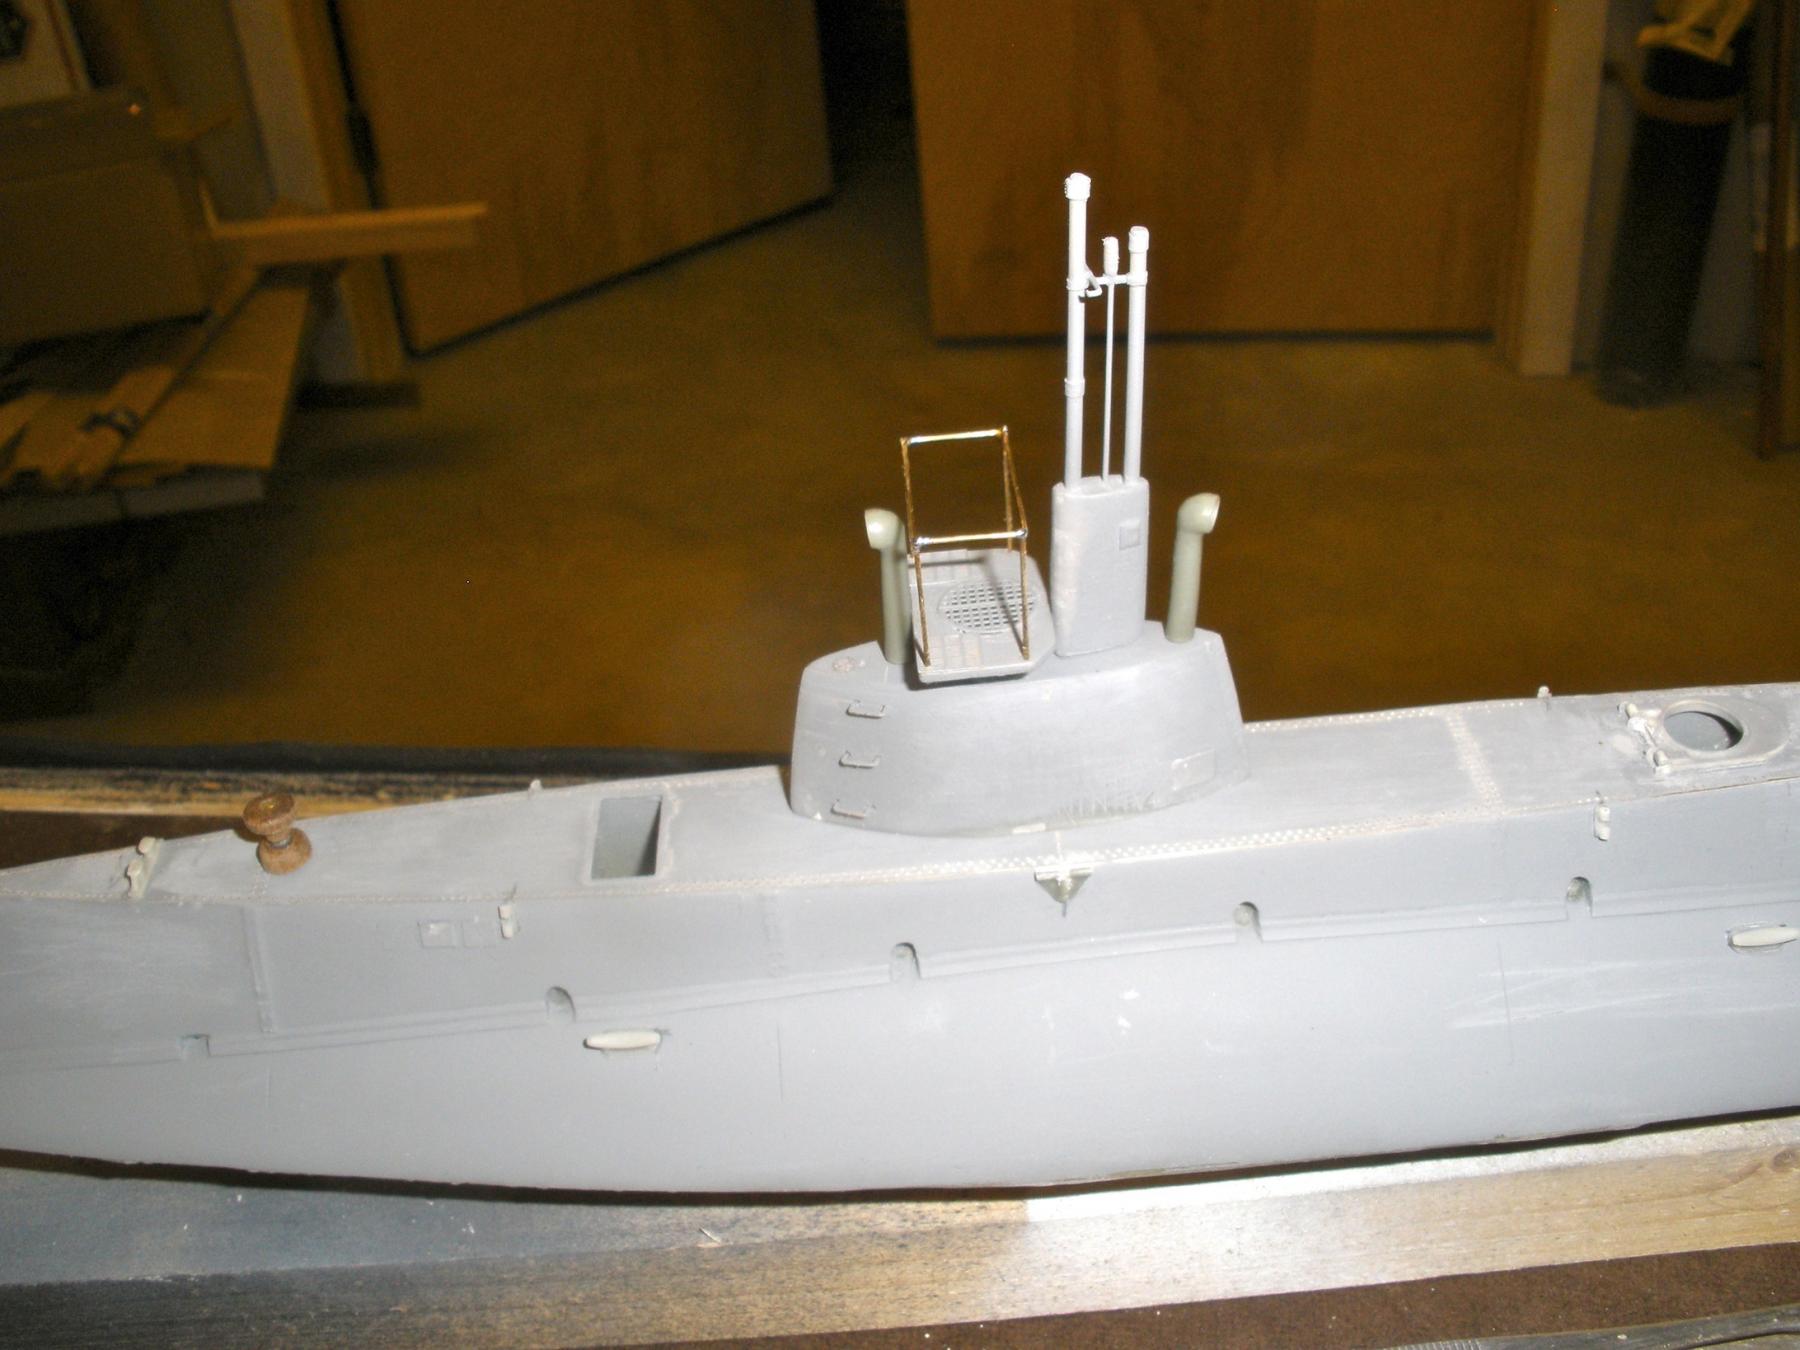
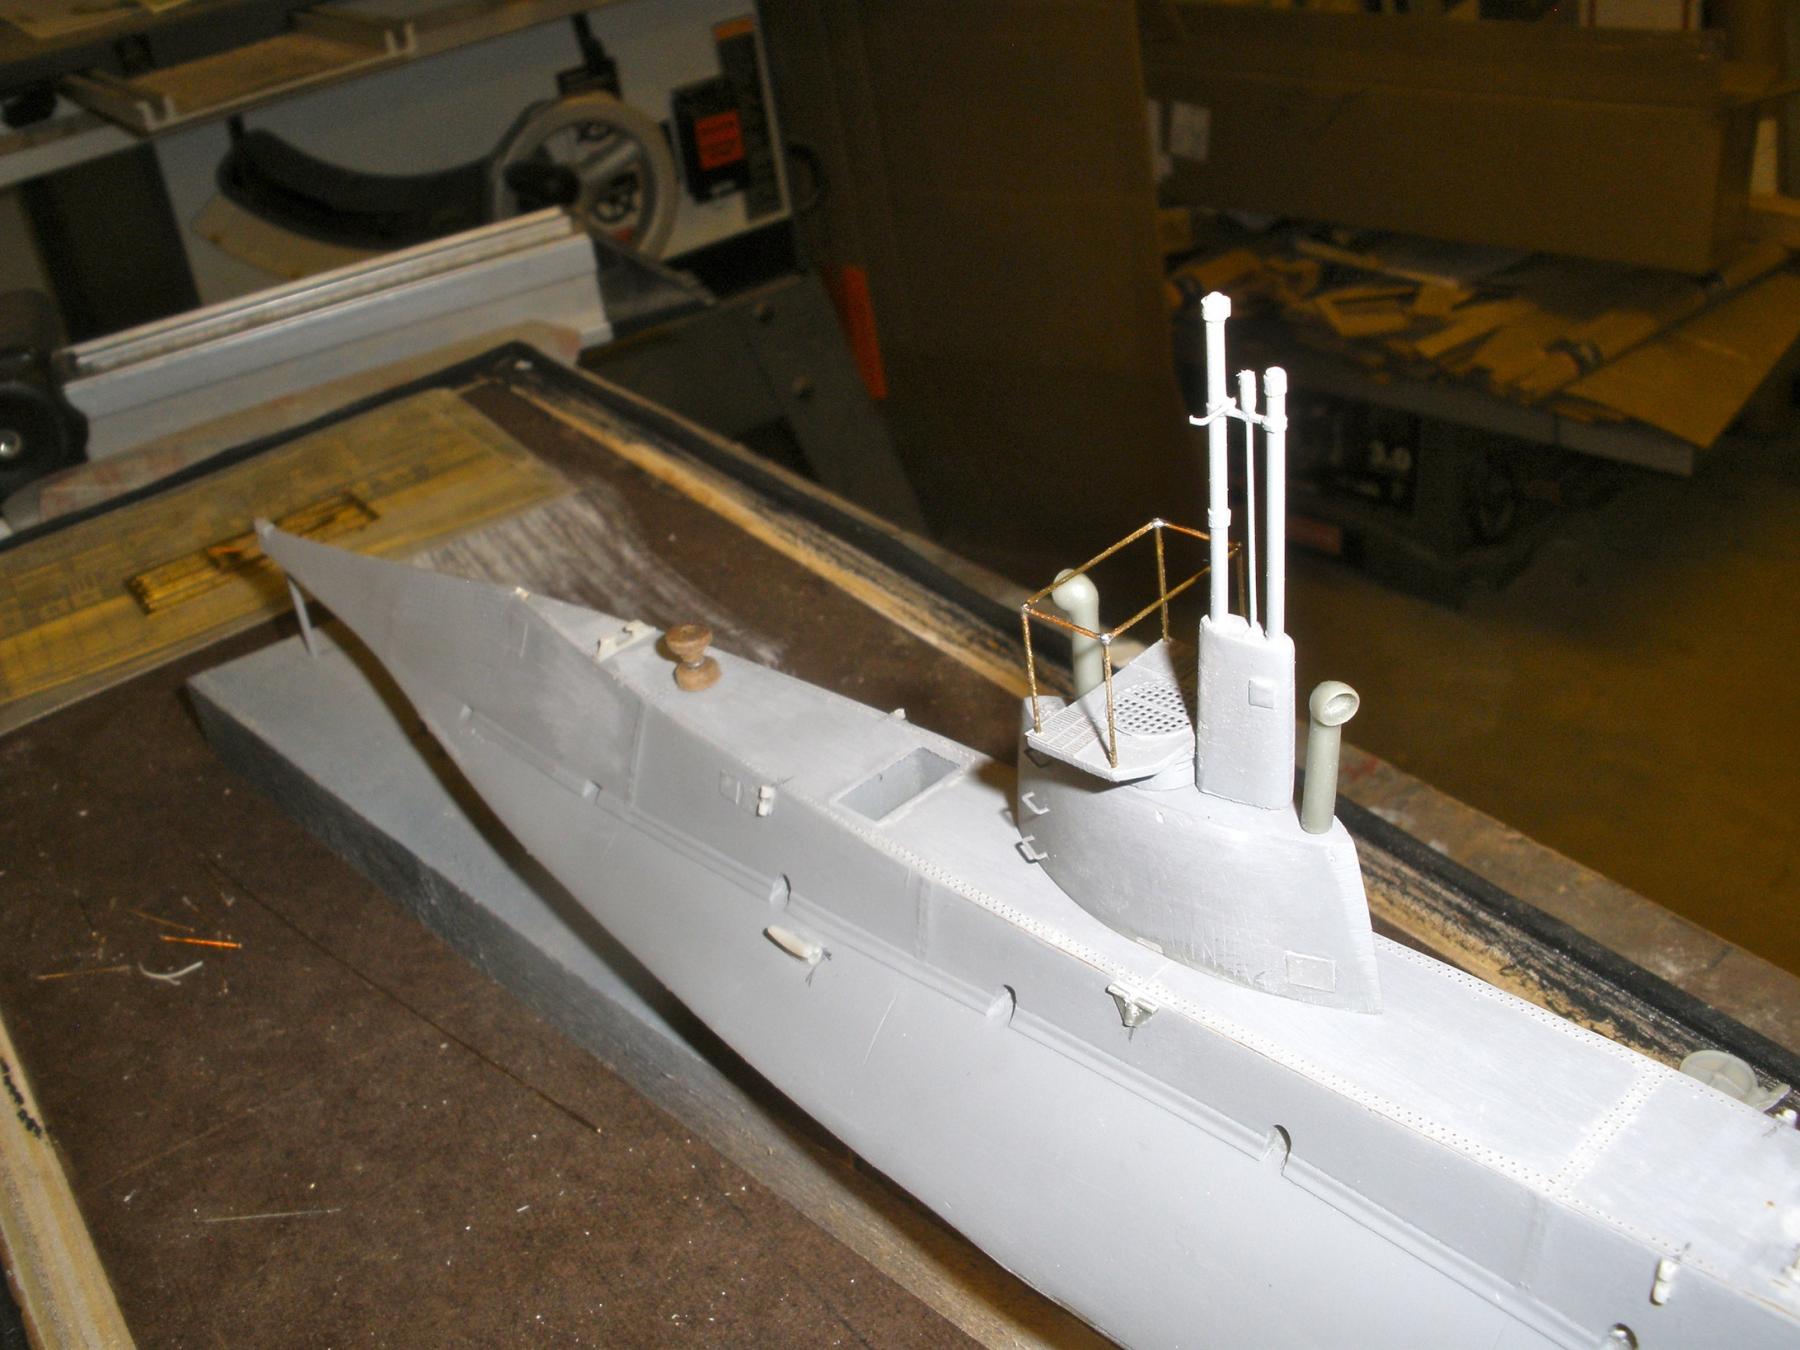
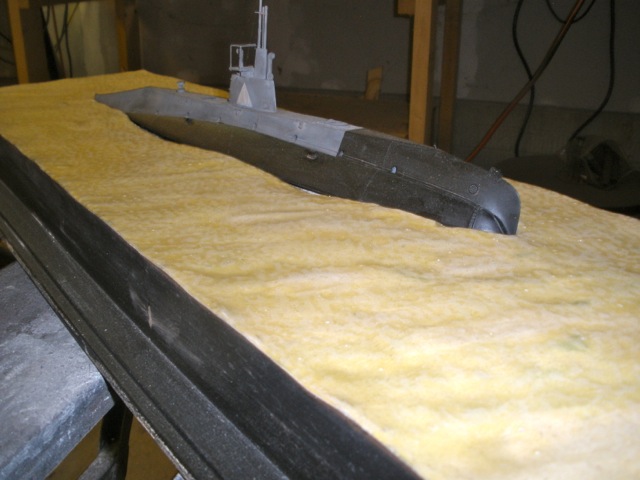
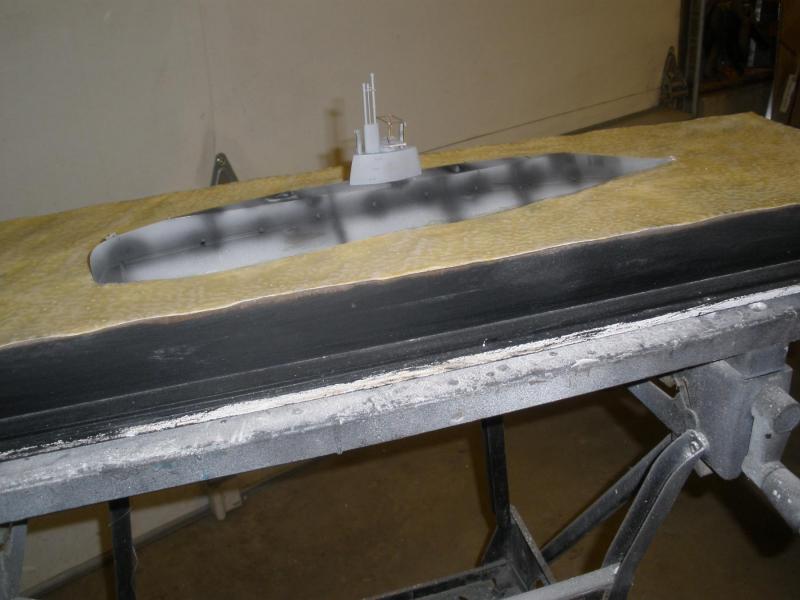
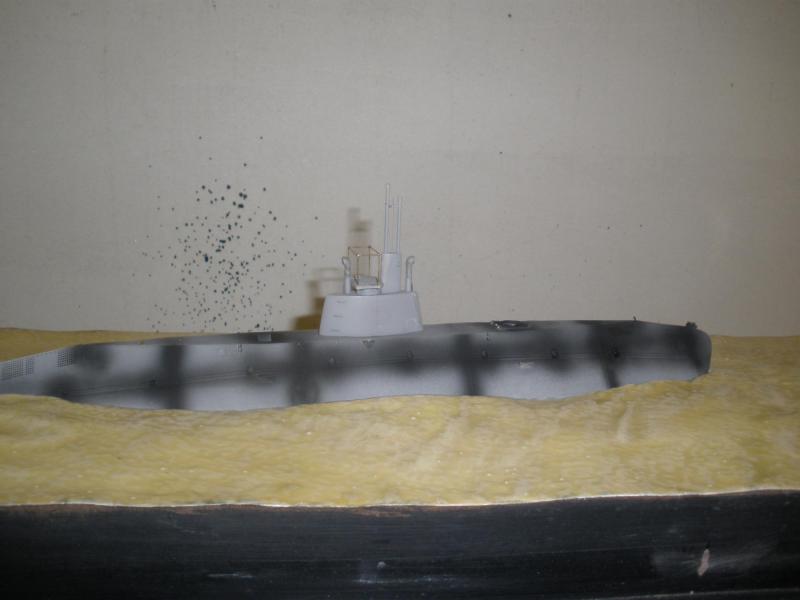
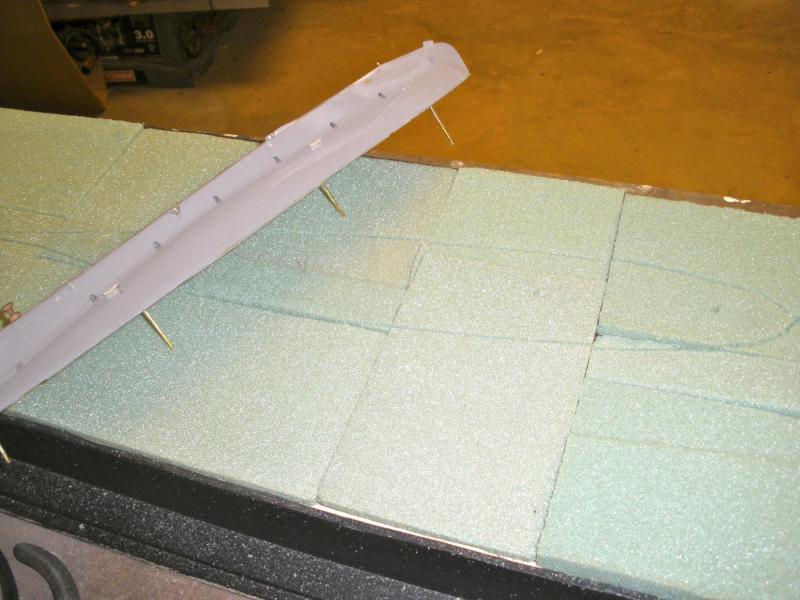
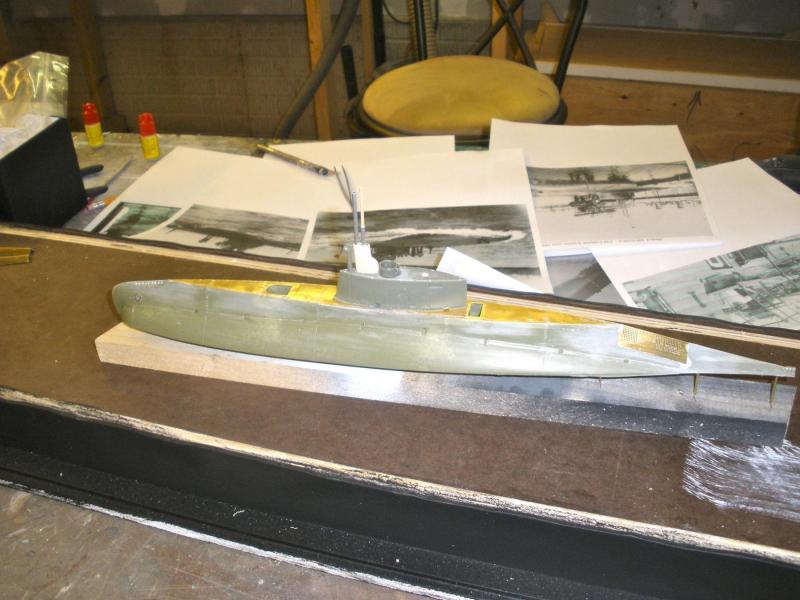
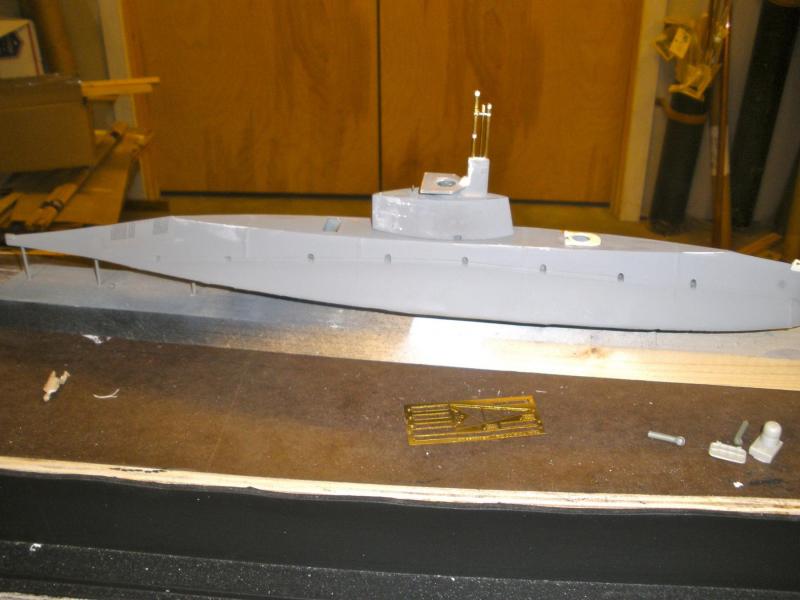
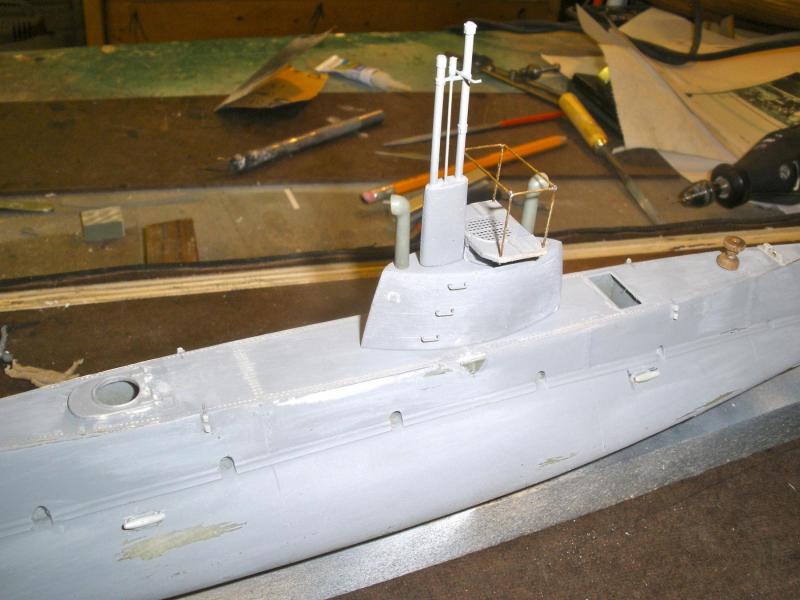
The Austro Hungarian version had a much larger conning tower which had to be replaced from the kit version. A communication buoy was made to replace the kit version. The new conning tower was added with the platform (which had to be dismantled every time the sub dived!)


-
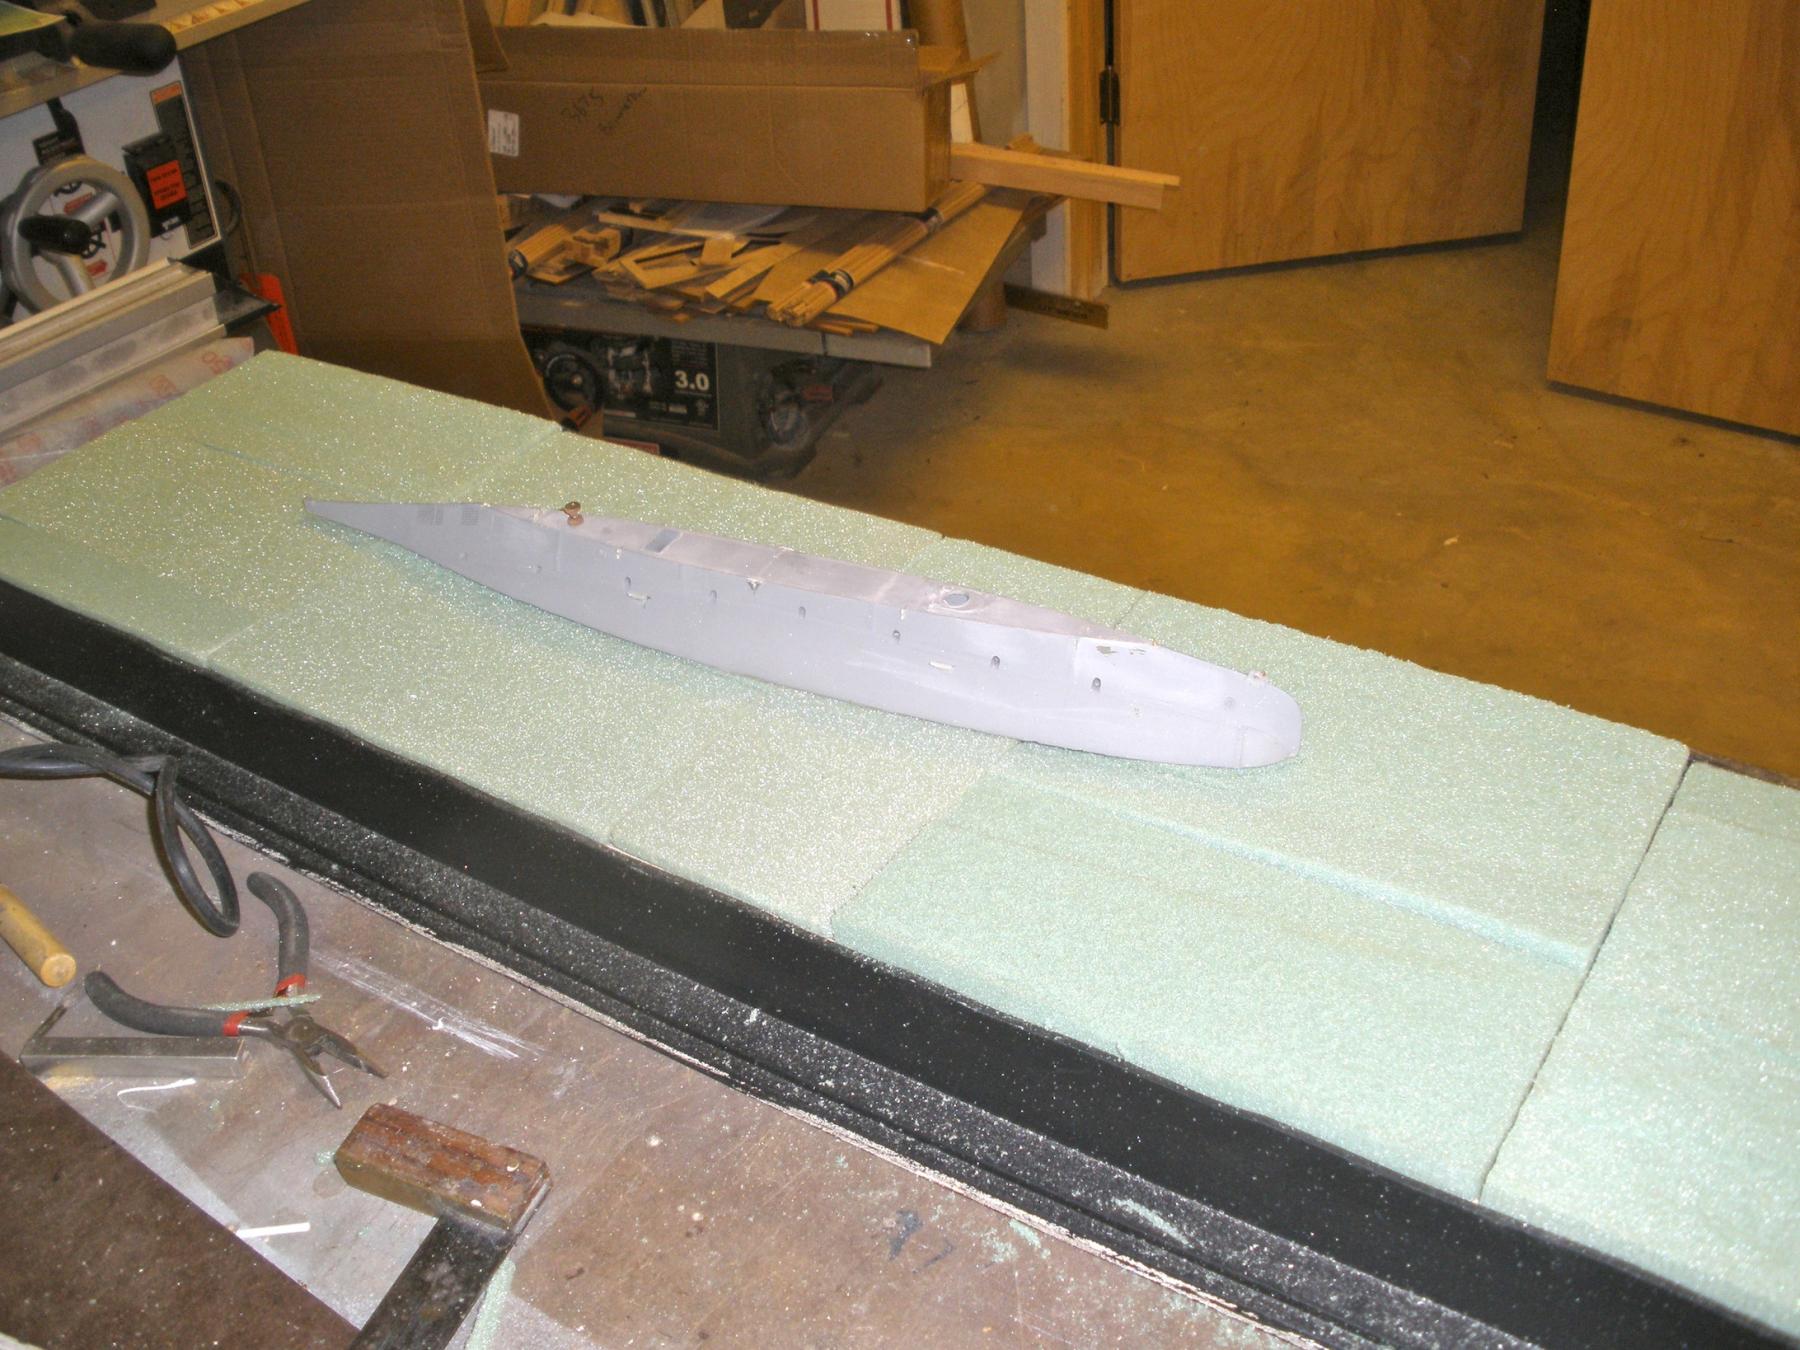
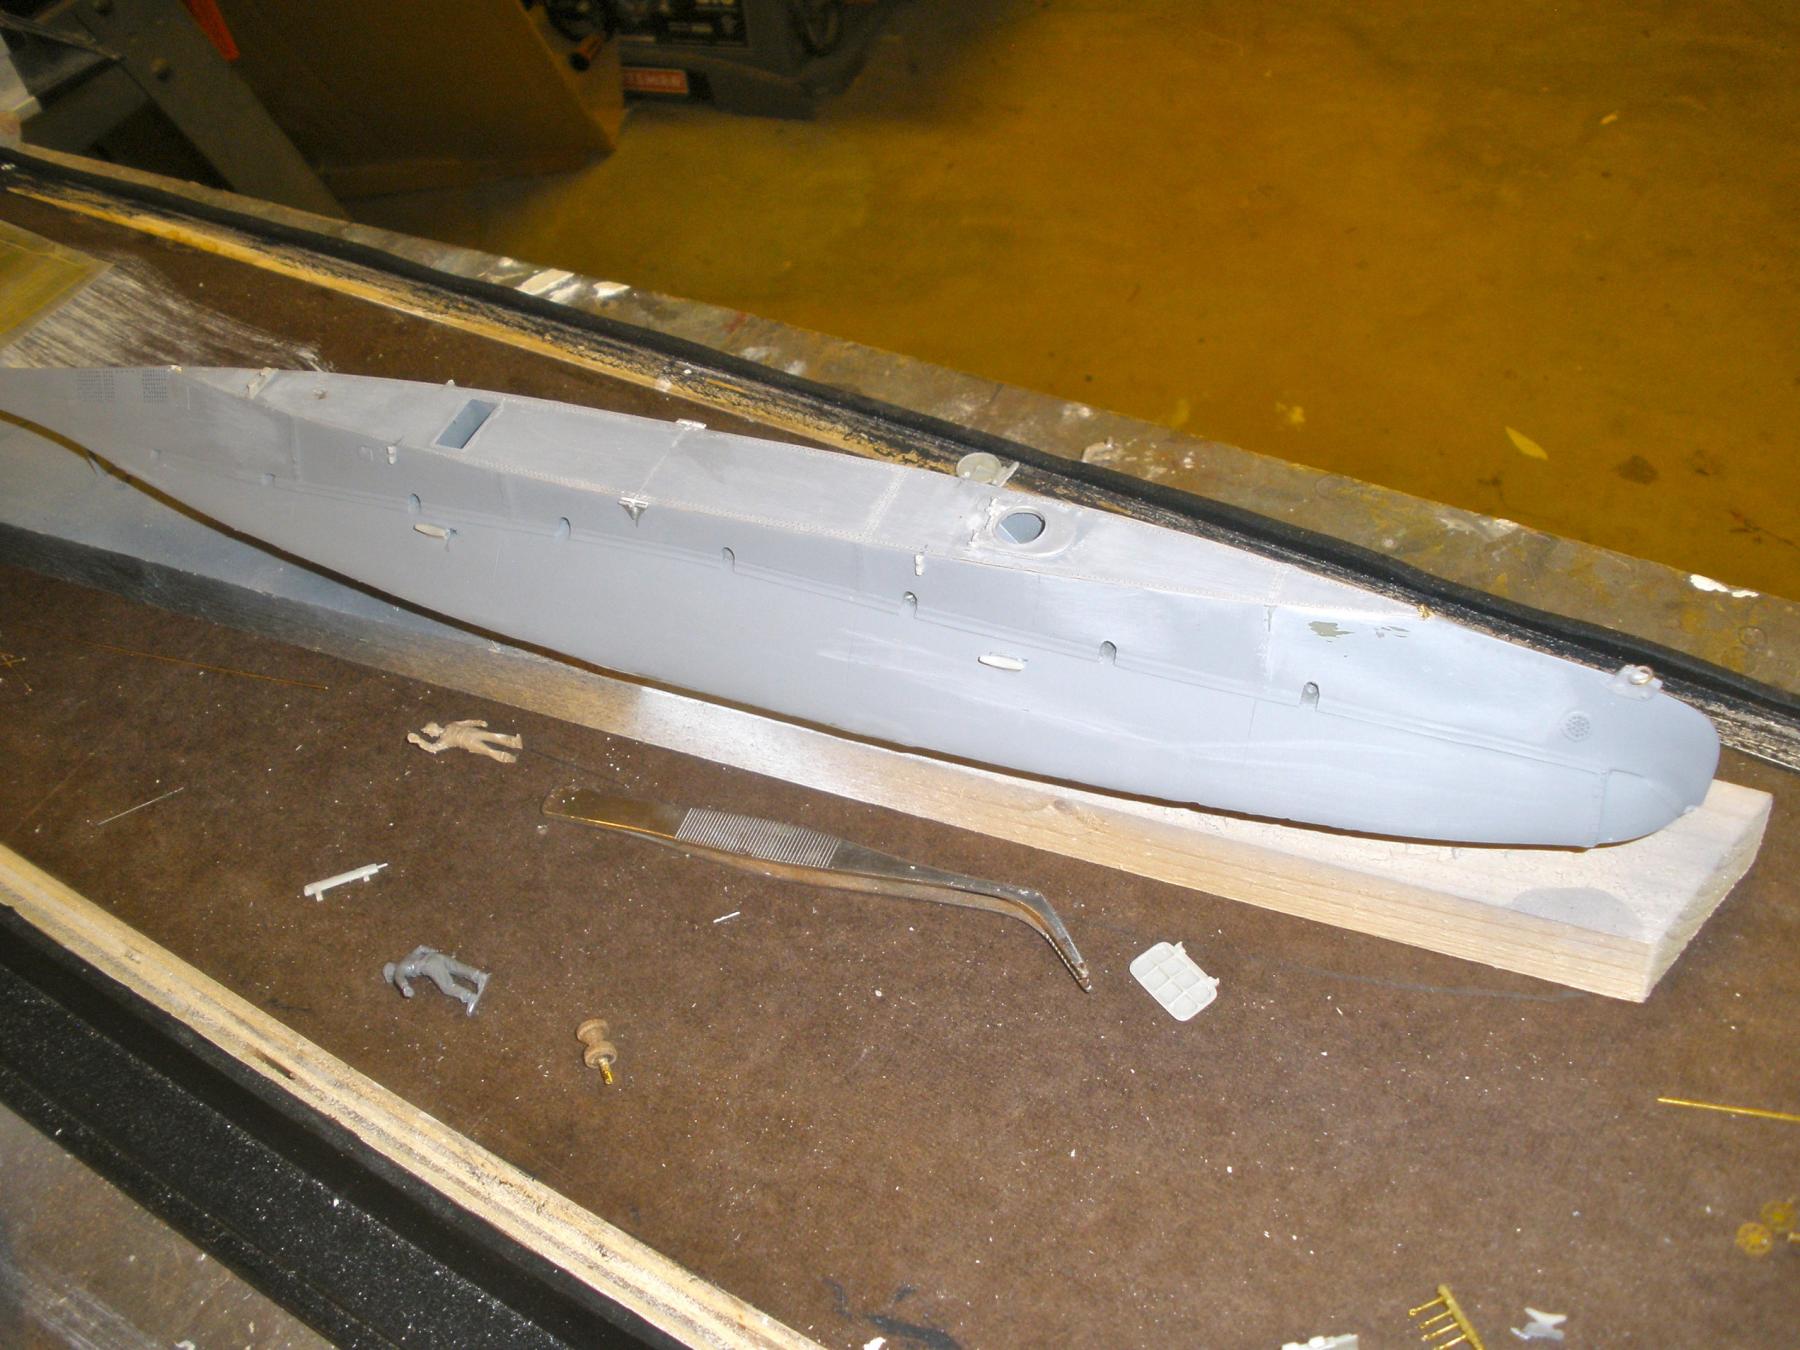
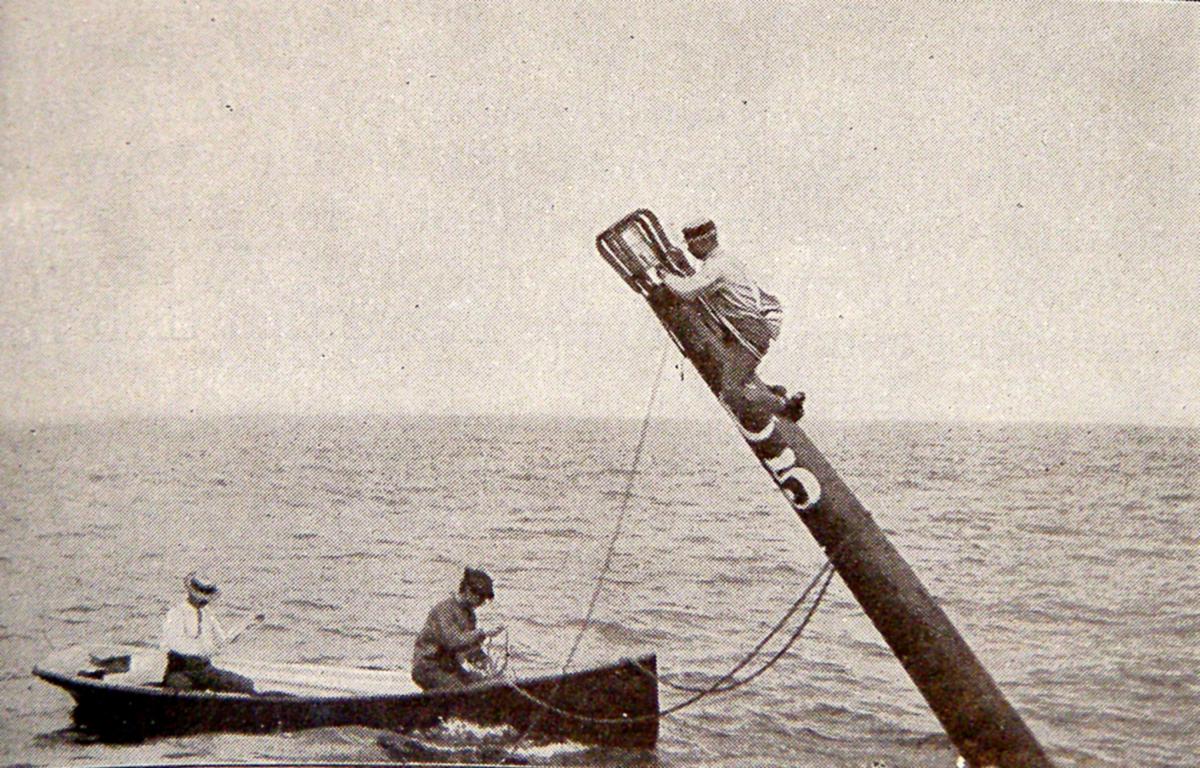
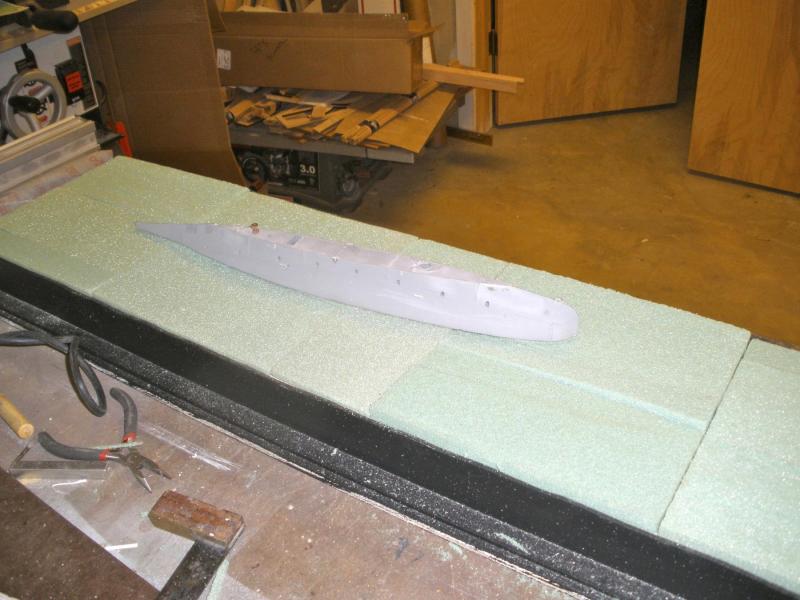
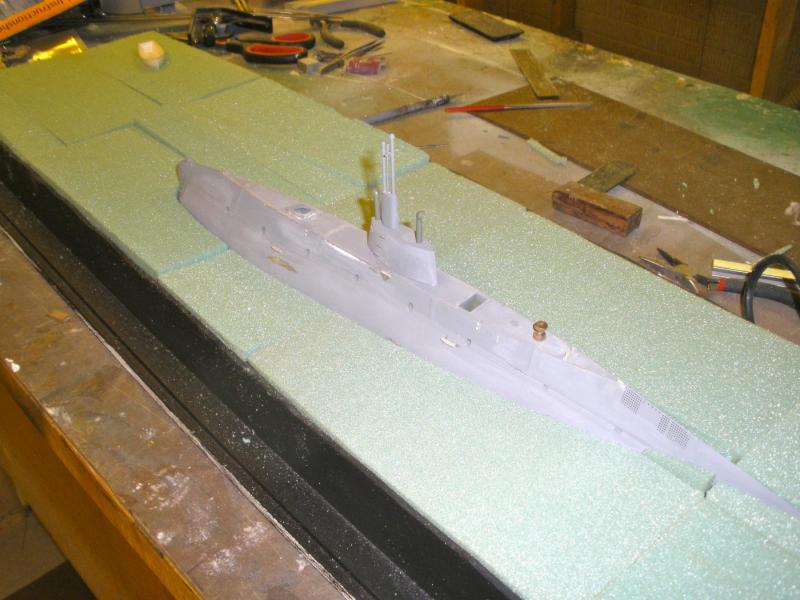
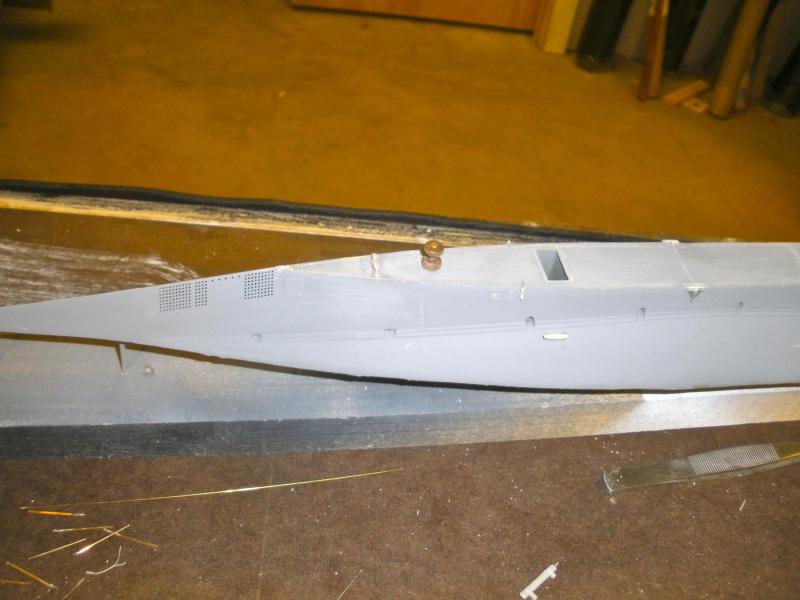
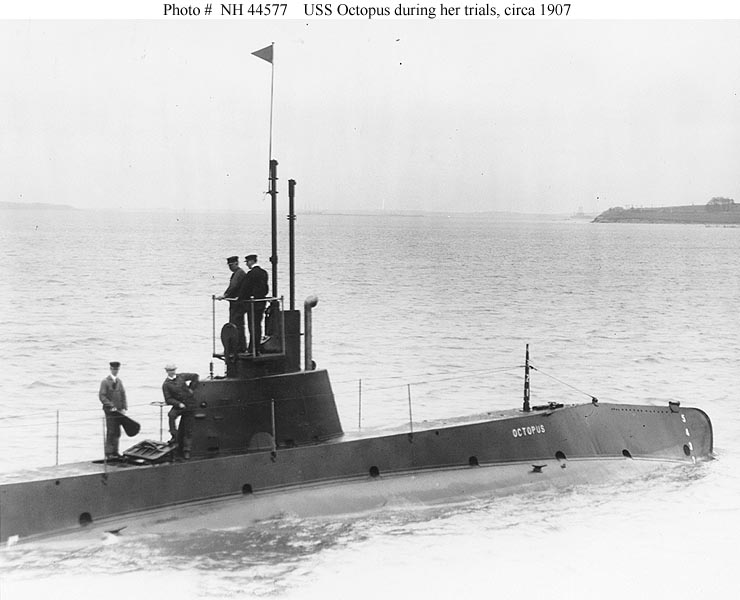
I'm building this to fill an empty case I have left in my workshop. I ordered it for a Garwood speedboat model for a client but I failed to take into account the hight of the plinth the boat sat on and the case ended up an inch and a half too low.. (Yes, even 'professionals' can make that sort of simple mistake after 25 years!) I was left with a beautifully made brass bound glass case that was not suitable for virtually any kind of ship model but I couldn't bring myself to get rid of it. After much pondering, I came up with the idea of a waterline submarine diorama. rom what I could see, the U boat scene has been done to death by modelers so I decided to look a little wider afield and came up with this Austrian company that produces a resin casting of a submarine made by US Holland company in the early 1900's. Several European nations purchased these small submarines as part of their naval build up before the outbreak of war in 1914. The subject of the kit is a Austro hungarian version. There is not a lot of information in the way of drawings available for the US version but there are quite a few photos so I decided to convert the kit to the US version operating circa 1915. The kit is rather pricey, but beautifully made and the brass etchings are a marvel of fine detail. I didn't have to do a lot of work, a new conning tower and communication buoy, some tower railings and periscopes being the most major items. I decided to set the sub on it's way home from a cruise heading inbound through the channel passing a small boat with a couple of coastguards repairing a channel buoy. Taken from a photo I had found earlier in my travels. . The hard choices made, I set about the conversion. Not as easy as it looked due to the fact that virtually no two C class boats were the same apart from the hull. They all seemed to have different features attached at different point. Some had an anchor door, others didn't, some had a conning tower deck twice the length of others in the same class. It all depended on which photo you looked at and there are not enough photos available of any one single boat to model it completely so I wound up 'approximating' some of the details. (which made a pleasant change!)

-
Lovely work Nils. It's turning into a real beauty. Dan.
- 2,625 replies
-
- 3
-

-
- kaiser wilhelm der grosse
- passenger steamer
- (and 1 more)
-
Erm…. Is it a bird….? Is it a plane…?
-
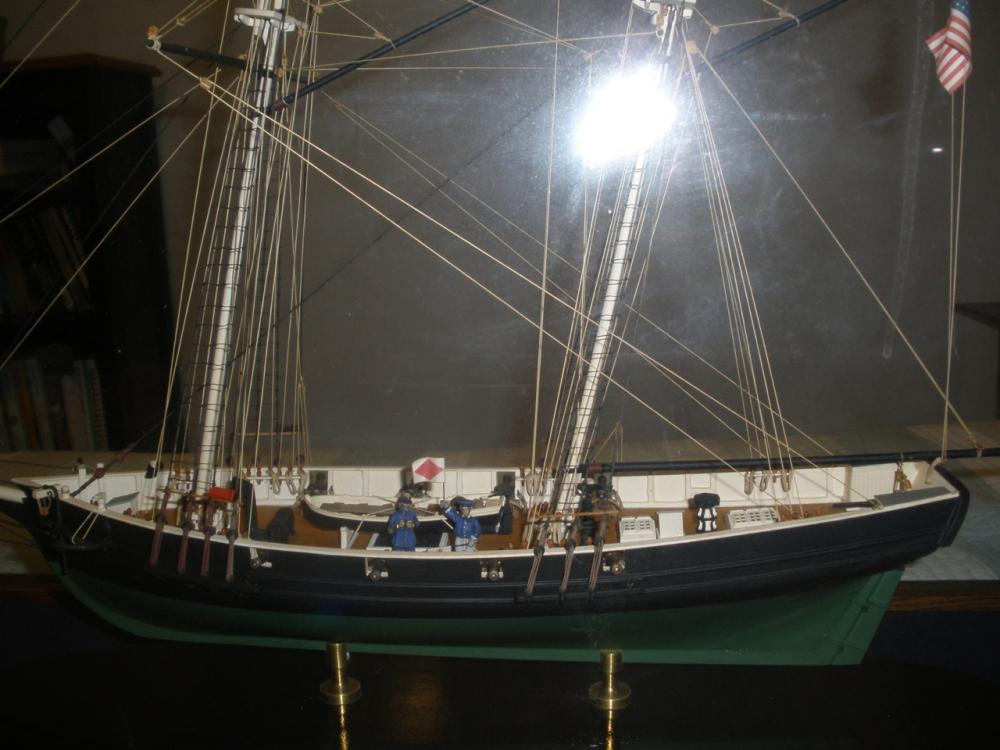
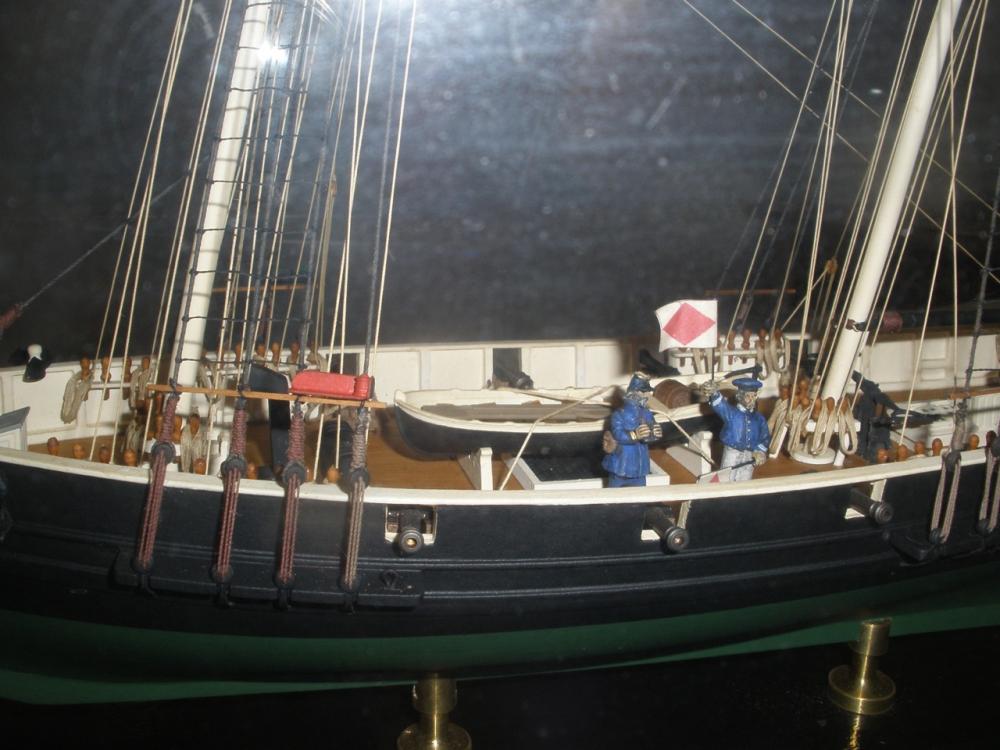
Here's a 'no frills' Civil War version.. Dan.
-
Filling - How do you do it?
overdale replied to mikiek's topic in Painting, finishing and weathering products and techniques
I use spackle for filling and leveling on first planking. If the spackle is drying out before it's properly spread, it may be because the raw wood is drawing out the water from the filler and making it dry and crumbly. I give the planks a thinned coat of varnish first which seals up the wood a little and allows more time to spread the filler. Dan. -
Daniel, just a suggestion for new ideas, but how about providing laser cut templates for a set of frames for different ships. You don't need to supply the entire kit, just the frame templates. A lot of people would be interested in stepping up from plank on bulkhead models if they had a reliable set of laser cut templates of the frames needed for a full framed hull.
-
Messis, I sometimes use acetone (nail polish remover) on glue stains as it is a bit more effective on white wood glue than alcohol. Try it on a test piece and see if it works for you. The black paint will go over waxed line if you use an oil based paint like Humbrol. If you thin it down with acetone it will penetrate the wax very effectively but most times it will cover on it's own. Dan.
-
Messis, If the rope is black, then use matt black paint to touch out the glue stain. Don't use shoe polish as it contains wax which won't give you good coverage. Dan.
-
Frigate Boston by overdale - FINISHED
overdale replied to overdale's topic in - Build logs for subjects built 1751 - 1800
Thanks Mike. I would love to say I used some 'special' varnish mix for the Boxwood, but I just sprayed it with good old Minwax matt finish in a spray can. The trick is to get the hull wood sealed as soon as possible after you are happy with the sanding, and build up several layers of varnish. That allows for a lot of inadvertent glue marks, paint etc to be scraped away later in construction without affecting the wood itself underneath. When the model is finished, the final finish is done with Minwax flat varnish from a can mixed with Acetone and sprayed with a small, cheap hobby spray gun. The acetone melts the surface of the original varnish when it hits it, blending or removing scratches and marks and then evaporates very quickly leaving an excellent flat finish. Dan. -
Frigate Boston by overdale - FINISHED
overdale replied to overdale's topic in - Build logs for subjects built 1751 - 1800
I sent the last batch of photos off to the guy who is paying for it and am waiting to hear back. Judging by the response here, I may actually get away with it so thank you all for your kind words. This morning after cleaning up the shipyard, I started a 2nd century Roman merchant vessel, waterline model 1/48 scale and a WWI US submarine, also waterline at 1/72 scale. Also soon due to start a 1694 British 6th rate hull model 1/48 scale. I certainly can't say it's boring..! Dan.