archjofo
-
Posts
1,498 -
Joined
-
Last visited
Content Type
Profiles
Forums
Gallery
Events
Everything posted by archjofo
-

ROYAL CAROLINE 1749 by Doris - 1:40 - CARD
archjofo replied to DORIS's topic in - Build logs for subjects built 1501 - 1750
Hello Doris, a fine collection of ship models that you have created in the course of your life. I admire your artistic style and precision with which you build your excellent models. I hope that you will show us a lot more of your art.- 883 replies
-
- 5
-

-
- royal caroline
- ship of the line
- (and 1 more)
-
Hello Nils, you're doing an excellent job.
- 2,625 replies
-
- 1
-
-
- kaiser wilhelm der grosse
- passenger steamer
- (and 1 more)
-
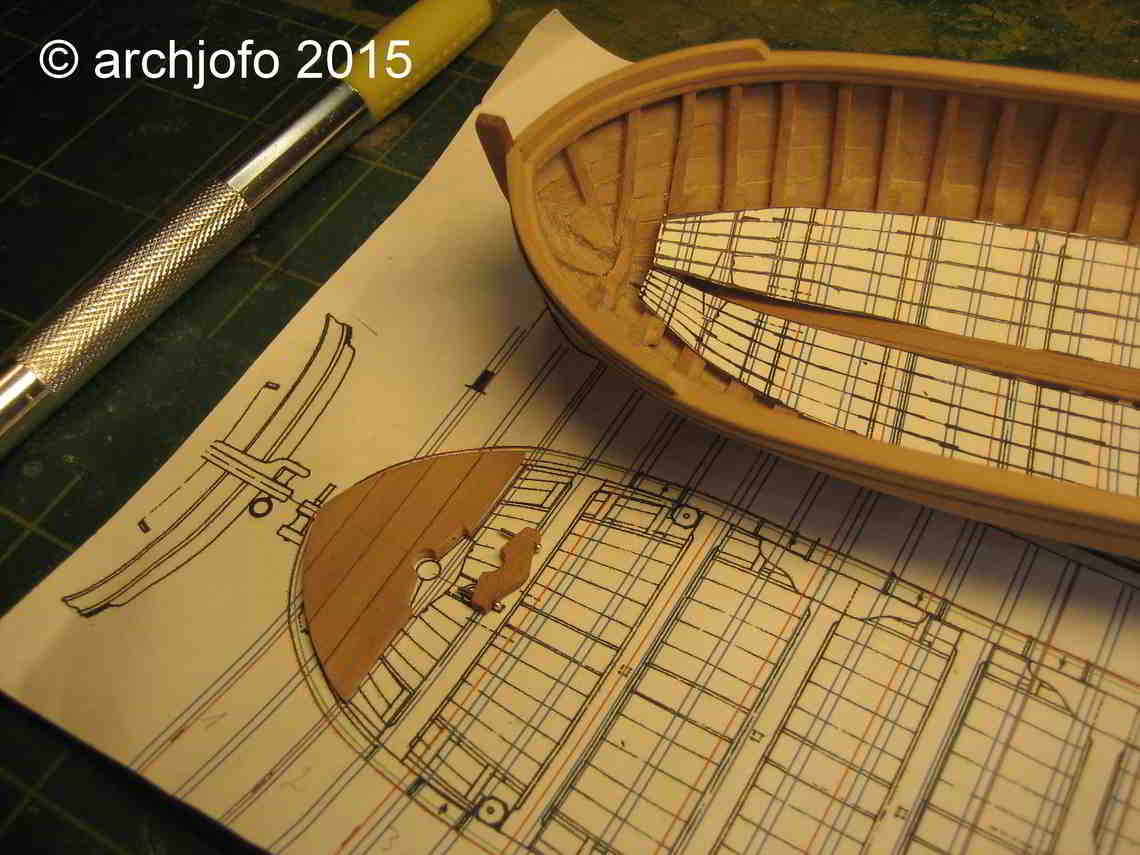
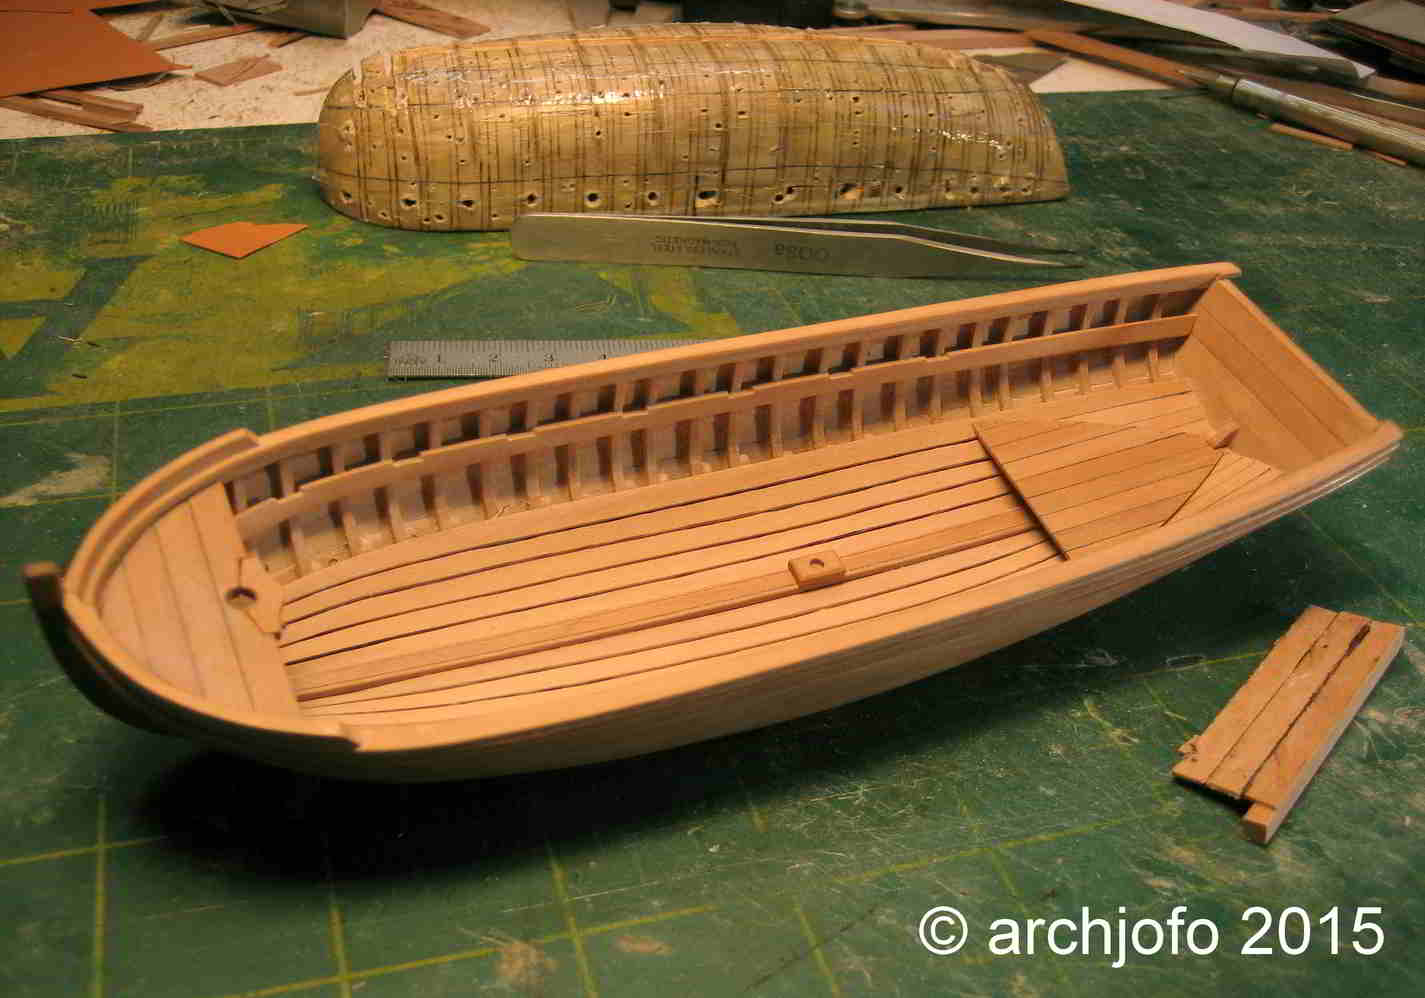
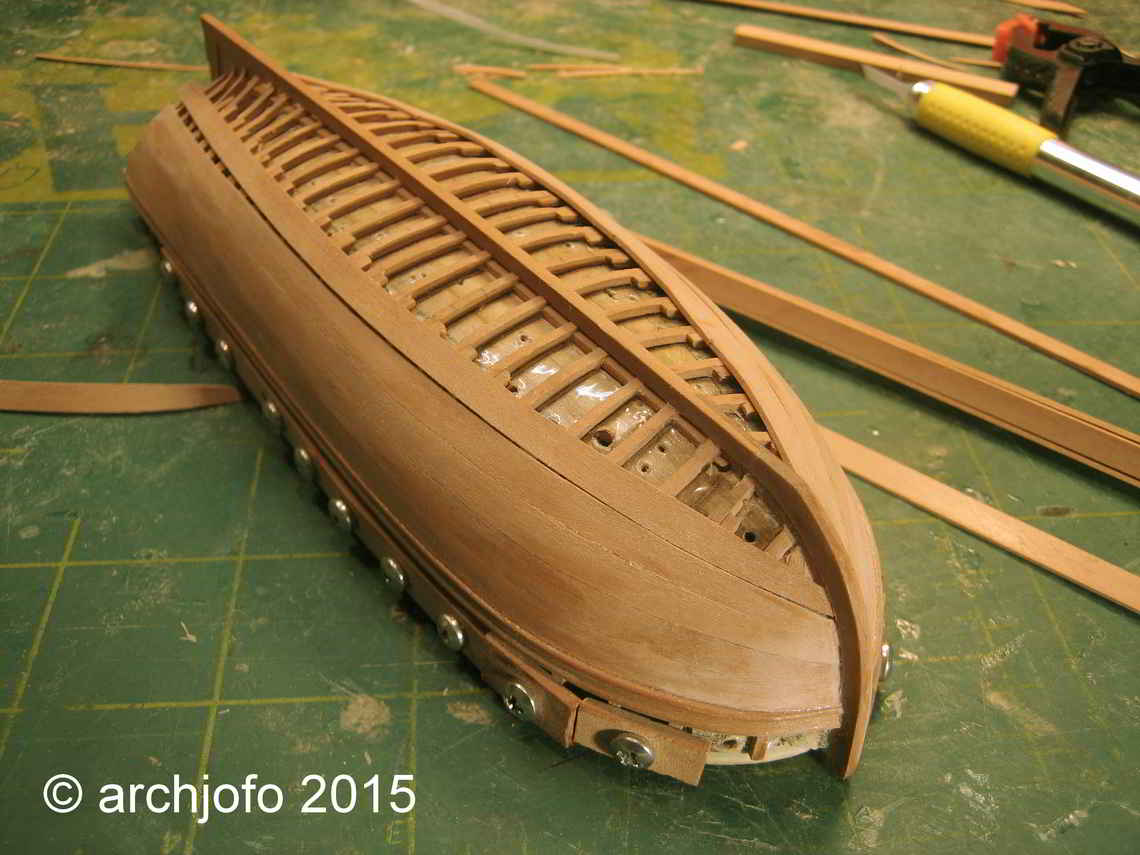
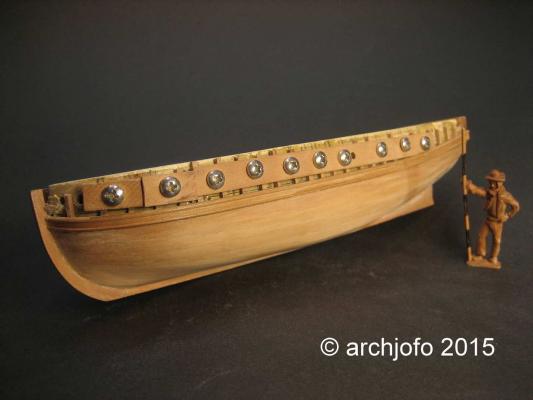
Hello, thanks for the nice comments. And here is the sequel to the interior fittings of the long boat.


-
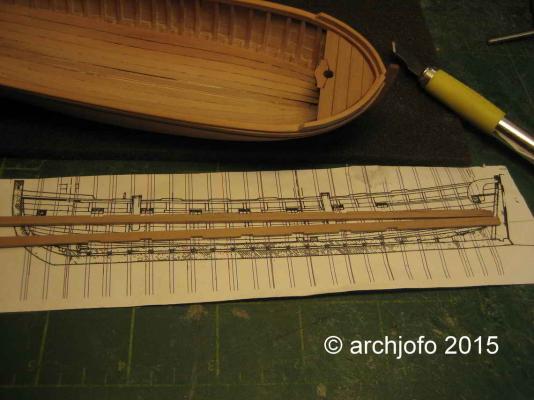
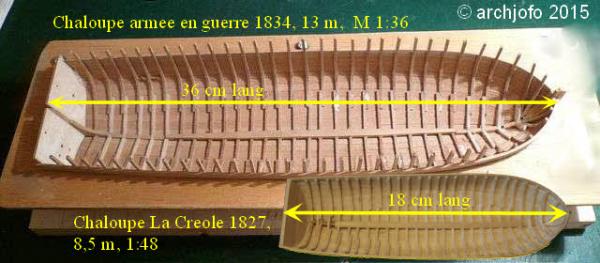
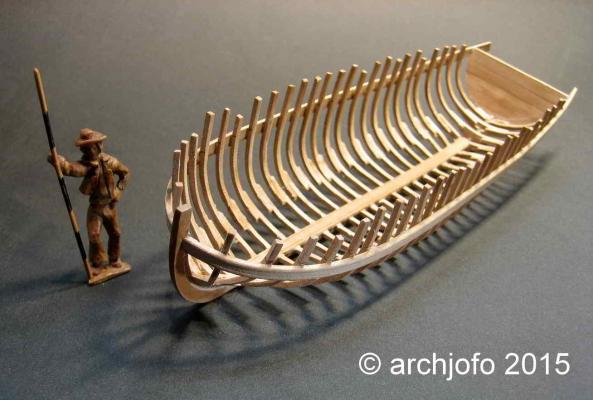
Hello, to build the sloop for my French corvette I have a lot of research on the Internet. I have seen this many wonderful plans and construction reports of a large long boat. This sloop can carry a 24 pound cannon. With a length of 13 m was used on large ships of the line. Many of these modelers build this sloop "Chaloupe armee en Guerre de 1834" according to the plans of Gerard Delacroix (Boudriot series) in scale 1:36. Current construction reports are good studio objects for all the details, just only bigger, like my small sloop for La Créole. Many of these models are fantastic works that have been produced with absolute precision. Therefore, I felt the need to compare the two models in terms of size. This I have done with a picture assembly. That's interesting?
-
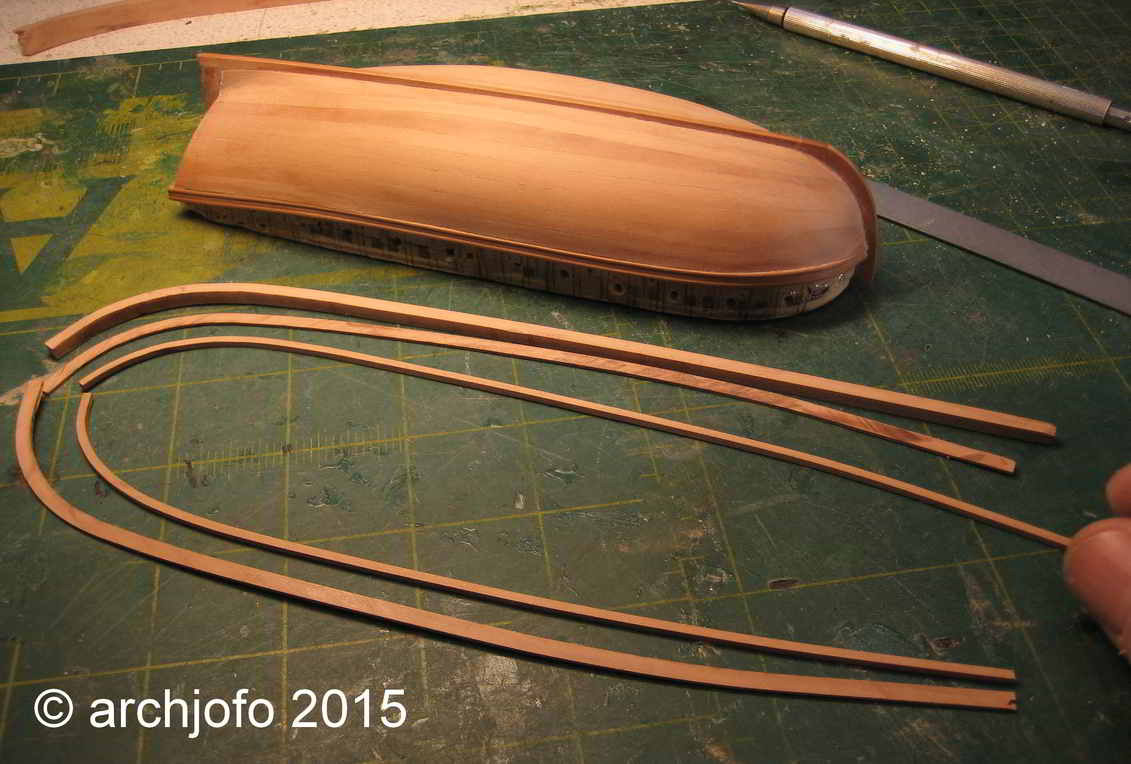
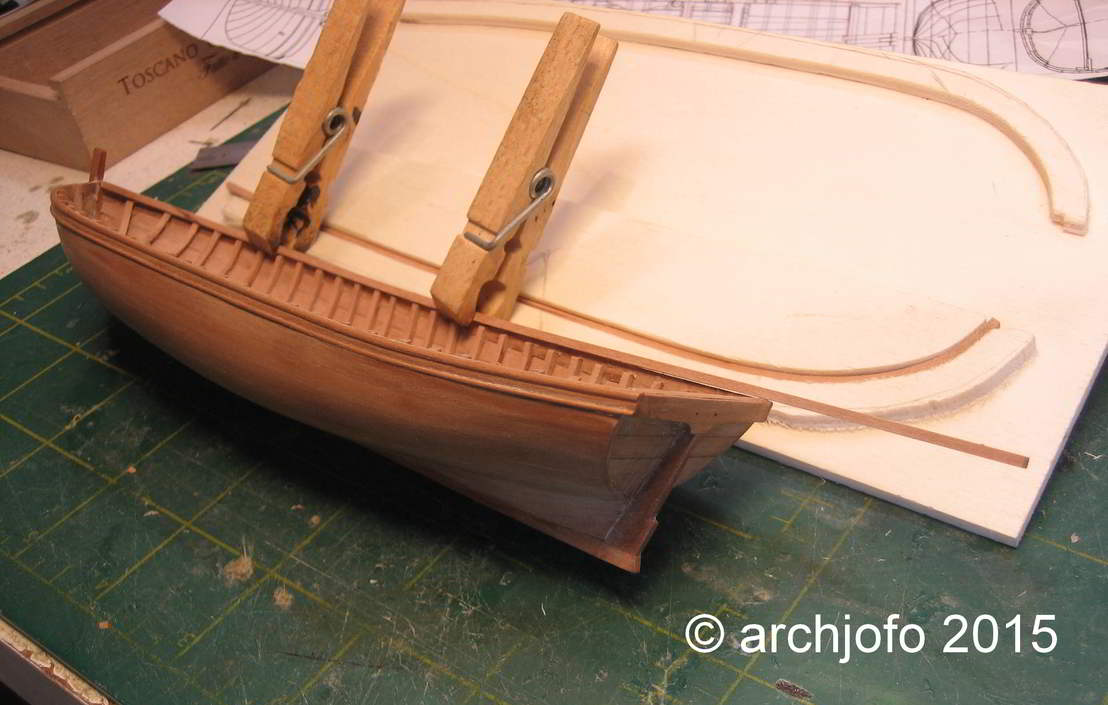
Hello, many thanks for your nice comments. Continued Construction of the sloop - expansion Meanwhile, I could make the gunwale successfully. As far as the gunwales for adapting and assembling are now being prepared. Soon it goes on here ...

-
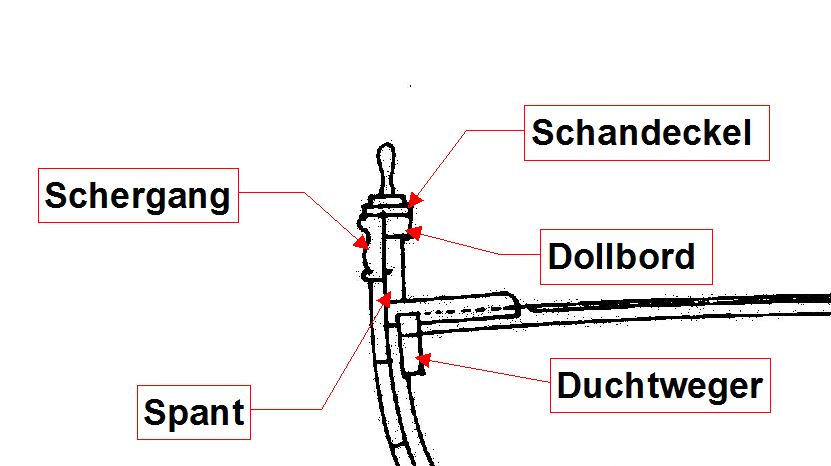
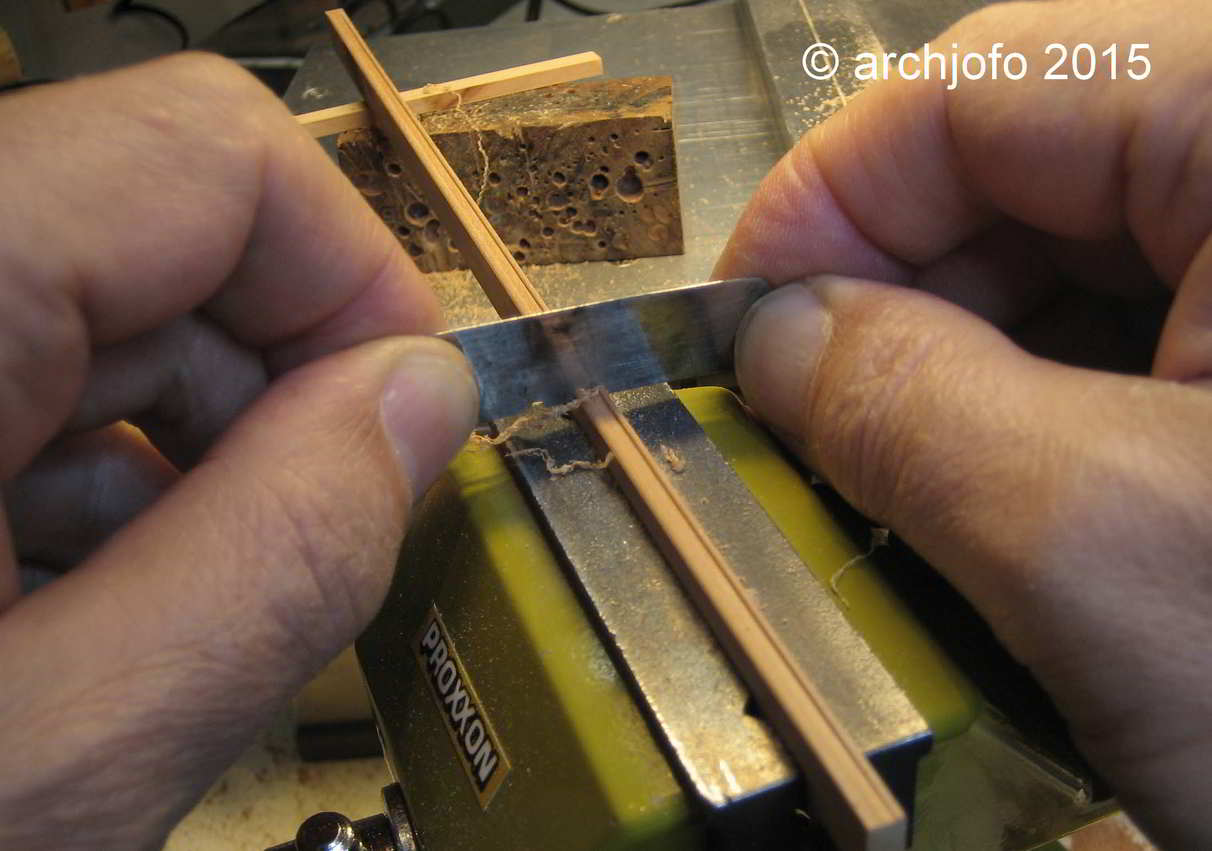
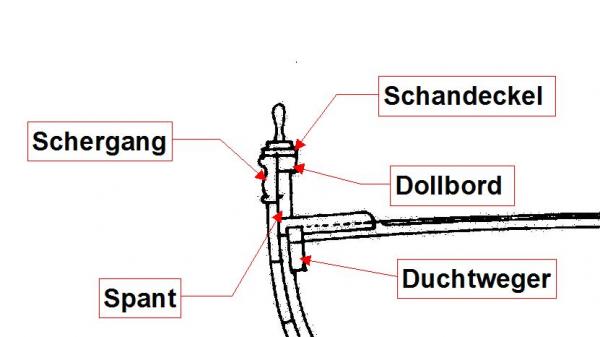
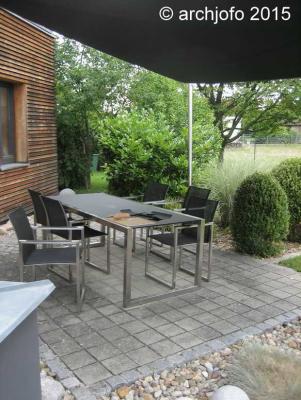
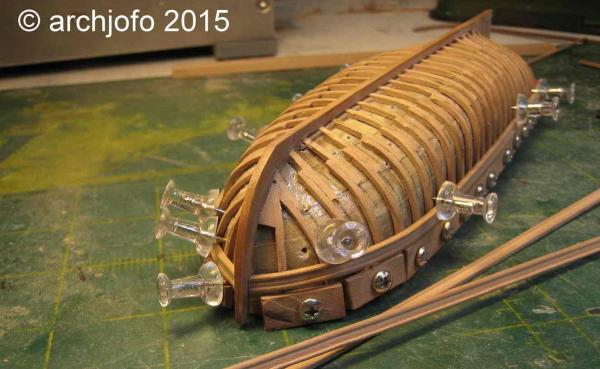
Hello Colleagues, here is the continuation: After removing the glue residue from the boot shell now follows the expansion of the sloop. The gunwales (Dollbord in German) I do with a bending device.


-
Hi Rob, only now I have your report found. Had I seen it earlier, I would have had some problems less. This is a fantastic model and a masterpiece. A very precise built model. My chaloupe is however built in 1:48 scale.
-
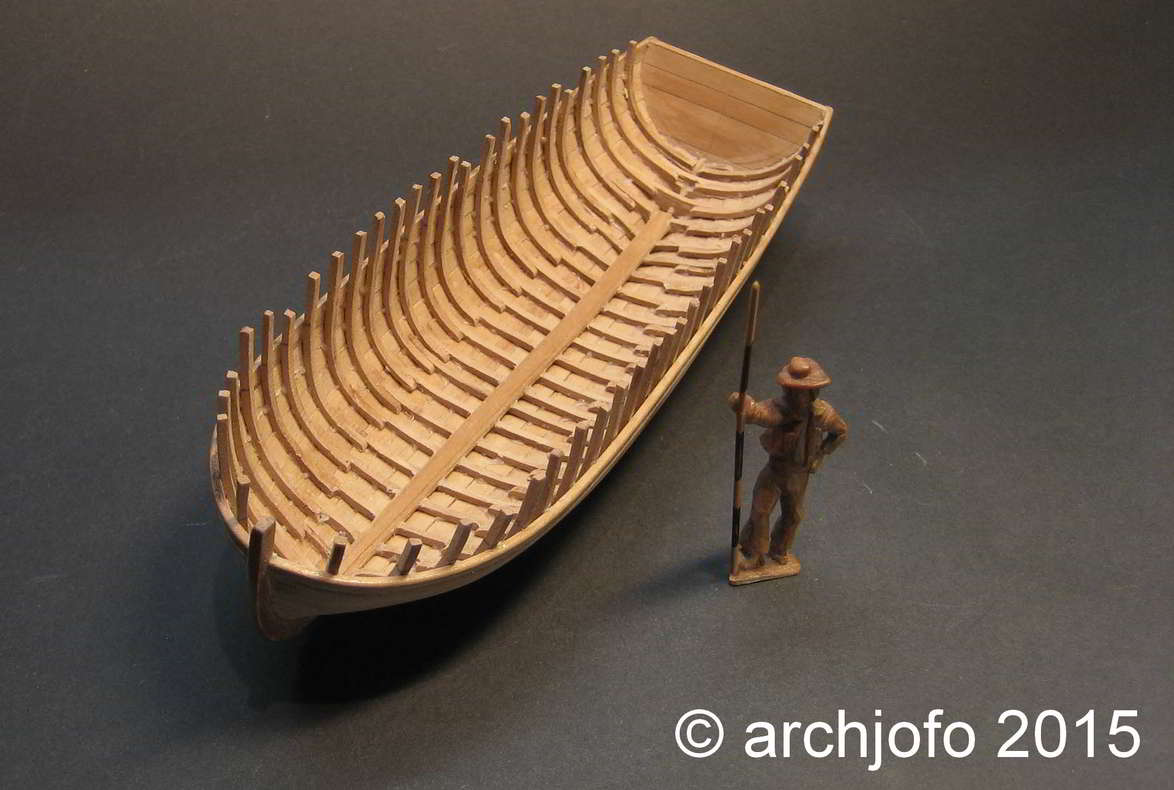
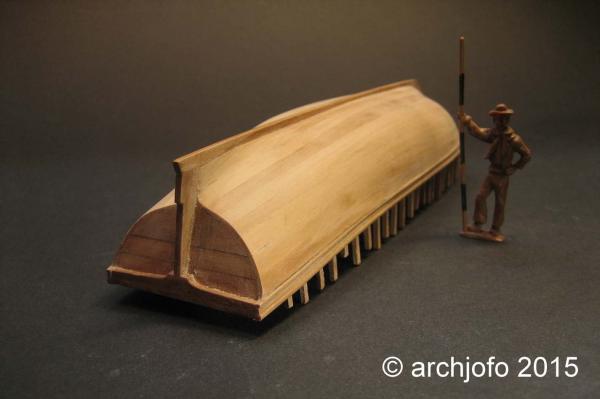
The longboat will be 18.4 cm long, which means 8.8 m length in the original.
-
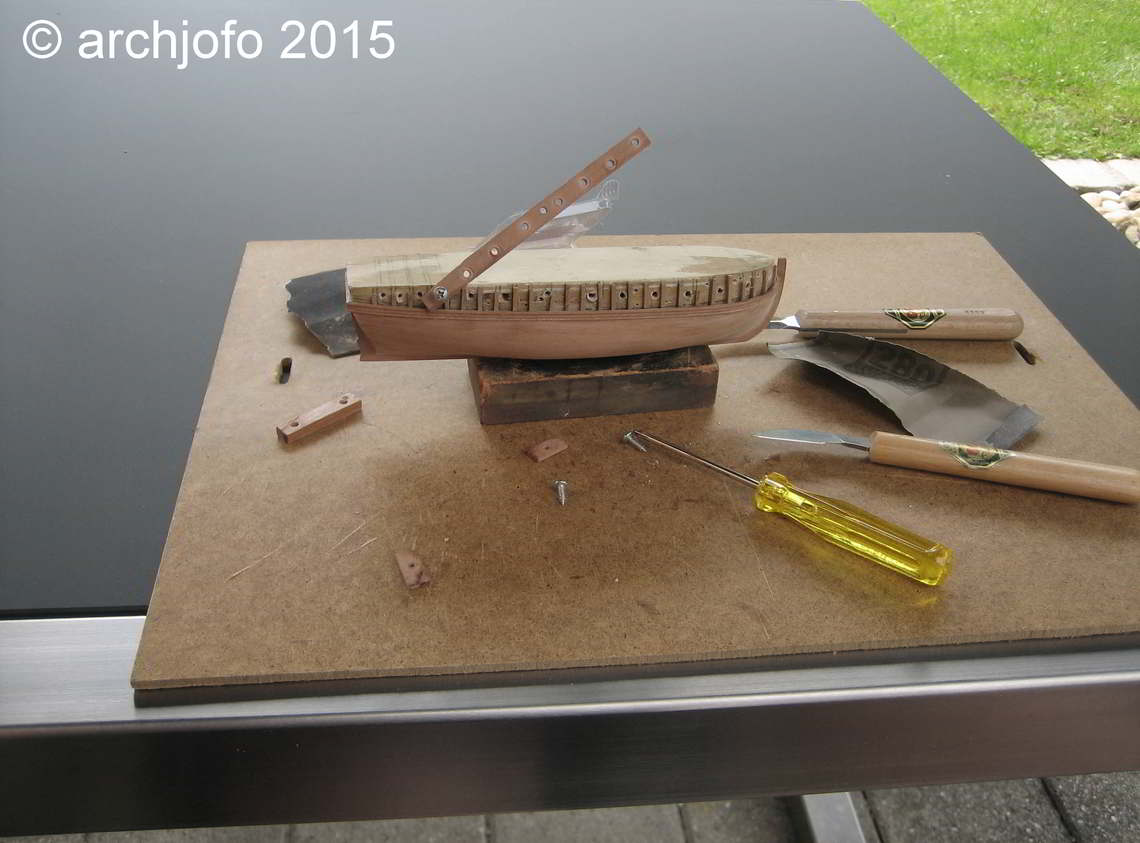
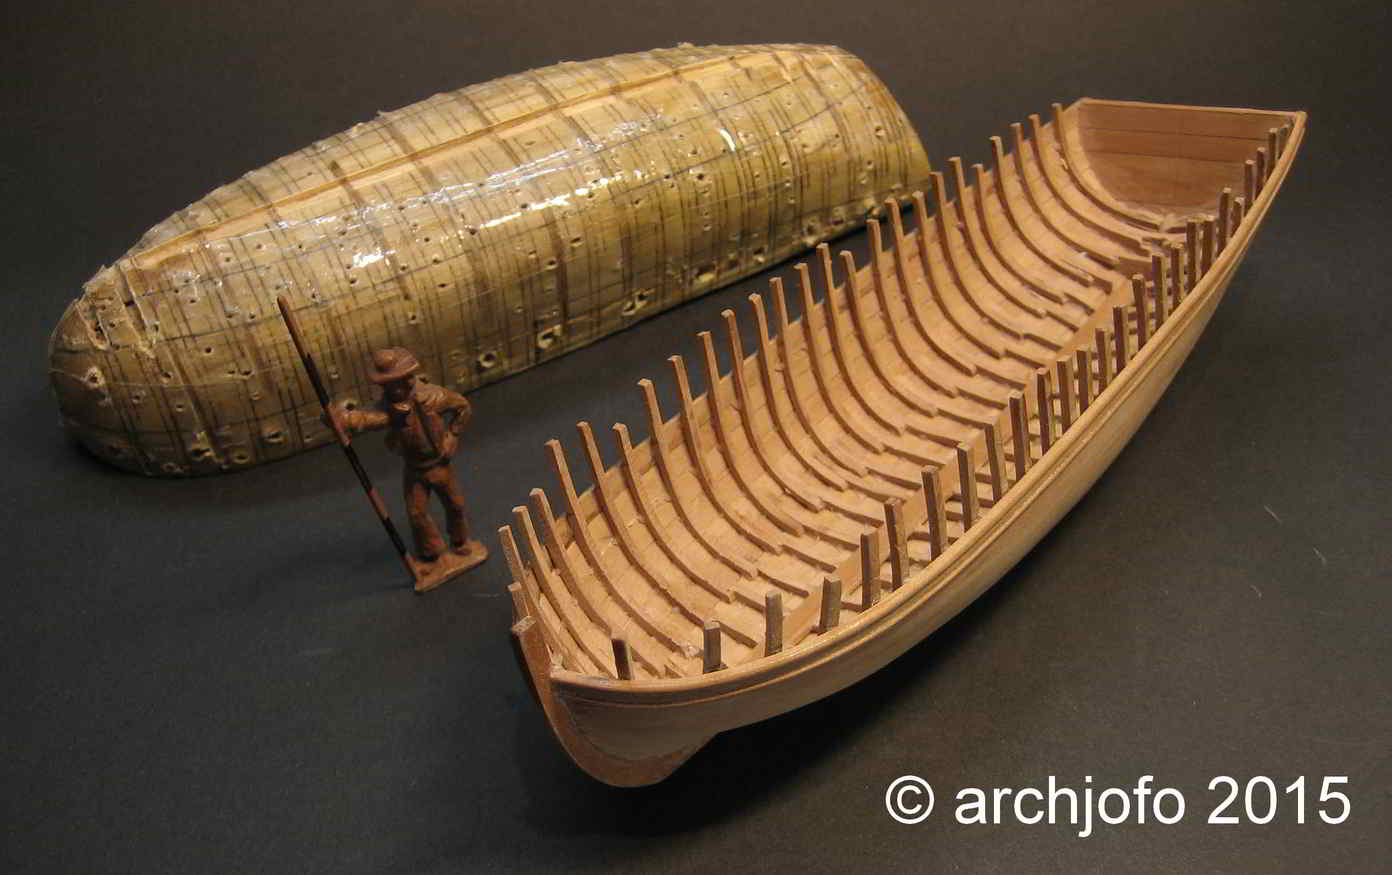
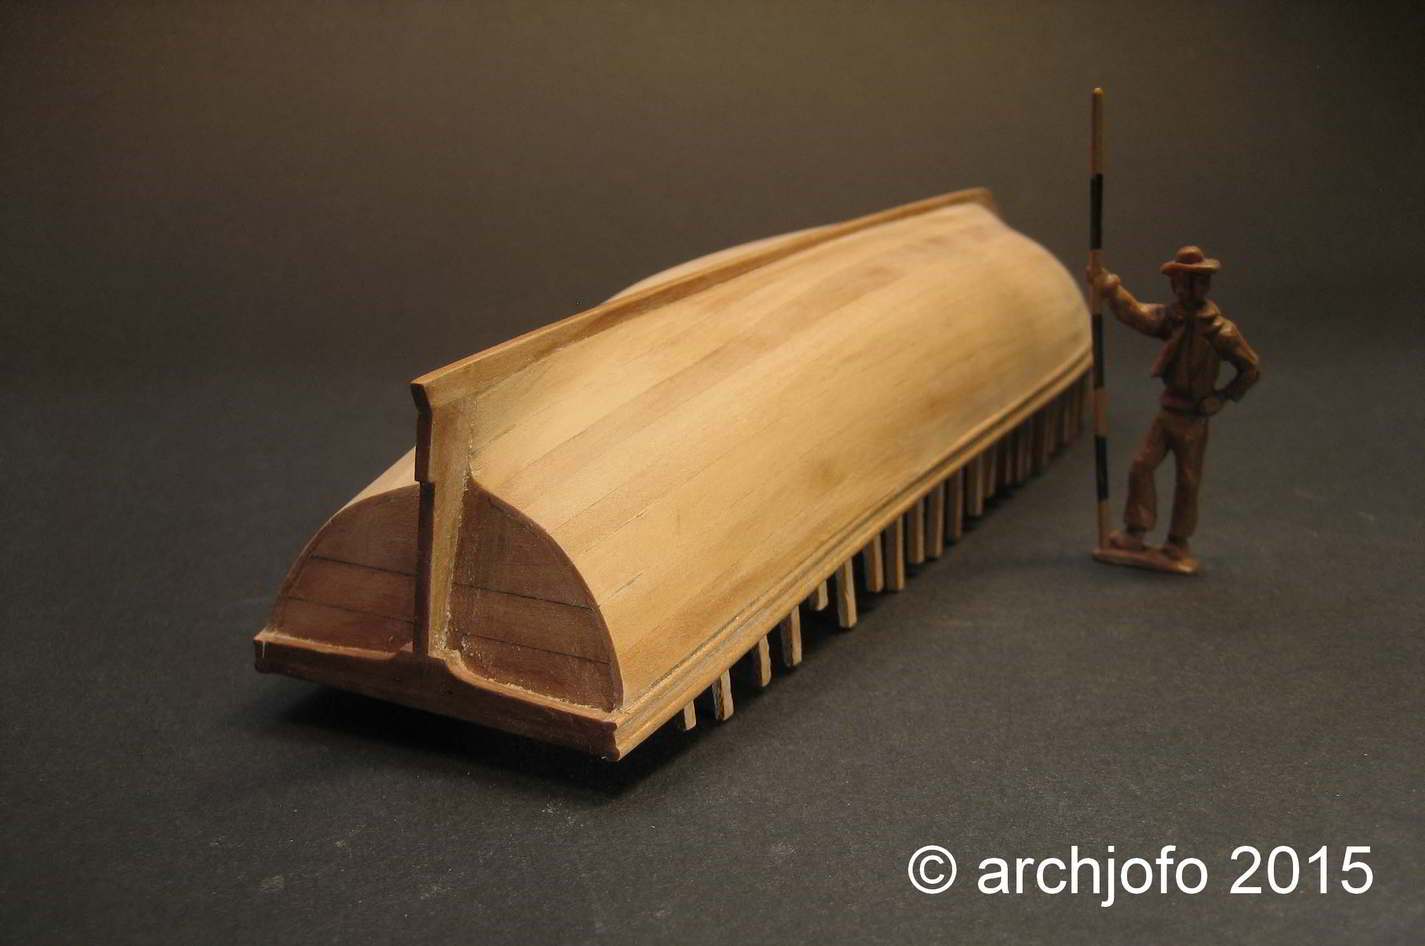
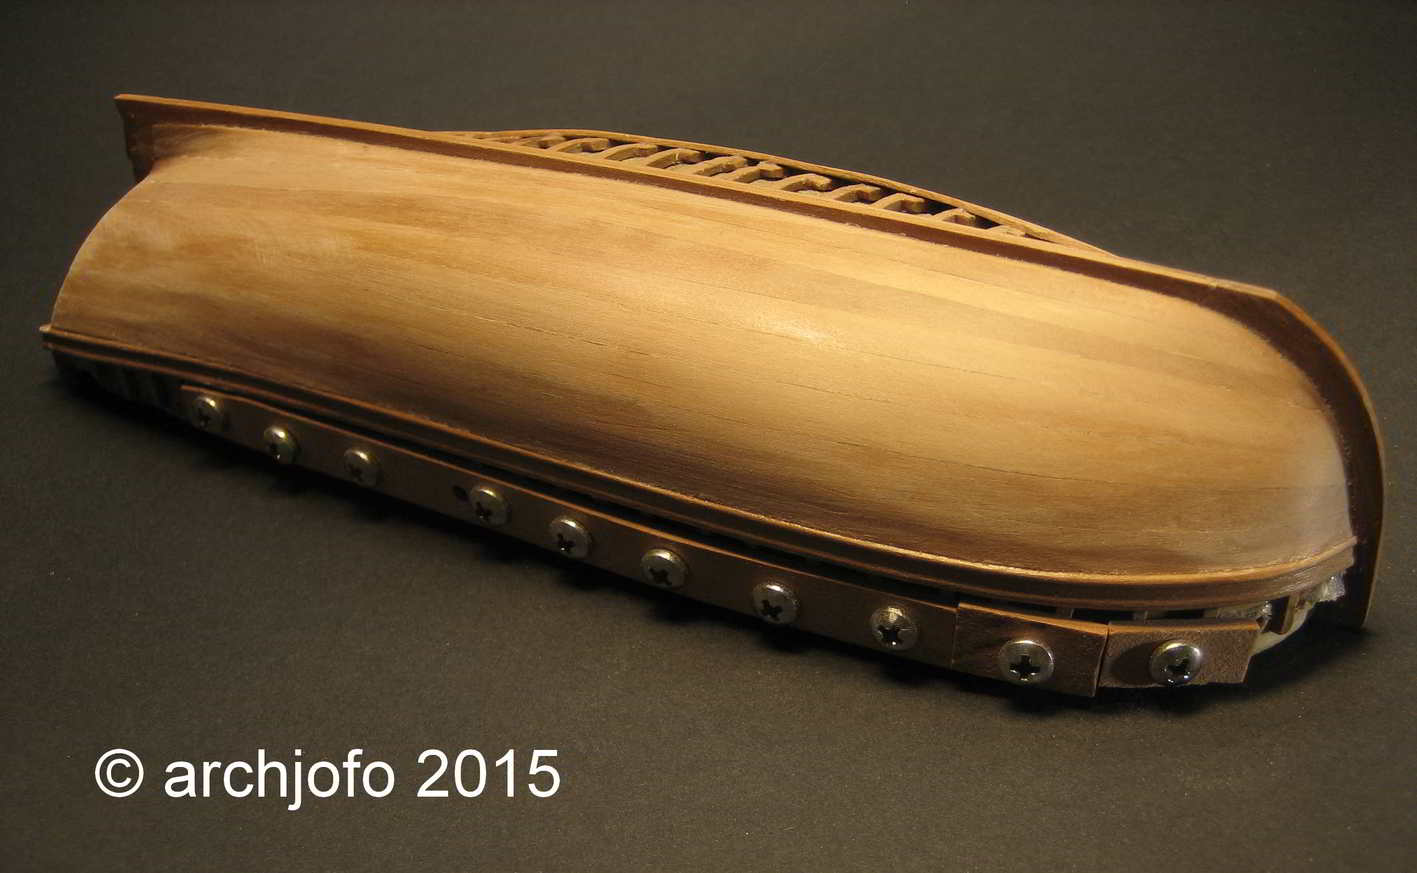
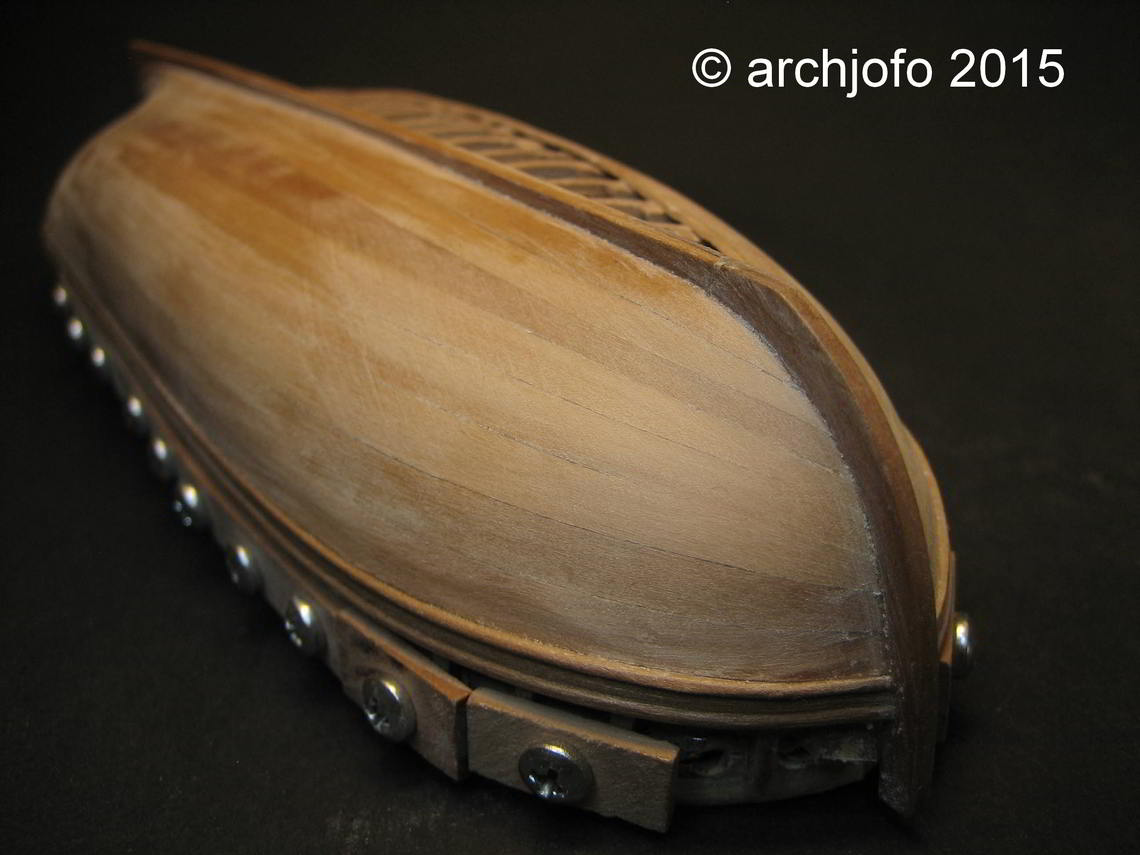
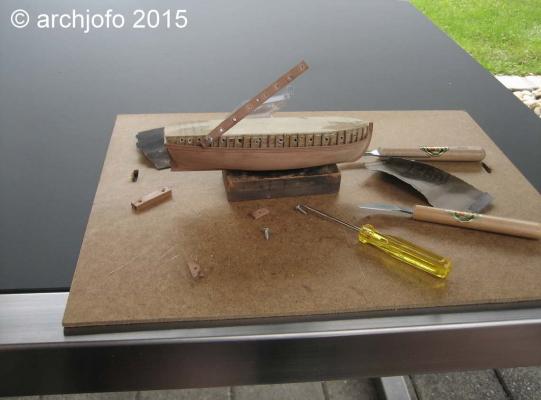
Hi, as previously announced here are the pictures from the removal of the boat shell. Before removing the shell I've sanded the hull. Sanding I was doing outdoors. With great excitement and nervousness I loosened the screws. I am satisfied with the result.


-
Hi, thanks for the interesting link. Without major problems I have today taken the boat from the mold. The form I had covered with tesafilm tape. I'll still show thereto a few pictures.
-
@redshirt @JesseLee Indeed, that's a little confusing. But I actually use "Elsbeere". Hi Christian, Carl, Mark, Greg and Nils, thanks for the positive response. The planking is now ready. The finishing touch still missing. Here are two pictures. The removal of the boot shell of the mold will be an exciting moment.

-
Hi Nils, the hull is very well built. I am eager what happens next.
- 2,625 replies
-
- 1
-
-
- kaiser wilhelm der grosse
- passenger steamer
- (and 1 more)
-
Sorry Mark, I wanted to say that it still needs to be finish-ground.
-
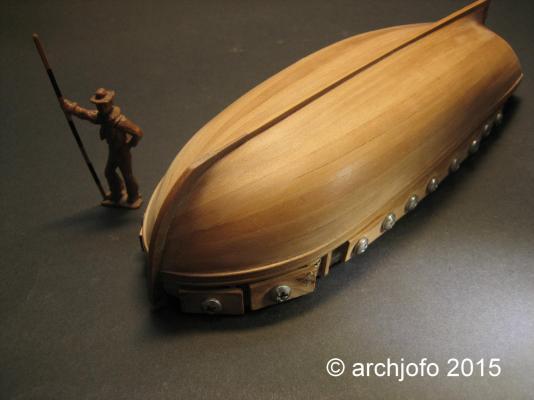
In the meantime, the planking is completed on the port side. The hull is not sanded, as can be seen.

-
In German, the wood is referred to as Elsbeere. In English it is called probably wild service tree? But I'm not quite sure.
-
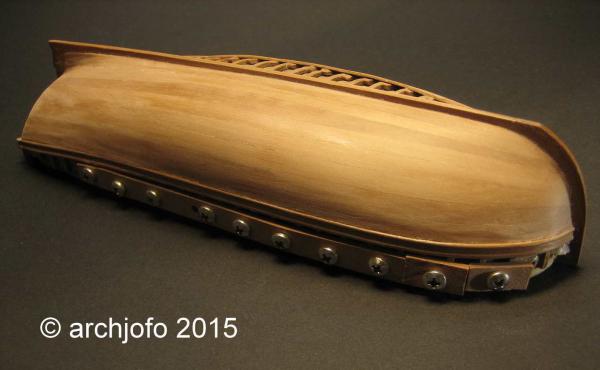
Karl, Mick, Cog and Greg, thanks for looking in. Slowly but surely, the planking is completed. I hope that it is the way I imagine it.
-
Hi Dirk, many thanks. I am working continuous on the planking of the long boat:

-
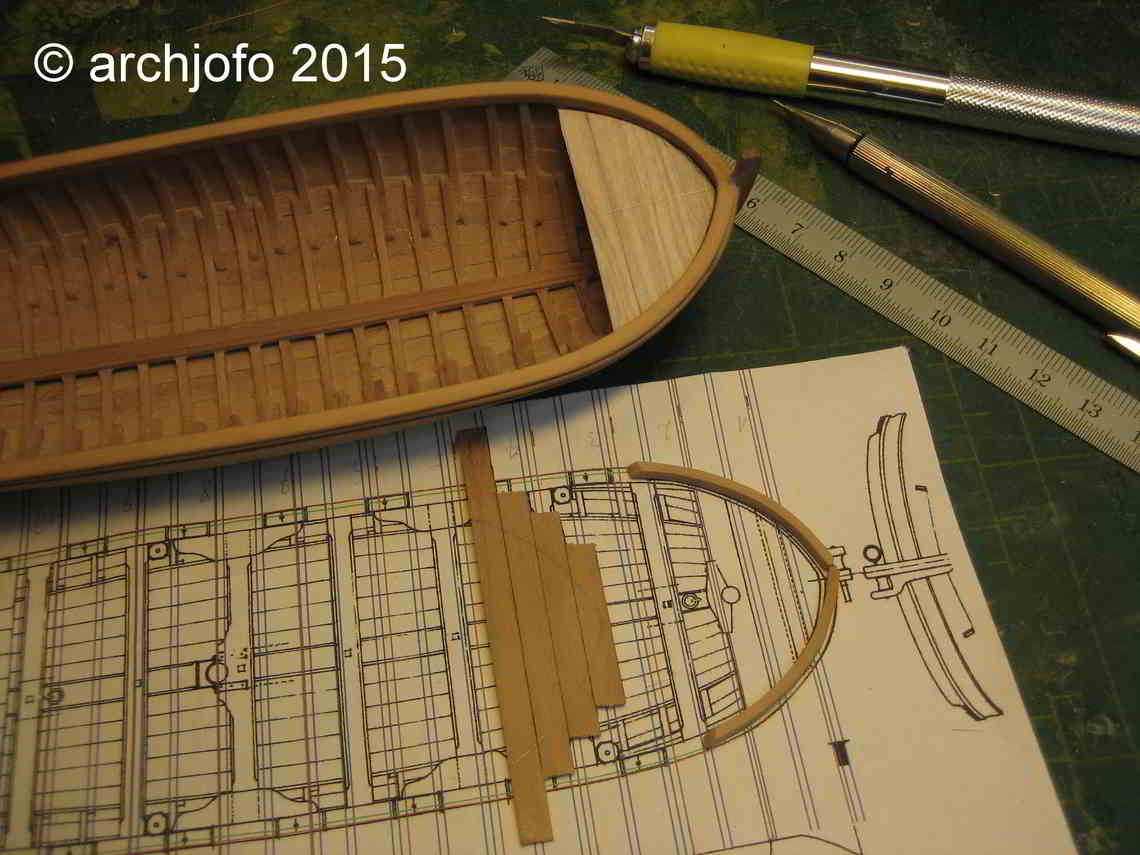
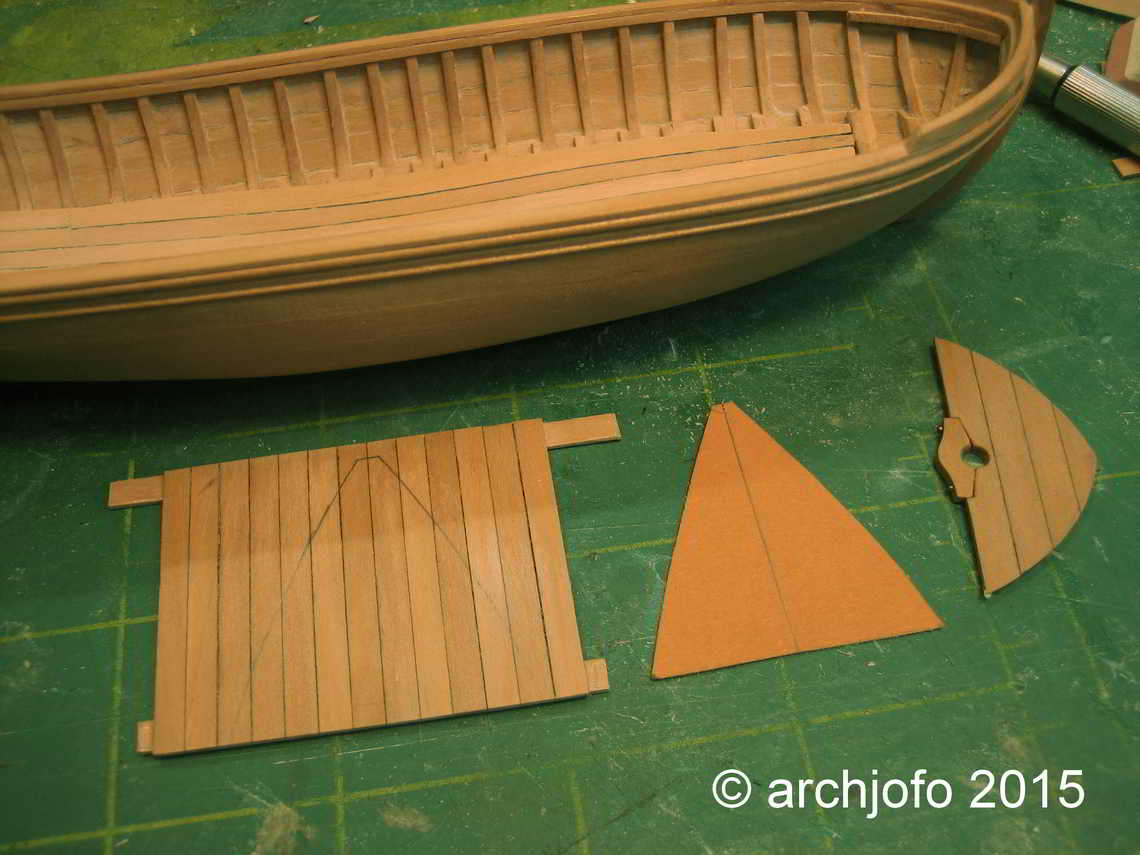
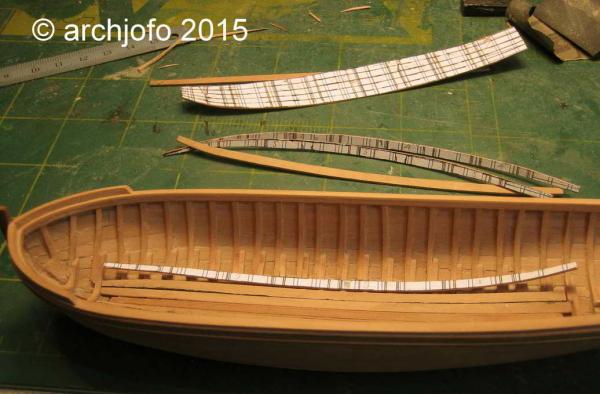
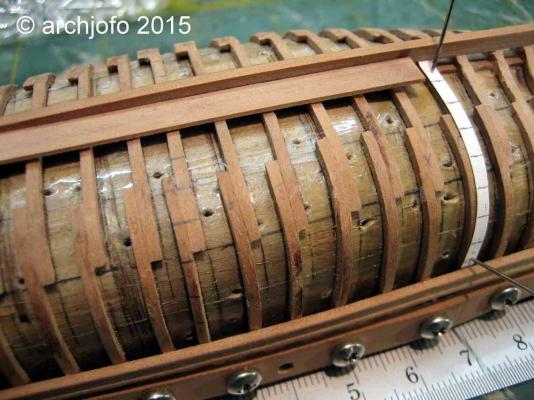
Hello there, here I show you images where the first planks are attached.

-
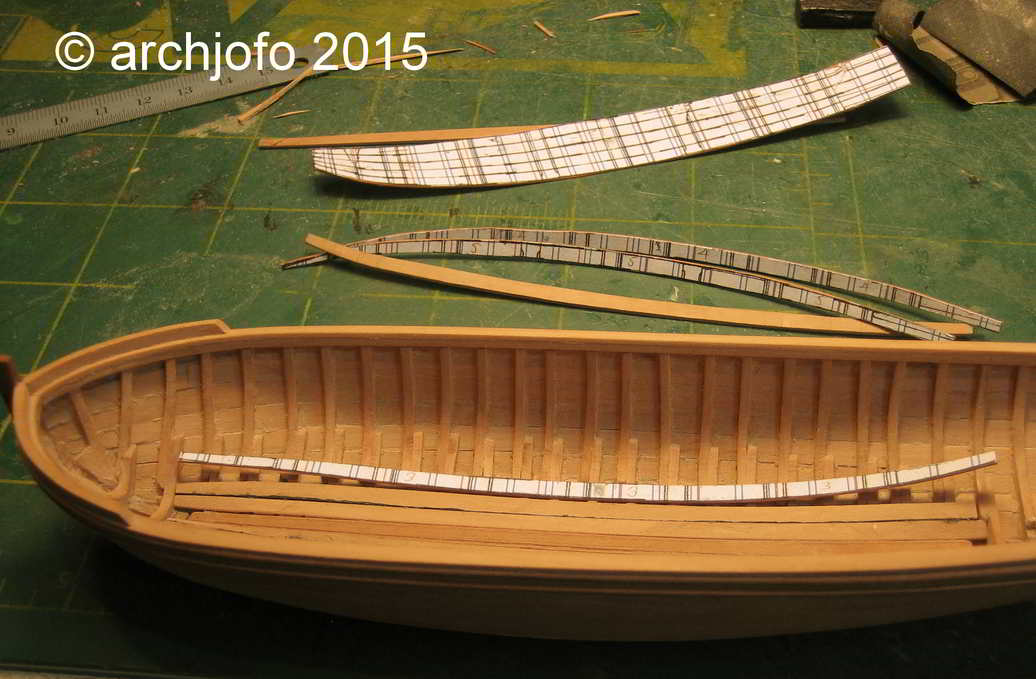
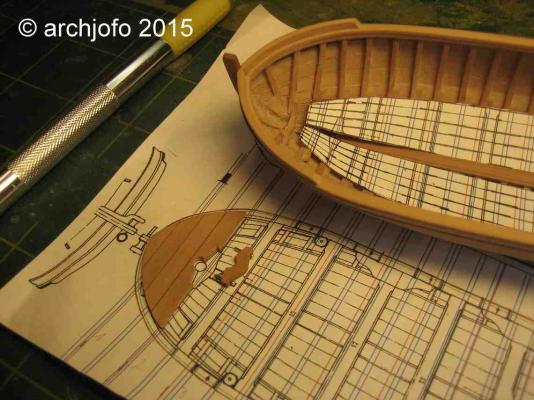
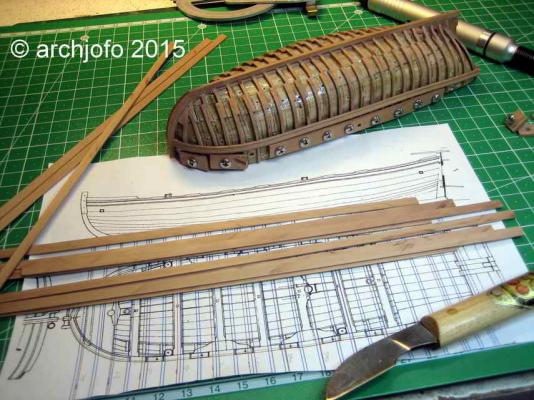
Hello, currently I am preparing the planking of the long-boat. The planks are already cut.
-
THE 74-GUN SHIP by Jeronimo
archjofo replied to Jeronimo's topic in - Build logs for subjects built 1751 - 1800
Hi Karl, I wish you good luck for the new project. -
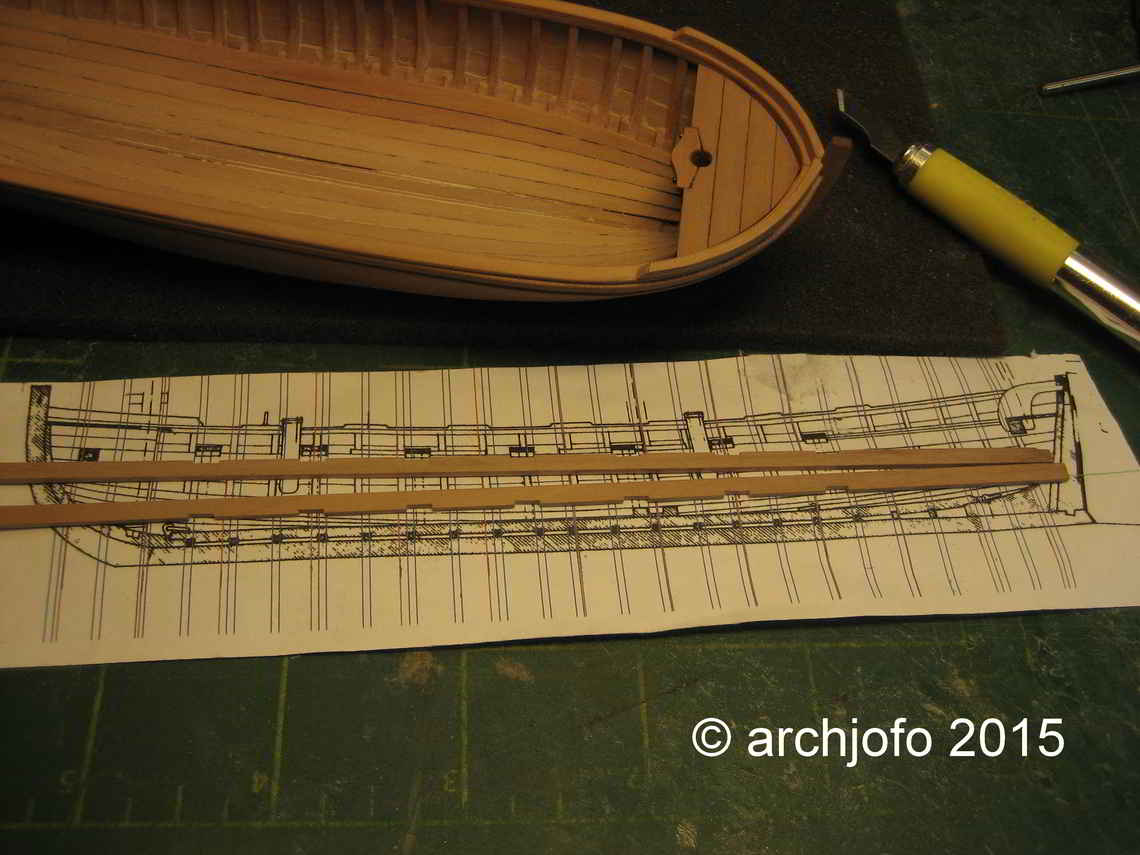
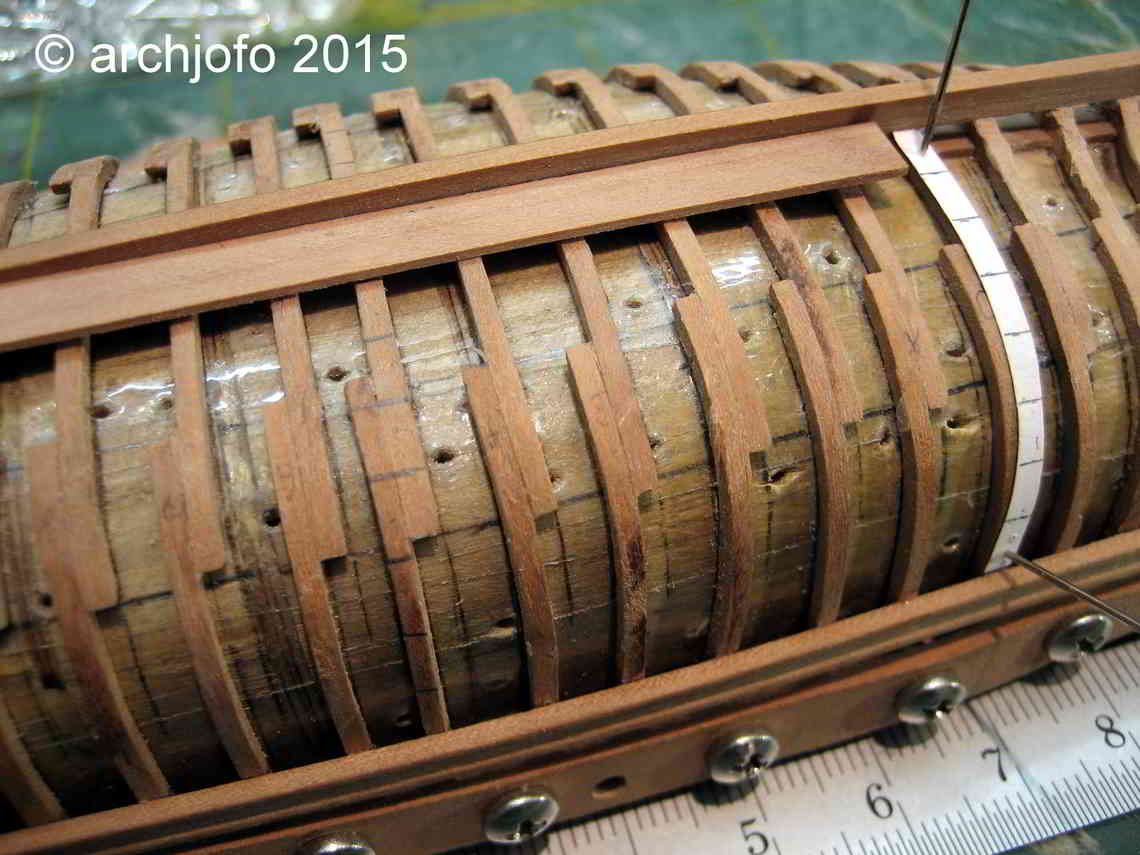
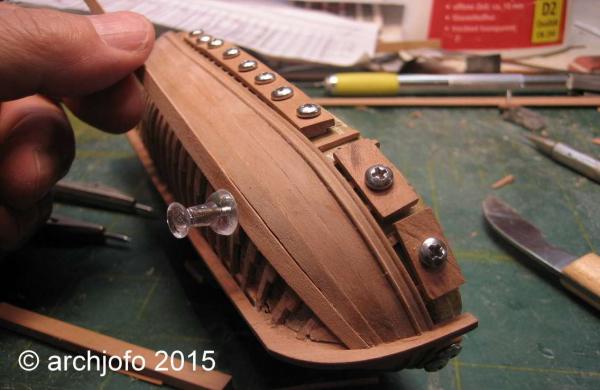
Hello JP, thank you for the kind words. And here is a short update of the report. The first two strakes are tightly glued.
-
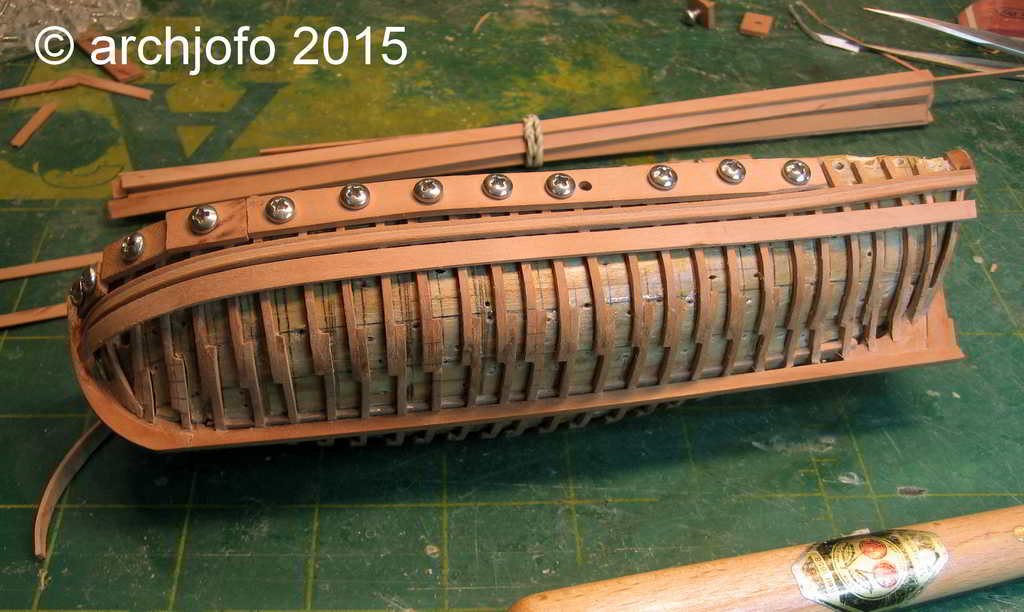
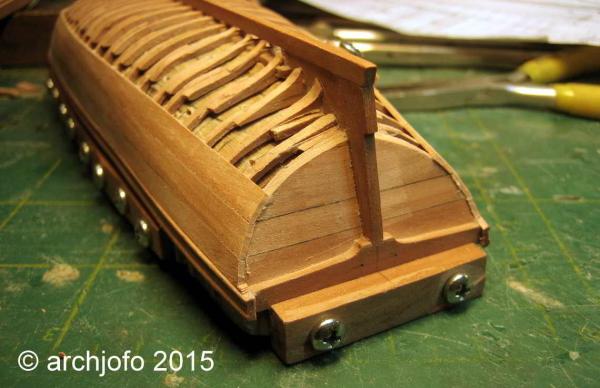
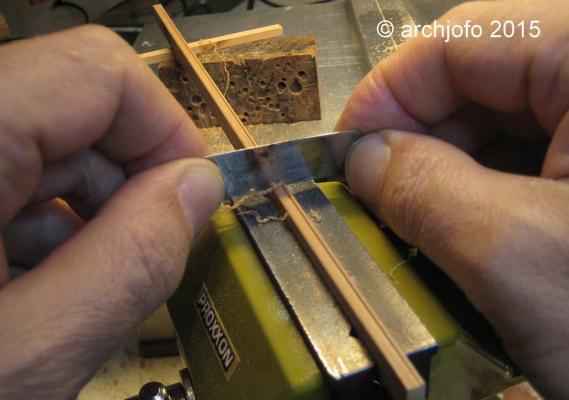
Hello Carl, thanks for the nice comment. We continue the construction of the long-boat with the planking. First, the profiled planks must be made. This is the first strake. By heating with a soldering iron, the soaked planks can be brought into the required form.
-
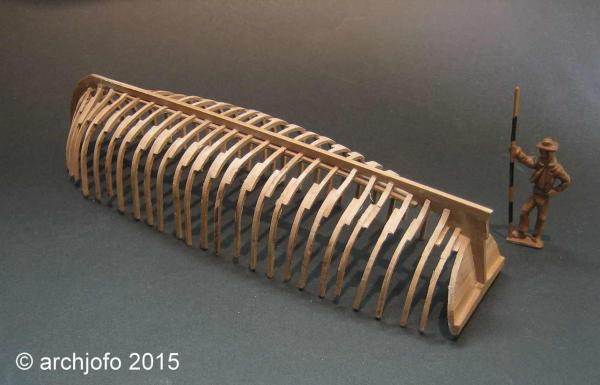
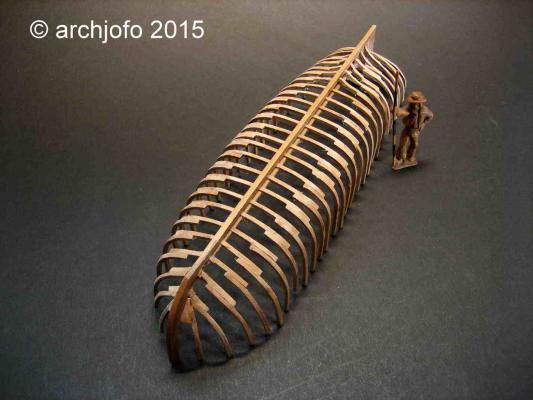
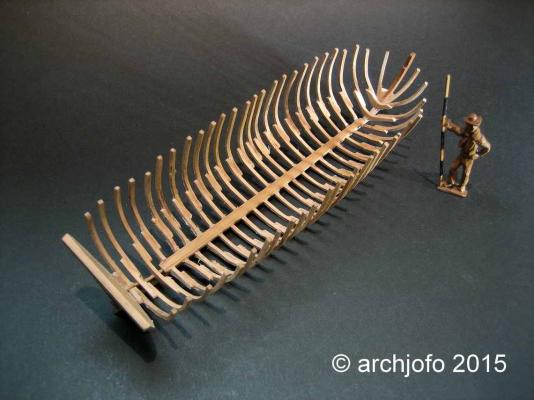
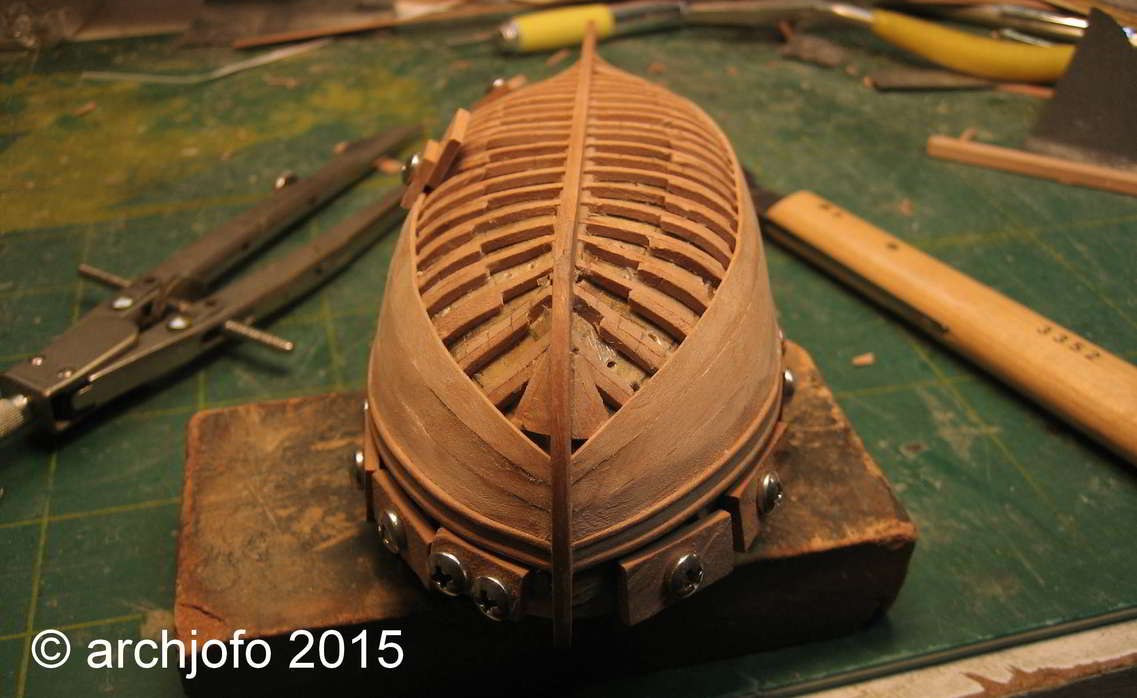
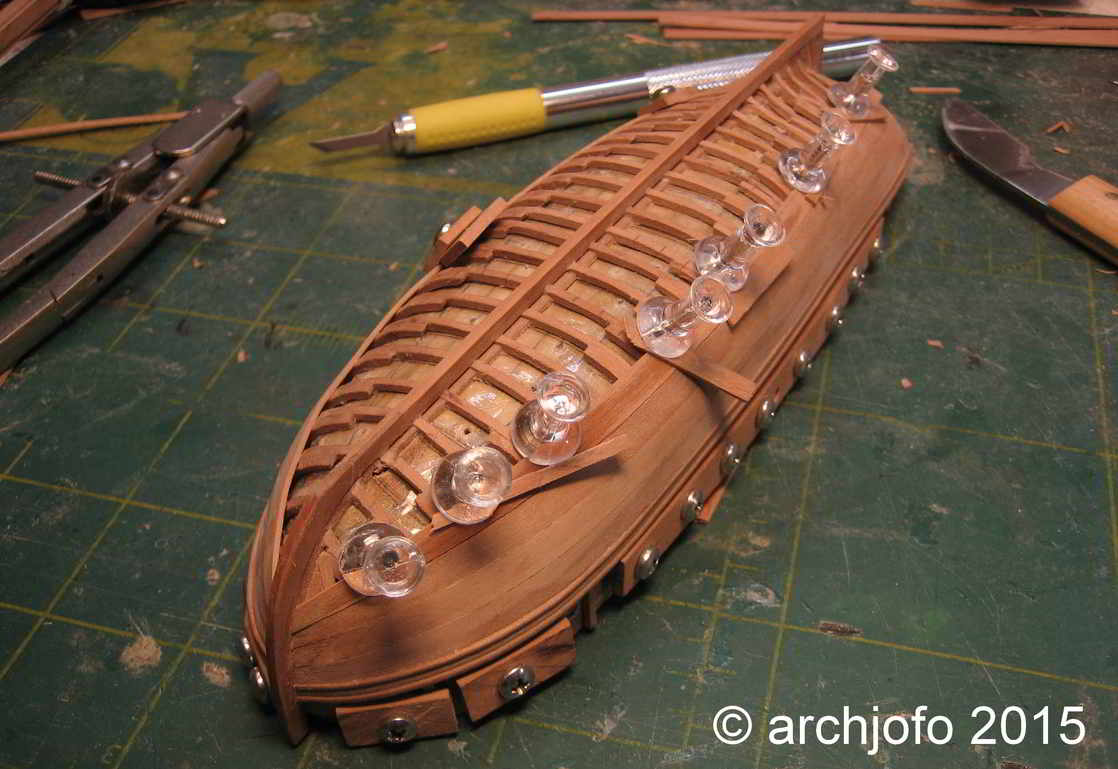
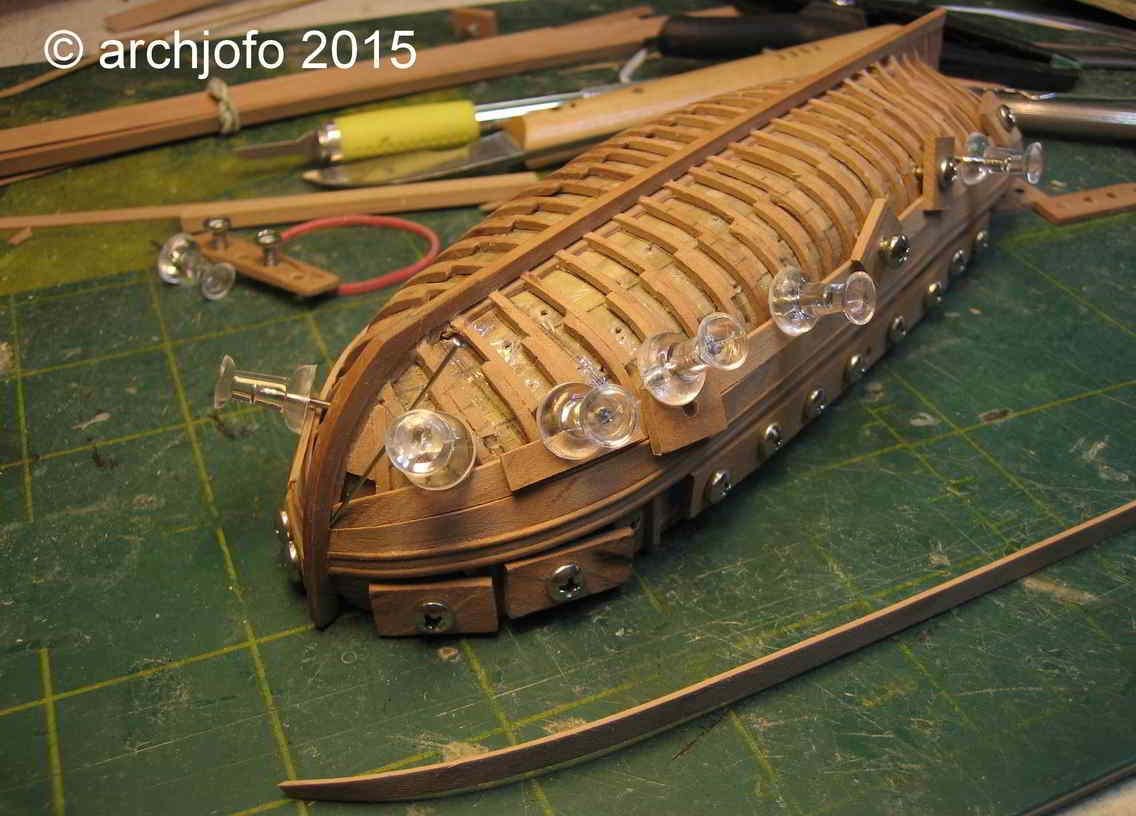
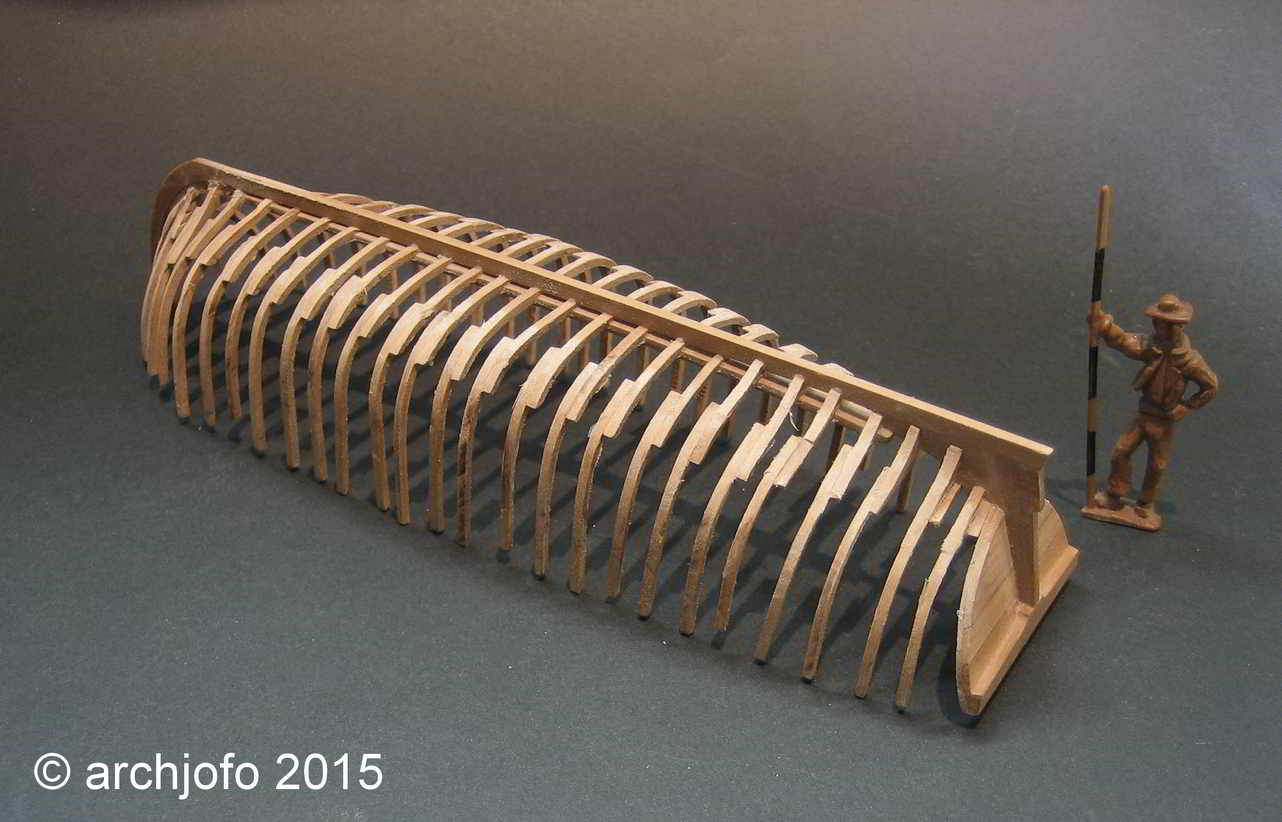
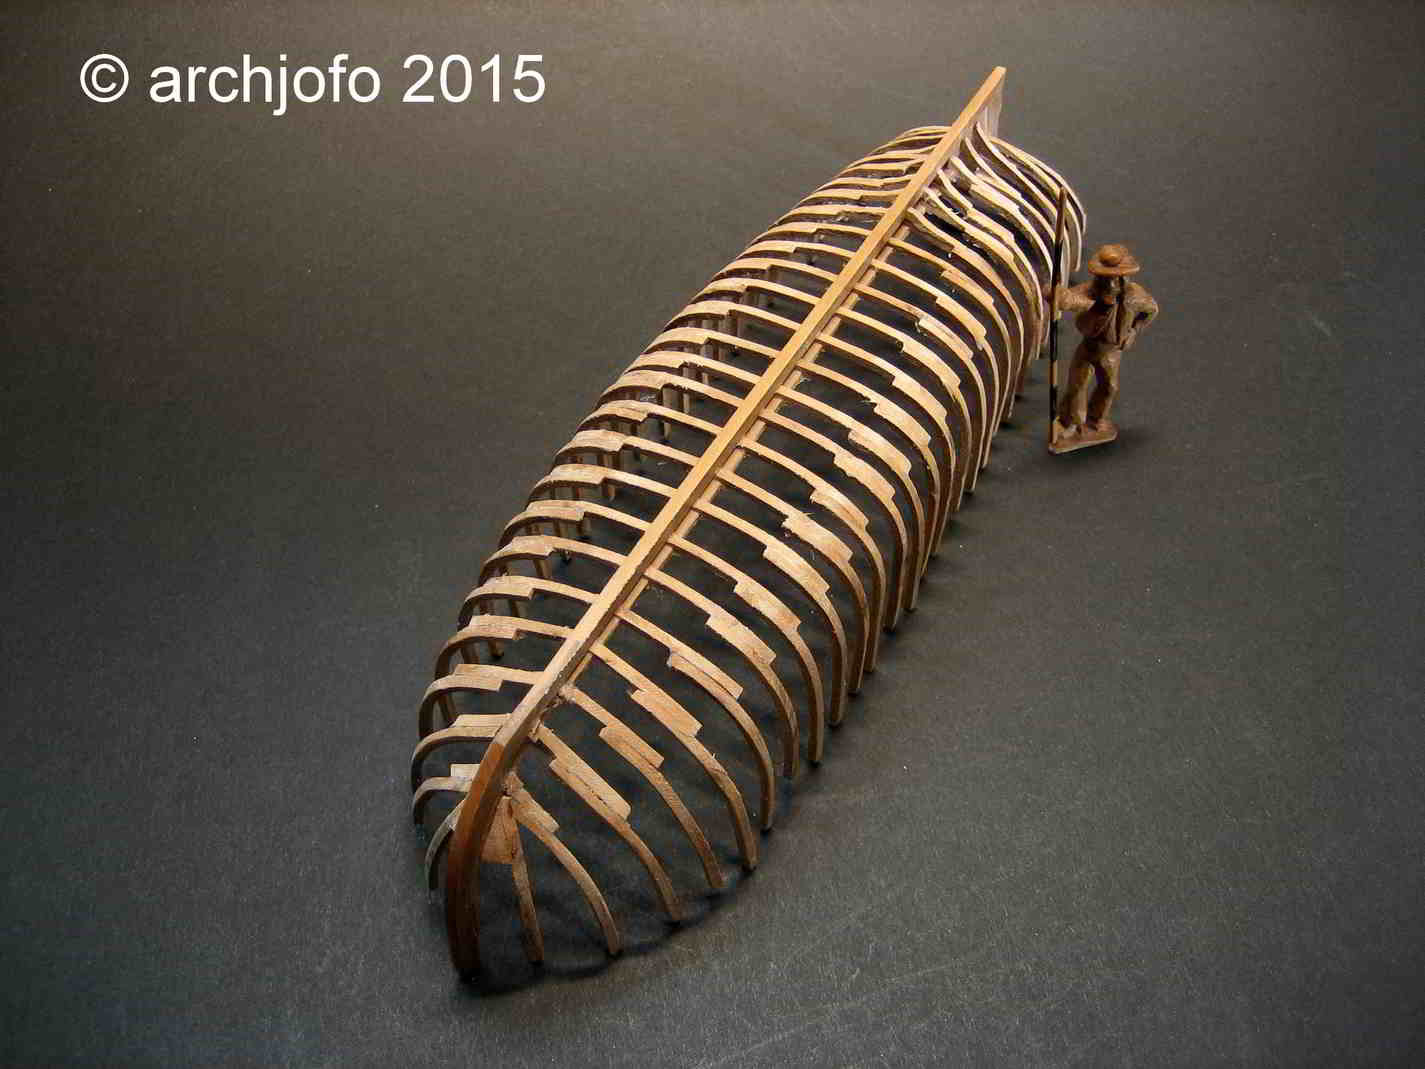
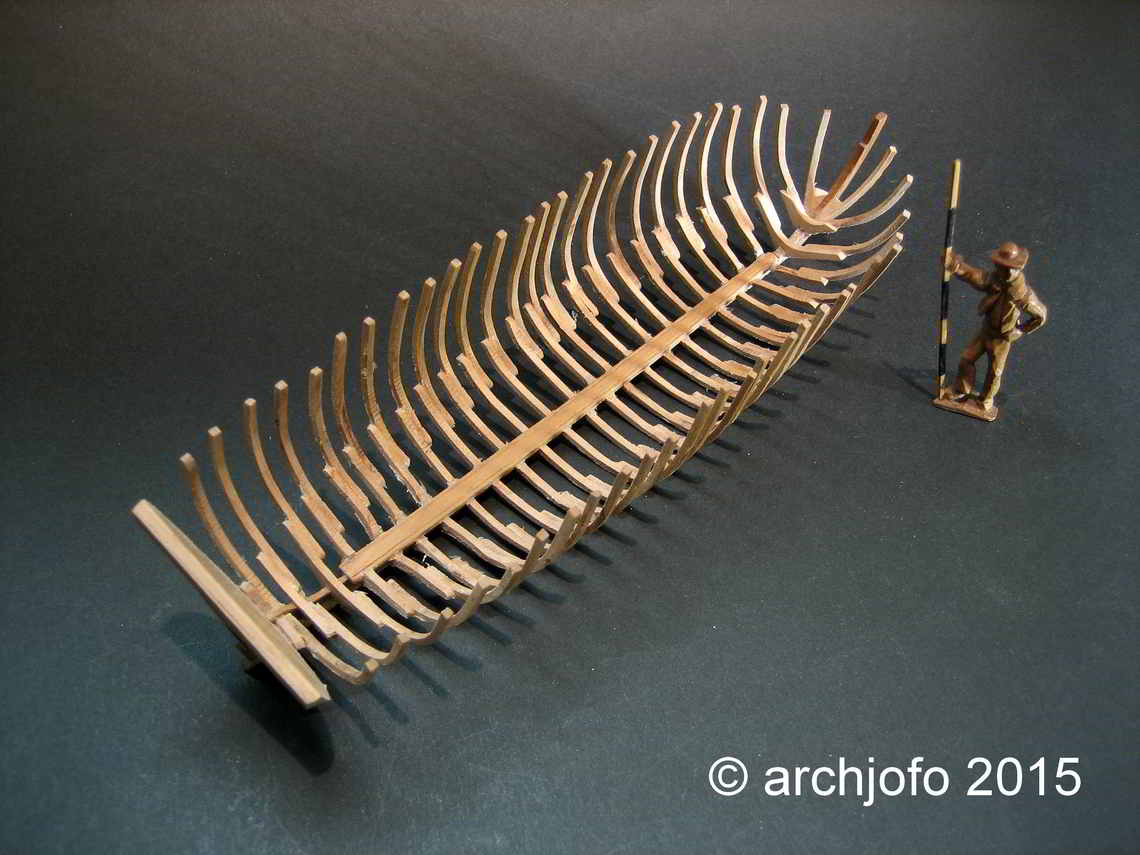
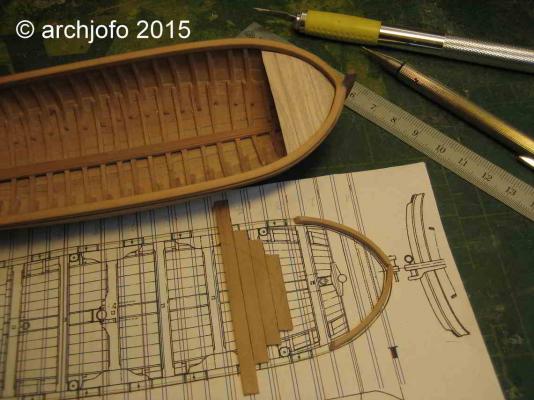
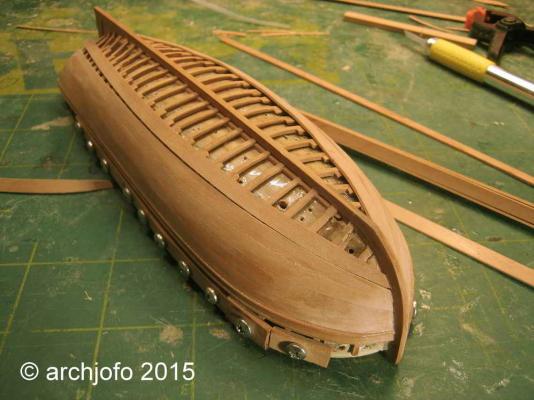
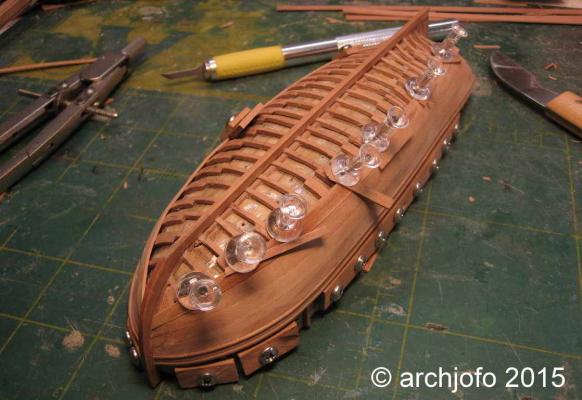
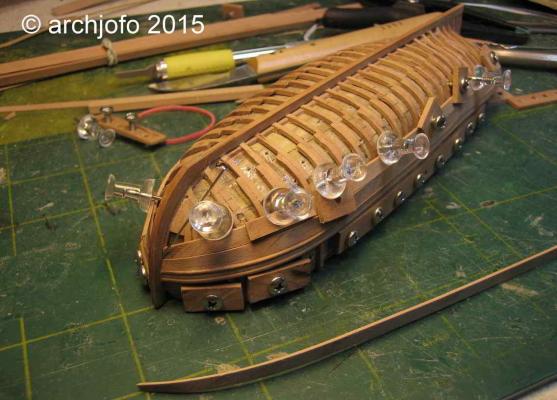
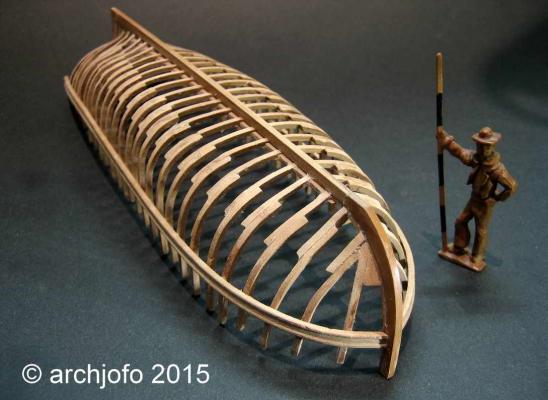
The framework is completed for planking.